Whether cold or hot weather, making the decision to upgrade your RV insulation is a game-changer. Quite simply, it can transform your rig into a comfortable space regardless of where or when you travel. As a couple that has braved the winter cold and sought refuge from scorching summer heat, insulation has played a critical role in energy efficiency, temperature regulation, and even soundproofing.
With a few thoughtful upgrades, you can improve climate control in your RV. That way, it feels like true home any time of year. So, let’s dive deeper into effective ways to boost your RV’s insulation and make your travels more enjoyable all year round.
1. Seal Windows and Doors for Maximum Efficiency
Over time, gaps and cracks around windows and doors develop, leading to annoying drafts. Properly sealing these entry points improves energy efficiency and makes it easier to regulate the interior temperature.
- Caulking. Use high-quality silicone caulk around windows, doors, and any seams where air might escape or come in. Silicone caulk is water-resistant and remains flexible through temperature changes, making it a great long-term solution.
- Weather Stripping. Check for deteriorating weather strips around the doors and windows. Replace them with new weather stripping designed for RVs to ensure tight seals.
Pro Tip: Keep a small infrared thermometer handy to identify any drafty areas quickly. These devices detect temperature variations, pinpointing where cold air is sneaking in.
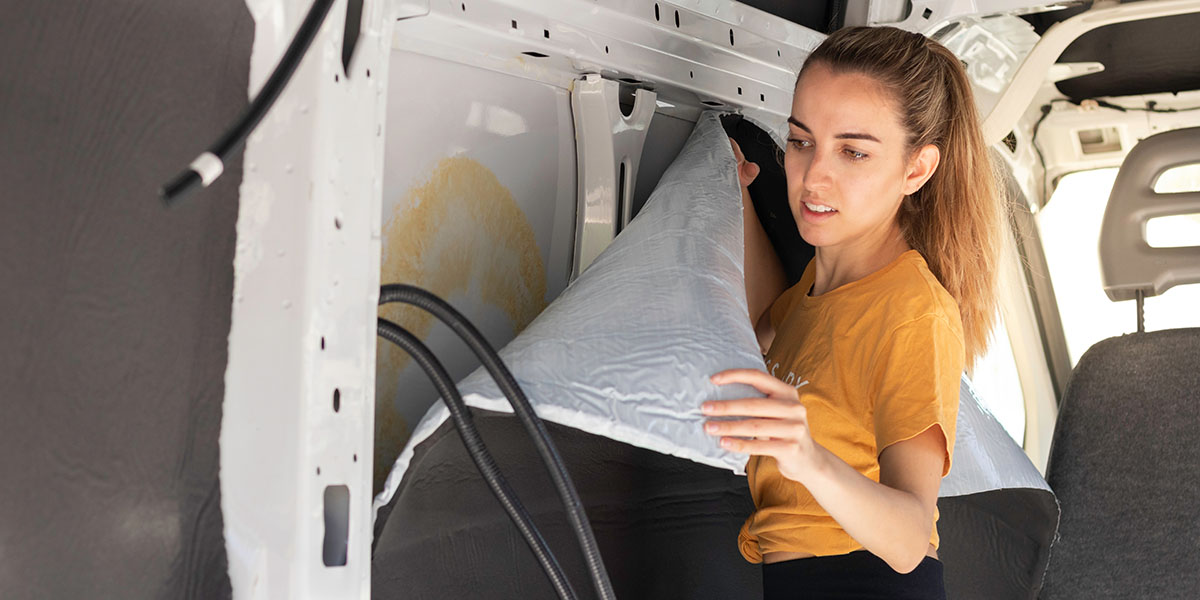
2. Install Reflective Insulation for Seasonal Comfort
Reflective insulation is a versatile and budget-friendly solution to minimize temperature fluctuations inside your RV.
- Window Film. Apply removable insulating window film to help reflect sunlight and keep heat out during the summer. In winter, this same film helps retain heat inside.
- Reflective Panels. These panels are particularly helpful if you camp in extreme climates. Place them in your windows or even under the roof vent covers for additional protection against heat loss or gain. There are several cost-effective options.
Pro Tip: Invest in thermal curtains. They provide additional insulation and are easy to pull closed when temperatures become extreme. This works great in our Class B van to keep the cold out in the winter and the heat out in the summer.
3. Upgrade to Energy-Efficient Windows
Upgrading your RV’s windows might require an initial investment, but the benefits in when you upgrade your RV insulation are long-lasting.
- Double-Pane Windows. These windows feature two layers of glass, and they help reduce condensation while maintaining a more consistent temperature inside your RV, making them a worthwhile upgrade.
- Alternative Solutions. If replacing windows is too expensive, consider using clear acrylic panels over your existing windows as an extra insulating layer.
Pro Tip: For maximum efficiency, ensure your window frames are insulated and sealed with foam tape or weatherproof caulk.
4. Add RV Skirting for Cold-Weather Camping
RV skirting is a game-changer for those spending extended periods in cold climates. It prevents cold air from circulating beneath your RV, helping to retain heat and protect your plumbing from freezing.
- Custom Skirting. Professional skirting is tailored to fit your RV and can be quickly installed and removed, but it can get pricey.
- DIY Skirting. Use foam board, vinyl sheets, or plywood for a budget-friendly option. Make sure the material is secure to block out drafts effectively.
- Airskirts: For those looking to add a more mobile and space-friendly option, this is a newer solution that may be perfect for those extended winter travel plans. They are pricey, but as a long-term investment in your rig, they may be worth it if you spend a lot of time in cold weather.
Pro Tip: Install a small space heater or heat lamp under your RV during freezing temperatures to prevent pipes from freezing and to provide an extra layer of warmth.
5. Insulate Vents, Skylights, and Fans
Vents and skylights are notorious for allowing air to escape, making them key areas to target for insulation.
- Vent Covers. Foam vent cushions are easy to install and block unwanted drafts. Look for reflective vent covers to further reduce heat transfer through skylights and roof vents.
- DIY Vent Covers. Cut pieces of foam board or insulated fabric to fit the openings, providing a simple and affordable fix.
Pro Tip: Use adhesive magnetic sheets to secure vent covers during travel. They hold firm but can be easily removed when not needed.
6. Prevent Heat Loss Under the Mattress
If your bed sits above a storage compartment or is directly over the RV’s undercarriage, it can become uncomfortably cold at night. The more you think about it, this is a prime place to upgrade your RV insulation.
- Foam Board Insulation. Cut foam boards to fit under your mattress. They provide a solid thermal barrier between the bed and the cold air below.
- Mattress Topper. Adding a memory foam or thermal topper ensures maximum comfort and helps retain body heat.
Pro Tip: Consider using electric blankets or a heating pad with automatic shut-off timers for extra warmth during cold nights. (The pad is actually much better for power consumption but is smaller.)
7. Use Door Snakes to Block Drafts
Simple but effective, door snakes (fabric tubes filled with rice, beans, or foam) block cold air from sneaking in under doors. This is more for doors inside your rig, as it can be a hassle for the entrance door.
Pro Tip: Keep an extra door snake in your storage compartments to use at windows or other drafty areas that may need quick insulation during extreme weather.
Bonus Section: Upgrades to Protect Pipes and Optimize Comfort Year-Round
Ensuring your RV stays comfortable and functional in extreme temperatures requires more than just insulation. Your heating, cooling, and plumbing systems play a critical role too. Combining smart upgrades with preventive measures helps maintain a consistent environment and protects your RV from temperature-related issues.
Upgrade Your HVAC System for Efficiency
Modern HVAC upgrades ensure your RV remains comfortable without wasting energy.
- Install a High-Efficiency Furnace. Newer RV furnaces are quieter and more energy-efficient than older models, reducing propane use while maintaining consistent warmth, so the long-term investment usually ends up paying off.
- Add a Smart Thermostat. A smart or programmable thermostat allows you to control your RV’s temperature remotely. You can optimize heating or cooling based on your schedule, improving energy efficiency.
Pro Tip: Portable fans and space heaters help distribute air more evenly, relieving your HVAC system’s workload and ensuring every corner of your RV stays comfortable. Battery powered fans are great and save your house batteries, but space heaters usually require a hookup or propane tank, so they can be costly.
Keep Pipes, Tanks, and Hoses from Freezing
When winter weather hits, preventing frozen plumbing is essential to avoid costly repairs. Cold weather can compromise your water systems if they’re not properly insulated and heated.
- Use a Heated Water Hose. A heated hose prevents water supply lines from freezing, ensuring you always have running water. Be sure to connect and plug it in before temperatures drop.
- Install Tank Heaters. Heating pads for your black, gray, and freshwater tanks keep them from freezing during cold spells, making them ideal for off-grid camping or winter stays.
- Insulate Exposed Pipes. Wrap foam insulation around pipes, especially those underneath your RV. For additional protection, apply heat tape before insulating.
- Monitor Temperatures. Keep an eye on temperatures near pipes and tanks using thermometers. This helps you take quick action if freezing becomes a risk.
Pro Tip: On extremely cold nights, leave your interior faucets slightly dripping to keep water moving. This simple trick prevents water from freezing inside pipes.
*****
Upgrading your RV insulation doesn’t just keep you comfortable — it extends your travel season and enhances energy efficiency. My wife and I actually prefer traveling in the shoulder months because extreme weather is less common, but we have been through summer heat waves and winter freezes many times.
So, take my word for it, whether it’s sealing windows, installing reflective panels, or adding foam insulation, each step brings you closer to creating a cozy, climate-controlled environment in your RV. With these upgrades, your rig will be ready to tackle everything from snowy mountain adventures to sweltering desert stays, ensuring every journey is enjoyable year-round.
Happy travels!
Leave a Reply