
Been bitten by the vintage bug? Welcome to the club! Now, listen to a little advice from a few long-time members: Your vintage RV restoration may not be as easy, cheap, or as linear as you imagine, but what’s beyond it can be even better than what you’ve dreamed. Our story is proof of that.
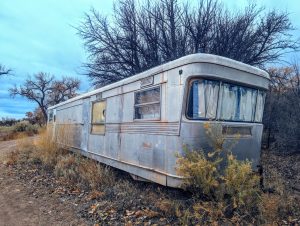
Our 1957 camper — who we lovingly refer to as Hamlet — was in quite a state when he rolled into our driveway in the late winter of 2011. While not a complete teardown, he needed moderate-to-major work both inside and outside. (So much so that about half-way through the project, we got in a tiny conflict over the use of the cordless drill.) Once, as Hutch was working on new sheet metal on the roof, Shari wanted to install a wine-glass rack over the sink.
“I need to see some cute,” Shari said imploringly, “I need to have some hope!”
After downsizing and renting out our home, we were in deep. And, truth was, we both needed to see some light at the end of the tunnel. Fortunately, the future ahead of our vintage RV restoration was even brighter than expected.
The Light at the End of a Vintage RV Restoration
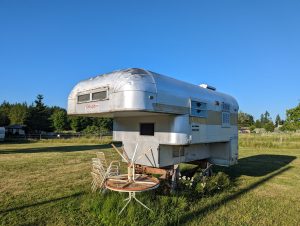
After traveling approximately over 200,000 miles in 12 and a half years through 49 U.S. States and 10 Canadian Provinces, our lil’ vintage home-on-wheels has proven to be up for just about any road challenge. We look back on those project times with fondness and a feeling that it was all worthwhile. Hamlet has now been to all 51 national parks you can drive to, as well as 13 Parks Canada sites.
Have we fixed it along the way? Of course! Does it require a lot of maintenance? Some, but nothing really major. (All rigs require maintenance.) Since we know our rig inside and out, we’ve been able to do 99 percent of the work ourselves by using some relatively simple tools, creativity and ingenuity, and a heavy dose of resourcefulness.
What to Avoid When Selecting a Vintage Rig
Jeremy — a vintage camper restorer and owner of Down River Vintage Trailer Restoration in Winlock, Washington — never gives a quote to anyone on their trailer project until he first fully removes the aluminum outer shell and takes a good look at what’s underneath.
Why is that? If you are seeking an easy to moderate amount of work, you’ll want to find a trailer with good bones. Perhaps it only needs some updating, polishing, painting, or redecorating. If you are up for a major project, no restoration or renovation is impossible. But every vintage is somewhere on that continuum. It just depends on how deep you want to dive in!
Below are some things to avoid if you are NOT up for a truly challenging and very time-consuming project:
Red Flags for a Vintage RV Restoration
- Very strong musty smell (some is normal)
- Significant damaging leaks (small leaks can be dealt with)
- Major rust on frame/tongue (surface level is OK)
- Major structural problems (what’s causing it to lean?)
- Soft spots in the floor (usually requires a complete tear down!)
- Electrical/appliances/propane not working (not impossible, just time consuming)
- Broke windows or door handles (hard to find parts unless it’s a popular model)
- Exterior dents or damage (will require replacement, very time consuming)
- Bent tongue or hitch (will need to be replaced before towing)
- Broken axle/bearings (will need to be replaced before towing)
- Owner doesn’t have the title (some states will accept a bill of sale for registration, but others are very particular — check out the DMV rules in your state before buying!)
- Completely stripped down on the inside (no cabinets, etc.)
*People buy these old rigs, then get overwhelmed and just sell; but often, they’ve already torn the inside apart. While it looks like it could save you time, BUYER BEWARE, as removing all cabinets removes structural integrity!
Do’s & Don’ts When Diving Into a Vintage Project
Definitely do …
- Keep the big picture in mind. Even so, try not to let it overwhelm you. Set small goals along the way and celebrate accomplishments.
- Determine what you can DIY. Figure out what you can do and what you need to hire out for. There’s no shame in knowing your limits!
- Research, research, research! Bookmark good resources. Here are some of our favorite websites and social media sites.
- Secure a long-term workspace. If possible, find a covered / indoor place to do the work. It’ll save you both time and some weather-related anxiety and give you the flexibility to do the work whenever you can.
- Decide where to start. If you choose a complete teardown, start with the outside. If not, start wherever it makes sense for you – or work on a bit of both depending on the weather and your working location.
- Make friends with other restorers. This can happen both online and in person. Check out Vintage Camper Trailers BootCamp to learn from experts in the field – all in one place!
Please don’t …
- Go for a gutted trailer. Avoid trailers that have been completely gutted on the inside – they lose much of their structural integrity without cabinets, closets, bench seats, etc. They should never be transported in that condition without some serious internal bracing.
- Be haphazard with material choices. Never use pressure treated wood where it could come into contact with aluminum siding. This type of wood is often treated with copper which can leach out of the wood and actually corrode the softer aluminum.
- Rush to repaint. To paint or not to paint? That is the question. If the trailer was already painted, definitely have it redone. But if it was originally unpainted aluminum, it might be better to simply polish, check out this great resource for polishing aluminum. We chose to paint over our trim, door and window frames and polish the rest of the aluminum.
Look Past the Ugly — Imagine What’s Possible!
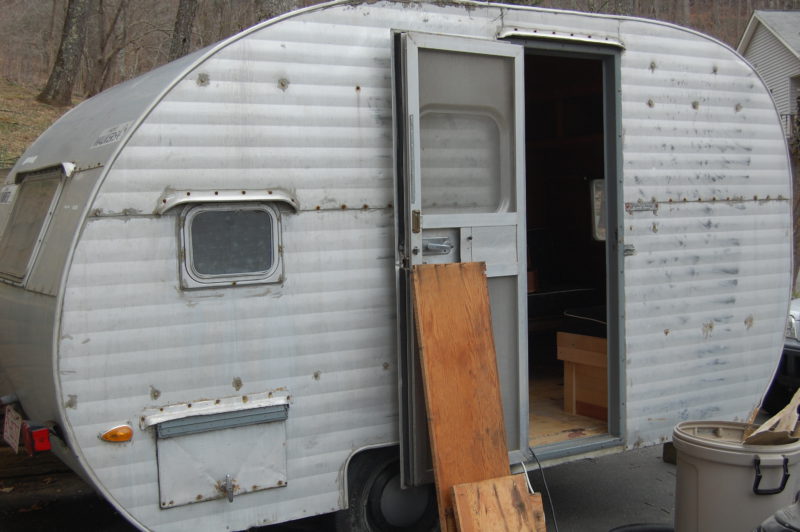
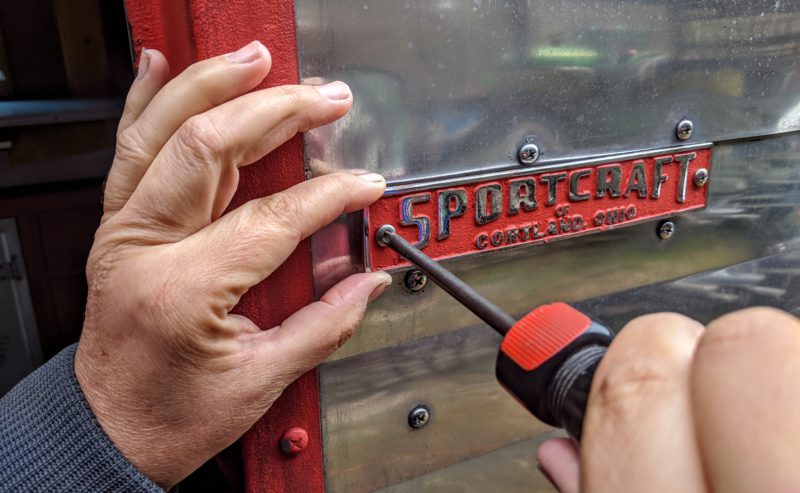
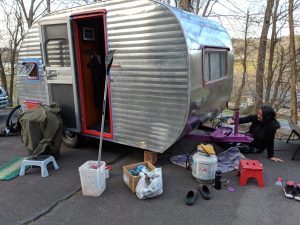
When our 1957 Sportcraft arrived in our driveway, the siding looked like aged duct tape, with sheet metal screws rusting, mildew and muck all over the exterior, and some small separation issues on the sides. And for, some reason, the previous owner who “restored it to sell” used tubes and tubes of silicone caulk everywhere — which took many days and a lot of elbow grease to remove. Even so, Shari didn’t fail to notice something about our new trailer, “He’s got good bones!”
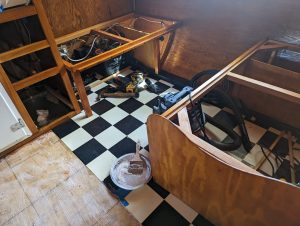
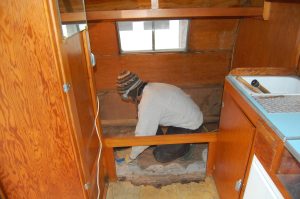
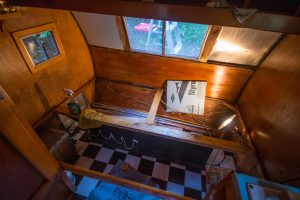
To see that, you had to look past some things. The inside had been “updated” with new yet hideous curtains. The two layers of flooring were cracked and peeling. The bed sagged in the middle, and you could feel the springs in the dinette bench seats poking through. Plus, there was some water damage on the wooden walls and ceiling. (See some highlights of where Hamlet started.)
But Hamlet, as we came to call our trailer, is a success story. We bought Hamlet for $900. And since 2011, we have put about $4,500 into it. Here’s a list of what we did to renovate it over the course of a year and half, as well as some fix-its since we’ve been living in Hamlet full-time.
Inside Hamlet’s Vintage RV Restoration
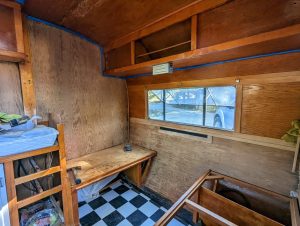
- Removed and rebuilt dinette seats to accommodate storage underneath. We hired a local upholsterer to construct and sew the cushions and pillows. This was money well spent, because neither did we own a sewing machine or have any experience with specialty sewing.
- Sanded and shellacked all walls, cabinets, drawers, etc.
- Removed all curtains, replaced with venetian blinds and installed blackout curtains around the bed for good sleeping and to keep the heat out.
- Rebuilt kitchen cabinet above counter and replaced all the hardware and electrical. (Tip: Don’t completely strip down cabinets; do them one by one for the same reason we mentioned earlier.)
- Found a replacement for the missing stove. Don’t skimp here and simply put in a camping stove as they burn less efficiently and could release carbon monoxide or noxious fumes inside your camper.
- Tore out the old bed. We then rebuilt it with a divider and accessible storage baskets underneath and invested in a super comfy mattress. (Seriously, the most comfortable bed we’ve ever slept on!)
- Replaced faucet and plumbing, and added super helpful dish sprayer.
- Peeled up two layers of linoleum flooring. We then put down a new thin layer of sub-flooring and replaced with black-and-white checkerboard linoleum tiles.
- Added new 12-volt LED strip lighting and refurbished existing lights.
- Removed the old roof vent and replaced it with a 12-volt Fantastic vent fan.
- Removed the ice tray on the old ice box and installed some shelving to make it a more usable space for dry food.
- Renovated the main closet to make it more functional. We added shelves and a behind the door pocket rack for easy grab storage.
Outside Work Restoring Hamlet to Vintage Condition
- Fabricated new “gearage door” that was previously screwed shut. We hired a local machine shop to make this for us as we didn’t have the tools.
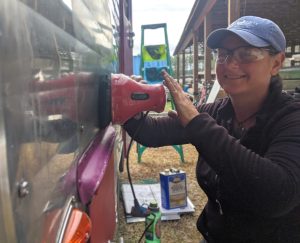
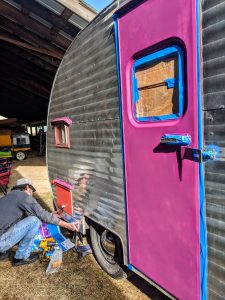
- Repaired minor dents and scratches in the door with Bondo. Then we painted window trim, frames and door. We weren’t able to restore the finish on these items so decided to add some fun color instead.
- Replaced windows with Lexan plastic. We outsourced the cutting and shaping.
- Removed all aluminum from the front to back. We added blue-foam insulation into each space between and sealed with spray foam before installing new aluminum.
- Replaced every single one of the 957 screws with stainless-steel screws to prevent future rusting.
- Retained the original pleated sides, which help with heat expansion and contraction. We polished, polished, and polished some more until we could see our reflection!
- Added a bike rack by welding on a hitch receiver to the frame. (We used the same machine shop that did our “gearage” door.)
- Replaced trailer brake/turn signal lights with brighter LED lights, and added additional lights below the back window and on the bike rack for higher visibility.
- Scraped and painted tongue and propane tank tray.
- Added propane tanks and replaced hoses to run both our two-burner stove and Mr. Heater Portable Buddy.
- Added diamond plate along bottom to create a more finished look (and hide some of the previous fixit flaws).
- Replaced axle and bearings, tires, leaf springs, and hubcaps. These were all done post remodel and were outsourced to a shop that specializes in trailers, not RV’s.
- Installed a basic solar-powered system, which has evolved significantly over the years!
Whew, and if that list isn’t intimidating enough for you, remember: Take it one step at a time and keep yourself motivated by focusing on that day you will pull out of your driveway!
Leave a Reply