Raise your hand if the first upgrade you make to your RV is the TV/entertainment setup! (Sadly, as I’ve found, this is not the best first step.) And if —like me — this happens to be the case for you, then know that you’re not alone. Fact is, an RV entertainment system doesn’t always age gracefully. So, if your rig is more than a few years old, chances are you’ve got a tangle of wires behind the TV. And a DVD or Blu-ray player you haven’t touched in God knows how long. And speakers that sound more like a tin can than a theater.
The good news? Upgrading the setup of your RV’s entertainment system is one of the most satisfying, easy, and impactful renovations you can make.
Whether you want to binge your favorite streaming shows on a rainy day, enjoy surround sound for movie nights at the campsite, or just simplify everything to be more user-friendly, updating your RV’s entertainment gear can make life on the road that much more enjoyable.
Here’s how to do it right.
Step 1: Take inventory — what are you working with?
Before you start ripping out cords and mounting new screens, take a step back and assess your current setup. Most RVs come equipped with a standard TV (sometimes two or three), basic speakers, an outdated head unit, and maybe a DVD or CD player combo.
Ask yourself:
- What still works?
- What’s outdated?
- What do I actually use?
Chances are, you’ll find that a lot of the original equipment is unnecessary or underpowered compared to modern alternatives.
Pro Tip: Take photos of all current wiring before removing anything. It’ll save time during reinstallation or upgrades.
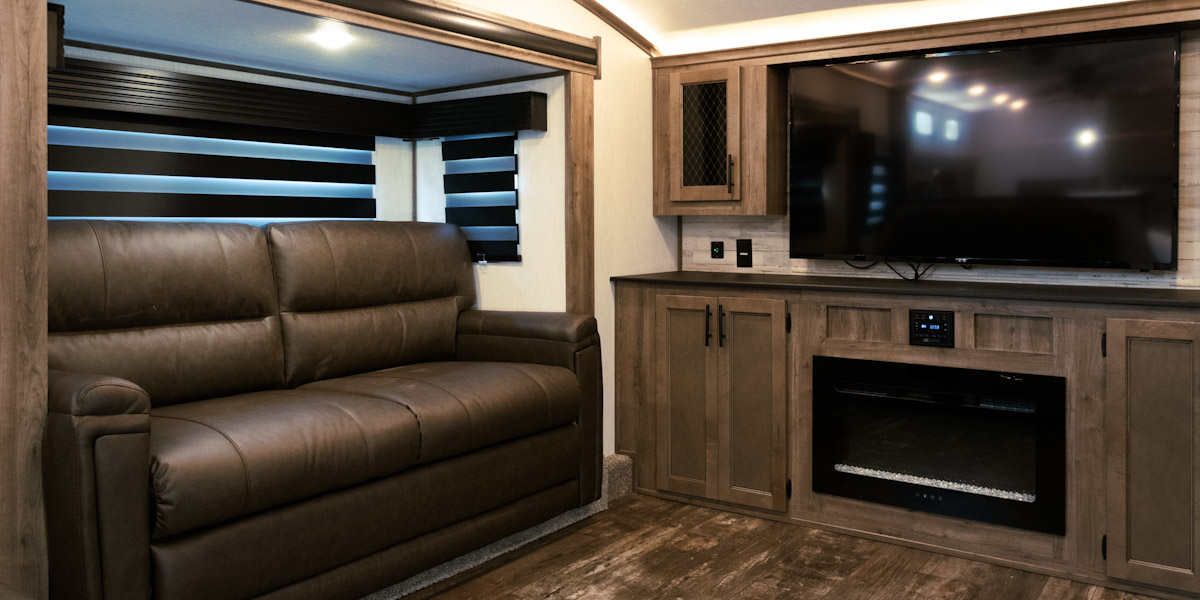
Step 2: Upgrade the TV (or TVs).
If your RV still has a bulky, low-res screen or an outdated wall mount, start here. Today’s smart TVs are lighter, thinner, and come packed with built-in streaming apps, Bluetooth, and Wi-Fi capability.
What to Look For:
- Size and weight. Choose something that fits your existing space and won’t strain the mounting area.
- Smart features. Built-in streaming means fewer devices to plug in.
- Power options. Some RVers prefer 12-volt TVs to save energy while boondocking, but even the regular flat screen option today is fairly power-efficient.
Pro Tip: If you’re replacing a TV near a window, look for one with an anti-glare screen. (RV interiors can get surprisingly bright.)
Step 3: Improve the sound.
Let’s be honest. The factory-installed RV speakers rarely do your favorite shows or playlists justice. Replacing them can drastically improve your sound quality, whether you’re watching Netflix or listening to a podcast while cooking dinner.
Popular Options:
- Soundbars. Easy to install and perfect for small spaces.
- Bluetooth speakers. Great for portability and outdoor use — this is our favorite because of sound quality, portability, price, and they’re battery powered. So, it checks all the boxes for RV life.
- Built-in speaker upgrades. Swap out old ceiling or wall speakers for better clarity and deeper bass.
Pro Tip: Choose a soundbar with HDMI ARC or Bluetooth for easier connection to newer TVs.
Step 4: Cut the cords (if you want to).
Gone are the days of needing five remotes and a stack of physical media. Today, most RVers opt for simple, wireless systems.
Consider:
- Roku, Fire Stick, or Apple TV. Streaming entertainment is great if you’re OK with your TV and just want more shows.
- Bluetooth pairing. This can work between your TV and sound system or phone and sound system.
- A central media hub. A hub will help to combine controls in one place. This is good if you really want to do a big time overhaul for a movie theater feel on wheels.
If you’re boondocking, don’t forget about data usage — streaming eats up bandwidth fast. Some RVers download content while connected to Wi-Fi and watch it later without using mobile data.
Pro Tip: A good smartphone with a mirror or wireless capability to your TV or a cable that connects directly to the TV HDMI can sometimes extend your data, because a lot of plans throttle your hotspot way before your phone’s internal data usage.
Step 5: Don’t forget internet and antennas.
Speaking of data, streaming content or tuning in to live TV depends on your signal. If you’re relying on campground Wi-Fi or a dated TV antenna, you might need a boost.
Upgrade Ideas:
- RV Wi-Fi boosters or cellular routers. That way, you enjoy better streaming.
- Digital antennas. This will provide access to over-the-air channels
- Signal amplifiers. These enhance reception in remote areas.
- Starlink. This is a great solution for heavy-data users and streamers.
If you work remotely or homeschool on the road, investing in a reliable mobile hotspot or Starlink system could be a game-changer. As digital nomads, my wife and I need options, so we have Starlink and two different phone carriers.
Pro Tip: Mounting your antenna higher (like on a ladder or roof rack) can improve signal without major installation work. But be careful about how you mount them, because they can be a travel day casualty if you’re not careful.
Step 6: Simplify the wiring and power setup.
Many RVers find a rat’s nest of outdated cables behind the entertainment center. Renovating your system is the perfect time to clean that up.
What to Do:
- Remove unused A/V and coaxial cables.
- Label all remaining wires for easy reference.
- Use cable ties or sleeves to keep things tidy.
And don’t forget to check power sources. Adding a power strip with USB ports or upgrading to a 12-volt TV could give you more flexibility for off-grid use.
Pro Tip: If you’re using an inverter, make sure your entertainment system is wired to a circuit that can handle it — especially if you’re off-grid and powering other electronics.
Bonus: Bring Movie Night Outdoors
Want to level up your RV entertainment beyond the walls of your rig? Consider a battery-powered projector and speaker combo like the Nebula Capsule 3 Laser Projector, which we personally use and love.
This compact device offers surprisingly impressive sound and picture quality — and with its built-in Bluetooth speaker, Android TV interface, and long battery life, it’s a plug-and-play option for campsite movie nights without the power drain on your house batteries. Pair it with a portable screen or even a high-quality white sheet, and you’ve got a 120-inch home theater under the stars.
Pro Tip: Use tent stakes, clips, or magnets if possible, so you can keep your sheet or screen taut for the best picture clarity, and don’t forget the popcorn.
Enjoying RV Entertainment System Efficiency
Upgrading your RV’s entertainment system doesn’t have to mean tearing apart your rig or spending a fortune. With a few strategic changes — like swapping in a smart TV, upgrading the sound, and simplifying connections — you can transform your space into a modern, functional home theater on wheels.
Whether you’re full-timing, weekend tripping, or just want a better setup for family movie night, these upgrades can help your RV feel more like home — and give you a welcome escape after a long day of adventuring.
Leave a Reply