Author: Arielle Patterson

  • How to Fill, Empty, and Clean Your RV Water Tanks

    How to Fill, Empty, and Clean Your RV Water Tanks

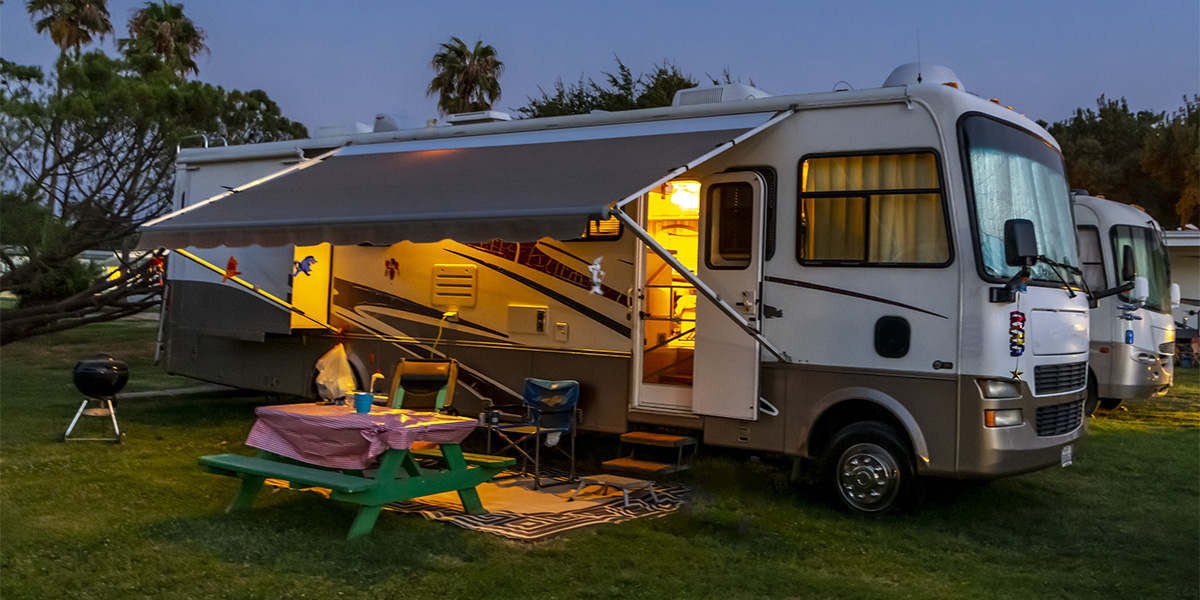
    RVing offers the wanderlust of camping with the comforts of home, including running water. However, upkeep for this convenience is different from being in your house. It’s important to know how to manage and maintain the fresh water, gray water, and black water tanks, whether you have a Class A motorhome or travel trailer. To get you started, RV Trader has broken down how to fill, empty, and clean your RV water tanks, as directed by most manufacturers.

    Filling Your Fresh Water Tank

    When filling the fresh water tank, remember to only use a potable water hose. This hose is designated for water that’s safe to drink and use for food preparation. Keep this hose separate to avoid contaminating your drinking water.

    Locate your RV’s intake valve and attach the potable hose to one end, with the other end connected to a water spigot. As water flows into the tank, keep an eye on the tank indicators inside the camper to gauge how full the tank is. Once the tank is full, remove the hose and place the cap back on.

    If water starts to spray from the hose while it’s connected, you could be overfilling your tank. You also want to make sure the water pressure isn’t too high. High pressure can damage your RV’s water systems and bust pipes or cause leaks. An RV water pressure regulator can help prevent this. Most manufacturers recommend maintaining a water pressure less than 45 psi.

    You should decide how much you want to fill your fresh water tank based on where you’re traveling and the hookups available. If you’re boondocking, you might not have access to fresh water, so a full tank makes sense. However, most campgrounds have fresh water fill stations, so you won’t need to travel with a full tank.

    Emptying Your Water Tanks

    After every trip, you should drain your fresh and wastewater tanks. 

    Draining the Fresh Water Tank

    Longtime RVers recommend not leaving water in your fresh water tank for more than two weeks. To empty the fresh water tank, start by turning off the hot water heater. Once the hot water heater has cooled, open all of the faucets. This includes the shower, toilet, and low point drain lines.

    Locate the fresh water tank drain, which is typically under the RV. Open the valve and let the water drain out. You can remove any remaining water by turning on the fresh water pump.

    Draining the Wastewater Tanks

    To empty the wastewater, locate the valves for the black and gray water tanks. You’ll want to start by emptying the black tank. By emptying the black water tank before the gray tank, you’re able to flush any leftover solids from the hose.

    Remember to only drain this water at the designated dump station. Hook your sewer hose up to the black water tank valve, pull the valve, and let the tank drain. When there’s no liquid coming through the hose, close the valve tightly.

    After the black water tank is drained, follow the same steps to drain the gray tank. Once the gray tank is empty, you can flush the tank to remove any stray bits leftover that could develop bacteria. Some RVs have a specialized flushing filter. To perform a manual flush, run the water in your shower, kitchen, and bathroom while you’re still connected to the dump station. 

    Cleaning Your Water Tanks

    If you notice any smells coming from the hoses and faucets, be sure to sanitize your water systems. Your RV’s water tanks can grow mold and odor-producing bacteria.

    Cleaning the Fresh Water Tank

    It’s especially important to clean your fresh water tank. A dirty tank can create an unpleasant smell and give your drinking water a bad taste. We recommend cleaning the tank at least every six months, or more if you’re a full-time RVer. By using a quarter cup of bleach for every 15 gallons of water your tank holds, you can sanitize your tank and fight off any growing bacteria. 

    Add the bleach to your tank then fill it with fresh water. Inside your camper, open all of the faucets until the tank is empty. Once the tank is empty, fill it again with fresh water and let it sit overnight. The next day, drain the tank through the faucets until the bleach smell is gone. You may need to repeat this process a few times. For more step-by-step instructions, watch this video on sanitizing an RV water system.

    Cleaning the Black Water Tank

    It’s a good idea to clean your black water tank at the end of your RV season to remove any buildup that may be inside.

    Start with an empty tank. Run a garden hose down through the toilet, which is typically located above the black water tank. Turn the hose on and move it around to spray throughout the tank. When the tank is full, drain it.

    There are products available to control the odors in wastewater tanks. If you have a bad odor in your tank, get an odor-control product and follow the directions to keep your tank smelling as clean as possible.

    Your camper’s water system can make your time on the road much more comfortable. By knowing how to properly fill, empty, and clean your RV’s water tanks, your water system will be perfectly managed and maintained so you can focus on the adventure ahead. For more specific instructions on filling your camper’s fresh water tank, including component locations and other recommendations, check your owner’s manual.

    If you’re ready to feel at home on the road, browse the new and used RVs available nationwide on RVTrader.com.

  • 6 Things to Know about Campground Memberships

    6 Things to Know about Campground Memberships

    RVing can be an affordable way to travel and explore the country, but campground fees can quickly add up. What if there was a way to save on those? Campground memberships, a favorite of camping aficionados, offer a way to save on campsite costs. Before you break out your wallet, check out RV Trader’s list of six things to know about campground memberships.

    1. Membership Cost

    The first step when researching a campground membership is determining your budget. Membership fees are usually charged monthly or annually, with higher memberships typically offering more campsite locations or exclusive access. As you look at the cost of membership, keep in mind the additional benefits and restrictions associated with your club, which we’ll discuss more below.

    2. Types of Memberships

    There are a few types of campground memberships that range in price and offerings.

    Reciprocal Camping Membership

    Reciprocal camping memberships require you to first be a member of one of the affiliated resorts or campgrounds. Because of this, fees are typically lower. Think of it as a supplemental membership. Joining a reciprocal membership program, such as Resort Parks International, can enhance your membership benefits at one of the affiliated sites. 

    Campground System Membership

    Campground system memberships offer a network of RV resorts and campgrounds under one umbrella. Unlike reciprocal camping memberships, you don’t need an additional membership for access to one of the campsites in the network. These memberships, such as Thousand Trails, can be more expensive since the cost of the campsite is covered in your membership fee.

    Discounted Camping Club

    Similar to campground system memberships, discounted camping clubs feature a network of campsites and RV parks. Instead of the membership fee covering your stay, you’ll receive a discounted rate to one of the campsites. Memberships like Passport America grant members 50% off camping fees at participating campgrounds.

    Rewards Membership

    Rewards memberships are offered by an individual campground brand. For example, Club Yogi Rewards is free and gives campers who stay at Yogi Bear’s Jellystone Park™ Camp-Resorts points to redeem there. Others, like KOA Rewards, charge a membership fee but give you on-site discounts and other perks.

    3. Campground Locations

    One of the best parts of traveling by RV is the ability to go anywhere. A membership can grant you access to campgrounds across the country. Most clubs and memberships have campground directories and online maps that you can browse to see all the locations you can visit. Tow your fifth wheel to one of the hundreds of participating campsites, depending on which membership you choose.

    4. Membership Benefits

    The biggest draw to a campground membership is receiving a lower rate or exclusive access to one of the participating campsites, which varies by membership. But you can also get additional perks. Many memberships include benefits such as: discounts on retail stores and nearby attractions, loyalty programs, access to social groups, and more.

    5. Membership Restrictions

    Campground memberships are pretty straightforward, but it’s always best to read and understand the fine print. Some memberships have restrictions on how often you can visit the campsites, length of stay, booking windows, and more. It’s also important to pay attention to how benefits, if any, are applied and cancellation fees.

    6. Popular Campground Memberships

    Each campground membership has something for every type of camper, from weekend warriors to full-time RVers. Here are some of the most popular campground memberships to choose from:

    • Boondockers Welcome
    • Escapees RV Club
    • Good Sam club
    • KOA Rewards
    • Passport America (click the link and get three months for free with a referral from RV Trader)
    • Thousand Trails

    Campground memberships are an investment that can help you save on your RV adventures. Now that you know more about campground memberships, you can start your research and determine which is best for you and your RV lifestyle.

    If you’re looking for a new or used RV for your next camping adventure, browse the nationwide for-sale and for-rent units available on RVTrader.com.

  • 13 Steps for Winterizing Your RV

    13 Steps for Winterizing Your RV

    Owning an RV can provide year-round adventures, but for many, the cold weather represents a hiatus from your travel trailer. Knowing how to properly store your RV can save you from a headache once warmer weather returns. Get your rig ready for the season with RV Trader’s 13 steps for winterizing your RV.

    Take our exclusive quiz to discover the autumn road trip destination that’s perfect for you!

    1. Clean the Interior

    Before storing your RV for the winter, perform a bit of housekeeping on the interior. Clean the main living area, kitchen and dining area, bedroom, and bathroom so your camper will be in pristine condition when you’re ready to ride when the weather warms up. Make sure you allow enough time to defrost the freezer compartment and wipe up any melted water. Avoid attracting pests by removing all food products from inside the RV.

    2. Drain the Wastewater Tanks

    Similar to how you drain your black and gray water tanks after a trip, you’ll want to do the same before you store your RV for the winter season. The water in these tanks can freeze when temperatures drop and develop gross bacteria. Drain both tanks, starting with the black water tank. Once the tanks are drained, clean the black water tank with a specialized cleaner that doesn’t contain harsh chemicals.

    3. Drain the Water Heater

    When you start your RV winterization process, turn off your water heater first. This gives the heater time to cool down and not be under pressure. You do not want to drain the water heater if it’s hot or has pressure built up. When it is safe to do so, use a socket wrench to remove the water heater drain plug and open the pressure relief valve to let the water drain out.

    4. Bypass the Water Heater

    When you bypass the water heater, you prevent antifreeze from getting inside. Start by opening the water heater’s screen on the outside of the RV. Remove the panel to access the valves and adjust them to bypass the water heater. To help you out, take a look at this video that shows how to operate the water heater bypass valves.

    5. Drain Other Water Lines

    The Family Motor Coach Association (FMCA) recommends taking several measures to prevent freeze damage to the plumbing system. In addition to your wastewater tanks and water heater, you should fully drain your entire water system by opening the hot and cold faucets, along with the toilet, shower and low point drain lines. Again, you’ll want to make sure that the water pressure is off before draining the freshwater tank.

    6. Empty the Water Lines

    To ensure the lines are clear, blow them out with compressed air. This step can begin after you drain the wastewater tanks and water heater, remove any inline water filters, and bypass the water heater.

    Connect an air compressor to one end of a blowout plug that’s in your water intake valve. Set the air pressure between 30 and 40 psi then blow the air into the lines, opening one line at a time. The air will push out most of the water from the lines.

    7. Add Antifreeze to the Water System

    Another technique for preventing potential plumbing issues is adding RV-specific antifreeze, made with propylene glycol, to your RV’s water system. Start by turning on the water pump and using a siphoning kit to flow antifreeze through your water system. To ensure that the antifreeze is getting into your entire system, you’ll want to see if the water is pink in the external faucets and valves, along with the internal faucets in the kitchen, bathroom and shower.

    Not sure which technique to choose? Read our previous article on winterizing your RV that discussed air vs. antifreeze.

    8. Add Stabilizer to the Fuel

    Just like antifreeze protects the plumbing system, fuel stabilizer can help avoid damage to your RV’s engine. Since fuel goes bad overtime, and can cause oxidation, add a stabilizer to prevent condensation. Once you add the stabilizer, let the engine run for a few minutes so it can make its way through the entire fuel system.

    9. Change the Oil

    After your last trip of the season, change the oil in your RV. The existing oil can become corrosive overtime, especially during your camper’s winter hiatus. Perform an oil change on your RV’s engine and generator before storage, or get it professionally serviced.

    10. Inspect the Exterior

    Give the exterior of your RV an inspection before you store it for the winter. You’ll want to check the condition of the roof, windows, doors, access panels, and sidewalls. Reseal or re-caulk any holes or cracks you find to keep your camper in good condition and prevent water, small animals, and pests from getting inside.

    11. Inflate the Tires

    Overtime, your RV’s tires will slowly deflate while parked. Fill the tires up with air before your rig sits idle to make sure they aren’t completely deflated in the spring. You can also use a lift or blocks to raise the unit and keep the tires from getting pressure damage.

    12. Charge and Maintain the Battery

    Disconnect your RV’s battery and store it in a cool, dry place. Freezing temperatures can cause damage and destroy the battery, so make sure the storage area isn’t too cold. You’ll want your battery to maintain a charge while you aren’t using it. Trickle chargers are designed to cycle off and on and maintain a charge without overheating the battery.

    13. Cover and Store Your RV

    The ideal location to store your camper would be a garage or under a covered car park or shelter. If that’s not possible, make sure your RV is parked on a paved/concrete surface. Protect your rig from potential snow, wind, and ice with a durable, breathable cover that won’t trap moisture.

    When freezing temperatures arrive, you know it’s time to winterize your RV. By following these 13 steps, you could be saving yourself from expensive damage to your rig. Be sure to review your owner’s manual before winterizing for important information about your particular RV and its parts.

    If you decide to set off on a winter getaway in your camper, read our previous article for 10 tips for winter RVing.

    Searching for a new Class A motorhome? Browse the nationwide inventory of new and used models on RVTrader.com.

  • 5 Ways to Sell Your RV Fast

    5 Ways to Sell Your RV Fast

    You always look forward to hopping in your RV and taking a break from the day-to-day hustle and bustle. After a while, you may decide it’s time for a new camper to take on adventures. The selling process can seem overwhelming but, if you’re equipped with the right strategies, you can quickly turn your used fifth wheel, travel trailer, or motorhome into profit. To help you get started, RV Trader has put together five ways to sell your RV fast.

    1. Use a For Sale Sign

    To quickly catch the attention of potential local buyers, using a for sale sign is a tried-and-true method. For the best results, park your RV in a heavily trafficked area with a sign in the windshield or on a window. In large, clear writing, include some information about your camper, such as the make, model, and year, as well as your contact information. If you park in the lot of a private business, make sure you ask permission from the business owner beforehand so your RV doesn’t get towed. If you still want to make memories in your RV as you’re trying to sell it, keep the for sale sign in a spot that won’t obstruct the driver’s view.

    You can also print for sale flyers and hang them on community boards at local businesses, at nearby campgrounds and RV parks, and other places around town. These flyers should provide prospective customers the same helpful information as a for sale sign.

    2. Sell on an Online Marketplace

    Online marketplaces allow you to reach a larger network of shoppers than a for sale sign. To begin, find a consumer-trusted online marketplace to ensure a safe and reliable selling experience. Then, create a detailed listing, which can be done in just minutes. Be sure to include as much information as possible in the description, including the type of RV, sleeping capacity, and vehicle weight. With this information, as well as additional specifics like the make, model, mileage, and more, shoppers can search for the right camper for their needs. The more detailed your listing, the faster you can connect with the best potential customer.

    While some buyers are comfortable with purchasing a unit sight unseen, it’s always helpful to give them a glimpse at what could be theirs. Take high-quality photos at different angles and add them to your virtual listing. You can even record a video of you giving a virtual tour of the RV, which can save you time with a prospective buyer compared to meeting in person.

    3. Utilize Social Media

    Leverage the power and reach of social media platforms to draw more attention to your for-sale RV. You can engage even more shoppers by posting photos and a description of your unit on your personal accounts, as well as community pages and groups for camping and RV enthusiasts. If you’re hoping to reduce or remove shipping and delivery costs, Facebook Marketplace is a great way to connect with local shoppers through your personal account. 

    Take it up a notch by sharing videos of your camper on Facebook, Instagram, and TikTok to get likes and attract potential customers. What better way to sell your Class A motorhome than showcasing how an owner can cruise across the country in style?

    4. Sell to an RV Dealer

    For a quick and easy experience, consider selling your used RV to a dealership. Instead of waiting to find the right buyer, call or email your local dealerships to see which can get you the best deal. If there’s a high demand for campers, you could get an instant cash offer since dealerships are going to resell your unit.

    Along with a faster close and convenient business hours, you’ll also save time compared to listing the unit yourself by not needing to verify a buyer’s credentials and haggling over price. Dealers will even take care of all the transfer paperwork for you.

    5. Trade In for a New RV

    If you’d like to get more for your sale to a dealer, you could trade in your old RV for a new one. Instead of pocketing the profit you make from selling your camper to a dealership, you can put that money towards a down payment for your next one. This is a great option for sellers who are already thinking about their next rig. Make sure you shop your used RV around to see which dealership can offer you the best deal and has the best new (or new-to-you) inventory to choose from. As an added benefit, you could even pay less on sales tax since many states charge the difference between your trade-in value and the price of your new RV.

    Bonus Tip: Rent Out Your RV

    Maybe you’ve decided it’s not the right time to sell, but you don’t want your RV to sit idle. Give someone else the gift of a mobile adventure, and make some extra money, by renting out your camper. Peer-to-peer (P2P) renting allows you to loan out your rig to other couples and families ready to hit the road. If this option interests you, read our previous article for tips on renting out your RV.


    Your RV has brought you joy for a long time, but selling can be less fun. Expedite the process by using a for sale sign, social media, online marketplace, dealership, or trading in your unit to sell your RV fast. Before you list your camper, make sure it’s spotless by giving it a deep clean inside and out.

    If you decide to sell your RV online, list your unit on the trusted, nationwide marketplace at RVTrader.com. And if you need additional resources to help you through the process, check out our RV Seller’s Guide and read our top tips for selling your used RV.

  • RV Trader Travel Spotlight: Great Smoky Mountains National Park

    RV Trader Travel Spotlight: Great Smoky Mountains National Park

    So, you’ve decided to take an RV road trip, but you don’t know where to go. Millions of visitors flock to Great Smoky Mountains National Park, making it one of the most-visited national parks in the country. With over 800 square miles, stretching from Tennessee to North Carolina, the park is best known for its stunning mountain ranges, wildlife, plant biodiversity, history, and more. In this RV Trader Travel Spotlight, we’ll discuss everything you need to know about visiting Great Smoky Mountains National Park.

    Great Smoky Mountains National Park History

    Cruise through history in your camper when you visit Great Smoky Mountains National Park. The Smoky Mountains are estimated to be between 200 and 300 million years old, with human history dating back to the prehistoric Paleo Indians. In fact, historic artifacts that are thousands of years old have been found within the park.

    In the 1900s, the area became home to loggers who quickly began cutting down the mountain’s majestic and historic forests. Fortunately, in 1934, after President Calvin Coolidge signed a bill to establish Great Smoky Mountains National Park, the state of Tennessee and North Carolina transferred deeds for the federal government to take over this land. At that time, only 20% of the original forest remained uncut within park boundaries. 

    In 1940, Great Smoky Mountains National Park was formally dedicated by President Franklin D. Roosevelt. Throughout the park, you can see remnants of its history, from the towering, mature treetops to the log buildings left behind by the former residents. Great Smoky Mountains National Park showcases serene, natural vistas and the rich cultural tapestry of Southern Appalachian history

    Things to Do at Great Smoky Mountains National Park

    Whether you prefer the thrill of hiking to a mountain peak or simply strolling along the forest floor as you view wildflowers, Great Smoky Mountains National Park has activities for every type of traveler. 

    Great Smoky Mountains National Park elk


    Auto Touring

    RVing gives you a unique opportunity to tour the Smokies from your mobile living room. Great Smoky Mountains National Park features 348 miles of scenic roadways to travel across, and most are paved. Imagine gazing out the window of your Class C motorhome at the flowing mountain streams and dense hardwood forests. If you have a tow-behind unit, you can detach your trailer and take an auto tour from your passenger vehicle.

    Travel trailers and RVs are prohibited on some secondary roads within the park. Informational booklets and guides are available online and at visitors centers to help you navigate these roads in your camper.

    Hiking

    Hiking is a year-round activity in the Smoky Mountains. Each season offers different landscapes and plant life to view. Do you want to hike to the highest summit? Or travel to a rushing waterfall? If you’re traveling with little ones, there are even kid-friendly hiking trails that are shorter and on paved ground. Here are some of the most popular hiking trails at Great Smoky Mountains National Park:

    • Charlies Bunion – Hikers can travel east along the Appalachian Trail to a breathtaking stone outcrop known as Charlies Bunion. This hike is four miles one way with an elevation change of 1,600 feet.
    • Alum Cave Bluffs – The Alum Cave Bluffs Trail is one of the most popular trails to get to Mount LeConte, the third-highest peak in Great Smoky Mountains National Park. This hike is 2.5 miles one way to Alum Cave Bluffs, then an additional 2.5 miles to the summit of Mount LeConte.
    • Rainbow Falls – The first mile of this trail can be strenuous, but it’s all worth it to experience Rainbow Falls. This 2.7-mile one-way hike also passes along a log footbridge and seasonal wildflowers.

    Biking

    Biking is another great way to explore Great Smoky Mountains National Park. Cyclists have their pick of many roads within the park, but should be cautious of vehicle traffic and narrow roadways. Use your own bike or rent one from the campground store. We recommend the Cades Cove Loop Road, an 11-mile one-way road that allows you to pedal past the park’s historic sites and even spot wildlife.

    Fishing

    Cast a line in one of the 2,900 miles of streams within Great Smoky Mountains National Park, filled with trout and smallmouth bass. These streams protect one of the last wild trout habitats in the eastern United States. Fishing is permitted year-round with a valid fishing license or permit from Tennessee or North Carolina.

    Wildlife Viewing

    Catch the area’s wildlife in action as you traverse Great Smoky Mountains National Park by RV or foot. Cades Cove and Cataloochee can offer unobstructed views of white-tailed deer, elk, black bears, turkeys, woodchucks, and more. Remember to remain a safe distance from these animals, and not disturb them in their natural habitat. Be sure to pack binoculars if you’d like to get a closer look at some of the wild animals that call the Smoky Mountains home.

    Best Time to Visit Great Smoky Mountains National Park

    If you’re traveling by RV, the summer and fall months are the best times to visit Great Smoky Mountains National Park. March to May and mid-September through November tend to offer more comfortable weather and fewer crowds.

    Great Smoky Mountains National Park fall river


    Each spring, the park hosts a Spring Wildflower Pilgrimage with guided walks and hikes to explore the Smoky Mountain’s diversity of wildflowers. Summer boasts the highest temperatures and largest crowds, with July being the busiest month of the season. October is the peak season for leaf peeping. The autumn leaf season is over several weeks, as the vibrant colors reach mid and lower elevations between mid-October and early November. Most snowfall occurs between January and March, but this is also the best time of year to view the wildlife since there are no leaves on the trees.

    With so much to see and do at Great Smoky Mountains National Park, it’s tempting to spend weeks or longer experiencing the beauty and history of the area. If that’s not realistic for you, we recommend spending at least three or four full days at the park.

    Where to Camp and Park Your RV at Great Smoky Mountains National Park

    Great Smoky Mountains National Park offers several different types of campsites, including frontcountry campgrounds with water and electrical hookups. There are nine developed frontcountry campgrounds for you to park your motorhome or unhitch your travel trailer while you visit the park. These campsites have size restrictions for trailers and motorhomes, so be sure to check the National Parks Service website before arriving. Reservations are available and are strongly recommended. Nearby in Gatlinburg, Pigeon Forge, and Cherokee, there are RV parks and campgrounds that are great accommodations if you don’t want to stay within the park.

    What’s Near Great Smoky Mountains National Park

    When you aren’t adventuring through the park, visit these destinations just outside the Great Smoky Mountains National Park entrances.

    • Gatlinburg – Gatlinburg, Tennessee offers a blend of adventurous attractions and family fun. This mountain resort destination has everything from treetop ziplines and mountain coasters to family-friendly amusements, a local arts and crafts community, and more.
    • Pigeon Forge – If you’re searching for entertainment and shopping, look no further than Pigeon Forge, Tennessee. Home to Dolly Parton’s theme park, Dollywood, Pigeon Forge brings singers, dancers, musicians, and other performers to stages across the city.
    • Cherokee – Across state lines, Great Smoky Mountains National Park has an entrance in Cherokee, North Carolina. Cherokee is home to the Eastern Band of Cherokee Indians, one of three recognized Cherokee tribes in the country. While it is a sovereign nation, visitors are invited to experience the area’s culture through arts and crafts shopping, native elk viewing, and historic attractions.

    After learning about some of the thrilling activities and marvelous scenery within Great Smoky Mountains National Park, it’s easy to understand why it’s a top-rated National Park year after year. So, pack your bags and hop in your RV because a wondrous adventure is waiting in the Smoky Mountains.

    Have you taken your RV to Great Smoky Mountains National Park? Share any tips you have in our comments section below. If you’re looking for a new or used RV to buy or rent for a road trip, begin your search on the nationwide online marketplace at RVTrader.com.

  • 8 Tips for Dealing with Pet Anxiety While RVing

    8 Tips for Dealing with Pet Anxiety While RVing

    You love your pet and want to bring them everywhere with you, including on the road in your RV. But before you head out onto the open road in your travel trailer or other RV, you’ll need to anticipate how your four-legged friend will react to spending time in a camper, especially if they’ve never done it before. Though you love RVing, there’s a chance that being in a new environment will stress out your pet. Prepare yourself and your furry co-pilots for life on the road with RV Trader’s eight tips for dealing with pet anxiety while RVing.

    1. Know the Signs of Pet Anxiety

    The first step to managing your pet’s anxiety is to be able to identify the symptoms. Here are a few signs to look for:

    • Whining, howling, or excessive barking in dogs
    • Bathroom accidents
    • Pacing
    • Restlessness
    • Trying to escape or digging around doors
    • Holding their tails close to their bodies
    • Unusual aggression and/or destructive behavior

    There are two types of anxiety: persistent and situational. Persistent anxiety is when your pet has a natural tendency to experience stress, which can require regular treatment. An example of this is separation anxiety, where your pet always feels stress when alone, no matter the specific situation. If your pet experiences separation anxiety, or any other persistent anxiety, we recommend not leaving them alone in your camper. Try to keep them with you at all times, or have someone remain in the RV with your pet if you need to leave and cannot take them with you.

    On the other hand, situational anxiety is when stress is caused by specific events and activities. Your pet may not usually have anxiety, but the strange experience of being in an unfamiliar vehicle that rumbles down the road and stops in unknown territory could trigger a typically calm pet to feel stress. If your furry friend has never been camping or in an RV before, keep a watchful eye on how they respond to each of the new things they encounter to see how they respond. If possible, slowly introduce them to these new stimuli. For example, let your pet explore your RV ahead of time in the days leading up to your trip.

    2. Take a Test Ride

    If your pet is new to RVing, let them spend short periods of time on the road before you set off on your adventure. Get your furry friend comfortable with the sights, sounds, smells, and movement of the camper. Take test rides around the neighborhood or to your pet’s favorite places, like the park.

    If your pet shows signs of stress or anxiety when in the RV, pull over and calm them down by slowly petting them. These test rides can be a great way to gauge how relaxed your pet will be when you’re on the road for days at a time.

    3. Pack Their Favorites

    If your pet is anxious on the road, it’s important to make them feel safe and comfortable in your RV. Start by packing some items from home that will feel familiar to them even in new surroundings. Bring their crate, dog bed, and any bedding that smells like home. Reward your pet, especially if they’ve been well behaved after long drives, with their favorite treats to encourage continued good behavior. Pack their favorite toys to play with at RV parks, campsites, or at rest stops.

    4. Give Your Pet a Place to Ride

    Determine where your pet will sit or lay while you are driving. Giving them a safe and stable place to ride will help with their anxiety and prevent them from sliding around while the RV is in motion. If your pet is crate trained, anchor it to the RV to prevent the crate from sliding around when you drive. If your furry friend requires constant physical touch and petting, adjustable harnesses can keep them closer to you. These strap into an RV’s seat belts so your pet can sit up or lay down comfortably. If you have a smaller furry companion, a pet car seat keeps them contained while giving them a view out the RV’s windows.

    5. Create a Routine

    If your pet is new to RVing, it’s important to create a routine for them. This routine should incorporate their regular at-home activities, as well as things for them to do on the road. Set designated times to get off the road and let your pet use the bathroom or go for a walk. Be sure to keep them on their regular feeding schedule, and always make sure they have access to plenty of water. While RVing offers a sense of adventure and spontaneity for humans, pets benefit from more structure and consistency. 

    6. Make Stops on the Road

    It can be challenging to find pet-friendly places to go and things to do, but your furry friend will thank you. Make stops on the road that give your pet a much-needed bathroom break and let them stretch their legs and explore. New surroundings can be incredibly exciting, but keep an eye on your pet to see how they’re handling everything. Loud noises and large crowds at rest stops can stress out your pet. Be sure to keep them leashed and close by whenever they’re out of the RV.

    7. Keep Pets Calm When They’re Alone

    Unfortunately, your pet won’t be able to accompany you to every pitstop you make on the road. If you do have to leave them alone in the RV, make your trips quick and keep the RV cool with a temperature-control system. It can also help to play relaxing music, or a movie or TV show, so your pet has background noise to distract them. As we said before, we strongly discourage leaving pets with separation anxiety alone in the RV.

    8. Get Some Extra Help

    Even after following all of these tips, you still might not be able to manage your pet’s anxiety. Fortunately, there are products that can give you some extra help when it comes to keeping your pet relaxed. You can purchase over-the-counter calming supplements online or in a store. If your furry friend has persistent anxiety, it’s best to give them a supplement every day. For situational anxiety, a calming supplement can be a last resort if none of the other soothing methods work. While many of these don’t require a prescription, you should speak with your veterinarian  as a precaution before you give your pet these supplements.

    There are also wearable methods of reducing pet anxiety. Anti-anxiety jackets, including the ThunderShirt and The Anxiety Wrap, create a hug-like feeling that comforts your pet and can decrease persistent anxiety.


    RVing can be an exciting adventure for your pet. By following these tips before you leave and on the road, you can help your pet deal with their anxiety as they show symptoms and teach them to cope with life on the road. Prioritizing your anxious pet’s needs can lead to new experiences and miles of fun in your RV with your cuddly companion.

    For more tips on RVing with pets, including articles, videos, and more, check out RV Trader’s Pet Resource Page. And, if you’re searching for your next RV to make your pet feel right at home, such as a cozy and fuel efficient Class B, browse the new and used models on RVTrader.com.

  • 7 Tips for Making Your RV Pet Friendly

    7 Tips for Making Your RV Pet Friendly

    You already love traveling in your RV. The only thing that could make it better is if your furry friend could hit the road with you. Bringing your pet on an RV getaway sounds like a lot of fun, but there are some steps to take if you want to make the experience safe and enjoyable for your animal. If you plan on traveling with your four-legged friend, RV Trader has seven tips for making your RV pet friendly.

    1. Get Your Pet Acquainted with the RV

    Before you set out on your travels, let your pet get comfortable with the smells and surroundings of your RV. Pay attention to your pet’s behavior as they explore the camper, and even take them on a short drive. If your pet starts showing signs of stress or anxiety, such as whining, pacing, or shaking, calm them down by pulling over and slowly petting them. Let your furry companion know that the RV is their home too, and help them adapt to the unfamiliar environment. Once they start to relax, feed them a treat so they associate being in the RV with receiving a reward.

    Check out our other article for more tips on dealing with pet anxiety during RV travel.

    2. Create a Space for Your Pet

    If your pet is crate trained, bring a collapsible crate so they have a safe and cozy place to sleep at night and relax during the day. Furnish their crate with a bed, as well as a blanket, favorite toy, or other item from home to help make your pet’s environment more familiar. Since wire crates are open on all sides, your pet will get better airflow compared to a plastic crate.

    If you have an indoor cat who’s used to going in a litter box, keep one in your RV in a spot that’s out of the way. Empty storage areas, such as under shelves or in a closet, are good places to hide a litter box in your rig.

    Bring a portable fence or pen to set up at campsites and RV parks so your pet has some room to roam at outdoor destinations. Collapsible pens adhere to the leash and containment rules that many RV parks and campgrounds enforce. These can also be easily stowed while you’re driving without taking up too much space.

    3. Give Your Pet Easy Access In and Out of the RV

    The fold-down steps in an RV are typically made with aluminum, or they’re coated with anti-skid tape so you can safely get in and out of your unit. These surfaces make it a little harder for dogs and cats to use. Consider putting down some carpet pieces or stair treads to give your pet more traction when they use the stairs. Some brands are made for indoor and outdoor use, so you won’t need to worry about the pieces developing mold and mildew. Or, if your pet has mobility issues, purchase a collapsible ramp to give them an assist.

    4. Secure Your Pet When Moving

    While your RV may feel like a living room on wheels to you, it’s still an unsteady environment for your pet. If your animal is having a hard time getting situated when you’re in motion, use one of these methods to safely secure them:

    • There are adjustable harnesses that snap into your RV’s existing seat belts so your dog can sit up or lay down on the seat.
    • If you packed a crate, you can anchor it or position it from sliding around as you drive, keeping your pet safe from any items that may fall as you navigate the roads.
    • You can also get a pet car seat for small animals that not only keep them secure, but elevate them enough so they can look out the window. 

    5. Give Your Pet a View

    One of the best parts of traveling by RV is getting to see all of the sights along the way. Give your pet the same opportunity by installing adjustable window shades or blinds in your unit. You’ll be able to raise the shades or blinds so your pet can easily see the view, then lower them when the sun gets too hot. A pet carrier placed near a window is also an ideal spot for your cat to hang out.

    6. Monitor Your RV’s Temperature

    One of the biggest dangers to the safety of pets traveling in an RV is overheating due to high temperatures. Always keep your camper at a cool enough temperature for your animal to be comfortable. Consider using a monitor that notifies you when there are changes in the temperature, humidity, and even loss of power to your unit, if you have to leave your pet alone. These high-tech monitors can operate over Wi-Fi or your phone’s cellular network.

    If your RV does get too hot, or you notice your pet excessively panting, keep a cooling mat in your unit. You can place these in your pet’s crate, on their bed, or on the floor where they lay to provide a cooling effect.

    7. Don’t Leave Your Pet Alone for Too Long

    When you stop at different destinations, you sadly won’t be able to bring your pet inside certain places. While you can keep them in your RV, as long as the inside temperature is being monitored, you never want to leave your pet alone for too long. When left unaccompanied, your animal could become very mischievous and start snooping around the RV where they shouldn’t be. Some dogs can get very vocal, disturbing the people around you, especially at campsites and RV parks. If you do have to leave your pet alone, take them for a walk beforehand, give them plenty of water, and consider installing a Wi-Fi-enabled camera. These cameras can help you keep an eye on your pet and even toss them a treat with the push of a button from your smartphone.

    If you’re traveling in a tow-behind camper, don’t ride with your pet unattended in the unit. Bumpy rides can lead to a stressed-out pet, and if you can’t be there to comfort them, it’s best to let them ride in the tow vehicle with you. 


    If you’ve never traveled with your pet before, these tips can make their experience in the RV safe and fun. Giving them time to adapt, creating a space for them, and taking safety precautions can help make every RV adventure with your furry friend a memorable one.

    For more tips on RVing with pets, including articles, videos, and more, check out RV Trader’s Pet Resource Page. And, if you’re searching for your next RV, browse the new and used models, for sale and for rent, on RVTrader.com.

  • 5 Reasons to Have Your For-Sale RV Inspected

    5 Reasons to Have Your For-Sale RV Inspected

    Deciding to sell your RV can raise a few questions. How much should I sell it for? What’s it like to sell on RV Trader? Should I get my unit inspected? If you’re thinking about that last question, you should know that a pre-sale inspection provides sellers and potential buyers upfront information about the condition of the for-sale RV. While there are several different ways to get your unit inspected, RV Trader Assurance powered by Lemon Squad allows private sellers to order pre-purchase inspections for their RVs when listing their unit on RV Trader’s online marketplace. To help you understand the benefits of this service, here are five reasons to have your for-sale RV inspected.

    1. Fast and Convenient

    You won’t need to worry about bringing your RV to a mechanic or dealership, then waiting hours or days for them to perform the inspection. With RV Trader Assurance, an Automotive Service Excellence (ASE)-certified Lemon Squad inspector comes directly to you, the seller, for an on-site inspection. This thorough inspection covers both the mechanical and cosmetic condition of the RV. The inspection report is sent through a digital dashboard that is typically available the following business day. 

    2. Can Help Determine Pricing

    A full inspection can uncover damage or issues with your for-sale RV. If you find problems during the inspection, you’ll be able to determine if it’s worth paying for the repair. Or, you may decide to lower the value of your RV instead of making the repair. In contrast, if an inspection delivers a clean bill of health, you can use that to increase the sale price of your RV and note that in your listing description.

    3. Makes Your Listing Stand Out

    Once your inspection is finished, your listing will receive a certified RV Trader Inspection Badge, which showcases your ability to provide an inspection report to prospective buyers. The Inspection Badge will stand out among the other listings on RVTrader.com, catching the eye of interested customers.

    4. Builds Buyers’ Confidence

    Knowing that an RV has already been inspected by a trusted third party offers buyers peace of mind about the unit they’re browsing. Shoppers can request the inspection report, which includes the following information:

    • Comprehensive examination of the internal and external structure
    • Complete mechanical inspection
    • Appliance inspection
    • Road test
    • Over 40 high-quality photos

    While RV shopping online has increased in popularity, many shoppers still have concerns. This detailed inspection acts as a gesture of goodwill. Potential buyers will feel more informed and confident in their purchase decision, increasing the likelihood that they’ll buy the RV.

    5. Can Lead to a Quicker Sale

    A pre-sale inspection of your RV can eliminate the back and forth between buyers and sellers. If you’ve already completed an inspection of your unit, you’ll be able to say with certainty that your unit is in great condition, or be able to address any issues upfront with a customer. The less negotiation, the faster you can seal the deal and turn your used RV into a profit.


    Owning an RV is an investment, and now it’s time to cash in. Getting an inspection on your for-sale RV is a quick and easy way to figure out the value of your unit and make potential buyers feel more confident about purchasing your camper, which speeds things up when selling your RV

    RV Trader Assurance powered by Lemon Squad is currently available to private sellers nationwide who list their RVs on RVTrader.com.

  • 8 Tips for Pop-Up Camper Maintenance

    8 Tips for Pop-Up Camper Maintenance

    Pop-up campers are a great camping option that allow you to experience the outdoors while avoiding pitching a tent on the hard ground. One of the smallest and lightest RV options, these campers are collapsable and easier to tow and maneuver compared to a full-size trailer. Outside of surface cleaning, proper maintenance is essential to extend the life of your pop-up camper. Keep your unit as good as new with RV Trader’s eight tips for pop-up camper maintenance.

    1. Use RV-Specific Cleaning Products

    When cleaning your pop-up camper, it may be easy to reach for your regular, handy cleaning products. That may work for cleaning some parts of your camper, such as windows and the interior, but some surfaces and fabrics need special products. Using cleaners that are made specifically for RVs is always a safer bet, especially if you don’t know which chemicals could be too harsh.

    2. Don’t Store Your Camper When It’s Wet

    If you get caught in the rain, you’ll want to ensure that your camper is completely dry before storing it. Moisture can lead to mildew and mold on your camper’s canvas. If possible, let your pop-up camper dry in the sun. Or, towel dry as much of the canvas as possible before storing the unit. If you do notice any moisture damage, clean the canvas as soon as possible. Make sure you know what type of material your canvas is made of, since different fabrics require different types of cleaning products.

    3. Waterproof the Canvas and Hard Sides

    Protect your camper in advance from water damage by waterproofing the canvas and hard sides of the unit. Use a water repellent to treat the surfaces of your camper. Check your work by seeing if water beads and rolls off the fabric, as opposed to soaking in. As you’re waterproofing, look for tears in the fabric of your canvas and repair them immediately with an adhesive glue or repair kit.

    4. Inspect the Roof Seals

    Make a habit of inspecting the roof seams and seals every few months. If you notice any cracking, apply a rubber sealant to keep the seams from drying out.

    5. Clean AC Filters

    If you choose to travel with an air conditioning system, remember to clean it out. A clean filter doesn’t have to work as hard as a dirty one, saving your pop-up camper’s battery some energy. How often you clean the AC filter depends on how often you use the unit. It’s beneficial to give the filter a quick look after every trip, especially if you’ve traveled somewhere with more dust in the air.

    6. Maintain Water and Waste Systems

    If you aren’t using the water hookups at a campsite,  you’ll rely on your pop-up camper’s freshwater system for cooking, drinking, and bathing. Before a camping trip, check the water levels in your tank to make sure you always have enough. You’ll want to keep the lines for your water system clean by occasionally sanitizing them during camping season and again at the end of the season.

    Drain any gray water, which is waste water from the sink and shower, with a different hose than you use for freshwater. If you’re camping in a remote area, or don’t have access to full hookups, keep an extra container or portable tank to collect the gray water. If you’re staying at a campsite, read the rules for waste water removal beforehand.

    7. Inspect Tires Regularly

    Nothing is worse than getting a flat tire when you’re cruising down the road while towing your pop-up camper. Your unit uses different types of tires than cars, which are designed with a higher operating pressure and stiffer sidewalls. Maintaining a pop-up camper’s correct tire pressure is critical in preventing flats, so inspect the tires before every trip. Consider purchasing a tire pressure gauge to get a reading no matter where you are.

    Before each trip, you’ll also want to use a torque wrench to check the tightness of the lug nuts. If lug nuts are not properly secured, your camper’s wheel could suddenly fly off.

    8. Check the Battery

    Your pop-up camper’s battery is essential in running anything that uses electricity if you don’t have access to electrical hookups. A battery monitor can help track your usage and let you know how much voltage is  left. To extend the life of your battery, avoid running below 50% of the total voltage. Between trips, recharge your battery. At the end of your camping season, store the battery in a dry environment at a moderate temperature.


    Pop-up campers provide a more affordable way to experience RV life. By following these tips for proper care and maintenance, you can avoid costly repairs and ensure that the unit remains a great investment.

    If you’re ready to buy a pop-up camper of your own, browse the nationwide marketplace at RVTrader.com.

  • RV Trader Travel Spotlight: Yellowstone National Park

    RV Trader Travel Spotlight: Yellowstone National Park

    Traveling by RV offers a scenic and exciting way to explore the country. One of America’s greatest wonders, and one of the top 10 national parks in the U.S., is Yellowstone National Park. Yellowstone is one of the most-visited national parks, showcasing the beauty of the west in its natural setting. Known for eye-catching views, native wildlife, and hydrothermal features like hot springs and geysers, there’s plenty of reasons why millions of visitors travel here each year. A bucket-list RV destination, we’ll break down everything you need to know about Yellowstone National Park in this RV Trader Travel Spotlight.

    Yellowstone National Park History

    Established on March 1, 1872, Yellowstone is regarded as the world’s first national park. During the 1871 Hayden Expedition, Nathaniel P. Langford, Thomas Moran, William Henry Jackson, and Henry W. Elliot surveyed the land, capturing visual proof of Yellowstone’s remarkable beauty and wonders. Six months later, Congress founded Yellowstone National Park and President Ulysses S. Grant signed the Yellowstone National Park Protection Act.

    However, the park’s history dates back thousands of years before American and European explorers arrived—to a time when native tribes and families used the land as their home and hunting ground. This history is preserved in archaeological sites and artifacts that give us a glimpse into life during that time. In fact, over 1,850 archaeological sites have been documented within Yellowstone. Imagine what the landscape looked like nearly 11,000 years ago as you walk some of the same trails that were used by people in the Paleoindian period.

    Things to Do at Yellowstone National Park

    The best way to learn more about Yellowstone is to get out there and experience it first-hand. There are a variety of ways to explore the park, spanning 3,472 square miles across Idaho, Montana, and Wyoming. From hiking, biking, and horseback riding to kayaking and scenic tours, Yellowstone offers over 2.2 million acres of adventure and relaxation in a natural setting.

    Old Faithful and Yellowstone’s Thermal Basins 

    One of Yellowstone’s most popular attractions is, without a doubt, Old Faithful. While it is not the largest geyser at Yellowstone, Old Faithful gained popularity for erupting most frequently—about every 90 minutes. Old Faithful is just one of over 500 geysers located within the park, and one of six that erupts on a predictable schedule. Plan your visit to one of the geysers around the predicted eruption schedule, available on the National Park Service website.

    ellowstone hot spring
    Image: National Park Service

    In addition to the geysers, Yellowstone also showcases other hydrothermal features, such as hot springs, mudpots and fumaroles, that are geological marvels. Here are a few we recommend you see:

    • Grand Prismatic Spring – Grand Prismatic is the largest hot spring within Yellowstone National Park. You’ll be instantly amazed by the spring’s vibrant rainbow hues. Grand Prismatic is between 370 feet in diameter and 160 feet deep.
    • Norris Geyser Basin – Walk across the boardwalk of Yellowstone’s oldest, hottest, and most acidic hydrothermal area. Norris Geyser Basin is the site of Steamboat Geyser, the tallest geyser in the world, and is part of one of the world’s largest active volcanoes.
    • Fountain Paint Pot – Fountain Paint Pot features four major types of hydrothermal features. Thermal activity is represented throughout the entire area. View bubbling mud pots, hot springs, geysers, and fumaroles from the boardwalk trail.

    While hot springs look inviting enough for a swim, it is illegal to swim or soak in any of Yellowstone’s thermal features. These thermal waters contain organisms that could cause illness or life-threatening infections.

    Hiking and Biking

    Yellowstone National Park boasts over 900 miles of hiking trails to traverse. Many of the trails are more than 7,000 feet above sea level, so bring your camera to capture the picturesque views. Here are three of our favorite hiking trails:

    • Fairy Falls Trail – While Yellowstone is known for Old Faithful, the Fairy Falls waterfall is also a spectacular landmark to behold. Walk 1.6 miles through a lodgepole pine forest to get to the falls. From there, the Spray and Imperial geysers are less than a mile away.
    • Mount Washburn Spur Trail – For a long-day hike, make your way along the Mount Washburn Trail. This 16.2-mile roundtrip trail starts and ends at the same trailhead, offering panoramic views of Mount Washburn, wildflowers in bloom, and the Washburn Hot Springs along the way.
    • Natural Bridge Trail – This one to two hour hike goes through the forest and along an old service road to a natural bridge that was cut out of a cliff by Bridge Creek. A short but steep hike, the Natural Bridge Trail is 2.5-miles roundtrip.

    There’s no better way to take in views of Yellowstone Lake, Lone Star Geyser, and Madison River than hiking and pedaling through Yellowstone. Hiking and biking trails vary in duration, so make sure you stay hydrated throughout the day. Also, keep in mind that biking is permitted on established roads and designated routes, but prohibited on backcountry trails, boardwalks, and oversnow routes. 

    Wildlife Watching at Yellowstone

    Observe wildlife, from a safe distance, as you explore the park on your own or on a guided tour. It is recommended to stay at least 100 yards away from bears and wolves, and at least 25 yards away from other wildlife. Binoculars are strongly encouraged if you want to get a closer look at the animals that call Yellowstone home.

    Yellowstone wildlife
    Image: National Park Service

    Best Time to Visit Yellowstone National Park

    For RVers, late spring through early fall present the best times to visit Yellowstone. April to May and September through October tend to offer more comfortable weather, less crowds, and fewer road closures. Watch as wildlife emerges from hibernation and the flowers start to bloom in spring. Autumn ushers in the vibrant foliage, and you’re also more likely to spot animals, who move to lower elevations when temperatures drop, foraging for food. July and August are the most popular months to visit since children are out of school.

    With so much to see and do at Yellowstone, you could easily spend a week or longer experiencing something new every day. If you don’t have that much time, we recommend spending at least three or four full days touring the park.

    Where to Camp and Park Your RV at Yellowstone

    Yellowstone National Park features 12 campgrounds and over 2,000 sites. Five of the campgrounds are overseen by Yellowstone National Park Lodges, while the National Park Service manages seven. RVs are allowed at all campgrounds within the park, but there are some size restrictions. Fishing Bridge RV Park is the only campground with full hookups available. Reservations are strongly recommended if you plan to park your RV at one of these campsites.

    Yellowstone RV camping
    Image: National Park Service

    What’s Near Yellowstone National Park?

    When you aren’t exploring the park, check out these neighboring attractions.

    • Grand Teton National Park – Located in the northwest area of Wyoming, Grand Teton National Park is brimming with history, wildlife, and activities for all ages. This year-round destination offers everything from hiking the lush valleys to snowshoeing the alpine terrain. We’ve previously covered a few of the many reasons you should explore Grand Teton National Park.
    • West Yellowstone, Montana – West Yellowstone is an outdoor enthusiast’s paradise, boasting ATV, UTV and snowmobile trails, fly fishing, and whitewater rafting. The southern Montana town also has year-round family friendly events and restaurants serving up regional specialities.


    An RV trip to Yellowstone National Park is sure to be filled with masterful landscapes, spectacular geological attractions, and memory-making experiences. Now that you have an idea of what awaits at Yellowstone, load up your camper and hit the road! 

    Have you taken your RV to Yellowstone? Share any tips or tricks you have in our comments section below. Searching for a new or used RV to rent or buy for a road trip? Shop the nationwide online marketplace at RVTrader.com.