Author: Gabriel Rivero

  • Visit the RV Hall of Fame in Elkhart: Your Go-To Guide

    Visit the RV Hall of Fame in Elkhart: Your Go-To Guide

    It doesn’t take long to figure out that there is a center of the RV world. If you’ve spent any time researching RVs, shopping for your next rig, or daydreaming about life on the road, chances are you’ve heard of Elkhart, Indiana. Known as the “RV Capital of the World,” this small Midwestern city has long been the epicenter of RV manufacturing. And tucked right in the heart of it is a hidden gem that every RV enthusiast should have on their bucket list: the RV/MH Hall of Fame.

    So, whether you are just passing through northern Indiana or setting out on an RV pilgrimage, visiting the RV Hall of Fame is a worthy destination. Always rewarding, the stop is fun, educational, and delightfully nostalgic.

    Here’s everything you need to know to plan your visit to the RV Hall of Fame.


    What is the RV Hall of Fame?

    Officially called the RV/MH Hall of Fame, this unique museum and archive celebrates the rich history of the recreational vehicle and manufactured housing industries. (I’d have guessed the “MH” was motorhome!)

    The facility includes:

    • A massive museum filled with vintage and modern RVs;
    • The Heritage Foundation Library and Archives; and
    • The Hall of Fame honoring industry pioneers and innovators.

    All that is great, but the real fun is walking through the museum. The best way to describe is that it feels like stepping back in time. (Or jumping ahead — they have a speculative interworld concept for the future too!) There, you’ll see everything from early 1910s travel trailers to the flashy motorhomes of the 1970s — and plenty of modern marvels.


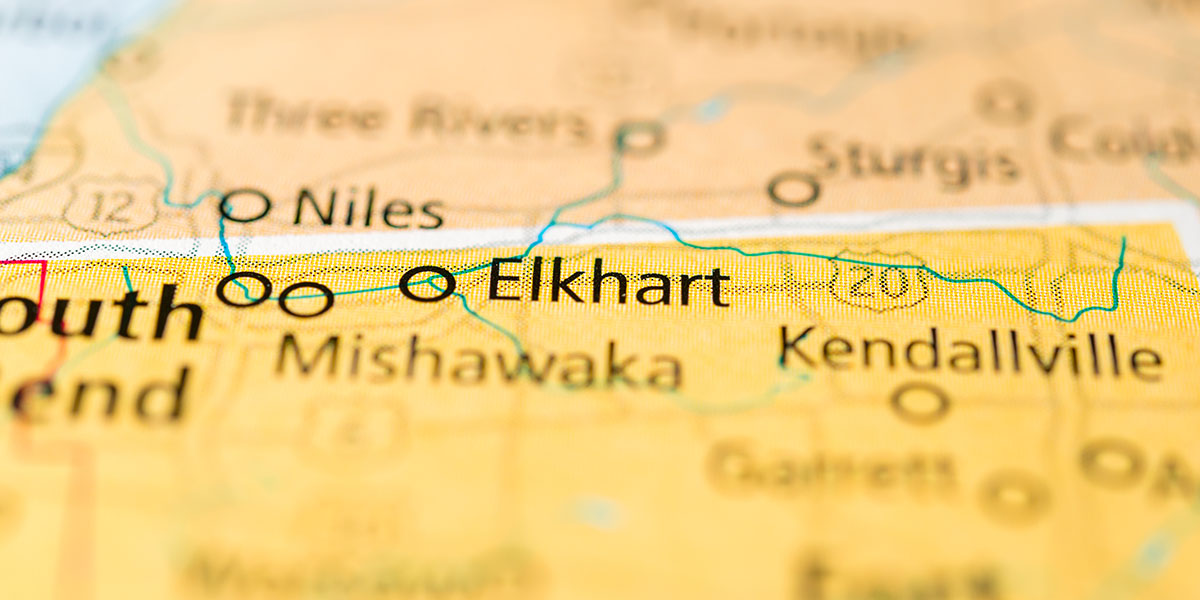
    Where is it located?

    You’ll find the RV Hall of Fame in Elkhart, Indiana. In fact, it’s right off Interstate 80/90 (the Indiana Toll Road). The address is:

    21565 Executive Parkway
    Elkhart, IN 46514

    As you might expect, this location is super convenient for RVers who are traveling through the Midwest. In fact, if you’re road-tripping along I-80/90, it’s quite easy to make this a stop along the way.

    Pro Tip: There’s plenty of RV parking on-site, so bringing your rig isn’t an issue.


    What’s worth seeing in the museum? 

    For most RV enthusiasts, the biggest draw is the RV Founders Hall. This sprawling exhibit space showcases over a century of RV history. There, you can expect to see (and in some cases enter) the following:

    • Vintage travel trailers. Step inside early campers from the 1910s–1950s and appreciate how far (and how cozy) RV design has come.
    • Classic motorhomes. From retro Airstreams to rare prototypes, this section is pure nostalgia for longtime RVers and curious newbies alike.
    • Unique prototypes and rare rRigs. Some models never made it to mass production, making this a rare glimpse at RV innovation through the decades.
    • Modern units on display. The museum doesn’t just focus on the past. You’ll also find sleek, contemporary RVs and motorhomes from well-known brands.

    For RV history buffs, it’s a chance to see how RV life evolved from basic, tent-style trailers to the modern rolling homes many of us enjoy today.


    Is it just RVs?

    Well, mostly! However, while the vintage RV displays are the star of the show, the RV Hall of Fame has a few more highlights worth checking out:

    • The Hall of Fame Gallery. Learn about the people who shaped the RV and manufactured housing industries.
    • The library and archives. If you love technical details, industry history, or classic RV literature, this research area is packed with documents and resources.
    • Gift shop. Pick up RV-themed souvenirs, books, and memorabilia.


    What’s admission like?

    As of this writing, here’s what you can expect for your visit.


    Hours

    • Monday through Saturday: 9:00 a.m. – 5:00 p.m. (EST)
    • Closed Sundays and major holidays


    Admission Prices

    • Adults: $15
    • Seniors (60+): $12
    • Youth (6–16): $10
    • Kids under 6: Free

    It’s always a good idea to double-check the current hours and admission rates on the official website before your trip, especially if you’re visiting around a holiday.


    Is there RV parking and camping nearby?

    The RV Hall of Fame offers free, spacious parking for RVs and tow vehicles, making it a stress-free stop whether you’re traveling in a motorhome, trailer, or van.

    If you’re looking to camp nearby, there are several options in the area, including:

    • Elkhart Campground. Full hookups and a convenient location just a few miles from the Hall of Fame.
    • KOA Middlebury. A bit farther out, but a popular choice for travelers exploring the region.
    • Merrillville or South Bend Options. Ideal if you’re continuing along I-80/90.

    Speaking of South Bend, for any fellow college football fans, this area has another big draw. Just about 30 minutes from Elkhart is the iconic University of Notre Dame, home of the Fighting Irish. As a huge college football fan, I always love being near fun college towns like this—especially in the fall when the leaves start changing and football season kicks off. It’s easily my favorite time of year. My wife Rocio on the other hand, loves the crisp weather and cozy fall vibes, but let’s just say she tolerates the football part for me. Fair trade, I’d say.

    So, you find yourself on the way to South Bend for the big game, maybe a swing through Elkhart would be fun add-on for your trip.


    Ultimately, is it worth the visit?

    If you’re an RVer — whether you’ve been on the road for years or you’re still in the dreaming stage — the RV Hall of Fame is well worth the visit.

    It’s not just about admiring vintage rigs (although that part’s pretty fun). It’s about appreciating how RV travel has evolved, seeing the roots of the lifestyle we love, and walking away with a deeper appreciation for the community and industry behind it.

    For anyone passing through Indiana or making an RV pilgrimage to Elkhart, this stop checks all the boxes: interesting, educational, and full of RV inspiration.


    Put this trip on your RV bucket list.

    The RV Hall of Fame is one of those spots that often flies under the radar — but for RV owners and enthusiasts, it’s simply a must-see. Whether you’re into history, design, or simply love exploring unique destinations, this museum offers a little something for everyone.

    So, if you find yourself cruising along I-80/90, consider making a pit stop in Elkhart. Stroll through decades of RV history, snap some photos, maybe pick up a little inspiration for your next adventure—and if you happen to visit during football season, maybe sneak over to South Bend for a game or to soak in the atmosphere.

    After all, seeing where RV life started makes you appreciate where it’s going—and reminds us that no matter what you travel in, it’s all about the journey.

  • 5 RV Solar Starter Kit Essentials to Power Your Adventures

    5 RV Solar Starter Kit Essentials to Power Your Adventures

    RVing isn’t all rainbows and butterflies — turns out that it’s about sunshine too! Personally, I am all about that. (A little too much if you ask my wife.) While on the road, I always try to harness solar energy and long battery life. That fact is that power — or the lack thereof — can make or break your RV experience. So, in this article, my goal is to help you identify the right RV solar starter kit essentials. (That way, you’re not in the dark about what to expect out on the road.)

    Whether you’re just beginning your journey into solar or looking to level up your existing setup, these RV solar starter kit products helps offer a practical and impactful way to power your adventures.

    This list is a brief starting point into the solar world to help you get an idea of where to start. For a more in-depth look at how solar power works or the components involved, feel free to jump ahead to those articles. Also, please note that the example s provided are just a few of the quality options available. 


    1. Portable Solar Panels – Power Wherever You Roam

    Portable solar panels are a versatile and convenient option for RVers who need a flexible and lightweight energy solution. They’re ideal for supplementing power when you’re parked in a shady area or require additional charging capacity on the road. Just connect. Move it to a sunny spot. And you’re good to go. Some have connectors that clamp directly onto your house battery like jumper cables. Others have specific connectors that come with your standard solar setup. Solar panels can range in size, shape, and performance, but the price will show it.

    Examples:

    • Hiluckey Solar Charger. This falls into the pocket-sized solar panels that you can have with you to charge up small items like phones and tablets. It work on your RV directly, but these are cheap options that can save your life if you need power to make a call, text, or go online.
    • Renogy 100W Foldable Solar Panel. This model offers ease of use with a built-in charge controller and clamps to connect directly to your batter without needing anything else. This provides consistent power even in less-than-ideal conditions.
    • Renogy 400W Lightweight Portable Solar Suitcase. Among one of the most trusted brands and coming in at a reasonable price for what it offers, this portable panel provides a lot of bang for buck.

    Why You Need It: Portable solar panels allow you to maximize solar energy use without committing to a fixed installation. They’re perfect for boondocking, day trips, or supplementing your rooftop panels during extended stays. Some are small enough to fit in your pocket on hike, if you want to charge up your phone in a pinch.

    Pro Tip: Position portable panels throughout the day to capture maximum sunlight, and pair them with a solar generator or full install for better energy storage.


    2. RV Solar Kits – A Comprehensive Solution

    For RVers who want to go all-in on solar, an RV solar kit provides as close to a complete package as possible. These kits typically include high-quality solar panels, charge controllers, and necessary mounting and wiring hardware, making them a one-stop shop for solar upgrades. They are a little easier and more affordable then a completely custom build, but these are as plug and play as DIY can be. You may still likely need to purchase a few smaller products or accessories to fit your RV, and you will likely want to upgrade your batteries, but a phone call to the company or an experienced tech can make life a lot easier.

    Examples:

    • Go Power! Rigid Eclipse Solar Kit. This kit includes premium rigid solar panels, a 30-amp MPPT controller, and all the essentials for a seamless installation. It’s an excellent choice for serious solar adopters.
    • Renogy Premium Solar Kit. Offers a range of options from 200W to 800W, providing flexibility for different RV sizes and power needs.
    • Zamp Solar Legacy Kit. Known for durability and efficiency, these kits are designed for RVers who demand top performance.

    Why You Need It: A well-designed solar kit simplifies the transition to solar by ensuring all components are compatible. This is a great option for RVers looking to power appliances like fridges, microwaves, and entertainment systems while off-grid.

    Pro Tip: Invest in an MPPT controller for better energy efficiency, particularly if you plan on expanding your solar setup in the future. We recently upgraded our solar setup to a Go Power! kit along with some extras, and here is a little look at our setup. We had it professionally installed, and we recommend you do too, unless you are really confident in your ability to DIY.


    3. Solar Generators: Compact Powerhouses

    Solar generators offer a clean, quiet, and portable solution for powering your needs. From big units that can power an entire RV, to smaller units that can charge phones, laptops, and run a few appliances and gadgets, solar generators or power stations are the easiest ways to jump into solar. These all-in-one units combine solar panels, inverters, and batteries to deliver reliable energy whenever and wherever you need it.

    Examples:

    • Go Power! DuraCube. This 500 watt power station is great, lightweight, and portable for phones, laptops, and smaller appliances on the go.
    • Jackery Explorer 1000 Plus. A well-balanced option with multiple output ports and excellent portability, ideal for light to medium power needs.
    • EcoFlow Delta Pro. This powerhouse offers expandable battery options, lightning-fast recharge rates, and enough capacity to run larger appliances and some RVs completely.

    Why You Need It: Solar generators eliminate the need for noisy gas-powered generators, providing an eco-friendly alternative that’s easy to transport. They’re particularly useful for emergencies, short trips, or RVers who don’t want to commit to a full solar setup.

    Pro Tip: Opt for models with pure sine wave inverters to safely power sensitive electronics like laptops and CPAP machines. If you want to power your full RV, make sure you know your power needs and the capacity of the unit you want to buy.


    4. Battery and Energy Storage – Reliable Power When You Need It

    A robust battery system is the cornerstone of any solar-powered RV setup. Lithium-ion batteries are the gold standard for their efficiency, longevity, and ability to provide deep cycling capabilities, making them an essential investment for solar enthusiasts.

    Examples:

    Why You Need It: High-quality batteries store the solar energy you collect, allowing you to use power at night or during cloudy weather. They also reduce dependency on shore power and noisy generators.

    Pro Tip: Pair your batteries with a monitoring system to track usage and ensure optimal performance, prolonging their lifespan.


    5. Solar Charge Controllers – The Key to Efficiency

    A solar charge controller ensures that the electricity generated by your panels is safely and efficiently stored in your batteries. These devices regulate voltage and prevent overcharging, making them critical for any solar setup.

    Examples:

    Why You Need It: By regulating energy flow, a charge controller ensures that your batteries are charged safely and efficiently. MPPT models, in particular, provide superior performance, especially in varying sunlight conditions.

    Pro Tip: Look for controllers with app compatibility to monitor and control your system from your smartphone.


    Your RV Solar Starter Kit and the Power of the Sun

    Solar power can revolutionize your RV lifestyle, offering independence, sustainability, and convenience. Which is why it’s increasingly popular. But whether you’re easing into an RV  solar starter kit  or going all-in with a full solar system, these five essentials help provide the perfect foundation for a bright future on the road. Ready to make the switch? The sun can help fuel your next adventure!

  • Top 5 Stinky Slinkies: The Best RV Sewer Hoses for the Job

    Top 5 Stinky Slinkies: The Best RV Sewer Hoses for the Job

    RVing may be an adventure, but let’s not sugarcoat every aspect of it. Exhibit A: Dumping your tanks — that can be …. a dirty job. Necessary as it is, you’ll want to make it less dreadful (and hopefully mess-free). And one of the best ways to do it is to ensure you have a top-quality RV sewer hose, affectionately known in the RV world as a stinky slinky. With the right hose, you can handle the dirty work with confidence, ensuring your travels stay smooth and sanitary. But different stinky slinkies do have different strengths.

    So, let’s dive into the top five stinky slinkies — and get you some must-know tips for keeping this essential RV task manageable.


    1. The Space Saver – Camco RhinoFLEX Sewer Hose Kit

    Why It’s Great: The Camco RhinoFLEX is a favorite among RVers for its unbeatable balance of durability, flexibility, and ease of use. Its rigid yet collapsible design makes it convenient to store and handle, even in tight spaces. It is versatile and holds up to frequent use. In short, there’s a reason why it’s a top seller on Amazon.

    Key Features:

    • The 15-foot hose compresses to just 52 inches for compact storage, which makes it perfect for RVs with limited storage space.
    • Comes with pre-attached swivel fittings, a clear elbow, and a four-in-one dump station adapter for added convenience.
    • Made from puncture-resistant materials, ensuring it holds up to frequent use.

    Pro Tip: Carrying two 10-foot hoses, like this one, gives you added flexibility for awkwardly placed dump stations. This hose offers the perfect balance of flexibility and reliability, making it a favorite choice for many RV owners.


    2. The Tough Customer – Thetford Titan Sewer Hose Kit

    Why It’s Great: Built to handle extreme conditions, the Thetford Titan is a rugged and reliable choice for RVers who demand durability. Whether you’re camping in subzero temperatures or navigating tough terrains, this hose can take it all. It’s made with heavy-duty materials that stand up to the elements, ensuring long-lasting performance. Personally, I try to avoid leaving any hose out in subfreezing temperatures though, as you can experience the “poopsicle”. 

    Key Features:

    • This 20-foot hose (two 10-foot hoses connected) is made from tough TPE material for superior resistance to wear and tear.
    • Ergonomic, secure fittings ensure a leak-free connection, preventing accidents while you’re handling your waste. Sometimes less is more. If you are close to the dump site, then it can be more convenient to only use one of the 10-foot hoses.
    • Universal adapter and handle make the dumping process easy and mess-free, so you can get in and out of the dump station quickly.

    Pro Tip: The Titan is perfect for full-time RVers or anyone who frequently camps in harsh conditions. Its durability means it’s ready for whatever the road throws at you. It’s an investment in reliability, and the peace of mind it provides is well worth the extra cost.


    3. The Master of Maneuver – Valterra Viper Sewer Hose Kit

    Why It’s Great: The Valterra Viper stands out for its kink-resistant design, making it one of the easiest hoses to maneuver. If you’ve ever wrestled with a hose that twists and tangles, you’ll appreciate the Viper’s smooth handling. It’s perfect for RVers who want a no-fuss hose that stays flexible even in cold weather, providing ultimate convenience.

    Key Features:

    • This 20-foot hose (two 10-foot hoses connected) comes with crush-proof rotating fittings for reliable, stress-free connections.
    • Abrasion-resistant material and UV protection ensure long-lasting use, even in harsh conditions.
    • Designed to maintain its shape and resist kinks, even during tough setups, reducing the frustration of twisted hoses.

    Pro Tip: The extra length makes this hose ideal for sites where dump stations are farther away, but its kink-free design ensures you won’t lose your cool trying to set it up. It’s a great option for RVers who need a hose that won’t kink, crack, or get tangled.


    4. The Safe Option – Camco Revolution Sewer Hose Kit

    Why It’s Great: This all-around reliable option combines flexibility, strength, and convenient storage, making it perfect for RVers of all experience levels. The Camco Revolution is easy to use and store, with features that simplify the process for everyone. If you want a hose that gets the job done without any fuss, this is a top contender.

    Key Features:

    • This 20-foot hose (two 10-foot hoses connected) collapses for compact storage, fitting easily into most RV compartments.
    • Swivel fittings offer 360-degree rotation for versatile connections, allowing you to maneuver it into position easily.
    • Includes a transparent elbow to monitor waste flow during dumping, adding an extra layer of peace of mind.

    Pro Tip: If you want a straightforward and versatile sewer hose that covers all the basics while still being user-friendly, the Camco Revolution is an excellent choice. It’s a great middle-ground option that combines convenience with functionality.


    5. The Deluxe Dumper – Lippert Waste Master Extended RV Sewer Hose

    Why It’s Great: The Lippert Waste Master is the luxury model of sewer hoses, designed for RVers who want the best of the best. With its high-end build and innovative features, it makes dumping tanks as streamlined as possible. This hose is all about providing a premium experience, making waste management easier and cleaner.

    Key Features:

    • Pre-installed cam lock system prevents leaks and ensures a secure connection, keeping everything tight and safe.
    • This 20-foot hose is made from heavy-duty material with a smooth interior for easy cleaning, which prevents build-up and maintains cleanliness.
    • Integrated shutoff valve for extra control and cleanliness during use, giving you more power over the entire dumping process.

    Extra Advice: The price tag on this stinky slinky may cause you to use it immediately, but for those willing to splurge, it’s the “Tesla” of stinky slinkies — high-tech, smooth, and it may be worth it for serious RV enthusiasts who want the top of the line. If you’re looking for top-tier quality, this hose does not disappoint.

    Pro Tip: This comes with a shut off valve at the end, and using that can sometimes be quicker and easier to get to than your shut off valve on the RV.


    Bonus Tip: Get a Clear Sewer Hose Adapter

    When it comes to managing your tanks, a clear adapter is more than a helpful accessory—it’s a game-changer. I suggest pairing any of these hoses with a clear adapter to avoid any “poopsie” surprises when you open the cap. Sometimes your release valve can open unexpectedly, and that can lead to a really nasty surprise. Not only does it help with unpleasant surprises when you first open the cap, but it lets you see when your tank is empty.


    Key Considerations When Shopping Stinky Slinkies

    • Material Matters. Look for crush-proof, abrasion-resistant materials for longevity.
    • Length. Hoses typically range from 10 to 25 feet. Choose one that suits your usual camping setup. Many seasoned RVers like the two 10-foot hose option if space isn’t an issue, because of the versatility and ease.
    • Storage Options. Collapsible designs are ideal for tight RV compartments.
    • Durability. Prioritize a sturdy, reliable hose over a cheap option that might fail at the worst time.


    The Right Stinky Slinkies for Smoother Dumps

    With the right stinky slinky in hand, managing your RV’s waste system doesn’t have to be a dreaded chore. (OK … maybe it still is.) But by investing in a reliable sewer hose and a few smart accessories, you’ll be ready to handle tank duties like a pro — leaving you more time to enjoy the road ahead! (And for those that may need a quick tutorial on dumping, feel free to watch me go through the steps.)

  • Top RV Navigation Systems on the Road — and Off It

    Top RV Navigation Systems on the Road — and Off It

    Navigating the open road in an RV is more than just getting from Point A to Point B. It’s about exploring scenic routes, avoiding trouble spots, and arriving at your destination stress-free. But with an RV, navigation comes with unique challenges. Like avoiding low-clearance bridges and finding fuel stations that accommodate larger vehicles. Or just planning routes that match your travel style. As an added bonus, traveling cross-country takes you in and out of cell coverage. A campground with Wi-Fi might be an oasis. So, quite simply, you need to have different RV navigation systems. It’s smarter, and it’s safer.

    After nearly seven years on the road and more than 100,000 miles traveled, my wife and I have honed in on the best RV navigation systems. And these five are the ones we recommend for every RVer, whether you’re a weekend adventurer or a full-time traveler.


    1. Get an RV-specific GPS system.

    Why You Need It: A standard GPS or phone app can get you lost — or worse — stuck in a tight spot. Trust me when I say, that simply following Google Maps can be great for scenic drives in a car, but we’ve ended up in some really tight and sketchy situations like that when towing. RV-specific GPS systems are tailored for larger vehicles, offering features like height and weight restrictions, RV-friendly routes, and campground suggestions. These systems also provide peace of mind by avoiding dangerous roads and ensuring you’re always on the safest path.

    Top Picks:

    • Garmin RV 890. Known for its large touchscreen and ability to customize routes based on your RV’s dimensions, this GPS also includes RV parks and service locations.
    • Rand McNally RVND 7. Offers detailed RV routing, live traffic updates, and trip planning tools, making it a great companion for long-distance trips.

    Pro Tip: Always keep your RV’s dimensions (height, weight, and length) handy and input them into your GPS for the most accurate routing. Double-check unfamiliar routes before committing, as even RV GPS systems can occasionally make errors.


    2. Use Google Maps … with a twist.

    Why You Need It: While not RV-specific, Google Maps is unbeatable for up-to-date traffic information, road closures, and real-time navigation. It’s a must-have tool for any RVer, particularly when used alongside other RV-specific navigation tools to ensure accuracy.

    How to Maximize It:

    • Use Street View to preview unfamiliar areas, ensuring you can navigate entrances, parking lots, or campgrounds.
    • Pair with RV Trip Wizard (more on this later) to double-check your route for RV-friendliness.
    • Set “Avoid Highways” or “Avoid Tolls” settings when you want a more scenic drive, but ensure the route is still RV-safe.

    Pro Tip: Be cautious with Google Maps’ suggested routes — it doesn’t account for RV-specific restrictions. Cross-reference with your RV GPS or a planning tool to avoid surprises, like low bridges or weight-limited roads. When we were towing 5th wheels for a couple of years at around 60-plus-feet long, we found that having Google Maps in addition to our Garmin was a great combination.


    3. Plan with two great RV apps.

    Why You Need It: These planning powerhouses are game-changers for RV travelers. Whether you’re mapping out a multistop road trip or searching for hidden gems along your route, both tools allow you to customize your journey based on your preferences and RV’s specifications. They make trip planning fun, seamless, and incredibly detailed.

    Apps We Love:

    • RV LIFE Trip Wizard. Tailored for RVers, it offers RV-safe routing based on your vehicle’s dimensions, fuel cost estimations, and an integrated campground search tool with reviews.
    • Roadtrippers App. Focused on discovery, it’s perfect for finding quirky roadside attractions, scenic byways, and offbeat destinations that make your journey unforgettable.

    How They Complement Each Other: RV Trip Wizard excels at logistical planning and ensuring safe routes for your rig, while Roadtrippers brings a sense of adventure and spontaneity by highlighting unique stops you might otherwise miss.

    Pro Tip: Use Roadtrippers to create an exciting itinerary filled with must-see attractions, then import your stops into RV Trip Wizard for an RV-friendly route that avoids low bridges or weight-restricted roads. Together, they create the ultimate trip-planning toolkit for RVers.


    4. Prepare for offline navigation.

    Why You Need It: Cell service is unreliable in remote areas, and having an offline navigation backup can be a lifesaver. Apps with offline functionality ensure you can stay on track even when technology fails.

    Top Picks:

    • CoPilot GPS. Offers RV-specific routing and allows you to download maps for offline use. It’s particularly helpful in national parks or rural areas with limited connectivity.
    • Gaia GPS. Ideal for boondockers, this app specializes in topographic and off-grid maps for finding remote campsites and trails. It’s perfect for those who enjoy exploring beyond traditional campgrounds.

    Pro Tip: Download maps ahead of time for areas you’ll be traveling through. Be sure to test the app in offline mode before setting out, so you’re familiar with how it works in the field.


    5. Keep paper maps and atlases as backups.

    Why You Need It: Sometimes, technology fails. A good old-fashioned paper map or atlas ensures you’re never completely lost. They’re also a fantastic way to explore scenic routes and hidden gems that GPS tools might not highlight.

    Top Picks:

    Pro Tip: Cross reference some cool locations and stops on atlases like these with GPS systems for cool stops to add to your trip. Plus, paper maps are a great backup if you ever lose power or need a break from screens.


    Bonus: Don’t discount the human connection.

    While technology is invaluable, nothing beats advice from fellow RVers or locals. Joining RV groups on Facebook or apps like Campendium can provide real-time tips about routes, campgrounds, and road conditions. Chatting with fellow travelers at a campsite or truck stop can also uncover hidden gems and practical advice that no app or GPS can replicate.


    With the right RV navigation systems, you’re a pro.

    Whether you’re heading to a bustling national park or a secluded boondocking spot, the right RV navigation systems can transform your trip from stressful to seamless. By using any one, or combining a few of the above-mentioned, RV-specific GPS systems, you’ll be prepared for whatever the road throws your way.

    And remember to always ask locals and fellow RVers, as word of mouth can sometimes lead to the best additions to your road trips. Hope to see you on the road and off the beaten path!

  • Top Hiking Shoes to Go Beyond the Campsite

    Top Hiking Shoes to Go Beyond the Campsite

    Hiking is one of the best ways to explore the outdoors, but without the right shoes … yeah. Even the most scenic trail can quickly turn into an uncomfortable, blister-filled challenge. Whether you’re covering rocky mountain terrain, navigating muddy trails, or just enjoying an easy day hike, choosing the right footwear is key to making your adventure more enjoyable.

    As an avid, albeit admittedly out-of-shape hiker, I’ve hiked countless trails across North America through national parks, remote backcountry destinations, and even easy city and park trails. One thing I’ve learned? There’s no one-size-fits-all when it comes to hiking shoes.

    The perfect hiking shoe depends on your terrain, hiking style, and personal preferences. That’s why I’ve broken down the best hiking shoes into three categories — lightweight hiking shoes for speed and comfort, midweight hiking boots for longer treks, and heavy-duty hiking boots for technical terrain. For each category, I’ll recommend what I feel is the best available option, regardless of price, and a solid budget-friendly alternative. 

    So, whether you’re a seasoned trekker or just starting your hiking journey, this list will help you find the right fit no matter where you plan to put the RV in park.


    Lightweight Trail Shoes – Speed and Comfort

    For hikers who prefer agility, breathability, and a fast-moving pace, lightweight trail shoes are the way to go. These are ideal for well-maintained trails, dry conditions, and anyone who wants to cover more ground with less weight on their feet. If you’re planning a long hike and want to keep your legs fresh, a good lightweight shoe can be a game-changer. They’re perfect for warm-weather hikes, faster-paced adventures, or trails that don’t require a ton of support.


    Best Available: Salomon S/Lab Ultra 3

    The Salomon S/Lab Ultra 3 is a favorite among trail runners and speed hikers. And for good reason. This shoe is designed for those who want maximum performance in a lightweight package. The aggressive tread grips dirt, loose gravel, and light rocky surfaces with ease, making it a solid choice for technical trails that demand precision. The snug fit ensures your foot stays locked in place, minimizing fatigue over long distances. 

    Pros:

    • Extremely lightweight and breathable. Ideal for long-distance hikers and fast-packers who prioritize speed.
    • Precise fit for technical trails. Keeps your foot secure on uneven terrain.
    • Excellent grip on dirt and rocky surfaces. Designed for multi-terrain hikes.

    Cons:

    • Not waterproof . If you’re hiking in wet conditions, your feet will get soaked.
    • Less cushioning than bulkier shoes. Not ideal for carrying a heavy pack.


    Budget-Friendly: Saucony Peregrine 13

    If you want a shoe that balances performance with affordability, the Saucony Peregrine 13 is a fantastic option. It delivers high-quality traction at a fraction of the price of some premium models. It’ll grip everything from packed dirt to loose gravel, while the lightweight construction keeps you moving efficiently. While it may not be as durable as high-end trail shoes, it’s an excellent choice for weekend hikers or those who don’t put heavy mileage on their footwear. 

    Pros:

    • Excellent traction for multiple terrains. Handles dirt, mud, and rock surfaces well.
    • Lightweight yet durable. Offers a great balance of comfort and longevity.
    • More affordable than premium trail runners. A solid choice for budget-conscious hikers.

    Cons:

    • Not ideal for carrying a heavy pack. Less supportive than midweight options.
    • Lacks extreme durability. May wear down faster under intense use.


    Midweight Hiking Shoes – Stability and Protection

    If you need more support than a trail shoe but don’t want the bulk of a full hiking boot, midweight hiking shoes offer the perfect balance. These provide extra stability, protection, and comfort for longer hikes and rougher terrain. They’re great for those who carry a light backpack or find themselves on mixed trails where a little extra foot protection goes a long way.


    Best Available: La Sportiva Spire GTX

    The La Sportiva Spire GTX is built for hikers who demand durability, support, and all-weather performance. Unlike lightweight trail shoes, this model incorporates a waterproof Gore-Tex lining, making it an excellent option for hikers who frequently encounter wet conditions. It provides excellent grip on uneven surfaces, and the midsole offers a perfect blend of cushion and support. 

    Pros:

    • Great balance of support and flexibility. Keeps you stable without feeling stiff.
    • Waterproof Gore-Tex lining. Ideal for wet and unpredictable conditions.
    • Durable Vibram outsole. Provides long-lasting traction on rough terrain.

    Cons:

    • On the pricier side. More expensive than budget-friendly alternatives.
    • Requires some break-in time. Not as comfortable right out of the box.


    Budget-Friendly: Merrell Moab Speed 2 GTX

    The Merrell Moab Speed 2 GTX is a fantastic choice for those who want a well-rounded hiking shoe at a more affordable price. This shoe has a reputation for comfort, and it delivers solid waterproof protection without adding excessive weight. It’s a reliable option for day hikes and moderate backpacking trips.

    Pros:

    • Comfortable right out of the box. No painful break-in period required.
    • Waterproof for wet conditions. Keeps your feet dry in light rain and puddles.
    • More affordable than premium models. Great value for the price.

    Cons:

    • Not as durable for extreme backcountry use. May wear down faster under heavy loads.
    • Less ankle support than a high-cut boot. Best for hikers who don’t need extra stability.


    Heavy-Duty Hiking Boots – Traction and Support

    For those tackling steep inclines, rugged backcountry trails, or carrying heavy packs, a durable hiking boot is a must. These boots provide extra ankle support, superior traction, and the durability needed for long days on the trail.


    Best Available: Salomon Quest 4 GTX

    The Salomon Quest 4 GTX is one of the top-rated hiking boots for a reason. Built for demanding terrain, this boot provides outstanding ankle support, waterproof protection, and a secure fit for tough hikes. The durable construction makes it an excellent choice for backpackers and mountaineers.

    Pros:

    • Outstanding ankle support for heavy loads. Ideal for backpacking and rugged hikes.
    • Waterproof Gore-Tex lining. Keeps your feet dry in all conditions.
    • Durable and built to last. Holds up in extreme environments.

    Cons:

    • Heavier than lightweight options. Takes some getting used to.
    • Requires a break-in period. May feel stiff at first.


    Budget-Friendly: Merrell Moab 3 Mid Waterproof

    For a reliable, budget-conscious option, the Merrell Moab 3 Mid Waterproof is hard to beat. This boot provides solid traction, waterproofing, and comfort at a much lower price than premium models. While it may not hold up in extreme conditions as well as the Salomon Quest 4 GTX, it’s a fantastic option for everyday hikers.

    Pros:

    • Comfortable and supportive for all-day hikes. Great fit for most hikers.
    • Waterproof and breathable. Keeps feet dry without overheating.
    • Affordable price. A solid boot without breaking the bank.

    Cons:

    • Not as durable for extreme hikes. May wear down faster in rough terrain.
    • Less support compared to pricier models. Not ideal for long backpacking trips.


    Bonus: Small Gear Upgrades That Make a Big Difference

    Socks matter more than you think.

    The right pair of socks can make or break a hike. Moisture-wicking, breathable socks help prevent blisters and keep your feet dry. Wool socks are a great choice because they regulate temperature and wick away moisture better than cotton.


    Trekking poles save your knees.

    A good hiking stick or trekking poles can help with balance, reduce impact on your knees, and make long hikes feel less exhausting. They’re especially useful for steep climbs, descents, and crossing uneven terrain.

    Chafing and friction prevention is key.

    Long hikes can cause unexpected friction and discomfort, especially in areas like your thighs, underarms, and feet. One of the best solutions I’ve found is Gold Bond Friction Defense—a game-changer for preventing chafing. Applying it before a hike makes long treks much more comfortable and eliminates that burning, irritated feeling at the end of the day.


    Hiking Shoes Have to Be the Right Fit — for You and the Terrain

    The best hiking shoe for you depends on the type of trails you plan to tackle, the weight you’re carrying, and your comfort preferences. If you’re a casual hiker who enjoys well-maintained paths, a lightweight hiking shoe will keep you comfortable without unnecessary bulk. If you’re venturing onto rougher terrain or carrying a heavier pack, midweight hiking boots provide extra stability and support. And for the extreme adventurers taking on technical climbs or multi-day treks, a heavy-duty hiking boot will offer the protection and durability needed to handle any challenge.

    No matter where your next trail takes you, the right pair of hiking shoes will ensure every step is a confident one. So, lace up, hit the trail, and enjoy the adventure ahead. Who knows, maybe we even cross paths out there.

  • Stylish Tips for RV Bathroom Remodels

    Stylish Tips for RV Bathroom Remodels

    Who’s ready to create the ultimate throne room on wheels?! Probably more of us than you think. Without question, revamping your RV bathroom can make a huge difference in the feel and comfort level when traveling the open road. Whether you’re looking to add functionality, modernize your design, or simply create a more inviting space, these five tips for RV bathroom remodels will help you do just that. From tiny touches to full-scale transformations, these ideas prove that small spaces can make a big impact.

    That said, just know that when tackling a bathroom remodel, it’s essential to balance aesthetics with practicality. RV bathrooms often come with unique challenges, such as limited space, moisture, and weight restrictions, but the payoff is that cozy and functional retreat on the road. As someone who really prefers using my own space over outside bathroom options on the road, I know how big of an impact personalizing that space can be,

    So, here are five ideas to spark your creativity and bring new life to your RV’s bathroom,. That way, you won’t need to stop at every gas station along the way.


    1. Go bold with wallpaper and color.

    Sometimes all it takes to breathe new life into your RV bathroom is a fresh splash of color and pattern. My wife just did this in our new RV by adding some homey wallpaper, and it really made a difference. Bold wallpaper, paired with complementary paint, can transform the mood of the entire space.

    Tips for Wallpaper in RV Bathroom Remodels:

    • Moisture-Resistant Materials. Use peel-and-stick wallpaper made for high-moisture areas to ensure longevity.
    • Test Small Sections First. Uneven RV walls may require extra smoothing techniques for wallpaper to stick properly.
    • Pair It with Bold Accents. Add small décor pieces like new towel hooks or framed prints to complete the look. These are cheap and easy upgrades that make a big difference.

    Adding wallpaper can also help create an illusion of space. For instance, vertical stripes can make your walls appear taller, while lighter colors can make the area seem larger. 


    2. Upgrade fixtures for a spa-like feel.

    A quick and impactful update comes from swapping out old, plastic fixtures for sleek, modern alternatives. Think brushed nickel or matte black faucets, rainfall shower heads, or sleek vessel sinks. These updates not only improve functionality but also create a high-end feel.

    Top Fixture Upgrade Tips:

    • Stick to Lightweight Materials. Opt for RV-friendly fixtures to keep the weight in check.
    • Invest in Water-Saving Options. Low-flow shower heads and faucets help conserve water without compromising performance.
    • DIY vs. Professional Help. Many fixture replacements can be tackled as a DIY project, but consult a pro for plumbing upgrades.

    Upgraded fixtures also provide an opportunity to infuse your personal style. Whether you prefer a minimalist aesthetic or a rustic farmhouse vibe, choosing the right finishes can tie the entire space together. Check out how a bathroom upgrade can change the game in this inspiring RV remodel.


    3. Maximize storage without compromising style.

    Limited space is one of the biggest challenges in RV bathrooms, but smart storage solutions can help. Built-in shelves, baskets, and over-the-door organizers add functional storage without taking up precious space. For an extra touch, use decorative bins or baskets to keep the aesthetic cohesive.

    Ideas for Optimized Storage:

    • Shower Shelving. Install corner shelves or adhesive shower caddies for toiletries.
    • Under-Sink Organization. Use stackable drawers or pull-out trays to make the most of cabinet space.
    • Wall-Mounted Accessories. Hooks, towel bars, and even hanging planters can double as décor and storage.

    Creative storage solutions aren’t just about saving space — they can also make your bathroom feel less cluttered and more serene. By organizing your essentials and minimizing visual clutter, you create a space that feels both functional and calming. Combining utility and style is a hallmark of great RV bathroom remodels.


    4. Replace the shower or toilet for enhanced comfort.

    If you’re ready to splurge, upgrading your shower or toilet can make a world of difference. A compact but luxurious shower stall with sliding glass doors or a high-efficiency porcelain toilet can elevate your bathroom experience entirely.

    Considerations for Replacements:

    • Water and Power Needs. Ensure your RV’s systems can handle the demands of new appliances.
    • Space-Saving Designs. Look for compact options that maximize room without compromising comfort.
    • Durability Matters. Choose materials built to withstand the unique wear-and-tear of RV life.

    Beyond comfort, these upgrades can also improve your RV’s resale value. A sleek shower or high-quality toilet signals to potential buyers that your RV is well-cared for and modern. With the right upgrades, your bathroom becomes a selling point, not just a functional necessity.


    5. Let your lighting work wonders.

    Good lighting can make your RV bathroom feel more spacious, bright, and welcoming. Replace old, yellowing bulbs with cool-toned LEDs, and consider adding vanity lighting for a functional yet stylish glow.

    Lighting Upgrade Tips:

    • Use Energy-Efficient LEDs. They save power and provide a cleaner, modern look.
    • Stick-On Lights for Flexibility. Great for those wanting temporary updates.
    • Highlight with Dimmers. Adjustable lighting adds versatility and ambiance to your space.

    Lighting isn’t just functional — it’s a mood-setter. By layering different types of lighting, like overhead fixtures, vanity lights, and even decorative sconces, you can create a bathroom that feels luxurious and welcoming. Don’t underestimate the power of good lighting to transform your space.


    Bonus: Think lightweight in RV bathroom remodels.

    As with any RV remodel, weight is a constant consideration. Opt for materials like lightweight MDF for cabinetry, acrylic for shower surrounds, and durable peel-and-stick tiles for walls. Always calculate the weight added to ensure your remodel aligns with your RV’s weight capacity.

    Lightweight materials don’t mean compromising on quality or aesthetics. Many modern options are designed to mimic high-end finishes while remaining RV-friendly. This means you can achieve the look you want without sacrificing your vehicle’s performance or safety.

    By focusing on design and function, these RV bathroom remodels show just how transformative an RV bathroom upgrade can be. Whether you’re tackling a full overhaul or small updates, these tips can guide you toward a space you’ll love using every day. I hope your new throne room is fit for a king or queen.

  • 5 Road Trip Reads to Bring Along This Summer

    5 Road Trip Reads to Bring Along This Summer

    When you’re hitting the road for adventure, a little light reading can be fun and go along way! (It just might be why you’re reading this!) The fact is that while RV trips may be about freedom, discovery, and creating lasting memories, but they involve a lot of know-how. And how do you get know-how? Through brute experience — or someone else’s. So, practical people that we are, RVers love reading something down-to-earth that helps with the day-to-day. Our list of summer road trip reads does that perfectly, mixing business with pleasure.

    From travel inspiration and practical tips to magazines and books, these five road trip reads all educate and entertain. (A great way top earn the right to ride shotgun!) Plus, I’ve even included a bonus section with two more resources I think you’ll love.


    1. Outside Magazine – Gateway to Adventure

    Outside Magazine is a cornerstone of outdoor adventure and travel literature. Known for its compelling storytelling, stunning photography, and in-depth reporting, the magazine covers everything from thrilling expeditions to tips on gear and destinations. Whether you’re a casual camper or a hardcore adventurer, Outside has something for everyone.

    What It Offers:

    • Adventure travel guides for North America and beyond
    • Practical advice on outdoor activities like hiking, kayaking, and cycling
    • Sustainable travel tips and environmental advocacy
    • Gear reviews to help you make the most of your outdoor experiences

    Highlights: With topics ranging from the best U.S. national parks to hidden gems for RVers, Outside consistently delivers actionable inspiration. The magazine also highlights the intersection of health, fitness, and travel, making it a holistic guide for outdoor enthusiasts. Having contributed to this publication myself, I can confidently say it’s a resource I return to again and again for both work and adventure.


    2. Rootless Living – Full-Timer and Digital Nomad Know-How

    Rootless Living Magazine is tailor-made for those embracing the nomadic lifestyle. Whether you’re a full-time RVer, #VanLifer, or part-time adventurer, this magazine dives deep into the unique challenges and rewards of living on the road.

    What It Offers:

    • Real-life stories from fellow RVers and nomads.
    • Practical tips for remote work while traveling.
    • Guides for navigating challenges like campground selection, connectivity, and maintenance.
    • Spotlights on travel destinations ideal for RVers.

    Highlights: Rootless Living stands out for its community-driven content. Readers get to hear firsthand accounts from those who live and breathe the RV lifestyle. It’s also a fantastic resource for anyone curious about making the leap into full-time RVing. (Having written an article for Rootless Living Magazine, I can attest to the magazine’s commitment to empowering and inspiring its audience.)


    3. National Geographic – Immersing in Wonder

    When it comes to breathtaking visuals and insightful stories, National Geographic sets the gold standard. This publication provides a deep dive into destinations, cultures, and experiences, making it a must-read for RVers looking to expand their horizons.

    What It Offers:

    • Comprehensive travel guides, including hidden gems and iconic destinations
    • Immersive storytelling that highlights local cultures and traditions
    • Expert tips on planning trips and making the most of your journey
    • Stunning photography that captures the essence of each location

    Highlights: National Geographic brings destinations to life with its in-depth features and expert recommendations. Whether you’re planning a trip to the Grand Canyon or exploring small towns in Canada, this magazine is a treasure trove of inspiration. Its focus on sustainability and cultural appreciation aligns perfectly with the RV lifestyle.


    4. THOR Industries Stories – Inside a Community

    THOR Industries Stories is a unique platform that brings the RVing community together through real-life tales of adventure, resilience, and exploration. From travel tips to inspiring stories, it’s a one-stop resource for RV enthusiasts.

    What It Offers:

    • Personal stories from RVers, including family adventures and solo travel journeys
    • Practical advice on RV maintenance, travel planning, and destination ideas
    • Spotlights on THOR Ambassadors, of which my wife and I have been lucky enough to be a part of for nearly 4 years, offering relatable insights and experiences
    • A behind-the-scenes look at the RV industry and its innovation

    Highlights: THOR Industries excels at showcasing the diversity of the RVing lifestyle. The platform inspires readers to embrace life on the road, whether it’s through practical tips or stories of overcoming challenges. Check out our ambassador story if you want to see some of the adventures my wife and I have gotten into over the years in our 100,000-plus miles of RVing.


    5. 50 States, 5,000 Ideas – A Brainstorming Device

    This National Geographic book by Joe Yogerst is a favorite among RVers for its thorough and visually stunning exploration of destinations across the U.S. Whether you’re planning your next big road trip or simply dreaming of future travels, 50 States, 5,000 Ideas offers endless inspiration.

    What It Offers:

    • Detailed road trip itineraries for all 50 states
    • Unique destinations, from iconic landmarks to hidden gems
    • Tips on activities, accommodations, and must-see attractions
    • Beautiful photography that inspires wanderlust

    Highlights: The book’s organized layout and accessible content make it easy to plan your trip. Whether you’re heading to the Pacific Northwest or the Great Plains, this guide ensures that every stop on your journey is filled with discovery and excitement.


    Bonus: Essential Resources for RV Enthusiasts

    RV Life Magazine

    RV Life Magazine provides practical advice, travel inspiration, and community-driven stories for RV enthusiasts. From maintenance tips to destination guides, this magazine is an invaluable resource for anyone living life on the road.

    What It Offers:

    • Expert reviews of RV models and gear
    • Insightful travel guides tailored to RVers
    • Tips on troubleshooting common RV issues

    Highlights: RV Life stands out for its balance of technical advice and engaging storytelling, making it the perfect companion for both novice and seasoned RV travelers.


    The Milepost – Alaska’s Ultimate Guide to Alaska

    For anyone dreaming of an Alaskan adventure (so many of us out there), The Milepost is an indispensable resource. This annual guide offers detailed mile-by-mile descriptions of routes across Alaska, the Yukon, and beyond, making it an essential tool for RVers exploring the rugged beauty of the Last Frontier. Trust me when I say, this is one of the essential road trip reads if you’re planning to head north — like North, North — anytime soon.

    What It Offers:

    • Maps, itineraries, and road descriptions for over 15,000 miles
    • Recommendations for accommodations, campgrounds, and attractions
    • Updates on road conditions and travel tips for remote areas

    Highlights: Known as the “bible of North Country travel,” The Milepost ensures that even the most remote destinations are accessible and enjoyable. Whether you’re planning a trip to Denali National Park or the Arctic Ocean, this guide has everything you need to make the journey unforgettable.


    Customize Your Road Trip Reads for Summer

    Each of these publications offers something unique for RV travelers, from practical advice to awe-inspiring stories. They’re good any season, but oh-so-perfect for summer. (Am I right, Alaska dreamers?) Whether you’re flipping through the pages of Outside Magazine, diving into National Geographic, or planning your Alaskan adventure with The Milepost, these reads will elevate your journey. The best part is most of these are digital now, so load up your bookshelf (or phone apps) and let these resources guide and inspire you on your next adventure.

  • Renovating Your RV Entertainment System

    Renovating Your RV Entertainment System

    Raise your hand if the first upgrade you make to your RV is the TV/entertainment setup! (Sadly, as I’ve found, this is not the best first step.) And if —like me — this happens to be the case for you, then know that you’re not alone. Fact is, an RV entertainment system doesn’t always age gracefully. So, if your rig is more than a few years old, chances are you’ve got a tangle of wires behind the TV. And a DVD or Blu-ray player you haven’t touched in God knows how long. And speakers that sound more like a tin can than a theater. 

    The good news? Upgrading the setup of your RV’s entertainment system is one of the most satisfying, easy, and impactful renovations you can make.

    Whether you want to binge your favorite streaming shows on a rainy day, enjoy surround sound for movie nights at the campsite, or just simplify everything to be more user-friendly, updating your RV’s entertainment gear can make life on the road that much more enjoyable.

    Here’s how to do it right.


    Step 1: Take inventory — what are you working with?

    Before you start ripping out cords and mounting new screens, take a step back and assess your current setup. Most RVs come equipped with a standard TV (sometimes two or three), basic speakers, an outdated head unit, and maybe a DVD or CD player combo.

    Ask yourself:

    • What still works?
    • What’s outdated?
    • What do I actually use?

    Chances are, you’ll find that a lot of the original equipment is unnecessary or underpowered compared to modern alternatives.

    Pro Tip: Take photos of all current wiring before removing anything. It’ll save time during reinstallation or upgrades.


    Step 2: Upgrade the TV (or TVs).

    If your RV still has a bulky, low-res screen or an outdated wall mount, start here. Today’s smart TVs are lighter, thinner, and come packed with built-in streaming apps, Bluetooth, and Wi-Fi capability.

    What to Look For:

    • Size and weight. Choose something that fits your existing space and won’t strain the mounting area.
    • Smart features. Built-in streaming means fewer devices to plug in.
    • Power options. Some RVers prefer 12-volt TVs to save energy while boondocking, but even the regular flat screen option today is fairly power-efficient.

    Pro Tip: If you’re replacing a TV near a window, look for one with an anti-glare screen. (RV interiors can get surprisingly bright.)


    Step 3: Improve the sound.

    Let’s be honest. The factory-installed RV speakers rarely do your favorite shows or playlists justice. Replacing them can drastically improve your sound quality, whether you’re watching Netflix or listening to a podcast while cooking dinner.

    Popular Options:

    • Soundbars. Easy to install and perfect for small spaces.
    • Bluetooth speakers. Great for portability and outdoor use — this is our favorite because of sound quality, portability, price, and they’re battery powered. So, it checks all the boxes for RV life.
    • Built-in speaker upgrades. Swap out old ceiling or wall speakers for better clarity and deeper bass.

    Pro Tip: Choose a soundbar with HDMI ARC or Bluetooth for easier connection to newer TVs.


    Step 4: Cut the cords (if you want to).

    Gone are the days of needing five remotes and a stack of physical media. Today, most RVers opt for simple, wireless systems.

    Consider:

    • Roku, Fire Stick, or Apple TV. Streaming entertainment is great if you’re OK with your TV and just want more shows.
    • Bluetooth pairing. This can work between your TV and sound system or phone and sound system.
    • A central media hub. A hub will help to combine controls in one place. This is good if you really want to do a big time overhaul for a movie theater feel on wheels.

    If you’re boondocking, don’t forget about data usage — streaming eats up bandwidth fast. Some RVers download content while connected to Wi-Fi and watch it later without using mobile data. 

    Pro Tip: A good smartphone with a mirror or wireless capability to your TV or a cable that connects directly to the TV HDMI can sometimes extend your data, because a lot of plans throttle your hotspot way before your phone’s internal data usage.


    Step 5: Don’t forget internet and antennas.

    Speaking of data, streaming content or tuning in to live TV depends on your signal. If you’re relying on campground Wi-Fi or a dated TV antenna, you might need a boost.

    Upgrade Ideas:

    • RV Wi-Fi boosters or cellular routers. That way, you enjoy better streaming.
    • Digital antennas. This will provide access to over-the-air channels
    • Signal amplifiers. These enhance reception in remote areas.
    • Starlink. This is a great solution for heavy-data users and streamers.

    If you work remotely or homeschool on the road, investing in a reliable mobile hotspot or Starlink system could be a game-changer. As digital nomads, my wife and I need options, so we have Starlink and two different phone carriers.

    Pro Tip: Mounting your antenna higher (like on a ladder or roof rack) can improve signal without major installation work. But be careful about how you mount them, because they can be a travel day casualty if you’re not careful.


    Step 6: Simplify the wiring and power setup.

    Many RVers find a rat’s nest of outdated cables behind the entertainment center. Renovating your system is the perfect time to clean that up.

    What to Do:

    • Remove unused A/V and coaxial cables.
    • Label all remaining wires for easy reference.
    • Use cable ties or sleeves to keep things tidy.

    And don’t forget to check power sources. Adding a power strip with USB ports or upgrading to a 12-volt TV could give you more flexibility for off-grid use.

    Pro Tip: If you’re using an inverter, make sure your entertainment system is wired to a circuit that can handle it — especially if you’re off-grid and powering other electronics.


    Bonus: Bring Movie Night Outdoors

    Want to level up your RV entertainment beyond the walls of your rig? Consider a battery-powered projector and speaker combo like the Nebula Capsule 3 Laser Projector, which we personally use and love.

    This compact device offers surprisingly impressive sound and picture quality — and with its built-in Bluetooth speaker, Android TV interface, and long battery life, it’s a plug-and-play option for campsite movie nights without the power drain on your house batteries. Pair it with a portable screen or even a high-quality white sheet, and you’ve got a 120-inch home theater under the stars.

    Pro Tip: Use tent stakes, clips, or magnets if possible, so you can keep your sheet or screen taut for the best picture clarity, and don’t forget the popcorn.


    Enjoying RV Entertainment System Efficiency

    Upgrading your RV’s entertainment system doesn’t have to mean tearing apart your rig or spending a fortune. With a few strategic changes — like swapping in a smart TV, upgrading the sound, and simplifying connections — you can transform your space into a modern, functional home theater on wheels.

    Whether you’re full-timing, weekend tripping, or just want a better setup for family movie night, these upgrades can help your RV feel more like home — and give you a welcome escape after a long day of adventuring.

  • Upgrade Your RV Lighting with 5 Illuminating Tips

    Upgrade Your RV Lighting with 5 Illuminating Tips

    Let’s face it: Lighting doesn’t always get the attention it deserves when it comes to RV improvements. An upgrade in RV lighting is not as flashy as a new solar setup. And it’s not as exciting as a remodeled kitchen. But good lighting quietly affects nearly everything you do on the road — from cooking and cleaning to working, reading, or just relaxing after a long day.

    If your current lighting setup feels a little dim, disorganized, or outdated, it might be time for a refresh. The right upgrades can help your RV feel more like home — and in many cases, they’re much easier (and more affordable) than you’d think.

    Here are five practical and worthwhile ways to upgrade your RV lighting, both inside and out.


    Tip No. 1: Make the switch to LED (if you haven’t already).

    Let’s start with the obvious upgrade: LED bulbs. If your RV still has incandescent or halogen lights, switching to LEDs is one of the simplest ways to reduce power consumption, cut down on heat, and brighten your space.

    What makes LEDs so ideal for RV life?

    • They use less energy, which helps extend battery life while boondocking.
    • They stay cool, which matters in small, enclosed spaces.
    • They last a long time, meaning fewer bulb changes (especially in hard-to-reach places).
    • You can choose from a range of color temperatures—from soft and cozy to crisp and bright.

    Most standard RV light fixtures can be retrofitted with compatible LED bulbs in minutes. Some RVers even replace entire fixtures with upgraded LED versions for a cleaner, more modern look.

    Pro Tip: Look for 12-volt-compatible LEDs designed for RV or marine use. They’re made to handle the slight voltage fluctuations that can happen in mobile setups.


    Tip No. 2: Add focused lighting where it matters most.

    A single overhead light in the center of a room might be fine for general use, but it often leaves key areas in the dark. Adding task lighting in places where you need it most can make a big difference in comfort and usability.

    Good candidates for added task lights include:

    • Kitchen prep areas. Under-cabinet puck lights or strip LEDs can illuminate countertops and help avoid cutting in the shadows.
    • Dining or workspaces. A small desk lamp or focused overhead light makes meals, writing, or laptop time a lot easier on the eyes.
    • Bedside areas. Wall-mounted reading lights or directional fixtures let one person read without lighting up the whole room.
    • Bathroom mirrors. A soft, diffused light around the mirror is a big help during the morning routine.

    These lights don’t have to be hardwired or permanent. There are plenty of battery-operated, stick-on, or USB-powered options that work well for RV use.

    Pro Tip: If you’re short on outlets or want to avoid cords, look for rechargeable or motion-activated lights. They’re great for closets, drawers, and other areas that don’t see constant use.


    Tip No. 3: Upgrade exterior lighting for safety and style.

    Whether you’re setting up camp after dark, taking a quick walk around the rig, or just enjoying time outside, good exterior lighting makes a difference in both function and safety.

    Here are a few exterior upgrades worth considering:

    • Awning lights. LED strip lights mounted beneath the awning provide a pleasant glow for outdoor evenings without attracting too many bugs.
    • Motion-sensor lights. A great choice for the entry door or rear bumper area — especially handy when arriving late or stepping outside at night.
    • Underbody lighting or step lights. These not only add visual appeal but also help prevent missteps after dark.
    • Storage compartment lights. Installing LED strips or battery-operated push lights in your exterior bays makes it easier to find gear without a flashlight.

    When adding exterior lighting, be sure to choose weatherproof products rated for outdoor use. If you’re drilling new fixtures into the RV body, use proper sealants to protect against water intrusion.


    Tip No. 4: Organize lighting zones and add dimmers.

    Ever flip a switch expecting one light to turn on, only to be surprised by another? Disorganized switch layouts and harsh lighting levels are common frustrations in RVs — especially older models. Creating clear lighting zones and adding dimmers gives you more control and flexibility.

    Here’s how to improve your lighting flow:

    • Group switches by area (kitchen, bedroom, bathroom) and label them clearly if needed.
    • Install dimmer switches in key areas like the living room or bedroom to adjust brightness as needed.
    • Use remote controls or smart lighting hubs for convenience, especially for hard-to-reach lights.
    • Replace clunky multi-switch panels with modern versions that are more intuitive and space-efficient.

    If you’re planning a larger interior update, reorganizing your lighting zones is well worth doing while everything is accessible. But even simple changes — like installing a plug-in dimmer for a desk lamp — can immediately improve how your space feels.


    Tip No. 5: Light up forgotten spaces.

    Some of the most useful lighting upgrades aren’t flashy — they’re practical. Think about all the spots in your RV that are hard to see into, especially at night or in low light. A small light in the right spot can turn a hassle into a functional space.

    Examples:

    • Pantries and closets. Stick-on LEDs or motion-sensor lights make it easy to see what’s buried in the back.
    • Under the bed. If you use this area for storage, adding a light here saves a lot of time and frustration.
    • Stairs or entry steps. Prevent nighttime stumbles with a small strip light or low-glow step light.
    • Utility bays or passthrough storage. These are often used during setup or teardown — adding lighting saves you from holding a flashlight in your mouth while you work.

    An upgrade in RV lighting here doesn’t require a full electrical overhaul. Most can be installed in a matter of minutes with adhesive tape or magnetic mounts.

    Pro Tip: Keep a few battery-powered lights or USB-rechargeable fixtures on hand. They’re great backups for boondocking or in case of a blown fuse.


    Also! Consider light color … it matters more than you think.

    Lighting isn’t just about brightness — it’s also about ambiance. The color temperature of your lights can affect how your RV feels, especially after sunset when your rig becomes your entire world.

    Color temperatures are measured in Kelvins (K):

    • 2,700K–3,000K. Warm white is cozy and inviting, great for bedrooms and lounges.
    • 3,500K–4,100K. Neutral white is clean and functional, ideal for kitchens and bathrooms.
    • 5,000K and up. Daylight white is bright and energizing, good for task areas.

    Using consistent color temperature throughout your RV creates a unified look, while mixing different temperatures intentionally (warm in the bedroom, neutral in the kitchen) helps define each zone’s purpose.


    Flipping the Switch for an Upgrade in RV lighting

    You don’t have to live with dim or outdated lighting in your RV. Whether you’re full-timing, weekend camping, or prepping for a big trip, small lighting upgrades can have a big impact on your comfort, safety, and overall experience.

    With the wide range of affordable, low-power LED solutions available today, most of these changes are DIY-friendly and budget-conscious. Even better? They help your RV feel brighter, more modern, and easier to live in day to day.

    So go ahead: flip the switch on better lighting. Your eyes (and your mood) will thank you.

  • Should I Renovate or Buy a New RV? Here’s How to Decide

    Should I Renovate or Buy a New RV? Here’s How to Decide

    There comes a time in nearly every RVer’s journey when you find yourself staring at your rig and wondering: “Should we renovate this thing, or is it time to buy a new RV and move on?”

    After nearly seven years on the road, and with more than a few RVs under our belt — from a couple of 40-plus-foot fifth wheels to a nimble Class B and now our Class C motorhome — we’ve faced this exact question more than once. Our RV has to function as our home, our office, and our gateway to adventure. So, when things stop working quite right or no longer fit our lifestyle, the big decision looms: Do we love it enough to renovate it, or is it time to list it, buy a new RV model, and move on?

    Whether you’re a full-timer (like us) or an occasional weekend warrior, here’s everything you need to know to help you decide whether to renovate or buy a new RV.


    When to Consider Renovating Your RV

    Renovating your RV can be an exciting opportunity to make your space truly feel like home. And there are countless people who have transformed dated interiors into custom havens with just a little vision and elbow grease.

    So how do you know when renovation is the right call? Here are four good signs.


    1. Your RV is structurally sound.

    If the bones of your RV are in great shape (chassis, frame, roof, and plumbing) then a renovation may be worth the time and investment. There’s no point updating cabinets or installing a new couch if your rig is plagued by leaks or structural issues.


    2. You love the layout … but hate the look.

    Sometimes it’s not about function, it’s about feel. Maybe your RV has the perfect kitchen size, a layout you love, and just enough storage — but it’s also rocking 2007 faux oak cabinetry and stained carpet that’s seen better days. Updating finishes, replacing flooring, or modernizing the color scheme can breathe new life into a dated RV.


    3. You’re handy. (Or at least willing to learn.)

    Renovation saves the most money when you’re able to DIY. From peel-and-stick backsplash to building custom dinettes, RVers have proven there’s very little you can’t learn through YouTube. Just know your limits, especially with things like electrical or plumbing.


    4. You Want to Save Money

    If you love your current rig (and it’s still got plenty of life left in it), renovation is usually far cheaper than upgrading. Plus, small updates can go a long way — replacing cushions, upgrading lighting, or even adding smart RV tech like a new control panel or solar monitoring system can be game-changers.


    When It’s Time to Get a New RV Model Instead

    As fun as renovation can be, sometimes upgrading just makes more sense. We’ve upgraded RVs for a few reasons over the years: growing needs, shifting travel styles, and the opportunity for better features or reliability.

    Here’s four signs it might be time to list it.


    1. Your travel needs have changed.

    When we switched from slow and longer stays to a go-go-go travel style, our needs changed dramatically. A rig that was perfect for long campground stays and day trips in the truck suddenly wasn’t cutting it, and a Class B became the best adventure RV we’ve ever had. If you’ve changed how (or how often) you RV, it might be time for a unit that better supports that.


    2. You’re spending more time fixing than enjoying.

    There’s a difference between upkeep and frustration. If you find yourself constantly at repair shops, chasing leaks, or stressing about the next breakdown, it may be time to cut your losses and find something more reliable.


    3. The layout no longer works.

    Even the prettiest renovation won’t fix a bad floorplan. If you’ve added a pet, a child, or a remote job to the mix and your RV just doesn’t function anymore, it might be time to find a layout that does. Our move from a Class B to a Class C gave us a separate living, working, and sleeping space, which completely changed our day-to-day comfort as we found the happy medium between long stays in the 5th wheels and the go-go-go travel style in the Class B. Our new RV is the perfect balance of those two, and we love it.


    4. You’re eyeing new tech and features.

    Sometimes, upgrading is about future-proofing. Newer rigs often come with integrated smart controls, better solar setups, more efficient appliances, and stronger insulation for all-weather RVing. If you find yourself longing for what’s standard in newer models, upgrading could be worth the investment, especially if the cost of upgrading your current rig to all these new features is too high.


    Renovation: The Pros and Cons

    Pros

    • More affordable than buying new
    • Customize to your exact taste
    • Keeps you in a layout or RV you love
    • Potentially adds resale value


    Cons

    • Time-consuming and can be stressful
    • May uncover hidden issues
    • Costs can add up quickly if not careful
    • Won’t fix mechanical or structural problems without a hefty price tag and knowledge of how to fix the problem


    Buying a New RV Model: The Pros and Cons

    Pros

    • Less worry about surprise repairs and an initial warranty if a new rig from a dealership
    • Comes with updated features and technology
    • Can better suit current lifestyle needs
    • Often more efficient and easier to travel with


    Cons

    • Expensive
    • Learning curve with new systems
    • Depreciation hits fast if buying new
    • Can take time to “find the right one


    Tips Before You Commit

    Do a deep clean and reset.

    Before you go down the renovation rabbit hole or start RV shopping, try a deep clean, some small updates, and a few days away in your current rig. Sometimes, we just need to reset our perspective. The things you dislike may not be dealbreakers after all.


    Rent or borrow other RV types.

    If you’re leaning toward upgrading but unsure which style is best, try renting a different RV type for a short trip to make sure it is the right fit.


    Make a budget … and stick to it.

    Whether you’re renovating or upgrading, costs can balloon fast. Sit down, research what your project or purchase will realistically cost, and factor in a cushion for surprises. Don’t forget to factor in storage or campground fees if your rig will be out of commission during renovations.


    Talk to other RVers.

    Chances are someone else has been exactly where you are. Social media, RV forums, and campground conversations are full of advice and personal stories that can help you see pros and cons you might not have considered.


    Deciding to Renovate or Buy a New RV

    At the end of the day, whether you renovate or upgrade comes down to one question: Does your current RV still support the way you want to live and travel?

    If the answer is yes, a few upgrades or tweaks might be all you need to fall in love with your rig again. But if it’s becoming a source of stress or no longer meets your needs, it might be time to start shopping for your next home on wheels.

    Whichever path you take, trust that it’s part of your RV journey — and the road ahead is filled with new adventures, new stories, and maybe even a fresh set of wheels.