Author: Gabriel Rivero

  • Ultimate RV Newbie Mistakes: Read Up, Rookies!

    Ultimate RV Newbie Mistakes: Read Up, Rookies!

    When my wife and I first started RVing nearly seven years ago, we had no idea just how much there was to learn. We’ve traveled all across the U.S. and Canada in multiple RVs, from two fifth wheels to a Class B van and now a Class C motorhome. All on our own, we made plenty of RV newbie mistakes. But these days, nothing reminds us about the RV learning curve like traveling with first-timers.

    Right now, we’re on a year-long road trip with my wife’s brother and our sister-in-law — who, before this adventure, had never RVed before. Watching them navigate the ins and outs of RV life has been both hilarious and eye-opening. (And, I should add, expected. RV newbie mistakes are part of learning.) Seeing them is a reminder that we were once in their shoes, making some of the same RV newbie mistakes they’re making now.

    And trust me, we’ve all been there. Whether you’re still shopping for your first RV or are already out on the road, chances are you’re going to make mistakes. Some will be funny after the fact (like leaving the sewer cap on when dumping your tanks). Others could be costly or even dangerous.

    So, to save you from the worst of them, here’s a list of RV newbie mistakes that nearly every new RV rookie makes — and how to avoid them.


    Mistake No. 1: Not Understanding Your RV’s Weight Limits

    If there’s one thing that every RVer should know before hitting the road, it’s how much weight their rig can safely handle. Many newbies just pack up and go without considering the following:

    • GVWR (Gross Vehicle Weight Rating). The maximum your RV can weigh when fully loaded.
    • GCWR (Gross Combined Weight Rating). The max weight of your RV plus any tow vehicle or towed trailer.
    • Tongue Weight and Payload Capacity. If you’re towing, these numbers matter a lot to avoid dangerous sway.

    We personally and unwittingly overloaded our second rig without even realizing it, and we suffered through costly mistakes as a result. (The biggest was having to upgrade to a new truck.) Luckily no accidents or serious incidents happened, but this type of situation can lead to poor handling, excessive tire wear, frame or axle damage, and so much more. Check your weight ratings, pack wisely, and don’t forget — water weighs a lot (8.3 pounds per gallon).


    Mistake No. 2: Ignoring Tire Pressure and Maintenance

    One of the most common (and dangerous) rookie mistakes is neglecting tire maintenance. Underinflated or overinflated tires can lead to:

    • Uneven wear
    • Blowouts on the highway
    • Poor fuel efficiency

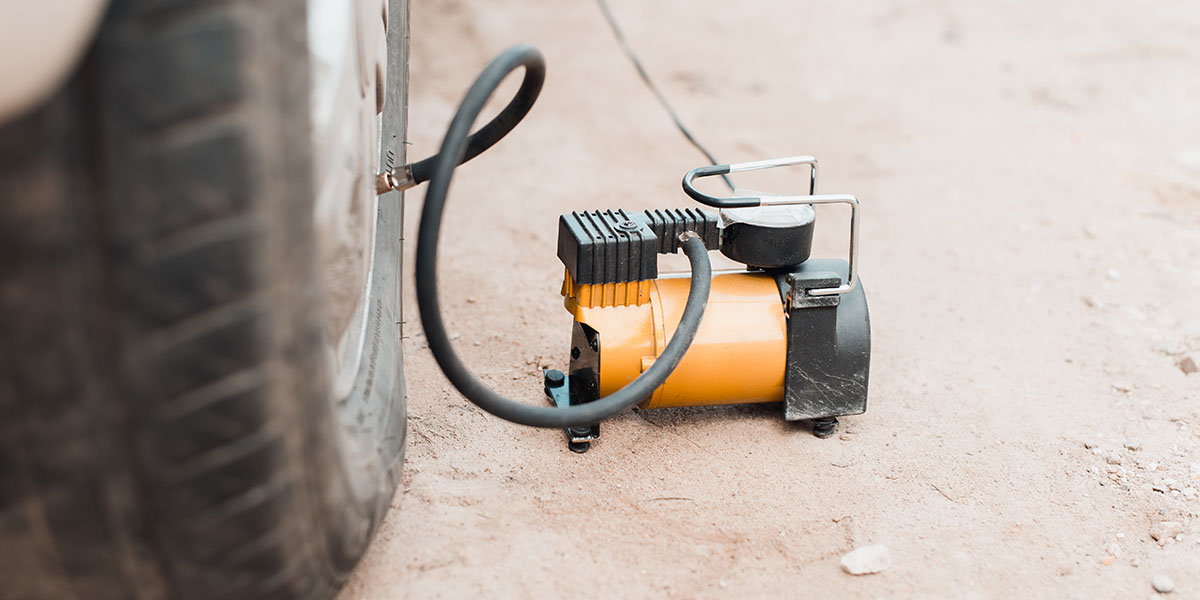
    Before every trip, check your tire pressure using a quality tire gauge and adjust it to the manufacturer’s recommended PSI. We highly recommend buying a good air compressor that you know can inflate your tires to the recommended weight. And, if possible, invest in a tire pressure monitoring system (TPMS) to keep tabs on your tires while driving.


    Mistake No. 3: Not Leveling Properly at Camp

    When we first started RVing, we thought “good enough” was fine when it came to leveling. Wrong!!! A poorly leveled RV can lead to:

    • Cabinets and doors that don’t close properly.
    • Uncomfortable sleeping arrangements. This one made my wife and I laugh hysterically the next day, after our in-laws ignored our advice not to sleep so slanted on their first night in their Class B van, and they woke up hating life.
    • Poor fridge performance. Some RV refrigerators need to be level to work properly.

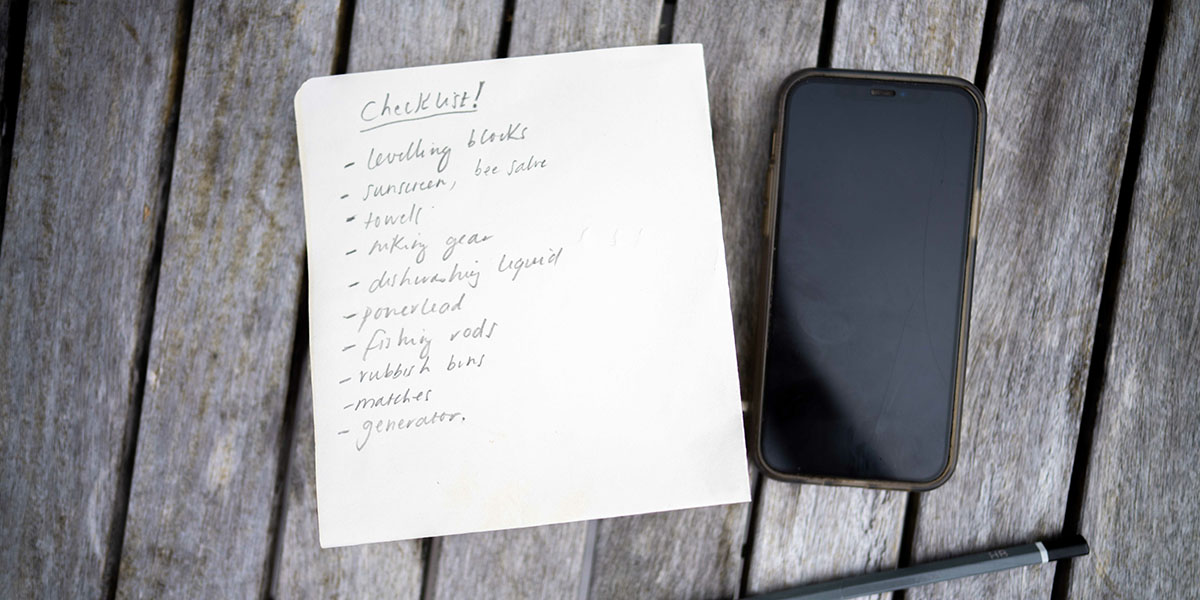
    Newbies often assume that leveling means eyeballing it. (And, admittedly, with years at it, my wife and I are pretty good at it.) But a small bubble level and some leveling blocks make all the difference. If you have an auto-leveling system, double-check it before settling in. It’s worth the extra few minutes.


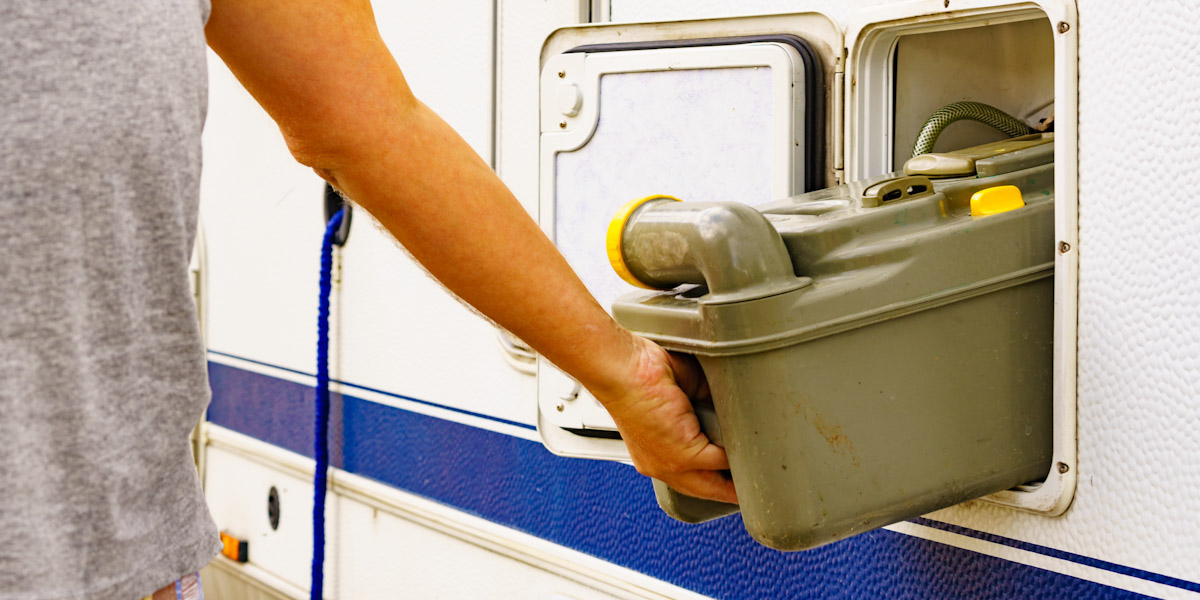
    Mistake No. 4: Underestimating the Importance of the Right Sewer Gear

    Ah, the dreaded black tank mistake known as the poopsie — every rookie’s rite of passage. If you think dumping your tanks is as simple as hooking up and pulling the lever, you’re in for a smelly surprise.

    Mistakes we’ve seen (or made ourselves) include:

    • Not securing the sewer hose properly. (Hello, disaster.)
    • Leaving the black tank valve open at an RV park. This causes the dreaded poo pyramid inside your tank. So …
      • Always close your black tank, add some water and treatment to it, and then when it is near full, you should open the valve and dump. 
      • Never think that you can leave the black tank open during a stay. It is only opened when dumping, and then it should be closed.
    • Not using a clear sewer hose adapter. You need to see when the water runs clear after rinsing.


    A Few Game-Changer Tips

    Invest in disposable gloves, RV-friendly toilet paper, and enzyme tank treatments to keep things clean and minimize the odor. We take it a step further and have a specific trash can with a lid for toilet paper that sits next to the toilet. This allows us to use normal toilet paper, which is way more readily available, and we don’t have to worry about the paper causing a blockage in the tank. Just make sure you have a trash bag, gloves, and disinfectant spray to dispose of the TP properly.


    Mistake No. 5: Not Understanding RV Electrical Systems

    We’ve met a lot of first-time RVers who plug into any power source without checking voltage, polarity, or amperage. This is a great way to fry your electronics.

    Things every RVer should always do:

    • Use a surge protector. Do this. before plugging into shore power.
    • Know your rig’s electrical needs. Do you require 30-amp or 50-amp service?
    • Check campground power pedestals. You want to identify any issues before plugging in.

    Blown fuses and dead batteries are frustrating, but an overloaded system can do real damage.


    Mistake No. 6: Thinking Boondocking is as Simple as Parking Anywhere

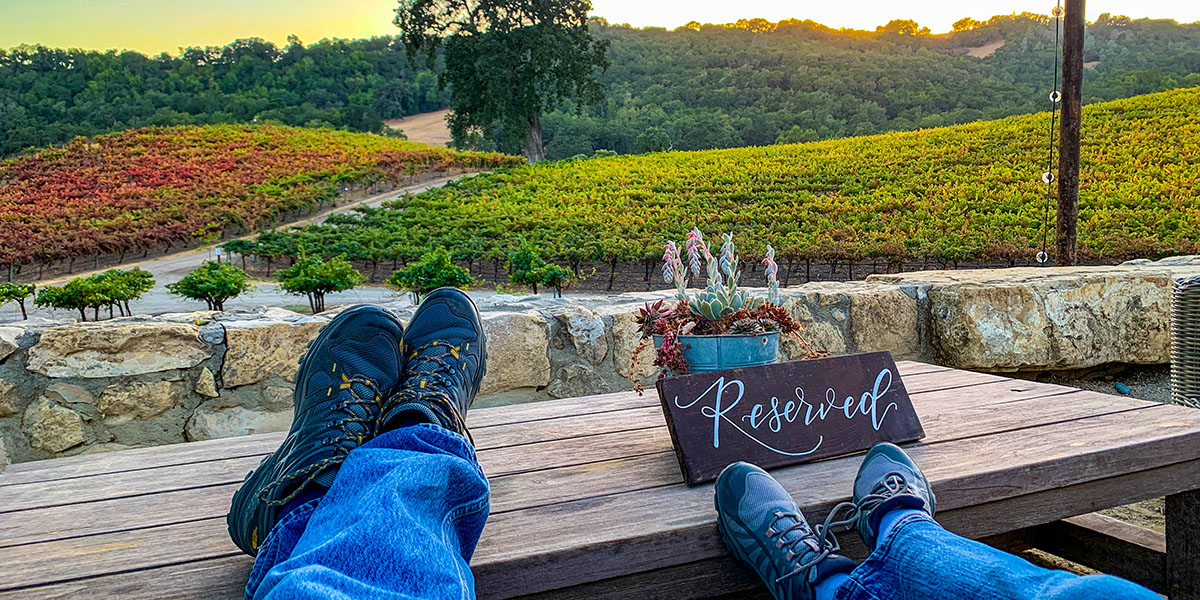
    Boondocking is our favorite way to camp, but a lot of rookies assume you can just pull up and park anywhere for free. It doesn’t quite work that way.

    Common newbie boondocking mistakes:

    • Not knowing where it’s legal to camp. Check BLM land, national forests, or other resources for options. We like to use apps like iOverlander and Hipcamp to search places to stay.
    • Running out of water or battery power. You tanks by themselves may run dry after a day or two.
    • Not having a plan for dumping tanks. When you’re off-grid, you need to know where your next dump station is.

    If you’re new to boondocking, start small. Try it for one or two nights near civilization before heading deep into the wild.


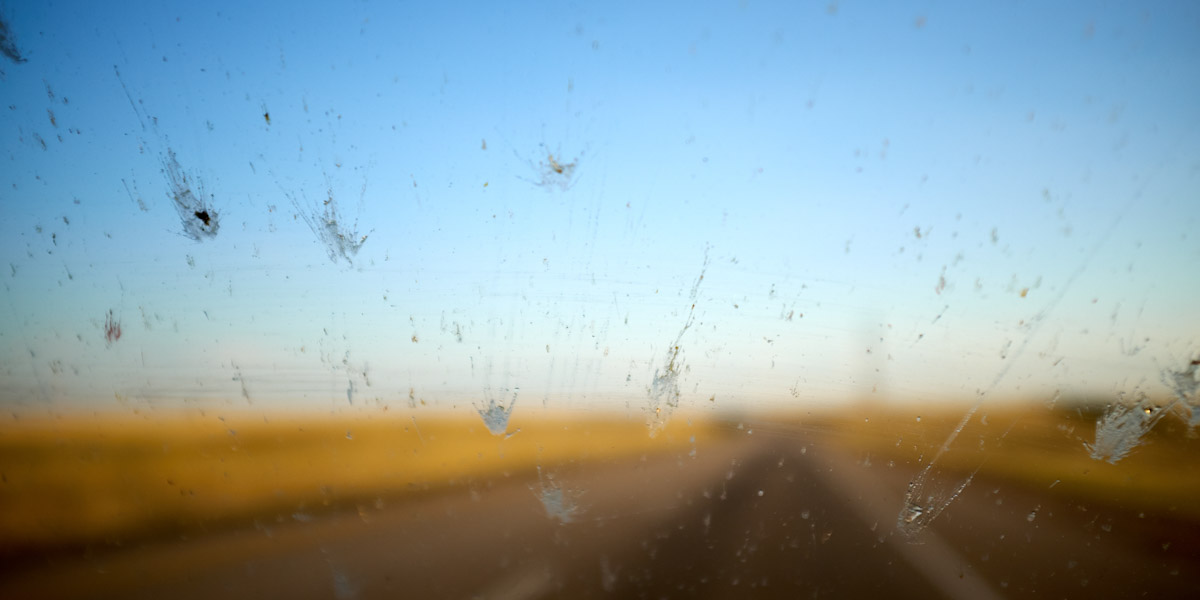
    Mistake No. 7: Not Checking the Weather Before Driving

    If you’re towing or driving a big rig, bad weather can ruin your day fast. Rookie RVers often make the mistake of:

    • Ignoring wind speeds.  High winds can push your rig around.
    • Driving in extreme heat. This puts extra strain on your engine and tires.
    • Not watching for icy conditions. A slide-out in winter is no fun.

    A simple weather check for the week and before every travel day can save you a ton of stress and potential damage.


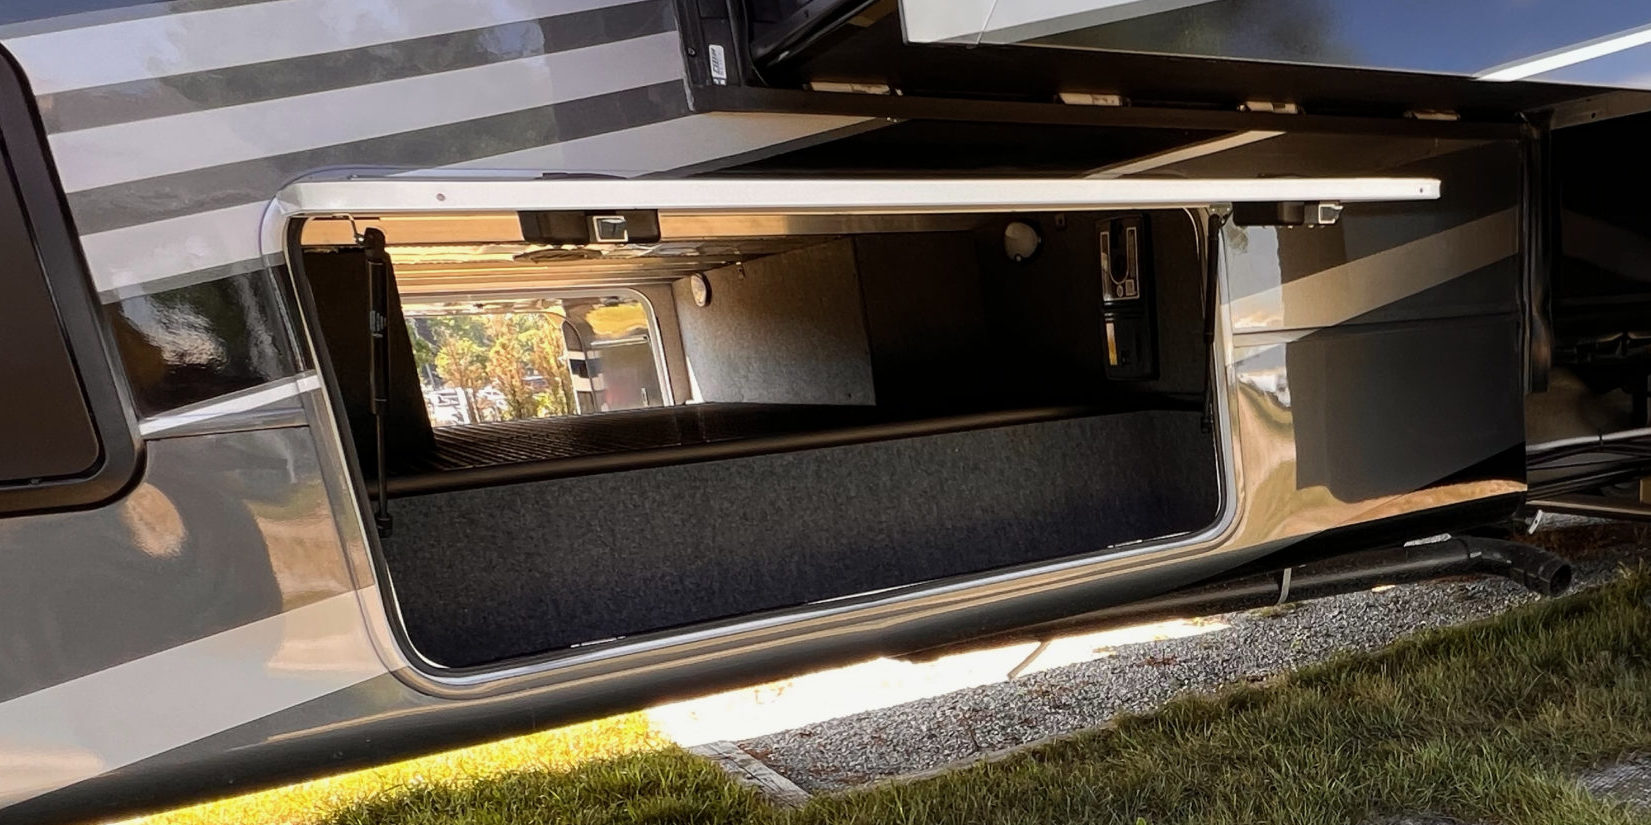
    Mistake No. 8: Forgetting to Secure Everything Before Driving

    It’s easy to forget how much stuff shifts while you’re driving until you hear something crash behind you. Newbies often forget to:

    • Latch cabinets and drawers
    • Secure loose items on counters
    • Lock the fridge

    We’ve all had the moment where we open the fridge or a cabinet after parking and get attacked by flying groceries or supplies. (It only takes once to learn your lesson.)


    RV Newbie Mistakes Happen — Learn From Them

    If you’re new to RVing, don’t stress too much about making mistakes. They will happen. Even after seven years of full-time RV life, we still have moments where we laugh at ourselves for doing something dumb.

    After traveling with my wife’s brother and sister-in-law for the past few months, it’s been fun to see RVing through fresh eyes again. They’ve had their fair share of learning experiences, but they’re getting better every day — and that’s what it’s all about.

    The key is to be prepared, ask questions, and always double-check your setup. Before long, you’ll be laughing at your own early mistakes and passing along advice to the next set of rookies.

    So, whether you’re just getting started or a few trips in — read up, learn from others, and enjoy the journey. Safe travels!

  • 7 RV Basement Storage Ideas to Max Out Your Space

    7 RV Basement Storage Ideas to Max Out Your Space

    We’ve all been there: staring into the basement storage of an RV full of the wrong kind of wonder. Dumbfounded, we’re wondering how on earth we’re supposed to fit all our gear, hoses, tools, and adventure essentials into that oddly shaped, underbelly compartment. (All, of course, without turning it into a black hole of clutter.) Staring into that abyss, it helps to have some pretty solid RV basement storage ideas. You know, the kind that have been paid for with experience.

    After seven years on the road, my wife and have seen and personally experienced it all — from fifth wheels (with cavernous passthrough storage that feels like a secret garage) to smaller rigs (where you have to play Tetris just to store a sewer hose). Whether you’re brand new to RVing or knee-deep in your third full-time rig, organizing and maximizing RV  basement storage space can make or break your road trip experience. Because let’s face it: Needing something and not having it when your on the road is the worst. 

    So, let’s dig into some surefire ways to evaluate your RV basement storage — and some ideas to make the most of it.


    1. Understand what you’re working with.

    Every RV’s basement storage is different. Class A motorhomes tend to have massive passthrough compartments, sometimes with slide-out trays or built-in lighting. Fifth wheels often have tall storage spaces up front and smaller compartments scattered along the side. Class C motorhomes and travel trailers? Usually more compact — requiring to show a bit more creativity with your RV basement storage ideas.

    But no matter which RV you own, you can start by taking inventory of your actual storage size and layout.

    • Is your storage passthrough or divided?
    • Do the doors lift or swing open?
    • Is there room to add bins, trays, or hooks?
    • Are any compartments heated or insulated (ideal for sensitive gear)?


    Pro Tip: Measure each compartment’s depth, height, and width — and jot those numbers down. You’ll want them handy when you’re shopping for bins, crates, or drawer systems that actually fit. We’ve definitely tried to wing it and pass by the store to eyeball a purchase and had it backfire because we were lazy and didn’t really measure. So, remember to measure twice and purchase once.


    2. Sort and prioritize what lives below.

    Not everything belongs in your basement compartments. So, before you toss in that folding kayak or bundle of tangled extension cords, ask yourself a few questions:

    • Do I need quick access to this item while traveling?
    • Can this safely ride in the tow vehicle instead?
    • Does it need to stay dry, cool, or protected from dust?

    We break our storage down into categories:

    • Travel day gear: Hoses, leveling blocks, wheel chocks, gloves
    • Camp setup/teardown supplies: Outdoor rug, camp chairs, grill
    • Emergency items: Tool kit, spare fuses, jumper cables, first-aid
    • Outdoor fun: Paddleboards, hammocks, hiking gear
    • Seasonal storage: Extra blankets, off-season clothing, holiday lights


    Pro Tip: If it hasn’t been used in three trips, it probably doesn’t need to ride along.


    3. Use bins — and label everything.

    We’re not exaggerating when we say plastic bins changed our storage life. Not only do they keep everything tidy, but they also make it easier to unload and reload without digging through a pile of chaos. Choose stackable bins with secure lids and handles — ideally clear, so you can see what’s inside.

    Label each bin clearly, and group them by frequency of use:

    • “Daily Use” bins go in front and are easiest to reach.
    • “Occasional Use” bins can live in the back or bottom.
    • “Emergency” gear stays accessible at all times.


    Pro Tip: If you don’t want to label and you have a decent memory, color-coding your bins can help with organization. Personally, we try to separate specific and similar items in different storage locations and keep them in those clear bins. It makes grabbing what we need when we need it that much quicker.


    4. Maximize vertical and wall space.

    You’d be surprised how much space you’re not using in your basement — especially on the walls and ceiling of the compartment.

    A few smart upgrades:

    • Command hooks or bungee cords for hanging hoses, folding tables, or lightweight tools
    • Magnetic strips for metal tools or objects that can bang around if they happen to move or fall of while traveling a crazy off-road adventure.
    • Overhead cargo nets or fabric shoe organizers to hold smaller items
    • Sliding trays or roll-out platforms (if your RV didn’t come with them)

    These can turn even the tightest space into a functional mini-garage.


    Pro Tip: If your storage compartments aren’t lit, consider battery-powered puck lights or LED strips so you’re not fumbling in the dark or using your phone light.


    5. Watch the weight distribution.

    It’s easy to get excited about how much gear you can fit, but don’t forget to keep an eye on your RV’s weight limits — and how that weight is distributed. Too much in one area can throw off your balance and handling, especially if you’re towing.

    Use a simple bathroom scale to weigh bins before loading, and spread the heavier items across multiple compartments. Keep especially heavy stuff low and centered to maintain your rig’s balance.


    Pro Tip: Keep your RV’s GVWR and axle ratings on hand, and use a CAT scale or similar weigh station to check your setup if you’re unsure.


    6. Keep dirty and clean items separate.

    This may seem obvious, but it’s a mistake most RVers make at least once: Storing your sewer hose with your leveling blocks or outdoor rug … that’s not great.

    Designate one bin (or more) for “dirty gear,” and keep it separate from anything you want to stay clean. We use a dedicated clear and black bin for sewer and dump-related items so they don’t contaminate anything else.


    Pro Tip: Use sealable containers with latching lids for anything that might leak, smell, or drip. Thank us later.


    7. Don’t overthink it — but do reevaluate often.

    RV life changes with the seasons, and so does your storage. You might need snow chains and flannel sheets in December, but come July, those can get swapped for sandals and beach umbrellas.

    Set a reminder to clean out and re-organize your basement every couple of months — or before each major trip. We’ve done the mid-trip storage purge more than once, and it’s way better to do it when you’re not hot, tired, and surrounded by mystery extension cords.


    Your Basement, Your Rules

    Maximizing RV basement storage isn’t just about organization or ideas — it’s about convenience, safety, and peace of mind on the road. The right system can mean the difference between a relaxing travel day and digging through three bins of mismatched gear just to find a wrench.

    At the end of the day, your basement setup should serve your travel style. For us, boondocking most of the time means we keep essentials like our water gear, extra power cables, and backup leveling supplies ready to go — but when we do hit a campground for a reset, we’re glad to have an outdoor rug and folding chairs tucked away, too.

    So, whether your storage space is a cavern or a closet, make it work for you. And if you ever find yourself asking, “Do I really need to bring this?”— you probably don’t.

    But don’t worry, the fifth bungee cord always sneaks its way back in anyway. And oh is it satisfying when you use it. 

  • Inspecting a Used RV: Always Check These 10 Things

    Inspecting a Used RV: Always Check These 10 Things

    Shopping for a used RV? It’s a little like dating. You’re excited, hopeful, and trying to spot red flags before making a long-term commitment. Whether you’re a seasoned traveler or gearing up for your very first road trip, buying a second-hand RV can be a smart way to stretch your budget. But it can also turn into a bumpy ride if you miss key warning signs. And more likely than not, if you’re inspecting a used RV, you can spot them.

    After years on the road and plenty of conversations with fellow RVers over campfires and coffee, we’ve heard plenty of “I should have seen” stories. And almost of them could have been spotted with some simple, standard checks.

    So, here are the top 10 things you should always, always look for when inspecting a used RV.


    1. Water Damage (Especially in the Roof, Ceiling, and Corners)

    Water intrusion is one of the most common and costly problems in used RVs. Leaks can come from roof seams, window seals, or improperly maintained slide-outs — and often go unnoticed until mold or soft spots appear.

    How to Check: Press gently on walls and ceilings, especially in corners and around vents and windows. Look for staining, bubbling, warping, or musty smells. If you see signs of previous patch jobs on the roof, ask when and how it was repaired.

    Pro Tip: Bring a moisture meter (they’re inexpensive online) to detect hidden water damage beneath the surface. They are fairly simple to use, but you can do a quick YouTube search to see how they work.


    2. Roof Condition (Look for Signs of Neglect)

    Even if no water damage is visible inside, the roof may still be at risk. RV roofs should be resealed every few years, and neglected ones are easy to spot — cracked caulking, sun damage, or bubbling membranes are all red flags.

    How to Check: Climb up if it’s safe (or ask the seller to) and inspect all seams, skylights, vents, and antennas. Feel for soft spots underfoot.

    Pro Tip: If the RV has been stored uncovered in harsh climates, the roof likely needs maintenance. Budget for resealing or even a roof replacement depending on age.


    3. Tires (Age Matters More Than Tread)

    RVs often sit for long stretches, and tires degrade over time — even if they look brand new.

    How to Check: Check the DOT date code stamped on the tire sidewall. If the tires are more than five to seven years old, plan on replacing them — regardless of tread depth.

    Pro Tip: Factor tire replacement into your offer — motorhome tires, especially on Class A motorhomes, can be pricey.


    4. Signs of Rodents or Pests (Bring a Flashlight)

    Mice love RVs. So do ants and wasps. From chewed wires and shredded insulation to nests in corners, signs of past or current infestations are not uncommon.

    How to Check: Open every compartment. Check under beds, in storage bays, and around the engine or generator area. Look for droppings, nests, or chewed materials.

    Pro Tip: RVs stored near fields or barns are more prone to critters. Don’t be shy — bring a flashlight and get hands-on with your inspection.


    5. Slide-Out Function and Seals (Test and Listen)

    Slide-outs add space but can also be trouble spots. Poor maintenance can lead to leaks, sagging, or failure to retract properly.

    How to Check: Extend and retract all slides fully. Listen for grinding noises and watch for hesitation. Inspect the seals for cracking, mold, or separation.

    Pro Tip: Watch how the interior trim moves with the slide. It can reveal structural shifts.


    6. Electrical and Battery Health (Test Function and Check Age)

    From lights and outlets to the water pump and fridge, the RV’s electrical system needs to be in working order. Batteries are often overlooked and can fail early if neglected.

    How to Check: Test all 12-volt and 120-volt systems. Plug the RV into shore power and also test battery-powered functions. Ask when the batteries were last replaced.

    Pro Tip: Look for corrosion on battery terminals and ask if the RV has a solar charging system. It can help preserve battery life.


    7. Plumbing and Tanks (Run the System)

    Leaks, cracks, or improperly winterized systems can lead to big problems. You want to ensure the plumbing is clean, functional, and undamaged.

    How to Check: Run water through every faucet, flush the toilet, and test the water pump. Inspect the fresh, gray, and black tanks for cracks or odors.

    Pro Tip: If the RV smells heavily of air fresheners, it might be hiding sewer odors or mold. Trust your nose.


    8. Appliances and HVAC (Give It a Go)

    Test the fridge, stove, microwave, furnace, and A/C. Repairs or replacements can be expensive—especially for RV-specific appliances.

    How to Check: Turn on the fridge (both propane and electric settings), check the oven and burners, and let the A/C run for several minutes.

    Pro Tip: Check the fridge vent outside. If it smells of ammonia or you see yellow residue, the cooling unit may be failing.


    9. Title, Registration, and Vehicle History (Walk Away Without Them)

    No one wants to buy an RV only to discover it has a salvage title or unpaid lien.

    How to Check: Verify the VIN, ask for a clean title, and check service records. If you’re buying a motorized RV, consider running a Carfax or similar report.

    Pro Tip: Walk away if the seller refuses to show the title or is vague about the RV’s history. Transparency matters.


    10. Overall Fit and Feel (It Matters)

    Beyond technical checklists, ask yourself: Does this RV feel right? Does it meet your travel needs, lifestyle, and comfort expectations?

    How to Check: Sit in the driver’s seat. Walk through the living space. Pretend you’re making coffee or walking the dog. Imagine rainy days and travel days.

    Pro Tip: Bring someone with RV experience if it’s your first rig. A second set of eyes (and questions) can save you from emotional purchases.


    Bonus: Schedule an Independent Inspection

    Even seasoned RVers can miss things when inspecting a used RV. Before handing over your hard-earned cash, consider hiring a certified independent RV technician to do a full inspection.

    What to Do: Search for highly rated NRVIA or RVTAA-certified inspectors in your area, especially if buying from a private party. Many offer mobile service and will meet you at the lot.

    Pro Tip: An inspection can cost a few hundred dollars — but it can save you thousands in repairs and give you peace of mind.


    Final Thoughts on Inspecting a Used RV

    Buying a second-hand RV can be one of the best decisions you make — if you go in informed. It’s an opportunity to score a great deal, customize your rig from the start, and maybe even skip that steep depreciation curve that comes with brand-new models.

    But the key is to treat the process like a home inspection and not a casual browse. When inspecting a used RV, bring your checklist. Ask tough questions. And take your time.

    The open road may be calling, but first, make sure the rig you’re about to take it on is ready to go the distance.

  • Finding a Pet-Friendly RV: 8 Tips for Dog Owners

    Finding a Pet-Friendly RV: 8 Tips for Dog Owners

    Being able to travel with your four-legged kiddos is one of the best parts of RV life — but it can also be one of the most chaotic. Our two pups, Wilson and Journey, have been road-tripping with us for years, and they’ve helped us learn what really matters when choosing a pet-friendly RV as a dog owner. From muddy paw prints and surprise zoomies to snuggling up with them for a good movie on a cold night, we’ve seen it all throughout our 100,000-plus miles on the road.

    So, whether you’re a dog owner shopping for your first rig or looking for a more pet-friendly RV, here’s what to look for when choosing a model that keeps both you and your canine companions comfortable, safe, and happy.


    1. Consider Floorplan Flow: The Dog Traffic Test

    We’ve experienced nearly every size and style with Wilson and Journey. From cavernous fifth wheels to a class B campervan, we’ve made it work with them because we’ve managed this key aspect.

    When you travel with dogs, space matters — especially on rainy days when everyone’s inside and you’ve just come back from a wet and muddy bathroom walk. Because at that point, the last thing you want is them having to share bed or couch space with you or track mud all over your rig.

    Look for floorplans that allow for easy movement. Slides can be a huge bonus, creating extra room for a dog bed or allowing your pets to stretch out without blocking every path to the bathroom or fridge.

    We find that open layouts and passthrough hallways often work best. Rear or easy access bath layouts can also help if you need a spot to dry off muddy paws before you do let them jump back up on the couch with you.

    Pro Tip: When walking through RVs, imagine your dog pacing alongside or just behind you. Is there room to move freely without stepping on tails or bowls? We chose a more open twin-bed layout with a rear bath for our campervan days, and that worked great for us. We could even convert the twins to a king bed and still have room for everyone.


    2. Check for Durable Flooring: Say No to Carpet

    Carpet and dogs? Let’s just say it’s a relationship that rarely ends well. After years of full-time travel, we got rid of the carpet at the house we bought quickly, because the difference is night and day. And the same goes for RVs.

    Between shedding, drool, mud, sand, and the occasional accident, it’s smart to prioritize flooring that’s easy to clean. Vinyl or laminate floors are durable, quick to sweep, and more forgiving when it comes to pet hair or muddy paws. Bonus points for textured flooring that doesn’t get slippery when wet.

    Pro Tip: Having a hand vacuum and cleaning wipes in easy reach of the entrance can make your life a lot cleaner and easier to manage. And if you can fit a nice entrance rug to clean feat and paws, your golden.


    3. Ease Pup Access: Pet-Friendly RV Entryways

    Some RVs have high or narrow steps that can be tough for senior dogs or short-legged breeds. If you’re traveling with an older pup (or one that just thinks they’re royalty), wider steps or lower profiles can make a big difference.

    Class C motorhomes and travel trailers tend to have lower entry points compared to fifth wheels or motorhomes with air suspension. Look for an pet-friendly RV with a solid, stable step system — or plan to upgrade with a pet ramp or foldable stair cover.

    Pro Tip: Look for models with grab handles near the door. You’ll use them too, but they’re also helpful for dogs who need a little assist on the way in or out.


    4. Choose Climate Control: Dogs Can’t Sweat It Out

    We all know how dangerous it can be for pets left in hot vehicles — even for a few minutes. In RVs, that danger can extend to your entire house-on-wheels during summer heat or shoulder-season sun.

    Look for RVs with strong insulation and quality AC, or multiple AC units in larger models, so that cooling and keeping the RV cool is not an issue. If you’re planning on boondocking then having a good generator that has the ability to run your cooling system is a must. You may be able to run some A/C systems on a big battery and solar system with the right inverter and setup, but that can be expensive and unwise to try unless you really know what you are doing. Backup power in the form of a good generator is usually the best option.

    Ducted air and ceiling fans (like MaxxAir or Fantastic Fans) can make a huge difference in airflow as well, especially if you have open layouts with good windows. So, these are good to look for when purchasing your pup-friendly home on wheels. 

    On the flip side, having a good heating system like a furnace or heat pump if you plan on partaking in some cold-weather camping is also a must. Because just like overheating can be a big issue, so can freezing temperatures.

    Pro Tip: Consider installing a temperature monitor in your RV that alerts your phone if things get too hot or too cold. Peace of mind is priceless. We have one, and when connected to our Starlink, we can check on the pups’ comfort level while out and about if we have cell signal.


    5. Think Outdoors Too: Shade and Tie-Outs

    If your dog loves lounging outdoors as much as ours do, pay close attention to the exterior of your RV.

    • Does it have a large awning for shade?
    • Are there outdoor power outlets for a fan or pet monitor?
    • Is there a convenient place to attach a leash or tie-out?

    Some rigs even have built-in exterior sprayers — perfect for rinsing off dirty paws after a hike or beach day.

    Pro Tip: A small outdoor mat can help keep sand, dirt, and pine needles from getting tracked into the RV. 


    6. Dig into Storage: For All Their Stuff (and Yours)

    We’ve learned the hard way that dog gear adds up fast. Travel bowls, extra leashes, waste bags, food containers, medications, beds, toys, towels—you get the idea.

    Look for RVs with ample storage space. Under-bed compartments, pantry closets, and pass-through bays give you flexibility to stash both pet gear and your own essentials.

    Pro Tip: Use clear plastic bins to organize your pet’s things. Label them and tuck them under the dinette, under the bed, or in the outside pass-through. That way, everything has a place — and nothing smells like dried kibble in your living space.


    7. Sniff Out Dog-Safe Features: A Few Pointers

    While not every RV comes with a “dog package,” here are a few bonus features that can make your life easier:

    • Window placement at nose level. Dogs love to look out the window. A low window in the living area can keep them entertained during downtime.
    • Screen doors with pet guards. If your pup likes to paw at the door, a reinforced screen will help avoid accidental jail breaks.
    • Built-in feeding drawers. Some high-end models offer pull-out pet feeding stations under the fridge or cabinets. Not necessary — but pretty neat. Our Class B van came with one, and it was great.

    Pro Tip: If your RV doesn’t come with these extras, a little DIY goes a long way. 


    8. Consider Travel Safety: Harnesses and Crates

    Your dog may love riding shotgun — but safety should still come first. Look for rigs that have safe areas for traveling pets, especially during long driving days. Some RVers use seat-belt-compatible harnesses or soft-sided crates anchored to furniture.

    If your dog is crate-trained, measure your crate and make sure it fits in the rig before you buy. Dinette benches, under-bed spaces, and slide-out areas are good options.

    Pro Tip: Practice drive days with short trips before a big adventure, because not all pets passengers are the same. You want to know what their travel style and comfort level is before heading out on a big adventure. If you can rent a pet-friendly RV before purchasing one, then that is a great idea.


    Tail-Wagging Travel Starts with the Right Rig

    At the end of the day, a pet-friendly RV doesn’t need to be custom-built for dogs to be a great home on the road. It just needs to work for your unique crew. Whether you’re boondocking in the desert or parked at a campground near the beach, a pet-friendly setup can make travel smoother, more comfortable, and a lot more fun for everyone involved.

    And while your dog might not care about the layout or solar setup, they’ll definitely appreciate having a cozy spot to curl up near you after a long hike, a safe place to nap while you’re on the road, and a view out the window to see the cool places you’ve brought them to.

    So, as you’re evaluating your next RV, take a moment to think like a dog. (No, seriously — get down on their level.) You might be surprised at how a few thoughtful features can make all the difference you and them on you travels.

  • Cleaning Bug Splatter Off Your RV: A Step-by-Step Guide

    Cleaning Bug Splatter Off Your RV: A Step-by-Step Guide

    If you’ve driven more than ten minutes in your RV — especially in the warmer months — you’ve probably been gifted with a splattered windshield and bug-caked front cap. It’s one of those unavoidable realities of life on the road. (And at least for us, if feels like it is inevitable the moment you leave a truck/RV wash.) More times than we can count, we’ve pulled into campgrounds plastered with bug splatter so thick on the front of our rig, it looked like a horror movie scene.

    But while bug splatter might be inevitable, leaving it there isn’t. Nor is it advisable, even for the laziest RVer. Those juicy little missiles can actually damage your RV’s finish, paint, and even headlights if ignored.

    So, let’s walk through what bug guts do to your rig, how to get them off safely, and how to prevent buildup in the first place.


    Why Bug Splatter Is More Than Just Gross

    It’s not just about looks. Bug splatter contains enzymes and acids that start breaking down surfaces quickly — especially in the sun. Letting it sit too long can cause:

    • Etched paint and decals,
    • Pitted or stained fiberglass,
    • Cloudy headlights, and
    • Reduced visibility through windshields.

    Some bugs are especially acidic (looking at you, lovebugs). And the longer they bake onto your RV’s front end, the more damage they can do.


    Step-by-Step: How to Clean Off Bug Splatter

    Like a new stain on a favorite shirt, time really is of the essence here. Letting bug splatter sit for days or weeks makes it much harder to remove. Here’s how to tackle it effectively.


    1. Soak the area.

    Start by soaking the front cap or affected surfaces with water to loosen things up. A hose with a spray nozzle or a foam cannon works well. If you’ve been driving all day, let the rig cool down before applying water to avoid streaking.


    2. Use a bug-specific cleaner.

    There are tons of RV-safe bug removers on the market. Look for one that’s safe for gel coat, fiberglass, paint, and decals. Apply it generously and let it sit for the recommended time — usually a minute or two.

    Some RVers swear by DIY options like diluted vinegar or dryer sheets, but we recommend using products designed for the job to protect your finish.


    3. Gently scrub.

    Use a microfiber cloth, soft sponge, or bug sponge (not steel wool or harsh pads) to gently wipe away the splatter. Avoid circular motions that could grind grit into your paint.


    4. Rinse thoroughly.

    Rinse the area well to remove residue from the cleaner and loosened splatter. If needed, repeat the process for stubborn spots.


    5. Wash the RV.

    Once the bug splatter is off, wash your entire rig as usual. This helps remove any leftover cleaner and keeps the finish protected.


    What Not to Do

    • Don’t use abrasive scrubbers. These can scratch your finish.
    • Don’t use high-pressure washers. Using one too close to seals, decals, or paint can cause unexpected damage.
    • Don’t wait too long. The sooner you clean, the easier it is and the less damage bugs can do.


    A Few Products For The Job

    A quick search online shows some of the following as good options for this fun job:

    Pro Tip: Keep a basic cleaning kit in your RV’s exterior storage so you can tackle splatter at your next stop instead of waiting until you’re home.


    Prevention Tips: Keep Bugs from Sticking

    While you can’t avoid bugs entirely, a few strategies can make them easier to clean off:

    • Apply a protective wax or sealant. The prime real estate here is your RV’s front cap and windshield. This creates a slick surface that makes bugs less likely to bond.
    • Install a bug screen or bra. This is specially helpful on Class A or Class C motorhomes with large front ends.
    • Use Rain-X or similar treatments. Using this on windshields to help dead bugs wash off more easily during rain or a rinse.
    • Park strategically. When stopped, park with your bug-covered side away from direct sun to reduce baked-on splatter.
    • Hit up truck/RV drive-through washes. These stops are your friend. We love passing through a Blue Beacon or similar truck wash made for semis, because they are usually fairly priced, do a decent job of cleaning your rig, and they apply several of the items on this list.

      Pro Tip: Always ask and know what chemicals they are applying, if they are RV safe, and explain what you want and don’t want them to do. Sometimes you have sensitive electronics like a generator that you don’t want to get soaked if they do an undercarriage wash.
      ALWAYS KNOW YOUR RIG!!!


    Buggin-Out on Bug Splatter

    Bug splatter is an unavoidable part of RV life — but it doesn’t have to become a permanent part of your paint job. With the right tools and a little regular maintenance, you can keep your rig looking fresh, protect your investment, and avoid the pain of repainting or restoring damaged fiberglass.

    Whether you’re prepping for your next road trip or cleaning up from your last one, a few extra minutes spent removing those buggy reminders will keep your RV in tip-top shape for years to come.

  • Hard-to-Store Items in an RV  — Plus 5 Models That Can Handle It

    Hard-to-Store Items in an RV — Plus 5 Models That Can Handle It

    If there’s one universal truth my wife and I have learned after nearly seven years on the road and four years as THOR Ambassadors, it’s this: No matter how much you downsize, there’s always that one thing (or more) that’s nearly impossible to store in your RV. What’s worse is that the hard-to-store items in an RV can often be our favorites. Maybe it’s your favorite folding e-bike, a paddleboard, a selection of essential footwear (that somehow multiplies and finds its way beside the front door), or that oddly-shaped kitchen appliance you swore you’d use every day.

    In a lifestyle where every square inch matters, these items often become one of two things. A source of frustration or of creative storage genius!

    So, let’s talk about it by the numbers. What are hard-to-store items in an RV and — since my wife and I are THOR Ambassadors — which THOR models actually give you the space to stash them without sacrificing your sanity or your precious legroom?

    Whether you’re looking for a spacious motorhome or a luxury fifth wheel, I’ve got an RV designed to handle your storage struggles like a pro.


    Notoriously Hard-to-Store Items in an RV

    Before we dive into the rigs, let’s split these into five categories. These are the repeat offenders that we  — and just about every RVer we’ve met — struggle to store:

    • Outdoor gear. Bikes, inflatable paddleboards, folding kayaks. Fact is, if it’s meant for adventure, it’s usually awkward and bulky.
    • Seasonal clothes. This one, somehow, always ends up being a much bigger factor than you’d expect. Whether you’re chasing sunshine or riding out snow, those puffy jackets, hiking boots, or swimsuits don’t store themselves. (And like those shoes, they seem to multiply.)
    • Tools and maintenance equipment: A decent toolkit, leveling blocks, sewer gear, an air compressor, et cetera. You need all or most of them. And they’re rarely small.
    • Pet gear. Travel crates, food bins, toys, grooming supplies. For us, traveling with our dogs Wilson and Journey means a whole extra storage category.
    • Office gear. As digital nomads, we travel with laptops, cameras, tripods, chargers, and more. And we’re not the only ones. It’s a reality for lots of remote workers. Workspace storage is a must.


    5 THOR RV Models — and Types — for a Storage Upgrade

    Now that we’ve identified the culprits, here are five THOR RV models that rise to the challenge and offer surprisingly smart solutions for hard-to-store items in an RV.


    1. Thor Motor Coach Tuscany 45MX | Class A Diesel Motorhome

    Perfect for: Full-timers with big gear and a need for luxury

    The Tuscany 45MX isn’t just a rolling luxury condo — it’s also built to carry everything you need for a lifestyle on the move. With full passthrough basement storage and optional slide-out trays, there’s ample room for bikes, camp furniture, gear bags, and even e-bikes. While you’re likely buying this coach for its high-end residential feel, the oversized storage is a practical bonus that makes bringing the gear for your hobbies simple and seamless.

    Why It Works:

    • Massive exterior storage compartments with optional slide-out trays
    • Ideal for full-timers or long-term travelers with gear-heavy hobbies
    • Combines functionality with luxury-level comfort


    2. Jayco Greyhawk 30Z | Class C Motorhome

    Perfect for: Versatile workspaces, tech gear, and full-time flexibility

    As digital nomads, we know that finding a comfortable and functional spot to work inside your rig can be a challenge. The Jayco Greyhawk 30Z provides just enough flexibility to make it work. The spacious slide-out dinette can double as a workstation, and there’s overhead cabinetry and hidden compartments for laptops, cables, and tech accessories. It’s not a dedicated office, but it’s more than enough to stay productive on the road without sacrificing your living space.

    Why It Works:

    • Roomy dinette area doubles as a reliable workstation
    • Ample overhead and under-seat storage for tech gear
    • Separate bedroom allows for work/life balance on the road


    3. Highland Ridge Open Range OF328BHS | Travel Trailer

    Perfect for: Paddleboards, seasonal gear, and flexible family needs

    This travel trailer line punches well above its weight when it comes to storage. And the Open Range OF328BHS in particular offer a versatile bunkhouse space, expansive underbed storage in the primary bedroom, and an oversized pass-through compartment that’s perfect for inflatables, beach gear, or bulky totes. Whether you’re traveling with kids or not, the additional interior space gives you room to adapt to your needs—whether that’s sleeping arrangements, gear hauling, or hobby storage.

    Why It Works:

    • Large pass-through exterior storage compartment
    • Versatile rear bunkroom that adapts to your travel lifestyle
    • Under-bed storage in the primary bedroom perfect for off-season gear


    4. Thor Motor Coach Sequence 20L | Class B Motorhome

    Perfect for: Minimalist travelers, toolkits, and everyday adventure gear

    We traveled the U.S. and Canada in this nimble little van, and what it lacks in size, it makes up for in smart design. One of the rear twin beds lifts up to reveal a deep compartment that handled our VIAIR air compressor, our small toolkit, and road emergency gear. The rear double doors made access a breeze, and we added a rooftop cargo box for overflow. For longer trips, pairing this van with collapsible shelves, hanging organizers, and dual-use furniture makes a big difference in maintaining your sanity.

    Why It Works:

    • Rear underbed storage compartments with easy access
    • Perfect for small essential gear, tools, and travel extras
    • Optional roof storage box expands capacity on longer trips


    5, Heartland Cyclone 4014C | Fifth-Wheel Toy Hauler

    Perfect for: Big toys, fire pits, camp chairs, and extra living space

    Toy haulers are known for hauling gear, and the Cyclone 4014C does not disappoint. With a 14-foot garage, walk-in pantry, and loft space, there’s enough room for fire pits, full patio sets, portable grills, and even ATVs. And let’s be real. While toy haulers often come with a steeper price tag, their ability to combine storage, flexibility, and livability makes them worth it for many RVers, especially families and adventurers who travel with a lot of “extra toys.”

    Why It Works:

    • 14-foot garage with tie-downs and ramp door
    • Bonus loft space and walk-in pantry for overflow storage
    • Built-in side patio turns into your outdoor lounge or living extension


    Tips for Tackling Tough Storage Challenges

    No matter what rig you’re in, here are a few tips that have helped us store those hard-to-fit essentials:

    • Think vertically. Use wall-hung baskets, hanging organizers, and cargo nets to make use of vertical space.
    • Label and tote it. Clear storage bins make finding gear faster, and labeling saves time and sanity.
    • Use outdoor storage. Don’t underestimate your exterior compartments or hitch/roof racks.
    • Rotate gear by season. Only carry what you need for your current trip — less clutter, more space. If traveling through multiple seasons, then try vacuum sealed/shrink bags to store clothes from different seasons that aren’t in use.
    • Multi-purpose everything. A camp stool that’s also a step. A crate that’s also a table. You get the idea.


    Final Thoughts on Handling Hard-to-Store Items

    Finding storage space in an RV is kind of like playing 3D Tetris — only your pieces are oddly shaped, come in different seasons, and sometimes bark. But when you choose the right rig, it doesn’t have to feel like a constant puzzle.

    Whether you’re hauling adventure toys, building a mobile office, or just trying to keep your RV from turning into a disaster zone, there’s a THOR RV out there built to solve your storage struggles.

    If you’re still searching for your perfect rig, start by thinking about what you need to store and go from there. Because when your RV fits your lifestyle, every trip feels a little more like home (and a lot less like a game of hide-and-seek with your gloves and hiking boots).

  • Got a Road Trip Checklist for Your RV? You Need One

    Got a Road Trip Checklist for Your RV? You Need One

    Hitting the road for a big RV road trip always comes with a rush of excitement. But let’s be honest: It can also come with a bit of angst. And truthfully, it doesn’t even matter whether you’re a newbie setting out on your first trip or just getting back on the road after a break. Everyone feels it. Because no one wants to  face-palm 200 mile. The fact is that a road trip checklist isn’t just helpful — it’s essential.

    After nearly seven years on the road, living full-time in various RVs (everything from a fifth wheel to a Class B van and now a Class C motorhome), we’ve learned this lesson more than once. It usually goes something like this. We’re setting up at a remote boondocking spot, proud of how smoothly things are going, and then we open a drawer and realize … we forgot something basic. The towels. The dog food. Replacing the sewage hose that started leaking last trip and you put off replacing. Yeah, not ideal.

    But happily, it is preventable. So, if you’re getting ready for that weekend getaway or planning your summer RV adventure, I highly recommend preparing a go-to road trip checklist — or even having more than one road trip checklist. (We’ll talk about that in a minute.) Quite simply, it’s one of the easiest ways to make your trip safer, smoother, and way more enjoyable.

    Let’s break down why a road trip checklist matters — and what should be on yours.


    A Road Trip Checklist … Because We’re All Human

    There are two kinds of people in the RV world: Those who swear by their checklist, and those who eventually become those people. (Usually after a painfully memorable oversight.) RVing isn’t like tossing a duffel into the backseat and grabbing drive-thru on the way. Your rig is your transportation, lodging, kitchen, and bathroom all in one. If something goes wrong (or gets left behind), it can affect multiple parts of your trip.

    Here’s what a solid checklist helps you do:

    • Avoid forgetting essentials (like a new black tank hose).
    • Prevent costly damage (did you check your tire pressure before pulling out?)
    • Improve safety (because double-checking your hitch setup is never overkill)
    • Reduce departure-day stress (which is a real gift to your future self)

    Plus, when you’re on the road often, it’s surprisingly easy to get overconfident. A checklist keeps even experienced RVers in check. 


    The Pretrip Essentials: Before You Hit the Road

    A road trip checklist starts before your tires even leave the driveway. This is the time to focus on prep, packing, and rig readiness.

    Mechanical Musts

    • Check tire pressure and tread (including your spare).
    • Test brake lights, turn signals, and headlights.
    • Inspect propane tanks for leaks and ensure they’re filled.
    • Verify fluid levels (oil, coolant, windshield washer).
    • Confirm tow connections and weight distribution (if towing).

    If you’ve ever had a sway issue on the freeway or struggled with uneven weight distribution, you know how important it is to dial this in. Safety and comfort depend on it.


    Interior Readiness

    • Secure loose items (inside cabinets, fridge, countertops).
    • Stock toilet paper (RV-safe only!), soap, and cleaning supplies.
    • Ensure batteries are charged (house and engine).
    • Fill freshwater tank and sanitize if needed.
    • Double-check fridge and pantry stock.

    And please, do yourself a favor: Make sure you’re stocked on coffee or whatever your go-to morning ritual requires. We’ve definitely had to make an emergency grocery detour for that morning coffee.


    Your Never-Leave-Behind List: A Supply Check

    There are some RV items that aren’t just nice to have — they’re vital. If they’re not already part of your road trip checklist, add them now.


    Gear You’ll Actually Use

    • Water pressure regulator
    • Sewer hose and elbow adapter (bonus: sewer hose support)
    • Leveling blocks or auto-leveler tools
    • Surge protector or EMS (electrical management system)
    • Freshwater hose (bonus if it’s heated for winter travel)
    • Extension cords and adapters (30/50 amp depending on your rig)
    • Wheel chocks and jack pads

    Forget one of these, and you might find yourself MacGyvering a setup with duct tape and prayers, which is never fun. (If this reference doesn’t make sense, feel free to Google it and send me a message here so I can feel that much older … lol.)


    Your Road-Ready List: Ensuring Safety and Comfort

    Once you’re rolling, you’ll want to make sure you have everything to stay safe and comfortable on the road.


    Safety First

    • Roadside emergency kit (reflectors, jumper cables, tools)
    • First aid kit
    • Fire extinguisher (up to date!)
    • Extra fuses and bulbs
    • Emergency contact info in an easy-to-find spot


    Comfort Boosters

    • Cozy bedding, blackout shades, and good pillows
    • Battery-powered fans or portable heater depending on weather
    • Outdoor rug and camp chairs
    • Headlamps, lanterns, and flashlights
    • Travel-friendly entertainment (books, games, downloaded shows)

    Pro tip: If you travel with pets like we do, remember to pack their essentials too. Wilson (our mellow Cairn terrier) and Journey (our high-energy staffy mix) each have their own checklist — food, leashes, meds, and favorite toys. Because you don’t want to be the human who forgot the chew bone.


    Departure Checklist: Before You Break Camp

    The departure checklist is crucial and often overlooked — especially when you’re ready to get going and skip the whole pack-up process. Your already out on the road or off-grid. Surely, you can now kick checklists to the curb. Wrong. You need a campsite checklist to consult any time you depart. (But trust us, this is the moment when something always tries to go sideways.)


    The Ready-to-Roll List

    • Retract slides and awnings
    • Disconnect utilities (water, electric, sewer)
    • Secure all cabinets and doors
    • Close roof vents and windows
    • Lock external compartments
    • Store outdoor gear and trash
    • Check tire pressure one more time


    Bonus: Your RV Travel Day Checklist

    Even once you’re rolling, having a travel-day checklist helps things go smoothly.


    Don’t Forget

    • Maps and/or GPS app is set up (and offline backups downloaded)
    • Know your route (and low clearance warnings!)
    • Snacks and water within reach
    • Entertainment for passengers
    • Fuel level and next planned gas stop

    And yes, bathroom breaks. Map them out. Not every gas station has an RV-friendly setup — or a working bathroom. Plan accordingly.


    Make It Personal: Customize for Your RV Life

    Every RVer’s checklist is a little different — and that’s how it should be. Your rig type, travel style, pets, kids, and destination all affect what you’ll need.

    Here are a few custom additions you might consider:

    • For boondockers: solar panel setup, portable power station, gray tank monitoring
    • For full-timers: mail forwarding setup, mobile internet gear, spare parts
    • For cold-weather campers: heated hoses, window insulation, space heaters

    Over time, your checklist becomes like a pretrip ritual. You can even laminate it and keep it by the door — or go digital with checklist apps or RV-specific tools. If you go through the checklist in the same order enough times, the process becomes second nature and the stress levels lower.


    Preserving Peace of Mind

    RV life is full of incredible moments — sunsets at the coast, spontaneous roadside attractions, cozy evenings around a fire. But those moments are a lot easier to enjoy when you’re not scrambling to fix something you forgot.

    A road trip checklist might not sound glamorous, but it’s one of the most powerful tools you can have in your RV toolkit. It helps you stay ready, feel confident, and (hopefully) avoid that awkward moment when you roll into a campsite only to realize you forgot something.

    So, whether you’re a full-timer, a weekend warrior, or just hitting the road for the first time—make the checklist. Use it. Love it. Because nothing says “I’m ready for adventure” like knowing your sewer hose is exactly where it should be.

  • 5 Products to Improve Your RV Tire Safety

    5 Products to Improve Your RV Tire Safety

    Unfortunately, I can tell you what it’s like to have an RV tire blowout  — naturally, miles from the nearest tow truck capable of towing my RV. So, believe me when I tell you: RV tire safety is no joke. In fact, it’s no exaggeration to say that tire safety is one of the most critical aspects of RV travel. Period.

    With the weight and size of an RV, even minor tire issues can escalate quickly. That can lead to costly delays or —worse — potential hazards. So, equipping yourself with the right tools and knowledge does more than ensure a smooth journey. It also gives you peace of mind.

    At a minimum, equipping yourself means making sure your rig has five essential products. From tire pressure to repair kits, be sure your always hit the road with these RV tire safety products.


    1. Your First Line of Defense – A Tire Pressure Monitoring System (TPMS) 

    A good tire pressure monitoring system (TPMS) is a game-changing tool for RVers. It continuously monitors your tire pressure. Some even check temperature, alerting you to any anomalies in real-time. With the weight distribution of an RV being so vital, a TPMS can help you avoid uneven wear, blowouts, and even improve fuel efficiency by keeping your tires at optimal pressure.

    Why It’s Essential:

    • Real-time alerts. Immediately notifies you of under-inflation, overinflation, or rapid pressure changes.
    • Improved efficiency. Properly inflated tires reduce rolling resistance, leading to better gas mileage.
    • Enhanced safety. Prevents catastrophic blowouts by catching problems early.

    Recommended Use: Look for a system that supports the number of tires your RV has, including towed vehicles or trailers. Some models offer Bluetooth connectivity, making it easy to check your tire status via an app.

    Pro Tip: Choose a TPMS with replaceable batteries for the sensors. It’s more cost-effective in the long run and ensures your system stays operational without needing frequent replacements.


    2. A Handy Never-Deflated Device – Portable Air Compressor

    A portable air compressor is a must-have for maintaining optimal tire pressure on the go. Whether you need a quick top-up or a complete reinflation after repairing a puncture, a good air compressor ensures you’re never stranded without properly inflated tires.

    Why It’s Essential:

    • Immediate access. Saves you from hunting down air pumps, especially in remote locations.
    • Powerful and versatile. Many models are capable of inflating high-pressure RV tires and can also be used for bikes, inflatables, or other equipment.
    • Prevention of uneven wear. Keeping all tires at their recommended PSI levels reduces the risk of uneven tread wear and extends tire life.

    Recommended Use: Invest in a model with a high-end max for PSI, as some models will fall far short of the necessary PSI levels of truck or RV tires. Also make sure that longer hoses and multiple nozzles are included to make it easier to handle large RV tires and other needs.

    Pro Tip: Keep a laminated card in your RV with the recommended PSI for all your tires. This simple reference saves time and ensures you always inflate them to the correct pressure.


    3. Protection from the Elements – Tire Covers 

    Tires are exposed to a variety of harsh conditions, from UV rays to rain and snow. Over time, this exposure can lead to cracks, dry rot, and decreased durability. RV tire covers are a simple yet effective way to extend the lifespan of your tires when your RV is parked.

    Why It’s Essential:

    • UV protection. Prolonged sun exposure is one of the leading causes of dry rot and tire failure.
    • Moisture barrier. Protects against rain, snow, and fluctuating temperatures that can lead to tire degradation.
    • Clean storage. Keeps tires free from dirt, grime, and debris, ensuring they’re ready for the road.

    Recommended Use: Choose covers made of heavy-duty, weather-resistant materials with elasticized hems or adjustable straps for a snug fit. If your RV has dual wheels, opt for covers designed specifically for tandem tires.

    Pro Tip: Clean your tires thoroughly and ensure they’re completely dry before covering them to avoid trapping moisture, which could lead to mold or rust.


    4. Some Stabilizers – Wheel Chocks and Leveling Blocks

    When your RV is parked, wheel chocks and leveling blocks are crucial for safety and comfort. They prevent accidental rolling and ensure your RV remains stable, protecting both your tires and suspension.

    Why They’re Essential:

    • Prevents rolling. Wheel chocks secure your RV in place, especially on sloped surfaces.
    • Protects tires. Evenly distributes weight to prevent flat spots or undue stress on specific tires.
    • Increases comfort. A leveled RV makes for more comfortable living and ensures appliances function properly.

    Recommended Use: Choose durable chocks made of rubber or heavy-duty plastic. For leveling blocks, look for stackable designs that can handle the weight of your RV. Some models even feature nonslip surfaces for added safety.

    Pro Tip: Leave wheel chocks and leveling blocks in easy to reach outside storage if possible, because you will be setting up and putting away so often.


    5.  A Quick Fix – Tire Repair Kits

    Flat tires are an inevitable part of RV travel, but an RV tire repair kit can turn a potential disaster into a minor hiccup. These kits provide the tools needed to patch small punctures, getting you back on the road quickly without waiting for roadside assistance.

    Why It’s Essential:

    • Quick fixes. Perfect for small punctures caused by nails, screws, or other debris.
    • Compact and portable. Easy to store and carry, making them ideal for emergencies.
    • Cost-effective. Saves money on towing or professional repair services for minor issues.

    Recommended Use: Opt for a comprehensive kit that includes plugs, sealants, valve stems, and tools like pliers and a T-handle reamer. For maximum convenience, pair it with your portable air compressor.

    Pro Tip: Practice using your tire repair kit before hitting the road. Familiarity with the tools ensures you can handle a repair quickly and confidently when needed.


    Bonus: The Ultimate Backup – a Spare Tire

    While modern technology and repair tools are indispensable, nothing beats having a spare tire as a safety net. Many RVs don’t come with a spare, so it’s worth checking and investing in one that matches your rig’s specifications.

    Why It’s Essential:

    • Immediate solution. Eliminates the need for roadside repairs when a tire is beyond fixing.
    • Peace of mind. Especially valuable in remote areas where help may be hours away.
    • Compatibility. Ensures you’re prepared for any unexpected flat or blowout.

    Recommended Use: Store your spare tire in an easily accessible spot and check its condition regularly. Make sure it’s inflated to the proper PSI and protected with a storage bag to prevent wear and tear.

    Pro Tip: Keep a set of lug wrenches, a heavy-duty jack, and gloves with your spare tire to streamline the replacement process. It’s also wise to carry a headlamp or flashlight for nighttime repairs.


    More RV Tire Safety, Less Road Stress

    Investing in these essential products will not only enhance your RV’s tire safety but also provide peace of mind on every journey. From preventing blowouts with a TPMS to being ready for emergencies with a repair kit or spare tire, these tools are invaluable for maintaining safe and enjoyable travels. With the right preparation, you’ll be free to focus on the adventure ahead, knowing your tires — and your trip — are in great shape!

  • RV Memberships That Actually Make a Difference

    RV Memberships That Actually Make a Difference

    When you’re on the road as often and as long as my wife and I are, you start to realize just how many RV memberships are out there. (Hint: There’s a lot.) Some sound too good to be true, but others are really too good to pass up. The fact is that whether you’re a weekend warrior or a full-timer clocking miles across the country, certain RV memberships can make a real difference in your travel experience. They can not only save you serious money; they can also unlock campgrounds you wouldn’t otherwise find.

    But here’s the thing: Not all RV memberships are created equal. Some are great for fuel savings. Others for discounted camping. And a few more? Well, let’s just say they’ve collected some dust.

    So, how do you know which memberships are worth it?

    Let’s break down which RV memberships actually make a difference — especially the ones we’ve personally used or seen fellow RVers rave about.


    1. Good Sam Club – Getting All the Discounts

    Who It’s For: Great for RVers who frequently stay at private campgrounds, travel long distances using major fuel stations, or shop at Camping World regularly.


    What It Offers:

    • Fuel discounts (up to 5¢ off at Pilot Flying J)
    • 10 percent off at over 2,000 campgrounds
    • Discounts at Camping World and other retail partners
    • Roadside assistance (if bundled with their extended coverage)


    Our Take: Good Sam was one of the first memberships we signed up for. It’s especially handy when you’re bouncing between private campgrounds and need a quick overnight with hookups — or you want a discount at Camping World while picking up a new water filter or sewer hose.

    We found the gas discount to be hit or miss depending on the area. (Sometimes the discount price was already matched or beat by competitors.) But the campground discounts and retail perks were easy to use.


    Pro Tip: If you’re mostly interested in the fuel savings, apps like GasBuddy or Upside can help you find cheaper gas nearby without needing a membership. Similarly, AAA offers some of the same roadside assistance perks, so if you’re already a member, double-check to avoid paying twice for similar benefits.


    2. Passport America – Paying for Itself

    Who It’s For: Ideal for budget-conscious RVers or road trippers who don’t mind calling ahead and reading campground policies to score deals on overnight stops. Really, since this an inexpensive membership that usually pays for itself on the first or second use, it is a nice one to have for almost anyone.


    What It Offers:

    • 50 percent off nightly rates at thousands of participating campgrounds
    • One of the lowest membership fees in the game


    Our Take: We’ve used Passport America in the past, especially on cross-country travel days where we just needed an overnight stop with hookups in the middle of nowhere. You do have to read the fine print — many campgrounds limit the number of nights you can stay at the discounted rate, and some have blackout dates or restrictions. Still, if you time it right, even one or two stays can recoup your annual fee.


    Pro Tip: If you only need the occasional overnight stay, check out apps like iOverlander, FreeRoam, or Campendium for free or low-cost stays—particularly in rural areas or public land. But if you want something with hookups and more reliability, Passport America offers incredible bang for your buck.


    3. Harvest Hosts + Boondockers Welcome – Enjoying Unique Stays

    Who It’s For: Perfect for self-contained RVers who love off-the-beaten-path experiences and enjoy supporting small businesses or connecting with fellow travelers.


    What It Offers:

    • Overnight stays at wineries, breweries, farms, museums, and private homes
    • Over 5,000 unique places to stay overnight
    • Annual fee for access to thousands of host locations
    • No campground fees (though purchases at host locations are encouraged)


    Our Take: This one’s been a staple in our travel toolkit. As full-time travelers who love boondocking, we appreciate the unique experiences and quieter overnights these memberships offer. We’ve stayed on vineyards, breweries, museums, farms, and more with Harvest Hosts and stay with generous hosts who’ve shared everything from travel tips to a helping hand with Boondockers Welcome.

    Yes, you typically need to be self-contained, and with Harvest Hosts you’re encouraged to make a purchase from the business (which we’re happy to do), but the trade-off is often a peaceful, scenic stay that’s far more memorable than a parking lot or crowded RV park.


    Pro Tip: If you’re only interested in the Boondockers Welcome side, it’s available as a standalone membership at a lower price point. Alternatively, some wineries and farms allow overnight parking through other programs for free—though they may be harder to find without a central platform.


    4. Escapees RV Club – Making RV Logistics Easy

    Who It’s For: Best for full-timers or long-haul travelers who want support with logistics like mail forwarding, domicile planning, or who enjoy learning from and connecting with a deeper RVing community. (Especially if you are a family with children looking to make friends with other kids in the same lifestyle.)


    What It Offers:

    • Discounted campgrounds in the Escapees network
    • Extensive education and community support
    • Mail forwarding, domicile assistance, and legal resources for full-timers
    • Escapees/Xscapers community events


    Our Take: We used Escapees primarily for their mail service in the beginning, which is helpful without a home base. Their educational webinars and online resources are also great if you’re new to RVing or looking for guidance on everything from domicile setup to boondocking skills.


    Pro Tip: If you’re mostly interested in the mail service, you could compare with other RV-specific mail providers or look into USPS General Delivery. Since we’ve been RVing for so long, know the ins and outs, and we have so many wonderful friends in the RV community already, this is membership only appealed to us for the mail forwarding. So we went with a company that specializes in that called iPostal1. That said, few RV memberships offer the level of service and long-standing reliability that Escapees has built over decades.


    5. Thousand Trails – Kissing Nightly Fees Goodbye

    Who It’s For: Great for full-time or seasonal travelers who want access to multiple campgrounds in a specific region or nationwide, especially if they alternate between boondocking and paid stays.


    What It Offers:

    • Prepaid camping in specific regions
    • No nightly fees (after initial membership and annual dues)
    • Optional upgrades for more nationwide access


    Our Take: Right now, we have the annual regional pass for Thousand Trails because it made the most financial sense for our current route. Even though we mostly boondock these days, having access to a network of campgrounds makes it easy to stop, reset, and recharge (literally and figuratively) between dry camping stretches. We’ve used it to dump tanks, catch up on laundry, and have a homebase in different areas.

    Some campgrounds are better than others (read reviews), but when you calculate the savings over time, it can be a smart move—especially if you’re in an area with several participating parks.


    Pro Tip: If you’re on the fence, try a zone pass first — it’s more affordable and lets you test the system. And for those who rarely use paid campgrounds, pairing free sites from apps like Campendium with the occasional state park might offer more flexibility without the upfront cost.


    6. Family Motor Coach Association (FMCA) – Equipping Motorhome Owners

    Who It’s For: Ideal for motorhome owners (especially Class As, Class Bs, or Class Cs) who want access to premium travel services, tire programs, and advanced RV support.


    What It Offers:

    • Tire discounts, mail service, tech resources
    • Travel assistance
    • Community rallies and events
    • FMCAssist emergency travel program


    Our Take: While we haven’t personally used FMCA ourselves yet, we’ve heard positive things from other RVers — especially those who travel in Class A and C motorhomes. The tire discounts alone can save hundreds, and the mobile tech resources are great for digital nomads and remote workers.


    Pro Tip: If you’re mainly eyeing FMCA for internet resources, you may be able to find comparable info in online forums or Facebook groups—though without the same level of tech support. Similarly, roadside assistance is available à la carte from providers like Coach-Net or AAA, depending on your rig and travel style.


    Honorable Mentions

    • KOA Value Kard Rewards. Great if you frequently stay at KOA campgrounds.
    • AAA or CAA. Offers limited but useful RV support and hotel discounts during hybrid trips.
    • RVillage (Community App). Not a traditional membership, but a great way to connect with other RVers and learn about meetups and campgrounds through social sharing.


    Do You Really Need Any RV Memberships?

    The answer to this question really depends on you. If you’re RVing just a few weekends a year, some of the higher-priced RV memberships may not be worth it. But if you’re on the road even a few weeks at a time, a good membership can save you more than it costs — and open the door to experiences that typical campgrounds just can’t match.

    Over the years, we’ve learned to take a “less is more” approach. We started out signing up for every club and discount we could find. Now we stick to the few that really work with how we travel. That’s the key — matching the membership to your style.

    We always recommend starting with one or two and seeing how often you actually use them. It’s easier than trying to track ten different logins and cards, only to realize you’ve forgotten half of them when you pull into the campground.

    So, from winery overnights to roadside tire savings, the right RV membership can do more than just cut costs. It can actually enhance your journey. They’re not one-size-fits-all. But when you find the ones that fit, they become indispensable tools in your travel kit. Overall, they help you get where you’re going cheaper, smoother, and with a few unexpected adventures along the way.

  • Portable Toilets and Cassettes: An Information Dump

    Portable Toilets and Cassettes: An Information Dump

    Let’s be honest: No one gets into RV life for the toilet experience. But if you’ve spent any amount of time on the road (like my wife and I in our seven years RVing), you know just how important a good waste setup can be. Heck, if you’ve road-tripped in a regular vehicle and had to use a gas station or fast-food bathroom, you understand and appreciate a good personal toilet setup. You also come to understand that a good toilet experience can happen in different ways — be that porcelain thrones or portable toilets.

    Personally, we’ve always had a traditional black tank system in our RVs. But over the years, we’ve seen just about every option out there. We’ve walked through countless RV shows. We’ve watch and eventually created more YouTube and Instagram demos than we’d like to admit. (And yes, that includes the awkward dump station how-tos.) Of course, we’ve also seen our fellow campers handling their portable setups at sites across the country. Trust us, we’ve seen it all.

    Now, one of the most frequently asked questions we hear from RV newcomers and weekend warriors is about “those removable toilets.” What are portable toilets? How do they work? And are they actually better than a regular black tank setup?

    So today, we’re giving you the full information dump on cassette, portable, and composting toilets in RV life.


    Portable Toilets: For Mobile Business

    Portable toilets are standalone, self-contained toilet systems that don’t require permanent installation or a plumbing connection. Think of them as upgraded versions of what you’d see at a festival, but cleaner, more efficient, and (hopefully) less disgusting.

    You’ll usually find these in smaller rigs like teardrop trailers, Class Bs, or pop-up campers where space and plumbing are limited. Some folks even add them to their vehicle setup for boondocking or off-grid convenience.


    Pros

    • Lightweight and easy to move
    • Great for tent campers or car campers
    • No complicated plumbing required
    • Ideal for quick overnight stops or off-grid flexibility
    • Simple to clean and affordable to replace


    Cons

    • Small capacity means frequent dumping
    • Manual dump process (yes, you have to carry it)
    • Limited ventilation can cause odors
    • Not ideal for full-time or long-term travel
    • Not designed for long-term heavy use


    Cassette Toilets: A More Manageable Dump

    Cassette toilets are a sort of hybrid. They’re usually permanently built into the RV like a traditional toilet, but they use a removable black tank (called a cassette) that you pull out from an exterior hatch to empty. They’re most common in European rigs and smaller Class Bs, but we’re starting to see them pop up more frequently in other smaller RVs here in the States.

    We’ve toured a lot of rigs with cassette toilets and talked to plenty of owners. While they can be a great space-saver, they definitely come with trade-offs.


    Pros

    • Built-in toilet with minimal space requirements
    • Newer RVs tend to have easy exterior access for removal and dumping
    • Doesn’t require a full plumbing system or traditional black tank setup
    • Great for compact RVs and vans
    • Can be dumped into many public toilets, pit toilets, or dump stations
    • Newer models sometimes include an electric flush and small rinse reservoir


    Cons

    • Small tank size fills quickly
    • Needs to be dumped every couple of days with regular use
    • Public dump stations or restrooms are often required and not always allowed or available
    • Carrying a full cassette through a public area isn’t exactly glamorous
    • Some models don’t have a vent, which can lead to odor
    • Waste tank seals can wear out and need replacing over time


    Composting Toilets: Down-to-Earth Solution

    Another increasingly popular option among #vanlifers, schoolies, and frequent boondockers is the composting toilet. Unlike portable or cassette toilets, composting models separate solids and liquids, using natural breakdown processes instead of chemicals or water.

    We’ve seen composting toilets pop up in a lot of Class B rigs and custom builds at RV shows, and they definitely have a loyal following — especially among off-grid travelers and eco-conscious RVers.

    Pros

    • No black tank required
    • Waterless and chemical-free
    • Solids container can last weeks before needing to be emptied
    • Liquids can be easily disposed of in appropriate facilities
    • Environmentally friendly and great for off-grid use


    Cons

    • More expensive upfront than other options
    • Learning curve for proper use and maintenance
    • Must empty liquids more frequently
    • Venting system requires installation and power
    • Some users find the solids emptying process a bit…personal and disgusting

    Sure: Composting toilets aren’t for everyone, but for those living off-grid or looking to reduce water use, they can be a smart, long-term solution.


    How Portable Toilets Compare to Black Tanks

    This is where we can speak from the most experience. We’ve always traveled with regular black tank systems — and despite the occasional clog, leak, or misread sensor, we’ve appreciated the capacity and convenience they provide.

    Traditional black tanks:

    • Hold significantly more waste (typically 15 to 50+ gallons)
    • Require less frequent dumping (we can usually go a week or more)
    • Can be emptied quickly at any standard dump station
    • Stay permanently connected and vented for less odor

    But they also:

    • Require a full dump station hookup (or macerator setup)
    • Need maintenance, like tank flushing and sensor cleaning
    • Can clog if you’re not careful with TP or water usage (We now use regular TP and have a designated bathroom trash can with a lid for only toilet paper. This has led to—fingers crossed—no clogs in years of use.)
    • Can get messy if hoses or valves malfunction

    Meanwhile, cassette, portable, and composting setups trade long-term ease for short-term simplicity.

    If you’re doing van life, short weekend trips, or traveling solo, these smaller options can be incredibly practical. But for long trips or full-time RVers like us, especially those with pets or extended travel goals that include long boondocking stays, the capacity and convenience of a traditional black tank setup wins out.


    Real-World Observations

    Even though we’ve never owned a cassette, composting, or portable toilet ourselves, we’ve seen plenty in action. We’ve watched folks roll into rest stops with a cassette or composting tank in hand, and while it gets the job done, you definitely need to be comfortable handling your own waste. (And doing it more frequently.) When you’re boondocking for days or weeks at a time, that frequency starts to matter.

    At RV shows, we’ve also noticed that newer builds — especially those aimed at off-grid lifestyles— are leaning toward composting toilets as a space-saving and eco-conscious solution. But again, that system isn’t for everyone, and it takes a bit more involvement to manage.


    Tips for Choosing the Right Setup

    Whether you’re in the market for a new RV or thinking about upgrading your current bathroom situation, here are a few things to keep in mind.

    • Know your travel style. If you’re part-timing or boondocking occasionally, smaller toilet systems can work well. Full-timers? Consider a setup that prioritizes convenience and capacity.
    • Think about where you’ll be dumping. Cassette toilets often require public restrooms, composting systems need thoughtful disposal of both liquids and solids, and traditional black tanks rely on designated dump stations.
    • Check local regulations. Some parks and areas have rules about how and where waste can be dumped.
    • Think about comfort and convenience. Ask yourself how often you want to interact with your toilet — and how okay you are with carrying your waste across a campground or into a public restroom.
    • Watch for wear and tear. Portable and cassette toilets often need new seals, handles, or tanks over time.
    • Consider ventilation and smell. Proper setup, whether black tank or composting, makes a huge difference in odor control.


    In the End, Everyone’s Gotta Go

    RV toilets might not be the sexiest part of RV life or full-time travel, but they are one of the most important. And while we’ll continue rolling with our black tank and clear elbow adapter (seriously, that little transparent piece is a game-changer), we totally get the appeal of cassette, portable, or composting setups — especially for new RVers dipping their toes into the lifestyle.

    At the end of the day, there’s no “right” choice — just the right one for your rig, your travel style, and your comfort level. If you value simplicity, don’t mind frequent dumps, and need something compact, cassette, portable, or composting toilets can absolutely do the job. If you’re looking for convenience, longevity, and less interaction with your waste (we hear you), a traditional black tank might be the way to go.

    Whichever path you choose, just remember: It’s not about the toilet. It’s about the journey — and being able to enjoy it comfortably, confidently, and cleanly.

    And hey, the next time you see someone walking through a gas station towards the restrooms with a weird plastic box in tow… just smile and give them a nod. They’re out there living the dream — one dump at a time.