Author: Gabriel Rivero

  • Hiking with Dogs: A Pet Etiquette Guide for the Trail

    Hiking with Dogs: A Pet Etiquette Guide for the Trail

    Sharing adventures and memories with your family, even the four-legged variety, is the best. Personally, some of our favorite memories on the road have involved hikes with our pups, Wilson and Journey. We’ve watched random sunsets at canyon overlooks. We’ve sat under forest canopies after steep climbs. Hiking with dogs adds a whole new level of joy (and sometimes chaos) to the experience. But it also comes with responsibility — especially when it comes to trail etiquette.

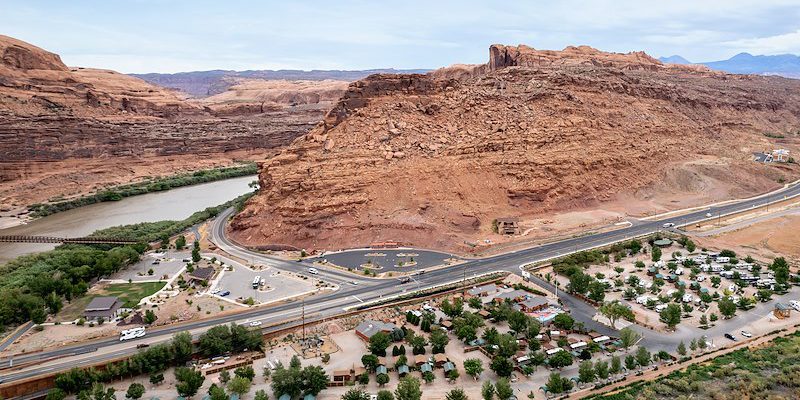
    As RVers and full-time travelers, we’ve taken our dogs on hikes in dozens of states, through national forests, desert landscapes, alpine meadows, and even city trails. And along the way, we’ve learned that hiking with dogs isn’t just about bringing water and leashes. It’s also about respecting the land, other hikers, and our pets’ limits.

    So, whether you’re new to hiking with dogs or just looking for a quick refresher, here’s our go-to guide for hitting the trail with your four-legged kiddos — while keeping things respectful, safe, and fun for everyone.


    Rule 1. Know before you go.

    First things first — not all trails are pet-friendly. Also, even dog-friendly parks and trails usually specific rules in place for a reason.

    Before heading out:

    • Check trail regulations. Many national parks don’t allow dogs on hiking trails, while others are more relaxed. (National forests and BLM land tend to be more pet-friendly.) Always verify online or with a ranger station prior to arriving at the park.
    • Know the leash laws. Many trails require dogs to be on a leash no longer than six feet. Others allow off-leash with voice control. But unless your dog has near-perfect recall, we recommend sticking to the leash.
    • Look up trail difficulty and terrain. Steep drop-offs, rocky scrambles, or hot desert stretches might be unsafe or uncomfortable for your pet.

    Pro Tip: Apps like AllTrails and Paw Parks often note if a trail is dog-friendly and what the terrain is like. We also use Instagram to preview what we’re getting into.


    Rule 2. Leash up and bring proper gear.

    Even if your dog is well-behaved off-leash, there’s a good chance you’ll encounter others who aren’t comfortable around dogs — or wildlife that could provoke a chase. That’s why we always have our pups on leash, assess the situation, and keep the leash handy if we ever let our dogs off in approved areas.

    Some of our must-have hiking gear for pups:

    • A strong leash and harness. We prefer harnesses that don’t restrict shoulder movement. Journey’s got power, and Wilson … well, he’s more of a vibe walker who wants to mark everything.
    • Collapsible water bowl and extra water. Don’t rely on creeks or puddles, especially during dry seasons. Bring those pups
    • Pet-safe hiking shoes. Sure, this is optional and specifically for rough, hot, or icy trails. Our pups don’t like doggy boots, so they don’t make it on some hikes that other dogs do. But they are great if you are going into hikes that will be rough on their paws.
    • Doggy pack. This is for longer hikes. If your pup is fit and trained, they can carry their own water or waste bags.
    • ID tags and GPS tracker. Just in case. Better to have it and not need it than to need it and not have it.
    • Muzzle for reactive dogs. Journey is great with people but very reactive to other dogs. So, we try not to take her on hikes we know will likely have high pet traffic. But when she does come with us, we always have a pet-friendly muzzle that doesn’t bother her, as it adds a layer of safety for all parties.


    Rule 3. Pack in, pack out — especially you know what.

    This one’s simple: Pick up after your dog. Always. Leaving dog poop on the trail is one of the biggest etiquette violations we see out there — and it can have serious environmental impacts.

    Even in the backcountry or on wilderness trails, pet waste can alter soil chemistry and affect wildlife behavior. It’s not “natural” just because it came from an animal, because your pet isn’t from the area.

    So, what do we do?

    • Carry extra bags. Bring more than you think you’ll need.
    • Double-bag and stash it. Take an odor-proof pouch to store it until you get to a trash can.

    No, it’s not glamorous — but neither is stepping in it.


    Rule 4. Be aware of other hikers.

    Not everyone loves dogs, and not every dog loves everyone. When hiking with pets, you’re not just responsible for your dog’s safety — you’re responsible for others’ comfort and experience too.

    Here’s what we always try to practice:

    • Yield right-of-way. Step off the trail and let others pass, especially on narrow or steep paths.
    • Leash up when you see others. Especially families with kids, other dogs, or hikers with gear.
    • Don’t assume off-leash is OK. Just because others are doing it (and trust me, they will) doesn’t mean you should.

    One of our biggest pet peeves (pun intended) is seeing pets off leash in areas that are designated leash areas. This is a safety rule for a reason. 


    Rule 5. Respect wildlife and the trail.

    We’re all out there to enjoy the outdoors — and that includes the animals who actually live there. Dogs are natural chasers, barkers, and scent explorers, but it’s our job to keep them from harassing wildlife or damaging sensitive habitats.

    What we do:

    • Keep dogs on trail. This avoids trampling native plants or disturbing nests.
    • Avoid hiking at dawn or dusk. This is especially important on areas with heavy wildlife activity. (Also, always check for bear warnings or other wildlife notices.) These times are usually the most active time for local wildlife.

    Also, remember that wildlife smells linger. Even if your dog doesn’t see the animal, they’re reacting to scent, which can make them pull or bolt unexpectedly. 


    Rule 6. Know your dog’s limits.

    Not every dog is built for every trail. Wilson, our chill Cairn Terrier, loves moderate walks and shaded trails but isn’t trying to summit anything too intense. Journey, our high-energy Staffy mix, will keep going until we make her stop — but even she’s had her limit on hot or exposed hikes.

    Things to consider:

    • Watch for overheating. Panting, drooling, or stopping frequently are signs your dog needs a break.
    • Paw protection. Hot pavement or jagged rocks can cause injury. Touch the ground with your hand. If it’s too hot for you, it’s too hot for them.
    • Hydration and breaks. Stop often, even if your dog isn’t asking for it.

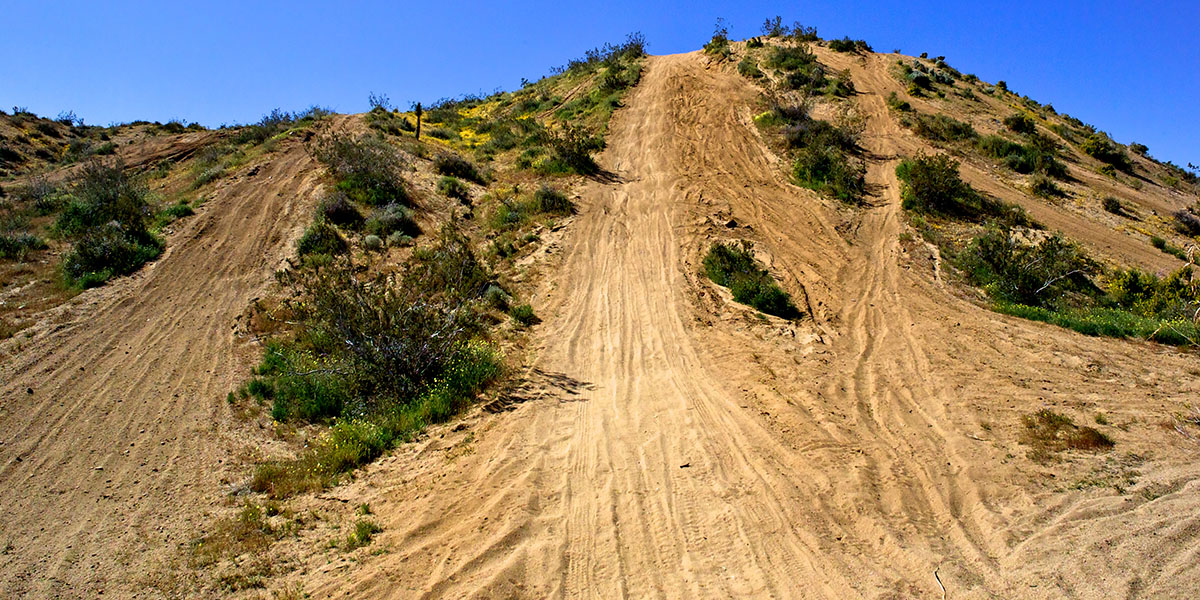
    Some of the hardest hikes we’ve done were in the sand dunes — beautiful, but exhausting, and tough on everyone’s legs and paws. That soft-sinking surface is basically like walking uphill forever. Know when to call it.


    Rule 7. Leave no trace — together.

    As RVers and hikers, we live by the Leave No Trace principles. When hiking with pets, this extends beyond the poop bags and water bowls. It’s about sharing the space responsibly.

    Here’s how we apply it with our dogs:

    • Stay on designated trails.
    • Minimize bark noise, especially in serene areas.
    • Keep dogs from digging, chasing, or damaging the natural area.

    When in doubt, we ask ourselves: If everyone did what we’re doing right now, would this trail still feel the same a year from now?


    Remember: Hiking with Dogs Is a Privilege

    We truly believe that hiking with dogs is one of the best ways to experience the outdoors. Watching our pups light up when they’re on the trail, splashing through streams, or sniffing around a quiet forest boondocking spot reminds us why we live this lifestyle. But it’s also a reminder: Not everyone can or wants to hike with dogs, and we all share the trail.

    Trail etiquette isn’t about rules for the sake of rules. It’s about preserving the spaces we love so we (and our dogs) can enjoy them again and again.

    So, pack that leash, grab the water bowls, and hit the trail the right way. Because when we all do our part, hiking with pets becomes more than just a walk in the woods — it becomes a shared adventure that makes every mile a memory worth wagging about.

  • Yes, RV Paint Is Different — Here’s What You Need to Know

    Yes, RV Paint Is Different — Here’s What You Need to Know

    If you’ve ever looked at your RV and thought, “Maybe I’ll just give this thing a fresh coat of paint,” pump the brakes for a second. Because while RVs may look like oversized vehicles or tiny homes on wheels, painting them is a whole different beast compared to your car or living room walls. Yes, RV paint is different. And if you don’t understand how and why, your dream of a DIY facelift could end up turning into a disaster.

    Now, if there’s one thing we’ve learned in our seven years on the road, it’s that many things about an RV — from the plumbing to the paint — is uniquely built for life in this particular lifestyle. It’s not to say that there aren’t any similarities, but some things are simply way different than your normal sticks and bricks home. That includes the exterior paint, which has to put up with way more abuse than your typical vehicle or home ever will.

    So, whether you’re planning a full-on DIY project or just curious why that paint quote was more than your first car, here’s everything you need to know about RV paint, how it differs, and how to make the right decision for your rig.


    Why RV Paint Is Different — and Why It Matters

    Let’s start with the obvious. Your RV is a giant moving box constantly exposed to the elements. Unlike a car that’s parked in a garage or a house that stays still, your RV’s paint job takes a beating. We’re talking sun, rain, dust storms, hail, temperature swings, tree sap, bug splatter, road grime … whew! You name it.

    RV paint is designed to handle all of that. It’s not just about looking pretty, it’s about protection, and here are some of the reasons this isn’t your normal paint job


    RV paint is a specialized composition.

    RVs often use high-end automotive or marine-grade paints, like polyurethane blends or epoxy-based paints. These paints are flexible, UV-resistant, and able to bond to materials like aluminum or fiberglass. That flexibility is key.  Your RV’s exterior expands and contracts with temperature changes, especially if you’re traveling between hot deserts and cool mountains.

    A regular house paint or basic enamel won’t cut it here. It’ll crack, chip, or peel within a season. RV-specific paint, on the other hand, is made to flex and protect over time.


    Surface compatibility requires prep and priming.

    RVs aren’t usually made from the same stuff as your sedan. (And they’re definitely not made like a house.) Most exteriors are fiberglass or aluminum, which both require special prep and paint to adhere properly. Without the right primer and prep work, even the best paint will start bubbling or flaking off before you’ve even made it to your next stop.

    A good bonding primer is crucial — especially if you’re painting over gel coat, which is slick and nonporous. Skip this step, and you’re just wasting time and money.


    UV and weather protection are critical.

    We’re not just talking about color fading. The sun can bake your paint job into a cracked, dull mess. And constant exposure to rain or road salt can lead to corrosion or delamination over time. That’s why high-end RV paints include UV inhibitors, clear coats, and often multiple layers of sealant.

    It’s also why a proper paint job — whether pro or DIY — requires more than just “a good coat.” You’ll need multiple layers and, ideally, a protective topcoat.


    What Kind of Paint You Should 

    Let’s break it down based on your exterior and your goals. (Because not all paint is created equal, and not all RVers have the same needs — or budget.)


    1. Automotive-Grade Polyurethane Paint

    This is the gold standard for most new RVs and professional repaints.

    • Pros: Extremely durable, colorfast, flexible, and resistant to UV damage and chemicals.
    • Cons: Expensive and typically requires a sprayer and a controlled painting environment (i.e., not your driveway or buddy’s garage).

    If you’re going for a full-body paint job at a dealership or RV shop, this is likely what you’re getting.


    2. Marine-Grade Epoxy Paint

    Ideal for fiberglass RVs, especially if you want max durability and weather resistance.

    • Pros: Built for harsh marine environments, excellent adhesion, and resistant to water and salt.
    • Cons: Fewer color options, pricey, and not as glossy as automotive finishes.


    3. Oil-Based Paints

    These are sometimes used on older rigs or for touch-ups and lower-budget projects.

    • Pros: Decent durability, easier for DIYers, and bonds well to metal or aluminum.
    • Cons: Slower drying time, more fumes, and requires regular maintenance.


    4. Latex Exterior Paint (Budget DIY Option)

    A popular choice among RV DIYers looking to freshen up their rig without breaking the bank.

    • Pros: Cheap, easy to work with, lots of color options.
    • Cons: Not built for RV wear and tear, can chip or fade quickly, and often requires frequent touch-ups.

    If you go this route, make sure to use a bonding primer, apply multiple coats, and finish with a UV-protective clear coat. Personally, I would try to stay away from this option unless your RV is in really bad shape paint-wise. (And you’re dead set on the cheapest DIY paint job you can do.) Always remember that in the long run, what starts out as a really cheap option, usually ends up being as expensive, if not more so, in the end.


    Essential, Unskippable Preparation 

    Before you ever open a can of paint, you need to prep your surface like your RV’s life depends on it — because, in a way, it does.

    • Wash thoroughly. Use a degreaser or RV-safe soap to remove dirt, wax, and grime.
    • Sand or scuff. Smooth surfaces like gel coat need to be roughened up to help paint stick.
    • Tape off. Windows, decals, rubber seals — cover anything you don’t want painted.
    • Prime properly. A quality primer designed for RV materials is essential.

    If you’re skipping the prep, you’re just setting yourself up for disappointment and failure.


    DIY vs. Professional RV Paint Jobs

    We’re big fans of a good DIY project, but full transparency — if you’re going for a full-body RV repaint, there’s a reason pro jobs cost up to $10,000. Between the need for equipment, ventilation, multiple coats, and curing time, it’s not a small task. Throw in the fact that if not done properly, you could cause some serious damage to your RV. For us, even though we’re DIYers, we’ve often found that contracting a professional is the way to go.

    That said, if you’re just doing touch-ups or a small cosmetic upgrade, a DIY job with the right prep, materials, and patience can be done.


    What About Custom Graphics?

    If your rig has decals or full-body graphics, repainting becomes a little trickier. Decals can be removed and replaced, but full paint jobs with graphics involve detailed masking and layering that’s best left to pros. The same goes for clear coating and buffing. If you want that showroom finish, it may be worth letting a specialist handle it. (Are you seeing a pattern here?)


    Don’t Forget the Interior

    Interior paint jobs are a different story altogether — and much more beginner-friendly. Because the interior of your RV isn’t exposed to the elements or expanding/contracting as much, you can get away with regular interior latex or enamel paint. Still, prep is important, especially when painting slick cabinetry or laminated surfaces.

    Pro tip: Use a bonding primer and sand lightly before painting cabinets or furniture. You’ll thank yourself later when it doesn’t peel.


    Another Option?

    Another popular option that is not as expensive and can give you that revamped look you’ve been hoping for is a good vinyl wrap. This is a great bang for buck option if you are looking to spruce up your rig for a few more years of use or immediate resale value. If you’d like to read more about this option, just write “More Vinyl Please” in the comments section, and I’ll be happy to write a similar article to this one with a pros and cons comparison section.


    So, Is Repainting an RV Actually Worth It?

    Yes, RV paint is absolutely different. And yes, treating it like you’re repainting your kitchen or touching up your sedan is a fast track to disappointment. But whether you’re looking to refresh your rig, cover up some road rash, or go all out with a custom look, knowing your options can help you get the results you’re after.

    If you’re going the DIY route (which I strongly suggest against unless you’re really confident), take your time, do your research (including the weather, if your RV is outside), and invest in quality materials. And if you decide to leave it to the pros, know that you’re paying for more than just paint. You’re paying for protection, longevity, resale value, and the experience of the professional taking on the project.

    Knowing if it’s ultimately worth it comes down to your budget, skill set, and reason for doing it. Always compare prices on RVTrader.com to see what RVs similar to your rig are selling for, especially in the year and condition you have and are hoping to upgrade to. That said, if you go through with it, here’s to showing off that new look on the open road! 

  • A Red Rock Playground: Inside the Sun Outdoors Arches Gateway

    A Red Rock Playground: Inside the Sun Outdoors Arches Gateway

    With the advent of warmer weather, spring and summer have RVers of all kinds itching to hit the road — break out! And few places provide a more breathtaking experience than the landscape of the American West. The bright canvass of cerulean sky. The red rocks of Utah. If that’s what you’re seeking (you are), there’s no better place to settle than Sun Outdoors Arches Gateway.

    Located just minutes from Arches National Park and Moab’s legendary off-roading trails, this RV resort puts you in the heart of one of the most stunning outdoor destinations in the country. Whether you’re into hiking, biking, off-roading, or just relaxing beneath the scenic red cliffs, Sun Outdoors Arches Gateway is the ultimate spring and summer getaway for RVers looking to embrace adventure.

    So, here’s the skinny on everything you need to know about this incredible campground — including all the bucket-list adventures that await nearby.


    Why Stay at Sun Outdoors Arches Gateway

    Spring in Moab, Utah is nothing short of magical. The winter chill fades. Wildflowers begin to bloom. And the blazing summer heat has yet to set in, making it prime time for hiking, off-roading, and exploring the red-rock landscapes.

    Sun Outdoors Arches Gateway isn’t just a place to park your RV — it’s a home base for adventure. The resort offers modern amenities, spacious RV sites, and easy access to some of the most famous landscapes in the Southwest. Whether you’re visiting for Arches and Canyonlands National Parks, the world-class off-highway-vehicle (OHV) trails, or the Colorado River, this RV resort puts you in the center of it all.

    With full-hookup RV sites, cozy vacation rentals, and top-tier amenities, it’s the ideal spot for both rugged explorers and comfort-seekers alike.


    Highlights at Sun Outdoors Arches Gateway

    You Get the Full Hookup

    What You’ll Love. It’s hard not to love a resort that offers spacious back-in and pull-through RV sites with full hookups, Wi-Fi, and cable TV. Plus, the sites here are well-maintained with level gravel. Setup is a breeze.

    Best Views. An additional feature at the Sun Outdoors Arches Gateway is the incredible landscape that surrounds the resort. If you want one of the very best views, try to snag a site facing the towering red rock formations for an unbeatable sunrise over the desert.


    Lodging and Amenities

    • Vacation Rentals. If you’re traveling with friends or family who don’t have an RV, the resort has comfortable rental options, including cozy cabins and cottages. They even have Airstreams on-site for rent.
    • Heated Pool and Hot Tub. After a day of hiking or off-roading, soak in the outdoor heated pool and hot tub while watching the desert sunset.
    • Activities on Site: From life-size chess and checkers to putting greens, a large playground for the kids, and more, there’s plenty of fun to have on site between hikes.


    Adventure-Ready Perks

    • On-Site Bike Wash and Repair Area. If you’re bringing your mountain or e-bike, there’s a dedicated wash station to rinse off all that Moab dust.
    • Gear and Supply Store. Forgot something? The general store carries basic camping gear, maps, snacks, and souvenirs.
    • Pet-Friendly. With plenty of open space and pet-friendly places in town, your four-legged adventure buddies are welcome. There are even two pet areas at the resort for them to run around and do their dirty business.


    Exploring Moab

    Spring is prime time for Moab. The temperatures are mild, the trails are open, and the adventure options are endless. Here are the top things for adventure-hungry RVers to do near Sun Outdoors Arches Gateway.


    Arches National Park 

    One of Utah’s Mighty Five national parks, Arches is home to over 2,000 natural rock formations, including the world-famous Delicate Arch. Even better? It’s just five minutes away! The park’s cooler spring temperatures make it an excellent time to explore iconic hikes.

    Incredible Trails

    • The Windows and Turret Arch: A quick but stunning hike for all ages. 1 mile, easy
    • Delicate Arch Trail: One of the most famous natural arches in the world. 3 miles, moderate
    • Devil’s Garden Trail: A longer trek featuring multiple arches. Up to 7.2 miles, moderate to challenging


    Canyonlands National Park 

    Only 30 minutes away and less crowded than Arches, Canyonlands National Park is — in my wife and I’s personal-yet-somewhat-controversial opinion — cooler than the Grand Canyon. Whatever your opnion is (or will become), it’s definitely a must-visit when visiting the area. The Island in the Sky district is closest to Moab and offers scenes you’ll remember your whole life.

    Unbelievable Views

    • Mesa Arch: A short sunrise hike to an incredible canyon-framed arch.
    • Grand View Point Overlook: The perfect scenic drive stop for panoramic canyon views.
    • Shafer Trail: A thrilling off-road drive down a winding canyon road.


    Off-Roading in the Red Dirt

    Moab is the off-roading capital of the U.S., and spring is the best time to hit the trails. Whether you bring your own ATV, dirt bike, or Jeep (or rent one in town), there are plenty of must-ride trails to pick from.

    Must-Ride Trails

    • Hell’s Revenge: The most famous 4×4 trail, featuring steep climbs and slickrock terrain.
    • Fins & Things: A fantastic beginner-friendly OHV trail with fun rock climbs.
    • Shafer Trail to White Rim Road: A breathtaking off-road drive through Canyonlands.


    Colorado River Adventures

    If you’re looking for a break from the desert heat, head to the Colorado River for splash. Whether you’re whitewater rafting or kayaking through the canyons, you’ll enjoy exploring the terrain in a new way.

    Cool River Activities

    • Scenic Rafting Trips: Spring is the best time for mild to moderate whitewater rafting.
    • Kayaking and Paddleboarding: Rent or bring your own kayak, and float through the scenic red rock canyons.
    • Jet Boat Tours. For a thrill-packed ride, check out high-speed boat tours along the river.


    Dead Horse Point State Park

    Overlooking the Colorado River, Dead Horse Point offers one of the most jaw-dropping views in Utah. Just 40 minutes from the Sun Outdoors Arches Gateway, ot’s a great place to simply immerse yourself in the landscape. 

    Experiencing the Terrain

    • Sunset Photography: Catch unreal sunset views over the canyons.
    • Hiking and Biking: Several scenic rim trails offer easier alternatives to Arches and Canyonlands.


    Tips to Book and Arrive at Sun Outdoors Arches Gateway

    1. Reserve Early. Moab is extremely popular in the spring, so book your RV site or vacation rental well in advance. This RV resort fills up quickly, especially in March through May.
    2. Bring Layers. Spring weather can be unpredictable — mornings and evenings can be chilly, while midday temps rise fast. Bring layered clothing, sunscreen, and lots of water for hikes. Summer, as you might expect, will heat things up.
    3. Plan for Crowds. Arches National Park implements a timed entry permit system in peak season (March through October), so reserve your park entry in advance.


    Getting There

    Moab is an RV road trip paradise! Sun Outdoors Arches Gateway is located just off Highway 191, making it easy to reach whether you’re coming from Salt Lake City (3.5 hours north) or Denver (5.5 hours east).

    Also, while driving or towing your RV in Moab, keep a few things in mind. First, watch for steep grades. Some roads in and out of Moab have steep sections. Drive cautiously. Second, make sure you refuel before entering remote areas. Gas stations are limited once you leave Moab. And finally, for your safety, check your brakes. If you’re towing, ensure your brakes are in top shape for winding canyon roads.


    Jumpstart Spring at Sun Outdoors Arches Gateway

    Whether you’re here for Arches, Canyonlands, off-roading, or just soaking in the desert beauty, Sun Outdoors Arches Gateway is the perfect spring campground. With modern amenities, unbeatable access to adventure, and the stunning landscapes of Moab right outside your RV door, it’s a bucket-list destination for springtime travelers. (That was certainly the experience for us!)

    So, pack your hiking boots, load up your off-road gear, and get ready for an unforgettable season in Moab. Spring in the desert doesn’t get better than this!

  • I Can’t Believe It: My RV Is Infested!

    I Can’t Believe It: My RV Is Infested!

    It’s every RVer’s nightmare. You’re finally settled at the perfect campsite. The slide is out. The dogs are napping, and the stars are peeking out — and then you hear it. The sound no one wants to hear inside their home on wheels: scratching, the pitter patter of really tiny feet, and that scurry across the ceiling. But you know what’s worse than that? Something brushing your face in the middle of the night. When that happens, there is no doubt. Your RV is infested.

    Unfortunately, RV pest infestations are more common than you might think. There are things you can do when storing your RV for winter to help, but nothing is guaranteed. Whether you’re parked in the forest, desert, or even a paved RV park, bugs and critters can — and will — try to find their way inside. And, yes, I’m speaking from personal experience. (More on that at the end.)

    So, if you’re dealing with something similar (I hope you’re not), know that you’re not alone. It happens. But here’s a quick guide on the little villains, how they get in, and what you can do about it if your RV is infested.


    Common Culprits: What’s Invading Your RV?

    Before you go full exterminator, it helps to identify what kind of pest you’re dealing with. Some of the most common RV invaders include:

    • Ants. Often drawn in by crumbs or improperly sealed food. Once they’ve found a route, they leave a scent trail that invites hundreds of their friends.
    • Mice and rats. These guys are pros at squeezing into tight spaces and love the warmth of RV insulation. Once inside, they chew wires, insulation, and even food packaging.
    • Spiders and other insects. Sometimes they’re just tagging along with firewood or crawling up water hoses. Most are harmless, but nobody wants a surprise spider in their bed.
    • Wasps and bees. These can build nests in vents, storage compartments, or under awnings. Not just annoying — these can be dangerous if you’re allergic or have pets.


    Entry Points: How They’re Getting In

    Most RVs, even the best-built ones, have small gaps and entry points that pests can take advantage of. To keep your RV from getting infested, keep an eye on these areas:

    • Underneath the rig. Power cords, water lines, and sewer hoses all create potential access points.
    • Slides and seals. Worn-out rubber seals or misaligned slides can leave just enough space for bugs or rodents to squeeze through.
    • Vents and access panels. Check the water heater panel, furnace vent, and refrigerator access. These areas are often overlooked.
    • Doors and windows. Gaps around weatherstripping or poorly sealed screen doors are prime entryways.


    Prevention: Keeping Them Out

    The best way to deal with RV infestations is to prevent them altogether. 

    • Seal it up. Use expanding foam or steel wool to close up any holes or gaps underneath your RV. Don’t forget around plumbing and electrical lines.
    • Use peppermint oil or dryer sheets. Mice hate the smell. We’ve tucked dryer sheets into cabinets and corners, and while not foolproof, it helps.
    • Keep it clean. Crumbs attract ants and rodents alike. Wipe down counters, sweep floors, and keep food in sealed containers.
    • Inspect before moving. Check your water and sewer connections, outdoor gear, and storage compartments before moving to make sure you’re not carrying new guests from your last stop.
    • Store food properly. Use hard plastic bins for pantry items and avoid leaving pet food out overnight.


    That’s All Nice, but My RV Is Already Infested!

    Already hearing mysterious sounds or seeing droppings? Time to act fast.

    • Mice countermeasures. Set traps. Snap traps or sticky traps are both effective. Use peanut butter or Nutella (yep, they’re bougie) as bait. Avoid poison if you have pets or kids. Not only is it dangerous, but mice may die inside your walls, creating a whole new smelly issue.
    • Ant annihilation. Follow their trail to find the entry point and seal it off. Use bait traps outside the RV near the path. Avoid spraying them directly, as that can scatter them and make the problem worse. Wipe surfaces with vinegar or citrus-based cleaners to remove scent trails.
    • Insect intervention. Spray natural or pet-safe repellents around common entry points. Keep lights off or dim at night when doors and windows are open to avoid attracting bugs inside.
    • Wasp wipeout. Check around slide toppers and awnings before extending. Spray nests from a safe distance at dusk or early morning when they’re less active. Remove any nests once they’re unoccupied.


    RV-Specific Pest Control Products

    If you’re in a spot where infestations are common, here are a few tools we always recommend:

    • Rodent repellent lights. These plug into your 12-volt system or run on batteries and emit a high-frequency sound that deters rodents (safe for pets).
    • Underbelly LED lights. Some RVers swear by LED rope lights or solar-powered lights placed around the bottom of the RV at night to keep critters away.
    • Screen covers. Add mesh covers to furnace and water heater vents to block insects and small rodents.

    *Travel Day Tip: Watch the Slide-outs. Slide gaskets are notorious for harboring pests if you’ve parked under trees or in grassy areas. A quick sweep or vacuum around the slide edges during setup goes a long way.


    Now, Back to That Mouse in My RV (for Your Entertainment)

    Let’s circle back to the little intruder I mentioned. Truth be told, after nearly seven years on the road, we’ve had our fair share of unwelcome visitors. But mice have definitely been the worst. Especially in cooler months, when the little guys are desperate for warmth, we’ve had a few run-ins. But one mouse stands out.

    At the time, we were parked in cooler weather, and I guess it didn’t take long for the mouse to find its way in. We didn’t notice much the first night, but we did wake up to what we thought were a ripped bag of tortilla chips and trash bag the next morning that we thought were from us moving things around in the dark before bed.

    That should’ve been the warning.

    That second night though, our dog Journey launched herself onto our bed in full panic. At first, we had no idea what startled her — until the next night when the same mouse ran passed me while I was sleeping and brushed my forehead at 2 a.m.

    No amount of coffee could undo that. I washed my face for ten minutes straight, then set out every trap we had. Caught him the next night, but we’ll never forget the shock. It was like something out of a sitcom — if that sitcom starred two very grossed-out RVers and a traumatized dog.


    Final Thoughts: Stay Vigilant, Stay Flexible

    Pests in your RV are one of those “not if, but when” situations — especially if you travel full-time or love staying off the beaten path. But the good news is that they’re manageable with a little preparation, a good sense of humor, and quick action when they do sneak in.

    Whether it’s your first RV mouse or the fifth time you’ve found ants on your counter, don’t panic if you discover your RV is infested. Take a breath. Clean it up. Seal the entry points. And get back to what really matters: enjoying your time on the road.

    After all, the only creatures you want curling up in bed with you are the ones you brought with you — preferably the furry, four-legged kind — unless it’s the middle of the night and she randomly wakes you from a dead sleep by landing on your stomach in a panic.


  • RV Acronyms Every Camper Should Know

    RV Acronyms Every Camper Should Know

    If you’re new to the RV world, you’ve probably come across a conversation (or ten) that flourishes RV acronyms like a secret code. “Our TT has a GVWR of 9,000 pounds, but the CCC is only 1,500 pounds. So, we make sure to check the PSI before heading out, especially when boondocking with no hookups.”

    Wait … what?

    OK, that might be a little extreme. (Just a little example for ya.) But it’s not far off. RV lingo is packed with crazy acronyms. Don’t let the alphabet soup overwhelm you though. Having a little guide that helps you know what they mean can make your life on the road much easier. Whether you’re shopping for your first RV, learning about weight limits, or planning your next trip, these acronyms will help you navigate the world of RVing like a pro.

    Let’s break down the most important RV acronyms that every camper should know.


    RV Types and Classes

    One of the first things you’ll encounter in the RV world is different types of RVs. Knowing the lingo will help you determine what kind of RV fits your travel style. (Especially because some folks use the shorthand.)

    A (Class A Motorhome)

    Class As are typically the largest and most luxurious motorhome type, and they are built on a bus or commercial truck chassis. These are the big guys — perfect for full-time or multi-month RVers who want all the amenities of home but require more maintenance and space to park.

    B (Class B Motorhome)

    Also known as camper vans, these are compact, fuel-efficient, and easy to drive. We have had our B, a THOR Sequence 20L, for a few years now — and we love it. Class Bs fit in standard parking spaces and are great for solo travelers, couples, or those who love van life.

    C (Class C Motorhome)

    These mid-sized motorhomes are built on a van or truck chassis with an overhead sleeping area. Class Cs are a nice balance between Class A and B, offering comfort while still being manageable to drive. We have since let our family travel in our Class B, and we now have a C on a Mercedes van chassis. 

    5W (Fifth Wheel)

    A large towable RV that connects to a special hitch in the bed of a truck. Fifth wheels provide spacious living areas and are a great option for full-time RVers. Just know that these are normally larger in size and can require 2500 or even 3500+ size (HD) heavy duty trucks

    TT (Travel Trailer)

    A towable RV that hitches to the bumper of a vehicle. Available in a variety of sizes, travel trailers are a great entry-level option for those who already own a capable tow vehicle.

    PUC (Pop-Up Camper)

    A small, collapsible trailer that expands into a tent-like RV. These pop-up campers are lightweight, easy to tow, and perfect for occasional campers.

    TC (Truck Camper)

    A compact RV that sits in the bed of a pickup truck. Ideal for off-grid adventures, these truck campers offer a small but mighty option for travelers who love boondocking. Many of these are heavy and can require an HD truck as well. Always refer to the weight capacity of your vehicle and the RV you are considering.

    And that is a great segue to our next category.


    Weight and Towing Terms

    When it comes to towing an RV safely, understanding weight ratings is critical. These acronyms will ensure you’re not exceeding your limits.

    GVWR (Gross Vehicle Weight Rating)

    The maximum weight your RV or tow vehicle is rated to safely carry, including passengers, cargo, fuel, and fluids. Exceeding this can lead to dangerous driving conditions.

    GCWR (Gross Combined Weight Rating)

    The total maximum weight of both your tow vehicle and your fully loaded RV combined. This number is crucial to avoid overloading your setup.

    UVW (Unloaded Vehicle Weight)

    The weight of your RV as it comes from the manufacturer, with no cargo, passengers, or fluids added.

    CCC (Cargo Carrying Capacity)

    The amount of weight you can safely add to your RV, including food, gear, water, and personal items, etc. This is calculated as: GVWR – UVW = CCC

    GAWR (Gross Axle Weight Rating)

    The maximum weight that each axle of your RV or tow vehicle can handle.

    TW (Tongue Weight)

    The amount of weight that rests on your tow hitch when pulling a travel trailer on your vehicle’s bumber. Proper weight distribution is key to safe towing.

    HW (Hitch Weight)

    The weight a fifth wheel places on the truck bed hitch.

    PC (Payload Capacity)

    How much weight your tow vehicle can carry, including passengers, cargo, and the hitch weight.


    Camping and Travel Terms

    Once you’re on the road, knowing these acronyms will help you navigate campgrounds, hookups, and off-grid adventures.

    FHU (Full Hookups)

    A campsite with electric, water, and sewer connections, making it easy to stay for extended periods without worrying about tank levels.

    W/E (Water and Electric)

    A campsite that offers water and electricity but no sewer hookup—you’ll need to use the dump station for waste.

    DRY (Dry Camping)

    Camping without hookups, meaning you rely on your RV’s battery, water tanks, and propane.

    BLM (Bureau of Land Management)

    Public lands where boondocking is allowed, often free and located in remote, scenic areas.

    NPS (National Park Service)

    Governs national parks and campgrounds. Many NPS sites have strict RV length limits, so check before booking.

    COE (Corps of Engineers)

    Campgrounds managed by the Army Corps of Engineers, often near lakes and rivers, offering beautiful and affordable camping options. These are usually hidden gems in the RV world, because not many people consider them as a first or even second option.

    TT (Thousand Trails)

    A popular membership-based RV park network offering discounted stays. This is great for those looking to have full hook-ups and extended stays.


    RV Maintenance and Systems

    Keeping your RV in top shape means knowing the ins and outs of its systems.

    PSI (Pounds Per Square Inch)

    The recommended air pressure for your vehicle’s tires, be it the RV or tow vehicle. Keeping them at the right PSI prevents blowouts and uneven wear.

    LP (Liquid Propane)

    Used to fuel stoves, water heaters, furnaces, and refrigerators in many RVs. It can sometimes be referred to as gas, so make sure you understand the difference between LP and gas/diesel for your vehicle.

    GFI (Ground Fault Interrupter)

    An electrical outlet safety feature that trips when it detects an issue. If your outlets stop working, check your GFI reset button. Many of them have a little light that indicates it has been tripped/turned off.

    ABS (Anti-Lock Braking System)

    A safety system that prevents skidding when braking hard.

    TPMS (Tire Pressure Monitoring System)

    A device that monitors tire pressure and alerts you to low or high PSI levels to prevent blowouts.


    Boondocking and Off-Grid Living

    For those who love to camp off-grid like my wife and I do, these acronyms will come in handy.

    AGM (Absorbent Glass Mat)

    A type of deep-cycle battery used for RV solar setups and off-grid power storage.

    LiFePO4 (Lithium Iron Phosphate)

    The current king of the deep-cycle battery world used for RV solar setups and off-grid power storage. They are the best option as of the writing of this article, but they are also the most expensive. As avid boondockers, we have found them to be a must have for our lifestyle. 

    MPPT (Maximum Power Point Tracking)

    A solar charge controller that improves the efficiency of solar panels and charges your house batteries faster than PWM.

    PWM (Pulse Width Modulation)

    A solar charge controller that connects your solar panels and charges your house batteries.

    AH (Amp Hours)

    A measurement of battery capacity, showing how much power your battery can store before needing a recharge.

    GPH (Gallons Per Hour)

    Used to measure water pump efficiency and propane usage.


    Don’t Worry! RV Acronyms Soon Become Second Nature

    Now, take a breather and save this list, because learning RV acronyms might save your travels. And once you get the hang of them, they become second nature. Whether you’re shopping for your first rig, planning your next trip, or troubleshooting an issue, knowing these terms will make your RV life smoother and more enjoyable.

    So, next time someone asks about your GVWR, FHU site, or TPMS, you’ll be able to nod knowingly and answer like a seasoned RVer. 

  • 5 Essentials for a Smoother RV Towing Experience

    5 Essentials for a Smoother RV Towing Experience

    Before you tow your RV, I have a small recommendation: Learn from my near-death experience. The first thing I ever towed was a hotdog cart. Then I towed a small U-Haul trailer (that was definitely heavier than I should have been towing). Luckily for me, they were fairly easy and straightforward. But it wasn’t until I jumped directly into two different 40-plus-foot fifth wheels that I learned what towing was really about. My steep learning curb almost killed me, but mastering smoother RV towing doesn’t have to come at that high of a price. But it does take practice.

    Towing — and especially parking — an RV is an art that transforms your vehicle into a mobile gateway to adventure. Art is subjective though. (And if you have a significant other helping you back up into a site, then you know exactly what I mean.) But, while the idea of towing a trailer or fifth wheel may seem intimidating, the right preparation and tools make the process a much smoother RV towing process.

    Whether you’re cruising through coastal highways, navigating mountain passes (this was my experience), or rolling through wide-open plains, these five essentials will enhance your experience, ensuring safety and ease every step of the way.


    1. Prioritize a quality hitch and weight distribution system.

    The hitch is the unsung hero to achieve a smoother RV towing experience. A solid hitch ensures that your RV and tow vehicle remain securely connected, even on uneven roads or during sharp turns. Without it, your journey can quickly go from exciting to stressful. Adding a weight distribution system amplifies this stability, allowing for more balanced towing and reducing strain on your tow vehicle.

    Weight distribution systems are particularly valuable for larger trailers. They help distribute the tongue weight across the axles. This minimizes rear sagging in your tow vehicle and improves steering and braking performance. A well-balanced setup not only keeps you safe but also enhances fuel efficiency — a win-win for long-haul RVers.

    Ensuring that your hitch and weight distribution system are compatible with your RV’s size and weight is critical. Regularly inspecting and maintaining these components can prevent wear and tear, making every journey safer and smoother.


    2. Stay on top of tire safety.

    Your RV’s tires are its lifeline to the road. Keeping them in optimal condition ensures smoother handling, better fuel economy, and a reduced risk of blowouts. When towing, the added weight of the trailer increases stress on your tires, making regular checks essential.

    Proper tire pressure is key to extending tire life and maintaining stability while towing. A tire pressure monitoring system (TPMS) is a game-changer, providing real-time updates on pressure and temperature to alert you to potential issues before they escalate. Pairing this with a portable air compressor ensures you can make adjustments on the go, whether you’re parked at a campsite or miles from the nearest service station.

    Another vital tool is a tire tread depth gauge, which helps monitor wear patterns. Uneven wear could signal alignment or suspension issues, which can impact towing safety. Investing in these tools and checking your tires regularly will keep you rolling smoothly toward your destination — no matter what the weather looks like.


    3. Maximize use of mirrors and camera systems.

    Visibility is a key factor in towing an RV safely. Extended mirrors and camera systems provide a clearer view of your trailer and the surrounding traffic. This helps you navigate lane changes, back up, and park with confidence. When towing a long or wide trailer, these tools become indispensable.

    Extended mirrors are designed to compensate for the additional width of your RV, giving you a better view of vehicles alongside and behind you. Combined with a rearview camera system, they reduce blind spots and make reversing less stressful. Modern systems often include high-definition cameras with night vision, making them useful even in low-light conditions.

    In addition to enhancing safety, proper mirrors and cameras also improve efficiency. They help you navigate tighter spaces, such as campgrounds or gas stations, without unnecessary delays or mishaps. Installing these tools is a small investment that pays off in a safer, more enjoyable towing experience.


    4. Enhance stopping power with brake controllers. 

    A brake controller is one of the most important safety features for anyone towing an RV. It ensures your trailer’s brakes work in tandem with your tow vehicle, providing smooth and controlled stopping power. Without it, the added weight of the trailer could significantly increase stopping distances, putting you and other drivers at risk.

    Brake controllers are particularly useful when descending steep grades or driving in wet conditions. They allow you to customize the braking force applied to the trailer, adapting to varying loads and road conditions. Some models even include features like proportional braking, which adjusts brake force based on the speed and pressure of your tow vehicle’s brakes.

    For optimal performance, always test your brake controller before starting your trip. Ensuring that your trailer’s brakes engage evenly with your tow vehicle will not only enhance safety but also reduce wear and tear on your braking system.


    5. Know your dimensions and weight ratings.

    Before hitting the road, understanding the dimensions and weight ratings of both your tow vehicle and RV is the most crucial step in ensuring a safer and smoother RV towing experience. This knowledge is foundational for selecting the right combination of tow vehicle and RV, planning your routes, and abiding by legal and safety requirements.

    Start by familiarizing yourself with your RV’s gross vehicle weight rating (GVWR), which includes the total weight of the RV when fully loaded with supplies, water, and passengers. Additionally, know the unloaded vehicle weight (UVW), hitch weight, and cargo-carrying capacity (CCC). For your tow vehicle, review its gross combined weight rating (GCWR), payload capacity, and towing capacity as outlined in the owner’s manual. Good practice is hitting a scale at gas station that has one so that you know where you stand fully loaded.

    Why is this critical? Towing an RV that exceeds your vehicle’s capacity can lead to significant safety risks, including poor braking performance, instability, and increased wear on your engine, transmission, and tires. Understanding these ratings also helps you stay compliant with state and federal regulations, as exceeding weight limits could result in fines or voiding your insurance in the event of an accident.

    Before purchasing an RV or tow vehicle, consider these dimensions and ratings alongside your lifestyle and travel plans. If you plan to tow through mountainous terrain or boondock with a fully loaded rig, selecting a vehicle with a higher towing capacity than the minimum required is a wise choice. Remember, safety starts with preparation—and this step sets the foundation for all your towing adventures.


    Bonus: Consider weight distro and water tanks.

    Proper weight distribution is another critical factor in achieving towing stability and safety. An unbalanced load can cause swaying, reduce steering control, and increase the strain on your vehicle’s suspension and brakes. Distributing the weight evenly between your tow vehicle and RV is key to maintaining a smooth and controlled ride.

    When it comes to weight distribution, water tanks often play a pivotal role. Depending on your travel plans, the amount of water you carry can drastically change the overall weight and its placement within the RV. For instance:

    • Full Tanks. While this is ideal for long boondocking trips, full tanks add significant weight, which must be factored into your towing setup.
    • Half-Full Tanks. This can cause water to slosh during transit, creating a shifting load that impacts towing stability.
    • Empty Tanks. Best for short trips or stays at campgrounds with hookups, minimizing extra weight and improving fuel efficiency.

    As I said before, to minimize risks, use a weight distribution hitch and monitor the placement of heavy items inside the RV. Store denser objects low and near the axles to maintain balance. For those planning off-grid adventures, consider how the distribution of fresh, gray, and black water tanks will affect your towing dynamics.

    Understanding and managing your RV’s weight and dimensions ensures safer travels, protects your equipment, and contributes to a more enjoyable towing experience.


    Smoother RV Towing for Every Adventure

    Towing an RV is more than just connecting a trailer to your vehicle—it’s about creating a seamless, stress-free experience that enhances your journey. By investing in the right tools and taking the time to understand your towing setup, you can ensure that every trip is as smooth, safe, and enjoyable as possible. Anything can happen along the way, but at least by following these tips, you have a better chance of minimizing the risk of them happening.

    From choosing the perfect hitch to maintaining your tires and ensuring visibility, these essentials provide peace of mind on the open road. Remember, preparation is key, and a little extra effort before you depart will go a long way in making your adventures truly unforgettable. 

  • Off-Road RV Trips for Adrenaline Junkies

    Off-Road RV Trips for Adrenaline Junkies

    For those who believe adventure begins where the pavement ends, off-road RVing is the ultimate way to explore the wild. If you crave rugged terrain, remote landscapes, and the thrill of tackling rough trails in your home on wheels, you’re in the right place. Off-road RV trips take adventure to another level, allowing you to access stunning, untouched landscapes that most travelers never see.

    Whether you’re looking to navigate steep mountain passes, desert dunes, or rocky backcountry roads, these trips will test your skills. They’ll push your rig to the limit. And they’ll reward you with some of the most epic campsites imaginable.

    But before you hit the dirt, it’s crucial to know what makes an RV off-road capable, how to prepare for remote travel, and where to find the best adrenaline-pumping destinations. Let’s dive into the best off-road RV trips for those who live for the thrill.


    What Makes an RV Off-Road Ready?

    Not all RVs are built for off-road adventures, so it’s important to understand what makes a rig capable of handling rugged terrain. If you’re planning to take your RV into the backcountry, here are the key features to look for.

    • High Ground Clearance. A lifted suspension and taller tires help your RV avoid obstacles like rocks, ruts, and deep sand.
    • Off-Road Tires. Durable, all-terrain or mud-terrain tires provide the grip you need to tackle dirt roads, gravel, and rocky paths.
    • Four-Wheel Drive or All-Wheel Drive. While not essential, having power distributed to all wheels makes a huge difference when dealing with loose terrain, steep inclines, and deep mud or sand.
    • Reinforced Suspension. Stronger shocks and springs help absorb the impact of rough terrain, making for a smoother ride.
    • Solar Power and Large Freshwater Tanks. When you’re off-grid, you need a way to power your essentials and store enough water for days — or even weeks — at a time.
    • Recovery Gear. A winch, traction boards, a shovel, and a good air compressor can be lifesavers if you find yourself stuck in sand, mud, or snow.

    While full-size motorhomes typically aren’t built for hardcore off-roading, many adventure-ready rigs like Class B camper vans, small Class C (like our Thor Delano), and off-road-capable travel trailers are up for the challenge.

    Now, let’s hit the dirt with some of the best off-road RV trips for thrill-seekers!


    1. Mojave Road – California & Nevada

    Why It’s Epic. A legendary overland route, the Mojave Road is a 140-mile dirt track crossing the Mojave Desert. This historic trail follows the original path used by Native Americans and early settlers, offering an unforgettable mix of challenging terrain, remote camping, and stunning desert landscapes.

    What to Expect:

    • Deep sand, washboard roads, and rock-strewn paths make for a technical drive.
    • Remote and rugged campsites with zero amenities.
    • Landmarks like the Lava Tubes, the Mojave Megaphone, and the eerie Rock Pile.
    • Big temperature swings — hot days and freezing nights.

    Pro Tip! Bring extra fuel, water, and plenty of recovery gear. The remote nature of this trip means self-sufficiency is a must.


    2. The Alpine Loop – Colorado

    Why It’s Epic. High-altitude mountain passes, stunning alpine lakes, and ghost towns make the Alpine Loop one of the most scenic off-road RV trips in the country. The 65-mile loop takes you through the heart of the San Juan Mountains, with jaw-dropping views at every turn.

    What to Expect:

    • Narrow, rocky roads that climb over 12,000 feet.
    • Breathtaking scenery, including Engineer Pass and Cinnamon Pass.
    • Remote ghost towns like Animas Forks.
    • Seasonal access — only open from late spring through early fall.

    Pro Tip! Your RV must have high clearance and good tires — the switchbacks and steep inclines aren’t for the faint of heart. Also, watch for altitude sickness if you’re not used to high elevations.


    3. The White Rim Trail – Utah

    Why It’s Epic. Located in Canyonlands National Park, the White Rim Trail is a 100-mile off-road route that loops around some of Utah’s most stunning red rock scenery. It’s a dream for adventure seekers, offering breathtaking overlooks, tight switchbacks, and thrilling cliffside driving.

    What to Expect:

    • Unbelievable desert landscapes with towering red rock cliffs.
    • Challenging terrain with steep drop-offs and sandy sections.
    • Limited camping permits, so book early.
    • No water sources—bring plenty of your own.

    Pro Tip! A 4WD, high-clearance rig is essential. Carry extra fuel, as there are no services anywhere on the trail.


    4. The Dalton Highway – Alaska

    Why It’s Epic. If you want the ultimate remote adventure, the Dalton Highway is it. This 414-mile gravel road takes you from Fairbanks to the Arctic Ocean in Alaska, following the Trans-Alaska Pipeline through some of the most isolated terrain in North America.

    What to Expect:

    • Massive stretches of nothing but wilderness.
    • Unpredictable weather — snow and ice are possible year-round.
    • Long sections without fuel stations — fill up whenever you can.
    • Wildlife encounters with bears, caribou, and moose.

    Pro Tip! A CB radio is recommended, as there’s little to no cell service. Also, be prepared for rock chips — this road is rough on windshields!


    5. The Dempster Highway – Yukon & Northwest Territories, Canada

    Why It’s Epic. If you’re looking for one of the most remote and adventurous drives in North America, the Dempster Highway is the ultimate off-road RV trip. Stretching 457 miles from Dawson City, Yukon, to Tuktoyaktuk on the Arctic Ocean, this rugged route takes you through breathtaking tundra, untouched wilderness, and some of the most gorgeous terrain in all of North America. To date, this is one of the most epic drives my wife and I have ever made, and it is definitely the most treacherous, considering all of the obstacles and the length of the drive. But we can’t wait to tackle it again.

    What to Expect:

    • Gravel and mud roads that can turn treacherous when wet.
    • Stunning views of the Tombstone Mountains (commonly referred to as the Patagonia of the North), Arctic tundra, and vast river valleys.
    • Zero services for hundreds of miles — fuel up and stock supplies before leaving Dawson City and any chance you get along the drive, because there are few stations along the way.
    • Extreme weather shifts — temperatures can plummet even in summer.
    • Remote camping opportunities with incredible wildlife encounters, including grizzly bears, moose, caribou, and wolves.

    Pro Tip! Spare tires are a must — flats are common on this rough road, and repair services are few and far between. Bring an extra fuel canister, as gas stations are limited, and keep an eye on weather conditions to avoid getting stuck in thick mud after a rainstorm. 


    Final Thoughts for Off-Road RV Trips

    Off-road RVing takes adventure to a whole new level, allowing you to experience some of the most breathtaking and remote places in North America. Whether you’re tackling desert trails, alpine passes, or backcountry routes, preparation is key.


    Off-Roading Essentials Checklist

    • High-clearance, off-road capable RV
    • All-terrain or mud-terrain tires
    • Extra fuel and water
    • Recovery gear (traction boards, winch, shovel)
    • Navigation tools (offline maps, GPS)
    • First-aid kit and emergency supplies
    • Air compressor for tire adjustments
    • Permits (some areas require reservations)

    Off-road RV trips aren’t just about the destination — they’re about the journey. The thrill of the unknown, the challenge of the trail, and the reward of an epic campsite make these adventures truly unforgettable.

    So, if you’re an adrenaline junkie, like we are, looking for the next big challenge, load up your rig, pack your gear, and hit the dirt. The wild is waiting … and so are we. See you on the roads less traveled. 

  • 4 Adventure-Ready THOR Toy Haulers for ATVs

    4 Adventure-Ready THOR Toy Haulers for ATVs

    If you love ATVs, dirt bikes, and off-road adventures, a toy hauler is the ultimate RV to fuel your adrenaline lifestyle. These rugged rigs combine the comforts of home with a dedicated garage space to haul all your favorite toys, making them the perfect choice for those who refuse to leave the adventure behind. But with all the toy haulers out there, you might wonder: What are the best toy haulers for ATVs?

    As a THOR Ambassador, I’ve had the opportunity to explore some of the best RVs in the THOR family, and if you’re looking for a toy hauler that can keep up with your need for adventure, you’re in the right place. Whether you prefer the extra space of a towable fifth wheel or travel trailer, the luxury of a Class A, or the versatility of a Class C, there’s a perfect toy hauler for every off-road enthusiast.

    Here are my top four picks from the THOR family for adventure-ready toy haulers that can take you—and your ATVs—anywhere.


    1. Fifth Wheel Toy Hauler: Keystone Fuzion 424

    Why It’s Built for Big Adventures

    The Keystone Fuzion 424 is an off-road-ready fifth wheel designed for serious toy hauler enthusiasts. If you need maximum garage space, tons of storage, and plenty of luxury, this fifth wheel is a dream setup. With a massive garage, patio ramp system, and high-end interior, it’s perfect for those who want an extended stay experience while bringing their off-road toys along for the ride.

    Note: This monster RV needs a beast to tow it around. It is a must to check all of the weight and length statistics of this RV vs the capabilities of your truck, as you will likely need a dually Heavy Duty pickup in the 3500 range or higher.


    Key Features

    • 13-foot garage with ramp patio system for the ultimate outdoor space.
    • HappiJac power bunk system with dual sofas for extra sleeping arrangements.
    • Onan 5.5kW generator & dual fuel tanks to keep the power on and your toys topped off with fuel.
    • King bed master suite with walk-in closet.
    • Three A/C units to stay cool in the desert heat.
    • Luxury kitchen with residential appliances for full-time RVers that want those classy touches.


    Pro Tip

    The Fuzion 424 is big (44 feet long!), so be mindful of campground restrictions. For ultimate flexibility, scout out BLM land or dispersed camping spots where size isn’t an issue. The ramp patio setup makes it perfect for boondocking, giving you a comfortable outdoor space no matter where you set up camp. 


    2. Travel Trailer Toy Hauler: Heartland Torque T322

    Why It’s the Best Towable Option

    If you’re looking for a travel trailer toy hauler that’s easy to tow yet capable of carrying your off-road gear, the Heartland Torque T322 is a fantastic choice. It blends rugged utility with modern comforts, making it ideal for off-road getaways. This model is perfect for weekend warriors and full-time RVers alike who want a balance of mobility, storage, and comfort.


    Key Features

    • 12.5-foot garage with a patio ramp.
    • 7,800-pound dry weight, making it half-ton towable for many trucks.
    • Large U-shaped kitchen with a full fridge and oven.
    • Private master bedroom with king-size bed.
    • 2,000-pound tie-downs for securing ATVs and dirt bikes.
    • Fuel station onboard for refueling your toys.


    Pro Tip

    For adventurers who want the flexibility of a travel trailer, the Torque T322 is a solid pick. Make sure your truck has the right towing capacity—while it’s lighter than a fifth wheel, it still needs a capable tow vehicle. The built-in fuel station makes it easy to keep your ATVs running without extra fuel cans, making this a great off-grid option.


    3. Class A Toy Hauler: Thor Outlaw 38MB

    Why It’s Perfect for Off-Roaders

    The Thor Outlaw 38MB is a Class A toy hauler built for power, luxury, and serious adventure. If you want to hit the trails all day and relax in a high-end motorhome at night, this is your rig. Built on a Ford F-53 chassis with a 7.3L V8 engine, it offers plenty of towing power and a spacious garage to haul ATVs, motorcycles, or dirt bikes with ease.


    Key Features

    • 10-foot 2-inch garage with a ramp that converts into a patio deck.
    • 1,500-pound tie-down rings to keep your toys secure.
    • 8,000-pound towing capacity for bringing extra gear or an additional trailer.
    • SkyBunk™ overhead sleeping area for additional sleeping space.
    • Fully equipped kitchen and residential-style living area.
    • Outdoor TV and sound system for unwinding after a day of off-roading.

    Pro Tip

    This Class A beast is big (39 feet 10 inches in length), so plan ahead when choosing boondocking locations. If you’re heading into rugged terrain, scout out wide-open areas with solid ground for safe parking and maneuverability. Many Class A toy haulers are best suited for established campgrounds or dispersed camping spots with plenty of room to maneuver.


    4. Class C Toy Hauler: Thor Outlaw 29T

    Why It’s Built for Versatility

    If you love the idea of a toy hauler with a garage but want a more compact rig, the Thor Outlaw 29T is a Class C toy hauler that’s perfect for off-roaders who want something easier to drive and park than a large Class A. This model is built on a Ford E-Series chassis with a 7.3L V8 engine, offering both maneuverability and power to tow an additional trailer with ease.

    Key Features

    • 8-foot by 8-foot garage with tie-downs to keep your ATVs or motorcycles secure.
    • 7,500-pound towing capacity for hauling extra gear or a small trailer.
    • Drop-down ramp door converts into an outdoor patio space.
    • Queen-size, cab-over bunk for extra sleeping space.
    • Spacious kitchen with full-size fridge to keep meals convenient on the road.
    • Solar prep for off-grid adventures.


    Pro Tip

    The Thor Outlaw 29T is a great middle-ground between a large, luxury Class A and a towable toy hauler. If you don’t want to deal with towing a separate trailer but still need garage space, this rig is an excellent choice. The garage also doubles as a flexible living space, making it ideal for longer trips with multiple uses for every inch of space.


    Which Toy Hauler Is Right for You?

    Choosing the right toy hauler for off-roading depends on your travel style, storage needs, and tow setup.

    • Need luxury with a built-in garage? Go for the Thor Outlaw 38MB (Class A).
    • Want a drivable Class C that still hauls your ATVs? The Thor Outlaw 29T is a smart choice.
    • Craving massive storage and top-tier amenities? The Keystone Fuzion 424 (Fifth Wheel) is perfect for full-time adventure.
    • Prefer a lightweight, towable option? The Heartland Torque T322 (Travel Trailer) has you covered.

    With so many adventure-ready toy haulers for ATVs in the THOR family, there’s no shortage of options for off-road thrill seekers. Whether you’re heading into the desert, climbing mountain trails, or hitting the dunes, one of these toy haulers will get you—and your ATVs—there in style.

    Now, load up your ATVs, hit the roads less traveled, and bring the adventure to your backyard. And if you’re looking for friends to join in, feel free to send me your GPS, because I’m always ready for an adventure.


  • A Little RV Privacy, Please! 5 Ways to Safeguard Personal Space

    A Little RV Privacy, Please! 5 Ways to Safeguard Personal Space

    Oh, the freedom! We all know the attraction of the RV life. There’s something about the open road, the ever-changing backyard, and the ability to take your home wherever you go. The very thrill of it begs to be shared and fuels romantic RV getaways. But once you’ve seen what you’ve seen that day and retire to the RV at day’s end, you may find yourself asking: How far does RV privacy go? Those folks parked in the campsites near you. Can they still see you, hear you, tell what you’re doing?

    The reality is that the RV lifestyle does sacrifice some privacy. Especially at a campground or RV resort — even some of the best ones. But whether you’re at a crowded campground or parked in a boondocking spot with curious hikers passing by, there are things you can do to prep your rig and safeguard your RV privacy. In fact, doing so will probably help you sleep better. Improving your RV’s privacy can make a huge difference in your comfort, security, and overall travel experience.

    So, whether you’re looking for ways to block out nosy neighbors or create a quiet retreat inside your rig, these five RV privacy upgrades will help you feel more at home — wherever you roam.


    1. Upgrade Your Window Coverings

    Windows provide natural light and beautiful views, but they also give outsiders an easy way to peek inside your RV. (To be fair, intentionally or unintentionally.) The right window treatments can instantly enhance your RV privacy and even improve insulation.


    Best Window Covering Options for RV Privacy

    • Blackout Curtains. These block out both sunlight and prying eyes. They’re great for night privacy, helping you sleep in after sunrise, and can also keep your RV cooler in the summer.
    • Day/Night Shades. Many modern RVs come with these, offering the option to let in filtered light while maintaining privacy during the day and full blackout at night.
    • Reflective Window Film. This is a great option for daytime RV privacy. It allows you to see out while preventing others from seeing in, but keep in mind that it doesn’t work as well at night when your lights are on inside.
    • Velcro or Magnetic Blackout Covers. These provide a simple and removable option, perfect for boondockers who want to block out all light and stay stealthy in urban settings.
    Pro Tip!

    If you’re on a budget, DIY window coverings using Reflectix and fabric can provide great privacy and insulation. Cut pieces to fit your windows, secure them with Velcro, and pop them in when you need extra privacy or temperature control.


    2. Use an RV Skirt or Outdoor Privacy Screens

    If you’ve ever camped at a busy campground, you know that sometimes it can feel like your neighbors are just a few feet away. (Because they probably are.) Using an RV skirt or outdoor privacy screens can help create a more private and comfortable outdoor space.


    A Few Options to Consider

    • RV Skirting. Not just for insulation in cold weather, RV skirting can also add an extra layer of privacy, blocking off the view underneath your RV from passersby. Fabric skirting is portable and easy to install, while more permanent options like rigid foam board offer better insulation.
    • Pop-Up Privacy Screens. These are lightweight, foldable barriers that provide an instant private outdoor area around your RV. They’re great for separating your space from neighboring campers.
    • Retractable Awnings with Side Panels. If you already have an awning, adding side panels can give you shade and privacy at the same time.
    Pro Tip!

    For a budget-friendly DIY privacy screen, consider using a tarp and bungee cords to create a temporary barrier around your outdoor space.


    3. Soundproof Your RV

    Privacy isn’t just about keeping people from seeing inside. It’s also about limiting how much noise travels in and out of your RV. Whether you’re parked at a noisy campground or you just don’t want your conversations to carry, a few soundproofing tricks can help.


    Ways to Reduce Noise Inside Your RV.

    • Weather Stripping. Adding weather stripping around doors and windows can help block sound from leaking in and out.
    • Soundproof Curtains. Heavier fabric curtains help absorb sound, reducing noise levels inside.
    • Foam Panels or Rugs. Adding soft materials like foam panels to the walls or thick rugs to the floor can help dampen sound and keep things quieter.
    • Door Draft Stoppers. These are great for blocking noise, light, and as it states, a draft from creeping in under your RV’s doors.
    Pro Tip!

    If you’re staying in a noisy campground, a white noise machine, phone app, or small fan can help mask outside sounds so you can sleep peacefully.


    4. Secure Your Entry Points

    Your RV’s doors and windows are not just for access — they also determine how secure and private your living space is. Adding some simple upgrades to these areas can make a big difference.


    How to Bolster Your RV’s Entry Points

    • Upgrade Your Door Locks. Many RVs come with standard locks that are easy to pick or duplicate. Consider upgrading to a keyless entry lock or deadbolt for better security.
    • Add a Security Camera. A small battery-powered security camera allows you to check who’s outside without opening the door and gives you added visibility even when you’re away.
    • Use a Door Curtain or Window Film. If your RV door has a window, cover it with a curtain or film to prevent anyone from seeing inside.
    • Install Motion-Sensor Lights. Outdoor lights that turn on when movement is detected help deter unwanted visitors while making it easier to see at night. This also helps with little critters that move about at night, as they tend to run from a light that turns on.
    Pro Tip!

    A simple stick-on frosted window film can let light in while keeping prying eyes out. It’s an inexpensive way to add privacy without blocking natural light completely.


    5. Create a Private Sleeping Space

    One of the biggest challenges in RV living is creating a private sleeping area, especially in smaller rigs or those with open layouts. Whether you’re traveling with family or just want a cozy retreat, there are ways to make your sleeping area more private.


    Upping the Privacy in Your Sleeping Space

    • Use a Privacy Curtain or Divider. If your RV doesn’t have a separate bedroom, installing a curtain or folding screen can give you a little extra separation.
    • Opt for a Murphy Bed or Loft Bunk. If you’re shopping for an RV, models with Murphy beds or loft bunks often provide a way to tuck away your sleeping space when not in use, keeping it more private when needed.
    • Position Your RV Strategically. If you have the option, park in a way that gives your bedroom windows the most privacy — whether it’s facing away from other campers or backing up to a more secluded area.
    Pro Tip!

    In smaller RVs, blackout curtains with Velcro closures can create an instant private sleeping nook without taking up extra space. They also help regulate sleep patterns when traveling north to places like Alaska or Canada that can experience extended, and in some cases 24-hour sunlight.


    Enjoying the Peace of RV Privacy

    Privacy is one of those things you don’t think about much until you realize you don’t have it. Whether you’re camping in a crowded RV park, boondocking in a busy area, or just trying to get a good night’s sleep, improving your RV’s privacy can make your travels much more comfortable.

    From simple window coverings to strategic parking and soundproofing techniques, there are plenty of ways to enhance privacy in your rig. The best part? Most of these upgrades are affordable, easy to install, and make a noticeable difference in your overall RV experience.

    So, whether you’re looking to keep out prying eyes, block out noise, or create a cozy retreat, these tips will help you turn your RV into the private sanctuary you deserve — no matter where the road takes you.

  • Don’t Forget Your RV Tire Maintenance This Winter

    Don’t Forget Your RV Tire Maintenance This Winter

    As the temperatures drop and the snow starts to fall, many RVers prepare to winterize their rigs for storage. Another intrepid variety of camper gets their home on wheels ready to embrace more cold-weather adventures ahead. But whether you’re hibernating for the winter, heading to a cozy mountain retreat, or boondocking in a frosty wilderness, there’s one essential part of your RV that needs extra care during the winter and often gets overlooked: your RV tire maintenance.

    Most campers know that RV tire maintenance is important for their safety when they’re criss-crossing the country in warmer weather. But cold-weather RV tire maintenance is also crucial. In fact, it has a big impact on ensuring safety, maximizing performance, and extending the lifespan of your tires.

    So, ere are five tips for the winter months to keep your RV rolling smoothly through the chilly conditions. 


    The Impact of Cold Weather on RV Tires

    Cold weather affects more than just your comfort — it significantly impacts your tires, too. As temperatures drop, air pressure in your tires decreases. Rubber compounds stiffen. Let’s face it: When it’s really cold, everything seems more stiff and rigid. (I know all my muscles and bones feel that way.)

    But with tires, these changes can lead to decreased traction, uneven wear, and even complete failure if not addressed properly. For RVers traveling in winter conditions, proper tire maintenance becomes a nonnegotiable part of safe and enjoyable adventures.


    Key Winter RV Tire Maintenance Tasks

    1. Monitor tire pressure religiously.

    Tire pressure can drop by 1 or 2 pounds per square inch (psi) for every decrease in 10 degrees Fahrenheit. Underinflated tires not only wear unevenly but also compromise your RV’s handling and fuel efficiency.

    Tips for Tire Pressure Management:
    • Invest in a tire pressure monitoring system (TPMS). A TPMS provides real-time updates on tire pressure, giving you peace of mind during winter travels.
    • Check tires regularly. Use a high-quality digital tire pressure gauge to check your tires before every trip and at least once a week during extended stays. While TPMS systems are great, double checking adds that extra layer of security and peace of mind.
    • Adjust for temperature, Inflate tires to the manufacturer’s recommended PSI while the tires are cold (before driving).


    2. Inspect for cold-weather cracks and damage.

    Cold weather can cause the rubber in your tires to become brittle, increasing the risk of cracking and other damage. Before hitting the road, take the time to inspect your tires for visible wear and tear.

    What to Look For:
    • Cracks or bulges. Check for cracks in the sidewalls and tread, as these can worsen in freezing temperatures.
    • Tread depth. Use a tire tread depth gauge to ensure you have enough grip for icy or wet conditions. The rule of thumb is to maintain a minimum tread depth of 6/32 inches.

      For those that don’t have, want to buy, or want to learn how to use a tread depth gauge, a much less scientific gauge is the “penny test”. While I strongly recommend a digital tread depth gauge, many RVers and car enthusiasts claim that the penny test is a decent way to check the tread if you can’t get it to a tire shop.

      What is the penny test?

      Insert the penny head-first into the tread groove, and if you can see the top of Lincoln’s head, your tire tread is worn and needs to be replaced; if his head is covered, the tread is still sufficient.

    • Valve stems. Examine valve stems for cracks or leaks that could compromise pressure stability.


    3. Weigh whether you need specialty tires for winter.

    If you’re traveling to areas with heavy snowfall or icy roads, investing in winter tires can greatly enhance your safety and driving experience. Winter tires are designed with specialized tread patterns and rubber compounds to provide better grip in cold conditions.

    Why Winter Tires Are Worth It:
    • Improved traction. Winter tires are engineered for snowy and icy surfaces, offering significantly better traction than all-season tires.
    • Enhanced safety. They reduce stopping distances on slippery roads, which is critical for a larger vehicle like an RV.
    • Longevity. Swapping to winter tires during colder months can extend the life of your all-season tires.
    • Hybrid option. Another option that some RVers choose is an all-terrain tire. They are somewhat of a middle ground between snow tires in terms of grip and stability in winter weather and the pavement/highway drive that an all-season tire will give you in normal conditions. Always talk to a tire professional when deciding what tires would be best for your style of travel.


    4. Store tires properly when not in use.

    For RVers who store their rigs during the winter, proper tire storage is essential to prevent flat spots, cracking, or other long-term damage. Tires that sit in one position for extended periods are especially vulnerable.

    Storage Tips:
    • Elevate tires. Use tire cradles or jack stands to lift your RV slightly off the ground and prevent flat spots.
    • Protect from UV damage. Store your RV in a covered area or use tire covers to shield tires from harmful UV rays.
    • Control temperature. Keep stored tires somewhere that is not affected by extreme weather to maintain their elasticity and durability.


    5. Adjust your driving habits.

    Cold-weather driving requires a slightly different approach to ensure your safety and your tires’ performance. Adjust your habits to adapt to the unique challenges posed by winter roads.

    Driving Tips for Cold Weather:
    • Reduce speed. Icy or wet roads can decrease traction, so slow down to maintain control. Slow and steady definitely wins the race in wintery conditions.
    • Avoid sudden moves. Brake, accelerate, and turn gradually to reduce the risk of skidding or losing grip.
    • Stay alert. Watch for black ice and snowdrifts, especially on less-traveled roads or in shaded areas.


    Bonus Tip: Carry a cold-weather tire emergency kit.

    Even the most prepared RVer can face unexpected challenges on the road. A cold-weather tire emergency kit ensures you’re ready for anything.

    What to Include:
    • A portable air compressor to adjust tire pressure on the go. Make sure it is powerful enough to inflate the usually higher PSI ratings that RV tires need.
    • A tire repair kit for minor punctures.
    • Heavy-duty tire chains for added traction in snowy or icy conditions.
    • Road flares or LED beacons to increase visibility if you’re stuck on the roadside.


    Safe Travels

    Whether you’re braving a frosty road trip or storing your RV for the season, cold-weather RV tire maintenance is a must for every RVer. By monitoring tire pressure, inspecting for damage, and taking steps to protect your tires, you can avoid costly repairs and ensure safe travels all winter long. With a little extra care, you’ll be ready to embrace the snowy landscapes and make the most of your winter RV adventures. Stay safe out there!