Author: Gabriel Rivero

  • A Winter Escape Key: Inside the Sun Outdoors Islamorada

    A Winter Escape Key: Inside the Sun Outdoors Islamorada

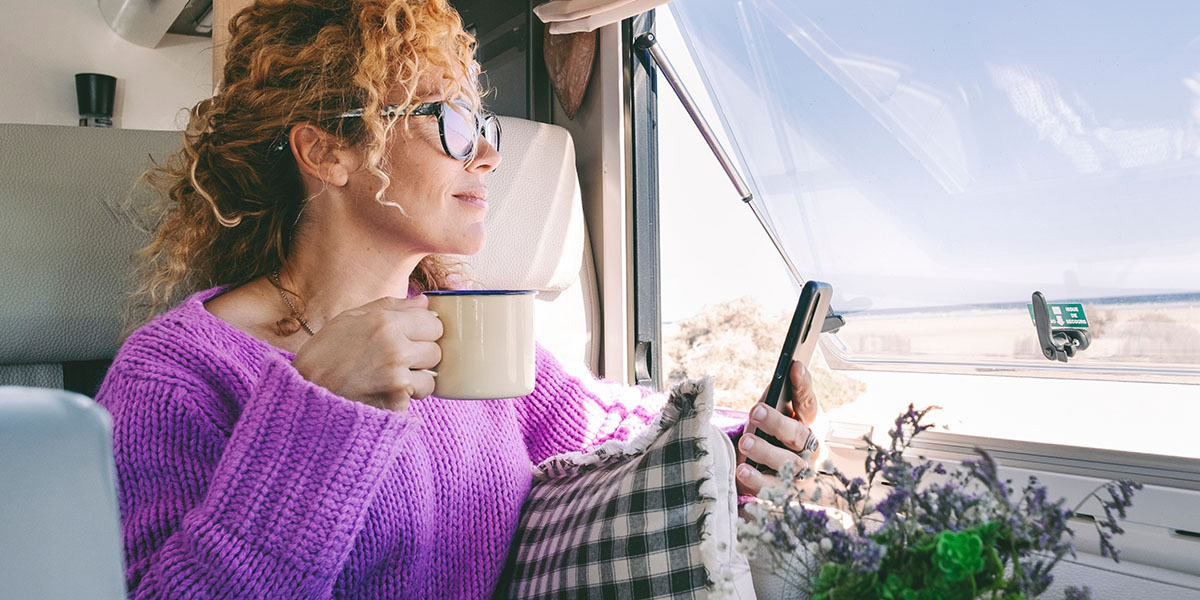
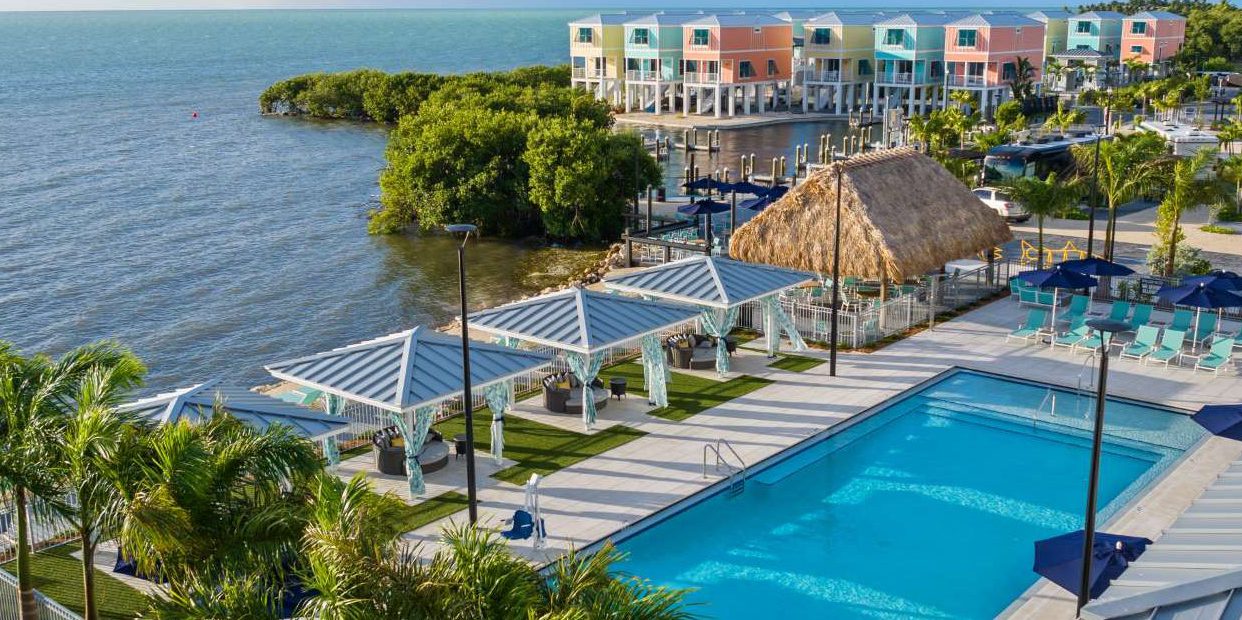
    Dreaming of a winter escape where snow is replaced by sand and chilly mornings give way to ocean breezes? That sounds like a wise decision, my fellow snowbird. So, take some sage advice for your RV migration: Look no further than Sun Outdoors Islamorada, a tropical paradise in the heart of the Florida Keys. Offering world-class amenities, breathtaking views, and endless activities, this RV resort is the perfect destination for those seeking a warm getaway.

    Here’s everything you need to know about making your winter retreat unforgettable at Sun Outdoors Islamorada.


    Why Stay at Sun Outdoors Islamorada

    Sun Outdoors Islamorada isn’t just a campground — it’s an RV resort. Situated along the turquoise waters of the Atlantic Ocean, this resort caters to every traveler. That’s whether you’re looking for adventure. Or relaxation. Or, as I suspect, a bit of both. The Florida Keys are renowned for their natural beauty, lively culture, and laid-back atmosphere. And all of that makes Islamorada a top-tier RV winter destination.

    The resort’s 82 RV sites offer options for everyone, from standard sites to deluxe plus spots equipped with a grill and refrigerator. For those RVers who want to share the winter with family and friends that don’t have their own home on wheels, Sun Outdoors Islamorada has gorgeous vacation homes with ocean views. Heads up though: Due to local ordinances, those luxurious vacation rentals do come with a minimum stay of 28 days. But they do rent, especially in the winter, because demand is extremely high.

    That being said, the resort is only the beginning. While the amenities are enough to keep you entertained, the surrounding area offers incredible opportunities for fishing, snorkeling, and exploring the unique charm of the Keys.


    Highlights at Sun Outdoors Islamorada

    RV Sites with Full Hookups

    What You’ll Love. Each of the 82 RV sites is designed with comfort and convenience in mind. From pull-through sites for larger rigs to deluxe plus sites with added perks like grills and refrigerators, there’s something for every type of camper.

    Best Views: The coveted water-view sites overlooking the Atlantic Ocean are the crown jewels of the resort, offering unparalleled sunrise and sunset vistas.


    Amenities for Relaxation and Fun

    • Pool and Cabanas. Cool off in the resort’s pool or rent a cabana for a private day of lounging.
    • Oceanfront Lounge. The welcome center features an ocean-view lounge where you can shoot pool and whip up a meal in the shared kitchen.
    • Fitness Center. Stay active during your getaway with a well-equipped fitness center.


    Outdoor Activities Galore

    • Kayaks and Paddleboards. Explore the crystal-clear waters of the Keys with kayaks and paddleboards available on-site.
    • Beach and Game Lawn. Relax on the sandy beach or challenge friends to a game of corn hole or life-size Jenga at the game lawn.
    • Weekly Music at the Tiki Hut. Enjoy live music under the iconic Tiki Hut for the perfect tropical evening.


    Exploring Islamorada and Beyond

    While the resort offers plenty to do, the surrounding area is packed with attractions that make Islamorada a gem in the Florida Keys.


    • Robbie’s of Islamorada. Feed massive tarpon, browse local artisan shops, or enjoy waterfront dining at this quintessential Keys spot. Robbie’s also offers snorkeling and fishing tours, perfect for exploring the vibrant underwater world of the Keys.
    • Theater of the Sea. For animal lovers, this marine park is a must-visit. Swim with dolphins, watch sea lion shows, or learn about local marine life through interactive exhibits.
    • Islamorada Brewery and Distillery. Sample craft beers and locally distilled spirits at this laid-back venue, a favorite among visitors and locals alike.

    • Day Trips to Key West or Everglades National Park. Venture an hour north to the Ernest F. Coe Visitor Center at Everglades National Park for wildlife spotting and hiking. Alternatively, head two hours south to Key West to explore its eclectic art scene, historic sites, and lively nightlife.

    • The Turtle Hospital. For a heartwarming and educational experience, visit the Turtle Hospital in nearby Marathon, just under an hour from Islamorada. This renowned facility is dedicated to rescuing, rehabilitating, and releasing sea turtles back into the wild. Guided tours offer a behind-the-scenes look at their incredible work, including visits to the rehabilitation tanks where you can see the turtles up close. It’s a fantastic outing for all ages and a wonderful way to support marine conservation efforts while learning about these incredible creatures.

    *I’ll include a link highlighting some of our adventures below, including a couple on this list, for you to see just how amazing this trip can be. 


    Tips to Book and Navigate Sun Outdoors Islamorada

    1. Reserve Early. Winter is peak season in the Florida Keys, so book your site well in advance to secure your preferred spot, especially if you want a water-view site.
    2. Stay Hydrated and Cool. The Keys are warm year-round. Pack sunscreen, reusable water bottles, and lightweight clothing to stay comfortable.
    3. Plan Activities. Popular excursions, like snorkeling and fishing tours, can fill up quickly during the winter. Booking ahead ensures you won’t miss out.


    Getting There

    Reaching Sun Outdoors Islamorada is a scenic adventure in itself. Nestled in the heart of the Florida Keys, the resort is accessible via the famous Overseas Highway (U.S. 1) — a breathtaking drive that stretches over 100 miles of islands, bridges, and aquamarine waters. 

    Arriving at Sun Outdoors Islamorada, you’ll see that the resort is conveniently located directly off U.S. 1, making it easy to spot. As you near, keep an eye out for the resort’s signage and slow down to make the turn into the entrance safely. Upon arrival, the check-in process is smooth, with ample space to maneuver your RV while registering. If you’re arriving after dark, ensure your headlights are in good working order, as some sections of the highway and the resort’s entrance may be dimly lit.


    Embrace Winter Bliss in Islamorada

    Sun Outdoors Islamorada is the perfect place to enjoy a slice of paradise. With its incredible amenities, unbeatable location, and endless activities, it’s the ultimate winter destination for RV travelers. Whether you’re soaking up the sun at the pool, kayaking through pristine waters, or exploring local attractions like Robbie’s or Theater of the Sea, this resort offers something for everyone.

    So, pack your sunscreen, fire up the RV, and get ready to trade snow for sand. Winter never looked so good! (And, if you want of a preview of what that could be like, check out our adventures in the Florida Keys!!!

  • Help! My RV Is Freezing

    Help! My RV Is Freezing

    If I’m being honest, winter camping has brought my wife and I some of the fondest and most stressful memories in RV life. Winter camping in an RV can be magical — snow-dusted forests, cozy nights by the heater, and the tranquility of off-season travel. But when your RV starts to feel like an icebox, the dream can quickly turn into a chilly nightmare. No one is enjoying anything if their RV is freezing.

    Whether you’re braving subzero temperatures or facing an unexpected cold snap, this guide will help you tackle freezing conditions and keep your RV warm, functional, and comfortable.


    Why Is My RV So Cold?

    RVs are not always built with harsh winter conditions in mind. Thin walls, minimal insulation, and draft-prone windows make it easy for the cold to seep in. Add to that any gaps or cracks in seals, and your RV can feel more like a refrigerator than a cozy home. But don’t worry — there are plenty of solutions to keep the cold at bay.


    Step 1: Inspect your RV for drafts and leaks.

    Cold air creeping in through cracks and seals is one of the main culprits when it feels like your RV is freezing. Start by inspecting these critical areas.

    • Windows and Doors. Look for drafts and gaps around frames. Use weather stripping or non-sag to create a tight seal. If you want to know what sealants to use in different situations, you check out this RV sealant article
    • Roof and Vents. Examine your roof seams and vents for cracks or deteriorating sealant. Self-leveling sealants are a go-to solution for patching these areas. 
    • Slide-Outs. Check the seals around your slide-outs for damage or wear. Flexible sealants can quickly fill in any gaps and flex with movement.

    Pro Tip: Use a flashlight or incense stick to detect drafts. Shine the light or waft the smoke near seals. If you see light or the smoke moves, you’ve found your culprit.


    Step 2: Add insulation where it matters most.

    Insulating your RV is crucial to fighting those freezing temperatures. Here are some quick upgrades to help trap the heat.

    • Windows: Cover windows with reflective insulation like Reflectix to prevent heat loss. For added coziness, hang thermal curtains or shades.
    • Underbelly. If your RV will be parked for an extended period of time and has an exposed underbelly, add foam board insulation or skirting to block cold air from circulating underneath.
    • Vents and Skylights. Foam vent cushions can help seal off these areas, which are often significant sources of heat loss.
    • Floors. Use small area rugs or mats to insulate floors and create another layer between your feet and the cold floor.

    Pro Tip: Even something as simple as a draft stopper or “door snake” under your entry door can make a big difference.


    Step 3: Heat your RV efficiently.

    The key to staying warm isn’t just generating heat — it’s keeping it from escaping. Here are the best ways to heat your RV.

    • Furnace. Your built-in furnace and is your first lines of defense, but furnaces can drain propane quickly. Make sure they are well-maintained and use propane sparingly, because in some cases it is your only heating and cooking source.
    • Heat Pump. Some rigs have a heat-pump combo with their A/C unit, and if you have a good generator or are connected to shore power, they can be a great source of warmth.
    • Portable Heaters. Electric space heaters are a great backup for maintaining warmth in small areas. Look for energy-efficient models with safety features like tip-over protection. Know that they draw a lot of power, so if you are off grid, then always monitor your battery levels.
    • Heated Accessories. Heated mattress pads or blankets can make your sleeping area toasty without overworking your furnace. A regular heating pad that you find at a pharmacy is also a cheap but effective option for warming up under the covers at a lower electric draw.

    Pro Tip: Use a combination of heating sources to distribute warmth evenly while conserving energy. Know that propane and electricity can drain quickly if you are off-grid and using these methods. So, setting the temperature for a bearable level like 60 and wearing layers helps to conserve resources. 


    Step 4: Protect your water system from freezing

    Frozen pipes and tanks are a winter camper’s worst nightmare. Here’s how to keep your water system functional.

    • Heated Hoses. Invest in a heated water hose to keep your fresh water flowing. Plug it in before temperatures drop.
    • Tank Heaters. Install heating pads on your freshwater, gray, and black tanks. These will prevent freezing even in frigid conditions.
    • Insulate Exposed Pipes: Wrap exposed pipes in foam insulation or heat tape to keep them from freezing.

    Pro Tip: If it’s particularly cold, leave a faucet dripping slightly to keep water moving through the system and prevent freezing.


    Step 5: Plan for power and propane.

    I touched on this before, but keeping your RV warm in freezing temperatures often means relying on power and propane. Here’s how to stay prepared.

    • Stock Up. Always carry extra propane tanks if possible and/or fill up often to prevent running out.
    • Monitor Usage. Track your propane and power levels closely so you never run out of heat or battery power.
    • Portable Power. A good solar/battery setup or portable generators can help ensure you’re never left without power for heaters, electric blankets, et cetera.


    Step 6: Stay comfortable inside.

    Finally, don’t forget about creature comforts to make your RV feel like home, even when the weather outside is frightful.

    • Layer Up. Wear several layers of clothing to stay warm without overworking your heating system.
    • Hot Drinks or soup. For us, nothing beats a cup of hot coffee in the morning, but hot cocoa or tea on a cold night goes a long way in the winter—keep a thermos handy to enjoy throughout the day. Personally, I’m a big soup guy too, so any tasty soup for lunch or dinner helps warm me from the inside.
    • Extra blankets. Adding extra blankets and throws around the rig always helps, and it’s a great way to get cozy for movie night. Whether it feels like your RV is freezing, or not, it’s a good idea to keep these on-hand if you’re a four-season RVer.
    • Curtains. In some RVs, adding something as simple as curtain to separate a cold room from one that you are trying to warm can save on resources and keep the temperature where you are more comfortable.


    Warmly Embrace the Winter RV Adventure

    Yes, winter camping in an RV has its challenges. But with proper preparation, it’s an experience like no other. From snowmobiling Yellowstone to skiing and snowboarding just steps from our home on wheels, we have had some amazing winter RV experiences. That’s why recommend trying it — at least once. And if you follow these tips on how to insulate your rig, prep your heating sources, seal up drafts, and keep your resources in check, you will be able stay cozy and enjoy the magic of winter landscapes. Embrace the adventure, and remember: A well-prepped RV is a happy RV, even when the temperatures dip below freezing!

  • RV Sealant: The Winter Camper’s Best Friend

    RV Sealant: The Winter Camper’s Best Friend

    When winter camping calls, your RV’s ability to stay warm and weatherproof becomes the cornerstone of comfort. Whether you’re navigating snow-covered forests or enjoying a quiet lakeside retreat, the unsung hero of your camper’s winter readiness is its RV sealant.

    Making sure your RV is buttoned up effectively protects against cold drafts, moisture, and potential long-term damage. (And sealing up your RV can involved more than just RV sealant.) But to get the results you want, you need to know the basics. So, in this article, we’ll focus specifically on the different types of RV sealant, when and where to use them, and some top product recommendations to make your winter RV adventures cozy and trouble-free. 


    Why RV Sealants Matter in Winter

    As almost all RV owner know (or will soon find out), winter conditions can be brutal on an RV. Ice, snow, and fluctuating temperatures challenge even the most well-maintained rigs. Gaps in seals can allow freezing air or water to creep in, leading to drafty interiors, moisture damage, or even structural issues. This is where RV sealants come to the rescue, acting as a barrier to keep your RV protected and insulated. They help keep the weather out and the comfort inside of your home on wheels.


    Types of RV Sealants and Their Uses

    The world of RV sealants can feel overwhelming, but understanding the key types and their applications will help you choose the right product for each job.


    1. Self-Leveling Sealants

    Best for: Horizontal surfaces like your RV roof. Self-leveling sealants are designed to spread evenly as it cures, creating a smooth, watertight seal on flat areas.

    Top Pick: Dicor 501LSW Self-Leveling Lap Sealant

    • Why It’s Great: This sealant is a go-to for sealing seams and vents on rubber or TPO roofs. It’s UV-stabilized and resists cracking, which is essential during winter freezes and thaws.
    • Pro Tip: Apply on a clear, dry day to allow proper curing before exposing it to snow or rain.


    2. Non-Sag Sealants

    Best for: Vertical surfaces like sidewalls, windows, and doors. Non-sag sealants are formulated to stay in place without dripping or sagging, even on inclined surfaces.

    Top Pick: Geocel ProFlex RV Flexible Sealant

    • Why It’s Great: Known for its flexibility, ProFlex works well on fiberglass and aluminum and withstands temperature extremes.
    • Pro Tip: Use masking tape around your application area for a cleaner finish, especially if working on visible sections like windows.


    3. Butyl Tape

    Best for: Underneath fixtures like vents, skylights, and window frames. Butyl tap is pliable, adhesive tape that conforms to irregular surfaces for an excellent initial seal.

    Top Pick: 3M Butyl Tape

    • Why It’s Great: Ideal for creating a strong base seal before applying a lap or non-sag sealant over it.
    • Pro Tip: Always remove old butyl tape before reapplying to ensure a secure fit.


    4. Silicone-Based Sealants

    Best for: Non-porous surfaces, such as glass or metal. Silicone-based sealants provide excellent water resistance and flexibility, but not suitable for areas exposed to high UV light or on rubber roofs.

    Top Pick: Permatex Clear RTV Silicone Adhesive Sealant

    • Why It’s Great: This sealant is a reliable option for quick fixes on windows or mirrors.
    • Pro Tip: Use sparingly, as silicone can be challenging to remove and is incompatible with some RV surfaces.


    5. Specialty Sealants for Extreme Conditions

    Best for: Areas exposed to heavy wear or harsh weather. These specialty sealants are formulated to handle extreme cold, water immersion, or high movement.

    Top Pick: Sikaflex-221 Multi-Purpose Sealant

    • Why It’s Great: Known for its durability, it adheres to multiple surfaces, making it versatile for tough jobs.
    • Pro Tip: Allow extra curing time in colder temperatures for maximum adhesion.


    6. Flexible Sealants for All-Weather Versatility

    Best for: Sealing joints and cracks that require flexibility and durability. These sealants are weatherproof, paintable, and adaptable to movement. All of which make this kind of RV sealant ideal for RV surfaces prone to shifting or flexing.

    Top Pick: Flex Caulk Waterproof and Weatherproof Sealant

    • Why It’s Great: Flex Caulk stands out as an all-purpose, heavy-duty sealant perfect for RV use. Its flexible, weatherproof formula makes it an excellent choice for sealing around windows, vents, trim, or any area exposed to movement or environmental stress. The built-in trigger applicator simplifies application, ensuring a precise and clean finish without needing extra tools. Once cured, Flex Caulk dries to a paintable surface, blending seamlessly with your RV’s exterior for a polished, professional look.
    • Pro Tip: Plan your application based on weather conditions, as colder or humid environments may slightly extend curing time. For larger projects, keep a damp cloth handy to smooth out edges and achieve an even seal.


    My Personal Must Haves

    With space being a premium in an RV, if I could only have two on the road, it would Dicor Lap Sealant and Flex Caulk. Both are easy to apply and super reliable. We recently used Dicor for our full solar and electrical upgrade when installing new solar panels. Its self-leveling properties and durability made the process seamless and gave us peace of mind for long-term weatherproofing. You can check out the full installation in this video on our Instagram

    We also use Flex Caulk around the RV in a pinch because it works well and comes with a squeeze handle. So, it is quick and easy to use on the go. There is no caulk gun needed.


    When and Where to Apply Sealants

    Proper application is just as critical as choosing the right sealant. Here’s a breakdown of common areas that benefit from RV sealant maintenance.

    Roof Seams and Vents. Check for cracks or peeling sealant, especially around vents, skylights, and air conditioning units. Use self-leveling sealant for the best results.

    Windows and Doors. Inspect for gaps where cold air or moisture could seep in. Non-sag sealants or butyl tape work well here.

    Underbelly and Storage Compartments. Look for potential openings where road debris or water might infiltrate.

    Slide-Out Seals. Ensure the rubber seals are in good condition and supplement with a compatible sealant for gaps.


    Additional Tips for Winterizing with RV Sealant

    Preparation Is Key. Clean all surfaces thoroughly before applying sealant to ensure proper adhesion.

    Temperature Matters. Most sealants cure best above 50 degrees Fahrenheit. So, plan applications during milder winter days or indoors.

    Inspect Regularly. A quick monthly check of your seals can save you from expensive repairs down the line.

    RV sealants may not be the flashiest part of RV maintenance, but they’re undoubtedly among the most important. With the right RV sealant and application, you can ensure your RV stays warm, dry, and comfortable all winter long. Whether you’re boondocking in snowy mountains or parked at your favorite winter campground, a well-sealed RV is the key to worry-free adventures. Don’t overlook this essential step. Your RV (and your wallet) will thank you!

  • Storing Your RV for the Winter? Do It the Right Way

    Storing Your RV for the Winter? Do It the Right Way

    Like my spirit animal, the bear, when the days grow shorter and the air gets cooler, we RV owners know when it’s time to prepare for winter hibernation. But proper RV storage isn’t just about parking your rig and calling it a season. Rather, it means ensuring that when spring rolls around, your RV is ready to hit the road — without surprises. Trust me, as someone who’s learned a few lessons the hard way, I can tell you that prep is essential when storing your RV for the winter.

    So, if you want to do it the right way (you do), here are the steps you need to take. It involves a little bit of cleaning, a grasp of RV winterization, and a few common-sense pointers. But together, all of it will help keep your RV safe, sound, and ready for adventure once the frost melts.


    1. Thoroughly clean your RV — inside and out.

    Cleaning your home, whether on wheels or sticks and bricks, is never fun. That said, it’s way easier to do it early than late. Early, in this case, means when you’re storing your RV for the winter. Your future spring-self will thank you.

    • Exterior Cleaning. Start by giving your RV a good scrub to remove road grime, dirt, and lingering bugs. Apply a coat of wax to protect the exterior from harsh winter weather. Consider a good coat of wax. It not only shields against moisture but also makes spring cleaning much easier.
    • Interior Cleaning. Empty your fridge and pantry of all food. Vacuum the floors. And wipe down every surface. Mold, mildew, and pests are your winter enemies, and a clean RV helps keep them away. Don’t forget often-overlooked areas like storage compartments, under seats, and in the bathroom. You don’t want that road fry that fell under the seat a couple months back to be the reason you come back to ants or mice.


    Pro Tip: To prevent any unpleasant surprises, leave your refrigerator and freezer doors slightly open. A small box of baking soda can work wonders for absorbing odors during storage. But remember to properly clean, dry, and turn off your fridge beforehand.


    2. Winterize your plumbing system.

    Failing to winterize properly can lead to costly repairs, as I learned the hard way. One year, I didn’t drain and blow out the lines properly, and when I dewinterized, the outdoor shower connector had cracked. The result? Water shot everywhere. And our departure was delayed by a full day as I scrambled to clean up, make a run to the hardware store, and repair the issue. It’s the perfect example of learning from my mistakes.

    • Drain and Flush. Start by draining all water from your freshwater, gray, and black tanks. Use your RV’s water pump to remove any lingering water and then flush the system with nontoxic RV antifreeze to protect your pipes from freezing. You should also look for a low-point drain to help you with the process of clearing out your lines.
    • Water Heater. Turn off and drain the water heater completely. If your RV has a bypass kit, use it to save antifreeze during the process.
    • Protect Every Faucet. Pour a small amount of antifreeze into your sinks, shower drains, and toilet to protect the P-traps and seals.


    Pro Tip: Use a checklist to ensure no faucet or drain is overlooked. Trust me, one missed step can lead to a mini disaster come spring.


    3. Inspect and protect your RV exterior.

    Your RV’s exterior takes the brunt of the meanest season’s harshest conditions. So, give it some TLC before storing your RV for the winter.

    • Check Seals and Roof. Carefully inspect all seals, seams, and the roof for cracks or damage. Apply a weatherproof sealant if needed, to prevent any weak spots from getting worse.
    • Tires. Inflate your tires to the manufacturer’s recommended pressure and cover them to protect against UV rays and cold weather. If possible, use leveling blocks or lift the RV slightly to reduce stress on the tires.
    • RV Cover. Invest in a breathable, high-quality RV cover to shield your rig from snow, ice, and debris. Ensure the cover is snug to avoid moisture buildup underneath.


    Pro Tip: Park on a level surface and use wheel chocks to prevent movement during storage. If you’re parking on dirt or gravel, placing plywood or some leveling blocks under the tires can help prevent sinking.


    4. Handle your power system with care.

    Your RV’s power system needs special attention to ensure it’s ready to roar back to life in spring. 

    • Remove Batteries. If possible, remove your RV’s batteries and store them in a cool, dry place. Use a battery maintainer to keep them charged and ready.
    • If You Can’t Remove Batteries. Disconnect the battery terminals to prevent phantom power draw. Check the batteries periodically to ensure they maintain a charge and aren’t exposed to freezing temperatures.
    • Unplug Everything. Disconnect all appliances, electronics, and propane tanks. This not only prevents potential damage but also reduces the risk of fire.


    Pro Tip: For rigs equipped with solar panels, covering them up when storing your RV for the winter is good practice as well. It’s a quick way to shield them from the elements.


    5. Keep those pesky pests out.

    Nobody likes unwelcome guests, especially rodents and insects that can wreak havoc during storage.

    • Seal Entry Points. Inspect your RV for any small gaps, vents, or cracks. Use foam sealant or wire mesh to block these entry points.
    • Repellents and Traps. Place peppermint oil-soaked cotton balls, dryer sheets, or safe repellents inside your RV to deter rodents. Set traps in areas where pests might be tempted to nest.
    • Food-Free Zone. Remove all food and even crumbs to ensure pests aren’t attracted to your rig.


    Pro Tip: Regularly check your RV during storage for signs of pests. The earlier you catch an issue, the easier it will be to address.


    6. Store your RV smartly.

    The right storage location can make all the difference in protecting your RV.

    • Indoor Storage. Whenever possible, store your RV in a climate-controlled facility to shield it from extreme weather. This will also minimize so much of the prep work, because it won’t be in the elements.
    • Outdoor Storage. Choose a secure location away from overhanging trees or potential hazards. A good RV cover is essential in this case.
    • Parking Prep. Ensure your RV is on a level surface. For added protection, consider using skirting to block cold air from circulating under the RV.


    Pro Tip: Visit your RV periodically during the winter to check for any issues, such as leaks or pest damage.


    Bonus tip: Get a jump on your spring checklist.

    As you prepare your RV for winter, create a checklist for spring maintenance. Include tasks like recharging batteries, flushing the water system, inspecting seals, and cleaning both the interior and exterior. Having a plan ready will make your transition back to the road seamless.


    Please learn from my mistakes.

    Winter RV storage can seem daunting, but with a little effort, you can avoid costly repairs and ensure your rig is ready to roll when the snow melts. If there’s one thing I’ve learned, it’s that proper winterization is worth every minute. Trust me, a few hours of preparation now will save you from a lot of frustration later. So, grab your checklist, follow these tips, and give your RV the care it deserves this winter. 

  • The Fine Art of RV Flipping

    The Fine Art of RV Flipping

    The idea of flipping an RV is gaining a lot of attention lately. And it’s easy to see why. There’s something exciting about taking a used RV that’s seen better days and transforming it into a stunning home on wheels — whether you plan to sell it for profit or embark on new adventures. While RV flipping might sound glamorous, let’s be real: It’s no small feat. It requires a keen eye, a good amount of sweat equity, and a touch of patience to pull off a successful flip.

    If you’re interested in learning the ins and outs of RV flipping, this guide will walk you through the key steps and considerations, borrowing insights from other experienced flippers. Whether you’re an RV enthusiast looking for a new challenge or someone with a passion for renovations, here’s what you need to know about the fine art of RV flipping.


    1. Finding the Right RV to Flip

    The first step in flipping an RV is selecting the right vehicle to renovate. Much like with house flipping, finding a diamond in the rough is critical. You want an RV that might need cosmetic or moderate mechanical work—think peeling wallpaper, outdated furniture, or scuffed floors — but isn’t a complete money pit.

    Popular places to search for RVs to flip include online marketplaces like Facebook Marketplace, Craigslist, and, of course, RVTrader.com. RV auctions and local dealerships can also offer great deals. Look for RVs that are structurally sound with functional appliances and no significant water damage — though minor leaks can be manageable if caught early.

    Pro Tip: Before you purchase, conduct a thorough inspection. If you’re not confident in your ability to assess the condition, hire an RV technician to inspect it for you. A little extra money upfront, can save you thousands of dollars on the backend.


    2. Planning Your Renovation and Budget

    Budgeting is crucial when flipping an RV. Without a clear plan, renovation costs can quickly get out of hand. Start by identifying which areas need work. Common renovation projects include new flooring, reupholstering furniture, updating kitchen appliances, or giving the exterior a fresh coat of paint. Decide what’s worth the investment and what you can DIY to save money.

    Experienced flippers recommend making a detailed budget and setting aside a contingency fund for unexpected repairs. Materials like vinyl flooring, peel-and-stick tiles, and RV-specific paints are popular choices for creating an updated look without breaking the bank.

    Pro Tip: Keep the audience for your flipped RV in mind. Are you targeting weekend campers, full-timers, or families? This will guide your design and help you focus on upgrades that add value.


    3. Tackling the Renovation Process

    This is where the real work begins. Depending on the condition of the RV, renovations can range from simple touch-ups to full-scale remodels. Some of the most common projects include:

    • Flooring Replacement. Installing vinyl planks or laminate flooring for a modern look.
    • Painting Cabinets. A fresh coat of paint can brighten the space without replacing cabinetry.
    • Furniture Updates. Consider reupholstering old cushions or replacing dated seating with multi-functional furniture.
    • Lighting Upgrades. Swapping out old fixtures for modern, energy-efficient LED lights.
    • Exterior Touch-Ups. Refresh the exterior with decals or paint for added curb appeal.


    Renovating an RV requires patience and flexibility. Not every project will go as planned, and you may encounter hidden issues along the way — especially with plumbing or electrical components.

    Pro Tip: Document your process with photos or videos. Not only will this serve as a great “before and after” comparison, but it can also increase your RV’s appeal when it’s time to sell.


    4. Navigating Licensing and Legal Requirements

    If you’re planning to flip RVs as a business, familiarize yourself with local regulations. Depending on your state, you may need a dealer’s license if you flip a certain number of RVs per year. Make sure you have all the necessary paperwork — titles, bills of sale, and any repair receipts—to avoid issues when transferring ownership.

    Pro Tip: If you’re only planning to flip one RV as a personal project, double-check your state’s rules to see if you need to register as a dealer. Each state has different thresholds, so it’s better to be prepared than caught off guard. 


    5. Marketing and Selling Your Flipped RV

    Once the renovation is complete, it’s time to find the right buyer. High-quality photos are essential for online listings. Show off the best features of your RV and include detailed shots of any upgrades. Platforms like RVTrader.com, Facebook Marketplace, and specialized RV groups are great places to list your RV. 

    When pricing your flipped RV, research similar models to ensure your asking price aligns with the market. Be transparent about the renovations you’ve done and any known issues — it builds trust with potential buyers.

    Pro Tip: Offer extras like kitchenware or outdoor furniture as part of the sale. These small touches can make your RV stand out and justify a slightly higher price. If you can film a quick video tour in three to five minutes, that goes such a long way.


    6. Profit or Keep? Deciding the Next Step

    For many RV flippers, the ultimate goal is to sell the RV and turn a profit. However, some people find that they’ve fallen in love with their renovated rig and decide to keep it for personal use. Either option is a win. If you choose to sell, you’ll have the satisfaction of knowing your hard work paid off. If you keep it, you have a new adventure vehicle that’s customized to your liking.

    Pro Tip: If you plan to flip another RV, track your expenses, lessons learned, and selling process. This will streamline your next flip and help you maximize profits.


    Lessons from the Experts: What to Watch Out For

    From following stories shared by seasoned RV flippers, there are a few common pitfalls to avoid:

    1. Ignoring Water Damage. Even minor leaks can lead to costly repairs. Always inspect for signs of water damage.
    2. Underestimating Time and Costs. Renovations often take longer and cost more than expected — plan accordingly.
    3. Skipping the Market Research. Understanding what buyers want can help you focus on the right upgrades and sell your RV faster.
    4. Falling in Love with Your Project. It’s easy to get attached, but if your goal is to flip for profit, you’ll need to stay objective about costs.


    Need a Little More Inspiration?

    If you’ve gotten this far, just remember that renovations take time, and unexpected challenges are part of the process. But to show you that anyone can get started, check out this inspiring story of a flipper who built a business from scratch: The Flipping Nomad: Homeless to RV Flipping Boss.


    The Thrill of the Flip

    Flipping an RV is not just about making money — it’s about the thrill of transformation. There’s something incredibly satisfying about taking an older RV and breathing new life into it, whether it’s to sell or to hit the road yourself. While it takes time, effort, and a bit of trial and error, the reward is worth it.

    Whether you’re looking to flip your first RV or have a passion for transforming these rolling homes, remember: each flip is a learning experience. Approach it with patience, flexibility, and a sense of adventure, and you’ll discover that RV flipping isn’t just a project — it’s a journey.

    So, if you’ve ever been tempted to take on an RV flip, why not dive in? Who knows — your next great adventure might start with a little paint, some new flooring, and a lot of creativity!

  • Alright! I’ll Empty the Black Tank

    Alright! I’ll Empty the Black Tank

    If you’ve spent any time RVing, you’ve probably discovered that not all parts of the adventure are scenic sunsets and s’mores by the campfire. One unavoidable task that every RVer has to face is emptying the black tank. And necessity of that task pushes forward the uncomfortable question: Who is going to empty the black tank? In my marriage, like many other RV families we’ve met on the road, this fun assignment is taken over by one person. And that person is me. I have offered to be the bearer of black news in my marriage, and it gives me a few points every time. Happy poopsy-free wife, happy life.

    While it may not be the highlight of your trip, mastering this job is essential to keeping your home on wheels running smoothly. (And trust us, it’s a whole lot easier with the right preparation and tools.) With a little know-how, you’ll soon have this process down to a science, leaving more time for the parts of RV life you love.

    Ready to dive in? Let’s get started!


    Step 1: Gather the Right Tools (They Make All the Difference)

    When it comes to emptying your black tank, preparation is key. Having the right tools on hand not only makes the process more efficient but also keeps things clean and—most importantly—minimizes unpleasant surprises. Here’s a checklist of what you’ll need:

    • Sewer Hose and Fittings. A durable, flexible sewer hose, often affectionately called the “stinky slinky,” ensures a secure connection between your RV and the dump station.
    • Disposable Gloves. These are non-negotiable. Protect your hands with a thick, disposable pair for each dump session.
    • Clear Hose Extension.While it’s not the prettiest part of the process, a clear extension lets you see when the tank is completely flushed.
    • Sewer Hose Support. Use a support to create a smooth slope for the hose, helping gravity do the work and preventing any unpleasant backups.


    Pro Tip: Store all sewer-related tools in a separate, labeled bin. This ensures they stay away from other camping gear, preventing contamination and making cleanup quick and easy.


    Step 2: Position Your RV for Success (Double-Checking Matters)

    Whether you’re at a dump station or a full-hookup campsite, how you position your RV makes a difference. You’ll want to park close enough that your sewer hose can reach the dump port comfortably without stretching. Take a few extra moments to ensure the ground is level and that the sewer connection is secure.

    When setting up, always double-check that you’ve attached the hose to the correct outlet. It sounds obvious, but on some rigs, the gray and black tank handles look identical.  And you don’t want any mishaps — trust us on this one!

    Pro Tip: Always empty the black tank first before opening the gray tank valve. This way, the gray water helps flush out the hose, leaving it cleaner and reducing odors.


    Step 3: Hook Up and Empty the Black Tank (Slow and Steady Wins the Race)

    Now comes the main event. Start by putting on your gloves and connecting your sewer hose to the RV’s black tank outlet. Secure the other end at the dump station, and make sure everything is locked tight to avoid leaks. Slowly open the black tank valve—don’t rush it. Let the contents drain completely, and give it a few extra moments to ensure everything flows out.

    If your RV has a built-in black tank flush, connect a dedicated hose to the flush inlet. Running fresh water through the tank helps clear out any stubborn waste or toilet paper that might linger. No built-in flush? No problem—a portable rinse wand or backflow connector like this will do the trick just fine.

    Pro Tip: Make sure that your black tank valve is closed and add a little extra water from your RV toilet foot-flush – I tend to add just a few seconds – so that what is inevitably left over in the tank doesn’t completely dry and get worse.


    Step 4: Flush the Gray Tank and Wrap It Up (You’ve Done the Dirty Work)

    Once the black tank is empty and closed, it’s time to open the gray tank valve. The soapy water from your sinks and shower will flush out any residue in the sewer hose, leaving it cleaner and fresher. This step also makes disconnecting the hose far less messy.

    After the tanks are empty, give your sewer hose a quick rinse — many dump stations have a non-potable water spigot for this purpose. Once everything is clean, disconnect the hose, cap the outlets, and store everything neatly in your designated bin.

    Pro Tip: Perform one final dump and rinse at the end of each trip if possible. This ensures your tanks stay clean during storage and prevents buildup that could lead to clogs or odors later on.


    Step 5: Use Tank Treatments to Keep Things Fresh (Say Goodbye to Odors)

    To keep your black tank smelling fresh and functioning properly, it’s a good idea to use an RV-specific tank treatment. These treatments help break down waste and prevent odors from becoming an issue, especially during warmer months. Drop-in pods are a popular option because they’re easy to use—just toss one into the toilet, and you’re good to go.

    If you’re staying at a full-hookup campsite, resist the urge to leave the black tank valve open all the time. Keeping the valve closed allows the tank to fill, which helps waste break down more effectively and prevents unpleasant buildup known as the “pyramid of doom.”

    Pro Tip: Always keep your drinking water hose and black tank rinse hose separate — cross-contamination is the last thing you want on an RV trip!


    Avoiding Common Mistakes (Because We’ve All Been There)

    1. Forgetting Gloves. Even if you think you’re quick, wear them. You’ll thank yourself later.
    2. Skipping the Tank Rinse. It only takes a few extra minutes and will save you headaches in the long run.
    3. Leaving the Black Tank Valve Open at All Times. This can lead to waste buildup, causing clogs and foul odors.
    4. Not Checking Connections. A loose fitting can turn into a big mess fast—double-check everything before opening valves.


    Wrap-Up: Embrace the Process and Enjoy the Journey

    Emptying the black tank may not be the highlight of your RV trip, but it’s a necessary part of the lifestyle. Once you’ve mastered the process, it becomes just another routine task, like setting up camp or cooking dinner outdoors. Plus, knowing you have clean tanks means less stress and more time to focus on the adventures that lie ahead. With the right tools, a little patience, and some practice, you’ll be able to handle this job with confidence. And, who knows? You might even become the go-to tank expert in your campground! (If that’s something you actually like).

    Happy RVing, and may your tanks always flow smoothly! Also, if you’d like a little video tutorial walking you through the process step by step, watch this.

  • Rest Assured! How to Add More Sleep Space to Your Camper

    Rest Assured! How to Add More Sleep Space to Your Camper

    Who doesn’t love a great family or friend road trip? There’s something about the RV life that simply begs to be shared. But once you begin adding extra RVers to your normal travel group, space can start getting tight — especially if you’re pushing against your RV’s standard sleeping capacity. But this is exactly the kind of challenge we campers love to tackle. And yes, we’ve got some ideas for you that should come in handy if you’re looking to add more sleep space to your camper.

    Rest assured, whether you need extra sleeping areas for kids, friends, or extended family, almost all RVs can be creatively modified to maximize space. So let’s explore a range of clever options — from fold-out beds to portable sleeping solutions — to ensure everyone gets a good night’s sleep without sacrificing comfort or functionality.


    1. Upgrade to Sofa Beds and Convertible Dinettes

    Replacing a standard sofa with a fold-out bed gives you an easy-to-use sleeping area without taking up additional space. Many RVers also upgrade their dinettes to models that transform into beds by lowering the table and rearranging the cushions. These dual-purpose solutions are ideal for compact RVs where maximizing space is key.

    Pro Tip: Opt for sofas with memory foam mattresses to enhance guest comfort. For dinettes, consider cushions with water-resistant covers to protect against spills.

    Expansion Idea: Adding a sleeper sofa with storage underneath can offer even more functionality, providing space to stash linens and pillows. Similarly, you can find fold-out dinette sets that convert faster with fewer cushion adjustments, minimizing setup time when you have tired travelers.


    2. Install Collapsible Bunk Beds or a Loft Area

    Collapsible bunk beds are a great space-saving solution. They fold neatly against the wall during the day, leaving plenty of room for activities. For RVs with higher ceilings, installing a loft bed adds a tucked-away sleeping space for kids or adventurous guests. Toy haulers and Class A motorhomes with raised ceilings are perfect candidates for loft installations.

    Pro Tip: Use lightweight ladders or step stools to provide safe and easy access to lofts or upper bunks.

    Expansion Idea: Consider adding privacy curtains around bunks or loft areas to create personal space. Some RVers install bunk beds with built-in storage cubbies or USB ports for added convenience, making them cozy, tech-friendly sleeping spaces.


    3. Flip Down Murphy Beds and Convertible Front Seats

    Murphy beds are popular because they fold up against the wall, creating open space during the day. These beds offer the benefit of a traditional mattress without permanently occupying floor space. In motorhomes, front captain’s chairs can be converted into temporary beds by using a board or cot between them — perfect for shorter stays or kids.

    Pro Tip: Install a locking mechanism on Murphy beds to ensure they stay secure during travel.

    Expansion Idea: If you install a Murphy bed, consider integrating shelving or a desk that folds on the underside for even more utility. Some RVers take it a step further by adding fold-out nightstands that swing into place when the bed is lowered.


    4. Max Out Inflatable and Flexible Options

    Air mattresses provide a flexible solution, ideal for guests or outdoor use. When deflated, they take up minimal storage space. Fold-out lounge chairs can double as single beds, fitting easily into smaller spaces. For those towing trailers with pickup trucks, the truck bed can serve as an extra sleeping area using an air mattress or sleeping pad, ideal for summer camping.

    Pro Tip: Choose a self-inflating air mattress to reduce setup time and store it in a protective case to prevent punctures.

    Expansion Idea: Consider adding a truck bed tent for privacy and protection if you plan to sleep outside the RV. 


    5. Hang a Hammock — Indoors or Out 

    Hammocks provide a lightweight, versatile sleeping option, both inside and outside the RV. They’re perfect for warm climates or adventurous guests who want to sleep under the stars. Some RVs have built-in anchor points to accommodate indoor hammock setups, adding an extra bed without taking up permanent space.

    Pro Tip: Store a compact hammock stand in your RV for times when trees or other anchor points aren’t available.

    Expansion Idea: Consider using a two-person hammock to increase sleeping capacity. Adding mosquito netting and a rain fly to outdoor hammocks can make them even more versatile, extending their use in various weather conditions.


    6. Embrace Slide-Out Bed Extensions

    RVs with slide-outs provide a perfect opportunity to expand sleeping areas. Some RVs come with couches, recliners, desks, or other options that take up a slide-out, and this is the perfect location to add sleeping through one of the previously mentioned conversions.

    Pro Tip: Add rubber or fabric seals to your slide-outs to prevent drafts from coming in, especially during colder weather.

    Expansion Idea: Use slide-out spaces for multi-use setups — such as adding a slide-out dining area that converts into a bed at night. This dual-purpose setup maximizes both sleeping and dining comfort.


    7. Bring Portable Bed Platforms

    Portable cots are an excellent solution for temporary guests. They are lightweight, easy to set up, and can be stored compactly when not in use. Folding bed platforms are another space-efficient option, providing added support for air mattresses or sleeping pads.

    Pro Tip: Keep a set of travel-friendly bedding with portable cots for a quick and comfortable sleeping solution.

    Expansion Idea: Choose cots with built-in organizers or side pockets for added convenience. Some RVers opt for cots with mosquito netting for outdoor use, making them versatile for both indoor and outdoor sleeping.


    8. Tack on a Tent Extension

    When indoor sleeping arrangements fill up, consider adding a tent, tent extension, or canopy to your RV. While regular tents store and are pretty universal, some tents attach directly to RV awnings, providing a protected space for extra sleepers. This setup is perfect for warm-weather camping and can also serve as a gear storage area. Also, if you’re looking for how to add more sleep space to your camper, most solutions end up subdivided your current RV space. What’s beautiful about this is that it literally adds space instead of subtracting it.

    Pro Tip: Choose a tent that’s easy to set up, and if you want the RV awning version, make sure to research that the option you choose fits your RV and awning.

    Expansion Idea: Add portable heaters or fans to make the tent extension more comfortable during temperature fluctuations. Some RVers also add inflatable mattresses inside the tent for a more luxurious outdoor sleeping experience.


    Bonus Section: Kid-Friendly Sleeping Spaces

    Traveling with kids requires thoughtful planning, especially when it comes to sleeping arrangements. Creating comfortable, fun sleeping spaces can make the journey smoother for everyone. Also, kids do have an inherent advantage — they’re kid-size. So whatever space you have goes further. Another advantage is that kids are usually more eager to embrace the adventure factor of an unconventional sleeping space. When you’re looking how to add more sleep space to your camper, those kinds of things add up. With that being said, here are a few suggestions for young kids.

    • Portable Cribs or Pack-and-Play. These are essential for families with toddlers, providing a familiar place for little ones to sleep. They fit well in slide-outs or closets.
    • Sleeping Cubbies. Use under-table spaces or small nooks to create fun sleeping cubbies for young children. Decorate them with pillows and fairy lights to make them extra cozy.
    • Hanging Bunk Pods. These lightweight fabric pods hang from the ceiling or bunk bed frame, providing a unique sleeping area for kids. They save space and are a big hit with adventurous little ones.


    Pro Tip: Create a bedtime routine to help kids adjust to sleeping in new environments. Small touches, like favorite blankets or bedtime stories, can make all the difference.


    Want to Add More Sleep Space to Your Camper? It’s All About Attitude

    Creating extra sleeping space in your RV doesn’t have to be complicated. As shown above, there are lots of ways to add more sleep space to your camper. From fold-out beds and loft areas to air mattresses and outdoor hammocks, there are countless ways to make your RV comfortable for guests and family. It’s just about thinking through what work for you and your RV. Then getting after it. With thoughtful planning and a few smart upgrades, your RV can become a welcoming home for everyone — no matter how many people hit the road with you. (Just make sure you’re stocked up for everything else you need for a great night’s sleep in your RV.) Safe travels and sweet dreams!

  • Hail to the Chief: RVing the Inauguration

    Hail to the Chief: RVing the Inauguration

    Regardless of what side of the aisle you may fall on politically, the change of power in our beautiful country is something to be celebrated. That collective respect for rule of law is a big reason why our constitutional republic is a bastion of light for democracy around the world. The presidential inauguration may be the best occasion to celebrate the principles that guarantee our freedom. And RVing the inauguration just may be the most appropriate — and American — way to attend. 

    Presidential inauguration historically combine historic speeches, and star-studded performances. For families with young children especially, it can be a great learning experience. Whether you’re a political enthusiast, a history buff, or simply want to witness history in the making, RVing the inauguration in Washington, D.C. offers an adventurous and flexible way to attend.

    Here’s your ultimate guide to planning the trip.


    Why Attend an Inauguration

    Attending a presidential inauguration is about more than politics. It’s about experiencing a moment where tradition meets the future. It’s a moment that is meant for citizens to experience. Over the years, inaugurations have featured memorable moments like John F. Kennedy’s inspiring speech where he said, “Ask not what your country can do for you,” and where Ronald Reagan optimistically shared his vision of a “shining city on a hill.” 

    These events offer a chance to witness history in person, alongside thousands of others united by a shared sense of occasion. While the majority of attendees tend to be aligned politically with the winner of the election, it can still be enjoyed and attended peacefully by all.

    With performances from world-renowned artists, speeches designed to inspire unity. With the picturesque backdrop of the National Mall, the inauguration is truly a once-in-a-lifetime experience. And it can be even more special when paired with an RV adventure.


    Where to Park Your RV

    While Washington, D.C. itself isn’t designed for RV camping, nearby areas offer excellent options. (And because of the extraordinary number of things to see, this year we even declared it RV City U.S.A.) Just keep in mind that reservations are essential and fill up quickly for inauguration week.

    1. Cherry Hill Park (College Park, MD). Located about 12 miles from downtown D.C., this full-service RV park offers easy access to the city via public transit. Amenities include Wi-Fi, a shuttle to the Metro, and on-site laundry facilities.
    2. Greenbelt Campground (Greenbelt, MD). This national park campground offers a more rustic experience with fewer amenities. But it’s a budget-friendly option close to the Metro. Important Note: Ensure your RV can fit within their size restrictions (30 feet).
    3. Capitol KOA (Millersville, MD). Roughly 30 miles from the Capitol, this KOA offers a quieter, family-friendly atmosphere. The campground features a shuttle service to downtown D.C. during busy times.
    4. Bull Run Regional Park (Centreville, VA). Situated about 30 miles west of D.C., this park offers spacious campsites and a peaceful setting away from the bustle.
    5. Harvest Host or BoonDockers Welcome: Sometimes a change of pace and simple local spot to call home can be fun experience.


    How to Attend the Inauguration

    Tickets

    This year, Inauguration Day is January 20, 2025. While general admission to the National Mall is free, tickets are required for reserved sections near the Capitol. A quick Google search will help get you started, but most tickets originate with a request to your respective congressman or congresswoman. Plan ahead though, because these tickets are limited, and they can go quickly.


    The National Mall

    Arrive early to secure a good viewing spot. Gates typically open around 6 a.m., and screenings at security checkpoints can take time due to the importance of the occasion and the attendees. Remember, anything that involves politicians, especially the President of the United States, will have extremely heightened security — and for good reason. The National Mall fills quickly. So, bring snacks, warm clothing, and comfortable shoes for a day of standing and walking.


    Transportation

    RVing the inauguration doesn’t mean parking your rig on the National Mall in your best Cousin Eddy style. Driving into D.C. on Inauguration Day is not recommended due to road closures and heightened security. I highly suggest you avoid driving yourself for several days before and after the event, especially if you are visiting and are not familiar with the area. D.C. is known for its mass transit, and they have a lot of experience dealing with this particular event. So, just arrive early and let experts shuttle you around the city stress free. The two best options are probably the Metro and biking or walking.

    • Metro. Use the Metro system, which offers direct access to the National Mall. Stations like Smithsonian, Federal Center SW, and Capitol South are ideal for getting close to the action.
    • Bike or Walk. If you’re camping nearby, consider biking or walking into the city for added flexibility. Electric bikes or scooters can be a fun and amazing experience for an event like this.


    What Else to Do in D.C.

    Washington, D.C., transforms into a hub of activity during the inauguration, but there’s more to explore before and after the big day.

    1. Smithsonian Museums. Free and world-class, these museums are ideal for filling downtime. Favorites include the National Museum of American History and the National Air and Space Museum.
    2. National Monuments. Visit iconic landmarks like the Lincoln Memorial, Washington Monument, and Martin Luther King Jr. Memorial.
    3. Georgetown. This historic neighborhood offers charming streets, boutique shopping, and excellent dining options.
    4. Dining in D.C. From food trucks on the National Mall to Michelin-starred restaurants, D.C.’s culinary scene caters to all tastes. It is a foodie lover’s paradise!


    What to Pack When RVing the Inauguration

    • Cold-Weather Gear. January in D.C. often brings freezing temperatures, so pack layers, gloves, and hats. Know that it might even snow.
    • Portable Chairs. Essential for long waits on the National Mall.
    • Snacks and Water. Food options can be limited during the event, so bring a little something to eat and drink — especially if your health needs require snacks or water.
    • Charging Supplies. Keep devices charged with portable power bank like this to capture and navigate the day without worry that your battery will die.
    • Extra Cash. D.C. is among the most expensive cities in the US, so know that things may be more expensive than you’re used to. And cash is king, especially when you pass by any street vendor.


    Bonus Tips for RVers

    1. Secure Your Campsite Early. Many RV parks near D.C. book up as soon as inauguration dates are announced.
    2. Plan Your Routes. Be aware of road closures and adjust your travel plans accordingly.
    3. Know the Rules. Security measures are strict, so familiarize yourself with what is and isn’t allowed on the National Mall.
    4. Have Fun … and Patience. This event is meant to be fun and memorable for the right reasons. So, try to remember that when you inevitably find yourself in a long line or little turned around with so many people and road closures.


    RVing the inauguration really is a memorable and special experience. It combines the freedom of the open road with the excitement of being part of history. From finding the perfect campsite to exploring the cultural and culinary treasures of Washington, D.C., planning ahead ensures a smooth and enjoyable trip. So, pack your RV, and get ready to hail to the chief in the most adventurous way possible!

  • The Unwritten Rules of Snowbirding

    The Unwritten Rules of Snowbirding

    Ah, that seasonal migration that sees thousands, maybe even millions, of birds heading south for the winter. What a sight to behold — on the highways. And see it you will if you join flocks of RVs in adjusting their latitude for a friendlier clime. In the RV world, we call this snowbirding. In the winter, many RVers seek a warmer, cozier nest to park at during the cold months. But if you’d like to do the same, you might have a few questions as a first timer. How can you make your seasonal RV migration the perfect mix of adventure, relaxation, and exploration?

    Well, as with any lifestyle, there are unwritten rules to help snowbirds maintain harmony with others and ensure a smooth journey. While some may ascribe these rules to instinct, we’ll take a moment to write down the unwritten for the uninitiated. So, whether you’re headed for the sunny beaches of Florida, the deserts of Arizona, or exploring unique stops along the way, following these guidelines can make your experience (and those of your fellow travelers) even better.


    1. Respect Your Neighbors and Their Space

    When RV parks and campgrounds are packed with snowbirds, shared respect becomes essential. Keep noise levels low, especially during early mornings and late evenings. This includes ensuring that generators are used responsibly and that loud activities, like music or social gatherings, don’t disturb others.

    Tip: Always park your RV and set up equipment — such as awnings, tables, and chairs — within your designated space. Try not to walk through anyone else’s site either. Encroaching on neighboring spots or common areas can lead to tension. And since you may be neighbors for a season, tension is best avoided from the get go. A little spatial awareness goes a long way! 


    2. Book Early and Stay Flexible

    Popular snowbird destinations like Florida, Texas, and Arizona fill up quickly, especially during peak season from November to March. Reserving sites in advance ensures you won’t be left scrambling for a place to stay. However, flexibility is equally important — whether it’s adjusting your route due to weather or switching campgrounds for better amenities.

    Tip: Keep your itinerary fluid and have a backup plan. Sometimes, the unexpected turns out to be the most memorable part of the journey. I can’t tell you how many times we have had more fun with the unexpected than the planned.


    3. Keep Your Site Clean and Tidy

    One of the simplest ways to be a good snowbird neighbor is to keep your space neat and follow campground guidelines for trash disposal and recycling. This not only creates a welcoming environment but also shows respect for the park staff and other RVers.

    Tip: Implement the Leave No Trace principle by ensuring your site is clean when you leave. Keeping outdoor areas tidy also helps prevent wildlife from scavenging near campsites.


    4. Introduce Yourself and Share Resources

    While snowbirding offers plenty of quiet moments, it also provides great opportunities to meet new people. A simple introduction to your neighbors can lead to new friendships or valuable tips about the area. Additionally, sharing tools or resources — like a ladder, grill, or even extra supplies — encourages a sense of community.

    Tip: Participate in campground activities, such as potlucks, bingo nights, or local outings. These events foster camaraderie and help create lasting memories on the road.


    5. Stay Connected and Prepared for Emergencies

    Staying in touch with family and monitoring weather or road conditions are essential parts of snowbirding. Equip your RV with mobile hotspots, Starlink, or some personal Wi-Fi. Try to keep campground Wi-Fi as a final option to stay connected, because more often than not, campground Wi-Fi can be slow or spotty. Preparation for emergencies — such as carrying a first aid kit, spare parts, and essential tools — ensures you’ll be ready for the unexpected.

    Tip: Use navigation apps like Google Maps or RV-specific tools to plan routes and avoid low-clearance bridges or challenging roads. Regular maintenance checks on your RV help prevent breakdowns on the journey.


    6. Respect Local Wildlife and Nature

    Snowbirding often takes you through nature-rich areas. While encounters with wildlife can be exciting, it’s essential to keep a respectful distance. Feeding animals or leaving food scraps out can create dangerous situations for both you and the animals, and you should never do that without the supervision and encouragement of local rangers or professionals that deal with animals.

    Tip: Follow local guidelines about wildlife safety and be mindful when hiking or exploring. Always store food securely to avoid attracting unwanted critters.


    7. Embrace a Minimalist Approach to Packing

    When RV living becomes your seasonal lifestyle, packing smart is key. Focus on multiuse items, such as convertible furniture or seasonal clothing that can be layered. The more organized you are, the less clutter you’ll need to manage. Remember that it is usually easier to stop and buy something as needed than to overpack and be forced to get rid of something if space becomes an issue.

    Tip: Invest in storage solutions like bins, organizers, or vacuum-sealed bags to make the most of your space. Having a “one-in, one-out” rule for new items helps prevent overcrowding. 


    8. Adapt to the Campground Culture

    Each RV park or campground has its unique vibe. Some might bustle with activities, while others might cater to those seeking peace and solitude. Take the time to observe and adapt to the culture of each location.

    Tip: If a campground promotes quiet time, embrace it. If it encourages social events, join in! Understanding the rhythm of your environment ensures an enjoyable experience for everyone. If you prefer a specific type of activity or culture, do some research well in advance to find a couple of campground options that meet your criteria.


    9. Know and Follow the Rules

    Every campground or RV park has specific rules — covering everything from quiet hours and pet policies to check-in/check-out procedures. Following these guidelines ensures smooth operations for the park and keeps you in good standing with management. If you are in one campground for a long time, it is always good to be in good standing with the staff, as they can make or break your stay.

    Tip: If traveling with pets, familiarize yourself with pet-friendly parks and follow leash laws. Bring waste bags and be diligent about cleaning up after your furry companions — this always gives bonus points with staff and fellow RVers alike.


    10. Enjoy the Journey

    Snowbirding is more than just escaping the cold — it’s about embracing a lifestyle of exploration and having fun. Take time to savor the small moments, whether it’s enjoying a sunrise at the beach or sharing stories around a campfire.

    Tip: Keep a travel journal or start a photo blog to document your adventures. Celebrating each step of the journey helps you stay present and appreciate the unique experiences snowbirding offers.


    Bonus Section: Winterizing for the Journey South

    Even though snowbirds head for warmer climates, winterizing your RV before departure may still be necessary if you will be traveling through freezing temperatures before arriving to your desired final destination. Freezing temperatures can damage pipes, tanks, and hoses, so preparation is crucial.

    • Winterize Plumbing. Drain your freshwater and wastewater systems if traveling through freezing zones. Use RV antifreeze to protect pipes from damage.
    • Heated Water Hose. Bring a heated water hose if you’ll need water connections during chilly stops.
    • Monitor Temperatures. Keep an eye on the weather forecast, and consider using tank heaters or insulation to prevent freezing.
    • Interior Warmth. A portable heater can help maintain interior comfort during travel through colder regions.


    Snowbirding offers the opportunity to escape the winter chill and explore new destinations, all while building a sense of community on the road. By following these unwritten rules — respecting neighbors, planning ahead, staying flexible, and embracing nature — you can make the most of your snowbirding adventure. And who knows, you may just come away with some new lifelong friendships.

    So, now that the temps are dropping, prepare your RV, stay connected, and enjoy the journey south, one sunny destination at a time. Safe travels!

  • 5 Ways to Make a Wow-Worthy RV

    5 Ways to Make a Wow-Worthy RV

    There’s something about stepping into an RV that feels like you’ve opened the door to adventure – literally and figuratively – as that door, once secured behind you, can whisk you away to some of the most memorable experiences of your life. Trust me, I know. After six years of RVing, you would think that my wife and I would be ready to hand in our keys, but we know that the open road and RV travel will always be in our blood.

    But what if your RV could be more than just a means to travel – what if it could be a showstopper and head turning event unto itself? How do you actually wow everyone who steps inside (or catches a glimpse from the outside)? Whether you’re looking to enhance the interior for your own comfort or want to turn heads at the campground, we’ve got five great ways to transform your RV into a jaw-dropping, wow-worthy home on wheels. Let’s get started!

    1. Upgrade Your Flooring

    One of the easiest ways to give your RV an instant “wow” factor is by upgrading the flooring. While some manufacturers are listening to us long-time RVers about stepping their interior game up to feel more like a true home, many older RVs feel dated and come with basic linoleum or carpet that can wear down quickly and hold onto dirt, stains, and odors. Switching to something more durable and stylish like vinyl plank flooring or laminate can completely transform the space, making it feel more like a true home. Plus, these options are easy to clean and maintain, which is essential for life on the road.

    Pro Tips

    Make sure to calculate the weight difference between your old and new floors so that you know what your final weight capacity will be, and that you’re not going over your suggested weight with a new heavier material.

    Also, choose a flooring material that can handle the temperature fluctuations and constant earthquake-like conditions inside your RV. You don’t want something that will warp or crack due to weather changes or washboard roads!

    DIY Suggestion

    Check out this video from The Flippin’ Tilbys about RV floor replacement by an expert DIY couple for good options and a detailed walkthrough.

    2. Revamp the Kitchen Space

    Whether you have a huge fifth-wheel or a Class B van, your RV kitchen can make a big impression! To jumpstart a kitchen upgrade, begin with updating the cabinetry with a fresh coat of paint or new hardware to give it a modern feel. Consider adding a peel-and-stick backsplash for a quick and easy pop of color or texture. If you’re willing to invest a bit more, upgrading the countertops or installing more efficient appliances (think compact microwaves or induction cooktops) can make a world of difference.

    Pro Tip

    Opt for lightweight materials when doing any kitchen renovations to avoid adding unnecessary weight to your rig. You’ll see this as a common theme, because weight is always at a premium in RVs and can make the difference between safe and fun ride or a dangerous experience.

    DIY Suggestion

    Peel-and-stick backsplash tiles are not only affordable but also give your kitchen an updated, custom look without a major renovation effort. You can also swap out dated handles and knobs for a sleek new look.

    3. Brighten It Up with Lighting

    Nothing says “wow” like walking into a bright, well-lit space – or so my wife loves to tell me. If your RV feels a little dark and dingy, upgrading the lighting can make a huge impact. Replace old, dated fixtures with modern LED lighting, and consider adding battery-operated under-cabinet lights in the kitchen or reading lights in the bedroom area. For a more dramatic effect, install dimmable LED strip lights around the ceiling or furniture to create a cozy atmosphere at night. There are even some that come with colors and connect to apps on your phone. This is a fun mood changer that is easy to install and adds a little flair.

    Pro Tip

    Battery-operated LED lights are a great option for RVers who want to avoid complicated wiring and want to save power when boondocking. They’re easy to install and perfect for creating ambiance without using shore power.

    DIY Suggestion

    If you have a cabinet or pantry that you know you will be using during dark hours and don’t want to wake anyone up, then you can look into some smaller motion-sensor LED lights.

    4. Add Personalized Decor

    Your RV should reflect your personality, and adding personal touches can make it feel more like home. Think about adding things like throw pillows, cozy blankets, artwork, or even some greenery (faux plants work well if you don’t want to worry about maintenance). A few strategically placed decor items can really elevate your space and make it feel inviting and warm. My wife has done this in every RV we’ve had, and you can’t imagine what a welcome atmosphere just a few of these can create.

    Pro Tip

    Use removable hooks or adhesive strips like Command strips to hang your decor and avoid damaging your RV walls. It’s important to keep things lightweight and easily removable for when you’re rolling down the road.

    DIY Suggestion

    Consider framing some of your favorite travel photos or printing out a custom map of places you’ve visited to create a fun, travel-themed gallery wall. Check out my wife’s picture experience wall in our newest RV.

    5. Upgrade the Exterior with an Awning or Outdoor Space

    Let’s not forget the outside of your RV! Creating a functional and stylish outdoor space can take your RV setup from basic to amazing. If your RV doesn’t already have an awning, adding one can create a perfect shaded space for lounging, cooking, or hanging out with friends and family. You can also create an inviting outdoor area with outdoor furniture, string lights, a portable grill, and a few outdoor rugs. Let’s face it, when you are out RVing in the middle of nature with friends and family, the goal is to be outside, and if you make the outside that much more inviting, you’ll find yourself lounging around a campfire, sharing stories with your loved ones, late into the night.

    Pro Tip

    Opt for lightweight, foldable outdoor furniture to save space and reduce your RV’s weight. A portable fire pit is also a great addition for evenings spent under the stars.

    DIY Suggestion

    Check out this easy-to-install awning shade for an instant outdoor upgrade. Adding some solar string lights – make sure they are lightweight and plastic – for an RV safe and eco-friendly glow at night!

    Bonus Tip: Regular Maintenance Goes a Long Way

    While these upgrades will wow your guests, keeping your RV in top condition with regular maintenance is just as important to make sure your home on wheels is functioning smoothly while you’re adding all the bells and whistles.

    Making your RV a wow-worthy space doesn’t have to break the bank. With a few key upgrades and some creativity, you can create an inviting, personalized home on wheels that will impress everyone at the campground – and make your travels even more enjoyable. Happy renovating, and may your RV adventures always be filled with great memories!