Author: Gabriel Rivero

  • Repairing RV Water Damage: Stains, Mold, and More

    Repairing RV Water Damage: Stains, Mold, and More

    RV life on the road is a proverbial roller coaster. One minute you’re enjoying a cup of morning coffee with a view of the crystal-clear waters of the Florida Keys. And the next minute? You’re drying the floor with beach towels, wondering where in the world the water is coming from. Sounds far-fetched, but that’s what happened in my first RV. Even with a major RV water damage scare like that, my love for this life is still as strong as ever. My wife and I are now well into year six of RV life, and we are on our fourth rig.

    For most situations, we have found that with some know-how and a bit of elbow grease, you can tackle many of these problems head-on and keep your RV in tip-top shape. But we have also realized that in some cases, getting a professional is the best option for the job.

    What can you do yourself, and how do you tell when it’s time to call for help? Here’s a guide to dealing with mold and water damage in your RV.


    Recognizing the Signs of Water Damage

    First comes water. Then comes damage. Then comes mold throughout the RV carriage. If you went back and sang that like I did, then you are my kind of people. In all seriousness though, that is the essential order for this process, so we start with the water.

    Water damage can sneak up on you if you’re not paying close attention. What starts as a small leak can quickly turn into a bigger problem, especially if it goes unnoticed. Here are some common signs:

    Common Signs of RV Water Damage
    1. Discoloration or Stains: Water stains on the ceiling, walls, or floors are often the first indicators of a leak. If you notice dark or discolored patches, it’s time to investigate.

    2. Soft Spots: Walk around your RV and press on the walls, floor, and ceiling. If you find any soft or spongy areas, this could indicate water damage beneath the surface.

    3. Musty Odor: Mold loves damp, dark spaces. If you detect a musty smell, it’s a strong sign that there’s moisture trapped somewhere, and mold could already be taking hold.

    4. Peeling Wallpaper or Paint: Water can cause adhesives to break down, leading to peeling wallpaper or bubbling paint. If you see these signs, there’s likely moisture behind the scenes.

    5. Warped or Buckled Materials: Wood or laminate flooring that is buckling, or walls that appear warped, are telltale signs that water has been pooling somewhere it shouldn’t.


    Steps to Address RV Water Damage

    Once you’ve identified the signs of water damage, it’s crucial to act quickly to prevent further issues, including the growth of mold. And trust me when I say they usually aren’t as easy to spot as a beach towel’s worth of water on the floor.


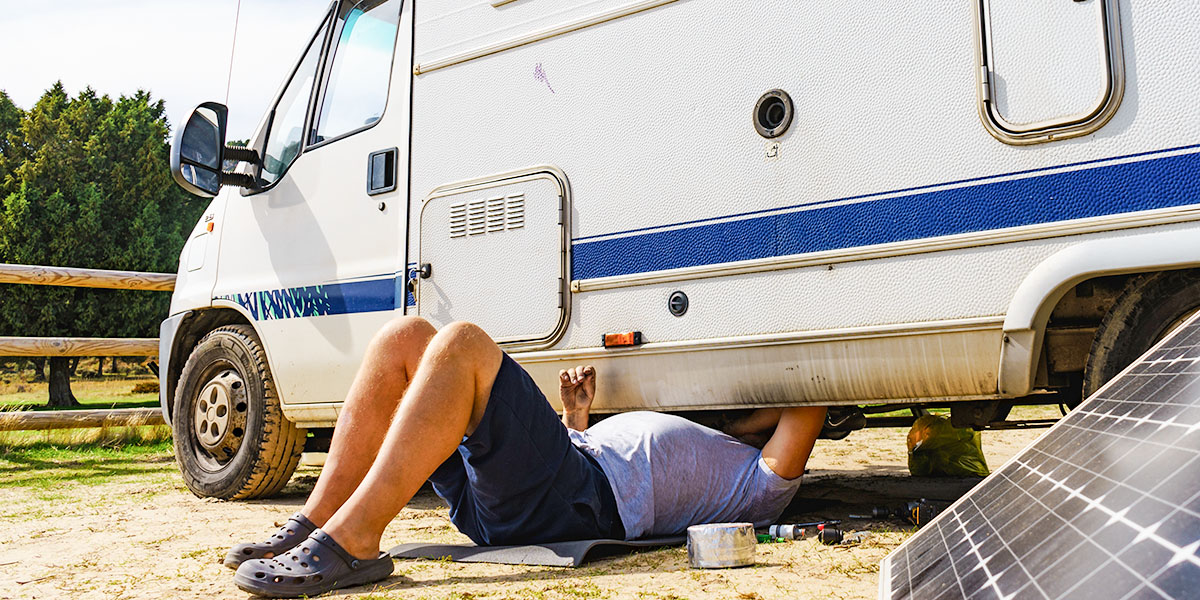
    Step 1: Find and Stop the Source of the Leak

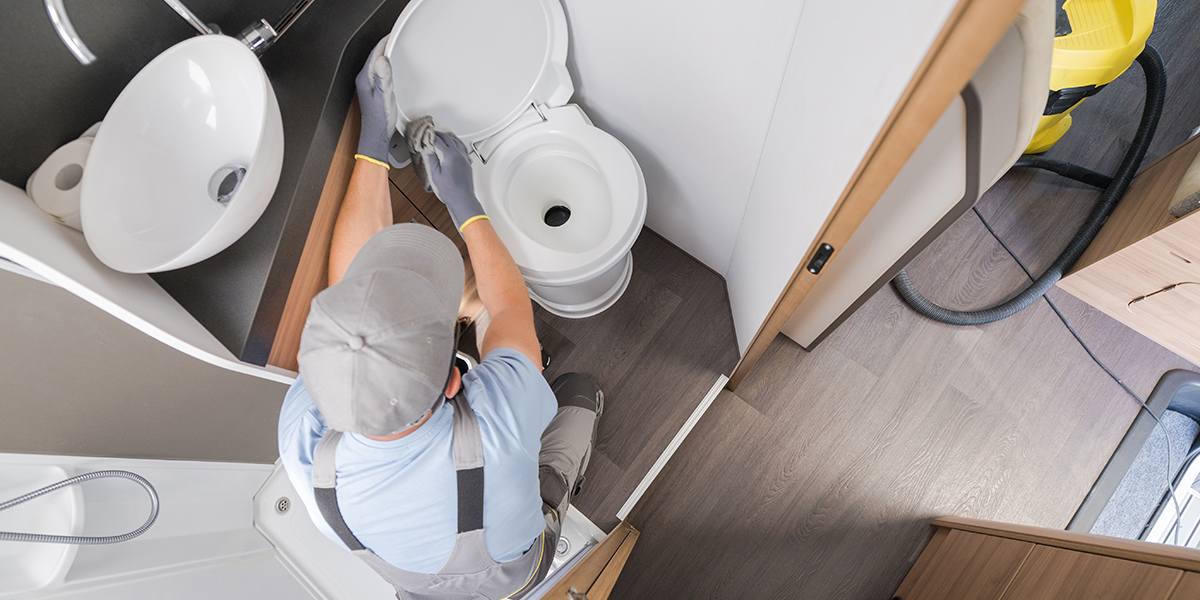
    Before you can begin repairing the damage, you need to stop more water from entering your RV. This could be from any number of sources or weak spots, but three of the more common culprits are a leaking roof, windows, or even plumbing. Inspect the areas where you noticed damage and trace the water back to its source.

    In our beach towel situation, we couldn’t find the leak at all, and that’s when we cut our losses and took it to the professionals. We were lucky enough to have the RV under warranty and they were eventually able to work on it. In our third RV we had a smaller leak from the window and all it needed was a bigger, thicker, seal around the window frame.

    Tip: Don’t forget to check around slide-outs, vents, and any other areas where the RV’s exterior is interrupted by seams or openings. These spots are notorious for letting water in.


    Step 2: Dry Out the Affected Area

    Once you’ve stopped the leak, your next step is to dry out the affected area as thoroughly as possible. Mold can begin to grow in as little as 24 to 48 hours, so time is of the essence.

    Tip: Use fans, a dehumidifier, and open windows and doors to get as much airflow as possible. If the weather is dry, this can be incredibly effective. If you have a chance to get to the west, where the climate is much drier, it can be a huge help. For more severe cases, you may need to use a wet/dry vacuum to remove standing water.


    Step 3: Remove Damaged Materials

    Water damage can weaken materials like wood, insulation, and even drywall. If any part of your RV shows signs of rot, warping, or mold, it’s essential to remove and replace these materials.

    Tip: Be thorough in your inspection and removal. Mold can spread quickly, and if any affected material is left behind, the problem could return. Use mold-resistant replacement material where possible to prevent future issues.


    Dealing with Mold: A Step-by-Step Guide

    While we were lucky with the mold situation in our RV. it was under warranty and was taken care of by professionals – I’ve had to deal with mold in buildings, and let me tell you, it is not a fun or healthy experience. So, if you discover mold in your RV, it’s important to handle it carefully to avoid spreading spores and worsening the problem.


    Step 1: Wear Protective Gear

    Mold can be harmful to your health, so before you begin, make sure you’re wearing gloves, a mask, and protective eyewear. This will help prevent inhalation of mold spores and skin contact. If you are like me and mold can have a truly negative experience on your health or breathing, then I highly suggest hiring a professional to work on the situation.

    Your health is always worth more than trying to save a few bucks with a DIY!


    Step 2: Isolate the Area

    If you are moving forward with a DIY, then the first step after putting on all your protective gear, is to try and seal off the area where the mold is located. Remember to close doors, cover vents, and tape plastic sheeting over doorways to contain any spores that might get kicked up during cleaning. This way the spores don’t spread to other parts of the RV.


    Step 3: Clean the Mold

    Sometimes a mixture of water and detergent as well as a commercial mold cleaner to scrub the affected area can go a long way. Another option to try is a solution of water and bleach (1 cup of bleach to 1 gallon of water) — but be sure to ventilate the area well.

    Tip: Avoid using bleach on porous surfaces like wood or drywall, as it doesn’t always penetrate deeply enough to kill all the mold. For these situations, try using a cleaner specifically designed for these materials.


    Step 4: Prevent Future Mold Growth

    Once the mold is cleaned, take steps to prevent it from returning. Ensure the area is thoroughly dried and consider applying a mold-resistant coating to surfaces prone to moisture. Regularly inspect your RV for any signs of new leaks or dampness and address these issues immediately.


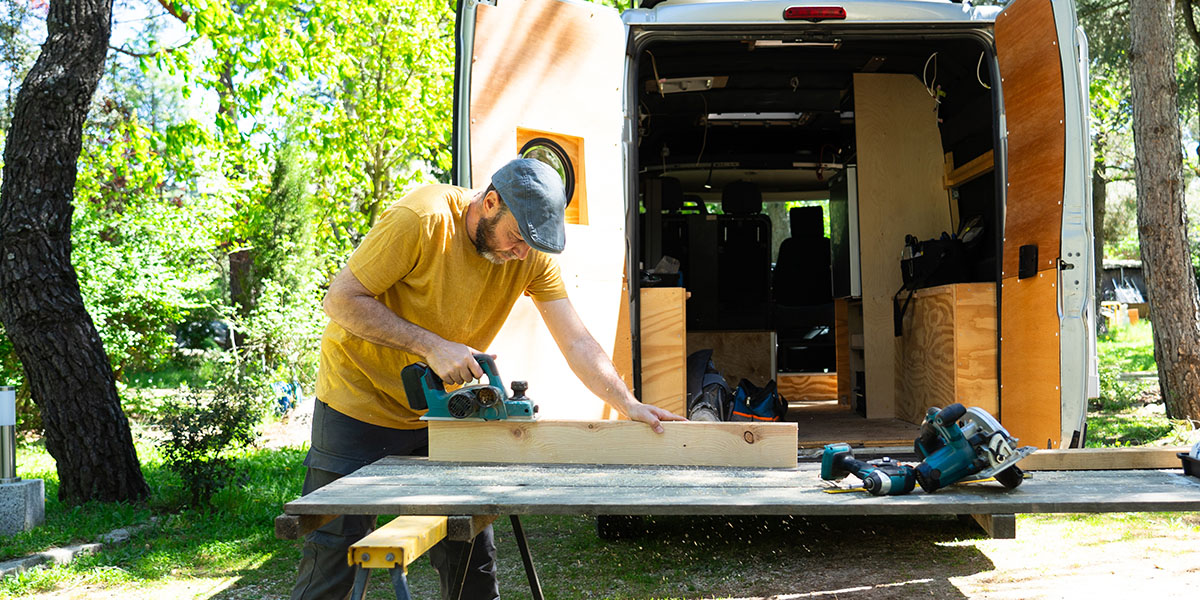
    Restoring or Replacing Damaged Materials: Bringing Your RV Back to Life

    After tackling water damage and mold, the next step is to restore or replace the affected areas to get your RV back in shape. This can seem overwhelming, but breaking it down into manageable steps makes it doable.

    1. Assess and Remove Damaged Materials: Start by thoroughly inspecting your RV to determine what needs to go — soft spots in the floor, warped walls, or swollen cabinetry. Carefully remove any damaged materials, being sure to cut away all affected areas to prevent future issues.
    2. Replace Subfloor and Wall Structures: If the subfloor or wall framing is compromised, replace these with new materials. Use sturdy plywood for subfloors and fresh wood for framing, ensuring everything is level and secure. Don’t forget to replace any damaged insulation with a mold-resistant option.

    3. Rebuild and Refinish: Once the structural repairs are complete, rebuild and refinish your RV’s interior:

      Walls: Install new wall panels, seal seams, and add a fresh coat of paint or wallpaper.
      • Flooring: Lay down new vinyl, laminate, or carpet, leaving room for expansion and finishing with trim.
      Cabinetry: Refinish or replace cabinets, making sure they’re securely installed.

    4. Final Touches: Finish by adding trim, painting, and decorating to make your RV feel like home again. With some effort, your RV will be ready for more adventures, looking and feeling as good as new

    Staying Ahead of RV Water Damage

    Dealing with water damage and mold in an RV is no fun, but with regular inspections and quick action, you can stay ahead of these issues. My wife and I have learned from experience that catching a leak early can save you a lot of headaches (and money) down the road. By following these steps and keeping a close eye on your RV, you can keep your home on wheels in great shape and focus on enjoying the adventures that lie ahead. Safe travels!

  • 6 Steps to Set Your RV Renovation Budget

    6 Steps to Set Your RV Renovation Budget

    If you’re here, I’m going to assume you are looking to finally pull the trigger on that RV renovation. You know, the one you’ve been putting off. And, since you’re here, I’m also going to assume that you have a burning question about your RV renovation budget: how much should this reno cost?

    For those in the starting phase and looking for ideas, you may want to check out my blog on popular RV renovations ideas. If you’re past that phase (or you just finished reading that blog), then it’s time to figure out the numbers. That’s where I can help. As fun and rewarding as transforming your RV into your dream home on wheels can be, when the costs start to add up, those dreams can turn into nightmares. So, to help you avoid some of the pitfalls, here’s a guide to help you set a realistic budget for your RV renovation.


    Step 1: Determine Your Priorities

    Before you start crunching numbers on your RV renovation budget, take some time to think about what’s most important to you in your RV. Are you focused on functionality, comfort, aesthetics, or maybe a combination of all three? By identifying your priorities, you can allocate your budget to the areas that matter most to you.

    Consider these questions:
    • Which areas of your RV need the most attention? (e.g., flooring, kitchen, bathroom)
    • What are the “must-haves” versus the “nice-to-haves”?
    • Are you planning any major structural changes, or are you mostly focused on cosmetic upgrades?

    Once you’ve got your priorities straight, you can move on to the next step.


    Step 2: Research Costs and Gather Estimates

    The next step is to research the costs associated with your renovation projects. This includes everything from materials and tools to professional labor if you’re not planning to DIY the entire project. For example, if you’re upgrading your flooring, you’ll want to look at the cost of materials like vinyl planks or laminate, as well as any tools you might need for installation. If you’re considering a solar power upgrade, you’ll need to factor in the cost of panels, batteries, and installation.

    DIY Tip: For a more accurate estimate and better pricing, consider visiting various local home-improvement stores and browsing online retailers. Don’t forget to include shipping costs for larger items that aren’t available locally. You can also look on Facebook Marketplace or some similar app to find products that may be in decent condition at a discounted price.


    Step 3: Set a Realistic Budget

    Now that you have a good idea of what each part of your renovation will cost, it’s time to set a budget. Be realistic about what you can afford and make sure to include a buffer for unexpected expenses – because trust me, there will be some. A good rule of thumb is to set aside an extra 15 to 20 percent of your total budget for those unforeseen costs that always seem to pop up during a renovation.

    Sample budget breakdown (not actual prices)

    • Flooring: $1,000 (including materials and tools)
    • Kitchen Remodel: $1,500 (including appliances, cabinets, and paint)
    • Bathroom Upgrades: $500 (including fixtures, paint, and accessories)
    • Solar Power Installation: $2,000 (including panels, batteries, and installation)
    • Miscellaneous: $500 (for smaller projects like painting and decor)
    • 20% Buffer: $1,100 (for unexpected costs)

    Total Budget: $6,600


    Step 4: Consider Financing Options

    If your renovation plans exceed your current financial liquidity, you might want to explore financing options. Some RV owners take out personal loans or use a credit card with an introductory zero-percent interest period to finance their renovations. This is a great tool if you know that you can pay off the entirety of the project in the allotted time for zero interest. A quick internet search for the best zero-percent credit cards can get you upwards of 12 months interest free. If you calculate your monthly payment for the total over that timeframe, and realize that you won’t be able to finish before interest starts accruing, then just be sure to factor in the cost of interest to ensure that your monthly payments fit comfortably within your budget.

    Financing Tip: If you’re planning to sell your RV in the future, consider how much your renovations will increase – or decrease – its resale value. This can help you determine whether financing your renovation is a sound investment.


    Step 5: Track Your Spending

    Once you’ve set your budget and started your renovation, it’s crucial to track your spending to ensure you’re staying within range. Keep all your receipts, and regularly update a spreadsheet or use a budgeting app to monitor your expenses. This will help you identify any areas where you might be overspending and allow you to make adjustments as needed. 

    Tracking Tip: Break down your spending by category (e.g., flooring, kitchen, bathroom) to see exactly where your money is going. This can also help you adjust your budget mid-project if you need to allocate more funds to a particular area.


    Step 6: Be Prepared to Make Adjustments

    Renovations rarely go exactly as planned, so be prepared to make adjustments along the way. If you find that you’re overspending in one area, consider scaling back in another. For example, if your kitchen remodel is costing more than expected, you might decide to delay the installation of that solar power system until a later date.

    Adjustment Tip: Prioritize the projects that are most important to you and be flexible with the rest. Remember, you can always tackle additional upgrades down the road.


    Renovating Your RV Without Breaking the Bank

    Setting an RV renovation budget is a crucial step that will help you turn your dream home on wheels into a reality without emptying your bank account. By determining your priorities, researching costs, setting a realistic budget, knowing your skill level, and tracking your spending, you can keep your renovation on track and enjoy the process. Whether you’re making small changes or tackling major upgrades, careful budgeting will ensure that your RV renovation is a success. Happy renovating, and may your travels be filled with adventure and comfort!

    For more inspiration and tips on RV renovations, check out my story on popular RV renovation projects. It’s packed with ideas that can help you transform your RV into the cozy, stylish retreat you’ve always wanted. Looking for more advice? Check out the RV 101 section on the RVTrader blog.

  • Sniffing Out the Top Dog-Friendly Parks in the U.S.

    Sniffing Out the Top Dog-Friendly Parks in the U.S.

    As dog parents who love exploring the great outdoors with our four-legged kiddos, we have investigated and experienced various places and ways to enjoy the great outdoors together with our two pups, Wilson and Journey. The two are very different. While Journey doesn’t do so well with other dogs (due to incidents she suffered before we rescued her), Wilson is as cool, calm, and collected as can be. This makes finding the perfect place for them to both enjoy nature with us extremely important. For that reason, we absolutely love and cannot recommend National Forests enough. For those who are looking for the perfect boondocking spot where your furry friend is a little freer to run and wander along with you, they just might be the top option. But dog-friendly parks, be they national or state, also give your pup a wide array of sites and smells.

    That said, national parks offer their own rewards. And state parks too. It’s an unforgettable experience being able to enjoy a national park’s stunning vistas. And a state park’s diverse trails are a dream for your best friend as they wag their tail at your side. One fact that many people don’t know, however, is that not all parks are dog-friendly. For that reason, through personal experience and research, we have created this guide to the top five national and state parks that welcome dogs. 


    What to Know Before You Go

    Before getting to our list, I wanted to share a few rules and common courtesies to know and follow any time you find yourself in a national or state park with your pup.


    Six-foot leashes are always a must.

    Even if your dog is extremely well behaved and trained. The biggest reasons for this are the simple fact that not all people are comfortable around dogs, and not all dogs have the best temperament around other people or fellow four-legged companions. So, if everyone follows this rule, it is a much safer, family friendly environment.


    Always pick up after your dog

    Pack it in, pack it out means anything you or your dog brings and can leave behind! Please carry extra poop bags with you. Keeping the parks and paths clean make it a more fun experience for everyone. Your dog is also not native to the environment, so any scat left behind may affect the area’s ecosystem.


    Know the weather and your dog’s ability.

    Weather affects everyone’s experience at a park, but not all trails or temps are created equally. Understand that extreme weather, hot or cold, can severely affect your pup’s health. If he or she is on a blistering road or path, their paws can severely be hurt. Similarly, if your dog is not the best hiker, he or she may have trouble out on some trails. (Also, for fun, find out which dog breed best fits your camping style.)


    Always pack for your dog.

    Remember, just like you get hungry and thirsty on a hike, so will your dog. So, please bring extra snacks and water for your pup. Proper packing also includes waste bags – including for No. 2 —and any extra gear your dog may need.

    Now, let’s get to our list.


    Top 5 Dog-Friendly National Parks

    1. Acadia National Park, Maine

    Acadia National Park is a haven for dog lovers. With over 100 miles of pet-friendly hiking trails and carriage roads, it’s heaven for master and beast alike. The stunning views of the Atlantic Ocean. The granite peaks. And those lush forests with all their smells. Wow. They all make it a perfect destination for outdoor enthusiasts. Don’t miss the chance to hike the Jordan Pond Path or stroll along the scenic Ocean Path with your dog.

    Tip to Put You on Scent: The park has a long coastline, but the water is off limits for your four-legged adventure buddy. 


    2. Shenandoah National Park, Virginia

    With over 200,000 acres of protected lands that are home to deer, black bear, songbirds, and more, Shenandoah National Park is a delight for both dogs and their owners. The park features over 500 miles of trails, including the popular Appalachian Trail, which runs through the park. Dogs can join you on almost all the trails, making it a perfect spot for long hikes.

    Tip to Put You on Scent: The park’s Skyline Drive offers numerous overlooks and picnic spots where you and your pet can take in the breathtaking views together. 


    3. Grand Canyon National Park, Arizona

    The Grand Canyon might not seem dog-friendly at first glance, but the South Rim offers several trails where dogs are welcome. The Rim Trail, with its breathtaking views, is a must-do. Dogs are also allowed at Mather Campground, Desert View Campground, and Trailer Village.

    Tip to Put You on Scent: Pets are not permitted below the rim. Due to the desert climate, be prepared with extra water for your pet and avoid hiking during the hottest parts of the day. There are pet-friendly shuttles available to help you navigate the park more easily.


    4. Great Sand Dunes National Park, Colorado

    Great Sand Dunes National Park offers a unique landscape of towering sand dunes, wetlands, and forests. Dogs are allowed on the dunes, in the Medano Pass Primitive Road, and throughout the campgrounds. The cooler morning and evening hours are ideal for exploring the dunes with your dog.

    Tip to Put You on Scent: Carry plenty of water and be cautious of hot sand that can burn your dog’s paws. Consider using booties to protect their feet and plan your visit during cooler seasons to make the most of your adventure. 


    5. Cuyahoga Valley National Park, Ohio

    Cuyahoga Valley National Park boasts over 125 miles of hiking trails where dogs are welcome. The Ohio & Erie Canal Towpath Trail is particularly popular, offering scenic views and a relatively easy walk. The park’s diverse ecosystems and waterfalls make it a wonderful place to explore with your canine companion.

    Tip to Put You on Scent: The park offers numerous opportunities for picnicking and resting, so plan to take breaks and enjoy the natural beauty with your pet.


    Top 5 Dog-Friendly State Parks

    1. Redwood State Park, California

    Home to some of the tallest trees on Earth, Redwood State Park is a breathtaking destination. Many of the park’s trails, including the scenic Coastal Trail, are dog-friendly. The towering redwoods and lush forest floors provide a serene environment for hiking with your dog.

    Tip to Put You On Scent: They’re not allowed on certain trails to protect wildlife. The park’s numerous picnic areas and campgrounds make it easy to spend a relaxing day or weekend immersed in nature.


    2. Fort De Soto Park, Florida

    Fort De Soto Park, located on the Gulf of Mexico, features a fantastic dog beach and several pet-friendly trails. The park’s beaches, trails, and campgrounds welcome dogs, making it a perfect spot for a coastal getaway.

    Tip to Put You On Scent: Dogs can run off-leash in the designated dog park areas but must be on a leash elsewhere in the park. The park also provides dog showers and water fountains to keep your pet cool and comfortable.


    3. Cape Henlopen State Park, Delaware

    Cape Henlopen State Park offers a mix of beach and forest trails that are perfect for exploring with your dog. The Gordons Pond Trail and the Walking Dunes Trail are particularly popular. Dogs are allowed on the beach during the off-season, making it a versatile destination year-round.

    Tip to Put You On Scent: Dogs must be leashed and are restricted from certain areas during the summer months. Plan your visit during off-peak times to enjoy more freedom and space with your pet.


    4. Dead Horse Point State Park, Utah

    Dead Horse Point State Park provides stunning views of the Colorado River and it’s direct neighbor, Canyonlands National Park. The park’s trails, including the scenic Rim Walk Trail, are dog-friendly and offer incredible vistas. It’s a great spot for those looking to experience Utah’s rugged beauty with their furry friend.

    Tip to Put You On Scent: Be mindful of the hot, dry climate, and carry plenty of water for both you and your pet, avoiding hikes during the midday heat.


    5. Hunting Island State Park, South Carolina

    Hunting Island State Park offers miles of pet-friendly trails and beaches. The Lagoon Trail and the Maritime Forest Trail provide beautiful scenery and diverse ecosystems. The park’s untouched beaches are perfect for a relaxing walk with your dog.

    Tip to Put You On Scent: Certain areas might have seasonal restrictions, so check ahead. 


    Bonus: Exploring Canadian National Parks with Your Dog

    If you have your passport handy, consider exploring the stunning national parks in Canada. While most of the national parks in the US are not as accommodating to your pup’s trail life, many Canadian national parks are incredibly dog-friendly, provided you follow the park rules. Bif name dog-friendly parks like Banff, Jasper, and Yoho offer breathtaking landscapes and numerous pet-friendly trails. As always, keep your dog on a leash, stick to designated areas, and be aware of local wildlife to ensure a safe and enjoyable experience.

    Tip to Put You On Scent: Before you go, check each park’s specific regulations regarding dogs, as they can vary. Be prepared for different weather conditions and pack accordingly for you and your pet.


    That’s it! That’s our must visit dog friendly national and state parks list! In all honesty, this list can be much longer. Many US state parks are dog friendly, so please let us know in the comments if you have any other must see “Dog-Friendly Parks.” 

    Exploring national and state parks with your dog is a fantastic way to bond and experience the beauty of nature together. By choosing dog-friendly parks like those listed above, and by following the rules, you can ensure a memorable and enjoyable adventure. Happy tails, I mean trails, and may your journeys with your furry friend be filled with discovery and joy!

  • What Are the Top Dog Breeds for RV Life?

    What Are the Top Dog Breeds for RV Life?

    Before we dive into the nitty-gritty of finding the best dog breed for RV life, let’s get one thing straight: The best dog for RV life is the one you already have! Whether they’re a laid-back lounge lizard like Wilson, our Cairn Terrier rescue who’s the epitome of chill, or a high-energy, always-ready-for-action bundle of joy like Journey, our Staffy mix who loves her brother but is cautious around other dogs, your pup is your best travel buddy. That said, if you’re in the market for a new furry friend or just curious about which breeds might be a great fit for RV life, this guide is for you.

    We have compiled a list of the top three breeds for each category of RVer. And, in the end, we included our top five overall breeds for the RV life in general. As we list each breed in this article, we’re also including its official ranking on the 2023 most popular dog breeds list, according to the American Kennel Club. 


    How We Ranked the Best Dog Breeds for RV Life

    To create this list, we cross-referenced the most popular dog breeds from the American Kennel Club (AKC) with the different types of RV users as identified by the RV Industry Association (RVIA). By considering the lifestyle and needs of various RVers — whether full-time nomads, weekend warriors, or adventure seekers — we’ve come up with a ranking system that highlights breeds that are popular, adaptable, and well-suited to the RV lifestyle. We also considered some personal experiences from the six years we’ve spent meeting amazing dogs on the road. That includes hearing the why and why not some people may prefer or stay away from certain dog breeds. (And sure, that may have created a little bit of a tiebreaker bias.) In truth though, we pretty much love all dogs. (If my wife could, she would have a traveling kennel on the road.)

    Two caveats to this list. For one, it does not consider the fact that several dog breeds are showing up on more banned breeds lists for different campgrounds and states. Since there is no universal banned breed list across all states and campgrounds, we decided to skip that aspect in our ranking system. However, we definitely urge you to consider this fact if you are considering your next furry companion for your RV travels. Second, we haven’t included mixed breeds — as much as we love them — because it’d get to crazy to chart.

    That said, let’s dig in.


    RV User Profiles and Their Perfect Breeds

    1. Happy Campers

    Who They Are: Relaxed RVers who enjoy unwinding and spending time with family, often taking short, leisurely trips.

    Top 3 Dog Breeds for Happy Campers:

    • Labrador Retriever (AKC No. 2): Labradors are the ultimate family dogs. With their friendly, easygoing nature, they are perfect for relaxed trips. They love being part of the family and are happy to chill by the campfire. Or join in on short hikes.
    • Golden Retriever (AKC No. 3): Golden retrievers are gentle, loving, and great with kids. Their calm demeanor and love of companionship make them ideal for family trips, where they can bask in the joy of togetherness.
    • Cavalier King Charles Spaniel (AKC No. 14): Small, affectionate, and adaptable, Cavaliers are perfect for happy campers who want a dog that’s content to snuggle on the couch but still enjoys a little adventure now and then.


    2. Casual Campers

    Who They Are: RVers who camp occasionally, often seeking social experiences and enjoying the camaraderie of the campground.

    Top 3 Dog Breeds for Casual Campers:

    • French Bulldog (AKC No. 1): French Bulldogs are social butterflies. They love to meet new people and dogs. Their low-maintenance needs and fun personalities make them great for short, sociable camping trips.
    • Beagle (AKC No. 8): Beagles are friendly, curious, and always up for a good time. They’re small enough to fit comfortably in an RV but have enough energy to enjoy exploring the campground. (Just always have a leash, because these scent hounds follow their nose.)
    • Cocker Spaniel (AKC No. 30): Cocker spaniels are easygoing and sociable. For campers who enjoy mingling with other RVers, they’ll find cocker spaniels share that passion. They’re friendly, adaptable, and love to be part of the action.


    3. Adventure Seekers

    Who They Are: Thrill-seekers who use their RVs to access rugged and remote destinations, often engaging in outdoor activities like hiking, biking, and climbing.

    Top 3 Dog Breeds for RV Adventure Seekers:

    • German Shepherd (AKC No. 4): Known for their loyalty and versatility, German shepherds are ideal for those who need a reliable, strong, and protective companion on their adventures. They’re great for rugged environments and challenging hikes.
    • Australian Shepherd (AKC No. 12): Australian shepherds are high-energy, intelligent, and thrive in active environments. They’re the perfect partner for adventure seekers who need a dog that can keep up on challenging trails and enjoy exploring new terrains.
    • Border Collie (AKC No. 31): Border collies are one of the most intelligent and energetic breeds. This makes them a good fit for RVers who love to stay active. They excel in agility and obedience, ensuring they’re always up for the next challenge.


    4. Avid RVers

    Who They Are: Enthusiasts who spend significant time on the road, exploring various destinations and making the most of their RV lifestyle.

    Top 3 Dog Breeds for Avid RVers:

    • Golden Retriever (AKC No. 3): Golden retrievers are adaptable, friendly, and love being part of a family. For RVers who spend a lot of time traveling, these dogs are a wonderful match. Great with kids. Great with other dogs. And just generally content wherever they are — as long as they’re with their family.
    • Poodle (AKC No. 5): Poodles are highly intelligent and adaptable, thriving in various environments. They’re also hypoallergenic, making them a good choice for RVers with allergies. Their friendly nature also makes them great companions for long trips.
    • Boxer (AKC No. 18): Boxers are energetic, loyal, and affectionate. They’re great for RVers who want a playful companion that’s also a good watchdog. Their muscular build and love for adventure make them great travel buddies.


    5. Escapists

    Who They Are: RVers who use their RVs to disconnect from the world and find peace in nature, often seeking solitude and quiet.

    Top 3 Dog Breeds for RV Escapists:

    • Cavalier King Charles Spaniel (AKC No. 14): Cavaliers are gentle, loving, and enjoy a quiet, relaxed atmosphere. They’re perfect for escapists who want a companion that’s happy to cuddle and enjoy the serenity of nature.
    • Shih Tzu (AKC No. 20): Shih tzus are affectionate and love a calm environment. For RVers who seek tranquility, a shih tzu is a good choice. They’re small and easy to manage, enjoying the comfort of a peaceful RV lifestyle.
    • Chihuahua (AKC No. 32): Chihuahuas are small, portable, and content with a quiet life. (Although they can provide some volume of their own.) They’re perfect for RVers who want a low-maintenance dog that’s easy to travel with and doesn’t require much exercise.


    6. Full-Timers

    Who They Are: Individuals or families who live in their RVs year-round, traveling across the country and making their RV their permanent home.

    Top 3 Dog Breeds for Full-Timers:

    • Labrador Retriever (AKC No. 2): Labradors are versatile, adaptable, and excellent family dogs, making them ideal for full-time RVers. They’re great with kids, other pets, and thrive in a variety of environments.
    • Miniature Schnauzer (AKC No. 17): Miniature schnauzers are smart, adaptable, and hypoallergenic, making them a good choice for full-timers. They’re small enough to manage in an RV but have a big personality that fits well with an on-the-go lifestyle.
    • Bernese Mountain Dog (AKC No. 21): Bernese mountain dogs are large, gentle, and perfect for RVers who live in cooler climates. Their calm demeanor and loyalty make them excellent companions for those who live on the road.


    7. Family Campers

    Who They Are: RVers who prioritize family-friendly experiences, often traveling with children and looking for a dog that fits in with a busy, active family.

    Top 3 Dog Breeds for Family Campers:

    • Labrador Retriever (AKC No. 2): Labradors are the ultimate family dog. They’re patient, loving, and great with kids, making them perfect for family campers who need a dog that can keep up with an active lifestyle.
    • Golden Retriever (AKC No. 3): Golden  retrievers are gentle, patient, and wonderful with children. They’re easygoing enough to be patient with kids but have the energy to join in on family activities.
    • Beagle (AKC No. 8): Beagles are fun-loving, friendly, and great with kids. Their small size makes them easy to manage, and their playful nature ensures they’re always up for a family adventure. 


    Overall Top 5 Best Dogs for RV Life

    These breeds are the most versatile and meet the criteria for the widest range of RV users, making them the top picks for anyone looking to add a dog to their RV adventures:

    1. Labrador Retriever (AKC No. 2)
      Why: Labradors are adaptable, friendly, and great with families. Their versatility makes them a fit for almost any RV lifestyle, from full-time living to casual weekend trips.
    1. Golden Retriever (AKC No. 3)
      Why: Golden retrievers are gentle, loyal, and great with kids, making them perfect for family campers, full-timers, and anyone looking for a loving companion on the road.
    1. French Bulldog (AKC No. 1)
      Why: French bulldogs are small, low-maintenance, and full of personality. They’re perfect for casual campers and those who want a dog that’s easy to travel with and doesn’t require a lot of exercise.
    1. Beagle (AKC No. 8)
      Why: Beagles are friendly, curious, and great with kids. Their small size and playful nature make them ideal for family campers and casual RVers who want a fun, easygoing dog. 
    1. Australian Shepherd (AKC No. 12)
      Why: Australian shepherds are high-energy, intelligent, and love adventure. They’re perfect for adventure seekers and avid RVers who need a dog that can keep up with an active lifestyle.


    Choosing the right dog breed for RV life depends on your lifestyle, the type of RVing you do, and what kind of companion you’re looking for. Whether you’re a full-time RVer who needs a loyal protector or a weekend camper who just wants a friendly face by the fire, there’s a breed out there that’s perfect for you. But remember, at the end of the day, the best travel buddy is the dog you already have, purebred or otherwise. So, pack up your RV, grab your pup, and hit the road — adventures await!

  • What Not to Do When Renovating Your RV (Like Ever, Ever)

    What Not to Do When Renovating Your RV (Like Ever, Ever)

    O, the DIY project, how I love and hate thee! If you are like me, then you mostly prefer to enjoy life, work on what you’re good at, and you try to get a professional to do your home and RV projects. That being said, saving money and time is always a great feeling, and it can be pretty fulfilling to make that cool renovation yourself — until it’s not. Because renovating your RV, while rewarding, is no joke.

    As an avid RVer and DIYer for over six years, I’ve talked before about 10 popular RV renovations that can transform your home on wheels into a personalized haven. However, there are a few common mistakes that can turn your dream renovation into a nightmare, and that is what today’s story is all about. To help you navigate this journey smoothly, here’s a guide on what not to do when renovating your RV.


    1. Don’t Dive Straight Into Renovating Your RV

    One of the biggest mistakes you can make is diving into your renovation without a detailed plan. This often leads to hasty decisions, budget overruns, and a lot of frustration. Trust me, planning and measuring several times before executing is the only way to go.

    With our new solar system, other than some minor wiring issues, the thorough planning thoroughly and measuring everything several times helped the project stay fairly on time and budget. Even then, unexpected things happened. Now, if you haven’t read my freezing toilet mishap, you can check out the link at the end of this post for a good laugh at my expense.

    Tip: Start by outlining your goals, making a budget, and creating a timeline. Sketch out your ideas and list the materials you’ll need before you begin. Once that is done, increase your cost and time estimates by 15 to 20 percent for unforeseen circumstances.


    2. Avoid Using Heavy Materials

    While it might be tempting to use materials like hardwood or granite to create a luxurious feel, these heavy materials can significantly affect your RV’s weight and fuel efficiency.

    Tip: Alternatives like peel-and-stick, vinyl planks, or laminate for countertops, flooring, and the like can offer a similar aesthetic appeal without the added weight.


    3. Don’t Ignore Your RV’s Weight Capacity

    This goes hand in hand with number 2, because every RV has a maximum weight capacity, and exceeding this can lead to safety issues, increased wear and tear, and potential fines.

    Tip: Weigh your RV before and after renovations to ensure you stay within the safe limit. Remember, this includes everything you plan to carry on your trips, including passengers, food, belongings, etc. If you can, try to get a good estimate on the total weight you are taking out and the weight you are adding for your project.


    4. Avoid DIY Electrical Work Without Proper Knowledge

    Tackling electrical work without the necessary expertise can be dangerous and lead to severe problems down the road like burnt fuses, wires, or even a full-blown fire.

    If you’re not confident in your electrical skills, it’s best to hire a professional. Even if you are confident, reading forums and watching YouTube videos are always recommended with these types of projects before beginning.

    Tip: Always disconnect and turn off the power before working on electrical components to avoid shocks and injuries.


    5. Don’t Sacrifice Function for Aesthetics

    It’s easy to get caught up in making your RV look beautiful, but functionality should always come first. A pretty kitchen isn’t much use if it doesn’t have enough storage or counter space. A balance between aesthetics and practicality will make your RV both beautiful and livable.

    Tip: Start by ensuring there’s ample storage, comfortable seating, and functional appliances. No matter where your renovation takes you, these are must-haves for any RV.


    6. Avoid Neglecting Proper Ventilation

    Proper ventilation is crucial in an RV to prevent issues like mold, mildew, and unpleasant odors. Skimping on ventilation can even lead to health problems and costly repairs.

    Ensure your RV has adequate vents and fans, especially in areas prone to moisture like the kitchen and bathroom.

    Tip: Regularly check and clean your ventilation systems and filters to keep them functioning properly.


    7. Don’t Forget About Temperature Extremes

    Materials that work well in a stationary home might not perform as expected in an RV due to temperature fluctuations. Warping, cracking, and other issues can arise if you choose the wrong materials.

    Tip: Consult with experts or fellow RVers for recommendations on the best materials for your climate. This will ensure your renovations last through all your adventures, hot or cold.


    8. Avoid Making Permanent Changes That Reduce Resale Value

    While personalizing your RV is important, making changes that are too specific to your taste can reduce its resale value. Permanent modifications might not appeal to future buyers.

    I took out the dinette and valances on one of our fifth wheels; when it came time to sell, the dealer that was helping us recommended that we reinstall them for the original look. Luckily we had hung onto them, and were able to restore and sell the RV.

    When in doubt, opt for neutral changes that enhance the RV’s appeal to a broader audience. Stick to timeless designs and avoid overly trendy choices.

    Tip: When deciding between two options, if one can be easily reversed, that is usually the best way to go.


    9. Don’t Underestimate the Importance of Quality Tools and Materials

    Using low-quality tools and materials might save you money initially, but they can lead to poor results and frequent repairs in the long run.

    Invest in quality tools and materials to ensure your renovations are durable and long-lasting. It’s worth spending a bit more upfront to avoid headaches later.

    Tip: Quality tools can also make the renovation process smoother and more enjoyable.


    10. Don’t Ignore the Legal and Safety Requirements

    Renovations that don’t comply with safety regulations and legal requirements can lead to fines, insurance issues, and even accidents.

    Familiarize yourself with local and state laws/codes for whatever state the RV is registered in, including safety standards and guidelines. This is especially true for weight limits, as some states have regulations for certain weights and driver license classifications.

    Ensure all renovations meet these requirements to keep your RV safe and compliant. Nothing is ever full proof, but taking these measures will help protect you, and it will likely minimize your risk of financial or legal issues with insurance or law enforcement, should an incident occur.

    Tip: A detailed plan is an invaluable asset when navigating regulations and requirements. Knowing the exact changes you want to make to your RV will help you look up relevant guidelines – or ask the right questions when consulting a professional.


    While jumping into renovating your RV can be exciting and rewarding, taking time to plan, and avoiding these common pitfalls is crucial to ensure a smooth and successful transformation. By planning meticulously, prioritizing functionality, and investing in quality, you can create a beautiful and practical home on wheels. Best wishes with renovating your RV, and remember, don’t be like me and try to fix a frozen toilet in the winter!

  • Always Ask These 13 Questions When Buying an RV

    Always Ask These 13 Questions When Buying an RV

    My wife and I have purchased four different RVs with four different experiences, and it’s always a fun but anxious experience. Is this the right one? Are we going to regret this? What are we forgetting? These are all logical questions, because buying an RV is a big investment, and making the right choice can mean the difference between endless adventures and constant headaches.

    Whether you’re a first-time buyer or looking to upgrade, asking the right questions when buying an RV is crucial to ensure you get the best value for your money. For that reason, we have created this list of the essential questions when buying an RV. (You know, the ones you don’t want to forget.) That way, your purchase process goes a little more smoothly.


    1. When can I have the RV inspected?

    Even if you are a veteran of the RV world, things can happen, and you can miss or forget something during your personal inspection or walk-through. For that reason, getting an independent, certified, and experienced RV tech to come and do a full inspection with a detailed write-up and pictures, if possible, is always the best practice.

    There were issues with our first RV that could have easily been avoided if we had gotten an independent RV inspection prior to purchase. On the other hand, we had four inspections on four different RVs before we finalized our last RV purchase. The difference was night and day, and we felt way more comfortable and confident when we finally pulled the trigger. Sure, this may be one of the most awkward questions when you’re buying an RV (no one likes to sound distrustful), but it’s so important it really should come first.

    Tip: If you request an independent RV inspection, make sure they have no ties to the private seller or dealership you are looking to buy from. Anyone, even an RV dealership, should allow you to have an independent RV inspector come and do a full inspection. If they don’t – run! That is not the RV for you.


    2. What’s the RV’s history?

    If you’re buying a used RV, knowing its history is vital. Request maintenance records and check for any signs of water damage, mold, or structural issues. Ask about previous owners, how the RV was used, the mileage, and any past accidents or repairs. A well-documented history can give you peace of mind about your purchase.

    Tip: It’s helpful to know if the RV was used for full-time living or just occasional trips, as this can affect the wear and tear on the vehicle. Conversely, an RV that has been sitting idle for long periods might have hidden issues like dry rot or engine problems.


    3. What’s the fuel efficiency?

    Fuel costs can add up quickly, especially on long trips. Understanding the fuel efficiency of your RV, or tow vehicle if you are buying a towable, can help you budget better and make more eco-friendly choices.

    Ask about the average miles per gallon (MPG) for the RV if you are buying a drivable, and make sure to confirm it by doing research online. Consider both highway and city driving. Also, inquire about any features that might improve fuel efficiency, such as aerodynamic design or fuel-efficient engines. If you’re considering a motorhome, knowing the fuel type (diesel or gasoline) can also impact your decision based on cost and availability.

    If you are going with a towable, do your research on towing capacity of bumper pull versus fifth wheel / gooseneck towing, and then make sure to understand the same basics of fuel type and mileage for your tow vehicle when towing.

    Tip: Once you know the MPG, calculate how far you can get on a single fill-up. During our first cross-country trip pulling a fifth wheel, we learned quickly that not only do long travel days add up, but diesel gas isn’t everywhere and adding an external gas tank was a necessity for us.


    4. What’s included in the price?

    The price tag on an RV can be misleading if you don’t know what’s included. Are you getting all the accessories, or will you need to buy essential items separately?

    Ask for a detailed list of what comes with the RV. This should include appliances, furnishings, and any extras like awnings or solar panels. Knowing what’s included can help you budget for any additional expenses.

    When buying from a dealership, make sure to see the exact unit you are buying, because a similar looking rig may have several other options included that will add to the price. When buying from a private seller, sometimes they will include hoses, extensions, and extras that can save you hundreds or even thousands of dollars, depending on what you can negotiate.

    Tip: Ask if there are any transferable warranties on the appliances or accessories, as this can save you money on future repairs or replacements.


    5. How are the tires?

    Tires are one of the most critical components of an RV and replacing them can be costly. But not replacing them can be way more costly. Even if the tires look good, they might be past their prime with rot or wear under the surface.

    Check the manufacturing date on the tires – most experts recommend replacing RV tires every five to seven years, regardless of tread wear. Ensure the tires are in good condition to avoid unexpected expenses and safety issues. Ask if a spare tire is included and verify if it is in good condition if it is.

    Additionally, inquire about recent alignments and whether the RV has been stored on concrete or dirt, as this can affect tire longevity.

    Tip: Even if you have newer tires, routine inspections can go a long way. We had some newer tires on our Class B van, but we didn’t check them after some rugged adventures, and a rear blowout really messed up our travel plans and budget.


    6. What’s the storage capacity?

    Storage is a key consideration, especially for long trips, full-time RV living, or traveling with a large family.

    Evaluate both interior and exterior storage options. Check for closets, cabinets, and compartments, and think about where you’ll store essentials like kitchenware, clothing, and outdoor gear, especially if you will be in different climates or terrains during your adventures.

    Ask if there are any expandable storage solutions or if the RV can be easily customized to add more storage.

    Tip: Space is just one part of the storage equation — don’t forget about weight!


    7. What’s the condition of the roof?

    The roof is one of the most vulnerable parts of an RV, and a leaky roof can lead to extensive damage all over your rig.

    Inspect the roof for any signs of damage or wear, and check if any repairs have been performed. Ask when it was last resealed or maintained. Regular roof maintenance is crucial to preventing leaks and extending the life of your RV. Also, consider the type of roofing material used, as some are more durable and easier to maintain than others.

    Tip: Patches can be a sign of previous leaks, and you’ll want to ensure they were properly fixed.


    8. What is the bed like?

    A good night’s sleep is crucial, especially when you’re on the road for extended periods. RVs usually come with less-than-optimal beds when they are purchased, and mattresses are usually among the first upgrades most RVers make.

    Test the bed for comfort and size. If you’re tall, ensure the bed is long enough. Ask if the mattress is included and if it’s of good quality. Lie down on it to test your comfort level. If it isn’t up to your standards, budget for a replacement. Consider the bed’s location and accessibility, especially if you or your travel partner have mobility issues.

    Tip: Make sure to ask if it is a custom style bed or one that can easily be swapped out.


    9. How does it drive?

    From drivable to towable, every RV handles differently, and it’s essential to get a feel for how it drives. A comfortable and safe driving experience is crucial for long trips.

    Always take the RV for a test drive. Pay attention to how it handles, brakes, and maneuvers in various conditions. Test it on different road types, including highways and narrow streets, to get a full sense of its handling.

    This goes for both drivable and towable options, as your tow vehicle’s capabilities really matter.

    Tip: Test the RV’s turning radius, as a wide turn can make it difficult to navigate in tight spaces.


    10. What’s the towing capacity?

    If you’re buying a towable RV, knowing your towing capacity is essential. You don’t want to discover too late that your vehicle can’t handle the load.

    Start by checking the RV’s gross vehicle weight rating (GVWR) and ensure your tow vehicle can safely handle the weight. This information helps you avoid overloading and potentially damaging both your RV and tow vehicle.

    Additionally, verify the towing capacity of your current vehicle and whether you’ll need any special equipment, like a weight distribution hitch or sway control. Also, ask about the brake system on the trailer and ensure it’s compatible with your tow vehicle. The same goes for a drivable if you are hoping to tow something behind it.

    Tip: Always double-check the weight! We purchased our first fifth wheel and truck combo together, but after a short time we upgraded to a new fifth wheel without checking the weight. And of course, it was too heavy for our truck, which resulted in additional costs to upgrade our towing vehicle.


    11. What about the tanks?

    The capacity of the fresh, grey, and black tanks goes a long way in determining how long you can stay off-grid without needing to refill. Knowing the state of the water and tank system is extremely important, because leaking or damaged systems can be expensive and messy to fix.

    Ask about the size of the freshwater, grey, and black tanks and how long it typically lasts based on usage. Consider your needs for cooking, cleaning, and personal hygiene. Also ask about the type of water heater and its capacity, as this will affect your showering and washing experiences. Additionally, inquire about the availability of an external water hookup and whether the RV has a water filtration system.

    Inspect the water and sewage systems, including the tanks and hoses. Check for any signs of leaks or damage around the water tanks and plumbing. It’s also helpful to know the location of the tanks for easy refilling, dumping, and maintenance. Where is everything located and how is the plumbing set up?

    Tip: Find out about and understand the weather conditions that your plumbing can withstand – your tank heaters and insulated vs exposed plumbing are a big deal in cold weather.


    12. Are there any custom modifications?

    Custom modifications can be a double-edged sword. While some can enhance your RV’s functionality, others might complicate repairs or reduce resale value. This can also be one of the easiest questions when buying an RV to forget.

    Ask about any custom modifications and why they were made. Ensure they were done professionally and won’t cause issues down the line. This knowledge helps you understand the RV’s unique features and potential quirks. If possible, get documentation or photos of the modification process to ensure it was done correctly.

    Also, consider how easy it would be to reverse these modifications if they don’t suit your needs. Custom modifications can sometimes void warranties, so check if this is the case with the RV you’re considering if there is any warranty that can actually be transferred.

    Tip: In many cases, if you are not the first owner, then a lot of or all of the warranties are void upon sale or transfer. So verify that as well.


    13. What’s the power setup?

    Your power setup is a huge deal when it comes to livability and functionality, especially if you want to go off-grid. What are the type and capacity of batteries? Is your rig a 30- or 50-amp setup? Do you have a solar package and/or a generator? Are there other charging capabilities? These are important for knowing and estimating your power consumption and battery life when off-grid.

    Batteries: Ask about the voltage, amperage, and size of your house battery system. If you are purchasing a drivable RV, determine if it is connected to your chassis battery and if so, how.

    Amperage: Knowing if your rig is 30- or 50-amp lets you know what kind of cables and hookups to purchase, and it lets you know what you can and can’t run off of your batteries and/or external power sources.

    Power sources: Understanding your external power sources like solar, generators, alternators, or trickle charging from a tow vehicle will help you better estimate your ability to go off-grid and how long you can do so.

    Tip: Batteries degrade with time and use. Verify the batteries are supplying the expected voltage and current, and hold the correct amount of charge.


    Don’t be shy. These questions when buying an RV can save your butt.

    Buying an RV is a significant investment, and asking the right questions when buying an RV can help you make an informed decision. (Not to mention saving you a lot of unforeseen heartache down the road.) So don’t be shy. Ask the questions. By understanding the RV’s history, condition, and features, you can avoid common pitfalls and find a home on wheels that meets your needs. Start your search on RV Trader.

  • DIY RV Fixes Any Newbie Can Do

    DIY RV Fixes Any Newbie Can Do

    Hitting the road in an RV is an adventure you’ll never forget, and in most cases, it will be some of the most fun you will have on the open road or in nature. There is a less memorable aspect to RVing though, and that is the dreaded fixes and repairs that are inevitable. To help you make more memories of the fun kind, here are some fairly easy DIY fixes and preventative measures that will keep you on the road with your headlights on, instead of on the side of the road with your hazards on.

    Oh, and for the record, I am far from an RV tech or repairman. This is just based on my experiences over six years and 100,000 miles of RV life on the road.


    Common Issues RVers Face

    As an RVer, you’ll likely face a few common issues that can be easily fixed or prevented with a bit of know-how. These problems range from minor leaks and blown fuses to tire changes and roof repairs. Addressing these issues promptly is crucial to maintaining the functionality and safety of your RV. By learning how to handle these basic repairs, you can avoid unnecessary service calls and keep your adventure on track, all while saving a lot of money in the process.


    Essential Tools and Supplies for DIY Fixes

    Before diving into the specifics of DIY repairs, it’s crucial to have the right tools and supplies on hand. Here are some must-have items for every RVer:

    • Basic Toolkit. Ensure you have a set of wrenches, screwdrivers, and pliers. These tools will cover a wide range of basic repairs.
    • Multimeter. Useful for diagnosing electrical issues, a multimeter can help you identify problems with your RV’s wiring and electrical components.
    • Duct Tape, Zip Ties, and Sealant. These versatile items can temporarily fix leaks and other minor issues until a more permanent repair can be made.
    • Spare Fuses and Bulbs. Electrical problems are common, and having spare fuses and bulbs can quickly resolve many issues without needing professional help.
    • Tire Pressure Gauge and Air Compressor. Maintaining proper tire pressure is essential for safety and fuel efficiency. A tire pressure gauge and good air compressor help ensure your tires are always at the correct pressure. Just make sure that the air compressor you have is strong enough to fill RV tires, which often require a much higher PSI than regular passenger vehicle tires.


    With these tools and supplies, you’ll be prepared to handle a variety of common RV issues. One final tip I can give before diving into a few specific DIYs is that while on the road, my wife and I try to take care of repairs in the parking lot of whatever stores we are buying parts at. If the space is there for you to make the repair comfortably, just realize that Murphy’s law is a real thing, and you will likely have to make another trip into a store to properly fix a problem. It’s easier to just walk back into a store instead of having to find another one to pull into along the way.


    Step-by-Step Instructions for Simple Repairs

    Fixing a Leaky Faucet

    One of the most common issues you will come across while RVing is a leaky faucet, and in most cases, it is relatively simple to fix. Here’s a step-by-step guide:

    1. Identify the Leak Source: Determine if the leak is coming from the faucet handle, spout, or connections underneath the sink.
    2. Gather Necessary Tools: You’ll need a wrench, screwdriver, and possibly replacement parts like washers, O-rings, clamps, or a hose.
    3. Turn Off Water Supply: Ensure the water supply or pump is turned off to avoid any mess. A bucket or something to catch trapped water is usually a smart idea as well.
    4. Disassemble the Faucet: Use the screwdriver and wrench to carefully remove the faucet or other component once you have determined the issue. In some cases, you will have to remove a few parts to get to the specific piece that needs to be repaired.
    5. Replace Damaged Parts: Check for worn-out washers, O-rings, or hoses, and replace them as needed.
    6. Reassemble and Test: Put the faucet back together, turn on the water supply, and test to ensure the leak is fixed.


    Replacing a Tire on an RV

    Changing a tire on an RV is slightly different from a regular vehicle due to the size and weight. Here’s how to do it safely:

    1. Proper Weight Ratings for Jacks. Ensure your jack can handle the weight of your RV. Check the weight rating before purchasing or using a jack. You should also know what the weight rating for your RV is, as it is essential for many aspects of RV travel.
    2. Check for a Spare Tire. Many RVs do not come with a spare tire, so your first step is to ensure whether or not you have one before hitting the road. If you do, make sure it is in good condition before setting out on your trip.
    3. Proper Tire Inflation Levels. Use your tire pressure gauge to check that all tires, including the spare, are inflated to the manufacturer’s recommended levels. Doing this regularly helps prevent blowouts or other issues.
    4. Safety First. Park on a level surface and use wheel chocks to stabilize the RV. If you have stabilizers on your RV that can be easily and safely deployed while changing your tire, that is a bonus. You should also make sure to turn on your hazard lights and place a cone if you have one.
    5. Loosen Lug Nuts. Before lifting the RV, slightly loosen the lug nuts on the wheel that needs to be replaced.
    6. Lift the RV with a Jack. Position the jack under a sturdy part of the RV’s frame and lift the vehicle until the tire is off the ground.
    7. Remove the Old Tire and Install the New One.  Remove the lug nuts and old tire, then place the spare tire on the wheel studs. Tighten the lug nuts in a star pattern by hand until the tire feels securely in place.
    8. Lower the RV and Tighten Lug Nuts. Carefully lower the RV and then fully tighten the lug nuts in a similar star pattern with the respective wrench to ensure proper tightening.


    Replacing a Blown Fuse

    Electrical issues are common in RVs, but replacing a blown fuse is straightforward:

    1. Locate the Fuse Box. The fuse box is usually found near the RV’s control panel.
    2. Determine the Faulty Fuse. Identify the blown fuse by checking for a broken filament or discoloration. This is where a simple multimeter comes in handy to diagnose and confirm.
    3. Replace the Fuse. Remove the faulty fuse and replace it with one of the same amperage. Avoid using a fuse with a higher or lower amperage rating, as this can cause electrical damage, or another blown fuse.


    Patching a Roof Leak

    A roof leak can cause significant damage if not addressed promptly, and the roof is something that I actually suggest you get professionally fixed if you are not confident in your DIY skills. That being said, a temporary patch can save your vacation until a professional can take a look. Here’s how to patch it:

    1. Identify the Leak Location. Look for signs of water damage or moisture inside the RV to pinpoint the leak.
    2. Clean the Area. Clean the area around the leak with soap and water, and let it dry completely.
    3. Apply Sealant and Patch. Use a roof sealant to cover the leak area, then apply a patch over it. Press firmly to ensure it adheres well.
    4. Allow to Dry and Test. Let the sealant dry completely before testing the repair by spraying water over the patched area.
    5. Duct Tape Isn’t Great, but It Can Help. If you don’t have sealant or a patch but you do find yourself with a leak, duct tape can sometimes be a temporary solution. Be sure that the tape will not further damage your roof, paint, or leaky area before applying, but I personally feel that in the case of a leak, that risk is worth it if bad weather is coming.

      *A good idea, if possible, is to check a weather app on your phone. You may be able to simply wait it out if the weather looks OK for the rest of your trip.


    Safety Tips and Precautions

    • Turn Off Power. Always unplug from shore power and turn off the power supply before attempting any electrical repairs to avoid shock or injury.
    • Wear Protective Gear. Use gloves, safety glasses, and other protective gear as needed to prevent injuries.
    • Ensure Proper Ventilation. When working with sealants or other chemicals, ensure the area is well-ventilated to avoid inhaling fumes.
    • Double-Check Work. After completing any repair, double-check your work to ensure everything is secure and functioning correctly. This is especially true if you are on the road and not at home with time and resources readily available for those dreaded multiple trips to the hardware store that I mentioned above.


    Additional Resources

    Just because you’re doing it yourself doesn’t mean you have to do it alone. I have three sources that I regularly use for help.

    • Online Forums and Communities. You would be surprised how a simple Google search for your specific problem can come back with forums or websites where people are discussing your problem and how to fix it.
    • Video Tutorials and Online Courses. YouTube searches can sometimes offer detailed video tutorials on various RV repairs. This is usually my favorite method, because I get a visual aide to reference.
    • Call a Professional. Whether it is a local professional that you may have found in a search or someone you may personally know, sometimes calling someone with more knowledge can lead to a simple cheap fix. This has happened to my wife and I while on the road, and we’ve had professionals walk us through a few possibilities over the phone that ended up saving us a lot of time and money. You’d be surprised how many people, even those that make a living off these kinds of repairs, will be willing to give a little free advice over the phone.


    Understanding and performing basic DIY repairs and maintenance can greatly enhance your RVing experience, giving you the confidence to handle common issues and keep your adventure on track. Practice these skills, learn from each experience, and soon you’ll be tackling more complex repairs with ease. Happy RVing, and hopefully we’ll see you on the road.

  • Replacing or Fixing an RV Toilet: A Step-by-Step Guide

    Replacing or Fixing an RV Toilet: A Step-by-Step Guide

    Ah, the joys of RV life – the open road, the freedom to roam, the adventures waiting around every bend, and the occasional spray of toilet water to the face! Let’s be honest, not every part of RV living is glamorous. Take, for example, the humble RV toilet. It’s a crucial component of your home on wheels, but one that often gets overlooked until it’s too late.

    If you’ve found yourself in need of fixing or replacing your RV toilet, fear not! This guide will walk you through the process step-by-step, with a personal experience that even I had to laugh at – well, I laughed days later, not in the moment.


    My Frozen RV Toilet Fiasco

    This is my somewhat long story and is mostly for laughs, so if you wish to skip to the how-to section, click here.

    Let me set the scene: It’s Idaho in the winter, and before you ask who goes camping in Idaho in the winter, that would be us. We were working on a contract that had us stay at an RV resort with hotel rooms. The temperature was going to drop into the negatives with windchill, so we stayed in a cozy hotel room, thinking that we would be fine leaving the heat on overnight. That was my first mistake. The following is what transpired.

    My breath fogs in the air as I step outside my hotel room to slip and slide my way over the ice and snow in the parking lot towards my RV. I’m bundled up and look like the Michelin man as I waddle over and into the less-than-freezing inside of my home on wheels where I realize that I may have set the heat a little low trying to conserve power and gas. I turn on the water pump, the motor churns to life, and … sprinkler sounds come from the bathroom. Oops, I warmed the inside of the RV, but I left that bathroom in the back a little too exposed to the weather.

    I open the bathroom door, water is shooting out from behind our RV toilet, and I know it’s up to me to fix it. After I shut off the water pump and arm myself with tools, I venture into the belly of the beast. As I begin disconnecting the toilet, disaster strikes. A specific connector, apparently not built to withstand arctic conditions, snaps clean off. I spout a few four-letter words, waddle back to the hotel room, and inform my wife, “We have to find an RV parts store.”

    We spent the next 30 minutes looking for somewhere that would have our specific toilet and the specific part I needed. The closest place was a Camping World about an hour away. When we arrived, they had the part ready, I purchased it and immediately went to work in the parking lot. After about 30 or 40 minutes of uncomfortably working on the toilet, I smiled and said, “Wow, that wasn’t too bad.” Of course, that’s when the fun really started. I asked my wife to turn on the water pump, and after a few seconds of seemingly successful silence, I leaned in, only to catch a jet of freezing cold water sprayed directly into my face.

    Luckily the water was coming from the outside connection and not a backfire, if you catch my drift. It turns out that trying to lazily skip a few steps wasn’t the best idea. Instead of taking the toilet out completely to work on the problem, I tried to work directly on the issue that needed fixing. After a few more four letter words – which my wife said were pointless, but they definitely made me feel a little better at the time – I inspected everything further and thought that maybe some other connectors and washers would be a good idea. I was confident that a stop at the hardware store for a few items and proper installation would do the trick.

    Since we were trying to make it pretty far on our travel day, we drove another two hours south to a Home Depot, where I proceeded take out the whole toilet to try and do it right. I went into the store and purchased everything I thought I would need and started taking out the toilet. It took me about 45 minutes out in the cold to take out the toilet, replace some connections, and add a little insulation around the tubing for future protection. When I put everything back together, I turned on the water, and sure enough, I got sprayed right in the face again. It turns out that in my haste to finally finish this project, I didn’t properly connect the new piece I purchased in the first place.

    At that point the four-letter words were really flowing, but I set out to start from the beginning again. After getting the toilet out, I of course fumbled one of the unique screws that holds it in place right down the poop-chute, and I nearly lost my mind. My wife, somewhere between aggravation and laughter, calmed me down, and then set out to help me in my final attempt after I took about 20 minutes to find a screw that would actually fit our toilet. Together, we were finally able to properly install the toilet and the replacement part.

    It turns out that doing things slowly, thoroughly, and completely from the beginning, is always the best way to do things. It also shows that while I try to do things myself, getting help from others is good practice too. And finally, as much as I hate to admit it, sometimes my wife does know best. I won’t tell her it’s not more than Google, even though I feel like she may think so, but she is brilliant and super handy too. I love her, and she’s the best partner I can ever have for all of my crazy life adventures.

    Now, for those that want to do it right the first time around, below are the tools and steps you should take to properly fix or replace your RV toilet.


    Tools and Materials Needed

    Before diving into the replacement process, gather the following tools and materials:

    • adjustable wrench
    • screwdriver set
    • plumber’s tape (Teflon tape)
    • replacement part or new RV toilet
    • rubber gloves
    • towels or rags
    • bucket

    Having these items on hand will ensure you’re prepared for the job without unnecessary interruptions.


    Step-by-Step Instructions

    Before beginning the installation, the most important aspect of this project is comparing your toilet and the specs of your RV bathroom with a possible replacement part or new RV toilet. You don’t want to start the project only to realize that what you purchased is not compatible.


    Step 1: Turn Off the Water Supply

    Begin by turning off the water supply to your RV. This will prevent any unexpected sprays of water (trust me, you’ll want to avoid this). Locate the water pump switch and ensure it’s off, or turn off the main water supply if you’re hooked up to an external source.

    Step 2: Drain the Toilet

    Flush the toilet to drain as much water as possible. Use towels or rags to soak up any remaining water in the bowl. This will minimize spills and make the process cleaner.

    Step 3: Disconnect the Water Line

    Use a wrench to disconnect the water line from the back of the toilet. Be prepared for a small amount of water to spill out. Have your bucket and towels ready to catch any drips.

    Step 4: Remove the Old Toilet

    Unscrew the bolts at the base of the toilet using a wrench or screwdriver. These bolts can sometimes be a bit stubborn, so applying some WD-40 or other lubricant and letting it sit for a few minutes may help. Lift the old toilet off the flange and set it aside. You might need an extra hand to help maneuver it out of the tight space.

    Step 5: Prepare the Flange

    Clean the flange area thoroughly with a rag. Remove any old wax or gasket material to ensure a good seal with the new toilet. Ensure the surface is smooth and free of debris. If the flange is damaged, this is the time to replace it to avoid future leaks.

    Step 6: Install the New Toilet or Replacement Part

    Place the new toilet onto the flange, aligning the bolt holes. Secure it with the provided bolts, tightening them evenly to avoid cracking the base. It’s important to tighten the bolts just enough to secure the toilet without over-tightening, which can cause damage.

    Step 7: Reconnect the Water Line

    Attach the water line to the new toilet, ensuring it’s snug and secure. Use plumber’s tape (Teflon tape) on the threads to prevent leaks. Double-check that the connection is tight but not overly tight, to avoid damaging the fittings.

    Step 8: Turn On the Water Supply

    Turn the water supply back on and check for leaks. If everything looks good, flush the toilet a few times to ensure proper operation. Monitor for any slow leaks over the next few hours to catch any issues early.


    Common Challenges

    Replacing an RV toilet isn’t always smooth sailing, as you can picture if you read my story. Here are some common challenges you might face, along with tips to overcome them:

    Leaky Connections

    Double-check that all connections are tight and secure. Use plumber’s tape to seal threads. If you notice any leaks, tighten the connections slightly more and ensure the plumber’s tape is correctly applied.

    Stubborn Bolts

    If bolts are rusted or difficult to remove, apply a lubricant or penetrating oil and let it sit for a few minutes before attempting to loosen them. A little patience with your elbow grease can go a long way.

    Misaligned Flange

    Ensure the flange is clean and properly aligned before securing the new toilet. If it’s damaged, consider replacing the flange as well. This can prevent future leaks and ensure a secure fit.


    Maintenance Tips

    To keep your new RV toilet in top condition, follow these maintenance tips:

    Regular Cleaning

    Clean the toilet regularly with RV-friendly cleaners to prevent buildup and odors. Avoid harsh chemicals that can damage the seals and components.

    Check for Leaks

    Periodically inspect the water connections for leaks and tighten as needed. Early detection can prevent water damage and save you from more extensive repairs.

    Winterize Properly

    If you’ll be camping in cold weather, take steps to winterize your RV to prevent freeze damage. Drain the water lines, add antifreeze as necessary, and insulate exposed pipes and connectors. If you are RVing in cold weather, be sure that your pipes, tanks, and bathroom have proper ventilation and heating to prevent freezing.


    Conclusion

    Replacing an RV toilet might not be the most glamorous task, but with the right tools, materials, patience, and in some cases, a good sense of humor, it can be a manageable experience for most DIYers. Whether you’re dealing with a frozen water fiasco or just looking to upgrade, this guide has you covered. Happy RVing, and may your travels be filled with adventure and well-functioning toilets!

  • 10 Popular RV Renovation Ideas: Personalizing Your Home on Wheels

    10 Popular RV Renovation Ideas: Personalizing Your Home on Wheels

    So, you bought the RV you’ve been searching months for, but it’s missing those final touches to truly give it that unique feel. That “Now, I’m home!” feeling. Well, no worries. I’m here to help give you some tips and inspiration on how to give your RV a bit of a facelift to make it truly feel like your home on wheels. Whether you’re a weekend warrior or a full-time RVer, these 10 RV renovation ideas can significantly enhance your comfort and enjoyment on the road.

    From simple decor changes to more substantial upgrades, here’s a guide to some of the most common RV renovations that can turn your RV into a cozy and stylish retreat.


    1. Flooring Upgrades

    While many RV manufacturers have listened and improved the flooring on newer units, it can still be a sticking point — no pun intended — for many DIYers looking to make that initial upgrade. Many RVs come with basic linoleum or carpet. Both can wear out quickly and hold onto dirt, stains, and more. Consider replacing these with more durable and stylish options like vinyl planks or laminate flooring. These materials are not only easy to clean but also add a touch of homey elegance to your space.

    DIY Tip: Make sure to choose flooring that can withstand temperature fluctuations and moisture, as these are common in RVs.


    2. Kitchen Remodels

    If food is the key to your heart, like it is for me, then the kitchen is likely the heart of your home. And if that is true, then your RV should be no different. Simple changes like painting cabinets, adding a backsplash, or upgrading your countertops can make a big difference. For a more significant transformation, consider replacing your RV’s appliances with more modern and efficient models.

    DIY Tip: Peel-and-stick tiles are a budget-friendly way to add a stylish backsplash without the hassle of traditional tiling.


    3. Bathroom Upgrades

    Most RV bathrooms are smaller than their sticks-and-bricks counterparts, but that doesn’t mean you can’t make it stylish, cozy, and functional. Simple and inexpensive changes like replacing the showerhead with a high-pressure, water-efficient model go a long way towards looks and saving water when you are out boondocking.

    For looks, installing a new vanity, or even adding some decorative touches like new curtains and towels can create a spa-like feel. OK, maybe not a spa-like feel, but it is definitely cozier than a bare RV bathroom. Trust me when I say that a nice shower rug on your feet when it’s really cold outside can go a long way.

    DIY Tip: Use damage-free adhesive hooks and suction cup organizers to maximize storage and keep everything in place while on the move.


    4. Solar Power Installation

    One of the best RV renovation ideas for just about any RV is adding solar panels and better batteries. Not only does this eco-friendly solution reduce your reliance on campsite power hookups, but it also allows you to enjoy off-grid camping with ease. A basic solar setup can power essential appliances and keep your batteries charged, giving you more freedom to explore remote locations. 

    If DIY solar scares you, then a good solar power station with folding solar panels is a great plug-and-play solution. These tend to be a little cheaper than building your own solar setup, but they are easy and come with a warranty.

    DIY Tip: Start with a smaller solar kit to understand your energy needs before expanding your system. Installation usually involves mounting the panels, running wiring to a charge controller, and connecting to your battery bank.


    5. Painting and Wallpaper

    A fresh coat of paint or some stylish wallpaper can drastically change the look and feel of your RV. While this is admittedly my weak point — I let my wife and her eye for decor make these upgrades — this quick and inexpensive change truly gives your RV a welcoming feel. According to her, light colors can make a small space feel larger. Bold patterns, on the other hand, can add a touch of personality. Don’t forget about the cabinets and furniture. A little paint can go a long way in updating your RV’s interior.

    DIY Tip: Use lightweight materials and ensure proper ventilation when painting to avoid lingering fumes.


    6. Furniture Upgrades

    Swapping out old, uncomfortable RV furniture for more modern, multifunctional pieces can greatly enhance your comfort. Consider installing a convertible sofa bed, a fold-out dining table, or even custom-built storage solutions that maximize every inch of your space.

    DIY Tip: Look for furniture that can be securely fastened to prevent movement while driving, and always consider the weight of old vs new furniture, because WEIGHT MATTERS!


    7. Lighting Improvements

    Good lighting can transform your RV from a dark cave into a warm, inviting space. If you are like me and don’t mind the cave feel, then you can skip to the next idea. But if you are like my wife and need light at all times, then replacing outdated fixtures with energy-efficient LED lights and adding under-cabinet lighting in the kitchen are a game-changer. If you want to go the extra mile, then consider installing dimmers to create a cozy ambiance.

    DIY Tip: Battery-operated LED lights are a great option for adding illumination without complicated wiring.


    8. Exterior Enhancements

    Don’t forget about the outside of your RV! Adding an awning, upgrading your outdoor lighting, or even just giving your RV a good wash and wax can make a big difference. For those who love outdoor living, consider installing an outdoor kitchen or entertainment area, or having an easy and functional setup that you can pull out wherever you go.

    DIY Tip: Portable solar lights can enhance your outdoor space without needing electrical wiring.


    9. Storage Solutions

    Maximizing storage in an RV is always a challenge, but it is essential. With a bit of creativity, you can make the most of your available space. Install shelves, hooks, and organizers to keep everything in its place. Think vertically and use every nook and cranny for storage. For some fun ideas, here is a video of us in our Class B van, maximizing all of our space to be able to stay on the road for months.

    DIY Tip: Over-the-door organizers are perfect for adding extra storage without taking up floor space.


    10. Personalized Decor

    Finally, add some personal touches to make your RV feel like home. I give my wife all the credit in the world. Simply hanging some photos, adding some cozy throw pillows and blankets, and incorporating decor like fake plants have transformed the living space and made it more inviting.

    DIY Tip: Use removable adhesive strips and hooks to hang items without damaging the walls.


    For most of these RV renovation ideas, you can keep your costs fairly low and find some good bang-for-buck options if you do a little research. But regardless of how little (or how much) you spend, renovating your RV to make it feel like your own cozy sanctuary on the road truly changes the RV experience for the better. It has made a world of difference for us. So, whether you’re making small changes or undertaking a major overhaul, these common RV renovation ideas will help you create that comfortable, stylish, and functional home on wheels. Happy renovating, and may your travels be filled with adventure and beautiful memories!