Author: praveen.pothuganti@traderinteractive.com

  • FMCA Tech Tip: Cold-Weather Camping Tips

    FMCA Tech Tip: Cold-Weather Camping Tips

    Not all RVers go into hibernation or head for warmer climates. Some embrace the winter weather and plan activities that involve RV trips. sledding, skiing, winter hiking… All of these are more pleasant when you know that you have a warm RV waiting for you at the end of the day’s adventure. However, some special preparations and precautions need to be taken. Here a few tips for winter RV trips.

    Water Tips

    Protecting the water system from freezing is of paramount importance. Most RVs aren’t designed for use in colder temperatures. Adding insulation or heat tape may be necessary. Another idea for short outings is to leave the RV water system winterized and then take along bottles of water for drinking and tooth brushing, and bring RV antifreeze for flushing the toilet.

    Cozy and Warm

    To ensure that things stay toasty inside the RV, make sure the furnace is operating properly before you leave home. Fill the propane tanks before you depart, and keep a close watch on tank levels during your outing. If you have a camping spot with electricity, bring along a thermostatically controlled ceramic heater to provide supplemental heat.

    If you’ll be using battery power to keep the furnace running, make sure the batteries are in good condition and stay fully charged. They will be less likely to freeze.

    Safety tips to help ensure a safe winter camping adventure:

    • Try to find a parking spot that is exposed to sunlight during the day and where some type of windbreak is available.
    • If it snows during your stay, make sure to keep the exhaust pipes for the generator or motorhome engine clear to allow gases to dissipate as they should.
    • Don’t allow too much snow to accumulate on the RV roof or allow it to cover vents, the satellite dish, etc.
    • Always test your carbon monoxide alarm before every outing. Carbon monoxide can be deadly, and the symptoms are similar to the flu.

    More Resources

    If your heart is set on cold-weather camping, check out this article for in-depth tips.

    FMCA RV Club brings you this monthly tip to Enhance Your RV Lifestyle. FMCA delivers RV know-how to its members. Join today and save $10 — a special offer for RV Trader readers. Learn more at https://join.fmca.com/trader18.

     
    This information is for educational purposes. FMCA shall not be responsible nor retain liability for RVer’s use of the provided information. Prior to making any RV service decision, you are advised to consult with an RV professional. 
  • RV Renovations: Backsplash Installation

    RV Renovations: Backsplash Installation

    Renovating an RV is an incredibly demanding yet rewarding process. Many people want to enjoy the RV lifestyle but are turned off by older, outdated interiors. For them, remodeling has become a way to create the homey and personalized space of their dreams in a home on wheels. Previously, we discussed the first two steps in the renovation process: painting and adding in new flooring. Once you have completed these two steps, you will be ready to move onto the next step: adding in a backsplash (or two!).

    Adding a backsplash into a moving home is a bit of a tricky process, but if you follow the right steps, you should have excellent results. Stick to the following six steps for RV backsplash results that will last for years to come.

    1. Determine where you want backsplash and placement

    Before beginning any preparation or purchasing for this project, you need to determine exactly where you will be placing your backsplash. Many RVers like to place a backsplash in the kitchen, for both aesthetic and functional purposes. Besides looking pretty, backsplashes tend to minimize mess in the kitchen and make for easier cleanup.

    If you decide to place one in your kitchen, you need to determine how much of the kitchen wall it will cover. Do you want it behind the stove only, or do you want it behind the stove and the sink? Or do you want your backsplash behind the entire kitchen, including your stove, sink, and any additional counter space. This is something only you can decide, and it may help to sketch your kitchen with the backsplash placed in different sections throughout. This way you can see exactly what it will look like before you begin.

    Some RVers decide to place a backsplash in their bathroom as well. Typically, this would be placed on the wall, between the mirror and the sink. If you decide to install a backsplash in your bathroom, you will need to decide if you want it above the sink only, or if you want it to wrap around the sides of the walls. Use the same method detailed above to help you decide.

    2. Decide on backsplash materials

    Once you have decided where to place your backsplash, it’s time to choose your materials. The main choices are deciding between a ceramic backsplash and a peel-and-stick backsplash. Many RVers go with peel-and-stick because it’s lightweight, easy to install & remove, and holds up well through travel. Still, it should be noted that not all types of peel-and-stick backsplashes fare well being near heat sources. If you choose to install a peel-and-stick backsplash, be sure to choose one with maximum heat resistance for best results and longevity.

    That being said, many RVers have also successfully installed ceramic backsplashes in their kitchens and bathrooms. While it is more work and maintenance, it is certainly possible to have a beautiful, ceramic tile backsplash in an RV, and it may even give your RV interior a homier overall feel.

    Once you have chosen your desired type of backsplash, it’s time to pick your choice of color and style. Subway tile is beautiful and classic, but there are also many more shapes, colors, and styles possible. Some companies make custom backsplash tiles in a myriad of shapes and colors, so really anything is possible. You will also need to select a matching grout color for ceramic tiles. Whatever you envision for your RV backsplash should be color-coordinated with the rest of your RV for best aesthetic results.

    3. Purchase materials

    Once you have decided what type of backsplash you want and where it will be placed, it’s time to measure your walls so that you know how much material to purchase. Measure the long side in its entirety, and then measure the height, starting under the cabinets and ending just above the countertop. Add a few extra inches to each side in case of errors – it’s always better to have more than you need than not enough.

    If you’re going with a ceramic backsplash, you will need to purchase tiles, grout, and mortar, as well as a bucket for mixing, spacers, and tools for mixing and applying mortar and grout. If you are installing a peel-and-stick backsplash, you’ll just need to purchase the tiles and extra spray adhesive if you decide to use it.


    4. Prep the wall for backsplash placement

    Once you have everything you need, you will need to ensure that your wall is prepped before beginning the installation. All this means is that you need to ensure that the wall is flat so that the backsplash can sit correctly. If the wall is uneven or bumpy, the backsplash will have difficulty holding up over time. Fill any bumps or nicks in the all with putty and allow it to dry for twenty-four hours before sanding it down flat.

    Likewise, ensure that any wallpaper borders have been removed from the wall. This can be accomplished by using a tool, such as a scraper or a flathead screwdriver, to pull the border away from the wall. Once part of the wallpaper has been lifted, you can begin gently peeling the entire border away. This may take some effort, and you will want to move slowly to avoid tearing the border before it has been removed from the wall.

    Once your walls have been flattened and sanded down, it is finally time to begin installing your backsplash.

    5. Install backsplash

    The process of installing your backsplash will look different for those who decide to use peel-and-stick tiles, versus those who decide to use ceramic tiles. If you are using peel-and-stick, you will want to begin in the lower left corner and work your way across the bottom of the space where you are adding tiles. Spraying additional adhesive on the tiles before placing them may help them to hold up longer, but it is not entirely necessary. Place each block of tiles as close as possible to the tiles next to it. This will help the tiles to lock together for better function and aesthetic purposes. Once you have completed the installation of the bottom row, move on to the next row and continue on until the entire area has been tiled. Take measurements and make cuts for the windows, outlets, and anything else in the space precisely for best results.

    If you are installing a ceramic backsplash, your process will be a bit lengthier and more labor-inducive. Most likely, your tiles will come in sections of pieces, and you should begin in the lower left corner. Before placing tiles, you will need to apply a layer or mortar to hold the tiles in place. Only mix small amounts of mortar at a time, as it dries very quickly. Follow the exact directions on the mortar packaging to ensure your mortar has the proper consistency.

    Apply a layer using a mortar application tool, then smooth out the mortar with a smoothing tool. Once the mortar is smooth, you may place your tiles. Apply mortar, smooth it, and place one section of tiles at a time. Place spacers in between the sections of tile for even positioning. Once you have finished one row, move on to the row above and then the row above that until you are finished.

    Make cuts for rounded edges, windows, outlets or anything else that is on the all is trickier with ceramic tile. You will need to rent or purchase a tile cutting tool for this part of the project. The stationary machine cutters are usually more accurate and effective then the handheld tile cutters. Mark the exact place to be cut with a sharpie and make cuts carefully and accurately for best results. Once your backsplash has been laid properly, you will need to allow it to dry for twenty-four hours before grouting.

    Mix your grout the same way you mixed your mortar and spray grout sealant before applying grout with a smoothing tool in small sections. There will be a thin layer of grout on the tiles while you are applying it. This is okay and can be easily wiped off the grout after it has dried for an additional twenty-four hours.

    6. Let “rest” and enjoy!

    Your RV should remain stationary for at least a week after installing a new backsplash.This way, the tiles will have time to dry and set before they are taken up to seventy miles per hour down the road. Once your tiles have had time to dry, you are all set to move your RV if need be.

    Installing a backsplash in the kitchen and/or the bathroom of your RV makes a world of difference. With each additional detail, your RV will begin to look homier and more modern. Once your backsplash is installed, you are ready to begin the next round of renovation projects: updating window treatments.

    Have you added a backsplash to your RV kitchen or bathroom? How did it turn out? Feel free to share in the comments below!
  • RV Renovation: Flooring Swap

    RV Renovation: Flooring Swap

    Traveling in an RV is a fun experience that anyone of any age or background can enjoy. There’s nothing like road tripping with a kitchen, bathroom, bedroom, and more at your constant disposal, and more people than ever are hitting the road to see just what it’s all about. But what happens when you want to buy an RV, but you don’t care for the interior style? Your best solution is to take on some renovations.

    Renovating an RV interior is a challenging and time-consuming project, but it results in a finished product that you will love because you designed it yourself. Painting is typically the first project in remodeling an RV, and there are many steps to painting, as discussed in the two previous posts.

    After painting, you will want to replace your RV’s flooring next. This is another tricky yet satisfying project that yields fantastic results. Follow along with these seven basic steps for a fool-proof guide to laying new floors in your RV.

    1. Remove the old floor

    Before you can even envision the new flooring in your RV, you will need to remove the old floor. Most RVs are carpeted, and if we’re being honest, removing the carpet can be a pain. First, you will need to pull the carpet away from the walls using pliers. Once the carpet is no longer sealed around the corners and edges of the room, you can begin to pry it up. You may need to cut the carpet in parts to remove it in several pieces. Beware of the many, many staples you will find beneath the carpet, as some of these will be sharp.

    Once the carpet is removed, you will need to remove all the staples that once held it in place. This is best done using a flathead screwdriver or needle nose pliers. Double check to ensure that all staples have been removed before moving on to the next step. Once the old carpeting is completely removed, you will be left with a plywood subfloor.

    2. Clean and prepare for the new flooring

    Removing the carpet makes a lot of mess, and you will want to clean up well before laying a new floor. Sweep up all the carpet particles and staple pieces, and vacuum up and dust and dirt particles that may be floating around.

    You will also need to move any furniture that is covering the floor, such as the couch, table dinette, and/or arm chairs. If you have a booth dinette, it is not necessary to replace the flooring under the benches. Simply move the table to another area when laying new flooring beneath it.

    Finally, be sure to fill any holes or imperfections in the sub-floor to ensure that the new floor has a flat surface to rest on. Sand down any bumps or nicks, and be sure to check over the whole floor to make sure you haven’t missed anything.

    2. Measure your RV’s square footage

    Next you will need to measure the square footage of your RV so that you know how much flooring to buy. Your measurements do not need to be perfect, but they should be close to avoid inaccuracies. Don’t forget to measure each individual room, including the main room, bathroom, bedroom, and/or cab area (if you are in a motorhome).

    3. Choose your new flooring

    The biggest choice in this whole process is selecting your new flooring. Your first decision must be between wood floors and carpet. Since RVs are typically used for messy camping trips, many renovators opt for hardwood floors, since these make for less mess and easier clean-up. It is also much simpler to lay your own hardwood flooring than it is to install your own new carpeting. If you do choose to go with carpeting, you may want to hire a professional to install it for you.

    Because you have to consider the overall weight of the RV, most people avoid laying real hardwood floors. However, wood-look laminate flooring is much lighter than real hardwood, and it tends to hold up very well in RVs. When choosing laminate flooring, you must then choose between peel-and-stick floors and click-and-lock floors.

    Peel-and-stick flooring simply involves peeling the backing off of adhesive pieces of flooring and pressing them onto the subfloor. The process is easy, and the results are great. However, sometimes these floors can shrink over time, and they can occasionally get caught in your slideouts when they are moving in and out.

    Click-and-lock flooring is a bit pricier than peel-and-stick, and the process for laying it is more involved. However, it is known for being higher quality and lasting longer. Each type of flooring has its pros and cons, so you will want to do your own research before making your final choice.

    Once you have narrowed down the flooring type you want, you can head to the hardware store to look at brand, colors, and samples. Be sure to pick a color that coordinates with the paint and color scheme, and choose a high quality brand for best results. Consider buying a single piece from your favorite types of flooring and bringing it back to the RV to see how it looks in your space.

    Once you have made your final choice, be sure to purchase more flooring than you need to allow for inaccuracies in measuring and potential mistakes.

    5. Plan for the slide

    For many people, laying new floor in their RV’s slideouts is the most intimidating part of this whole process. However, laying floors on your slideouts is really no different than laying it anywhere else in your RV. Once there is no furniture or carpeting in the way, you will just need to ensure you have a flat surface, and that the flooring will not extend past the end caps on the slideout. Once you have planned for your slides, you are finally ready to begin.

    6. Lay floor

    With all the preparation out of the way, you are finally ready to lay your new floors. You will want to watch plenty of Youtube videos before beginning this step so that you can see exactly how it’s done. If you are using peel-and-stick flooring, you may want to consider spraying extra adhesive onto each piece for better results.

    No matter which type of flooring you use, (peel-and-stick or click-and-lock), be sure to pick a corner to start in, and work your way around the room accordingly. Work in a cohesive pattern to avoid mistakes, and stagger the floors for the best overall look. When making cuts, use exact measurements and ensure the piece will stick before applying adhesive or locking it into place. Consider using transitions or thresholds between rooms for the smoothest overall look.

    Do not rush this step. Take your time to ensure that the floors turn out as best as they can. This process may take a few days to complete.

    7. Let the floors cure

    Once you have laid new floors, you must give them a few days to rest without walking over them. This will ensure that all adhesive properly sticks and that the new floor has time to adjust to the subfloor. Once a few days have passed, you can safely walk across the new floors and enjoy your handiwork.

    Laying new flooring is fairly simple and makes a world of difference in an RV and will increase value if you are looking to sell. Replacing the carpet is also an especially good idea in older RVs, where the same carpet has been laid for many years. Laminate flooring is great for those who travel with pets and small children and is sure to last for years of use when installed properly. With the flooring replaced, you are all set to begin the next task in your renovation project: installing new trim and moulding throughout.

    Have you replaced the flooring in your RV? What steps did you follow? Feel free to drop a comment below!

  • FMCA Tech Tip: Purging RV Propane Containers

    FMCA Tech Tip: Purging RV Propane Containers

    When one or more of a motorhome’s gas-burning appliances exhibit strange, random, or difficult-to-diagnose problems, it may signal the need to purge the propane container. Brand-new propane containers also must be purged properly before being filled for the first time. So what is purging? Does it apply to all RV propane containers? How do you know if your container needs such a service? And who can do it?

    For answers, read this how-to guide from FMCA and the “RV Doctor” Gary Bunzer:

    About Propane Containers

    Before answering those questions, let’s define the term “propane container.” Most motorhomes are equipped with horizontal propane containers bolted to the frame of the coach. Typical motorhome propane containers are regulated by the American Society of Mechanical Engineers (ASME), as documented in its Boiler and Pressure Vessel Code. A horizontal ASME container is called a tank. The capacity of an ASME tank usually is expressed in gallons.

    Some smaller Type C coaches and older motorhomes may be outfitted with upright propane containers installed in a side compartment; it’s the same type of container usually found on towable RVs or in home gas barbecue grills. Such containers (which can be vertical or horizontal) are called cylinders, and are governed by the U.S. Department of Transportation (DOT) within the agency’s Hazardous Materials Regulations. Cylinders destined for Canadian provinces are regulated by Transport Canada (TC). The capacity of a DOT/TC cylinder typically is measured in liquid pounds.

    So, generally speaking, an ASME tank is bolted to the coach, while a DOT cylinder is portable and replaceable. Both types of containers require purging at some point.

    Why Purge?

    New propane containers are hydrostatically tested for leaks before shipment. A container that is destined for an RV, whether it’s a tank or a cylinder, usually is filled with compressed air (or sometimes another inert gas) when it is shipped from the supplier. Air contains moisture and other contaminants. Purging removes the air, moisture, and contaminants; if the purge process is not performed before the container is filled with propane the first time, combustion problems or delivery line pressure irregularities may develop later.

    Unfortunately, most new motorhome buyers don’t know whether their propane container was properly purged prior to that first filling, since a new motorhome usually is delivered to the owner with a full (or nearly full) container of fuel. I suggest asking that question during the walk-through or before officially taking delivery. Ask to see the pre-delivery inspection (PDI) form for validation. It’s in the best interest of both the RV dealer and the buyer to have a proper purging verified in writing before the retail delivery of an RV.

    Purging applies to older propane containers as well. In fact, any time a container has been opened to the atmosphere, for any reason, a new purging must take place before refilling with fresh fuel. Say, for instance, the internal float assembly fails, or the shut-off valve leaks and that component needs to be replaced; the tank must be purged after the replacement, since air has been allowed to enter. And that air contains moisture and perhaps other contaminants.

    The Moisture Problem

    Even a little water lying at the bottom of a propane container can be a problem. Any moisture present from the container to the inlet of the pressure regulator can cause the regulator to freeze up. There are two types of regulator freeze-up, both with negative outcomes.

    One type of regulator freeze-up occurs as the fuel in the container becomes vaporized on its pressurized path to the regulator inlet. The pressure regulator has individual sections where the fluctuating container pressure is reduced in two steps to the delivery line pressure required by the appliances. The propane vapor must pass through small orifices in these two stages in order for the pressure to be reduced sequentially and smoothly. Propane’s “boiling point” is minus 44 degrees Fahrenheit. Below that, it exists in liquid form; above that, it vaporizes. So, any remnant of water will freeze in those small internal orifices and block the flow of propane vapor through the regulator.

    The second type of regulator freeze-up happens externally during the winter months when mud or water or slush splashes up from the roadway, freezes, and blocks the second-stage atmospheric vent opening on the regulator. If the diaphragm inside the regulator cannot breathe, it cannot regulate, and it simply locks up. That’s why it’s important for the vent portion to be positioned downward and the regulator to be covered at all times during operation.

    The result of either type of regulator freeze-up is no propane flow, and the appliances will shut down just as though the container were out of fuel.

    When To Purge

    A container that has been in use for a while may need to be purged if more than one appliance has operational issues. For instance, the furnace doesn’t ignite right away; the water heater burner sputters; the cooktop burner flame lifts off the burner; or a burner flame is abnormally large or small, or more orange than blue in color. Any operational issue with an appliance is a cause for concern and should be investigated. It simply may be an out-of-adjustment regulator or an appliance in need of cleaning, but it could also be caused by moisture inside the container.

    Who To Call

    Certified and master certified RV service technicians are trained to properly purge a propane container. As an alternative, most propane retailers also can do the procedure.

    As mentioned, new tanks and cylinders typically are filled with air when shipped, but containers already in service will contain propane. In the case of the latter, before purging, it will be necessary to remove or burn off the container’s remaining propane.

    What Owners Can Do

    Since safety is paramount, FMCA recommends an annual test of the pressure regulator, as well as the entire propane gas distribution system, by a certified RV service technician. The condition of the container also should be checked. In addition, the RV owner should test the propane leak detector periodically.

    If the propane’s odorant is ever detected, immediately turn off the container’s service valve and schedule the RV for tests.

    And RVers should always keep a close eye on how well the RV’s appliances are operating. This can be your first sign of a problem.

    FMCA RV Club brings you this monthly tip to Enhance Your RV Lifestyle. FMCA delivers RV know-how to its members. Join today and save $10 — a special offer for RV Trader readers. Learn more at https://join.fmca.com/trader18/.

    This information is for educational purposes. FMCA shall not be responsible nor retain liability for RVer’s use of the provided information. Prior to making any RV service decision, you are advised to consult with an RV professional.

  • Styling an Outdoor RV Space

    Styling an Outdoor RV Space

    When camping in their RVs, many people opt to decorate their interior spaces. In many ways, this simple task can help your home away from home to feel more personalized while you are away on vacation. However, many people forget that when decorating an RV, you can also decorate your outdoor space to add to the overall homeyness.

    Since your outdoor space can be treated like a front porch, decorating this area can make your RV feel more like home, as well as making it appear more welcoming to guests who stop by. So next time you go camping, instead of just setting up two camp chairs outside, consider the following tips for setting up an outdoor space where you will love to spend time relaxing and recharging.

    Image: RV Select


    1. Roll out your awning

    Image: RV Share

    Extending your awning is one of the easiest things you can do to set up your outdoor space. This involves no additional purchases or packing, since your RV should already come with an attached awning. Just simply set up your awning by extending it manually or electrically, depending on the type of awning you have.

    Your awning essentially sets the parameters for the space where you will be adding furniture and decorating. Establishing the exact location of your porch is important because it gives you an idea of what will fit into your porch area and what won’t. Your awning will also provide you with some shade while you are enjoying your outdoor space, so once it is all set up, you are ready to move onto the next step.

    2. Invest in some comfy and cute camp chairs

    Image: RV Select 

    Camp chairs are essential to any outdoor RV set-up. They are used around the firepit, at outdoor tables, and even just to sit outside and enjoy coffee. While there are a multitude of camp chairs on the market, it is best to invest in some that are both comfortable and aesthetically pleasing. This will help your front porch to look clean and polished. Be sure to find chairs that do not clash with your awning or exterior RV color, as this will give you a cohesive space to add to.

    3. Add a table with a tablecloth and clamps

    One of the best things about having a cozy outdoor space is the ability to eat outside. Most people prefer to eat at a table, so this is a must when styling your outdoor area. Choose a table large enough for your family as well as any friends who may periodically join you for dinner. Be sure to find a table that can collapse and stow easily for travel. Many people end up selecting six or eight-foot banquet tables that fold in half. This offers plenty of space and durability, while also while packing up easily.
    Once you have selected a table, be sure to pick out a couple of table cloths that match your outdoor colors. These will help to minimize mess, while also adding to the overall homey vibes of your front porch space. Don’t forget clamps to make sure your table cloth doesn’t blow away.

    4. Select an outdoor rug

    Image: RV Web

    Once your camp chairs and table are in place, you should add a rug to tie the whole space together. If you have chosen simple chairs and table cloths, you can select a rug with a bolder pattern or color. However, if your chairs and tablecloth are already bright and colorful, consider choosing a more subtle rug to avoid clashing. Be sure to select a rug that is optimized for outdoor use, and ensure that you find one large enough to cover a majority of the space under your awning. This will ensure overall cohesiveness and matching in your outdoor area.

    5. Hang some string lighting

    Image: Smart RVing
    While fairly inexpensive and simple, there is just something about string lighting that really adds to a space. Basic strands of edison bulbs or globe lights pulls everything together under a glowy aura that feels magical and even a bit upscale. Grab a couple of packs of your favorite outdoor string lights, and hang them on your awning in whichever way you think looks best. Some folks hang them around the edges of the awning, while others criss-cross them across the center. Whichever way you choose is sure to look beautiful and really pull everything together.

    6. Add additional decorative accents

    Image: Camp Addict

    Finally, be sure to add in some fun decor to really spruce things up. This could include anything from a wreath on your front door, to hanging outdoor plants, seasonal flags, a doorstep rug, garden decor, citronella candles (which double as bug repellant), or anything else that matches your space and makes you happy. If you have a hammock or a grill, these also add to the beauty and functionality of your porch area. Remember that less is often more, and a few simple pieces can really go a long way.

    RV camping is an excellent way to vacation, and it’s even more enjoyable when your RV truly feels like a home. We hope these easy tips have inspired you to start decorating your patio soon!

    Have you decorated your outdoor space? What items and pieces did you use? Feel free to share in the comments below!

  • FMCA Tech Tip: Winterizing Your RV: Air vs. Antifreeze

    FMCA Tech Tip: Winterizing Your RV: Air vs. Antifreeze

    Unless you’re one of the lucky RVers heading south this time of year, fall’s cooler weather means it’s almost time to winterize your RV. The how-to of winterizing can be a hot debate (pun intended). FMCA has tips to help you decide the right option for your RV.

    About Winterizing

    Winterizing deals primarily with the plumbing system and protecting your RV from freeze damage. All water must be removed from holding tanks, water lines, and plumbing fixtures. Two methods are performed to winterize RV plumbing: using air pressure to blow moisture out of the system or pumping antifreeze through the water lines.

    Which should you use? The answer depends on where you live and the complexity of your RV’s plumbing system.

    Air

    Air is easy to use; just connect an air compressor to the water hose and blow everything out. In theory, the system will be dry. Plus, air is free, so it eliminates the need to buy bottles of antifreeze. Air pushes most of the water out, but residual water can remain in water lines’ low spots where it can freeze, expand, and cause damage.

    In a simple RV with minimal plumbing lines, using only air may not be an issue. But if you live in a place with long, cold winters, using air may not be enough to protect your RV from freeze damage.

    Antifreeze

    RV professionals consider antifreeze to be the best method for preventing freeze damage. Keep in mind that it differs from automotive antifreeze. RV antifreeze is nontoxic and is safe to use in fresh-water systems. It freezes but does not solidify. Instead, it turns to slush, which will not expand to crack fittings or water lines.

    One drawback to antifreeze is that it can be messy and requires buying a few gallons every season. It also can cause water from treated lines to taste bitter.

    More Resources

    For detailed, step-by-step instructions on the winterizing process, click here.

    Join the air vs. antifreeze debate. Check out this video from “RV Doctor” Gary Bunzer.

    FMCA RV Club brings you this monthly tip to Enhance Your RV Lifestyle. FMCA delivers RV know-how to its members. Join today and save $10 — a special offer for RV Trader readers. Learn more at https://join.fmca.com/trader18/.

    This information is for educational purposes. FMCA shall not be responsible nor retain liability for RVer’s use of the provided information. Prior to making any RV service decision, you are advised to consult with an RV professional.

  • Painting an RV: Part II

    Painting an RV: Part II

    With the increasing popularity of RV ownership, many people choose to renovate their RV interiors. Renovating allows for individuality and personalization, and there are so many projects you can complete in the process of modernizing an RV. Painting your RV walls and cabinets is one such project that, arguably, yields the most results.

    Previously, we discussed how to prep your RV interior for paint. Prep work involves smoothing all walls, sanding, cleaning, and taping and covering all areas you don’t want painted (see previous post for more details). Once your prep work is done, you are ready to begin the task that will show actual results: painting! Follow along with the steps below for best results.

    1. Choose your paint

    This might just be the most important decision in your whole painting process. Paint colors should be chosen alongside the RV’s overall color palette. After all, in a space of less than five hundred square feet, it is even more important to select specific colors that match a cohesive theme. This will ensure that your finished product looks polished and classy.

    Head to the hardware store and select your favorite color swatches from your preferred paint brands. Bring home a variety of swatches and hold them against your RV walls. Envision them filling your space, and ask friends and family for their opinions. Consider taking a few days to think about your choice before you begin. This is a big decision and you don’t want to rush it.

    Paint colors are a personal preference but it is often recommended to stick to neutral tones in tiny spaces. For instance, white is great for opening up a space and making it look bigger – which is why it is a popular choice amongst RV renovators. However, many are wary of choosing white because it can also be a challenge to keep clean and fresh. Paler grays are also popular, as they are easier to keep clean and still brighten up the space while keeping it neutral.

    Bright colors are fun, but they can also make a small space look tacky if used in excess. If you are wanting some color, you may want to consider painting just an accent wall here or there. If you choose to paint in all neutrals, you can always use decorations, furniture, blankets, throw pillows, rugs and more for pops of color.

    Once you have chosen your colors, you will need to choose your desired paint finish. There are many different opinions and preferences, but most agree that cabinets should be painted with a gloss or semi-gloss finish. This makes them more durable and easier to clean. Walls, on the other hand, can be painted in whichever finish you prefer. Eggshell and satin tend to have a lower-gloss look and are easier to clean than matte paint.

    2. Gather your supplies

    Once you have chosen your paint colors, head to the hardware store to gather your supplies. You will need painting trays, disposable paint tray liners, a paint roller handle, disposable rollers, paintbrushes, and, of course, paint and primer. Be sure to purchase a variety of roller sizes for all the different surfaces in your RV. Two and four-inch rollers are great for cabinets and smaller surfaces, while six and eight-inch rollers are excellent for walls and other larger spaces.

    In addition, select the best quality paint brushes and rollers that you can find. This way, you will avoid leaving bristles and lint behind in your paint to ensure a smoother finish. Finally, consider buying more supplies than you need to avoid additional trips to the store. You can always return the extras when you are finished, and this will be less inconvenient than having to pause your project and head to the store multiple times.

    3. Test your colors

    If you carefully selected your colors, pictured them in your RV, and asked friends and family for advice, it may feel unnecessary to test the colors in your RV. However, this step is crucial to ensuring that your final product is exactly as you envisioned it. Paint a small section of a few different areas in your RV, and allow the paint to dry for a few hours. If the dried product looks good, you are all set to move forward with the final steps. If it is darker or lighter than you expected, or if you don’t like the finish, it is time to head back to the hardware store to select and test some more colors.

    4. Apply primer

    Although there are many paint and primer combination products, applying primer separately has many benefits. When covering darker walls or cabinets, you will need a few layers of paint for full coverage. This means that you will likely not paint a single coat of paint and be done with this project, so you might as well take the time to apply primer.

    Primer will serve as a buffer between the walls and your final coat(s) of paint. It will also ensure better paint adherence and durability. For best results, be sure to choose a higher quality primer (such as Kilz or Zinsser Cover Stain) and paint one or two coats. Allow the primer to dry for a minimum of twenty-four hours between coats for the best and longest lasting results.

    5. Paint!

    Once you have completed steps one through four, you are finally ready for paint. To avoid drips and runs, paint during the day when the sun is out. For best visibility, open all windows and turn on all the lights in the RV. If the paint runs or drips, be sure to smooth over it before it dries.

    If all goes well, you will only be painting your RV once. Go slow and take your time to minimize mistakes and imperfections. For full coverage, it is best to apply at least two coats of paint. As with the primer, allow the paint to dry at least twenty-four hours between coats for best results.

    Although it is only the first step in the renovation process, painting yields big results. When you have finished painting, your RV will look like an entirely different space. This may leave you excited to move onto the next step in the process. Be sure to check out the other guides in this renovation series to learn how to replace your floors, install new lighting, and more.

    Have you painted an RV before? What was the process like? Feel free to share in the comments below! And if you haven’t already, don’t forget to check out Part I of our RV painting series.
  • Painting an RV: Part I

    Painting an RV: Part I

    Renovating an RV has become an increasingly popular challenge in recent years. A simple search of the “RVrenovation” hashtag on Instagram will instantly yield photos of thousands of brightly-colored, modernly-designed units all over the world.

    The reasons for remodeling an RV interior differ, but the main motivation stems from a desire to make an RV your own. Many RVs come from the factory turn-key ready, but some people feel that these lack personality and individuality. Additionally, older RVs from different eras (8+ years old) are often outdated in the decor department and in need of some serious sprucing. Still, others may just not match the taste and style preferences of their respective owners. Whatever the reasons for beginning an RV renovation and whatever projects you have planned, your very first project should be painting.

    Painting an RV is no small job. While the surface area of the total space may be small, there are many nooks and crannies, which makes painting time-consuming and labor-intensive. In addition, there is quite a bit of prep work involved. In order to ensure that the paint adheres to the surface, you must sand, clean, and tape, all before beginning the actual paint job. To get started – you’ll want to:

    1. Decide where you want to paint

    The very first step to painting is deciding exactly which surfaces you plan to paint. When renovating an RV, many people paint both the walls and the cabinets. Others decide to paint the walls and leave the cabinets with the original wood-grain look. No matter which surfaces you decide to paint, determining this ahead of time is important because it will let you know which areas to prep. Once you have decided where to paint, you can move on and start your prep work.

    2. Flatten out all surfaces to be painted

    Most people paint right over the wallpaper in RVs. Removing wallpaper is a sticky and messy process, and there is really no reason to complete this extra step prior to painting. However, if there are wallpaper borders present, these must be removed before painting. Failure to remove these will result in a bumpy and uneven surface, and the finished product will not be as polished.

    Most wallpaper borders in RVs can be found in either the kitchen or the bathroom. To remove these, simply slide a thin tool under the border to begin peeling it up, and pull the border away from the wall. There will be some resistance, but it should eventually peel off in one piece. If you are unable to remove the wallpaper, try melting the glue with a heat gun. Scrape any excess glue off the walls once borders are removed.

    Additionally, you must fill any and all holes or nicks in the walls with putty if you want a smooth final appearance. Allow the putty to dry for at least six hours before moving on to step three.

    3. Sand all surfaces to be painted


    Sanding is arguably the most important step of the painting process. Assuming your RV will travel to a variety of climates in its lifetime, it is especially important to ensure that the paint adheres to the walls as best as possible. Since RV wallpaper and cabinets are typically covered in a glossy, laminate finish, you must be sure to remove this before you can paint. Failure to complete this step will result in a finished product that is extremely prone to peeling and does not hold up well over time.

    It is best to sand with an electric sander and some 80 or 120-grit sandpaper. Any size sander will get the job done, but a smaller, hand-held sander will be easier to maneuver into tight spaces. Be sure to sand all surfaces that will be painted. This will take up quite a bit of time, but it is very important and worth every second when your final painted product lasts for years.

    3. Clean thoroughly

    After sanding, everything in the RV will be covered in a thick layer of dust. It is vital that you clean up all of this before painting. If you don’t clean well, residual dust may stick to your paint as it is drying, discoloring it, and leaving the walls looking perpetually dusty. Thoroughly wipe down all countertops, and then vacuum and sweep up all dust particles on the floors.

    Next, wipe down the walls, cabinets, and any other surface that will be painted with TSP. Otherwise known as trisodium phosphate, TSP is a heavy-duty cleaner that is diluted and used for cleaning surfaces that will later be painted. You can find it at any hardware or home repair supply store.

    4. Remove hardware 


    If you are painting your RV cabinets, you will need to remove all cabinet doors and drawer faces before you can begin to paint. It is best to do this after sanding so that you don’t have to sand these on a tabletop or on the ground. In addition, you should remove all hardware (hinges, handles, etc.) to ensure that you can paint as closely as possible.

    NOTE: If you have plastic or metal hardware, it is best to remove the hardware prior to sanding the cabinets.

    You must also remove all outlet covers, lights and light switch covers to ensure they are not accidentally painted. You can complete this step with either a screwdriver or a drill with an appropriately-sized bit.

    5. Tape Before You Paint

    This is the final step of prepwork. Before painting, you must tape off anything that is not going to be painted. This includes the ceiling, floors, baseboards, appliances, windows and anything else that you do not want to accidentally paint. Be sure to tape carefully and as closely as possible for best results. If you are not planning to replace your flooring after painting, be sure to cover the floors in drop cloths to avoid drips.

    Once you have completed all of these steps, you are ready to gather your supplies and begin painting. Keep an eye out for the next post in the series, where we will discuss painting tips and tricks that are sure to leave your RV looking good as new.

    Have you painted an RV? What did you do for prepwork? Feel free to share in the comments below! And don’t forget to check out Part II of our RV painting series.

  • FMCA Tech Tip: Disaster-Proof Your RV for Hurricane Season and Beyond

    FMCA Tech Tip: Disaster-Proof Your RV for Hurricane Season and Beyond

    Are you prepared for an emergency while RVing? Unfortunately, September’s history as an active month for hurricanes reminds RVers of the importance of being prepared. Read FMCA’s tips to prepare yourself for emergencies and natural disasters while RVing.

    Evacuation Safety

    Prepare two escape plans. One is for abandoning the RV when you need to get yourself and occupants out safely. The other is a plan for packing/driving the RV away when time allows you to evacuate ahead of a wildfire, hurricane, or other threatening situation.

    Pro-Tip: FMCA’s blog offers resources for evacuating from a wildfire.

    Escape Plan #1

    In the first instance, have a plan for escaping the RV in a variety of scenarios (galley fire, engine fire, RV lying on its side or roof). What is the quickest way to escape? How will you make sure all occupants are accounted for? Will one specific person be in charge of helping pets get to safety?

    In boating, a “ditch bag” is kept handy to grab just before one abandons ship into the water or a life raft. Prep your own “ditch bag” to grab in case of RV disaster.

    Pro-Tip: In your grab-and-go bag, consider including copies of important documents such as insurance policies, driver’s licenses, phone numbers, and credit cards.

    Escape Plan #2

    In the second instance, consider how you would need to evacuate the RV from a location.

    • A few points to think about as you form your plan:
    • How would you handle removing the electric, water, and sewer hookups?
    • If you drive a motorhome, consider if you’d have time to connect the towed vehicle.
    • How long does it take you to retract the awning(s), slide-out(s), and leveling jacks for a quick getaway?
    • If you or your driving partner is incapacitated, can the other person safely pack up the RV and drive you to safety?
    • Do you have a reliable AM/FM radio or weather radio to stay informed of the latest weather or road condition updates? Remember that you may lose internet connectivity in an emergency or extreme weather situation.
    • Do you have a Plan B for dealing with unexpected delays such as a stuck slide-out or sticky awning?

    Consider making an “evacuation checklist.” Decide what items absolutely must be taken care of before you can safely move the RV and what can be eliminated, sped up, or modified.

    Pro-Tip: On your evacuation checklist, list a family member or friend that you could call to let them know your emergency evacuation plans. This person can then alert other loved ones that you have safely evacuated.

    We hope you never find yourself in an emergency situation while RVing. You can’t predict the future, but you can help prepare yourself and your family by thinking about “What if?” scenarios.

    FMCA RV Club brings you this monthly tip to Enhance Your RV Lifestyle. FMCA delivers RV know-how to its members. Join today and save $10 — a special offer for RV Trader readers. Learn more at https://join.fmca.com/trader18.

    This information is for educational purposes. FMCA shall not be responsible nor retain liability for RVer’s use of the provided information. Prior to making any RV service decision, you are advised to consult with an RV professional.

  • Where Can I Buy an RV Warranty?

    Where Can I Buy an RV Warranty?

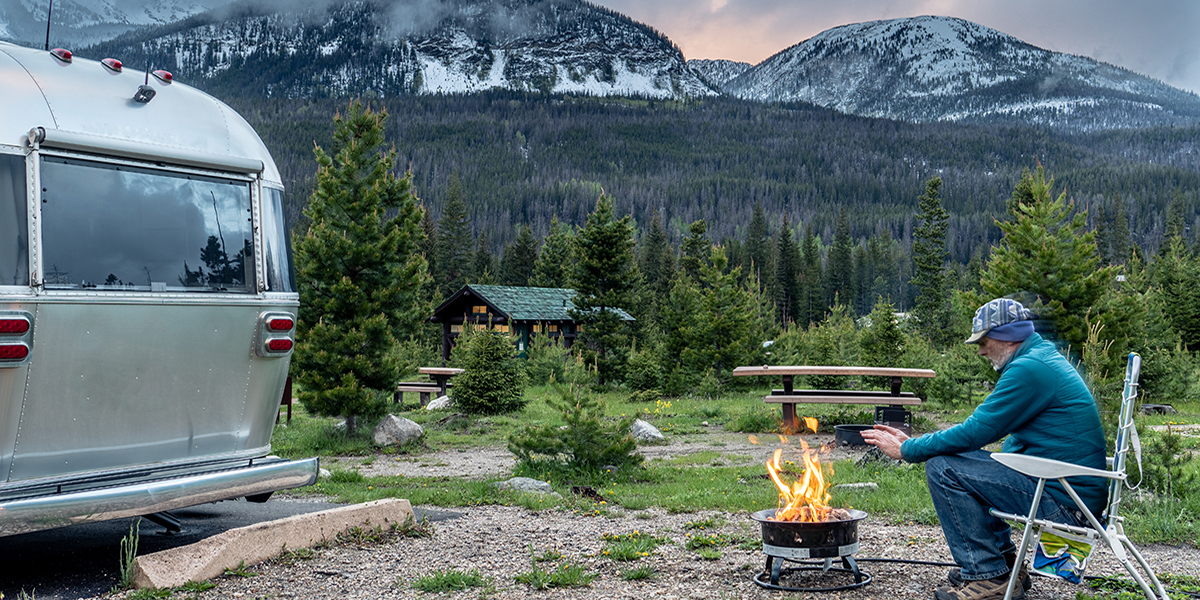
    You have options when it comes to where you can purchase an RV. The primary two choices are RVs bought directly through a private party, or from the lot of a dealership. Both buying options have pros and cons, and the correct venue for purchase will depend on your needs as a traveler. Subsequently, the options to protect your new rig will differ depending on who supplies your coverage.

    In this post, we explore some key differences between buying an RV through a private party versus a dealership, plus some important factors to note on protecting your investment.

    From an RV Dealer

    There are lemon laws in place for many dealerships, and if you’re purchasing new, you’ll also receive a one-year manufacturer’s warranty for any shake-out issues. For used units, you typically have a 30-day grace period to get any repairs covered.

    But what happens beyond those 30-days, or even the year?

    When you purchase an RV directly through a dealer, you have two options to protect your investment. You can either buy extended warranty coverage through their existing programs, or you can go through an online broker.

    No matter where you purchase your policy, there are some things you should look for to ensure reliable coverage. First, is there an option for personalized quotes? Not every traveler has the same needs, and you don’t want a one-size-fits-all policy. Make sure your purchase includes the components you want protected, and that you’re not paying for what you don’t.

    Next, confirm the person selling the policy is a subject matter expert in the warranty itself, not just the physical RV. Beyond that, post-purchase support can be invaluable when it comes to smooth claims processing. You’ll want to make sure there is someone to go up to bat for you and communicate between all parties involved (including: the administrator, repair facility, and obligor).

    You’ll also want to look at the network of repair facilities the coverage offers. Can you go to any repair shop in America and Canada, or are you limited to a few, or just the dealership? The policy won’t be of much help if you’re in a bind on the road and you can’t get the repairs covered at the local shop, or by a mobile mechanic.

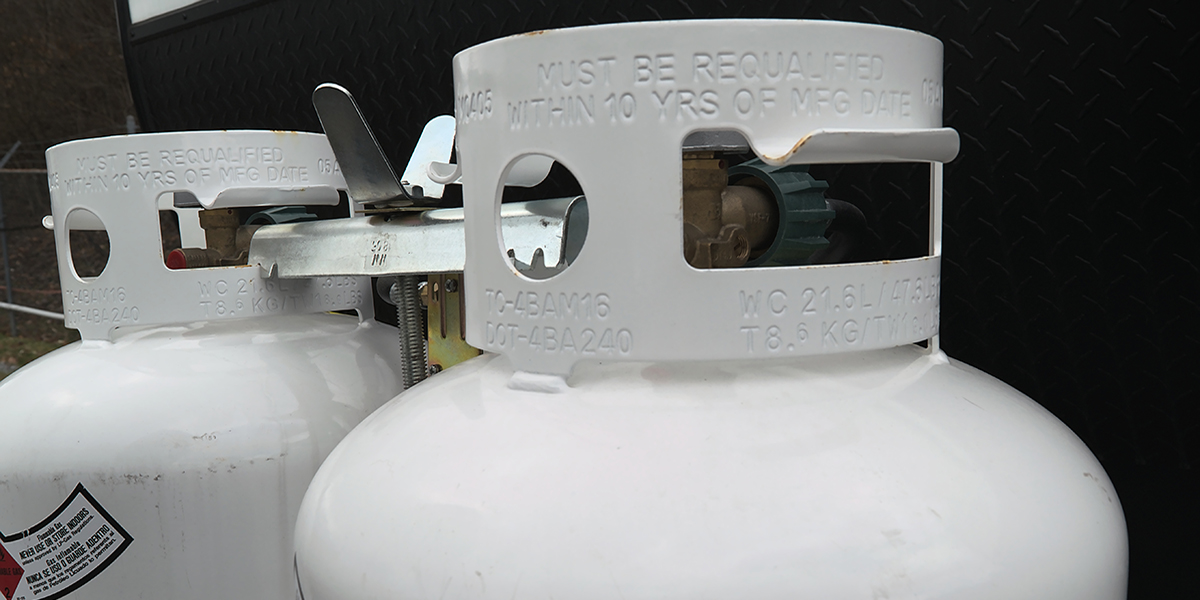
    Another thing to note, is that you’ll have the longest warranty term options with the cheapest price when you are purchasing a new unit. That’s because the brand-spanking-new RVs driving off the lot have the lowest probability for breakdowns in the eyes of warranty companies. If price is a factor for you, consider purchasing a policy before your manufacturer’s warranty runs out to ensure you’re getting the most bang for your buck.

    Through a Private Party

    Once you purchase a used RV, you’ll either find that the original owner has already fixed a majority of the initial issues, or you’ll have an as-is vehicle that needs a multitude of repairs on your own dime.

    The older the motorhome or towable becomes, the more important it is to purchase supplementary protection products like an extended warranty or roadside assistance. These policies can benefit your purchase decision in more ways than one, and truly serve as a tool to assist in choosing a quality rig at a fraction of the cost.

    Unfortunately, the older the rig is, the more susceptible it is to breakdowns. That’s because 3 out of 10 RVs will need a major repair within their first two years on the road. That jumps to 8 out of 10 RVs by the fifth year, and nearly every RV by the eighth year of use! Those odds aren’t great for your budget if you don’t have some sort of additional protection in place.

    The quotes from extended warranties can help determine how often your specific unit will breakdown. Warranty companies are constantly evaluating the risk associated with specific units, and the price of coverage can give you further insight into how frequently you may expect your RV to fail during the lifetime of the policy.

    It’s important to note that an online broker will be the only option for extended warranty coverage after a private party sale. Brokers are often able to offer a wider array of options and age eligibility, making them a perfect fit for many private party shoppers.

    Plus – the RV extended service contract can continue to add monetary value even if you decide to sell your home-on-wheels down the road. It suggests that a rig has been well maintained and any issues or service needed was performed in a thorough manner. Similarly, if your private party purchase came with an extended warranty, it likely suggests the RV has been well cared for.

    Things to Consider When Selling Your RV

    Whether you purchase a warranty from a dealership or from an online broker, make sure it’s fully transferrable. If you sell your RV directly to another RVer, that process should be simple. A small fee, and a few quick signatures should be all that’s required to transfer the remaining policy term to the new owner. If you’re not absolutely certain you’ll hold on to your rig for the remainder of its lifetime, you should make sure to confirm the transfer process with your broker or dealership.

    You have options when it comes to buying your RV, and protecting it long term. The tips above are an excellent way to begin your education on the differences between private party and dealership RV purchases, along with the different roads you can take to protect your investment after you’ve secured your home-on-wheels.


    Article written by Wholesale Warranties, the leading provider of RV Extended Warranties direct to consumer. With a focus on education, customer service and reliable coverage, Wholesale Warranties has established themselves as the premier option for RVers looking to protect the road ahead. To work with a highly trained RV warranty specialist on an RV protection quote for your home-on-wheels, please call 800-939-2806 or visit wholesalewarranties.com.