Author: praveen.pothuganti@traderinteractive.com

  • 5 Simple Ideas for Renovating Your RV

    5 Simple Ideas for Renovating Your RV

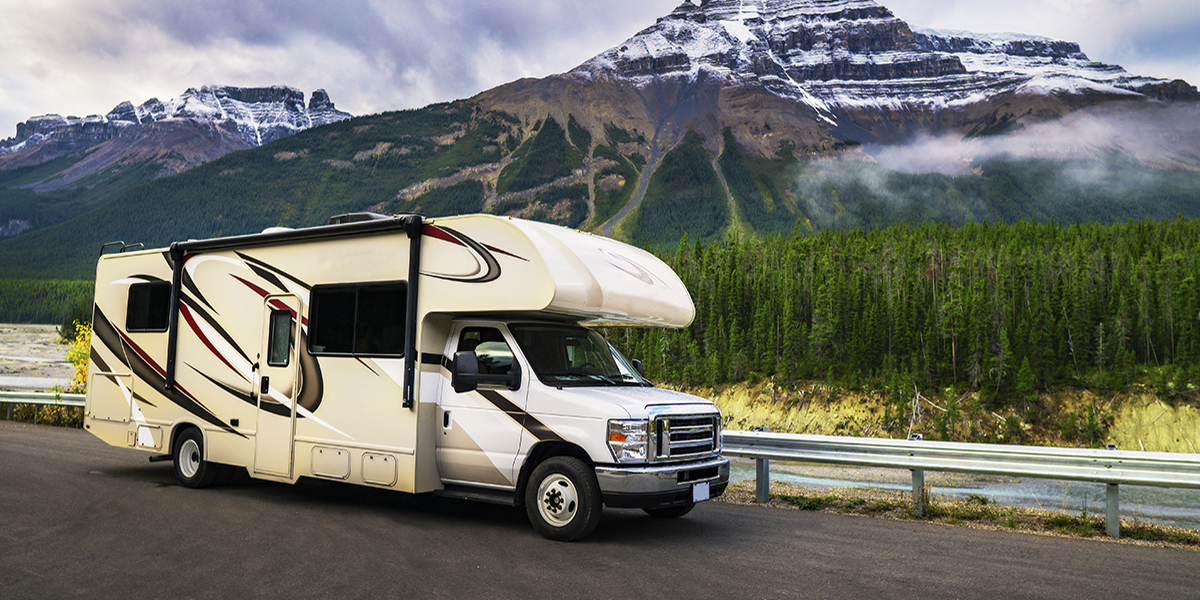
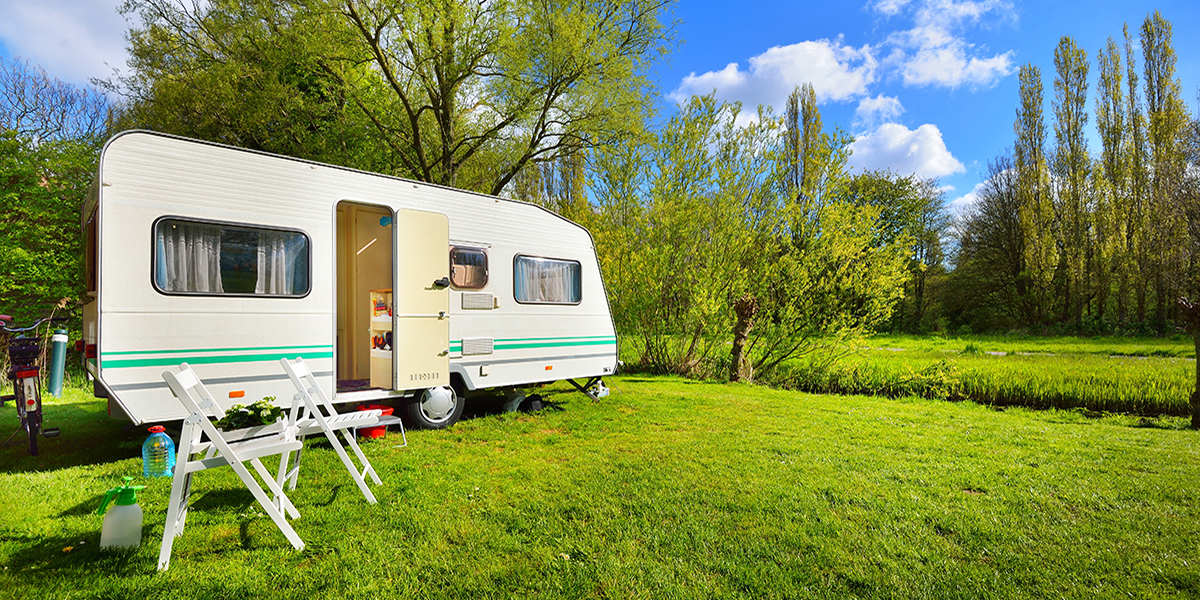
    In the past decade, RV ownership has risen tremendously. From people living and traveling in RVs full time to people taking them on weekend trips and vacations, more people than ever are becoming RV owners and enjoying their vacation homes on wheels. With hundreds of types of RVs available, RV life looks a little different for everybody. One thing remains the same though: many RVs have fairly outdated interiors.

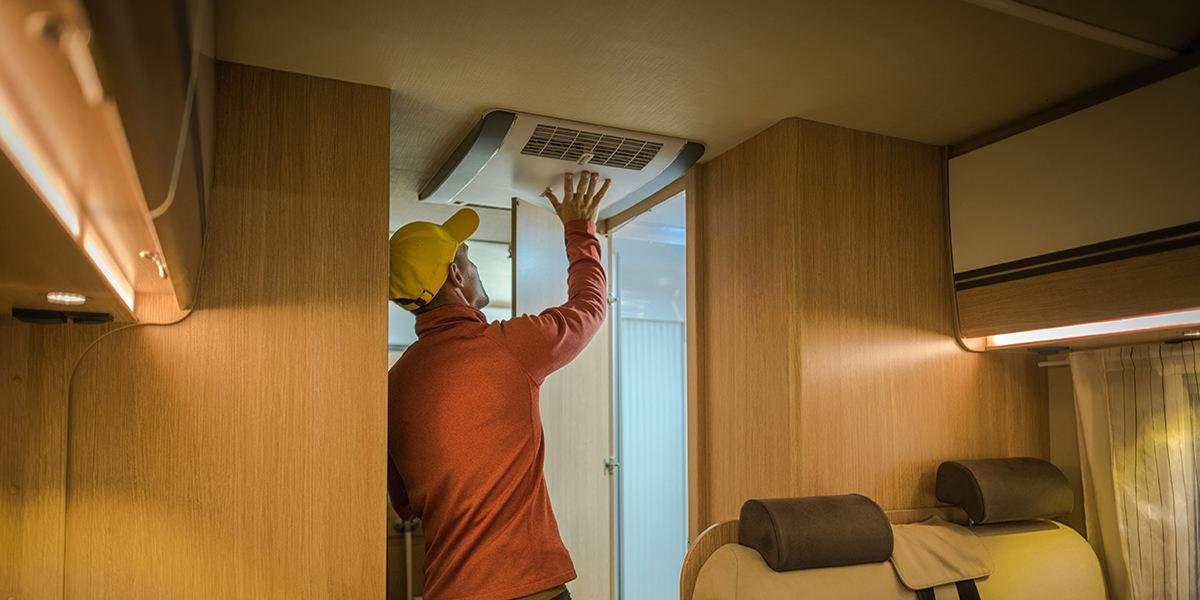
    Some modern RVs have interiors that match current decor trends. However, many from the 90s and early 2000s are dark and covered in floral fabrics. This may be a deterrent to those who would like to buy but do not like certain RV interiors. Some people may not have considered this, but RV interiors are customizable and can be completely renovated.

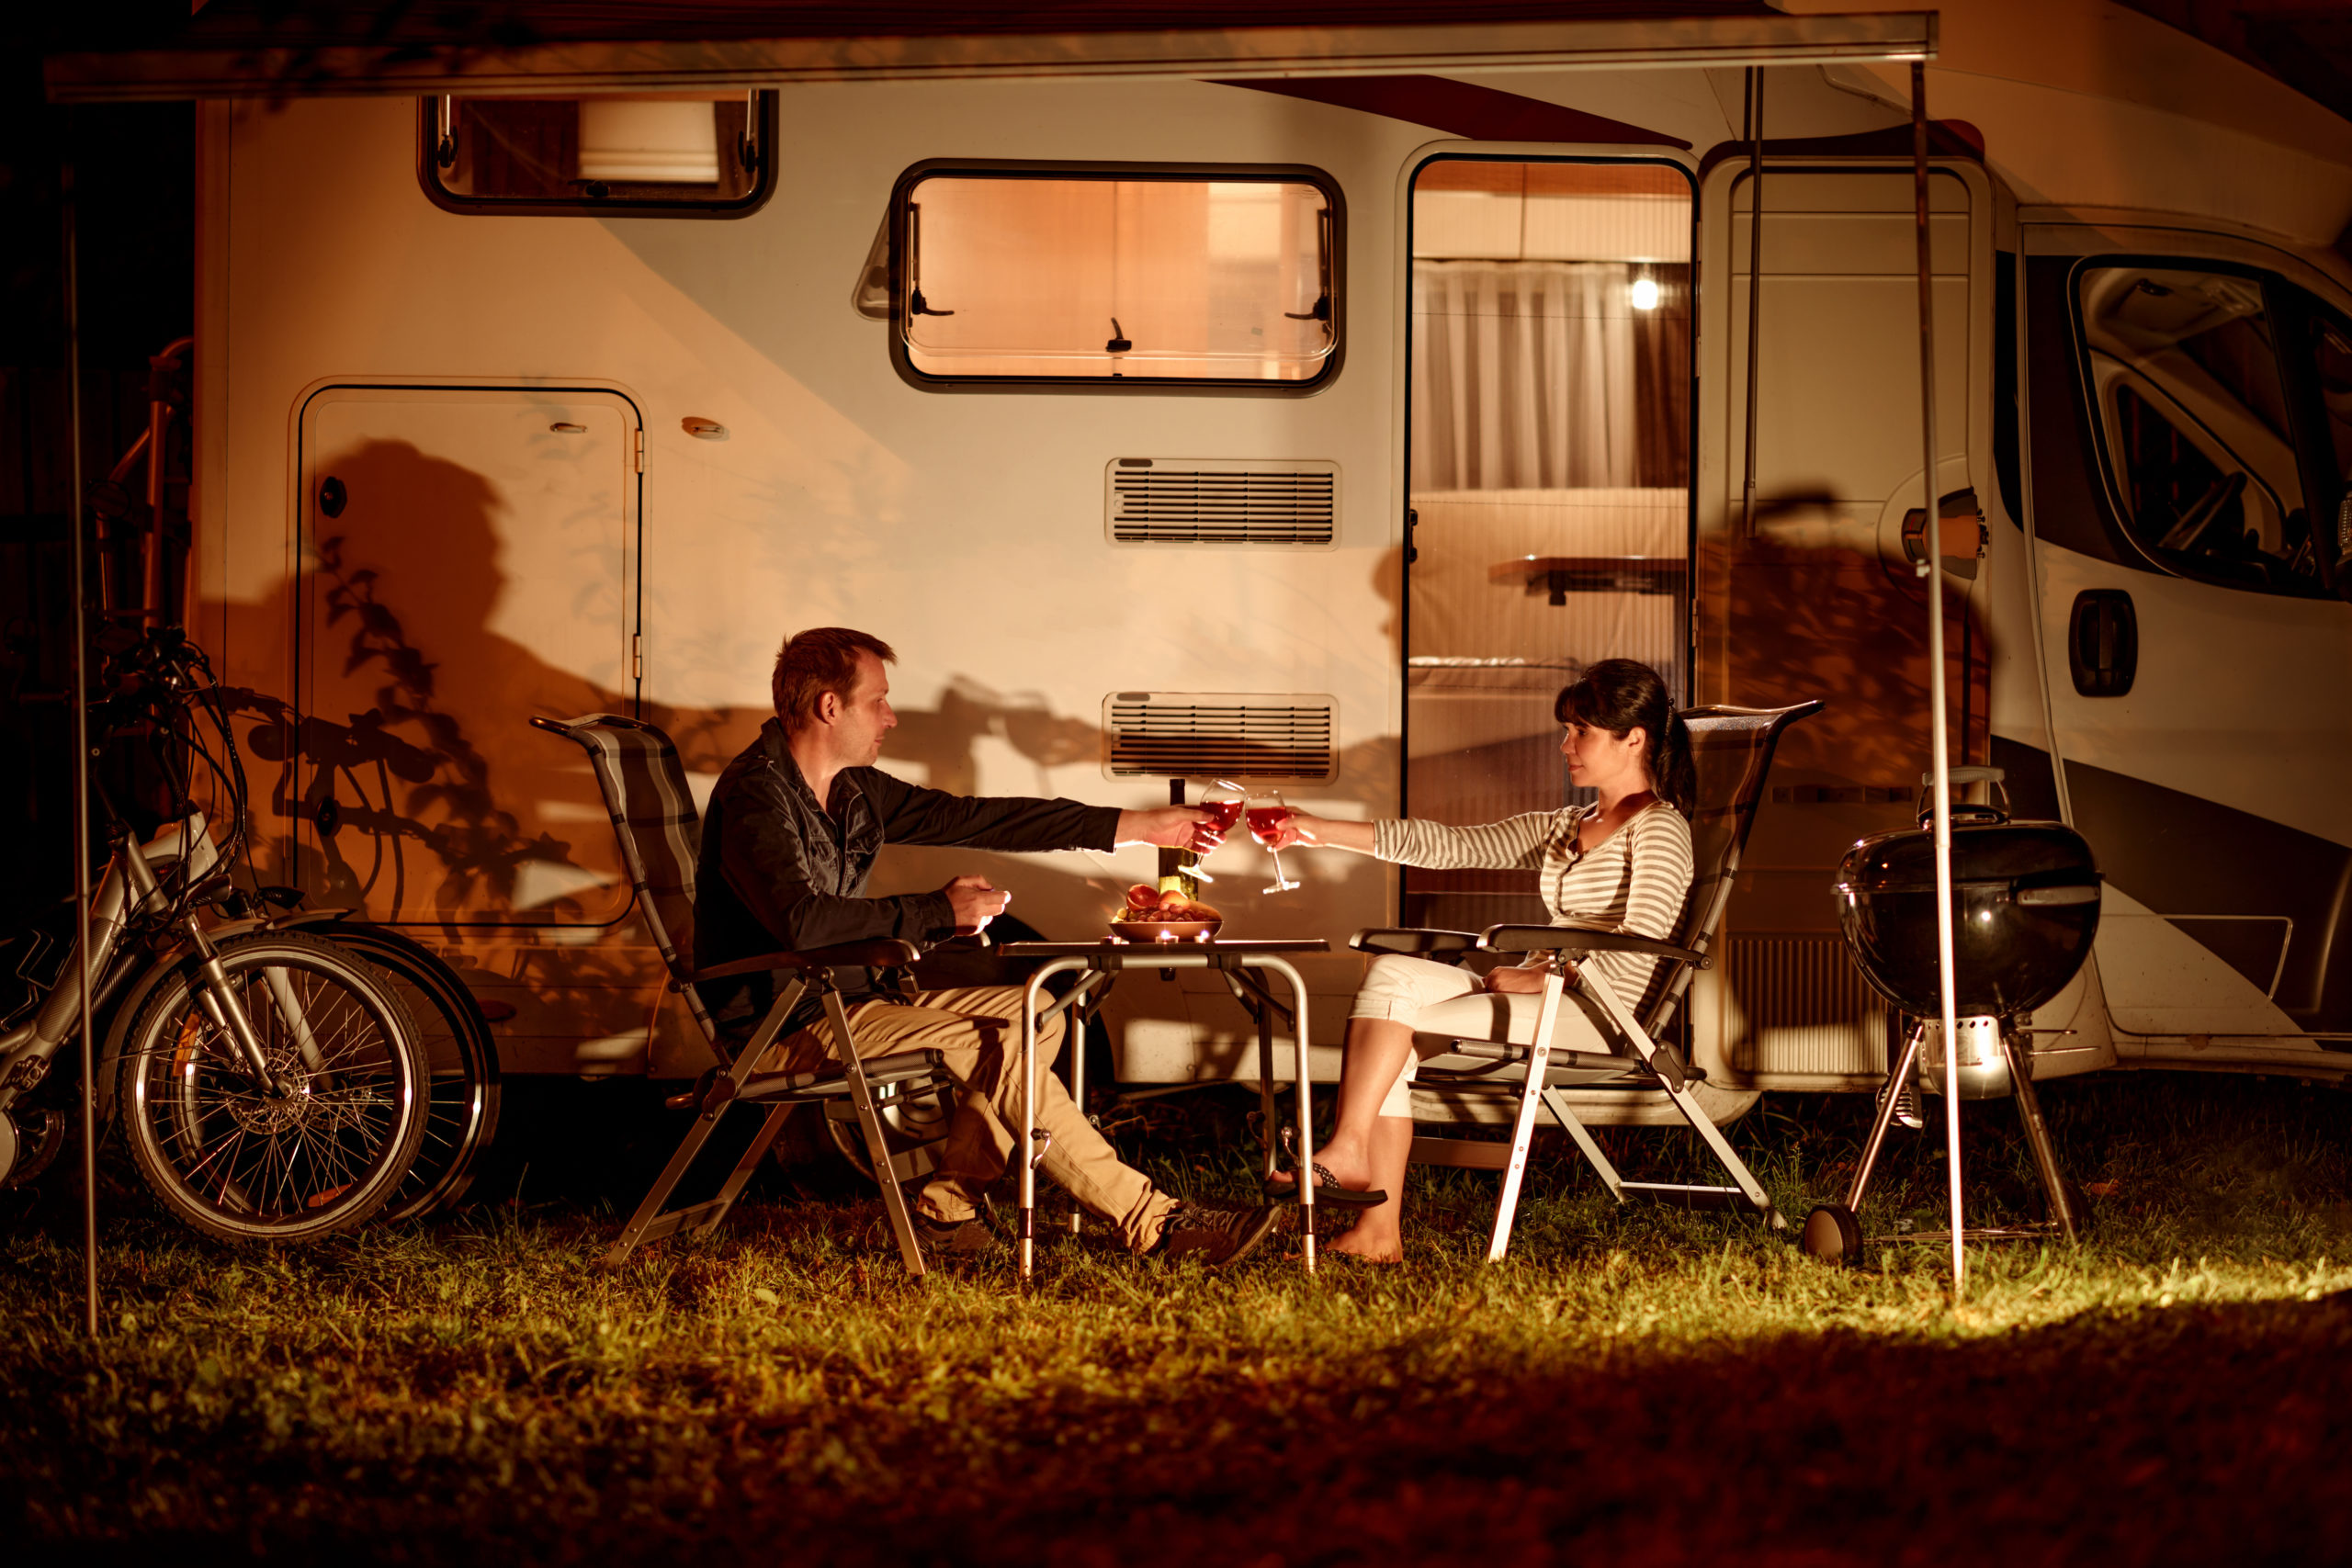
    The idea of renovating an RV may seem rather daunting and difficult to a first-time owner. However, certain small adjustments can make a huge difference, especially in a tiny space. A little goes a long way, and just a few weeks of work can have your RV looking bright, cozy and modernized in no time. After all, traveling in your tiny home on wheels is much more fun when done in style. Consider these suggestions for simple projects that will make the biggest changes in your RV.

    1. Decorate

    Decorating can completely transform your space without requiring a complete renovation. Simple changes like fresh throw pillows, bedding, curtains, decorative blankets, wall hangings, area rugs, photos and plants can add a ton of character with only a bit of work. Decorating is all about personal preference and taste. Find items that make you happy and incorporate them throughout your RV. You can even utilize items found on your travels to remind you of the places your tiny home as taken you.

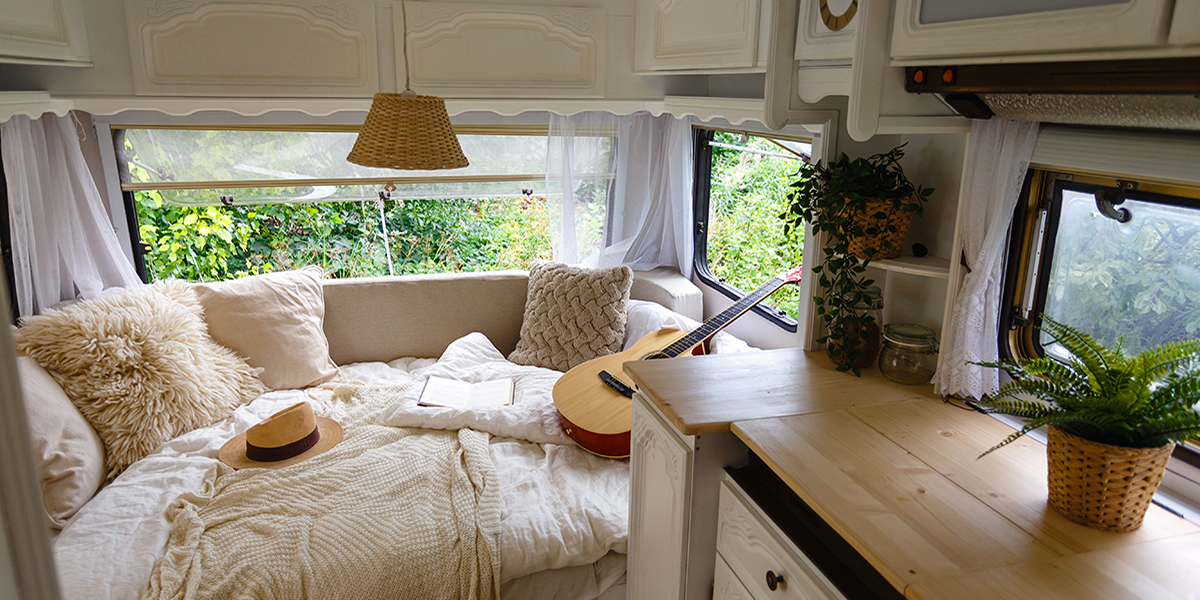
    When decorating a tiny space, it is usually best to keep the same theme and color scheme for the entire RV. Be sure to choose a theme that matches your personality, and the rest is up to you! Remember that a little goes a long way in a small space, and just a few items can make a big difference.

    2. Add new window treatments

    Swapping window treatments is one of the simplest things that makes the biggest difference. Window valances in older RVs are typically covered in busy patterns and cover a large portion of the windows. Removing these can instantly brighten up the space, let in more light, and create a much more modern look. They can easily be replaced with roller shades, accordion blinds, or curtains. You could even go with a combination of curtains and shades.

    If replacing the window valances entirely is outside of your comfort zone, they can easily be removed and recovered with a simpler fabric, then returned to their original position. This will allow you to choose a color scheme that matches your new RV design without overly changing the space, if that is what you prefer.

    3. Swap furniture

    Replacing furniture is another fairly easy task that can change an entire space. Sofa beds can be easily replaced with a new futon, and recliners are easily swapped with an accent chair. IKEA has a great line of furniture geared towards small spaces. Be sure to bolt any new furniture to the floor to keep it from sliding around when you are on the move.

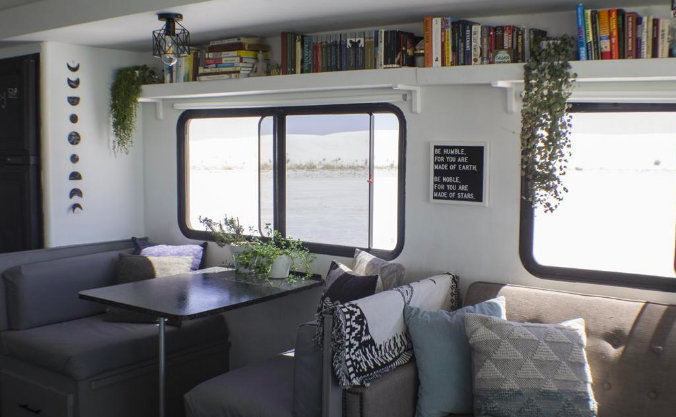
    Dinettes can also be transformed fairly easily. If yours is the type with a table and chairs, these can be easily replaced with a modern set. If you have a dinette with a table and benches, consider painting the benches and recovering the cushions. You can even add throw pillows to the dinette benches for extra comfort. This will completely change the overall look and feel of your living and dining room space.

    4. Paint

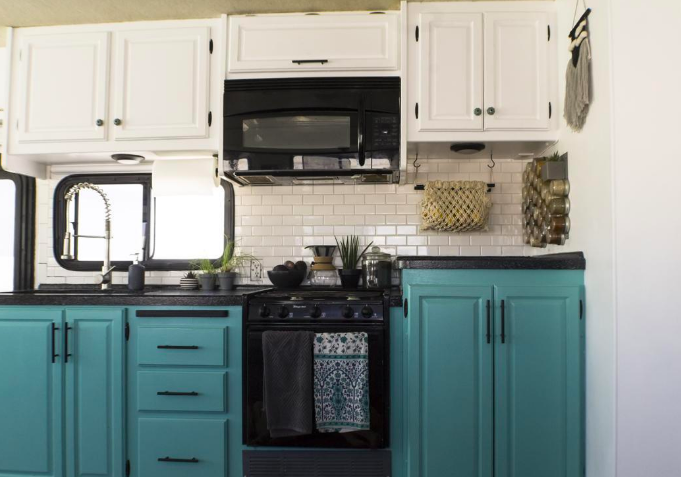
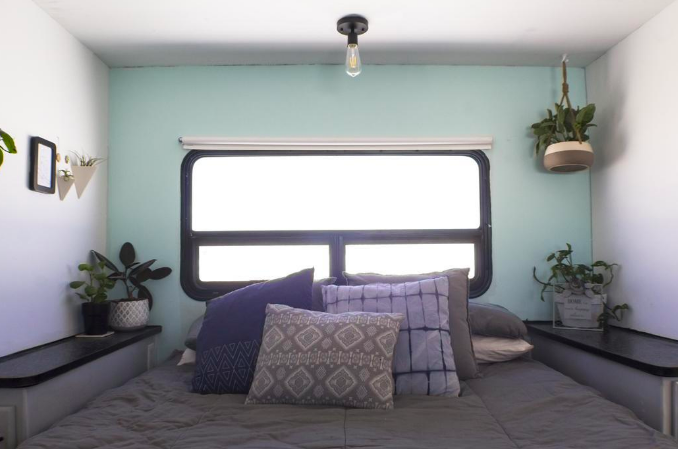
    Painting an RV is no small task. However, the reward is a beautiful space that will feel much more bright and airy. Many RV renovations are completed with white paint because of the openness it allows the floor plan. However, other neutral colors such as gray and beige also look nice and often stay cleaner-looking.

    If you are thinking about painting with bright colors, consider utilizing accent walls as a pop of color, while keeping the rest of the walls neutral colors. Remember that very bright colors can sometimes feel overpowering in a small space, so they are often best in small doses.

    Before you paint, there is a bit of prep work involved. First you need to decide if you want to paint the walls only or both the walls and the cabinets. Wallpaper and wooden surfaces should then be lightly sanded to remove the outer coating. Next, you should clean the walls and cabinets thoroughly. It is best to use TSP (trisodium phosphate), as it is best at removing all dirt and debris, allowing paint to better adhere to surfaces. Finally, you should begin with a coat of primer before painting with at least two coats of the final color.

    5. Replace the flooring 

    Replacing the flooring in an RV is another task that is time-consuming yet very rewarding. Over time, the carpet in RVs becomes very worn and often somewhat dingy. If you remove the carpet, you are free to install a new floor. The most popular option is wood-look laminate flooring. Real hardwood floors are beautiful, but they are typically too heavy for a standard RV weight limit. Laminate floors are made to look like wood at a fraction of the price and weight.

    When choosing flooring options, you must decide between peel-and-stick floors and click-and-lock floors. Each of these types of flooring has different pros and cons, so you will need to do your research to decide which type is best for you and your RV.

    There are so many more changes that can be made to RVs, but these are some of the most basic concepts. If you are new to the world of RV renovation, the idea alone may seem daunting. However, if you begin with these five steps, you are sure to create a beautiful space that you will love.

    The unit above is for sale! Check it out here on RV Trader. 
  • FMCA Tech Tip: Replacing Your RV’s Air Conditioner

    FMCA Tech Tip: Replacing Your RV’s Air Conditioner

    Your RV’s air conditioner(s) lead a tough life. On the roof, they are subjected to the hottest heat that the sun can dish out. They also can be damaged by tree branches when the RV is maneuvered into a tight campsite, and they just love to pick up moisture that can lead to rust. Then add in the constant vibration and pounding from the road…eek!

    Like any component in an RV, especially those with movable parts, air conditioners don’t live forever. Eventually, you will have a failure. Minor items, such as starting capacitors, can be replaced, but the A/C unit itself is generally not serviceable.

    Fortunately, air conditioners aren’t all that hard to replace. You’ll need a few basic tools, some reflective foil tape, and some caulk. The hardest part is getting the new unit up on the roof.

    Background

    Air conditioners are designed to fit a 14-inch-square hole in the roof. That is the industry’s standard roof vent size, which makes replacement easy. Some units drop the air straight through the roof and ceiling directly into the RV’s interior; in others, air passes through ducts before entering the RV’s living areas.

    However the air is ducted, both system types use the same 14-inch-square hole in the roof, and the air conditioner is secured with four mounting screws. Power generally is run through the ceiling to the opening.

    Removing the Old RV A/C Unit

    • First, switch off the circuit breaker that supplies the 120-volt-AC power to the air conditioner so that it is safe to perform work. Set the thermostat to the “off” position, too.
    • Next, remove the existing unit, starting with the fiberglass cover. Remove the four screws that hold the cover in place.
    • In most RV air conditioners, electrical connections and components are inside the cool air plenum to help keep them cool as well. To disconnect these, remove the sheet-metal cover from the plenum. The plenum joints may be taped; if so, use a utility knife to cut the tape at the joints.
    • Disconnect the 120-volt-AC wires. Most likely, you will see the entire control box connected to the thermostat using two wing nuts. Remove the two wing nuts, and put the control box down into the plenum to get it out of the way. There may also be a temperature sensor probe inserted into the evaporator coil that can be removed.
    • Some units have a diffuser in the ceiling. The diffuser must be removed from the interior ceiling, and then the four bolts that hold the air conditioner to the roof must be removed. If there is no diffuser and your RV has a ducted ceiling instead, you will likely see screws installed from the A/C unit and tapped into the steel tube roof trusses.
    • Scrape off any old caulk from the screws, remove the screws, and slide the old A/C unit out of the way.
    • Once the old unit is removed, thoroughly clean the rooftop area.

    Installing the New RV A/C Unit

    • Once the new unit is up on the roof, maneuver it into position. This may require two people to ensure proper placement of the unit on the gasket.
    • Next, cut the foil tape and remove the screws from the new unit. This allows the sheet-metal cover to be removed to provide access to the front mounting holes, as well as the wiring.
    • On most new units, there is a foam gasket designed to compress and seal the area around the access hole so that water cannot enter the RV’s interior. Set the new unit in place and mark the location of the existing mounting holes; to match them, drill into the new air conditioner’s baseplate. (On a design without ducts, that would not be necessary, because the four bolts run right through the access hole in the roof.)
    • To finish the mount, install the four screws, taking care not to overtighten and distort the base. (Overtightening can lead to warping, which can cause leaking, excessive vibration, and fan and/or compressor noise.)
    • Apply a dab of caulk over each of the four mounting screw heads.
    • Retrieve the control box from the access hole in the roof plenum, reconnect the wiring, and place the temperature probe into the evaporator core.
    • Attach the control box to the sheet-metal cover with the two wing nuts, and reinstall the cover. After all of the sheet-metal screws are in place, cover the seams with a new roll of foil tape.
    • Before reinstalling the cover, switch the circuit breaker back on and test the unit.

    FMCA RV Club brings you this monthly tip to Enhance Your RV Lifestyle. FMCA delivers RV know-how to its members. Join today for just $50 — a savings of $10 just for RV Trader readers. Learn more at https://join.fmca.com/trader18.

    This information is for educational purposes. FMCA shall not be responsible nor retain liability for RVer’s use of the provided information. Prior to making any RV service decision, you are advised to consult with an RV professional.

  • FMCA Tech Tip: Guide to Motorhome Lubricants

    FMCA Tech Tip: Guide to Motorhome Lubricants

    Motorhomes require periodic maintenance to stay in good working order. Engine oil changes are the most common procedure, but axles, the transmission, wheel bearings, and other components also must be serviced. No oil or lubricant is one-size-fits-all, so it’s important to make the right choice for each component according to the chassis manufacturer’s specifications.

    Lubricants are designated with American Petroleum Institute (API) or military (MIL) category numbers that identify their suitability for various applications. To choose the proper lubricant, consult your motorhome’s owners manual for the prescribed API service level, and then match the lubricant’s viscosity and rating to your vehicle’s operating environment.

    Ratings

    Two ratings apply to lubricants — viscosity and quality.

    Viscosity

    Viscosity is another term for thickness. An engine is designed to utilize a specific viscosity oil for a given set of operating conditions. That’s why the Society of Automotive Engineers (SAE) determines viscosity grades according to a standardized numerical rating. Always check the owners manual to determine the proper engine oil viscosity for your vehicle. The larger the number, the heavier the oil. For example, an SAE 40 oil is heavier than an SAE 30 oil.

    Viscosity also denotes the ability of the oil to flow at a given temperature. As oil heats up, it thins, flows faster, and doesn’t provide the same level of lubrication as a thicker oil. If the oil is too thick, it won’t flow fast enough to lubricate critical components. SAE ratings reflect the ability of oil to flow at 210 degrees Fahrenheit. The ratings can be useful for determining how an oil will perform in summer, but they don’t take into account the low-temperature performance of the oil in winter. So, a second test is performed at 0 degrees Fahrenheit to assess oils designed for winter use and to designate a “W” rating. For example, 10W oil is thinner than 20W oil, but both are designed for winter use. The thinner 10W oil will flow better in colder temperatures.

    Most engine wear and tear occurs during startup when the motor is turning over but everything is cold and the pistons haven’t yet expanded to their operating tolerances. Oil begins to flow, but by the time it reaches all critical areas, the engine has been running for a few seconds. A lighter-weight oil brings the oil pressure up much faster than a thicker oil. But, once the engine is working under a heavy load, the oil becomes too thin to provide adequate lubrication. So, in the case of a single-viscosity oil, it is better to opt for a heavy oil and live with the startup wear than to use a lighter oil and pay the penalty when the engine is working really hard.

    Multiviscosity oils eliminate that dilemma. A multiviscosity oil has two ratings. For example, a 10W-30 oil provides the cold-temperature performance of a 10W winter oil, yet it retains the high-temperature performance of an SAE 30 summer oil once the engine reaches its operating temperature. This offers the best of both worlds and does a better job of protecting your engine at both startup and when under load.

    Quality

    Oil quality is determined by its chemical makeup and its imbedded additives. Base oils account for about 85 to 90 percent of the formulation. The remainder consists of additives that provide full protection, including antioxidants, viscosity modifiers, dispersants, detergents, antiwear agents, rust and corrosion inhibitors, antifoam agents, and a host of others. API established its rating system to identify the quality of every oil.

    Both API and SAE ratings are marked on every container. Consult the vehicle’s owners manual for the minimum API rating specified for your engine. You always can exceed the API ratings and use a better grade oil, but never drop below the minimum API rating.

    Check The Manual

    A proper maintenance cycle for your motorhome revolves around following the recommended service schedule and matching every component with the correct lubricant. The owners manual specifies the minimum requirements, but keep in mind that exceeding those specs with a higher-quality lubricant generally will yield greater longevity. Taking proper care of your coach will save you money in the long run and greatly improve the odds of trouble-free operation.

    FMCA RV Club brings you this monthly tip to Enhance Your RV Lifestyle. FMCA delivers RV know-how to its members. Join today for just $50 — a savings of $10 just for RV Trader readers. Learn more at https://join.fmca.com/trader18.

    This information is for educational purposes. FMCA shall not be responsible nor retain liability for RVer’s use of the provided information. Prior to making any RV service decision, you are advised to consult with an RV professional.

  • Amazing Reasons to Hit the Road Full Time

    Amazing Reasons to Hit the Road Full Time

    There’s nothing quite like an amazing weekend spent camping. Heck, if you can get in a whole week, that’s even better. However, the very best option—and one many people don’t even consider—is to take on RV living.

    That’s right! Why not hop in your RV and hit the road full time?

    This might seem like a crazy notion, but believe it or not, more and more people are choosing this lifestyle. These are people from all age groups and backgrounds, and while they may be making some sacrifices to live this way, most of them are also having the time of their lives.

    Are you considering jumping into full time RVing? Here are 6 amazing reasons why we think you should do exactly that.

    1. Meet New People

    While many people worry about leaving their friends and family behind when beginning the full time life, and while this is a completely legitimate concern, many people are also amazed at the new people they meet through their travels.

    From chatting with friendly locals and learning all about an area has to offer to building friendships with campground neighbors, there are new relationships to be made around every corner. Of course, the best new friends are the ones who are full timers just like you. A number of those living the RV lifestyle even choose to travel with their full time friends!

    Even if you don’t travel together, always make sure to get the contact info of newfound friends. You never know when your paths may cross again, and you might be surprised how often it happens.

    2. Learn New Things

    You learn something new everyday. Never was this phrase more true than it is for an RVer.

    Traveling full time in an RV will give you the opportunity to learn about the day-to-day lives of people in all parts of the country. It will allow you to explore national parks, museums, zoos, and historic sites. It will also require you to learn how to fix things for yourself, how to navigate with a map when the GPS loses signal, and how to keep your cool and solve problems in the moment.

    All of these things combined will have you learning more than you ever thought possible.

    3. Check Off that Bucket List

    As mentioned before, you will definitely be seeing lots of new things as you travel. In fact, if you plan things right, you can use your travels to start checking things off your bucket list.

    Don’t have a bucket list? You’ll want to make one before you hit the road. Just don’t count on ever reaching the end of the list, because new things tend to sneak onto it just as fast as the old ones get checked off.

    4. Grow Closer to Your Family

    Whether you’ll be traveling with the spouse and kids, with your parents/grandparents, or only with your significant other, you can count on growing pretty close with your family and travel-mate(s).

    Some people claim they could never live in the small space an RV offers with their family and stay sane, but the truth of the matter is, once you find your groove, living in a small space becomes easy. Once you reach this easy stage, the tiny living does nothing more than encourage your travel group to grow closer to one another, as it forces you to connect more often and spend more time bonding.

    5. Connect with Nature

    In our modern society, far too many people are completely disconnected from nature. Many people will go days without taking notice of the weather, birds, or trees around them, let alone make a conscious effort to get outside and really connect with nature.

    This is so unfortunate, considering the amazing effect some quality time spent outdoors can have on the mind, body, and soul.

    While traveling and living in an RV certainly doesn’t guarantee more outside time, it definitely does encourage it. After all, you’re going to be spending a significant amount of time in campgrounds, which are almost always set in beautiful places and tend to offer outdoor recreation opportunities.

    Additionally, if you plan to visit national parks, you might just find yourself turning into something of a hiker!

    6. Save Money

    Last but not least, we must mention the financial aspect of RVing. A lot of people assume you have to be rich to travel full time.

    Obviously, having a lot of money is nice, but it certainly isn’t necessary. In fact, some people find that by paying cash for a used rig, making use of campground memberships, using reciprocal programs to save money on sightseeing, and traveling at a slower pace, they are even able to save money over living in a sticks-and-bricks home.

    If you’re looking for an amazing way to live while saving a bit of money, full time RVing absolutely might be an option. That said, you will want to do the math first, and saving money probably shouldn’t be your primary reason for hitting the road.


    Author: Chelsea Gonzales, Fulltime Families

  • FMCA Tech Tip: What Do I Do If My RV’s Tire Blows Out?

    FMCA Tech Tip: What Do I Do If My RV’s Tire Blows Out?

    A tire blowout is the worst fear of many RVers. What would you do if you found yourself in this situation? Read FMCA’s tips to stay safe on the road.

    Understanding Tire Failure

    According to Goodyear engineers, obstructions (nails, sharp objects, curbing) are the major causes of tire damage. However, many tire failures are caused by progressive damage.

    Each mile your tire rolls down the highway overloaded or underinflated, it may be suffering internal damage that’s not apparent during a casual tire inspection. The day that the tire fails, you may be traveling empty or not moving at all. The tire simply will reach the point where the damage has exceeded its design limits. It may blow out or shed its tread.

    Tires do not heal themselves, so if they are damaged due to underinflation, inflating them to the correct pressure may not prevent eventual failure.

    What To Do If Your Tires Fail

    If you experience a tire blowout, you better have your seat belt on because it can be a wild and bumpy ride.

    Your natural reaction is to apply the brakes, but don’t do it! Michelin Tire Company recommends briefly pushing the accelerator to the floor (if traffic conditions allow) to regain momentum in the direction you are going and then gently taking your foot off the accelerator. Hold the steering wheel firmly and regain control. If you are on an expressway, move into the far right lane as quickly and safely as possible. Allow your vehicle to slow, without applying the brakes, to 10 to 15 MPH before pulling off the road surface.

    Watch this video from Michelin, How To Handle An RV Tire Blowout.

    And — remember — the #1 tip if you find yourself in the middle of a tire blowout is to remain calm. You can’t predict the future, but you CAN prepare yourself for potential emergencies. Knowledge is power.

    FMCA RV Club brings you this monthly tip to Enhance Your RV Lifestyle. FMCA delivers RV know-how to its members. Join today for just $50 — a savings of $10 just for RV Trader readers. Learn more at https://join.fmca.com/trader18/.

    This information is for educational purposes. FMCA shall not be responsible nor retain liability for RVer’s use of the provided information. Prior to making any RV service decision, you are advised to consult with an RV professional.
  • Leveling Your RV Fridge

    Leveling Your RV Fridge

    Does My RV Need to Be Level for the Fridge to Work?

    We were preparing to go camping one weekend and, as usual, I turned on the RV fridge the night before we were leaving to make sure it nice and cold. However, it didn’t get cold. In fact, it actually got warmer!

    I was so bummed! I thought my fridge was broken. So, I grabbed the manual to troubleshoot the situation. I checked and rechecked the on-off switch. I made sure the fridge was getting electricity and even made sure the propane was turned on.

    But nothing worked, and I feared the worst. I thought my fridge was dead and started thinking about packing a cooler for our weekend trip.

    But then I remembered that an RV fridge should to be level to operate correctly – or in my case operate at all. And my driveway, where the RV was parked, is at a fairly steep slope.

    So, I pulled the RV out of the driveway and parked it in the street in front of our house where the road is more level. It wasn’t perfectly level, but it was more level than our driveway.

    And, sure enough, the fridge began to cool rather quickly! So, it turns out that yes, your RV needs to be level for the refrigerator to work correctly.

    Can I Damage the Fridge if My RV is Not Level?

    Yes, you can damage your RV fridge if you run it for more then 30 minutes when it is not level. If the refrigerator is operated when it is not level and the vehicle is not moving, liquid ammonia will accumulate in sections of the evaporator tubing. This will slow the circulation of hydrogen and ammonia gas, or in severe cases, completely block it, resulting in a loss of cooling.

    Some RV refrigerators have an automatic shut off if this occurs, but most do not. The fridge just continues to try to cool, and eventually, the cooling unit will heat up, burn out, and fail. And it doesn’t matter if the fridge is running on electric or propane. The result will be the same.

    How Do I Know if My RV is Level Enough?

    The official answer is that every refrigerator has its own specifications, but in general, your RV is considered level if it is within 3 degrees side to side and 6 degrees front to back. So, what does that mean and how do I figure it out?
    What I have found is that your RV should feel like it is level when you walk inside. You can fill a cup with water and place it on your dinette top or, and as long as the water looks pretty close to level, you should be in good shape.

    You can also place a level on the floor of your RV and make sure at least half of the air bubble remains inside the level markers. These are just rules of thumb, but they should work for most RV refrigerators.

    Can I Run the Fridge While Driving?

    You can run the fridge while you are driving under normal conditions. And you should, especially if you have food in it. Even though the fridge will be out of level at times when you are driving the motion of the RV will allow the cooling gasses to flow within the coils and not overheat the cooling element.

    However, if you are driving up or down steep inclines for more than a few minutes, you should actually turn off the fridge until you get to more level terrain. For example, if you are going up or down a 10% slope for more than 10 minutes, you could do some damage to your cooling unit. So, it’s best to turn off the fridge under these extreme circumstances.

    In summary, your RV refrigerator needs to be as level as possible to operate as efficiently as possible. Just use good common sense and a cup of water on the counter to make sure you are level when parked. And turn off the fridge while you are driving on roads with steep grades of 10% or more for more than 10 minutes. Just remember to turn the fridge back on once you are driving on more level roads!


    Author: Mike Scarpignato, Founder of RVBlogger 
  • Tech Tip: Tips for Fuel Savings on RV Trips

    Tech Tip: Tips for Fuel Savings on RV Trips

    No one likes paying more at the pump, especially when it comes to RV travel. Follow FMCA’s simple steps to help find the best fuel savings.

    Download an App

    Let an app do the work for you. Download a mobile app like Gas Buddy or Trunow to find the best fuel prices in your current ZIP code. Both apps include gasoline and diesel fuel prices.

    Be Mindful of Credit Card Purchases

    Many credit cards “pay back” a bonus amount, usually 5 percent, on fuel purchases and perhaps certain other purchases. The catch: many fuel outlets also sell fast food or groceries, so if the computer doesn’t recognize the fuel purchase at check-out, you won’t get the 5 percent discount. Keep an eye on your monthly invoice!

    In addition, gas station credit cards can be useful if you’re brand-loyal and pay off the card each month. Otherwise, watch those interest rates.

    Ask about Cash Discounts

    Some stations, especially in rural or less populated area, offer a discount for paying with cash. Even a few cents off per gallon can add up to savings.

    Consider Warehouse Clubs

    Warehouse clubs are increasingly offering fuel discounts, but if you’re a diesel user and clubs carry only gasoline, a membership (sometimes costing $40 a year or more) may not be worth it to you. The other catch is that the fuel discount also may require shopping in the store for a minimum dollar purchase.

    Sign Up for Supermarket Loyalty Cards

    Supermarket loyalty accounts can mean savings, and some of the large chains give points that add up to a fuel discount after you reach a certain amount. Some large chains even offer “double” or “triple points” during the summer months, which is considered the typical “road trip” season. It’s usually easy and free to sign up for loyalty cards.

    With all special offers, it’s important to always read the fine print. Be a smart consumer and do your homework. With a little planning, you CAN save at the pump.

    FMCA RV Club brings you this monthly tip to Enhance Your RV Lifestyle. FMCA delivers RV know-how to its members. Join today for just $50 — a savings of $10 just for RV Trader readers. Learn more at https://join.fmca.com/trader18.

    This information is for educational purposes. FMCA shall not be responsible nor retain liability for RVer’s use of the provided information. Prior to making any RV service decision, you are advised to consult with an RV professional.

  • FMCA Tech Tip: Steps to Maximize Your RV’s Tires

    FMCA Tech Tip: Steps to Maximize Your RV’s Tires

    For many RVs, tires can be the weak link that disrupts travel if not properly maintained. Quite often, overloading is the cause of tire failure. Follow these simple steps provided by tire expert and FMCA member Roger Marble to increase your chances of problem-free travel.

    Initial Steps

    Once you take these two initial steps, you’ll only need a few minutes each month to maintain your properly inflated tires.

    1. Know the proper tire inflation pressure for your RV.

    2. Ensure that your tires are always inflated to that level.

    But how do you find out what your proper inflation number should be?

    Determining the Correct Tire Inflation Pressure

    First, it’s important to note that the proper inflation level is unique to your RV. Following the suggested inflation levels provided by the manufacturer on the tire certification label is only the beginning. The manufacturer’s suggested tire inflation pressure is based on an assumption, but only you are able to determine the true weight of your RV during travel.

    To learn your RV’s true weight, pack it with all the items you expect to carry on your trip – clothes, fuel, food, water, family members, and pets. Then visit a scale that can weigh your RV and provide weights by individual wheel position. This is important because the required air pressure is based on the load on each individual tire. You also can book an appointment with the Recreation Vehicle Safety and Education Foundation (RVSEF) at most FMCA events to obtain individual wheel weights.

    Once you know the load being carried by each wheel position, you can determine the minimum inflation pressure needed to carry that load. We recommend visiting www.rvsafety.com to help guide you.

    In addition, you can find a “helping hand” by visiting the FMCA forums, where you can find threads specifically dedicated to RV tire maintenance .

    Determining the Cold Inflation Pressure

    You will also want to be sure to determine your tires’ minimum cold inflation pressure (CIP). Visit tire manufacturer websites to find your tire brand and a table that has your tire size. Once you find that, look for the inflation level that carries your load or greater. This is the minimum cold inflation pressure, and it is recommended you go up in inflation by about 10%. Changes in air temperature, for example, can cause minor fluctuations in tire pressure, and increasing the CIP will help to eliminate the need to adjust tire pressure each time these fluctuations occur.

    Measuring Tire Pressure

    When measuring your RV’s tire pressure, try to make sure the tire is cool and in the shade. Ideally, the tires will have not been driven on or exposed to sunlight for at least 2 to 3 hours. That usually means the best time to check your tire pressure is first thing in the morning or late in the evening once you’ve settled in after a day of travel.

    Getting started is always the hardest, but by making tire maintenance — and measuring the PSI of your tires — part of your travel routine, you can greatly reduce the risk of experiencing tire failure while on the road.

    And don’t forget — FMCA members are eligible for discounts on Michelin, BF Goodrich, Hankook and Continental tires. Members have reported saving hundreds on replacement tires! Learn more.

    FMCA RV Club brings you this monthly tech tip to Enhance Your RV Lifestyle. FMCA delivers RV know-how to its members. Join today for just $50 — a savings of $10 just for RV Trader readers. Learn more at https://join.fmca.com/trader18.

    This information is for educational purposes. FMCA shall not be responsible nor retain liability for RVer’s use of the provided information. Prior to making any RV service decision, you are advised to consult with an RV professional.

  • FMCA Tech Tip: RV Spring Cleaning Tips

    FMCA Tech Tip: RV Spring Cleaning Tips

    Spring is in the air! FMCA has gathered a few less-routine RV spring cleaning tips that are easy to overlook when you’re excited to prepare for the season ahead.

    Exterior Cleaning

    • Insects, especially mud dauber wasps, like to build nests in refrigerator burner tubes, rooftop tank vents, water heater vents, and furnace chimneys. Check and remove any obstructions.
    • Spring is a good time to seal your RV’s exterior with a wax or poly sealant. This will provide a barrier to the elements and protect your rig throughout the year. Consult your RV owner’s manual for recommendations for the particular finish of your RV.
    • Windows, door frames, vents, and any rooftop protrusions (plumbing, air conditioner, satellite, or antennas) should all be cleaned. They also need a good bead of sealant to prevent water intrusion. Check for any cracked caulking, and re-caulk any problem areas.
    • Don’t forget to check your RV storage areas. Odds are that dust and dirt have settled here. Sweep out and, if needed, wash these compartments.

    Carpet and Furniture

    • Carefully check your RV’s carpet and furniture. Unfortunately, an RV can be a haven for insects, mice, or other rodents during the cold winter months. Mice have been known to chew through carpet or furniture to make their nests.
    • Wash items that you may just spot-clean throughout the year, such as heavy bedding, rugs, pillows, etc. Before you hit the road this spring, now is the time to take care of items that can be difficult to clean while on the road.
    • Clean upholstery and furniture per your RV owner’s manual instructions. Some finishes, such as suede or leather, need special care. Leather can keep its beautiful finish for years if properly maintained.
    • Spring is a good time to vacuum and steam-clean the carpet. This will help prevent odor problems and is another task that is more difficult to complete while you’re in the midst of the RV season.

    Kitchen

    • Clean the air filters on the microwave oven and stove hood exhaust. Replace as needed.
    • Speaking of filters…there may also be filters on your water lines for incoming water. Check filters for the sink or ice maker, and clean as needed.
    • Clean the interior of the refrigerator with a good disinfecting cleaner. Leave the doors open to allow for air circulation.

    Bathroom

    • Clean the toilet, sink, and shower with a mild cleaner such as lemon juice and baking soda. Try to avoid bleach products, as they can degrade the seals in your holding tanks over time.
    • Check your bathroom cabinets for expired medications and products. Make sure your first aid kit is stocked.

    Removing RV Odors

    The need for odor and moisture control is greatest when an RV is closed up and placed in storage during the off-season. Mold, mildew, and bacteria love to grow in enclosed spaces where the air is not refreshed. Air fresheners help, but they merely mask odors rather than remove them. To remove odors that have a foothold in your RV, consider using an activated charcoal odor removal substance, such as Bad Air Sponge.

    And Don’t Forget…

    Spring cleaning is the perfect time to check the batteries in your fire detector and carbon monoxide detector. This is a simple and important step to protect your family throughout the year.

    Hopefully these less common tips provide ideas as you begin your RV’s spring cleaning. Happy travels!

    FMCA RV Club brings you this monthly tech tip to Enhance Your RV Lifestyle. FMCA delivers RV know-how to its members. Join today for just $50 — a savings of $10 just for RV Trader readers. Learn more at https://join.fmca.com/trader18.

    This information is for educational purposes. FMCA shall not be responsible nor retain liability for RVer’s use of the provided information. Prior to making any RV service decision, you are advised to consult with an RV professional.

  • FMCA Tech Tip: Low-Voltage RV Wiring Repairs

    FMCA Tech Tip: Low-Voltage RV Wiring Repairs

    Low-voltage wiring repairs to your RV can be tackled by RV owners who have some basic knowledge and a few specialized tools. Learn how to perform simple electrical wiring repairs to your RV, thanks to the experts at FMCA.

    Overview

    Wiring is the backbone of an RV’s electrical system. Wires must be the proper size to handle the rated current flow for each device. If a wire is too small in diameter or makes too long of a run, the powered device will starve for voltage or current, and both the wiring and the device will overheat.

    Think of wiring as you would a plumbing system. As the flow rate of water increases, so must the diameter of the water pipe to overcome the restriction of a smaller pipe. As the pipe length increases, a larger diameter may be required to compensate for the loss in pressure as a result of friction within the pipe. Electrical wiring operates on the same principle, so it’s important to use the proper wire gauge for the designated load. A circuit that runs fine on a 16-gauge wire may not be suitable if more devices are added to that wire. A larger wire gauge may be needed to handle the increased loads.

    The wire gauge is not dependent on the voltage but on current flow, which is measured in amperes. A 15-amp circuit requires a 14-gauge wire, but if that load increases to 20 amps, a larger diameter, 12-gauge wire is needed. When choosing a wire size for a particular application, it’s important to determine the total current draw for that circuit and compare that with a wire-gauge chart.

    Stranded wire, rather than solid wire, is used for low-voltage DC wiring in RVs. A big advantage of stranded wire is its flexibility. It also holds up better when subjected to vibration.

    It’s important to understand that the insulation surrounding the conductor is sensitive to voltage. The insulation in low-voltage wiring is rated at a maximum of 50 volts and should never be used for high-voltage applications. Wiring specifically designed for higher voltage should be used exclusively on 120-volt-AC circuits.

    Most low-voltage wiring insulation consists of two varieties, GPT and GXL. GPT wiring has a PVC jacket that is good for interior wiring and is rated to 176 degrees Fahrenheit. GXL wiring costs a bit more, because it has a cross-linked polyethylene jacket and is rated for 257 degrees Fahrenheit. GXL is required for use in hotter locations, such as engine compartments, but can be used anywhere.

    Wire insulation prevents electricity from jumping out of the conductor to the surrounding environment. Insulation also provides some protection to the conductor. Eventually, though, a wire that is subject to vibration and is in contact with another object can rub through its insulation and may short to another conductor. If the short occurs to ground, the breaker or fuse should trip, but if it shorts to another hot circuit, you may experience any number of electrical anomalies. If the conductor shorts to the chassis or other metal component, the result may be a hot-skin condition, which in a high-voltage instance can be a serious, even fatal, hazard.

    To prevent abrasive wear, wiring should be placed inside a protective wiring loom. The most common is corrugated split-nylon loom, which is available in various sizes. Rated at up to 300 degrees Fahrenheit, the loom protects the wire from damage caused by abrasion, chemicals, and heat. The split in the loom allows for easy access when inserting wires. The loom is easy to cut to the desired length with a utility knife. Nylon cable ties should be used to fasten the loom to the RV at suitable points.

    Overcurrent Protection

    Wires heat up as current flow increases. If a short circuit develops, the amperage spikes and the wire gets so hot that it burns off its insulation. That can start a fire, which in the worst case could consume an RV. That’s why overcurrent protection is needed for every circuit. Such protection can be in the form of a fuse or a circuit breaker. Fuses are disposable, so once they blow, they must be replaced.

    Circuit breakers are more costly, but for critical circuits they can be reset and used again. Type I circuit breakers automatically reset once they cool and are the most common. Type III circuit breakers have a small reset button that must be manually pushed to restore power to the circuit. Remember that the portion of wire between the battery and the fuse or circuit breaker is unprotected, so it’s important to position the circuit breaker as close to the power source as possible to achieve the best possible protection. Circuit breakers must be matched to the wire gauge as well. Adding a larger fuse or breaker to a wire that isn’t designed to carry that much current defeats the purpose of the protection.

    Connections

    Proper connections must be made to securely attach wiring to the destination equipment or device. Simply wrapping a wire around a screw head invites failure. When a screw connection is needed, a loop-end wiring terminal should be attached to the end of the wire so that it can be securely fastened to the screw. Most auto parts stores carry an assortment of wire terminal ends that contain loop-end terminals. Stores also sell butt-end and flat-blade connectors, which are used to join two wires.

    A PVC or nylon insulation collar surrounds the crimp barrel of each connector and is color-coded to identify the size of wire each terminal requires. A red collar signifies a terminal designed for 18-gauge or 20-gauge wire. A blue collar is designed for 14-gauge or 16-gauge wire, while yellow is rated for 10-gauge or 12-gauge wire. Selecting the correct terminal for a particular wire size ensures a tight connection that won’t detach.

    You’ll need to use a crimping tool, but be careful, because some of the inexpensive ones do a poor job and the connection may pull apart. I suggest a crimp tool such as the Paladin Tools PA1308 or the S&G Tool Aid 18900. These tools, which have a die with three barrel sizes, perform a complete roll crimp on the fitting, rather than a single indent, producing crimps that won’t pull apart.

    Many connections require running a wire to ground. Loose, damaged, or missing ground connections are some of the most prevalent issues when chasing down an electrical problem. Such ground connections attach to the vehicle’s frame to complete the circuit. Often, the connections are in a location that is subject to corrosion. As a preventive measure, protect the connection with battery terminal sealant. A ground connection should be to clean, bare metal. Remove paint that could hinder the connection, and use a star lock washer to help bite into the frame and make better contact with the terminal ring. If you use a bolt rather than a screw, a nylon lock nut or lock washer will prevent the nut from vibrating loose.

    Soldering wires together makes a solid connection. However, battery and inverter cables pass large amounts of current, which can melt the solder. Such high-capacity connections should have crimped connectors. Crimping tools for large connectors are expensive, so your best option may be to find a truck or RV service center that can perform the crimps for you.

    Corrosion Protection

    When electrical current passes through two dissimilar metals, galvanic corrosion can occur. When moisture attacks connections, rust can form. Salt water and acidic vapor from nearby batteries hasten these forms of corrosion and inhibit the ability of the connection to pass current.

    When making a soldered splice of two wires, it’s important to seal the connection and protect it from corrosion. Polyolefin shrink tubing is ideal; it forms a seal that protects the connection from the elements. Shrink tubing is placed over the wires prior to soldering and then slides over the connection after it has been soldered. Then, a hair dryer or heat gun warms the tubing and shrinks it to seal the wire.

    Shrink tubing also can be used to seal the barrel ends of ring-style terminals to prevent corrosion from rotting the wire inside the barrel. This is especially important for battery terminal connections. Large-diameter shrink tubing for these cables is available in both red and black to identify positive and negative cables. When making a connection in a clean environment, such as behind a vehicle’s instrument panel, standard insulated butt connectors or flat-blade connectors generally are adequate.

    Top-post batteries can receive further protection against corrosion. For example, to each post, add a felt washer that contains NOCO Company’s NCP2 corrosion preventative compound. NCP2 also is available in spray cans and can be useful for coating ground connections or terminal studs in areas that are exposed to the elements.

    By investing a little time learning some electrical basics and having a few small tools, you’ll be able to handle most of your wiring repairs.

    FMCA RV Club brings you this monthly tech tip to Enhance Your RV Lifestyle. FMCA delivers RV know-how to its members. Join today for just $50 — a savings of $10 just for RV Trader readers. Learn more at https://join.fmca.com/trader18.

    This information is for educational purposes. FMCA shall not be responsible nor retain liability for RVer’s use of the provided information. Prior to making any RV service decision, you are advised to consult with an RV professional.