Author: Freedom in a Can

  • Glacier National Park: RV Travel and Camping Guide

    Glacier National Park: RV Travel and Camping Guide

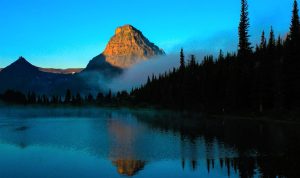
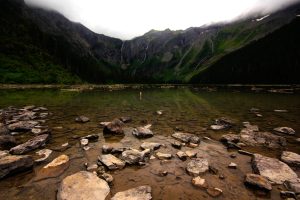
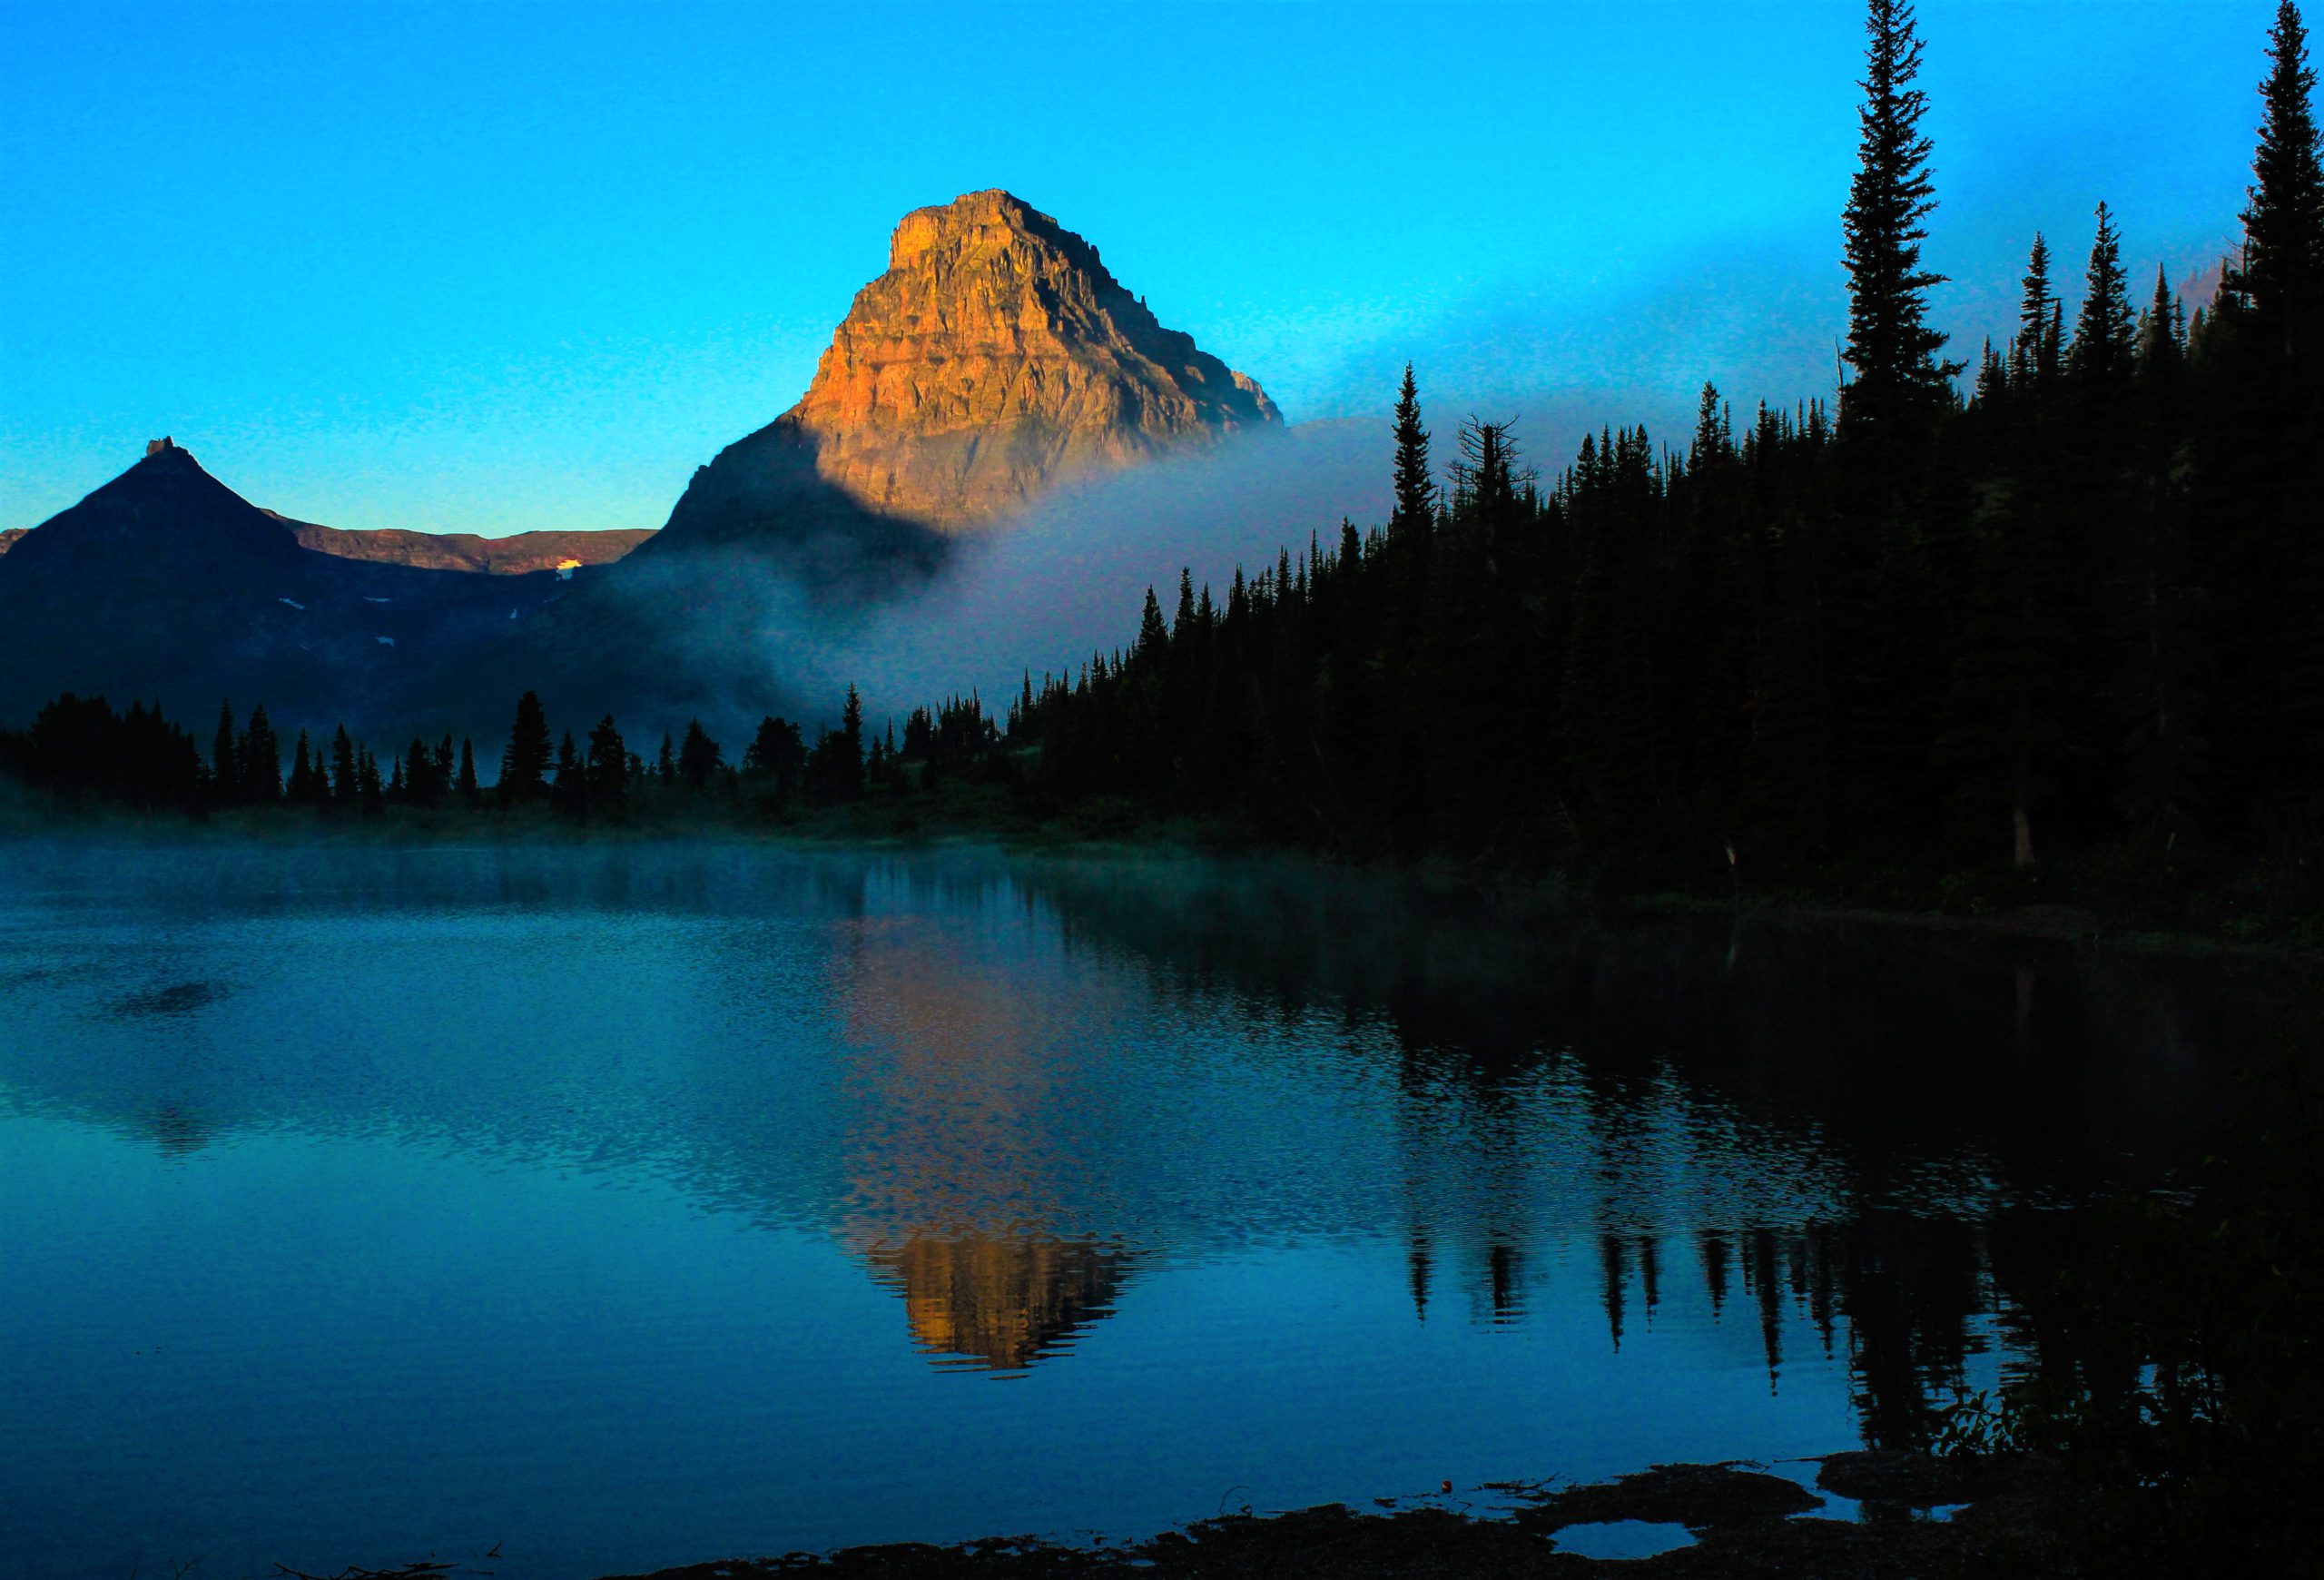
    What makes a perfect national park? Start with water — blending together glaciers, waterfalls, alpine meadows, glacially carved valleys, and serene lakes. Then stir in fantastic wildlife watching opportunities. Add a dash of historic chalets, lodges, and scenic drives. And cover with a thick layer of hiking and paddling opportunities. As you might imagine, there are just few places on this continent that can bring these ingredients together. But the mighty Glacier National Park does exactly that, offering something for every traveler’s palette!

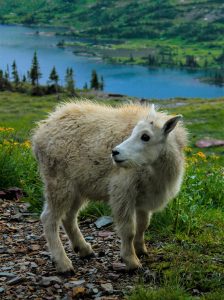
    As one of the top ten most visited national parks in the U.S., this park is VERY busy during the summer months. So, as an RVer, it’s important to plan ahead to give yourself plenty of time to enjoy this immense park. Also, be sure to pack your patience along with your bear spray. (Yes, there are grizzly bears.)

    As you plan your trip, you’ll want to camp close to the places you want to visit. Here’s what you need to know to successively navigate through, camp in, and enjoy this extraordinary national park.


    Scenic Drives 

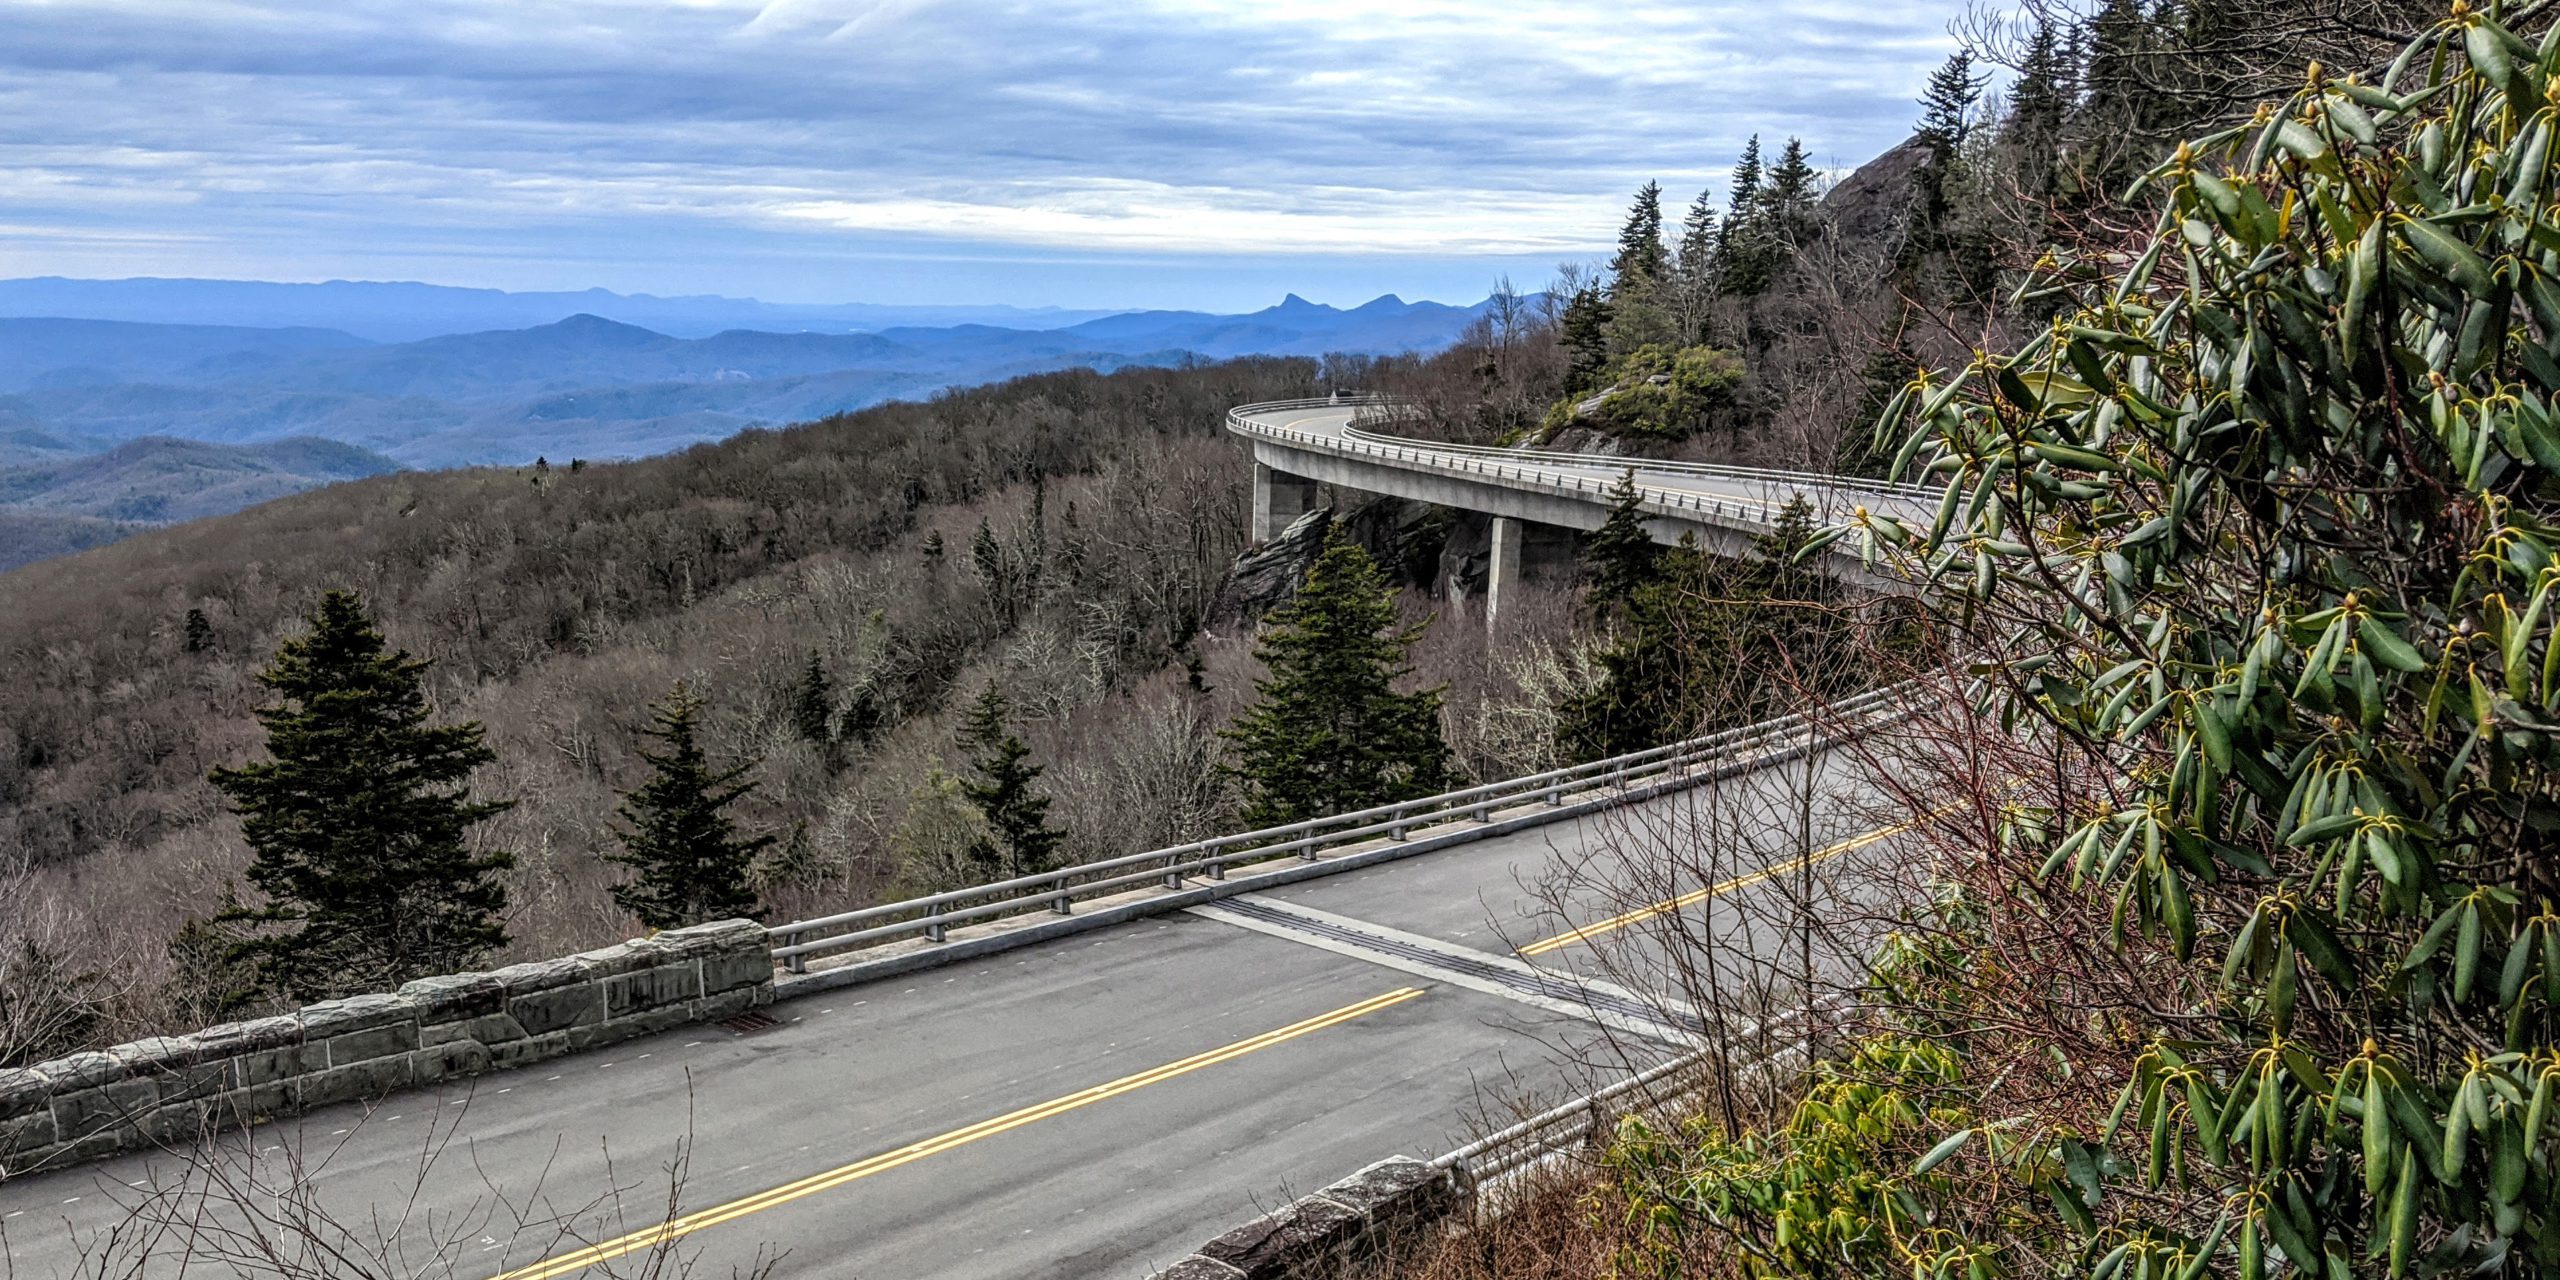
    While every single drive through and around the park is gorgeous, you don’t want to miss the Going to the Sun Road! However, it is important to keep timing and vehicle limitations in mind when planning your visit in order to avoid disappointment and congestion. The Going to the Sun Road is open year-round near the West Entrance, but be advised: The entire road does not usually open until late June at the earliest. The alpine sections typically close for the winter around the third week of October. (However, this can also happen earlier due to wintery weather. You can find historical open and close dates here.)

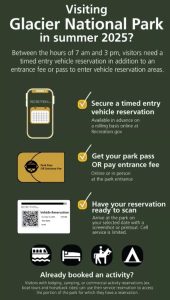
    To reduce traffic and make the road accessible to emergency vehicles, timed entry vehicle reservations for 2025 are required between June 13 and September 28 for the west side of Going-to-the-Sun Road and North Fork — from 7 a.m. to 3 p.m. The park is open 24/7 and visitors may enter vehicle reservation areas before 7 a.m. or after 3 p.m. without a vehicle reservation.


    Important Notes for RVers

    Vehicle Length

    Vehicles and vehicle combinations longer than 21 feet (including bumpers) or wider than eight feet (including mirrors) are prohibited between Avalanche Creek and Rising Sun. Also, vehicles over 10 feet in height may have difficulty driving west from Logan Pass to the Loop due to rock overhangs. Consider a shuttle if your vehicle falls into these specific limitations.

    Summer Shuttle Service 

    Free summer shuttle service for Going-to-the-Sun Road begins July 1 and continues through Labor Day. The shuttle serves both the east and west sides of the park. Additionally, shuttles are wheelchair-accessible and most offer bike racks. Shuttles typically run every 15 to 30 minutes and are first-come, first-served. During the high season, wait times to board a shuttle may be an hour or more depending on where and when you seek to board.

    Hiker-Biker Shuttle Service

    There is a unique opportunity for visitors who visit early in the season! Prior to the road opening for the season, a hiker-biker shuttle service allows recreational access for hikers and bikers beyond vehicle gate closures on Going-to-the-Sun Road. This service often begins in late may and runs on weekends through June 29 or until the day the Going-to-the-Sun Road fully opens. (Whichever comes first.)


    Must-Hike Trails 

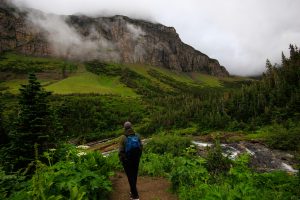
    Hiking is one of the most popular activities in Glacier National Park! The top 10 most popular hikes in the park — like Grinnell Glacier, Highline Trail, and Avalanche Lake — all average hundreds of hikers per day. The Hidden Lake Trail at Logan Pass is spectacular, but averages over 1,600 hikers per day. Most of Glacier’s trails are full-day hikes with significant elevation gain. However, with over 700 miles of trails, enjoying a less popular trail (and perhaps less challenging) will allow you to get away from the crowds and still experience the raw beauty of this place. 

    Another option is to get up with the sun and start your hikes very early in the day. That, or head out in the later afternoon (3 p.m. or later) to avoid the bulk of the crowds in the high season. Don’t forget your headlamps and extra layers as the daytime high temps can plummet when the sun sets and weather can move in quickly! 


    East Side

    Two Medicine Area

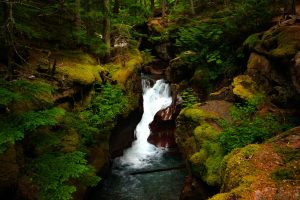
    • Hikes to Waterfalls. Appistoki Falls, Aster Park Falls, and Running Eagle Falls (accessible) are shorter hikes on the easier side and could be done over the course of a day. Longer hikes, but worth it, include Rockwell Falls and Twin Falls.
    • Dawson Pass. This is a rugged trail with over 2,500 feett of elevation gain offering gorgeous views of mountain peaks and alpine lakes.  Dawson and Pitamakan Pass Trails can be combined for a popular all-day loop! 

    Reflections in Two Medicine Lake.


    St Mary’s Area

    • Beaver Pond. Nice and easy loop.  Keep an eye out for beaver activity!
    • Hikes to Waterfalls. St Mary Falls and Barring Falls are shorter hikes with much less elevation gain than many other Glacier hikes.


    West Side

    Lake McDonald Area 

    Rocky Point and Trail of the Cedars (accessible) are both short, beautiful hikes. Seeking a bigger challenge? Two long-distance national scenic trails run through the park. First, the Continental Divide Trail (CDT)  runs along the spine of the Rocky Mountains from the Mexican border in New Mexico to the Canadian border in Montana. 

    The other national scenic trail is the Pacific Northwest Trail (PNT) which provides a continuous 1,200-mile route through some of the region’s most spectacular and diverse terrain. The trail crosses through five primary geographic areas: the Rocky Mountains, Columbia Mountains, North Cascades, Puget Sound, and Olympic Peninsula.

    Camping at Lake McDonald.


    RV Parks & Campgrounds 

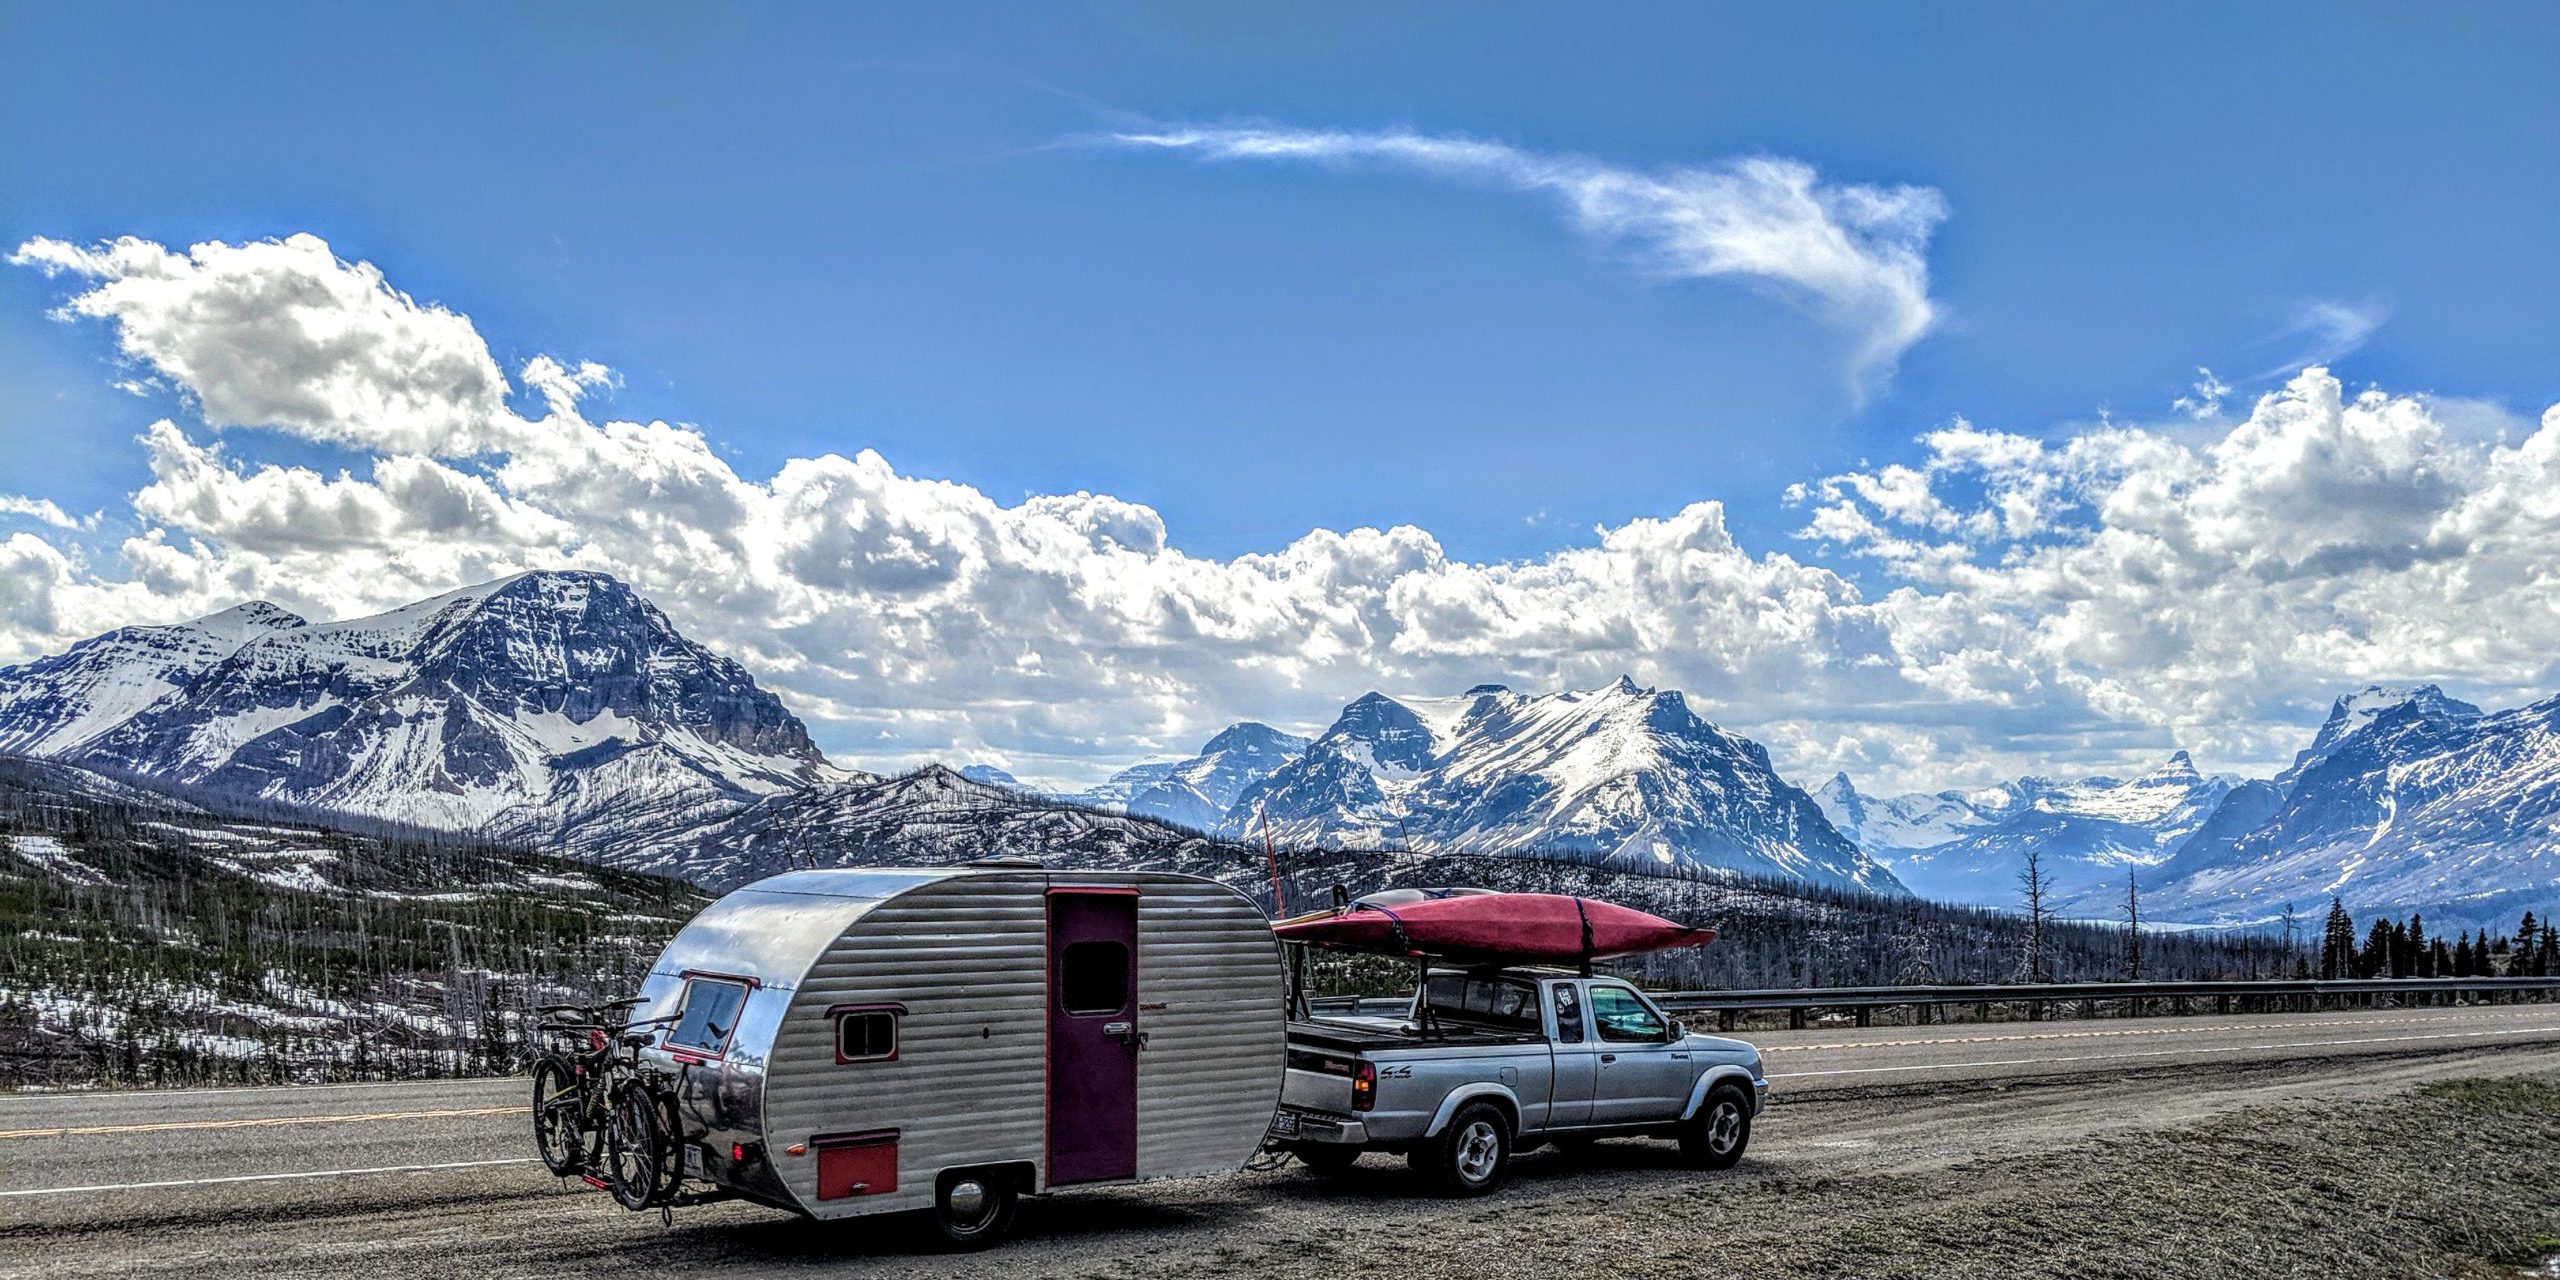
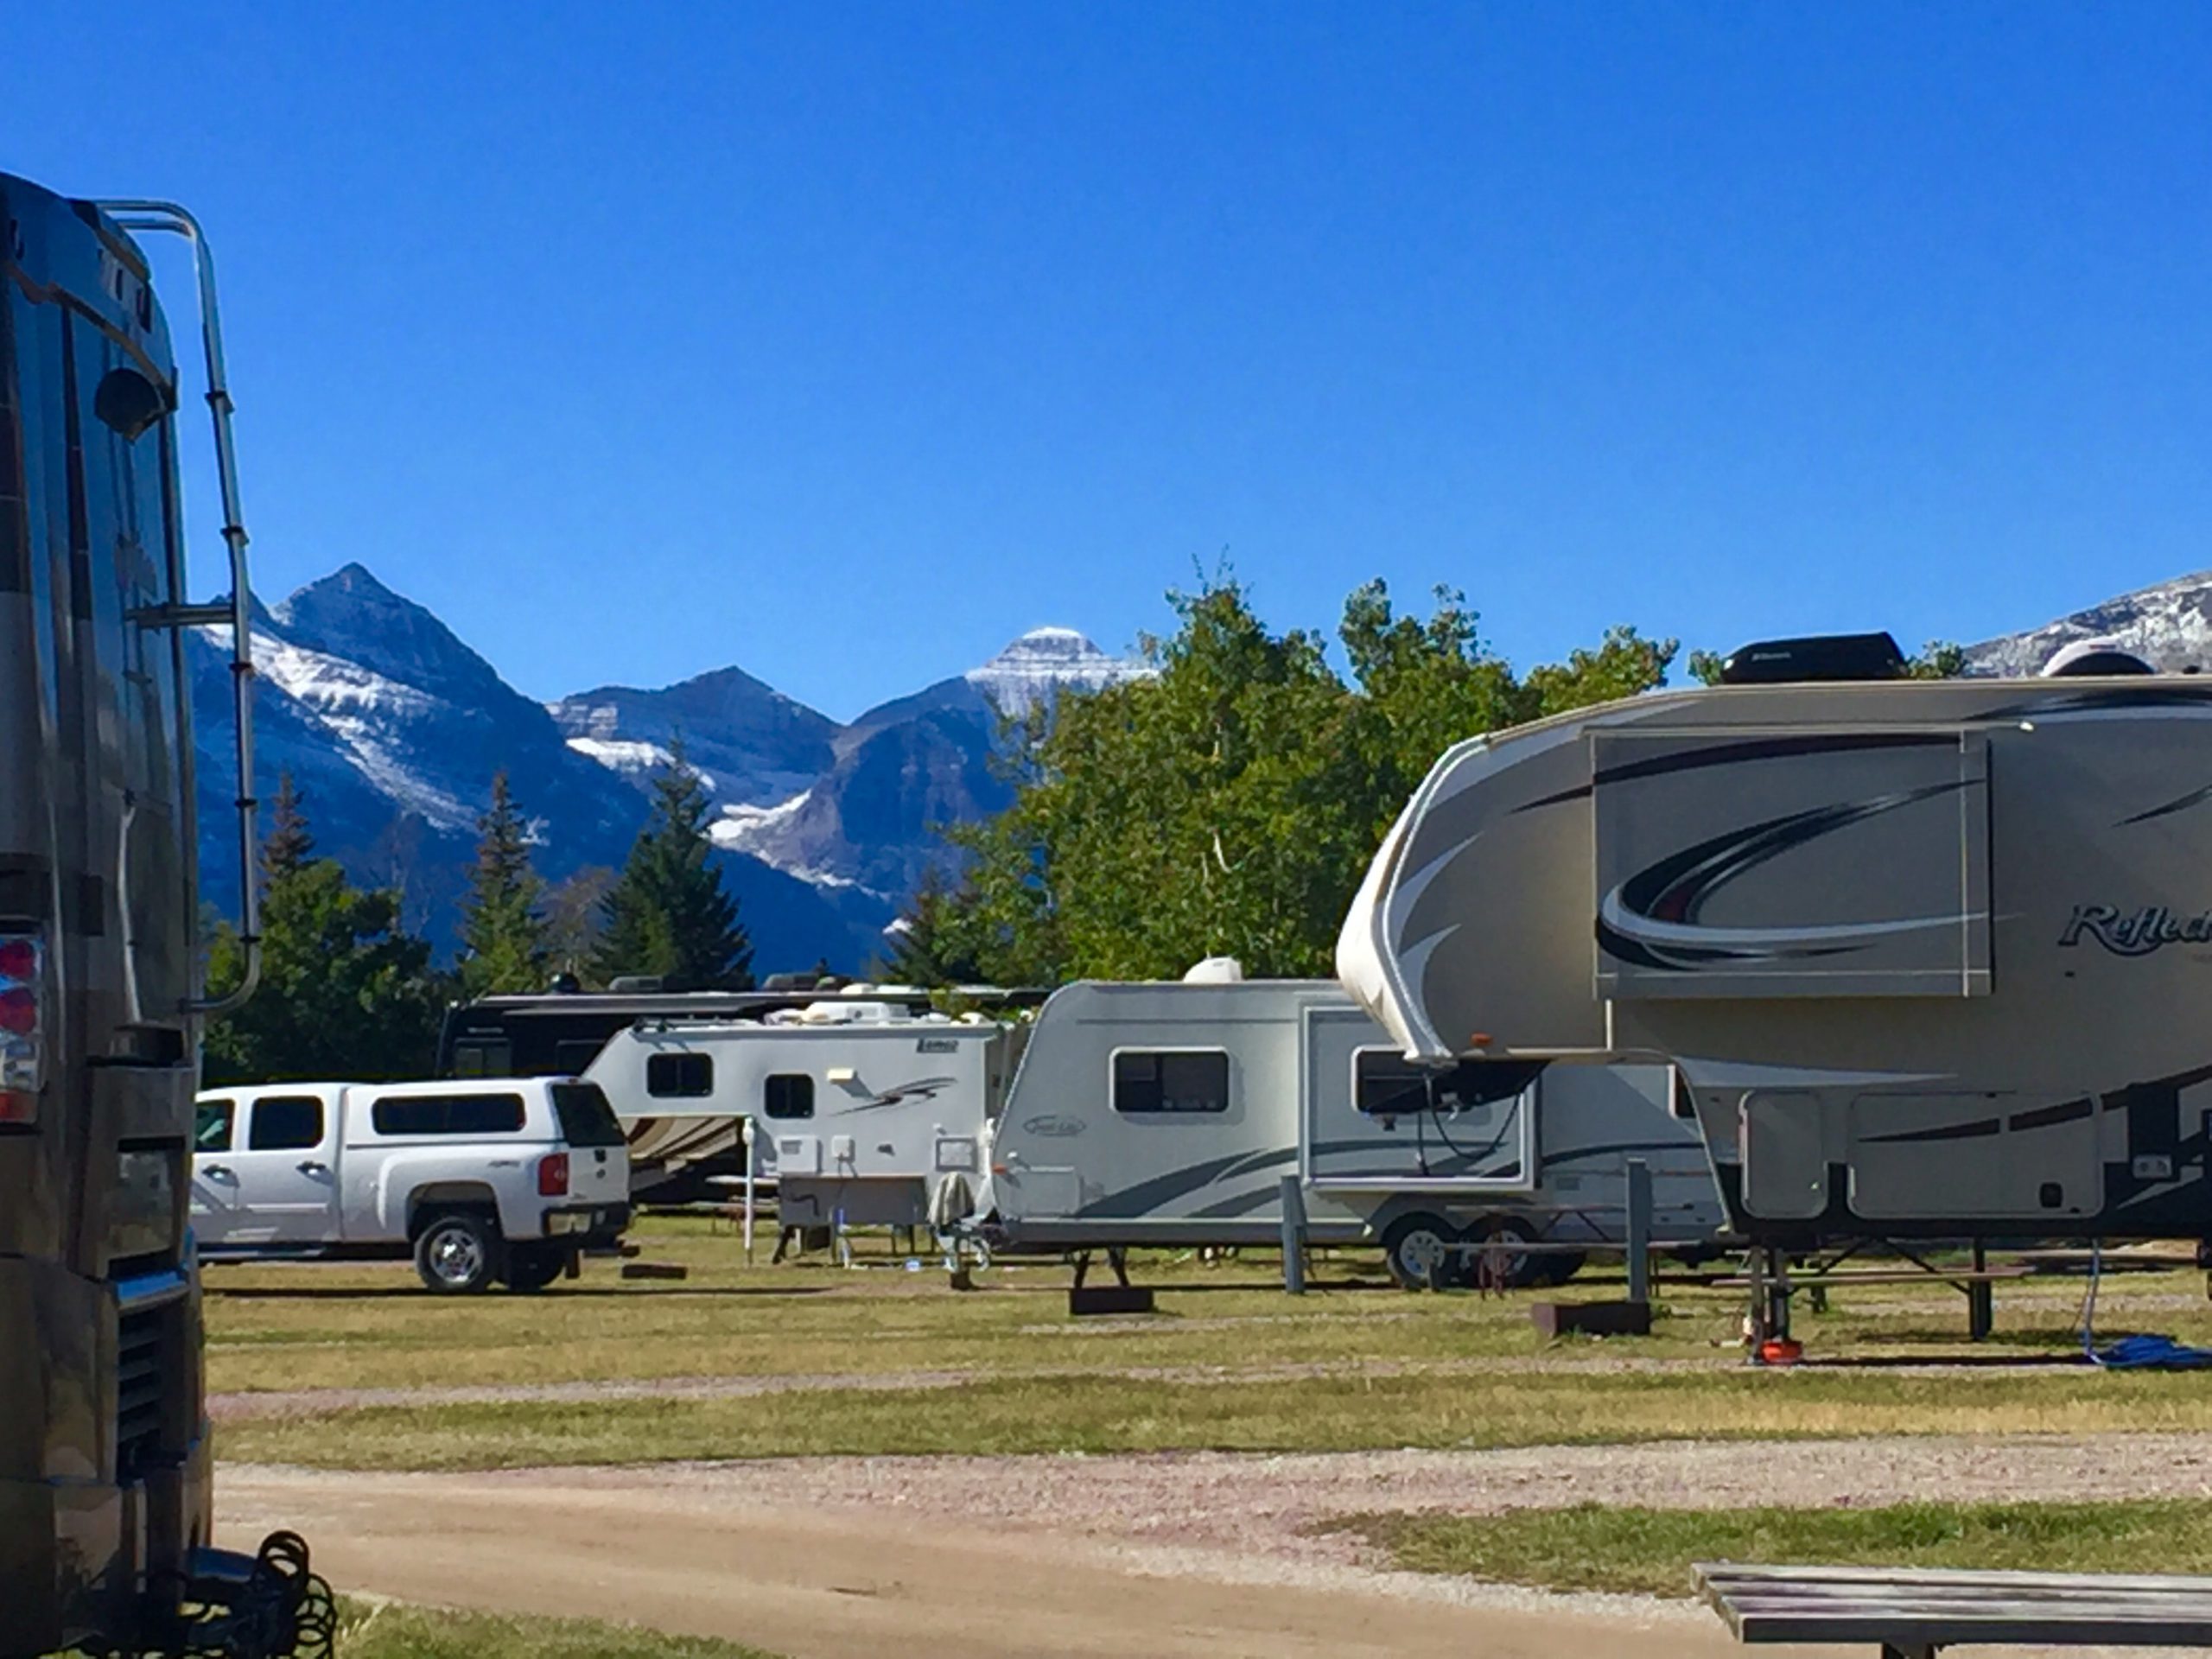
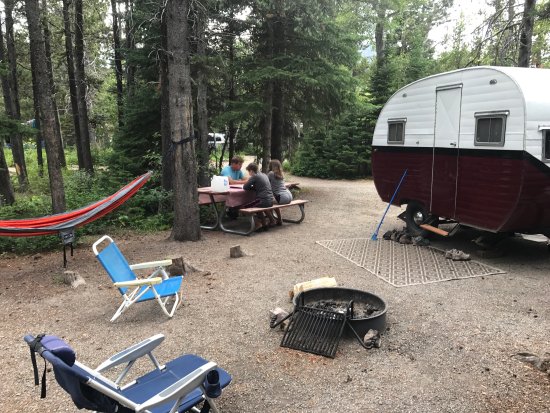
    Camping in Glacier National Park is one of the best ways to experience this spectacular place. There are nine campgrounds accessible to RVs, each varying in size and amenities. Notably, eight of the nine campgrounds require reservations. Rising Sun Campground remains the only first-come, first-serve campground open to RVers (with the exception of Apgar in the winter). Importantly, visitors need to know that none of the park’s campgrounds offer electrical, water, or sewer hook-ups.

    Experientially, if you are planning more than a couple of days in this park, we recommend splitting your time between camping on the east side and camping on the west side. That way, you can experience the best the park has to offer.


    No Reservation Required

    Rising Sun. This first-come, first-serve campground lies just west of St. Mary and offers beautiful sunrises in the morning with Red Eagle Mountain as a backdrop. In particular,  it provides a great base camp for hiking east of Logan Pass.  Sites can accommodate vehicle lengths up to 21 feet. Additionally, it provides some shade, although solar power is possible in many sites. The campground is also typically open from early June to early September.


    Reservations Required

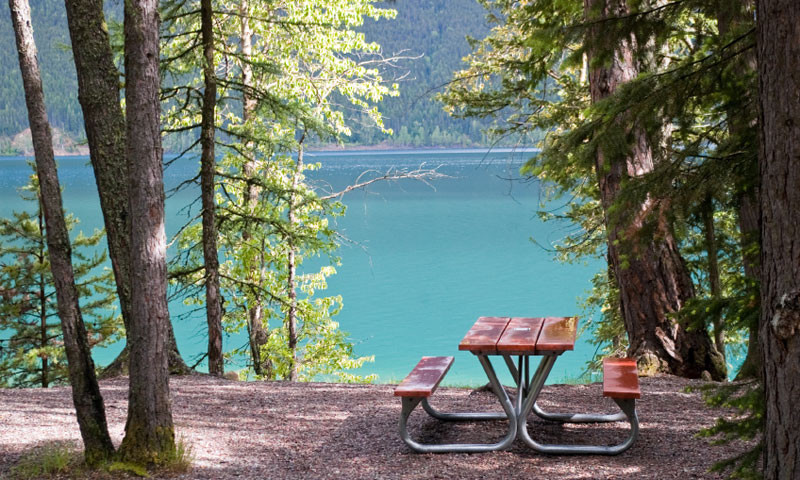
    Apgar. This campground is located on the west side of the park at 3,500 feet and is situated on the shores of Lake McDonald. While it is the largest campground in the park, only 25 sites can accommodate up to a 40 foot RV or truck and trailer combination. Lots of shade and open year-round (with primitive camping during the late fall, winter, and early spring; no reservations required in the winter).

    Avalanche. Located in one of the most popular sections of Glacier National Park west of the Continental Divide, Avalanche lies in the sweet spot. About half of the sites accommodate vehicle lengths up to 26 feet, many with ample shade. Avalanche typically opens in the summer from mid-July to mid-September.

    Fish Creek. The second largest campground in the park, Fish Creek comes loaded with shade. Some sites offer filtered lake views, though not directly on Lake McDonald itself. The campground typically opens mid-May to early September.

    Sprague Creek. Found on the northeast shore of Lake McDonald, Sprague Creek lies just off Going-to-the-Sun Road. Towed units (vehicle plus unit) and RVs exceeding 21 feet are not permitted in this campground due to the nature of the entrance road. Lots of shade and typically open from late May to late September.

    St. Mary. The largest campground on the east side near the St. Mary Visitor Center, St. Mary provides only three sites able to accommodate RV or vehicle/trailer combinations up to 40 feet. Twenty-two sites can accommodate up to 35 feet. Shade is sparse but great for solar-powered rigs and open year-round. (With a portion of the campground open during the winter with no reservations required.)


    St. Mary Campground.


    Currently Under Construction Restrictions in 2025

    Two Medicine. This park is approximately 13 miles from East Glacier. Ten sites will accommodate up to a 35 foot RV or truck and trailer combination. Sites include some with shade, although solar power remains possible in many sites. Two Medicine typically opens from late May to mid-September. There is a primitive camping season from mid-September into October, weather permitting. (Note: During fall primitive season in 2025, the campground will be closed due to construction.)

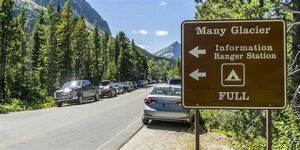
    Many Glacier. This campground is great for wildlife lovers. About 10 percent of the sites can accommodate vehicles up to 35 feet in length. Lots of shade here. The campground is typically open from early June to mid-September. (Note: Closed for construction during the 2025 season.)


    Many Glacier Campground.


    Beyond Campgrounds

    Beyond federal campgrounds maintained by the park, the greater Glacier area offers an abundance of camping options from RV resorts to dispersed camping.

    • National forest campgrounds near the park are a great option when the federal campgrounds are packed and you want an authentic mountain experience. 
    • Harvest Hosts and Boondockers Welcome offers members several camping options on the western side of the park.
    • Dispersed camping is scattered throughout the mountains. If you are equipped with solar power and interested in off-grid camping or boondocking, check out the iOverlander app for some good overnight options where you will find fewer trees.


    Seasonal Advice 

    Glacier National Park is split by the western Continental Divide at the famous Logan Pass.  Based on Rocky Mountain standards, Logan Pass is not all that high in elevation at 6,600 feet. Even so, the area does receive a significant amount of snow (up to 100 feet!). Also, it can be incredibly windy in the winter — up to 140 miles per hour!   

    May through September is the best, but also the busiest time, to visit the park. The shoulder season (just a couple of weeks before and after) can offer unique and much less crowded opportunities.

    If you must visit during the summer, our best advice is to get out early and stay out late to avoid crowds in the most popular areas of the park. Go to lesser visited areas in the middle of the day (10 a.m. to 3 p.m.). For more popular areas, plan trips in the morning and evening.


    Planning Considerations

    • Parking. It’s limited. During summer, parking lots often fill by early morning.
    • Traffic Restrictions. During extreme congestion, access to whole areas may be temporarily restricted to allow for emergency vehicles.
    • Fuel. There are no fueling stations within Glacier’s boundaries.
    • Route Restrictions. Glacier’s entries and roads all have specific restrictions. Know before you go! 
    • Fire Alert. Summer fire season is a reality. Be ready to change your plans on a moment’s notice.
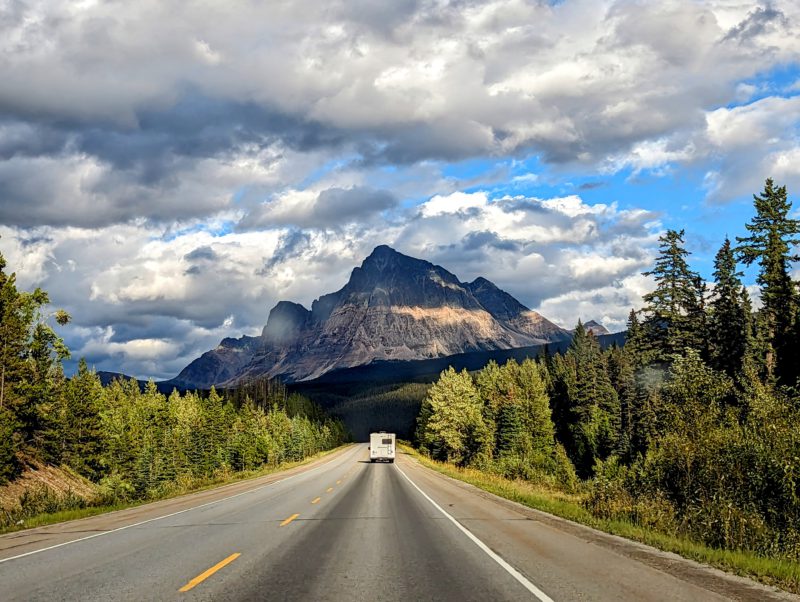
    • Crossing the Border. If you plan to continue into Canada to visit Waterton National Park or the Canadian Rockies, keep in mind that the Chief Mountain Border Crossing is only open during the summer season.

    With the Four Ps (patience, preparation, planning, and persistence), you can make your dream Glacier National Park trip a reality! We suggest spending at least a week in Glacier National Park in order to make the most of your visit to this spectacular park.


    Unique Programs & Opportunities

    Tours & Programs

    Guided Tours

    Guided tours ranging from rafting to hiking to boat and bus tours to horseback riding are offered by licensed concessionaires who work with the park. These are great options for visitors with less outdoor experience to get into the heart of the park!

    Native America Speaks Programs

    Each summer, members of the Blackfeet Nation and Confederated Salish and Kootenai Tribes share personal knowledge of their history and culture. This program began in 1982 and is the longest running Indigenous speaker series in the National Park Service. It is a very unique opportunity. Programs are generally offered at park campgrounds and historic lodges, and in locations throughout the Blackfeet Nation.


    Recreational Activities

    Cycling

    In addition to the very popular option of biking portions of (or the entire) Going to the Sun Road, there are four multiuse trails throughout the park, though no true mountain biking trails.  Bicycles are permitted on all paved and unpaved roads.

    Fishing

    Since no fishing license is required within the park boundaries — and lakes and streams are abundant — fishing is a very popular activity among visitors. Keep in mind that some waters are off-limits, and there are many regulations regarding season and catch limits that should be followed.  
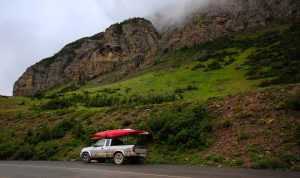
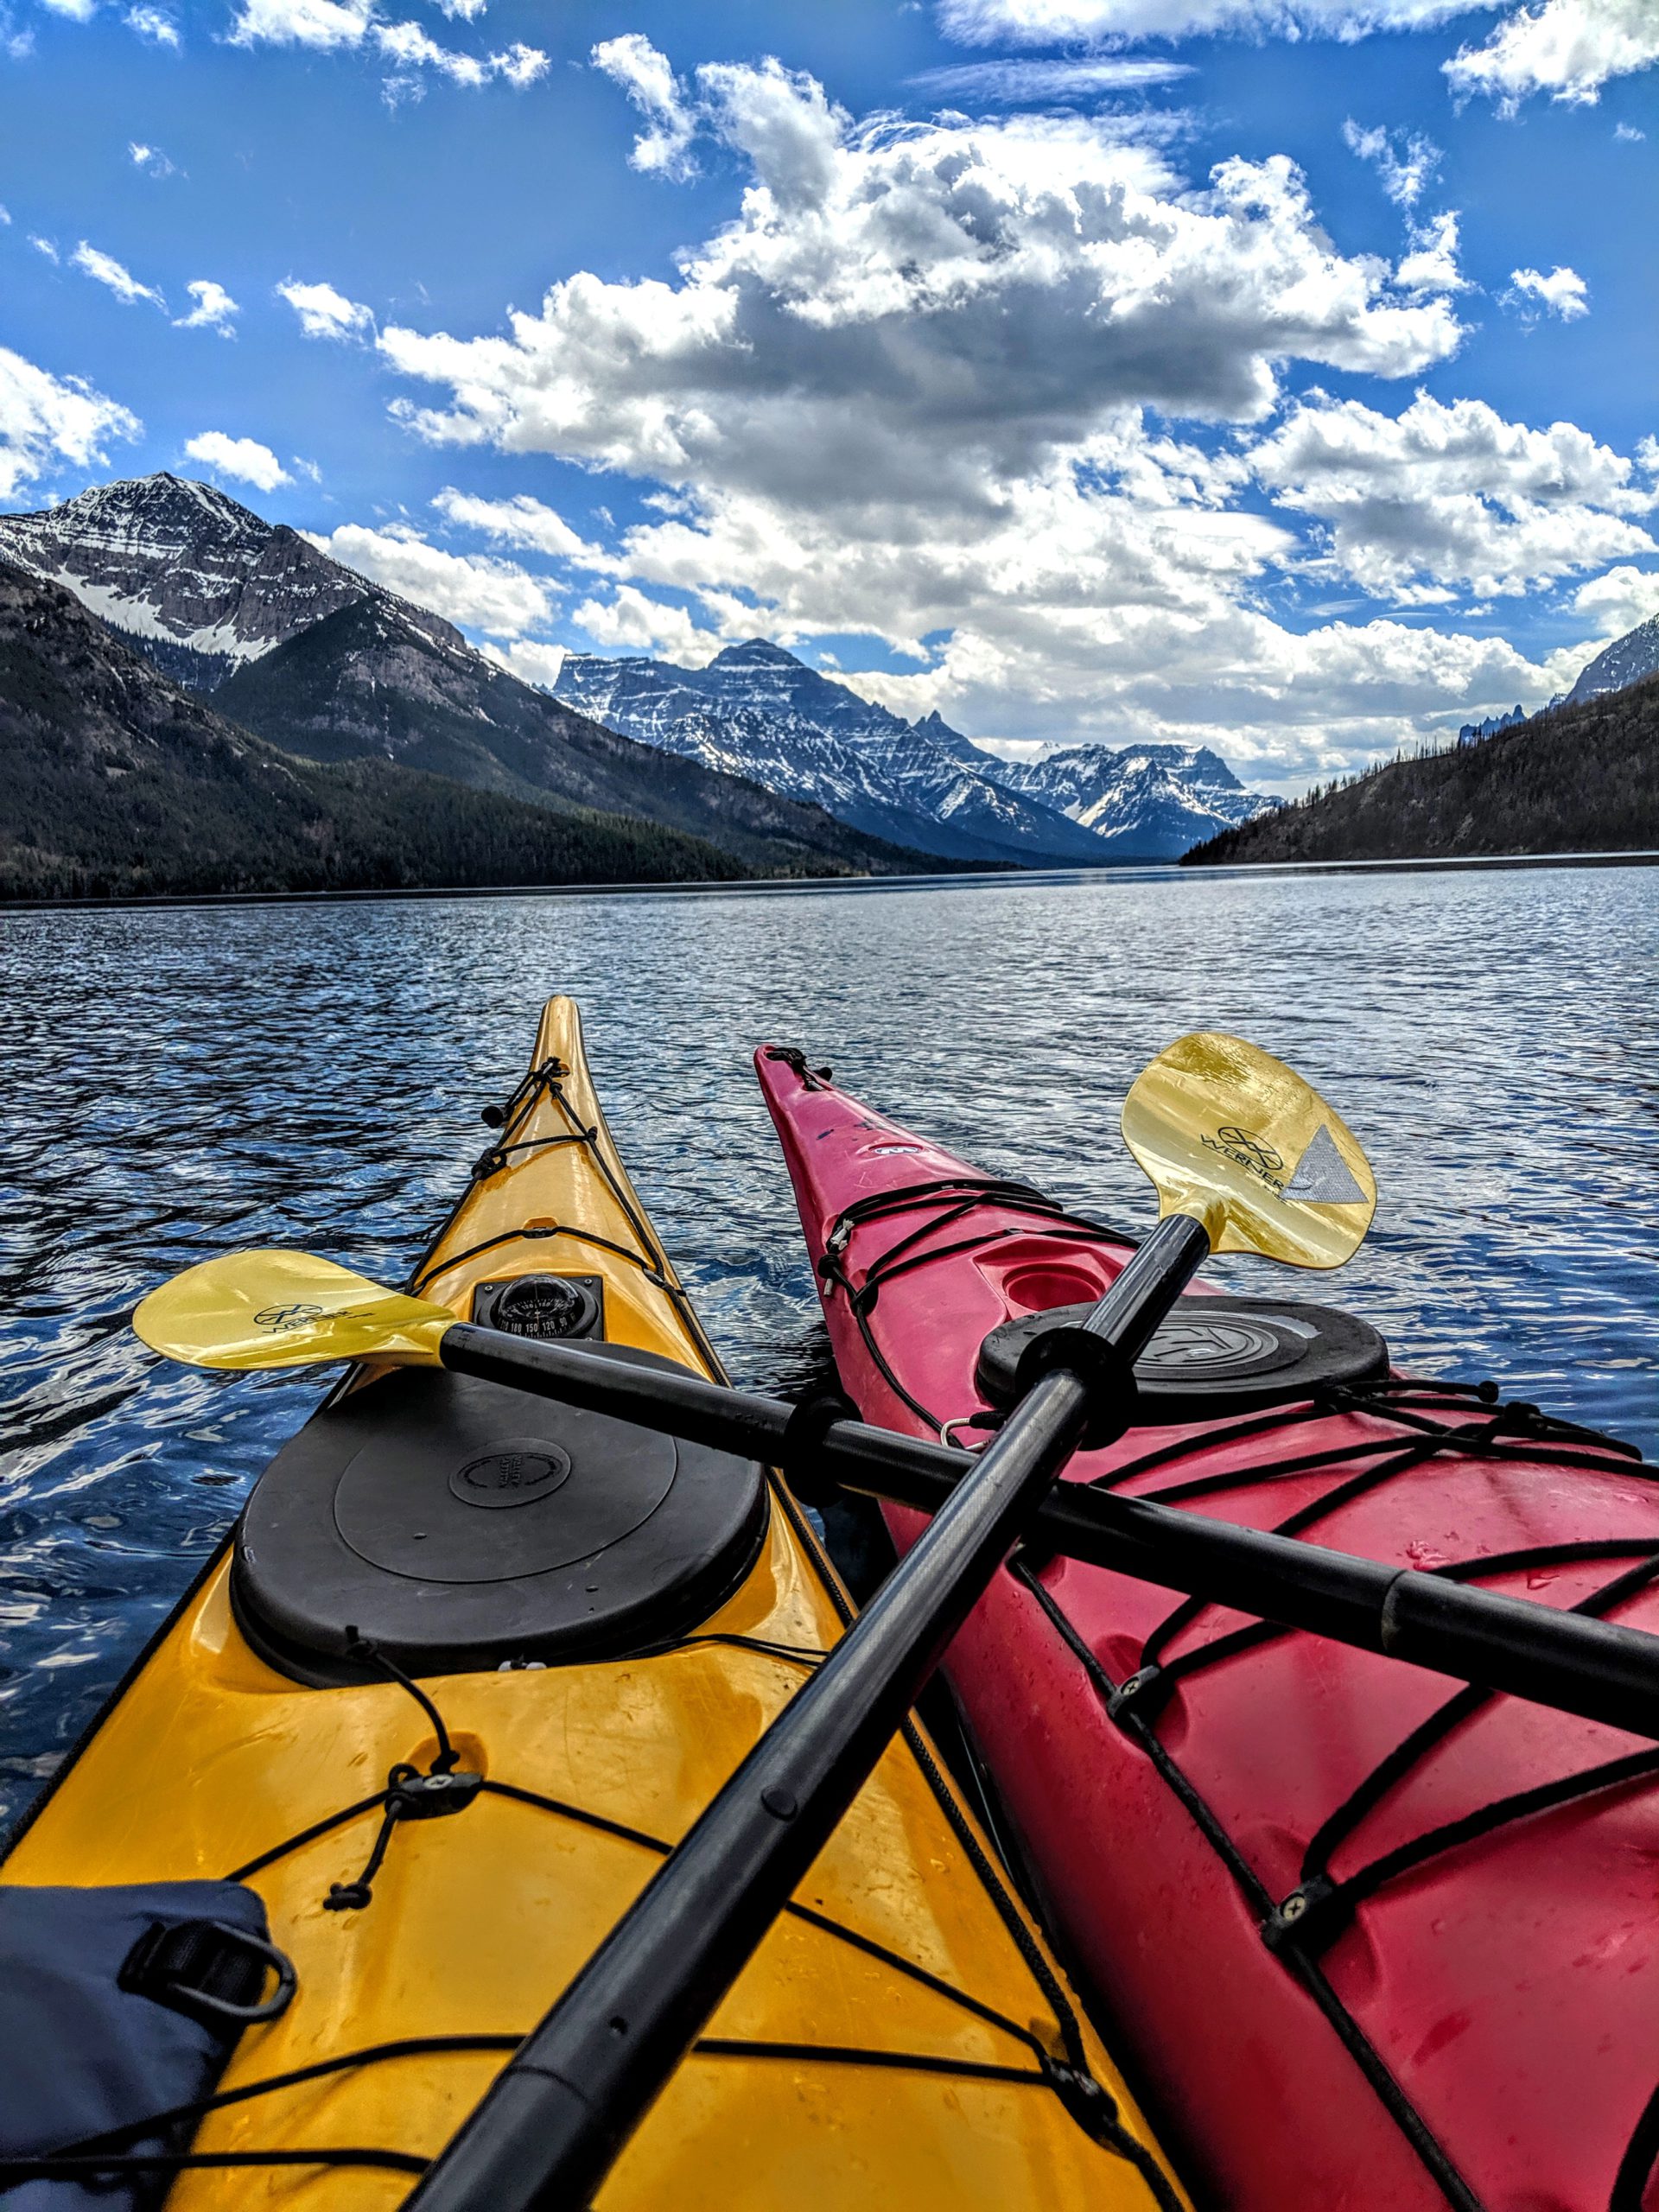
    Boating

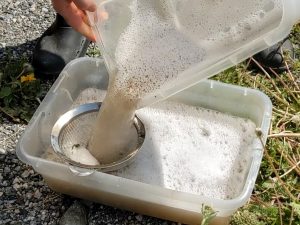
    All watercraft launched within Glacier National Park must be inspected for aquatic invasive species prior to launching. Vessels are permitted on park waters on the west side of the Continental Divide between mid-May and late October, and on the east side between late May and late September. Inspection stations are conveniently located on both the west and east sides of the park.


    Bring your kayaks!


    Winter Sports

    If cooler temperatures and no crowds are more inline with your interests, try a winter visit to the park and enjoy abundant opportunities for both snowshoeing and cross country skiing. (Note the campgrounds that are open during the winter months in the RV Parks & Campgrounds section above.)

  • My RV Broke Down! What Should I Do Next?

    My RV Broke Down! What Should I Do Next?

    Imagine: You’ve just crested the hill on a long, winding mountain pass in central Nevada. Then your engine suddenly starts making an unfamiliar noise. The check engine light starts blinking rapidly as  the engine temperature gauge shoots up into the red. You pull over to the side of the road, and it starts to set in: Your RV broke down. Suddenly, your dream road trip takes an undesired turn. 

    You glance at your cell phone signal. Nothing. The last house you saw five miles back down the road looked like it was abandoned during the Dust Bowl era. The last vehicle you saw was even further away from the old house. But, the shoulder along the road where you pulled over is nice and wide. You shut things down, and settle in. (Did I mention that it’s getting darker?)

    What do you do?  


    Being Prepared for an RV Breakdown

    A Cool-Head Mentality

    While this might seem like the set up for a cheap horror flick, keep your head about you. Panic improves nothing. It’s also good to remember: You’re in an RV. That means that you’ve got your home with you. There’s plenty to eat and drink. You have a place to sleep and take care of all your immediate needs for at least one night. By any other vehicle trip standards, you’re already way ahead of the curve.  

    So, while you’re contemplating your next steps, take a minute to congratulate yourself for being where you are, what you have with you, and the great story that you’re going to tell when you get back!  (We promise this helps.)

    Personally, we’ve experienced all kinds of engine and trailer related troubles in our nearly 13 years on the road. We’ve experienced everything from a flat tire in West Virginia to a bearing blow out near Happy, Texas (yes, we see the irony) to multiple engine hiccups from sea to shining sea. Nearly all of these breakdowns have been minor, and for some inexplicable reason, seem to occur on a Friday at about 3:00 p.m. (You know, with just enough time to maybe get to a mechanic, but not enough time to do anything about it until the following week.) We’ve only been involved in one semi-serious collision where we were grateful to be able to walk away, but our towing vehicle … well, not so much. (But that’s another story for another time.)

    In each case, keeping a cool head has made a big difference in how we tackled our problems.


    An RV Insurance Policy

    As Edna from The Incredibles reminds us, “Luck favors the prepared!”  In other words, you have to be ready for what might happen before it happens.

    Starting with good quality insurance is key — whether it’s through your existing auto insurance policy or a separate policy for your RV. While most car insurance covers the liability on anything it tows, it doesn’t necessarily cover anything else like collision or comprehensive. (We nearly found this out the hard way.)

    As full-timers, we carry RV insurance that will not only help us pay for repairs, it also covers the cost of alternative housing (i.e., hotel, apartment, AirBnB) for a short time while our home is being worked on as a result of an incident. We’ve only needed it once in nearly 13 years, but it was incredibly helpful (and put our minds at ease) when we needed to replace our trailer’s axle during the pandemic-induced supply shortage over Thanksgiving week in 2020. What could have been a total nightmare turned into an enjoyable week in Santa Fe!

    Now, returning to our hypothetical situation where your RV broke down, let’s use that to illustrate how to be prepared for the unlikely event of an RV breakdown. This should help in the event you need do a little RV breakdown triage.


    So, your RV broke down. Breathe: Is this something you can repair on your own? 

    Answer: Yes! As long as I have the tools.

    If you’re handy, mechanical, or have earned the wisdom of the wrench, this little hiccup could just be a bump along the way. You’ve got a good collection of tools, and perhaps some frequently worn out parts for your rig along for the ride. Along with those tools, a prepared RVer should have some basic safety supplies. Frankly, if your RV broke down, something is wrong. And now might be the time you need that fire extinguisher.

    Even if you don’t have the right tools, you may still have DIY options. Many auto parts stores have a tool loaner program for those more specific tools that might not fit into your repair kit. In addition, many stores have delivery vehicles which can bring them right to you. Believe it or not, many online auto part retailers have same-day delivery options. (So, just ask.) Simply choose that option when ordering, then select on a map where you are and they’ll bring it right to you. 

    Other options can include delivery services like Doordash or Uber delivery.  While it might be more expensive than getting it delivered to your home, it’s cheaper than a tow from the middle of nowhere!


    Answer: No way. Can’t fix it.

    If you find yourself on the side of the road, with the hood up scratching your head, it’s time to call in some help and there are lots of ways to do it. 


    Can you reach out for assistance? 

    Answer: Yes! I still have cell service or Wi-Fi.

    When cell phone and internet booster gear pays off …

    Many RVers have some sort of internet booster, extra cell phone with a different carrier, Wi-Fi hotspot, satellite internet, or even a spot/personal locator beacon. And frankly, these devices (all designed to function outside of normal cell phone communications) can be super helpful in an emergency and contribute to that prepared feeling. Many of these will allow you to communicate with a towing service, insurance company, or repair shop from anywhere you happen to be.  


    What to look for in a repair shop …

    We’ve mostly had great experiences with tow trucks and repair shop. In 13 years, there are only two that we can think of have made us angry enough to leave a bad review. Vetting the shop before going there might avoid the feeling of being taken advantage of. But let’s get real: When your RV broke down, you didn’t pick the spot. So, it can be hard to get picky when a shop might be the only act in town.

    Even so, reading customer reviews (more than one) can help you get ahead of any problems certain shops may have. And once you’re done, pay it forward. Be sure to leave an honest review so others can take advantage of your experience. Do they generally have a good reputation among customers? Are they associated with a national or regional chain? What are your options if you don’t like the vibe you’re getting? Remember: It might be worth a more expensive towing bill than having to deal with a shady shop. Your RV broke down. You’re likely already pretty stressed, so you don’t need more anxiety.


    Thoughts on national/regional repair chains …

    We’ve had positive (and negative) experiences with both independent and nationally affiliated repair shops. So, we’re not making a comment about quality. Rather, if you choose to go with an independent shop, be sure that they’ll stand by their work if or when something goes wrong with that part or repair.

    Understanding what to do down the road may help give you peace of mind. (And some recourse if the repair doesn’t hold up.) Keep good records (with receipts) of ALL of the work that you have done to your rig — both the work you do or have someone else do. 


    Answer: Nope. No signal in sight.

    Don’t discount the kindness of strangers and fellow travelers.

    If you can’t reach out with modern technology, you might just have to put out a sign and wait for someone to wander by. A few years ago, we traveled to Alaska from Washington state. We were just one of thousands of travelers all generally heading to the same place. (After all, there’s just two roads to get you there.) Along the way we kept seeing the same people. Even though our schedules differed, we seemed to be in a very long game of leapfrog. A small community of travelers developed, one which we knew we could rely upon should we get into a tight spot.  

    Additionally, we’ve been helped by locals when we needed it. Frankly, it’s always been a positive experience that restores our faith in humankind. When we ask for help, we open ourselves up. It’s a place of vulnerability, a recognition that even if we are prepared for many things, we don’t have it all figured out. Allowing someone to help you is actually a gift for them and for you.

    Think about the last time you helped someone. How did it make you feel? Remember that in your moment of trouble that you can also make someone feel that spark of goodness, that joy of helping out. It takes the pressure off and creates a connection — and possibly a friendship. (Don’t forget to pass it on!)


    No Matter What, Stay Confident

    There’s no better feeling than being prepared for the unexpected, and with just a small investment and an adventurous spirit you can be ready for whatever comes your way.  Remember that you got into this activity to have adventures, and unplanned repairs can open you up to a whole new world!

  • Driving Your RV on a Steep Grade: A Safety Guide

    Driving Your RV on a Steep Grade: A Safety Guide

    Summer is coming and cooler mountain temps are calling! But are you ready to drive your RV on a steep mountain grade? The fact is that if you are new to driving a big rig or pulling a trailer, those winding mountain roads may seem a bit intimidating.

    After nearly 13 years of full-time RVing all over the North American continent, we’ve definitely experienced a few white-knuckle grades and narrow winding roads! So, we thought we’d provide some basic tips for making these incredible journeys a bit less scary and a lot more safe.


    Do a Road Trip Safety Check — Before You Go

    Before starting out on any road trip, it’s a good idea to have your brakes, axle, tires, and hitch inspected. (And repaired, as necessary.) Be sure to top off all fluids, flush your radiator, and check the condition of your oil as well. Understanding your towing capacity and making sure you are towing with the correct hitch and sway bars are also keys to safety on steep grades! 


    Make Sure You Understand Road Grade Percentage 

    Road grade refers to the amount a road rises or drops over a specific distance. In case it’s been a minute since your last driver’s license test, road grades signs in the U.S. are bright yellow with black letters, have a truck depicted on them, and include a percentage. A five percent grade means the road will rise or fall five feet for every 100 linear feet. This means if you see a sign warning of a five percent grade for the next four miles, you’re going up or down 1,056 feet in the next four miles.  

    The maximum grade for a federally funded road in the United States is six percent. However, this increases to seven percent in mountainous areas — as long as the speed limit is below 60 miles per hour. However, noninterstate roads do not have grade limits. While most public roads are under 10 percent, there are a few upwards of 20 percent!

    If you are reading this and beginning to conjure up memories of Ricky and Lucy driving their “Long, Long Trailer” up some ridiculously steep grades, we can assure you that you will likely never encounter anything quite that steep. While the Rockies, Sierra Nevadas, and Cascades certainly have some steep roads, the roads in North America with the steepest terrain may surprise you!

    If you aren’t a thrill seeker, here are some resources that’ll help you plan your route to avoid steep grades (and save money on fuel): Mountain Directory and Road Grades USA and Canada.


    Uphill vs. Downhill: Important Considerations

    There are some different driving tactics to consider when driving uphill versus downhill. Let’s take a minute to break these tips down a bit.


    Driving Uphill with Your RV

    Stay in Your Lane

    If you are able to safely drive at the same speed as other traffic, use the left lane to pass, then move back to the right lane. But, if you are moving more slowly than other vehicles on the road, stay to the right. Settle in. And maintain a safe speed. Just allow faster vehicles to pass you. Consider using your emergency flashers if you need to go very slow. Take your time — an RV roadtrip should not be a race!


    Listen to Your Vehicle

    Turn off music, podcasts, and limit conversations around you so you can listen to your vehicle as you are heading uphill. If it sounds like it’s struggling or the engine is changing tones regularly, adjust your speed or gears to accommodate.


    Turn Off Overdrive

    To keep the engine from “bounding” (i.e., trying to find the right gear), turn off your vehicle’s overdrive.  This will also reduce strain on the vehicle’s transmission.


    Watch Your Vehicle’s Engine Temperature

    Even if you’ve done all the safety checks and topped off all the fluids, you may run into road grades which could cause your engine to overheat. (Especially in the summer.) Turn off your vehicle’s air conditioner before heading through steep terrain to reduce strain on the engine. If your vehicle’s engine temperature is running a bit higher than usual, pull over in a safe spot and let the engine cool down before starting off again. Some roads with very steep grades have designated spots for vehicles to park while they cool down.

    Don’t push the limits of your vehicle as you could do a tremendous amount of damage. And, if you see another rig in this situation, be sure to give them plenty of space as you pass. If overheating becomes a regular issue for your vehicle, consider these options:

    • Double check your towing capacity versus the weight of the vehicle that you are towing. Take your rig to a weigh station if you want to know the exact weight of your fully loaded vehicles.
    • Double check your radiator fluid (when the engine is cool!) to make sure you don’t have a leak.
    • Add a transmission cooler to help dissipate the heat in the engine.
    • Avoid driving during the heat of the day in the summertime. Rather, drive steeper grades in the morning or evening..
    • Have your rig inspected by a mechanic who understands the impact of steep grades on your vehicle.


    Driving Downhill with Your RV

    Utilize Engine Braking

    Always keep in mind that your RV is heavier than your passenger vehicle. While this is obvious, you’d be amazed at how many people forget this simple fact. That extra weight means more momentum. Which means that you need more breaking power and a longer breaking distance to safely manage curves in the road — as well as safe distances between other vehicles.  

    Drivers should avoid using their brakes for extended amounts of time. It can cause them to heat up, as well as increase wear and tear on them. In extreme situations, this overheating can result in total brake failure and leave you unable to stop your vehicle. Drivers should think about applying the brakes more strongly with intervals of no brakes, rather than a consistent weaker dragging of the brakes which can allow heat to build up.   

    Start a downhill section by slowing down — before the grade. Then gear down before the steep section. This can help manage the vehicle’s speed without wearing out the brakes.  Moving down in gears slowly is the name of the game here. You never want to go from fifth gear to second gear immediately. Rather, moving from fifth to fourth and then to third is a good practice. While downshifting, listen to the revving of the engine to determine if the RPMs are too high or too low, and adjust the gears accordingly.


    Watch for Curves Ahead

    Many graded roads also have curves. So, be sure to keep an eye out for signs indicating “curves ahead” and adjust your speed as needed. These signs will indicate the recommended speed for safely navigating the curve, and often indicate if it’s different for trucks (including RV’s) as there is a greater danger of rollover when your vehicle is tall.

    We often drive a bit less than the speed limit on curvy roads to remain completely in control. If traffic builds up behind you, gently pull over only when it’s safe to do so to allow them to pass.  


    Stay in Your Lane

    If you are able to safely drive at the same speed as other traffic, use the left lane to pass, then move back to the right lane. But, if you are moving more slowly than other vehicles on the road, stay to the right, maintain a safe speed, and just allow the other smaller vehicles to go around.


    Watch for Speed Demons

    Be sure to keep your eyes peeled for fast moving cars, especially those whipping in and out of their lane in heavy traffic. They can quickly cause a dangerous problem as they recklessly maneuver along the highway. Focus on your own speed, stay to the right, and just let them pass you. Everyone will be happier and safer.


    Understand Runaway Ramps

    When driving a large vehicle on steep grades or long descents, brake failure can be both terrifying and extremely dangerous. Runaway ramps can be a true lifesaver if you experience brake failure on your RV or tow vehicle.  There are typically signs indicating you’re approaching a runaway ramp. They are not just for semi-trucks. Runaway ramps are designed as a safety feature for any vehicle whose brakes have failed. Most runaway ramps are filled with sand or gravel and the vehicle’s axles sink into them to stop the vehicle’s forward momentum. In some cases, they have cables designed to slow your speed and then breakaway as you plow through. Stopping can be rather abrupt and violent, but they are definitely effective! 


    Know the Signs of Brake Failure

    • Spongy or soft brake pedal? If you notice that your brake pedal feels unusually soft or spongy when you depress it, the cause may be air in the brake lines or leaking brake fluid. Either problem can become dangerous quickly. Pull over immediately.
    • Smell something burning? A burning smell coming from your brakes can indicate that they are overheating due to constant use or that there is a mechanical issue causing friction such as a stuck caliper. Stop immediately!
    • Dashboard warning lights? Most vehicles are equipped with sensors that can detect issues with the braking system. If you see a warning light on your dashboard that looks like a brake symbol, it’s important to pull over and inspect your brakes immediately. 
    • Loss of braking power? If your brakes do not respond properly and you are unable to slow down or stop, this is definitely brake failure. Downshift quickly in order to use the engine to slow down, and pull up on the emergency brake if necessary. Honk your horn to alert other drivers and use your emergency flashers if other vehicles are present.


    Other Key Additions to Improve Steering Control When Heading Downhill

    • Electronic Trailer Brakes 
      Most modern trailers have electric brakes which help slow the trailer. These are applied through a sensor in your towing vehicle, commonly installed below the steering wheel, so that when you depress the brake pedal, the brakes engage in a relative way. They can also be applied independently by using the hand lever on the brake sensor. This is especially helpful and can prevent disaster in a trailer sway situation.  
    • Remote Tire Air Pressure Monitors 
      Good tire pressure will mean safe and effective braking. Most modern vehicles have these on the towing vehicle, but you may not have these on the trailer, or on your “toad” (the small vehicle towed behind a Class A or Class C motorhome). Being aware of any low pressure in any of your tires can prevent catastrophe when descending a steep hill or highway gradient.  


    RV Those Steep Grades — and Enjoy the View


    If you follow these tips, stay alert behind the wheel, and maintain your vehicle appropriately, steep road grades don’t have to be intimidating. Just take it slow and steady.  Extreme road grades demand a driver’s full attention and respect. You should always be cautious when driving on them to ensure that everyone arrives at their destination safely. But, at the same time, don’t stress out. You’re in the mountains for the view. Enjoy it.

  • 7 Fresh Picnic Recipes You Can Prep in Your RV

    7 Fresh Picnic Recipes You Can Prep in Your RV

    Sitting by the lake, waterfall, or river while enjoying a picnic lunch or dinner is a simple pleasure in life that many folks have forgotten. And for campers on an RV trip, quite frankly, it’s low-hanging fruit. All you need are a few fresh picnic recipes, a little food prep, and a view worth driving to.

    Now, the driving is up to you (although we could recommend some great camping spots), but we got you covered on picnic recipes. Here are seven easy, no-or-low cook recipes that anyone can tackle in an RV kitchen. They’re fresh, tasty, and perfect to take as a packable picnic that’ll rival anything you can purchase at an upscale deli. (And all for a quarter of the price!) Each recipe makes about four hearty servings. 

    Mix and match the picnic recipes that sound good to you, bring a picnic blanket or hammock, and maybe a bottle of bubbly?  


    Summer Couscous Salad — with Lemon Basil Dijon Dressing


    Couscous Salad

    Ingredients:

    • 2 tablespoons olive oil
    • 1 teaspoon garlic (minced)
    • 1/2 medium onion (finely chopped)
    • 1.5 cups pearl couscous 
    • 1.5 teaspoons veggie bouillon
    • 3 cups of water


    Instructions: In a large skillet, sauté couscous in olive oil for two minutes. Then add onion and garlic and cook until garlic and onions are soft. Add water and veggie bouillon and simmer until liquid is completely absorbed. The couscous should be fully cooked, but still firm and chewy. Set aside and let cool completely.


    Mixin’s:

    • 1/2 English cucumber (diced, about 1 cup)
    • 4 ounces cherry tomatoes (halved, about 1 cup)
    • 1/2 red or orange bell pepper (diced)
    • 4 baby carrots (chopped)
    • 1 cup fresh mozzarella cheese (cubed)
    • 2 cups of arugula 
    • 2 tablespoons mint leaves (finely chopped)


    Instructions: Add chopped vegetables to the cooled couscous and mix in thoroughly.


    Lemon Basil Dijon Dressing

    Ingredients:

    • 4 -5 tablespoons fresh lemon juice
    • 1/4 cup olive oil
    • 2 teaspoons Dijon mustard
    • 1 garlic clove (minced)
    • 1 teaspoon dried basil
    • 1 teaspoon agave syrup 
    • 1 pinch sea salt
    • 1/2 teaspoon black pepper


    Instructions: Mix ingredients together in a small container. Add to salad just before serving. Top with sliced almonds for some extra crunch and protein.


    Asian Pear Waldorf Salad


    A fun twist on an old standby that grandma used to make! Higher in protein, lower in fat, and a delicious bit of sweetness to complement a savory picnic lunch.


    Ingredients:

    • 2 Asian pears (chopped)
    • 1-2 cups coconut and/or plain Greek yogurt (depending on your preferred sweetness level)
    • 1 cup chopped walnuts
    • 1 to 2 celery stalks (chopped)
    • 1/2 cup dried cranberries


    Instructions: Mix all ingredients together in a bowl and serve. 


    Roasted Potato Salad

    Our neighbor brought this potato salad recipe to a potluck almost 20 years ago, and we’ve never made it any other way since! Leaving the skins on the potatoes and roasting them with a bit of garlic, salt, and pepper takes this potato salad to the next level! 


    Ingredients:

    • 20 tiny red potatoes (halved or quartered depending on size)
    • 2 to 3 tablespoons olive oil
    • Salt and pepper (to taste)
    • 1 teaspoon garlic (minced)
    • 1 cup plain Greek yogurt and/or mayonnaise
    • Dijon mustard (to taste)
    • 2 to 3 green onions (diced)
    • 3 hard-boiled eggs (mashed)


    Instructions: Coat the potatoes in olive oil, garlic, salt and pepper. Roast in a large, covered pan until the potatoes are just tender when poked with a fork. This usually takes about 10 to 15 minutes on the stove top, turning regularly to make sure they are lightly browned on each side. Hard boil three eggs while potatoes are cooking. Let potatoes and eggs cool. Peel the eggs and mashed them, then mix together with the potatoes, yogurt/mayo, mustard, and onions. Refrigerate until ready to serve.


    Grilled Veggie Muffaletta 


    This vegetarian version of a New Orleans style sandwich is best made the day before you serve it. The key to this recipe is a high-quality loaf of crusty sourdough bread that will stand up to the ingredients you put inside. No quantities are listed here as it depends on the size of bread loaf you use. Here are some of our favorite ingredients, but you can layer up anything that sounds good to you.


    Ingredients:

    • Large loaf of crusty sourdough bread (unsliced)
    • Olive tapenade
    • Chili crisp (optional, if you’d like some extra spice)
    • Sundried tomatoes (julienned)
    • Marinated artichokes (finely chopped)
    • Cremini mushrooms (sliced)
    • Spanish onion (sliced)
    • Red or orange bell pepper (sliced)
    • Zucchini or summer squash (sliced)
    • Sliced Swiss, Havarti, or provolone cheese (or a combination)

    Instructions: Sauté the mushrooms, onions, and peppers until lightly caramelized. While the veggies are cooking, prepare the bread loaf. Slice the top off the loaf with your knife at a downward angle, remove the inside of the loaf to create a hollow “bread bowl.” Be sure to leave at least 1/2 “ of bread crumb. (Note: Don’t waste the bread you removed from the center. Cut it into chunks and use it to dip in soup, or toast it up and use them as croutons.)

    Start layering the ingredients inside, starting with cheese, then top the entire muffaletta with the large bread slice that you cut off the top.  

    Wrap the loaf in aluminum foil, then place it in a tightly wrapped plastic grocery bag to prevent leakage. Place in the refrigerator overnight with a press on top. Usually, a cast iron skillet or heavy pan works well. After about 12 hours, the layers have transformed into something far greater than the sum of all the ingredients. Slice pie shaped sections of the loaf, toast in a griddle or oven, or consume cold. Enjoy!


    7-Layer Dip


    Another easy layered recipe, but this time no cooking is required! (Who doesn’t love picnic recipes that are easy?) Making this yourself is 10 times better tasting than buying it premade. Open a few tubs and cans, then chop an onion and shred some cheese. No quantities are listed here as it depends on the size of container you use.  


    Ingredients:

    • Chili beans (mashed)
    • Greek yogurt
    • Pub cheese
    • Salsa
    • Cheddar cheese (shredded)
    • Red onion (finely chopped)
    • Guacamole
    • Tortilla cChips

    Instructions: Using a small metal pan, glass baking dish, or plastic leftovers container, layer each ingredient on top of the next, starting with the beans and ending with the guac.  Dig in with your favorite tortilla chips!


    Roasted Brussels Sprouts Salad


    This hearty and healthy salad can be made ahead of time, then dressed just before serving.  You can substitute with broccoli or even asparagus if Brussels sprouts aren’t your thing.


    Brussels Sprouts

    • 1/2 pound of Brussels sprouts, sliced in half
    • 2 tablespoons olive oil
    • 2 cloves fresh garlic, crushed
    • Dash or two of sea salt and black pepper

    Slice Brussels sprouts in half, trim off the stem end a bit, and put them in a large mixing bowl. Coat them with olive oil, salt, pepper, and garlic. Roast the sprouts in a large, covered pan for about 10 to 15 minutes on the stove top, turning regularly to get a good char on each side.  

    When you can easily poke them with a fork, remove them from the heat and let them completely cool. (Note: You are seeking an al dente texture, not mushy.)


    Mixin’s:

    • 20 grape tomatoes (sliced in half)
    • 2 cups of baby kale
    • 1/2 tub of goat or feta cheese
    • 1/4 cup of almonds or pecans (chopped)
    • Balsamic vinaigrette (to taste)

    Instructions: Once the sprouts are cooled, mix in the remaining ingredients. Toss with your favorite Balsamic vinaigrette and serve!


    Asian Ginger Slaw


    This no-cook recipe is a fun twist on an old standby.  The nuts add a bit of extra crunch and some protein as well.


    Ingredients:

    • 2 cups purple or green cabbage (shredded)
    • ¼ cup slivered almonds
    • 3 green onions (diced)
    • Asian sesame dressing (to taste)


    Instructions: Fill your basket, grab a blanket, round up your favorite people and head out to your favorite view. We hope these picnic recipes help freshen up your next adventure!

  • Congaree National Park: RV Travel and Camping Guide

    Congaree National Park: RV Travel and Camping Guide

    A place unlike any other, Congaree National Park may not drive the same traffic as the biggest national park names. But since when has RVing been about following the crowd? Even more importantly, where else can you experience the largest intact expanse of old-growth bottomland hardwood forest left in the Southeast? Here, huge trees with giant knees thrive in a swamp, where muck is so thick that it filters out pollutants. In the early days of summer, there’s a synchronous firefly festival — otherworldly enough to filter out the muck of disenchantment and reawaken your sense of wonder.

    Small yet mighty, this national park is a special place. And it’s also less than an hour-long drive of Columbia, South Carolina, making it a very accessible day trip! So, whether you are planning a short summer trip or plotting a longer stay in your RV, here’s what you need to know to RV at Congaree National Park.


    Scenic Drives

    There are some national parks that are just made for long scenic drives. Unlike it’s Tennessee-North Carolina neighbor, Great Smoky Mountains National Park, Congaree isn’t one of them. Since most of this park is only accessible by foot or boat, there are no designated scenic drives within this park. With that said, the drive in from any direction is quiet, peaceful, and beautiful – especially in the season for those autumn colors!


    Must-Hike Trails 

    The park’s terrain is generally very flat with only slight elevation changes. Congaree National Park lies within a floodplain the size of Maryland, which means that all trails are subject to seasonal flooding. So, be sure to check the park’s alerts page before heading out on any hike. Most trails begin from the Harry Hampton Visitor Center, and the following are some of our absolute favorites — for any difficulty level.


    Easy

    Boardwalk Trail. This elevated trail meanders through the forest and swamp areas, offering access during higher water. It is wheelchair-accessible, making it a great option for visitors with limited mobility or families with strollers. Distance: 2.6 miles roundtrip

    Bates Ferry Trail. Following a historic colonial road, this is a great option for hikers seeking a shorter path out to see the Congaree River. Distance: 2.2 miles roundtrip


    Moderate

    Weston Lake Trail. This hike provides access to an old-growth cypress-tupelo forest. Following the edges of Weston lake and Cedar Creek, you may see otters and wading birds. The eastern portion of this trail follows a cypress-tupelo slough (dried-up river bed) where many cypress knees can be seen sticking up out of the water. Distance: 4.5 miles roundtrip


    Challenging

    Oakridge Trail. Passing through a stunning stretch of old-growth forest, this trail allows hikers to explore towering oak trees and cross several small creeks. The number of low-lying sloughs makes this trail great for viewing wildlife like deer and wild turkey. Distance: 7.1 miles roundtrip


    Hutch walking the famous Boardwalk Trail.


    RV Parks & Campgrounds

    Park Campgrounds

    Inside of Congaree National Park itself, there are no accommodations for any vehicle, RV, or van camping. The only campgrounds within the park are by reservation only and can only accommodate tents or hammocks. These are Longleaf Campground (a walk-in from parking lot) and Bluff Campground (a one-mile hike further). Backcountry camping is also available within park boundaries and is available by wilderness permit only.


    Public and Private Campgrounds

    Within a 30- to 45-minute drive, you will find several South Carolina state parks and local county parks. Check the Experience Columbia website for private campgrounds in the area that can accommodate RVs and vans.


    Seasonal Advice

    With a humid subtropical climate, Congaree National Park experiences mild winters and very warm, wet summers. The park is accessible in all seasons but is best experienced in the spring and fall when temperatures are at their most comfortable. (And when the insects are generally not a problem.) With that said, this is the only national park we’ve ever seen with a mosquito meter prominently displayed outside the visitor center! If you want to avoid these pesky insects and high humidity, avoid a summertime visit.


    Spring

    March to May can be one of the best times to visit the park. Temperatures are generally warm, with average daily highs reaching the mid to upper 70s. Rainfall averages around three inches per month, with insects generally not a problem.


    Summer

    June to August is normally the hottest and most humid time of the year. Daily temperatures regularly reach into the upper 90s, with high humidity making it feel like it’s 110! Thunderstorms are common and often happen with little or no warning. Precipitation is approximately four and a half inches per month.


    Autumn

    September to November is also a wonderful time to visit Congaree National Park. Temperatures are in the 70s with low humidity.  Fall colors peak between the end of October and early November. Average rainfall is around three inches per month, and water levels are ideal at this time of year for taking a paddling trip on Cedar Creek.


    Winter

    November to February is mild, with average daytime temperatures reaching the mid 50s, though nighttime temperatures can dip below freezing. Snow is not typical, though it can occur. Flooding is most frequent at this time of the year as the park lies in a huge watershed, so any significant rain in upstate South Carolina can cause a quick rise in water levels. 


    Unique Programs & Opportunities

    Kayaking & Canoeing

    Paddling trips are a great way to experience the heart of the park and the Congaree swamp ecosystem! If you are not equipped with your own boat, local outfitters offer guided trips.


    Cedar Creek

    This waterway offers boaters various trip options ranging from a few to 20 miles, depending on where you put in and take out (three different designated landings). Some sections can be done as an easy out-back paddle when the current is slow. Longer paddling trips will likely require several portages over downed trees, depending on the water level.  You’ll experience swamp life at its best with jumping fish, various snakes curled up in the trees, and a variety of bird life flying through the trees and across the creek. Riverbanks will likely be very muddy and slippery, so caution and appropriate footwear are necessary.


    Congaree River Blue Trail

    As compared with a creek, this river is a bigger paddle challenge, offering a 50-mile, multi-day experience. The Blue Trail starts in the city of Columbia and ends at Route 601 Landing near the confluence of the Congaree and Wateree, and travels past diverse habitats, offering paddlers the opportunity to see bald eagles, alligators, and a variety of other wildlife.

    No designated campsites are provided, but boaters can camp along the river, using the sandbars that are available during times of low water, or backcountry camp (permit required) when they reach river mile 26 within the park. Riverbanks will likely be very muddy and slippery, so caution and appropriate footwear are encouraged.

    Fun Facts!  Swamps are incredibly important ecosystems!  They protect dry lands from excessive flooding, as floodwater is diverted into swamps before reaching dry land and claiming the lives of people and destroying property. Some Baldcypress trees in this region are more than 2000 years old and the forest floor is made up of Dorovan Muck — up to eight feet or a muddy mixture of clay and old leaf debris that filters water by trapping and detoxifying harmful pollutants.  


    More Outdoor Fun!


    Synchronous Firefly Festival

    With over 2,000 species of synchronous fireflies worldwide, only three species live in North America. Every year, synchronous fireflies come out for approximately two weeks between mid-May and mid-June. During this time, visitors can experience a fascinating display of synchronous flashing while the fireflies search for a mate. There is an annual lottery for this fascinating phenological event, as it is an extremely popular time to visit the park.


    Fishing

    Fishing is allowed within the park with a valid South Carolina fishing license. Catch and release is encouraged to preserve the quantity and biodiversity of the fish population. All fishing must be from the shore or nonmotorized boats.


    Ranger-Led Programs

    Guided walks and talks are a great way to learn about the park. Generally held from November-February, many different programs are offered daily. Check their online calendar for details.

    *****

    While this unique park is relatively small, there are some fascinating things to see and do.  Time your visit wisely, come prepared for whatever nature brings your way. You’ll have a wonderful time exploring this fascinating national park in the heart of the Southeast!

  • Open Water: Spring Kayak Spots to RV This Spring

    Open Water: Spring Kayak Spots to RV This Spring

    One of the best ways to experience a place and get away from crowds is on the water. RVing gives you access to innumerable bodies of water. And kayaking allows you to get out into the natural environment — all without having to share a narrow trail or path with thousands of other people. Which is why RVing and kayaking go so well together. There are so many spring kayak spots to drop your boat in for a day. Or, even more adventurous, you could leave your RV behind for several days and stay at paddle-in campsites that allow you to experience some more remote wilderness areas. 

    We’ve lived full-time on the road since 2012. In that time, our vintage camper, Hamlet, has put in a lot of miles. But so have our boats. In fact, our kayaks have traveled over 200,000 miles to 49 U.S. states and 10 Canadian provinces as we’ve explored this gorgeous North American continent.

    Depending on the type of kayaking you’d like to do, you have many options. These range from rivers to inland lakes and the open waters of the ocean. What follows are just a few of our favorite spring kayak spots, and we’re certain you’ll love them too.


    Saltwater Spring Kayak Spots


    Island Hopping Along the Maine Coast

    Maine – Late Spring to Early Summer

    The “Vacationland” of Maine includes over 4,000 islands located in its Gulf, and boasts one of the longest coastlines of any state in the nation. While it can still be pretty chilly in the early to mid spring, the later spring can offer some gorgeous days without the crowds or heavy lobster boat traffic. (Remember that water is always cold — even in the height of summer.)  While Mt. Desert Island and the Porcupine Islands are popular places to kayak while visiting Acadia National Park, the entire coast of Maine offers one beautiful inlet to explore after the next.

    If you are new to kayaking, local guide services offer both small group and private tours which highlight the best sights of this spectacular coast. Or, bring your own kayak and create a multiday kayak camping adventure on the numerous public islands in the area.

    Tips: The Maine Island Trail Association is a great resource for locating public islands and getting maps of the area. Get to know the tides as they can be extreme, where you can expect to be able to land at various tide levels, and watch out for lobster boats!  


    Subtropical Shores of Southern Florida

    Florida – Late Winter to Early Spring

    After a long winter with freezing temperatures, no spring trip can really compare to the warm relief of a wilderness trip to the Everglades in Florida. While most people think of the “River of Grass” and a flat bottomed fan boat skimming above the surface, a multitude of deserted beaches actually pervade here.  

    Adventures in your kayak could last from a few hours to a few weeks. Paddle the inside routes threading between islands of mangrove trees and camp at “chickees” (elevated platforms) along the way. Or take the outside route and find some of the Gulf Coast’s most pristine beaches on the most seaward islands. These barriers between Gulf and inland fresh water take a pounding during storm season and create an ideal sandy camping spot.  

    Biscayne Bay National Park offers ideal paddling conditions on the Atlantic side of the Florida peninsula.  The protected waters of the bay allow paddlers to explore mangrove covered islands, shipwrecks, or overnight camping experiences.  

    Tips: Winter (November through March) is the best season to experience the tip of Florida, as soon as the likelihood of hurricanes has diminished. Check out the local paddling guides that operate in each park to discover what might be of interest, or head straight to the national park ranger stations to secure your paddling permits.  


    More Than Meets the Eye in Mono Lake

    California – Late Spring to Early Summer

    Just east of the Sierra Nevada Mountains of California, lies one of the most unique lakes we’ve ever paddled. Situated inland near the California/Nevada border, you might expect this lake to be fresh water, but the nature of its location and the water flowing into it (with no exits) has created one of the most alkaline and salty inland lakes you may ever encounter.

    Along the southwestern shoreline are fascinating Tufa formations. Kayaking near these formations allows you a much closer look at the nesting osprey who return to their spring homes every year. Bring your binoculars, though, as it’s important to give the birds the space they need. (At least 300 feet, so about the length of a football field.) They will definitely let you know if you get too close!

    Tips: Stop at the Mono Lake Visitor Center for more information and education about the area. This is a remote lake with plenty of boondocking and camping nearby. Winds pick up in the afternoon, so it’s best to get on the water early and off the water before noon. Come prepared with fresh water to rinse your boats and gear as they will be covered in white deposits after kayaking.


    Wildlife Lover’s Refuge at Point Reyes 

    California – Late Winter to Early Spring

    Just a few hours drive to the north and west of San Francisco Bay, Point Reyes National Seashore offers a wide variety of paddling opportunities for all skill levels. The protected waters of Tomales Bay, on the east side of Point Reyes offer abundant paddling opportunities, from a lazy afternoon to an adventurous overnight.  Be sure to check out Drakes Beach to view Elephant Seals by the thousands!  (Note: This area near this beach and all of Drakes Estero Marine Sanctuary are only open to paddling from July 1 to February 28 to protect seal populations.)  

    The ocean side of the point provides the experienced paddler with challenging surf and wind potential, so know your skill set. Most paddlers will stick to the relatively protected waters of Drake’s Bay, but be aware of seasonal closures.  

    While there are few RV camping opportunities nearby, and none within Point Reyes, Bodega Dunes Campground is less than 40 miles away and offers stunning camping and additional boating opportunities. 

    Tips: The National Seashore has some excellent resources for kayaking in the area.  March also marks the end of Dungeness Crab season, so if you like your crustaceans fresh, plan accordingly.  


    Freshwater Spring Kayak Spots


    Salt River Canyon Surprises in the Superstition Mountains

    Arizona – Late Winter to Early Spring

    While you might expect this area to be listed among the saltwater spots above, don’t let the name deceive you! Cutting through the spectacular Superstition Mountains located east of Phoenix is a series of reservoirs which supply the greater Phoenix area with a fresh water supply and hydroelectric power. Kayaking from the shores of Canyon Lake and up the Salt River Canyon is a spectacular day trip filled with fascinating landscapes and an absolute oasis of the best flora that the Sonoran Desert has to offer!  Keep your eyes peeled along the cliffs above for bighorn sheep, too.  

    Tips: It tends to get rather warm and somewhat busy in the late spring/early summer. So, we recommend enjoying this lake in the early spring and during weekdays in order to avoid crowds. Launch from the shore near the picnic area on Canyon Lake, then proceed up the river as far as you can.

    The flow is minimal and the river is wide, so it’s very easy to attain. The further up you go, the more beautiful and fascinating the canyon becomes, with plenty of places to pull off for a picnic lunch, or even camp overnight. Winds can pick up in the late afternoon, so plan accordingly.  The camping and boondocking in and around this area is plentiful and beautiful.  


    Slithering Through Side Canyons 

    Utah – Mid to Late Spring 

    While the reservoir in the Glen Canyon National Recreation Area (just above the Grand Canyon) is jam-packed with house boats and parties during the summer months, mid to late spring offers kayakers a place to wander in peace and quiet. The landscape of the Navajo Sandstone formation looks a bit like melting Neapolitan ice cream, with side canyons that allow kayakers to paddle deep into the inlets and go back in time to Ancient Puebloan ruins and sandstone cathedrals. If you are seeking a multiday kayak camping adventure, there are dispersed campsites along the lake with no permits required.

    Tips: Stop by the Glen Canyon Visitor Center to get a map of the area, so you know where to find launching/landing spots, as well as find those “secret” side canyons.


    Turquoise Glacial Waters of North Cascades National Park

    Washington State – Late Spring to Early Summer 

    Spring runoff from the surrounding glaciers turns this series of reservoirs from green to iridescent blue in the spring, making for a surreal and stunningly beautiful scene! Three reservoirs lie along the Skagit River which cuts through the Skagit Valley: Ross Lake, Diablo Lake, and Gorge Lake. While Gorge Lake and Diablo Lake offer easy access to day paddles, Ross Lake is a bit more of a mission and offers numerous paddle-in campsites that are reservable (in-person only) at the backcountry ranger office in Marblemount. 

    On the east side of the North Cascades park complex lies the second largest glacially carved body of water on the west coast, Lake Chelan. With dozens of small, boat-in USFS campgrounds around the lake, your first-come, first-served options are nearly limitless.

    Tips:While the water is ice cold, late spring weather can offer gorgeous sunny days before “fire season” fully kicks in. Be prepared for anything though, as the weather can change drastically over the course of a single day. There is plentiful RV camping in the national park.


    Unforgettable Voyages in Voyageurs National Park

    Minnesota – Late Spring to Early Summer 

    Some parks are simply best experienced from the water. And Voyageurs, along the Canadian border in northern Minnesota, is most definitely one of them.  Named after French Canadian canoe traders in the Seventeenth through Nineteenth Centuries who plied these canoe trails hauling furs and raw materials eastward, this park offers a private island camping experience that few others can provide.  

    A day trip on these lakes is a gorgeous way to get away from it all for a short time. And, the options for backcountry kayak/canoe camping are so numerous that you can choose the adventure level which suits your desires. Backcountry camping reservations and permits must be made in advance of arriving at the park, so knowing your skills and abilities are crucial to establishing an itinerary. The lakes can be both serene and rough, depending on the time of day, but the numerous islands typically provide some shelter from the wind.

    Tips: Summertime can be crowded and buggy, but late spring (and early fall) are often pleasant, if not a bit chilly. If you can fit your trip in before/after fishing season, you’ll have the lakes to yourself.  There are no RV campgrounds in the park itself, but there are private campgrounds in the area.


    A Final Word on Kayaking Tips and Best Practices  

    • Life jackets. ALWAYS wear an appropriate life jacket while kayaking.
    • Communications. Bring a device to reach someone in case of an emergency. (Like an inReach or Marine radio AND cell phone in waterproof case.)
    • Provisions. Bring enough food and water for your time on the water. Even on the water, it’s easy to get dehydrated.  
    • Float plans. If you are going on a multi-day adventure, always leave a float plan behind with a friend or family member.

    New to kayaking? We talk more about kayaking for beginners elsewhere, but another easy way to get started on how to paddle is through the American Canoe Association. They lead and instruct courses to develop greater skills and experience — wherever you want to park.

    Getting out on the water can be one of the best ways to avoid crowds and see an area from a different perspective. With some preparation and the appropriate equipment for the body of water, kayaking is an activity that is perfect for every age group — from five to 75!

  • Savory Southwestern RV Recipes with a Chili-Powered Kick!

    Savory Southwestern RV Recipes with a Chili-Powered Kick!

    The concept of food from heaven is a cross-cultural concept — especially to the hungry! And if there’s one type of regional food — aside from pizza — that everyone loves, it’s gotta be from the Southwest and the land of roasted chiles. Call it Mexican, Southwestern, Tex-Mex, what you will, these Southwestern RV recipes by any other name taste just as sweet. (Or maybe Shakespeare would allow us, “spicy.”) Moreover, you can enjoy them any time of year — whether you’re snowbirding through the winter or getting festive for Cinco de Mayo

    Now, when I say chiles, I’m not talking about devouring a stack of jalapeno poppers. (Or, about playing with fire and eating a Carolina Reaper.) I’m talking about fresh Hatch chiles and an open flame for some of the best Southwestern RV recipes you’ll ever taste.

    So, here are a few of our favorite recipes from our Southwestern camp cooking collection. Now, let’s get cookin’!


    Hatch Chili Enchilada Sauce


    A Quick Word on Chili Sauce Choices

    It’s a simple question that stands in for the state motto of New Mexico: Red? Green? Or Christmas? For those not in the know, this question, asked at just about any kind of New Mexican restaurant, is about chili sauce.

    For the uninitiated, here’s a translation: Do you want just one kind of chili sauce (red or green) or a more festive blend of red and green together (Christmas)? For the record, there’s no wrong answer. 


    Lessons from New Mexico

    We were making dinner with a friend in Taos, New Mexico, and when she suggested enchiladas, we admitted that we might need to run to the store for some sauce. Right away, she stopped what she was doing. She looked right at us like we’d just suggested McDonald’s for dinner. Then she said, “Ummm … so, we don’t eat chili sauce from a can here in New Mexico.”

    Now fortunately, after reprimanding us, she then reached for her stash of Hatch chili powder and introduced us to a whole new world. We’ve never gone back to canned sauce since because we always have these simple ingredients with us.


    Ingredients

    3 cups water
    1.5 teaspoons garlic powder
    1.5 teaspoons onion powder
    1 veggie bouillon cube
    1 teaspoon salt
    ½ cup all-purpose flour
    ¼ cup Hatch red or green chile powder 


    Prep Instructions

    Put all ingredients in a medium sauce pot and use an immersion blender to mix until silky smooth. Cook over medium heat, stirring until thickened. Can be made ahead of time and stored in a jar. If using green chili powder, add some roasted chopped chili peppers to the sauce after mixing with the blender.  

    *Recipe adapted from the “Blonde Chicana Bride’s Mexican Cookbook” by Helen C. Keen.


    Cheesy Enchilada Pie


    Enchiladas are the perfect way to end a chilly day at camp. Or after a long hike or bike ride. You know — when you are really hungry! Many of the ingredients can be prechopped, mixed, or made before heading out for a camping trip. All that makes it a simple heat, layer, and cook process when you’re ready to dig in. Make it in the RV kitchen or outside on the campfire. No oven required.


    Ingredients

    1 16-ounce can black beans
    1 can diced tomatoes (with chili and onion)
    1 16-ounce can seasoned pinto beans or chili beans
    1 sweet onion, small
    1 red or yellow bell pepper, large
    5 baby Portobello mushrooms
    ½ lb of sharp cheddar cheese, shredded
    12 corn tortillas
    Enchilada sauce ingredients (from recipe above)

    Suggested Toppings: Avocado, sour cream or Greek Yogurt, chopped green onions, and spicy ranch dressing. Then make the enchilada sauce using recipe above and set it aside.


    Prep Instructions

    For a 10-inch, deep-dish pan.

    • Mix and warm – cans of black beans, pinto beans, and diced tomatoes
    • Chop and saute – peppers, onions, mushrooms
    • Shred – sharp cheddar cheese
    • Lightly grill – 12 corn tortillas


    Layer the Ingredients as Follows

    Think of this like a lasagna.

    • Lightly cover the bottom of the pan with sauce.
    • Place three corn tortillas over the sauce (overlapping).
    • Cover the tortillas with a 1/3 of bean/tomato mixture.
    • Add 1/3 of sauteed veggies.
    • Cover with 1/3 shredded cheese.
    • Add another thick layer of sauce.
    • Repeat these layers two to three more times, depending on the depth of your pan, ending with a heavy ladle of sauce, and sprinkled with cheese.

    Since all of the ingredients are warmed or cooked before layering, just cover and heat thoroughly to melt the cheese and heat the sauce until it is bubbling. This usually takes 15 to 20 minutes, turning regularly to even out the heat. This can be cooked over an open fire or on a two-burner stove (resting in between the two burners). Makes enough for six to eight hungry campers!


    Spicy Cheesy Corn Fritters


    Spicy and savory, balanced with a hint of sweetness from the corn and loaded with texture, we devoured this side dish as the main event — topped with spicy chili or black beans, and hearty doses of sour cream, salsa, and green onions.  

    Ingredients

    Mix These WET …

    1 egg
    3/4 cup milk
    1/2 cup cheddar cheese, grated
    1 15.5-ounce can of corn, drained
    1 small can of diced Hatch green chilies, mild or spicy (or 1 or 2 chipotle peppers in adobo sauce for a smoky rich flavor)
    1/4 red onion, chopped and sautéed


    Then Mix These DRY

    1/4 cup yellow cornmeal
    3/4 cup all purpose flour
    1/2 teaspoon baking powder
    2 teaspoon oregano
    1 teaspoon cayenne pepper
    2 teaspoon garlic powder
    2 teaspoon crushed red pepper flakes


    Thoroughly mix wet and dry ingredients together. Generously grease pan or griddle with olive oil. Pour 1/4 cup of batter on griddle, much like you are making pancakes. Cook three to five minutes per side, and flip when set-up and browned. Flip again when other side is browned and cook for a couple more minutes until middle is firm. Makes about eight fritters.

    Suggested Toppings: Chili beans, Greek yogurt or sour cream, chopped green onions, diced avocado, salsa and/or hot sauce


    Portobello Mushroom Poblano Pesto Enchiladas … with Chipotle Cream Sauce! 


    Back in the early Nineties (and just outta college), Hutch slung burritos at a popular Mexican restaurant in Boulder, Colorado to make money to support his triathlon training and racing habit. This recipe is adapted from one of his favorite dishes on their menu. (Which, truth be told, he used to woo Shari during their first few months of dating.) Like any good meal, it’s a bit time-consuming, but worth every messy pot it takes! 


    Ingredients

    3-4 poblano peppers (or jar of roasted peppers)
    1 medium Spanish onion
    3 large Portobello mushrooms
    12 white (or blue) corn tortillas
    3 cups 2% or whole milk
    4 tablespoon butter or olive oil
    4 tablespoon all-purpose flour
    1 lbs white sharp cheddar cheese, grated
    2 chipotle peppers in adobo sauce
    1 8-ounce jar of prepared pesto
    Salt and black pepper, to taste


    Prep Instructions

    You’ll make all the parts of this recipe separately then layer like you would a lasagna in this order (from the bottom up of course) in a Dutch oven, lasagna pan, or Banks Fry-Bake. Then, reheat the entire casserole over the fire, grill, or in the oven until the top layer is bubbling. If using a campfire, be sure to add hot coals to the top in order to heat from the top down. Makes eight healthy servings!  As one of our favorite Southwestern RV recipes, we serve this dish with spicy slaw and chili beans on the side.  


    Step 1: Roast 3-4 Poblano Peppers (over a fire or propane flame). When skin is charred and blistered, wrap hot peppers in a wet paper towel then store in a large plastic bag for about 10 minutes. (This helps with removing the skin.)  Then remove all of the blackened skin. It’s a bit messy — but worth it.


    Step 2: Make Veggie Filling

    1 medium-large Spanish onion, sliced
    3 large portobello mushrooms, sliced
    3 medium-large poblano peppers, roasted, skinned, seeded, and sliced
    1-2 tablespoons olive oil

    Combine olive oil, mushrooms, and onions in a large pan.  Sauté until vegetables begin to soften, then add pre-roasted poblano peppers. Cook for about two to three more minutes, or until all veggies are tender. Set aside but keep warm.


    Step 3: Lightly Toast 12 White Corn Tortillas. Set aside but keep from drying out.


    Step 4: Prepare Chipotle Cream Sauce. Make this sauce last because it needs to stay warm to not separate.  

    3 cups 2% or whole milk, warmed (until you see the small bubbles forming on the sides)
    4 tablespoons butter or olive oil
    4 tablespoons all-purpose flour
    1 cup white sharp cheddar cheese, grated
    2 chipotle peppers in adobo sauce
    Salt and black pepper, to taste

    Melt butter in a saucepan. Stir in the flour and cook, stirring constantly, until the paste cooks and bubbles a bit, but don’t let it brown (about two minutes). Add the WARMED milk, continuing to stir as the sauce thickens. Bring it to a boil. Add the cheese, cook, stirring for two to three more minutes. Using an immersion blender, blend in the chipotle peppers with about one to two tablespoons of the adobo sauce.


    Step 5:  Layer All Ingredients 

    Begin layering your baking pan, dutch oven or Bank’s Fry Bake pan in the following order:

    • Chipotle cream sauce (enough to coat the pan)
    • Corn tortillas (pre-toasted and overlapping, some gaps will happen)
    • Pesto sauce (small smear on top of tortillas)
    • Veggie filling
    • Cheddar cheese
    • Repeat layers at least 3-4 times, depending on the depth of your baking dish
    • Final layer: Chipotle cream sauce then sprinkle remaining cheese on top.  


    Ridiculously Easy Veggie Chili 


    It happens all the time. Your amazing hike took longer than expected, and you arrive back at camp ravenous. Bust out the beans and have a warm, hearty dinner on the table in 20 minutes.  Before everyone has changed their clothes and settled in, dinner will be served.  Serves four hungry campers — in a hurry!


    Ingredients

    2 cans of chili beans in mild or medium sauce
    2 cans of seasoned black beans
    1 can sweet corn
    1 can of fire roasted chopped tomatoes (or 2 cans of Rotel)
    1 medium onion, chopped
    ½ pound of Impossible burger or veggie crumbles, cooked
    1-2 tablespoon olive oil
    1 bag of shredded cheddar cheese
    1 small tub of plain Greek yogurt
    Hot sauce

    Note: Don’t forget the can opener for this one!


    Prep Instructions

    • Make this on the campstove or over a campfire.
    • In a large pot (or Dutch oven if cooking over a campfire), saute onion in olive oil.  
    • When translucent, add burger or crumbles and saute until browned.   
    • Add all beans and chopped tomatoes. 
    • Add hot sauce if you want it spicy. 
    • Simmer for about 12 minutes. 
    • Serve up and top with cheese, sour cream or Greek yogurt, and tortilla chips.


    Spicy Tamale Bowls


    A few years ago, we were living the #vanlife in Hawaii for a few weeks. We rented a classic V-dub Vanagon. It was slow, underpowered, smelled a little funny, and if you took a left turn just a little too fast, the oil sensor alarm would go off. (In other words, it was AWESOME!)

    We cruised the island, boondocked in some places, camped at Haleakala, and found some simply stunning roadside tamales. Outside of the Southwest, these were seriously the best we’ve ever eaten. But no matter where you get (or make) your tamales, once they are prepared, this has got to be one of the easiest and tastiest Southwestern RV recipes around. 


    Prep Instructions

    • Steam tamales, two per person
    • Heat 1 can of black or chili beans (a can works for two people).
    • Top with beans, salsa, avocado, diced Hatch green chilies, and Greek yogurt or sour cream.


    Enjoy Southwestern RV Recipes on the Road

    We hope these Southwestern RV recipes spice up your RV camp cooking and your future desert adventures inspire you to try some fantastic culinary feats of your own design! S

  • Saguaro National Park: RV Travel and Camping Guide

    Saguaro National Park: RV Travel and Camping Guide

    Certain things are symbolic of the American West — like the cowboy and Kokopelli and the cactus. And few cacti are more iconic that the saguaro, a giant, tree-like cactus shaped like a dancing candelabra. Among saguaro, no two are identical. (Some are actually comical.) This unique plant is also the namesake for Saguaro National Park. (And, also comically, few people know how to pronounce it correctly.)

    But pronunciation problems have never kept travelers from entering this Western spectacle of beauty. Fact is, once you experience this fascinating desert garden in the heart of the spectacular Sonoran Desert in Arizona, we guarantee that its poetic pronunciation of “se-WAH-ro” will simply roll off your tongue!

    So, if you’re thinking of rolling into this national park with your RV, we’d love to share some tips that will help you make it an unbelievable road trip.


    Scenic Drives 

    Saguaro National Park has two distinct sections: the Rincon Mountain District to the east and the Tucson Mountain District to the west. The sections are divided by the city of Tucson, Arizona, which is in the heart of an snowbird’s winter paradise. All of which makes this park an ideal destination during the cooler months.

    Both districts of Saguaro National Park offer scenic drives around a forest of cacti, each with a magnificent number of saguaros! However, before you get started, be advised: Trailers longer than 35 feet, or any vehicle wider than eight feet, are not permitted on either of the following scenic drives.


    Rincon Mountain District (East)

    The Cactus Forest Scenic Loop Drive is a paved eight-mile road that features several trailheads, scenic vistas, and pullouts; but it does not offer parking for RV’s or larger vehicles.


    Tucson Mountain District (West)

    The Scenic Bajada Loop Drive is a great way to explore the foothills and take in the stunning views of the Tucson Mountains and the dense cactus forest!  This six-mile unpaved, graded dirt road offers scenic pullouts, picnic areas, and hiking trailheads. High clearance or four-wheel drive is not needed to drive the loop.


    Must-Hike Trails 

    When hiking in Saguaro National Park, wear sturdy shoes or boots, hydrate before hiking, bring plenty of water along, and check the weather for daytime highs and potential thunderstorms. While most of the park’s hikes are easy to moderate, the sun and heat of the desert can transform a short, easy hike into a very strenuous day. Be prepared and have fun!  Please note which district these trails are located.


    Easy

    Freeman Homestead Nature Trail. Wander down this loop path to the site of an old homestead foundation, a grove of large saguaros and a cool desert wash. Interpretive signs share the history of the area and plant life along the way. Rincon District, 1-mile loop


    Wild Dog Trail. This trail begins from the parking lot off Hohokam Road and takes you into the national park. While short, be prepared for sandy desert hiking, loose rock, and no shade.  You’ll enjoy tall saguaro and beautiful views.  Great for a short sunset hike! Tucson Mountain District, 1.9 miles out and back


    Moderate

    Hope Camp Trail to Ridge View Trail.  From the Loma Alta Trailhead, take the Hope Camp trail for one-tenth of a mile until meeting the Ridge View Trail, then take a left and begin to climb in elevation. Views of Rincon Peak appear after a brief slope, and get even better as you go up further. Towards the end of the trail, there are incredible panoramic views and brilliant seasonal wildflowers. The trail ends at the top, with an incredible view into Box Canyon. Rincon District, 2 miles out and back, 400 feet elevation

    *Note: If you continue along the Hope Camp Trail, you’ll find two old cowboy camps marked with windmills. Hope Camp Trail is a multiuse trail, so expect to see mountain bikers.


    King Canyon & Gould Mine Trails. This trail begins in a sandy wash bottom between the canyon walls to the junction and returns via the King Canyon trail (an old mining road). There are several rocky “stair-step like” sections in the wash bottom. You’ll enjoy spectacular views of saguaro and many other cacti varieties along the way. Tucson Mountain District, 2.5-mile loop, 400 feet elevation


    Challenging

    Tanque Verde Ridge Trail. While considered strenuous, the views and seasonal wildflowers are certainly worth the hike up!  In less than a mile, you’ll reach the ridge with a greater than 280-degree view, including the Tucson Basin and other mountain ranges. A couple of miles in you’ll come upon a unique, crested saguaro. Then a bit further up, you’ll reach “The Dome,” which offers even more breathtaking views. This trail continues to Juniper Basin Campground (6.9 mile mark, 3000 feet elevation) as well as Tanque Verde Peak (8.7 miles, 4000 feet elevation). Rincon District, distance and elevation vary depending on length


    RV Parks & Campgrounds

    Park Campgrounds

    Unfortunately, there are no accommodations for any vehicle, RV, or van camping inside of Saguaro National Park. Backcountry, hike-in wilderness camping is available within park boundaries and is available by wilderness permit only.


    Public and Private Campgrounds

    With the city of Tucson splitting the park into two distinct districts and serving as a winter RVers paradise, state parks, county parks, and privately-operated campgrounds abound in the surrounding area.  The Dyrt PRO camping app will provide all the details you may need to find a spot to park your rig while exploring the nearby national park.

    For boondocking and dispersed camping options, check out the nearby options of Redington Pass (GPS: 32.2555, -110.6622), Snyder Hill BLM (GPS: 32.1567, -111.1157), and Old Ajo Highway (GPS: 32.1614, -111.1038). For current road surface conditions, which can vary from well-graded to deeply rutted, check out the iOverlander app for recent reviews.


    Seasonal Advice

    While some may think that the desert lacks seasonal changes at all, there are actually five distinct seasons in the Sonoran Desert which bring with them fascinating changes to the landscape.  


    Summer – July to Mid-September

    Summer monsoon season is the most dramatic weather event of the year. Tropical air creates humidity and moderates June’s extreme temperatures by providing frequent thunderstorms, and is the main growing season for many of the larger shrubs and trees. 


    Fall – October to November

    Autumn brings warm temperatures, low humidity, and little rain. A few cactus species flower this time of year. Autumn and late summer occasionally receive heavy rains from Pacific hurricanes.


    Winter – December to February

    Winter in the desert brings mostly sunny, mild days, with intermittent storms bringing wind, rain, and cool to cold temperatures. February is often warm and dry, and feels more like spring.


    Spring – February to April

    Spring brings mild temperatures with little rain and is often windy. It is the main flowering season for annuals, shrubs, and trees. Some winter annuals may bloom in February in warm, wet years. 


    Foresummer – May to June

    The foresummer drought brings high temperatures with very low humidity or rain most years.  May is very warm and often windy, while June is hot and usually calm. Nearly every living thing is in basic survival mode until the rains arrive later in the summer. There is little biological change during this season except for the flowering and fruiting of saguaro, foothill Palo Verde trees, and desert ironwood trees. 


    Unique Programs & Opportunities

    While this unique park is relatively small, there are some fascinating things to see and do. Plan plenty of time to explore this park, or make note of what you may do on a return visit. Come prepared for whatever nature brings your way, drink plenty of water at all times of the year, and you’ll have a wonderful time exploring this fascinating national park!


    Fun Activities

    Ranger-Led Programs. Available year-round, guided programs are a great way to learn about the park. From January – April, many different programs are offered daily. During the summer, only a few programs are offered due to extreme heat.

    Petroglyphs. The Signal Hill Petroglyph Site (Tucson Mountain District) has about 200 prehistoric Native American petroglyphs from 550-1550 years ago, many of which can be seen from the trail that ascends the hill.

    Biking. Bring your bikes or e-bikes! Tucson is one of the most bicycle-friendly cities in the US and a popular way to enjoy the scenic loop drives mentioned above. There are also several multi-use trails in and around the park.


    Amazing Sunrise and Sunsets

    Some of the most stunning times to experience the desert are at the beginning and end of the day, when the low angle sunlight enhances the diversity of desert hues and illuminates its many moods. 

    Rincon Mountain District (East). Best views can be found along Cactus Forest Scenic Loop Drive, Tanque Verde Ridge Trail, and the Javelina Rocks pull-out along the scenic loop drive.

    Tucson Mountain District (West). Gates Pass in Tucson Mountain Park, a few miles southeast of the Tucson Mountain District is ideal for watching the sunset. (*Note: Vehicles over 25 feet in length are not recommended as it is a steep, winding road to and from the overlook.) The Wild Dog Trail is also an ideal spot to watch the sun go down.


    Cactus Pointers

    Concerning saguaro, these fascinating slow growing cacti rely on a Palo Verde “nurse tree” to provide shade during the first part of its life in order to survive the desert heat. Saguaro are usually only 1 to 1.5 tall at eight years old. They begin to grow arms between ages 50 and 70, and can occasionally develop unique crests. Saguaro may live to nearly 200 years old, and if you are lucky enough to be in the region at the right time of year, you’ll get to see the local pollinators buzzing around their “floral crowns.”

    However, saguaro are just the beginning of the fascinating cacti growing in the beautiful gardens throughout this national park. Others with intriguing names such as Pink Hedgehog, Cow-Tongue Prickly Pear, Fishhook Barrel, Organpipe Cactus, Queen of the Night, Teddy Bear Cholla, Pancake Prickly Pear, and more speckle the Sonoran desert landscape. Each bloom at a different times of the spring and summer. Explore the cactus gardens found just outside of both of the park’s visitor centers. Then enjoy a scenic drive or hike to see even more desert flora diversity.


  • Going to California: Navigating RV Regulations

    Going to California: Navigating RV Regulations

    Rumors are flying around California’s so-called “RV Ban,” aka the Advanced Clean Truck (ACT) regulations, leaving lots of campers wondering how it may impact them. So, it’s a good time to clear the air on the recent California RV regulations.

    First, if you need you’re feeling anxious, take a big breath. Let it out. Stay calm. Hear the good news upfront: This isn’t going to affect your trip to Joshua Tree National Park. The recent California RV regulations don’t ban RVs or RV sales—  or even RV propane stoves for that matter. There’s no need to panic. You can still drive your RV anywhere in the state, just as you always have, or perhaps dreamed of!

    On another level, clearing the air is exactly what these regulations are all about. ACT is trying to tackle the largest emissions currently on the nearly 400,000 miles of road in The Golden State.  California is the nation’s most populous state at over 39 million people and has 31.1 million vehicles registered. (Over half of which are trucks.)  The goal is to transition all new heavy and medium duty trucks to a zero emissions vehicle (ZEV) platform by 2036.


    Clearing the Air on the ACT Regulations

    The state of California, with recommendations from the California Air Resource Board (CARB), passed regulations under the Advanced Clean Trucks in 2021. The regulations address  medium and heavy-duty trucks emissions through regulations on the sale of vehicles built on large chassis. While this mostly impacts trucks, a few larger motorhomes also qualify. Even though RVs make up only a small fraction of all types on the road today, they are still within the weight limits.

    One crucial detail to point out is that ACT only applies to new vehicles starting with the 2024 model year. If you already own a larger motorhome or self-driven RV, California won’t come knocking. Even if you’re relocating to California, unless your big rig has less than 7,500 miles, it’s not considered new. So, registering it in CA won’t be an issue.  


    Which Types of RVs Are Impacted?

    While a lot of discussion has centered on the largest motorcoaches, Class As and some models of Class C, the Advanced Clean Truck regulations have clear-cut rules based upon gross vehicle weight ratio (GVWR). Any gas vehicle with a GVWR of 8,500 pounds or more are included. That means that many Class B camper vans are also included. (Again, this applies only to vehicles sold and registered in California with a model year of 2024 and later.)

    While towable RVs sell in greater numbers than self-driven RVs, Class As, Bs, and Cs are unlikely to disappear from RV dealership lots. RV dealerships can continue to sell gas-powered motorhomes, provided those coaches comply with the ACT regulations. RVs that do meet these conditions will be clearly labeled so that the consumer will know that they meet the necessary requirements. 


    How Industries Are Adapting

    Of course, it’s not just the RV industry that is feeling it. The trucking industry, school buses, tow trucks, delivery trucks, and other commercial vehicles are also being impacted  However, according to CARB, many vehicle manufacturers are already ahead of the game. Many have even met their sales quotas two years ahead of schedule.)(Want to learn fact from fiction?  Check out CARB’s Myth busting data sheet.)

    As of 2025, only seven to 11 percent of all vehicle sales need to be ZEV, so that manufacturers can focus on one line of vehicles in production before updating another. What this means is that certain manufacturers can purchase credits from other manufacturers who have met and exceeded their quota. This provides greater flexibility within the regulations to continue to plan for a later transition.  


    Which Other States Have Adopted CARB’s Recommendations?

    Along with California, Massachusetts, New Jersey, New York, Oregon, and Washington are following suit with the CARB recommendations. While several of these states are still in ongoing discussion and negotiations, it’s important that you look into the current state of affairs in those states. Some aren’t implementing these regulations until 2026 or 2027.  Registering new models in these states will likely mean adhering to the same requirements as the California RV regulations. 


    What if I Own an Older Model Motorhome?

    Most states already have emissions requirements for any gas-powered vehicle, whether it has a sleeping/living space in it or not.  In California, all larger vehicles (18,000 pounds GVWR) that are registered in the state have had to conform to the Clean Truck Check since 2021, which does apply to many self-driven motorhomes regardless of model year and currently costs $31 (2025).  

    Neither California, nor any of the states currently adopting these CARB regulations, are banning RVs — small, medium, or the size of a small apartment. They are simply trying to put a plan in place to phase in a greater share of zero emission vehicles, while still keeping many diesel and gas-powered vehicles on the road.  Your current model should still serve you for years to come. This is a future in which we can all breathe a little easier!

  • Earth Day Ethics: An RV Guide to Leave No Trace

    Earth Day Ethics: An RV Guide to Leave No Trace

    The freedom to live, work, and play in gorgeous natural places comes with an incredible, but simple, responsibility. Living and traveling in our RV for the past 12 and a half years has afforded us some incredible opportunities to spend weeks — even months — in some of the most beautiful, pristine, and remote areas of this continent. (For those of us who crave both adventure and solitude, this is truly RVing nirvana!) Visiting some of the Earth’s most serene places strikes a cord in the heart of the traveler of admiration and affection. That desire — to preserve, to leave no trace when your RV passes on — is a great place to start.

    There is an ethics to traveling. Earth Day is a great reminder that it’s not a burden so much as joy. Personally, as full-timers, without the office or responsibilities of a house calling us back home, we can work, play, and live wherever we desire. Doing so, however, creates an awareness that extended stays in pristine places can have negative consequences on the environment for others and future generations to enjoy.

    So, how can we balance a desire to be out there with our own sense of stewardship for it. Quite simply, we all must accept our role as caretakers.

    Young scouts learn the importance of picking up trash and leaving a place better than they found it. While that’s an important part of the overall ethic of our collective responsibility to the planet, Leave No Trace principles go far beyond just picking up litter. These principles are a commitment to making a difference for future generations as well as the preservation of the biodiversity of a natural area.  

    Let’s talk about exactly how you can live out Leave No Trace in your RV.


    First: Understand How RVs Can Hurt an Environment

    Without careful management, we can have a negative impact on pristine wilderness areas we seek to explore and enjoy. We can pollute the air and waterways, and disrupt habitats with noisy generators, improper outdoor lighting, careless site selection, and trash.  

    In popular natural destinations that attract many RV campers, the repeated cycle of compaction, habitat disruption, and improper waste disposal can lead to significant environmental impacts. Fragile ecosystems, such as wetlands, meadows, and deserts, are particularly vulnerable as these areas often have unique species that depend on specific conditions to thrive. When their habitats are disrupted, not only is the local flora and fauna affected, but there can also be a ripple effect that impacts the wider ecological web of the area.  

    As RVers, we hold the keys to making a significant difference with each choice we make. From the paths we drive to the ways we manage our waste, we either contribute to the problem or become part of the solution.


    Second: Learn the 7 Principles of Leave No Trace

    Sure, if you haven’t practiced these principles before, these may sound like a lot to think about, especially when you are on vacation!  But really, once you learn the seven principles of Leave No Trace and how you can implement them in your RV, they simply become … second nature.  (Pun intended!)  

    Ask any Boy or Girl Scout to recite these seven principles, and they may even sing you a song that they’ve learned to remember them. But, most adults can only name a few. If it’s been a while since you’ve been a scout or scout leader (or if you’ve never been a scout), here’s a quick overview.

    1. Plan Ahead & Prepare
    2. Travel and Camp on Durable Surfaces
    3. Dispose of Waste Properly
    4. Leave What You Find
    5. Minimize Campfire Impacts
    6. Respect Wildlife
    7. Be Considerate of Others


    Sounds simple, right? While most of these principles are common sense, there are some environmental impacts from RV camping that may surprise you. (And yes, there are real temptations! Who doesn’t want to touch a manatee?!

    Now, let’s take the next step and discuss how Leave No Trace  principles can be easily integrated into a RV camping lifestyle to help preserve our special places and keep our wild places truly wild.


    Third: Reduce Your Impact with 6 Simple Tips

    1. Sharpen your campsite selection.

    • Problems. Soil erosion can be exacerbated by the weight and pressure of large RVs on the land. This can lead to compacted soil, which reduces its ability to absorb water and support plant life. In turn, this can lead to increased runoff and erosion. Also, when RVers wander off of established paths or create new ones, they can destroy and disrupt wildlife habitats, contributing to erosion or soil degradation that may take years or even decades to recover. Recreational off-trail choices in the area — from hiking and cycling to motorcycle and OHV use — can leave a serious impact.
    • Solutions. RVers should use established campsites, boondocking areas, and parking areas to avoid damaging untouched natural areas. When these are not available, look for durable surfaces, such as gravel or sand, that are more resistant to wear, and more porous for ground water saturation. Learn to identify cryptobiotic soil when camping in the desert and steer clear of it. It takes decades to regenerate this precious soil upon which desert plants rely, so “Don’t Bust the Crust!” And always stay on designated trails when hiking to prevent soil erosion and protect plant life as well — and only use motorized vehicles on trails or roads designated accordingly.


    2. Avoid campfire hazards.

    • Problems. Boondocking areas are often littered with numerous campfire rings, many containing half-burned wood, or even worse, smouldering ashes. Also, campers often build very large fires, which can stray out of control and cause forest fires. Or they try to burn objects such as wooden pallets, or metal cans and plastic which give off noxious fumes.
    • Solutions. RVers should bring their own portable fire pit/grill and keep fires minimal, especially in fire prone regions. There are many LNT options made by OTZI, Solo, and Primus which leave absolutely no ashes or wood behind. Or camp next to an existing campfire ring and be sure to burn wood completely down to white ashes. Never try to burn materials in the fire unless they are made from paper or wood. Before leaving the area, make sure your fire is “dead out” by dousing it with plenty of water and stirring it to make sure all ashes have cooled. Never leave a fire until the ashes are cold. And, please clean any fire pits in the area that are littered with trash and recycling!


    3. Game-plan your waste water disposal.

    • Problems. Improper disposal of gray and blackwater tanks can contaminate water and soil, posing health risks to both humans and wildlife. Chemicals from soaps, detergents, and human waste can upset the natural chemistry of ecosystems, leading to algal blooms and other negative environmental issues.
    • Solutions. Use dump stations to dispose of the wastewater in your tanks. If you do dishes in bins to save water, filter out any food particles with a small sieve and scatter the wastewater in a different place each day (but never within 150 feet of a water source). This lessens the impact on a specific area. Throw away any food particles in your trash so as not to attract any critters to the area. If limited facilities make it difficult to dispose of waste properly, plan trips into town that align with dump station locations. It’s all about being proactive and planning ahead!


    4. Carefully monitor your trash disposal.

    • Problems. Littering, whether intentional or accidental, can not only be unsightly, it can lead to the destruction of pristine natural areas and have very negative impacts on wildlife. It teaches wildlife to live off of human food/trash rather than find their own.  Just as deadly is micro-trash like twist ties, bread bag clips, Hershey bar wrapper corners, bottle caps, dental floss, and cigarette butts. Wildlife can confuse these tiny pieces of trash as food, and are often found in the stomachs of dead birds and other marine critters.
    • Solutions. In remote areas, RVers should always pack out what they pack in. This means being prepared with trash bags and recycling containers. One way to minimize your trash is to responsibly burn any used paper products and paperboard boxes. Consider reusable or biodegradable products to minimize plastic waste — think reusable water bottles and jugs instead of disposable ones. In all camping areas, always scour your campsite for all trash (including micro-trash) and make sure it ends up in the trash/recycling before you leave.


    5. Decrease your resource consumption.

    • Problems. RVers often use too much water (especially in desert areas) and consume too much power, causing them to run a gas generator for several hours per day. This creates both air and noise pollution, as well as being a fire risk in drier areas.
    • Solutions. Resource conservation starts with using less water and electricity. An appropriately-sized solar powered system for your RV can silently provide all the power you need by garnering energy from the sun, thus eliminating the need for a gas generator all together. Conserving water is easy by taking shorter showers and using a basin for washing dishes, which reduces water usage. Remember, every small action contributes to the larger goal of preserving the environment, and allows you to stay out longer!


    6. Limit your campsite lighting.

    • Problems. RVers often leave bright outdoor lights on all night. Bright, unshielded lighting can affect bird migration, sea turtle hatchlings (when camped near the beach), and night sky viewing in dark sky areas. They can also bother nearby campers who seek out dark areas.
    • Solution. Only use outdoor lighting when necessary and make sure it is shielded so that it doesn’t point upward. Small solar lights or under RV lights are fine to make it safer to move around the campsite at night, but it’s important to turn them off before you go to bed.


    The Joy of Leave No Trace as You RV

    To truly appreciate nature’s unique gifts and ensure their preservation for future generations, it is crucial to understand the effects that our recreational choices have on our planet. By becoming aware of these impacts, and sharing them with others, we can all make informed decisions that align with the seven principles of Leave No Trace. Before you know it, it’ll become second nature for you and your family!