Author: Freedom in a Can

  • Biscayne National Park: RV Camping and Travel Guide

    Biscayne National Park: RV Camping and Travel Guide

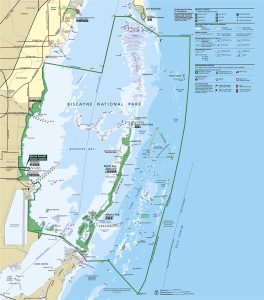
    Located offshore between Miami and the Florida Keys, Biscayne National Park is a boater, angler, and diver’s paradise that is not to be missed! (Especially if you are snowbirding in Florida for the winter.) The park preserves a stunning combination of crystal clear ocean waters, emerald islands, and diverse, yet vulnerable, coral reefs.

    Within this fascinating 250-plus square miles, the National Park Service protects at least 10,000 years of human history. So, from native tribes and pineapple farmers to famous shipwrecks, there is so much for an RVer to explore at Biscayne National Park. (Even if you have to exit the RV and enter the water to see most of it.)


    Scenic Trips

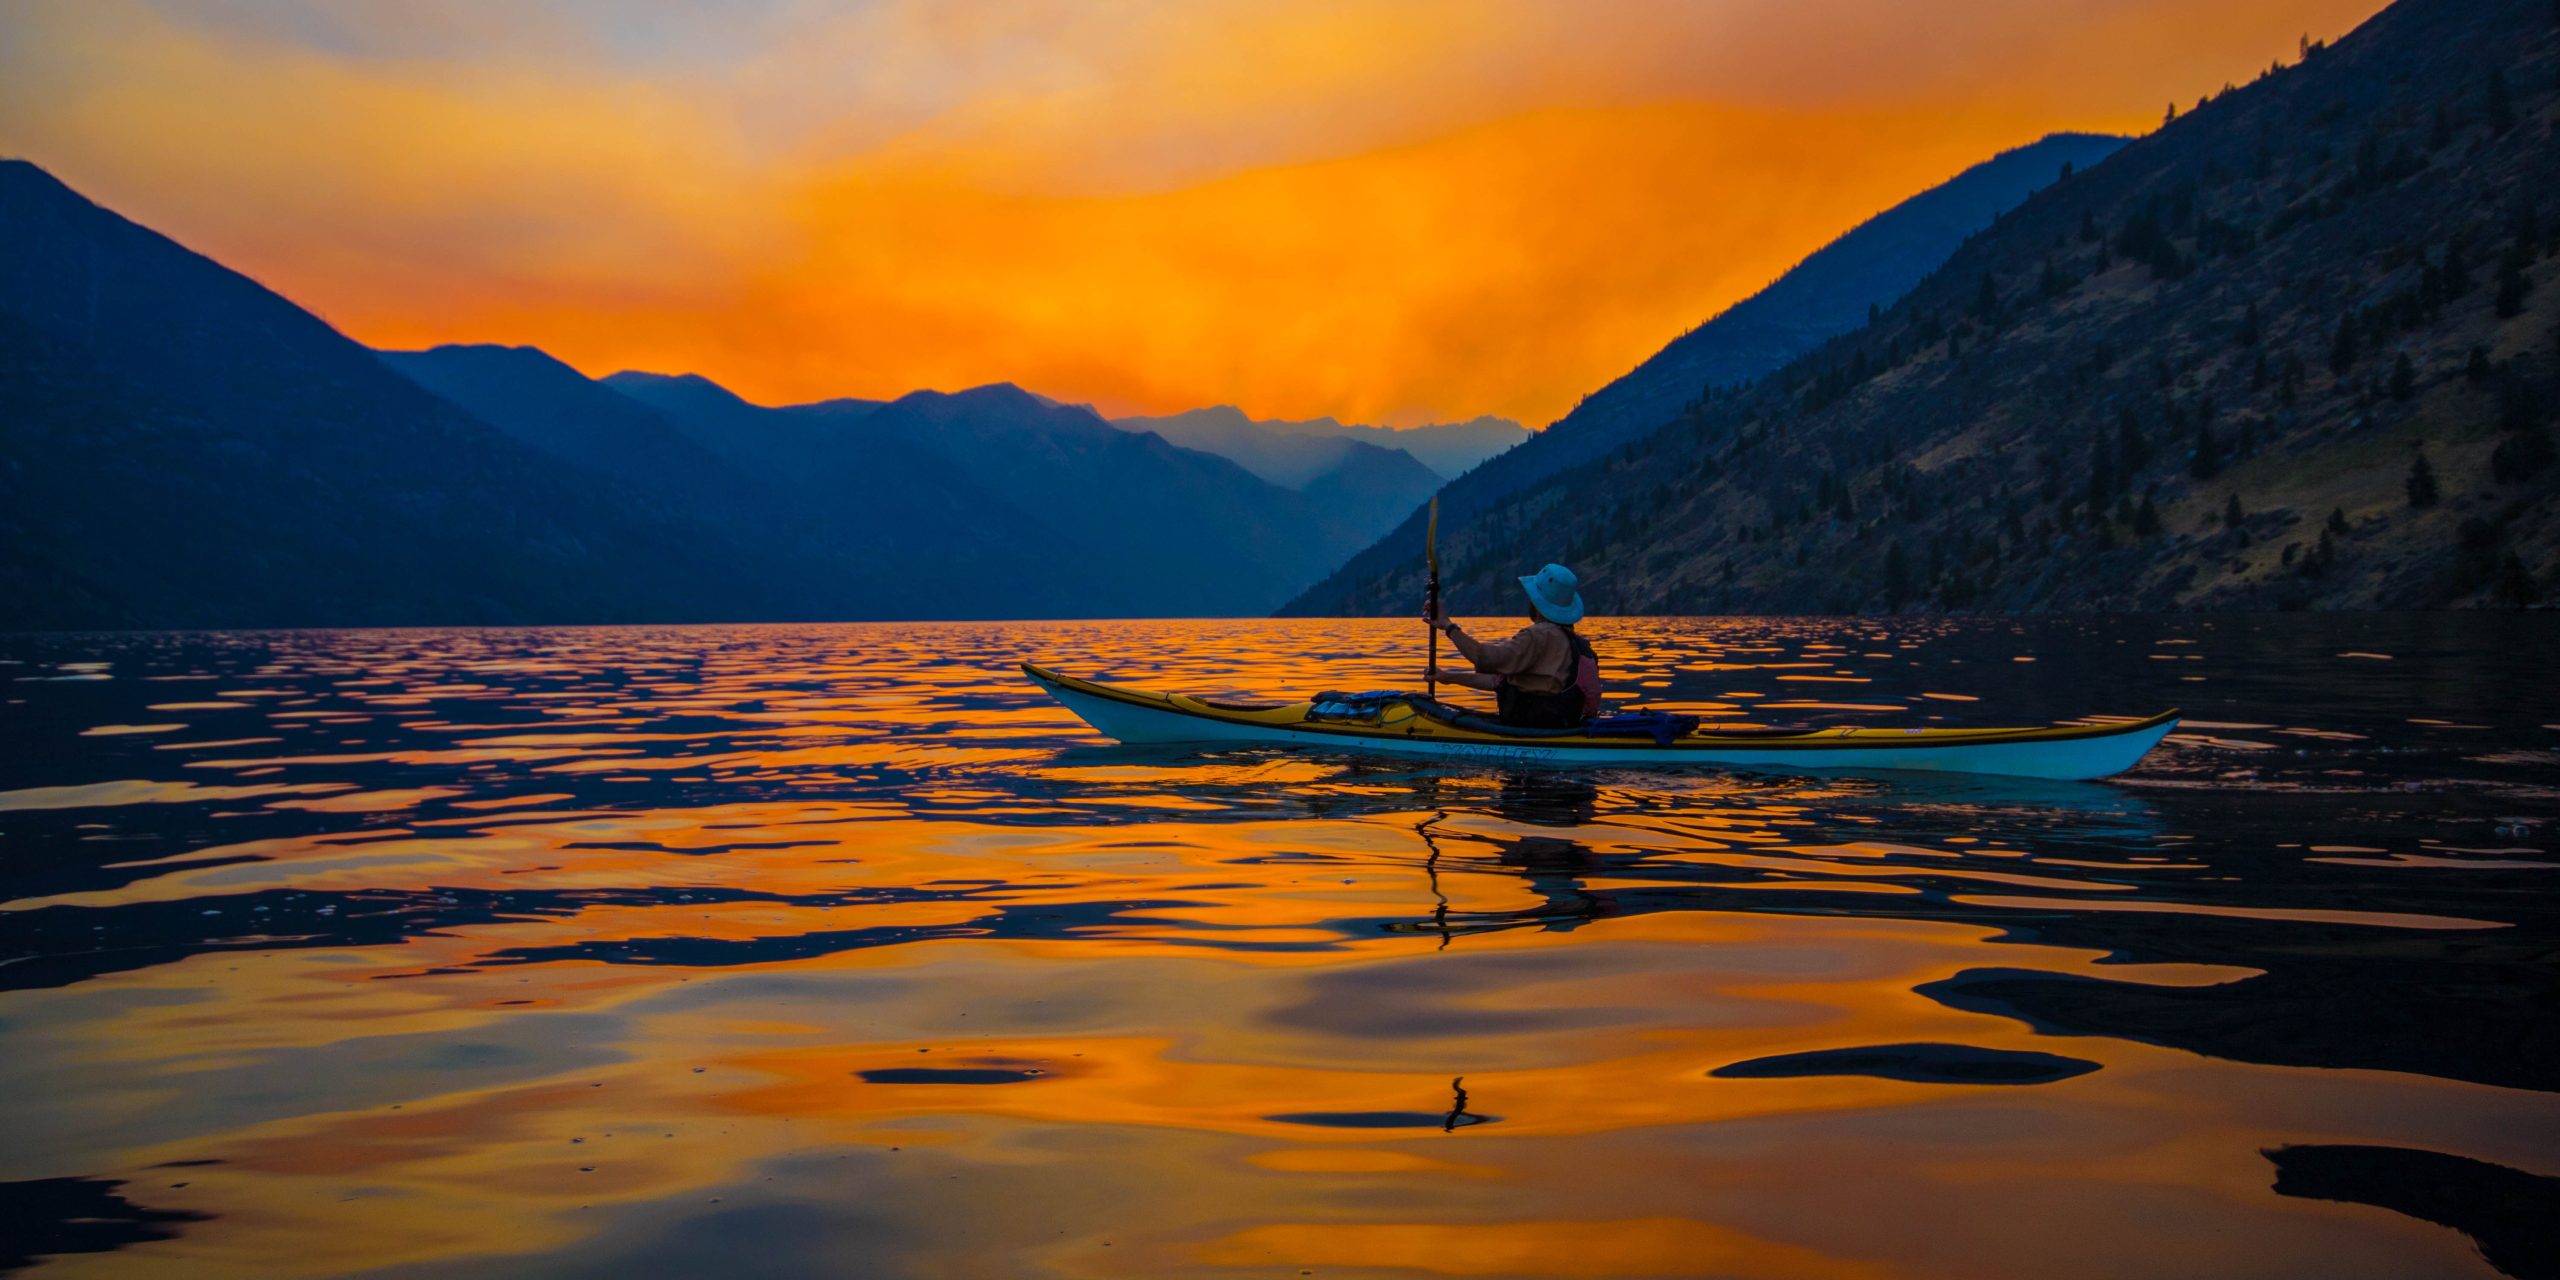
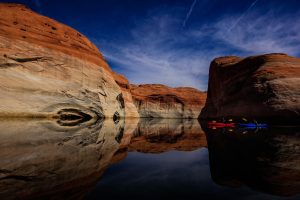
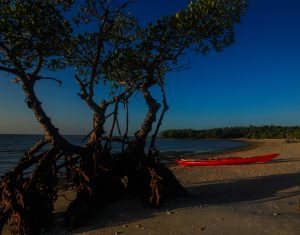
    With 95 percent of Biscayne National Park covered by sparkling ocean water, boating (of all types) is one of the most popular activities in the park. Canoeing and kayaking are perfect ways to explore the shallow bays and mangrove-lined shores. You can even join a Park Ranger for a 90-minute paddling clinic if you’ve never paddled a canoe. (Or if you simply need a refresher.)

    In good weather, more experienced kayakers can cross the 7-mile expanse of Biscayne Bay to Elliott or Boca Chita Keys. Among the keys, Adams Key is a popular launching spot for accessing these areas from the south. Using the islands as a base camp allows time for exploring the lagoons, creeks, and channels south of Caesar Creek. Since many of these more remote areas are too shallow for motorized vessels, canoeists and kayakers are likely to have these stunning remote places to themselves.

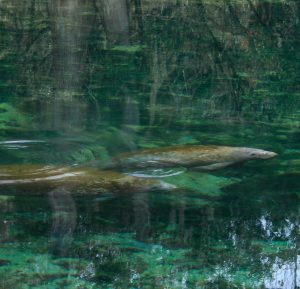
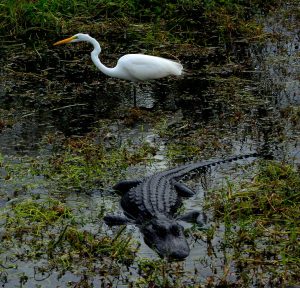
    If viewing marine wildlife is on your list, Shallow Jones Lagoon is a great place to explore. There, you can see rays, upside-down jellyfish, tropical fish, and wading birds. Hurricane Creek, named for the fact that old-timers would tie their boats here during big storms, provides spectacular canoe and kayak opportunities as well. It also offers excellent snorkeling beneath mangrove roots. Under the surface, snorkelers can observe sea squirts, crabs, anemones, and endless marine wildlife.


    Must-Visit Trails — Above and Below Water

    Hiking Trails

    As you might expect at Biscayne National Park, most of the exploration is by water. Even so, there are two fun hiking trails that tunnel through the tropical hardwood forest of Elliott Key. One runs across the entire seven miles of the Key. Another one-mile-long loop trail runs between the bay and ocean sides of the Key, beginning and ending at the marina. In each, be prepared for overgrown trails, as foliage grows quickly in a year-round warm and humid climate.


    Underwater Exploration

    Unique to the national parks, the Maritime Heritage Trail offers the opportunity to explore six documented shipwreck locations. The underwater trail takes you through a wide variety of vessel sizes and types, in addition to Fowey Rocks Lighthouse.  Each site has been documented by archaeologists, and the NPS has installed vessel moorings to prevent damage from anchoring. These six sites, spanning nearly a century of history, were chosen to highlight the park’s maritime heritage. They also were selected for ease of access, quality of diving, and known history. To get the most from your visit, be sure to take advantage of the NPS educational materials. All are available in print and online — and can also be found on in-water plaques.

    Of the six shipwreck sites, the Erl King, Alicia, and Lugano are best suited for scuba diving. However, the other three sites — Arratoon Apcar, Keel Showing Wreck, and Mandalay — can easily be enjoyed by snorkelers. Mandalay offers an incredible opportunity for snorkelers to experience a shipwreck in a beautiful natural setting. 

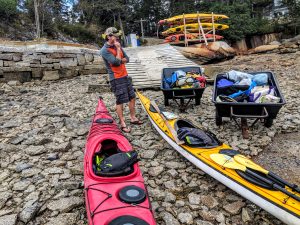
    Launching your own kayak or canoe is also allowed from the designated area adjacent to the parking lot. (And yes, it is free of charge.) Leaving a vehicle in the parking lot overnight is permitted while camping on one of the park island. Jus remember to stop in the visitor center to fill out a free parking permit. (And always leave a float plan behind with a friend or family member as a safety precaution.)


    RV Parks & Campgrounds 

    As you might expect, the only campgrounds in the park are tent-only and are located on islands: Boca Chita Key and Elliott Key. That makes a lot of sense considering they can only be accessed by boat. Camping is first-come, first-serve, and it islimited to 14 consecutive nights. (Fees are nightly.)  If you’re arriving by water in a personal motorized vessel, there is also a required docking fee. Both camping and docking fees can be paid via the Recreation.gov mobile app.  

    • Boca Chita Key is the park’s most popular island. It features beautiful waterfront views, a grassy camping area, picnic tables and grills. Toilets are available, but there are no showers, sinks, or drinking water. The harbor entrance at low tide is approximately four feet.
    • Elliott Key is the park’s largest island. Restrooms with sinks and cold water showers, picnic tables and grills are available. Drinking water is available, but bring water as a precaution if the system goes down. Elliott Key harbor is approximately 2.5 feet at low tide. There are 33 boat slips in the marina.  


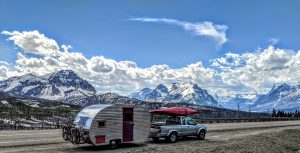
    While there are no RV campgrounds within the park boundaries, RV camping is available in the greater Homestead/Florida City areas – approximately eight to 10 miles from the park. While most are private campgrounds, a good public option is Long Pine Key Campground. (It’s located in nearby Everglades National Park). There are also a handful of Harvest Hosts and Boondockers Welcome options in the area for self-contained RVers.


    Seasonal Advice 

    Biscayne National Park lies in a subtropical climate with sunshine year-round. Winters are normally dry and mild, with occasional fronts bringing wind and a bit of rain. Summertime brings hot and humid weather with scattered thunderstorms in the afternoons. The average high temperature in January is 77 degrees Fahrenheit. In August, it is typically around 90 degrees Fahrenheit. The average rainfall for the area is nearly two inches in January, but can be upwards of nine inches in August. So, come prepared with rain gear. Hurricane season is June 1 through November 30. Mosquitoes and other pesky insects can be present year-round. As with many parks, one visit is often not enough to see and explore all of what Biscayne has to offer. We recommend at least a few days for first-time visitors, allowing you the opportunity to also identify what you might do during a return visit!


    Insider Tips!

    Guided Tours

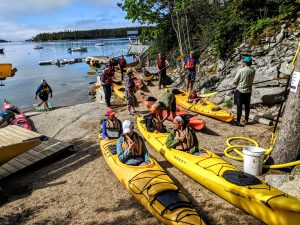
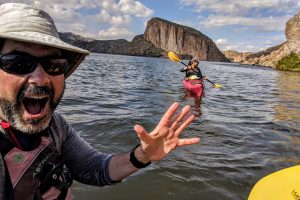
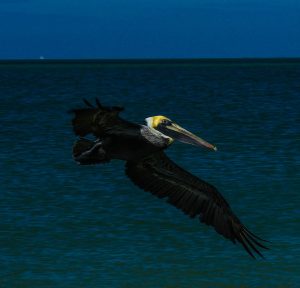
    Snorkeling, Paddling, & Sailing. If you prefer to join a tour, unique combinations of these water-based, eco-adventures are offered by the Biscayne National Park Institute.  Tours vary from a couple of hours to a full day accommodate different abilities, ages, and experience levels. Wildlife is typically quite abundant!

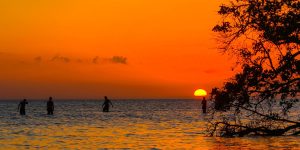
    Boat Cruises. Those looking for a less active adventure in the park can hop aboard a motorized vessel to enjoy the scenery and history from the deck of a boat. Also offered by the Biscayne National Park Institute are tours of the Stiltsville “floating” houses and evening sunset cruises (November to March). 


    Popular Activities

    Volunteer Clean-Ups/ If conservation work is up your alley, join the BNPI on a volunteer marine debris cleanup trip. Enjoy a day paddling while making a meaningful contribution to coastal habitats.

    Fishing. Don’t forget this big one: AFlorida saltwater fishing license is required to cast a line. Fishing is allowed in various locations throughout the park, but off-limits in others. So, it’s important to check regulations. The park rangers even offer a Fishing Clinic during certain times of year.

    Public Marina Access. If you plan to bring your own boat, Miami-Dade County operates marinas and boat ramps adjacent to the park — with Homestead Bayfront and Black Point marinas feeding directly into the park. 

    Indoor Activity. Artists have always played a crucial role in increasing awareness and inspiring stewardship of national parks. The Dante Fascell Visitor Center gallery provides a space where contemporary artists, inspired by the beauty of Biscayne National Park and South Florida, display their work. 

  • Kayaking: A Beginners Guide for RVers

    Kayaking: A Beginners Guide for RVers

    “Where’re ya putting in those kayaks?” is a common question we get from curious bystanders. (We hear it wherever we go, whether that is near some body of water, or, a little more earnestly, when we’re parked in the middle of a desert.) As full-time RVers, having our kayaks with us at all times means that we can paddle away from the shore whenever and wherever the opportunity arises. Part of the beauty of kayaking is portability, which is why kayaks pair perfectly with RVs.

    In my 20 years of teaching kayaking, we often hear the question, “What kind of kayak should I get?” With a little humor, we usually reply with, “the one you will paddle.” But the reality is that for RV owners, kayak selection is twofold. You need to select the right kayak for your style of paddling. And you have to look at the realistic storage situation in/on/with your RV. Ultimately, you want to minimize any barriers to getting on the water. 

    And there’s good reason for that.

    Kayaking takes us to remote places away from noisy motorboats. Easier to maneuver and cut through headwinds better than stand up paddle boards, they can be the very definition of outdoor relaxation. At the same time, kayaking can be the apex of adrenaline pumping, razor-edge, adventure. As a general rule of thumb, the smaller the boat, the easier the turning and the slower the hull speed. The longer the boat, the easier the tracking (going straight) and the faster it can move through the water. Favoring one often means sacrificing the other.  

    Now, let’s talk about which kayak is right for you and your rig.


    Learn the Types of Kayaks

    Sea Kayaks

    Seas kayaks are 14 to 22 feet long, with an enclosed cockpit. This allows paddlers to stay drier through the use of a nylon or neoprene spray skirt. Dry hatches for both storage and buoyancy are also common. Made from injected plastic, fiberglass, or even carbon fiber, these boats can range from heavy and durable to ultra lightweight and costly. They track much better than shorter boats, especially into the wind and allow a faster hull speed. This sacrifices easy turning. And that can be frustrating in heavy seas or cross-winds. While sold as sea kayaks, they are quite versatile. We use ours in lakes (and even slow rivers) quite often.


    Fishing Kayaks

    Also known as “sit on tops,” fishing kayaks are six to 14 feet long. They are very popular with anglers because of their open design, stability, and higher seat. (The latter allows a better angle of what’s under the water.) The double-hull design provides storage areas and stability, but can be difficult to paddle long distances. They are also much heavier than single-hull boats of the same length. 


    White Water Kayaks

    White water kayaks are six to nine feet long, with an enclosed cockpit and spray skirt. Short boats with flat bottoms are considered “play” boats and facilitate surfing and acrobatic maneuvers in fast moving water. Longer boats with more rounded hulls can be better for steep rivers with difficult rapids. These boats can turn on a dime, but track less easily when kayaking.


    Recreational Kayaks

    These 8-to-14-foot kayaks combine many of the better features into one all-around boat. Often, this makes perfect for beginners who are planning to do more flat water paddling. The cockpit is usually very open, but cit an incorporate a spray skirt. Lighter than a sit on top, they track better than a white water boat. But their open cockpit can mean more water splashing in. 


    Foldable Kayak

    Who needs roof racks? Taking up no more space than a large suitcase, these boats can be a great option for those with fewer over-vehicle storage options or solo travellers.  

    *****

    The variety of RV or vehicle storage options are as vast as the types of boats available, from assisted-lifting roof racks to custom cradles. Often, simply asking your local kayak dealer to help solve your storage solution is the fastest way to get a solution for your specific kayak.   


    Stock the Necessary Gear 

    While you can rent a boat near just about any body of water, it’s worth the small investment to have your own gear that fits you and your style of kayaking. At a minimum, you’ll need:


    1. Personal Floatation Device (PFD, aka lifejacket). Between 80 to 90 percent of all boating related drowning victims were not wearing a PFD.  In short: ALWAYS wear it! Get a comfy one designed for the sport, and you’ll forget it’s even there.
    2. Paddle. Two bladed paddles allow alternating paddle strokes on either side for good forward momentum and maneuverability. The paddle you need depends on the style of boat you choose.
    3. Spray Skirt. If paddling a closed cockpit kayak, spray skirts can help to keep water out.  Skirts are sold by waist size and cockpit size, so are very specific to the paddler and the boat.
    4. Signaling/Communication Device. These can range from having a cell phone in a dry case, VHF radio, or flares, to highly visible clothing at a minimum.


    Prepare to Get Started

    • Learn from a Guide. Taking a guided tour with a professional instructor is a good way to see what kayaking is all about. Another benefit is that you don’t have to worry about the gear, the paddling plan, and safety.  
    • Start with a Rental. Renting a boat in a recreational area is also a great way to try things out, and see what you like (or don’t like) about their boats.  
    • Take a Class. Enrolling in an instructional course can meet you where you are. The ACA (American Canoe Association) offers courses for beginners to expert instructors.  
    • Connect with a Club. Joining a local paddle club will introduce you to others who share your interests, and is also a great way to get insider knowledge about the area.


    Visit Awesome Kayaking Destinations

    While our list of favorite places to kayak is at least a mile long, here are a few of our faves. All of which are very accessible for beginners.


    Unsalted (aka Freshwater) Kayaking

    North Cascades, Washington. Two main reservoirs lie along the Skagit River — Ross Lake and Diablo Lake. The nearly iridescent blue water created by glacial run-off creates a surreal and stunningly beautiful scene. (Don’t believe us? Check out the image at the top of this blog!)

    Grand Canyon, Arizona. Spending 10 to 21 days paddling the Grand Canyon is beyond most people’s skill level, but there is a section of the river that is a perfect day trip for beginners. Hire a back-haul service to take you up to the Glen Canyon Dam, then paddle/float the 16 miles back to Lee’s Ferry.

    Lake Powell, Utah. Exploring the narrow side canyons away from the main lake provides a more serene experience as you’ll be away from most of the motorboat traffic.  It also affords you the opportunity to explore Ancient Puebloan ruins and sandstone cathedrals.  

    Voyaguers, Minnesota:  A day trip on these lakes is a gorgeous way to get away from it all for a short time. The lakes can be both serene and rough, depending on the time of day, but the numerous islands typically provide some shelter from the wind.


    Salted (aka Saltwater) Kayaking

    Maine Coast, Maine. One of the best ways to explore Maine is from the water surrounding it. With over 5,000 miles of shore line and over 4,000 islands, you could kayak in a different area every season and never see it all. Local guide services offer both small group and private tours which highlight the best sights of this spectacular coast. It’s a great way for beginners to become more familiar with ocean kayaking.

    Biscayne, Florida. Kayaking is the perfect way to explore the shallow bays and mangrove-lined shores of this national park. Guided trips offer beginners a great introduction to some of the more popular lagoons and keys, while more experienced kayakers can cross the 7-mile expanse of Biscayne Bay to Elliott or Boca Chita Keys. See our recent blog on Biscayne National Park for more info.


    *****

    Our RV travels have led us all across the continent and included many world-class paddling destinations. With our boats up top and gear in the back of our truck, we’ve made many memorable moments in our travels from the cockpit of our boats!

  • Some Not-So-Obvious RV Energy Savers

    Some Not-So-Obvious RV Energy Savers

    Like many RVers, when we chose full-time RVing, we did so to live more sustainably. For us, it made just made sense from multiple perspectives —  energy, financial, and environmental. Now, after traveling for over 12 years, we’ve learned a lot. Just like we hoped, living smaller allows us to save a ton of energy and save money on utilities. But we’re way better at it now than we were at the start. A big reason? Some not-so-obvious RV energy savers.

    These RV energy savers don’t just work for us. They’ll apply to any-sized rig. And they are especially useful if you plan to camp or boondock off-grid — and don’t want to haul around a noisy gas generator. Best of all, they’re not some big selling point of what to buy. These energy savers are a lot more about what to do.


    Basic RV Energy Savers for Newbies

    Let’s start with some basic off-grid energy savers. If you’re an experienced RVer, you’re likely tracking these already. But for RV newbies, these RV energy savers can be instant game changers.

    • Opt for 12-Volt Power. Use 12-volt-DC instead of 120-volt-AC appliances whenever possible. Quite simply, 12-volt will run directly off your battery without needing to power up the inverter.  
    • Switch Off the Inverter. Turn off your inverter when not running 120-volt-AC appliances. Install an inverter toggle switch next to the door as a visual reminder.
    • Cut Off Phantom Power. Turn off and unplug appliances that draw phantom power. Water pumps and water heaters are notorious energy suckers. Test appliances with a “kill a watt” meter to know what is the biggest draw.
    • Find Low or No Wattage Alternatives. Avoid using high wattage appliances when off-grid, especially if they heat or cool. Use a pan with a lid to reheat food, griddle to toast bread, and French press/kettle for coffee. 
    • Cook Outside. Take cooking to the campfire – it’s both fun and will save energy!
    • Minimize Screen Time. Let nature fill your soul instead of screen time — enjoy a star filled sky or campfire.
    • Put the Sun to Work. Use solar power combined with a DC to DC charger to keep your RV batteries topped off. Learn how to design an RV solar-powered system to meet your energy needs. 
    • Charge While the Going Is Hot. When your solar RV battery bank is fully charged and the sun is still shining, plug in all of your electronics (e.g., laptops, phones, tablets, cameras, headlamps, etc.) and store all of that extra solar energy!


    Seasonal RV Energy Savers

    Stay Warm in Winter 

    Using propane rather than electricity to heat your rig is more efficient. As full-time RVers, we go through about six standard, 20-pound tanks per year. (Around $150 for both cooking and heating annually.) While we like to head to warmer climates for the winter, that’s not always an option. Here are a few tips:

    • Choose a sunny campsite for some powerful, passive heating.
    • Keep the heat in! RVs lose much of their heat through windows, doors, as well as the floor. Cold winter air flowing underneath your RV can make the floor feel like a freezer! Use AirSkirts RV Insulation underneath to block that cold air flow and place rugs in key areas where you sit or stand. Also, insulate windows with shades or covers, and insulate around any gaps in the door.
    • Heat yourself from the inside. Indoor exercises, cozy sweaters, down booties, a warm cup of tea, and your favorite blanket – even a low-wattage heated throw — all help. 
    • If skiing and snowboarding are not your thing, snowshoeing will warm you up quickly and help you enjoy the season outdoors. Traction devices on your hiking boots will also help you get around safely. 
    • RV heaters are notoriously loud and inefficient, while Mr. Heater Propane Buddy is silent and can be used to heat a specific room. 
    • Use a low-wattage mattress warmer plus a down comforter for those really cold nights.


    Stay Cooler in the Summer 

    While we typically head north, coastal, and up in elevation during the summer to stay cool, avoid humidity, and travel without the need for air conditioning, we occasionally spend time in (or traveling through) some very warm areas. These are a few tips to stay cooler:

    • Choose a shaded campsite for some natural, passive cooling.
    • Close RV shades and cover windows when the full sun is pouring in to avoid a “greenhouse effect.”
    • Cook outside with a propane stove or grill so you don’t heat up your RV. Eat easy, cool meals that don’t require much cooking.
    • Enjoy a natural breeze outside and stay in the shade as much as possible. If inside, keep air flowing with small personal fans and a ceiling vent fan to draw warm air out.
    • Get out on the water in a kayak, go for a swim, or put your chairs half way in the water.
    • Cool yourself from the inside out by staying well hydrated. 
    • At night, use a ceiling vent fan, blowing out, and open only one window by the bed — just one — to concentrate the air flow over the sleeping area.


    Saving energy in your RV will make your travels more affordable and enjoyable, no matter what the season!

  • 7 Delicious Holiday Desserts You Can Make on the Road

    7 Delicious Holiday Desserts You Can Make on the Road

    Making delicious holiday desserts can be fun — even in your tiny RV kitchen with limited tools. As full-time RVers and nearly lifelong campers, we’ve used a two-burner propane stove and a campfire Dutch oven for our baking needs for over 25 years. As foodies, we absolutely love to challenge ourselves with new recipes and adapt new ways to make them. Remember: It’s not the size of your kitchen, or number of appliances, but the size of your imagination that truly matters. (For the record, our only electric kitchen appliance is an immersion blender.) 

    With that in mind, we hope that these seven delicious recipes for holiday desserts — with both bake and no-bake options — inspire you to lean into your creativity and discover your own inner pâtissier! While some may sound fancy, they’re all very simple to make. And no matter where you’re going this holiday season, bring one of these holiday desserts in the door, and you’ll get a warm welcome.


    Baking Recipes for the Oven and the Campfire

    Dark Chocolate Cake with Rum Glaze & Raspberry Sauce

    Adapted from the Moosewood Restaurant Cookbook, this six-minute vegan chocolate cake is the perfect campfire cake. It’s a good base for just about anything you want to put on it. We’ve used a German chocolate frosting, a butter cream frosting, as well as just powdered sugar. This rum glaze with raspberry sauce topping came from our former dean of students, with whom we worked in the early 2000s.


    Cake Ingredients
    • 1 1/2 cups unbleached white flour
    • 1/3 cup unsweetened cocoa powder
    • 1 teaspoon baking soda
    • 1/2 teaspoon salt
    • 3/4 cup sugar
    • 1/2 cup vegetable oil
    • 1 cup cold coffee
    • 2 teaspoons pure vanilla extract
    • 2 tablespoons cider vinegar


    Cake Instructions
    • Mix all dry ingredients together. (You can pre-mix these ingredients at home and bring them in a food storage container.) 
    • Mix in all wet ingredients, adding the cider vinegar last. Stirring in the vinegar will lighten the color of the cake batter and cause it to rise and bubble. 
    • Pour into a greased fry-bake pan, or Dutch oven, immediately.
    • Cover and cook over a campfire for approximately 20 minutes, rotating occasionally. Be sure to put coals on the top of the lid to cook from the top down as well.  See this video for details.


    Note: While you can just pour the glaze and sauce below over the cake once it has cooled, you could also make two cakes and layer the icing/topping in between and on top.


    Glaze Ingredients
    • 1/4 cup dark rum
    • 1/4 cup water
    • 1 stick butter
    • 1 cup sugar


    In a sauce pan, stir all ingredients together and bring to a boil for two minutes. Let rest, but keep warm, until the cake is ready. Pour over top.


    Raspberry Sauce Ingredients
    • 1 large package frozen raspberries
    • 3 tablespoons water
    • 2 tablespoons granulated sugar, to taste


    Combine frozen raspberries, water, and sugar into a sauce pan. Stir while the mixture is coming to a boil. Cook until thickened. 


    Turkish Baklava

    Most people associate baklava with slaving in the kitchen and rolling out filo dough all day. But it’s surprisingly simple. (It’s also a real crowd pleaser.) While you might be more familiar with the Greek version with walnuts, the Turks have their variation that uses pistachios. This recipe comes from Shari’s Turkish neighbor in Santa Barbara, California back in the 1990s. Since then, it’s become one of our standard holiday desserts. 


    Ingredients
    • 2 1/2 sticks of butter
    • 1 package of frozen filo dough (these often come two per pack, you just need one of the packages)
    • 12 ounces of pistachio meats (or walnuts if you want to go Greek)
    • 2 cups sugar
    • 2 cups of water
    • 3/4 tablespoon lemon juice


    Instructions
    • Preheat the oven to 350 degrees.  Grind pistachios into a crunchy-powdery form. This is easiest to do in a food processor, but also possible with an immersion blender, or chef’s knife.  
    • Melt butter.  
    • Thaw and unroll the filo dough. Place one- third of the filo dough in the bottom of a rectangular cake pan. Spread half of the ground pistachios over this first filo layer. Add one-third more of the filo dough, then spread the other half of the ground pistachios over the second filo layer. Top with the remaining third of the filo dough.  
    • Using a small, sharp knife, cut into 1-inch-by-3-inch pieces. The filo dough is fragile, so go slowly and make sure to cut all the way through to the bottom. Pour melted butter over the top, making sure to get it into all of the cracks.   Place back in the oven for about 30 minutes (until the top layer is lightly browned).
    • While baking, make a simple syrup by combining water, sugar, and lemon juice in a pot on the stove. Bring to a boil and let simmer for at least one minute (or until all sugar solids dissolve).   
    • Remove baklava from the oven and let cool for about three minutes. Pour the simple syrup over the baklava, making sure to get it into all of the cracks.  Let sit for three to four hours before serving. Enjoy!


    No Bake Recipes

    Chocolate Silk Pie

    Your friends and family seriously won’t believe this one is vegan. (It’s also great for folks with a dairy allergy or sensitivity!) Adapted from Farm Sanctuary in Watkins Glen, New York, we added the raspberry sauce for some bright fruity fun. Alternatively, you can replace the cold coffee with creme de menthe for a chocolate mint flavor and top with regular or vegan whipped cream.  


    Pie Ingredients
    • 2 cups Ghiradelli dark chocolate chips (these are the vegan type)
    • 1/3 cup cold dark roast coffee (or creme de menthe liquer)
    • 1 package silken tofu (if you are not a regular tofu buyer, this is a very different texture than most tofu so be sure it says “silken” on the package)
    • 1 teaspoon vanilla extract
    • 1 tablespoon maple syrup
    • 1 Oreo cookie crust or chocolate nut crust


    Pie Instructions
    • Melt chocolate chips over a double boiler, then stir in vanilla, coffee, and maple syrup.  
    • Combine tofu and chocolate mixture in a blender – we use a plastic pitcher and an immersion blender.  Process until very smooth and creamy.  
    • Pour mixture into cookie crust and refrigerate overnight.  
    • Topping of your choice.


    Raspberry Sauce Ingredients
    • 1 large package frozen raspberries
    • 3 tablespoons water
    • 2 tablespoons granulated sugar, to taste


    Combine frozen raspberries, water, and sugar into a sauce pan. Stir while the mixture is coming to a boil. Cook until thickened. Chill in the refrigerator before serving.  


    Egg Nog Pie 

    This recipe comes from the Smithville Inn in Ohio and has been a holiday tradition in the Hutchison family for more years than Hutch can remember. We added just a bit of bourbon for extra fun and flavor.


    Pie Ingredients:
    • 1 teaspoon gelatin
    • 1 teaspoon cold water
    • 1 cup milk
    • 1/2 cup sugar
    • 2 tablespoon corn starch
    • 1/4 teaspoon salt
    • 3 egg yolks, beaten
    • 1 tablespoon butter
    • 1 teaspoon vanilla
    • 1 teaspoon bourbon
    • 1 cup whipping cream (whipped), measure before whipping
    • Nutmeg and cinnamon/sugar to taste for top
    • Your choice of 9-inch pie crust (Standard crust, graham cracker, chocolate, pecan — all are great!)


    Instructions
    • Soak gelatin in cold water.
    • Scald milk in the top of a double boiler.
    • Combine sugar, corn starch, salt and mix well.
    • Add to scalded milk and cook until thick and smooth.
    • Continue cooking for 15 minutes longer.
    • Stir a small amount of mixture into beaten egg yolks, then return to the double boiler and cook a few minutes longer.
    • Add butter and gelatin and stir.
    • Cool.
    • Add vanilla and bourbon.
    • Fold in whipped cream.
    • Pour into the 9-inch pie crust of your choice.
    • Sprinkle generously with nutmeg and cinnamon.
    • Refrigerate until ready to serve. Can be frozen as well.


    Chocolate Fondue

    A big fondue dinner was a Hutchison family tradition for New Year’s Day. Prior to hitting the road full-time, we carried on this tradition and hosted an annual Holiday Fondue Fest for 40 of our closest friends and colleagues. There were four courses, with this recipe being the grande finale! It’s delicious, fun, and can be made in a fondue pot, over a gas stove, or even over a campfire (watch it closely though!).


    Ingredients
    • 1 bag of dark chocolate chips
    • 1 cup heavy cream
    • Pinch of salt
    • Splash of triple sec


    Optional Flavors

    Instead of triple sec, use a splash of vodka.  Then, spice it up with some flavor options.  You can even have a few different options for a taste test!

    • Add a 1/2 teaspoon each cinnamon and ancho chile pepper for a Mexican hot chocolate spin.
    • Add peppermint extract for peppermint chocolate fondue. Start with 1/4 teaspoon and increase according to taste.


    Dippers

    Strawberries, bananas, apples, Nilla Wafers, angel food cake, brownie bites, pretzels, biscotti, Nutter Butters, graham crackers, you name it!


    Dark Chocolate Tiramisu 

    Most people think of tiramisu as one of the fanciest holiday desserts, but it’s one of the easiest things to make. (The folks in Italy know what’s up.) This original New York Times recipe has been altered to suit Shari’s chocolate tooth — and it’s the best tiramisu we’ve ever had!


    Ingredients
    For the Cream
    • 4 large egg yolks, beaten
    • 1/2 cup granulated sugar, divided
    • 3/4 cup heavy cream
    • 8 ounces mascarpone (room temperature)


    For the Assembly
    • 1 3/4 cup strong coffee or espresso
    • 2 tablespoon rum
    • 2 tablespoon unsweetened cocoa powder
    • 24 ladyfingers (approximately 7-ounce package)
    • Dark chocolate shavings

    Chocolate Lovers Alert! Use some of the leftover chocolate fondue from above (as the middle layer). This is Shari’s addition, and it’s divine.


    Instructions
    • Beat the yolks with the sugar until the mixture is thickened and light lemon colored, then add the mascarpone and beat until thoroughly blended.
    • Whip the cream with a mixer or hand blender, and fold the cheese/egg mixture into it.
    • Combine the espresso and rum together in a small bowl.
    • Carefully dip the ladyfingers into the espresso/rum mixture and arrange half of them on a serving dish (approximately 9-inch-by-13-inch-by-2-inch). It’s just a quick dip and roll, not a full saturation.
    • Pour in half of the cheese/cream mixture and smooth over the top.
    • Pour in a thin layer of warmish chocolate fondue and smooth over the top.
    • Repeat with the other half of the ladyfingers and cheese/cream mixture, then finish with an even dusting of unsweetened cocoa powder (using a small sieve) and dark chocolate shavings.
    • Refrigerate overnight.


    Layered Cheesecake Pie

    Shari grew up eating this deliciously sweet dessert at every family holiday gathering. It’s like a fruit pie, cream pie, and a cheesecake combined into one layered pan. This recipe fills a 9-inch-by-13-inch baking dish.


    Ingredients
    Crust & Topping
    • 1 box graham cracker crumbs
    • 2 sticks butter, melted
    • 1/4 cup sugar


    Mix together to form the crust. Half of this mixture will be pressed into the bottom of the pan; half will be gently patted on top as the final layer. See assembly instructions below.


    Cheese Filling
    • 16 ounces cream cheese, softened
    • 3/4 cup sugar
    • 2 teaspoon vanilla
    • 2 envelopes of Dream Whip
    • 2 envelopes Knox gelatin
    • 1/2 cup cold water


    Instructions for Cheese Filling
    • Dissolve gelatin in water. 
    • Cream sugar, vanilla, and cream cheese together.  
    • Fold in dissolved gelatin.
    • Prepare two envelopes of Dream Whip according to package directions, then fold into cheese mixture.


    Fruit Filling

    2 cans of Comstock pie filling (blueberry, raspberry, cherry — choose your flavor). You can also make your own, but this is the OG from the Seventies.


    Assembly Instructions

    From the bottom up: Press half of the graham cracker mixture firmly into the bottom of the pan. Spread half of the cheese mixture evenly over the top. Then pour in all of the fruit filling and spread evenly then the other half of the cheese mixture. Top with the remaining half of the graham cracker crust, and gently pat down until smooth and covered.  Refrigerate several hours (or overnight) before serving.


    Holiday Desserts Sweeten the Season

    Spending the holidays in your RV never has to mean going without amazing desserts. These sure-to-please holiday desserts will help your family create new traditions. (And be warned: Once you bring one of these holiday desserts, you will will be expected to from here on.) If this is your first year, don’t be surprised if you impress your friends at the holiday potluck. If someone says, “You made this in that tiny kitchen!?!” then you can let them know: Oh yeah you did!


  • 10 Off-Grid Gifts for Boondockers

    10 Off-Grid Gifts for Boondockers

    Shopping for a minimalist is not easy. And boondockers definitely fall into that category. Sure, even while they get away from it all, they too want to enjoy their creature comforts. The things is that boondockers are very specific about what those comforts are. They only take what is essential. So, if you’re buying gifts for boondockers, they need to be things they can’t live without. (Yeah, no pressure.)

    Since 2012, we have boondocked all over the North American continent in our tiny vintage camper trailer and have tested our off-grid system to its max. We’ve done it in every season. And we’ve done it in every type of environment — from the deserts to the mountains to the coast.

    So, take our word for it when we tell you that these 10 gifts for boondockers are perfect for your favorite picky,  minimalist camper.


    A Robust Solar-Powered System

    The Ultimate Long-Term Cash Saver

    Where would we be without the energy we get from the sun? We roam nearly reservationless — camping in thousands of low-cost and free places, all completely off-grid. Our small and robust Renogy solar system powers our life and mobile business. So, we don’t have to rely on campground electrical outlets. This means that we can be more flexible, make fewer reservations, and boondock on public land. Giving the gift of solar also helps save money down the road. We have literally saved over $200,000 on camping fees since 2012. (You can also arrange a free solar consultation with us, as we are solar experts and offer free coaching services.) By giving solar power, you’re also giving one the best gifts for boondockers — the ability to live more with less.


    12-Volt Chest Fridge

    Extra Cold Food Storage — Without the Energy Drain

    Most small RVs have a tiny built-in fridge. But these 12-volt chest fridges can expand your cold food storage space significantly without draining the house batteries — especially if you set it up via a DC to DC charger and dedicated battery in your tow vehicle. We absolutely love our ICECO 12-volt fridge. It just sips at the energy, and it can last up to 10 days on a single charge (100Ah LiFePO4 battery).


    A Quality Foldable Grill

    For Camp Chefs Big on Taste and Short on Space

    Ever have a love affair with a piece of camping gear? When we saw the OTZI grill advertised online, we had to give it a try. Over the past decade, we have tried several other portable grills, all with varying degrees of frustration. Designed to pack away flat in a durable carrying case, and made of durable alloy, this innovative grill is perfect for those camp chefs who are big on taste but short on space! We make everything from pizza to paninis and brownies to burgers with this cool little wood (or charcoal) fired grill. 


    Better RV Levelers

    It Just Might Be a Marriage Saver

    See that red thing under our trailer’s tire?  This easy to use method to level the camper side-to-side has (literally) saved our marriage! It’s so simple, quick, and robust. Anderson levelers should be standard issue with every RV ever sold. They’ve done their job in thousands of not-so-level camping areas and still look like we bought them last week. Simply drive up until you’re level and then chalk the wheel. 


    Upgraded Trailer Tongue Lock

    Peace of Mind While Your Away

    Leaving an RV parked at a boondocking area while you go adventuring can be a little unsettling, especially if there aren’t any close by neighbors. While there are no guarantees in life, locking the tongue of your trailer with a more robust trailer tongue lock is worth the peace of mind. Our Reese Towpower Coupler Lock has been very effective and is easy to install. Honestly, this is one of those gifts for boondockers that hardly anyone thinks of, but will be really appreciated.


    5-Gallon Buckets + Lugaloo

    A Little DIY Business Startup

    These are helpful for all kinds of things, from collecting firewood to hauling water from a creek for washing or for filtering drinking water. Both are easily acquired from any hardware store. And if you need an easy off-grid toilet, they are compatible with the Luggable Loo seat cover/lid. We have a bucket dedicated to clean things (filtering water) and one dedicated to gross things (waste/trash). Add some bags, kitty litter, cedar mulch, whatever, and presto! An easy, cheap, no-fuss boondocking toilet that won’t fill up your black water tank!


    Gravity Water Filter

    On-Demand Fresh Water Replenishment

    A quality water filter is a must! Filtering wild water allows boondockers to use local creek or lake water as drinking water without having to boil. You can stay out on public land longer, without having to leave and find a water fill-up.  Our Sawyer water filter is small, easy to use and can be assembled in under a minute.


    Shower Tent + Electric Shower Sprayer

    Helping Conserve Your Water Supply 

    Being able to shower outside while boondocking allows you to use local creek and lake water then heat it up with the sun or on a propane stove. Doing this won’t drain your RV water tank, nor does it fill up your gray water tank. A good quality shower tent will last for years, and if you add an electric shower sprayer (with USB rechargeable pump) and a clean 5-gallon bucket to the mix, it’ll almost feel like home!  


    Outdoor Propane Stove

    Kicking the Cooking Outside

    Sometimes, it’s too hot to cook inside your RV. A small, lightweight propane stove can make it more pleasant and fun to cook outside. We’ve had a couple of different stoves over the years and have finally settled on a Primus Tupike. It’s built to last a lifetime rather than just a few camping seasons. It can be used with either the little green can or connected directly to an external propane tank. 


    12-Volt Air Compressor + Tire Repair Kit

    Your Back-on-the-Road Device

    When you are away from it all and get a flat tire, it can really put a damper on your plans. Having a handy 12-volt air compressor and a tire repair kit at the ready can have you back in business in no time. Also, if you lower your tire pressure to drive in the sand or soft off-road areas, a compressor is a must so that you can return your tires to their regular pressure when you hit the pavement again. Note:  If you repair a tire on your own, it’s always good to have a professional look at it upon return to civilization.  

    *****

    Even the most-dour minimalist will love any of these 10 gifts for boondockers. They will help keep your favorite boondockers happy, safe, and sound for many years to come — wherever they camp.

  • Yes! You Can RV with a Disability

    Yes! You Can RV with a Disability

    After spending several weeks with my elderly mother, we’ve been reminded how frustrating travel can be for anyone experiencing limited mobility. Navigating airports, parking lots, hotel rooms, public bathrooms, and restaurants is complicated for wheelchairs and walkers alike. What about RVing? Is it possible to RV with a disability? Or to have an RV designed to meet your specific mobility needs?

    These are the questions lots of people face. And, to be honest, for many people with mobility needs, the lure of the outdoors is has an even bigger pull. No one wants to be shut in. But in many cases, an RV is the ideal answer to travel more comfortably. To open up the outdoors. And to kick down old boundaries — all while exploring your bucket-list destinations!

    So, let’s talk about the all-umportant details of how to RV with a disability.


    What to Look for in an RV for People with Mobility Issues

    While most RVs on the market can be customized for someone with impaired mobility, here are some key features to consider if you have mobility issues or want to host someone who does.

    • Hydraulic ramps or a wheelchair lift
    • Lower control panels, and optional hand controls for driving instead of foot pedals (on self-driven RVs)
    • Open floorplans
    • Wide doorways
    • Height adjustable counters, lower sinks, and seating with adjustable headrests
    • Lower beds for easy transfer
    • Spacious bathrooms and roll-in showers that are equipped with seats, handheld shower hoses, and safety bars  


    Class A or Class C motorhomes with an open floorplan might be best. Quite simply, they offer more interior space for wheelchairs or walkers to move around. But, if you have a traveling companion who is able to detach/hook up a trailer, there are also a few models to consider. Manufacturers that offer accessibility features include: Newmar, Winnebago, Harbor View, and Keystone.

    Tip! When shopping for an RV to meet your mobility needs, be sure to bring along the special equipment you use regularly. (At the very minimum, have the dimensions.) You need to make sure the RV can accommodate your needs.


    Special Passes to Smooth Your Path

    National Passes

    The America the Beautiful Pass offers visitors free entrance into all national parks, recreation areas, Bureau of Land Management (BLM), and national forest areas which charge an entrance fee. While folks under the age of 62 pay $80 for this annual pass, folks with a disability (no age limit) can obtain this same pass (known as the Access Pass) for free.  There is no upfront charge. Plus, Access Pass cardholders and their traveling companions get half of camping fees in all federally-owned campgrounds! You can obtain an Access Pass online or in person at many NPS sites.


    State Park Passes

    As you might expect, some states are more tuned into RVers with disabilities than others. Even so,  it never hurts to explore if your state offers discounted passes. For instance, California State Parks offers a Disabled Discount Pass for a whopping $3.50. It also allows persons with permanent disabilities a 50 percent discount on vehicle day use, family camping, and boat use fees.  Washington offers residents who are legally blind, profoundly deaf, or who meet the disability definition by the SSA a free Disability Pass.  This pass offers free parking, watercraft launch, and trailer dump use as Washington State parks. On toipos of that there’s the 50 percent discount on nightly camping and moorage fees. There are plenty of other programs out there, too. So, check your state park’s website for details.


    Campground & Park Accessibility Features 

    Nearly every state park campground and all federally-owned campgrounds offer at least on to two sites specifically designed for folks with mobility challenges. Some county-owned parks and privately-owned parks are ADA-accessible as well. Typically, these campsites are paved, making wheelchair and walker access easier. They are also usually situated next to the bathroom and/or shower house with a paved path in between the campsite and the bathroom. Most bathrooms have at least one bathroom and/or shower stall designed to accommodate a wheelchair. Many modern campground bathrooms offer single-use bathroom/shower combinations which are fully-equipped for disabled access. (But, if you’re planning a trip, it’s always good to call ahead and ask.)

    In addition to campsites and bathrooms, many state parks and national parks offer special accommodations for disabled visitors. Some offer paved trails or boardwalks to popular areas or viewpoints. Others offer special equipment such as all-terrain wheelchairs that can be used on many hiking trails, sand dunes, and beaches. Some chairs are even self-driven and motorized like the ones offered by Minnesota State Parks, while Florida State Parks offer specialized wheelchairs that provide visitors assistance with getting into the ocean. 


    Additional Assistance

    National Park Service visitor centers are designed to accommodate wheelchairs and walkers. (And all of the NPS films offer subtitles for hearing impaired folks.) All national parks that offer a shuttle bus service have wheelchair ramps and designated wheelchair space onboard. Many ranger-led programs can accommodate wheelchairs as well. If you are interested in a tour offered by one of the park’s concessionaires, ask if they can accommodate your mobility needs.  

    When planning your next national park road trip, check the “Plan Your Visit” tab on each park’s website to find information about “Accessibility” at that specific park. Check out Reader’s Digest’s recent article highlighting the eight most accessible U.S. national parks!

    Finally, for senior travelers or those who need to recover from surgery or a serious medical condition, the Escapees C.A.R.E. program is like no other. Exceptionally, it allows RVers to remain in their rolling home in an assisted-living facility type of arrangement in Livingston, Texas.


    The Secret to RV with a Disability

    Regardless of your mobility challenges, take courage: There is an RV and campground that can accommodate your needs! Don’t let your disability hold you back from your traveling and camping dreams. The secret to RV with a disability is one part courage and one part planning. With the right amount of each, you’ll be blown away by the adventures you can access. So, get out there and enjoy the scenic beauty and fascinating history that North America offers!

  • Great Smoky Mountains National Park: RV Camping and Travel Guide

    Great Smoky Mountains National Park: RV Camping and Travel Guide

    Quite simply, the Great Smoky Mountains National Park is a park of superlatives. It is THE most visited park in the nation with over 36,000 visitors per day. For perspective, its 13.3 million visitors, from last year alone, is greater than the total annual visitations to Yosemite, Yellowstone, and Grand Canyon combined!

    So, why do countless daily visitors flock to this iconic park? What do millions expect to find in a park that straddles the Appalachian ridge lines between North Carolina and Tennessee? As you might expect, it’s a combination of many things, from its beauty and sweeping mountain views to its numerous hiking opportunities. The park itself covers 519,680 acres, making it one of the largest protected, natural areas in the East.

    In terms of wildlife, the Great Smoky Mountains National Park is the most biodiverse park in the U.S. It’s geology is equally fascinating. Park elevations range from 875 feet at Abrams Creek to 6,643 feet at Kuwohi (formerly Clingmans Dome), which why it offers the greatest number of life zones. Sixteen mountain peaks go above 6,000 feet. While not the tallest, they are the oldest in North America. Some outcroppings contain rocks formed during the Precambrian era — over 1.1 billion years ago!  Small wonder it is an International Biosphere Reserve and World Heritage Site.

    But best of all? It’s infinitely accessible by RV. Let’s talk about that.


    Scenic Drives 

    Nearly 400 miles of roads lead from mountain streams, waterfalls, and historic buildings to panoramic views of hardwood forests stretching as far as your eyes can see.  

    Drive each of the five distinct park areas to experience the diversity of the landscape. Those fives areas in Great Smoky Mountain National Park are: Cades Cove, Cataloochee & Balsam Mountain, Foothills Parkway East, Roaring Fork, and Kuwohi & Newfound Gap. 

    With all of these driving options and park visitors, staying safe requires extra vigilance especially with a longer RV. The winding mountain roads, wildlife, other visitors, and motorcyclists hugging the yellow line can all cause a potential collision and injury — so go slow and leave the sight-seeing to your passengers.

    Note: Most roads are paved and the gravel roads are typically maintained in suitable condition for standard passenger cars.


    Must-Hike Trails 

    With 150 trails totaling 848 miles within the park, including 74 miles of the famous Appalachian Trail, there are options for every skill level. A quick stop at one of the four visitor centers can give you some great trail information. Here are a few popular options.

    • Alum Cave Trail to Mount LeConte. This challenging 11-mile trail leads hikers through dense forest and up over 3,000 feet to spectacular summits. Difficulty Level: Hard
    • Charlie’s Bunion via Appalachian Mountain Trail. This peculiarly named 8-mile trail winds along the summit ridge line, highlighting not only the best of the Appalachians, but also their sense of humor.  It’s 1,800 feet of up and at ‘em! Difficulty Level: Moderate
    • Laurel Falls Trail. This 2.4-mile trail leads to a classic Appalachian waterfall, gaining only 403 feet. Difficulty Level: Easy


    Here’s a fun fact for you: The park offers hiking mileage pins to reward folks who explore the park on foot! Stop by a visitor center to purchase a pocket-sized booklet to record your mileage. Pins and stickers awarded to both individuals (100-plus miles) and families (10-plus miles) who have tracked their hiking miles in the park.


    RV Parks & Campgrounds 

    Nine of the 10 campgrounds within the Great Smoky Mountains National Park offer standard RV/tent sites. Smokemont Campground offers 44 sites specifically designated for RVs, but no hook-ups. Look Rock offers four sites designated for large RVs with water and electric hook-ups, plus six additional sites with hook-ups for either smaller RVs or tent users.  If you have a large RV and want hook-ups, you will need to plan six months out to reserve one of the four spots!  

    Dump stations with potable water are located at Cades Cove, Cosby, Deep Creek, Look Rock, and Smokemont campgrounds. A dump station is also available across the road from the Sugarlands Visitor Center, approximately six miles from Elkmont Campground.

    Communities in both North Carolina and Tennessee surrounding the park offer services and amenities that are not available within, including private RV parks, restaurants, gas stations, grocery stores, and more. For boondocking options, the park is surrounded by the Nantahala, Pisgah, and Cherokee National Forests in North Carolina and Tennessee.


    Seasonal Advice 

    Great Smoky Mountains National Park busiest months are June, July, and October. (With May, August, and September being close seconds.) A visit during the fall can be a very special time to be there, but be prepared to fight for parking spaces and campsites.Reservations are key! To avoid crowds, consider planning your trip during the shoulder season.

    Topography can drastically affect local weather conditions. Depending on the time of year and the elevation, you could experience three seasons in a single day.


    Great Smoky Mountains National Park Weather

    • Temperatures can vary 10-20 degrees between the mountain base and its peak.
    • Clear skies near the base do not guarantee equally pleasant weather at higher elevations.
    • Rainfall averages 55 inches annually in the lowlands to 85 inches annually at Kuwohi, the highest point in the park.
    • Trip planning and weather-appropriate clothing will help ensure an enjoyable visit during any season!


    Notes for Each of the Four Seasons

    • Spring. March through May brings unpredictable weather. Changes occur rapidly. Sunny skies can yield to snow flurries in a few hours.
    • Summer. June through August means heat, haze, and humidity. Afternoon showers and thunderstorms are common.
    • Autumn. September through mid-November welcomes cooler weather that signals the onset of the fall color season. Warm days alternate with cool nights.  *Note: This is also hurricane season in the Southeast.
    • Winter. Mid-November through February is generally moderate, but weather extremes do occur, especially at higher elevations. It is not unusual to have warm temperatures in the valleys and snow on the summits.


    Insider Tips!

    Popular Programs, Tours, & Festivals

    Ranger-Led Tours. From hikes and walks to lectures and programs on natural and cultural history, these programs bring the park to life. Join Rangers to search for salamanders and aquatic insects. Go on wildflower, fern, or tree identification walks. And even visit the air quality monitoring station to learn of the dangers that are impacting this park.

    Historic Buildings & Areas. Visit the five historic areas with nearly 100 structures preserving Southern Appalachian heritage, as well as 160 family cemeteries with nearly 5,000 gravestones. Some are even listed in the National Register of Historic Places.

    Annual Programs. The Music in the Mountains festival (July 10 – August 3, 2025) shares the rich musical traditions of the Southern Appalachians. The Smokies Harvest Celebration (mid-September through late November) offers traditional autumn activities that were an important part of rural life including interactive demonstrations such as sorghum-processing, blacksmithing, apple cider pressing, broom-making, and woodworking.  And, the Festival of Christmas Past celebration (December) offers old-time music, harp singing, storytelling, children’s activities, and craft demonstrations such as weaving, spinning, quilting, and basket making.


    Special Travel Note for 2024-2026

    Great Smoky Mountains National Park was hit hard by Hurricane Helene in late September 2024, temporarily closing numerous roads, trails, and campgrounds. While the park staff and volunteers are working hard to make necessary repairs, be sure to check the status of the park’s roads, facilities, and trails before you go. Few are able to see Great Smoky Mountains National Park in a single visit, so choose what you will explore on your first visit. Then leave plenty for future visits down the road. If this is your first time visiting this iconic park, we recommend planning to stay at least a week.

  • How to Explore More — While Saving RV Mileage

    How to Explore More — While Saving RV Mileage

    As full-time RVers, folks we meet often make assumptions about our lifestyle. Usually, the first assumption is that we are always driving. But realistically, if they knew how many miles do we drove annually, the answer would probably surprise them. Fact is: we’ve learned the fine art of saving RV mileage.

    Astoundingly, the best way to save money on fuel for your RV is to simply drive less. So, just because you have an RV doesn’t mean that you have to visit all the iconic western national parks in one season. What it does mean is that you have an opportunity to do something that most people don’t: Really explore the place where you’re at. You can go deep in a state or region of North America that fascinates you. Or you could even start in your own backyard.

    “A [person] on foot, on horseback or on a bicycle will see more, feel more, enjoy more in one mile than the motorized tourists can in a hundred miles.” – Edward Abbey, Desert Solitaire

    Becoming an informed traveler — rather than just a tourist — takes time. We learned to slow our pace down and start exploring. We wanted to experience our country, rather than just see it. Anyone can read about the geology, geography, and anthropology of an area. But until you experience it firsthand, you won’t truly appreciate the uniqueness of any given place.


    Where to Start: America’s Best Backyards

    Taking the time to explore an area by bicycle, on foot, or with kayaks will allow for even deeper exploration. Eschewing interstates to drive down backroads always enables you to see the real North America. Just select Avoid Highways on Google Maps and discover some amazing places to explore nearby without marathon driving days. Or, better yet, simply get lost. (Of course, you can always use your GPS to get you back on track.)

    Sure: The immenseness of North America can be overwhelming. It’s a massive continent, so where do you begin? Start with what intrigues you, what you find fascinating. 

    Below are a couple of maps that will help you fine tune some deep exploration as they divide the U.S. and Canada into “cultural” areas — as well as six of our favorite areas that we’ve explored.


    Into the Eastern Sierras

    We spent the better part of three months exploring California’s Eastern Sierra Mountains, and never got bored! With tens of thousands of acres of public land, hundreds of lakes and hiking trails, several hidden hot springs, and so much to explore, we simply weren’t ready to leave. But the hot summer weather encouraged us to head north and coastal.


    Utah’s Five National Parks

    Utah hosts a whopping five national parks: Arches, Bryce, Capitol Reef, Canyonlands, and Zion. In addition to these gorgeous red rock parks, there are 6 national monuments (including one of the largest caches of dinosaur bones found in one place), 6 national historical trails and parks, and 1 massive national recreation area.  And, that’s just NPS land in the state of Utah.  Beyond these national public lands, the state is loaded with state parks, alpine peaks, lakes, and major rivers. You could spend most of your life here and never see it all. (And if you have kids, these parks will blow their mind.)


    The Four Deserts of North America

    Some RVers flock to the southwest in the wintertime.  We’ve spent several winter seasons deeply exploring the unique deserts of New Mexico, Arizona, California, and Nevada. Stay warmer and dive deep into the backroads and hidden gems of all four North American deserts – you’ll be delighted with some stunning sunsets, fascinating flora and fauna, and fun adventures!


    Doing Alaska

    Some Alaska-bound RVers have attempted to “do Alaska” in three to four weeks and then had the audacity to say, “We don’t really see the big deal.” We spent five months there. (Which still wasn’t enough to do it justice.) And in those months, we traveled into Canada as well — through British Columbia, Northwest Territories, Yukon Territory, and Alaska. The two of us experienced more than we ever thought possible, but only traveled 8,000 miles. We hiked remote national parks. We biked. And we kayaked in every major region, all while keeping up with our mobile business.  


    Maine’s Vacationland

    Maine, what can we say? You’re an old favorite that is always hard to leave! This part of the Northeast isn’t quite New England. As the map above suggests, it’s a region in and off itself with deep Acadian roots. Really, it feels like the South of the North. Many flock to the coast for lobster in the summer, but the central part of the state welcomes you with numerous lakes and rivers which spring from the snow runoff of the Appalachian Mountains. We’ve spent entire summers and autumns exploring this one state. (Always good for saving RV mileage.) And there’s always more to do the next time we return.


    Circling the Great Lakes

    The Great Lakes region offers some spectacular and serene scenery as well as opportunities for every water sport you can imagine!  Make it a goal to explore all five of the Great Lakes. Or enjoy the Lake Superior Circle Tour and include Ontario, Canada into part of your travels.  


    Secrets of Saving RV Mileage

    How much do we drive annually as full-time RVers? On average we drive around 16,000 miles per year in one vehicle. By comparison, most American couples drive about 30,000 between two vehicles.  It’s amazing, but true, that everyday short trips to work, the grocery store, and swim practice can rack up more miles than regional RV travel. You’ll save a bunch of money (and time), and be better for it!

    *****

    So, now you too figured out the art of saving RV mileage. (Nice!) Well, there are even more ways to save. Explore more in our Cutting RV Travel Costs 101 series.

    The First Step to Find Your Dream RV (Part 1)
    A Few RV Secrets to Help You Save on Camping Fees (Part 2)
    Boondocking Essentials for RV Newbies (Part 3)

    RV Kitchen Must-Haves: How to Make Memorable Meals That Save Cash (Part 4, Coming Soon)
    Going Deep into Your Backyard (Part 5, Coming Soon)

  • How to Treat River Water at Your Campsite

    How to Treat River Water at Your Campsite

    Our favorite boondocking campsite is just off the road among the trees with a little babbling brook running alongside. We simply step out of our door high up in the Jefferson National Forest, and dip our kettle into the clear running stream for our morning’s coffee. But is that safe? It’s a common question RVers and campers have. Because the truth is that not everyone knows how to treat river water. 

    While we all love getting outdoors, the reality is that our supplies dictate our stay in any given play. And fresh water is near the top of any supply list. How much you have will ultimately limit your stay at any beautiful place — no matter your RV’s holding tank capacity. Since most American use an average of 82 gallons of freshwater per day, business as usual ain’t gonna cut it!

    Of course, conserving water helps. But having ways to treat river water and other sources to replenish you freshwater supply? That will enable you to enjoy your location far longer. 


    Why You Need to Treat River Water?

     We’re visual creatures, so don’t feel bad if you’ve looked a stream, lake, or pond then said (or thought), “This water looks so clear … I wonder if I could drink it.” Deep down though, you probably know you shouldn’t go for the chug-a-lug. Any freshwater source found in the wild is also used by wildlife. Mammals, including people, can carry bacteria in their GI tract that can make us sick. Since their waste finds its way into the water source,  single-celled organisms — like Giardia — and viruses can be found in even the clearest sources. 

    Which means you to treat it before you drink it. And if you don’t know how, you can learn any one of the following ways to naturally replenish your freshwater supply.


    Ways to Treat Freshwater

    Boil It

    How it works: Most folks know this one. And it works. Heat will kill any bacteria, protozoa, or viruses in the water. Just ensure that it comes to a rolling boil. Any heat source can do the job, stove, campfire, or even a candle under a tin can.  

    • Upside: lightweight, mobile and a  two-in-one for hot drinks. 
    • Downside: requires time, fuel, and won’t remove sediment.


    Treat It With Chemicals

    How it works: Iodine and chlorine tablets or drops can treat water while camping or at home. So long as your chemical supply is strong, you can use this method.

    • Upside: lightweight, easy to measure in liter bottles. 
    • Downside: needs time to dissolve in the water, and diffuse throughout the liquid to be effective (usually 20-30 minutes); also, it can leave a bad taste.


    Use a Filter

    How it works: Filters can separate out most large, single-celled organisms, bacteria and protozoa — in addition to sediment. (The two previous methods don’t do that.) That makes filters a great way to get clean drinking water from a muddy source. Filters with an iodine screen will also kill the viruses that might pass through the filtration process.

    • Upside: the best tasting option to remove harmful microbes and sediment.
    • Downside: can be heavy, easily clogged, and difficult or time consuming for a larger group.


    Employ Ultraviolet Light

    How it works: First off, this is not just leaving the water in the sun. You’ll need a lightweight UV device that emits a light which you immerse into your water container for a specific length of time. The UV light kills the bacteria and viruses. 

    • Upside: easy to use, simple, and straightforward.
    • Downside: can be expensive, requires batteries, and won’t remove sediment. 


    Let Gravity Do the Work

    How it works: When tent camping in the backcountry or in our RV, we most often use a simple in-line filter for treating water. We even made a gravity filter with the following that can do the work while we do something else.  

    • 2 containers to hold water
    • 1 inline filter
    • 2 lengths of flexible tubing 


    First, fill the first container with untreated water. Place it higher (rock, tree stump, picnic table) than the second, which will collect the treated water. Place the input tubing into the untreated water and create some suction on the output. Once the water is flowing, place the output tubing into the clean second container.

    It helps if both tubes are already full of potable water to start the flow. This will create a siphon from the dirty water container which will flow through the filter and leave you with potable water on the other end, as described in this video


    Think About Site Selection

    Move up the watershed whenever possible. This makes sense, right? The closer that you are to the source the more likely that the water will  be cleaner and have less sediment. As an example, if you’re near a stream, see if there is a creek close by flowing into it? Likewise, if you’re on a lake, is there a stream coming into it? You get the idea. Point is that you want to get as close to the source as makes sense for your situation. Doing so will likely give you water that’s at a better starting point for purification.


    Tip for Sediment Removal

    Use a bucket to collect water and let it settle out overnight. Gently skim the cleaner water off the top. Try pouring the water through a bandanna, t-shirt, or clean pillowcase. To get a little more serious with seriously silty, muddy water, you can use a chemical water kit like Water Wizard that uses a polyaluminum-chloride solution, which binds with the sediment and helps it fall to the bottom. Once the sediment falls, the water above is more easily filtered or treated for drinking. We used this during our Grand Canyon rafting adventure, and it worked spectacularly!


    When Do I Not Need to Treat Water?

    Generally, if you’re washing dishes, yourself, or clothing, you don’t need to purify the water. Expecially if your water source is generally clean and not contaminated from recent flooding or heavy rain.


    *****

    We hope these tips allow you to stay for longer at your next boondocking site, and keep you camping instead of going in search of an RV refill station.Of course, which method is best for you depends upon how you’re camping and what you want to carry in your RV.  Personally, we like to bring iodine tabs in our small first aid kit that we take everywhere.  The tiny bottle will last for years as a backup method, even if we bring along a pump filter. But that’s what works for us. Your preferred method to treat river water may be different. 

  • Easy Thanksgiving Recipes for the Modern Pilgrim

    Easy Thanksgiving Recipes for the Modern Pilgrim

    RVers by the millions roll into campgrounds across the United States for Thanksgiving week. Those who have full RV kitchens (and love to cook) often go to the effort to make the whole shabang. At the same time, just as many others simplify the process, cook over a fire, and employ fun and delicious recipes which involve the whole family. No matter which way you choose to roll, cooking some or all of the big meal outside will be memorable. But having some road-friendly, easy Thanksgiving recipes is the real key.

    So, with Thanksgiving just a few weeks away, let’s get started! From meal prep and main dishes to sides and deserts, these easy Thanksgiving recipes are made for the modern pilgrim.


    Making Holiday Meal Prep Easy

    For most families — both at home and on the road — Thanksgiving is the biggest meal of the year. Which means you need to make things easy on yourself. In other words, don’t start late! Meal prep is already a big part mastering the RV life, but it’s critical for a big meal. Many of these easy Thanksgiving recipes can be made up to two days prior. That prep work will make the holiday meal much less intimidating to prepare within a small space. Trust us: Getting ahead of the big day is something you’ll certainly be thankful for.


    Indoor and Outdoor Kitchen Prep

    • If you don’t have a lot of space, split the meal prep between the indoor and outdoor kitchen (grill or propane stove).
    • Clean out your RV fridge so that you have plenty of space.
    • Have several cutting boards and knives at the ready, and a few extra saute and sauce pans that can be used inside or over a fire (cast iron or Dutch ovens are perfect).  
    • Don’t hesitate to decorate the picnic table, but leave the fancy stuff at home.  A holiday-themed tablecloth along with a few candles and small gourds are a great start. Then find some pine cones and greenery for some natural flair.


    Roles and Responsibilities

    • If you are just a small group, downsize your recipes. If you are traveling as just a couple or by yourself, don’t be shy. Round up some nearby campers for a Holiday Potluck!
    • Involve as many people as you can and let them choose their recipe. Many can be made by food motivated kids with some basic cooking skills.
    • Thanksgiving on paper plates just won’t cut it. But everyone knows that all those dirty dishes will make a lot of work on the backend. So, get ahead of it. Use a three-wash bin (hot soapy water, warm rinse water, cold bleach water) method will make washing up a cinch.
    • Don’t forget to Leave No Trace. Eat well, but never feed wildlife.


    A Road-Friendly Main Dish

    Holiday Wreath

    Of all these easy Thanksgiving recipes, this one just may become a family favorite. And that includes any chef that doesn’t have the time, energy, or space to cook a turkey. Inspired by a recipe in the Pampered Chef catalog from Fall/Winter 2000. We used to make this only in a traditional oven, then tried it in a Dutch oven over a campfire while camping in Yosemite one Thanksgiving.  So much fun!

    It’s a vegetarian recipe, but the plant-based meat can be replaced with cooked turkey or sausage. The filling combines many of the flavors of Thanksgiving into one dish and can be made one to two days ahead. Then it’s just a matter of laying out the crescent rolls, adding the filling, and baking — either in the RV oven or over a campfire in a Dutch oven. Best served piping hot with mushroom gravy (see below)!


    Ingredients

    Combine the following ingredients the night before and refrigerate overnight.

    • 1/2 cup chopped celery
    • 3/4 cup dried cranberries or tart cherries
    • 8 ounces Swiss cheese
    • 2 cup chopped pecans (toasted if you want)
    • 1 medium sweet onion, finely chopped and sautéed
    • 8 veggie sausage patties, cooked and crumbled
    • 3/4 cup mayonnaise (or vegan cashew aioli)
    • 2-3 tablespoon honey Dijon
    • 1 teaspoon cracked pepper
    • Salt to taste


    The following ingredients will be used when making the wreath the next day.

    • 4 8-ounce packages of refrigerated crescent rolls (or make your own)
    • Whites of 1 egg, beaten
    Instructions
    • Lay out crescent rolls on a piece of parchment paper over a cutting board, just larger than your Dutch oven.  
    • Carefully spoon pre-made mixture onto dough and fold crescent rolls over mixture to create the wreath. 
    • Transfer the wreath with parchment paper into a large Dutch oven. Brush top with egg white.
    • Bake over a campfire or grill for about 20 to 25 minutes (or until crescent rolls are golden brown and the inside mixture is bubbly). Make sure the bottom doesn’t get too hot, and use coals from the fire to cook from the top down.


    Adding Portobello Mushroom Gravy

    What’s Thanksgiving without gravy? How about a simple portobello mushroom version? Purchase your favorite gravy mix and follow package directions. Saute a couple large handfuls of sliced mushrooms and one large Spanish onion in two to three tablespoons of olive oil. Add some fresh (or dried) sage, garlic powder, and black pepper to taste. Stir until thickened. 


    Sides That Steal the Show! 

    Cook These Easy Thanksgiving Recipes on the Day Itself

    • Fire Roasted Sweet Potatoes. If you want to try something different, wrap some sweet potatoes in foil, poke with a fork, and bake them in the fire pit or on the grill. Serve them like a baked potato, drizzled with honey butter and spiced pecans. The sweet and savory mix is divine!  
    • Garlic Mashed Potatoes. If you must have mashed potatoes, skip the mess of peeling, boiling, and mashing potatoes (not to mention the clean-up). Start with your favorite dehydrated mashed potatoes, add some roasted garlic, fresh butter, and sprinkle the top with some fresh parsley.  Unless you’ve invited Rachel Ray or your fussy Aunt Karen to join you, folks will think it’s scratch-made.  
    • Cornbread Stuffing. If you aren’t making a turkey, no worries. Use your favorite boxed stuffing mix and add some additional spices, walnuts, chopped celery, dried cranberries, and onions, etc.  These additions will turn a boring stuffing mix into something extra special.


    • Parmesan Crusted Roasted Brussel Sprouts. We both hated them as kids, but now crave them anytime those little green balls of fun are in season. This delicious recipe adds some Panko bread crumbs, chopped garlic, and parmesan for extra crunch and flavor. You can make these on the stovetop, over the grill, or in the oven if you have one.
      Inspired by a recipe from RecipeTin Eats.  We spiced this recipe up a bit with red pepper flakes and roasted the sprouts in a Dutch oven on the stove top. This allows you to use a two-burner stove, grill, or campfire instead of an oven.

      Ingredients
      • 1 pound brussels sprouts (trimmed and halved)
      • 2 tablespoons extra virgin olive oil
      • 2 garlic cloves (minced)
      • 1/4 teaspoon salt
      • 1/4 teaspoon black pepper
      • 1/4 teaspoon red pepper flakes
      • 1/3 cup grated parmesan 
      • 1/3 cup panko breadcrumbs
      Instructions
      • Place prepared sprouts in a bowl and coat with oil, toss lightly.
      • Sprinkle with garlic, salt, pepper, parmesan, and breadcrumbs, toss to coat.
      • Heat cast iron pan on stove top and spread sprouts out evenly in the pan.
      • Roast with lid on for about 10 minutes, stirring occasionally to prevent sticking and make sure all sides are browned. Turn heat down a bit and roast for another 8-10 minutes, or until a fork slides in easily.
      • Serve warm and be sure to scrape any loose parmesan breadcrumbs off the pan and sprinkle over the top!  That’s the best part. 


    Make These Sides 1-2 Day Prior

    • Roasted Brussel Sprout Salad. This one is simple and it’s sure to turn Brussels sprouts haters into Brussels sprouts lovers.  Roast the sprouts (described above) and all them to cool. Follow this recipe (one of the best easy Thanksgiving recipes around) to turn them into a delightful salad that can be made the day before. This simple salad is full of crunch, flavor, and texture. It’s sure to turn Brussels sprouts haters into Brussels sprouts lovers. This delightful salad can be made the day before the holiday.
      Ingredients
      • 1 pound of Brussel Sprouts (follow recipe above)
      • 20 grape tomatoes, sliced in half
      • 1/2 tub of goat cheese OR feta cheese
      • 1/4 cup of dried cranberries
      • 1/4 cup of almonds, walnut, OR pecans, chopped
      • Balsamic vinaigrette, to taste
      Instructions
      • Use the recipe above to roast the Brussels sprouts, then allow to cool completely in the fridge, or covered outside on the picnic table.
      • Once cooled, mix in the rest of the rest of the ingredients, toss with your favorite balsamic vinaigrette and serve!


    • Fresh Cranberry Sauce. If you want to keep it traditional, using fresh cranberries couldn’t be easier, and it’s worth the extra few minutes. Bring a small bag of cranberries and 1 cup of water to a boil, then add some raw agave syrup or sugar to taste. 
    • Apple, Cranberry, and Pecan Waldorf Salad. This is a twist on an old standby. Mix equal parts mayo and Greek yogurt, add a couple chopped apples, ½ cup dried cranberries, and ½ chopped pecans, and some lemon juice to taste.  
    • Cranberry Jalapeno Chutney. Warning, this recipe is addicting! It can be served as an appetizer, could be a side dish with fresh bread. Or if you aren’t careful, it could become your whole meal.
      Inspired by a recipe from Mel’s Kitchen Gourmet. We prefer more spice and tartness than Mel’s recipe, so we doubled the jalapeno and significantly reduced the sugar. For camping, an immersion blender takes up so much less space, is much easier to clean, and works just as well.  If you use a Pyrex bowl for blending, just put the lid on, and store it in the same container you blended it in. Super easy clean up!

      Ingredients
      • 12 ounces fresh cranberries
      • 3 green onions, chopped
      • 1/4 cup fresh cilantro, chopped
      • 1 large jalapeno pepper, seeded and diced
      • 1/4 cup sugar, more if you like it sweeter
      • 1/2 teaspoon ground cumin
      • 2 tablespoons lime juice
      • 1/4 teaspoon salt
      • 1 block of light cream cheese, softened
      • Serve with rice crackers, toasted bread (pumpernickel or sourdough), and/or sliced apples.
      Instructions
      • Coarsely chop cranberries with an immersion blender. Add the green onions, cilantro, jalapeno, sugar, cumin, lime juice, and salt. Blend until the ingredients are well combined and finely chopped. 
      • Cover and refrigerate for at least four hours.
      • Spread the cream cheese in an even layer on a serving plate or pie dish and top with the cranberry mixture.


    A Wow Dessert (That You Don’t Have to Bake)

    Pumpkin Latte Cheesecake

    While you could simply purchase a pumpkin pie and no one will bat an eye (especially if you add freshly whipped cream with a little bourbon and vanilla), here is one of the best easy Thanksgiving recipes around: pumpkin latte cheesecake. This homemade pumpkin dessert is fun and easy to make while camping.   

    For those who don’t love pumpkin pie, this recipe is next level… and oh-so-easy because no baking is required! So simple, even the kids can make it on their own. Inspired by a recipe from Kraft-Heintz, we added more spice for more pumpkin pie flavor, less sugar, replaced the standard graham cracker crust with a pecan crust, and added some bourbon vanilla to the Cool Whip topping. These small changes made a BIG difference with both flavor and texture!

    Ingredients
    • 8 oounces cream cheese, softened
    • 1 cup canned pumpkin
    • 1/4 cup sugar, more if you like it sweeter
    • 1 teaspoon pumpkin pie spice
    • 1 teaspoon bourbon vanilla
    • 8 ounces tub Cool Whip, thawed
    • 1 premade pecan crust
    Instructions
    • Beat cream cheese, pumpkin, sugar, and pumpkin pie spice with mixer until blended. Gently stir in 2-1/2 cups Cool Whip.
    • Spoon into pecan crust and level out mixture.
    • Refrigerate for 3 hours or until firm.
    • Mix 1 tsp bourbon vanilla with remaining Cool Whip, and refrigerate.
    • Spread remaining Cool Whip over top of pie and sprinkle with additional pumpkin pie spice for decoration.


    *****


    With some prior planning and some small recipe tweaks, preparing a full Thanksgiving spread at your campsite is not only possible, it may become an annual tradition! Just beware: Afterwards, everyone may be coming to you for easy Thanksgiving recipes!

    For more fun camp cooking techniques and recipes, check out our Gourmet Camp Cooking & Baking Seminar. We wish you a fantastic holiday season ahead!