Author: Freedom in a Can

  • Everything You Need to Work Remotely from Your RV

    Everything You Need to Work Remotely from Your RV

    When we first hit the road in 2012, we met just a handful of folks working online jobs from their RVs. Eight years later, as a result of COVID, it seemed that anyone who had dreamed of working remotely bought an RV and became our neighbors. While the pendulum has swung back in the other direction a bit, there are still several million people who work remotely. Not all of those work remotely from an RV. But all of them have either kept their existing online job, found one,  or — like us —created their own mobile business.

    If you’re thinking about working remotely from your RV, we have some wisdom to share. From the equipment you’ll need to how to set up yourself as a business entity, we’ll cover that all here.


    Mobile & Online Jobs

    Do you already have a job that allows you to work from anywhere with an internet connection? With reliable Fi-Fi and a robust solar-powered system, you’re good to go! If you are seeking to do online work while traveling, no one knows this type of work better than the folks at Escapees RV Club. It’s who they are.  

    At the beginning of your remote job hunt? Looking in the right places will be essential. While there are thousands of remote work opportunities listed on various websites, be sure to check out the RVer Job Exchange. We also recommend joining the Xscapers Community if you plan to move around the country. 


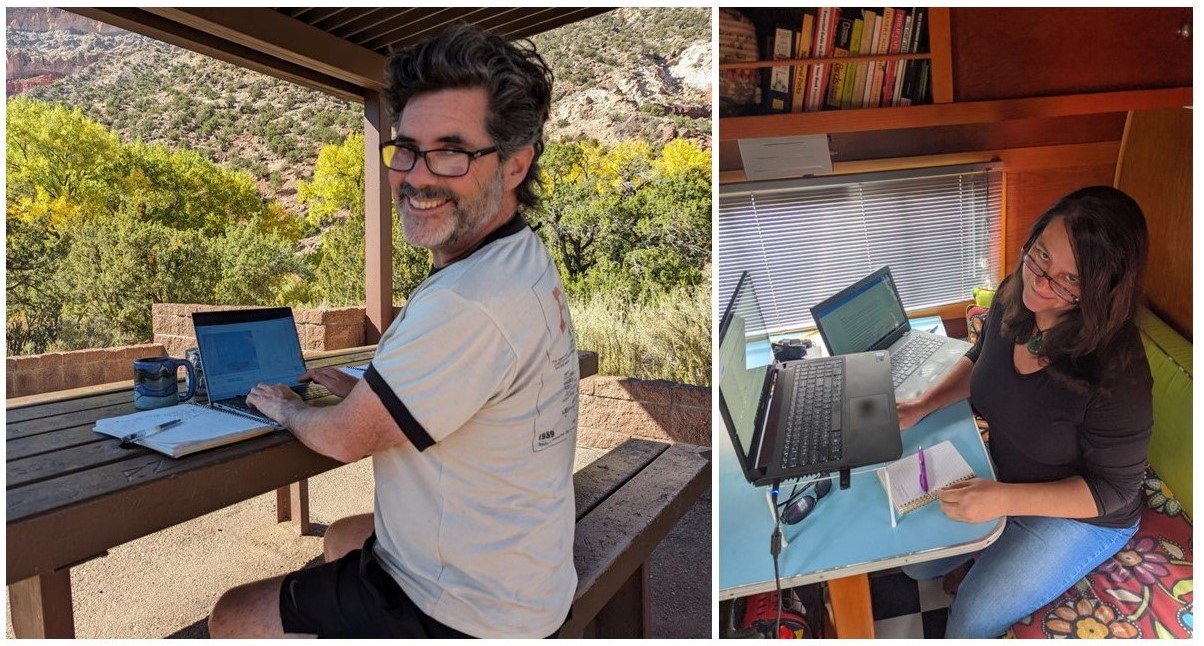
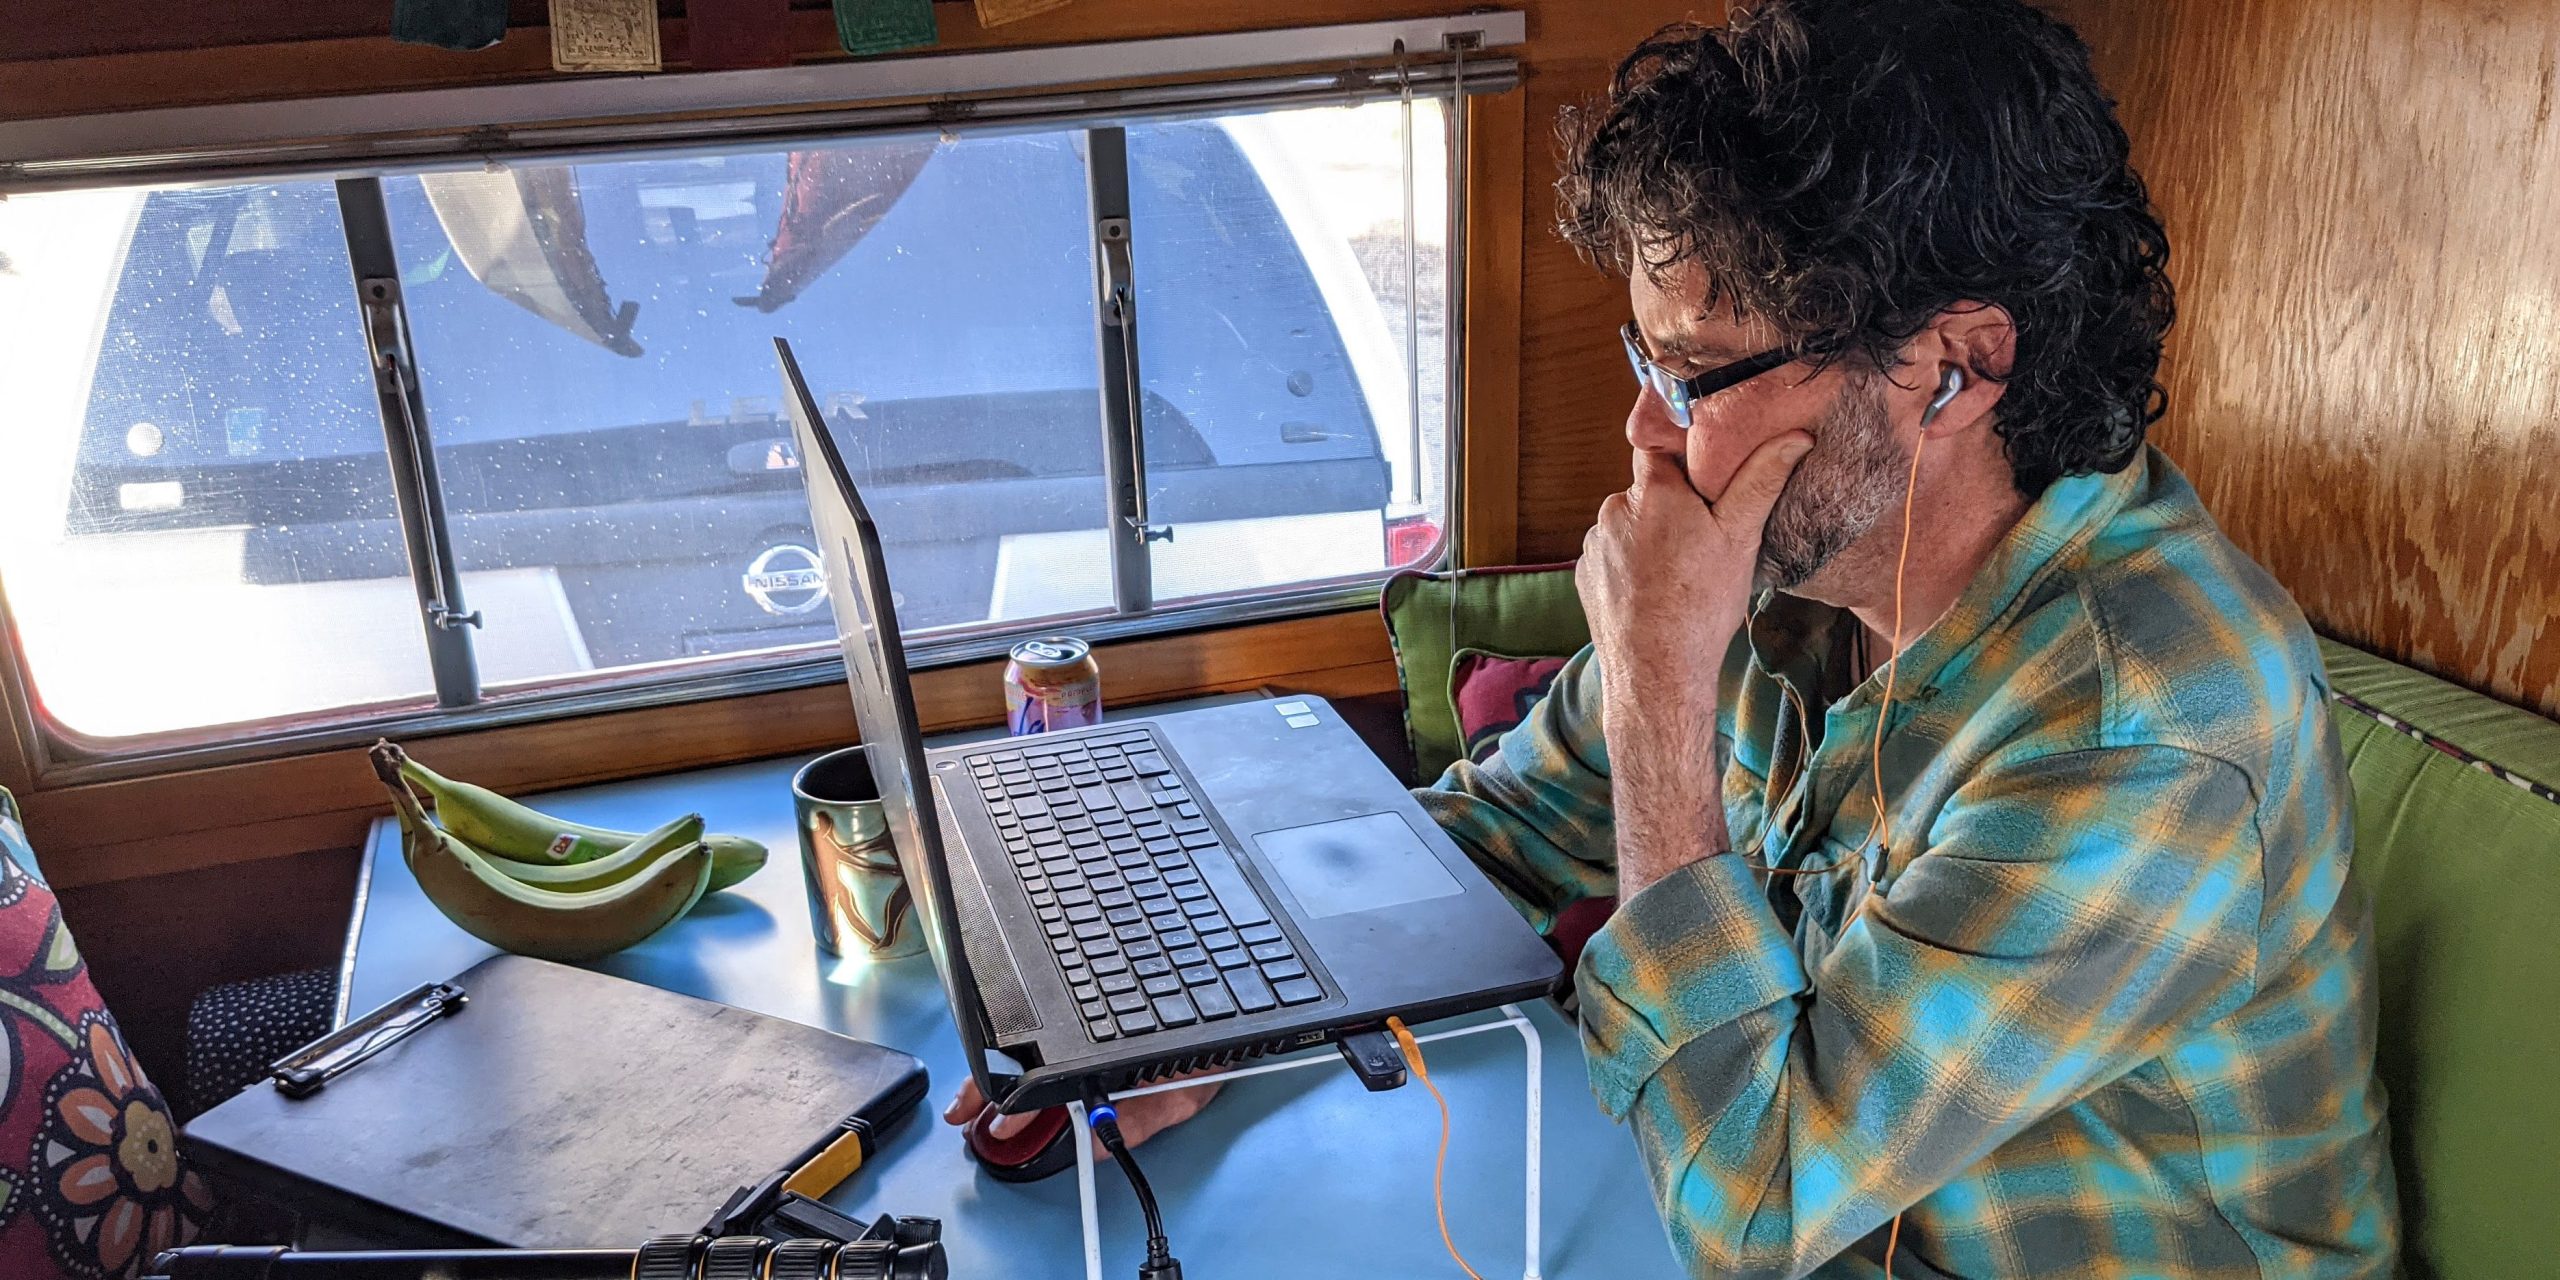
    Equipment to Work Remotely from Your RV

    Does your RV or van have a usable work space?  For us, having a table and a place to store our laptops and other business equipment when not in use is all we need. Others prefer a dedicated office space in their RV. In addition to a workspace that works for you, you’ll likely need some sort of internet connection and prices range widely. We used a mobile hotspot for many years, and have recently added satellite-based internet as service has become more widespread. It’s been a complete game changer! 

    • Mobile hotspot allows you to use your smartphone as a Wi-Fi connection. It’s included with most cell carrier plans. Still, you must have a strong signal for it to work properly. $ 
    • Weboost is an antenna that is designed to boost a weak cell phone signal. So, remember: There has to be some signal for it to work. $$ 
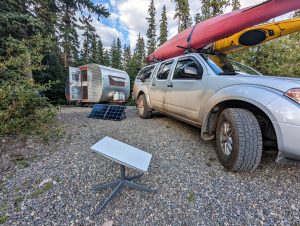
    • Starlink Roam is very reliable and uses a small satellite dish that you can mount on your RV or set out when you need it.  With a clear shot to the sky, it works all over the US, Canada, and Mexico.  $$$


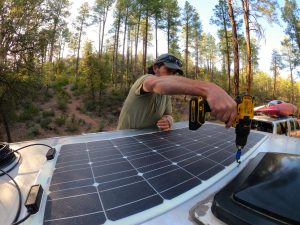
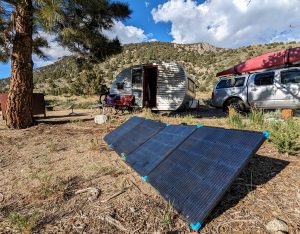
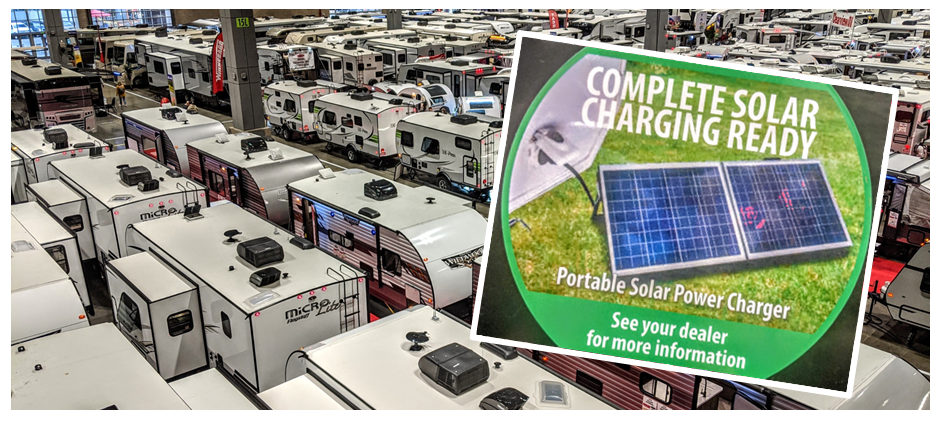
    Solar Power + Self-Contained

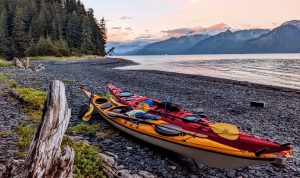
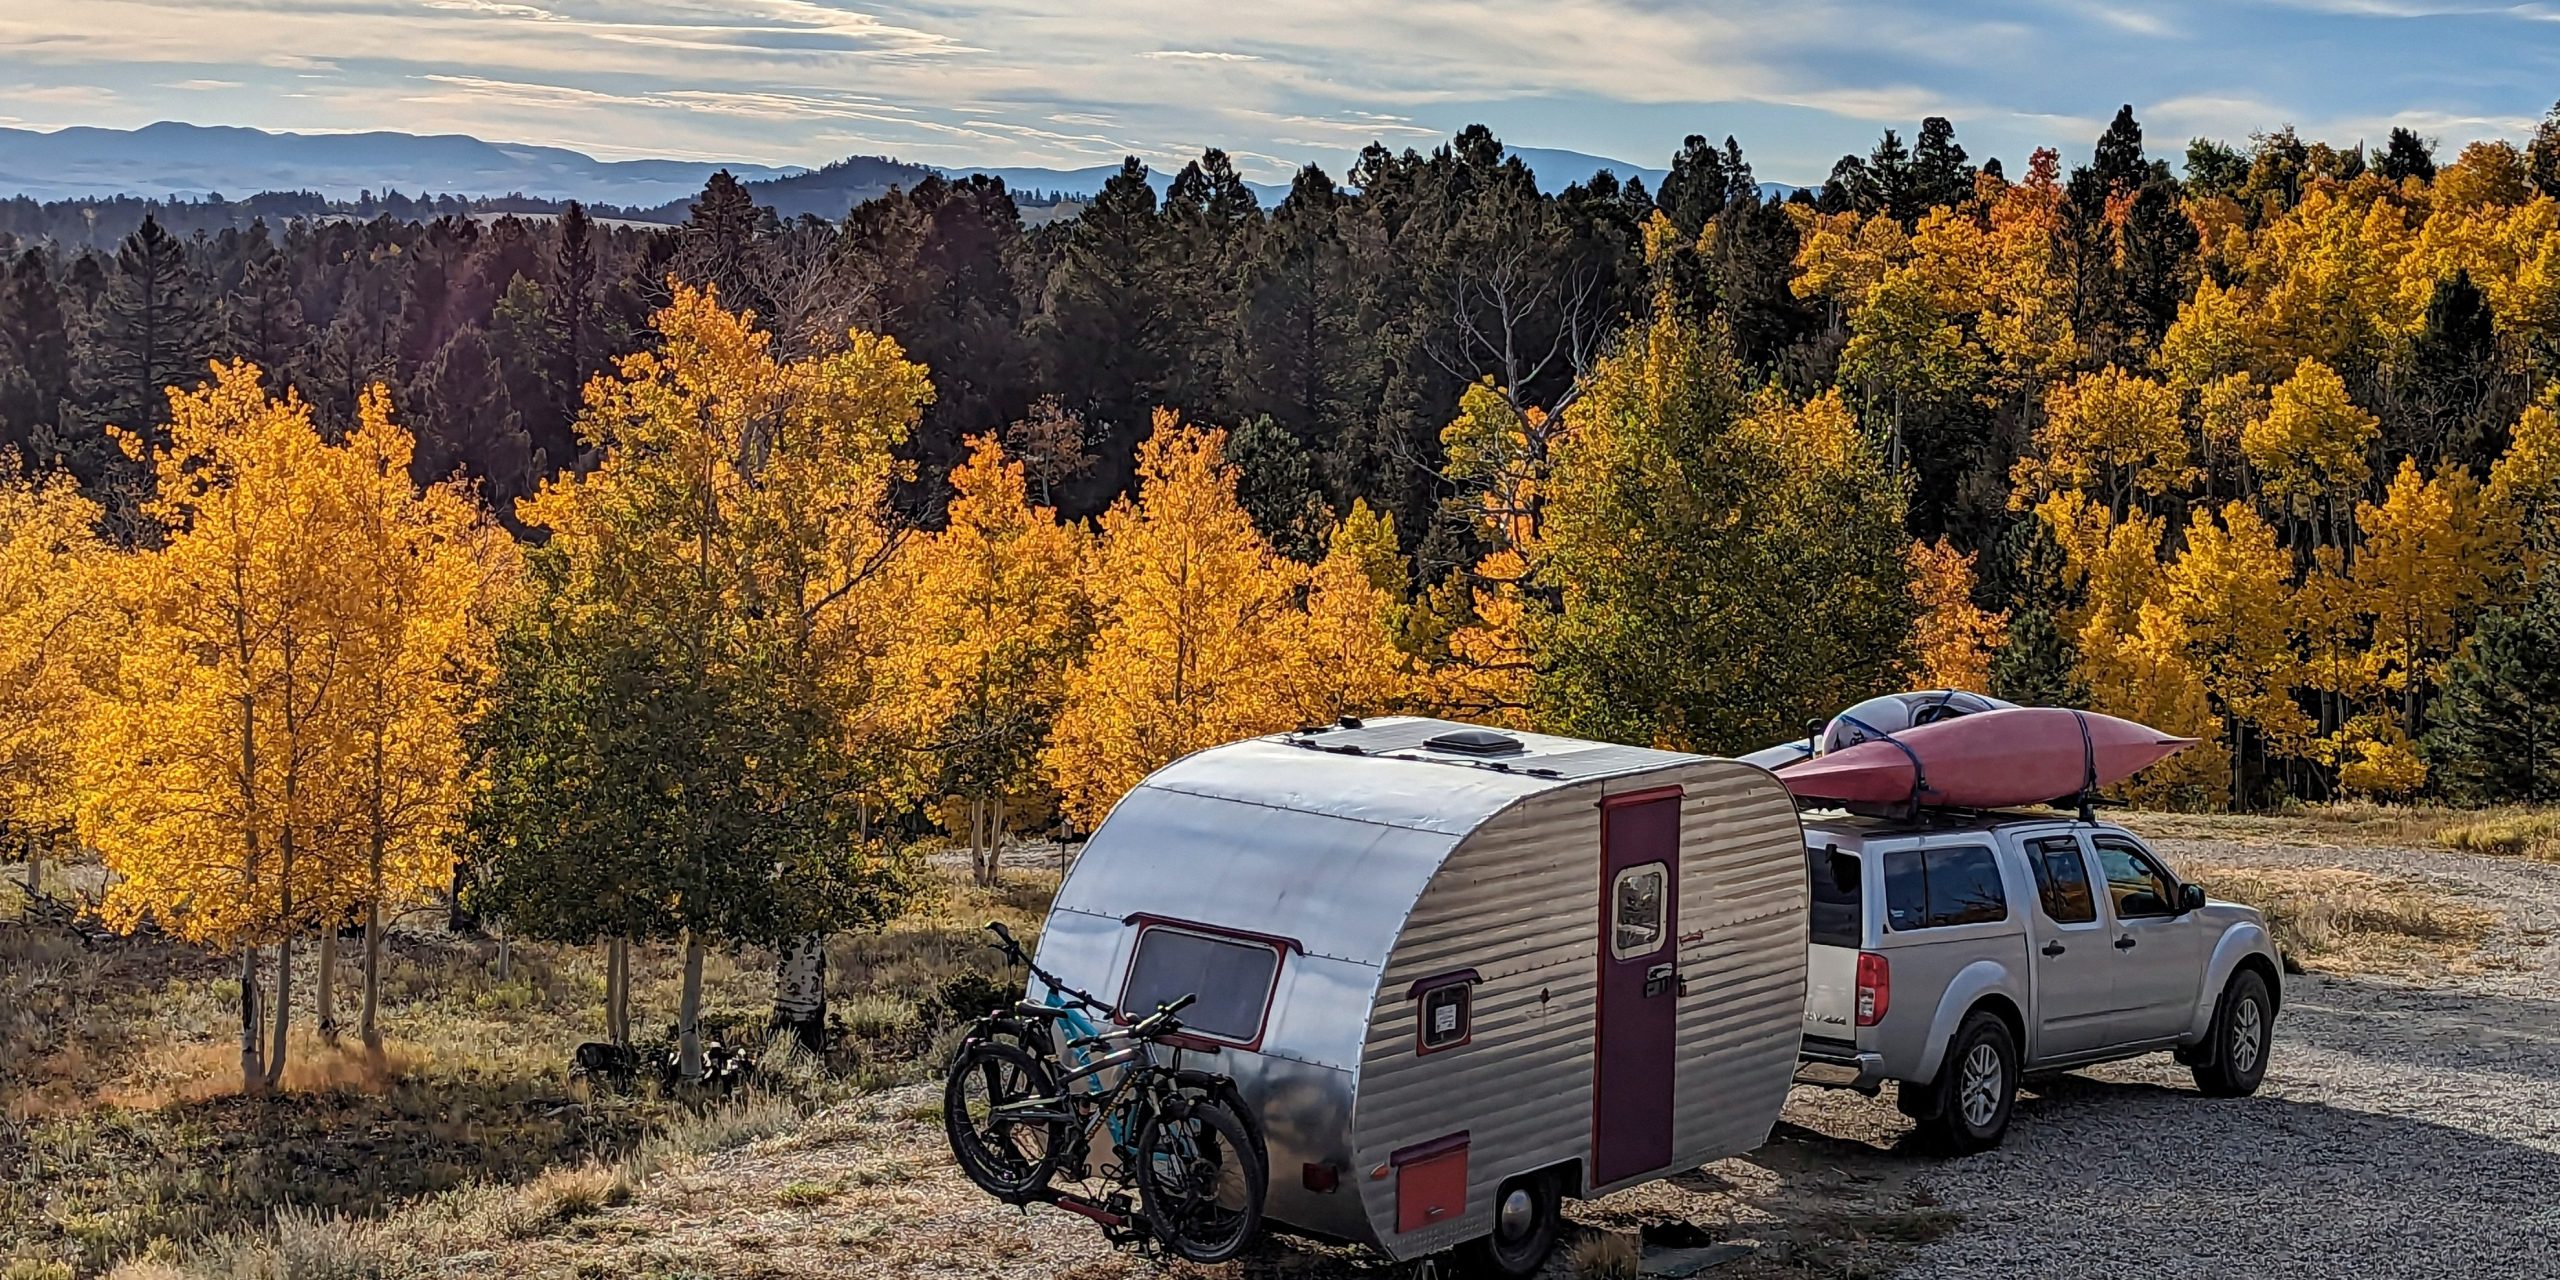
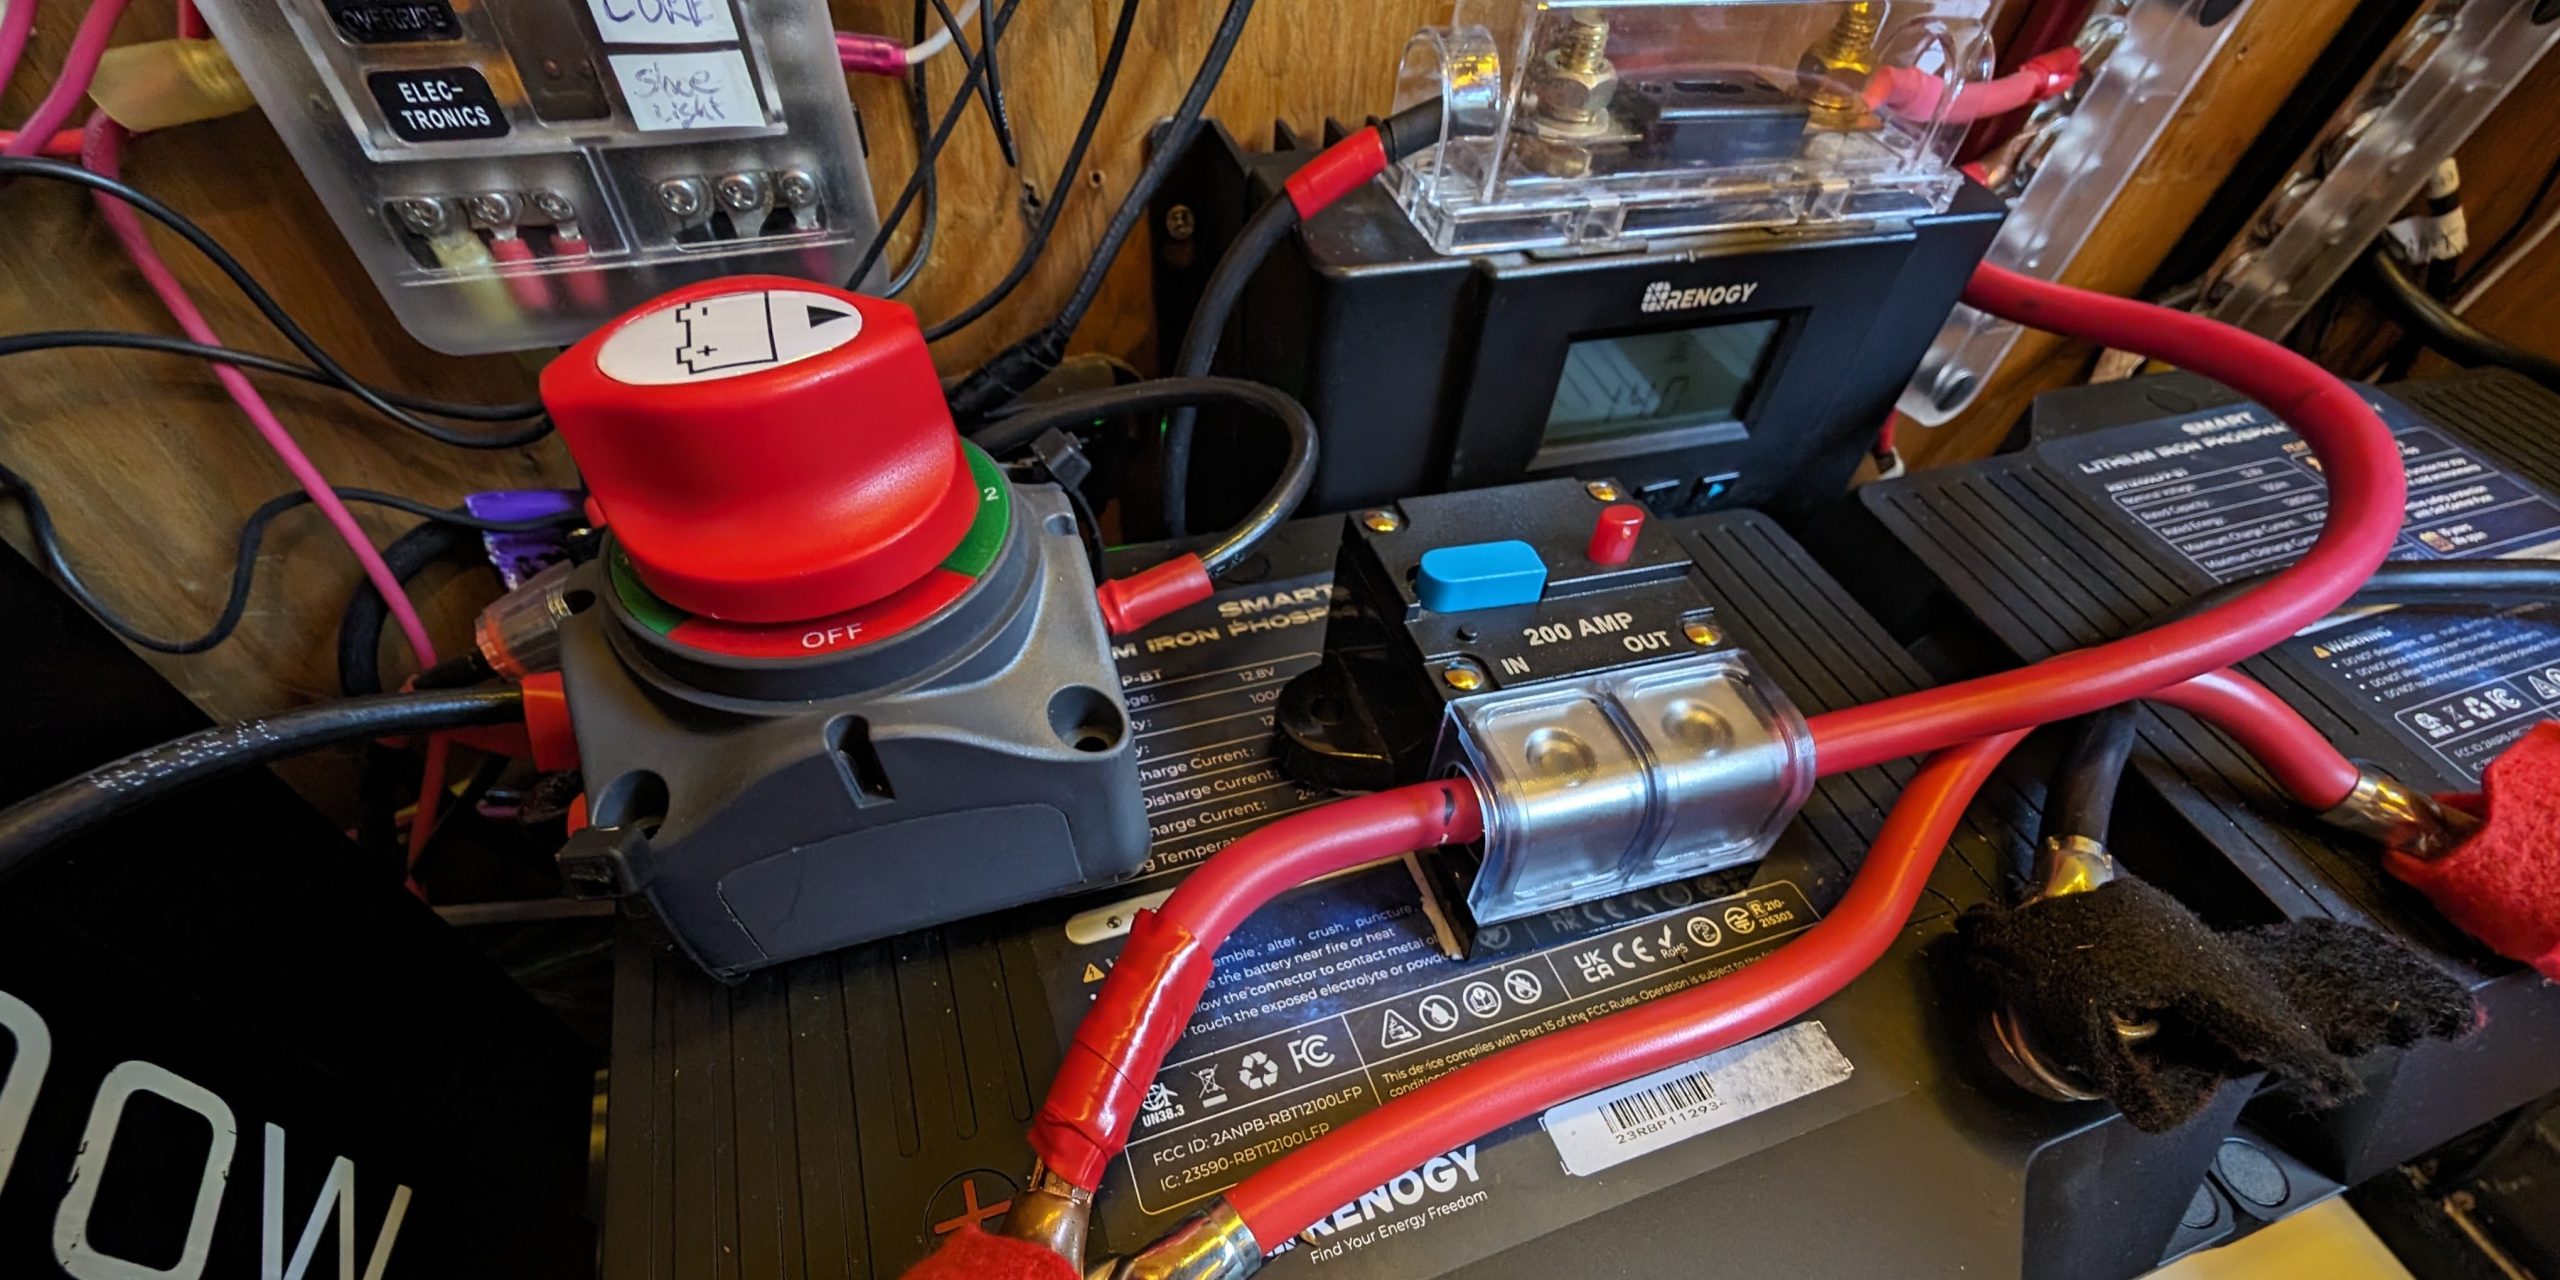
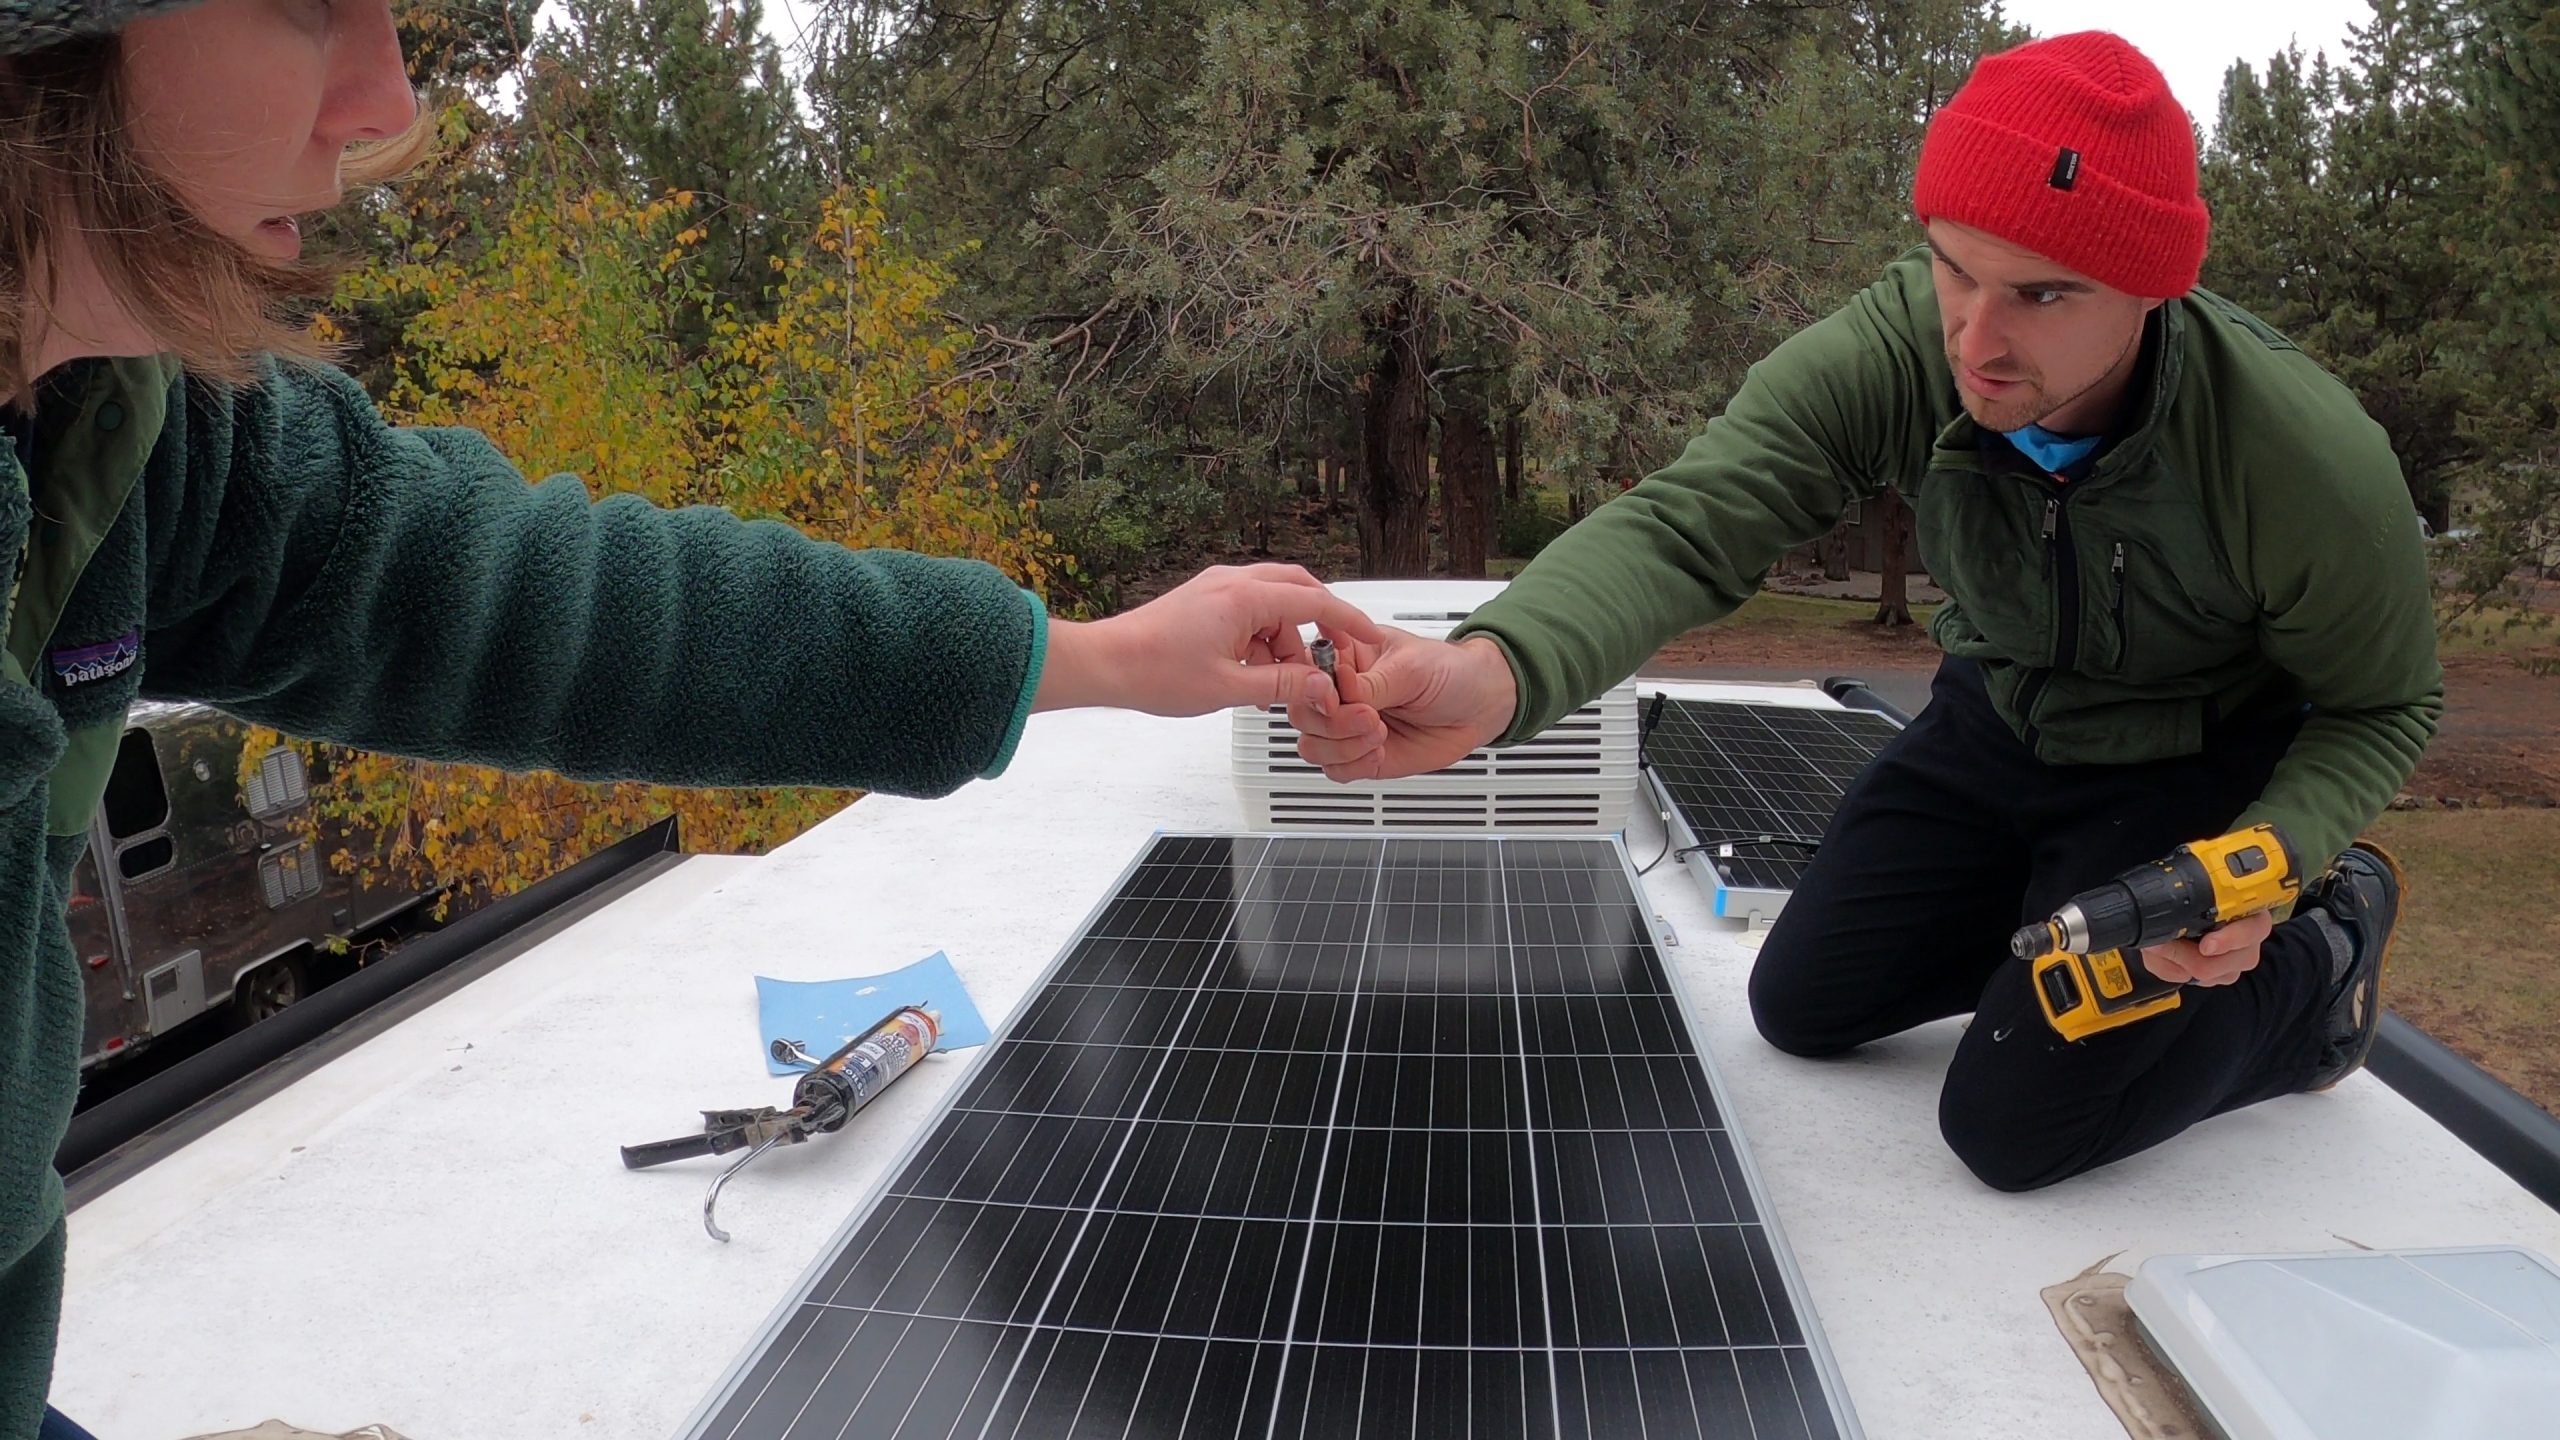
    While adding an off-grid solar powered system isn’t a necessary part of working remotely, it sure is helpful. Doing so will save you a ton of money. Which, you may note, will allow those paychecks to go much further. We estimate that we’ve saved over $200K in camping fees over the past 12 years by camping on public land and in off-grid campgrounds.  If you’ve missed our blogs about how to run your RV on solar, start here.

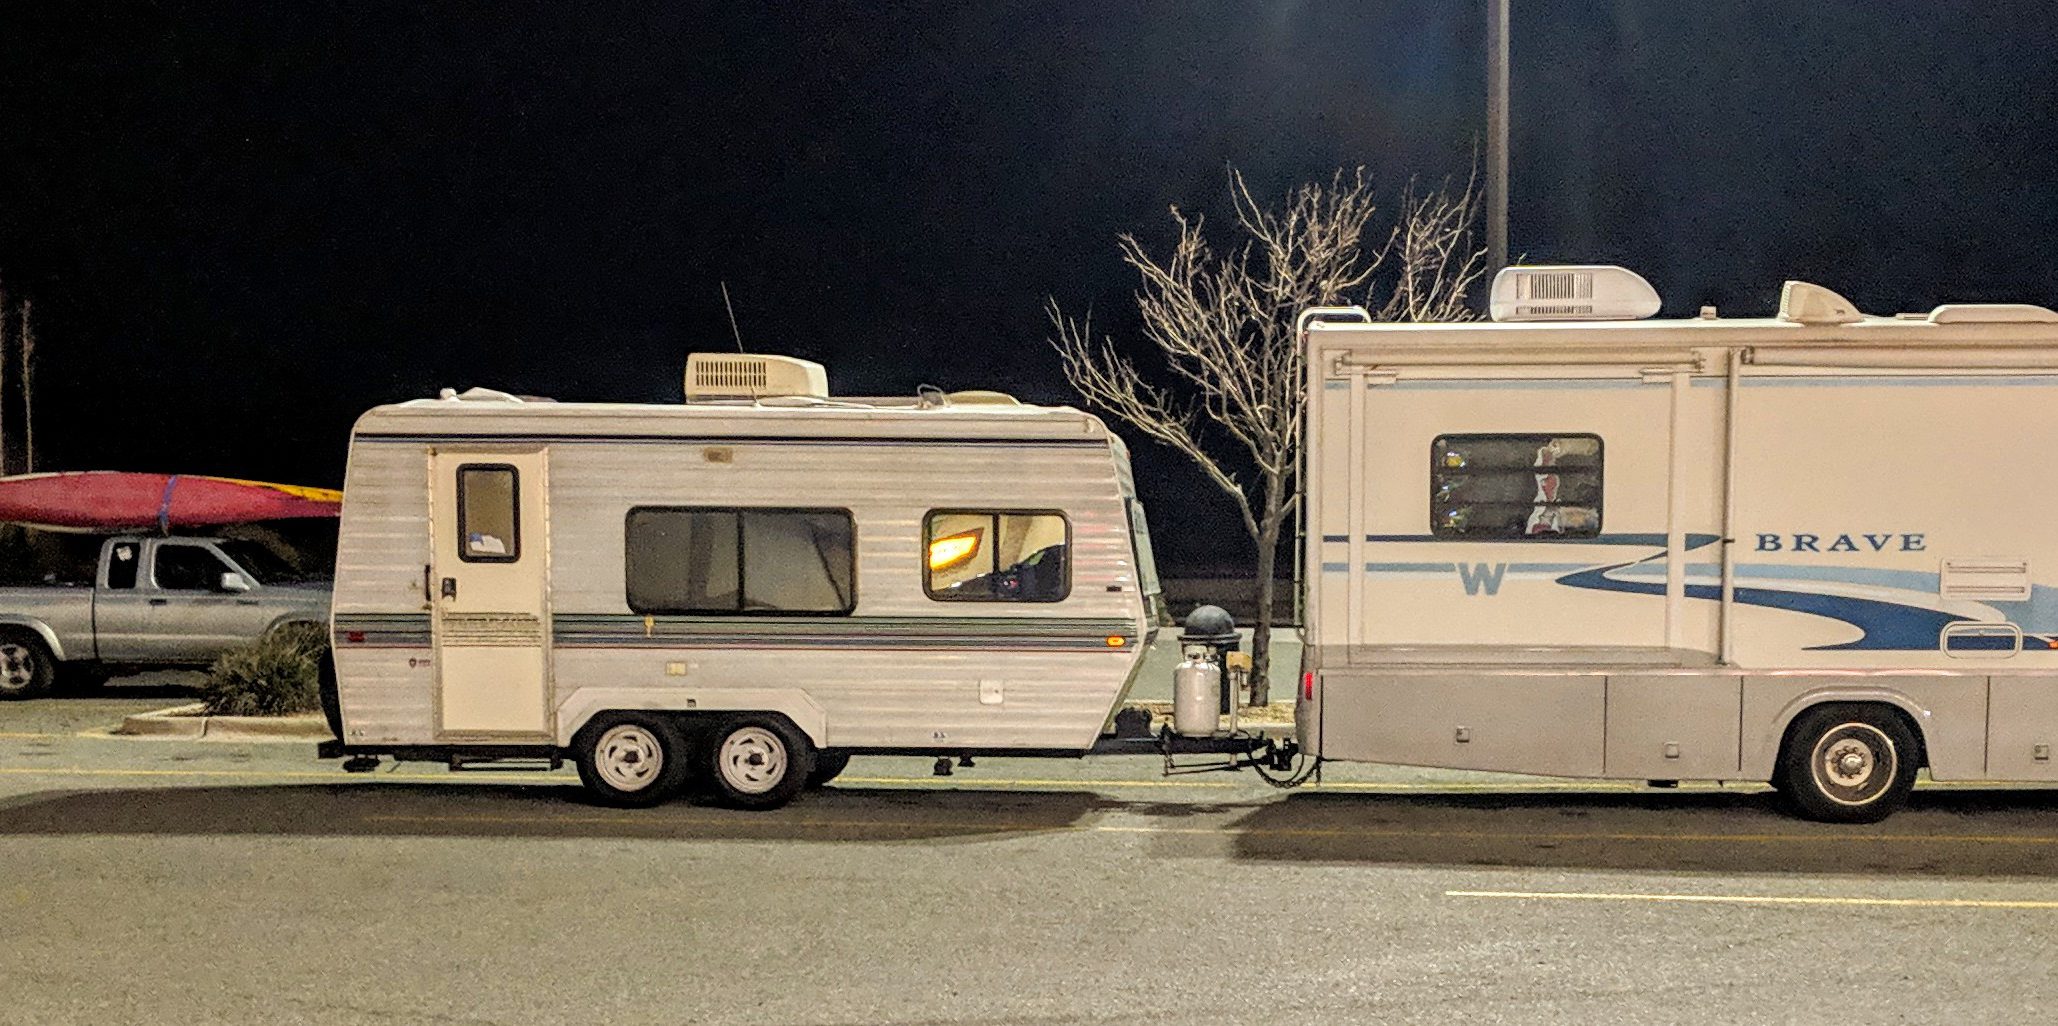
    If you are going to boondock, being self-contained is not always necessary. But it’s good to practice all Leave No Trace principles. It’s also good to know key boondocking skills. Like how to filter water. And identifying where you can dispose of your waste appropriately – especially if you plan to be “out there” for a while.  There are some helpful RV travel apps that will direct you to water refills, showers, dump stations, and dumpsters.


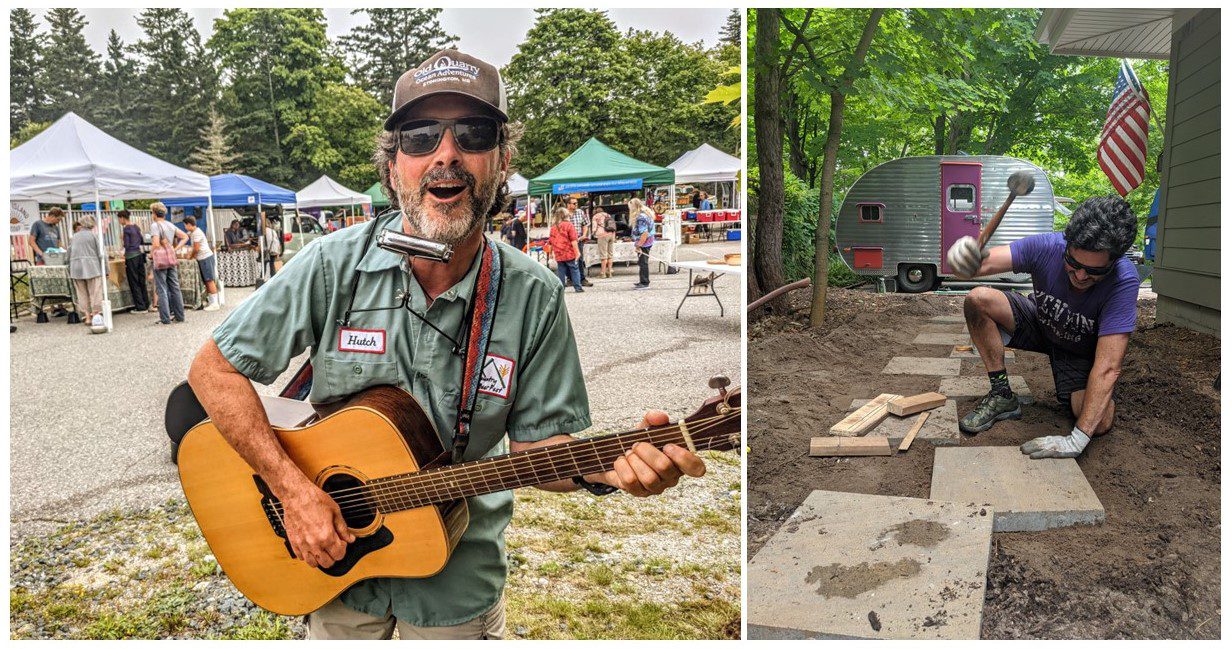
    Starting Your Own Gig!

    If you’d told us in 2012 that we’d be running a mobile business 12 years later, we would have thought you were crazy.  After working seasonally for many years, we decided to give our own mobile business a go. Since then, we have discovered just how great it is to be more in control of our own schedule so that we can be where we want to be — when we want to be there.  It may sound overwhelming to those non-business types, but honestly, a few days of research and paperwork, and we were on our way.  You can learn more about our sustainable RV lifestyle business at FreedomInCan.com.

    Start with the secretary of state website in your state to learn the necessary steps of establishing an LLC, and getting an understanding of state tax laws and rules. Then, head over to IRS.gov to get a federal tax ID number (EIN), and away you go! We also highly recommend hiring an accountant that understands the nature of your business. We can’t say enough about our accounting team. They are RVers themselves, and have helped us interpret and make sense of the appropriate tax laws. (Check out our website for more details!)

    Finding work that will sustain your lifestyle is often the first step in fulfilling your RV traveling dreams!  Next up, we’ll discuss how to stretch your traveling budget and meet like-minded people by doing work trade and volunteering while living in your RV.


    Want to learn more about working from the road? This article is part of our Working from the Road 101 series.

    The Essential Mindset to Work from Your RV (Part 1)
    Seasonal RV Jobs and Side Gigs: How to Find Them (Part 2)

    Everything You Need to Work Remotely from Your RV (Part 3)
    RV Work Trade and Volunteering (Part 4, Coming Soon)

  • Kenai Fjords National Park: RV Camping and Travel Guide

    Kenai Fjords National Park: RV Camping and Travel Guide

    Every RVer knows that some places in the world are simply more special than others. And for a lot of those places, you have to make sacrifices to get there. And in Alaska, there is a place like that. A place where you can drive your RV, camp along the ocean with glacier views, hike to a massive icefield, watch tidewater glaciers calve into the sea, and gasp as breaching whales perform their aquatic ballet. All within the same U.S. national park: Kenai Fjords. 

    After a decade of full-time RVing, we finally made it to our 50th U.S. state. With our trusty vintage camper in tow, we spent five months exploring Alaska and western Canada. One of our many life goals has been — and remains — to explore each of the 63 U.S. National Parks. There are 51 to which you can drive an RV. The other 12 parks require a ferry, plane, and/or one heck of a backcountry hike or paddle. 


    Scenic Drives 

    Kenai Fjords National Park lies on the edge of a remote peninsula. Uniquely, much of it is only accessible by plane or boat with just one road in and out. While not a traditional park loop road, the drive through the Kenai Peninsula is one of the most picturesque in Alaska. With views of the Cook Inlet, Turnagain Arm, Coastal Range, gorgeous rivers, and alpine glaciers in nearly every direction, the 125-mile drive down the Sterling Highway from Anchorage to Seward offers some of the most amazing scenery Alaska has to offer.


    Must-Hike Trails 

    The park maintains hiking trails within the Exit Glacier area. This includes one of our favorite day hikes in ANY U.S. national park! There are several options to suit any interest, time, and ability.


    • Glide Along the Alluvial Plane. Take an easy stroll through the alluvial plane and along the Resurrection River,  which is formed by meltwater from Harding Icefield and Exit Glacier.
    • Track Glacial Time Travel. A slightly longer trail takes you up to the overlook of Exit Glacier’s current terminus. The view provides a historical timeline of the receding ice.
    • Elevate Your Level. A more serious option (this is one of our top 10 hikes) is along the Harding Icefield Trail. This hike takes you on a 9-mile out and back trip with an elevation gain/loss of nearly 6,400 feet. It’s a true stunner from start to finish!
    • Take the Tour. Join a ranger-led walk on Exit Glacier. Doing so allows you the unique opportunity to walk on the ice, learn about the geological and climatic forces which shape glaciers, and understand the dos and don’ts of exploring glaciers on your own.


    Just outside of the park, Caines Head State Recreation Area offers some gorgeous, moderate hiking trails. These will lead you through the temperate rainforest and down to the shores of Resurrection Bay. There, you’ll be greeted with glacier views and a perfect beach for a picnic.


    RV Parks & Campgrounds 

    While there is only one first-come, first-served tent-only campground in Kenai Fjords National Park, the adorable town of Seward (adjacent to the park) offers RVers everything they need. There are also several options in their Parks and Recreation Department campgrounds. Most even have ocean views and electrical hook-ups. There are also a handful of private RV parks in the immediate area that offer full services, as well as some camping options in the Chugach National Forest.

    Camping reservations are probably only necessary during the salmon run (July thru early August) and on summer holiday weekends. If you prefer to keep your plans flexible, any other time of the year will likely offer you numerous first-come, first-served options.

    If you are equipped with solar power and up for some off-grid camping or boondocking to save some money and get away from the crowds, check out the iOverlander app for some good options. 


    Seasonal Advice 

    The best time to visit Kenai Fjords is June-September, though the months of May and October could offer some unique beauty, and virtually no crowds. This peninsula gets a lot of rain, as it is situated in a temperate rainforest along the ocean. Bring quality rain gear and comfortable muck boots to stay dry when Mother Nature decides to dump! 


    Insider PRO Tip! 

    Hands down, the very best way to explore and experience this stunning park is from the water. Whether you choose a fishing charter, wildlife cruise, or kayaking tour, get out on the water into Resurrection Bay and beyond. For boat tours in the early or late part of the season, bring full winter gear along with rain gear if you want to spend time out on the deck of the boat.

    Visiting Kenai Fjords was a momentous occasion for us as it was our final (51st) “drive-to” park where we celebrated a decade of full-time RVing. Need we say more? Start planning your 2025 road trip! Check out the abundant resources on our website and YouTube channel for planning your RV road trip to Alaska.

  • How to Choose the Right Tow Hitch for Your RV

    How to Choose the Right Tow Hitch for Your RV

    After 10 years on the road, we updated our towing vehicle to a 2015 Nissan Frontier with a larger engine, more towing capacity, and even a rear bed cover to keep our extra gear out of the weather. But we were surprised when we hooked up our vintage camper, because the truck’s rear axle was riding a little low. Had the trailer gained weight?  Or did we not have the right tow hitch?

    Despite having a preinstalled towing package, our new truck didn’t have the same rear suspension of the former. When we hitched up and loaded our extra gear into the back, it caused the rear suspension to sag.  To remedy this, we added “helper springs.” We’ve ridden along smooth and level for four years now.  

    This experience pointed out a key difference between overloading the suspension and overloading the vehicle’s capacity. Increasing the stiffness of your rear suspension will not increase the total towing capacity or total tongue weight limits of your vehicle. In our case, it helped level our tow and smooth out the ride.  

    In our recent article about hitches, we discussed a few key points about safe driving with a trailer, as well as the different classes of hitches. But how do you choose the right tow hitch for your vehicle?


    4 Things to Know, BEFORE You Tow Our Example: 2015 Nissan Frontier + 15’ Camper
    Tow Vehicle’s Towing Capacity (TC)  6,100 pounds (5,000*)
    T-GVW (Trailer Gross Vehicle Weight) 3,300 pounds [should be less than 80% of (TC)]
    Trailer’s Tongue Weight (TW) 330 pounds
    Rear Gross Axle Weight Rating (rGAWR) 3,331 pounds


    *Our vehicle’s towing capacity is less when using a standard rear hitch (dead weight); a weight distribution hitch allows us to tow closer to the maximum weight of 6,100 pounds.


    Don’t know your numbers? Here are some great resources to determine them for your situation. Each hitch class has a safe range. Below are some considerations that might make your hauling experience even safer!


    RV Hitch Options

    Standard Hitch & Receiver (aka Dead Weight)

    Class III trailer hitches are the most common. They cover the largest range of vehicles with moderate towing capacity, as well as the largest range of trailers.  With a 2-inch by 2-inch hitch receiver and a 2-inch – 2 5/16-inch ball receiver, this setup will handle many campers.  

    In a standard set-up, the weight of the trailer is primarily resting upon the towing vehicle’s rear axle.  The recommended towing capacity in this configuration is less than the manufacturer’s maximum capacity. 

    It is important to choose the right rise or drop on the hitch insert (ball mount) so that the trailer and tow vehicle ride level.  Measuring the height of your hitch receiver and the height of your trailer hitch coupler (while level and on level ground) should do the trick.  There are several hitch types:

    Standard Hitch Types
    • Riser Hitch. Raises the ball above the hitch receiver.
    • Drop Hitch. Lowers the ball below the hitch receiver. You can turn a riser into a drop by simply flipping it over and reorienting the ball (and vice versa).
    • Adjustable Hitch. This is a good choice if you’re going to be hauling various trailers.  


    Weight Distribution Hitch vs. Sway Bars

    • Weight distribution hitches include metal spring bars that connect to brackets on the trailer tongue. When loaded this helps distribute the weight of the entire rig across both axles of the towing vehicle and the axle(s) of the trailer. Everything rides smoothly and evenly, which maintains performance, braking, and control of the rig. Many modern weight distribution hitches also include sway control. These hitches allow a greater towing capacity. For example our Nissan Frontier has a maximum of 6,100 pounds with a weight distribution hitch. But it has only 5,000 pounds with a standard hitch.
    • Sway bars are a friction device that connects from the side of the trailer tongue to a secondary ball mount on the side of the ball hitch insert. When driving at highway speeds, any crosswinds have to overcome the additional friction of the sway bar in order to push the trailer around. This helps keep everything tracking nicely behind the tow vehicle. To maneuver into a camping spot, it’s a simple matter of releasing the tension on the bar so you can more easily back into a tight spot.  


    Hitches for BIG RIGS

    Class IV and V hitches are for towing the heaviest loads. Both fifth wheels and gooseneck hitches have a connection point in the bed of the towing truck, rather than near the bumper. Either allows for a closer pivot point so that the trailer tracks better when cornering and is generally more maneuverable as a result. The difference between the two is where the coupler mechanism lies.  

    • Gooseneck trailers locate the ball hitch in the truck bed, while the coupler is on the trailer “neck.” As the name suggests, it looks like a bird reaching into the back of the truck. 
    • Fifth wheel hitches locate the “ball” on the trailer, while the coupler is installed in the center of the truck bed. Fifth wheel couplers are more intricate, can handle more weight and generally allow a smoother, and more stable tow, which is why they are preferred over goosenecks for RV applications.    


    In our next blog, we’ll cover some do’s and don’ts when connecting trailers, some common mistakes we’ve made, and discuss the great “grease or no grease” debate. 

    Eager to learn more about hitches? That’s very wise. Read more from our RV Tow Hitches 101 series.

    Hitch Types and Ratings: RV Basics (Part 1)
    How to Choose the Right Tow Hitch for Your RV (Part 2)
    5 Common Mistakes That Lead to RV Trailer Hitch Problems (Part 3)

  • Seasonal RV Jobs and Side Gigs: How to Find Them

    Seasonal RV Jobs and Side Gigs: How to Find Them

    Before hitting the road in our vintage camper, we had saved enough money to travel — albeit on a shoestring budget — for about a year and a half. We simply weren’t sure what would be next for us. Maybe we’d go back to careers and “real life” after exploring our country. Or maybe we’d just keep going? Within the first few months, we met many people who worked while traveling and discovered hundreds of different ways to earn decent money while traveling in our RV! Surprisingly, there are lots of opportunities out there to find seasonal RV jobs and side gigs. If you know where to look, that is.

    So, let us return the favor, and share the resources and tricks that have worked for us.


    Seasonal RV Jobs for Full-Timers

    Seasonal opportunities can be full or part-time, and include campground hosting, working at national parks and state parks, guiding for tour companies, managing B&Bs, teaching at environmental education centers, working at ski resorts, restaurants, and retail stories … and so much more. If you are traveling as a couple (or with a family), one person may choose seasonal in-person work while the other works online at “home.”

    While the list below is not exhaustive, here are some great options that can get you jumpstarted if you’re hunting for seasonal RV jobs:


    Full-Timer Side Gigs and Odd Jobs

    If you are partially-retired (or just seeking some additional income), pick up a side gig or odd job while traveling. Craigslist, community bulletin boards, or libraries are a good place to begin. We’ve had great luck finding odd jobs by simply posting a well-written ad on Craigslist.

    We’ve done yard work, light construction, home repair, painting, and cleaned homes prior to sale/rental — just to name a few. Hutch also made some extra cash playing guitar at farmers markets. (The customers and vendors loved it!) Haven’t figured out your side gig yet? Lots of great ideas can be found on Side Hustle Nation!


    Always Ask, “Are You Hiring?”

    Can you skip the classifieds? Yes! We’ve found 99 percent of our seasonal jobs by simply asking up front, rather than combing through posted job listings. We decided where we wanted to be for the season, and then reached out to the person in charge. A well-written, professional resume never hurts — especially if it focuses more on your skill set than on your position history.


    Seasonal RV Jobs: A Few Personal Favorites

    Here are just a few examples of the jobs we’ve secured by simply asking, “Are you hiring?”:

    • Campground Guides. We emailed the owner of a gorgeous campground on the coast of Maine where we had stayed a couple of years prior. In addition to a campground and rustic cabins, they offered eco-tours, guided kayak experiences, and sailing lessons. We sent over our resumes and references, and within a week, we both had great jobs for the summer.
    • Wine Tasting Insiders. Just before we left to volunteer for four months in Kenya, we contacted the manager at a popular winery in Northern Michigan that we loved. Upon return from Africa, we had jobs waiting for us as tasting room associates for the summer and fall seasons.
    • Educators and Kayakers. We secured volunteer positions with the Education Team at Acadia National Park in Maine for the spring and fall. To make money during the summer, we contacted a number of sea kayaking tour companies and campgrounds in the area. Within a few weeks, we both had full-time, seasonal jobs and a place to park Hamlet for the summer at a beautiful campground on Mt. Desert Island!


    Has every job been awesome? Not a chance. Some were truly challenging. But others were super fun and rewarding. No matter how it shook out, we always learned something from each experience, met some lifelong friends, and had a nice place to stay while earning some extra cash.


    Signs a Seasonal or Side Job Might Work

    You’ll know the job is a good fit when you:

    • love the area and have some time off to explore it,
    • have a comfortable spot for you and your RV for the season,
    • are being paid a decent wage and/or compensated with a free campsite, and
    • are treated like a professional team member.

    If you find that any of the above are not met (and you’ve tried negotiating), we encourage you to quit and find something that better suits you. Be professional, upfront, and simply move on. You’ll be glad you pulled up stakes and rolled out, as it’s one of the best parts of RV living.

    Seasonal RV jobs not your thing? That’s OK. It’s not for everyone. Next up, we’ll discuss how to find online jobs, as well as the equipment you’ll need to turn your RV into a traveling home office.

    Want to learn more about working from the road? This article is part of our Working from the Road 101 series.

    The Essential Mindset to Work from Your RV (Part 1)
    Seasonal RV Jobs and Side Gigs: How to Find Them (Part 2)

    Everything You Need to Work Remotely from Your RV (Part 3)
    RV Work Trade and Volunteering (Part 4, Coming Soon)

  • A Few RV Secrets to Help You Save on Camping Fees

    A Few RV Secrets to Help You Save on Camping Fees

    The No. 1 way to cut costs on your next RV road trip is to spend less money on camping fees. (Following your RV purchase, that is. More on cutting purchase costs here.) Out on the road, most RV parks and state parks that offer full or partial hook-ups charge $50 to $100 per night. While still cheaper than a night in a hotel, camping fees on a long road trip can add up as quickly as your bill at the gas pump!

    We’ve traveled the continent with solar as our main source of electrical power, so we don’t need hook-ups and can camp on FREE public land and/or inexpensive campgrounds. We estimate that we’ve saved over $200,000 on camping fees since 2012!

    Where do you find these free and lower cost alternatives? While not an exhaustive list of all available resources, below are our go-to resources for information about free dispersed camping and traditional fee-based campgrounds, as well as boondocking for a couple nights. Most locations have stay limits, so pay close attention to those so you don’t put a strain on resources, or get a ticket. Also, please leave every place BETTER than you found it by following Leave No Trace!


    Website Resources to Save on Camping Fees

    Both the Bureau of Land Management (BLM) and U.S. Forest Service offer numerous options from semi-developed campgrounds (for a small fee) to dispersed camping with nothing but open land (usually free). Most do not offer hook-ups, so being self-contained is key. Some offer potable water and vault toilets. Nearly all offer gorgeous views. While most of the BLM land is found out West, national forests are located throughout the country. Stay limits are typically 14 to 21 days. So, always check the local regulations. If you are 62 or older or are disabled, get an America the Beautiful” Senior Pass or Access Pass which gives you half-off camping on ALL federal properties … saving you even more!

    • BLM: While land use and camping information is available online (by state), stop by the state’s BLM office for a free paper map that outlines the amenities for each area and is helpful when you have no cell service.
    • USFS: This website offers information about 157 national forest and grassland campgrounds! You can search by state, or by a specific forest/grassland area. The only downside is that there is no integrated map function, so you have to triangulate the data with either a road atlas or phone navigation app.

    Smartphone Apps

    iOverlander 2

    iOverlander 2 is the updated version of the original crowd-sourced app that helps you find everything. That could be a spot on the side of the highway for the night. Or a dispersed camping area. A casino. Even a parking lot. Always read reviews before you head to the pinned location on the map. Restrictions change frequently, and some could be marked as closed! Completely free.


    The Dyrt

    The Dyrt is a comprehensive campground locator app, offering the most listings of any app across the U.S. Read reviews and see photos/videos from real people who’ve camped there. Use the helpful filters to find free and inexpensive campgrounds, as well as dispersed areas. Search regions and create lists to plan out your next camping trip.  Even book reservable sites and get discounts through the app. Free; the PRO version provides some bonus features that are well worth the small annual fee!


    Boondockers Welcome

    This app is a collection of 3600+ people across the U.S. and Canada who love to offer their driveway, land, farm, etc. to other self-contained RVers for free. Some hosts do offer hook-ups for a nominal fee, as well as water, local knowledge, and new friendships. Use the availability calendar on the app to request a night’s stay (or up to five nights depending on the host). Annual fee.


    Harvest Hosts

    Harvest Hosts is a network of wineries, breweries, distilleries, farms, and attractions that invite self-contained RVers to stay in 5200+ sites across the U.S. and Canada. The annual fee provides members unlimited access to overnight stays at any one of the hosts’ locations. Members are encouraged to purchase at least $30 of products made by the host. It’s is a great way to support the small business allowing you to park there. The hosts typically do not offer hook-ups, so being self-contained is key. Use the availability calendar on the app to request a night’s stay (usually limited to one night). Annual fee.


    Nice! Now I Can Save on Camping Fees … But What Other Ways Can I Save?

    In addition to these helpful apps, there are several Facebook groups in which members post free and dispersed camping options. Just search Facebook with keywords such as boondocking, free camping, or dispersed camping and request to be part of the group. There’s a whole community ready to help you save on camping fees — and, in turn, ready to hear how you’re doing it yourself. Use these helpful resources on your next RV road trip to save hundreds, if not thousands of dollars! 

    We’ll be back next time with more information about key boondocking essentials that’ll make off-grid camping a breeze!

    Enjoying what you’re learning? This article is part of our Cutting RV Travel Costs 101 series.

    The First Step to Find Your Dream RV (Part 1)
    A Few RV Secrets to Help You Save on Camping Fees (Part 2)
    Boondocking Essentials for RV Newbies (Part 3)
    RV Kitchen Must-Haves: How to Make Memorable Meals That Save Cash (Part 4, Coming Soon)
    Going Deep into Your Backyard (Part 5, Coming Soon)


  • 5 Solar Components Every RVer Should Know

    5 Solar Components Every RVer Should Know

    So, you’ve gotten yourself a solar-ready RV, and now you want harness energy from the sun, huh? And store it for later use, of course. Then make it usable to run ordinary household appliances in your RV, right? Well, that requires four simple solar components: solar panels, charge controller, battery bank, and an inverter. And to really trick out your off-grid RV, let’s throw in a fifth component — the DC to DC charger!


    Important Electrical Terms to Master Solar

    Before diving into the solar components, let’s introduce a few electrical terms that you need to know. To simplify, I’ll use the analogy of water flowing through a garden hose to illustrate. Amperage (A) is the flow of current through the electrical system. Or, in our analogy, the flow of water through the hose. Voltage (V) is the pressure of the electrical system, which is like the force on the water moving through the hose. Wattage (W) is the electrical work being done by an appliance itself. With our analogy, that’d be the overall effectiveness of the hose.

    To increase flow, you need a bigger hose, but the spray will lose pressure. To increase pressure, add a nozzle which restricts the flow but increases the spray power. While either one may still get that bird poop off your RV window, the important thing to remember is that to get power (W) you multiply the flow (A) times the pressure (V) – Amps x Volts = Watts

    One last term to understand is Watt hours (Wh). Watt hours are the amount of time you could do the electrical work with the given energy supply. Or, back to our analogy, how long you could wash the RV with the hose at the same pressure and flow. It is simply watts times hours. (We’ll cover how to determine your RV’s average daily Wh in our next blog.)


    5 Essential Solar Components

    Here’s a quick look at what each of the five major solar components do. I’ve also included how each is rated using the different units of electricity described above.

    1. Solar Panels

    Solar panels produce an electrical current when sunlight shines upon them. That current can run a DC appliance directly, but most off-grid systems use batteries to store that energy for later use. (For example, when it’s after dark, cloudy, or raining.) Solar panels are rated in watts (W). The watts of a specific solar panel (e.g., 100W, 200W, 300W) indicates the maximum power a panel can produce under optimal solar conditions. Solar panels come in either rigid, flexible, or bifacial varieties. They can also be permanently fixed to the roof or set up on the ground near the RV. (Portable solar panels are made specifically for this purpose.)


    2. Charge Controllers

    The charging current from the solar panels will fluctuate based upon what’s happening in the atmosphere (passing clouds, etc.). Charge controllers manage the charging current between the panels and the battery bank. They act as the “brain” of the system, and ensure that the battery bank is charged appropriately and safely. Charge controllers are rated in amps (A). The specific rating (20A, 40A, 100A) is the upper limit of current that the controller can safely handle. The two different types of charge controllers are PWM (Pulse Width Modulation) and MPPT (Maximum Power Point Tracking) — with MPPT being up to 30 percent more efficient!


    3. Deep Cycle Batteries

    Deep cycle batteries come in various voltages (12V-24V-48V), but their capacity is rated in amp hours (Ah). That way, you will know the length of time you could expect a specific flow in amps. There are four types of solar deep cycle batteries: flooded lead acid, gel, AGM, and lithium-ion phosphate. Deep cycle batteries are designed to be discharged and charged many times over their lifespan. And they can vary significantly with regards to their chemistry, price, lifespan, charging time, cycles, etc.


    4. Inverters

    Inverters are rated in watts (W) because they do the work of changing DC power to AC power for your appliances that have a standard household plug. Their rating (700W, 1000W, 3500W) indicates the maximum power output that an inverter can safely handle. Pure sine wave inverters most closely replicate the type of AC power that is delivered to your home and are less likely to damage sensitive electronics.


    5. DC-to-DC Chargers

    DC-to-DC chargers make use of excess engine power while the vehicle is running to effectively charge the RV battery bank. These chargers serve as an electrical “pump” — taking that trickle charge typically delivered through a 7-pin trailer connection and pumping it up to 30A, 40A, 50A, or 60A. These chargers are rated in amps (A), with this number referring to the possible maximum current that the charger can safely deliver to the RV batteries. Some models even combine a charge controller and DC to DC charger into one unit to save space.


    So, Now You Know the Solar Components … What’s Next?

    As you dive into your own RV solar project, understand that everyone has different energy needs and uses their RV differently. In our next blog, we’ll dive into how to design a solar powered system that will work for you and your energy demands!

    Enjoying what you’re learning? This article is part of our RV Solar 101 series.

    What to Look for in a Solar-Ready RV (Part 1)
    5 Solar Components Every RVer Should Know (Part 2)
    RV Solar Explained … with Middle School Math (Part 3)
    Does a DIY RV Solar System Install Make Sense for Me? (Part 4)
    Choosing the Right Solar Powered System for My RV (Part 5, Coming Soon)

  • The Essential Mindset to Work from Your RV

    The Essential Mindset to Work from Your RV

    A road-life friend of ours once said that losing her job was the best gift she’d ever received. Without that jolt to her normal routine, she swears that she’d still be plodding a worn path waiting for the day to retire, instead of living the exciting new life she’s created. All it took was a corporate downsize.

    Finding work while traveling requires creativity, resourcefulness, flexibility and an ability to see yourself in a new light. Luckily our friend already had these qualities in spades. Rather than seeing herself as her resume implied, with a list of professional positions, she saw herself as a collection of skills that apply to a variety of settings. Thinking outside the confines of your well-grooved career path is key to discovering a whole host of new opportunities. And if you’re just starting out, learning this lesson early is essential to success.

    Since 2012, we’ve found plenty of paid work opportunities (both online and in-person) while traveling in our little vintage canned-ham camper named Hamlet. Has every job been awesome? Nope. But through each, whether sublime or subpar, we learned, laughed, and kept our road life rolling. 

    If you catch yourself wondering if you’re ready to start the road life yourself, we can help you find out.


    Agree with These 10 Statements? You Might Be Ready to Work from Your RV

    Any of these sound like with where you are right now?

    1. “Breaking up my routine and establishing new ones seems interesting and exciting.”
    2. “I want to go to new places, and get to know them more intimately than just a short vacation.”
    3. “I can get creative about taking care of my life stuff, like laundry, mail, grocery shopping and showers.”
    4. “I love having friends and work colleagues all over the country.”
    5. “Learning new things and taking on new roles doesn’t rattle me, so long as I have the support of good trainers and supervisors.”
    6. “I’d finally like the chance to simply do my job, punch out, and not think about work all the time.”
    7. “If something needs to be done, I’m gonna do it.”
    8. “I’d love to live close to the places everyone goes to on vacation, and help them enjoy it.”
    9. “I don’t usually keep traditional work hours, I’d rather keep my own and get the work done when it needs to be.”
    10. “I really feel like I could do my work from anywhere.”


    If you agreed — or mostly agreed — with these statements, then working from the road might just be for you. 

    Another friend out’s job went online during the pandemic. She decided to never go back. She’s able to do her job, on her own time, while traveling and exploring in her RV with her retired partner. Sure: She needs a good Wi-Fi connection and a few daily hours of focused attention. But she’ll keep doing this, she says, until they make her go back into the office. 

    Everyone’s situation will be different, some people will need to work full-time to keep the health insurance and pay college tuition, while others may decide that they no longer want to maintain their former lifestyle. An RV lifestyle can be far less expensive than you’d expect, but it all depends on how you do it. (Stay tuned for more in our blog series on Cutting RV Travel Costs!)


    Remote RV Job Opportunities 

    Consider this your new job board if you want to work from you RV! Just a few categories to get you daydreaming …

    • Seasonal jobs and side gigs are the name of the game if you seek to work full or part-time in beautiful parts of the country. From campgrounds, outdoor outfitters, state/national parks to retail stores, lodges, restaurants, and more. 
    • Online jobs are plentiful both full or part-time. This type of work allows you to be wherever you want to be, so long as you have enough power and connectivity. Since the 2020 pandemic, this category has simply exploded!
    • Many careers offer traveling opportunities. While the medical field offers opportunities for traveling nurses, doctors, radiologists, and veterinarians, we’ve also met accountants, construction workers, financial advisors, videographers, graphic designers, occupational therapists, writers, sales people, photographers, and many others.
    • Work-trade opportunities abound in national/state parks, as well as through Workamping, organic farming, and various volunteer opportunities which cover your stay in exchange for a few days per week of work.
    • Starting your own mobile business. Millions of people have figured out how to do this while traveling – including ourselves with Freedom in a Can, LLC. We do writing, photography, videography, and seminars – all from the convenience of our camper, and all with solar power. 


    It’s not your resume, per se, but your abilities, skills, and previous experiences that make you such a great hire! Stay tuned: In the next article, we’ll break down how — and where — to find some of these cool jobs.

    Want to learn more about working from the road? This article is part of our Working from the Road 101 series.

    The Essential Mindset to Work from Your RV (Part 1)
    Seasonal RV Jobs and Side Gigs: How to Find Them (Part 2)

    Everything You Need to Work Remotely from Your RV (Part 3)
    RV Work Trade and Volunteering (Part 4, Coming Soon)

  • Hitch Types and Ratings: RV Basics

    Hitch Types and Ratings: RV Basics

    Looking forward to hitching up and hitting the road in your new RV?  Well, safe to say, RV Towing 101 probably wasn’t covered the last time you took a DMV test. And yet the difference between driving a standard vehicle and driving while towing a trailer is significant. Very significant. And you won’t be able to enjoy that newly purchased RV trailer without understanding hitch types and ratings.

    So, let’s get you hooked up with all the towing know-how you need. In this article, we’ll provide some pointers for the road, a few key hitch facts, and a breakdown of classes of hitch types and ratings. Additionally, we’ll provide follow-on articles (coming soon) on choosing the right hitch and common mistakes.


    Some Considerations Before You Hit Road

    • Stopping distance is increased, perhaps doubled, at highway speeds.
    • Overall vehicle length is doubled, or more.  You need more space in order to pull out into traffic, to merge, pass, to make a turn, and to maneuver in general. 
    • Your total rig weight is much greater, adding more mass and momentum and less mobility in any defensive driving situation.
    • Following distance needs to be greater, perhaps more than twice your usual habit, because of everything above.


    Remember, other drivers may not take your careful planning or weight distribution into consideration. This can become frustrating especially in heavy traffic, but keep in mind that you’re big. You’re visible. And you’re probably in someone’s way, so they’ll have to deal with you.  


    What to Know (About Your RV) Before You Tow

    • Your vehicle’s towing capacity. Can the vehicle you drive safely pull a trailer (fully loaded) and bring everything to a stop safely?  A good rule of thumb is for the GTW (Gross Trailer Weight) to never exceed 80 percent of your vehicle’s maximum towing capacity.
    • Your vehicle’s max tongue weight (MTW). Can the rear axle of your vehicle handle the additional weight of the trailer that isn’t being carried by the trailer axles? Generally this is 10 to 15 percent of the total trailer weight.  


    Having your vehicle and camper evenly matched is incredibly important to safe towing. As you head to the campsite you may have brought extra things: coolers full of food, kids, pets, extra fuel, outdoor adventure toys, and more. All of these need to be considered so you won’t put excess wear and tear on your vehicle nor exceed the safety limits of your rig.  


    Understanding How Hitches Work

    Most conventional trailers and campers use a ball hitch mechanism to connect. The ball hitch insert connects to the towing vehicle through a hitch receiver which is bolted/welded to the vehicle chassis below the bumper. Here’s a great article that dives deep into trailer hitches. Note: Bumper hitches are NOT recommended for safely towing and are illegal in California. 


    The trailer has a hitch coupler that drops down over the ball when the coupler handle is in the open position.  When closed, it brings a locking device (underjaw) up into position under the lower section of the ball. This prevents the hitch coupler from bouncing off the ball hitch while towing.  The handle can be locked into position with either a pin or a standard lock.  


    Classes of Hitch Types and Ratings

    Class I Hitch

    This is the perfect hitch for lightweight loads like bike racks, cargo carriers, or very small trailers, and works with smaller vehicles.

    • GTW (1,000 to 2,000 pounds); MTW (100 to 200 pounds); Receiver Size 1¼ inch
    • Class I hitch receivers have a tab so that you can only use a Class I hitch accessory with this receiver. Since Class II hitches have the same receiver size, this is necessary so that you don’t unintentionally overload the receiver. 

    Class II Hitch

    Heavier duty than Class I, these are still paired with smaller vehicles, but can accept heavier loads.  

    • GTW (2,000 to 3,000 pounds); MTW (200 to 300 pounds); Receiver Size 1¼ inch
    • Class II can accept Class I hitch accessories. 


    Class III Hitch

    Most traditional travel trailers will fall into this class, it is the most common hitch class across all towing vehicles because of the weight capacity range.  

    • GTW (3,500 to 8,000 pounds); MTW (300 to 800 pounds); Receiver Size 2 inch
    • Typical vehicles include full-sized sedans, minivans, SUVs, and trucks.


    Class IV Hitch

    A much heavier duty load rating than Class III, but retains the 2-inch by 2-inch receiver.  

    • GTW (5,000 to 12,000 pounds); MTW (500 to 1,200 pounds); Receiver Size 2 inch
    • Typical vehicles include large SUVs and trucks.


    Class V Hitch

    The biggest hitch type which is typically welded directly to the vehicle’s frame and offers a very large receiver. Intended to pull the heaviest loads like toy haulers, horse trailers, etc. An adapter can also help you insert Class IV (and lower) accessories into a Class V hitch receiver.

    • GTW (10,000 to 25,000 pounds); MTW (1,000 to 2,500 pounds); Receiver Size 2 ½ to 3 inch
    • Typical vehicles include large trucks with massive towing capacity.


    Next up, we’ll talk about how to interpret your vehicle’s ratings, what sway hitches and drop hitches are all about — and the pros and cons of a fifth wheel trailer.  

    Eager to learn more about hitches? That’s very wise. Read more from our RV Tow Hitches 101 series.

    Hitch Types and Ratings: RV Basics (Part 1)
    How to Choose the Right Tow Hitch for Your RV (Part 2)
    5 Common Mistakes That Lead to RV Trailer Hitch Problems (Part 3)

  • The First Step to Find Your Dream RV

    The First Step to Find Your Dream RV

    Seeking to buy your dream RV, but concerned about finances? The first step in cutting RV travel costs is to buy only what YOU actually need. Much like a house, the more square footage, the more expensive it is to purchase, insure, heat/cool, maintain, pay taxes, etc. With a rolling home, you also have to consider the costs associated with storage, annual registration, camping fees, campsite availability, and fuel costs.

    Since 2012 we’ve lived, worked, and traveled full-time in our vintage rig of just 72 square feet, and have explored the continent as well as every national park to which you can drive. While many may think that we are crazy for living in such a small space, we often say that we live small while living large! 

    Along our journey and at our speaking gigs at RV shows around the country, we’ve met hundreds of people who tell us that they bought too big of an RV the first time around. They are looking for that “sweet spot” between enough comfortable space, interior storage, as well as something that is easy to manage — both on the road and financially. 

    So, you might be asking how you can find that “sweet spot.” Well, friend, this article is for you.


    Don’t Skip This First Step

    It may sound obvious, but here it is: STOP before you go shopping. Don’t just buy what your neighbors have or what your brother-in-law raves about! (It’s such a temptation.) Remember: There are thousands of different RVs. So take the time to do your own homework and figure out what YOU need and what YOU can afford. And, be sure to tour several rigs before making a decision. This process will likely save you a bundle of money and much headache, both now and in the future.


    Now, Ask Some Crucial Questions

    • How are you going to use your rig?

      If you are planning to rent an annual campsite at the lake and visit throughout the year, or just head to the local RV park or state park a couple of times per summer, then size, length, and weight doesn’t really matter as much. Conversely, if you plan to drive it longer distances, visit national parks, and national forests that offer more modest-priced campsites — or even live in it full-time — our best suggestion is to purchase a rig under 25 feet. Overall, it will be less expensive and you’ll be able to fit into a wider variety of beautiful, inexpensive campsites. Less than 25 feet is also much easier to drive and will greatly reduce the stress of finding gas stations that can accommodate your rig, not to mention parking at grocery stores, laundromats, and when visiting those old friends that live along your route.


    • How many people are going to live in it regularly?

      One trap that many couples get into with both retirement homes and RVs is that they want something that will accommodate their grown children and grandkids. Many folks seeking to downsize their rig tell us that they bought a big RV to accommodate the extended family, but found that they’ve only joined them a couple of times. Again, buy what YOU need. You can always rent an RV, or vacation home, to accommodate others. In the long run, this act alone will save you tens of thousands of dollars.


    • Can you afford the fuel costs, campsites, storage, taxes/registration, and maintenance and repairs?

      You know that neighbor who has that big rig parked on their property, but never actually moves it? They probably bought too big and have found that it’s less expensive and less stressful to simply not go anywhere. Don’t let this be you.


    Then Imagine Life in That Dream RV

    Play out a couple of dream RV road trips ahead of time. Price out what they will cost in terms of fuel, campsites, and extras. Contact the DMV and find out how much taxes and registration will be for the rig you are interested in purchasing (varies WIDELY by state). If you are unable to store it on your own property, look into storage facilities nearby and price them out. Finally, factor in about 10 percent of the purchase price for annual maintenance and repairs. If all of that adds up to what you can comfortably afford, then you’ve found your rig! 

    In addition to these three very important prepurchase questions, this article (which includes a helpful RV shopping checklist / spreadsheet) will help you keep track of various options, floorplans, and packages included in many modern RV’s as you shop around.

    Once you’ve found your dream RV, give us a shout and tell us how the process was for you. Have fun, be safe, and we’ll see you on the road!

    Enjoying what you’re learning? This article is part of our Cutting RV Travel Costs 101 series.

    The First Step to Find Your Dream RV (Part 1)
    A Few RV Secrets to Help You Save on Camping Fees (Part 2)
    Boondocking Essentials for RV Newbies (Part 3)
    RV Kitchen Must-Haves: How to Make Memorable Meals That Save Cash (Part 4, Coming Soon)
    Going Deep into Your Backyard (Part 5, Coming Soon)

  • What to Look for in a Solar-Ready RV

    What to Look for in a Solar-Ready RV

    So, those solar-powered RV’s caught your eye, huh? (You’re here, so figured they might have.) Well, if you’re looking for the right solar-ready RV model, you’re going to want to get familiar with the terms. Trust us: We know. We’ve been in your shoes. Before hitting the road full-time in 2012, we added a small solar set-up to our vintage camper so that we could save money and camp off-grid without a noisy gas generator.  What we didn’t realize at the time was that we were on the front end of the RV solar revolution that has swept the world!  For the past 12 years, we’ve been teaching RVers how to go solar while we’ve explored North America.

    So, let’s make this intro lesson short and sweet. We’ll go deeper into more solar specifics in future follow-on articles, but here’s what you need to know —and the questions you need to ask — as you get started.


    What solar options are available on RV’s?

    Ranging from the “solar-ready RV” to full-scale solar system packages with all the bells and whistles, the options are many — and can be confusing for newbies. Below are three common options that you’ll find when shopping:


    1. Solar-Ready

    Some RV manufacturers add a special port to the outside of the rig into which you can easily plug a specific brand’s portable solar panel. It’s helpful because the plug directly connects to the house battery, so set-up is simple.  However, a solar-ready RV does NOT mean that the rig comes with any solar components. Typically, in addition to the panels, you will need to purchase a charge controller as well as an inverter if you want to run more than just lights and 12V DC appliances. Most RV’s come with a single, basic 12V lead acid battery, so you may want to upgrade the battery bank to LiFePO4.


    2. Solar Battery Maintainer

    Many modern rigs boast a small wattage solar panel (<50 watts) and charge controller that are designed to simply maintain the RV/van house battery.  While these battery maintainers are NOT robust enough for off-grid RVing, they can be beneficial if you plan to store your rig outside when not in use. These small panels will keep your batteries topped off, so you are always ready to roll on to your next adventure.


    3. Off-Grid Solar Packages

    Some RV manufacturers offer a few models with built-in solar panels integrated into the roof, or as a post-production addition. These systems can provide enough power for average off-grid use of the built-in 12-volt appliances (e.g., lights, slide-outs, water pump, stereo, slides, etc.). However, a few RV manufacturers are now offering robust, large-scale solar packages which include all five of the major solar components. These “off-grid” solar packages range from modest systems on medium-sized travel trailers to huge systems on larger rigs which can add upwards of $15,000 to the RV’s sticker price. The more expensive systems are designed to be able to run the entire RV’s electrical system as well as some of the other “creature comforts” you might want to bring along.  


    Questions to Ask Before Shopping for a Solar-Powered or Solar-Ready RV

    Do you plan to camp off-grid frequently or just the occasional overnight? Do you plan to run additional electric appliances beyond what is preinstalled in the rig?  Like many campers, do you need to be able to work electronically? And how much power will you actually need?  In our next couple of articles, we’ll be discussing how to calculate your energy needs. To get a head start, download our Solar System Sizing worksheet.


    Questions for the RV Dealer

    With the solar-ready RV becoming a popular option, the salesperson should be able to answer these questions, or show you where to find them:

    What brand(s) of solar components are pre-installed in the RV?  RV manufacturers might choose off-brand solar components that are less expensive, and possibly less quality.  Do the research about solar brand(s) so that you know what you are buying. Also, ask about the type and size of the individual solar components, such as:

    • Total solar array wattage and voltage? And also, type (PWM vs MPPT) and size (amps) of solar charge controller
    • Size (total amp hours) and chemistry (lead acid or Lithium Iron Phosphate) of the battery bank?
    • Inverter size, type, and the load (wattage) it can handle?  
    • DC to DC charger size (amps)?
    • Is the converter compatible with Lithium Iron Phosphate batteries?


    Does the RV warranty include the solar components?  Also ask, for how many years? Is it different for the various system components? Does installing additional panels on the roof void the warranty?


    Have we peaked your interest in RV solar?  Hope so. Now, here comes more questions: Which solar components do you need? Can you DIY part or all of a solar powered system? Absolutely! We’ll be discussing these details in the next couple of months, so stay tuned for more resources to build-out a robust solar system that will meet your energy demands no matter what type and size of rig you own or plan to buy.


    What to Look for in a Solar-Ready RV (Part 1)
    5 Solar Components Every RVer Should Know (Part 2)
    RV Solar Explained … with Middle School Math (Part 3)
    Does a DIY RV Solar System Install Make Sense for Me? (Part 4)
    Choosing the Right Solar Powered System for My RV (Part 5, Coming Soon)