Category: Maintenance

  • Prepare Your RV for Winter Living in 6 Key Areas

    Prepare Your RV for Winter Living in 6 Key Areas

    So, you want to go camping year-round! That’s awesome, and it’s quite an adventure. Four-season camping opens all new possibilities for RV travel, but be advised: It requires thorough preparation to ensure comfort and prevent potential damage to your RV in varying weather conditions. To be clear, we’re talking about winter. If you want to take on all-weather camping, you need to prepare your RV for winter living.

    As you might have guessed, “prepare” is the key word here. Most of things we’ll mention here are best done in the fall (at the latest). So, here’s a breakdown of the key areas to address as you prepare your RV for winter living and get ready to take on year-round adventures.


    1. Double check insulation and drafts.

    • Exterior inspection and sealing. Carefully examine the RV’s exterior for cracks or gaps, especially around the roof and seams, and seal them with appropriate sealant to prevent cold air and leaks.
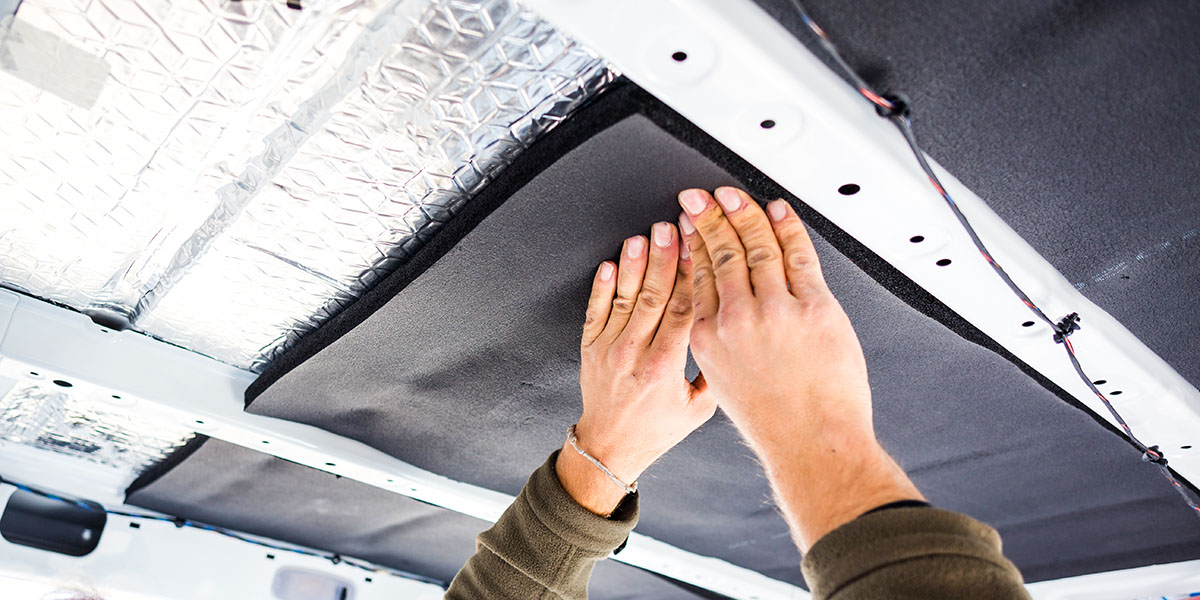
    • Window and door seals. Ensure that windows and doors close tightly and apply weatherstripping to block drafts and improve insulation. Consider using bubble insulation or other reflective foil to further insulate windows and skylights, particularly in cold weather.
    • Window coverings. Use heavy drapes or insulated curtains to block cold drafts from windows.
    • Floor insulation. Insulate the RV floor with foam board or thick rugs/carpets to prevent cold air from entering from below.
    • RV skirting. Installing an RV skirt around the base can effectively block cold winds and help keep the interior warmer, protecting components and potentially reducing propane consumption.
    • Slide-out insulation. Place foam board insulation beneath slide-outs to minimize drafts, remembering to remove it before retracting them. 


    2. Get detailed with heating and ventilation.

    • Heating system check. Ensure your RV’s built-in furnace is clean and functioning properly.
    • Supplementary heating. Consider using a portable electric heater when hooked up to electricity to conserve propane. For boondocking, a small propane heater can be more efficient than the onboard furnace. 
    • Vent covers. Install vent covers to allow for ventilation while preventing drafts and reducing condensation.
    • Condensation control. Use a dehumidifier to control moisture buildup, especially when using heaters, to prevent damage and mold growth. Opening vents can also help. 
    • Air circulation. Consider using small battery-powered fans for air circulation, particularly in warmer months or when not hooked up to power. 


    3. Make sure your plumbing system is protected.

    • Leak detection. Inspect all plumbing connections and hoses for leaks before hitting the road, as cold can worsen existing issues. 
    • Winterizing. If temperatures will drop below freezing, drain the freshwater tank, water lines, and water heater, then add RV antifreeze to the plumbing system to prevent freezing and bursting pipes.
    • Heating pipes and hoses. Use heat tape or strips on freshwater and sewer hoses, as well as exposed valves and connections, to prevent them from freezing.
    • Internal plumbing. Open cabinet doors in the bathroom and kitchen to allow the RV’s heat to reach the interior plumbing. Allowing faucets to drip slightly in freezing temperatures can also help keep water moving and prevent freezing.
    • Water tanks. Place a small heater near water tanks in the underbelly or disconnect external water sources and rely on the internal freshwater tank.


    4. Don’t forget battery care.

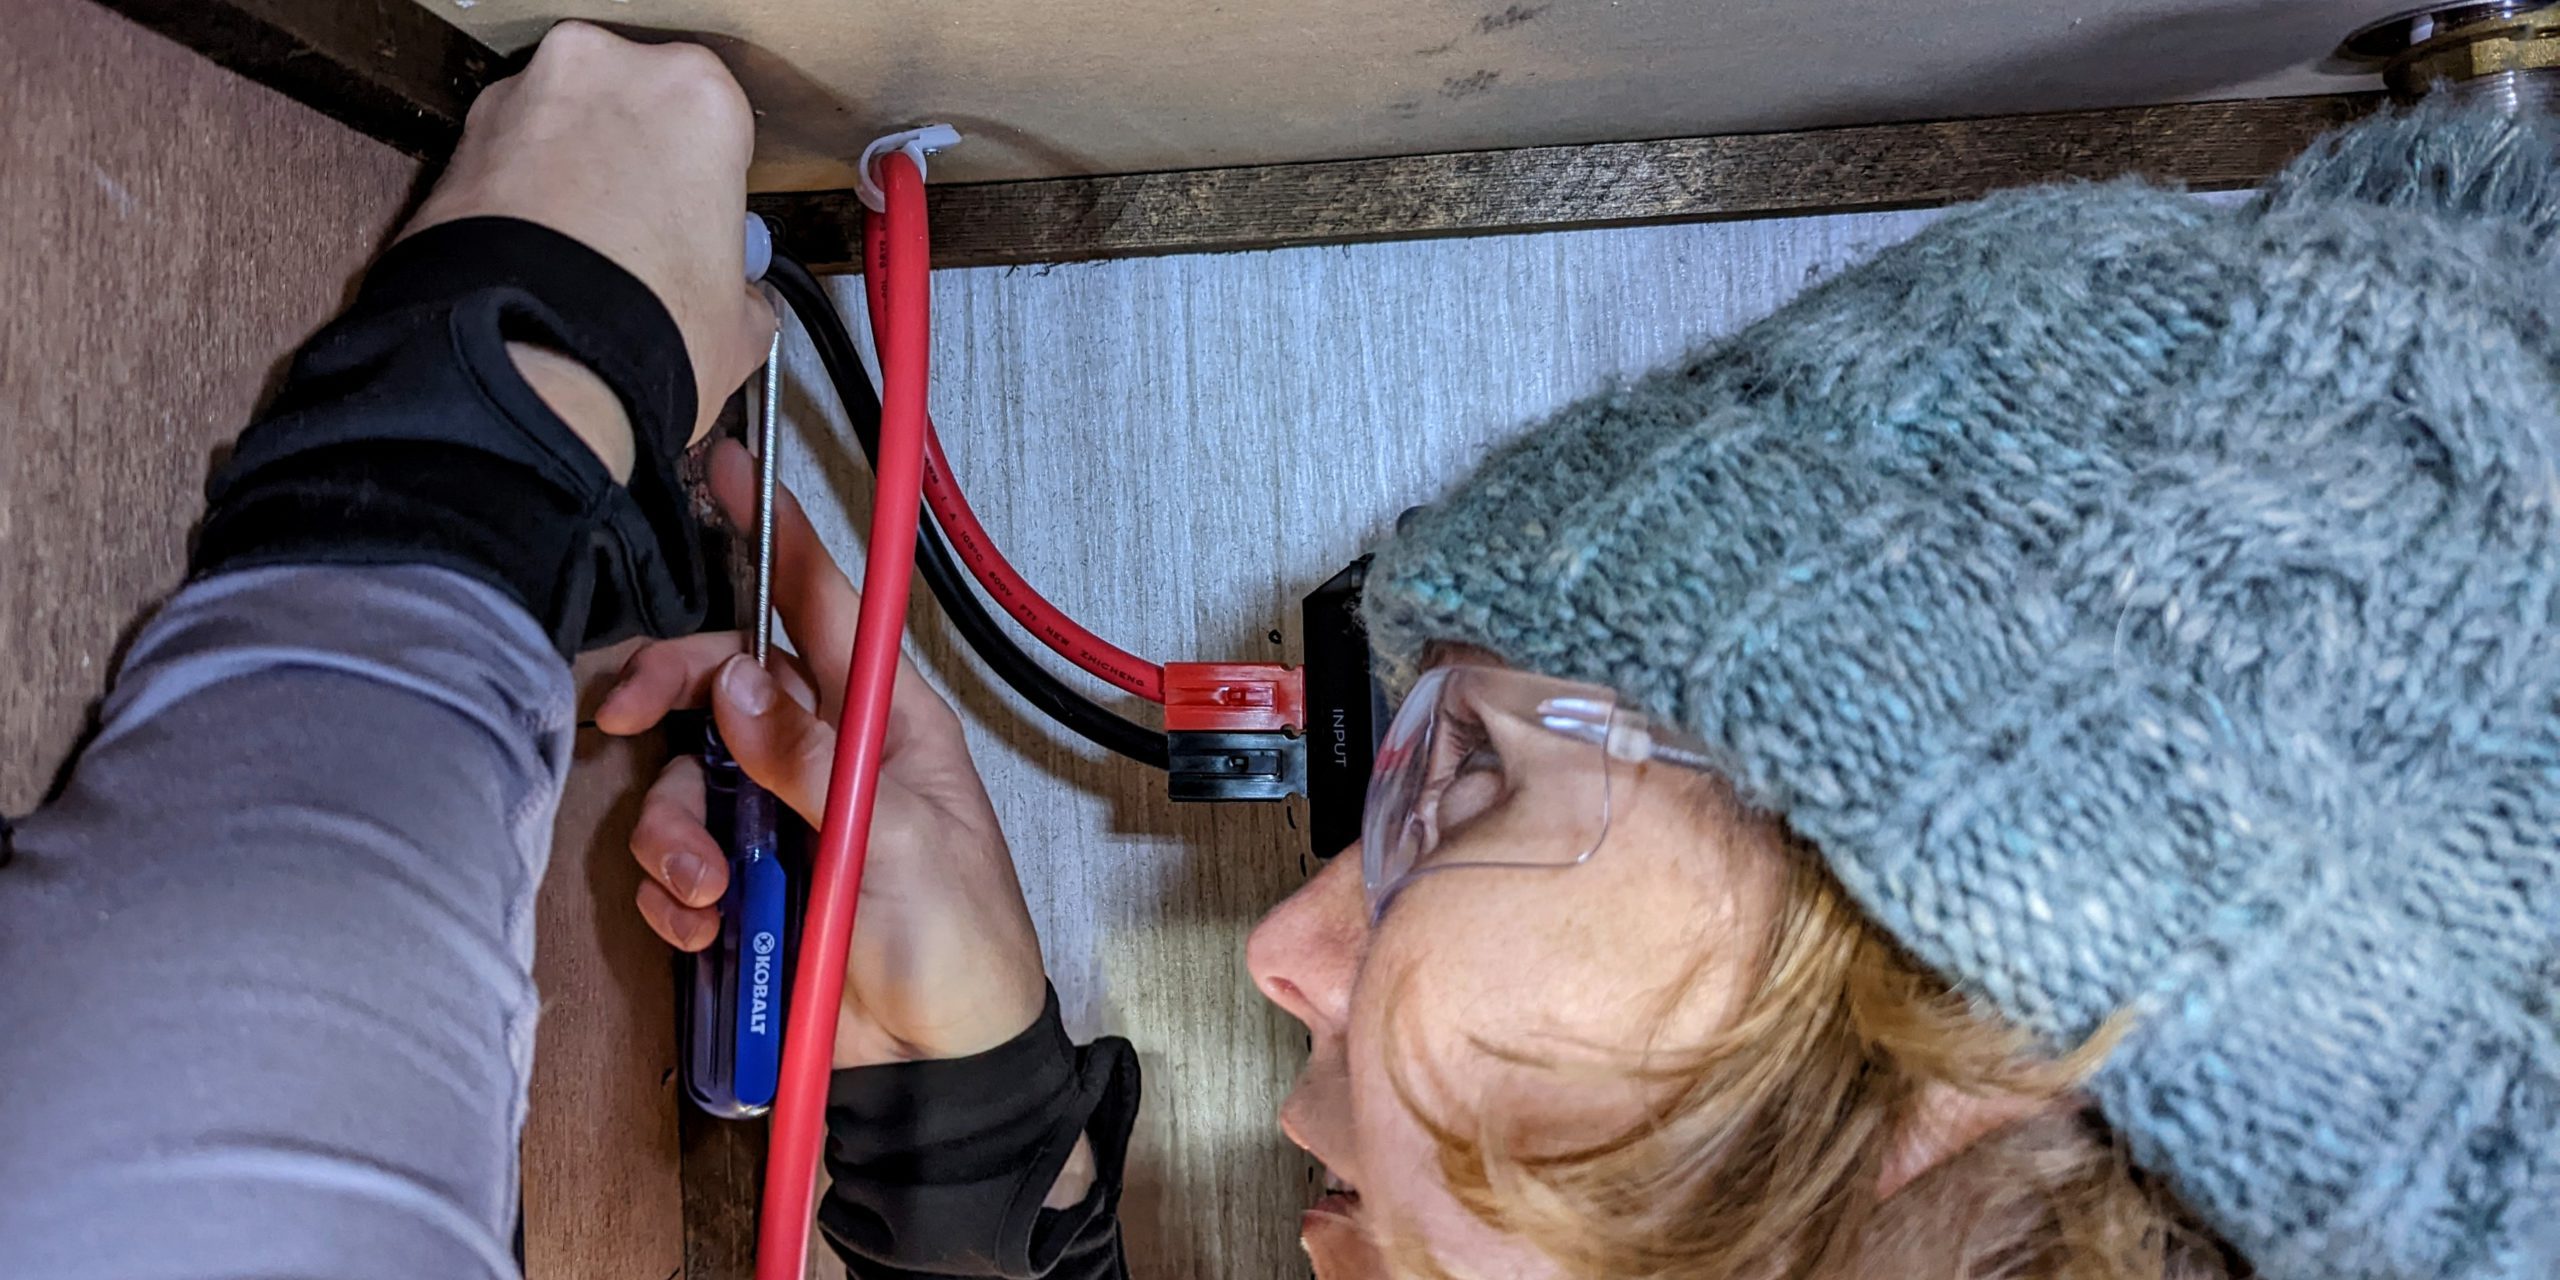
    • Battery inspection. Before each trip, inspect batteries for corrosion or damage, ensuring they are fully charged and securely connected.
    • Regular charging. Charge batteries frequently and disconnect them if storing for extended periods.
    • Optimal charging temperature. Store batteries indoors in a warm location, ideally above 50 or 60 degrees Fahrenheit, as concrete can draw heat away. Use a battery warmer or tender if storing in colder conditions.
    • Battery maintainer/float charger. Use a battery maintainer or float charger to keep batteries fully charged during storage.
    • Proper storage. If you’re storing the RV for the winter after a few all-weather adventures, remove the batteries and store them indoors in a warm, well-ventilated area. 


    5. Practice meticulous tire maintenance.

    • Tire pressure monitoring. Monitor tire pressure religiously, as temperature can cause pressure changes. Adjust to the manufacturer’s recommended PSI and consider a tire pressure monitoring system (TPMS).
    • Tire inspection. Before driving, inspect tires for cracks, bulges, and tread depth. The penny test or a tire tread depth gauge can help assess tread depth.
    • Valve stems. Examine valve stems for cracks or leaks.
    • Tire chains. If anticipating snowy or icy conditions, have a set of tire chains readily available. Be sure to check RV rental agreements for any restrictions on chain use.
    • Driving habits. Reduce speed and avoid sudden movements when driving on icy or wet roads. Be extra cautious with braking, as RVs often have rear-wheel drive. Also be aware of the dangers involved in driving through areas that have high winds as they will have their own set of challenges and could push you right off of the road.
    • Emergency kit. Carry a portable air compressor, a tire repair kit, and heavy-duty tire chains. 


    6. Pack some extra all-weather essentials.

    • Clothing. Pack clothing suitable for varying weather conditions, including base layers, insulating layers, waterproof outerwear, and appropriate seasonal clothes. Don’t forget you only have so much room for storage so choose accordingly.
    • Bedding. Bring extra blankets, warm bedding electric blankets for chilly nights as well as bedding for those warmer nights depending on your season and your location.
    • Safety devices. Ensure carbon monoxide detectors and fire alarms are functional and have fresh batteries.
    • Emergency supplies. Always carry a well-stocked first aid kit, flashlight with spare batteries, and extra food and water.
    • Navigation tools. Have a reliable GPS system, offline maps, and a paper map or road atlas.
    • Entertainment. Pack books, board games, or other forms of entertainment for inclement weather days.
    • Outdoor gear. Include camping chairs, an outdoor mat, and potentially a screen room or shade tent for outdoor relaxation.
    • RV-specific supplies. Remember essentials like leveling blocks, hoses, power adapters, surge protector, wheel chocks, and an RV-safe toilet paper and septic tank treatment. 


    After You Prepare Your RV for Winter Living

    Ember RV has a pretty unique and awesome sticker that they put on all their RVs. It says, “USE COMMON SENSE.” That definitely applies not only as you prepare your RV for winter living, but also as you take on all-weather travel.

    No matter where you’re going, which season it is, or during the trip itself, you should always consult your RV’s manual for specific instructions on preparing for different temperatures and conditions. Always research the weather and road conditions of your destination before embarking on a trip and consider the potential challenges of driving an RV while in or under multiple different types of weather.

    All-weather camping can be incredible, and in winter, it can lead to some incomparable views. Just, you know, use common sense.
  • 8 RV Maintenance Tasks for Your Summer Checklist

    8 RV Maintenance Tasks for Your Summer Checklist

    Summertime means vacation time for lots of folks, which means you’re not only taking your RV on the road — you’re taking your family. And if you’re going to take what (or more specifically, who) is most precious to you, you’ll also want to make sure that your RV is safe and road ready before you drive out onto the asphalt into the summer heat. So, like so many other things in the RV life, you need a checklist: a summer RV maintenance checklist.

    Well, consider that wish granted! This RV maintenance checklist is a simple guide for keeping your RV in top shape during summer months.


    Essential RV Maintenance Tasks for a Summer Checklist

    1. Inspect and clean your roof and exterior.

    • Inspections. Check your RV’s roof for cracks, punctures, or loose seams, especially before and after periods of heavy use or harsh weather.
    • Cleaning. Clean your roof thoroughly with RV-specific cleaners to remove dirt, debris, and prevent mold and mildew growth.
    • Sealants. Inspect the sealants around vents, skylights, and other roof penetrations for cracks or deterioration, and reseal as needed with appropriate RV-grade sealants to prevent leaks.
    • Awnings. Inspect the awning for wear and tear, clean it regularly with mild soap and water, and ensure it extends and retracts smoothly.
    • Exterior surfaces. Wash and wax your RV exterior regularly to protect against harsh summer UV damage and to maintain its appearance. 


    2. Give those tires a closer look.

    • Tire pressure. Check tire pressure before each summer trip and monthly during storage, adjusting to the manufacturer’s recommended PSI.
    • Inspection. Look for cracks, bulges, cuts, or uneven wear on the tread and sidewalls. 
    • Age. Replace tires every five to seven years, regardless of tread depth, as rubber deteriorates over time.
    • Rotation. Rotate tires every 5,000 to 7,000 miles to ensure even tread wear.
    • Summer storage. Cover tires when storing the RV for extended periods to protect against UV damage. 


    3. Double-check your batteries.

    • Charging. Fully charge batteries before and after each trip and keep them topped off with a battery conditioner during storage. A good investment is a trickle charger which keeps your batteries fully charged when not being used.
    • Fluid Levels. For flooded lead-acid batteries, check the water levels and refill with distilled water as needed.
    • Terminals. Inspect and clean battery terminals and connections to prevent corrosion and ensure a strong electrical connection.
    • Storage. Store batteries in a cool, dry place and disconnect them if storing the RV for an extended period. 


    4. Refresh your plumbing  and water systems.

    • Sanitization. Sanitize the freshwater tank according to the manufacturer’s guidelines.
    • Leaks. Check for leaks in the water lines and appliances and address them promptly.
    • Water heater. Flush the water heater to remove sediment and check the anode rod annually.


    5. Manually check the engine and mechanical hot spots.

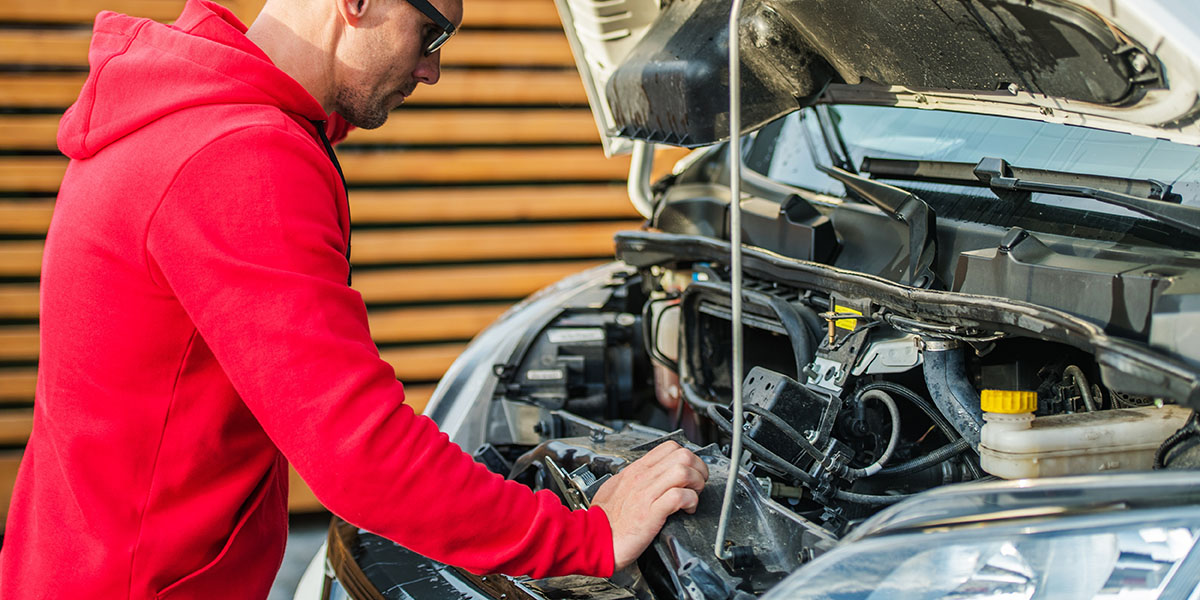
    • Engine fluids. Check and top off engine oil, coolant, transmission fluid, and other fluids.
    • Engine maintenance. Follow the manufacturer’s recommendations for oil changes, filter replacements, and other routine engine maintenance.
    • Belts and hoses. Inspect belts and hoses for cracking, deterioration, or proper tension.
    • Brakes. Have brakes inspected and serviced to ensure proper function.
    • Wheel bearings (trailers/fifth wheels). Repack or replace wheel bearings to prevent overheating and axle failure. 


    6. Prep and test run appliances and systems.

    • HVAC. Clean air conditioner filters and inspect seals and gaskets to ensure efficient cooling and heating.
    • Propane system. Check for leaks around connections using a soapy water solution and ensure the system’s hoses and regulators are in good condition.
    • Appliances. Clean and maintain RV appliances like the refrigerator, stove, and water heater according to manufacturer’s recommendations.
    • Generator. Run the generator for at least two hours to keep it in good working order.
    • Slide-outs. Clean and lubricate slide-out seals and mechanisms following manufacturer’s instructions. 


    7.  Ensure safety equipment is present and operational.

    • Detectors. Check smoke alarms and carbon monoxide detectors regularly and replace them as indicated by the manufacturer.
    • Fire extinguishers. Ensure fire extinguishers are accessible and within their expiration dates.
    • Lights. Check all interior and exterior lights for proper function, including brake lights, turn signals, and headlights. 


    8. Round out with general maintenance and storage (when ready).

    • Lubrication. Lubricate hinges, locks, and other moving parts to prevent rust and ensure smooth operation.
    • Pest control. Seal any cracks or crevices with steel wool or sealant to keep out rodents and insects.
    • Storage. Store the RV in a covered area or use a breathable RV cover to protect it from the elements.


    One Last Reminder for Your RV Maintenance Checklist

    It’s important to remember to always consult your RV’s owner’s manual for specific maintenance schedules, recommendations, and instructions for your particular make and model. Some tasks may require specialized tools or knowledge, and it’s best to consult a qualified RV technician for those jobs. 

  • How to Install an RV Air Conditioner

    How to Install an RV Air Conditioner

    So, you know what you need to do. You’ve analyzed your RV’s airflow. And you’ve resisted the spasmodic urge to skip all other steps and just replace your RV air conditioner. No, no. That’s not you. You know that your RV air conditioner needs replacing, and you’ve found the right model. The big question that remains is: Who is going to install the RV air conditioner? Is that the kind of thing you can DIY, or should you let a professional step in?

    Good questions. And we have good news. Whether you’re replacing a faulty unit or upgrading to a newer model, you can remove and install an RV air conditioner — both rooftops and mini- splits. They just need to be done differently — each with some careful planning and the right tools.

    Whichever option is the one you’re looking at, we can walk you through it.


    Option 1: Install an RV rooftop air conditioner.

    Safety first — turn off the power.

    Turn off all power. (You knew that, right?) You’ll want to disconnect the battery, unplug shore power, and turn off any generators. Ensure the RV is completely powered down before starting. Locate furnace fuse and turn off A/C power. 


    Now, remove the old A/C unit.

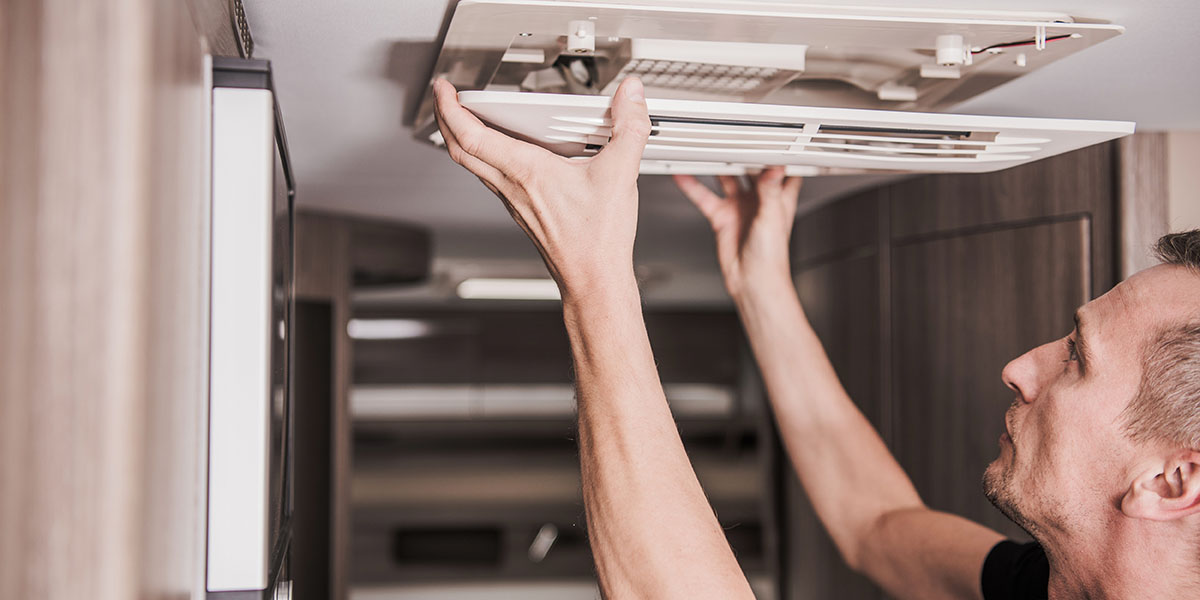
    On the inside of the RV, remove the inside cover plate. This is typically found on the ceiling where the A/C unit sits on the roof. Carefully identify and disconnect the wires connected to the controller box. (Tip: Take pictures or notes of the wire connections for easy reference during installation.) Then remove the controller and other parts. Set these aside to refer to later. Next, remove the mounting bolts. These are typically four long bolts located at the corners of the ceiling assembly.

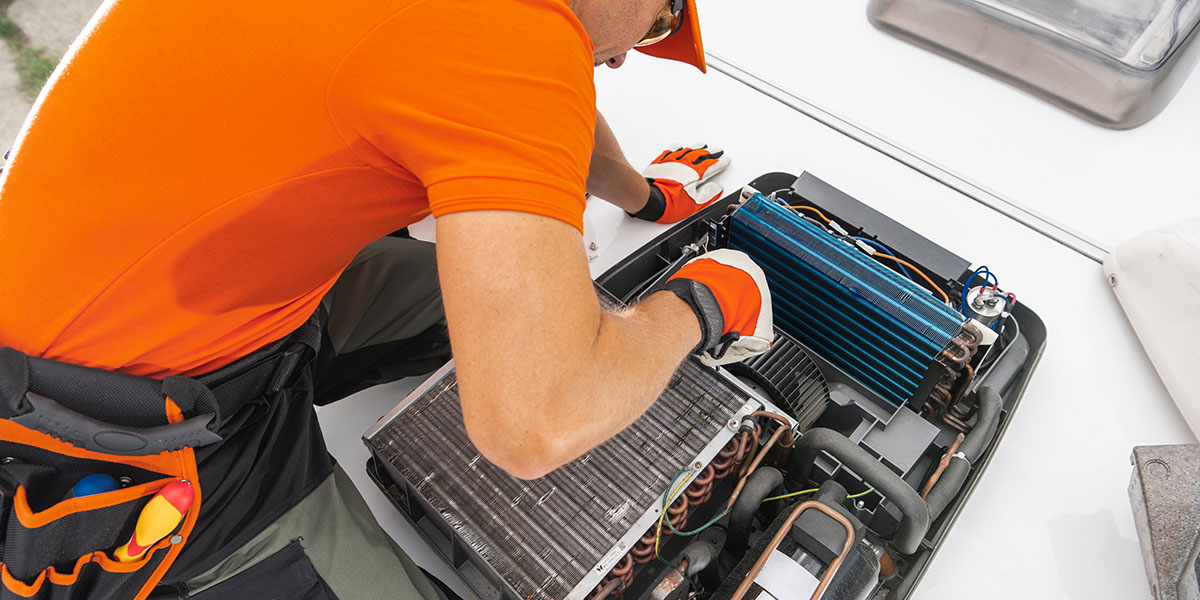
    Heading up top to the roof, make sure you access the roof safely. If your RV doesn’t have a ladder, use plywood to bridge roof joists and provide stable footing. Once in a secure and stable position, remove the rooftop air conditioner cover. (This may be held on by a few screws.) Carefully remove the rooftop A/C unit. It will be heavy, so handle it with caution. You might need to push up from the bottom to loosen it. 


    Follow these instructions to install the new unit.

    Place the new A/C unit on the roof, ensuring it aligns with the existing opening and that the gasket on the bottom is properly positioned over the opening. Dry-fit the frame, adjust the foam divider if necessary, and secure the frame to the ceiling by evenly tightening the bolts to compress the gasket. Next, hook up the electrical wiring, connect the wiring using the provided connectors or terminal block. Attach the air distribution box (ADB). Remove the filter cover and filter from the ADB, and attach it to the mounting frame. Then reconnect control wires and tuck loose wires, reconnect control wires and neatly tuck any loose wires inside the electrical box. Next, you will replace filters and covers. Then power up and test the unit’s various modes.

    When replacing a factory-installed unit, you may need to find the model number for a compatible replacement. If your old unit had an analog controller, a new digital controller and thermostat may be required. Don’t Forget: RV A/C units are heavy, so plan for safe lifting onto the roof. Also, remember that proper sealing is important for efficient operation and airflow optimization. Always use a new gasket and remove the old one when replacing an old unit. 

    Naturally, you should always refer to the specific instructions provided with your A/C unit. (But you already knew that.)


    Option 2: Install mini-split air conditioner.

    Not everyone has — or wants — a rooftop A/C on their RV. Alternatively, installing a mini-split air conditioner in your RV can offer several advantages. These include improved cooling efficiency and lower power consumption compared to traditional RV A/C units. 

    Importantly, as you might have guessed, the installation process is a little different. One that isn’t: the power. Turn. It. Off.


    Pick your spot and mount the indoor unit.

    Choose a location on an interior wall. You want it away from windows, corners, and high-traffic areas to ensure proper airflow and comfort. You also may want to build a supporting shelf. Securely attach the provided mounting bracket to the chosen wall or cabinet. Ensure the bracket is level and has adequate support. Then carefully hang the indoor unit onto the installed bracket. 

    Route the refrigerant lines and electrical wires from the indoor unit through the wall or cabinet to the outside. (You will need to drill a hole for this purpose.) Connect the drain hose from the indoor unit to ensure proper condensate drainage. Use clamps or straps to secure the line set and drain hose along their path. 


    Position the outdoor unit in a convenient spot.

    Common locations for the outdoor unit, compressor, include the rear bumper while some people opt to place it where a generator was previously located. Install a sturdy bracket on the chosen location to support the outdoor unit. Consider the weight capacity of the mounting area, especially if using a bumper mount. Mount the outdoor unit onto the bracket. 

    One big consideration to keep in mind: It’s crucial to cover the outdoor unit’s fan and coils while traveling to protect them from wind damage and bugs. 


    Connect the lines and wiring.

    With your supports in place, now it’s time to connect the refrigerant lines from the indoor unit to the outdoor unit. Connect the electrical wiring between the indoor and outdoor units according to the manufacturer’s specifications. (If you are connecting refrigerant lines yourself, you’ll need to vacuum seal the system to remove air and moisture before charging it with refrigerant.)


    Assign a designated electrical circuit for your mini-split.

    Most mini-split systems require a dedicated electrical circuit for optimal operation. You can run power to the mini-split by utilizing a breaker from one of your existing rooftop AC units. Alternatively, you can power it directly from a solar generator or other suitable power source. 


    Test and finish.

    Turn on the mini-split system and test its operation. Tidy up the refrigerant lines and drain hose. Cover any exposed holes or openings with the appropriate materials. 


    Keep a few other important considerations in mind.

    While some RV owners can install mini-splits themselves, it is recommended to consult a professional RV HVAC installer for the electrical wiring and refrigerant line connections. Mini-splits are simply more difficult than rooftop installations, and if it’s outside your skill set or comfort, there’s no shame in having a pro do it. Either way, always consult the manufacturer’s installation manual for specific instructions and recommendations for your mini-split system. 

    Also, whichever A/C system you decide to install, be prepared to make some minor to major modifications to your RV to accommodate the units, line routing, and wiring. It could even be a good time to check your whole electric system.

  • Before Replacing an RV Air Conditioner, Take These 7 Steps

    Before Replacing an RV Air Conditioner, Take These 7 Steps

    RV air conditioners are designed to provide cooling and comfort while on the road or at campsites. (Not that you really need that reminder if you’re on the road in the U.S. this summer.) However, like so many things, we often don’t really notice the A/C so long as it is working. But when it starts failing to do its job — keeping you cool — it doesn’t take long for you (or your passengers) to start wondering: Is replacing the RV air conditioner the answer?

    I get it. When the air goes down, a quick and easy solution can seem attractive. (Really attractive!) But in reality, you’ll do everyone a service (including possible your wallet) if you slow down.

    RV air conditioners come in different types and sizes to suit different types and sizes of RVs for different RVers with different cooling needs. So, before replacing your RV air conditioner, there a few, key things you should do to make sure it’s truly necessary — and that, if needed, you choose the right replacement.

    First let’s discuss the types of RV air conditioners. Consider it a primer not only to identify what you have — but also what you might get.


    Step 1: Identify your RV air conditioner.

    Rooftop Units

    Rooftop RV air conditioners are a popular and effective choice for lots of campers — especially those who travel frequently in warm weather. These units are mounted on the roof of the RV, which helps conserve interior space and provide powerful, consistent cooling. They operate by drawing in warm air, cooling it using a refrigerant system, and distributing the chilled air back into the RV. The hot air generated by the cooling process is expelled outside through the rooftop unit.


    Under-Bench/Closet Units

    These types of air conditioner are installed under a bench other seating areas or closets within the RV. The benefit of these unit is that they save space. By locating the unit under a bench or a closet, you can free up valuable roof space. The rooftop space could then be used for other things like solar panels or simply reducing the overall height of your RV. (Scraping off your air conditioner at a low vertical clearance is an all-too common hazard.) Additionally, with the main unit tucked away, under-bench or closet air conditioners often run more quietly than rooftop units. This leads to a more peaceful environment inside your RV.

    Another bonus is that the concealed nature of under-bench or closet units often result in a cleaner, less visually intrusive exterior compared to traditional rooftop units. Many under-bench/closet models are heat pumps. These offer both cooling and heating capabilities. It also makes them suitable for use in a variety of climates.


    Mini-Split Units

    Mini-splits are significantly more energy-efficient than traditional RV AC systems. As result, they regularly boast SEER ratings between 20 and 35. (As compared to 8-9 for rooftop units.) This makes them ideal for off-grid camping or boondocking where power is limited.

    Unlike noisy rooftop units, mini-splits are designed to operate quietly. (Again, this helps ensure a peaceful environment inside your RV.) With a separate outdoor compressor and indoor air handler, mini-splits offer more flexibility in placement than rooftop units. This allows for optimized positioning to suit your RV’s layout. Mini-splits eliminate the need for bulky ductwork, saving valuable interior space in your RV.


    Portable Units

    These units are self-contained and can be moved around as needed. This makes them a flexible option for smaller RVs or temporary cooling. They don’t require permanent installation and can be set up in any room with a window. Portable A/Cs can effectively cool down a specific area where you are located, rather than the entire RV. Understandably, this leads to potentially lower energy consumption. Portable units can supplement your existing RV AC during extreme heat. (Or even act as a backup in case the main unit fails.) Many models can run on portable power stations or solar generators, providing cooling even when you don’t have access to shore power. 


    Step 2: Consider the age and condition of your A/C.

    If your A/C is old and showing significant signs of wear, there will be signs. One good examples: reduced cooling capacity even after cleaning and maintenance. If that sounds like your unit, it might be time to consider replacing your RV air conditioner. So, let’s discuss the cost-effectiveness of repair versus replacement.

    When an RV air conditioner malfunctions, the decision to repair or replace it depends on several factors, including the age of the unit, the cost of repairs, and the frequency of past issues.

    Generally, if the A/C is relatively new and the repair cost is low, repair is a good option. However, if the unit is older, experiencing frequent breakdowns, or the repair cost is high, replacement might be more cost-effective in the long run. 


    Step 3: Assess the signs of A/C problems.

    First, does your current air conditioner have reduced cooling capacity If your RV isn’t cooling effectively, especially in warm temperatures, it could be a sign of the A/C unit nearing the end of its lifespan. Also, any of the following may be an indicator that you are AC unit needs to be replaced.

    • Weak or limited airflow can indicate problems with the blower motor, duct blockage, or a failing fan.
    • Loud or unusual sounds, such as grinding or rattling, can signal issues like loose parts or worn-out bearings.
    • Musty or burning smells can suggest underlying issues like mold, mildew, or electrical problems.
    • Leaks in or around the A/C unit can be a strong indicator of trouble, including potential refrigerant leaks. If the unit cycles on and off repeatedly without effectively cooling, it could be caused by thermostat problems, electrical issues, or a malfunctioning compressor.
    • Higher than usual energy consumption could indicate an inefficient or malfunctioning A/C unit.


    Step 4: Perform basic troubleshooting and maintenance.

    Ensure the unit is properly plugged in and check for tripped breakers or blown fuses. Clogged filters can significantly reduce airflow and cooling efficiency. Ice buildup can restrict airflow, so try turning off the unit to allow the coils to thaw. Look for leaks or gaps in the duct collar that might be allowing cold air to escape and loose mounting bolts can cause leaks allowing cold air to escape through the roof of your RV. 


    Step 5: Consider professional help.

    Complex issues like refrigerant leaks, compressor problems, or motor replacement are best handled by certified RV HVAC technicians. We recommend professional services for maintaining the complex pieces of your RV’s AC system such as compressors, refrigerator coolant and condensers it to name just a few components.

    Also, many technicians can come to your location, saving you the hassle of driving to a repair shop. Even though we do recommend seeking out professional services for the more complex problems mentioned above, deinstallation and reinstallation of an A/C unit on top of your RV is definitely doable by anyone. Replacement of a mini-split is a little bit more involved, but under bench and closet units are also easily replaced by the owner.


    Step 6: Think about the replacement unit.

    Not every air conditioner fits every RV. Consult a dealer or service center for advice on selection. Consider factors like Btu cooling capacity, whether a heat pump is desired, and if remote control functionality is needed. Installation can be complex and may require specialized skills, especially for features like cutting roof openings and wiring connections, but we feel that many of you out there have the skills necessary to replace your air conditioner.

    By carefully assessing your current unit’s condition, performing basic maintenance and troubleshooting, and seeking professional help when needed, you can make an informed decision about whether to replace or even upgrade your RV air conditioner.


    Step 7: Research popular brands for replacing an RV air conditioner.

    There are many units out there for your RV and you must do your research to determine what type of air conditioner you want if you just want to go backstock with the same type of air conditioner you already have or doing an upgrade to a mini split. If your replacing an RV air conditioner, here are a few manufacturers that are leaders in the industry.

    • Dometic. Known for energy efficiency and noise reduction, with features like remote control and programmable timers.
    • Furrion. Offers powerful and efficient cooling, with features like dual fans and vibration smart technology.
    • Coleman-Mach. Offers a range of durable models, including low-profile units for improved fuel efficiency.
    • Pioneer. Known for under-bench units with heat pump functionality for year-round comfort. 
  • Your RV and UV Protection: 9 Actions Every Owner Should Take

    Your RV and UV Protection: 9 Actions Every Owner Should Take

    The fact is that the sun — bright orange ball that it is — can sneak up on us. We head outdoors and enjoy the sunny the weather with easy nonchalance. But for your RV, those ultraviolet (UV) rays aren’t just sunny — they can punish different components over time. So, plussing up your RV with UV protection is crucial for extending its lifespan. (In addition to maintaining its aesthetic appeal.)

    Fact is, UV radiation is no joke. And an RV that neglects UV protection can ultimately expect damage to its exterior paint, roof, and interior furnishings. However, by understanding these risks, RV owners can easily boost their UV protection with some pretty simple preventive measures.

    So, let’s name them. The following are nine ways to help you safeguard your investment from the menace of the sun. 


    The Danger of UV Rays for Your RV

    Ultraviolet rays are a type of electromagnetic radiation emitted by the sun. They are categorized into three types: UVA, UVB, and UVC. While UVC rays are absorbed by the Earth’s atmosphere and do not reach the surface, UVA and UVB rays can have detrimental effects on materials, including those used in RV construction. UVA rays penetrate deep into materials and can cause fading and degradation over time. UVB rays, while less prevalent, are responsible for sunburn and can also damage surfaces.

    Both types of UV rays can lead to the deterioration of your RV’s exterior and interior, resulting in costly repairs and a diminished appearance. Some common indicators to recognize the signs of UV damage would be the following.


    Signs of UV Damage

    • Fading Paint. The vibrant colors of your RV may start to fade, leading to a dull appearance. 
    • Cracked Surfaces. The exterior materials, including fiberglass and vinyl, may develop cracks or become brittle. 
    • Deteriorated Seals. UV exposure can weaken the seals around windows and doors, leading to leaks.

    How to Protect Your RV from UV Rays

    1. Use UV-resistant materials.

    When investing in an RV, choose a model that uses UV-resistant materials. Many manufacturers now incorporate materials designed to withstand UV exposure. If you’re planning to customize or repair your RV, look for fabrics, paints, and coatings that specifically state UV resistance.


    2. Regularly wash and wax your rig.

    Keeping your RV clean is essential for protecting it from UV rays. Dirt and grime can trap moisture and lead to mold and mildew, which can exacerbate UV damage. Regularly wash your RV using a mild detergent and water. After cleaning, apply a high-quality wax designed for RVs. Wax acts as a barrier against UV rays and helps to protect the paint.


    3. Use UV-blocking covers.

    When your RV is parked, especially for extended periods, consider using a UV-blocking cover. These covers are designed to shield your RV from direct sunlight. That prevents the UV rays from causing damage. Choose a cover that fits well and is made from breathable material to prevent moisture buildup underneath.


    4. Park your RV in the shade.

    Whenever possible, park your RV in shaded areas. (You already knew that, right?) Trees, awnings, and other structures can provide natural protection against UV rays. If you’re at a campground, look for sites with ample shade. If shade is not available, consider using portable sunshades or canopies to create a shaded space for your RV.


    5. Install window tinting.

    Window tinting can significantly reduce UV exposure inside your RV. Applying a UV-blocking film to your windows helps protect your interior furnishings and occupants from harmful rays. This goes beyond preserving the appearance of your RV. It also keeps the interior cooler and enhances comfort during hot weather.


    6. Make use of awnings and sunshades.

    Awnings are a great addition to any RV. They provide shade and reduce direct sunlight exposure. Ensure your awning is made from UV-resistant fabric. Additionally, consider using side panels or sunshades that can be attached to the awning for extra protection.


    7. Keep regular with your inspections and maintenance.

    Conduct regular inspections of your RV to identify any signs of UV damage. Check for fading, cracking, or deterioration in the exterior materials and seals. Addressing these issues promptly can prevent further damage. (That way, you can avoid costly repairs.) Regular maintenance forever remains essential for the longevity of your RV. It includes resealing joints and applying protective coatings.


    8. Store your RV properly.

    If you plan to store your RV for an extended period (like all winter), choose a location that minimizes UV exposure. Ideally, store your RV in a garage or covered storage facility. If that’s not possible, use high-quality covers. Also, ensure that all windows and vents remain closed to protect against UV rays and potential weather damage.


    9. Apply a protective coating.

    There are various protective coatings available that can be applied to your RV’s exterior to provide an extra layer of UV protection. These coatings can help prevent fading, cracking, and weathering by forming a barrier against the sun’s rays. Always follow the manufacturer’s instructions for application for the best results.


    Defend Your RV with UV Protection

    Understanding UV exposure is key to protecting your RV. Familiarize yourself with the UV index, which indicates the strength of UV radiation on a particular day. On days with high UV indexes, take extra precautions by minimizing exposure and ensuring your RV is adequately protected.

    Remember, just like other maintenance tasks, protecting your RV from UV rays is an essential part of maintaining its value and ensuring a pleasant camping experience. By understanding the risks associated with UV exposure and implementing proactive measures, you can significantly extend the lifespan of your RV. Regular maintenance, use of protective materials, and proper storage practices will help keep your RV looking great and functioning well for many adventures to come. Remember, a little effort in protecting your RV today can save you time and money in repairs tomorrow. Enjoy your travels knowing your RV is well-protected against the sun’s harmful rays!

  • Optimizing Your RV Airflow: A Step-by-Step Guide

    Optimizing Your RV Airflow: A Step-by-Step Guide

    Some things don’t take too long to figure out. And if you’re living in an RV, one thing you figure out pretty quick is that optimizing airflow is crucial to enhance comfort, efficiency, and overall performance. Proper RV airflow does lots of things — all which make life in your RV more enjoyable. It ensure that your rig is maintains  comfortable temperatures you sert. It reduces humidity levels. And down the line, it improves the efficiency of your heating and cooling systems.

    All that sounds great, right? But what’s the key to optimizing RV airflow? Buying a new A/C system? (We’ll talk about that in another article.) The truth is that while a new system can be a helpful addition, the most practical things you can do simply involve awareness and a little maintenance.

    So, let’s talk through some key strategies to optimize airflow in your RV.


    Step 1: Understand the basics of RV airflow.

    Just to make sure everyone is on the same page here, airflow refers to the movement of air within your RV’s interior and systems. Good RV airflow helps in distributing conditioned air (either heated or cooled) evenly throughout the space. Therefore, it’s essential to understand how air moves in and out of your RV, the impact of temperature differences, and how various materials can affect RV airflow.


    Step 2: Assess your current airflow situation.

    Before making any changes, it’s essential to evaluate your RV’s existing airflow. Check for areas that may be obstructing airflow. Take a look at furniture placement, curtains, or other items. Also, identify hotspots or cold spots within your RV. These spots can indicate poor airflow in certain areas. 


    Step 3: Check your ventilation systems.

    Most RVs are equipped with ventilation systems. These systems include roof vents, windows, and exhaust fans. Make sure the following systems are functioning correctly. 

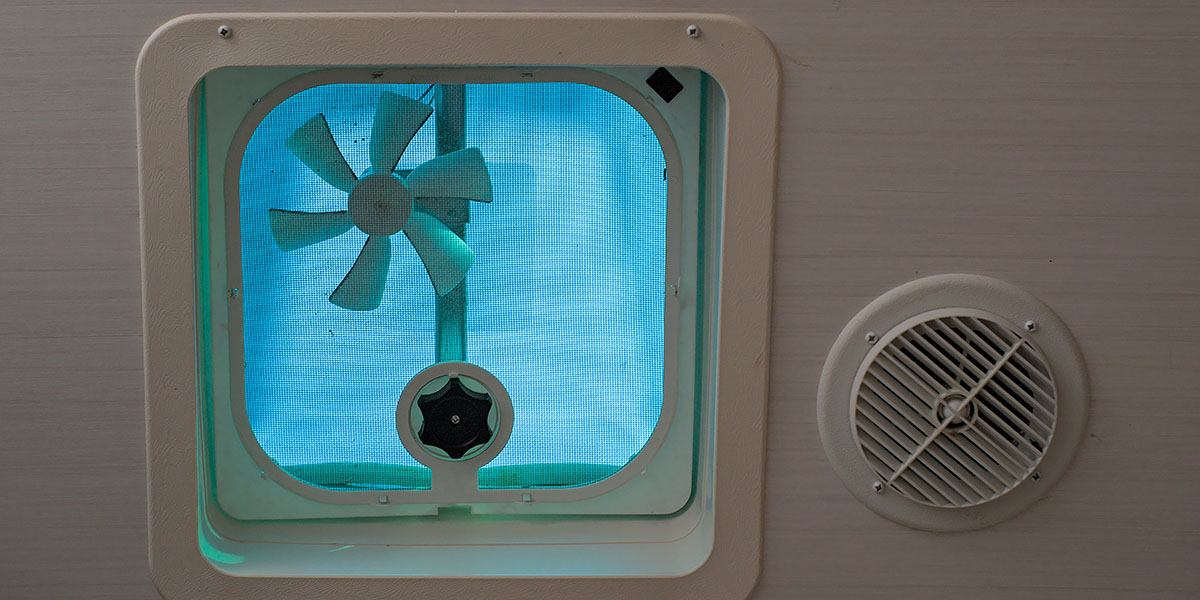
    • Roof Vents. Install or maintain roof vents that can be opened to allow warm air to escape. This is particularly useful in warmer climates.
    • Exhaust Fans. Use exhaust fans in the kitchen and bathroom to remove excess humidity and odors. These fans help in creating a negative pressure that allows fresh air to enter through other openings. Oftentimes, these fans are tiny and ineffective, and ready for replacement.
    • Windows. Open windows strategically to create cross-ventilation. This allows cooler air to flow in while warm air exits.


    Step 4: Evaluate your RV’s insulation.

    Proper insulation is vital for maintaining a comfortable temperature and optimizing airflow. RV insulation helps to keep the conditioned air inside and reduces the need for heating or cooling. Consider these options:

    • Reflective Insulation. Install reflective insulation materials on windows to minimize heat gain from sunlight.
    • Insulated Window Covers. Use insulated curtains or thermal blinds to keep heat in during winter and out during summer.
    • Underbelly Insulation. Ensure the underbelly of your RV is insulated to prevent heat loss and improve overall efficiency.


    Step 5: Consider upgrading your HVAC system.

    If your RV’s heating, ventilation, and air conditioning (HVAC) system is outdated or inefficient, consider upgrading to a more modern system. Newer units often come with better airflow designs, variable speed fans, and improved energy efficiency.

    • Ductless Mini-Split Systems. These systems can provide efficient heating and cooling with better airflow control.
    • High-Efficiency Air Conditioners. Look for units with a high SEER (Seasonal Energy Efficiency Ratio) rating for better airflow and efficiency.


    Step 6: Optimize your air ducts.

    If your RV has a ducted HVAC system, ensure the ducts are clean and unobstructed. Dust and debris can accumulate over time, affecting airflow. Consider the following.

    • Duct Cleaning. Regularly clean the ducts to improve airflow and indoor air quality.
    • Duct Insulation. Insulate your ducts to minimize heat loss or gain, especially if they run through unconditioned spaces.
    • Duct Sealing. Check for leaks in the ductwork and seal them to prevent air from escaping.


    Step 7: Place fans strategically.

    Adding fans can enhance airflow and improve comfort levels within your RV. Consider these types of fans.

    • Portable Fans. Use small fans to circulate air in specific areas, especially in hotter regions.
    • Ceiling Fans. Install ceiling fans to help distribute air evenly throughout the living space.
    • Exhaust Fans. In addition to kitchen and bathroom exhaust fans, consider adding a roof-mounted exhaust fan for additional ventilation.


    Step 8: Maintain your RV’s exterior.

    The exterior of your RV can significantly impact airflow. Regular maintenance can help ensure that air can move freely.

    • Clear Obstructions. Remove any debris, branches, or dirt from vents, exhaust ports, and air intakes.
    • Check Seals and Caulking. Inspect seals around windows, doors, and vents. Replace any worn or damaged seals to prevent air leaks.
    • Aerodynamic Design. If possible, consider upgrades that improve the aerodynamics of your RV, such as streamlined hoods or fairings.


    Step 9: Monitor humidity levels.

    Excess humidity can lead to discomfort and mold growth within your RV. Optimize RV airflow to manage humidity levels effectively with the following.

    • Dehumidifiers. Use portable dehumidifiers to reduce moisture levels in the air.
    • Humidity Sensors. Invest in a humidity sensor to monitor levels and adjust ventilation as needed.


    Step 10: Create a regular maintenance routine.

    Establishing a routine for maintaining your RV’s airflow system is crucial for long-term performance. Regular checks and maintenance tasks include:

    • Inspecting and Cleaning Filters. Replace or clean air filters in your HVAC system regularly.
    • Checking for Leaks. Periodically inspect ducts and vents for leaks and seal them as necessary.
    • Seasonal Maintenance. Before and after camping seasons, perform a comprehensive check of your RV’s ventilation and airflow systems.


    Step 11: Optimize layout and design.

    The layout of your RV can influence airflow significantly. Consider rearranging furniture or using space-saving designs to allow for better air circulation. For example, with furniture placement, avoid placing large pieces of furniture in front of vents or airflow pathways. Common sense stuff like that.


    Step 12: Enjoy improved RV airflow.

    Optimizing airflow in your RV is essential for comfort, energy efficiency, and maintaining a healthy living environment. By understanding the basics of airflow, utilizing ventilation systems, upgrading HVAC equipment, and maintaining your RV regularly, you can enhance the overall performance and enjoyment of your recreational vehicle. Whether you are a weekend camper or a full-time RVer, prioritizing airflow optimization will significantly improve your experience on the road.

  • Cleaning Bug Splatter Off Your RV: A Step-by-Step Guide

    Cleaning Bug Splatter Off Your RV: A Step-by-Step Guide

    If you’ve driven more than ten minutes in your RV — especially in the warmer months — you’ve probably been gifted with a splattered windshield and bug-caked front cap. It’s one of those unavoidable realities of life on the road. (And at least for us, if feels like it is inevitable the moment you leave a truck/RV wash.) More times than we can count, we’ve pulled into campgrounds plastered with bug splatter so thick on the front of our rig, it looked like a horror movie scene.

    But while bug splatter might be inevitable, leaving it there isn’t. Nor is it advisable, even for the laziest RVer. Those juicy little missiles can actually damage your RV’s finish, paint, and even headlights if ignored.

    So, let’s walk through what bug guts do to your rig, how to get them off safely, and how to prevent buildup in the first place.


    Why Bug Splatter Is More Than Just Gross

    It’s not just about looks. Bug splatter contains enzymes and acids that start breaking down surfaces quickly — especially in the sun. Letting it sit too long can cause:

    • Etched paint and decals,
    • Pitted or stained fiberglass,
    • Cloudy headlights, and
    • Reduced visibility through windshields.

    Some bugs are especially acidic (looking at you, lovebugs). And the longer they bake onto your RV’s front end, the more damage they can do.


    Step-by-Step: How to Clean Off Bug Splatter

    Like a new stain on a favorite shirt, time really is of the essence here. Letting bug splatter sit for days or weeks makes it much harder to remove. Here’s how to tackle it effectively.


    1. Soak the area.

    Start by soaking the front cap or affected surfaces with water to loosen things up. A hose with a spray nozzle or a foam cannon works well. If you’ve been driving all day, let the rig cool down before applying water to avoid streaking.


    2. Use a bug-specific cleaner.

    There are tons of RV-safe bug removers on the market. Look for one that’s safe for gel coat, fiberglass, paint, and decals. Apply it generously and let it sit for the recommended time — usually a minute or two.

    Some RVers swear by DIY options like diluted vinegar or dryer sheets, but we recommend using products designed for the job to protect your finish.


    3. Gently scrub.

    Use a microfiber cloth, soft sponge, or bug sponge (not steel wool or harsh pads) to gently wipe away the splatter. Avoid circular motions that could grind grit into your paint.


    4. Rinse thoroughly.

    Rinse the area well to remove residue from the cleaner and loosened splatter. If needed, repeat the process for stubborn spots.


    5. Wash the RV.

    Once the bug splatter is off, wash your entire rig as usual. This helps remove any leftover cleaner and keeps the finish protected.


    What Not to Do

    • Don’t use abrasive scrubbers. These can scratch your finish.
    • Don’t use high-pressure washers. Using one too close to seals, decals, or paint can cause unexpected damage.
    • Don’t wait too long. The sooner you clean, the easier it is and the less damage bugs can do.


    A Few Products For The Job

    A quick search online shows some of the following as good options for this fun job:

    Pro Tip: Keep a basic cleaning kit in your RV’s exterior storage so you can tackle splatter at your next stop instead of waiting until you’re home.


    Prevention Tips: Keep Bugs from Sticking

    While you can’t avoid bugs entirely, a few strategies can make them easier to clean off:

    • Apply a protective wax or sealant. The prime real estate here is your RV’s front cap and windshield. This creates a slick surface that makes bugs less likely to bond.
    • Install a bug screen or bra. This is specially helpful on Class A or Class C motorhomes with large front ends.
    • Use Rain-X or similar treatments. Using this on windshields to help dead bugs wash off more easily during rain or a rinse.
    • Park strategically. When stopped, park with your bug-covered side away from direct sun to reduce baked-on splatter.
    • Hit up truck/RV drive-through washes. These stops are your friend. We love passing through a Blue Beacon or similar truck wash made for semis, because they are usually fairly priced, do a decent job of cleaning your rig, and they apply several of the items on this list.

      Pro Tip: Always ask and know what chemicals they are applying, if they are RV safe, and explain what you want and don’t want them to do. Sometimes you have sensitive electronics like a generator that you don’t want to get soaked if they do an undercarriage wash.
      ALWAYS KNOW YOUR RIG!!!


    Buggin-Out on Bug Splatter

    Bug splatter is an unavoidable part of RV life — but it doesn’t have to become a permanent part of your paint job. With the right tools and a little regular maintenance, you can keep your rig looking fresh, protect your investment, and avoid the pain of repainting or restoring damaged fiberglass.

    Whether you’re prepping for your next road trip or cleaning up from your last one, a few extra minutes spent removing those buggy reminders will keep your RV in tip-top shape for years to come.

  • Evaluating Your RV Braking System: A Make or Break Task

    Evaluating Your RV Braking System: A Make or Break Task

    Everyone knows that we live in a fast-paced world. We’re always on the go, always moving forward. Working for the weekend we can’t wait to go on the next trip. And there’s absolutely nothing wrong with that. That is unless our go-go-go attitude neglects the necessity of the stop. With the weight of our RV behind us, taking good care our our RV braking system couldn’t be more important.

    Even so, you might ask: Where do I start when checking the brake system on my RV? (Not a bad question at all.)

    Everything starts with identifying the type of RV braking system you own. So, let’s start by discussing the different types of RV braking systems. Then we’ll dive into preventive maintenance, checks, and what you should relegate to your local RV dealer. 


    3 Types of RV Braking System

    Basically, you can divide RV braking systems down into a three categories: hydraulic, electrical, or air-assist braking systems. Here’s what you should know about each.


    Hydraulic Systems

    Hydraulic RV braking systems are usually found on RVs and campers that are smaller in size and or weight. Still, it is possible to find a hydraulic system on a larger RV. These braking systems are the most common type of braking system on small RVs, campers, and some trailers. These systems use a master cylinder and hydraulic fluid to stop the vehicle or towed rig. When activated by the brake pedal, the fluid is slightly pressurized and then moves through the lines. This causes the brakes to apply pressure on the drum or brake rotor. Another type of hydraulic braking system is a surge break. A urge break is attached directly to the trailer hitch, but  it operates independent of the tow vehicle.


    Air-Assist Systems

    Air-assist braking systems are mainly found on larger and or heavier RVs such as a Class A and Class C motorhomes. Simply put, air braking systems work in a similar way that a hydraulic braking system works. The big difference is that instead of hydraulic fluid being pushed through to activate the brakes, the air braking system pushes air through activating the brake pads on the RV through brake chambers.


    Electrical Braking Systems

    You will find electrical braking systems mainly on towables, like fifth wheels and travel trailers. This system can be activated by a brake controller located in the cab of the tow vehicle. Electrical braking systems also can be controlled or activated solely through the brake pedal of the tow vehicle. There, it send a signal through the seven-pin connector to the trailer when plugged in to the tow vehicle.


    Auxiliary Systems

    Also, as a sidenote on brakes, these three systems are only the main categories of RV braking systems. But there are auxiliary braking systems that augment the main braking systems of an RV. Among the auxiliary systems are things like antilock braking systems, transmission retarders, and exhaust brakes. However, in my opinion, checking these systems and diagnosing any type of issue during a preventive maintenance check should be left to the pros.


    Maintenance on Your RV Braking System

    Universal Checks

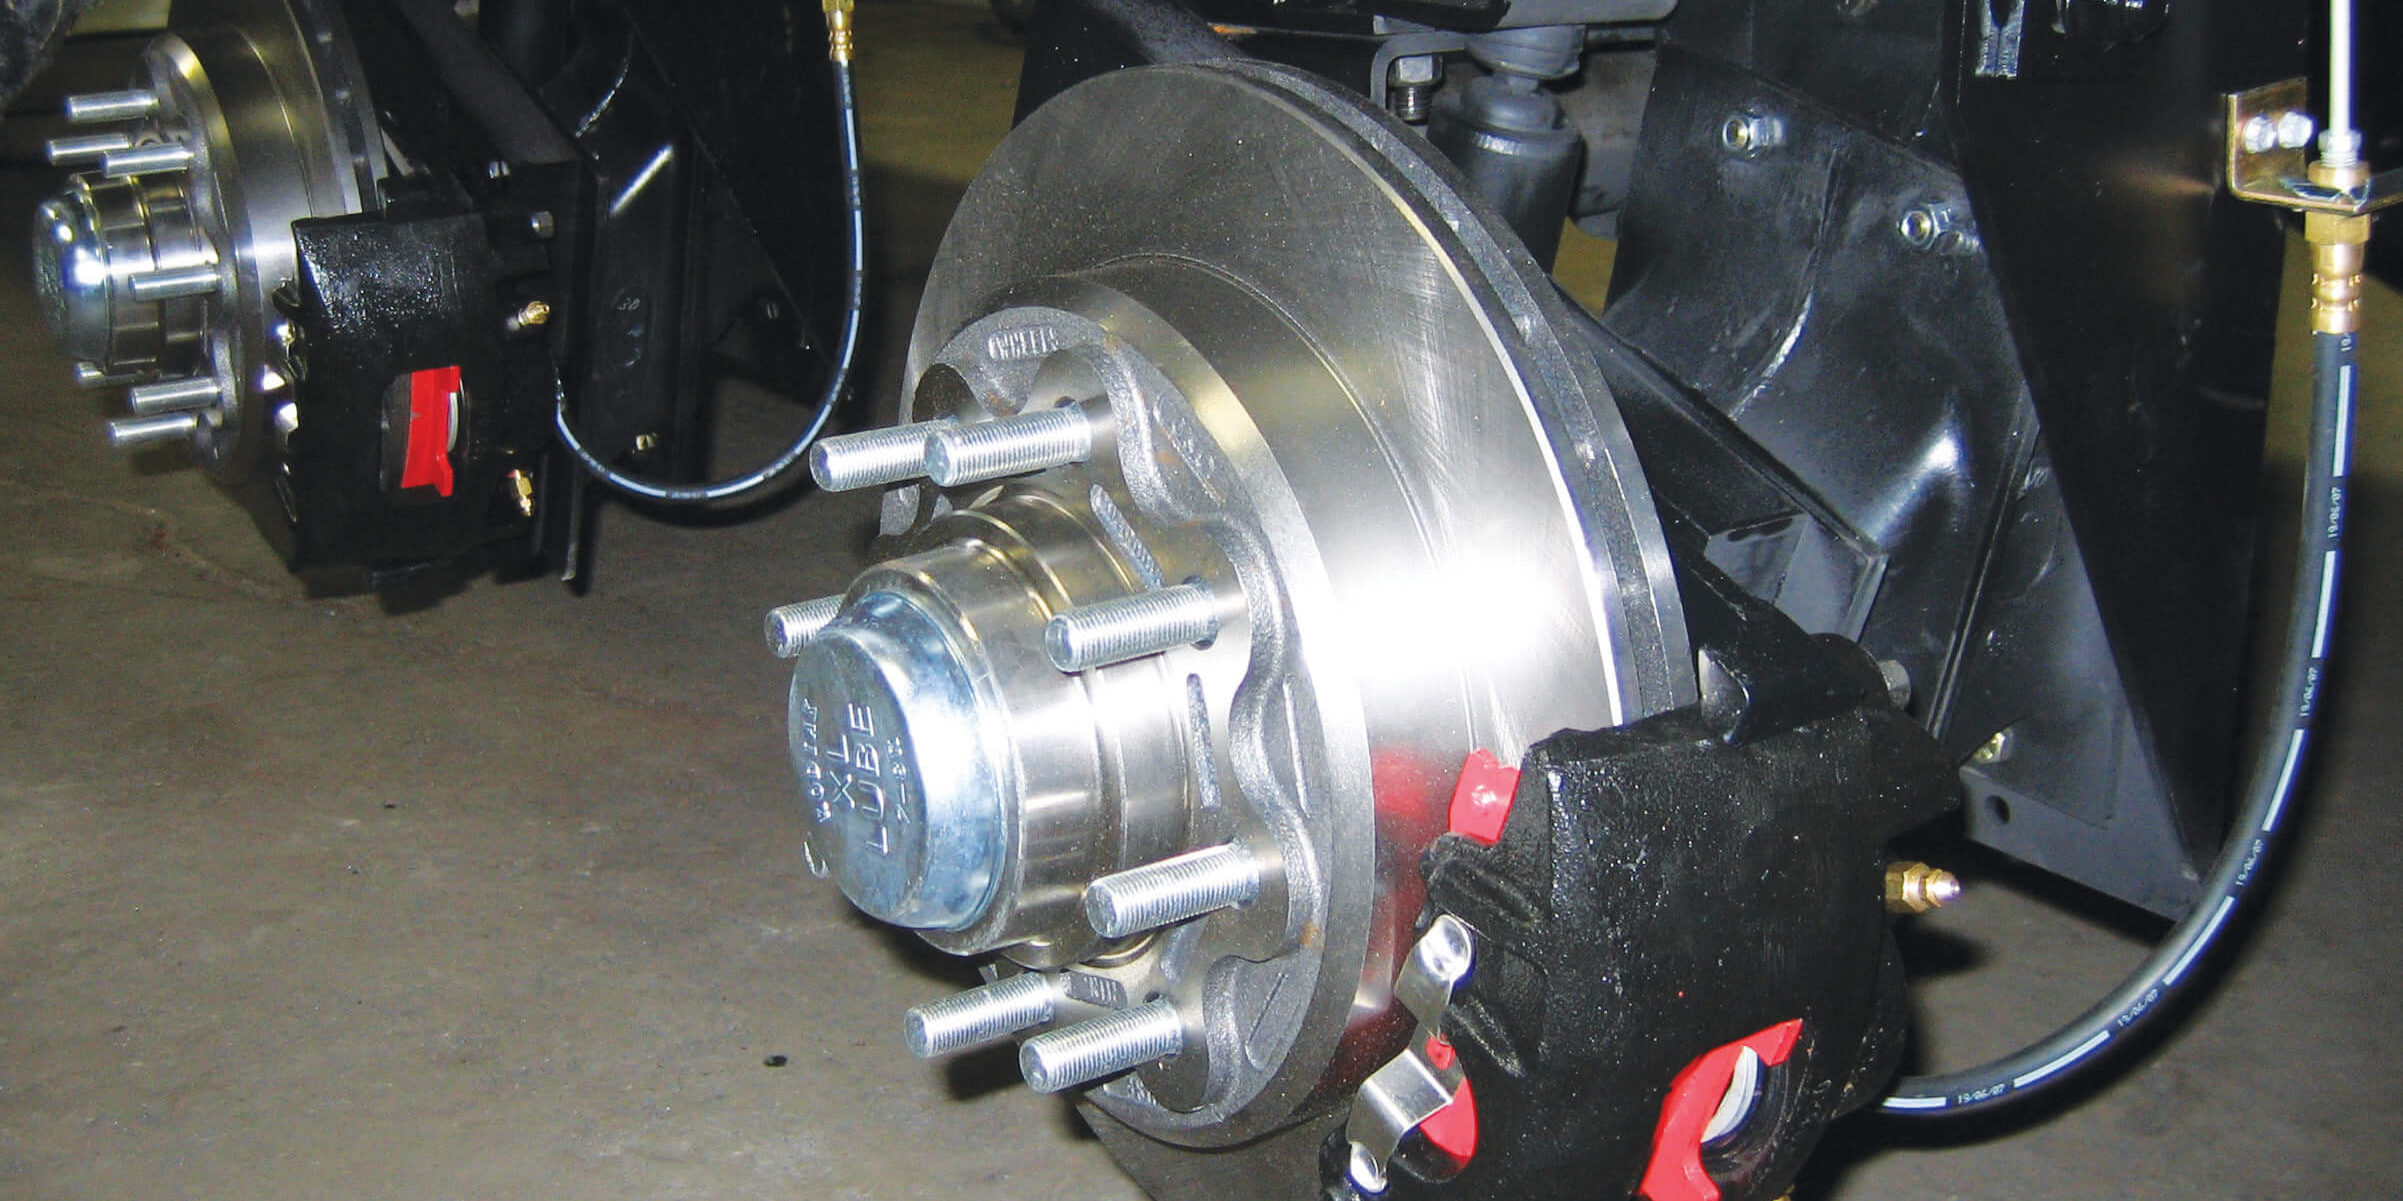
    Now, let’s talk about maintenance on those brakes. If you haven’t figured it out yet, your RV is one of the largest vehicles on the road. So, it takes more time to stop — especially when you are also towing. To tackle maintenance of its vital braking system, start at the end of the system: the pads, discs, drums, and rotors. Starting here is best because regardless of the type of system you have, they are all basically the same systems at the tire. If you have disc brakes, you will have brake pads which will need to be checked on a regular basis especially before and after long trips. As a rule of thumb, I would recommend that you check them out at least every six to seven months.)


    Discs, Pads, and Rotors 

    Many of you out there that are shade-tree mechanics. You’re pretty comfortable with the basics. If you fall into that category, you should be able to replace your own pads easily saving lots of time and money. While you’re at it, you should also rotate your rotors. In an RV, they do see a lot of wear and tear. So, it’s a good idea to rotate them at every other pad change.

    Also, it is a good idea to take them periodically to your local brake shop to have them turned. While there, the pros can ensure that they are not warped or wearing non-uniformly. Your local brake shop should also be able to tell you when it’s time to replace your rotors. As a reminder, each time you turn them it takes a little bit more of the metal away from the rotor. Your local shop will be able to tell you at what point they are non-usable.


    Drum Brakes

    Along the same lines, if your RV has drum brakes, there are some standard checks that you will want to perform. These usually include checking the brake shoes on your drums for any deep grooves. It’s also important to check the remaining parts of the drum system —  the self-adjusters, brake shoe spring holders, and cables and parts associated with the emergency brake.

    Drum brake systems are usually associated with RVs of a vintage nature. Brake drums need to be turned just like brake rotors. Likewise, they have a certain number of times they can be turned before they need to be replaced. Shade-tree mechanics should be able to complete this type of maintenance as well since drum brake systems are less complex.


    Hydraulic-Specific Checks

    Regardless if you have drums or discs on your hydraulic or electric or air braking system, it’s good to remember that they can come under extreme pressure. At times, they can also see very high temperatures due to the amount of braking necessary. (Which, of course, may depend on the terrain or traffic conditions.) But this is especially true when talking about hydraulic braking systems. The fact of the matter is that the amount of heat and pressure does not typically affect hydraulic fluid, but. it does affect any condensation that gets absorbed overtime in the system. (A good symptom of this is when you have a soft or spongy brake pedal.)

    Therefore, you should check your hydraulic brake fluid levels regularly. When you  see condensation or water present (or every 10,000 miles or per your owner’s manual recommendations), completely change out your brake fluid in your entire system. Other items to inspect while you were already there are the wheel cylinders for any weeping of hydraulic fluid. Check the brake lines themselves for any kinks or leaks and any power brake booster items that depend on vacuum from the engine. 


    Air-Assist-Specific Checks

    An air-assist RV braking system includes an air compressor, an air tank, and (in some systems) multiple air tanks or reservoirs. Added to this are brake chambers which convert the compressed air into mechanical force to operate the brake shoes or pad, a brake pedal with linkages, and brake drums, discs, shoes or pads. (There’s a lot going on here.) The compressor builds and maintains air pressure. The tanks store compressed air. And the chambers convert air pressure into mechanical force to apply the brakes. The brakes themselves will be either brake drums or disc brakes as we have discussed previously.

    On a regular basis, you should drain your air reservoirs. The bad news about this system is that this reservoir that holds your compressed air also tends to collect water and oil. Ultimately, that will degrade air braking functions. (Also, it’s always a good idea good to check your owner’s manual for instructions that are specific for your rig.) Inside of this component, is also a filter which is there to collect the moisture and oil. It should be replaced about every two years. Or, if you drive more often and have further trips, it’s always good to be on the safe side of things and check your filter sooner than later.


    Making RV Braking System Checks Regular

    As with many other RV maintenance tasks, you as the RV owner have the capability of checking out your own braking system. It’s similar to the way  you would check out your electrical system. Uses your owner’s manual to determine specifically the schedules you should follow.

    However, we would be remiss to mention that many of the items in your braking systems should be checked by your local RV shop especially if you are unfamiliar with this type of inspection on your own. It’s always better to be safe than sorry, especially when you’re far from home trying to relax in the great outdoors of our beautiful country.

    While both failing to brake and accelerating too quickly can contribute to accidents, failure to brake is more frequently cited as a contributing factor. Inadequate brakes can lead to rear-end collisions due to inability to stop in time. Conversely, while speeding and sudden acceleration can also cause accidents, studies have shown that faulty brakes are a more direct cause of accidents than speeding.

    So, check those brakes and enjoy every stop — no matter where you roam!

  • Most-Forgotten RV Maintenance Items

    Most-Forgotten RV Maintenance Items

    Most RV owners know that maintaining your RV is essential for ensuring safe, comfortable, and fun travel. But let’s be honest — not all RV owners do it. (And all too often experience the consequences.) Most RV owners are familiar with the basics. They’ll check tire pressure, inspect the battery, and ensure the brakes are functioning. (All good there.) But there are several often-overlooked aspects of RV maintenance. These forgotten items can lead to significant issues down the road if not addressed properly.

    Working from the outside to the inside (not order of importance), this article will explore some of the most forgotten items in RV maintenance, why they’re essential, and tips on how to keep your RV in top shape.


    No. 1: Exterior Wash and Wax

    Sure, this may seem like extra work (and a small item on your very long checklist), but it’s kind of sad that many RV owners never take the time to give their rig a proper wash and wax. And the fact is, it’s not really just about looks. Failure to at least doing this at least a few times a year, will cause your exterior to break down over time. This will lead to paint damage paint and rust.

    Furthermore, a clean and waxed RV not only has a better appearance (although it definitely does that). It also helps it retain value over time. While cleaning your RV, you should inspect the areas where dirt gathers. Some usual suspects are around your wheel wells, under the awnings, around the RV slides and seals, and around entry points on your roof such as vents and skylights.


    No. 2: Chassis Maintenance

    The RV chassis is the backbone of the vehicle and requires regular maintenance to ensure safe operation. This includes checking the suspension system, steering components, and alignment.

    Despite it’s importance, many RV owners forget about chassis maintenance. And it’s kind of easy to understand why. The living areas of the RV are simply more visible. But don’t let the unseen sneak up on you. Schedule a professional chassis inspection annually to ensure everything is functioning correctly. Also, keep an eye on the fluid levels for the transmission and differential.


    No. 3: Brake System Checks

    Frankly, brake systems are probably the least checked and most neglected part of the RV. That despite this system being one of the most important safety features of an RV. Brake pads and shoes, and rotors and drums can wear down over time leading to reduced braking performance. Depending on the type of braking system you have, there are multiple components from the pedal to the linkages … to the air reservoirs … to the hydraulic master cylinder and wheel cylinders, et cetera. All of these items should be inspected at least visually before any trip. A more detailed inspection can be done whenever you have your tires rotated.

    Additionally, brake fluid should be checked and replaced as needed. One reason is that hydraulic systems seem to take on condensation. (One indicator is that it will cause a soft or spongy brake pedal.) You should have your entire brake system inspected by your local RV shop at least yearly (and more frequently if you travel more often and also frequent hilly areas).


    No. 4: Tire Maintenance

    While it’s a pretty common practice to check tire pressure, RV owners tend to often overlook other areas of tire maintenance. This includes checking the tire tread depth, inspecting for any signs of wear, bulges and cuts and ensuring the tires are rotated on a regular basis.

    Underinflated or overinflated tires can lead to poor fuel efficiency, uneven tire wear, and unsafe driving conditions. Additionally, remember to inspect the spare tire regularly, as it can often be forgotten — and ensure that your rig is properly equipped for RV tire maintenance and repair.


    No. 5: Elastomeric Sealing and Caulking

    The roof, windows, and doors of an RV are highly susceptible to leaks, which can lead to extensive water damage and mold growth. Many RV owners forget to regularly inspect and maintain the seals and caulking around these areas. (Heading into the winter season is always a good time to check your seals.)

    It’s essential to check for cracks, peeling, or deterioration of the sealing material. Inspect the seals and roof at least twice a year, especially before the travel season. If you find any issues, clean the area thoroughly before applying new caulk or sealant.


    No. 6: Propane System Inspection

    The propane system is essential for running appliances. (Think of  ranges and stoves, three-way refrigerators, and heaters.) However, many RV owners forget to inspect the propane system regularly for leaks and proper functioning. A leak can be dangerous and lead to costly repairs.

    Use a soap solution to check for leaks by applying it to the connections and looking for bubbles. When making checks on this system, you want to focus on the connections at the tanks, the connections at the appliances, and the actual lines themselves. You may have flexible and or hard lines. Also, ensure that the propane tanks are secure and certified on a regular basis.


    No. 7: Water and Water Tank System

    One of the most crucial yet often neglected aspects of RV maintenance is the RV water system. Many RV owners forget to sanitize their freshwater tanks and lines regularly. Contaminated water can lead to health issues and can even damage the plumbing system.

    It’s recommended to sanitize the water system at least once a year, especially if the RV has been unused for an extended period. Use a mixture of bleach and water (1/4 cup of unscented household bleach for every 15 gallons of water) to clean the system. After sanitizing, run the water until you can smell the bleach. Let it sit for a few hours. Then flush with fresh water, running the water until you can no longer smell bleach or detect any other product in your system except H2O.

    Flushing of the gray and black water tanks is also important to the health of your water system in your RV. Make sure to also fill your gray and black water tanks up at least ¾ of the way to flush them out every season.


    No. 8: HVAC System Maintenance

    The heating, ventilation, and air conditioning (HVAC) system in an RV is often taken for granted. (Until it stops working — as soon as you need it.) Checking and replacing the air filters should be done on a regular basis. You should check and replace air filters regularly. Not doing this will will negatively affect your RV, just like it would in a house. It can lead to reduced efficiency and air quality issues.

    Inspect the HVAC system at the beginning of each travel season and replace filters as needed. Additionally, clean the exterior unit to remove dust and debris that can hinder performance.


    No. 9: Battery Care

    Another commonly neglected area is your battery banks and associated cables and switches. RV batteries require regular maintenance to ensure they provide the appropriate amount of charge to start your RV. (That in addition to charging other necessary batteries to run all the accessories in your RV that run on a 12-volt or 24-volt system.)

    This includes checking fluid levels, cleaning build up on the terminals, making sure batteries are charging as they should, checking all the cables, switches and busbars. Many RV owners forget about their batteries, as well as the other components of the electrical system (more on that in a second). It’s particularly common when the RV is not in use, which can lead to dead batteries when they are finally ready to hit the road.

    Check the battery fluid levels monthly. Clean the terminals with a mixture of baking soda and water if you notice corrosion. It is also recommended that you use a battery tender to trickle charge your batteries so that you will not be surprised where’s the dead battery when you’re ready to go on your trip.


    No. 10: Electrical System Evaluation

    We’ll admit it: Your RVs electrical system can be a very complex system. Many owners totally forget to perform regular checks. (And others pretend to forget.) These checks include simple inspecting of exposed wiring harnesses, testing your ground on your 120-volt AC system, and testing out all appliances and outlets and lights to ensure functionality.

    RVs typically have either at 12-volt and or 24-volt DC system which is charged by your alternator on your vehicle, solar panels on the roof, or through your on-board generator (if you have one). Make sure to note any lights that may flicker or are in operable, any appliances that do not work properly or intermittently. If you encounter any issues, start with your fuse block and more breaker box to ensure they are properly seated and not trip or blown. Any major issues with either the DC or the AC system should be referred to your local RV shop.


    Perfecting Your RV Maintenance Checklist

    RV maintenance is a task that requires attention to detail. While it’s easy to remember the more prominent aspects of maintenance, it’s often the forgotten items that can lead to significant issues down the road. By staying vigilant and proactive about these commonly overlooked areas, RV owners can ensure their vehicles remain safe, comfortable, and ready for adventure. Regular maintenance not only prolongs the life of the RV but also enhances the overall travel experience, allowing for countless memorable journeys. You know, the stuff we like.

  • How Do I Check My RV Electrical System?

    How Do I Check My RV Electrical System?

    Compared to brick-and-mortar houses, an RV electrical system can be much more complex and diverse. Up front, you should know that that increases the importance of regular checks and maintenance by you the owner. And frankly, that can feel like a lot if you’re not naturally mechanically minded.

    The good news is that you don’t have to be an electrician or engineer to do these checks. You just need to master a few basics and be diligent with your maintenance. And to help you do that, we’ll walk through this step by step.


    The Basic Elements of an RV Electrical System

    RVs will have a 12- or 24-volt DC system. This system powers ceiling vents, water pumps, some lighting, sensors and gauges for water tanks, some small appliances, and your RV starting system. Also, your RV has a 120-volt AC system to provide power for major appliances. (Think of things like refrigerators, televisions, microwaves, air conditioners and coffee machines.) Your electrical system could also be supplemented by solar power through an inverter and batteries and your RV may also be equipped with an onboard generator. 


    Getting Started: Inspecting Your AC System

    The main component of the RV electrical system is the 120-volt AC system. This system, as mentioned, provides power for your larger appliances. Periodically, if possible, you should start your checks with the outlets where your appliances plug-in.

    First, checking for previous evidence of arcing and discoloration of the plugs. The AC system also drives the DC system through a converter charger that keeps your 12/24-volt DC direct current system functioning. Therefore, periodic inspection of the converter charger and the wires that go to and exit the component is recommended. Depending upon the total AC requirements of your RV, you will experience between a 30-amp or 50-amp power cord, an external receptacle or your power cord (that could be hardwired), and an internal breaker panel with matching rated breakers appropriate for your system requirements.

    Personal maintenance and checking of the AC system involves inspecting and checking certain items. These include the power pedestal or other outlet, your shore power cord, and the point at which the cord makes its connection to your RV for previous evidence of arcing. This point of inspection for your power cord and adapters is important prior to going to a new site. That’s because you want to ensure that you have the proper cable or adapter. (A quick phone call to the facility where you’ll be staying is recommended.)

    Also, periodically, you should inspect your breaker panel and breakers for any damage to the breakers. Damage can be indicated by previous evidence of arcing here, along with the wires that connect to them. Look also at your transfer switch that switches between your sources of power: shore power, generator, or batteries through an inverter. Other items to consider when conducting your electrical system inspection are your smoke detectors, carbon monoxide detectors, and your GFCI outlets.


    Backup Checkup: Checking the On-Board Generator

    Besides shore power, another way to power your RV’s AC electrical system is through an on-board generator. RVs with this capability are able to provide their own power. On-board generators can generate AC power. They come in a variety of models. They can run on anything from gasoline to diesel to propane depending upon the manufacturer.

    Personal maintenance on this subcomponent of your RV electrical system first includes the batteries. During this inspection, you are looking for corrosion around the battery terminals, loose connections for evidence of arcing and any loss of battery cable insulation.

    The next item you should check is your air filter to check for any debris and to make sure it has not met its life expectancy. You also want to go ahead and check the levels of each battery, the condition of the oil. Also check the coolant level, the hoses, lines, and radiator, if it has one. Regarding its electrical output, you will want to visually inspect the cord which provides the current from the generator and is attached to the power transfer switch. As mentioned, this switch will automatically select between power sources such as the generator, shore power, or DC to AC inverter. 


    DC Power: Assessing Fuses, Corrosion, and More  

    As we had already discussed, your RV will obtain power by either plugging into an external source such as a house receptacle or a campsite power pedestal, or from a generator. From one these sources, DC voltage is created via a converter charger hooked into the battery bank. The charger converter could have its own set of fuses usually mounted on the outside of the unit. From there, voltage will flow into a centralized fuse box where voltage is distributed throughout the RV to all the DC run items.

    When experiencing any fault at a part of your DC system, always check the fuses first. As a note, many modern RVs have a power control center which houses both DC fuses and AC breakers. Where DC direct current is concerned and depending on the size and class of your RV), you could have either a 12-volt DC or a 24-volt DC system. (The latter can be more efficient than a 12-volt DC system.)

    During an inspection, you are looking for corrosion around the battery terminals, previous evidence of arcing, loose connections, and any loss of battery cable insulation. (As well as the fuses in the fuse block.) In either system, your DC systems will draw power from a bank of 12-volt and or 6-volt, deep-cell batteries that provide a sustained discharge. As mentioned, they will either be charged by a solar power system or a DC charger converter or your vehicles alternator in some applications.

    Just like many other things, no one thinks about the RV electrical system until it breaks down at the most inconvenient time. A good rule of thumb where checking your DC system is concerned is to go ahead and plan it for the same time your oil change. 


    Next: Evaluating the Solar Power System

    If you have an solar RV electrical system, you have the ability to generate electricity to be stored in a bank of batteries. The basic system has the following components: panels, controllers, batteries, inverters, battery isolators, busbars, shunts, and fuses. When checking this part of your RV electrical system, you want to conduct a visual inspection of the panels themselves, the wiring harness, and connections to the charge controller before and after each trip.

    The charge controller regulates the flow of electricity preventing overcharging and ensuring an efficient energy transfer. Next on the list to inspect is the inverter. (That is, if you have not already inspected it in a previous part of your inspection. It will be probably installed near the charger.) The reason we want to check this part of our system more often is because these systems are very expensive and are always exposed to the elements.


    Additional Solar Items to Inspect

    The remaining parts of this system to be inspected are battery isolators, busbars, shunts, and fuses. You should inspect each connection at each isolator on a regular basis. An evergreen example is during the time you change your oil. The battery isolators separate batteries in multi battery applications. This allows each battery to charge alone. What this does for the system is that it protects each battery from discharging into another battery in the bank. You should inspect each connection at each isolator on a regular basis. (Wanna guess my recommendation when that should be? When you change your oil. No surprise there.)

    Another part of your solar system are busbars. These are metal strips that allow multiple wires of the same charge to be connected to a central point. The shunt allows you to measure the amount of electrical current in your circuits. This is installed after your bank of batteries before your charge controller, which monitors your batteries charge and capacity.

    Next in your system, you have fuses. These are tiny but necessary circuitry insurance made up of small pieces of wire that are designed to break the circuit when reaching a level beyond its capacity — circuit rating. Even though these are typically the smallest as part of your system, you should check your fuses first. It could be the simplest cause of an electrical breakdown.


    Regularizing Your RV Electrical System Checks

    Whatever type of RV that you have, you should develop a maintenance checklist. This is always good to break out you before and after your trips. (Also, you know, when you get your oil checked.) The reality is that electrical issues can be very frustrating. However, with a little bit of preventive maintenance and checks, you can avoid many issues. And issue avoidance is key to enjoy your time in your RV.