Category: Maintenance

  • Let’s Talk About RV Slide Lubrication

    Let’s Talk About RV Slide Lubrication

    Do you remember the time in your life when you caught the bug to get away and experience the great outdoors? Most of us probably started in a ripstop tent then dreamed of a pop-up — the gateway camper for a lot of people. But as our families and love of the outdoors grew, so too our RVs and camper needs became more complex. At the center? Space — that age-old camper conundrum. And for those of us who want all the comforts of home with us, the slide-out system was a big innovation. Interior space in an RV with a slide-out literally expands, but so does our maintenance checklist. Enter RV slide lubrication.

    It’s sneaky. You may not have thought about before. But now, if you’re enjoying all that extra space, we need to talk about RV slide lubrication. You know, so your outdoor fun runs smoothly.


    Slide-Out Origins: A Tale of Moving Parts

    You may be surprised to find out that the first slide-out was made by a San Francisco camper builder. His name was Gustav Bretteville, and he developed it in 1915. It was advertised as an Automobile Telescoping Apartment, which sold for $100 and was designed to sit on the back of a Model T Ford Runabout.

    Going back to those origins, it helps us think about the modern-day RV slide-out system. For example, consider that the slide-out is engineered with multiple components. In this “telescoping apartment,” there are motors and actuators. Then racks and rails. And seals and weather protection. And also, pumps, cylinders, flanges, and control systems that all must work in conjunction to extend and retract your RV’s interior space. Those are a lot of moving parts with a lot of friction points. (You see where we’re going with this.)


    Using the Right Kind of Lubricant 

    First, you will want to lubricate your RV slide-outs and components with a silicone-based, slide-out lubricant that is pretty dry. (As opposed to oily.) Then you’ll want to put proper amounts of lubricant on the components of the slide-out. (Look for gears, pulleys, tracks, bearings, chains and or cables.) You will also want to avoid using any type of oil-based lubricants or grease. Those kinds of lubricant attract dust and dirt.


    Identifying Your Type of Slide-Out 

    There are three basic types of slide-out mechanisms, and they all require lubrication. The three types are electric, hydraulic, and tip-out slides. 

    Electric slides use a motor and a rack-and-pinion or cable system to move the slide-out. The rack-and-pinion could require lubrication at the pivot points as well as where the cable systems slide around pulleys if present.

    Hydraulic slide mechanisms utilize a hydraulic pump that extend and retract the slide-out. You’ll see these more often on heavier slides. Due to their stability and strength, they can handle heavier slides with a smoother operation. Some places on these parts could have fittings requiring lubrication.

    Tip-out slides are a much simpler mechanism. They use a hinge at the bottom of the slide-out which manually tips the slide-out. These are found more often on earlier model RVs. On these types, the hinges should also be lubricated on a regular basis.


    How to Lubricate Different Components

    Now let’s talk about the many components that make up the slide-out systems and their required lubrication. First, there are the actuators and motors. These components transfer the motor/pump power into the slide-out movement or hydraulic pumps to drive the slide-out.

    Next, lubricate the hardware, such as tracks and rails . Tracks, often made of aluminum, provide stable paths for the slide-out to move in and out while rails are attached to the slide-out and work in conjunction with the tracks to allow smooth movement also requiring lubrication.

    The next thing you should check to while you are in the area are the seals and weather protection components and flanges. It is highly recommended that you keep your eye on your seals and use products to condition them regularly to prevent drying and cracking.

    Many slide-outs use up to three different types of seals and can be very challenging to find replacements. Seals are vital items on your slide-out since they prevent moisture and debris from entering the RV. The flange is a part of the RV wall that the slide-out seals against, ensuring a weather-tight seal. Here you want to ensure when inspecting your flange that no damage has been caused to them. They should be straight so that they provide even pressure on the seal between the flange and the body of the RV. 


    What to Inspect on Your Slide-Out

    As part of your inspection and to continue your RV slide lubrication and conditioning detail, you will want to look over your control systems. These are comprised of control switches, a wiring harness, pumps and cylinders, racks, framing, and arms. Control switches allow you to extend and retract the slide-out. Your wiring harness connects the control switches to the motors or pumps, and the hydraulic systems (pumps and cylinders) are essential for generating and controlling the hydraulic pressure needed to move the slides.

    Racks, framing, and arms provide structural support and ensure proper alignment of the slide-out mechanism and wear pads protect the slide-out tracks and other components from damage. Many of these components should be inspected on a regular basis and serviced by a licensed RV maintenance facility when necessary. You should always refer to your owner’s manual for specifics as to where and when to lubricate any of the subcomponents of these systems.


    What to Look for as Your Inspect

    Keep an eye out for irregular or uneven slide-out operation, paying particular attention to and listening out for any irregular or improper noises and sounds. Unfortunately, in situations like this, the initial cause can sometimes be attributed to … (you might have guessed it) … lack of RV slide lubrication. If it is all possible, you should employ the use of a friend so that one of you can operate the slide switches on the inside of your RV while your helper can watch and listen to the slide-out you are inspecting.

    If you do discover during this part of your inspection that your slide-outs are not operating in tandem or extend or retract off-kilter, you should seek out your nearest authorized dealer or maintenance facility as soon as possible to prevent any larger issues. Lastly, you should consider the protection of your slide-out underbelly by using a corrosion protection product to protect the metal underneath the slide-out. 


    No-Nos for RV Slide Lubrication

    Finally, since we have been discussing RV slide lubrication and all the things you should do to keep your slide-outs operating properly, know this: There are some things that you should remember not to do. As mentioned earlier, stay away from and avoid using any type of oil-based lubricants or grease.

    Second, it may sound like common sense, but don’t open slide-outs on nonlevel surfaces. This can put undue stress on the mechanism and potentially cause damage. Also, keep in mind that you don’t want to over-lubricate. Just use sufficient lubricant to cover the needed areas.


    A Simple but Important Maintenance Task

    In RVing, a simple truth can be both reassuring and scary: The fact is that many items of RV maintenance are up to you. RV slide lubrication is one of those tasks. Just as with your other maintenance tasks, always refer to your owner’s manual for specifics. (Looks something like this, but, you know … for your model.) Also, it is always recommended to employ your local licensed RV dealer for any maintenance above an owner’s level operation.
  • I Can’t Believe It: My RV Is Infested!

    I Can’t Believe It: My RV Is Infested!

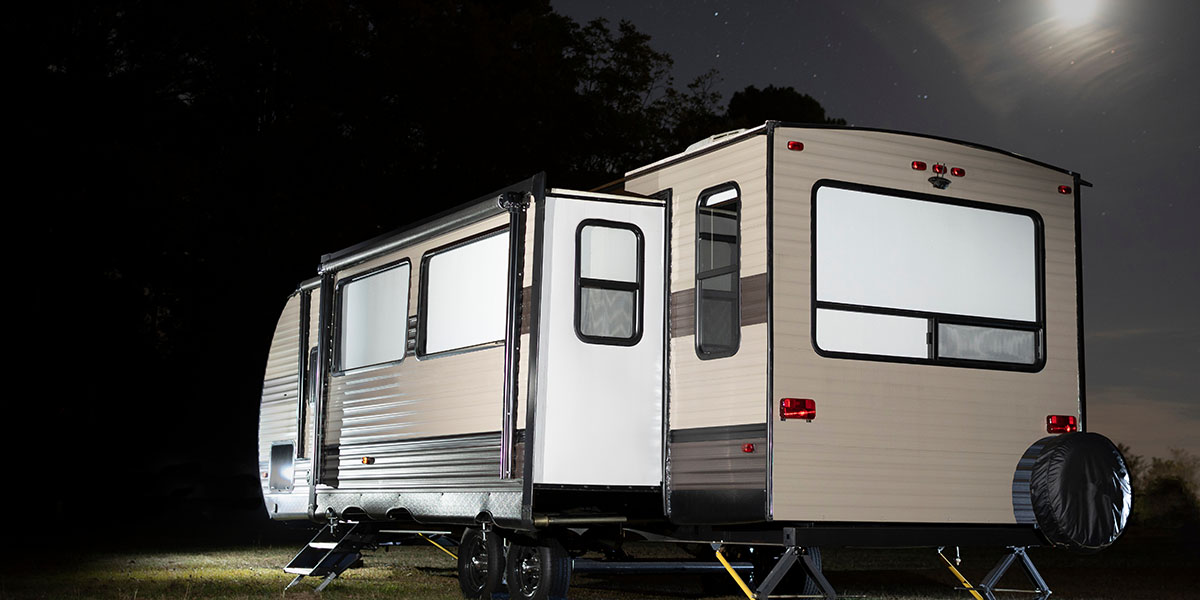
    It’s every RVer’s nightmare. You’re finally settled at the perfect campsite. The slide is out. The dogs are napping, and the stars are peeking out — and then you hear it. The sound no one wants to hear inside their home on wheels: scratching, the pitter patter of really tiny feet, and that scurry across the ceiling. But you know what’s worse than that? Something brushing your face in the middle of the night. When that happens, there is no doubt. Your RV is infested.

    Unfortunately, RV pest infestations are more common than you might think. There are things you can do when storing your RV for winter to help, but nothing is guaranteed. Whether you’re parked in the forest, desert, or even a paved RV park, bugs and critters can — and will — try to find their way inside. And, yes, I’m speaking from personal experience. (More on that at the end.)

    So, if you’re dealing with something similar (I hope you’re not), know that you’re not alone. It happens. But here’s a quick guide on the little villains, how they get in, and what you can do about it if your RV is infested.


    Common Culprits: What’s Invading Your RV?

    Before you go full exterminator, it helps to identify what kind of pest you’re dealing with. Some of the most common RV invaders include:

    • Ants. Often drawn in by crumbs or improperly sealed food. Once they’ve found a route, they leave a scent trail that invites hundreds of their friends.
    • Mice and rats. These guys are pros at squeezing into tight spaces and love the warmth of RV insulation. Once inside, they chew wires, insulation, and even food packaging.
    • Spiders and other insects. Sometimes they’re just tagging along with firewood or crawling up water hoses. Most are harmless, but nobody wants a surprise spider in their bed.
    • Wasps and bees. These can build nests in vents, storage compartments, or under awnings. Not just annoying — these can be dangerous if you’re allergic or have pets.


    Entry Points: How They’re Getting In

    Most RVs, even the best-built ones, have small gaps and entry points that pests can take advantage of. To keep your RV from getting infested, keep an eye on these areas:

    • Underneath the rig. Power cords, water lines, and sewer hoses all create potential access points.
    • Slides and seals. Worn-out rubber seals or misaligned slides can leave just enough space for bugs or rodents to squeeze through.
    • Vents and access panels. Check the water heater panel, furnace vent, and refrigerator access. These areas are often overlooked.
    • Doors and windows. Gaps around weatherstripping or poorly sealed screen doors are prime entryways.


    Prevention: Keeping Them Out

    The best way to deal with RV infestations is to prevent them altogether. 

    • Seal it up. Use expanding foam or steel wool to close up any holes or gaps underneath your RV. Don’t forget around plumbing and electrical lines.
    • Use peppermint oil or dryer sheets. Mice hate the smell. We’ve tucked dryer sheets into cabinets and corners, and while not foolproof, it helps.
    • Keep it clean. Crumbs attract ants and rodents alike. Wipe down counters, sweep floors, and keep food in sealed containers.
    • Inspect before moving. Check your water and sewer connections, outdoor gear, and storage compartments before moving to make sure you’re not carrying new guests from your last stop.
    • Store food properly. Use hard plastic bins for pantry items and avoid leaving pet food out overnight.


    That’s All Nice, but My RV Is Already Infested!

    Already hearing mysterious sounds or seeing droppings? Time to act fast.

    • Mice countermeasures. Set traps. Snap traps or sticky traps are both effective. Use peanut butter or Nutella (yep, they’re bougie) as bait. Avoid poison if you have pets or kids. Not only is it dangerous, but mice may die inside your walls, creating a whole new smelly issue.
    • Ant annihilation. Follow their trail to find the entry point and seal it off. Use bait traps outside the RV near the path. Avoid spraying them directly, as that can scatter them and make the problem worse. Wipe surfaces with vinegar or citrus-based cleaners to remove scent trails.
    • Insect intervention. Spray natural or pet-safe repellents around common entry points. Keep lights off or dim at night when doors and windows are open to avoid attracting bugs inside.
    • Wasp wipeout. Check around slide toppers and awnings before extending. Spray nests from a safe distance at dusk or early morning when they’re less active. Remove any nests once they’re unoccupied.


    RV-Specific Pest Control Products

    If you’re in a spot where infestations are common, here are a few tools we always recommend:

    • Rodent repellent lights. These plug into your 12-volt system or run on batteries and emit a high-frequency sound that deters rodents (safe for pets).
    • Underbelly LED lights. Some RVers swear by LED rope lights or solar-powered lights placed around the bottom of the RV at night to keep critters away.
    • Screen covers. Add mesh covers to furnace and water heater vents to block insects and small rodents.

    *Travel Day Tip: Watch the Slide-outs. Slide gaskets are notorious for harboring pests if you’ve parked under trees or in grassy areas. A quick sweep or vacuum around the slide edges during setup goes a long way.


    Now, Back to That Mouse in My RV (for Your Entertainment)

    Let’s circle back to the little intruder I mentioned. Truth be told, after nearly seven years on the road, we’ve had our fair share of unwelcome visitors. But mice have definitely been the worst. Especially in cooler months, when the little guys are desperate for warmth, we’ve had a few run-ins. But one mouse stands out.

    At the time, we were parked in cooler weather, and I guess it didn’t take long for the mouse to find its way in. We didn’t notice much the first night, but we did wake up to what we thought were a ripped bag of tortilla chips and trash bag the next morning that we thought were from us moving things around in the dark before bed.

    That should’ve been the warning.

    That second night though, our dog Journey launched herself onto our bed in full panic. At first, we had no idea what startled her — until the next night when the same mouse ran passed me while I was sleeping and brushed my forehead at 2 a.m.

    No amount of coffee could undo that. I washed my face for ten minutes straight, then set out every trap we had. Caught him the next night, but we’ll never forget the shock. It was like something out of a sitcom — if that sitcom starred two very grossed-out RVers and a traumatized dog.


    Final Thoughts: Stay Vigilant, Stay Flexible

    Pests in your RV are one of those “not if, but when” situations — especially if you travel full-time or love staying off the beaten path. But the good news is that they’re manageable with a little preparation, a good sense of humor, and quick action when they do sneak in.

    Whether it’s your first RV mouse or the fifth time you’ve found ants on your counter, don’t panic if you discover your RV is infested. Take a breath. Clean it up. Seal the entry points. And get back to what really matters: enjoying your time on the road.

    After all, the only creatures you want curling up in bed with you are the ones you brought with you — preferably the furry, four-legged kind — unless it’s the middle of the night and she randomly wakes you from a dead sleep by landing on your stomach in a panic.


  • Dewinterizing an RV: An Easy Checklist

    Dewinterizing an RV: An Easy Checklist

    It’s time. Finally. Your whole calendar year has been building up to this moment. It’s time to crack open that garage or storage unit. Or to take a stroll to the back forty where you last left your great love for the winter. It’s time to rekindle the flames of adventure. To stoke the embers of romance with the great outdoors beyond the horizon. That’s right: IT’S RV SEASON AGAIN! But, before you get too carried away (who could blame you?), remember: Dewinterizing an RV is essential.

    Like any great relationship, it would be foolish to just hop into the saddle and take off. This old love of yours needs a little work to get humming back into harmony. Because if you were smart (and you’re an RV Trader reader, so we’ll assume yes), you made some careful winterizing tweaks to your adventure-on-wheels before putting her to bed.

    So, let’s take a look at what you need to do and undo when dewinterizing an RV. 


    Basic Tasks for Dewinterizing an RV

    Here’s a checklist of the most elementary dos and undos:


    Flush the pipes.

    Depending on how far into the wintery north you last parked, you might’ve added some nontoxic RV antifreeze to your water system. One of your most important dewinterizing steps is giving that a healthy flush. Turn on your water pump, and let all your faucets vent until the water runs clear. If you’ve got a water heater, turn it on and check that it’s functional. And if you find any residual taste or odor from the anti-freeze liquid, try running some baking soda through the system.

    Because your water system sat stagnant for months, it’s always possible that bacteria may have built up, so you’ll also want to sanitize the system. Here’s our look at water system maintenance, with tips for filling and cleaning. 


    Give your tires a good pump.

    Count on dropping around two to three PSI per month as a general rule, so get out the pump and go to town. Check your owner’s manual for the correct fill pressure.


    Reinstall and charge your batteries.

    Just like tires, your electrical system is likely to lose a little bit of oomph while sitting dormant. So, make sure you’re fully charged. Charge and inspect your backup system too. If you don’t have one, now’s a great time to make sure you’re never stuck without power by picking up an RV-friendly battery charger


    Update your license and registration, please.

    If it’s been months since you hit the road, it’s a good time to double-check that your registration is up-to-date. 


    Change your filters.

    Now’s also the perfect time to get up-to-date on your air and water filter changeouts. 


    Get your motor running!

    Check all your fluid levels, then start that engine! Extreme temperatures can be hard on engines, so let it run for a few minutes. Then look for any drips, sneaky drops, or seeping fluids. 


    Check Off Your Annual Checklist

    Whether you have a Class A motorcoach or a pull-behind travel trailer that oozes your personality, there are plenty of preventative maintenance checks you should be doing annually. Just like my grandma used to check all of her smoke detectors when spring cleaning, now’s a great time to knock some of those annual tasks out. Here are a few you should consider when dewinterizing an RV. 


    Perform a water leak check.

     While you’re sanitizing your water system, turn on your water pump and listen for it to shut off. That means your system is fully pressurized. Listen for the next several minutes to ensure the pump doesn’t kick back on. While listening, check your toilet, shower, and sink for any dripping or seeping water. If your pump does turn back on, you’ve got some leak hunting to do, as you’re losing pressure from somewhere. If your system is leak-free, the pump will stay off. So, if you hear nothing, you’re likely good to go. 


    Check your propane system.

    Open the gas lines and sniff around for any strange smells. Then, fire up each of your appliances to ensure they’re still working properly. 


    Perform a tire check.

    You’ll already be getting pumped up, so check your tires while you’re at it for any signs of wear. Tire issues while on the road can be a HUGE problem, and many problems can be avoided with proper attention and care.


    Visually inspect your RV, camper, or trailer’s exterior.

    Changes in temperature can be hard on all sorts of materials, especially plastic and rubber. Check weatherstripping around windows, air vents, and doors. Look for any developing rust on metal surfaces. And check for cracks in plastics or other facades.


    Test your generator. 

    Check your oil level and make sure your exhaust is clear. Then let ‘er rip, testing for proper performance on each electrical system and appliance. Remember that power is a critical safety feature, and don’t accept anything less than peak, reliable performance.


    Restock safety and emergency supplies.

    Check dates on any expirable materials, including medication. Restock any items you may have used, like Band-Aids, bug spray, or other consumables. Do a double check also of all safety items in case of emergency.

    Regular maintenance is critical to making the most out of your RV, so hopefully you’re putting the work in all year long! Here’s a look at some items you should have on-hand to make regular maintenance a snap.

  • Spring Cleaning Your RV — Inside and Out

    Spring Cleaning Your RV — Inside and Out

    It’s that time of year. Many RVers are beginning to make their plans for the season. Of course, that starts with going outside and spring cleaning your RV — an unenviable yet necessary task. So, we thought we’d share some of our best tips for spring cleaning your RV. That way, you can get the dirty work done and let the fun begin as the weather warms up. 

    In spring cleaning your RV, though, you’ll also find that it gives you a great opportunity to reevaluate the things you’re bringing with you. (And, perhaps, replace some of the items that don’t make the cut. Or, even better, sometimes leave some things behind.)

    So, let’s get started!


    Start with a Clean Slate

    In personal practice, the first thing we do when spring cleaning the RV is to literally empty out the entire RV. Yes, all of it. (If you haven’t already done this in winterization, that is.) We pull everything off every shelf in our travel trailer. The we put those items in totes and boxes. 

    As we do this, the boxes get labels. And, to facilitate that, we get a roll of Post-It® Labeling and Cover-Up tape. Essentially, this is a Post-It® note on a roll much like other tape. And it’s really convenient for this task. Like a traditional Post-It note, this comes off without leaving a mess, and, being in a roll, you can use as much or as little as you need. This makes it easy to remember what’s what and what goes into which cabinet. In our case, we also label the cabinet doors with this stuff since it doesn’t leave any permanent reminder of your cleaning efforts. That way box A-1 matches cabinet A-1. 

    Naturally, as we empty the trailer, we realize that many of the items just hadn’t been touched in a while. (That’s a clue.) For example, at one point, we thought it would be funny to have pink flamingo wine glasses. But, quite honestly, they never got used. (Like not even once.)

    Realizing that creates an opportunity for things like donations. I am always really surprised by just how much stuff manages to find its way into our donation box. 


    Clean Up and Wipe Down

    Once all the shelves and drawers are empty, we take our shop vac and clean out the entire trailer. It’s amazing how much dust and grime end-up inside the trailer. But, really it’s a good thing, because  we also use our rig quite a bit. So, it makes sense that dirt is one of the souvenirs we collect on the road. 

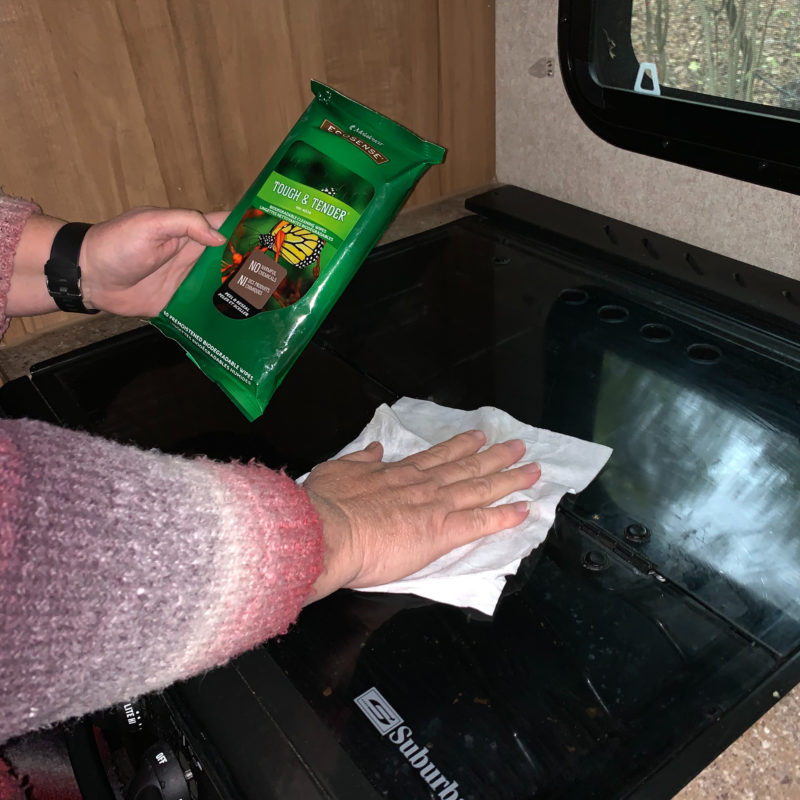
    With the shelves and drawers empty, and after being vacuumed, this also gives us the opportunity to wipe down the whole interior as well. It’s wonderful how refreshing the RV seems after this exercise. 

    Wiping down all the surfaces in the RV.


    Do the Extra Checks

    Faucet Filtration

    While going through the shelves and drawers might be obvious, this is also a good time to take the aerators out of the faucets in your rig and give them a rinse. Many of the faucets and plumbing fixtures in your RV have tiny little screens to keep things flowing nicely. But little rocks and other debris can get caught in these over time reducing flow. On most faucets, for example, you can simply unscrew the tip and voila! There you’ll find the screen.

    However, do pay very close attention to these as you disassemble them. (Because you have to put them back on.) Many of these have a certain way that they go together to optimize flow and performance. Putting them back together correctly is the key to optimal water flow. I just take them apart carefully (it’s really easy), rinse them out in the house, and put them back together the way they came apart. 

    There are likely screens in the places where hoses attach to the outside of your rig, too, that might need a little rinse. 


    Mattress Moisture

    Another place many RVers don’t consider —surprisingly — is under the mattress. RVs can be sources of pretty significant moisture. In some cases, that moisture can collect under the mattress. I like to lift the mattress and just make sure it’s dry under there. 

    If your RV has an issue with condensation developing under the mattress (which isn’t unusual in smaller rigs), you might consider something like a Froli Sleep System. This is like a plastic sheet of little springs that raise the mattress off the platform. The interesting thing about these is that you can get various firmness levels to the springs. So, you can also adjust the comfort of the mattress when you install one of these. In addition, you could literally create firmer or softer parts of the bed. Many RVers have told me that they simply put one of these Froli systems under their stock RV mattress and that it makes things pretty comfortable. 


    The Froli sleep system. (Image from Froli)


    Reorganize and Refresh

    Once all those things have been taken out of the camper and it’s time to put them back,  consider changing how they’re storedMy wife, who’s very good at storage hacks, measured out the various cabinets and storage closets. Doing so, she found clear plastic containers — such that everything that’s in there now is in one of those. This does a couple of things. First, it stores those items well. Second, it makes them easy to take out. 

    You can get that can of SPAM that’s at the back of a cabinet or just reach the bread more easily. Whatever suits you. But I like how nice everything looks too. And these individual clear plastic storage totes also just look good and keep things from shifting too much. 

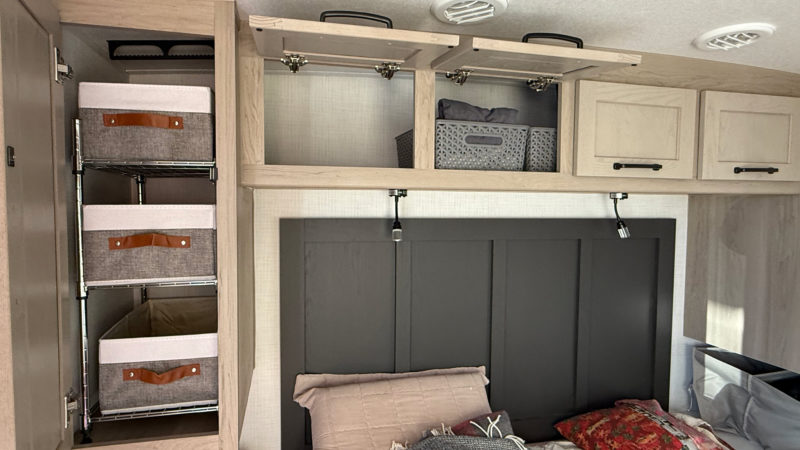
    I also put together one of those shelving units that my wife found for each of the closets in our bedroom. Then we put soft totes in those closets. So, now they’re better organized. Further, we can take the totes in and out as we come home. That means we can load them in the house and just carry them to the RV. 

    There are also baskets in the overhead cabinets for the same reason. 

    Another benefit to bringing everything out when spring cleaning your RV is that you can run all the silverware and containers in the camper through a home dishwasher. For us, we do our best when we’re out on the road, but the dishwasher at home just does a great job. So, this is an excuse to run it all. Emptying things out when spring cleaning your RV also gives you the chance to wash the bedding and towels — all the soft things that normally live in the camper. 


    The drawers and cabinets in our RV got their own reorganizing spring makeover.


    Repeat the Process Outside

    After we empty all the inside and clean and put everything back in a better-organized form, we do the same for the storage bays outside the RV. It’s really shocking how disorganized those outside storage bays get. So, once everything is out, it also gets reevaluated. 

    So, nope: We don’t need three separate sets of wheel chocks. Nor do we need four water hoses. (Three will do.) And that kind of stuff on repeat.

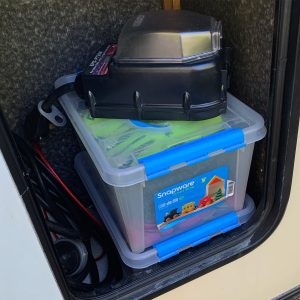
    Taking all the items out of the storage bays on the outside of the rig allows you to do the same thing as the inside of the rig — improve your storage tote game. (Except the ones we place in the outside compartments are those black-and-yellow mini tubs.)

    Being a nerd, I also put labels on all the totes that make the cut back inside the RV. So, there’s one tote with the air compressor. One with a power drill. Another with lanterns — that sort of thing. (It’s really easy to remember what’s in which tote when they have labels on them.)

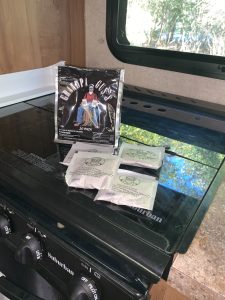
    Another thing we do is replace the rodent repellant in the rig twice a year. We happen to like the Grandpa Gus rodent repellant. (It has served us very well for quite a few years.) When everything’s out of the RV, and the rig has been vacuumed, we then replace the pouches of rodent repellant, which make the rig smell good to us but, theoretically, not to the varmints. 


    Double-Check Seals and Stuff

    Sealing the Deal

    While we clean the rig, we also inspect all the seals and other breaches on the outside of the RV. You’re supposed to inspect all the seals on the RV every 90 days — and we do — but this is one of the seasonal reminders that it’s time to do this task. 

    I don’t know of any RV that doesn’t recommend inspecting all the seals on the exterior of the rig. While I’ve never had to mitigate a failing seal, it’s still best practice to know what condition they’re in and resolve any questionable seals. Think of anywhere there’s a hole in the sidewall or roof of the RV and know that there’s a flexible sealant there. 

    These are the things that need routine inspections. 

    You might also inspect any propane appliances to make sure that there aren’t nests or other blockages to safe operation. If they look clean in the business end of the appliance, they’re likely performing properly. But many spiders, for example, love the odorant that’s in propane and build webs which can actually cause the appliance to not operate properly — and potentially even become a safety hazard. 


    Inspecting Appliances

    I also use the shop vac to clean out all these spaces so they look clean again. Propane appliances that are free of dust and webs operate more efficiently and more safely. 

    If your water heater has an anode rod, you likely removed that when you winterized your RV. If you notice that it’s deteriorating, that’s normal. But it’s also where those little rocks might come from in the faucet aerators. 

    Since it’s out and easy to look at, see if your anode rod is still usable, or if it’s time for a new one. If there is some wear on it, that’s just normal. It’s a sacrificial element to keep the water heater itself from rusting away. I have a picture of a new one and one that is, truly, completely used-up. 


    Just to illustrate: a new anode rode versus one that is completely used up.


    Bonus Tip: Maybe Freshen Your Spice Rack

    I’ll leave you with this last tidbit. I love to cook. (You know, because cooking meanseating!) So, I have a set of spices just for the RV. Spring is when I go through those and freshen them up. Spices do age out and the temperature challenges that are the inside of an RV plus the vibration on the road can compact them. 

    If you have little bottles of compacted powder instead of spices, it might be worth replacing those with fresh spices. 


    Might be time to refreshen up your spice rack.


    Final Thoughts on Spring Cleaning Your RV

    It’s really refreshing to have your RV well-organized, smelling great, and looking good too. (It makes you want to get out there!)Doing the dirty work prepares you for another season of adventures and doing your best to disorganize the rig, which means that it’ll also be so much easier next spring. 

  • Weatherproofing Your RV for Winter Travel

    Weatherproofing Your RV for Winter Travel

    The days of storing your RV for the winter season could soon be over. These days nearly all RVs are designed for year-round use. That means that whether you’re planning a winter RV trip to warmer temperatures or just heading up to the local ski hill, your RV can provide you with a comfortable living space when you get there. But regardless of where you’re headed on your winter travels, weatherproofing your RV is a must to ensure your arrive safely to your destination. (And stay warm after you get there.)

    In addition to keeping your rig warm and cozy, weatherproofing your RV involves keeping plumbing lines flowing and engines and generators running. In this guide, we’ll share everything you need to know about weatherproofing your RV for winter travel.  


    Getting Your RV Fit for Winter Travel

    Knock out manufacturer-recommended RV maintenance tasks.

    If you’ve been doing manufacturer-recommended maintenance on your RV, getting it ready for winter travels will be a piece of cake. However, if you’ve skipped some of the recommended maintenance tasks (like many of us), you’ll want to catch up with these before you subject your RV to a winter road trip. This is especially true when it comes to the various components of your RV wheels, including the tires, and wheel bearings. After all, there are few things worse than having a tire blowout or having a wheel fall off on a frozen highway.


    Warm up your engine oil with a block heater.

    A block heater can protect your engine from sub-freezing temperatures that cause engine oil to thicken and diesel fuel to gel. Either of these conditions are hard on engine components and can make it difficult — or impossible — to start your RV. An engine block heater is strongly recommended if you plan to travel where winter temperatures fall below negative five degrees Fahrenheit on a regular basis.  

    It’s a good idea to outfit your RV generator with a block heater too. (Especially if it’s exposed to temperatures of less than 60 degree Fahrenheit.) This will help make it last longer and make it much easier to start.

    Engine block heater components are fairly simple. They consist of a small heating element and a power cord. Pretty simple. Many late model RVs already have a block heater installed and only need the power cord hooked up. 


    Get better control with snow tires and tire chains.

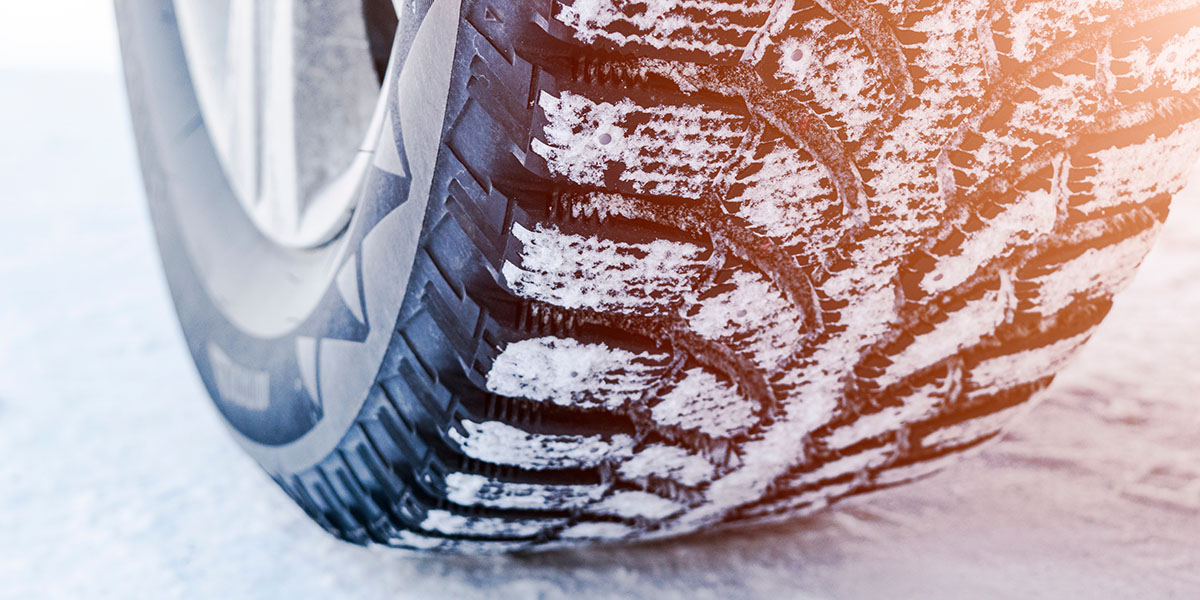
    Ice, snow, and black ice can create hazardous winter driving conditions. Having good snow tires can make the difference between staying in control on the road and being in an accident. Snow tires are designed to give you traction on the road. Aside from having an aggressive tread pattern that sheds debris and water, good snow tires are made of a pliable rubber compound that resists freezing temperatures. Snow tires have an “Alpine” symbol with a mountain and a snowflake that makes them easy to identify.

    It goes without saying that snow tires should be used on your tow vehicle. (That’s obvious, right?) However, having them on your trailer or fifth wheel is also essential.  After all, if your trailer wheels slide sideways, it can wreak havoc with tow vehicle handling. On top of that, it could create a hazardous situation. In the cold, no less. That could really spoil your day.  

    When Snow Tires Aren’t Enough

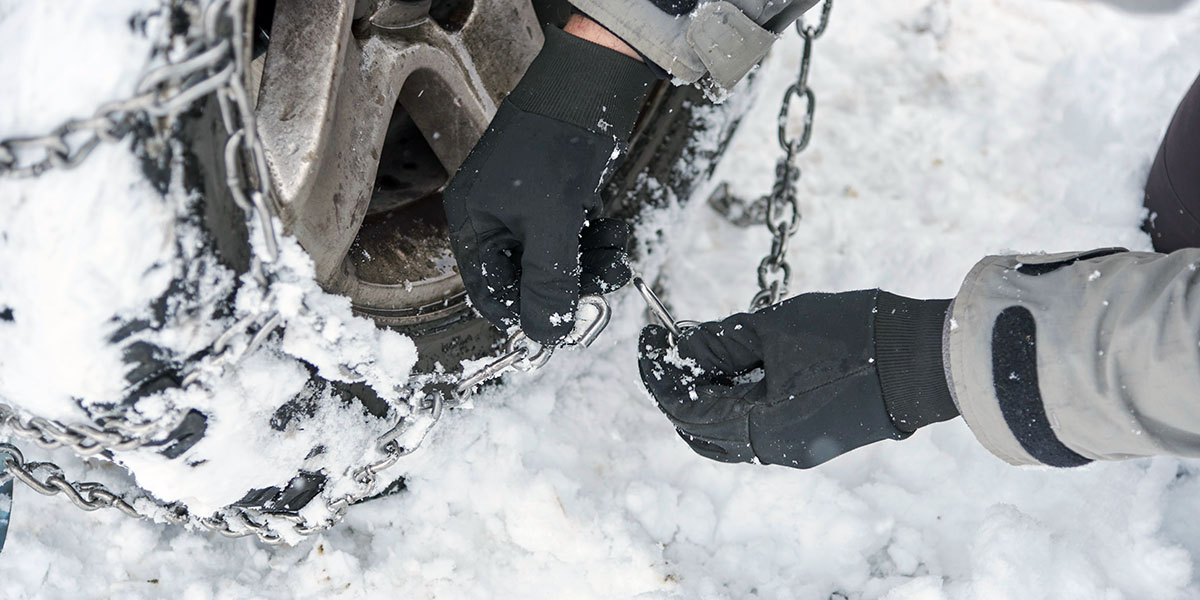
    Driving in heavy snow, especially if it’s in a mountain pass,  demands even more traction than snow tires can offer. This is where tire chains come in handy. These can be very useful when you’re traveling through mountain passes that can be very rapidly covered in inches of snow. Aside from that, the majority of jurisdictions with mountains have laws that make it mandatory for vehicles to carry tire chains. 

    Tire chains are available in a range of sizes to fit virtually any tire. They’re used on the drive wheels of the vehicle. Motorhomes and other vehicles that have dual wheels should have tire chains that fit over both wheels on each wheel set.   


    Heating Your RV in the Winter

    Having a warm, cozy RV is important in winter months. Of course, there are several ways you can do this. But the trusty propane furnace remains the most common heat source for most RVs. (Diesel furnaces and electric fireplaces, and in-floor heating systems are also gaining popularity.) Whatever type of heating system your RV has, it’s important to: 

    1. Know it operates.
    2. Do a trial run before you leave on your trip to ensure it’s functional.
    3. Have enough fuel to last the duration of your trip. Propane refills can be hard to find in some areas, especially in winter.


    Keep your water flowing.

    Amenities such as a functional indoor toilet, a place to wash up, and a warm shower are part of what makes an RV a home on wheels. That being said, frigid winter temperatures can freeze pipes and other plumbing components fast, especially while the RV is traveling. If your RV has a heated basement with enclosed tanks, you probably won’t need to worry about frozen plumbing components while you travel. On the other hand, if the tanks and plumbing (including waste valves) are exposed to the elements, you’ll want to take some precautions.  If that’s the case here’s what you can do to protect RV plumbing while you travel.  

    1. Winterize your RV before you go and bring a supply of bottled water. This is by far the most inconvenient option, but if you only plan to travel for a few days en route to a warm destination, it makes sense.   
    2. Install insulated heat tape on exposed RV plumbing and tank heating pads on RV freshwater and waste tanks. These systems run on either DC (12-volt) or AC (120-volt) power. If your RV has rooftop solar panels and an inverter you can use AC power to power heating pads while the RV is in motion.


    Handle condensation concerns.

    Condensation is a winter RVing concern that can cause mold, staining, and rot if left unchecked. This is caused when moist air inside a warm RV reaches its cold outer walls. The temperature change from warm to cold causes water molecules in the air to change from gas to a liquid. The result is an accumulation of water on the inside surfaces of windows and walls.  This creates the perfect environment for mold to grow.    

    Activities like making coffee, cooking, taking a shower, or just breathing create a surprising amount of moisture inside the RV. In addition, propane releases a small amount of water into the air as it burns. So, just running propane appliances like the furnace or cooktop add even more humidity. 

    While you can’t prevent moist air inside the RV, you can minimize its effects by using an electric cooktop for cooking,  and by using vent fans while you cook or shower. A small dehumidifier in the RV can greatly reduce the amount of moisture in the air.


    Insulate the windows.

    RV windows can lose a considerable amount of heat without adding insulation to them. Heat loss can be greatly reduced by keeping RV window coverings drawn. Using reflective insulation (like Reflectix) on RV windows can double their R-Value, making your RV just a little cozier. 


    Wrapping Up on Weatherproofing Your RV

    Taking the time to prepare your RV for winter travels helps to ensure that you’ll make it safely to your destination and be comfortable when you get there. Be sure to prioritize road safety, making sure the heating system functions, and keeping the water system from freezing  With careful preparation, you can confidently explore the beauty of winter landscapes in your RV.

  • Don’t Forget Your RV Tire Maintenance This Winter

    Don’t Forget Your RV Tire Maintenance This Winter

    As the temperatures drop and the snow starts to fall, many RVers prepare to winterize their rigs for storage. Another intrepid variety of camper gets their home on wheels ready to embrace more cold-weather adventures ahead. But whether you’re hibernating for the winter, heading to a cozy mountain retreat, or boondocking in a frosty wilderness, there’s one essential part of your RV that needs extra care during the winter and often gets overlooked: your RV tire maintenance.

    Most campers know that RV tire maintenance is important for their safety when they’re criss-crossing the country in warmer weather. But cold-weather RV tire maintenance is also crucial. In fact, it has a big impact on ensuring safety, maximizing performance, and extending the lifespan of your tires.

    So, ere are five tips for the winter months to keep your RV rolling smoothly through the chilly conditions. 


    The Impact of Cold Weather on RV Tires

    Cold weather affects more than just your comfort — it significantly impacts your tires, too. As temperatures drop, air pressure in your tires decreases. Rubber compounds stiffen. Let’s face it: When it’s really cold, everything seems more stiff and rigid. (I know all my muscles and bones feel that way.)

    But with tires, these changes can lead to decreased traction, uneven wear, and even complete failure if not addressed properly. For RVers traveling in winter conditions, proper tire maintenance becomes a nonnegotiable part of safe and enjoyable adventures.


    Key Winter RV Tire Maintenance Tasks

    1. Monitor tire pressure religiously.

    Tire pressure can drop by 1 or 2 pounds per square inch (psi) for every decrease in 10 degrees Fahrenheit. Underinflated tires not only wear unevenly but also compromise your RV’s handling and fuel efficiency.

    Tips for Tire Pressure Management:
    • Invest in a tire pressure monitoring system (TPMS). A TPMS provides real-time updates on tire pressure, giving you peace of mind during winter travels.
    • Check tires regularly. Use a high-quality digital tire pressure gauge to check your tires before every trip and at least once a week during extended stays. While TPMS systems are great, double checking adds that extra layer of security and peace of mind.
    • Adjust for temperature, Inflate tires to the manufacturer’s recommended PSI while the tires are cold (before driving).


    2. Inspect for cold-weather cracks and damage.

    Cold weather can cause the rubber in your tires to become brittle, increasing the risk of cracking and other damage. Before hitting the road, take the time to inspect your tires for visible wear and tear.

    What to Look For:
    • Cracks or bulges. Check for cracks in the sidewalls and tread, as these can worsen in freezing temperatures.
    • Tread depth. Use a tire tread depth gauge to ensure you have enough grip for icy or wet conditions. The rule of thumb is to maintain a minimum tread depth of 6/32 inches.

      For those that don’t have, want to buy, or want to learn how to use a tread depth gauge, a much less scientific gauge is the “penny test”. While I strongly recommend a digital tread depth gauge, many RVers and car enthusiasts claim that the penny test is a decent way to check the tread if you can’t get it to a tire shop.

      What is the penny test?

      Insert the penny head-first into the tread groove, and if you can see the top of Lincoln’s head, your tire tread is worn and needs to be replaced; if his head is covered, the tread is still sufficient.

    • Valve stems. Examine valve stems for cracks or leaks that could compromise pressure stability.


    3. Weigh whether you need specialty tires for winter.

    If you’re traveling to areas with heavy snowfall or icy roads, investing in winter tires can greatly enhance your safety and driving experience. Winter tires are designed with specialized tread patterns and rubber compounds to provide better grip in cold conditions.

    Why Winter Tires Are Worth It:
    • Improved traction. Winter tires are engineered for snowy and icy surfaces, offering significantly better traction than all-season tires.
    • Enhanced safety. They reduce stopping distances on slippery roads, which is critical for a larger vehicle like an RV.
    • Longevity. Swapping to winter tires during colder months can extend the life of your all-season tires.
    • Hybrid option. Another option that some RVers choose is an all-terrain tire. They are somewhat of a middle ground between snow tires in terms of grip and stability in winter weather and the pavement/highway drive that an all-season tire will give you in normal conditions. Always talk to a tire professional when deciding what tires would be best for your style of travel.


    4. Store tires properly when not in use.

    For RVers who store their rigs during the winter, proper tire storage is essential to prevent flat spots, cracking, or other long-term damage. Tires that sit in one position for extended periods are especially vulnerable.

    Storage Tips:
    • Elevate tires. Use tire cradles or jack stands to lift your RV slightly off the ground and prevent flat spots.
    • Protect from UV damage. Store your RV in a covered area or use tire covers to shield tires from harmful UV rays.
    • Control temperature. Keep stored tires somewhere that is not affected by extreme weather to maintain their elasticity and durability.


    5. Adjust your driving habits.

    Cold-weather driving requires a slightly different approach to ensure your safety and your tires’ performance. Adjust your habits to adapt to the unique challenges posed by winter roads.

    Driving Tips for Cold Weather:
    • Reduce speed. Icy or wet roads can decrease traction, so slow down to maintain control. Slow and steady definitely wins the race in wintery conditions.
    • Avoid sudden moves. Brake, accelerate, and turn gradually to reduce the risk of skidding or losing grip.
    • Stay alert. Watch for black ice and snowdrifts, especially on less-traveled roads or in shaded areas.


    Bonus Tip: Carry a cold-weather tire emergency kit.

    Even the most prepared RVer can face unexpected challenges on the road. A cold-weather tire emergency kit ensures you’re ready for anything.

    What to Include:
    • A portable air compressor to adjust tire pressure on the go. Make sure it is powerful enough to inflate the usually higher PSI ratings that RV tires need.
    • A tire repair kit for minor punctures.
    • Heavy-duty tire chains for added traction in snowy or icy conditions.
    • Road flares or LED beacons to increase visibility if you’re stuck on the roadside.


    Safe Travels

    Whether you’re braving a frosty road trip or storing your RV for the season, cold-weather RV tire maintenance is a must for every RVer. By monitoring tire pressure, inspecting for damage, and taking steps to protect your tires, you can avoid costly repairs and ensure safe travels all winter long. With a little extra care, you’ll be ready to embrace the snowy landscapes and make the most of your winter RV adventures. Stay safe out there!

  • Help! My RV Is Freezing

    Help! My RV Is Freezing

    If I’m being honest, winter camping has brought my wife and I some of the fondest and most stressful memories in RV life. Winter camping in an RV can be magical — snow-dusted forests, cozy nights by the heater, and the tranquility of off-season travel. But when your RV starts to feel like an icebox, the dream can quickly turn into a chilly nightmare. No one is enjoying anything if their RV is freezing.

    Whether you’re braving subzero temperatures or facing an unexpected cold snap, this guide will help you tackle freezing conditions and keep your RV warm, functional, and comfortable.


    Why Is My RV So Cold?

    RVs are not always built with harsh winter conditions in mind. Thin walls, minimal insulation, and draft-prone windows make it easy for the cold to seep in. Add to that any gaps or cracks in seals, and your RV can feel more like a refrigerator than a cozy home. But don’t worry — there are plenty of solutions to keep the cold at bay.


    Step 1: Inspect your RV for drafts and leaks.

    Cold air creeping in through cracks and seals is one of the main culprits when it feels like your RV is freezing. Start by inspecting these critical areas.

    • Windows and Doors. Look for drafts and gaps around frames. Use weather stripping or non-sag to create a tight seal. If you want to know what sealants to use in different situations, you check out this RV sealant article
    • Roof and Vents. Examine your roof seams and vents for cracks or deteriorating sealant. Self-leveling sealants are a go-to solution for patching these areas. 
    • Slide-Outs. Check the seals around your slide-outs for damage or wear. Flexible sealants can quickly fill in any gaps and flex with movement.

    Pro Tip: Use a flashlight or incense stick to detect drafts. Shine the light or waft the smoke near seals. If you see light or the smoke moves, you’ve found your culprit.


    Step 2: Add insulation where it matters most.

    Insulating your RV is crucial to fighting those freezing temperatures. Here are some quick upgrades to help trap the heat.

    • Windows: Cover windows with reflective insulation like Reflectix to prevent heat loss. For added coziness, hang thermal curtains or shades.
    • Underbelly. If your RV will be parked for an extended period of time and has an exposed underbelly, add foam board insulation or skirting to block cold air from circulating underneath.
    • Vents and Skylights. Foam vent cushions can help seal off these areas, which are often significant sources of heat loss.
    • Floors. Use small area rugs or mats to insulate floors and create another layer between your feet and the cold floor.

    Pro Tip: Even something as simple as a draft stopper or “door snake” under your entry door can make a big difference.


    Step 3: Heat your RV efficiently.

    The key to staying warm isn’t just generating heat — it’s keeping it from escaping. Here are the best ways to heat your RV.

    • Furnace. Your built-in furnace and is your first lines of defense, but furnaces can drain propane quickly. Make sure they are well-maintained and use propane sparingly, because in some cases it is your only heating and cooking source.
    • Heat Pump. Some rigs have a heat-pump combo with their A/C unit, and if you have a good generator or are connected to shore power, they can be a great source of warmth.
    • Portable Heaters. Electric space heaters are a great backup for maintaining warmth in small areas. Look for energy-efficient models with safety features like tip-over protection. Know that they draw a lot of power, so if you are off grid, then always monitor your battery levels.
    • Heated Accessories. Heated mattress pads or blankets can make your sleeping area toasty without overworking your furnace. A regular heating pad that you find at a pharmacy is also a cheap but effective option for warming up under the covers at a lower electric draw.

    Pro Tip: Use a combination of heating sources to distribute warmth evenly while conserving energy. Know that propane and electricity can drain quickly if you are off-grid and using these methods. So, setting the temperature for a bearable level like 60 and wearing layers helps to conserve resources. 


    Step 4: Protect your water system from freezing

    Frozen pipes and tanks are a winter camper’s worst nightmare. Here’s how to keep your water system functional.

    • Heated Hoses. Invest in a heated water hose to keep your fresh water flowing. Plug it in before temperatures drop.
    • Tank Heaters. Install heating pads on your freshwater, gray, and black tanks. These will prevent freezing even in frigid conditions.
    • Insulate Exposed Pipes: Wrap exposed pipes in foam insulation or heat tape to keep them from freezing.

    Pro Tip: If it’s particularly cold, leave a faucet dripping slightly to keep water moving through the system and prevent freezing.


    Step 5: Plan for power and propane.

    I touched on this before, but keeping your RV warm in freezing temperatures often means relying on power and propane. Here’s how to stay prepared.

    • Stock Up. Always carry extra propane tanks if possible and/or fill up often to prevent running out.
    • Monitor Usage. Track your propane and power levels closely so you never run out of heat or battery power.
    • Portable Power. A good solar/battery setup or portable generators can help ensure you’re never left without power for heaters, electric blankets, et cetera.


    Step 6: Stay comfortable inside.

    Finally, don’t forget about creature comforts to make your RV feel like home, even when the weather outside is frightful.

    • Layer Up. Wear several layers of clothing to stay warm without overworking your heating system.
    • Hot Drinks or soup. For us, nothing beats a cup of hot coffee in the morning, but hot cocoa or tea on a cold night goes a long way in the winter—keep a thermos handy to enjoy throughout the day. Personally, I’m a big soup guy too, so any tasty soup for lunch or dinner helps warm me from the inside.
    • Extra blankets. Adding extra blankets and throws around the rig always helps, and it’s a great way to get cozy for movie night. Whether it feels like your RV is freezing, or not, it’s a good idea to keep these on-hand if you’re a four-season RVer.
    • Curtains. In some RVs, adding something as simple as curtain to separate a cold room from one that you are trying to warm can save on resources and keep the temperature where you are more comfortable.


    Warmly Embrace the Winter RV Adventure

    Yes, winter camping in an RV has its challenges. But with proper preparation, it’s an experience like no other. From snowmobiling Yellowstone to skiing and snowboarding just steps from our home on wheels, we have had some amazing winter RV experiences. That’s why recommend trying it — at least once. And if you follow these tips on how to insulate your rig, prep your heating sources, seal up drafts, and keep your resources in check, you will be able stay cozy and enjoy the magic of winter landscapes. Embrace the adventure, and remember: A well-prepped RV is a happy RV, even when the temperatures dip below freezing!

  • RV Sealant: The Winter Camper’s Best Friend

    RV Sealant: The Winter Camper’s Best Friend

    When winter camping calls, your RV’s ability to stay warm and weatherproof becomes the cornerstone of comfort. Whether you’re navigating snow-covered forests or enjoying a quiet lakeside retreat, the unsung hero of your camper’s winter readiness is its RV sealant.

    Making sure your RV is buttoned up effectively protects against cold drafts, moisture, and potential long-term damage. (And sealing up your RV can involved more than just RV sealant.) But to get the results you want, you need to know the basics. So, in this article, we’ll focus specifically on the different types of RV sealant, when and where to use them, and some top product recommendations to make your winter RV adventures cozy and trouble-free. 


    Why RV Sealants Matter in Winter

    As almost all RV owner know (or will soon find out), winter conditions can be brutal on an RV. Ice, snow, and fluctuating temperatures challenge even the most well-maintained rigs. Gaps in seals can allow freezing air or water to creep in, leading to drafty interiors, moisture damage, or even structural issues. This is where RV sealants come to the rescue, acting as a barrier to keep your RV protected and insulated. They help keep the weather out and the comfort inside of your home on wheels.


    Types of RV Sealants and Their Uses

    The world of RV sealants can feel overwhelming, but understanding the key types and their applications will help you choose the right product for each job.


    1. Self-Leveling Sealants

    Best for: Horizontal surfaces like your RV roof. Self-leveling sealants are designed to spread evenly as it cures, creating a smooth, watertight seal on flat areas.

    Top Pick: Dicor 501LSW Self-Leveling Lap Sealant

    • Why It’s Great: This sealant is a go-to for sealing seams and vents on rubber or TPO roofs. It’s UV-stabilized and resists cracking, which is essential during winter freezes and thaws.
    • Pro Tip: Apply on a clear, dry day to allow proper curing before exposing it to snow or rain.


    2. Non-Sag Sealants

    Best for: Vertical surfaces like sidewalls, windows, and doors. Non-sag sealants are formulated to stay in place without dripping or sagging, even on inclined surfaces.

    Top Pick: Geocel ProFlex RV Flexible Sealant

    • Why It’s Great: Known for its flexibility, ProFlex works well on fiberglass and aluminum and withstands temperature extremes.
    • Pro Tip: Use masking tape around your application area for a cleaner finish, especially if working on visible sections like windows.


    3. Butyl Tape

    Best for: Underneath fixtures like vents, skylights, and window frames. Butyl tap is pliable, adhesive tape that conforms to irregular surfaces for an excellent initial seal.

    Top Pick: 3M Butyl Tape

    • Why It’s Great: Ideal for creating a strong base seal before applying a lap or non-sag sealant over it.
    • Pro Tip: Always remove old butyl tape before reapplying to ensure a secure fit.


    4. Silicone-Based Sealants

    Best for: Non-porous surfaces, such as glass or metal. Silicone-based sealants provide excellent water resistance and flexibility, but not suitable for areas exposed to high UV light or on rubber roofs.

    Top Pick: Permatex Clear RTV Silicone Adhesive Sealant

    • Why It’s Great: This sealant is a reliable option for quick fixes on windows or mirrors.
    • Pro Tip: Use sparingly, as silicone can be challenging to remove and is incompatible with some RV surfaces.


    5. Specialty Sealants for Extreme Conditions

    Best for: Areas exposed to heavy wear or harsh weather. These specialty sealants are formulated to handle extreme cold, water immersion, or high movement.

    Top Pick: Sikaflex-221 Multi-Purpose Sealant

    • Why It’s Great: Known for its durability, it adheres to multiple surfaces, making it versatile for tough jobs.
    • Pro Tip: Allow extra curing time in colder temperatures for maximum adhesion.


    6. Flexible Sealants for All-Weather Versatility

    Best for: Sealing joints and cracks that require flexibility and durability. These sealants are weatherproof, paintable, and adaptable to movement. All of which make this kind of RV sealant ideal for RV surfaces prone to shifting or flexing.

    Top Pick: Flex Caulk Waterproof and Weatherproof Sealant

    • Why It’s Great: Flex Caulk stands out as an all-purpose, heavy-duty sealant perfect for RV use. Its flexible, weatherproof formula makes it an excellent choice for sealing around windows, vents, trim, or any area exposed to movement or environmental stress. The built-in trigger applicator simplifies application, ensuring a precise and clean finish without needing extra tools. Once cured, Flex Caulk dries to a paintable surface, blending seamlessly with your RV’s exterior for a polished, professional look.
    • Pro Tip: Plan your application based on weather conditions, as colder or humid environments may slightly extend curing time. For larger projects, keep a damp cloth handy to smooth out edges and achieve an even seal.


    My Personal Must Haves

    With space being a premium in an RV, if I could only have two on the road, it would Dicor Lap Sealant and Flex Caulk. Both are easy to apply and super reliable. We recently used Dicor for our full solar and electrical upgrade when installing new solar panels. Its self-leveling properties and durability made the process seamless and gave us peace of mind for long-term weatherproofing. You can check out the full installation in this video on our Instagram

    We also use Flex Caulk around the RV in a pinch because it works well and comes with a squeeze handle. So, it is quick and easy to use on the go. There is no caulk gun needed.


    When and Where to Apply Sealants

    Proper application is just as critical as choosing the right sealant. Here’s a breakdown of common areas that benefit from RV sealant maintenance.

    Roof Seams and Vents. Check for cracks or peeling sealant, especially around vents, skylights, and air conditioning units. Use self-leveling sealant for the best results.

    Windows and Doors. Inspect for gaps where cold air or moisture could seep in. Non-sag sealants or butyl tape work well here.

    Underbelly and Storage Compartments. Look for potential openings where road debris or water might infiltrate.

    Slide-Out Seals. Ensure the rubber seals are in good condition and supplement with a compatible sealant for gaps.


    Additional Tips for Winterizing with RV Sealant

    Preparation Is Key. Clean all surfaces thoroughly before applying sealant to ensure proper adhesion.

    Temperature Matters. Most sealants cure best above 50 degrees Fahrenheit. So, plan applications during milder winter days or indoors.

    Inspect Regularly. A quick monthly check of your seals can save you from expensive repairs down the line.

    RV sealants may not be the flashiest part of RV maintenance, but they’re undoubtedly among the most important. With the right RV sealant and application, you can ensure your RV stays warm, dry, and comfortable all winter long. Whether you’re boondocking in snowy mountains or parked at your favorite winter campground, a well-sealed RV is the key to worry-free adventures. Don’t overlook this essential step. Your RV (and your wallet) will thank you!

  • Storing Your RV for the Winter? Do It the Right Way

    Storing Your RV for the Winter? Do It the Right Way

    Like my spirit animal, the bear, when the days grow shorter and the air gets cooler, we RV owners know when it’s time to prepare for winter hibernation. But proper RV storage isn’t just about parking your rig and calling it a season. Rather, it means ensuring that when spring rolls around, your RV is ready to hit the road — without surprises. Trust me, as someone who’s learned a few lessons the hard way, I can tell you that prep is essential when storing your RV for the winter.

    So, if you want to do it the right way (you do), here are the steps you need to take. It involves a little bit of cleaning, a grasp of RV winterization, and a few common-sense pointers. But together, all of it will help keep your RV safe, sound, and ready for adventure once the frost melts.


    1. Thoroughly clean your RV — inside and out.

    Cleaning your home, whether on wheels or sticks and bricks, is never fun. That said, it’s way easier to do it early than late. Early, in this case, means when you’re storing your RV for the winter. Your future spring-self will thank you.

    • Exterior Cleaning. Start by giving your RV a good scrub to remove road grime, dirt, and lingering bugs. Apply a coat of wax to protect the exterior from harsh winter weather. Consider a good coat of wax. It not only shields against moisture but also makes spring cleaning much easier.
    • Interior Cleaning. Empty your fridge and pantry of all food. Vacuum the floors. And wipe down every surface. Mold, mildew, and pests are your winter enemies, and a clean RV helps keep them away. Don’t forget often-overlooked areas like storage compartments, under seats, and in the bathroom. You don’t want that road fry that fell under the seat a couple months back to be the reason you come back to ants or mice.


    Pro Tip: To prevent any unpleasant surprises, leave your refrigerator and freezer doors slightly open. A small box of baking soda can work wonders for absorbing odors during storage. But remember to properly clean, dry, and turn off your fridge beforehand.


    2. Winterize your plumbing system.

    Failing to winterize properly can lead to costly repairs, as I learned the hard way. One year, I didn’t drain and blow out the lines properly, and when I dewinterized, the outdoor shower connector had cracked. The result? Water shot everywhere. And our departure was delayed by a full day as I scrambled to clean up, make a run to the hardware store, and repair the issue. It’s the perfect example of learning from my mistakes.

    • Drain and Flush. Start by draining all water from your freshwater, gray, and black tanks. Use your RV’s water pump to remove any lingering water and then flush the system with nontoxic RV antifreeze to protect your pipes from freezing. You should also look for a low-point drain to help you with the process of clearing out your lines.
    • Water Heater. Turn off and drain the water heater completely. If your RV has a bypass kit, use it to save antifreeze during the process.
    • Protect Every Faucet. Pour a small amount of antifreeze into your sinks, shower drains, and toilet to protect the P-traps and seals.


    Pro Tip: Use a checklist to ensure no faucet or drain is overlooked. Trust me, one missed step can lead to a mini disaster come spring.


    3. Inspect and protect your RV exterior.

    Your RV’s exterior takes the brunt of the meanest season’s harshest conditions. So, give it some TLC before storing your RV for the winter.

    • Check Seals and Roof. Carefully inspect all seals, seams, and the roof for cracks or damage. Apply a weatherproof sealant if needed, to prevent any weak spots from getting worse.
    • Tires. Inflate your tires to the manufacturer’s recommended pressure and cover them to protect against UV rays and cold weather. If possible, use leveling blocks or lift the RV slightly to reduce stress on the tires.
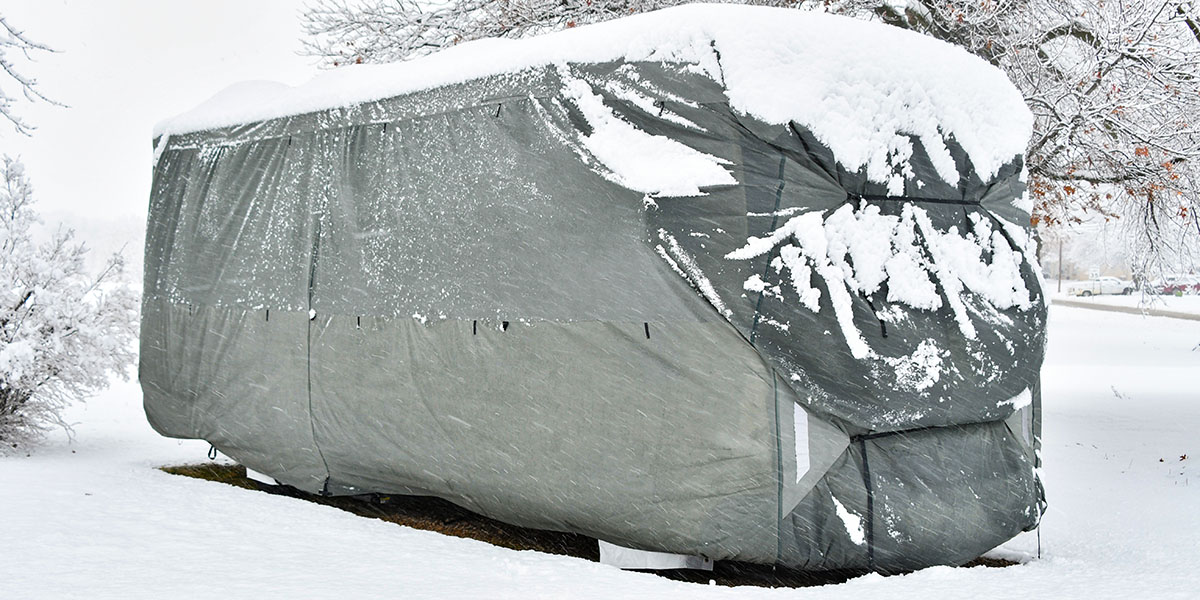
    • RV Cover. Invest in a breathable, high-quality RV cover to shield your rig from snow, ice, and debris. Ensure the cover is snug to avoid moisture buildup underneath.


    Pro Tip: Park on a level surface and use wheel chocks to prevent movement during storage. If you’re parking on dirt or gravel, placing plywood or some leveling blocks under the tires can help prevent sinking.


    4. Handle your power system with care.

    Your RV’s power system needs special attention to ensure it’s ready to roar back to life in spring. 

    • Remove Batteries. If possible, remove your RV’s batteries and store them in a cool, dry place. Use a battery maintainer to keep them charged and ready.
    • If You Can’t Remove Batteries. Disconnect the battery terminals to prevent phantom power draw. Check the batteries periodically to ensure they maintain a charge and aren’t exposed to freezing temperatures.
    • Unplug Everything. Disconnect all appliances, electronics, and propane tanks. This not only prevents potential damage but also reduces the risk of fire.


    Pro Tip: For rigs equipped with solar panels, covering them up when storing your RV for the winter is good practice as well. It’s a quick way to shield them from the elements.


    5. Keep those pesky pests out.

    Nobody likes unwelcome guests, especially rodents and insects that can wreak havoc during storage.

    • Seal Entry Points. Inspect your RV for any small gaps, vents, or cracks. Use foam sealant or wire mesh to block these entry points.
    • Repellents and Traps. Place peppermint oil-soaked cotton balls, dryer sheets, or safe repellents inside your RV to deter rodents. Set traps in areas where pests might be tempted to nest.
    • Food-Free Zone. Remove all food and even crumbs to ensure pests aren’t attracted to your rig.


    Pro Tip: Regularly check your RV during storage for signs of pests. The earlier you catch an issue, the easier it will be to address.


    6. Store your RV smartly.

    The right storage location can make all the difference in protecting your RV.

    • Indoor Storage. Whenever possible, store your RV in a climate-controlled facility to shield it from extreme weather. This will also minimize so much of the prep work, because it won’t be in the elements.
    • Outdoor Storage. Choose a secure location away from overhanging trees or potential hazards. A good RV cover is essential in this case.
    • Parking Prep. Ensure your RV is on a level surface. For added protection, consider using skirting to block cold air from circulating under the RV.


    Pro Tip: Visit your RV periodically during the winter to check for any issues, such as leaks or pest damage.


    Bonus tip: Get a jump on your spring checklist.

    As you prepare your RV for winter, create a checklist for spring maintenance. Include tasks like recharging batteries, flushing the water system, inspecting seals, and cleaning both the interior and exterior. Having a plan ready will make your transition back to the road seamless.


    Please learn from my mistakes.

    Winter RV storage can seem daunting, but with a little effort, you can avoid costly repairs and ensure your rig is ready to roll when the snow melts. If there’s one thing I’ve learned, it’s that proper winterization is worth every minute. Trust me, a few hours of preparation now will save you from a lot of frustration later. So, grab your checklist, follow these tips, and give your RV the care it deserves this winter. 

  • Alright! I’ll Empty the Black Tank

    Alright! I’ll Empty the Black Tank

    If you’ve spent any time RVing, you’ve probably discovered that not all parts of the adventure are scenic sunsets and s’mores by the campfire. One unavoidable task that every RVer has to face is emptying the black tank. And necessity of that task pushes forward the uncomfortable question: Who is going to empty the black tank? In my marriage, like many other RV families we’ve met on the road, this fun assignment is taken over by one person. And that person is me. I have offered to be the bearer of black news in my marriage, and it gives me a few points every time. Happy poopsy-free wife, happy life.

    While it may not be the highlight of your trip, mastering this job is essential to keeping your home on wheels running smoothly. (And trust us, it’s a whole lot easier with the right preparation and tools.) With a little know-how, you’ll soon have this process down to a science, leaving more time for the parts of RV life you love.

    Ready to dive in? Let’s get started!


    Step 1: Gather the Right Tools (They Make All the Difference)

    When it comes to emptying your black tank, preparation is key. Having the right tools on hand not only makes the process more efficient but also keeps things clean and—most importantly—minimizes unpleasant surprises. Here’s a checklist of what you’ll need:

    • Sewer Hose and Fittings. A durable, flexible sewer hose, often affectionately called the “stinky slinky,” ensures a secure connection between your RV and the dump station.
    • Disposable Gloves. These are non-negotiable. Protect your hands with a thick, disposable pair for each dump session.
    • Clear Hose Extension.While it’s not the prettiest part of the process, a clear extension lets you see when the tank is completely flushed.
    • Sewer Hose Support. Use a support to create a smooth slope for the hose, helping gravity do the work and preventing any unpleasant backups.


    Pro Tip: Store all sewer-related tools in a separate, labeled bin. This ensures they stay away from other camping gear, preventing contamination and making cleanup quick and easy.


    Step 2: Position Your RV for Success (Double-Checking Matters)

    Whether you’re at a dump station or a full-hookup campsite, how you position your RV makes a difference. You’ll want to park close enough that your sewer hose can reach the dump port comfortably without stretching. Take a few extra moments to ensure the ground is level and that the sewer connection is secure.

    When setting up, always double-check that you’ve attached the hose to the correct outlet. It sounds obvious, but on some rigs, the gray and black tank handles look identical.  And you don’t want any mishaps — trust us on this one!

    Pro Tip: Always empty the black tank first before opening the gray tank valve. This way, the gray water helps flush out the hose, leaving it cleaner and reducing odors.


    Step 3: Hook Up and Empty the Black Tank (Slow and Steady Wins the Race)

    Now comes the main event. Start by putting on your gloves and connecting your sewer hose to the RV’s black tank outlet. Secure the other end at the dump station, and make sure everything is locked tight to avoid leaks. Slowly open the black tank valve—don’t rush it. Let the contents drain completely, and give it a few extra moments to ensure everything flows out.

    If your RV has a built-in black tank flush, connect a dedicated hose to the flush inlet. Running fresh water through the tank helps clear out any stubborn waste or toilet paper that might linger. No built-in flush? No problem—a portable rinse wand or backflow connector like this will do the trick just fine.

    Pro Tip: Make sure that your black tank valve is closed and add a little extra water from your RV toilet foot-flush – I tend to add just a few seconds – so that what is inevitably left over in the tank doesn’t completely dry and get worse.


    Step 4: Flush the Gray Tank and Wrap It Up (You’ve Done the Dirty Work)

    Once the black tank is empty and closed, it’s time to open the gray tank valve. The soapy water from your sinks and shower will flush out any residue in the sewer hose, leaving it cleaner and fresher. This step also makes disconnecting the hose far less messy.

    After the tanks are empty, give your sewer hose a quick rinse — many dump stations have a non-potable water spigot for this purpose. Once everything is clean, disconnect the hose, cap the outlets, and store everything neatly in your designated bin.

    Pro Tip: Perform one final dump and rinse at the end of each trip if possible. This ensures your tanks stay clean during storage and prevents buildup that could lead to clogs or odors later on.


    Step 5: Use Tank Treatments to Keep Things Fresh (Say Goodbye to Odors)

    To keep your black tank smelling fresh and functioning properly, it’s a good idea to use an RV-specific tank treatment. These treatments help break down waste and prevent odors from becoming an issue, especially during warmer months. Drop-in pods are a popular option because they’re easy to use—just toss one into the toilet, and you’re good to go.

    If you’re staying at a full-hookup campsite, resist the urge to leave the black tank valve open all the time. Keeping the valve closed allows the tank to fill, which helps waste break down more effectively and prevents unpleasant buildup known as the “pyramid of doom.”

    Pro Tip: Always keep your drinking water hose and black tank rinse hose separate — cross-contamination is the last thing you want on an RV trip!


    Avoiding Common Mistakes (Because We’ve All Been There)

    1. Forgetting Gloves. Even if you think you’re quick, wear them. You’ll thank yourself later.
    2. Skipping the Tank Rinse. It only takes a few extra minutes and will save you headaches in the long run.
    3. Leaving the Black Tank Valve Open at All Times. This can lead to waste buildup, causing clogs and foul odors.
    4. Not Checking Connections. A loose fitting can turn into a big mess fast—double-check everything before opening valves.


    Wrap-Up: Embrace the Process and Enjoy the Journey

    Emptying the black tank may not be the highlight of your RV trip, but it’s a necessary part of the lifestyle. Once you’ve mastered the process, it becomes just another routine task, like setting up camp or cooking dinner outdoors. Plus, knowing you have clean tanks means less stress and more time to focus on the adventures that lie ahead. With the right tools, a little patience, and some practice, you’ll be able to handle this job with confidence. And, who knows? You might even become the go-to tank expert in your campground! (If that’s something you actually like).

    Happy RVing, and may your tanks always flow smoothly! Also, if you’d like a little video tutorial walking you through the process step by step, watch this.