Category: Maintenance

  • 6 Tips for On the Road RV Repairs

    6 Tips for On the Road RV Repairs

    You’re all set for an adventure in your RV: hitting the open road, exploring the great outdoors, and camping with your family and friends. You’re having a great time, but without warning you encounter some trouble with your RV: a flat tire, a mechanical problem, or issues with your appliances. While routine RV maintenance can prevent a lot of wear and tear, there are still things that can go unexpectedly wrong while on a road trip. However, with a little planning ahead, you can be prepared for whatever problem is thrown your way. Here are six tips for on the road RV repairs from RV Trader.

    1. Have RV Repair Resources Ready

    Create a folder for all the important info you need when you’re on the road and need a repair. Have copies of your RV insurance, towing vehicle insurance, any travel or trip insurance you may have purchased, a roadside assistance plan, and all the details for your emergency contacts. Keep the folder organized and nearby so you’re ready when you run into a roadside problem.

    2. Study Your Service Plans

    Know ahead exactly what your vehicle warranty covers. If it’s from a dealer or manufacturer, they may provide an emergency hotline or website chat that can provide an immediate response to help you solve a roadside problem. Warranty and service plan providers may be able to send roadside assistance or steer you in the right direction to a reliable repair shop.

    3. Hire a Mobile Mechanic

    If you’re stuck with a roadside problem that seems complicated, consider hiring a mobile mechanic. These days mobile mechanics can be just as convenient as ride sharing or food delivery services. They’ll come directly to you for routine repairs or maintenance with your oil, battery, filter, and tire issues.

    4. Find Help Nearby

    If you’re out camping at an RV Park, the staff or a fellow RVer might be able to lend a hand. Some RV Parks can provide directions to mechanics or repair shops that are local, trusted partners. If you’re stranded on the road, find a nearby town or city with a service shop for some help. Even with a breakdown, your RV can still provide you with a place to stay while you wait for repairs.

    5. Fix It Yourself

    Even with so many parts, you might be able to fix a roadside problem by yourself. Always check your owner’s manual for any repairs you may be able to do. You can use online resources such as videos, blogs, and forms to take out the guesswork and help you pinpoint a problem if it’s not obvious. Avoid do-it-yourself repairs that would void a warranty. Have your toolkits ready for these repairs:

    • Flat Tire: Pull off to the shoulder, put on your hazards, and put out reflectors or cones. Have a spare tire ready, gloves, towel, ramp jack, wrenches, and a bolt cutter. 
    • Dead Battery: Bring a portable jump starter fitted for your RV engine size. Jumper cables are another option, but they need to be specifically sized for your RV and jump-started by another RV, not a car.
    • Defective Appliances: Propane tanks power many RV appliances. Check the tank’s propane level in case it needs to be refilled or replaced. Check hose connections and fittings for any leaks.
    • Leaks: Roof renew kits can seal up cracks, tears, and holes.

    6. Stay On Top of Repairs

    Keep up with regular RV maintenance and keep track of any repairs you do yourself or any work done by a mechanic. Keep these records in your RV repair folder, so you can stay on top of the most recent work done to each area of your RV. Whenever you pull over at a rest stop or service station, do a visual inspection of your vehicle, checking your tire pressure and oil level.

    By planning ahead, you can take on unexpected problems with your RV that you may face while out on the open road. Whether the repair may be big or small, being prepared can help you problem solve and get moving again. Looking to get moving in your next RV? See a full selection of units on RVTrader.com.

  • 8 Tips for Pop-Up Camper Maintenance

    8 Tips for Pop-Up Camper Maintenance

    Pop-up campers are a great camping option that allow you to experience the outdoors while avoiding pitching a tent on the hard ground. One of the smallest and lightest RV options, these campers are collapsable and easier to tow and maneuver compared to a full-size trailer. Outside of surface cleaning, proper maintenance is essential to extend the life of your pop-up camper. Keep your unit as good as new with RV Trader’s eight tips for pop-up camper maintenance.

    1. Use RV-Specific Cleaning Products

    When cleaning your pop-up camper, it may be easy to reach for your regular, handy cleaning products. That may work for cleaning some parts of your camper, such as windows and the interior, but some surfaces and fabrics need special products. Using cleaners that are made specifically for RVs is always a safer bet, especially if you don’t know which chemicals could be too harsh.

    2. Don’t Store Your Camper When It’s Wet

    If you get caught in the rain, you’ll want to ensure that your camper is completely dry before storing it. Moisture can lead to mildew and mold on your camper’s canvas. If possible, let your pop-up camper dry in the sun. Or, towel dry as much of the canvas as possible before storing the unit. If you do notice any moisture damage, clean the canvas as soon as possible. Make sure you know what type of material your canvas is made of, since different fabrics require different types of cleaning products.

    3. Waterproof the Canvas and Hard Sides

    Protect your camper in advance from water damage by waterproofing the canvas and hard sides of the unit. Use a water repellent to treat the surfaces of your camper. Check your work by seeing if water beads and rolls off the fabric, as opposed to soaking in. As you’re waterproofing, look for tears in the fabric of your canvas and repair them immediately with an adhesive glue or repair kit.

    4. Inspect the Roof Seals

    Make a habit of inspecting the roof seams and seals every few months. If you notice any cracking, apply a rubber sealant to keep the seams from drying out.

    5. Clean AC Filters

    If you choose to travel with an air conditioning system, remember to clean it out. A clean filter doesn’t have to work as hard as a dirty one, saving your pop-up camper’s battery some energy. How often you clean the AC filter depends on how often you use the unit. It’s beneficial to give the filter a quick look after every trip, especially if you’ve traveled somewhere with more dust in the air.

    6. Maintain Water and Waste Systems

    If you aren’t using the water hookups at a campsite,  you’ll rely on your pop-up camper’s freshwater system for cooking, drinking, and bathing. Before a camping trip, check the water levels in your tank to make sure you always have enough. You’ll want to keep the lines for your water system clean by occasionally sanitizing them during camping season and again at the end of the season.

    Drain any gray water, which is waste water from the sink and shower, with a different hose than you use for freshwater. If you’re camping in a remote area, or don’t have access to full hookups, keep an extra container or portable tank to collect the gray water. If you’re staying at a campsite, read the rules for waste water removal beforehand.

    7. Inspect Tires Regularly

    Nothing is worse than getting a flat tire when you’re cruising down the road while towing your pop-up camper. Your unit uses different types of tires than cars, which are designed with a higher operating pressure and stiffer sidewalls. Maintaining a pop-up camper’s correct tire pressure is critical in preventing flats, so inspect the tires before every trip. Consider purchasing a tire pressure gauge to get a reading no matter where you are.

    Before each trip, you’ll also want to use a torque wrench to check the tightness of the lug nuts. If lug nuts are not properly secured, your camper’s wheel could suddenly fly off.

    8. Check the Battery

    Your pop-up camper’s battery is essential in running anything that uses electricity if you don’t have access to electrical hookups. A battery monitor can help track your usage and let you know how much voltage is  left. To extend the life of your battery, avoid running below 50% of the total voltage. Between trips, recharge your battery. At the end of your camping season, store the battery in a dry environment at a moderate temperature.


    Pop-up campers provide a more affordable way to experience RV life. By following these tips for proper care and maintenance, you can avoid costly repairs and ensure that the unit remains a great investment.

    If you’re ready to buy a pop-up camper of your own, browse the nationwide marketplace at RVTrader.com.

  • 4 Basics of Routine RV Maintenance

    4 Basics of Routine RV Maintenance

    There’s a lot that goes into RV maintenance — after all, these are big units with lots of parts — but if you commit to keeping your rig properly maintained, it can take you thousands of miles and last for years. Some RV maintenance will need to be done by a seasoned professional, but it’s still important for you, as the owner and operator, to be well versed in the basics. The more you can monitor and service on your own, the less likely you are to end up with a major issue while out on a trip. Starting from the top down, here are four basics of RV maintenance.

    1. Roof

    The biggest thing you’re looking for on the roof is cracks in the sealant around the seams. If your sealant is corroded or cracked, water can soak into the roof’s framework and end up in the ceiling panels. A roof inspection is not something you need to do every day, but try to closely look it over about every three months. When you crawl onto the roof, look around the edges, vents, skylights, air conditioning unit, and any other parts or features to ensure everything is still properly sealed. If you decide to add new sealant to an area, keep in mind that roof materials can range from fiberglass to metal to rubber and more, so make sure to pick a product that’s compatible with the roof’s material. 

    2. Slides & Awnings 

    Maintenance on your slides and awnings starts with regular cleaning. You want to make sure that there isn’t any dirt build up that’s hiding potential problems, particularly around the seals. If you leave dirt caked on for months at a time, you’re sure to run into corroding issues. There are also specific things to look for, depending on the type of slide you have.

    • Schwintek Slides • Check that the gears on the side of your slideroom box work properly.
    • Acu-Slides • Check that there is about one inch of give on the cord when your slide is fully extended.
    • Power Gear Slides • Check that there are no hydraulic leaks and that the motor assembly is fastened correctly.

    Once everything is clean, make sure to lubricate the sliding mechanism so there isn’t any friction during the opening and closing process. This can wear down the apparatus, causing issues over time. When you look for lubricant for your unit, make sure to pick one that’s specifically designed for RVs. Unfortunately, WD-40 often won’t cut it.

    3. Fluids & Filters 

    Keeping your fluids and filters well maintained might seem like a small task, but it’s extremely important. If internal components get too dirty, it can cause major stress on your engine and drivetrain, which can lead to larger issues down the road, which is no fun.

    Fluids

    The owner’s manual of your RV is an excellent resource when it comes to your fluids. It should tell you the correct levels for each fluid, walk you through how to check and change the fluids, and provide intervals for how often to do so. At a minimum, you should always check your fluids before taking a trip, and then every couple weeks while the RV is in use. Also at minimum, change your RV oil at least once a year. The major fluids that should be checked during routine maintenance are:

    • Oil
    • Coolant 
    • Brake Fluid
    • Radiator Fluid
    • Transmission Fluid
    • Power Steering Fluid
    • Windshield Wiper Fluid

    Filters

    Each filter is tied to the performance of a major system within your RV, so it’s important to keep them clean. For instance, if you have a dirty air filter, the air coming out of your vents might not be cool, even if the AC unit is running. Changing these out is a fairly simple process and can be done on a seasonal basis. Check your owner’s manual for exact filter changing instructions and intervals. During your routine maintenance, check the following filters:

    • Air
    • Fuel
    • Coolant
    • Hydraulic

    4. Tires

    Because RVs often sit idle for long periods of time, their tires may be prone to premature deterioration. Luckily, tire maintenance is pretty straight-forward. Regularly make sure the air pressure in your tires matches the manufacturer recommendation. If you’re driving around with deflated tires, it causes more wear and tear than necessary and your tires will wear out more quickly. You’ll also want to keep your tires clean and dry. Make sure to wash them down to remove any dirt or oil you might have picked up on the road. Other than that, you just need to perform regular inspections of your tires to make sure the sidewalls are intact and there is no uneven wear on your tread. These could be signs that you might need a new tire, and it might be a good idea to get it professionally checked so you don’t blow a tire on the road. 


    Keeping your RV in good shape doesn’t have to be an overwhelming process. These are four basic things you can do in between major service appointments to be sure that your unit is always adventure-ready. And if you’re looking for an RV for your next adventure, check out all the new and used RVs available nationwide for-sale and for-rent on RVTrader.com.

  • 7 Tips for Preparing Your RV for a Hurricane

    7 Tips for Preparing Your RV for a Hurricane

    Traveling in an RV can be an exciting adventure, but one thrill you don’t need is the dread of an impending hurricane! If you plan to travel to an area—or live in an area—that’s prone to hurricanes or tropical storms, it’s important to know how to prepare yourself, family, and unit for this extreme weather. Get a plan in place ahead of time with RV Trader’s seven tips for preparing your RV for a hurricane.

    1. Track the Weather

    Weather patterns and conditions can change quickly, especially during hurricane season. Remain proactive by keeping an eye on weather forecasts. As you’re following the weather alerts online, on TV, or over the radio, make sure you understand what each type of weather condition indicates.

    • Advisory – Advisories are most often used for less severe weather, like wind.
    • Watch – A hurricane is possible. Watches typically span over a large area for a long period of time.
    • Warning – Hurricane conditions are imminent. Warnings cover a smaller, more precise area for a definite period of time. High Wind Warnings are issued for wind speeds of 40 mph for an hour or more, or wind gusts of 56 mph for any duration.

    2. Prepare an Emergency Kit

    RVs aren’t safe to drive in any storm with high winds. Whether you have to hunker down in a storm shelter or safely in your RV, make sure you have everything you need to wait out the storm. Here are some items to keep in an emergency/evacuation kit:

    • Drinkable water
    • Water for brushing your teeth, flushing, and washing
    • Non-perishable food
    • Medication
    • Cash and ATM cards
    • First-aid kit
    • Batteries
    • Battery-operated radio
    • Portable phone charger
    • Flashlight
    • Rain attire, including jackets and boots
    • Insurance information and other important documents

    3. Choose the Right Campsite

    During hurricane season, boondock your RV in an elevated location that’s away from large trees. Pick up any nearby fallen tree branches that could become projectiles and cause damage during high winds. Once you’ve secured the campsite, find the closest storm shelter in or near the campground and determine an evacuation plan.

    4. Do a Safety Check of the RV

    Before a storm, perform a safety inspection of your RV. Fill the fuel tank and check the windshield wipers and tires. If your unit has a gas-burning stove, be sure to check the batteries in your RV’s smoke alarm and carbon monoxide detector. Finally, test your generator to make sure it’s ready for use before, during, or after a storm.

    5. Secure Your RV

    If you aren’t able to store your RV inside a garage or storage facility, do your best to protect it from the effects of the storm. Cover and tie down the unit, board up windows, and make sure the water tank is full in order to add weight, lower the center of gravity and increase stability. If you have items outside your RV, such as lawn chairs, tables, and grills, make sure to tie those down too. Chock the tires of travel trailers in both directions to stop the wheels from rolling. If your RV has slide outs, stow them away.

    6. Check Your RV Insurance

    Before hurricane season, check that the insurance policy on your RV is up to date and covers the effects of hurricanes, such as wind and water damage. Make sure you know if your insurance requires that you follow state or local evacuation mandates in order to access coverage. Before the storm, take photos or videos of your RV and belongings so you’ll have a record to show your insurance agent, if necessary. After the storm, take photos and videos of any damage.

    7. If You Get Caught in a Storm

    If you’re on the road and get caught in a storm without time to prepare, carefully drive to the nearest exit, find a large, sturdy building near to which you can park your RV, and seek shelter inside. Tune into a local weather forecast, or utilize a mobile weather app, to track the storm conditions and determine when it will be safe to get back on the road. When it is safe, NEVER attempt to drive through high standing water or flash floods.


    Safety should always be a priority when traveling in your RV, but even more so during hurricane season. These tips can help prepare your RV for a hurricane, whether you encounter a storm on the road, are using your unit to evacuate, or are simply securing the RV until the storm passes.

    If you’re searching for your next RV, browse the for-sale units available nationwide at RVTrader.com.

  • 8 RV Renovation Tips for Beginners

    8 RV Renovation Tips for Beginners

    You want to renovate your RV, but you don’t know where to start, right? Customizing and fixing up an RV offers nearly endless options, which may seem intimidating at first. The end result will be well-worth it, but without preparation, the remodel process can be full of missteps and unforeseen expenses. Before you start picking out paint samples, get a plan in place with RV Trader’s eight renovation tips for beginners.

    1. Know Your Budget

    Start your remodel journey by planning your finances. Decide how much you’re willing to spend on this process. While it’s always efficient to use a professional contractor, doing the renovations yourself keeps you in control of your money since you decide which supplies to use and you won’t have to pay yourself for labor costs. Don’t forget to leave room in your budget for any unexpected costs along the way. And if you don’t have your entire budget up front, don’t worry. The long renovation process will likely give you time to continue saving for each expenditure along the way.

    2. Assess the Condition of Your RV

    Before you start planning your dream redesign, make a quick assessment of your camper. If you’re purchasing an RV specifically to renovate, check the condition of the appliances, windows, tires, water systems, and electrical. You’ll also want to keep an eye out for engine problems, water damage, and frame damage. If you find an issue with your camper after you buy it, get it fixed before starting your renovation.

    3. Decide What You Can DIY

    Renovations can range anywhere from a complete gut job to simpler aesthetic touch ups, requiring different resources and skill levels. If you decide to go the DIY route and not use a professional, it’s best to do a renovation that allows you to work with your RV’s existing structural, electrical, plumbing, and mechanical systems. You know how much you can take on. If a project becomes too much, reach out for help.

    4. Have a Realistic Timeline

    Remodeling your camper will likely take longer than you expect. Knowing and preparing for this in advance can help you avoid future frustrations. Replacing light fixtures can take a few hours, but painting, building shelves and tables, and installing new appliances can be much more time consuming. If you live in your RV full-time, make a plan for where you’ll stay during parts of your renovation. Remember, you can’t tackle all of your ideas at the same time, so keep in mind how long each project will take before you start a new one.

    5. Figure Out Where to Shop

    Shopping doesn’t have to break the bank, especially when you plan ahead. Define your decorating style, whether it’s modern, rustic, or industrial, and shop retailers that have the widest selection. Shopping at just a few intentionally selected stores, instead of running around to a bunch, will save time that can be spent on designing and renovating. Accessories and fixtures specifically for RVs can cost more than they do for homes, so shop around and price compare to get the quality and style you want at a lower price. Popular household furnishing stores also have lightweight furniture that’s perfect for RVs. 

    6. Make a List of What You’ll Need

    As you plan your projects, make a list of the tools, fabrics, paints, and furnishings you’ll need for your remodel and the quantity you’ll need. Power tools like drill sets can add to your budget, so rent or borrow them when possible. Buy extra renovation essentials like painter’s tape, paper or plastic covers, and sanding paper. These can go quicker than you think so it’s always best to have more on hand.

    7. Measure Everything

    Measuring your RV is a critical step in determining the full scope of your project. Use a measuring tape and go room to room to get the dimensions of your camper. Measure once then do it again to make sure all the sizing is correct before you buy anything. Make a note of where switches and outlets are located to avoid blocking them with any new furniture. Don’t forget to also measure the height and width of your RV door to ensure that you can fit your purchases through the opening.

    8. Connect with Other RV Renovators

    Online forums and Facebook groups are a great way to connect with other people who have renovated their campers. Share your remodeling projects, ask for advice, and get ideas from other RV renovators. Follow DIYers on social media for even more designs and tips. What you see from someone else could spark inspiration for your project.


    Now that you have an idea of how to start, get ready to design and remodel your rig. Putting a plan in place early on can make your RV renovation process easier and help keep you on budget. Before you know it, you’ll be on your way across the country in your chic, updated camper. For similar advice, review the RV Renovations resource page, which offers a series of detailed articles, checklists, and videos.

  • FMCA Tech Tip: RV Roof Replacement

    FMCA Tech Tip: RV Roof Replacement

    A complete roof replacement is one of the biggest repair jobs RV owners may tackle. The procedure has been documented online in numerous articles and videos, often by RV owners with little or no previous experience replacing a roof. In fact, this difficult and time-consuming process requires advanced skills in carpentry and general fabrication. Some people undertake it themselves to avoid the high cost of having it done professionally, but bear in mind the cost is a function of the project’s complexity. Before you undertake this task, please consider the following: 

    • You will need an indoor workshop that can house the RV, a covered outdoor space, or an extended period of good weather without rain, probably at least two weeks straight.


    • You will have to remove all objects from the roof, including air conditioners. Without a forklift, this is a dangerous procedure, as A/C units are extremely heavy. 


    • You will have to lift the roofing materials, including plywood substrate, onto the roof. Again, without a forklift or lifting rig, this is dangerous. 


    • Working on an RV roof is inherently dangerous. 


    • You must obtain the appropriate roofing material, which will cost at least a few thousand dollars. As an experienced RV technician, I have replaced many RV roofs. It is an extremely labor-intensive project. Please consider having the work done by your local RV shop, which has the needed expertise and equipment. That said, if you believe you have the skills and the proper equipment, or you just want a better understanding of what it involves, read on. 


    Be extremely careful at all times while working on an RV roof. Move slowly to avoid a fall. This is not a one-person job, so make sure you have people available to assist.  

    Know Your Roof

    The main RV roofing materials are aluminum, fiberglass, vinyl, and rubber. Know what you have before proceeding with a replacement. You need not use the same material for the new roof, but using a different type will increase the complexity of the job. This article describes replacing rubber with rubber. Replacing another type of material with rubber generally requires extra planning, which is sometimes not evident until the old roof is removed.

    Materials

    Purchase the required materials in the correct quantities before you start the work. You may find you need additional supplies as you go, but be prepared with the basics:

    • EPDM or TPO rubber: Order sufficient length and width to cover the roof in a single piece. The roll of rubber should be long enough to cover the entire length and width of the RV roof, plus at least 6 inches on each side. Rubber roofing generally is available in widths of 8.5 feet and 9.5 feet. 


    • Adhesive: To ensure proper coverage, you need at least one gallon for every 175 to 200 square feet of roof. Be sure to purchase adhesive made specifically for the roof material. Some suppliers offer roof installation kits that include the adhesive, butyl, and lap sealant. This can be an economical way to purchase the supplies, but if you have a larger RV, you may want to purchase two kits. I recommend Dicor products for both the membrane and the installation kit. 


    • Butyl tape: This seals the fixtures to the roof. You need at least 75 feet of tape for every 20 linear feet of roof. Be sure to use butyl tape and not regular putty tape, as the latter can damage the rubber over time. 


    • Self-leveling lap sealant: This is applied generously to every hole and fixture on the new roof. At least three tubes are needed for every 20 linear feet of roof, but it’s very possible that will not be enough. 


    • EternaBond tape: This is expensive, and although not required, I recommend it in place of lap sealant, as it is permanent and less messy. Or, you may choose to use a combination of the two. EternaBond, when properly applied to a clean surface, provides a watertight and permanent seal. If you use EternaBond, be sure to refer to the manufacturer’s directions. 


    • Substrate: Prior to removing the existing roof material, it may not be apparent whether you need to replace the substrate or how much you need to replace. Usually, 1/4-inch plywood is sufficient, although you may choose to use 3/8-inch. Oriented strand board (OSB) also can be used. 


    • Trim strips: You may need new trim strips, or you may need to install them where they don’t currently exist. 


    • Screws: It is a good idea to purchase a few boxes of screws in a variety of styles and lengths, including wood screws and self-tapping sheet-metal screws. I usually use 1-inch, 1 1/2-inch, and 2-inch screws. 


    • Masking tape or drywall tape: A 1-inch-wide roll is used to tape the seams in the wood substrate. One roll should be sufficient. 


    • Miscellaneous: While you are on the roof, inspect all caps and covers for damage. If necessary, replace them.

    Preparation

    Be sure you have plenty of work space around the RV. And make sure you have ample time to complete the project. If the work is being done outside and you encounter a delay, you risk losing the favorable weather. Follow these steps:


    • Ladder: If your RV does not have a ladder, it may be because the roof is not strong enough to support your weight. In that case, lay sheets of plywood on the roof for support. If your RV does have a ladder, you will have to remove it, or at least unscrew the roof brackets, so be sure you have an A-frame or extension ladder long enough to safely access the roof. The ladder also is needed to install and remove the side trim pieces and roll out the membrane. 


    • Remove sealant: All sealant must be completely removed from all roof fixtures. This is a time-consuming process. Use whatever tools work for you, such as putty knives, as well as plastic and gasket scrapers. Take the time to do it carefully, as you don’t want to damage the fixtures. Once you have stripped the fixtures, remove and save all the screws, which you may want to reuse if they are in good shape. Rusted screws are a sign of water damage, so inspect those areas carefully, as explained below. 


    • Remove fixtures: Once all the screws are removed, carefully pry the fixtures off the roof. This can be difficult, because they should be stuck to the roof with butyl putty. Be careful not to damage the fixtures while removing them. 


    • Remove air conditioners: Remove the mounting bolts and ceiling plenum, disconnect all cables, and ensure the air conditioner power supply is turned off. A/C units are extremely heavy, so normally forklifts are used to remove them from the roof. You may be able to leave the A/C on the roof, and simply move it around while you work, but I don’t recommend this, as you risk damaging the new rubber. Always get help when lifting or moving an air conditioner. 


    • Remove the awning: If you are removing a rubber roof, the RV awning must be removed, along with the horizontal trim pieces and awning drip rail. This is because the rubber roof likely is curled over the edge of the roof and secured under these pieces. Before removing the awning, lock the ratchet in the “extend” position. Then remove the screws holding the fabric to the drip rail, as well as the lag bolts holding the upper mounting brackets in place. Remove the awning arms from the lower brackets and have an assistant grab one awning arm while you grasp the other. Have a third person climb a ladder to ensure the fabric slides out of the drip rail without binding or tearing while you and your buddy walk the awning out of the drip rail. Carefully lean the awning against a wall to prevent damage. 


    • Clean the fixtures: I like to clean the fixtures at this point rather than prior to reinstalling them. You may choose to seek assistance with this so you can continue working on the roof. Scrape the remaining sealant and butyl putty from the fixtures. I recommend using an industrial cleaner or silicone remover so they look as nice as the new roof. Further inspect the fixtures for damage and replace them if necessary.

    Removal

    You should find that the rubber is tucked under the front cap, and likely on top of the rear cap. Grab one end of the rubber and pull firmly to release it from the adhesive. You may choose to cut the rubber into smaller pieces to make it easier. Be extremely careful during this step, as the resistance of the rubber against the glue could change at any time. At this point, you should have a bare roof with only substrate exposed.  

    Replacement

    Thoroughly inspect the substrate. If you find rot or damage, consider replacing that section of wood. If any of the substrate is significantly damaged, especially from water, you may need to replace the batt or plastic-foam insulation underneath. In extreme cases with wood-frame RVs, you also may need to do some framing repair. Surprises like this take us back to the recommendation to let professionals tackle roof replacement. If you wish to replace the substrate: 

    • Remove all screws securing the wood to the roof frame. 


    • Carefully lift the substrate off the roof framing. Do so in one piece, if possible. Once the substrate is removed, do not walk between the roof rafters. If a number of boards have been removed, you may want to temporarily lay down plywood across the rafters for easier access to the exposed area. 


    • Be sure to replace substrate in full sheets. Make sure the replacement substrate is the same thickness as the original. 


    • If the substrate has any cutout features, replicate them on the replacement piece. Use the removed piece as a template, or measure on the roof to identify the exact locations for the cutouts. If the feature is a drilled hole for a vent stack or wire access, it must be precisely drilled prior to installing the new substrate piece. If the cutout is a large hole for a vent, air conditioner, etc., mark the location and then drill and rout once the wood is screwed down. 


    • After preparing the substrate section with predrilled holes, install it on the roof by securing it with screws, as per the original piece. Countersink the screws so the heads are flush with the surface or slightly below so the screws don’t protrude into the rubber membrane. 
    • Thoroughly inspect the entire roof for loose or protruding screws, wood splinters, etc. Prior to installing the rubber membrane, make sure the substrate is clean and free of any protrusions or anything that might damage the rubber. 


    • Sand the substrate anywhere you find splinters or other protrusions. 


    • Bevel the perimeter edges of the substrate using a sander or router. 


    • Using drywall tape or masking tape, secure all seams that are wider than 1/16 inch. I generally also tape the perimeter edges. 


    • Sweep the entire roof or blow it clean using compressed air. 


    • Once you are sure the roof is clean and smooth, place the rubber on the roof and roll it out. Make sure it is centered and squared front-to-back and side-to-side, and ensure you have at least 6 inches extra in all directions. 


    • The rubber should lay on top of any roof protrusions such as vent stacks. 


    • Roll the rubber halfway back toward the center of the RV from either the front or rear. The substrate will be exposed on either the front or back of the RV roof. 


    • Use a 9-inch-wide short-nap paint roller to apply the adhesive to the exposed half of the roof according to the manufacturer’s instructions. Some adhesive brands should be applied only to the substrate, while others are applied to both surfaces. Apply it at a rate of one gallon per 175 to 200 square feet. Refer to the manufacturer’s instructions for set-up time. 


    • Using ladders placed on each side of the RV, have an assistant help roll the rubber membrane over the adhesive, being sure not to allow large bubbles or creases. 


    • Roll the unglued half of the membrane over the glued half and repeat the gluing process. 


    • The adhesive remains pliable enough to adjust the membrane, if needed. 
    • For any protrusions such as vent stacks, use a razor knife to cut a small “X” in the rubber and push it down over the protrusion so it goes through the hole made by the “X.”   


    • Use a squeegee or broom to eliminate any bubbles or creases from the membrane. 


    • At the front of the RV, tuck the rubber under the front cap, but lay the membrane over the rear cap. 


    • To prepare the roof cutouts, cut an “X” from corner to corner of each roof cutout. Fold the cut flaps down into the cutout and staple them to the roof framing. You may trim the flaps later. 


    • Stick butyl tape to the original trim pieces, but do not remove the backing paper yet. 


    • Replace the upper horizontal trim pieces by removing the paper butyl backing and placing the trim in the same location as it was originally. If possible, line the screw holes up as well. While positioning the trim, firmly pull down on the rubber membrane, but do not stretch it. 


    • While holding the rubber, attach the trim to the sidewall and replace the screws. This ensures the membrane is taut along the edges and down the side of the RV. Alternately, you may choose to staple the membrane to the sidewall of the RV, using 1/2-inch staples placed every 5 to 6 inches along the sidewall. Make sure to pull on the membrane while you are stapling, and that the staples lie along the trim line so they are not visible. 


    • Replace all roof fixtures, being sure to place butyl tape on the underside along the screw flange. 


    • When replacing skylights, be sure to use sealant specifically formulated for the plastic. I recommend Surebond SB-140. 


    • Replace the pan gaskets on the air conditioners to avoid water leakage. Tighten the A/C screws so the gasket is half its original thickness. Do not tighten past this point. 


    • Using self-leveling lap sealant and/or EternaBond, thoroughly seal all fixtures by generously covering the edges, screw heads, and any other possible point of entry. It’s okay to overcompensate to ensure the roof does not leak. 


    • Reinstall the awning by having two people assist with sliding it back into the drip rail. Center the awning fabric in relation to the roller tube and replace the drip rail screws. Squeeze a generous amount of sealant into the top bracket screw holes and reinstall the top bracket. 
    • Trim the rubber membrane wherever it protrudes beyond trim strips. 


    As a certified RV technician who has replaced many roofs, I still find this a time-consuming and difficult task. I once again urge you to seek professional help to replace your RV roof. If you choose to make it a do-it-yourself project, beware of the numerous online articles and videos that may do more harm than good.

  • FMCA Tech Tip: What Are Turn Alarms?

    FMCA Tech Tip: What Are Turn Alarms?

    Turn-Alarm can do more than alert drivers that a turn signal is still on.

    It happens to almost everybody. After passing a vehicle on a highway, you forget to turn off the turn signal. Because of distractions such as heavy traffic or sunlight on the dash, you travel a couple of miles without noticing the small blinking arrow on the instrument panel. And if you’re in a motorhome, you don’t hear the faint clicking of the flasher element, because it’s usually mounted on the firewall far under the dash.  

    When we owned a 2007 Allegro Bus motorhome, I eventually began holding on to the turn signal lever when changing lanes so I wouldn’t forget to cancel the signals. Then I heard about a product from Stockton, California-based Daeco, called Turn-Alarm. It replaces an existing turn signal flasher element with one that makes a “beep” sound while the turn signal is on. 

    Later, I found that the Turn-Alarm could have other uses as a warning system, such as alerting me when my satellite dish is up, when the gray-water tank is full, or when the cargo doors are open. But first, let’s focus on Turn-Alarm’s original purpose. I bought a Turn-Alarm that fit my Allegro Bus. Installation was simple — just unplug the original flasher element and plug in the Turn-Alarm. At first, the beep was a bit too loud, but that was easy to solve. A miniature sound transducer is inside the Turn-Alarm’s housing, and sound exits the housing via a 3/16-inch-diameter hole. I reduced the volume by covering part of the hole with a small piece of electrical tape. Twenty-three Turn-Alarm models are available. The Turn-Alarm website shows how to determine the replacement for your original flasher. When in doubt, you can contact Daeco by email or by phone. The basic models are two- or three-pin Turn-Alarms with simple plug-and-play installations. Turn signal flashers either thermally or electronically open and close the circuit, causing the turn signals to flash on and off. Thermal flashers do this by utilizing the resistance in the turn signal circuit, which is why larger flasher elements typically are used when pulling trailers with additional lights. LED lights have extremely high resistance, and they may not function with standard turn signal flashers. For those situations, Turn-Alarm offers a model 262LED flasher.

    Additional Uses

    After we bought our Entegra Coach motorhome, we could rely on a vehicle information display on the instrument panel to warn us, visually and audibly, when the turn signals were left on. So, I did not need a Turn-Alarm for that purpose. However, I found numerous other uses for the device.

    My first task was to add a warning system so that I wouldn’t drive away when my Winegard Trav’ler satellite dish was up. At the time, Winegard offered an optional auto-stow kit (it is no longer being manufactured). Basically, it was a four-wire cable that plugged into the back of the Winegard controller box, and it stowed the dish automatically when the ignition key was on. I didn’t want that, but I did want a warning, and the cable had one wire available for that purpose.   I used a nylon cable tie to place a Turn-Alarm model 262LED flasher behind the dash. I drilled a small hole in the instrument panel and mounted a red LED in it. I then ran 12-volt ignition hot power to the Turn-Alarm’s input tab, connected the ground wire on the 262LED to ground, and ran another wire from the Turn-Alarm’s output tab to the input side of the red LED lamp. I used regular female spade wire connectors to connect to the Turn-Alarm. I then ran another wire from the LED’s output connection to the orange wire labeled “for OEM use” on Winegard’s auto-stow cable. When the ignition key is in the “on” position and the satellite dish is up, the dish’s controller box completes the circuit to ground. The Turn-Alarm sounds the alarm, and the red LED light on the dash flashes on and off. 

    My next task was to add an alarm that sounds when the gray-water tank is full. Our motorhome came with a 709-P3 SeeLevel tank monitoring system. I replaced its display panel with a 709-RVC-PM SeeLevel panel, which includes RV-C communication, as well as a set of programmable alarm contacts that serve as switches to trigger external alarms. I programmed the display to close the contact and act as a switch to activate the alarm when the gray-water tank level rises to 96 percent. I then mounted another red LED lamp in the mud bath area where the monitoring equipment is located, and I added a mini rocker switch so that I can silence the alarm if I want. I placed another 262LED Turn-Alarm behind the panel, and I wired everything in pretty much the same order as in my satellite dish warning scheme, except that I used battery hot power rather than ignition hot power, and I used the SeeLevel contacts to ground the circuit.

    Other Models

    Other Turn-Alarm models offer a remote sound and an LED module that connects via a 3-foot cable to the two- or three-terminal flasher element. Originally designed for motorcycles, the remote models can be used anywhere an operator desires better sound and visibility. In addition, a universal Turn-Alarm, model U-1, is available. It does not require replacement of the turn signal flasher element. The U-1 can be used with newer vehicles that have nonstandard flashers or body control modules. A motion sensor attaches to the turn signal lever via hook-and-loop tabs. A control box, mounted beneath or above the dash, includes the sound transducer orifice and a red LED. An on-off power switch conserves the 9-volt battery’s power when not in use. 

    The Turn-Alarm is an easy way to add an audible alert and flashing warning lamp, whether for turn signals or other applications. In fact, I intend to install a Turn-Alarm for my cargo doors so that I’m warned if they are left open once the engine starts and the park brake is released, or if the doors pop open while I’m driving.

    Daeco Turn-Alarm (209) 952-0923 

  • FMCA Tech Tip: Leveling An RV

    FMCA Tech Tip: Leveling An RV

    One of the first things I do when I enter a new RV park is evaluate the quality of my assigned pad. This inspection is part of the ritual I perform before I pull into a site. Primarily, I assess the site’s length, width, ground type, and exact hookup location, as well as how level the site is. The latter issue is the focus of this article.

    Why Being Level Matters

    One reason an RV should be level is personal comfort. People are used to existing on a horizontal plane. We don’t feel comfortable walking up or down an incline in our RV, or sleeping on an angle (generally speaking, of course). Leveling the RV helps to ensure that your bed is oriented to allow for healthful and restful sleep. It’s hard to cook eggs when the RV is slanted. The list goes on. In addition, an absorption refrigerator can malfunction when it operates outside its manufacturer’s level specifications. According to Norcold, modern fridges work fine at angles of plus or minus 3 degrees side-to-side and 6 degrees front-to-back. Dometic has similar specs. These angles pretty much match what is comfortable to people inside an RV. If you use a bubble level, half a bubble from level should be sufficient for short-term stays, while longer stays should warrant a more concerted effort to center the bubble.

    When To Level

     Generally, an RV should be leveled as soon as you have a suitable pad, although there may be subtle variations as to when leveling fits into the order of operations. For instance, for RVs with powered leveling jacks and slideouts, some manufacturers mandate the slides be extended before the jacks; others specify jacks before slides. Make sure you understand and follow the manufacturer’s recommended order. Also, after extending a slideout, recheck that the refrigerator is level. Before you finalize the RV’s position and begin the leveling procedure, check for clearances for the slideouts, awnings, steps, and entry doors. Look for anything that may interfere, including tree branches and power/water pedestals. Make sure you have enough power cord, fresh-water hose, and sewer hose to reach those services. If you use a satellite dish, be sure you can position it to have a clear view of the sky. Ensure you have enough door-side space for a picnic table and/or eating area. Perform a physical walk-around of the RV prior to final positioning. Look for bumps, dips, and other uneven spots, especially in unpaved areas. Sometimes moving just a few feet can simplify the leveling process.

    How To Level

    First, it is important to understand the difference between stabilizing jacks and leveling jacks. Stabilizing jacks on lighter travel trailers and some motorhomes should never be used to lift the RV. They should be lowered to the ground only until they stabilize the RV, but not enough to take vehicle weight off the wheels and axle. Stabilizing jacks generally utilize a worm-drive shaft with a hand crank (although powered versions are available). If your RV has stabilizing jacks, do not use them to level the vehicle, but lower them to the ground once the unit is level. Leveling jacks, on the other hand, usually are hydraulic or pneumatic (air) rams/pistons (with the notable exception of travel trailer tongue jacks). Make sure you know the difference as indicated by your manufacturer. Both hydraulic and pneumatic systems often incorporate suspension dump capability on RVs with air suspension. This enables the system to evacuate the bags prior to the leveling process, allowing the leveled RV to be closer to the ground.  To level an RV without power levelers, you must carry ramps and/or leveling blocks with you, as well as a bubble level, although good smartphone apps are available for this purpose. If possible, place the level in the freezer compartment, as this is the most significant level surface. Position your ramps or blocks, and then slowly and carefully drive your RV onto them until it is level as indicated on the bubble. Be sure to use a spotter to carefully monitor the tire locations on the ramps/blocks. The biggest risk is driving off the end of a leveling ramp. In addition, be sure the entire tire footprint is supported; otherwise, tire damage can result. With practice, you should be able to identify how many blocks are needed or how far up the ramp you need to go to correct for different off-level conditions. If you have a travel trailer, you often can level the unit using only the tongue jack, but be sure to chock the wheels when you finish the leveling procedure. Indeed, whether you are leveling a motorhome or a trailer, chock all wheels still on the ground, and in the case of a motorhome, set the parking brake. For motorhomes without leveling jacks, position the coach so only the front wheels require raising, as it’s safer and easier to ramp or block the front tires than the rear. If the front wheels must be lifted a significant amount, it may make sense to move to a more level spot.

    Use Of Leveling Jacks

    If your RV is equipped with leveling jacks, be sure to follow the manufacturer’s instructions. You may have auto-leveling or manual jacks. As I noted with manual leveling, it’s important to lift only a motorhome’s front axle. Raising the rear wheels off the ground is dangerous because it negates the parking brake feature. The parking brake on the rear axle prevents vehicles from rolling away. If the rear wheels are lifted off the ground, it’s possible the vehicle can roll off the jacks. While some people may argue that the jacks prevent the motorhome from moving laterally, that may not be the case, as the friction between the jack pad and the ground may be insufficient to keep the RV from moving. That is especially true in the case of kick-down jacks, which may be kicked up if the RV is jolted or otherwise disturbed. If you are using leveling jacks, I recommend the use of jack pads. These can be purchased or homemade. They are usually thick, square blocks of a larger size than the jack feet and they are used to increase the stroke of the jacks and/or protect against soft ground by reducing the force exerted over the area. Make sure you don’t end up in a precarious situation when the leveling is complete. If the RV appears unsafe or is raised too much (to the point you can’t enter your RV without a step stool), I recommend you either reposition your RV more favorably or get a different site. This is true regardless of the leveling method you use — ramps, blocks, or jacks. In extreme cases, I have had to leave campgrounds that did not have any available sites that were even remotely level. 

    On a side note, I often am asked my opinion on storing RVs with powered jacks extended to take the weight off the tires. I don’t store my coach this way, since there is risk of corrosion or rust on the extended ram over time, especially in inclement weather. Therefore, I prefer to leave my jacks retracted. I protect the tires by parking on pavement or pieces of wood. Commercial products made of nylon or similar material are available to insulate the tires from concrete, the ground, or other surfaces. I also move the RV periodically to alter the tire positions. Even if your RV has leveling jacks, it is a good idea to use a bubble level or app occasionally. Leveling jacks can go out of calibration, resulting in an out-of-level condition. The bubble level allows you to properly level your RV and determine whether the jacks require calibration. If the jacks report an out-of-level condition when the bubble level indicates the RV is level, follow the jack manufacturer’s instructions to calibrate the system. Also remember to maintain your jacks according to your manufacturer’s instructions. This includes keeping the reservoir topped off with the correct fluid (often transmission fluid) and ensuring the electrical connections are clean and tight. Significant current is drawn from the batteries to power the hydraulic pump, so loose or dirty connections can cause damaging or dangerous arcing. For a variety of reasons, it’s important to level your RV at a campsite. Be sure to understand the methods that apply to you.

    By: Steve Froese, F276276

  • FMCA Tech Tip: Improving the Quality of RV Drinking Water

    FMCA Tech Tip: Improving the Quality of RV Drinking Water

    A variety of products are available to improve the quality of your RV’s drinking water. When you fill your RV with fresh water, it may contain minerals, sediment, and chemicals, as well as bacteria and microorganisms such as cysts that can cause serious health issues. Calcium and lime are minerals that can damage plumbing fixtures. Iron can be equally destructive. Fortunately, water can be treated, but you must determine the type of water-conditioning system that will best meet your needs.

    Filters

    It may be helpful to understand the basics of filters. Filters are rated in microns. One micron equals one millionth of a meter. (For comparison’s sake, the diameter of a human hair can range from about 40 microns to more than 80 microns.) So, a 10-micron filter removes particles that are 10 microns or larger; anything smaller passes through the filter. A 10-micron filter removes smaller particles than a 40-micron filter, for instance. If two filters are similar in size, the filter with the lower numerical rating will restrict water flow more than the filter with the higher rating, because the finer filter media creates more resistance to water flow. Choosing a larger filter with more surface area can restore the water flow to an acceptable level. 

    The material that filters the water — the media — can vary. In a basic filter, pleated paper removes particles much like a vehicle’s air filter does. Once particles fill up the paper pleats, the filter restricts water flow and must be replaced. Other basic filters may employ a blow-molded media that allows the particles to be embedded into the filter with some depth, which results in longer life. Basic water filters are suitable for removing sand and solid particles that are larger than the filter’s micron rating. But they will not remove fine particles or ions that are suspended in the water. So, while they can filter the water, they do not treat it. Granular activated carbon (GAC) filters remove chlorine, sulfur, and other contaminants from water, as well as taste and odor. Some RVers have expressed concern that using carbon filtration to remove chlorine may cause stagnation in fresh-water tanks. 

    A tank’s vent allows chlorine to evaporate anyway. Rather than relying on chlorine to prevent stagnation, make sure the fresh-water tank doesn’t stay filled with the same water for long periods — use the water, or simply drain the tank. Also, sanitize the tank periodically. If the water in the tank is used and replenished regularly, such as when full-timing, you may need to sanitize only annually. But if the RV sits unused for extended periods, you may need to sanitize much more frequently. 

    A drawback to carbon is that bacteria can grow and build up inside the filter. That can be prevented by choosing a bacteriostatic filter with kinetic degradation fluxion (KDF) media, which are high-purity copper-zinc granules interspersed with the carbon. KDF controls the buildup of bacteria, extending the filter’s life. Chlorine, lead, mercury, and hydrogen sulfide are removed, and even iron, to an extent. The GAC/KDF filters cost a bit more than standard GAC filters, but the results are well worth it. Such filters are available from various vendors, including Hydro Life, Pentek, and Flow-Pur. 

    Another option is the Pulsar Quantum Disinfection System by US Water Systems. The filter’s media surfaces have been modified via a patent-pending process. According to the company, tests by the EPA and other certified labs have shown that 99.99 percent of microorganisms such as bacteria, yeast, and algae are immediately destroyed as they come in contact with the media. The drawback is that before water enters the Quantum Disinfection System, it must be prefiltered to remove iron, sulfur, manganese, tannins, turbidity, and suspended solids, which can bind the Quantum Disinfection media.

    Iron

    Iron can affect the color and taste of water, and it can be difficult to remove from water. As noted, KDF-based filters can educe iron to an acceptable level, if the iron content is fairly low. But for water supplies with a fairly high iron content, a dedicated iron filter is required. It also will remove sulfur.

    An iron filter draws air into a chamber where the iron or sulfur is oxidized into particulate. The water then percolates over a bed of filtration media, which traps the iron or sulfur oxides. When it is no longer effective, the iron filter regenerates by backflushing, similar to a water softener. However, no salt or brine tank is required. The filter is simply backflushed with water, and then air is allowed to enter the top of the filter to recharge it. 

    Iron filters can be equipped with manual heads or automatic heads to facilitate regeneration. A drain line must be connected to the gray-water tank or to the sewer to accommodate the wastewater when backflushing, although the water is safe and could be dispersed onto the ground if that is allowed. The media has a long life; it’s likely you’ll never have to replace the filter or its media for as long as you own your RV. Because it does not require disposable filters or salt to operate, it’s basically a zero-cost maintenance item for as long as you own the filter.

    Water Softeners

    Drinking hard water, which is high in mineral content, is not a known health hazard. In fact, the World Health Organization has determined that hard water could be a good supplementary source of calcium and magnesium. However, minerals such as calcium carbonate cause a lime-scale buildup in an RV’s fresh-water system. The scale can restrict flow in cross-linked polyethylene (PEX) water lines and can lead to galvanic corrosion when two dissimilar metals are in contact. Hard water also inhibits soap suds, leaves soap scum after showering, and produces white calcium deposits on dishes and cups after washing. 

    Hard water can’t be treated effectively by conventional filters. Treatment requires a water softener, which consists of a tank filled with polymer resin beads. A softener operates on an ion-exchange principle. The resin is treated with a salt brine that coats the beads with sodium ions. As water passes through the softener, the resin exchanges the calcium and magnesium ions for sodium ions, which effectively neutralizes the hardness in the water. 

    Eventually, the sodium ions become depleted and the resin beads become coated with the calcium and magnesium ions. At that point, the softener can’t treat any more hard water and requires regeneration. During regeneration, the ion-exchange process is reversed. A salt brine passes through the softener, picks up the hard water deposits from the resin media, and carries it into the wastewater through a backwash process. Once these deposits have been removed from the resin, a salt brine runs through the softener to recoat the resin with sodium ions so that it can continue to soften incoming water. 

    Residential softeners have metering systems and regeneration controls that do this automatically, based on the volume of water. But they are too large for use in an RV. Small, portable units for RVs are available but require manual regeneration. 

    To determine when regeneration is necessary, RV owners can use inexpensive test strips to measure water hardness according to a color chart. Regeneration generally involves adding salt crystals like solar salt to a filter housing or chamber, and then running water through the softener to dissolve the salt and carry the brine through the resin beads, treating it as it passes through.

    In my motorhome, I installed a residential-style softener with a fully automated control head from Motor Coach Water Filtration. The compact package fits into an RV’s basement compartment, yet it has the features of large residential softeners, including a separate brine tank. The system is programmable and automatically regenerates the softener when needed. It also uses less salt during the regeneration process than manual systems. Keep in mind that some claims by those selling water softeners can be suspect. Advertising that says a softener will treat a certain number of gallons is misleading. Water softeners treat a given amount of hardness in water. If the water is mildly hard, the softener can treat many more gallons than when treating extremely hard water. Areas such as the Pacific Northwest, the Southeast (except for Florida), and the New England states generally have soft water, while much of the Midwest has moderately hard to extremely hard water, as do portions of the Southwest. Softeners with larger tanks can treat more water between regeneration cycles. 

    For RV owners, storage space is limited, so compromises must be made. If space is not available, you can utilize a large softener and place it outside the RV near the campground water supply. However, to prevent damage to the softener, it must be kept from freezing. Also, softeners should be transported in the vertical position to avoid damaging the strainer basket. 

    Deionized Water

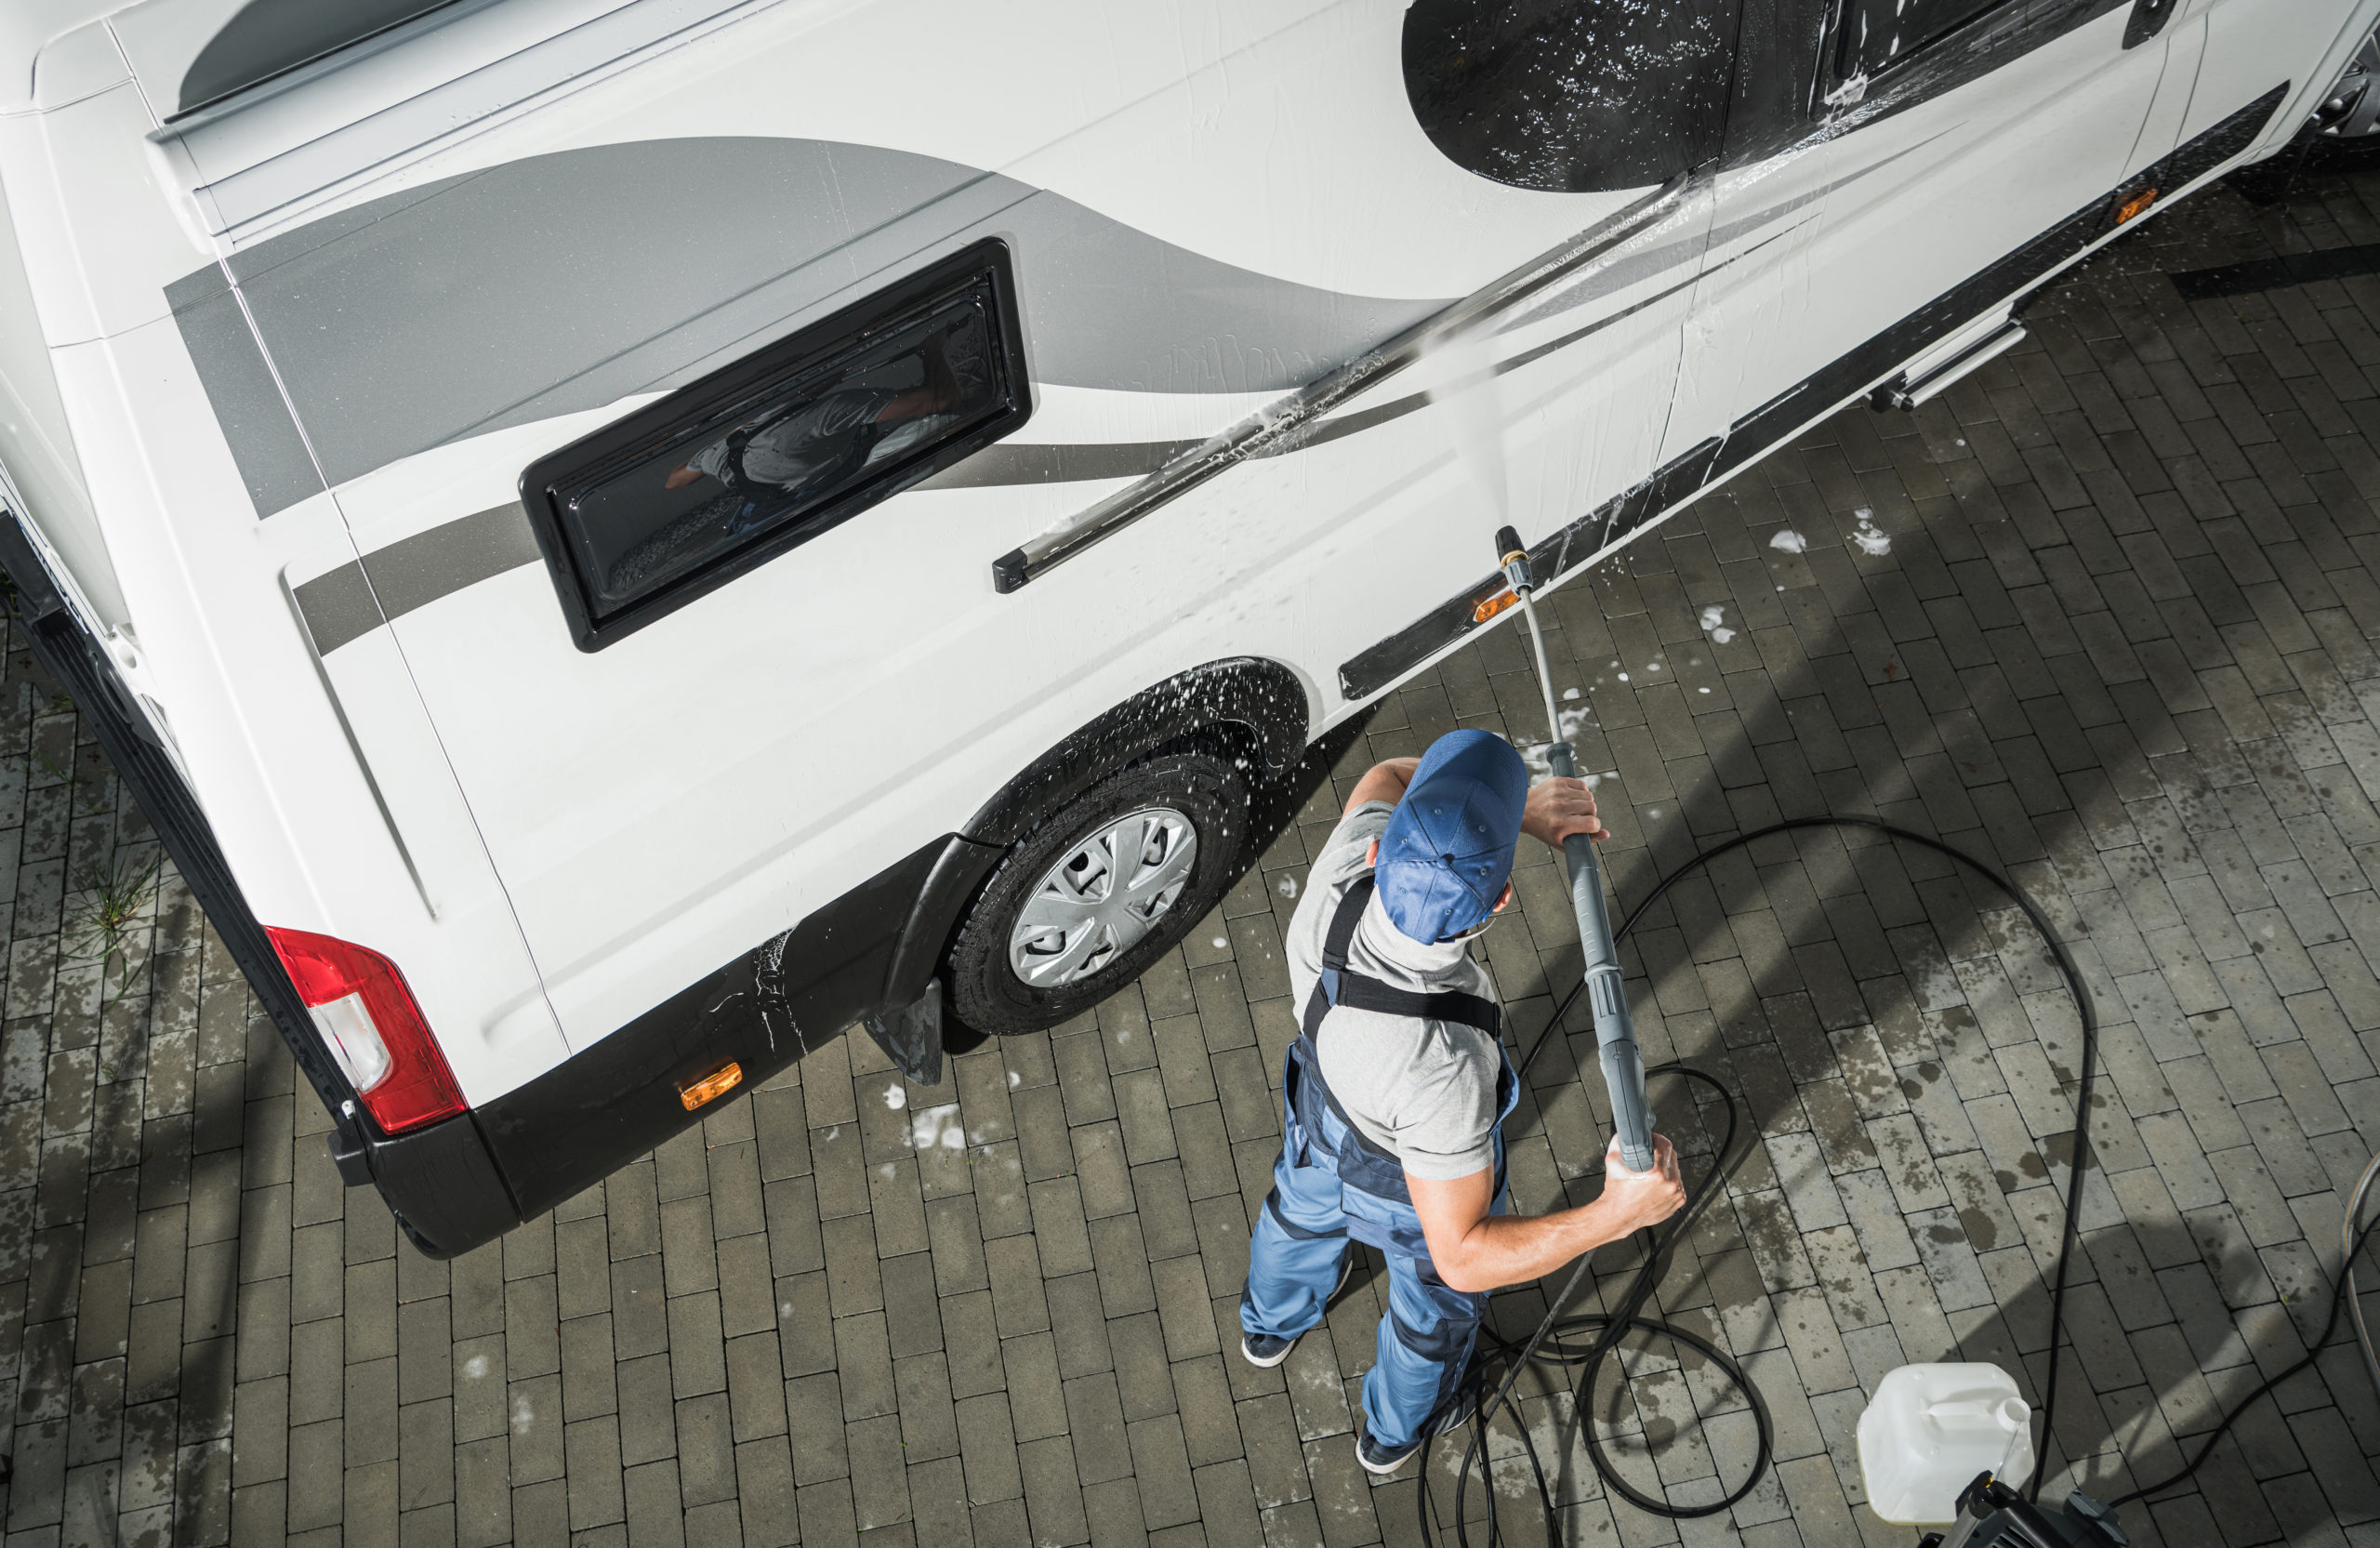
    When you wash and rinse your RV with untreated water, minerals in the water leave spots on the painted finish. Deionized rinse water eliminates those spots. Deionized water has had almost all of its mineral ions removed, such as sodium, calcium, iron, chloride, and sulfate. But deionization does not significantly remove viruses or bacteria. 

    Deionizers are available in a variety of configurations. Like in a water softener, the media in a deionizer eventually gives up its ions and no longer works. It must be replaced or regenerated. Regeneration is feasible only on large-scale applications, because concentrated acid and caustic material are used to strip away accumulated ions through physical replacement. For typical consumer use, such as when washing an RV, replacement cartridges are more desirable. A two-bed system uses separate positively charged and negatively charged ion resin beds. Both types of resin are required to totally deionize water, although mixed-bed systems are available that require only one tank. A mixed-bed system provides the highest water quality, while a two-bed system has a larger capacity. 

    Once the resin has been exhausted, it must be replaced. Some tanks can be refilled with bulk media, while other systems use disposable cartridges. A dual-probe total dissolved solids (TDS) meter, with one probe sampling incoming water and the other sampling the outgoing deionized water, can tell you when the media is no longer functioning. Deionizer media life can be extended by using regular softened water for washing the RV and reserving the deionized water for the final rinse.

    Reverse Osmosis Systems

    In reverse osmosis (RO) systems, water is forced through a semipermeable membrane that filters out contaminants larger than the water molecules; smaller particles remain in the water. An RO system removes contaminants such as arsenic, sodium, nitrates/nitrites, copper, lead, and some organic chemicals. The municipal additive fluoride also is removed. RO systems require pressure to force the water through the membrane. A fair amount of wastewater is involved in the process, and the fairly low water pressure in an RV water system means you expend more water than you purify. Because the filtered water passes through the RO system quite slowly, it goes to a storage tank for use as needed. 

    Water must be reasonably clean before entering an RO system, so prefilters and carbon block filters are used to remove contaminants such as volatile organic chemicals, chlorine, and synthetic chemicals. The end product is RO water that is 95 percent to 99 percent pure. Some experts argue that such water can be too pure, because in addition to harmful contaminants, RO removes calcium and magnesium — minerals that are essential to our health. 

    Reports from the World Health Organization (WHO) point out that while food is our principal source of calcium and magnesium, many people’s diets fail to include the recommended amounts. For some people, “mineral-rich drinking waters may provide substantial contributions to total intakes of these nutrients . . .” a 2009 WHO report said. The report also said it’s worth weighing the potential benefits of systems that remove minerals from water against the potential harm of reducing calcium, magnesium, and fluoride levels below recommended thresholds. 

    You can find experts on both sides of this issue. If you are considering the purchase of an RO system, do some research so you can make a decision that best fits your needs. If you have an RO water system and are con-cerned about the removal of beneficial minerals, you might consider purchasing a remineral-ization kit that adds calcium and magnesium to water. Also be aware that water produced by an RO system has a lower pH, which makes it corrosive to fresh-water plumbing. As a result, brass fittings, faucet fixtures, and water pump components may have shorter lives.

    Sanitation

    Regardless of the filtration method you choose, the system won’t perform its best if bacteria or algae are in the system. You must sanitize the system. Chlorine bleach has its drawbacks. Typically, household bleach is a solution of 5 percent to 7 percent sodium hypochlorite. That concentration drops drastically through gasification — as much as 50 percent in one month — so chlorine as a sanitizer has a short shelf life. Chlorine also penetrates plastic and can harm fresh-water tanks, PEX water lines, and water-pump seals. In addition, when chlorine comes into contact with organic material, it produces trihalomethanes, which are recognized carcinogens. 

    An alternative is Pro Products’ Sani-System, a liquid sanitizer that is EPA-approved for water softeners, RO systems, and water coolers. Sani-System is an ammonium-chloride-based product that is said to kill 99.9 percent of bacteria within 60 seconds, whereas chlorine bleach and peroxides must be in the system much longer to oxidize or kill bacteria. Sani-System is not an oxidizer and won’t harm plastics, rubber, or polyamide RO membranes. And unlike bleach, which leaves a residual chlorine taste and takes time to remove by continued flushing, Sani-System rinses out of the system easily without an aftertaste. It does not harm carbon, but carbon’s porosity makes it difficult to rinse out completely. 

    So, the best practice is to remove carbon filter elements prior to sanitizing and replace them when finished. There is no one-size-fits-all solution to water treatment. Choose a method that works for your situation to ensure that you have a safe water supply and a fresh-water system that runs well.

    Resources:

    CR Spotless Water Systems, C13245 (858) 530-9993 www.crspotless.com

    Motor Coach Water Filtration (239) 776-6002 www.motorcoachwaterfiltration.com

    On The Go (866) 482-9614 www.portablewatersoftener.com

    RV Water Filter Store (602) 625-1875 www.rvwaterfilterstore.com

    Pro Products (Sani-System) (866) 452-7842 www.proproducts.com

    Softcell Recreational Water Systems, C11469 (612) 325-2886 www.softcellwater.com

    US Water Systems (855) 923-6913 www.uswatersystems.com

    Western Water Purifier Co., C7 (800) 559-2837  

  • Top Tips for RV Spring Cleaning

    Top Tips for RV Spring Cleaning

    Warmer weather is almost here. We can practically feel it! Before you know it, you’ll be loading up the RV for your next road trip. But slow your roll before you roll out. When was the last time you deep cleaned your RV? Spring is the perfect time to put a little elbow grease into your beloved home on wheels and we’ve got a few helpful tips. Check out our top tips for RV spring cleaning. 

    Inside:

    • Wipe down ceilings, walls, hard surfaces, and appliances with a multi-surface cleaner that is EPA registered to disinfect and remove bacteria, viruses, mold, and other allergens.
    • Empty, vacuum, and wipe out storage areas and cabinet pulls. Haven’t used an item in a couple of years? Get rid of it. Toss out any old or expired foods or spices. 
    • Strip and wash bedding, vacuum the mattress, and spray with an aerosol disinfectant before remaking the bed.
    • Vacuum blinds, valances, and lampshades with a soft brush, then go over with an adhesive lint roller.
    • Remove spots with a damp, soapy cloth. For hard-to-remove grease stains, scrape with a knife, then layer paper towels on top of the stain. Using the lowest heat setting, iron the paper towels to lift the grease. Then, gently scrub the spot with a mix of dish soap, white vinegar, and water. Finish your routine by steam cleaning.


    • To flush your freshwater system lines, connect a clean water hose to your home’s outdoor faucet and connect the other end to your RV city water connection. Open your gray tank, turn on all the faucets, and run until the water looks, smells, and tastes clean. Use an RV freshwater deodorizer to flush your freshwater tank.


    Outside:

    • Start at the top. For fiberglass roofs, use a soft brush, hose, and any wash-and-wax product to remove grime. While you’re up there, look for any loose or cracked sealant and follow the manufacturer’s directions to remove old caulking and repair. If you have an older RV with a rubber roof, you’ll need specific rubber roof cleaning products.
    • Know what you’re made of – metal or fiberglass. For painted or polished metal bodies, use a pre-wash to remove grime and grit, then clean with a non-abrasive cleaner, soft-bristled brush, and microfiber cloth or mitts. High-pressure washing is not recommended because these RVs are clad and riveted, and water can seep in between the seams. For fiberglass, use a wash-and-wax product with UV protection. Again, beware of the high-pressure washer – it can damage slideout seals and peel exterior decals. 
    • Use a silicone-based cleaner on all window, door, and slide-in gaskets or flexible weather sealants. Most spray on and don’t require any wiping or additional cleaning. Don’t neglect your awnings—they need a rinse, too.


    Remember, spring cleaning is an opportunity to look for any problems and give your RV the attention it deserves so you’ll be ready to roll on your next adventure. Happy cleaning!

    Looking for an RV of your own this spring?

    Browse thousands of models on RVTrader.com 


    *Before tackling any cleaning jobs, check your owner’s manual for specific recommendations.