Category: Maintenance

  • FMCA Tech Tip: Water Heater Maintenance For Your RV

    FMCA Tech Tip: Water Heater Maintenance For Your RV

    Take care of your water heater and you will be sure to have a reliable supply of hot water during your travels.

    Prolonged showers at home may be taken for granted. While traveling in an RV, a hot shower might involve an interesting test of timing, especially when more than one person is considered. It is truly the experienced RVer who is aware of just how long it takes four to 16 gallons of hot water to trickle down the drain, even while practicing sound water conservation.

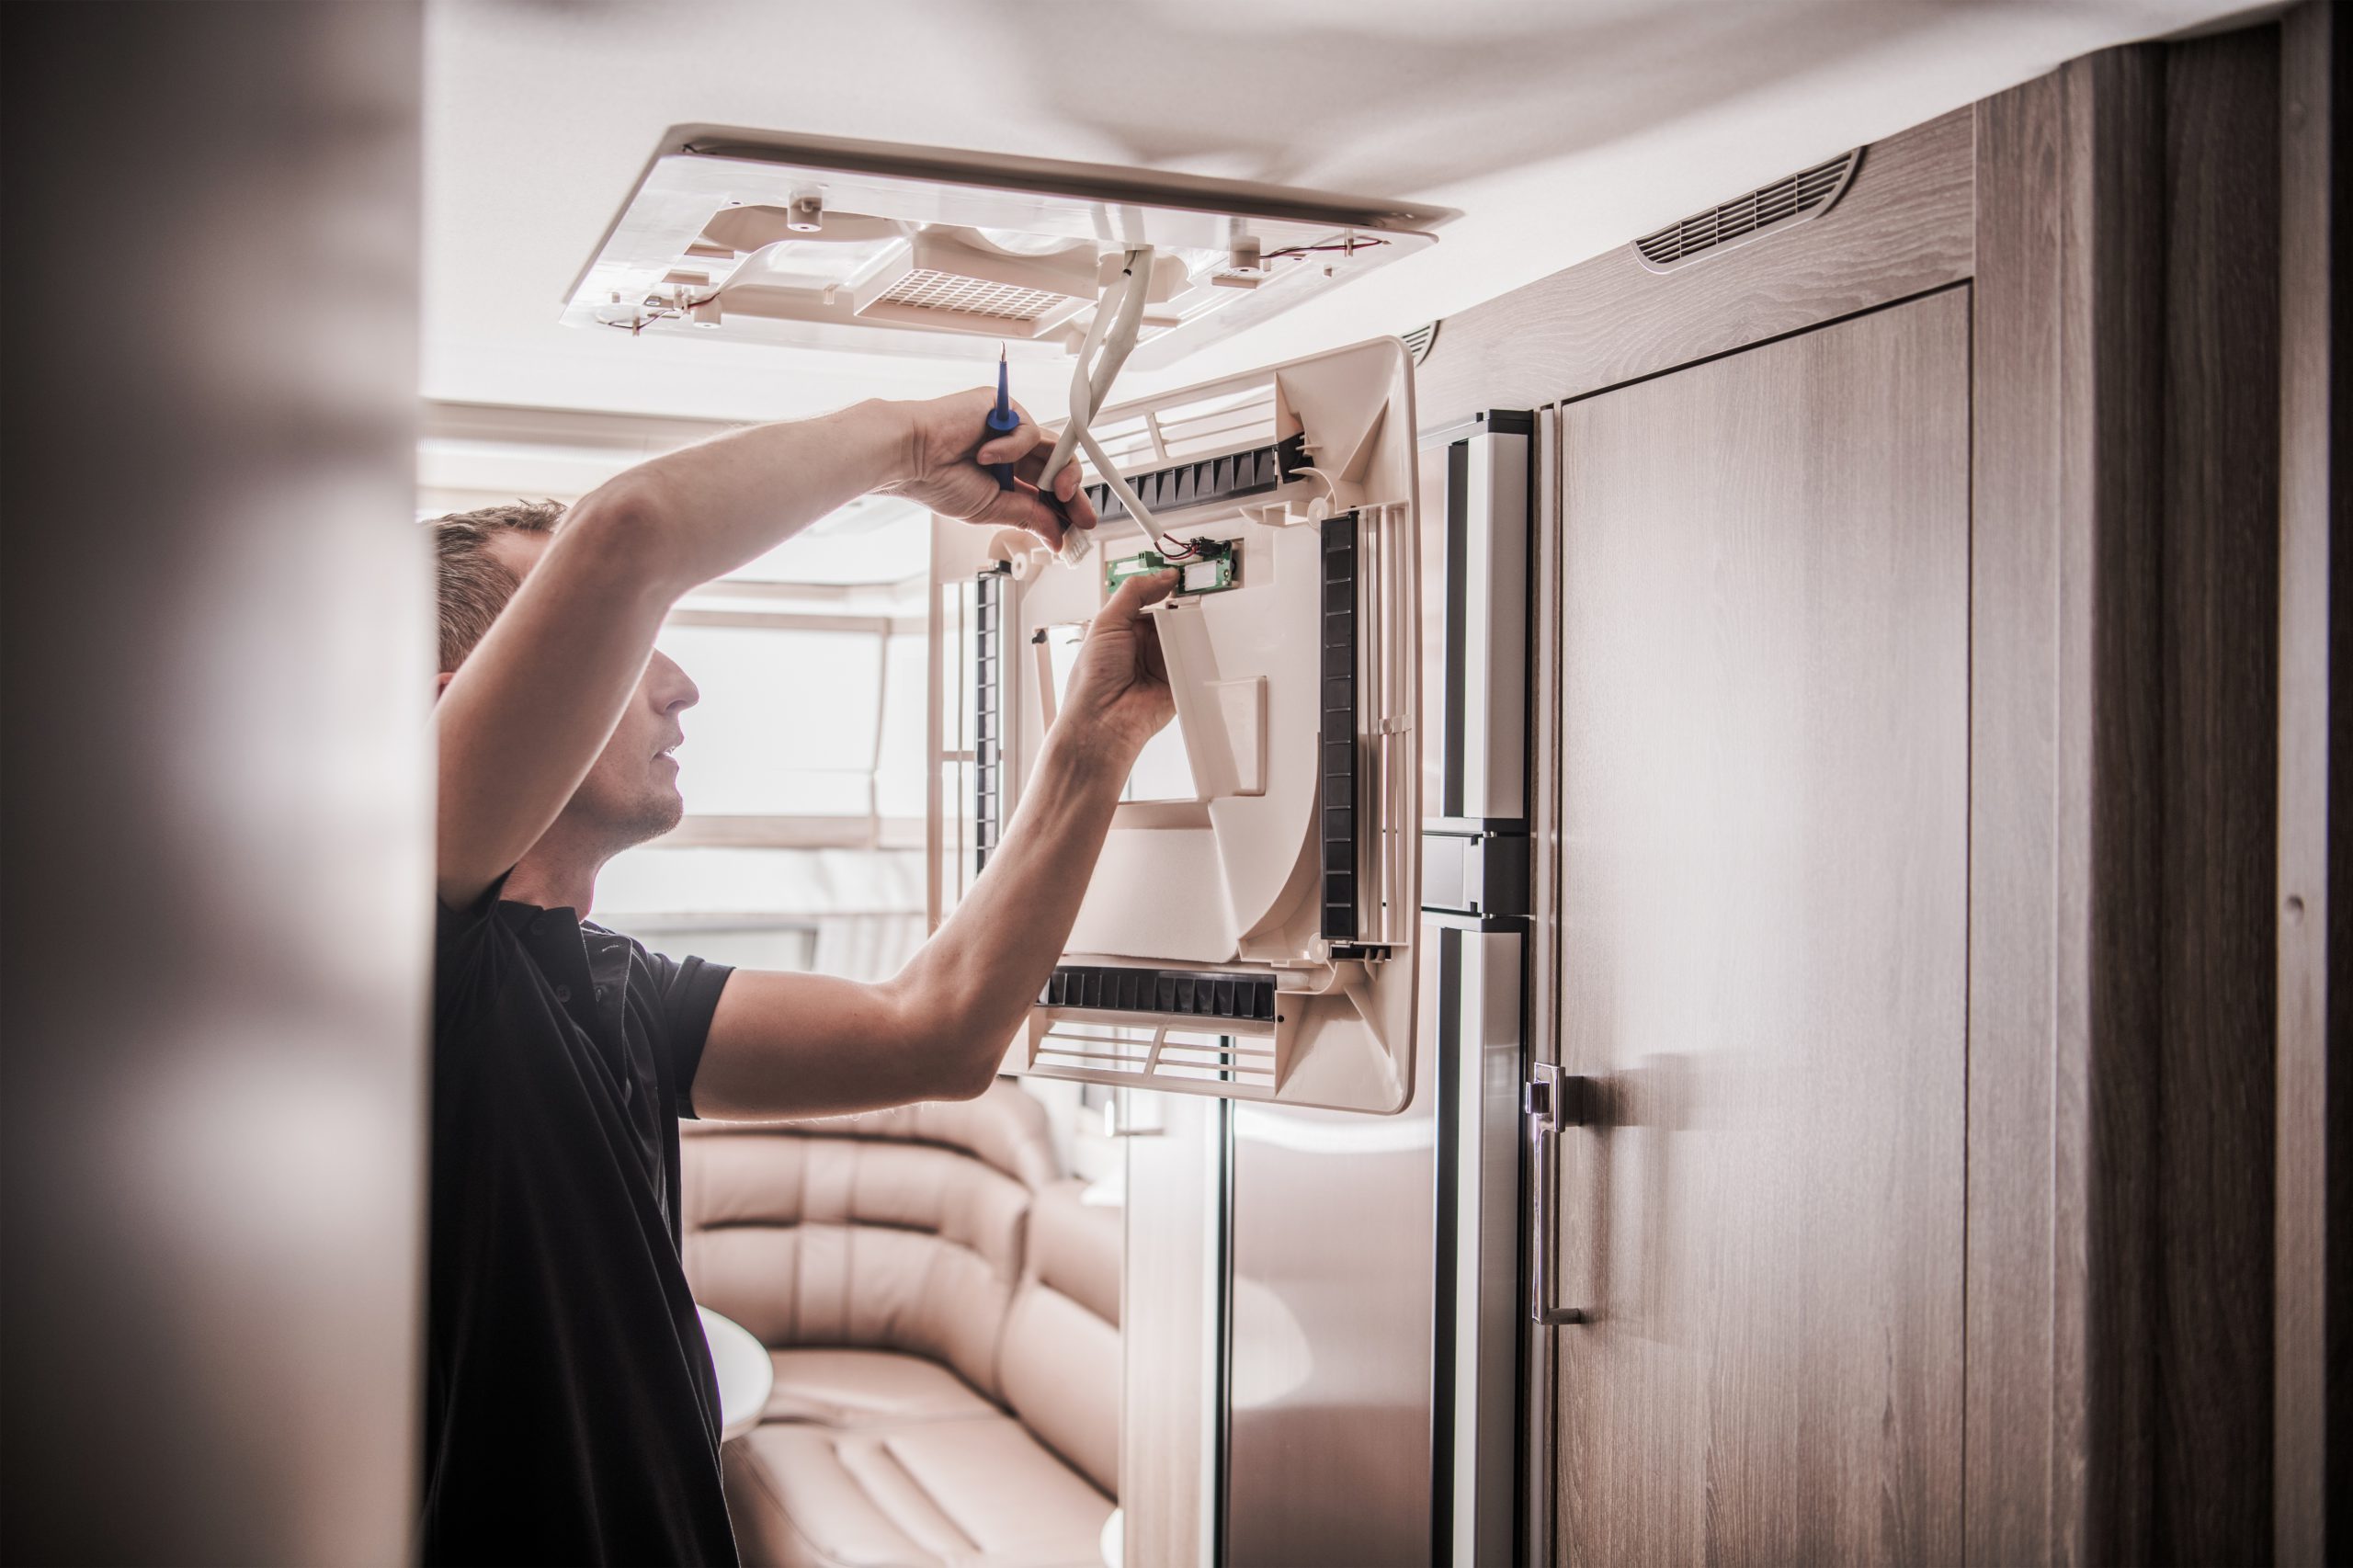
    The typical RV water heater, however, like any propane-burning appliance, requires occasional maintenance in order to maximize its potential. Fortunately, the water heater is usually easy to access, with most mandated tasks doable by most RV handypersons. The water heater is typically situated at a comfortable height, and most components are located on the outside of the RV behind a vented door. Some older models may have parts and pieces at the rear of the unit, but for the most part, newer units have their components on the exterior.

    Types Of Water Heaters

    The most common type of water heater found in campers today is the direct spark ignition (DSI) model. To use this fully automatic model, all an owner has to do is to make sure the heater is properly filled with water and then flip a switch. A circuit board controls all its relative functions. Since it’s the most prevalent, the DSI type will be the focus of this article.

    The second most popular choice of RV builders today is the pilot-type heater. Simple in design and function, pilot-type heaters have been an RV industry mainstay for years. Even though they are less expensive than their automatic cousins, they are less popular. It appears that automation wins out over economics.

    Another type of water heater is the electric-only version. Powered by 120-volt-AC electric, these units operate only when plugged into a shoreline or when onboard generator or inverter power is available. As many manufacturers of larger RVs move toward all-electric appliances, this type is sure to become more popular. They are plentiful in the marine world as well.

    Most water heaters today combine propane and electric power. An electric heating element protrudes into the tank portion of the heater, which allows the RV to utilize propane while dry camping, or power the water heater with 120-volt-AC electricity while plugged in. (Quick note: if your heater is a combination gas/electric-type model, and AC electricity is available, you can quickly bring the water temperature up by operating the unit on gas and electric at the same time.) It is not advisable to install an aftermarket electric heating element designed to replace the drain plug. Use only manufacturer-approved replacement parts.

    An internal heat exchanger (motor-aid) is another option offered by water heater makers. This feature allows the motorhome’s engine coolant lines to be routed through tubing inside the storage tank, thereby heating the water while the engine is running. By the time the user reaches a destination, hot water is readily available at the faucets. While this may be convenient, the maintenance factor becomes greater with motor-aid models, because the hoses periodically need to be replaced. On some of the larger Type A motorhomes, this could be an expensive, yet necessary, undertaking. Akin to some models of RV refrigerators, water heaters, too, are available using three different energy sources.

    Yet another type of water heater is making a comeback in the RV industry: the weight-saving tankless heater, which is commonly called an instantaneous water heater. This design does not involve an actual storage tank. Incoming water flows through a coil that is heated by super-sized propane burners. The flame is lit only when there is a demand for water. As soon as the hot faucet is turned off, the burner goes off as well. Activation is automatic via an impeller-type switching valve.

    Finally, many owners of diesel-powered motorhomes may be familiar with hydronic heating systems in which individual zones within the coach are comfort-heated independently, while at the same time domestic water is heated and delivered to all the hot faucets inside the motorhome. Since 1984, hydronic heating systems have been installed in many brands of motorhomes. Because this type of system requires specific, atypical maintenance procedures, we’ll leave hydronic heating maintenance to a future blog. Our focus here will center on the typical DSI propane RV water heater found in thousands of RVs.

    Water Heater Components

    Components found on every propane water heater containing its own storage tank (pilot and DSI-type) include:

    • an inner storage tank
    • a pressure and temperature (P&T) relief valve
    • a drain plug; a main burner orifice
    • a mixing tube
    • the primary air adjustment.

    What follows is a brief description of each of these parts and their maintenance requirements.

    Storage tank

    The inner tank is surrounded by insulation and typically encased with cardboard, foam, or metal. Water heaters are usually installed under a cabinet, so other than the access door, external aesthetics are not necessarily a consideration.

    Flushing the tank is the main task to consider. To extend the life of the tank and to eliminate the buildup of mineral deposits inside, flush the heater at least a couple times each season. Mineral deposits settle to the bottom of the tank, so simply draining it will not completely rinse out these deposits, as the drain outlet is not positioned at the very bottom of the tank.

    Pressure and temperature (P&T) relief valve

    As a safety component, the P&T valve often has been viewed by RVers as an enigma of sorts. Many P&T valves have been unnecessarily replaced, deemed defective simply because they sometimes dripped water. But that is by design. Here’s why:

    As any contained liquid is heated and the temperature rises, the content will expand and become pressurized. Without a means to regulate or control this expansion during the heating cycle, the unchecked pressure and temperature could eventually rupture the tank, resulting in serious injury. Water temps exceeding 210 degrees Fahrenheit are considered unsafe. Therefore, all P&T valves on today’s heaters are preset to open at 210 degrees. In the small confines of the RV water heater, the water is heated relatively quickly, so keeping up with the drastic fluctuations of both temperature and pressure is extremely important.

    It is also important that a cushion of air be maintained inside the tank, above the level of the water. This air pocket acts like an accumulator during hot water delivery and also allows space for the water to expand during the heating cycle. Over time the oxygen in this air pocket is absorbed into the water, with the net result being a completely filled tank, with no void above.

    At this point, there is no place for the expanding water to move into since the tank is literally full. The P&T valve then does its job — it opens. Expelling hot water from the outlet of the P&T valve allows cold water to enter the tank (thus lowering the temperature) and the relief valve closes.

    P&T valves will fail over time, but, by and large, all will drip on occasion. If an adequate air cushion is maintained, the P&T relief valve should not leak. If an adequate air cushion is not maintained, then it is normal for the valve to drip water. If the valve drips or weeps during nonheating phases and the pressure within the fresh water system is regulated properly, then the relief valve may indeed be faulty.

    Drain plug

    All water heaters have a drain of some type. Older models incorporated an actual drain valve, while modern units use a threaded plug. Atwood (www.atwoodmobile.com) installs a plastic pipe plug. Many owners have mistakenly and inappropriately replaced the plastic plug with one made of brass. The plastic plug actually serves as a redundant safety device and should never be replaced with a metallic plug. If the plastic plug becomes damaged, always replace it with an Atwood plastic plug.

    Atwood water heaters, by the way, do not require an anode, since their inner tanks are constructed of aluminum alloy. Do not cave into aftermarket attempts to sell you an anode for an Atwood water heater.

    Suburban (www.rvcomfort.com) incorporates a component called an anode rod into its drain plug. Designed as a sacrificial element, the magnesium anode keeps electrolysis to a minimum and extends the life of the inner tank. All chemical and mineral reactions taking place inside the tank will attack the “weaker” molecules of the magnesium anode instead of the tank walls. Periodically, this sacrificial anode will have to be replaced. A deteriorated anode rod also may produce a less-than-favorable odor that can permeate the water system. Replace the Suburban anode rod/drain plug when it is reduced to 25 percent of its original size. On older American Appliance heaters, the anode will be accessible inside the motorhome at the rear of the heater.

    Main burner orifice

    The main burner orifice is threaded into the gas control valve outlet fitting. It directs a specific amount of propane into the next downstream component, the mixing tube. The orifice can be removed, soaked in acetone, allowed to air dry, and reinstalled. Never insert anything into the orifice. A simple acetone cleaning is all that is necessary to keep the gas flowing properly.

    Mixing tube

    The mixing tube is where the propane and the primary air are mixed just prior to combustion at the main burner. This tube, though not a precision component, must be kept clean, and more importantly, properly aligned.

    As gas is projected through the main burner orifice, air is drawn in through the openings in the mixing tube. This “Venturi effect” brings in air that is needed to mix with the propane in order to have safe and complete combustion.

    Make sure the mixing tube is properly centered on the main burner orifice fitting and that the alignment with the gas control valve is correct. Misalignment is one of the most common reasons for improper combustion in water heaters. The mixing tube should be in line with the flow of gas and positioned so the orifice is aimed at the direct center of the opening to the mixing tube.

    This is the component that’s most prone to critter infestation, such as insect and spider nests, so make sure to check and clean it out often.

    Primary air adjustment

    As mentioned, the opening in the main burner orifice has a specific-size opening, so the only variable in the gas/air ratio is the amount of primary air allowed to enter. The primary air adjustment controls the volume of this incoming air.

    The primary air adjustment is manipulated while the main burner flame is ignited. The flame should appear mostly blue in color with some orange or yellow tinges. Proper adjustment is attained when the flame is the correct color and also when the burner does not produce a loud, roaring flame. If you can hear the burner more than 5 feet away with the water heater door closed, chances are the mixture is incorrect and further adjustment is necessary.

    In addition to the common components listed above, DSI models also incorporate a thermostat, an energy cut off (ECO) switch, a circuit board, a solenoid gas valve, and an electrode assembly.

    Thermostat

    Longtime coach owners might remember when all water heaters were controlled by a manually adjusted thermostat. A lever or knob was manipulated to make the water hotter or colder. With a DSI heater, adjustment of the water temperature is out of the RVer’s hands. On most units the thermostat is a preset, temperature-sensing, normally closed thermal switch that electrically turns off the heating sequence when the preset temperature has been attained. The nonadjustable thermostat is a thermal disc device secured to the front or rear of the water heater in direct contact with the inner tank. Most thermostats for DSI water heaters are preset for temperatures between 120 degrees and 140 degrees Fahrenheit. In some cases, a thermostat can be replaced with one of a higher or lower temperature rating.

    ECO switch

    Wired in-line between the circuit board and the gas valve, in series with the thermostat is the ECO switch. Some may contain a resettable push button; others will automatically reset once the water temperature drops below the preset temperature rating of the ECO switch. The ECO switch and the thermostat are considered high-temperature safety devices to help protect the appliance and the user. Other than keeping the wire connections clean and tight, no maintenance is required for the ECO switch or the thermostat.

    Circuit board

    The circuit board is the heart of any DSI appliance. Similar to a furnace board, the circuit board for a water heater energizes and opens the gas solenoid valve; creates a high-voltage spark that ignites the burner; monitors the flame sense circuit from the electrode assembly; and places the unit into lockout when it fails to detect a flame. Clean the contact strip where the multipin connector plugs in. Consider purchasing a product called DeoxIT (www.caig.com). Small amounts of corrosion, invisible to the naked eye, can prohibit proper current conduction, often resulting in strange operating characteristics. Keeping the board contacts clean and preserved will minimize or eliminate erratic operation.

    Solenoid gas valve

    The solenoid gas valve is controlled by the circuit board. The incoming gas tube attaches to one side of this valve while the main burner fitting and orifice are located at the other end. Energized by a 12-volt-DC electric coming from the circuit board, the gas valve will remain open as long as it is receiving voltage. The gas solenoid valve closes only under the following normal conditions: when the water temperature reaches the maximum thermostat rating; when the ECO trips and opens; and when the 12-volt-DC power supply is interrupted from the circuit board.

    As with the thermostat and ECO, just keep the electrical connections on the gas valve clean, dry, and tight.

    Electrode assembly

    The electrode assembly receives the high-voltage output from the circuit board and creates an electrical arc to ground. At the same time, the gas and air mixture is forced to flow through this electrical arc, initiating fuel ignition at the burner. The electrode probe also “senses” the presence of the flame and sends a micro-amp signal back to the board, allowing the gas valve to remain open. If the flame is extinguished for any reason, the micro-amp circuit between the electrode and board is broken, and the board shuts off the voltage to the gas valve, thereby closing it and stopping the flow of propane.

    This electrode assembly is susceptible to carbon buildup and heat stresses over a period of time. Many circuit boards have been replaced in error when the cause of an outage has simply been a dirty electrode assembly. Periodically removing the carbon deposits and brightening each electrode will help keep the heater working properly.

    Carbon deposits can be cleaned off and the probes brightened with steel wool. Inspect the probes and replace the entire assembly when the probes become pitted or if a portion of the ceramic insulator is broken. Check the gap between the probes. If the electrode assembly has three probes, the gap between the spark probe and the ground probe should be half as large as the gap between the ground probe and the flame sense probe. Manipulate only the center ground probe to achieve this spacing differential. If the arc jumps from the spark probe to the flame sense probe, it will damage the circuit board, which could be an expensive consequence.

    If the electrode assembly has only two probes, the gap between them should measure approximately 1/8-inch. Take care when adjusting these probes. If any portion of the ceramic insulator becomes cracked or broken, the entire electrode assembly will have to be replaced.

    There are also variables outside the water heater unit that need to be maintained and monitored for optimal performance.
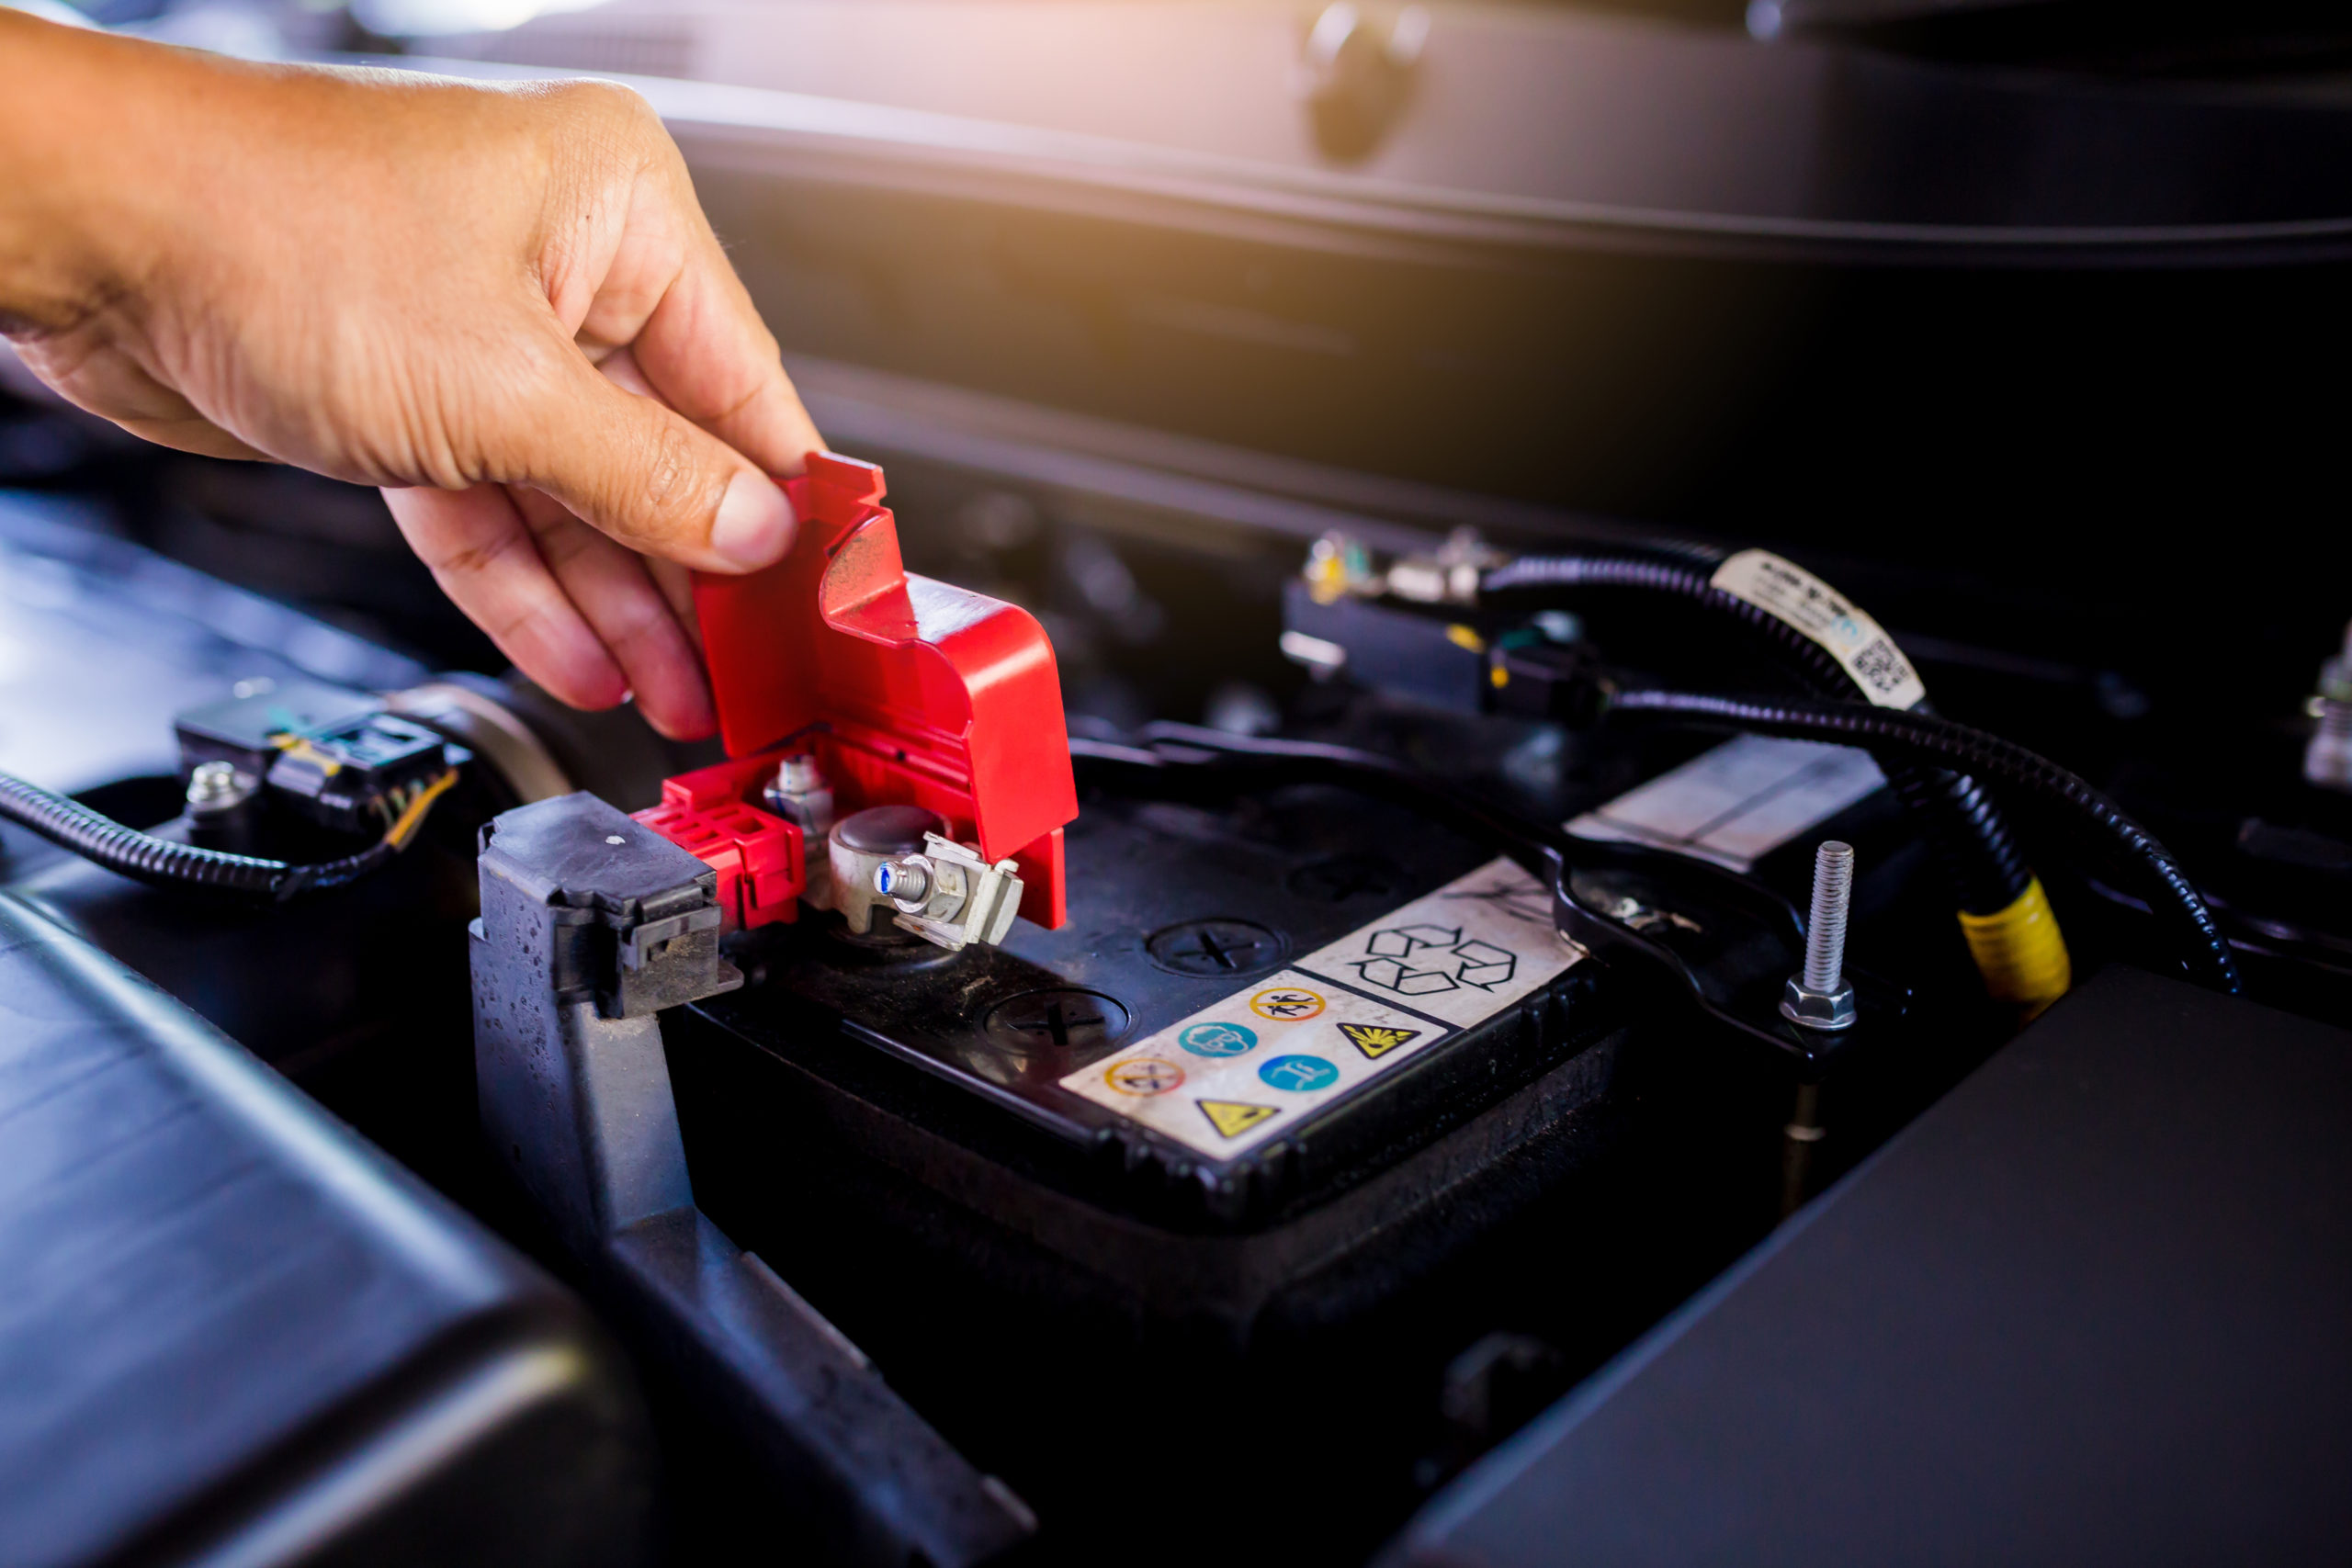
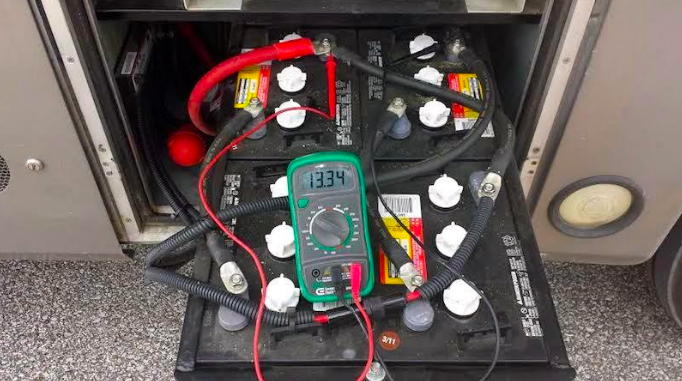
    Battery voltage

    To operate correctly, the incoming DC voltage must be maintained between 10.5 and 13.5 volts to all DSI appliances, whether on battery power or through the converter. Also, do not overlook the negative side of DC circuitry. A faulty ground connection at the water heater can cause erratic operation and outages.

    Propane gas pressure

    At least once each year, have a professional RV service technician measure and adjust the propane delivery line pressure, evaluate the regulator lockup pressure, and have the entire propane system checked for leaks. These tests will ensure all the propane-burning appliances are fed the proper gas pressure. Ignoring this can lead to intermittent operation, appliance failure, undetected leaks, and regulator failure. It is a safety issue.

    Additional Water Heater Tips

    At least once (maybe twice) during the camping season, it will be necessary to perform the described maintenance procedures on the water heater. Remember, the heater’s controls are exposed to the elements; therefore road grime, dust, and dirt have ample opportunity to gather in and around the various components. Periodically blowing the exposed areas of the water heater with compressed air will help to minimize this condition. Likewise, soot and remnants of combustion will gather in the flue portion of the heater. Blow through the flue occasionally with compressed air as well. Be sure to wear eye protection when performing this step, as flying debris will be present.

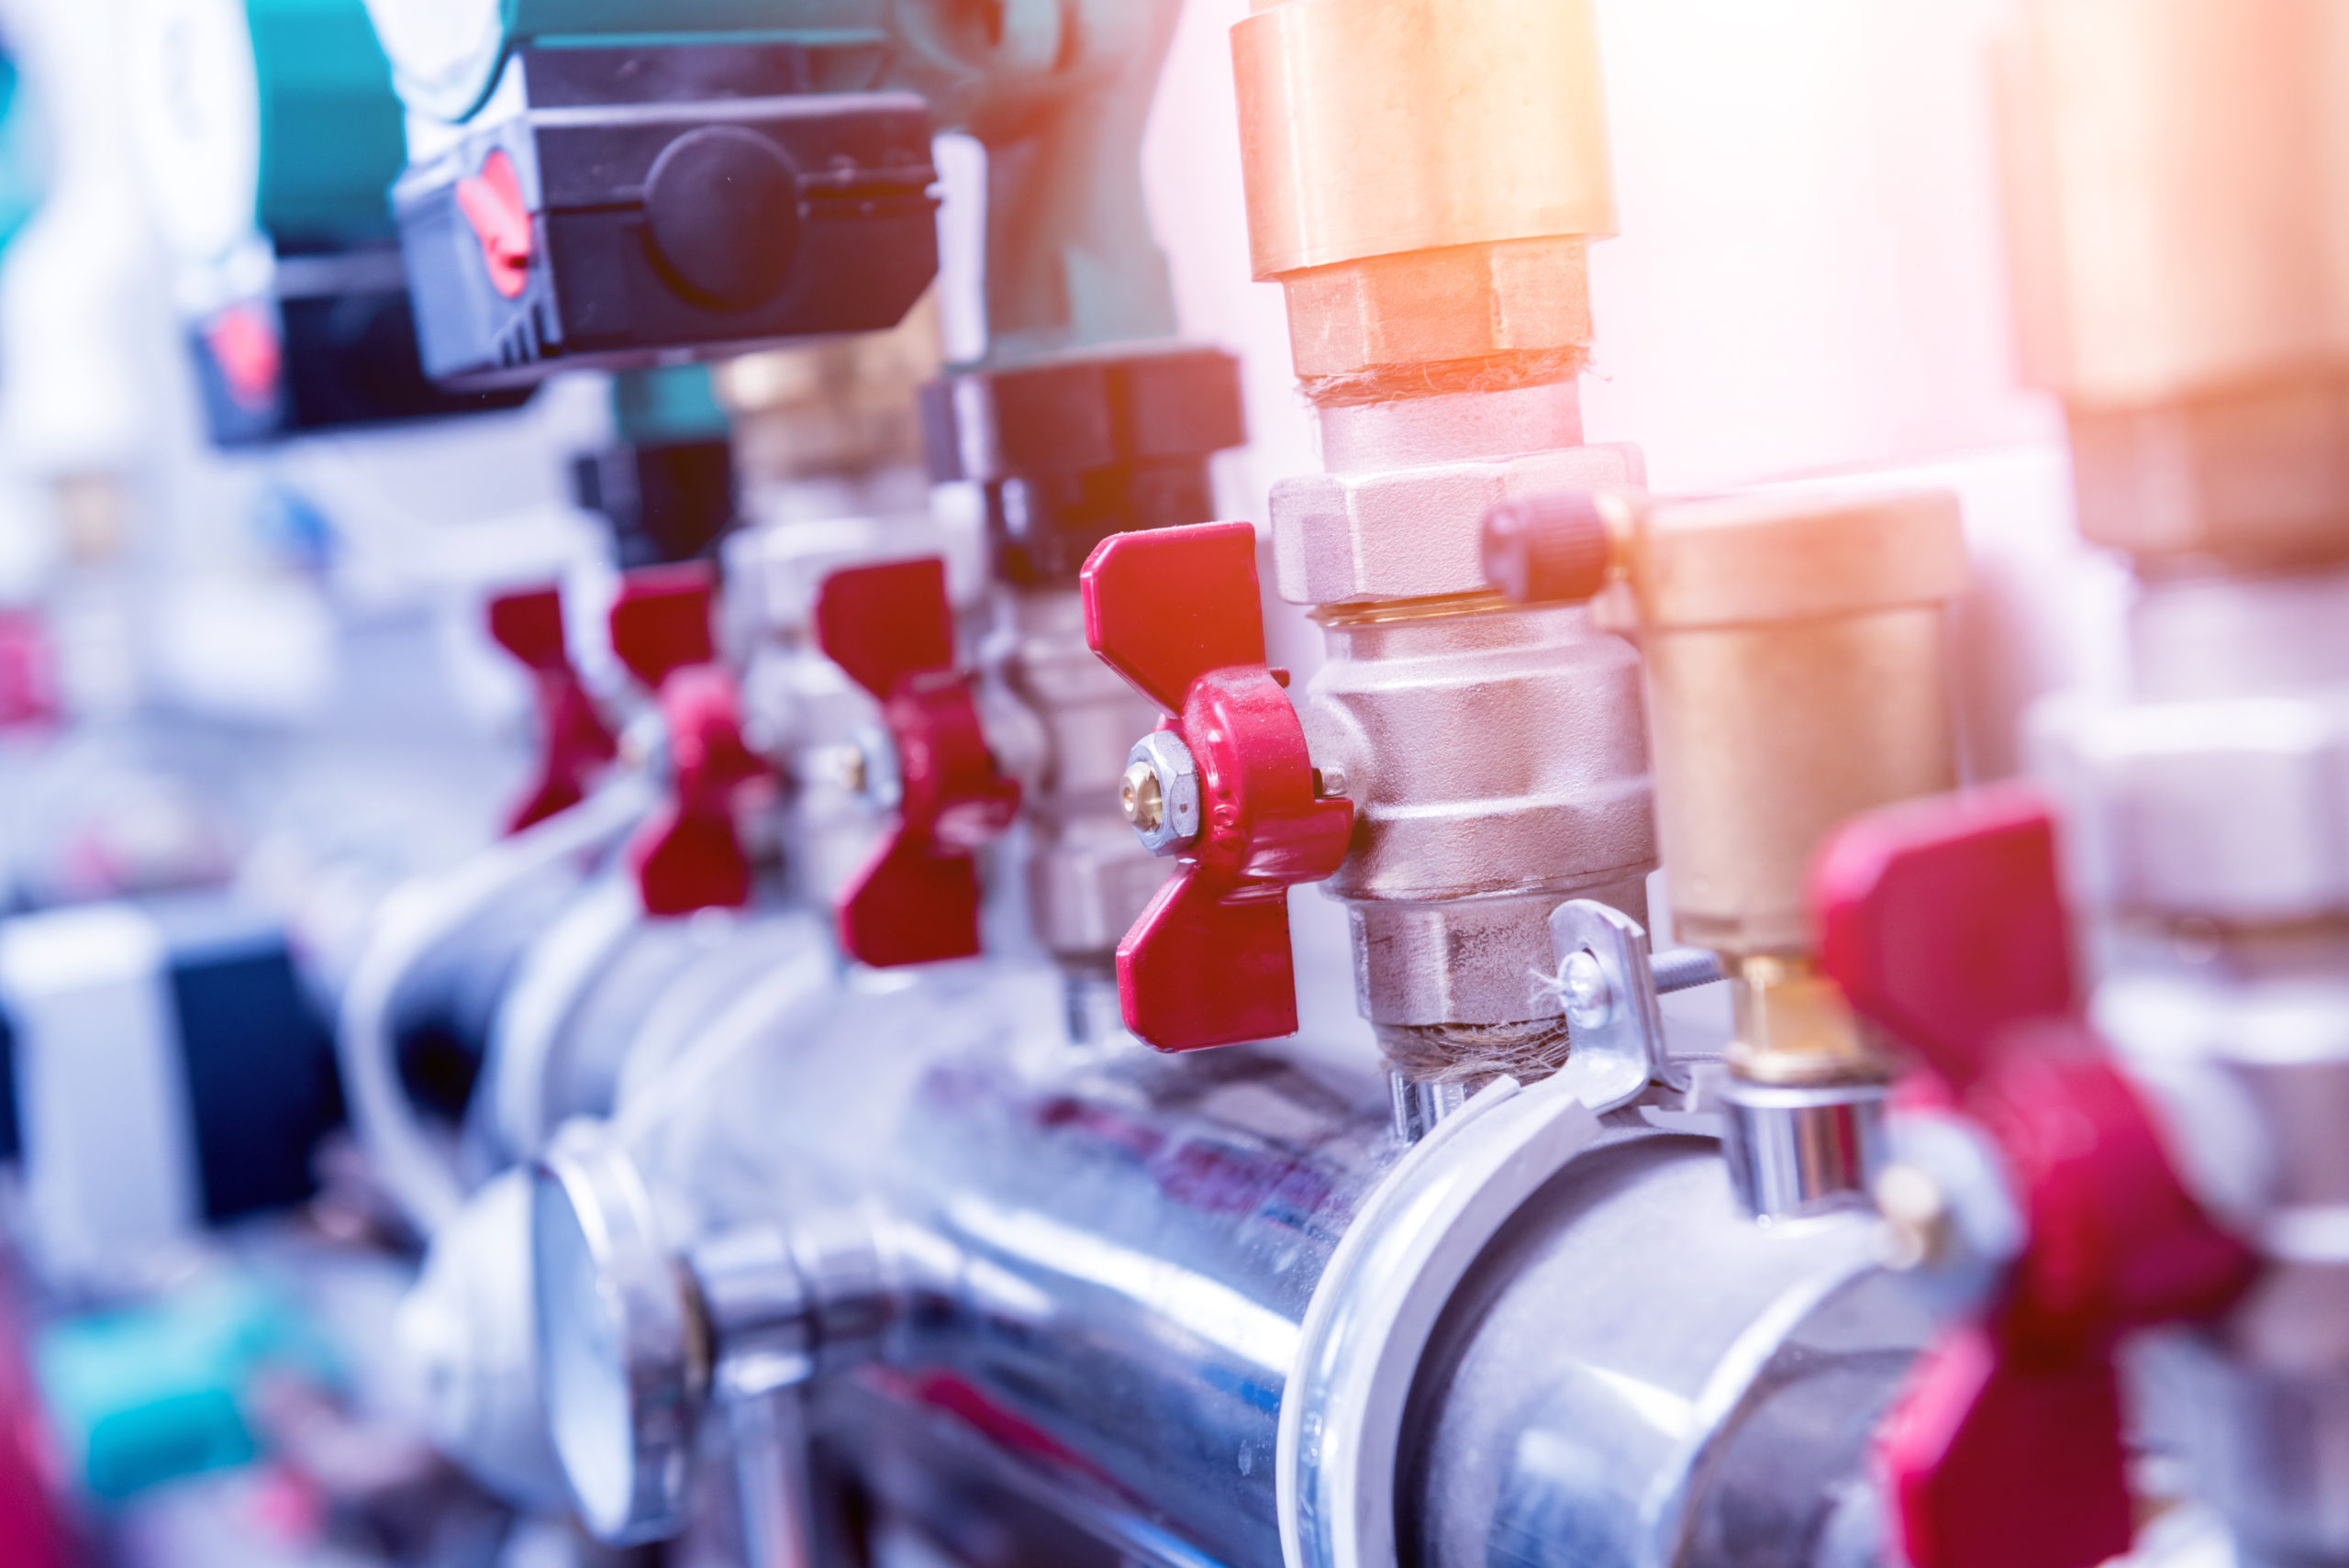
    Though most RVs come from the factory outfitted with a water heater bypass kit, it is advised to install one if yours is not so equipped. Permanently attached to the rear of the water heater, the valve configuration of a bypass kit allows the water heater to be closed off from the rest of the fresh water plumbing system. This is helpful when the RV’s plumbing system is winterized and RV antifreeze is used.

    Purchase a kit equipped with metallic valves. Plastic bypass valves can contribute to water heater operational issues such as intermittent hot water and low hot water pressure, among other symptoms. Brass valves will not distort with prolonged exposure to heat, and they are not prone to failure.

    In addition, there might be a one-way check valve positioned at the cold inlet fitting at the rear of the water heater (there also may be one at the water heater outlet). This prevents heated water from migrating out of the heater and back into the cold water plumbing. Normally, this isn’t an issue, but if there happens to be a cold water tee plumbed into the system fairly close to the rear of the water heater, heated water can be drawn into another fixture, such as the toilet. It can be a bit unnerving to see steam rising from the toilet whenever it’s flushed. You chuckle, but it has happened!

    Although a check valve has no maintenance requirements, it is mentioned in case your water heater does not have one at the cold inlet. It’s relatively easy to install, and it just may save the heater from expending unnecessary energy trying to heat water in the cold distribution piping just outside of the water heater itself.

    The Wrap-Up

    As with many items aboard the RV, preventive maintenance practices will not only extend the life of the water heater, but they can eliminate, or at least minimize, those pesky interruptions during excursions. As usual, if you do not feel comfortable performing any of the procedures listed here, do not attempt them. Simply call your local RV service shop. Service centers employing certified or master certified technicians stand more than ready to perform this service for you. And remember, RVing is more than a hobby; it’s a lifestyle!

    How to Correctly Flush the RV Water Heater

    1. Make sure all energy sources to the water heater are turned off and that the water inside the tank has cooled.

    2. Turn off all sources of water pressure — the demand pump and the city water supply — and bleed off the water system pressure by opening a faucet.

    3. Drain the water heater by removing the plug. To aid in draining, open all the hot faucets throughout the RV.

    4. If water barely trickles out of the drain opening at this point, carefully insert a straightened coat hanger into the tank to help break up any calcified deposits. Take special care not to scrape the inner sides of the tank, or damage may result.

    5. Use a water heater cleanout tool to help flush mineral deposits. When all evidence of cloudy water has been eliminated, close all the hot faucets opened earlier and turn on the city water supply or the demand pump — the higher the pressure, the better. If a pressure regulator is normally used in-line with the city connection, temporarily remove it for this step.

    6. Open the pressure and temperature (P&T) relief valve and allow water to gush from the drain opening as fresh water rushes in.

    7. Allow this flushing to continue for five to 10 minutes. This will remove any stagnant water along with any remaining mineral particles in the tank.

    8. After about 10 minutes of flushing, turn off the water source; reinstall the drain plug; and close the P&T valve by allowing the lever to snap shut.

    9. Turn on a water pressure source once again and open all the hot water faucets inside the coach until water flows freely from all hot faucets. This will automatically fill the water heater and eliminate air pockets in the distribution system.

    10. Finally, turn off the water source but leave the hot faucets open. Then open the P&T relief valve once again to release any water at the top of the tank. This establishes that needed cushion of air on top of the water. Remember, this air gap is necessary so the heated water will have room to expand. When water stops dripping from the P&T valve, close the hot faucets inside the motorhome and the P&T valve. The heater is now ready for operation.

    FMCA RV Club brings you this monthly tech tip to Enhance Your RV Lifestyle. FMCA delivers RV know-how to its members. Learn more at FMCA.com.

    This information is for educational purposes. FMCA shall not be responsible nor retain liability for RVer’s use of the provided information. Prior to making any RV service decision, you are advised to consult with an RV professional.

  • FMCA Tech Tip: RV Storage – Some Do’s and Don’ts For RV Storage

    FMCA Tech Tip: RV Storage – Some Do’s and Don’ts For RV Storage

    As we move further into fall, memories of our summer RVing excursions may still linger in our minds. But with the coming chill, so too does the thought of putting our faithful RV into storage mode. Though a seemingly mundane task, there is a correct methodology for getting your coach ready for any period of non-use; especially if you are contemplating utilizing one of the available private or public storage facilities. Certain precautions, correctly applied, will guarantee your coach will stand a better chance of surviving its secluded hibernation.

    The first necessary decision is whether to store your rig at home or off-site at a dedicated RV storage facility. If you have a relatively level space at your residence, there’s no need to spend the bucks at a facility unless security is an issue. But keep in mind, many municipalities are cracking down on stored RVs within residential areas, even those parked on the street. It is your responsibility to learn if your home base has any new RV restrictions. Also check your existing Covenants, Conditions, and Restrictions (CC&R’s), if applicable.

    RV Storage Locations

    Everything from a vacant dirt lot to an indoor five-star, temperature-controlled facility can be considered for parking your rig for any period of non-use. When deciding which level of sophistication (and subsequent degree of expense) to evaluate, the primary concern should always be the overall security and welfare of your RV. A nicely paved, inexpensive level lot behind a locked gate might sound appealing, but if its location is remote, it might not be a wise choice. An isolated location might be susceptible to vandals or break-ins. Do your homework when considering such a location.

    Preparing the RV

    Flush and drain every holding tank. The fresher the tanks, the better the chance of minimizing sewer odor build-up and blockages. Don’t forget to flush and rinse the sewer hose as well! If possible, lubricate the termination valves, but leave them in the closed position.

    Some RVers remove every drop of water from the fresh water plumbing system, but if below freezing weather is anticipated, I recommend the wet method of winterizing, whereby RV anti-freeze is pumped throughout the fresh water piping system and poured into every P-trap. Enough anti-freeze should also be flushed down the toilet and sinks; just enough to cover the bottom of each holding tank.

    Ensure the propane container is turned completely off and that all the appliances are off. Check the integrity of the cover over the propane regulator.

    If outdoors, cut cardboard inserts to position inside the water heater and refrigerator exterior access panels to keep the dust and dirt accumulation to a minimum. Cover the furnace intake and exhaust assemblies with blue painter’s tape to keep insects from entering.

    Place an opened box of baking soda or an appropriate desiccant/absorbent inside the refrigerator food compartments and prop open the refrigerator door(s).

    If possible, remove the batteries when expecting sustained below-freezing temperatures or if the coach will be in a remote, unsecured location. Always fully charge all batteries before storing the rig. Once fully charged, employ the battery disconnect device, if so equipped, or at the very least, remove the ground terminals from the batteries to disconnect them totally. Remove all dry cell batteries too!

    Turn off all 120-volt (AC) circuit breakers and unplug any device that plugs into a receptacle, such as the refrigerator, microwave/convection oven, washer, dryer, entertainment centers, icemakers, televisions, etc. Rogue lightning strikes, even a couple hundred yards away, can cause problems. Expensive problems!

    Thoroughly inspect the underneath portions of the RV. Look closely for any cracks or openings into the floor or interior of the coach. Seal around drain piping, propane tubing, and electrical harnesses that extend through the floor into the living areas of the coach.

    When parked on asphalt, use non-absorbing, synthetic blocks under the footprints of the tires. If stored outdoors, cover the tires to minimize UV and ozone contamination and obscure the windows to avoid sun damage and the fading of fabrics. In high moisture locales, place absorbent desiccant inside the two major living sections of the RV.

    Consider using a total coach cover, but take precautions to keep the cover from rubbing on the roof or at the edges. This can be damaging to synthetic roofing materials such as EPDM rubber or TPO. At the very least, it’s a wise decision to install a rooftop air conditioner cover if a coach cover is not used.

    If possible, leave a roof vent cracked open slightly at one end of the RV and a window cracked open at the opposite end. This will induce a bit of convection airflow inside the coach to minimize the progression of mold and mildew.

    Check all window, roof vents and door seals and weather-stripping. As I often mention, moisture intrusion is the biggest cause of RV damage. Also, treat all exposed exterior surfaces with the appropriate protectant.

    Periodic Visitation

    When possible, visit your hibernating rolling home from time to time; especially if the period of non-use extends past just a few weeks. It’s a wise RVer who changes the position of the RV at least once a month, moving it forward or backwards slightly, to alter the footprint of the tires to prevent flat spots from developing. Just a foot or two is usually all that is required.

    It is also recommended to periodically start a gasoline motorhome engine and to exercise a gasoline generator, when so equipped. Consult the owner’s manual for your make of chassis and generator for specific instructions, but the general consensus is to run the generator for a couple of hours at half-load, at least once a month, in order to prohibit varnishing of the fuel. One single two-hour run at half-load is much better than a bunch of short runs. Diesel-powered RVs and generators will likely require different procedures, so be sure to follow the recommendations of the manufacturer to avoid performance issues when it’s time to awaken your resting rig from its respite.

    Once a month, carefully inspect the roof for entry points of water intrusion if a total coach cover is not employed. Always perform roof repairs as soon as leaks are discovered. Do not wait until you remove the coach from storage! Any damage will only get worse over time.

    When it is time to remove your RV from storage, always consult with the facility manager to absolve any dispute or damage issue possibly incurred during the storage period before moving the RV. Be sure to re-activate your full insurance coverage!

    By carefully determining and acknowledging your requirements ahead of time, and wisely choosing the best-suited storage location, your RV will safely endure its period of non-use and present itself ready for the next step, the spring shakedown! And remember, RVing is more than a hobby, it’s a lifestyle!

  • Tech Tip: RV Waste Management 101

    Tech Tip: RV Waste Management 101

    It’s the topic that no RVer enjoys. However, waste containment and odor control are necessary aspects of RVing. FMCA and the “RV Doctor” Gary Bunzer present RV Waste Management 101.

    The Basics

    Your RV’s waste plumbing is made of two components: the gray system (liquid waste) and the black system (solid waste). Gray tanks can be outfitted with a drain opening as small as 1-1/2-inch. Black tanks are required to have a 3-inch outlet. As many RVers know, any accumulation of waste within these drain openings or the holding tank system can lead to odors.

    Nothing can ruin an RV trip faster than having holding tank odors permeate the RV’s interior, so let’s examine the common causes of RV odors…

    P-traps

    The first line of defense against invading fumes is the water lock, which is established by P-traps located below the sinks and tub/shower drains.

    Long a staple in the plumbing industry, the common P-trap works well in residential homes. However, because of the seasonal nature of RVing, P-traps in RVs typically are used less frequently, which can result in the P-trap’s water seal becoming diminished. The jostling that occurs while traveling; improper siphoning action during highway turns and tank evacuations; or simply drying out from non-use can render the water seal ineffective at blocking odors.

    In addition, the P-trap requires diligent maintenance, including frequent cleanings and freeze protection. If neglected, waste residue inside the trap can foster bacteria growth and subsequent odors.

    However, there is an alternative to the common P-trap: the HepvO waterless sanitary valve. Available in the aftermarket and now found on many RVs right from the factory, the HepvO waterless valve replaces the P-trap, creating an effective seal against odors. This sanitary valve is constructed with a self-sealing, flexible, silicone membrane that allows water to flow through it but completely closes off when water flow stops. Therefore, holding tank odors are prevented from migrating up and through the sinks, tub, or shower.

    The Toilet

    As for the toilet, keep water in the bowl at all times, though that may be challenging when the RV is stored. Still, with water in the bowl, you are guaranteed that no holding tank odors can escape into the RV’s living area.

    If your RV’s toilet will not hold water, chances are it is time to replace the internal seals and gaskets. You’d be surprised to see just how many seals are used in an RV toilet! Dry toilet seals are the main sources of black tank odors. Most toilet manufacturers offer gasket repair kits. Most likely, this type of maintenance will be necessary at some point during your RVing career.

    Waste System Venting

    Venting is required for both the black and the gray systems. How do RV manufacturers accomplish this? The common method is to run a length of thermoplastic ABS pipe from the holding tank up and through the roof of the RV.

    The importance of proper venting cannot be overstated, especially as it relates to odor control. Without correct venting, sinks will not drain properly; bacteria can propagate; and holding tanks will not drain as quickly or completely.

    Keep in mind, as a holding tank empties or a sink drains, fresh air must enter the drainage system. Since holding tanks rely solely on gravity for emptying, having air enter the system as sinks and tanks are drained results in a faster and more thorough process. To accomplish proper air flow, there are two types of vents used in RV waste systems: direct exterior vents and anti-siphon trap vent devices.

    Vent Type #1 – Direct Exterior Vents & Maintenance

    Direct exterior vents connect the waste system to the atmosphere outside. As mentioned earlier, most RV manufacturers install a vertical piece of ABS piping up and through the roof for both the black and gray systems. (If you own a small RV, it is possible your RV has a different type of direct vent: a side-mounted vent. Side venting is only permissible in the liquid waste system and only found on compact RVs.)

    Sometimes RV manufacturers cut a large hole in the ceiling and roof during installation of the vertical vent pipe. Oftentimes, this opening is not sealed properly around the outside perimeter of the pipe. In other instances, the vent pipe itself may not extend far enough above the roofline; the industry rule is that the vent pipe must extend at least 2 inches above the roof. If the vent pipe is not sealed properly, tank odors can pass up the direct exterior vent; collide with the underside of the sewer vent cap; be forced back down the sides of the vent pipe; travel into the ceiling area; and then migrate to the living area.

    To ensure this doesn’t happen in your rig, remove the sewer vent(s) on the roof and ensure the space around the vent pipe is sealed tightly. Also, make sure that the pipe itself stands at least two inches above the roof. If necessary, extend the vent by using a common ABS coupling and a short piece of pipe.

    In addition, depending on how the vent is attached to the top of the holding tank, vent pipes have been known to fall down inside the tank below the surface of the waste, nullifying any venting action and allowing odors to exit the tank. By inspecting the vent termination on the roof regularly, this can be avoided.

    Vent Type #2 – Anti-Siphon Trap Vent Devices (ASTVD) & Maintenance

    The second type of vent is the anti-siphon trap vent device (ASTVD), nicknamed “check vents.” These are used as secondary vents to aid in draining sink fixtures. They allow air into the drainage system but prohibit air from passing out of the system. ASTVDs are installed in the liquid drain piping system at or near a P-trap inside a cabinet. Look under your RV’s kitchen and bathroom sink areas to find them. They are mounted at least 6 inches above the P-trap’s horizontal arm. ASTVDs do not allow odors to escape into the living portion of the RV, thanks to a pressure-controlled, rubberized, one-way valve. In other words: air in but not out.

    The rubber membrane employed in ASTVDs can sometimes dry out and become stuck in the open position. If holding tank odors are prominent under a galley or bathroom cabinet near the P-trap, chances are it is time to lubricate the rubber seal inside the ASTVD. Use lubricant to moisten the rubber diaphragm. Since it is located above the actual flow of waste water, the ASTVD is simply threaded into a fitting above the trap arm and can be easily removed for periodic maintenance.

    Tank Additives

    Enzyme-based, bacteria-infused blends have proven to be the most effective type of tank additive. These blends actually digest the odor-causing molecules at the source inside the waste tanks, thereby eliminating odors rather than masking them.

    Some holding tank treatments may consist of harmful chemicals such as formaldehydes. Try to avoid these if possible. The issue of chemical products has prompted many state parks, campgrounds, dump stations, and local municipalities to ban the evacuation of RV holding tanks if such chemicals are used.

    Remember that, to a certain extent, RV holding tanks are living, thriving environments. Anti-bacterial soaps, detergents, or DIY treatments can destroy the “good bugs” that are beneficial in helping the elimination of odors.

    Tank Monitoring and Blockage

    Most RVs today feature some visual method to help owners determine the fluid levels in the holding tanks. This is normally accomplished with “through the wall” monitoring sensors attached to the tanks. Others use externally applied, electronic sensors. It’s those “through the wall” sensors that can be aggravating for RVers. False or inaccurate monitor panel indications caused by tank sludge and debris stuck on the sensor probes are far too common.

    The easiest way to avoid black tank blockages is to use copious amounts of fresh water during each flushing of solid waste. Always be sure to cover the very bottom of each holding tank with fresh water after each evacuation. Do not store the RV for lengthy periods with contents still in the tank.

    A Happy Holding Tank… 

    Being proactive when it comes to your RV’s waste system will reap its rewards for you and also protect the environment. If anything, it will ease offensive smells! A happy holding tank is a healthy holding tank.

    And, remember, when working on your RV’s waste plumbing system, even when simply “dumping” the holding tanks, take safety precautions. Wear disposable gloves when handling sewer hoses and connections. And when using hand tools while working on these systems, be sure to clean and disinfect them after each use.

    FMCA RV Club brings you this monthly tech tip to Enhance Your RV Lifestyle. FMCA delivers RV know-how to its members. Learn more at FMCA.com.

    This information is for educational purposes. FMCA shall not be responsible nor retain liability for RVer’s use of the provided information. Prior to making any RV service decision, you are advised to consult with an RV professional.

  • FMCA Tech Tip: Overlooked Maintenance

    FMCA Tech Tip: Overlooked Maintenance

    Missed RV upkeep and repair items can become costly if you do not catch them in time.

    You have made a major investment in an RV. You take great pride in keeping it clean, waxed, and properly maintained. Have you completely read, understood, and followed the information and instructions in all of the manuals for your unit? Some coaches come with encyclopedia-size booklets, others with just a thin pamphlet. Either way, numerous items require regular attention, some of which you may never have heard of or thought about. I hope that this article will encourage you to look into them.

    Some RVers cite cost as a reason they haven’t precisely followed recommendations in the manuals. However, many businesses have found it is cheaper and safer to implement a planned preventive maintenance (PM) schedule for their equipment. Even if they trade or sell their equipment often, they know that an attached PM report increases the items’ resale value.

    Imagine you are out looking at two nearly identical RVs with the same mileage. One comes with documented PM records and costs more than the one without. Which one would you purchase? If you stop to think about it, the one without records may end up costing you more during its life. First, you have to spend money to bring it up to specs before any trips. Second, items that have not been maintained properly will wear out faster than normal, use more energy, and could be dangerous.

    More often than not, overlooked maintenance items are the leading contributor to the need for emergency road repairs. You can save time, money, frustration, and maybe your marriage just by following your manuals’ recommendations. Many RVs out there receive little or no care; is yours one of them? When they do break down, it may be just a tip of the iceberg of problems to come.

    An old saying from the horse and buggy days applies to the RV lifestyle: “Rode hard and put away wet.” This means subjecting something to extremely hard use and then doing nothing to care for it when finished. Our RVs can sit for several months unused, and then they are off to the races for a weekend getaway or a coast-to-coast run. After reaching the destination, we shut them down and ignore them until the next expedition. Because of a RV’s weight and aerodynamics, the motor, transmission, cooling system, and brakes could be considered as operating in a severe-duty service whenever used. This makes preventive maintenance more important than ever, so follow the manuals’ suggestions.

    Below is a list of items that are easy to overlook. It is a little long; however, these items deserve attention before they require an expensive solution. Most manufacturers recommend them as yearly checks. Please reference your manuals, the company’s website, or its service department for specific recommendations regarding your RV and its components and accessories.

    Frame/Driveline


    • Batteries: Far and away, the most common battery repairs technicians make are to resolve loose connections, especially on the ground/negative side and wires. Check all terminals and frame grounds for corrosion and tightness. Wash down battery areas with a water-and-baking soda solution or an approved cleaner. Check electrolyte levels; fill with distilled water if needed, usually just enough to cover the plates.
    • Brakes’ hydraulic systems – Use test strips to check the fluid level and its moisture content. Periodic flushing is required to maintain your safety, approximately every three years or 25,000 miles, whichever comes first. Fluid does break down and can attract moisture over time from the heat generated by braking. A noticeable change in efficiency and required pedal force will occur. More importantly, the calipers and the ABS systems’ control module could be damaged, causing a very expensive repair.
    • Air systems: Drain ping/storage tanks completely every month to remove moisture. Some units have a replaceable desiccant filter that is easy to overlook but is extremely vital to brakes and suspension.
    • Pads, calipers, rotors, or drums: Check for usable life left, cracking, or glaze and make sure they all operate properly.
    • Brake lines: Check for severe rust on metal lines. Watch out for cracks or weeping on flexible lines.
    • Grease/Lubrication: Climb underneath your coach and count every zerk fitting you can find. Look at all suspension components; steering linkage, including the connection to the steering wheel; driveshaft; universal joints; transmission; clutch shafts; and tag axle. Keep this number (I have counted as many as 43) in your notes with the owners manuals. After a lube, oil, and filter service is performed, ask how many grease zerks they serviced. If it does not match your number, ask why. Then check one that is hard to find for proof of new grease! You would be amazed at how many dry ones I encounter. Some motors have grease zerks on the cooling fan assembly. Do not forget about sliders, rollers, or bearings on racks (generator, cargo, steps, propane tanks, batteries, etc.).
    • Hydraulic Slideouts And Leveling: Fill the oil level with the proper type oil and look for leaks.
    • Rear End/Differential: Refer to the coach’s chassis maintenance schedule; however, if a schedule is not available, change the fluid every 100,000 miles. Check the vent tube for blockage. Check the universal joints when greasing and replace if any looseness is detected.
    • Steering: Check fluid; change when suggested (usually three to five years).
    • Suspension: Springs, control arms, and sway bars all have bushings that can wear out. Shocks that have oil stains on them or more than 50,000 miles need to be replaced.
    • Tag Axle: Check wheel bearings for adjustment and lubrication.
    • Tires: Look for dry rot, bulges, cracking, and correct pressure. Stay away from tire dressings that make them shiny, as they tend to have silicone or petroleum-based ingredients that can accelerate tire deterioration. It’s probably best to simply wash the tires with soap and water, and rinse them thoroughly afterward.
    • Transmission: Check the fluid and filter; refer to the coach’s chassis maintenance schedule. If a schedule is not available, change at 50,000 to 100,000 miles.

    Electrical


    • Generator: Wash with a cleaner such as Mean Green and low-pressure water; air dry before using. Change air and fuel filters; some models have filters or screens on cooling air/compartment inlets. Gasoline types should be run once every five to six weeks under medium load, have their fuel system drained, or have Sta-Bil added to the fuel (make sure it’s in the carburetor before shutting down the gen set). Run diesel generators at least every two to three months. Warm them up, operate under a load for 10 to 15 minutes, and cool down for another three to five minutes before shutting off. This keeps the fuel fresh, lubricates the parts, and keeps the generator ready for emergencies.
    • Lights: Check all interior and exterior lights on all vehicles (towable included).
    • Shore Power Cord: Clean and wipe down with silicone spray or a product such as 303 Aerospace Protectant (do not use anything slick on coaches equipped with a cord reel).

    Engine And Compartment


    • Lube, Oil, And Filter: This should be a no-brainer, so remember the time intervals also; oil is your engine’s lifeblood. Follow change intervals to a tee. Stay with quality name-brand oil and filters, especially on diesel engines when new. Many diesel motors require break-in valve and injector adjustments. According to Caterpillar, Cummins, and Detroit Diesel, this first adjustment is very critical.
    • Air Conditioner: Check pressure and operation of the dash air conditioner before the season.
    • Hoses: Look for rub marks, bulges, cracks, or weeping. Secure hose clamps.
    • Serpentine/Fan Belts: Check for cracking or frayed cords. They should be changed every five to eight years/50,000 to 125,000 miles.
    • Engine Cooling/Radiators – Antifreeze: Fill and have the pH level checked. Change every three to five years/65,000 to 100,000 miles. Use only the antifreeze approved for your engine; there are differences. Diesel owners: It is vital to check the pH level and appropriate buffers.
    • Fins/fan: Carefully check, clean, and straighten cooling fins. If the fan’s blades are bent or damaged, replace the fan with a new one.
    • Filters: They are installed in places you never thought of: air, fuel, water separator, cabin, antifreeze, radiator pre-filters/screens, air compressor, crankcase.

    Exterior

    • Air Conditioner: Remove the cover of the roof air conditioner; check for mud dauber nests; clean the fins and fans of leaves, sticks, moss, and nests. You will save energy and help the unit last longer.
    • Seams: Check all seams for faulty caulk, especially the roof around antenna mounts, skylights, ladder, and vents.
    • Furnace: Remove the cover and clean. Replace filters if applicable (e.g., Aqua-Hot). Look out for mice and their nests.
    • Horns: Do they work?
    • Refrigerator Covers: Remove the outer cover and vacuum clean. Check for spiders, as they love this area. Find the black drain tube, check for obstructions, and route to drain outside of the cover.
    • Roof Maintenance: Clean, look for, and repair defects. Apply proper protection.
    • Slideout Seals: Clean and lubricate every six to 12 months.
    • Storage And Entrance Doors: Clean and lubricate seals, lifting mechanism, latches, and hinges.
    • Water Heater: Remove the bottom plug and drain the heater. Replace the anode rod. Clean the propane-heating tube. Remove the plug-in 12-volt connector and reconnect (cleans contacts).
    • Windshield Wipers: Check and replace. Better to do this now before you’re caught in a big rainstorm. Refill the washer fluid reservoir.

    Interior

    • Air Conditioner: Clean or replace filters monthly. Carefully clean/vacuum cooling fins.
    • Detectors: Change batteries in smoke, carbon monoxide, and LP-gas detectors.
    • Furnace: Remove the covers and vacuum the area clean.
    • Water Systems: Check the under-counter and ice-maker filters and replace if necessary.
    • Windshield: Clean the inside as well as the outside. Remember how hard it was to see through when driving into the sun on your last trip?

    Even though this list may appear overwhelming, the items are not all due at once. Mileage, hours, and/or age will dictate when attention is required throughout the year and life cycle of your RV.

    Consult this checklist when searching for a used RV. Finding one with documented PM schedules included generally indicates the entire rig was properly maintained. If you purchase one with a questionable service record, either you’ll become handy at repairs or spend a lot of money for someone who is.

    If purchasing an older RV with low mileage, or if you let yours sit unused for extended periods, think about this: mechanical items are designed for use on a regular basis. Using them as they were intended to be used generally makes them last longer, with fewer problems, than those you don’t use regularly.

    Think about our own bodies. When we exercise regularly, we feel better, move around easier, are more alert, and are less prone to injuries and arthritis. Usually we spend less on health care as a result. If we stop exercising, we gain weight, slow down, and acquire more aches and pains; medical expenses and time spent at the doctor rises dramatically. The same thing happens with your RV. This can become a vicious cycle.

    Stop exercising your RV and the seals in the motor, rear, and steering dry out and shrink because oil drains off them. Oil drains off motor parts, causing rust and stuck valves. Additives in the oil break down even with age, allowing suspended acids and damaging particles to settle on critical parts. Tires will dry rot and crack, because they depend upon movement to excrete protective agents to block this. Transmission internals can rust and clutch packs go dry. Brakes can rust or seize up, lock up a wheel, or generate enough heat from dragging to burn out a wheel bearing. Brake, fuel, and air lines can rust through from condensation in the storage area. Critters and insects love to make nests in stationary RVs.

    You’ve probably heard some RVers say, “Hey, I start mine and let it idle once a month.” Just starting the motor and letting it idle can do more damage than good, but that’s for another time and article.

  • Vintage Trailer & RV Restoration Hazards

    Vintage Trailer & RV Restoration Hazards

    Traveling in an RV or with a travel trailer can be a great experience. It’s a great way to cover a lot of ground and have a comfortable place to stay after hiking, getting out on the lake, or just enjoying the serenity of your campsite.

    Brand new RVs and travel trailers can cost a fortune, and can depreciate quickly. This is why many travel and camping enthusiasts are instead restoring old RVs and camper trailers to enjoy their ventures. Not only do vintage RVs and travel trailers often cost a fraction of the price, they’re also packed with charm and style. In addition, restoring old campers is an excellent way to customize it with an interior of your choice. Before you get started on your restoration, though, there are some hazards to consider.

    Tires, Bearings, Brakes, and Driveline

    When buying an older RV or camper trailer you should always bring someone along who can inspect the mechanical components. For RVs, this is especially important since you’re buying a vehicle, not just a camper. You should always inspect the frame, tires, axles, and bearings. It’s pertinent to make sure the tires and bearings are in good shape before moving the trailer or RV very far.

    Tires & Bearings

    If grease seals have failed, bearings can overheat in a matter of minutes, causing your tires to stop rotating. This shouldn’t need an explanation, but once a tire wears unevenly they must be changed. Driving on a worn tire could lead to a blowout. If they’ve sat in the same place for an extended period of time, tires can easily succumb to dry rot creating unsafe driving conditions that could be catastrophic at highway speeds.

    Brakes & Driveline

    The brakes and driveline should be inspected prior to purchase. For RVs, U-joints should be inspected and replaced if any play is found. U-joint failure can compromise the driveshaft and leave you stranded. If brakes are worn or not in working order, a heavy RV can be very dangerous to drive. Travel trailers weighing more than 3500 lbs are often equipped with drum brakes that should be inspected as well. Brake pads and linings were often made with asbestos, and precautions should be taken if you plan to perform the work yourself. Transmission gaskets and clutch plates were made with asbestos as well. If your RV requires a new clutch or brakes, it may be best to leave it to a professional if the RV or trailer was made before the 1980s.

    Many automotive parts and building materials utilized asbestos before the partial ban in 1987 because it was inexpensive, heat resistant, and strong. When airborne, asbestos containing dust can become trapped in the linings of the lungs, causing pleural mesothelioma. Too often, the presence of asbestos in older vehicles is overlooked before undergoing a restoration process. Exposure to asbestos should not be taken lightly as a staggering 12,000-15,000 people die from asbestos-related diseases each year in the United States.

    Interior Restoration

    The interior restoration of vintage travel trailers and RVs is the most exciting part of bringing an old camper back to life. Redoing the interior allows you to customize the space any way you’d like and it also gives you the opportunity to check for water damage and leaks as well as install better insulation. This is also a good time to inspect the electrical system and components, propane hoses, and plumbing. Ensuring these items are in usable condition and updating insulation for a higher R-value will make your camping experience more comfortable and enjoyable.

    The Demolition

    Before tearing out the old interior of your vintage RV or camper trailer, you should be aware that some of these parts could contain asbestos. Commonly used in vinyl tile and adhesives to add strength, these items should be removed with caution. If possible, you can leave vinyl tile in place and go over top of the material with your new flooring or backsplash. However, on some campers, the subfloor itself may need to be replaced or you may want to redo the insulation underneath.

    If you do remove the vinyl tile and its adhesive, you should wear a respirator that fits well, a dust mask from the hardware store won’t protect you against exposure. You should also wear a Tyvek suit or clothing that can be hosed down or discarded with the tiling. Remove the clothing immediately after leaving the demo area. Don’t go inside before thoroughly washing your hands and showering. There are many resources available on how to safely remove asbestos, but if you don’t have the capabilities to do so, you may want to hire a professional for the demolition.

    Old insulation could also pose a threat, as loose-fill insulation of times past often contained asbestos. Most of the time, however, travel trailers and RVs used a batt style insulation instead of loose-fill. You should still proceed cautiously and inspect the insulation for asbestos contamination. If you’re not sure how to identify asbestos, there are many abatement professionals that will test materials that have the potential of containing asbestos.

    Inspecting Old Components

    Now that you’ve demoed the walls, floor, and safely removed old insulation, it’s imperative that you inspect all electrical lines, gas hoses, and plumbing. If you’re not familiar with what these components should look like, this is another opportunity to hire a professional. Many DIY’s don’t want to pay the professional price, but doing so for electrical, plumbing, and gas can save you countless hours, and eliminate the potential for serious failures down the road.

    If propane or plumbing lines have become dry rotted or have been tampered with by animals while sitting, a tiny leak could become disastrous. Damaged plumbing lines could ruin all the hard work you put into redoing the interior, especially if that leak is in a line for grey or black water. All plumbing hoses and holding tanks should be thoroughly inspected and replaced if damaged. Often, a do-it-yourselfer can undertake minor plumbing. Propane repairs, however, should be performed by a professional, as a propane leak can lead to a buildup of gas in your camper. Not only can propane cause serious harm to the body if inhaled, it can also lead to an explosion. A propane leak detector should be installed as low as possible, as propane is heavier than air.

    Electrical wiring and components should also be inspected. Electrical faults are one of the main causes of fires in camper trailers and RVs. Electrical wiring can become dry and brittle with age, causing the wire insulation to crack—exposing bare metal. Should two bare wires come into contact with one another, a spark can occur and potentially ignite a fire. Electrical systems should be inspected and installed by a professional as well. This can save you wasted time and provide peace of mind that you don’t have an unknown fire hazard.


    Restoring a vintage camper trailer or RV can be rewarding in many ways. It will certainly bring years of enjoyment and adventure. It can also help you to build or hone in skills that you’ll find useful for many other projects. With all the benefits it can provide, you should never take shortcuts or compromise your safety in the process. As eager as you’ll be to get out on the open road, it’s vital to tackle every step with diligence and thorough knowledge so that you won’t be left stranded, injured, or unhealthy along your journey.

    Ready to find a vintage RV of your own? Start your search on RV Trader today.

  • FMCA Tech Tip: RV Battery Types

    FMCA Tech Tip: RV Battery Types

    Our friends at FMCA are breaking down the different types of batteries for an RV. Check them out below.

    Options include lead-acid and lithium-ion, as well as a choice between 6-volt and 12-volt. The 12-volt-DC electrical system is one of the primary lifelines of an RV. The source of that power can involve some combination of generator, shore power, solar energy, and batteries, as well as the converter and the inverter/charger. Here, our focus is batteries, and the possible choices.

    If your RV usually is connected to grid power, you aren’t as dependent on the house battery bank; the primary concerns are proper battery maintenance and avoiding overcharging. However, when you are boondocking, or dry camping, you rely heavily on the batteries’ ability to deliver a steady supply of 12-volt power. Historically, the go-to battery for RV use has been the flooded lead-acid battery, which is the oldest type of rechargeable battery, invented in 1859. These are the batteries in automobiles, but for RV house use they have larger plates than “starting” batteries, to facilitate deep cycling. While lead-acid batteries haven’t changed much in more than 100 years, newer technologies have introduced other lead-acid batteries to the market, including gel-cells and absorbed glass mat (AGM); both are of a type called valve-regulated lead-acid (VRLA). And recently, lithium-ion (Li-ion or Li+) technology was introduced. So, which type of battery should you choose for your home on wheels? Also, should you buy 6-volt or 12-volt? Each battery type has its advantages, disadvantages, price range, and requirements. For instance, there are different charging requirements that your existing converter or inverter/charger may not be able to accommodate. So, while you can keep the batteries charged, you run the risk of overcharging or damaging them, or reducing the batteries’ life.

    Flooded Lead-Acid

    These are still the most common and inexpensive batteries for RV use. Although they can be constructed differently, all batteries of this type consist of lead plates (electrodes) suspended in electrolyte, which is water-based sulphuric acid. Almost all RVs currently in use can accommodate flooded batteries without modification to the charging system. An overview of flooded batteries: *They are available in serviceable or maintenance-free versions. The only difference is that the latter lack caps that allow access to the electrolyte. For serviceable batteries, the electrolyte must be monitored periodically for level and condition. *While all batteries should be kept clean, flooded batteries require regular cleaning of the terminals, posts, straps, and surrounding area to remove corrosive battery acid, which builds up regularly because of the water-based acid. Such batteries also release hydrogen, especially while being charged. *Because the acid is suspended in water, there is a risk of acid damage or injury if a flooded battery leaks, falls over, gets cracked, or is otherwise damaged. *Discharging a deep-cycle flooded battery to less than 50 percent charge can limit battery life. So, such batteries are capable of only about half of their listed amp-hour capacity. *Sulfation — lead sulfate crystals settling on the battery plates — occurs in flooded cells. Reversible sulfation is a normal part of the chemical reaction, but permanent sulfation reduces battery efficiency, as well as life and charge capability. Excessive sulfation is the primary cause of premature failure of flooded lead-acid batteries.

    Gel-Cell

    This is the next step in the evolution of batteries. Silica dust is added to the electrolyte of these batteries to create a thick gel. Because the electrolyte is much more viscous, it cannot readily leak or spill. Gel-cell batteries have more stringent charging requirements than AGM batteries. Since the advent of AGM, gel-cell batteries have become rare in RVs.

    Absorbed Glass Mat (AGM)

    These batteries go one step further than gel by absorbing the electrolyte into fine fiberglass pads. The pads can be flat, resulting in standard lead-acid battery size and shape, or they can be rolled into cylinders for a smaller battery footprint. Since the electrolyte of AGM batteries is fully absorbed into mats, the batteries are leak-proof and spill-proof, short of major damage to the battery casing. AGM batteries are not subject to the same charging restrictions as gel batteries, so, generally, standard RV charging equipment can be used without modification. Some high-end converters and inverter/chargers have charge settings for AGM batteries, which have charging curves that differ slightly from those of flooded batteries. As with gel batteries, external corrosion is nonexistent with AGM batteries. In addition, gel and AGM batteries are much less prone to sulfation. And internal resistance is much lower in AGM batteries than in flooded cells, so AGM charging time is much shorter.

    Lithium-Ion

    Although lithium-ion (Li-ion or Li+) battery technology has been around since the 1980s, historically it has been used in smaller consumer devices such as cell phones and laptop computers. With recent advances, the batteries now can work in larger applications such as RVs and standby power plants. They are a marked departure from their lead-acid counterparts. Comparing the energy density between lithium-ion and lead-acid batteries reveals stark differences. A lead-acid battery can store about 25 watt-hours per kilogram of battery, whereas a lithium-ion battery can store 100 to 265 watt-hours per kilogram. This results in a 50 percent to 70 percent weight savings per amp-hour over a lead-acid battery of the same size. Lithium-ion batteries also have absolutely no discharge memory, so they are almost 100 percent efficient and can be recharged from completely dead in as little as one hour, depending on the charging technology and battery. This means they can deliver their full rated capacity. The built-in electronics automatically regulate the charging, and chargers designed specifically for lithium-ion batteries are highly recommended. Using a “general” charger could reduce the battery life, but this may not be noticeable by the user. It is important to understand the administrative functions that a particular battery management system controls, as not all battery circuitry is the same. Lithium-ion batteries require an onboard control circuit; therefore, the cost compared to lead-acid batteries is very high. However, such costs are defrayed when considering battery life, number of charges possible, and the energy output. (Thanks to Avanti Lalwani of Briter Products for assisting with lithium-ion specifics.)

    6-Volt Or 12-Volt Batteries?

    The key factor in this choice is current capacity. Two 6-volt batteries must be connected in series in order to achieve 12 volts, whereas two 12-volt batteries must be connected in parallel to maintain 12 volts. In the series configuration, the voltage doubles (6 volts + 6 volts = 12 volts), but the current stays the same. In the parallel scenario, the voltage stays the same, but the current doubles.

    One major reason to use 6-volt batteries is to get more current capacity (measured in amp-hours), although that increase may be nominal. The question may arise: If current capacity doubles with two 12-volt batteries configured in parallel, why opt for 6-volt batteries wired in series? The answer: Because of denser plates in a 6-volt battery, the current capacity is more than double that of a single 12-volt battery. Therefore, by installing two 6-volt batteries in place of one 12-volt battery, the mathematical result is a higher current capacity.

    The same is true if we double or triple the battery bank. Four 6-volt batteries (wired in a series/parallel configuration) provide more current capacity than two 12-volt batteries, etc. However, installing 6-volt batteries comes at the cost of extra weight and space requirements. Six-volt batteries also may be more expensive than 12-volt batteries. Here is my general advice:
    *If you do a lot of boondocking but don’t want to spend the money on lithium-ion batteries, install as many batteries as you can make room for in your RV. I also recommend using 6-volt batteries. While you will have space for only half the number of batteries in terms of equivalent voltage, you will gain more than twice the current capacity.

    *If money is not a concern, go with lithium-ion. You will have more battery per square foot, and much more current capacity, as these batteries are virtually 100 percent efficient. You also will be able to charge your battery bank very quickly, which is important when dry camping. And you will save significant weight, if this is important to you. Lithium-ion is the battery technology of the future, and I predict the price of these batteries may drop in the next few years. However, the high cost is the only downside, and that is largely offset by their high efficiency and long life. The question of which type of RV batteries to use remains a topic of debate in RV circles. RVers should collect information such as that provided in this article and consider their individual needs in order to make an educated decision.

  • RV Renovations: Updating RV Light Fixtures

    RV Renovations: Updating RV Light Fixtures

    When renovating your RV interior, there are so many projects that you can tackle to update and revamp your space. And considering most of us have a bit of extra time on our hands, now is a great time to tackle any renovations or updates you’ve been wanting to make. Each of these projects ranges in difficulty, with some being fairly easy and others being trickier. As you begin to complete each task, your RV will start to look more and more modern over time. If you want your RV to look truly modern and like a traditional home, it could be a great idea to replace your current light fixtures with newer ones.
    Many RV light fixtures are made of plastic and tend to look cheap and outdated. Most are covered in cloudy globes, tacky patterns, and brassy metal colors. Replacing these with chic, modern fixtures will transform the entire look of your space and bring it into the current era. Although replacing your lighting sounds like a difficult project, it is totally possible to do yourself if you plan ahead, move slowly and carefully, and follow this simple set of instructions.

     
    Disclaimer: Before we begin, please note that we are not electricians, and any electrical work you complete yourself should always be examined by a professional before repeated use. All electrical projects are considered dangerous and should be handled and completed with care. If you are not comfortable with tackling this project yourself, an electrical contractor could easily accomplish this for you. Now that you know the risks, let’s dive in.


    1. Gather your materials

    This tutorial assumes that your lighting is wired for DC power, which is the case for almost all RVs. Finding DC light fixtures that look modern and cost a reasonable price tends to be difficult. For this reason, many RVers purchase and install AC light fixtures that are made for traditional homes. This requires some additional wiring but is totally doable.

    When collecting your materials, purchase your favorite AC light fixtures in whichever style you are decorating your RV. Then, purchase DC light bulbs that will fit those fixtures. These can be found in a variety of home goods stores, online RV catalogs, or even on Amazon. Once you have your materials, you are ready to begin.

    2. Disconnect your house batteries and all other power sources

    Start by disconnecting your house batteries that power your RV and anything else that connects it to power. Unplug from shore power, and double-check that nothing is switched on. This step is absolutely essential to keep you safe while you are completing this project.


    3. Remove the existing DC light fixture that you will be replacing

    RV light fixtures are typically mounted with a couple of screws, so removing your old fixtures with a screwdriver should be fairly simple. Once you have unscrewed them, they will likely just be hanging on by their wiring.
    Credit: DIY Network

    4. Remove any fittings on the DC lines that were connected to the old fixture

    Next, you will need to disconnect the old light fixture. Disconnect all the lines, and remove any fittings that were part of the old fixture. This is important in preparing to install the new fixtures.
    Credit: John Moore Services

    5. Strip back the wire insulation

    Using a sharp tool, strip back the insulation on the wiring that will connect your new light fixtures. This is necessary to connect the new fixtures to your current RV electrical system.

    6. Connect the lighting

    Next, you will need to connect the positive and negative DC lines to the white and black “AC” lines of the new fixture using whatever fittings you like. This is best completed using wire nuts. The DC socket light bulbs only tend to work when wired one way, contrary to simpler DC bulbs, due to their transformer. Therefore, it is a good idea to connect everything, then turn the power back on and check that the bulb is lighting before fully installing the new fixtures.

    Credit: @wheres.mal.now

    7. Add on/off switches

    This is an optional step, but completing it will make your lighting situation much simpler. Many older DC light fixtures have on/off switches built into them. The new AC fixtures may not have on/off switches, so it is a good idea to retrofit switches into them. You can accomplish this by removing the switches from the old DC fixtures and installing those in the AC fixtures.

    If reusing your old switches is not possible in your situation, you should be able to pick up small, simple switches at your local hardware store. These newer switches will just need to be installed inline on one side of the power feed. Typically, the negative line is used. Simply wire the negative line through the new switch, and you will have an on/off feature for your new light fixture.

    8. Finish mounting the new fixture

    Once your new lights are wired in, the hard part is over. It is imperative that you double-check that the power is properly connected and the switches are in good working order before moving on to install the light fixtures. Since your new light fixtures are likely very different from your old ones, you may need to drill new holes to affix them to their new positions. If the new fixtures do not cover over the holes from the old fixtures, you may need to fill in the old holes with putty, and sand and paint over them. This step will look different for everyone, so just be sure your new lighting is properly mounting before moving on to your final steps.
    Credit: @wheres.mal.now

    9. Install the DC bulb and enjoy!

    Once your lighting is hardwired and installed, all that’s left is to install your new DC light bulb. Make sure the new bulb is screwed in tightly, and then flip your power back on, and turn on your lights. Then, sit back and admire your hard work and your newly-modernized RV lighting.

    Installing new lighting fixtures in your RV is fairly simple if you have any sort of prior electrical experience. Even without prior experience, beginners should be able to complete this project by closely following these steps. Again, do not attempt this if you are not confident in your abilities, as any electrical professional could easily complete this if you gather the correct tools tools for them. Once your new lighting is installed, you are ready to move on to the next project: making over your cab area. Stay tuned for the next update!

     
    Have you updated your RV interior’s light fixtures? What process and methods did you use? Feel free to share in the comments below!
  • FMCA Tech Tip: The Importance of Waste System Venting in RVs

    FMCA Tech Tip: The Importance of Waste System Venting in RVs

    Proper holding tank venting is required (mandated actually), for both the black and the gray waste systems found on recreation vehicles and the method chosen by most RV manufacturers is to run a length of ABS pipe from the holding tank, up and through the roof of the RV. The importance of proper venting, in both systems, cannot be overstated, especially as it relates to odor control. Additionally, without correct venting, sinks will not drain properly, bacteria can propagate and holding tanks will not drain as quickly or completely.

    Keep in mind, as a holding tank empties or a sink drains, air must enter the drainage system. Since RV fixtures as well as holding tanks rely solely on gravity while emptying, having air enter the system as sinks and tanks are drained, results in a faster and more thorough process. There are two types of vents used in recreation vehicle waste systems: direct exterior vents and anti-siphon trap vent devices (ASTVDs).

    Direct Vents

    Direct vents connect the waste systems (either within the drain piping or directly from the holding tank) to the atmosphere outside. There is one other type of direct vent; a side-mounted vent. Side venting is only permissible in the liquid waste system, (typically from a single fixture), and only found on the smallest recreation vehicles. Clearly, the most common and the most effective waste system vent stacks, however, are those that protrude above the roof.

    Anti-Siphon Trap Vent Devices (ASTVD)

    Another type of vent is the anti-siphon trap vent device. These handy gadgets are used as a secondary vent to aid in draining sink fixtures. Also called “check vents,” ASTVDs allow air into the drainage system, but prohibit air from passing out of the system. ASTVDs are installed in the liquid drain piping system at or near a P-trap inside a cabinet. Look under the kitchen and lavatory sink area and you should find them. They are mounted at least 6-inches above the P-trap’s horizontal arm. ASTVDs do not allow odors to escape into the living portion of the RV because of an integral atmospheric pressure-controlled, rubberized, one-way valve. In other words, air in, but not out.

    In addition to ASTVDs, there must still be at least one vent protruding through the roof to allow sewer gases out of that holding tank; ASTVDs are not primary vents. The better-designed waste systems will have ASTVDs installed at every P-trap as well as a direct vent running from each holding tank up and through the roof.

    Direct Vent Maintenance

    I’d wager not many active RVers have ever given serious thought to actually performing any maintenance on the waste system vents. But here’s something to investigate if you’ve never done so before. Sometimes coach manufacturers cut a very large hole in the ceiling and roof for vertical vent pipes to pass through; it obviously makes the installation a little easier and a lot faster. Oftentimes this gap is not sealed properly all the way around the outside perimeter of the pipe.

    If the area around the pipe is not sealed properly and is routed through an oversized hole, it’s likely the tank odors will pass up the vent, collide with the underside of the common sewer cap and be forced back down, around the side of the vent pipe and into the ceiling area where it eventually migrates to the living area. It would behoove the serious coach owner to remove the top cap of each sewer vent on the roof and ensure the space around the perimeter of the vent pipe is sealed tight.

    Better yet, consider the addition of a new roof vent cap. This newer type of replacement vent actually creates a negative pressure inside each holding tank and literally sucks the gases and odors out of the holding tank. Easily installed by any RV handyperson, you might not need holding tank additives ever again! Remember, RVing is more than a hobby, it’s a lifestyle!

  • RV Renovations: Renovating a Dinette

    RV Renovations: Renovating a Dinette

    In an RV, a dinette is one of the most useful and functional spaces you will find. For many people, this centrally-located space can be used as a kitchen table, a desk or office space, a craft center, or even somewhere to hang out and watch movies and relax. Dinettes can come as a booth with two benches or as a table with four chairs and vary in size, shape, and color. However, in some older RVs, dinette areas tend to be a bit outdated. Often, they are covered in tacky fabrics, dark woods, and textured wallpapers, and, for some people, this can be a bit of a disappointment when they are considering a purchase. Yet, with some simple changes, you can easily transform your dinette space into an area that you will enjoy utilizing for years to come. Follow along to learn some simple tips for updating and modernizing your RV’s dinette cushions, updating your table, and decorating tips.

    Credit: Domestic Imperfection

    Updating Your Dinette’s Cushions

    Your very first step in your makeover should be to recover your dinette’s cushions. This will make the biggest overall difference to the dinette space and can provide inspiration for the later steps. If your RV’s dinette is a table and chairs (instead of a booth with cushioned benches), then simply skip this step and move on to the next post, where we will discuss updating your table and decorating your dinette space.

    There are three methods you can use to update your dinette’s cushions, as detailed below.

    Credit: @188sqft

    1. Buy New Cushions or Cushion Covers

    While different RV dinettes are often made with different sized cushions, there are typically a few different sizes in production. Often, manufacturers will sell either entire cushions (the foam plus the cover) or just the covers. In the second case, you would need to remove your current cushion covers from your dinette cushions and keep the foam for the new covers. If your cushions’ foam is dingy or overly worn, you can always purchase new foam for the cushions from a local craft store, using exact measurements from your older cushions.

    Measure your dinette cushions’ height, length and width, and search online for RV cushions. These can often be found on Amazon, eBay, and several different RV supply companies. Keep in mind that you will typically only find solid colors and patterns, and these cannot be customized. Prices will vary depending on the source, so be sure to thoroughly search for the best cushions and best overall deal before making your purchase. This option is not the most customizable, but it certainly entails the least amount of work and the quickest results.

    2. Have Your Cushions Reupholstered Professionally

    This choice is likely the priciest, but it allows the RV owner more options for customization. Utilizing a professional also tends to yield the best overall results. Find a local seamstress or someone who specializes in furniture reupholstery and is up for the task. In some cases, you must purchase your own fabric, but in other cases, the seamstress can often provide you with fabric from their collection, as well. Keep in mind that this option tends to be very pricey. However, if you have an ideal image in mind for how you want your cushions to look, as well as the necessary resources and a great local seamstress, then this option is the best one for you.

    Credit: Sawdust 2 Stitches

    3. Recover Your Cushions Yourself (DIY)

    For those with a crafty side, this option is fun, inexpensive, and can also allow you many different possibilities. There are a few different options available for recovering your own dinette cushions, and your skillset and sewing abilities will determine which option you choose. If you have a sewing machine and are up for a challenge, you can follow a tutorial to make your own zip-on cushions at home. These covers can be removed for easy cleaning anytime and will look beautiful and professionally-made if done correctly.

    For those with a crafty side but fewer sewing skills, there is another simpler method that will turn out just as beautiful with less work and fewer supplies. To cover your cushions using the no-sew method, you will first need to gather your materials. These include a staple gun and plenty of industrial staples, your fabric of choice, and plywood cut to size for each cushion.

    Fabric can be purchased at your local fabric store. Outdoor fabric comes highly recommended, as it is the most durable and easiest to clean. Be sure to purchase more fabric than you need in case of mishaps or inaccurate measurements. When choosing your fabric, keep the overall color scheme and theme of your RV in mind, and be sure to choose a fabric that will match or coordinate nicely. Remember that these cushions are a large piece of your overall space, and choosing a louder or busier fabric could make the space look a bit chaotic. If you choose a simpler fabric, you can always decorate with brighter throw pillows and wall hangings later on.

    The plywood can be purchased from your local hardware store. You will need one piece for each cushion (four pieces total for four cushions). Each piece of plywood should be one inch shorter than your cushion foam in both length and width. Once you have your supplies, you are ready to begin. Follow the steps below for a quick and easy process to recover your cushions without sewing:

    • Lay the plywood out flat, and place the corresponding foam cushion on top of the plywood.
    • Place your fabric over the cushion and plywood.
    • Cut the fabric to size, leaving a minimum of 16-18” extra on each side.
    • Wrap the cushion very tightly (like a present), and use clamps to hold the fabric in place.
    • Flip the cushion over, and staple the fabric directly to the plywood. Use lots of staples to ensure a better hold.
    • That’s it!

    Of the above methods, whichever you choose is sure to look beautiful and bring a more modern and homey vibe to the overall space. Once your dinette cushions are updated, you can move on to makeover your table and decorating the space.

    Follow along for ideas on how to finish up making over your RV’s dinette area.

    Update Your Table

    RV tables come in a variety of shapes and sizes. If you are wanting to update your table, there is no shortage of things you could try. Each of these possibilities yields beautiful results that will have you excited to enjoy a meal at your new table.

    1. Paint + Epoxy

    This option is rather simple in theory but requires plenty of prep work and dry time. It involves painting your table in the same way that you would paint a wall or cabinets, but then adding an epoxy layer over top to seal it and protect it for long-term use. For those who use this method, you must first prep the table by sanding it down to allow the paint to adhere properly. Then you must clean thoroughly before painting. Paint two to three coats, allowing a minimum of twenty-four hours dry time in between each coat. Some people paint one solid color, but others may choose to paint a design into the table or even try a faux marble or wood-look painting style. Once you have painted, you are ready for epoxy.

    Epoxy is a bit difficult to work with and must be poured slowly and leveled before it begins to dry. Follow along with a more detailed tutorial for more ideas on how to use this method on your RV’s table surface.

    Credit: @livesmallridefree

    2. Laminate Countertop Recovering Kit

    If you RV’s table is laminate, this may be a great option for you. Prep work involves sanding and cleaning, as with the previous method. Then, you can use a thick paint to cover the table before applying small paint chips to cover the surface. Next, you must use a sealant to protect the surfaces and ensure your hard work will last. This method is fairly simple and can be completed in just a few days. Kits can be purchased online or at hardware stores and come with all the tools you need for this project.

    3. Butcher Block or Wood

    Butcher block and wooden tables look beautiful in a traditional home, so why not try them out in an RV? For this method, you would need to remove your previous table entirely and build a new one. You can find a variety of woods at hardware stores or through online retailers. You must affix the new wood to the old table post securely. Be sure to seal the wood with a food-safe sealant before finalizing the project.

    Credit: @188sqft

    4. Peel-and-Stick Countertop Covers

    This method is also quite popular and holds up quite well, surprisingly. You can find peel-and-stick materials made for countertops at some hardware stores or through a variety of online retailers. They can come in wood-look, marble-look, granite-look, quartz-look, and more. These are cost-effective, lightweight, and simple to install. Simply clean your table well, and press the cover onto the table, starting at one end and working your way over to the next. Use a credit card to press out all the air bubbles, and cut the cover to size.

    5. Cover in Metal

    This method is very artsy and will leave your space with a bit of an industrial look. Thin sheet metal can be purchased at hardware stores and hammered around the edges of the table to cover over the old surface. You must nail the metal into the bottom of the table to ensure longevity.

    Credit: @ourvieadventures

    6. Cover in Leather

    Similar to covering your table in metal, you can also cover your table in leather fabric. The fabric can be purchased at your local fabric store ad comes in a variety of colors. Simply cut it to size, and wrap it around your table. Use fabric glue or to adhere the leather to the table, or nail it to the bottom of the table depending on your preference.

    7. Build Something Custom

    If none of these previous options suit you, you can always build something custom. With this method, options are endless, and you can end up with exactly the look you want. This is great for those who maybe don’t have a dedicated dinette space and want to add one in, or for those who are looking for something a bit more non-traditional. Whatever you try, be sure to keep your RV’s overall weight in mind and always seal with a food-safe sealant before finalizing your project.

    Credit: @slowcarfasthome

    8. Buy a Table

    This option was saved for last because it is often difficult to find an RV-sized table in stores. However, if you shop around, you may be able to find something you like that is professionally-made and of good quality. Be sure to anchor the table to the ground to ensure it does not slide around during travel.

    Finish off your dinette space by decorating the area. Consider adding a plant or two to the table to make it feel more homey. Add candles for a seasonal ambiance. Hang some curtains for additional personality. Hang your favorite photo or piece of art on the wall to make it more personal. Add a few throw pillows to make the dinette comfier. This part is where your personality will really shine through, so be sure to add in items that make you happy and add character to the space. And remember, in a small home, less is often more.

    Renovating your dinette area is a challenging, yet rather rewarding process that will yield beautiful results and add plenty of personality to your overall space. Updating your table and decorating will add brightness and cheer to your space, leaving you even more excited to take your RV on trips all over the country. Be sure to consider these ideas for a brand-new dinette area that your whole family will love and enjoy.

    Have you recovered your RV’s dinette cushions or updated your table? Which method did you choose? Feel free to let us know in the comments below!

    Renovating not for you? That’s okay. Check out some of the latest RVs on RV Trader.

  • Deep Cleaning Your RV, Inside & Out

    Deep Cleaning Your RV, Inside & Out

    Summer is just around the corner—and with it, some of the best camping of the year. While the coronavirus has put many vacation plans on hold, you’ll want to be ready to go when campgrounds reopen. With all this extra time on your hands, there’s truly no better time to deep clean your RV.

    Ready to get your RV in order? We’ve put together a list of tips and tricks to get your RV super shiny and clean, so all you’ll have to do is pack and turn the key when it’s time to hit the road again.

    Let’s start with a few tips on cleaning the inside of your RV.

    Inside:

    • Mold can grow just about anywhere when your RV isn’t being used. Wipe down ceilings, walls, hard surfaces, and appliances with a multi-surface cleaner that is EPA registered to disinfect and remove bacteria, viruses, mold, and other allergens. Choose one that is safe for your whole interior, including finished wood, granite, and stainless steel.
    • Let’s face it—most of us have no idea what is in the back of our RV’s drawers, cabinets, and closets. Now’s the time to empty, vacuum, and wipe out storage areas. Haven’t used an item in a couple of years? Get rid of it. And toss out any old or expired foods or spices. Not sure if that mac and cheese is still safe to eat? Get the USDA’s FoodKeeper app for shelf-life guidelines.
    • With use, cabinet pulls get surrounded by a buildup of oil and dirt. Mix 2 parts baking soda and 1 part coconut or vegetable oil and use an old toothbrush to gently scrub away the gunk.
    • Strip and wash bedding, vacuum the mattress, and spray with an aerosol disinfectant before remaking the bed.
    • Window tracks, valances, blinds, and cloth lampshades all capture dust and dirt. For tracks, vacuum with a thin nozzle, then dip Q-tips in white vinegar or window cleaner and wipe out every nook and cranny. Vacuum blinds, valances, and lampshades with a soft brush, then go over with an adhesive lint roller.
    • Still see signs of last year’s vacation on your carpet and couches? Begin by removing small spots with a damp, soapy cloth. For hard-to-remove grease stains (think pizza), scrape with a knife, then layer paper towels on top of the stain. Using the lowest heat setting, iron the paper towels to lift the grease, then gently scrub the spot with a mix of dish soap, white vinegar, and water. Finish your routine by steam cleaning.
    • To flush your freshwater system lines, connect a clean water hose to your home’s outdoor faucet and connect the other end to your RV city water connection. Open your gray tank, turn on all the faucets, and run until the water looks, smells, and tastes clean. Use an RV freshwater deodorizer to flush your freshwater tank.
    • Smell something? It could be dried waste stuck to the sides and sensors in your black water holding tank. Some campers swear by the ice method—dump a few buckets of ice cubes down the toilet, then drive along and let the ice clean the sides. For a proven fix, purchase a wand-style tank rinser, hook up to a hose or faucet, and lower into the tank to wash away debris. For tanks mounted directly under the toilet, get a straight wand. If you have bends in your plumbing or an offset tank, choose a flexible wand.

    Outside:

    • Start at the top. For fiberglass roofs, use a soft brush, hose, and any wash-and-wax product to remove grime. While you’re up there, look for any loose or cracked sealant and follow the manufacturer’s directions to remove old caulking and repair. If you have an older RV with a rubber roof, you’ll need specific rubber roof cleaning products.
    • Know what you’re made of – metal or fiberglass. For painted or polished metal bodies, use a pre-wash to remove grime and grit, then clean with a non-abrasive cleaner, soft-bristled brush, and microfiber cloth or mitts. High-pressure washing is not recommended because these RVs are clad and riveted, and water can seep in between the seams. For fiberglass, use a wash-and-wax product with UV protection. Again, beware of the high-pressure washer—it can damage slideout seals and peel exterior decals. For seriously faded decals, gently scrub with a wet no-scratch fiberglass pad. This will brighten them but also shorten their lifespan.
    • Use a silicone-based cleaner on all window, door, and slide-in gaskets or flexible weather sealants. Most spray on and don’t require any wiping or additional cleaning. Don’t neglect your awnings—they need a rinse, too. Extend and hose off, but don’t scrub—it can weaken fabric and remove protective finishes.

    Before tackling any cleaning jobs, check your owner’s manual for specific recommendations. Remember, spring cleaning is an opportunity to look for any problems and give your RV the attention it deserves. And considering we all have a bit of extra time on our hands, let’s use it to our advantage. A little TLC now equals comfortable, worry-free vacations in the months ahead. Happy cleaning!

    Have any cleaning tips of your own? Let us know your methods in the comments below.

    Ready for a new RV instead? Check out our newest inventory.