Category: Maintenance

  • FMCA Tech Tip: Exterior Maintenance

    FMCA Tech Tip: Exterior Maintenance

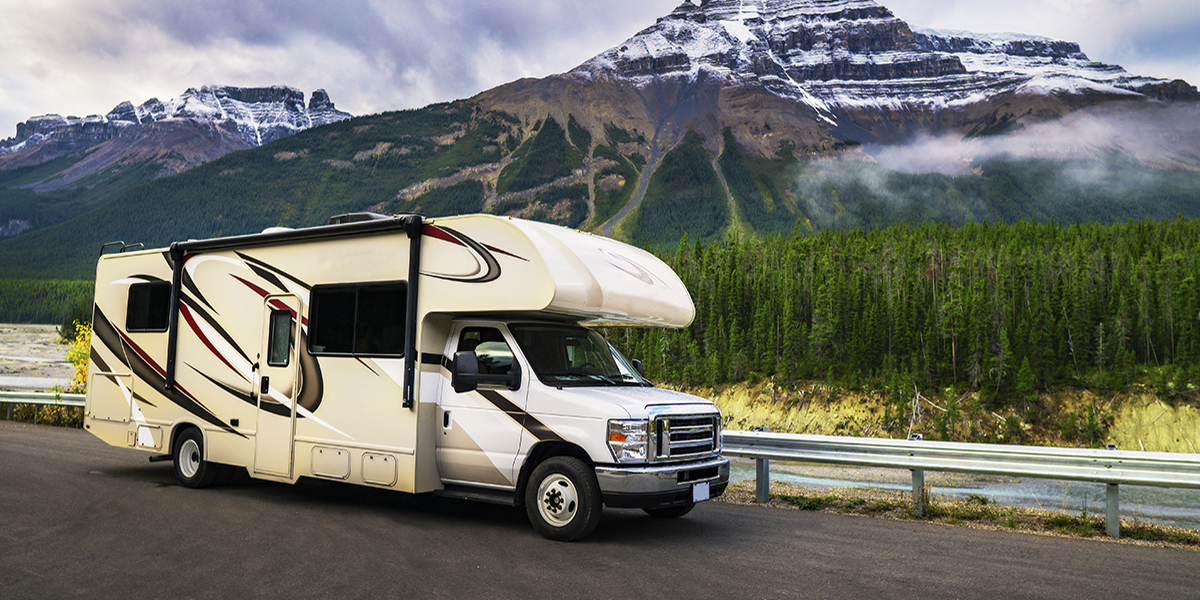
    Keep your RV exterior looking its best with these tips from FMCA and the “RV Doctor” Gary Bunzer. Take pride in your home on wheels!

    RV Exterior Tip #1: The Roof

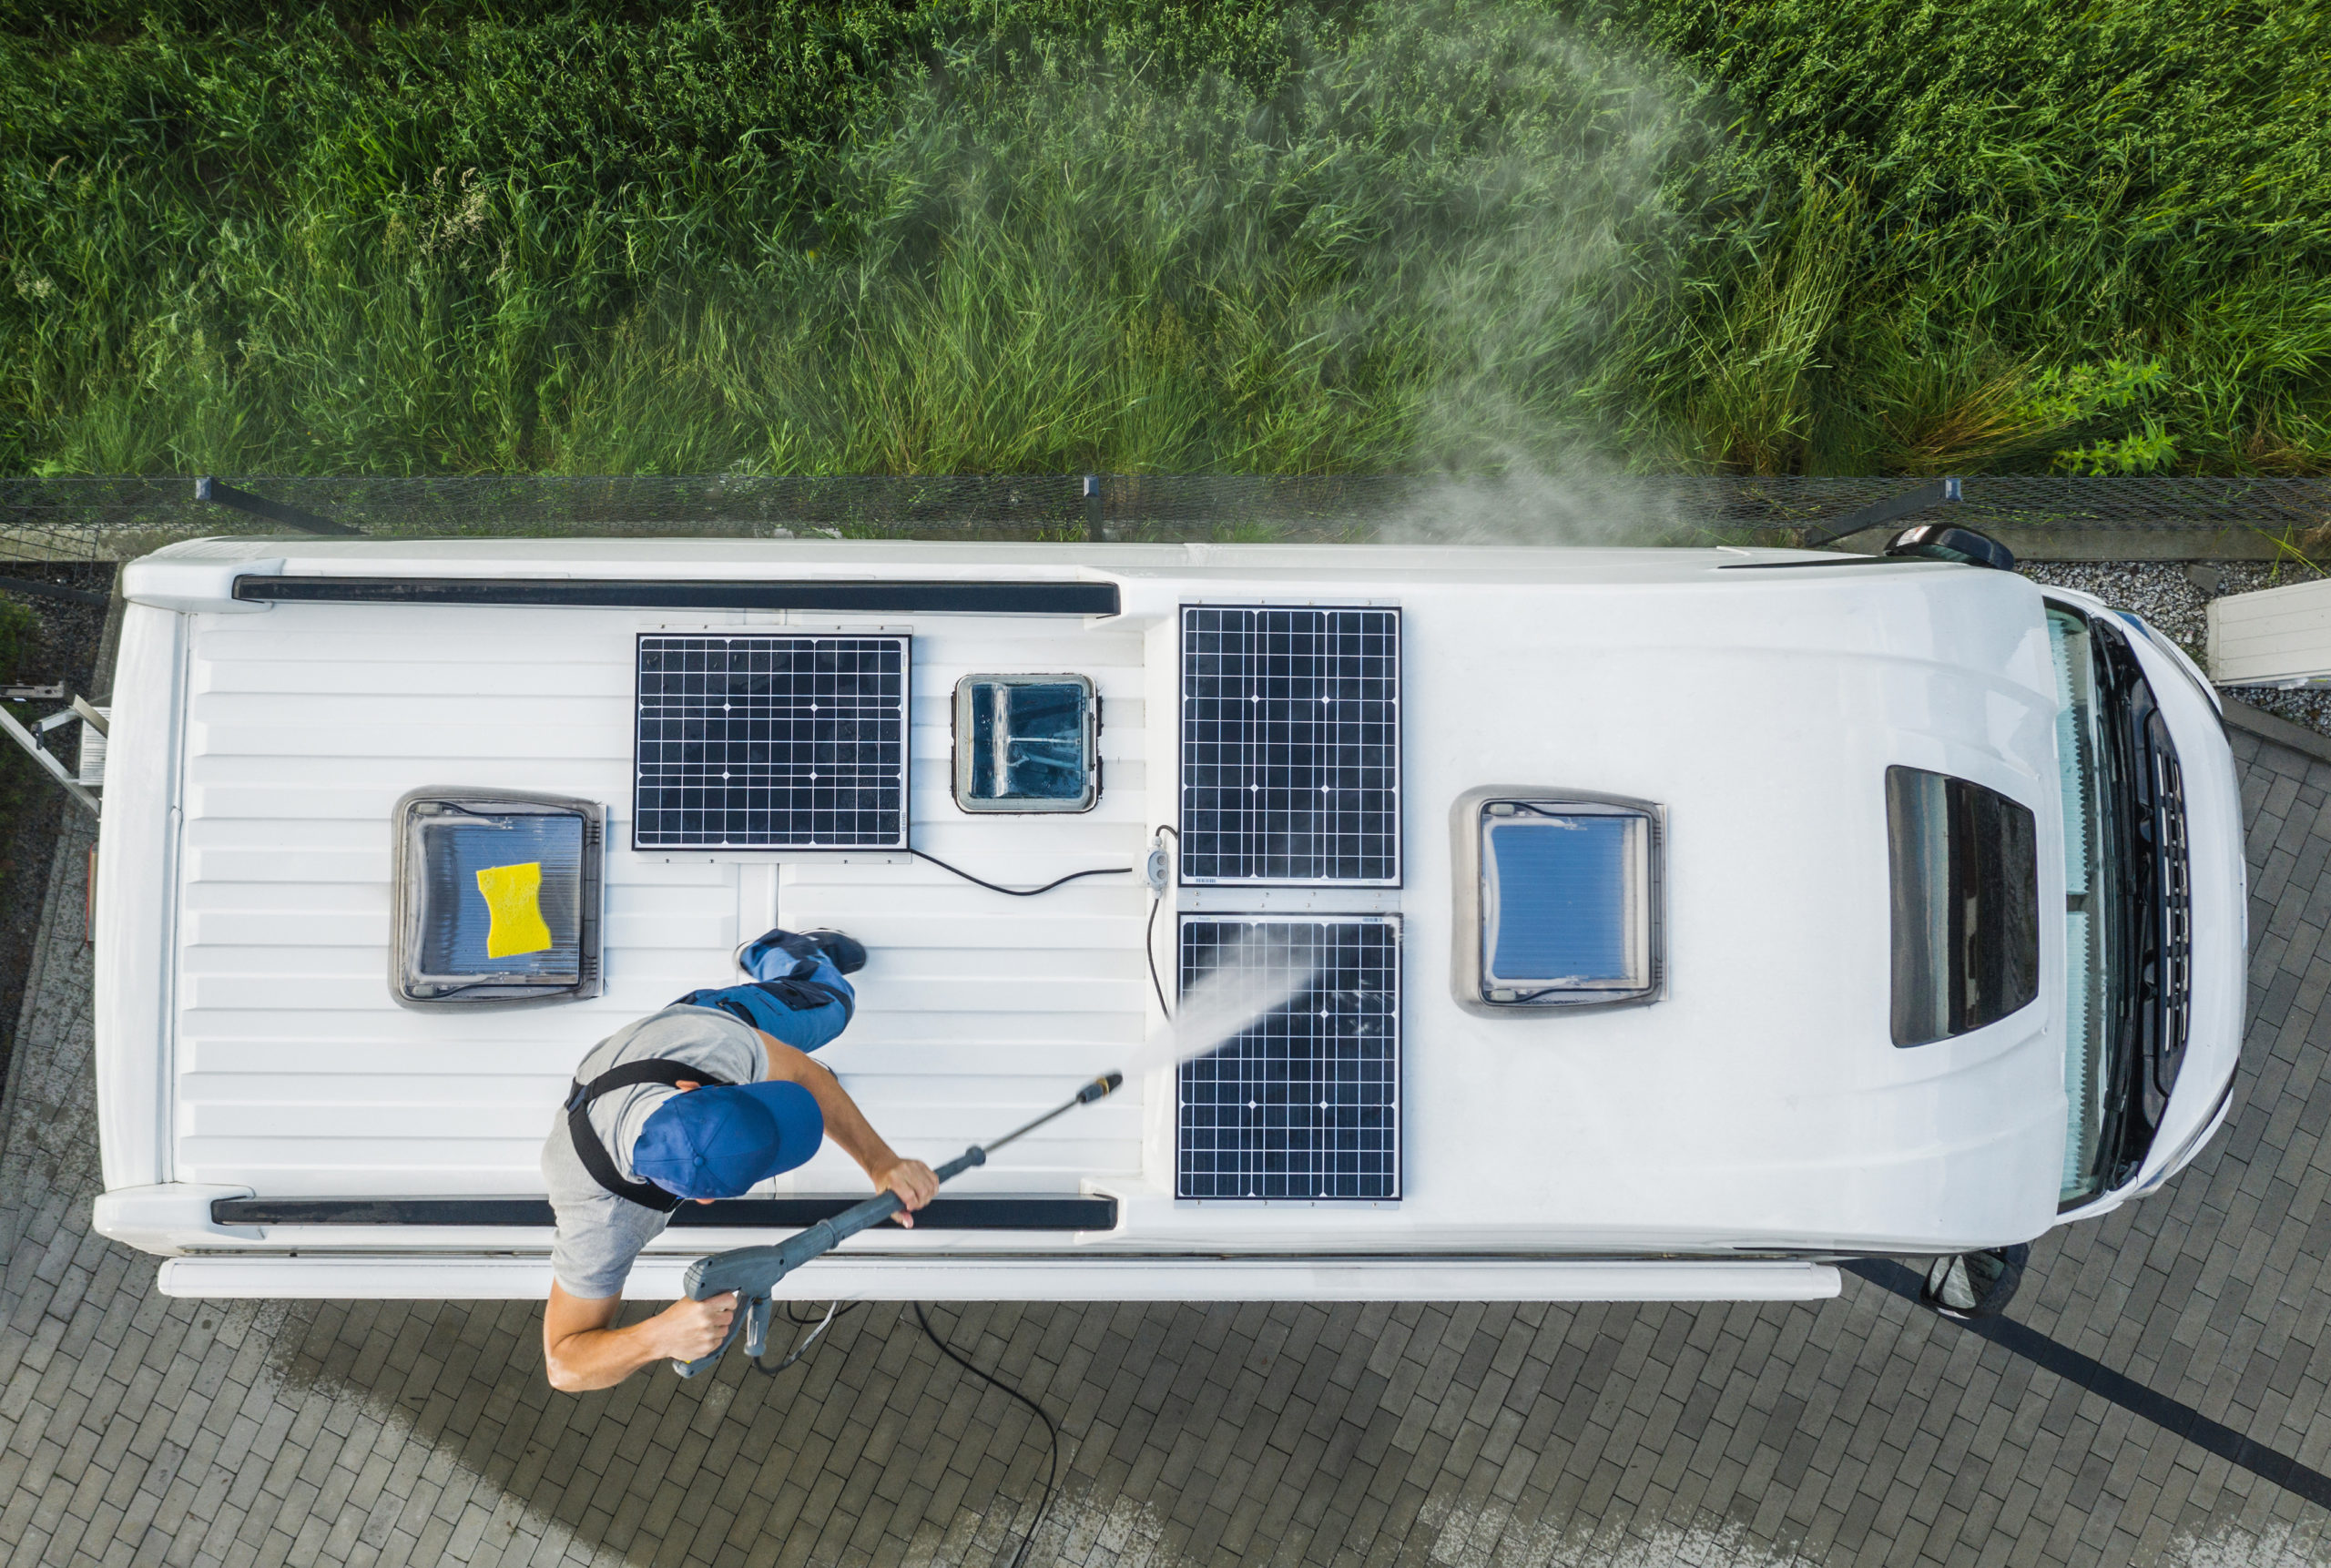
    Get into the habit of inspecting the RV exterior once a month, with special attention given to the roof. Examine the seams, edges, moldings, caps, and anything else attached to the roof. Any screw or mounting method used on the roof can become an entry point for moisture. Water intrusion is the largest threat to any RV.

    Small problems will not go away on their own. Left unaddressed, small problems will only worsen and quickly move (along with their associated cost) from the preventive maintenance stage. So follow these steps to manage small problems:

    • Keep the roof clean. Use a soft broom every couple of weeks to sweep away leaves, dirt, and road grime.
    • Look closely for evidence of mold and mildew, especially on synthetic surfaces.
    • Remove bird droppings or tree sap as soon as it is spotted.
    • Wash the roof with the appropriate cleaning agent four or five times each year. A clean roof is simply easier to inspect!

    And, finally, know what material forms your RV’s roof. Use products that are safe for your RV’s roof surface material.

    RV Exterior Tip #2: Sidewalls

    Likewise, learn what material is used on the exterior of your RV’s sides. Is it painted aluminum? Fiberglass? Filon or another FRP derivative? ABS or PVC plastic? Are steel components used? If you own a Type C motorhome, don’t forget about the cab portion and its exterior surface.

    Scan the sides of your RV and start counting how many components are attached: storage bay doors, refrigerator vents, furnace vents, city water inlet, etc. Every attachment point is a potential source for a water leak.

    Inspect all seals around the sidewall openings. At the first sign of a deteriorating sealant, reseal! In severe cases, it may be necessary to completely remove the component and reinstall using fresh sealant. In other cases, a quick but correct application of a silicone sealant over the suspected gap may be all that is required.

    Next, check for black streaks. Unfortunately, every RV is susceptible to those nuisance black streaks caused by four elements: dirt, moisture, time, and neglect. This video explains how these streaks form and how to remove them.

    When using any type of black streak remover, never apply the solution directly to the surface of the sidewall. Moisten a clean, soft cloth with the remover and try to keep within the boundaries of the black streak. All black streak removers contain components that will remove existing wax, so areas treated with the remover will need to be re-waxed.

    Unless the black streak is deep-seated and has become oxidized, it eventually should come off or at least be minimized. If the black streak has oxidized into the finish, other products exist that can address this specific type of problem. But, remember, it’s crucial to use a product compatible with your RV’s exterior surface to prevent further damage – read those labels!

    RV Exterior Tip #3: Fiberglass Caps

    Many RVs have some form of plastic caps covering their front or rear ends. Over time and with exposure to UV rays and ozone, the appearance of these fiberglass caps can become dull or fade to a certain extent. This is the first degree of oxidation. Whenever sunlight, heat, and moisture collide, oxidation can be expected.

    The second level of oxidation results in a pronounced chalking of the finish. You’ve probably seen front and rear caps that display a distinct, blotch-like chalky residue that can be wiped away with a moist rag. Neglected further, the cap surface eventually can crack and deteriorate and, in the process, cross the line between restorative maintenance and damage repair. If individual fibers become visible in the fiberglass, it may require a repair out of the DIYer’s realm.

    Fiberglass front and rear caps must be protected with wax or polish. Plain old car wash soap is a good option because it does not remove wax as detergents do. Polish is similar to wax, but some polishes and polishing compounds actually contain trace amounts of abrasives.

    RV Exterior Tip #4: Undercarriage

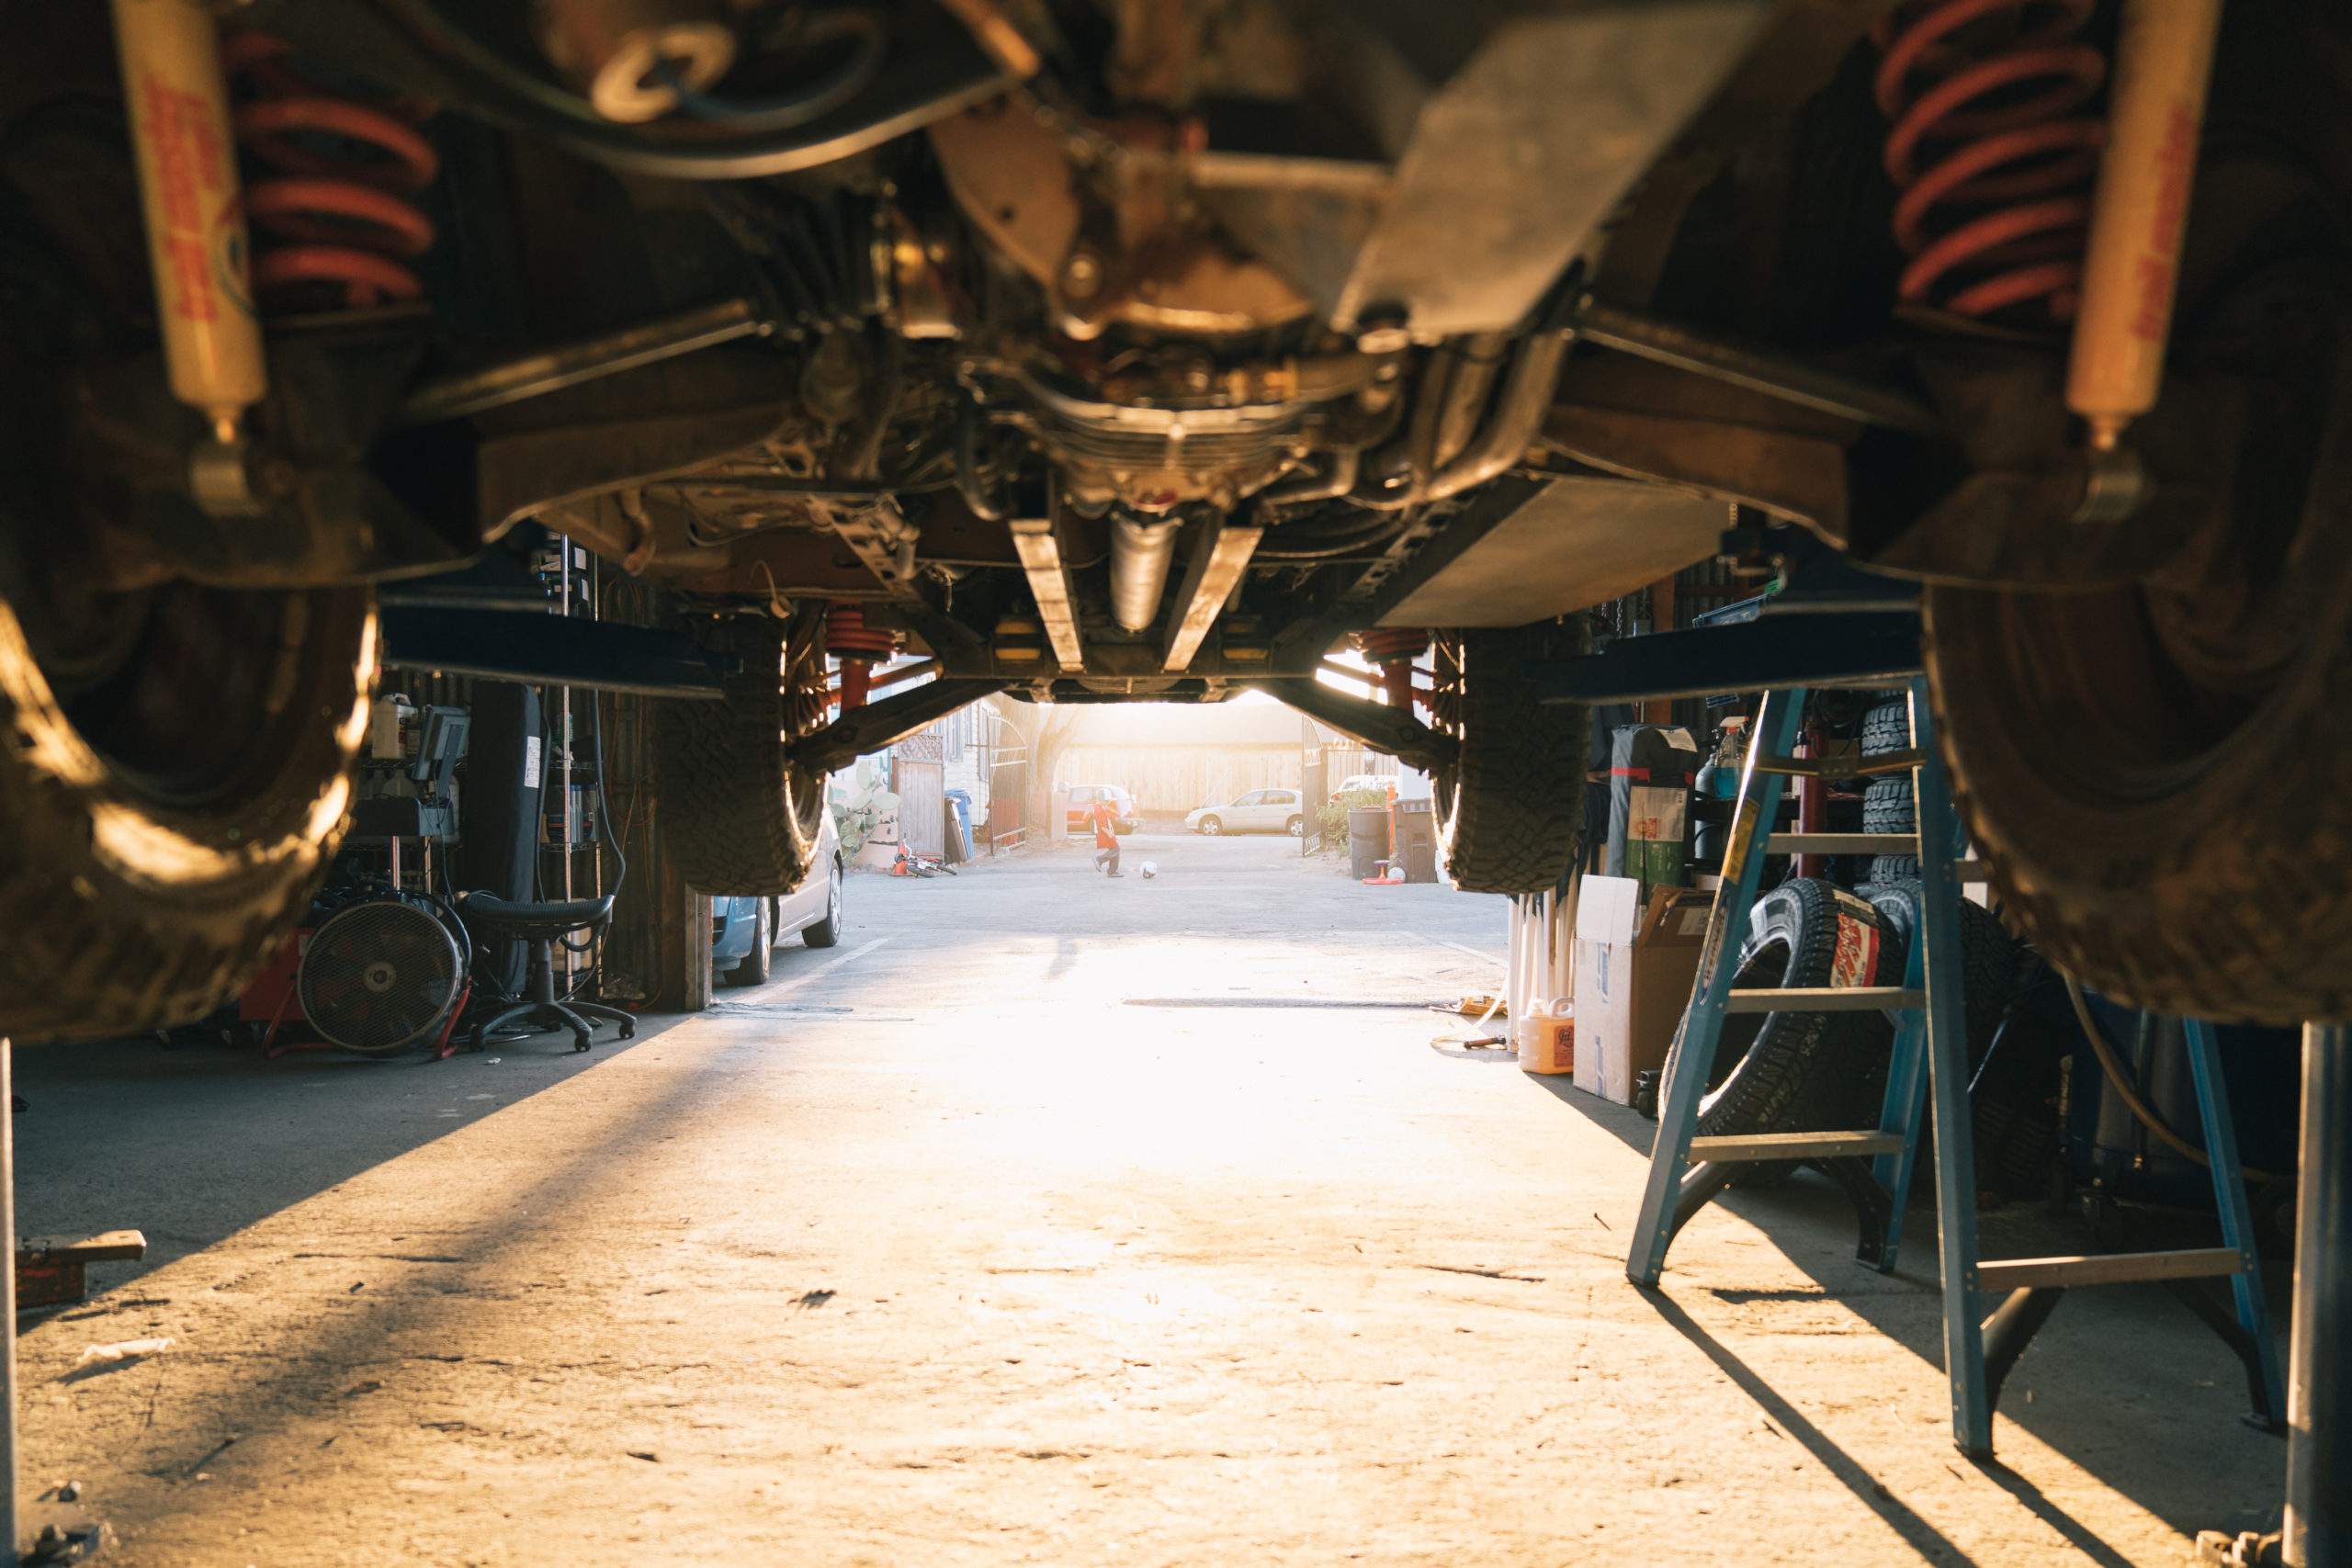
    The underneath surface of the RV is the “forgotten” exterior surface. The main concern is critter infestation. Look for large gaps around exposed plumbing that may pass through the floor and subfloor. It’s important to seal around all gaps that can trap moisture and road debris.

    Look for loose or damaged sections of the underbelly, regardless of the types of materials used under there. Some RVs have sealed underbellies, while other RVs may be open to the bottom of the subfloor. Others may have only a soft plastic wrap encasing the floor insulation. Look for anything that appears out of the norm. While you’re down there, check all chassis and suspension components for damage or irregularities, and look for evidence of water leaks. If you use the RV in winter conditions where salt is used on the roads, check for rust.

    For more RV exterior maintenance tips, visit Family RVing magazine.

    This information is for educational purposes. FMCA shall not be responsible nor retain liability for RVer’s use of the provided information. Prior to making any RV service decision, you are advised to consult with an RV professional.
     
     
  • FMCA Tech Tip: 5 Tips to Make RV Service Less Stressful

    FMCA Tech Tip: 5 Tips to Make RV Service Less Stressful

    It’s time again for RV service. You explain your problem to the service writer, sign the repair order, grab a cup of coffee and wait. And wait, and wait and wait.

    Within the realm of RV repair facilities, time equates to dollars, especially for those non-warranty invoices. It stands to reason that if you can help speed up the diagnostic period, you, the RV owner, will save money and time in the long run. Here are five items that any RV owner can do to help save money and time while helping provide a roadmap for the service shop to follow.

    1. Record All Identifying Numbers

    Keep a list of your RV’s brand names, models numbers, serial numbers, and spec numbers. Your dealer or service center will be able to rapidly transfer the necessary numbers to service orders and avoid having to track down records located in hard to reach places. Additionally, the service writer will be able to identify appliances and devices that may be under recall.

    Here is a sample form to get started. Download now: RV Records Template 

    2. Organize a Repair History of Your RV

    Gather any receipts, warranty forms and repair invoices for work completed on your RV. If you are like most people, you’ve lost some, stuffed some in a storage compartment, or maybe put some in a box subconsciously thinking you might need them someday.

    Try to develop a plan for the safekeeping of these documents. At the very least, keep your paperwork in a three-ring binder arranged in chronological order. If a service writer can quickly scan your repair history and find a specific trend, it may help speed up the time spent in the shop.

    Besides, a detailed and chronological record of repairs and services shows you have taken care of your RV. This simple recordkeeping could possibly add to your RV’s resale value.

    3. List All Add-On Components

    Similar to the previous item, this one suggests you maintain a list of all after-market accessories that have been installed. Not only does it provide a detailed account of how you have increased the value of your rig, it could also save troubleshooting time.

    4. Look for the Obvious

    Once it’s apparent that something is not quite right with your RV, do yourself a favor and perform a little inspection. Look for obvious signs that something may be amiss:

    • Stains or discolorations
    • Water pooling or dripping
    • Burned wires
    • Broken hardware
    • Fuel dripping
    • Missing components
    • Disconnected or loose wires
    • Cracked fittings

    Your assertiveness to “look for the obvious” might save you money and put you back on the road that much quicker.

    5. Document the Exact Specifics

    This one takes a little more effort on your part. Whenever a symptom develops, begin to write down specific aspects that pertain to it. You know your RV best – pass that knowledge on to the service facility.

    Start with the basics:

    • Does the problem occur every time?
    • Only at night?
    • Or only after start-up?
    • Only after shut-down?
    • When you drive a certain speed?

    Note any geographical attributes at the time of the occurrence:

    • High elevation
    • Steep incline
    • Humid weather
    • Dusty conditions
    • Or maybe you only notice the problem on trips to a certain location – lake, desert, mountains, etc.

    Additionally, use your product knowledge to further pinpoint a possible cause. For instance, if you are experiencing a refrigerator problem, does the problem exist during both gas and electric operation? While driving or while parked? Only during the heat of the day or at night also? Document the specifics.

    Remember, these tips are for your best interest. The more information that can be provided to the technician, the better! When you follow these five tips, your RV’s visits to the service bay will be less stressful for everyone involved.

    This information is for educational purposes. FMCA shall not be responsible nor retain liability for RVer’s use of the provided information. Prior to making any RV service decision, you are advised to consult with an RV professional.
     
     
  • RV Renovations: Backsplash Installation

    RV Renovations: Backsplash Installation

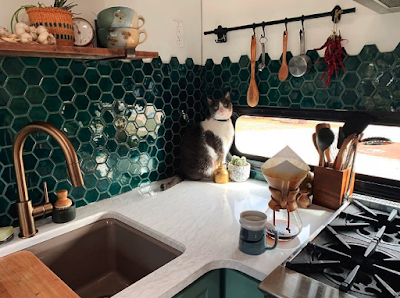
    Renovating an RV is an incredibly demanding yet rewarding process. Many people want to enjoy the RV lifestyle but are turned off by older, outdated interiors. For them, remodeling has become a way to create the homey and personalized space of their dreams in a home on wheels. Previously, we discussed the first two steps in the renovation process: painting and adding in new flooring. Once you have completed these two steps, you will be ready to move onto the next step: adding in a backsplash (or two!).

    Adding a backsplash into a moving home is a bit of a tricky process, but if you follow the right steps, you should have excellent results. Stick to the following six steps for RV backsplash results that will last for years to come.

    1. Determine where you want backsplash and placement

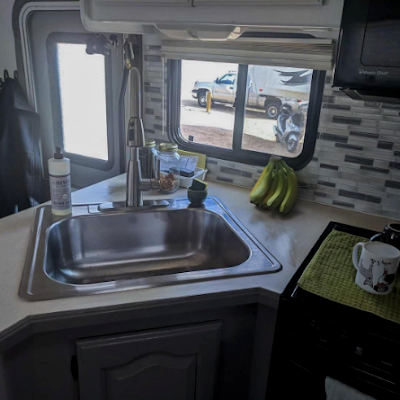
    Before beginning any preparation or purchasing for this project, you need to determine exactly where you will be placing your backsplash. Many RVers like to place a backsplash in the kitchen, for both aesthetic and functional purposes. Besides looking pretty, backsplashes tend to minimize mess in the kitchen and make for easier cleanup.

    If you decide to place one in your kitchen, you need to determine how much of the kitchen wall it will cover. Do you want it behind the stove only, or do you want it behind the stove and the sink? Or do you want your backsplash behind the entire kitchen, including your stove, sink, and any additional counter space. This is something only you can decide, and it may help to sketch your kitchen with the backsplash placed in different sections throughout. This way you can see exactly what it will look like before you begin.

    Some RVers decide to place a backsplash in their bathroom as well. Typically, this would be placed on the wall, between the mirror and the sink. If you decide to install a backsplash in your bathroom, you will need to decide if you want it above the sink only, or if you want it to wrap around the sides of the walls. Use the same method detailed above to help you decide.

    2. Decide on backsplash materials

    Once you have decided where to place your backsplash, it’s time to choose your materials. The main choices are deciding between a ceramic backsplash and a peel-and-stick backsplash. Many RVers go with peel-and-stick because it’s lightweight, easy to install & remove, and holds up well through travel. Still, it should be noted that not all types of peel-and-stick backsplashes fare well being near heat sources. If you choose to install a peel-and-stick backsplash, be sure to choose one with maximum heat resistance for best results and longevity.

    That being said, many RVers have also successfully installed ceramic backsplashes in their kitchens and bathrooms. While it is more work and maintenance, it is certainly possible to have a beautiful, ceramic tile backsplash in an RV, and it may even give your RV interior a homier overall feel.

    Once you have chosen your desired type of backsplash, it’s time to pick your choice of color and style. Subway tile is beautiful and classic, but there are also many more shapes, colors, and styles possible. Some companies make custom backsplash tiles in a myriad of shapes and colors, so really anything is possible. You will also need to select a matching grout color for ceramic tiles. Whatever you envision for your RV backsplash should be color-coordinated with the rest of your RV for best aesthetic results.

    3. Purchase materials

    Once you have decided what type of backsplash you want and where it will be placed, it’s time to measure your walls so that you know how much material to purchase. Measure the long side in its entirety, and then measure the height, starting under the cabinets and ending just above the countertop. Add a few extra inches to each side in case of errors – it’s always better to have more than you need than not enough.

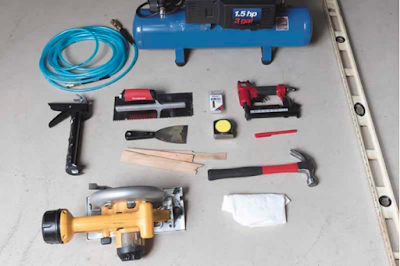
    If you’re going with a ceramic backsplash, you will need to purchase tiles, grout, and mortar, as well as a bucket for mixing, spacers, and tools for mixing and applying mortar and grout. If you are installing a peel-and-stick backsplash, you’ll just need to purchase the tiles and extra spray adhesive if you decide to use it.


    4. Prep the wall for backsplash placement

    Once you have everything you need, you will need to ensure that your wall is prepped before beginning the installation. All this means is that you need to ensure that the wall is flat so that the backsplash can sit correctly. If the wall is uneven or bumpy, the backsplash will have difficulty holding up over time. Fill any bumps or nicks in the all with putty and allow it to dry for twenty-four hours before sanding it down flat.

    Likewise, ensure that any wallpaper borders have been removed from the wall. This can be accomplished by using a tool, such as a scraper or a flathead screwdriver, to pull the border away from the wall. Once part of the wallpaper has been lifted, you can begin gently peeling the entire border away. This may take some effort, and you will want to move slowly to avoid tearing the border before it has been removed from the wall.

    Once your walls have been flattened and sanded down, it is finally time to begin installing your backsplash.

    5. Install backsplash

    The process of installing your backsplash will look different for those who decide to use peel-and-stick tiles, versus those who decide to use ceramic tiles. If you are using peel-and-stick, you will want to begin in the lower left corner and work your way across the bottom of the space where you are adding tiles. Spraying additional adhesive on the tiles before placing them may help them to hold up longer, but it is not entirely necessary. Place each block of tiles as close as possible to the tiles next to it. This will help the tiles to lock together for better function and aesthetic purposes. Once you have completed the installation of the bottom row, move on to the next row and continue on until the entire area has been tiled. Take measurements and make cuts for the windows, outlets, and anything else in the space precisely for best results.

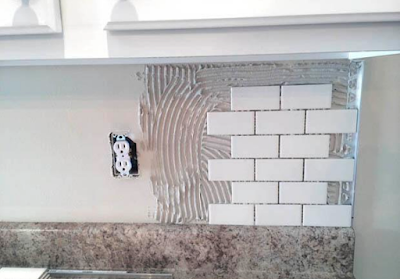
    If you are installing a ceramic backsplash, your process will be a bit lengthier and more labor-inducive. Most likely, your tiles will come in sections of pieces, and you should begin in the lower left corner. Before placing tiles, you will need to apply a layer or mortar to hold the tiles in place. Only mix small amounts of mortar at a time, as it dries very quickly. Follow the exact directions on the mortar packaging to ensure your mortar has the proper consistency.

    Apply a layer using a mortar application tool, then smooth out the mortar with a smoothing tool. Once the mortar is smooth, you may place your tiles. Apply mortar, smooth it, and place one section of tiles at a time. Place spacers in between the sections of tile for even positioning. Once you have finished one row, move on to the row above and then the row above that until you are finished.

    Make cuts for rounded edges, windows, outlets or anything else that is on the all is trickier with ceramic tile. You will need to rent or purchase a tile cutting tool for this part of the project. The stationary machine cutters are usually more accurate and effective then the handheld tile cutters. Mark the exact place to be cut with a sharpie and make cuts carefully and accurately for best results. Once your backsplash has been laid properly, you will need to allow it to dry for twenty-four hours before grouting.

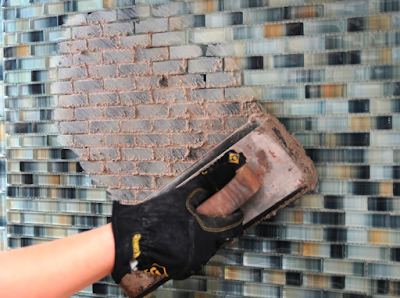
    Mix your grout the same way you mixed your mortar and spray grout sealant before applying grout with a smoothing tool in small sections. There will be a thin layer of grout on the tiles while you are applying it. This is okay and can be easily wiped off the grout after it has dried for an additional twenty-four hours.

    6. Let “rest” and enjoy!

    Your RV should remain stationary for at least a week after installing a new backsplash.This way, the tiles will have time to dry and set before they are taken up to seventy miles per hour down the road. Once your tiles have had time to dry, you are all set to move your RV if need be.

    Installing a backsplash in the kitchen and/or the bathroom of your RV makes a world of difference. With each additional detail, your RV will begin to look homier and more modern. Once your backsplash is installed, you are ready to begin the next round of renovation projects: updating window treatments.

    Have you added a backsplash to your RV kitchen or bathroom? How did it turn out? Feel free to share in the comments below!
  • RV Renovation: Flooring Swap

    RV Renovation: Flooring Swap

    Traveling in an RV is a fun experience that anyone of any age or background can enjoy. There’s nothing like road tripping with a kitchen, bathroom, bedroom, and more at your constant disposal, and more people than ever are hitting the road to see just what it’s all about. But what happens when you want to buy an RV, but you don’t care for the interior style? Your best solution is to take on some renovations.

    Renovating an RV interior is a challenging and time-consuming project, but it results in a finished product that you will love because you designed it yourself. Painting is typically the first project in remodeling an RV, and there are many steps to painting, as discussed in the two previous posts.

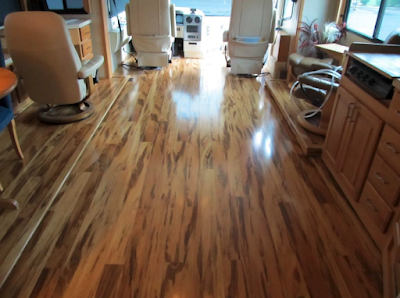
    After painting, you will want to replace your RV’s flooring next. This is another tricky yet satisfying project that yields fantastic results. Follow along with these seven basic steps for a fool-proof guide to laying new floors in your RV.

    1. Remove the old floor

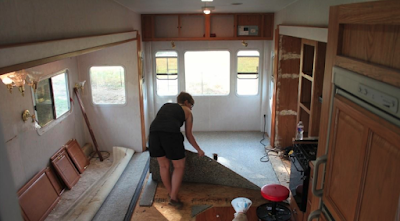
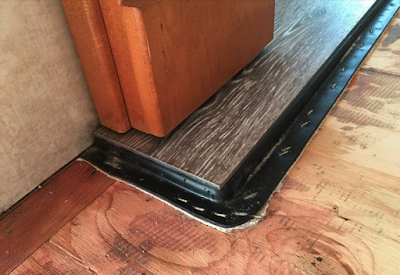
    Before you can even envision the new flooring in your RV, you will need to remove the old floor. Most RVs are carpeted, and if we’re being honest, removing the carpet can be a pain. First, you will need to pull the carpet away from the walls using pliers. Once the carpet is no longer sealed around the corners and edges of the room, you can begin to pry it up. You may need to cut the carpet in parts to remove it in several pieces. Beware of the many, many staples you will find beneath the carpet, as some of these will be sharp.

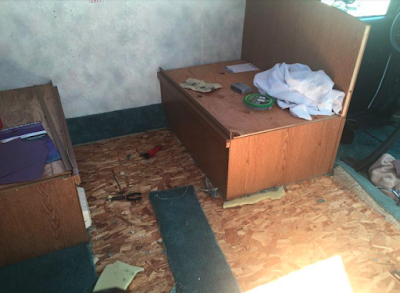
    Once the carpet is removed, you will need to remove all the staples that once held it in place. This is best done using a flathead screwdriver or needle nose pliers. Double check to ensure that all staples have been removed before moving on to the next step. Once the old carpeting is completely removed, you will be left with a plywood subfloor.

    2. Clean and prepare for the new flooring

    Removing the carpet makes a lot of mess, and you will want to clean up well before laying a new floor. Sweep up all the carpet particles and staple pieces, and vacuum up and dust and dirt particles that may be floating around.

    You will also need to move any furniture that is covering the floor, such as the couch, table dinette, and/or arm chairs. If you have a booth dinette, it is not necessary to replace the flooring under the benches. Simply move the table to another area when laying new flooring beneath it.

    Finally, be sure to fill any holes or imperfections in the sub-floor to ensure that the new floor has a flat surface to rest on. Sand down any bumps or nicks, and be sure to check over the whole floor to make sure you haven’t missed anything.

    2. Measure your RV’s square footage

    Next you will need to measure the square footage of your RV so that you know how much flooring to buy. Your measurements do not need to be perfect, but they should be close to avoid inaccuracies. Don’t forget to measure each individual room, including the main room, bathroom, bedroom, and/or cab area (if you are in a motorhome).

    3. Choose your new flooring

    The biggest choice in this whole process is selecting your new flooring. Your first decision must be between wood floors and carpet. Since RVs are typically used for messy camping trips, many renovators opt for hardwood floors, since these make for less mess and easier clean-up. It is also much simpler to lay your own hardwood flooring than it is to install your own new carpeting. If you do choose to go with carpeting, you may want to hire a professional to install it for you.

    Because you have to consider the overall weight of the RV, most people avoid laying real hardwood floors. However, wood-look laminate flooring is much lighter than real hardwood, and it tends to hold up very well in RVs. When choosing laminate flooring, you must then choose between peel-and-stick floors and click-and-lock floors.

    Peel-and-stick flooring simply involves peeling the backing off of adhesive pieces of flooring and pressing them onto the subfloor. The process is easy, and the results are great. However, sometimes these floors can shrink over time, and they can occasionally get caught in your slideouts when they are moving in and out.

    Click-and-lock flooring is a bit pricier than peel-and-stick, and the process for laying it is more involved. However, it is known for being higher quality and lasting longer. Each type of flooring has its pros and cons, so you will want to do your own research before making your final choice.

    Once you have narrowed down the flooring type you want, you can head to the hardware store to look at brand, colors, and samples. Be sure to pick a color that coordinates with the paint and color scheme, and choose a high quality brand for best results. Consider buying a single piece from your favorite types of flooring and bringing it back to the RV to see how it looks in your space.

    Once you have made your final choice, be sure to purchase more flooring than you need to allow for inaccuracies in measuring and potential mistakes.

    5. Plan for the slide

    For many people, laying new floor in their RV’s slideouts is the most intimidating part of this whole process. However, laying floors on your slideouts is really no different than laying it anywhere else in your RV. Once there is no furniture or carpeting in the way, you will just need to ensure you have a flat surface, and that the flooring will not extend past the end caps on the slideout. Once you have planned for your slides, you are finally ready to begin.

    6. Lay floor

    With all the preparation out of the way, you are finally ready to lay your new floors. You will want to watch plenty of Youtube videos before beginning this step so that you can see exactly how it’s done. If you are using peel-and-stick flooring, you may want to consider spraying extra adhesive onto each piece for better results.

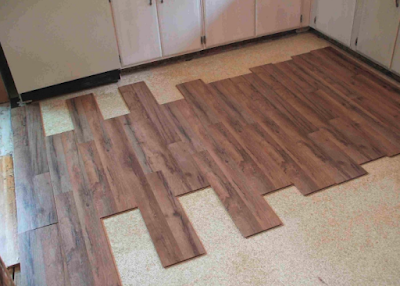
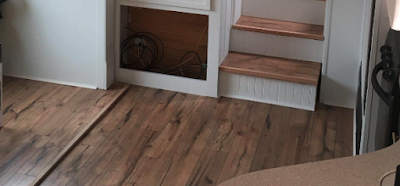
    No matter which type of flooring you use, (peel-and-stick or click-and-lock), be sure to pick a corner to start in, and work your way around the room accordingly. Work in a cohesive pattern to avoid mistakes, and stagger the floors for the best overall look. When making cuts, use exact measurements and ensure the piece will stick before applying adhesive or locking it into place. Consider using transitions or thresholds between rooms for the smoothest overall look.

    Do not rush this step. Take your time to ensure that the floors turn out as best as they can. This process may take a few days to complete.

    7. Let the floors cure

    Once you have laid new floors, you must give them a few days to rest without walking over them. This will ensure that all adhesive properly sticks and that the new floor has time to adjust to the subfloor. Once a few days have passed, you can safely walk across the new floors and enjoy your handiwork.

    Laying new flooring is fairly simple and makes a world of difference in an RV and will increase value if you are looking to sell. Replacing the carpet is also an especially good idea in older RVs, where the same carpet has been laid for many years. Laminate flooring is great for those who travel with pets and small children and is sure to last for years of use when installed properly. With the flooring replaced, you are all set to begin the next task in your renovation project: installing new trim and moulding throughout.

    Have you replaced the flooring in your RV? What steps did you follow? Feel free to drop a comment below!

  • FMCA Tech Tip: Purging RV Propane Containers

    FMCA Tech Tip: Purging RV Propane Containers

    When one or more of a motorhome’s gas-burning appliances exhibit strange, random, or difficult-to-diagnose problems, it may signal the need to purge the propane container. Brand-new propane containers also must be purged properly before being filled for the first time. So what is purging? Does it apply to all RV propane containers? How do you know if your container needs such a service? And who can do it?

    For answers, read this how-to guide from FMCA and the “RV Doctor” Gary Bunzer:

    About Propane Containers

    Before answering those questions, let’s define the term “propane container.” Most motorhomes are equipped with horizontal propane containers bolted to the frame of the coach. Typical motorhome propane containers are regulated by the American Society of Mechanical Engineers (ASME), as documented in its Boiler and Pressure Vessel Code. A horizontal ASME container is called a tank. The capacity of an ASME tank usually is expressed in gallons.

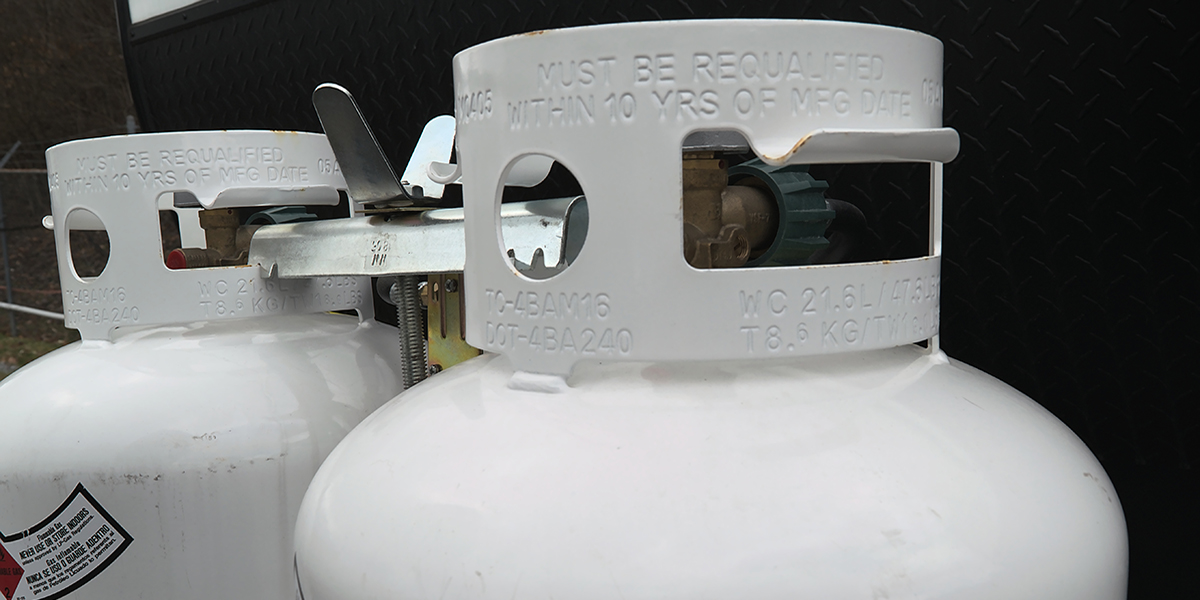
    Some smaller Type C coaches and older motorhomes may be outfitted with upright propane containers installed in a side compartment; it’s the same type of container usually found on towable RVs or in home gas barbecue grills. Such containers (which can be vertical or horizontal) are called cylinders, and are governed by the U.S. Department of Transportation (DOT) within the agency’s Hazardous Materials Regulations. Cylinders destined for Canadian provinces are regulated by Transport Canada (TC). The capacity of a DOT/TC cylinder typically is measured in liquid pounds.

    So, generally speaking, an ASME tank is bolted to the coach, while a DOT cylinder is portable and replaceable. Both types of containers require purging at some point.

    Why Purge?

    New propane containers are hydrostatically tested for leaks before shipment. A container that is destined for an RV, whether it’s a tank or a cylinder, usually is filled with compressed air (or sometimes another inert gas) when it is shipped from the supplier. Air contains moisture and other contaminants. Purging removes the air, moisture, and contaminants; if the purge process is not performed before the container is filled with propane the first time, combustion problems or delivery line pressure irregularities may develop later.

    Unfortunately, most new motorhome buyers don’t know whether their propane container was properly purged prior to that first filling, since a new motorhome usually is delivered to the owner with a full (or nearly full) container of fuel. I suggest asking that question during the walk-through or before officially taking delivery. Ask to see the pre-delivery inspection (PDI) form for validation. It’s in the best interest of both the RV dealer and the buyer to have a proper purging verified in writing before the retail delivery of an RV.

    Purging applies to older propane containers as well. In fact, any time a container has been opened to the atmosphere, for any reason, a new purging must take place before refilling with fresh fuel. Say, for instance, the internal float assembly fails, or the shut-off valve leaks and that component needs to be replaced; the tank must be purged after the replacement, since air has been allowed to enter. And that air contains moisture and perhaps other contaminants.

    The Moisture Problem

    Even a little water lying at the bottom of a propane container can be a problem. Any moisture present from the container to the inlet of the pressure regulator can cause the regulator to freeze up. There are two types of regulator freeze-up, both with negative outcomes.

    One type of regulator freeze-up occurs as the fuel in the container becomes vaporized on its pressurized path to the regulator inlet. The pressure regulator has individual sections where the fluctuating container pressure is reduced in two steps to the delivery line pressure required by the appliances. The propane vapor must pass through small orifices in these two stages in order for the pressure to be reduced sequentially and smoothly. Propane’s “boiling point” is minus 44 degrees Fahrenheit. Below that, it exists in liquid form; above that, it vaporizes. So, any remnant of water will freeze in those small internal orifices and block the flow of propane vapor through the regulator.

    The second type of regulator freeze-up happens externally during the winter months when mud or water or slush splashes up from the roadway, freezes, and blocks the second-stage atmospheric vent opening on the regulator. If the diaphragm inside the regulator cannot breathe, it cannot regulate, and it simply locks up. That’s why it’s important for the vent portion to be positioned downward and the regulator to be covered at all times during operation.

    The result of either type of regulator freeze-up is no propane flow, and the appliances will shut down just as though the container were out of fuel.

    When To Purge

    A container that has been in use for a while may need to be purged if more than one appliance has operational issues. For instance, the furnace doesn’t ignite right away; the water heater burner sputters; the cooktop burner flame lifts off the burner; or a burner flame is abnormally large or small, or more orange than blue in color. Any operational issue with an appliance is a cause for concern and should be investigated. It simply may be an out-of-adjustment regulator or an appliance in need of cleaning, but it could also be caused by moisture inside the container.

    Who To Call

    Certified and master certified RV service technicians are trained to properly purge a propane container. As an alternative, most propane retailers also can do the procedure.

    As mentioned, new tanks and cylinders typically are filled with air when shipped, but containers already in service will contain propane. In the case of the latter, before purging, it will be necessary to remove or burn off the container’s remaining propane.

    What Owners Can Do

    Since safety is paramount, FMCA recommends an annual test of the pressure regulator, as well as the entire propane gas distribution system, by a certified RV service technician. The condition of the container also should be checked. In addition, the RV owner should test the propane leak detector periodically.

    If the propane’s odorant is ever detected, immediately turn off the container’s service valve and schedule the RV for tests.

    And RVers should always keep a close eye on how well the RV’s appliances are operating. This can be your first sign of a problem.

    FMCA RV Club brings you this monthly tip to Enhance Your RV Lifestyle. FMCA delivers RV know-how to its members. Join today and save $10 — a special offer for RV Trader readers. Learn more at https://join.fmca.com/trader18/.

    This information is for educational purposes. FMCA shall not be responsible nor retain liability for RVer’s use of the provided information. Prior to making any RV service decision, you are advised to consult with an RV professional.

  • FMCA Tech Tip: Winterizing Your RV: Air vs. Antifreeze

    FMCA Tech Tip: Winterizing Your RV: Air vs. Antifreeze

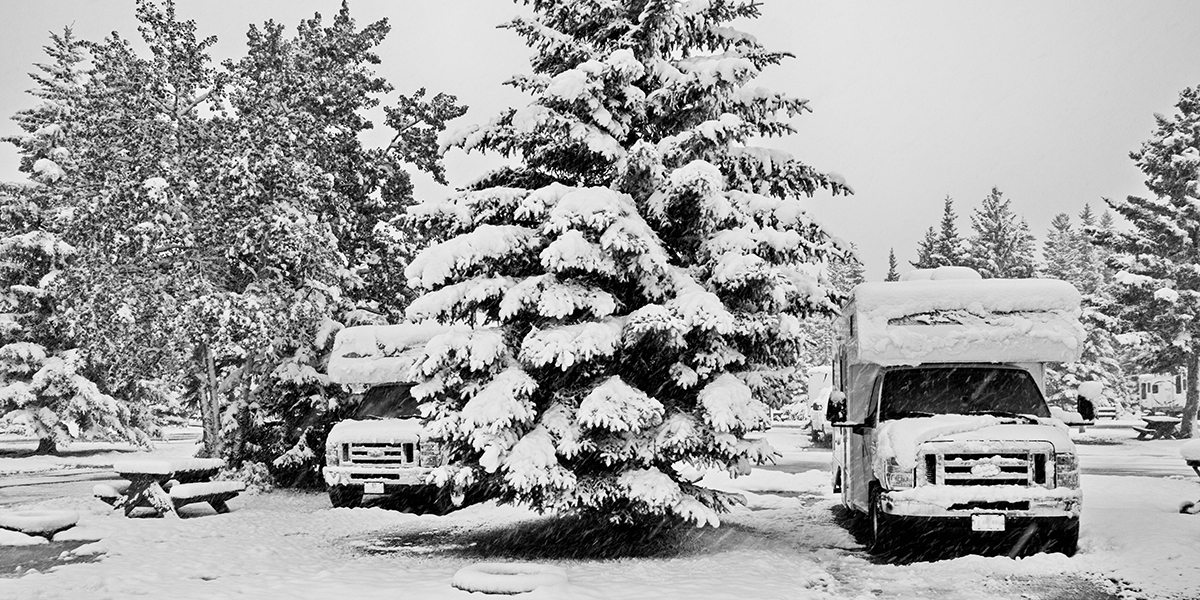
    Unless you’re one of the lucky RVers heading south this time of year, fall’s cooler weather means it’s almost time to winterize your RV. The how-to of winterizing can be a hot debate (pun intended). FMCA has tips to help you decide the right option for your RV.

    About Winterizing

    Winterizing deals primarily with the plumbing system and protecting your RV from freeze damage. All water must be removed from holding tanks, water lines, and plumbing fixtures. Two methods are performed to winterize RV plumbing: using air pressure to blow moisture out of the system or pumping antifreeze through the water lines.

    Which should you use? The answer depends on where you live and the complexity of your RV’s plumbing system.

    Air

    Air is easy to use; just connect an air compressor to the water hose and blow everything out. In theory, the system will be dry. Plus, air is free, so it eliminates the need to buy bottles of antifreeze. Air pushes most of the water out, but residual water can remain in water lines’ low spots where it can freeze, expand, and cause damage.

    In a simple RV with minimal plumbing lines, using only air may not be an issue. But if you live in a place with long, cold winters, using air may not be enough to protect your RV from freeze damage.

    Antifreeze

    RV professionals consider antifreeze to be the best method for preventing freeze damage. Keep in mind that it differs from automotive antifreeze. RV antifreeze is nontoxic and is safe to use in fresh-water systems. It freezes but does not solidify. Instead, it turns to slush, which will not expand to crack fittings or water lines.

    One drawback to antifreeze is that it can be messy and requires buying a few gallons every season. It also can cause water from treated lines to taste bitter.

    More Resources

    For detailed, step-by-step instructions on the winterizing process, click here.

    Join the air vs. antifreeze debate. Check out this video from “RV Doctor” Gary Bunzer.

    FMCA RV Club brings you this monthly tip to Enhance Your RV Lifestyle. FMCA delivers RV know-how to its members. Join today and save $10 — a special offer for RV Trader readers. Learn more at https://join.fmca.com/trader18/.

    This information is for educational purposes. FMCA shall not be responsible nor retain liability for RVer’s use of the provided information. Prior to making any RV service decision, you are advised to consult with an RV professional.

  • FMCA Tech Tip: Disaster-Proof Your RV for Hurricane Season and Beyond

    FMCA Tech Tip: Disaster-Proof Your RV for Hurricane Season and Beyond

    Are you prepared for an emergency while RVing? Unfortunately, September’s history as an active month for hurricanes reminds RVers of the importance of being prepared. Read FMCA’s tips to prepare yourself for emergencies and natural disasters while RVing.

    Evacuation Safety

    Prepare two escape plans. One is for abandoning the RV when you need to get yourself and occupants out safely. The other is a plan for packing/driving the RV away when time allows you to evacuate ahead of a wildfire, hurricane, or other threatening situation.

    Pro-Tip: FMCA’s blog offers resources for evacuating from a wildfire.

    Escape Plan #1

    In the first instance, have a plan for escaping the RV in a variety of scenarios (galley fire, engine fire, RV lying on its side or roof). What is the quickest way to escape? How will you make sure all occupants are accounted for? Will one specific person be in charge of helping pets get to safety?

    In boating, a “ditch bag” is kept handy to grab just before one abandons ship into the water or a life raft. Prep your own “ditch bag” to grab in case of RV disaster.

    Pro-Tip: In your grab-and-go bag, consider including copies of important documents such as insurance policies, driver’s licenses, phone numbers, and credit cards.

    Escape Plan #2

    In the second instance, consider how you would need to evacuate the RV from a location.

    • A few points to think about as you form your plan:
    • How would you handle removing the electric, water, and sewer hookups?
    • If you drive a motorhome, consider if you’d have time to connect the towed vehicle.
    • How long does it take you to retract the awning(s), slide-out(s), and leveling jacks for a quick getaway?
    • If you or your driving partner is incapacitated, can the other person safely pack up the RV and drive you to safety?
    • Do you have a reliable AM/FM radio or weather radio to stay informed of the latest weather or road condition updates? Remember that you may lose internet connectivity in an emergency or extreme weather situation.
    • Do you have a Plan B for dealing with unexpected delays such as a stuck slide-out or sticky awning?

    Consider making an “evacuation checklist.” Decide what items absolutely must be taken care of before you can safely move the RV and what can be eliminated, sped up, or modified.

    Pro-Tip: On your evacuation checklist, list a family member or friend that you could call to let them know your emergency evacuation plans. This person can then alert other loved ones that you have safely evacuated.

    We hope you never find yourself in an emergency situation while RVing. You can’t predict the future, but you can help prepare yourself and your family by thinking about “What if?” scenarios.

    FMCA RV Club brings you this monthly tip to Enhance Your RV Lifestyle. FMCA delivers RV know-how to its members. Join today and save $10 — a special offer for RV Trader readers. Learn more at https://join.fmca.com/trader18.

    This information is for educational purposes. FMCA shall not be responsible nor retain liability for RVer’s use of the provided information. Prior to making any RV service decision, you are advised to consult with an RV professional.
  • FMCA Tech Tip: Replacing Your RV’s Air Conditioner

    FMCA Tech Tip: Replacing Your RV’s Air Conditioner

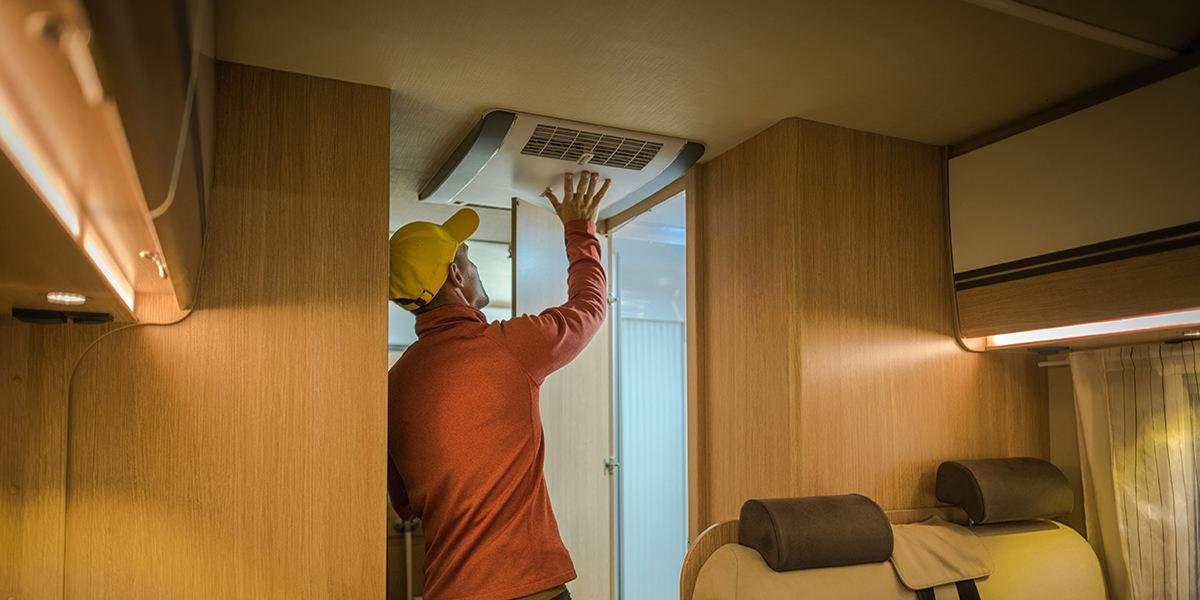
    Your RV’s air conditioner(s) lead a tough life. On the roof, they are subjected to the hottest heat that the sun can dish out. They also can be damaged by tree branches when the RV is maneuvered into a tight campsite, and they just love to pick up moisture that can lead to rust. Then add in the constant vibration and pounding from the road…eek!

    Like any component in an RV, especially those with movable parts, air conditioners don’t live forever. Eventually, you will have a failure. Minor items, such as starting capacitors, can be replaced, but the A/C unit itself is generally not serviceable.

    Fortunately, air conditioners aren’t all that hard to replace. You’ll need a few basic tools, some reflective foil tape, and some caulk. The hardest part is getting the new unit up on the roof.

    Background

    Air conditioners are designed to fit a 14-inch-square hole in the roof. That is the industry’s standard roof vent size, which makes replacement easy. Some units drop the air straight through the roof and ceiling directly into the RV’s interior; in others, air passes through ducts before entering the RV’s living areas.

    However the air is ducted, both system types use the same 14-inch-square hole in the roof, and the air conditioner is secured with four mounting screws. Power generally is run through the ceiling to the opening.

    Removing the Old RV A/C Unit

    • First, switch off the circuit breaker that supplies the 120-volt-AC power to the air conditioner so that it is safe to perform work. Set the thermostat to the “off” position, too.
    • Next, remove the existing unit, starting with the fiberglass cover. Remove the four screws that hold the cover in place.
    • In most RV air conditioners, electrical connections and components are inside the cool air plenum to help keep them cool as well. To disconnect these, remove the sheet-metal cover from the plenum. The plenum joints may be taped; if so, use a utility knife to cut the tape at the joints.
    • Disconnect the 120-volt-AC wires. Most likely, you will see the entire control box connected to the thermostat using two wing nuts. Remove the two wing nuts, and put the control box down into the plenum to get it out of the way. There may also be a temperature sensor probe inserted into the evaporator coil that can be removed.
    • Some units have a diffuser in the ceiling. The diffuser must be removed from the interior ceiling, and then the four bolts that hold the air conditioner to the roof must be removed. If there is no diffuser and your RV has a ducted ceiling instead, you will likely see screws installed from the A/C unit and tapped into the steel tube roof trusses.
    • Scrape off any old caulk from the screws, remove the screws, and slide the old A/C unit out of the way.
    • Once the old unit is removed, thoroughly clean the rooftop area.

    Installing the New RV A/C Unit

    • Once the new unit is up on the roof, maneuver it into position. This may require two people to ensure proper placement of the unit on the gasket.
    • Next, cut the foil tape and remove the screws from the new unit. This allows the sheet-metal cover to be removed to provide access to the front mounting holes, as well as the wiring.
    • On most new units, there is a foam gasket designed to compress and seal the area around the access hole so that water cannot enter the RV’s interior. Set the new unit in place and mark the location of the existing mounting holes; to match them, drill into the new air conditioner’s baseplate. (On a design without ducts, that would not be necessary, because the four bolts run right through the access hole in the roof.)
    • To finish the mount, install the four screws, taking care not to overtighten and distort the base. (Overtightening can lead to warping, which can cause leaking, excessive vibration, and fan and/or compressor noise.)
    • Apply a dab of caulk over each of the four mounting screw heads.
    • Retrieve the control box from the access hole in the roof plenum, reconnect the wiring, and place the temperature probe into the evaporator core.
    • Attach the control box to the sheet-metal cover with the two wing nuts, and reinstall the cover. After all of the sheet-metal screws are in place, cover the seams with a new roll of foil tape.
    • Before reinstalling the cover, switch the circuit breaker back on and test the unit.

    FMCA RV Club brings you this monthly tip to Enhance Your RV Lifestyle. FMCA delivers RV know-how to its members. Join today for just $50 — a savings of $10 just for RV Trader readers. Learn more at https://join.fmca.com/trader18.

    This information is for educational purposes. FMCA shall not be responsible nor retain liability for RVer’s use of the provided information. Prior to making any RV service decision, you are advised to consult with an RV professional.
  • FMCA Tech Tip: Guide to Motorhome Lubricants

    FMCA Tech Tip: Guide to Motorhome Lubricants

    Motorhomes require periodic maintenance to stay in good working order. Engine oil changes are the most common procedure, but axles, the transmission, wheel bearings, and other components also must be serviced. No oil or lubricant is one-size-fits-all, so it’s important to make the right choice for each component according to the chassis manufacturer’s specifications.

    Lubricants are designated with American Petroleum Institute (API) or military (MIL) category numbers that identify their suitability for various applications. To choose the proper lubricant, consult your motorhome’s owners manual for the prescribed API service level, and then match the lubricant’s viscosity and rating to your vehicle’s operating environment.

    Ratings

    Two ratings apply to lubricants — viscosity and quality.

    Viscosity

    Viscosity is another term for thickness. An engine is designed to utilize a specific viscosity oil for a given set of operating conditions. That’s why the Society of Automotive Engineers (SAE) determines viscosity grades according to a standardized numerical rating. Always check the owners manual to determine the proper engine oil viscosity for your vehicle. The larger the number, the heavier the oil. For example, an SAE 40 oil is heavier than an SAE 30 oil.

    Viscosity also denotes the ability of the oil to flow at a given temperature. As oil heats up, it thins, flows faster, and doesn’t provide the same level of lubrication as a thicker oil. If the oil is too thick, it won’t flow fast enough to lubricate critical components. SAE ratings reflect the ability of oil to flow at 210 degrees Fahrenheit. The ratings can be useful for determining how an oil will perform in summer, but they don’t take into account the low-temperature performance of the oil in winter. So, a second test is performed at 0 degrees Fahrenheit to assess oils designed for winter use and to designate a “W” rating. For example, 10W oil is thinner than 20W oil, but both are designed for winter use. The thinner 10W oil will flow better in colder temperatures.

    Most engine wear and tear occurs during startup when the motor is turning over but everything is cold and the pistons haven’t yet expanded to their operating tolerances. Oil begins to flow, but by the time it reaches all critical areas, the engine has been running for a few seconds. A lighter-weight oil brings the oil pressure up much faster than a thicker oil. But, once the engine is working under a heavy load, the oil becomes too thin to provide adequate lubrication. So, in the case of a single-viscosity oil, it is better to opt for a heavy oil and live with the startup wear than to use a lighter oil and pay the penalty when the engine is working really hard.

    Multiviscosity oils eliminate that dilemma. A multiviscosity oil has two ratings. For example, a 10W-30 oil provides the cold-temperature performance of a 10W winter oil, yet it retains the high-temperature performance of an SAE 30 summer oil once the engine reaches its operating temperature. This offers the best of both worlds and does a better job of protecting your engine at both startup and when under load.

    Quality

    Oil quality is determined by its chemical makeup and its imbedded additives. Base oils account for about 85 to 90 percent of the formulation. The remainder consists of additives that provide full protection, including antioxidants, viscosity modifiers, dispersants, detergents, antiwear agents, rust and corrosion inhibitors, antifoam agents, and a host of others. API established its rating system to identify the quality of every oil.

    Both API and SAE ratings are marked on every container. Consult the vehicle’s owners manual for the minimum API rating specified for your engine. You always can exceed the API ratings and use a better grade oil, but never drop below the minimum API rating.

    Check The Manual

    A proper maintenance cycle for your motorhome revolves around following the recommended service schedule and matching every component with the correct lubricant. The owners manual specifies the minimum requirements, but keep in mind that exceeding those specs with a higher-quality lubricant generally will yield greater longevity. Taking proper care of your coach will save you money in the long run and greatly improve the odds of trouble-free operation.

    FMCA RV Club brings you this monthly tip to Enhance Your RV Lifestyle. FMCA delivers RV know-how to its members. Join today for just $50 — a savings of $10 just for RV Trader readers. Learn more at https://join.fmca.com/trader18.

    This information is for educational purposes. FMCA shall not be responsible nor retain liability for RVer’s use of the provided information. Prior to making any RV service decision, you are advised to consult with an RV professional.

  • FMCA Tech Tip: What Do I Do If My RV’s Tire Blows Out?

    FMCA Tech Tip: What Do I Do If My RV’s Tire Blows Out?

    A tire blowout is the worst fear of many RVers. What would you do if you found yourself in this situation? Read FMCA’s tips to stay safe on the road.

    Understanding Tire Failure

    According to Goodyear engineers, obstructions (nails, sharp objects, curbing) are the major causes of tire damage. However, many tire failures are caused by progressive damage.

    Each mile your tire rolls down the highway overloaded or underinflated, it may be suffering internal damage that’s not apparent during a casual tire inspection. The day that the tire fails, you may be traveling empty or not moving at all. The tire simply will reach the point where the damage has exceeded its design limits. It may blow out or shed its tread.

    Tires do not heal themselves, so if they are damaged due to underinflation, inflating them to the correct pressure may not prevent eventual failure.

    What To Do If Your Tires Fail

    If you experience a tire blowout, you better have your seat belt on because it can be a wild and bumpy ride.

    Your natural reaction is to apply the brakes, but don’t do it! Michelin Tire Company recommends briefly pushing the accelerator to the floor (if traffic conditions allow) to regain momentum in the direction you are going and then gently taking your foot off the accelerator. Hold the steering wheel firmly and regain control. If you are on an expressway, move into the far right lane as quickly and safely as possible. Allow your vehicle to slow, without applying the brakes, to 10 to 15 MPH before pulling off the road surface.

    Watch this video from Michelin, How To Handle An RV Tire Blowout.

    And — remember — the #1 tip if you find yourself in the middle of a tire blowout is to remain calm. You can’t predict the future, but you CAN prepare yourself for potential emergencies. Knowledge is power.

    FMCA RV Club brings you this monthly tip to Enhance Your RV Lifestyle. FMCA delivers RV know-how to its members. Join today for just $50 — a savings of $10 just for RV Trader readers. Learn more at https://join.fmca.com/trader18/.

    This information is for educational purposes. FMCA shall not be responsible nor retain liability for RVer’s use of the provided information. Prior to making any RV service decision, you are advised to consult with an RV professional.