Category: RV Advice

  • Alright! I’ll Empty the Black Tank

    Alright! I’ll Empty the Black Tank

    If you’ve spent any time RVing, you’ve probably discovered that not all parts of the adventure are scenic sunsets and s’mores by the campfire. One unavoidable task that every RVer has to face is emptying the black tank. And necessity of that task pushes forward the uncomfortable question: Who is going to empty the black tank? In my marriage, like many other RV families we’ve met on the road, this fun assignment is taken over by one person. And that person is me. I have offered to be the bearer of black news in my marriage, and it gives me a few points every time. Happy poopsy-free wife, happy life.

    While it may not be the highlight of your trip, mastering this job is essential to keeping your home on wheels running smoothly. (And trust us, it’s a whole lot easier with the right preparation and tools.) With a little know-how, you’ll soon have this process down to a science, leaving more time for the parts of RV life you love.

    Ready to dive in? Let’s get started!


    Step 1: Gather the Right Tools (They Make All the Difference)

    When it comes to emptying your black tank, preparation is key. Having the right tools on hand not only makes the process more efficient but also keeps things clean and—most importantly—minimizes unpleasant surprises. Here’s a checklist of what you’ll need:

    • Sewer Hose and Fittings. A durable, flexible sewer hose, often affectionately called the “stinky slinky,” ensures a secure connection between your RV and the dump station.
    • Disposable Gloves. These are non-negotiable. Protect your hands with a thick, disposable pair for each dump session.
    • Clear Hose Extension.While it’s not the prettiest part of the process, a clear extension lets you see when the tank is completely flushed.
    • Sewer Hose Support. Use a support to create a smooth slope for the hose, helping gravity do the work and preventing any unpleasant backups.


    Pro Tip: Store all sewer-related tools in a separate, labeled bin. This ensures they stay away from other camping gear, preventing contamination and making cleanup quick and easy.


    Step 2: Position Your RV for Success (Double-Checking Matters)

    Whether you’re at a dump station or a full-hookup campsite, how you position your RV makes a difference. You’ll want to park close enough that your sewer hose can reach the dump port comfortably without stretching. Take a few extra moments to ensure the ground is level and that the sewer connection is secure.

    When setting up, always double-check that you’ve attached the hose to the correct outlet. It sounds obvious, but on some rigs, the gray and black tank handles look identical.  And you don’t want any mishaps — trust us on this one!

    Pro Tip: Always empty the black tank first before opening the gray tank valve. This way, the gray water helps flush out the hose, leaving it cleaner and reducing odors.


    Step 3: Hook Up and Empty the Black Tank (Slow and Steady Wins the Race)

    Now comes the main event. Start by putting on your gloves and connecting your sewer hose to the RV’s black tank outlet. Secure the other end at the dump station, and make sure everything is locked tight to avoid leaks. Slowly open the black tank valve—don’t rush it. Let the contents drain completely, and give it a few extra moments to ensure everything flows out.

    If your RV has a built-in black tank flush, connect a dedicated hose to the flush inlet. Running fresh water through the tank helps clear out any stubborn waste or toilet paper that might linger. No built-in flush? No problem—a portable rinse wand or backflow connector like this will do the trick just fine.

    Pro Tip: Make sure that your black tank valve is closed and add a little extra water from your RV toilet foot-flush – I tend to add just a few seconds – so that what is inevitably left over in the tank doesn’t completely dry and get worse.


    Step 4: Flush the Gray Tank and Wrap It Up (You’ve Done the Dirty Work)

    Once the black tank is empty and closed, it’s time to open the gray tank valve. The soapy water from your sinks and shower will flush out any residue in the sewer hose, leaving it cleaner and fresher. This step also makes disconnecting the hose far less messy.

    After the tanks are empty, give your sewer hose a quick rinse — many dump stations have a non-potable water spigot for this purpose. Once everything is clean, disconnect the hose, cap the outlets, and store everything neatly in your designated bin.

    Pro Tip: Perform one final dump and rinse at the end of each trip if possible. This ensures your tanks stay clean during storage and prevents buildup that could lead to clogs or odors later on.


    Step 5: Use Tank Treatments to Keep Things Fresh (Say Goodbye to Odors)

    To keep your black tank smelling fresh and functioning properly, it’s a good idea to use an RV-specific tank treatment. These treatments help break down waste and prevent odors from becoming an issue, especially during warmer months. Drop-in pods are a popular option because they’re easy to use—just toss one into the toilet, and you’re good to go.

    If you’re staying at a full-hookup campsite, resist the urge to leave the black tank valve open all the time. Keeping the valve closed allows the tank to fill, which helps waste break down more effectively and prevents unpleasant buildup known as the “pyramid of doom.”

    Pro Tip: Always keep your drinking water hose and black tank rinse hose separate — cross-contamination is the last thing you want on an RV trip!


    Avoiding Common Mistakes (Because We’ve All Been There)

    1. Forgetting Gloves. Even if you think you’re quick, wear them. You’ll thank yourself later.
    2. Skipping the Tank Rinse. It only takes a few extra minutes and will save you headaches in the long run.
    3. Leaving the Black Tank Valve Open at All Times. This can lead to waste buildup, causing clogs and foul odors.
    4. Not Checking Connections. A loose fitting can turn into a big mess fast—double-check everything before opening valves.


    Wrap-Up: Embrace the Process and Enjoy the Journey

    Emptying the black tank may not be the highlight of your RV trip, but it’s a necessary part of the lifestyle. Once you’ve mastered the process, it becomes just another routine task, like setting up camp or cooking dinner outdoors. Plus, knowing you have clean tanks means less stress and more time to focus on the adventures that lie ahead. With the right tools, a little patience, and some practice, you’ll be able to handle this job with confidence. And, who knows? You might even become the go-to tank expert in your campground! (If that’s something you actually like).

    Happy RVing, and may your tanks always flow smoothly! Also, if you’d like a little video tutorial walking you through the process step by step, watch this.

  • Some Not-So-Obvious RV Energy Savers

    Some Not-So-Obvious RV Energy Savers

    Like many RVers, when we chose full-time RVing, we did so to live more sustainably. For us, it made just made sense from multiple perspectives —  energy, financial, and environmental. Now, after traveling for over 12 years, we’ve learned a lot. Just like we hoped, living smaller allows us to save a ton of energy and save money on utilities. But we’re way better at it now than we were at the start. A big reason? Some not-so-obvious RV energy savers.

    These RV energy savers don’t just work for us. They’ll apply to any-sized rig. And they are especially useful if you plan to camp or boondock off-grid — and don’t want to haul around a noisy gas generator. Best of all, they’re not some big selling point of what to buy. These energy savers are a lot more about what to do.


    Basic RV Energy Savers for Newbies

    Let’s start with some basic off-grid energy savers. If you’re an experienced RVer, you’re likely tracking these already. But for RV newbies, these RV energy savers can be instant game changers.

    • Opt for 12-Volt Power. Use 12-volt-DC instead of 120-volt-AC appliances whenever possible. Quite simply, 12-volt will run directly off your battery without needing to power up the inverter.  
    • Switch Off the Inverter. Turn off your inverter when not running 120-volt-AC appliances. Install an inverter toggle switch next to the door as a visual reminder.
    • Cut Off Phantom Power. Turn off and unplug appliances that draw phantom power. Water pumps and water heaters are notorious energy suckers. Test appliances with a “kill a watt” meter to know what is the biggest draw.
    • Find Low or No Wattage Alternatives. Avoid using high wattage appliances when off-grid, especially if they heat or cool. Use a pan with a lid to reheat food, griddle to toast bread, and French press/kettle for coffee. 
    • Cook Outside. Take cooking to the campfire – it’s both fun and will save energy!
    • Minimize Screen Time. Let nature fill your soul instead of screen time — enjoy a star filled sky or campfire.
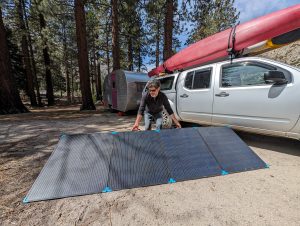
    • Put the Sun to Work. Use solar power combined with a DC to DC charger to keep your RV batteries topped off. Learn how to design an RV solar-powered system to meet your energy needs. 
    • Charge While the Going Is Hot. When your solar RV battery bank is fully charged and the sun is still shining, plug in all of your electronics (e.g., laptops, phones, tablets, cameras, headlamps, etc.) and store all of that extra solar energy!


    Seasonal RV Energy Savers

    Stay Warm in Winter 

    Using propane rather than electricity to heat your rig is more efficient. As full-time RVers, we go through about six standard, 20-pound tanks per year. (Around $150 for both cooking and heating annually.) While we like to head to warmer climates for the winter, that’s not always an option. Here are a few tips:

    • Choose a sunny campsite for some powerful, passive heating.
    • Keep the heat in! RVs lose much of their heat through windows, doors, as well as the floor. Cold winter air flowing underneath your RV can make the floor feel like a freezer! Use AirSkirts RV Insulation underneath to block that cold air flow and place rugs in key areas where you sit or stand. Also, insulate windows with shades or covers, and insulate around any gaps in the door.
    • Heat yourself from the inside. Indoor exercises, cozy sweaters, down booties, a warm cup of tea, and your favorite blanket – even a low-wattage heated throw — all help. 
    • If skiing and snowboarding are not your thing, snowshoeing will warm you up quickly and help you enjoy the season outdoors. Traction devices on your hiking boots will also help you get around safely. 
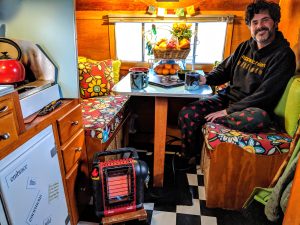
    • RV heaters are notoriously loud and inefficient, while Mr. Heater Propane Buddy is silent and can be used to heat a specific room. 
    • Use a low-wattage mattress warmer plus a down comforter for those really cold nights.


    Stay Cooler in the Summer 

    While we typically head north, coastal, and up in elevation during the summer to stay cool, avoid humidity, and travel without the need for air conditioning, we occasionally spend time in (or traveling through) some very warm areas. These are a few tips to stay cooler:

    • Choose a shaded campsite for some natural, passive cooling.
    • Close RV shades and cover windows when the full sun is pouring in to avoid a “greenhouse effect.”
    • Cook outside with a propane stove or grill so you don’t heat up your RV. Eat easy, cool meals that don’t require much cooking.
    • Enjoy a natural breeze outside and stay in the shade as much as possible. If inside, keep air flowing with small personal fans and a ceiling vent fan to draw warm air out.
    • Get out on the water in a kayak, go for a swim, or put your chairs half way in the water.
    • Cool yourself from the inside out by staying well hydrated. 
    • At night, use a ceiling vent fan, blowing out, and open only one window by the bed — just one — to concentrate the air flow over the sleeping area.


    Saving energy in your RV will make your travels more affordable and enjoyable, no matter what the season!

  • 5 Ways to Make a Wow-Worthy RV

    5 Ways to Make a Wow-Worthy RV

    There’s something about stepping into an RV that feels like you’ve opened the door to adventure – literally and figuratively – as that door, once secured behind you, can whisk you away to some of the most memorable experiences of your life. Trust me, I know. After six years of RVing, you would think that my wife and I would be ready to hand in our keys, but we know that the open road and RV travel will always be in our blood.

    But what if your RV could be more than just a means to travel – what if it could be a showstopper and head turning event unto itself? How do you actually wow everyone who steps inside (or catches a glimpse from the outside)? Whether you’re looking to enhance the interior for your own comfort or want to turn heads at the campground, we’ve got five great ways to transform your RV into a jaw-dropping, wow-worthy home on wheels. Let’s get started!

    1. Upgrade Your Flooring

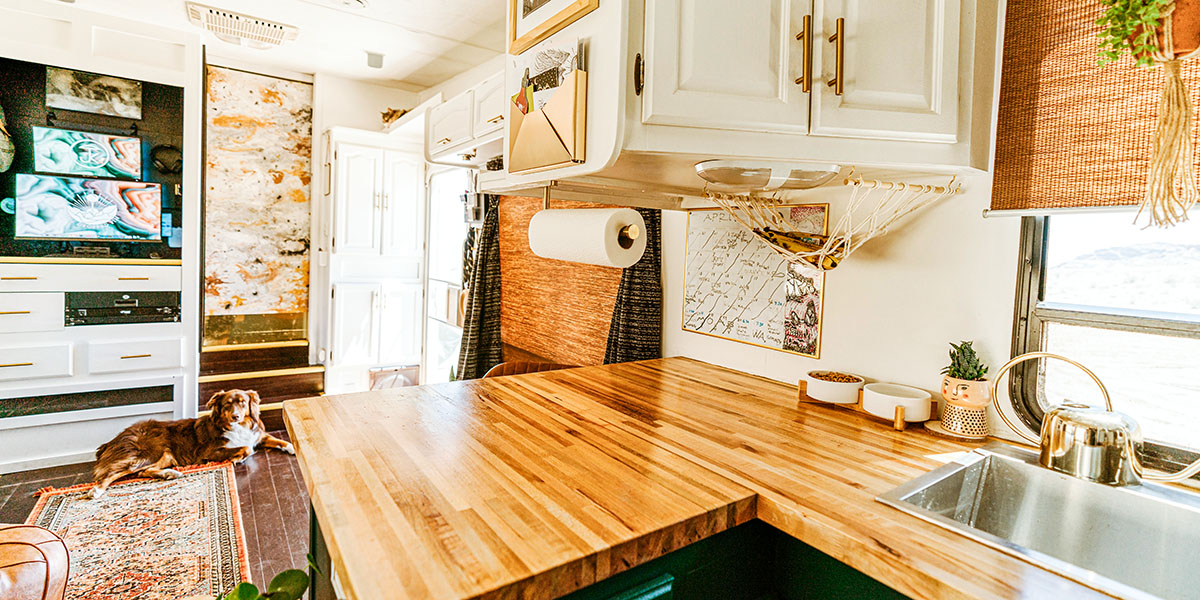
    One of the easiest ways to give your RV an instant “wow” factor is by upgrading the flooring. While some manufacturers are listening to us long-time RVers about stepping their interior game up to feel more like a true home, many older RVs feel dated and come with basic linoleum or carpet that can wear down quickly and hold onto dirt, stains, and odors. Switching to something more durable and stylish like vinyl plank flooring or laminate can completely transform the space, making it feel more like a true home. Plus, these options are easy to clean and maintain, which is essential for life on the road.

    Pro Tips

    Make sure to calculate the weight difference between your old and new floors so that you know what your final weight capacity will be, and that you’re not going over your suggested weight with a new heavier material.

    Also, choose a flooring material that can handle the temperature fluctuations and constant earthquake-like conditions inside your RV. You don’t want something that will warp or crack due to weather changes or washboard roads!

    DIY Suggestion

    Check out this video from The Flippin’ Tilbys about RV floor replacement by an expert DIY couple for good options and a detailed walkthrough.

    2. Revamp the Kitchen Space

    Whether you have a huge fifth-wheel or a Class B van, your RV kitchen can make a big impression! To jumpstart a kitchen upgrade, begin with updating the cabinetry with a fresh coat of paint or new hardware to give it a modern feel. Consider adding a peel-and-stick backsplash for a quick and easy pop of color or texture. If you’re willing to invest a bit more, upgrading the countertops or installing more efficient appliances (think compact microwaves or induction cooktops) can make a world of difference.

    Pro Tip

    Opt for lightweight materials when doing any kitchen renovations to avoid adding unnecessary weight to your rig. You’ll see this as a common theme, because weight is always at a premium in RVs and can make the difference between safe and fun ride or a dangerous experience.

    DIY Suggestion

    Peel-and-stick backsplash tiles are not only affordable but also give your kitchen an updated, custom look without a major renovation effort. You can also swap out dated handles and knobs for a sleek new look.

    3. Brighten It Up with Lighting

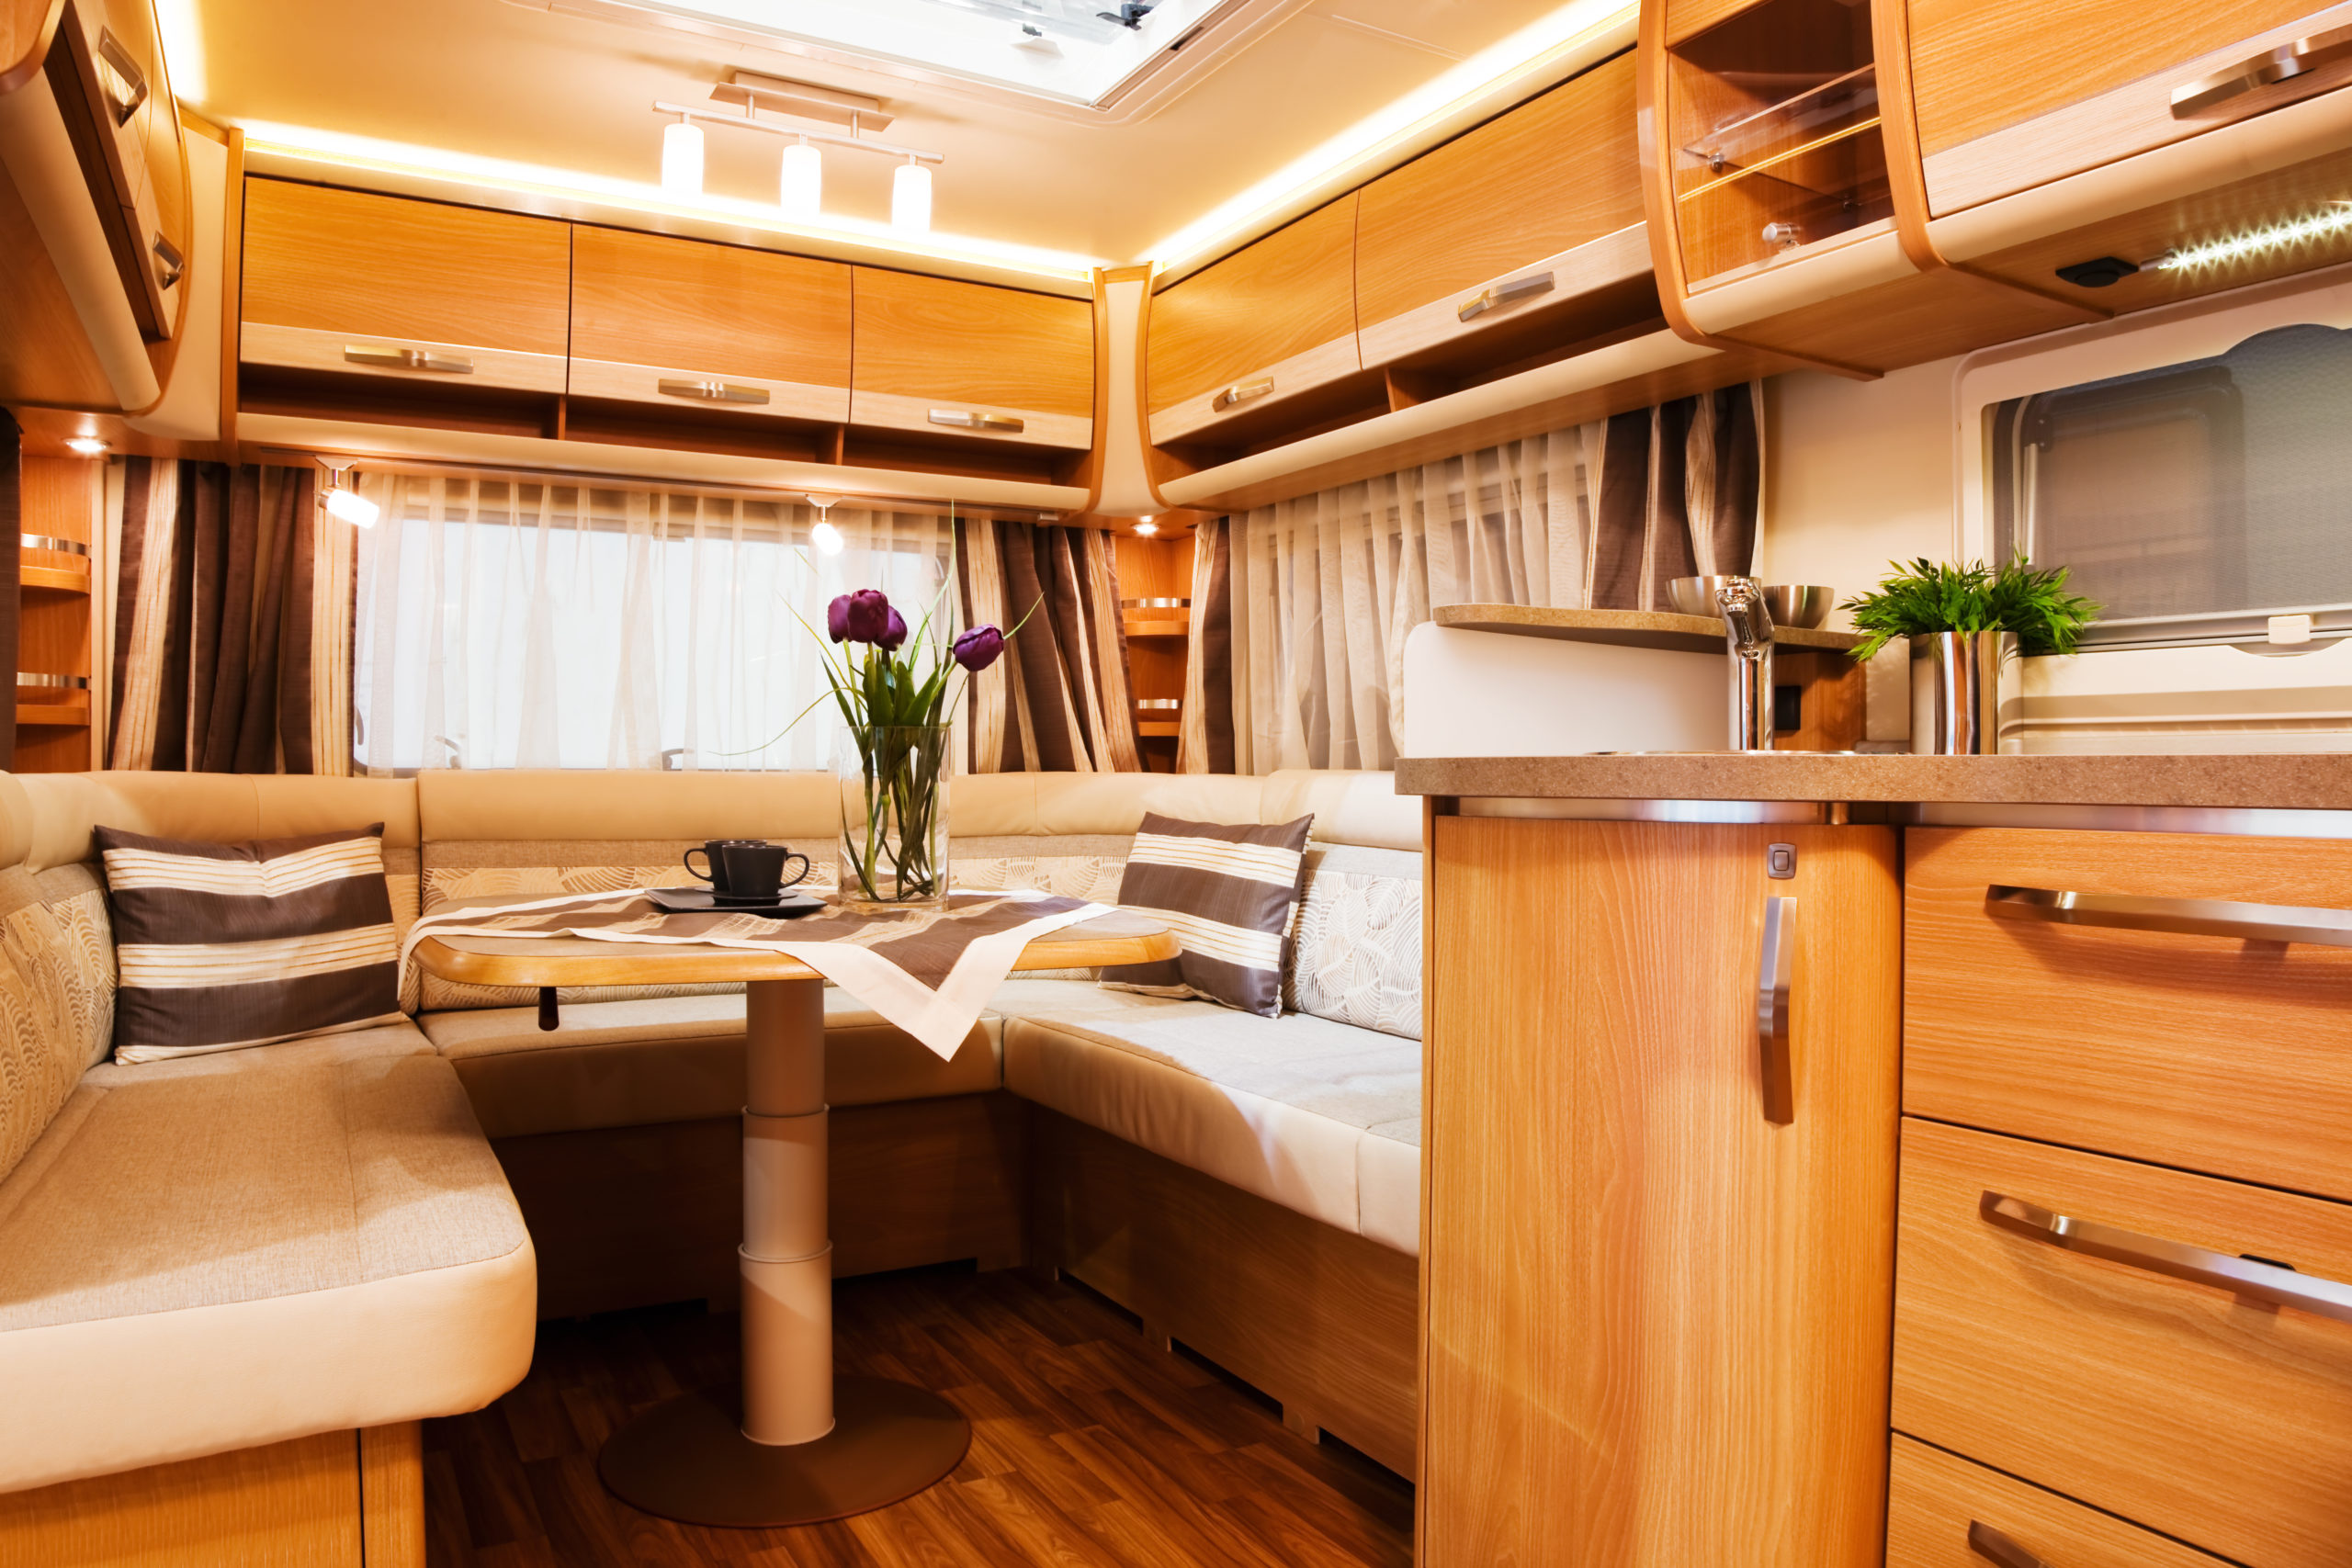
    Nothing says “wow” like walking into a bright, well-lit space – or so my wife loves to tell me. If your RV feels a little dark and dingy, upgrading the lighting can make a huge impact. Replace old, dated fixtures with modern LED lighting, and consider adding battery-operated under-cabinet lights in the kitchen or reading lights in the bedroom area. For a more dramatic effect, install dimmable LED strip lights around the ceiling or furniture to create a cozy atmosphere at night. There are even some that come with colors and connect to apps on your phone. This is a fun mood changer that is easy to install and adds a little flair.

    Pro Tip

    Battery-operated LED lights are a great option for RVers who want to avoid complicated wiring and want to save power when boondocking. They’re easy to install and perfect for creating ambiance without using shore power.

    DIY Suggestion

    If you have a cabinet or pantry that you know you will be using during dark hours and don’t want to wake anyone up, then you can look into some smaller motion-sensor LED lights.

    4. Add Personalized Decor

    Your RV should reflect your personality, and adding personal touches can make it feel more like home. Think about adding things like throw pillows, cozy blankets, artwork, or even some greenery (faux plants work well if you don’t want to worry about maintenance). A few strategically placed decor items can really elevate your space and make it feel inviting and warm. My wife has done this in every RV we’ve had, and you can’t imagine what a welcome atmosphere just a few of these can create.

    Pro Tip

    Use removable hooks or adhesive strips like Command strips to hang your decor and avoid damaging your RV walls. It’s important to keep things lightweight and easily removable for when you’re rolling down the road.

    DIY Suggestion

    Consider framing some of your favorite travel photos or printing out a custom map of places you’ve visited to create a fun, travel-themed gallery wall. Check out my wife’s picture experience wall in our newest RV.

    5. Upgrade the Exterior with an Awning or Outdoor Space

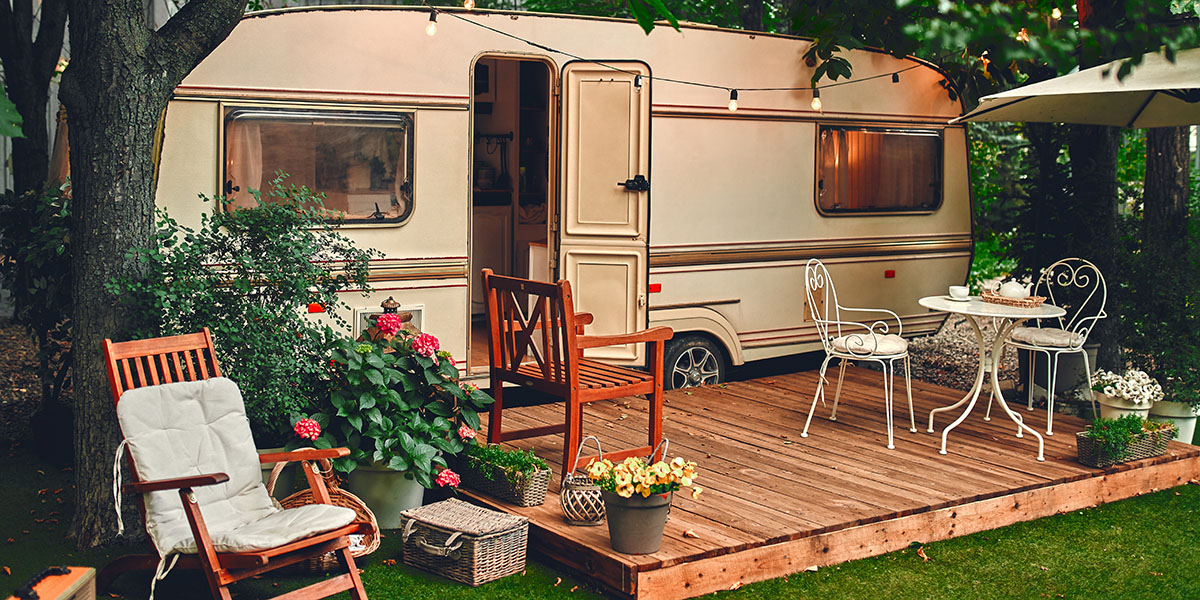
    Let’s not forget the outside of your RV! Creating a functional and stylish outdoor space can take your RV setup from basic to amazing. If your RV doesn’t already have an awning, adding one can create a perfect shaded space for lounging, cooking, or hanging out with friends and family. You can also create an inviting outdoor area with outdoor furniture, string lights, a portable grill, and a few outdoor rugs. Let’s face it, when you are out RVing in the middle of nature with friends and family, the goal is to be outside, and if you make the outside that much more inviting, you’ll find yourself lounging around a campfire, sharing stories with your loved ones, late into the night.

    Pro Tip

    Opt for lightweight, foldable outdoor furniture to save space and reduce your RV’s weight. A portable fire pit is also a great addition for evenings spent under the stars.

    DIY Suggestion

    Check out this easy-to-install awning shade for an instant outdoor upgrade. Adding some solar string lights – make sure they are lightweight and plastic – for an RV safe and eco-friendly glow at night!

    Bonus Tip: Regular Maintenance Goes a Long Way

    While these upgrades will wow your guests, keeping your RV in top condition with regular maintenance is just as important to make sure your home on wheels is functioning smoothly while you’re adding all the bells and whistles.

    Making your RV a wow-worthy space doesn’t have to break the bank. With a few key upgrades and some creativity, you can create an inviting, personalized home on wheels that will impress everyone at the campground – and make your travels even more enjoyable. Happy renovating, and may your RV adventures always be filled with great memories!

  • How to Master Essential Maneuvers in a Motorized RV

    How to Master Essential Maneuvers in a Motorized RV

    When shopping for a larger motorized RV, one of the challenges many people fear is just driving the thing around. But it’s surprisingly less challenging than you might anticipate.

    As with so many things, practice makes perfect. Whether it’s a large motorhome or even a small trailer, putting in the hours behind the wheel can mean the difference between nerves of steel and chattering teeth.

    Read on to learn how to safely practice driving a motorized RV, and what you should focus on to help you go from mystery to mastery behind the wheel even of the largest rigs.

    Before You Start: Adjust Your RV’s Mirrors

    You already know how to adjust the mirrors on your daily driver, but adjusting the mirrors on your RV is another thing altogether. To help explain the difference, I reached out to Peter Knize of The RV Geeks, who has been a professional bus driver and is a recognized leader in training people to drive larger RVs.

    “The two mirrors – flat and convex – need to be used together as a team,” says Knize, because neither mirror on its own provides all the information you need from behind the wheel. The convex mirror lets you keep an eye on objects beside your RV, while the flat mirror lets you look farther away. When adjusting your mirrors, you want to see vehicles and terrain transition from one mirror to another – setting the “crossover point” – near the rear corner of the vehicle.

    The flat mirror on the passenger side of the RV, meanwhile, should be adjusted with the horizon visible near the top and the awning arm just visible at the edge of the glass. Read Knize’s full article for photos and illustrations to show what you should be able to see in the mirrors and what the effective field of view is, seen from overhead.

    Many newer RVs will have blind spot or proximity sensors to tell you that there may be a vehicle in the lane next to you. Though these notifications are handy, they do not take the place of your own visual confirmation using properly adjusted mirrors.

    Practice in a Parking Lot – With Cups

    When I worked at a RV dealership, something I would do with the more nervous drivers is go to an open parking lot with a package of plastic disposable cups. These things make quite a loud sound when you run them over, yet the consequences of doing so are nothing to worry about.

    We would outline the borders of a typical camp site and parking lot with the cups, then the driver would practice maneuvers that were challenging for them – with the radio off and the windows open so they could absolutely hear if they smashed one of the cups. Then it was practice, practice, practice.

    Turning: Radius and Clearance

    Large vehicles, whether they be a Class A or a towable, will obviously require more maneuvering around corners, especially in tight circumstances. Knowing how much space to give your rig around a bend is a key maneuver to master.

    If you’ve ever watched a city bus navigate a corner, it’s not much different in a larger RV where you may have to drive a bit past the corner before you start to make your turn.

    This is where the plastic cups can be very helpful in getting the exact distance down. Knowing where to start your turn can make the difference between an unremarkable change in direction and a trip-ruining run-in with local flora.

    Turning, Part 2: Off-Tracking

    This is a common term for truckers and something RV owners should learn. When driving in a straight line, the rear wheels follow the same path as the front wheels. However, off-tracking occurs when you turn the RV and the rear wheels follow a different path than the front wheels. If you’ve ever towed a trailer, you’ve seen this in action.

    A number of things affect this, but it’s primarily the distance between the centers of the axles on your RV, known as the wheelbase, and how tightly the front wheels can steer, known as wheel cut.

    So, even if you’ve navigated the front wheels around a corner, the rear wheels take a different path and can jump the curb or worse if this isn’t taken into account. According to another article from The RV Geeks, one of the most common places to see damage on larger rigs is right in front of the rear wheels where a driver didn’t account for off-tracking sufficiently.

    Again, the plastic cups can help you learn how the rear wheels of your RV follow the fronts.

    Low-Speed Maneuvering: Rear Overhang

    Even though the plastic cups are very good at letting you know when your tires aren’t where they’re supposed to be, your RV can extend quite a distance beyond its wheelbase. One of the first things operators of any larger vehicle should be aware of is their vehicle’s rear overhang. This is the portion of the RV behind the rear axle of the rig.

    When you’re turning the front of the RV one way, the back end swings the opposite direction. This is also true of larger trailers, too, and can be an area where drivers can get into trouble at filling stations and the like.

    Knowing how the back of your RV swings when completing any turning maneuver is one of the techniques absolutely worth mastering. This, again, can be practiced in a large parking lot, but you’ll want to have a spotter to point out where the outside corner of the RV goes when turning, and when it goes out of bounds for your simulated camp site.

    Keep a Departure Checklist

    Recently I was camping with a group from a rally and one of the attendees was happily setting off and waving at all of us while towing his Jeep – that was still in park. Yikes.

    The first thing I do when leaving the campground is turn off the radio and open the windows. This lets me hear anything that might be amiss, such as a vehicle being towed in park. Or even the sounds the engine and hitch – if there’s a hitch – are making.

    I also firmly believe that, no matter how experienced you are, having checklists is essential. This can really come in handy at those rallies and gatherings where you’re greeting old friends as you arrive and bidding new friends adieu when you leave. Getting caught up in all the hustle and bustle can be distracting and cause you to forget your usual process.

    As for the guy with the Jeep, I literally ran behind him for almost the whole length of the campground yelling and waving my arms like a madman. So, here’s a bonus tip: Be aware of what’s around you as you’re coming and going.

    Go to an RV Rally

    Speaking of which, one of the places where you can get experience with a professional is at some of the larger RV rallies. Many of the bigger gatherings feature hands-on driving workshops and classes that can be very worth the time.

    If you haven’t attended an RV rally yet, this might be the perfect reason.

    Hire a Coach

    If you have the budget, consider hiring someone familiar with the type of vehicle you’re driving. If it’s a large Class A, reaching out to a transit bus company and hiring one of their better drivers to sit in the passenger seat and share their tips could be a great option.

    Another idea might be to reach out to a local RV dealership and hire one of the transport drivers for the day.

    Lastly, you may even be able to reach out to the local school district and hire one of their bus drivers. If they can haul around dozens of screaming students while making all their stops without incident, they can certainly help you master your nice, quiet RV.

    Practice, Practice, Practice

    If you want to learn more about driving a large RV, the two articles Peter shared with us will help fill in a lot of the mechanics behind these maneuvers.

    Once you’re ready to put the theory into practice, setting up a closed course in an empty parking lot, attending a class at a rally, or even hiring a professional commercial driver are all ways to get time behind the wheel to help you assuage your fears and head out on the road to adventure with confidence and a big smile.

  • The Year is Wrapped! See the 5 Most Popular RVs of 2024

    The Year is Wrapped! See the 5 Most Popular RVs of 2024

    After a whole year of buying and selling on RV Trader, lots of folks want to know: What were the most popular RVs of 2024? We understand why. If you’re buying, it’s good to know that you’re following — or bucking — a trend. And if you’re selling, woo! It’s especially nice to know if your RV is a hot commodity.

    So, let’s kick mystery to the curb and lift the veil on RV Trader’s most popular RVs of 2024! We looked at the top RVs that have garnered the most views from off-grid dreamers, deal hunters, and research-savvy sellers. That means that these results were not just searched. Listings of these top models were selected and viewed more than their peers on RV Trader.

    Now, like all online shopping, why you’re viewing what you’re viewing is ultimately a you question. But these five RV models were the most popular answers for RV shoppers and sellers in 2024. And that’s something a lot of us that are still buying and selling RVs out there want to know in 2025.


    No. 5: Grand Design Reflection

    We’ve seen Grand Design’s more affordable and varied line of travel trailers on the unseen part of this list (the Grand Design Imagine came in at No. 9), but an even larger number of you are looking for the more premium product from Grand Design. We’re talking about the Reflection series

    This upscale travel trailer brand has proven popular. It has a reputation for good insulation, which can extend your camping season. That, combined with it’s four-season capability, is another reason they’re one of the most popular RVs. Grand Design claims that these are tested from zero to 100 degrees Fahrenheit, 

    Grand Design absolutely does a good job with floorplans. These often include innovative features that others take some time to copy. Newer Reflection fifth wheel models also incorporate anti-lock brakes, an important safety feature. Plus, many of these models feature large, spacious interiors with premium features. Simply said, the Reflection can elevate any camping experience. And lots of folks are looking to do just that.


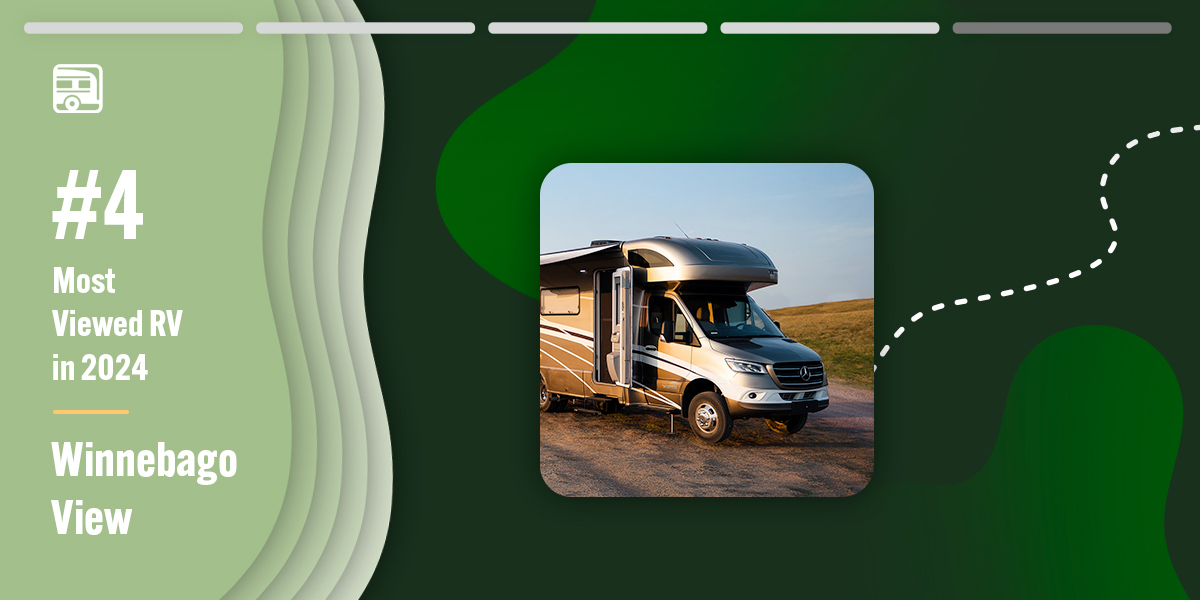
    No. 4: Winnebago View

    The Winnebago View has been in production for quite a few years. So, it’s no wonder it fits nicely in the top five of our most popular RVs list. Offering the performance and efficiency of the Mercedes-Benz Sprinter platform (more on that soon), the View combines a nicely-appointed interior with a manageable size. The latter makes it easier to handle and perfect for visiting those National Park campgrounds that some larger rigs can’t get into. 

    Since the View has such a long history, you can find these in more affordable prices despite their more upscale appointments. That is, if you’re looking for a used rig. 

    There are also some nifty new floorplans in the View family. One even features ample storage in the back for bikes or other cargo. 

    Older Winnebago View models tend to hold up well. The exteriors feature full body paint instead of stickers. Further, the durability of the Mercedes-Benz Sprinter chassis is hard to beat, which is another big plus. It’s not unusual to find some pretty nice looking older Winnebago Views for sale. So, it’s no wonder they’re one of the most popular RVs. 


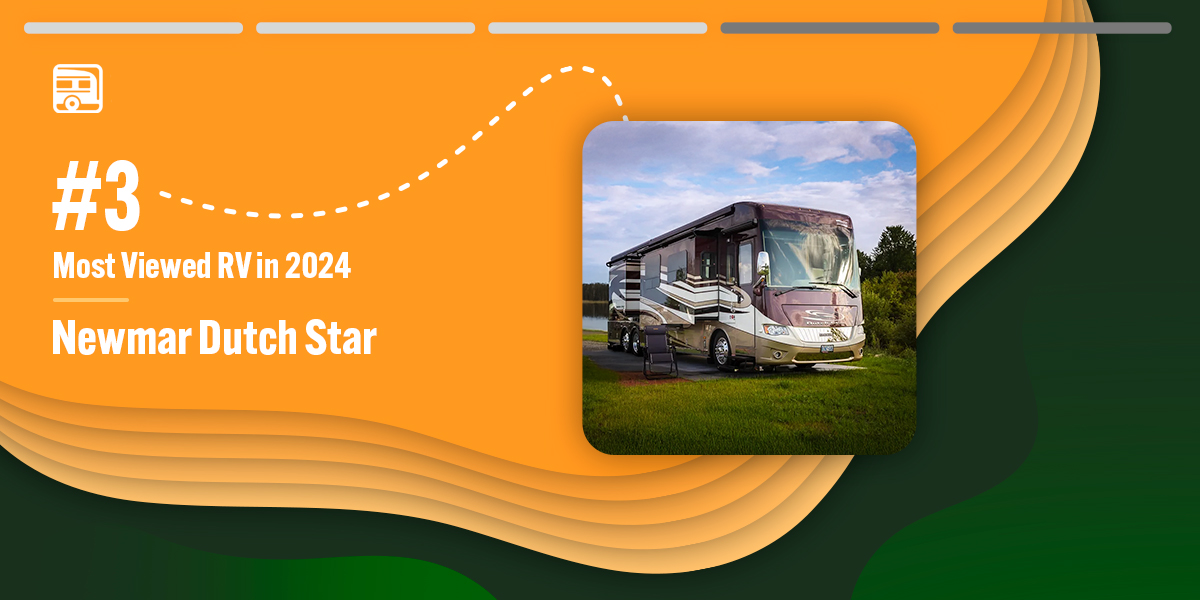
    No. 3: Newmar Dutch Star

    Newmar is another of those cornerstone motorhome brands that has stood the test of time. Newer models are large diesel-powered Class A models with opulent interiors and a plush feel. But, go back enough years, and you’ll find older models with gas engines. And many still have a lot of life left in them. 

    Among the reasons we suspect many of you are hunting for the Newmar Dutch Star is to embark on full-time living. With so many of the included features and functions in these motorhomes, they’re quite up to the task. Washer/dryers, central vacuums, and premium materials all make full-time RVing a pleasant experience indeed. The premium driving features and powerful diesel engines in the newer models just add to that. 


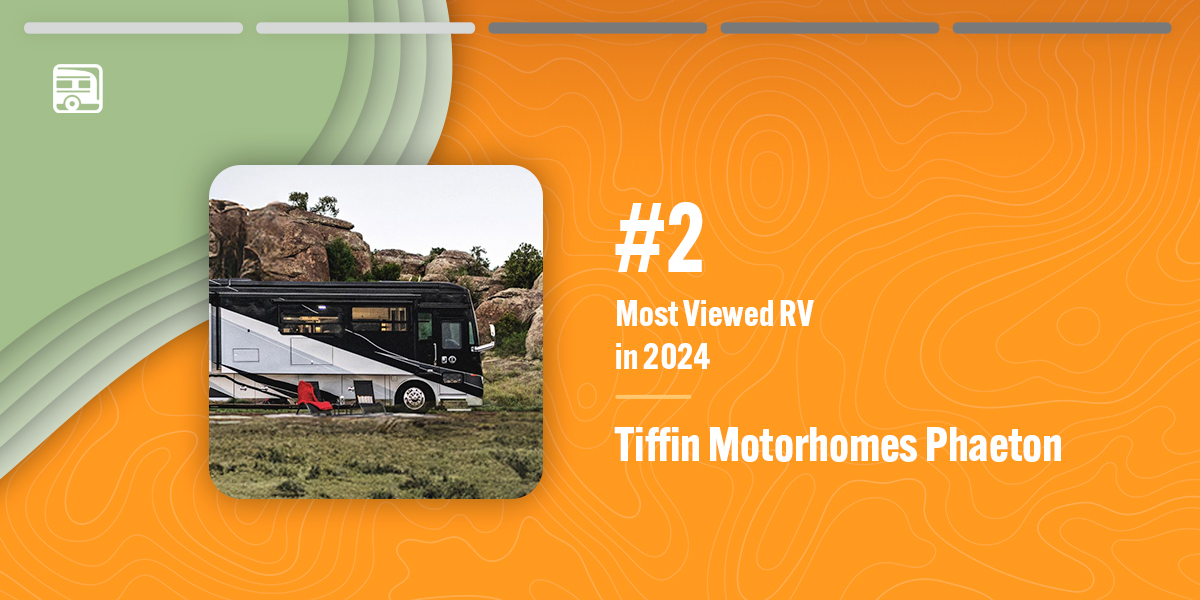
    No. 2: Tiffin Phaeton

    There was a time when the TV show “Lifestyles of the Rich and Famous” was a popular watch for a lot of people. Perhaps those same people are now hunting a motorhome on RV Trader. Because the Tiffin Phaeton is a new star on that show. 

    Once again, the Tiffin brand is back on the list and for good reason. Until recently, the Red Bay, Alabama company was the pride and joy of the Tiffin family. These Class As are very high quality RVs that are fully outfitted with premium quality and high-end features. Even now founder Bob Tiffin is still in the picture. And there are plenty of examples of relatively new Tiffin Phaetons here on RV Tradaer that are gently used. 

    In fact, a model that’s just a few years old could be a relative bargain in today’s market. With premium, upscale interiors, these models convey a sense of luxury and style. Quite simply, the Tiffin Phaeton embodies the full complement of useful and extraordinary features. Which is why it makes for such a luxurious camping experience. 

    These kinds of RVs often cater to those who have chosen to live the RV lifestyle full-time. Nut, no matter how often you get to use the rig, it’s pretty much guaranteed to be something worthy of that old TV show. 


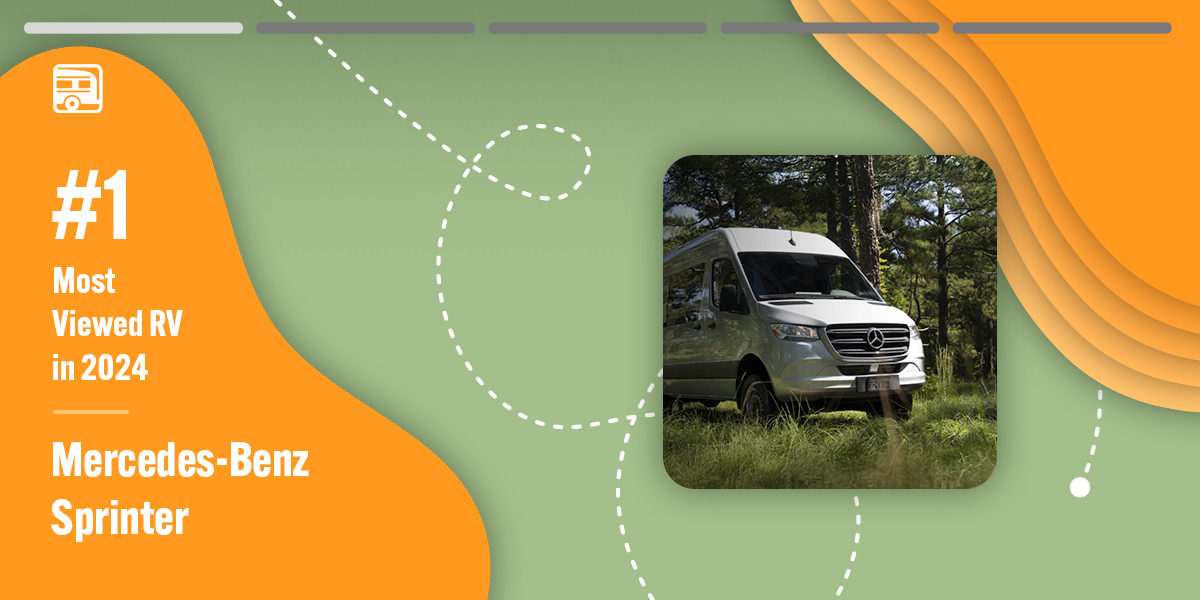
    No. 1 Mercedes-Benz Sprinter

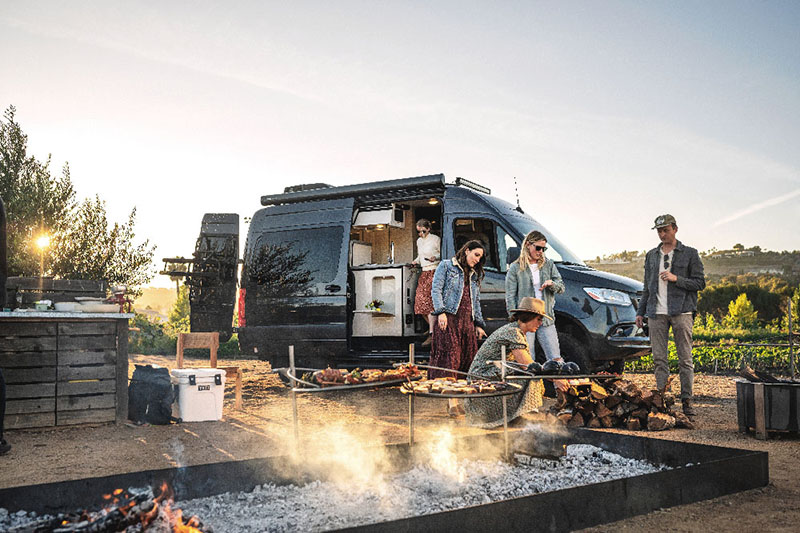
    Far and away, the most viewed RV on RV Trader is the Mercedes-Benz Sprinter. Now, we understand: This is a broad category. So, let’s look at a few aspects of it. First, while some segments of the RV market may not as strong as they once were (the pandemic spike!), van life is still something a lot of people are interested in. And that the Mercedes-Benz Sprinter tops our list of most popular RVs bears that out. In 2024, more people were viewing it on RV Trader than anything else.


    Matchless Versatility

    There are so many ways you can outfit a Mercedes-Benz Sprinter. So, that may explain why this is such a popular view on RV Trader. Many RV companies start with a Sprinter in van form and then outfit them into campers. You can think of things like the Winnebago Solis, for example. These vans offer all the things you’d want in a camper — kitchen, bed space, toilet, and shower. But it all comes in an overall footprint that’s not much bigger than some larger cars. That means you get all the ability to camp but still retain your ability to park one of these in the same parking space as people in their private vehicles. 

    The other unique thing is that you can be as stealthy as you like. Some of the RVs based on Sprinter vans look much like a vehicle a tradesperson would use. So, sneaking an overnight in some parking lots are possibilities in some cases. 

    Another interesting use case is people with families whose children are involved in group activities like bands or sports. Some of the ways RV companies have configured offerings on the Sprinter chassis makes them a good way to shuttle those offspring to the event. All while still having a clean bathroom and a kitchen to prepare snacks once you’re there. And, since you can park in the same parking lot as the other parents with SUVs and such, there’s another reason to love these. 


    A Powerful Name

    As much as these Class B vans are available in relatively compact and less adorned stylings, you can also get larger examples that are rather luxurious. There are some pretty elaborate examples of RVs based on the Sprinter chassis, including offerings from Airstream and Grech RV that provide quite luxurious trappings and features wrapped in the Sprinter’s shell. 

    Potential buyers also might be viewing these because of the Mercedes-Benz branding. Mercedes-Benz has long been a leader in vehicle safety systems. And the Sprinter is not excluded from that. While base Sprinter models are more marketed toward the trades, you can absolutely find models that are lavishly appointed and incorporate every modern safety technology on the market.

    Something some already know is that Mercedes-Benz also has a long history of creating some very capable off-road vehicles, like the Unimog. While a Sprinter isn’t quite the backwoods conquerer, it is available with all-wheel-drive, which can make those winter skiing trips much more accessible. 


    Rigged for Upfitting

    Then you get to the upfitter stage. Since there are so many of these Sprinters out there all over the world, there is also a very healthy aftermarket world ready to sell you just about anything you want. 

    You could start with a bare Sprinter van and outfit it as creatively as you like. There are companies that offer interior and exterior features so you an tailor your van to whatever capability you’re interested in. Not just things like storage and organization, either. There are companies who will gladly customize your Sprinter with very capable off-road pieces and others who will do a fantastic job of powering the van with solar and lithium battery systems that offer incredible boondocking functionality. 

    More than just about any other platform, the Sprinter offers the ability to start in one place and go almost as far as you can imagine. With the number of RV companies offering campers based on this platform to the huge volume of aftermarket support, it’s no wonder it tops our list of most popular RVs. 


    Behind Everything, the You Question

    But the most important question remains: What are you looking for? Are you hunting for a weekend camper … or something to go hunting Bigfoot? Is off-grid prowess your thing  … or do you just want to head for the hills for a weekend away? Or do you want to be the parent with the best vehicle at the children’s sporting events? The good thing is the Sprinter is capable of supporting any of those lifestyle choices and so much more. 

  • Driving Your RV in Winter Conditions: A Safety Guide

    Driving Your RV in Winter Conditions: A Safety Guide

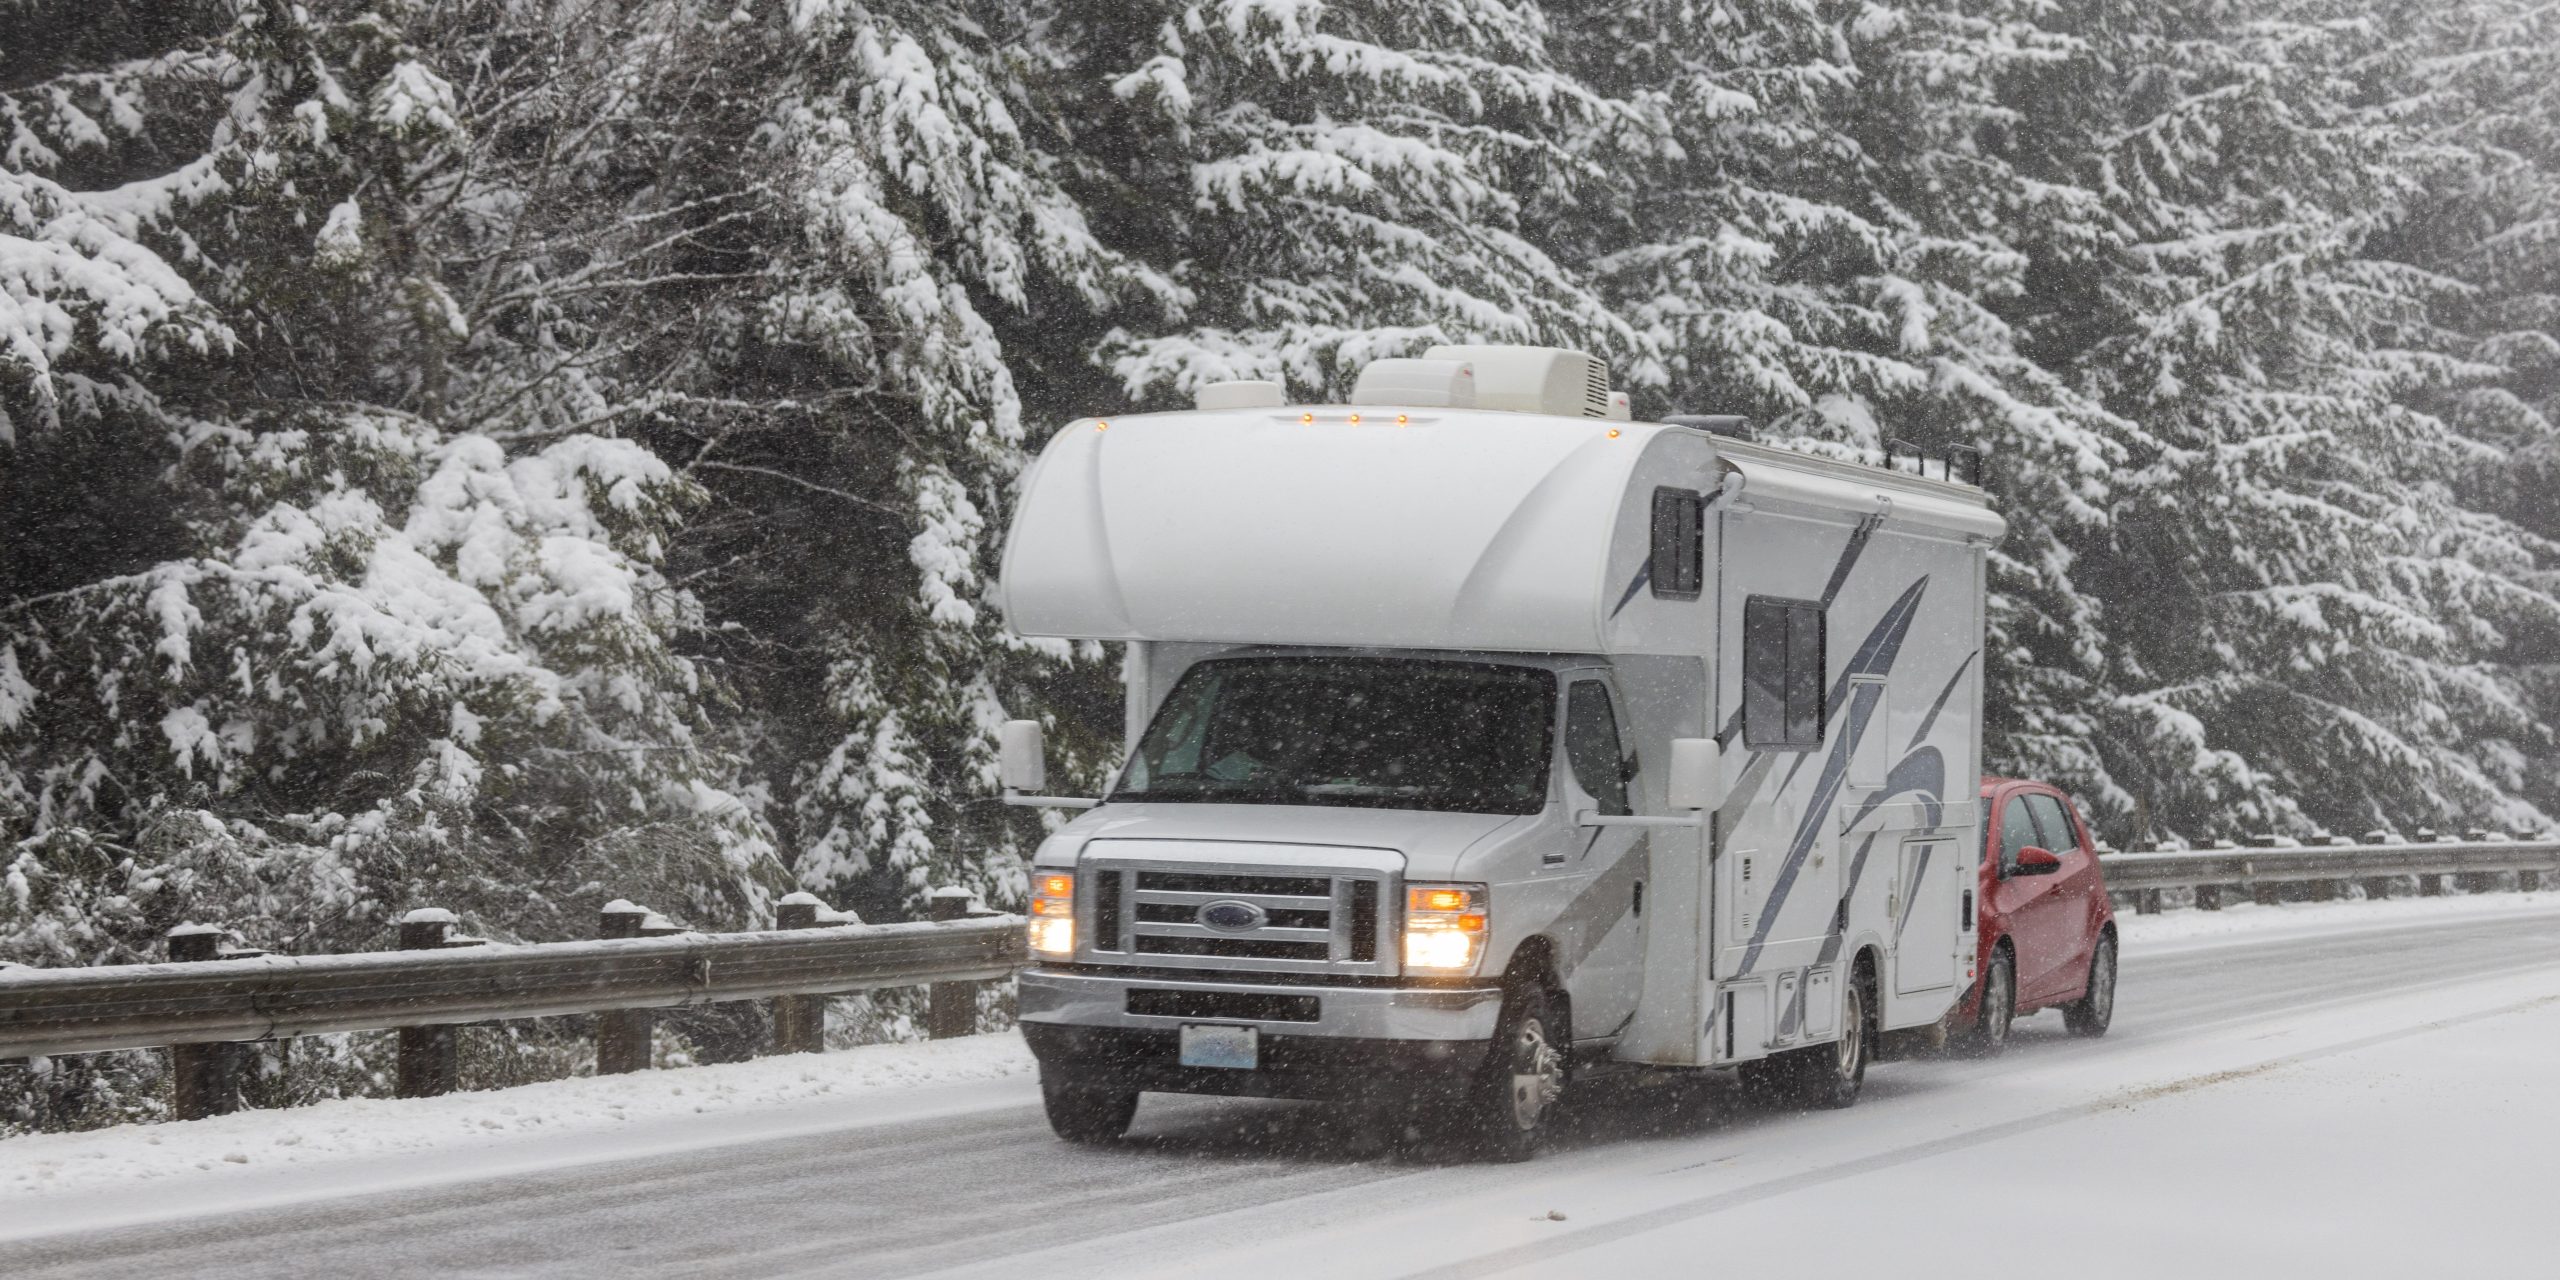
    Winter is already upon us. That means whether you’re planning to take your RV somewhere warmer, or you’re thinking about a winter camping vacation, you’re going to have to drive your RV in potentially hazardous conditions. Slippery roads, cold temperatures, unpredictable winds and snowstorms can all be a challenge to navigate in an RV. So, if the thought of driving your RV in winter conditions is a little nerve wracking, you’re not crazy. You’re smart.   

    In this article, we’ll give you the best tips for driving your RV in winter weather. (And if you’re wondering what I know about all that, you should know something: I camp in Canada.) Trust me, with a little good advice in hand, you can make the most of winter driving. That way, you get safely to your destination.  


    Avoid Driving When Roads Are Bad

    Driving an RV in winter conditions is a lot like driving in any other weather.  However, because RVs tend to be heavy, they tend to drive better than some other vehicles in winter weather. Even so, you should also know that their longer wheelbase means if something goes badly, it tends to go really badly. 

    Let me give you an example. A normally small annoyance, like another driver suddenly cutting in front of you, can turn into a white-knuckled, one-sided conversation with God as you desperately try to avoid a collision. Not to mention, getting misdirected by an online map app and having to get back on route can result in driving miles off course before you find a not-so-convenient spot to turn around.  

    There’s no doubt that driving in winter weather can be hazardous. That’s why it’s always wise to postpone travel in winter weather, when roads are snow-covered, icy, or otherwise slippery.  You also might want to avoid these: the 10 most dangerous winter roads.


    Preparation Is Key (As Always)

    It goes without saying that a good plan combined with proper preparation are important any time of year. In winter time, planning and preparation are critical when it comes to safety. Being prepared means taking into account everything that could go wrong and being ready for it. Here’s how you’ll need to prepare for your journey, long before you jump into the driver’s seat. 


    Ensure You Have the Right Gear

    • Have the right tires. Make sure your RV or tow vehicle has snow tires or all-terrain tires that are approved for use in snow.  Snow tires are designed to provide traction when road conditions are slippery. In states and provinces with mountain ranges, it’s mandatory to either have snow tires or carry tire chains (depending on the weight of your vehicle).
    • Carry tire chains and know how to put them on.  Snow chains are used when snow has already accumulated on the road. Tire chains can make the difference between getting stuck or sliding into a ditch and staying on the road.  However they can be tricky to install, and the side of a snowy road is a terrible place to learn how to do so. That being said, it’s a good idea to practice installing your tire chains before you leave and always put them on before you get stuck.
    • Be prepared to get unstuck. Carry traction boards and a snow shovel just in case you need them.
    • Pack cold weather gear. Do this for each traveler in the RV. No matter how well-heated your rig is, having warm gear is critical in the event the RV propane regulator gets frozen, the solar panels get buried under snow, or the myriad of other things that could go wrong. Winter jackets, gloves, knit hats, warm socks and winter boots are a necessity for winter travel.
    • Pack plenty of blankets. If everything else goes wrong, these will be a life saver till you can get everything back right.
    • Store bottled water. Be sure to have water in jugs or bottles inside the RV. That way, even if the RV plumbing freezes en route to your destination, you’ll still have water for drinking, cooking, bathing. Water is essential for life (and coffee), so bring enough for everyone in the RV, including pets. 
    • Stock up on propane. Fill up with fuel and propane before your planned departure time.


    Go the Extra Mile on Route Planning

    • Plan your route. Most folks do this with a route planning app like Google Maps, Apple Maps, or RV Life Trip Wizard. (Trip Wizard has RV safe driving directions.) But it’s a good idea to bring a current road map or atlas along with you. That way, you can double check to make sure the route planner doesn’t take you the wrong way.  This happens more frequently than many people think.
    • Have an alternative route plan. You know, in case there are unexpected delays, weather events, or road closures along your route.
    • Check the weather routinely. Go online to check the weather along your route before you leave. Weather conditions can change quickly in winter, so it’s a good idea to check the forecast ahead of time.
    • Be aware of highway conditions. You can find highway conditions and road closures along your route on your state or provincial highway department website. Always check before you drive. You really don’t want to find out bad news en route.
    • Share your plans. Let someone know your destination and your route plan. Also have a plan to check in with them to let them know you made it.


    Fine-Tune Your Timing 

    • Avoid driving between sunset and early morning. Roads are more likely to accumulate black ice at these times.
    • Plan to take your time. Allow lots of extra time to get to your destination. The time you’ll need will vary according to your route and driving conditions. However, don’t rely on any online resource for approximate driving time, as they never take unexpected events into account. 
    • Take frequent breaks. Driving safely in winter weather requires complete focus and total concentration. You can get tired out without even noticing. Fatigue kills because it slows reaction times and causes you to make the kind of errors in judgement that cause accidents. No amount of caffeine and snacks can prevent fatigue. The only way to stave it off is by taking frequent and adequate rest breaks.


    Calmly Handle the Conditions

    • Don’t drive with snow on your RV. Clear all snow from your RV roof, windows, mirrors and backup camera before you take off. Snow flying off your RV as you drive can impact the visibility of the drivers around you. And that can affect your safety too.
    • Give your engine adequate time to warm up. RVs and tow vehicles have big engines. That means it can take 15 minutes for the engine to completely warm up. Always follow your RV manufacturer’s recommendations in your RV or tow vehicle’s manual. 
    • Drive according to conditions. Your RV requires a much greater stopping distance than usual in  winter driving conditions. Leave extra space between your RV and the vehicle in front of you. Maintain a slow but steady speed and avoid using the brake pedal.
    • Don’t rush. Slow down even more and put your hazards on if there’s ice or snow on the road. 
    • Correct sliding with steering. What to do if you start to slide, remove your foot from the brake pedal. Then steer into the direction the back wheels are sliding until you safely correct the skid.  
    • Know when to stop. Find a safe spot to pull over and ride out a snowstorm instead of driving through it. If you happen to run into a snowstorm while you’re on the road, it’s best to find a safe spot to pull over until roads or highways have been cleared. Taking a break from driving in your cozy home on wheels is often much safer than driving in the poor visibility and road conditions of a snowstorm.


    Final Thoughts on Driving Your RV in Winter

    It’s always best to avoid driving in winter weather, especially when the vehicle you’re driving is an RV. However, when there’s no way to avoid winter driving, it makes good sense to plan your trip carefully. Being prepared can turn an otherwise potentially deadly situation into an epic adventure where everyone survives with a good story to tell around the campfire. Preparation for winter RV driving should involve packing enough food and supplies as well as having plenty of fuel, propane, and water. The biggest advantage of driving an RV is being able to pull over and live comfortably if conditions become hazardous. After all, your RV has everything you need to be comfortable and cozy until conditions improve.

  • Your Get-Smart-Quick Guide to RV Antifreeze

    Your Get-Smart-Quick Guide to RV Antifreeze

    Colder weather is already approaching. (And in many cases it’s already here. That means it’s time to start thinking about winterizing your RV to protect it from freezing temperatures. One of the most critical tasks involved in preparing your RV for winter’s onslaught is using RV antifreeze to keep water from freezing in the pipes and bursting them.

    In this guide, we’ll delve into everything you need to know  Starting with what it is (and is not), we’ll share when, why, and how you should use it to protect your RV’s plumbing system this winter. 


    What RV Antifreeze Is — and What It Isn’t

    You’ve probably seen jugs of pink stuff in the RV maintenance section of  your local RV parts or hardware store. Although RV antifreeze is usually found alongside automotive antifreeze, always remember: Even aside from it’s usual pink color, it’s very different from automotive antifreeze. RV antifreeze is formulated with propylene glycol and is made to be nontoxic. Automotive antifreeze, on the other hand, is very toxic because it’s made with ethylene glycol. That’s because the two have very different purposes. And the differences between RV and automotive antifreeze don’t end with toxicity.

    Let’s be clear: RV and automotive antifreeze aren’t interchangeable at all. RV antifreeze was formulated specifically for use in plastic RV plumbing components. It even acts as a lubricant for the RV toilet seal. But’s not for use  in your car, because propylene glycol just doesn’t have the necessary properties to allow it to regulate engine temperature. 

    Conversely, automobile antifreeze is specially formulated to help regulate the temperature of vehicle engines no matter what the ambient temperature is. And even more ephartically, you would never want to use automotive antifreeze in RV plumbing because it’s highly toxic. And that’s not all. Automotive antifreeze is also corrosive to plastic and rubber. That means instead of protecting RV plumbing, automotive antifreeze destroys it. 


    RV Antifreeze Is Not Safe for Consumption

    Even though RV antifreeze is technically nontoxic, you should avoid consuming it. Even though propylene glycol is used in minute amounts in processed foods, RV antifreeze is not considered safe for consumption. At least not beyond the trace amounts you ingest when you use it as intended. That being said, after you drain all the antifreeze out of your pipes, the freshwater coming out of  your RV faucets will be safe to drink. 


    Why It’s Necessary for Winterization

    Water is one of very few substances that expands as it freezes. That means water that freezes in your RV pipes also expands as it transforms into a solid. This expansion is enough to burst pipes and fittings, creating leaky plumbing and water damage as well as moisture related problems like mold.  

    Water freezes at 32 degrees Fahrenheit. Contrastingly, RV antifreeze doesn’t freeze until the ambient temperature is a very chilly  negative 50 degrees Fahrenheit and doesn’t expand when it finally freezes. Unlike water, instead of expanding into an RV pipe destroying solid form, RV-specific antifreeze freezes into a semi-liquid slush that’s harmless to plumbing. You can probably see why it makes sense to get all the water out of your RV plumbing system and replace it with the pink stuff.  


    What About Environmental Concerns?

    As you’re probably aware, automotive antifreeze has multiple and significant negative environmental impacts. First of all, it’s highly toxic to every living organism, including the bacteria in sewage systems. Automotive antifreeze is so bad for the environment that it’s considered a hazardous material. That being the case, most communities have laws regarding how to dispose of automotive antifreeze.

    On the other hand, RV antifreeze is considered non-toxic and breaks down quickly when introduced to a sewage system or water supply. That means when you flush it out of your RV plumbing when spring rolls around, it can go down the drain at the dump station. 


    How Much Do You Need for RV Winterization?

    When it comes to RV antifreeze, most RVs don’t need a lot. Many RVs only require one or two gallons of RV antifreeze  to protect the entire plumbing system. But it really depends on the size of your rig. So, if you have a larger RV with multiple bathrooms you may need as much as five gallons.


    Where to Buy This Magical Stuff

    RV antifreeze is easy to find. It’s readily available from RV supply stores, automotive stores, and hardware stores as well as from online retailers. Here’s a brief list of some of the places where you’ll find RV antifreeze: Amazon, Tractor Supply, Walmart, and Home Depot.


    How To Use It to Winterize Your RV

    It’s essential to winterize your RV when it will be in storage for the winter months or only used occasionally during that time. Winterizing your plumbing system means draining out all the water and replacing it with RV antifreeze.  


    Prepping Your Plumbing System

    1. Disconnect from city water and make sure the hot water tank has been turned off overnight.
    2. Empty the majority of water from the plumbing system. With the pump on, turn a faucet on and pump all the water from the freshwater tank and most of the water from the plumbing system.  Flush the toilet too. Turn the pump off.
    3. Empty the black tank and gray tank. 
    4. Drain the outside shower hose.
    5. Open the low point drains beneath the RV.
    6. Drain the hot water tank by opening the pressure relief valve and remove the drain plug or anode rod. 
    7. Open the drain valve under the freshwater tank to drain all the water from it. 
    8. Optional step: Connect an air compressor to the city water connection and blow any remaining water out. While this is preferable, it’s not absolutely necessary.
    9. Close  all the valves
    10. Find the bypass valves for the water heater and close it to prevent antifreeze from entering the water heater. There will be an intake valve and an outlet valve-both should be closed.


    Applying RV Antifreeze

    1. Locate the water pump intake and ensure that it has an antifreeze syphon hose connected. Many RVs have one installed, but if yours doesn’t simply replace the freshwater line with a siphon hose.
    2. Open the siphon hose valve and close the valve that allows water to flow from the freshwater tank.
    3. Insert the siphon hose into a bottle of RV antifreeze.
    4. Turn the pump on.
    5. Open the cold water at the kitchen faucet and close it after pink fluid comes out. Now open the hot water and wait until pink antifreeze comes out before closing it. Repeat these steps with each faucet in the RV, including the indoor and outdoor shower. 
    6. Flush the toilet until pink antifreeze runs into the bowl. Leave antifreeze in the bowl to help condition the seal at the bottom of the bowl.
    7. Turn the pump off.
    8. Pour a little antifreeze down each drain in the RV to prevent the the P trap from freezing.
    9. Drain the pump by finding two hoses located near it underneath the RV and opening them. Leave them open until you see RV antifreeze draining from them.
    10. Dump any leftover antifreeze into the toilet, as well as the sink and shower drains.


    Final Thoughts on the Pink Stuff

    RV antifreeze is crucial for protecting your RV’s plumbing system from freezing while your RV is in storage over winter.  RV winterization is easy and can often be done in under 30 minutes, even on a large RV. If you really want to go the extra mile with RV winterization, you’ll want to blow every last bit of water out of your plumbing with an air compressor before pumping RV antifreeze into it. In spring, winterization is as easy as connecting to city water and turning on the faucets until no pink comes out.

  • Avoid These Costly RV Renovation Mistakes!

    Avoid These Costly RV Renovation Mistakes!

    Cha-ching. Cha-ching. That mental or literal register sound can be your RV renovation nightmare. It’s the calling card for your archnemesis — the blown-up budget! You may picture yourself cruising down the highway in a decked-out home on wheels, living the RV or van life dream of embarking on epic road trips. However, between the initial plan and the final product, there are plenty of budget traps that could turn your renovation into a financial blackhole. What starts as a “simple refresh” can snowball into surprise expenses, hidden damages, and unexpected splurges. That is, unless you avoid some costly — and common — RV renovation mistakes.

    If you detour away from these pitfalls, renovating an RV can be an exciting and rewarding project. This blog will walk you through five common ways renovators blow their budget — and how to avoid them —s o you can create the RV of your dreams without draining your savings. Let’s get started!


    1. Underestimating Structural Repairs

    A fresh coat of paint or some new flooring might be what you had in mind, but things can quickly change once you start peeling back the layers of your RV. Structural issues —such as water damage, rotten subfloors, or cracked walls—are some of the most common hidden problems. They often catch renovators off guard. These repairs are not just inconvenient. Thet can also be costly. Ignoring or cutting corners on these types of repairs can lead to further damage, making it even more expensive in the long run.

    Pro Tip: Before diving into your renovation, we can’t recommend having your RV inspected by a professional enough. (Especially if you suspect there might be hidden damage.) The cost may set you back a few hundred greenbacks, but it may save you thousands. If hiring an inspector isn’t feasible, do a thorough DIY inspection. Checking around windows. Examine plumbing connections. Assess roof seams for water damage. Addressing these issues upfront will help you avoid costly surprises during the project.


    2. Falling in Love with High-End Upgrades

    Luxury sure is tempting. And with endless inspiration from social media and Pinterest, it’s easy to find yourself wanting the finest fixtures, sleek appliances, or custom cabinetry. The problem is that these high-end upgrades come at a premium. And the price tag adds up quickly. Plus, some luxury options are better-suited for a home rather than an RV, (Meaning they could break or wear out faster on the road.)

    Pro Tip: Pick two or three statement upgrades to splurge on that will have the most impact. Think flooring, countertops, or an upgraded mattress (an upgraded mattress is always a must for us). Balance the rest with budget-friendly options like peel-and-stick backsplash tiles or thrifted furniture. Remember, the goal is functionality and style, but not at the expense of practicality for life on the move.


    3. Ignoring RV-Specific Products

    Many renovators assume they can use regular household products in their RV, only to find out too late that certain materials don’t work well on the road. (If you’ve done this, don’t feel bad. It’s one of the most common RV renovation mistakes.) Standard home flooring might warp under varying temperatures, and heavy countertops or furniture will weigh down your RV, reducing fuel efficiency. Worse, incompatible materials can lead to costly repairs down the road if they break during travel.

    Pro Tip: Use products designed for RV life. Lightweight vinyl flooring, collapsible furniture, and RV-specific appliances are all excellent investments. These products are built to handle vibrations, movements, and environmental challenges unique to RV travel. Research your options carefully. (YouTube renovation videos are a great place to start.)


    4. Skipping a Detailed Budget Plan

    Without a solid budget, costs can spiral out of control. Many renovators start with a vague idea of how much they want to spend, only to find themselves overwhelmed by hidden expenses. Every additional purchase — whether it’s an upgraded faucet or unexpected plumbing repair — pushes you further off-track. Without a clear plan, it’s easy to lose sight of your financial goals and end up spending way more than anticipated.

    Pro Tip: Break your budget down into specific categories such as flooring, furniture, appliances, and labor. Assign a spending limit to each category and build a 10 to 20 percent buffer into your overall budget for unexpected costs. Keep a running tally of expenses as you go to make sure you’re staying on track.


    5. Overlooking the Time Factor

    Renovations don’t just cost money — they cost time, too. Every day spent renovating means time off the road, which can be frustrating if your RV is your full-time home or part of a rental income stream. Additionally, longer projects often lead to more expenses, whether it’s a few extra hardware store runs or paying for additional labor. Renovations that drag on can also sap your enthusiasm, tempting you to make costly decisions just to wrap things up faster.

    Pro Tip: Set realistic timelines for each stage of the renovation. Prioritize must-do upgrades first—like repairing leaks or updating appliances—and save non-essential projects for later. Remember, the faster you get back on the road, the less likely you are to blow your budget with unnecessary extras.


    Bonus Tips: How to Avoid RV Renovation Mistakes

    • Start Small. If it’s your first RV renovation, start with small projects to learn the ropes before diving into a complete overhaul.
    • DIY When Possible. Labor costs add up quickly, so handle smaller tasks yourself—like painting or installing new curtains—to save money.
    • Shop Secondhand. Facebook Marketplace, thrift stores, and RV forums can be gold mines for budget-friendly furniture and décor.
    • Get Creative. Look for multipurpose furniture that can save space, like convertible sofas or beds with built-in storage.
    • Stick to the Plan. Avoid scope creep by focusing on your must-haves. It’s easy to get carried away with extra projects once you start, so remind yourself of your original goals.


    Final Thoughts: Stay on Track and Enjoy the Journey

    Renovating your RV is an exciting opportunity to personalize your space, but it’s easy to get carried away and blow your budget. By planning ahead, setting clear priorities, and staying mindful of your expenses, you can create a beautiful and functional RV without breaking the bank.

    Just like a road trip, RV renovation is a journey — there will be bumps along the way, but the reward is well worth it. Whether you’re transforming your RV into a cozy getaway or prepping it for a new adventure, keeping your budget in check — and avoiding those dreaded RV renovation mistakes — will help you enjoy the process (and the finished product) even more. Happy renovating!

  • 7 Ways to Upgrade Your RV Insulation

    7 Ways to Upgrade Your RV Insulation

    Whether cold or hot weather, making the decision to upgrade your RV insulation is a game-changer. Quite simply, it can transform your rig into a comfortable space regardless of where or when you travel. As a couple that has braved the winter cold and sought refuge from scorching summer heat, insulation has played a critical role in energy efficiency, temperature regulation, and even soundproofing. 

    With a few thoughtful upgrades, you can improve climate control in your RV. That way, it feels like true home any time of year. So, let’s dive deeper into effective ways to boost your RV’s insulation and make your travels more enjoyable all year round.


    1. Seal Windows and Doors for Maximum Efficiency

    Over time, gaps and cracks around windows and doors develop, leading to annoying drafts. Properly sealing these entry points improves energy efficiency and makes it easier to regulate the interior temperature.

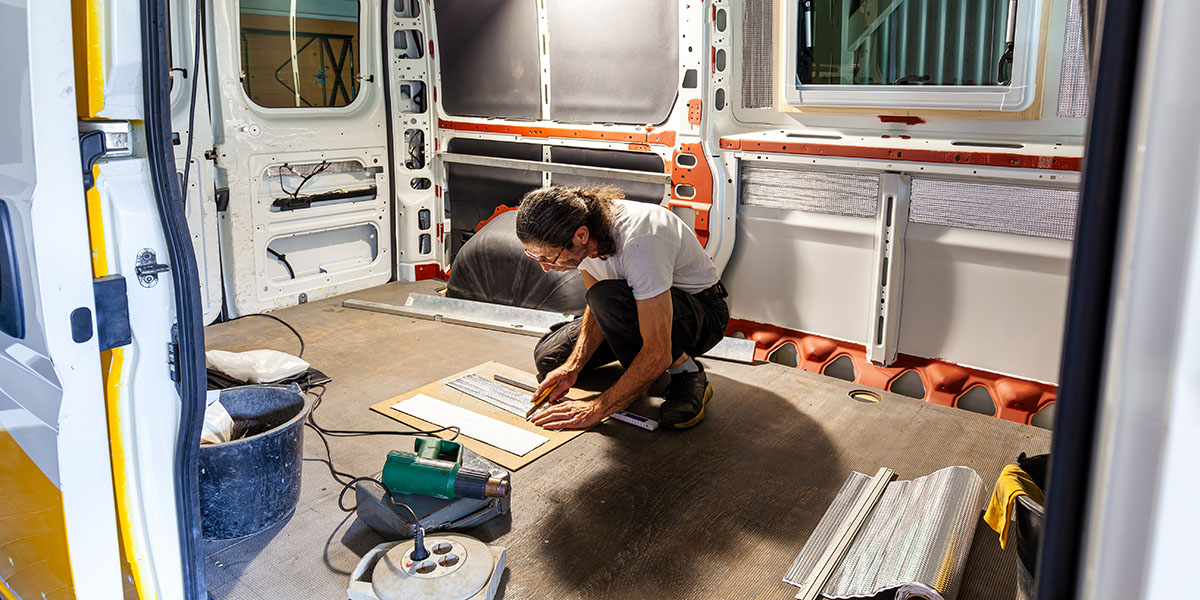
    • Caulking. Use high-quality silicone caulk around windows, doors, and any seams where air might escape or come in. Silicone caulk is water-resistant and remains flexible through temperature changes, making it a great long-term solution.
    • Weather Stripping. Check for deteriorating weather strips around the doors and windows. Replace them with new weather stripping designed for RVs to ensure tight seals.


    Pro Tip: Keep a small infrared thermometer handy to identify any drafty areas quickly. These devices detect temperature variations, pinpointing where cold air is sneaking in.


    2. Install Reflective Insulation for Seasonal Comfort

    Reflective insulation is a versatile and budget-friendly solution to minimize temperature fluctuations inside your RV.

    • Window Film. Apply removable insulating window film to help reflect sunlight and keep heat out during the summer. In winter, this same film helps retain heat inside.
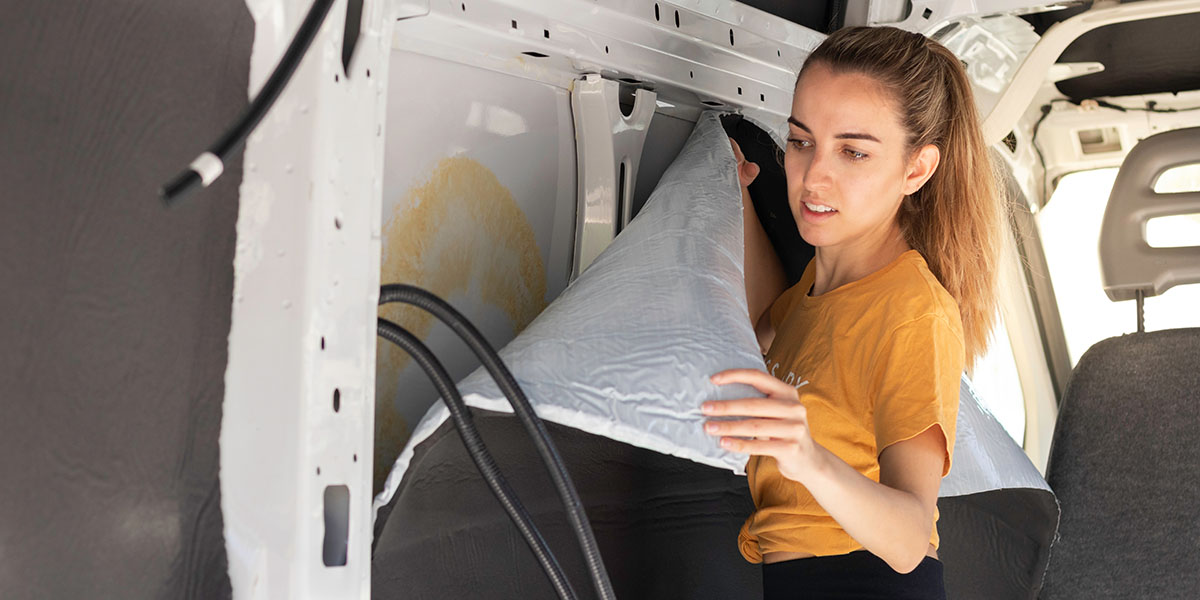
    • Reflective Panels. These panels are particularly helpful if you camp in extreme climates. Place them in your windows or even under the roof vent covers for additional protection against heat loss or gain. There are several cost-effective options.


    Pro Tip: Invest in thermal curtains. They provide additional insulation and are easy to pull closed when temperatures become extreme. This works great in our Class B van to keep the cold out in the winter and the heat out in the summer. 


    3. Upgrade to Energy-Efficient Windows

    Upgrading your RV’s windows might require an initial investment, but the benefits in when you upgrade your RV insulation are long-lasting.

    • Double-Pane Windows. These windows feature two layers of glass, and they help reduce condensation while maintaining a more consistent temperature inside your RV, making them a worthwhile upgrade.
    • Alternative Solutions. If replacing windows is too expensive, consider using clear acrylic panels over your existing windows as an extra insulating layer.


    Pro Tip: For maximum efficiency, ensure your window frames are insulated and sealed with foam tape or weatherproof caulk.


    4. Add RV Skirting for Cold-Weather Camping

    RV skirting is a game-changer for those spending extended periods in cold climates. It prevents cold air from circulating beneath your RV, helping to retain heat and protect your plumbing from freezing.

    • Custom Skirting. Professional skirting is tailored to fit your RV and can be quickly installed and removed, but it can get pricey. 
    • DIY Skirting. Use foam board, vinyl sheets, or plywood for a budget-friendly option. Make sure the material is secure to block out drafts effectively.
    • Airskirts: For those looking to add a more mobile and space-friendly option, this is a newer solution that may be perfect for those extended winter travel plans. They are pricey, but as a long-term investment in your rig, they may be worth it if you spend a lot of time in cold weather.


    Pro Tip: Install a small space heater or heat lamp under your RV during freezing temperatures to prevent pipes from freezing and to provide an extra layer of warmth.


    5. Insulate Vents, Skylights, and Fans

    Vents and skylights are notorious for allowing air to escape, making them key areas to target for insulation.

    • Vent Covers. Foam vent cushions are easy to install and block unwanted drafts. Look for reflective vent covers to further reduce heat transfer through skylights and roof vents.
    • DIY Vent Covers. Cut pieces of foam board or insulated fabric to fit the openings, providing a simple and affordable fix.


    Pro Tip: Use adhesive magnetic sheets to secure vent covers during travel. They hold firm but can be easily removed when not needed.


    6. Prevent Heat Loss Under the Mattress

    If your bed sits above a storage compartment or is directly over the RV’s undercarriage, it can become uncomfortably cold at night. The more you think about it, this is a prime place to upgrade your RV insulation.

    • Foam Board Insulation. Cut foam boards to fit under your mattress. They provide a solid thermal barrier between the bed and the cold air below.
    • Mattress Topper. Adding a memory foam or thermal topper ensures maximum comfort and helps retain body heat.


    Pro Tip: Consider using electric blankets or a heating pad with automatic shut-off timers for extra warmth during cold nights. (The pad is actually much better for power consumption but is smaller.) 


    7. Use Door Snakes to Block Drafts

    Simple but effective, door snakes (fabric tubes filled with rice, beans, or foam) block cold air from sneaking in under doors. This is more for doors inside your rig, as it can be a hassle for the entrance door.

    Pro Tip: Keep an extra door snake in your storage compartments to use at windows or other drafty areas that may need quick insulation during extreme weather.


    Bonus Section: Upgrades to Protect Pipes and Optimize Comfort Year-Round

    Ensuring your RV stays comfortable and functional in extreme temperatures requires more than just insulation. Your heating, cooling, and plumbing systems play a critical role too. Combining smart upgrades with preventive measures helps maintain a consistent environment and protects your RV from temperature-related issues.


    Upgrade Your HVAC System for Efficiency

    Modern HVAC upgrades ensure your RV remains comfortable without wasting energy.

    • Install a High-Efficiency Furnace. Newer RV furnaces are quieter and more energy-efficient than older models, reducing propane use while maintaining consistent warmth, so the long-term investment usually ends up paying off.
    • Add a Smart Thermostat. A smart or programmable thermostat allows you to control your RV’s temperature remotely. You can optimize heating or cooling based on your schedule, improving energy efficiency.


    Pro Tip: Portable fans and space heaters help distribute air more evenly, relieving your HVAC system’s workload and ensuring every corner of your RV stays comfortable. Battery powered fans are great and save your house batteries, but space heaters usually require a hookup or propane tank, so they can be costly.


    Keep Pipes, Tanks, and Hoses from Freezing

    When winter weather hits, preventing frozen plumbing is essential to avoid costly repairs. Cold weather can compromise your water systems if they’re not properly insulated and heated.

    • Use a Heated Water Hose. A heated hose prevents water supply lines from freezing, ensuring you always have running water. Be sure to connect and plug it in before temperatures drop. 
    • Install Tank Heaters. Heating pads for your black, gray, and freshwater tanks keep them from freezing during cold spells, making them ideal for off-grid camping or winter stays.
    • Insulate Exposed Pipes. Wrap foam insulation around pipes, especially those underneath your RV. For additional protection, apply heat tape before insulating.
    • Monitor Temperatures. Keep an eye on temperatures near pipes and tanks using thermometers. This helps you take quick action if freezing becomes a risk.


    Pro Tip: On extremely cold nights, leave your interior faucets slightly dripping to keep water moving. This simple trick prevents water from freezing inside pipes.

    *****

    Upgrading your RV insulation doesn’t just keep you comfortable — it extends your travel season and enhances energy efficiency. My wife and I actually prefer traveling in the shoulder months because extreme weather is less common, but we have been through summer heat waves and winter freezes many times. 

    So, take my word for it, whether it’s sealing windows, installing reflective panels, or adding foam insulation, each step brings you closer to creating a cozy, climate-controlled environment in your RV. With these upgrades, your rig will be ready to tackle everything from snowy mountain adventures to sweltering desert stays, ensuring every journey is enjoyable year-round.

    Happy travels!

  • The Ultimate Base Camp: Top RVs for Hunting Season

    The Ultimate Base Camp: Top RVs for Hunting Season

    Using your RV as a base camp while you hunt just makes a lot of sense. It extends your ability to stay out in the wild, whether you’re spending your days in the stand, blind, or out tracking a trail. It’s a no brainer. The really question for a lot of hunter is more simply: What are the top RVs for hunting season? (And what kind of things are RV companies doing that make RVs better for spending time in the great outdoors?)

    So, we went on an information hunt of our own. And here are a few essential things we considered that a good hunting rig should have to have these three things:

    • Credible boondocking capability. Because you will likely spend time in the wild as part of the adventure — and that probably won’t include hook-ups.
    • Flexible sleeping arrangements. Because hunting trips, more often than not, are friend trips not couple trips. (Hats off to you if you’re the exception.)
    • Off-road functionality. Because sometimes the best game happens lies far from the hardball.


    With those criteria in mind, let’s take a look at the best RVs for hunting season – from mild to wild. And yes, some of them are real trophies.


    Ember RV Overland 240TKR

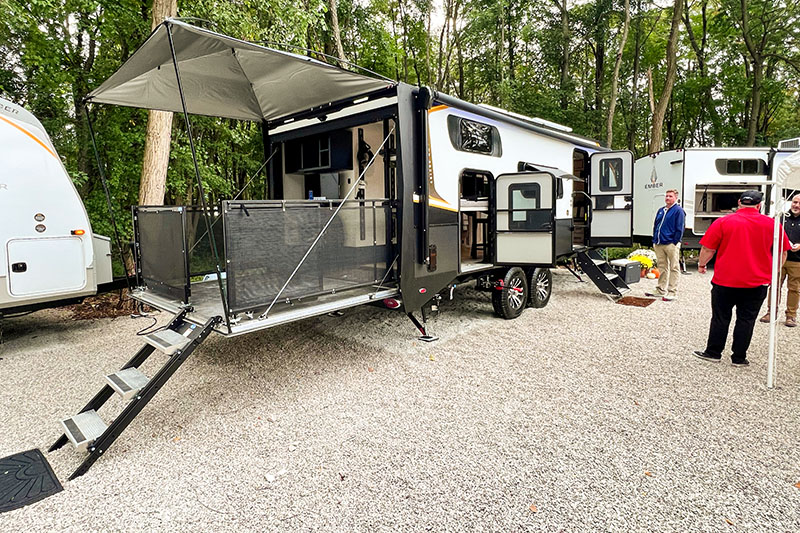
    A rear ramp-deck expands the Ember Overland 240TKR

    The first time I saw the Ember RV 240TKR I knew that the decision makers at Ember RV had outdoorsmen in mind. This model has the most unique bed situation in the front. It’s a Murphy bed but with a big difference. The bed itself is actually two parts, each of those being a twin-sized bed. You can push the beds apart and there’s a hanging closet that can slide between them allowing for two friends to have their own bed. If you do bring your significant other along, the beds can push together and form a large single bed. It’s pretty slick.

    But that’s not the only magic in this travel trailer. It also features a rear cargo area that uses E-Track rails so there is a lot that can happen here as well. Included in the trailer are platforms so you could make two double-over-double bunks — certainly capable of sleeping adults. Since the platforms rest on the E-Track, which Ember calls EmberTrack, you can leave one at home to increase cargo space or even hang things like hammocks, drawers and cases for hunting supplies. There’s also a drop-down door in the back, similar to a toy hauler, that turns into a patio.

    And, the Ember Overland series uses the Curt independent suspension which is one of the better set-ups for towing and off-roading. This might be one of the better RVs out there for hunting.

    MSRP: $74,935 •  Length: 28 feet 3 inches • Height: 10 feet 11 inches • Dry Weight: 6,765 pounds


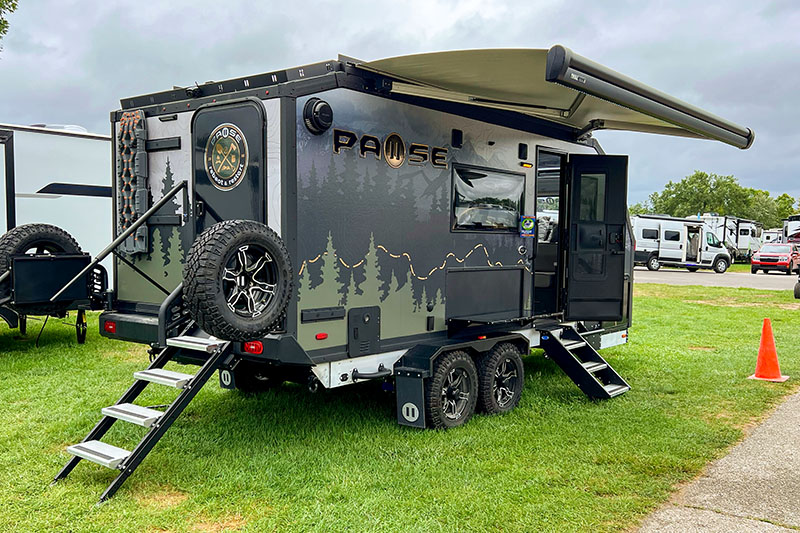
    Palomino Pause

    The Palomino Pause is notable for its mud room and air ride suspension

    Like the Ember RV model, the Palomino Pause features a rugged build with an exceptional independent suspension. But the Palomino offering goes one step further with an air ride suspension that allows you to raise and lower the RV. There are a number of models in the Pause line, but they all feature a rugged huck-bolted frame and a mud room in the back. (The perfect place to keep hunting supplies and clothing without bringing them into the main space of the trailer.)

    Looking at the Pause 20.3 there is a full outdoor kitchen with a 12-volt cooler and propane flat-top griddle. Something unusual about this model is that the interior walls are 3D-printed and all the cabinets and drawers and interior pieces are human-made pieces so they’re far more resistant to damage from water.

    The limitation on this model, though, is that there’s only one bed in here at the front. So, while it may be one of the top RVs for hunting season, it’s more specifically suited for hunting alone.

    MSRP: $78,997+ • Length: 19 feet 11 inches to 25 feet 10 inches • Height: 10 feet 9 inches • Dry Weight: 5,773 to 7,909 pounds


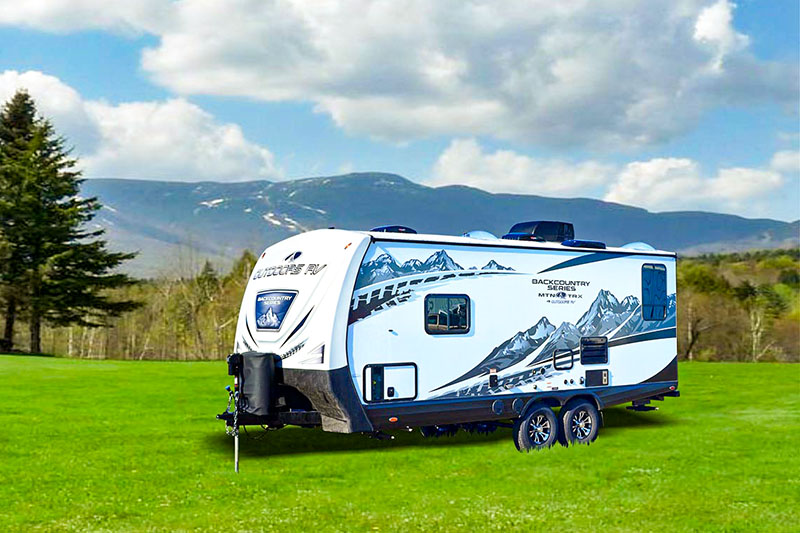
    Outdoors RV Backcountry Series 20BD

    The Backcountry 20BD is ready for cold weather and off-road travel

    If you’re not on the West Coast you may not have heard of Outdoors RV, but they’re a company that specializes in towable RVs that are extraordinarily rugged and well-suited to camping even in very cold weather. In fact, Outdoors RV’s trailers are some of the better rigs for camping in the cold.

    But something unusual is that the company builds their own chassis and certifies those for off-road use. The company makes a variety of models from travel trailers to toy haulers. The Backcountry 20BD is the smallest rig they make in this series. Still, this has a dinette in the back that can convert to a 40-inch-by-84-inch bed and a proper queen-size bed at the front. To reflect their outdoors credibility there’s even a gun safe by the bed.

    This is also one of the few travel trailers you can find with a built-in generator for serious off-grid capability. These also have good sized holding tanks since the company’s chassis are able to support the weight of plenty of water.

    MSRP: $67,505 • Length: 25 feet 3 inches • Height: 11 feet 7 inches • Dry Weight: 6,155 pounds


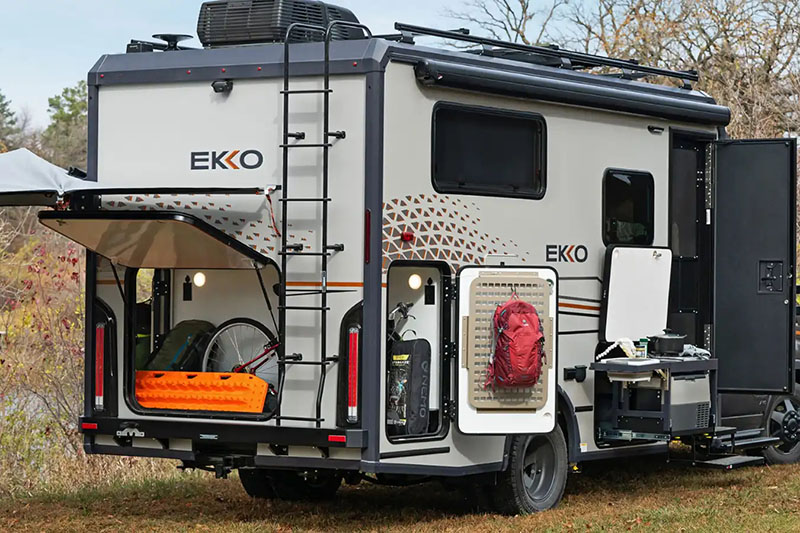
    Winnebago EKKO

    The Winnebago Ekko is designed with four-season camping in mind

    The Winnebago Ekko is an evolutionary rig in some ways being essentially a Class B Plus, which translates into a van/cutaway front and a motorhome back end but without a sleeping area over the cab. (Got all that?) The Ekko is just a few inches wider than the Ford Transit body on which it is based so it retains much of the drivability of a Class B, which is one of the strong suits of this genre.

    By adding a big square box to the back that minor addition of width translates into a whole different experience for the camping side of the vehicle. And I have to say that Winnebago has taken every advantage of this body as well.

    This rig was very intentionally created to deliver four-season camping as much as possible. The walls of the motorhome section are two inches thick, and the roof is three inches thick. The entry door very specifically does not have a window so it can be better insulated.There is a thick blanket that Winnebago makes in house that separates the cab from the camper portion if you’re really in cold temperatures. All the tanks and plumbing are within the cabin of the camper and even the wet bay is heated. Of course, those tanks have 12-volt heating pads on them.

    Even More to Like About the EKKO

    What I like about this RV is the twin beds in the back that can be converted to a king-sized bed which increases flexibility. These beds are also on a raised platform of sorts which leaves a very substantial rear cargo area. This cargo bay is lined with panels to which you can attach things to hold whatever you like – from outdoors gear to tools.

    There are now two variants on the EKKO – one of which is on the Ford Transit all-wheel-drive platform and the other on the Mercedes-Benz Sprinter all-wheel-drive. There is also a pop top model now available if you really want to increase the sleeping space in here.

    EKKO Transit 22A – MSRP: $215,551 • Length: 23 feet • Height: 10 feet 6 inches • GVWR: 11,000 pounds

    EKKO Sprinter 23B – MSRP: $245,152 • Length: 24 feet 6 inches • Height: 10 feet 11 inches • GVWR: 11,030 pounds


    Thor Motor Coach Tranquility 24A

    The Thor Tranquility 24A has off-road cred and a battery system for quiet boondocking

    If you’re looking for a Class B camper that has some off-road credibility and the ability to sleep two friends, the Thor Tranquility 24A is worth a gander. Based on the Mercedes-Benz Sprinter all-wheel-drive Thor steps up the appearance with high-performance lighting and several other exterior details that make this perform and look the part of an off-road machine.

    Something I like about the way Thor does their B vans is with the Mastervolt power system. Using the alternator in the engine this marine-grade power system allows you to operate the entire camping portion of the RV on battery power so you can stealthily enjoy the woods without hearing the noise of a generator.

    I also like that the bathroom spans the width of the back of this rig so it’s more spacious than in many other Class B RVs.

    MSRP: $216,860 • Length: 24 feet 4 inches • Height: 10 feet 6 inches • GVWR: 11,030 pounds


    Pickup Campers

    For a lot of hunters there’s nothing better than a pickup camper. You can outfit a pickup you like ,whether that’s a stylish city cruiser or a serious off-road challenger. As such, it can make a lot of sense to put a camper on the back of a pickup. Another big plus on pickup campers is that you can still tow. So. if your outdoor adventure incudes fishing, you can bring along your boat, for example. Here are a couple of campers we’ve seen recently that are among the best RVs for hunting season.


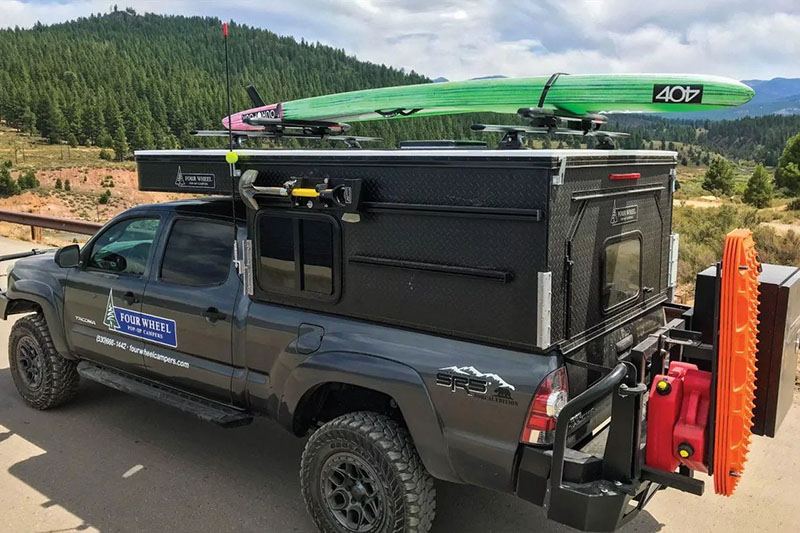
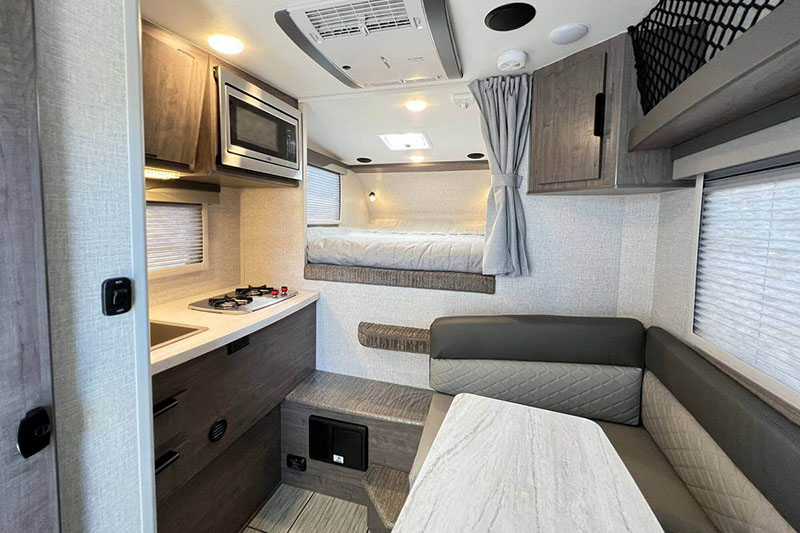
    Four Wheel Campers Project M

    The Project M is a blank slate to be customized to suit your needs

    Four Wheel Campers offers campers for just about any pickup configuration out there. One of the unique things about these all-aluminum campers is that the roof easily pops up and down. So, you have a lower height when traveling but then good ceiling height when camping.

    The company makes these for full-sized trucks, of course, but they have models compatible with mid-sized trucks, including the Jeep Gladiator pickup. The company makes a wide variety of camper configurations and works with customers to tailor a rig to your style of camping with a wide number of choices of interior pieces and design. This is an old school way of doing things that still makes sense.

    But another option they have is their Project M. This is essentially a blank slate where you can outfit the camper how you deem fit. That means you can use the camper during the week as an office or just to haul supplies and on the weekend as a camper. There are a lot of choices of windows and other pieces in these but they are affordable and still have the over-cab bunk Four Wheel Pop-Up Campers is known for.

    MSRP: $11,895 • Length: Sized to fit specific truck and bed length • Height: 3 feet 7 inches to 3 feet 9 inches down; 5 feet 4 inches to 5 feet 6 inches popped up • Base Weight: 352–465 pounds


    Lance 650 Truck Camper

    The Lance 650 Truck Camper packs a lot into a small space.

    Lance Camper has been a benchmark for many decades in the pickup camper world. The company also makes high-quality travel trailers and has even introduced the new Enduro line of serious off-grid trailers. But pickup campers are still a hallmark of the Lance brand.

    As such, these high-quality campers slot into the back of your truck. And they still offer many of the same creature comforts of a travel trailer. We took a look at Lance’s smallest pickup camper, the 650 Truck Camper, since it can be fitted to a short-bed pickup which many of us have. Yet these still have holding tanks and air conditioning, a water heater and dry bath. It’s a lot packed into the space. Of course, this has the over-cab bunk but there’s also a dinette in here that folds down into a bed.

    MSRP: $42,696 • Length: 15 feet  6 inches Height: 8 feet 1 inch (with A/C unit) • Dry Weight: 1,813 pounds


    So You’re Hunting RVs for Hunting Season?

    When you’re embarking on a hunting trip deep in the woods (and need a reliable base camp for your adventures), the right RV can make all the difference. Features like independent suspension, off-grid power systems, and flexible cargo areas ensure that you can focus on your outdoor experience. All without sacrificing comfort or convenience. Each feature deserves special consideration when you’re considering not just the best RVs for hunting season, but also the right RV for the way you hunt.

    No matter which model you choose, these RVs provide the durability and flexibility needed for an unforgettable hunting season in the wild. Ultimately, the best RVs for hunting season are the one that match your personal style of adventure.