Category: RV Advice

  • Easy Rider: How to RV with Your Motorcycle

    Easy Rider: How to RV with Your Motorcycle

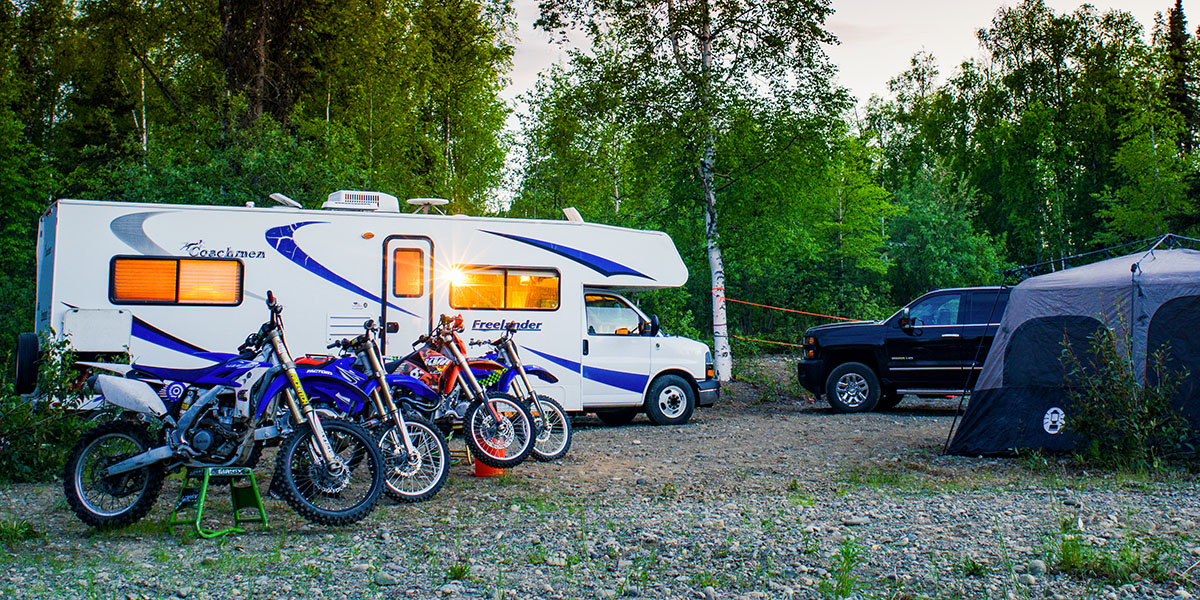
    Traveling by RV sure is great, but it doesn’t replicate the rapturous, untamed freedom that a motorcycle can offer. And if you’ve ever taken a cross-country motorcycle road trip, then you’ve had a taste of that Tom Petty magic. It’s perfectly wild and free, iconic in every way. That is, until it’s time to set up your tent in the rain, in the dark, after a seven-hour ride. You’re tired, cold, hungry and irritable, to say the least. But it’s possible to indulge in the freedom that a motorcycle brings us without having to tough it out in the rough. Because you don’t really have to choose between traveling by RV or by bike. You can RV with your motorcycle.

    For everyone who would like to have your cake and eat it too, this is the dream. With an RV, you can travel with all the comforts of home and bring your motorcycle with you. You can freely explore your destination. Range far and wide —all while having a nice cozy bed to sleep in at day’s end, rain or shine.

    Here’s what you need to know to make that happen — the methods, the key numbers to know, and the best RVs to do it.


    How to RV Your Motorcycle with an RV

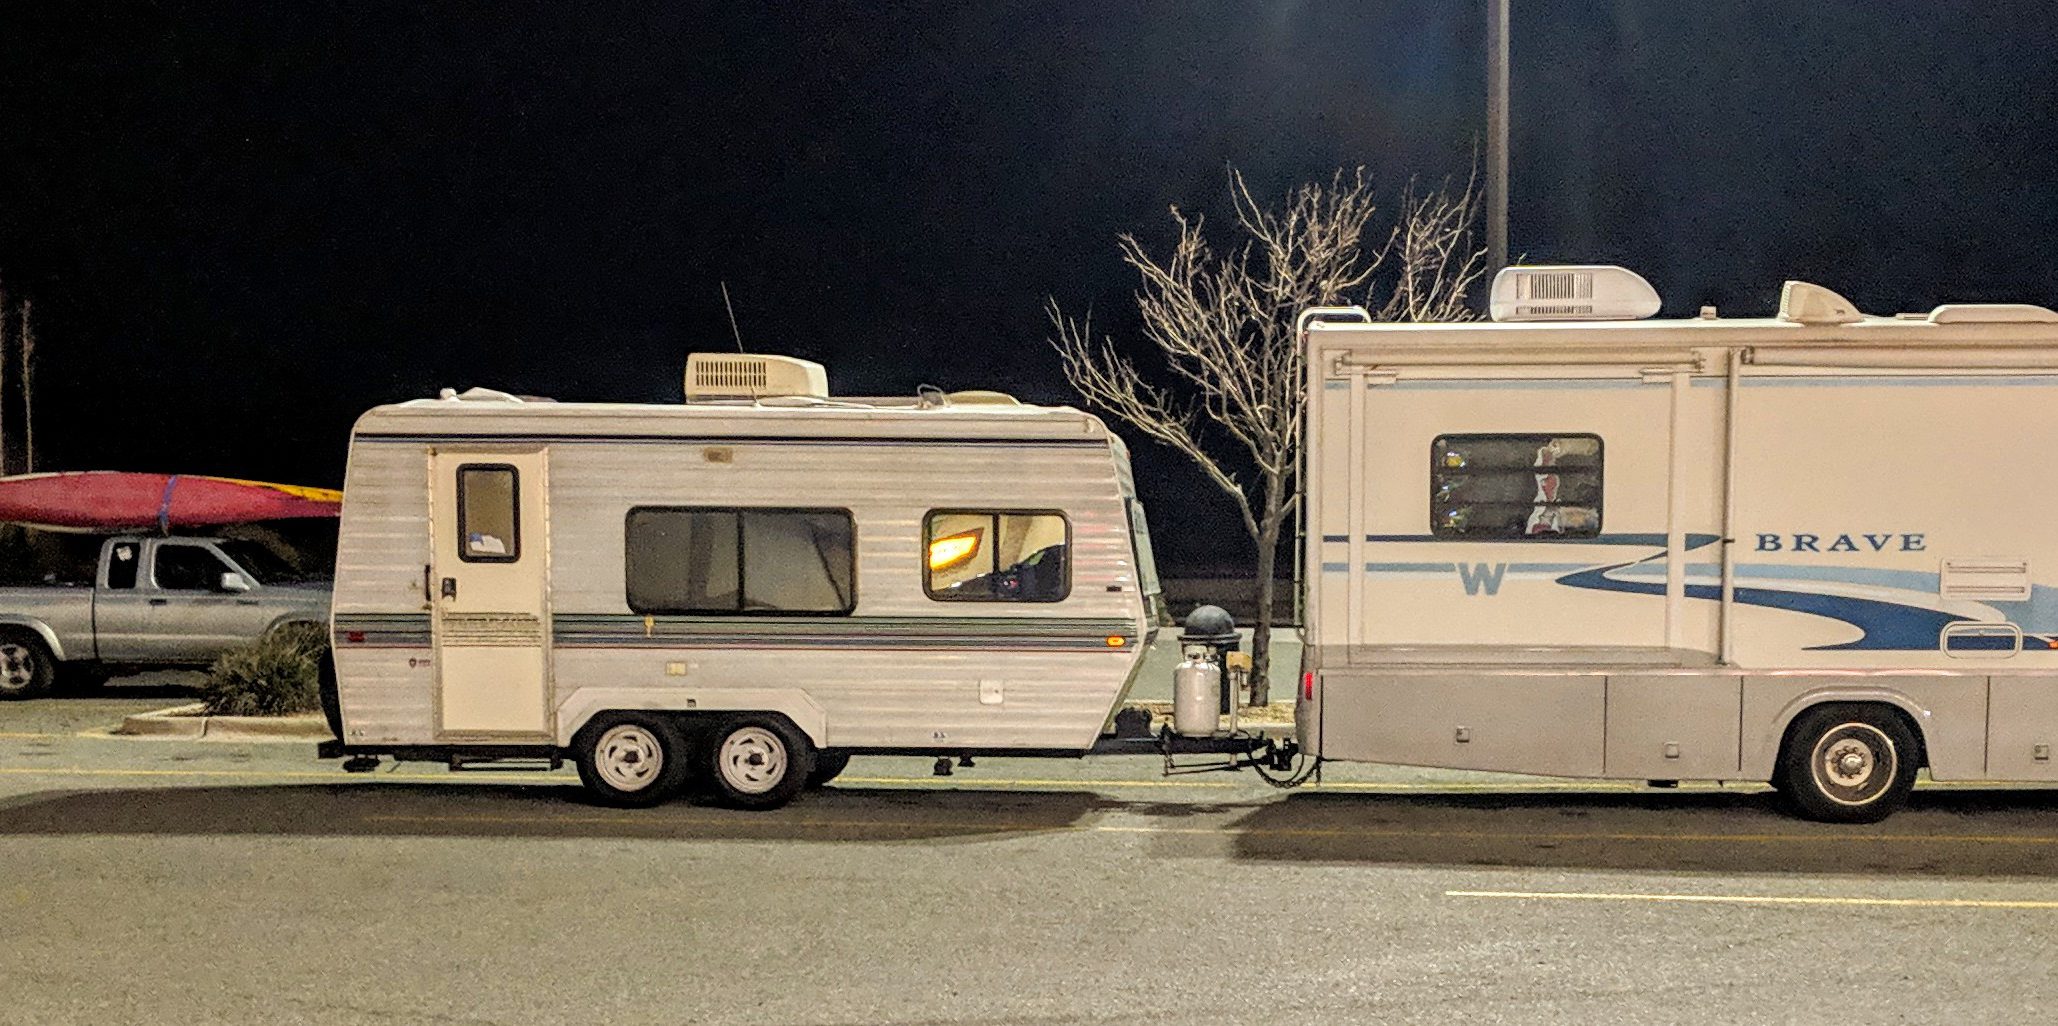
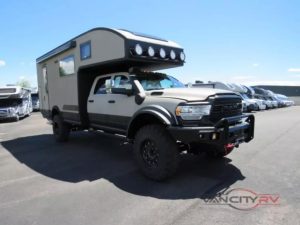
    There are a few ways to transport your motorcycle with your RV. You can tow it behind, mount it on the back, or park it inside. With a Class A motorhome, you can either use a lift on the back of the motorhome, or you can tow the bike behind you. With a standard fifth wheel, you’re limited to towing your motorcycle with a lift on the back. While many fifth wheels do not have a frame sturdy enough to support the lift, some do.

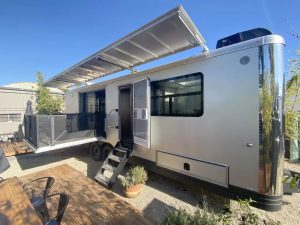
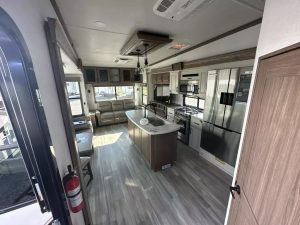
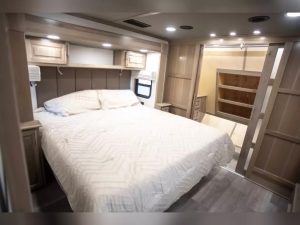
    A toy hauler, on the other hand, is an altogether different animal. Toy haulers can come in the form of either a fifth wheel or a travel trailer. With a garage in the rear, a toy hauler can safely store your motorcycle, provided the garage is big enough. In most cases, if you’re buying or renting an RV to transport your motorcycle, toy haulers are the best place to start.


    Key Considerations for Motorcycle Transportation

    When look for the perfect solution to RV with your motorcycle, keep the following key numbers in mind:

    Motorcycle Weight

    Ideally, you’ll want to weigh your bike, but you can use the manufacturer’s stated curb weight as a starting point. Include the weight of any equipment (such as spare tires) that will be riding along with your motorcycle.

    Motorcycle Dimensions

    Every trailer and carrier is different, but you can cover all your bases by measuring your bike’s overall height, width, length, and wheelbase, as well as the width of the tires. If you’re looking at an enclosed trailer, add in a little extra maneuvering space.

    Load Capacity

    When shopping for a trailer or mount, look for a load capacity greater than the combined weight of your motorcycle and any equipment.

    Trailer or Mount Weight

    The weight of the trailer or mount itself, which can be much heavier than you might think.

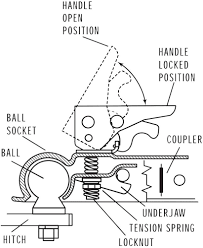
    Gross Vehicle Weight Rating (Towing capacity)

    If you are mounting your motorcycle to your vehicle, you’ll want to make sure that the total weight —motorcycle, mount, and everything else inside — does not exceed the vehicle’s GVWR. If you are towing your motorcycle, then you want to make sure that the combined weight of the motorcycle and trailer do not exceed your vehicle’s towing capacity. Exceeding these limits will affect vehicle stability. It can also cause excess wear and tear on your vehicle. As result, that could potentially lead to expensive repairs or even an accident.

    Axle Weight Rating

    This is an additional limit to consider if you’re mounting your motorcycle. Because the weight of the motorcycle will be resting entirely on the rear axle of your RV, you’ll need to make sure that it can handle the disproportionate weight.

    State Towing Limits

    There are many rules and regulations on towing. Maximum weight for trailers without their own brake. A reduced speed limit. How many trailers you’re allowed to tow. There are many states where it’s not even legal to tow a motorcycle trailer behind your fifth wheel (called double- or triple-towing). Check the local laws for every state along your itinerary so you aren’t caught off guard.


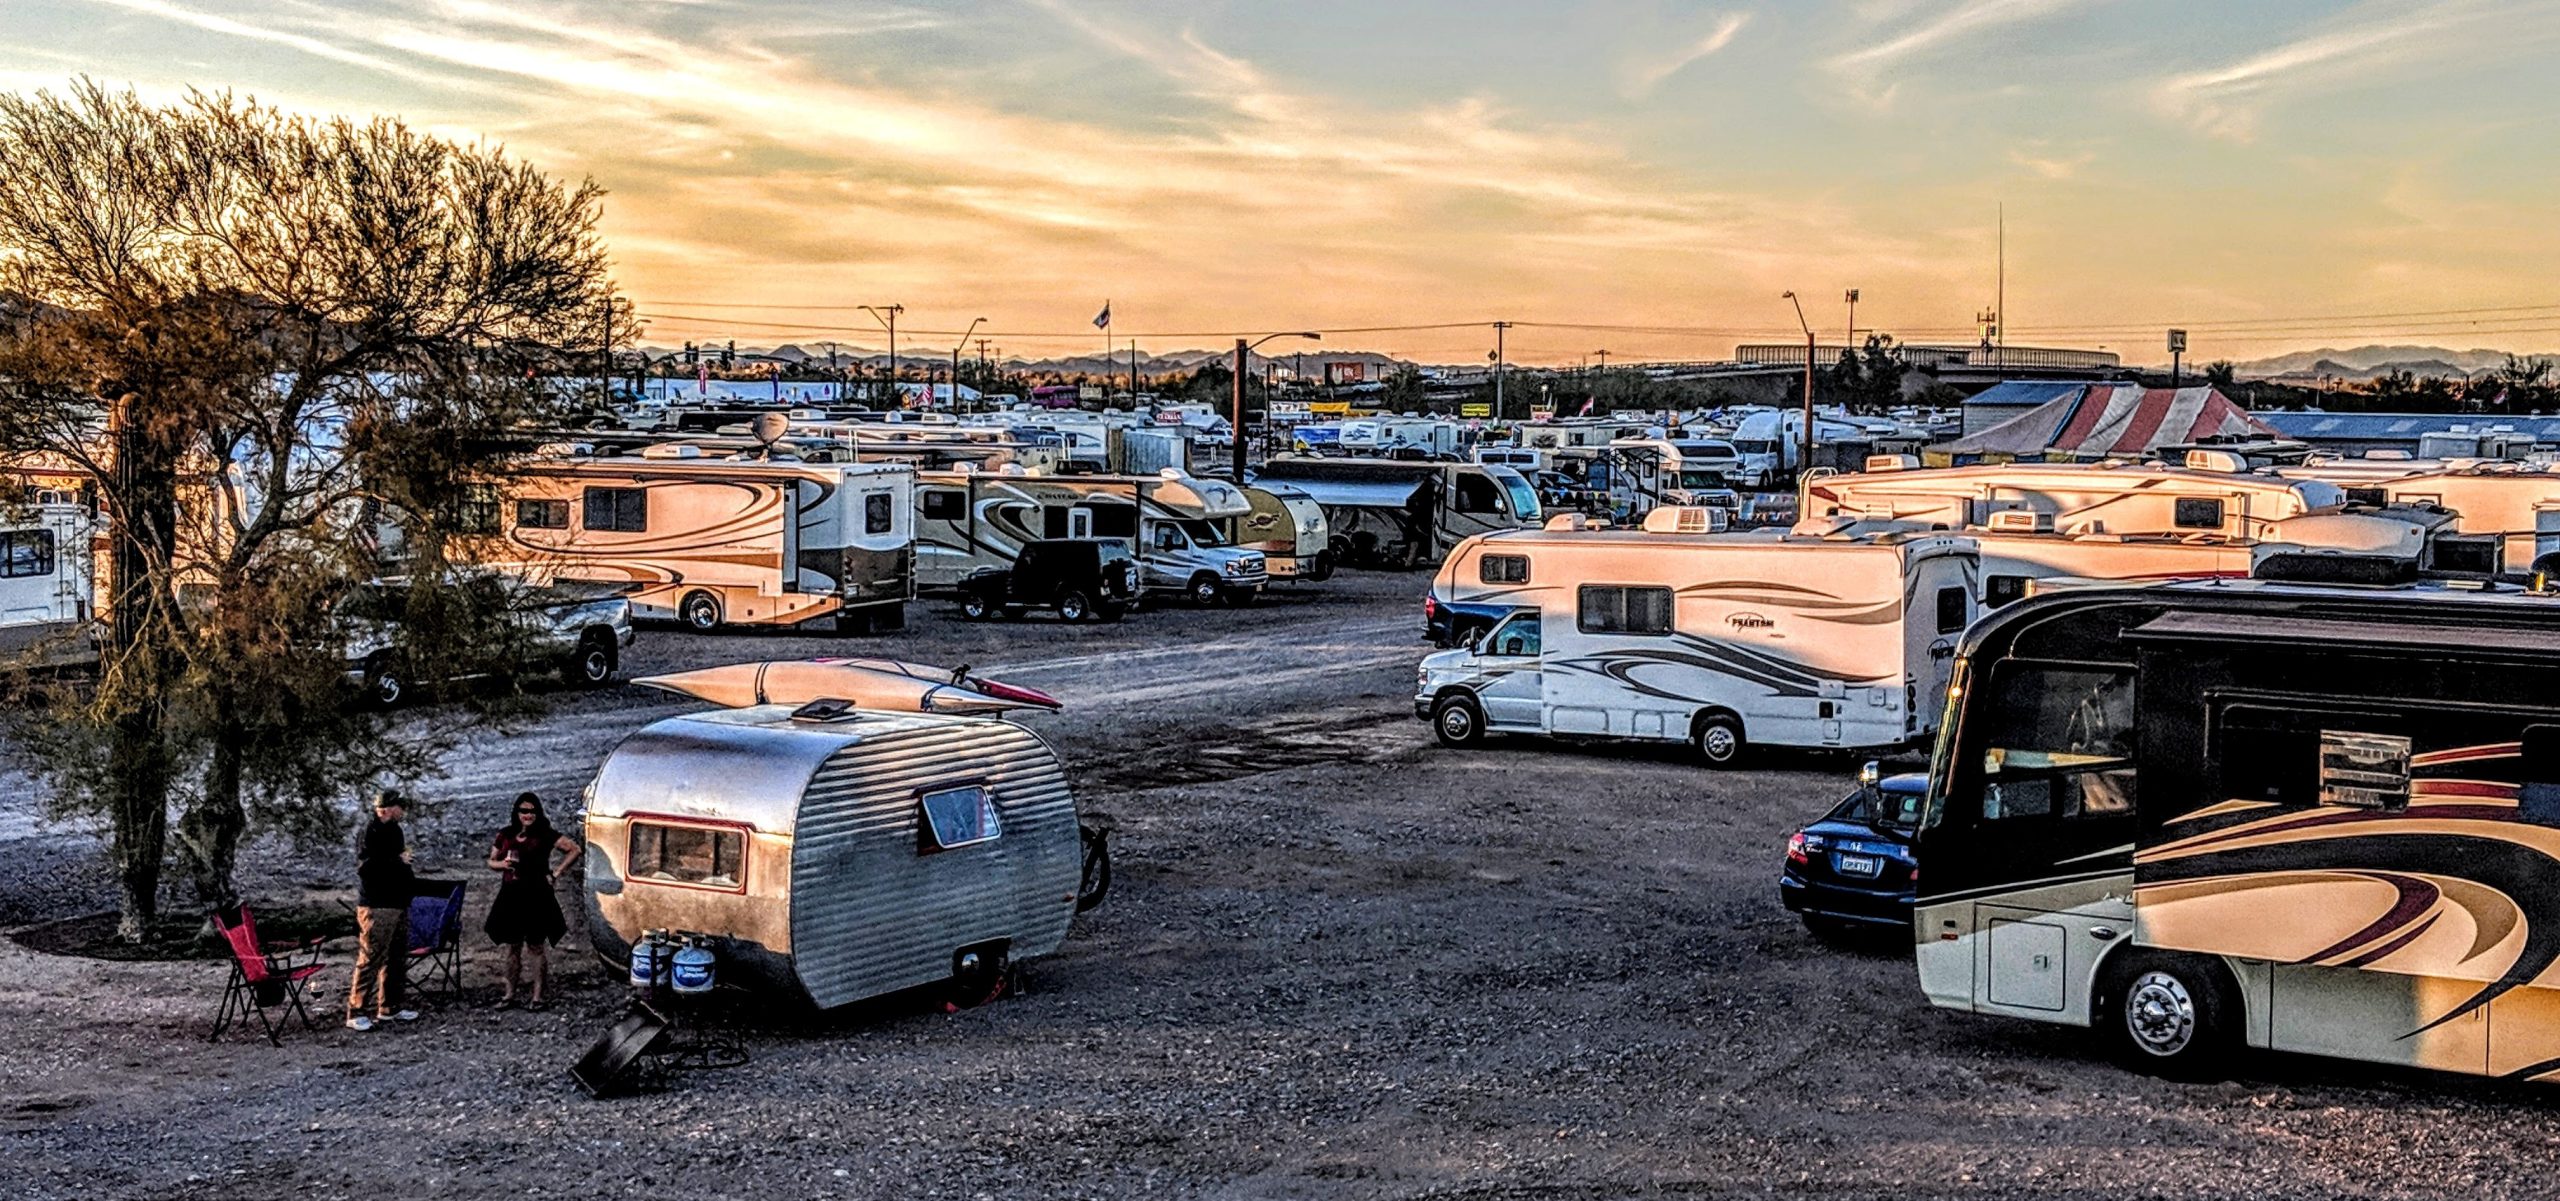
    The Best RVs to Transport Your Motorcycle

    Toy Haulers

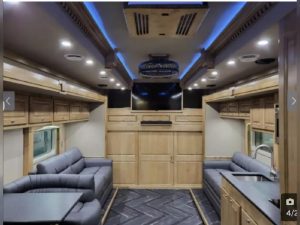
    Toy haulers are designed to RV with your motorcycle (or other large toys). Therefore, they’re built with the towing capacity and space you need. When shopping, factor in storage for accessories and equipment in addition to the toy that you are hauling. Some toy haulers allot the majority of floor space for the main event, leaving little extra room for other items you may want to bring along.

    Grand Design, Forest River, and Keystone consistently stand out among the crowd of toy hauler makes. The Momentum 376TH Toy Hauler has won numerous accolades, a reflection of Grand Design’s consistent attention to detail and quality product.

    Which toy haulers are the most popular within the riding community? The Keystone Raptor Series received great reviews among veteran Sturgis Harley riders.  Why? It boasts a roomy garage with a flexible floor plan.

    The Forest River XLR series offers a variety of toy haulers, both as fifth wheel and travel trailers. The XLR Hyperlite Toy Hauler comes in a variety of models, offering an enclosed garage, open deck, or open passageway. The floor plans are roomy with a spacious garage to boot.

    If you have two full-size Harley-Davidson motorcycles that you need to transport, then you may want to consider something along the lines of a Forest River Series Platinum Salem Fox Toy Hauler. It’ll get the job done and is reasonably light at 6,500 pounds dry.
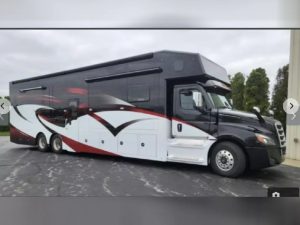
     

    Class A Motorhomes

    Generally speaking, gas-powered Class A Motorhomes can tow up to 5,000 pounds, while diesel-powered motorhomes can tow up to 10–15,000 pounds. In many cases, you will be able to tow your secondary car and use a hydraulic lift to transport your motorcycle. A Class A is a heavy-duty vehicle that gives you the many options for your auxiliary travel toys, but you’ll want to double-check your weight limits and towing capacity before deciding.

    If you aren’t towing a secondary vehicle, you can tow your motorcycle behind your Class A motorhome in all 50 states. This is a versatile solution to RV with your motorcycle that is limited only by your towing capacity and trailer configuration.

    A lift can come in handy if you already have something hooked up behind your RV. If you are looking at installing a lift on your Class A motorhome, it’s important to do your research; picking the right lift and the right installation method depends on your needs and your particular RV. Since a lift extends from the back of your motorhome, also check to see how it interacts with your towing setup and that you have the clearance you need to hitch and unhitch a trailer.
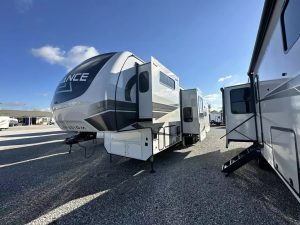
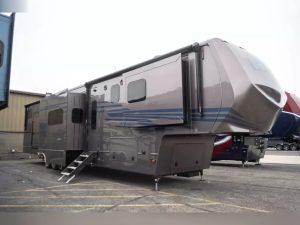
     

    Fifth Wheels

    Of the three types of RV we’re talking about today, this is the trickiest when it comes to accommodating a motorcycle — but it can be done. If you have a fifth wheel and you want to install a lift onto the back, keep in mind that you will need to have a frame that’s sturdy enough to support the load. Alternatively, if you decide to tow your motorcycle behind your fifth wheel, make sure you confirm the legality of double-towing (sometimes called triple-towing) in all states along your journey.

  • Hitch Types and Ratings: RV Basics

    Hitch Types and Ratings: RV Basics

    Looking forward to hitching up and hitting the road in your new RV?  Well, safe to say, RV Towing 101 probably wasn’t covered the last time you took a DMV test. And yet the difference between driving a standard vehicle and driving while towing a trailer is significant. Very significant. And you won’t be able to enjoy that newly purchased RV trailer without understanding hitch types and ratings.

    So, let’s get you hooked up with all the towing know-how you need. In this article, we’ll provide some pointers for the road, a few key hitch facts, and a breakdown of classes of hitch types and ratings. Additionally, we’ll provide follow-on articles (coming soon) on choosing the right hitch and common mistakes.


    Some Considerations Before You Hit Road

    • Stopping distance is increased, perhaps doubled, at highway speeds.
    • Overall vehicle length is doubled, or more.  You need more space in order to pull out into traffic, to merge, pass, to make a turn, and to maneuver in general. 
    • Your total rig weight is much greater, adding more mass and momentum and less mobility in any defensive driving situation.
    • Following distance needs to be greater, perhaps more than twice your usual habit, because of everything above.


    Remember, other drivers may not take your careful planning or weight distribution into consideration. This can become frustrating especially in heavy traffic, but keep in mind that you’re big. You’re visible. And you’re probably in someone’s way, so they’ll have to deal with you.  


    What to Know (About Your RV) Before You Tow

    • Your vehicle’s towing capacity. Can the vehicle you drive safely pull a trailer (fully loaded) and bring everything to a stop safely?  A good rule of thumb is for the GTW (Gross Trailer Weight) to never exceed 80 percent of your vehicle’s maximum towing capacity.
    • Your vehicle’s max tongue weight (MTW). Can the rear axle of your vehicle handle the additional weight of the trailer that isn’t being carried by the trailer axles? Generally this is 10 to 15 percent of the total trailer weight.  


    Having your vehicle and camper evenly matched is incredibly important to safe towing. As you head to the campsite you may have brought extra things: coolers full of food, kids, pets, extra fuel, outdoor adventure toys, and more. All of these need to be considered so you won’t put excess wear and tear on your vehicle nor exceed the safety limits of your rig.  


    Understanding How Hitches Work

    Most conventional trailers and campers use a ball hitch mechanism to connect. The ball hitch insert connects to the towing vehicle through a hitch receiver which is bolted/welded to the vehicle chassis below the bumper. Here’s a great article that dives deep into trailer hitches. Note: Bumper hitches are NOT recommended for safely towing and are illegal in California. 


    The trailer has a hitch coupler that drops down over the ball when the coupler handle is in the open position.  When closed, it brings a locking device (underjaw) up into position under the lower section of the ball. This prevents the hitch coupler from bouncing off the ball hitch while towing.  The handle can be locked into position with either a pin or a standard lock.  


    Classes of Hitch Types and Ratings

    Class I Hitch

    This is the perfect hitch for lightweight loads like bike racks, cargo carriers, or very small trailers, and works with smaller vehicles.

    • GTW (1,000 to 2,000 pounds); MTW (100 to 200 pounds); Receiver Size 1¼ inch
    • Class I hitch receivers have a tab so that you can only use a Class I hitch accessory with this receiver. Since Class II hitches have the same receiver size, this is necessary so that you don’t unintentionally overload the receiver. 

    Class II Hitch

    Heavier duty than Class I, these are still paired with smaller vehicles, but can accept heavier loads.  

    • GTW (2,000 to 3,000 pounds); MTW (200 to 300 pounds); Receiver Size 1¼ inch
    • Class II can accept Class I hitch accessories. 


    Class III Hitch

    Most traditional travel trailers will fall into this class, it is the most common hitch class across all towing vehicles because of the weight capacity range.  

    • GTW (3,500 to 8,000 pounds); MTW (300 to 800 pounds); Receiver Size 2 inch
    • Typical vehicles include full-sized sedans, minivans, SUVs, and trucks.


    Class IV Hitch

    A much heavier duty load rating than Class III, but retains the 2-inch by 2-inch receiver.  

    • GTW (5,000 to 12,000 pounds); MTW (500 to 1,200 pounds); Receiver Size 2 inch
    • Typical vehicles include large SUVs and trucks.


    Class V Hitch

    The biggest hitch type which is typically welded directly to the vehicle’s frame and offers a very large receiver. Intended to pull the heaviest loads like toy haulers, horse trailers, etc. An adapter can also help you insert Class IV (and lower) accessories into a Class V hitch receiver.

    • GTW (10,000 to 25,000 pounds); MTW (1,000 to 2,500 pounds); Receiver Size 2 ½ to 3 inch
    • Typical vehicles include large trucks with massive towing capacity.


    Next up, we’ll talk about how to interpret your vehicle’s ratings, what sway hitches and drop hitches are all about — and the pros and cons of a fifth wheel trailer.  

    Eager to learn more about hitches? That’s very wise. Read more from our RV Tow Hitches 101 series.

    Hitch Types and Ratings: RV Basics (Part 1)
    How to Choose the Right Tow Hitch for Your RV (Part 2)
    5 Common Mistakes That Lead to RV Trailer Hitch Problems (Part 3)

  • The First Step to Find Your Dream RV

    The First Step to Find Your Dream RV

    Seeking to buy your dream RV, but concerned about finances? The first step in cutting RV travel costs is to buy only what YOU actually need. Much like a house, the more square footage, the more expensive it is to purchase, insure, heat/cool, maintain, pay taxes, etc. With a rolling home, you also have to consider the costs associated with storage, annual registration, camping fees, campsite availability, and fuel costs.

    Since 2012 we’ve lived, worked, and traveled full-time in our vintage rig of just 72 square feet, and have explored the continent as well as every national park to which you can drive. While many may think that we are crazy for living in such a small space, we often say that we live small while living large! 

    Along our journey and at our speaking gigs at RV shows around the country, we’ve met hundreds of people who tell us that they bought too big of an RV the first time around. They are looking for that “sweet spot” between enough comfortable space, interior storage, as well as something that is easy to manage — both on the road and financially. 

    So, you might be asking how you can find that “sweet spot.” Well, friend, this article is for you.


    Don’t Skip This First Step

    It may sound obvious, but here it is: STOP before you go shopping. Don’t just buy what your neighbors have or what your brother-in-law raves about! (It’s such a temptation.) Remember: There are thousands of different RVs. So take the time to do your own homework and figure out what YOU need and what YOU can afford. And, be sure to tour several rigs before making a decision. This process will likely save you a bundle of money and much headache, both now and in the future.


    Now, Ask Some Crucial Questions

    • How are you going to use your rig?

      If you are planning to rent an annual campsite at the lake and visit throughout the year, or just head to the local RV park or state park a couple of times per summer, then size, length, and weight doesn’t really matter as much. Conversely, if you plan to drive it longer distances, visit national parks, and national forests that offer more modest-priced campsites — or even live in it full-time — our best suggestion is to purchase a rig under 25 feet. Overall, it will be less expensive and you’ll be able to fit into a wider variety of beautiful, inexpensive campsites. Less than 25 feet is also much easier to drive and will greatly reduce the stress of finding gas stations that can accommodate your rig, not to mention parking at grocery stores, laundromats, and when visiting those old friends that live along your route.


    • How many people are going to live in it regularly?

      One trap that many couples get into with both retirement homes and RVs is that they want something that will accommodate their grown children and grandkids. Many folks seeking to downsize their rig tell us that they bought a big RV to accommodate the extended family, but found that they’ve only joined them a couple of times. Again, buy what YOU need. You can always rent an RV, or vacation home, to accommodate others. In the long run, this act alone will save you tens of thousands of dollars.


    • Can you afford the fuel costs, campsites, storage, taxes/registration, and maintenance and repairs?

      You know that neighbor who has that big rig parked on their property, but never actually moves it? They probably bought too big and have found that it’s less expensive and less stressful to simply not go anywhere. Don’t let this be you.


    Then Imagine Life in That Dream RV

    Play out a couple of dream RV road trips ahead of time. Price out what they will cost in terms of fuel, campsites, and extras. Contact the DMV and find out how much taxes and registration will be for the rig you are interested in purchasing (varies WIDELY by state). If you are unable to store it on your own property, look into storage facilities nearby and price them out. Finally, factor in about 10 percent of the purchase price for annual maintenance and repairs. If all of that adds up to what you can comfortably afford, then you’ve found your rig! 

    In addition to these three very important prepurchase questions, this article (which includes a helpful RV shopping checklist / spreadsheet) will help you keep track of various options, floorplans, and packages included in many modern RV’s as you shop around.

    Once you’ve found your dream RV, give us a shout and tell us how the process was for you. Have fun, be safe, and we’ll see you on the road!

    Enjoying what you’re learning? This article is part of our Cutting RV Travel Costs 101 series.

    The First Step to Find Your Dream RV (Part 1)
    A Few RV Secrets to Help You Save on Camping Fees (Part 2)
    Boondocking Essentials for RV Newbies (Part 3)
    RV Kitchen Must-Haves: How to Make Memorable Meals That Save Cash (Part 4, Coming Soon)
    Going Deep into Your Backyard (Part 5, Coming Soon)

  • What to Look for in a Solar-Ready RV

    What to Look for in a Solar-Ready RV

    So, those solar-powered RV’s caught your eye, huh? (You’re here, so figured they might have.) Well, if you’re looking for the right solar-ready RV model, you’re going to want to get familiar with the terms. Trust us: We know. We’ve been in your shoes. Before hitting the road full-time in 2012, we added a small solar set-up to our vintage camper so that we could save money and camp off-grid without a noisy gas generator.  What we didn’t realize at the time was that we were on the front end of the RV solar revolution that has swept the world!  For the past 12 years, we’ve been teaching RVers how to go solar while we’ve explored North America.

    So, let’s make this intro lesson short and sweet. We’ll go deeper into more solar specifics in future follow-on articles, but here’s what you need to know —and the questions you need to ask — as you get started.


    What solar options are available on RV’s?

    Ranging from the “solar-ready RV” to full-scale solar system packages with all the bells and whistles, the options are many — and can be confusing for newbies. Below are three common options that you’ll find when shopping:


    1. Solar-Ready

    Some RV manufacturers add a special port to the outside of the rig into which you can easily plug a specific brand’s portable solar panel. It’s helpful because the plug directly connects to the house battery, so set-up is simple.  However, a solar-ready RV does NOT mean that the rig comes with any solar components. Typically, in addition to the panels, you will need to purchase a charge controller as well as an inverter if you want to run more than just lights and 12V DC appliances. Most RV’s come with a single, basic 12V lead acid battery, so you may want to upgrade the battery bank to LiFePO4.


    2. Solar Battery Maintainer

    Many modern rigs boast a small wattage solar panel (<50 watts) and charge controller that are designed to simply maintain the RV/van house battery.  While these battery maintainers are NOT robust enough for off-grid RVing, they can be beneficial if you plan to store your rig outside when not in use. These small panels will keep your batteries topped off, so you are always ready to roll on to your next adventure.


    3. Off-Grid Solar Packages

    Some RV manufacturers offer a few models with built-in solar panels integrated into the roof, or as a post-production addition. These systems can provide enough power for average off-grid use of the built-in 12-volt appliances (e.g., lights, slide-outs, water pump, stereo, slides, etc.). However, a few RV manufacturers are now offering robust, large-scale solar packages which include all five of the major solar components. These “off-grid” solar packages range from modest systems on medium-sized travel trailers to huge systems on larger rigs which can add upwards of $15,000 to the RV’s sticker price. The more expensive systems are designed to be able to run the entire RV’s electrical system as well as some of the other “creature comforts” you might want to bring along.  


    Questions to Ask Before Shopping for a Solar-Powered or Solar-Ready RV

    Do you plan to camp off-grid frequently or just the occasional overnight? Do you plan to run additional electric appliances beyond what is preinstalled in the rig?  Like many campers, do you need to be able to work electronically? And how much power will you actually need?  In our next couple of articles, we’ll be discussing how to calculate your energy needs. To get a head start, download our Solar System Sizing worksheet.


    Questions for the RV Dealer

    With the solar-ready RV becoming a popular option, the salesperson should be able to answer these questions, or show you where to find them:

    What brand(s) of solar components are pre-installed in the RV?  RV manufacturers might choose off-brand solar components that are less expensive, and possibly less quality.  Do the research about solar brand(s) so that you know what you are buying. Also, ask about the type and size of the individual solar components, such as:

    • Total solar array wattage and voltage? And also, type (PWM vs MPPT) and size (amps) of solar charge controller
    • Size (total amp hours) and chemistry (lead acid or Lithium Iron Phosphate) of the battery bank?
    • Inverter size, type, and the load (wattage) it can handle?  
    • DC to DC charger size (amps)?
    • Is the converter compatible with Lithium Iron Phosphate batteries?


    Does the RV warranty include the solar components?  Also ask, for how many years? Is it different for the various system components? Does installing additional panels on the roof void the warranty?


    Have we peaked your interest in RV solar?  Hope so. Now, here comes more questions: Which solar components do you need? Can you DIY part or all of a solar powered system? Absolutely! We’ll be discussing these details in the next couple of months, so stay tuned for more resources to build-out a robust solar system that will meet your energy demands no matter what type and size of rig you own or plan to buy.


    What to Look for in a Solar-Ready RV (Part 1)
    5 Solar Components Every RVer Should Know (Part 2)
    RV Solar Explained … with Middle School Math (Part 3)
    Does a DIY RV Solar System Install Make Sense for Me? (Part 4)
    Choosing the Right Solar Powered System for My RV (Part 5, Coming Soon)

  • DIY RV Fixes Any Newbie Can Do

    DIY RV Fixes Any Newbie Can Do

    Hitting the road in an RV is an adventure you’ll never forget, and in most cases, it will be some of the most fun you will have on the open road or in nature. There is a less memorable aspect to RVing though, and that is the dreaded fixes and repairs that are inevitable. To help you make more memories of the fun kind, here are some fairly easy DIY fixes and preventative measures that will keep you on the road with your headlights on, instead of on the side of the road with your hazards on.

    Oh, and for the record, I am far from an RV tech or repairman. This is just based on my experiences over six years and 100,000 miles of RV life on the road.


    Common Issues RVers Face

    As an RVer, you’ll likely face a few common issues that can be easily fixed or prevented with a bit of know-how. These problems range from minor leaks and blown fuses to tire changes and roof repairs. Addressing these issues promptly is crucial to maintaining the functionality and safety of your RV. By learning how to handle these basic repairs, you can avoid unnecessary service calls and keep your adventure on track, all while saving a lot of money in the process.


    Essential Tools and Supplies for DIY Fixes

    Before diving into the specifics of DIY repairs, it’s crucial to have the right tools and supplies on hand. Here are some must-have items for every RVer:

    • Basic Toolkit. Ensure you have a set of wrenches, screwdrivers, and pliers. These tools will cover a wide range of basic repairs.
    • Multimeter. Useful for diagnosing electrical issues, a multimeter can help you identify problems with your RV’s wiring and electrical components.
    • Duct Tape, Zip Ties, and Sealant. These versatile items can temporarily fix leaks and other minor issues until a more permanent repair can be made.
    • Spare Fuses and Bulbs. Electrical problems are common, and having spare fuses and bulbs can quickly resolve many issues without needing professional help.
    • Tire Pressure Gauge and Air Compressor. Maintaining proper tire pressure is essential for safety and fuel efficiency. A tire pressure gauge and good air compressor help ensure your tires are always at the correct pressure. Just make sure that the air compressor you have is strong enough to fill RV tires, which often require a much higher PSI than regular passenger vehicle tires.


    With these tools and supplies, you’ll be prepared to handle a variety of common RV issues. One final tip I can give before diving into a few specific DIYs is that while on the road, my wife and I try to take care of repairs in the parking lot of whatever stores we are buying parts at. If the space is there for you to make the repair comfortably, just realize that Murphy’s law is a real thing, and you will likely have to make another trip into a store to properly fix a problem. It’s easier to just walk back into a store instead of having to find another one to pull into along the way.


    Step-by-Step Instructions for Simple Repairs

    Fixing a Leaky Faucet

    One of the most common issues you will come across while RVing is a leaky faucet, and in most cases, it is relatively simple to fix. Here’s a step-by-step guide:

    1. Identify the Leak Source: Determine if the leak is coming from the faucet handle, spout, or connections underneath the sink.
    2. Gather Necessary Tools: You’ll need a wrench, screwdriver, and possibly replacement parts like washers, O-rings, clamps, or a hose.
    3. Turn Off Water Supply: Ensure the water supply or pump is turned off to avoid any mess. A bucket or something to catch trapped water is usually a smart idea as well.
    4. Disassemble the Faucet: Use the screwdriver and wrench to carefully remove the faucet or other component once you have determined the issue. In some cases, you will have to remove a few parts to get to the specific piece that needs to be repaired.
    5. Replace Damaged Parts: Check for worn-out washers, O-rings, or hoses, and replace them as needed.
    6. Reassemble and Test: Put the faucet back together, turn on the water supply, and test to ensure the leak is fixed.


    Replacing a Tire on an RV

    Changing a tire on an RV is slightly different from a regular vehicle due to the size and weight. Here’s how to do it safely:

    1. Proper Weight Ratings for Jacks. Ensure your jack can handle the weight of your RV. Check the weight rating before purchasing or using a jack. You should also know what the weight rating for your RV is, as it is essential for many aspects of RV travel.
    2. Check for a Spare Tire. Many RVs do not come with a spare tire, so your first step is to ensure whether or not you have one before hitting the road. If you do, make sure it is in good condition before setting out on your trip.
    3. Proper Tire Inflation Levels. Use your tire pressure gauge to check that all tires, including the spare, are inflated to the manufacturer’s recommended levels. Doing this regularly helps prevent blowouts or other issues.
    4. Safety First. Park on a level surface and use wheel chocks to stabilize the RV. If you have stabilizers on your RV that can be easily and safely deployed while changing your tire, that is a bonus. You should also make sure to turn on your hazard lights and place a cone if you have one.
    5. Loosen Lug Nuts. Before lifting the RV, slightly loosen the lug nuts on the wheel that needs to be replaced.
    6. Lift the RV with a Jack. Position the jack under a sturdy part of the RV’s frame and lift the vehicle until the tire is off the ground.
    7. Remove the Old Tire and Install the New One.  Remove the lug nuts and old tire, then place the spare tire on the wheel studs. Tighten the lug nuts in a star pattern by hand until the tire feels securely in place.
    8. Lower the RV and Tighten Lug Nuts. Carefully lower the RV and then fully tighten the lug nuts in a similar star pattern with the respective wrench to ensure proper tightening.


    Replacing a Blown Fuse

    Electrical issues are common in RVs, but replacing a blown fuse is straightforward:

    1. Locate the Fuse Box. The fuse box is usually found near the RV’s control panel.
    2. Determine the Faulty Fuse. Identify the blown fuse by checking for a broken filament or discoloration. This is where a simple multimeter comes in handy to diagnose and confirm.
    3. Replace the Fuse. Remove the faulty fuse and replace it with one of the same amperage. Avoid using a fuse with a higher or lower amperage rating, as this can cause electrical damage, or another blown fuse.


    Patching a Roof Leak

    A roof leak can cause significant damage if not addressed promptly, and the roof is something that I actually suggest you get professionally fixed if you are not confident in your DIY skills. That being said, a temporary patch can save your vacation until a professional can take a look. Here’s how to patch it:

    1. Identify the Leak Location. Look for signs of water damage or moisture inside the RV to pinpoint the leak.
    2. Clean the Area. Clean the area around the leak with soap and water, and let it dry completely.
    3. Apply Sealant and Patch. Use a roof sealant to cover the leak area, then apply a patch over it. Press firmly to ensure it adheres well.
    4. Allow to Dry and Test. Let the sealant dry completely before testing the repair by spraying water over the patched area.
    5. Duct Tape Isn’t Great, but It Can Help. If you don’t have sealant or a patch but you do find yourself with a leak, duct tape can sometimes be a temporary solution. Be sure that the tape will not further damage your roof, paint, or leaky area before applying, but I personally feel that in the case of a leak, that risk is worth it if bad weather is coming.

      *A good idea, if possible, is to check a weather app on your phone. You may be able to simply wait it out if the weather looks OK for the rest of your trip.


    Safety Tips and Precautions

    • Turn Off Power. Always unplug from shore power and turn off the power supply before attempting any electrical repairs to avoid shock or injury.
    • Wear Protective Gear. Use gloves, safety glasses, and other protective gear as needed to prevent injuries.
    • Ensure Proper Ventilation. When working with sealants or other chemicals, ensure the area is well-ventilated to avoid inhaling fumes.
    • Double-Check Work. After completing any repair, double-check your work to ensure everything is secure and functioning correctly. This is especially true if you are on the road and not at home with time and resources readily available for those dreaded multiple trips to the hardware store that I mentioned above.


    Additional Resources

    Just because you’re doing it yourself doesn’t mean you have to do it alone. I have three sources that I regularly use for help.

    • Online Forums and Communities. You would be surprised how a simple Google search for your specific problem can come back with forums or websites where people are discussing your problem and how to fix it.
    • Video Tutorials and Online Courses. YouTube searches can sometimes offer detailed video tutorials on various RV repairs. This is usually my favorite method, because I get a visual aide to reference.
    • Call a Professional. Whether it is a local professional that you may have found in a search or someone you may personally know, sometimes calling someone with more knowledge can lead to a simple cheap fix. This has happened to my wife and I while on the road, and we’ve had professionals walk us through a few possibilities over the phone that ended up saving us a lot of time and money. You’d be surprised how many people, even those that make a living off these kinds of repairs, will be willing to give a little free advice over the phone.


    Understanding and performing basic DIY repairs and maintenance can greatly enhance your RVing experience, giving you the confidence to handle common issues and keep your adventure on track. Practice these skills, learn from each experience, and soon you’ll be tackling more complex repairs with ease. Happy RVing, and hopefully we’ll see you on the road.

  • Replacing or Fixing an RV Toilet: A Step-by-Step Guide

    Replacing or Fixing an RV Toilet: A Step-by-Step Guide

    Ah, the joys of RV life – the open road, the freedom to roam, the adventures waiting around every bend, and the occasional spray of toilet water to the face! Let’s be honest, not every part of RV living is glamorous. Take, for example, the humble RV toilet. It’s a crucial component of your home on wheels, but one that often gets overlooked until it’s too late.

    If you’ve found yourself in need of fixing or replacing your RV toilet, fear not! This guide will walk you through the process step-by-step, with a personal experience that even I had to laugh at – well, I laughed days later, not in the moment.


    My Frozen RV Toilet Fiasco

    This is my somewhat long story and is mostly for laughs, so if you wish to skip to the how-to section, click here.

    Let me set the scene: It’s Idaho in the winter, and before you ask who goes camping in Idaho in the winter, that would be us. We were working on a contract that had us stay at an RV resort with hotel rooms. The temperature was going to drop into the negatives with windchill, so we stayed in a cozy hotel room, thinking that we would be fine leaving the heat on overnight. That was my first mistake. The following is what transpired.

    My breath fogs in the air as I step outside my hotel room to slip and slide my way over the ice and snow in the parking lot towards my RV. I’m bundled up and look like the Michelin man as I waddle over and into the less-than-freezing inside of my home on wheels where I realize that I may have set the heat a little low trying to conserve power and gas. I turn on the water pump, the motor churns to life, and … sprinkler sounds come from the bathroom. Oops, I warmed the inside of the RV, but I left that bathroom in the back a little too exposed to the weather.

    I open the bathroom door, water is shooting out from behind our RV toilet, and I know it’s up to me to fix it. After I shut off the water pump and arm myself with tools, I venture into the belly of the beast. As I begin disconnecting the toilet, disaster strikes. A specific connector, apparently not built to withstand arctic conditions, snaps clean off. I spout a few four-letter words, waddle back to the hotel room, and inform my wife, “We have to find an RV parts store.”

    We spent the next 30 minutes looking for somewhere that would have our specific toilet and the specific part I needed. The closest place was a Camping World about an hour away. When we arrived, they had the part ready, I purchased it and immediately went to work in the parking lot. After about 30 or 40 minutes of uncomfortably working on the toilet, I smiled and said, “Wow, that wasn’t too bad.” Of course, that’s when the fun really started. I asked my wife to turn on the water pump, and after a few seconds of seemingly successful silence, I leaned in, only to catch a jet of freezing cold water sprayed directly into my face.

    Luckily the water was coming from the outside connection and not a backfire, if you catch my drift. It turns out that trying to lazily skip a few steps wasn’t the best idea. Instead of taking the toilet out completely to work on the problem, I tried to work directly on the issue that needed fixing. After a few more four letter words – which my wife said were pointless, but they definitely made me feel a little better at the time – I inspected everything further and thought that maybe some other connectors and washers would be a good idea. I was confident that a stop at the hardware store for a few items and proper installation would do the trick.

    Since we were trying to make it pretty far on our travel day, we drove another two hours south to a Home Depot, where I proceeded take out the whole toilet to try and do it right. I went into the store and purchased everything I thought I would need and started taking out the toilet. It took me about 45 minutes out in the cold to take out the toilet, replace some connections, and add a little insulation around the tubing for future protection. When I put everything back together, I turned on the water, and sure enough, I got sprayed right in the face again. It turns out that in my haste to finally finish this project, I didn’t properly connect the new piece I purchased in the first place.

    At that point the four-letter words were really flowing, but I set out to start from the beginning again. After getting the toilet out, I of course fumbled one of the unique screws that holds it in place right down the poop-chute, and I nearly lost my mind. My wife, somewhere between aggravation and laughter, calmed me down, and then set out to help me in my final attempt after I took about 20 minutes to find a screw that would actually fit our toilet. Together, we were finally able to properly install the toilet and the replacement part.

    It turns out that doing things slowly, thoroughly, and completely from the beginning, is always the best way to do things. It also shows that while I try to do things myself, getting help from others is good practice too. And finally, as much as I hate to admit it, sometimes my wife does know best. I won’t tell her it’s not more than Google, even though I feel like she may think so, but she is brilliant and super handy too. I love her, and she’s the best partner I can ever have for all of my crazy life adventures.

    Now, for those that want to do it right the first time around, below are the tools and steps you should take to properly fix or replace your RV toilet.


    Tools and Materials Needed

    Before diving into the replacement process, gather the following tools and materials:

    • adjustable wrench
    • screwdriver set
    • plumber’s tape (Teflon tape)
    • replacement part or new RV toilet
    • rubber gloves
    • towels or rags
    • bucket

    Having these items on hand will ensure you’re prepared for the job without unnecessary interruptions.


    Step-by-Step Instructions

    Before beginning the installation, the most important aspect of this project is comparing your toilet and the specs of your RV bathroom with a possible replacement part or new RV toilet. You don’t want to start the project only to realize that what you purchased is not compatible.


    Step 1: Turn Off the Water Supply

    Begin by turning off the water supply to your RV. This will prevent any unexpected sprays of water (trust me, you’ll want to avoid this). Locate the water pump switch and ensure it’s off, or turn off the main water supply if you’re hooked up to an external source.

    Step 2: Drain the Toilet

    Flush the toilet to drain as much water as possible. Use towels or rags to soak up any remaining water in the bowl. This will minimize spills and make the process cleaner.

    Step 3: Disconnect the Water Line

    Use a wrench to disconnect the water line from the back of the toilet. Be prepared for a small amount of water to spill out. Have your bucket and towels ready to catch any drips.

    Step 4: Remove the Old Toilet

    Unscrew the bolts at the base of the toilet using a wrench or screwdriver. These bolts can sometimes be a bit stubborn, so applying some WD-40 or other lubricant and letting it sit for a few minutes may help. Lift the old toilet off the flange and set it aside. You might need an extra hand to help maneuver it out of the tight space.

    Step 5: Prepare the Flange

    Clean the flange area thoroughly with a rag. Remove any old wax or gasket material to ensure a good seal with the new toilet. Ensure the surface is smooth and free of debris. If the flange is damaged, this is the time to replace it to avoid future leaks.

    Step 6: Install the New Toilet or Replacement Part

    Place the new toilet onto the flange, aligning the bolt holes. Secure it with the provided bolts, tightening them evenly to avoid cracking the base. It’s important to tighten the bolts just enough to secure the toilet without over-tightening, which can cause damage.

    Step 7: Reconnect the Water Line

    Attach the water line to the new toilet, ensuring it’s snug and secure. Use plumber’s tape (Teflon tape) on the threads to prevent leaks. Double-check that the connection is tight but not overly tight, to avoid damaging the fittings.

    Step 8: Turn On the Water Supply

    Turn the water supply back on and check for leaks. If everything looks good, flush the toilet a few times to ensure proper operation. Monitor for any slow leaks over the next few hours to catch any issues early.


    Common Challenges

    Replacing an RV toilet isn’t always smooth sailing, as you can picture if you read my story. Here are some common challenges you might face, along with tips to overcome them:

    Leaky Connections

    Double-check that all connections are tight and secure. Use plumber’s tape to seal threads. If you notice any leaks, tighten the connections slightly more and ensure the plumber’s tape is correctly applied.

    Stubborn Bolts

    If bolts are rusted or difficult to remove, apply a lubricant or penetrating oil and let it sit for a few minutes before attempting to loosen them. A little patience with your elbow grease can go a long way.

    Misaligned Flange

    Ensure the flange is clean and properly aligned before securing the new toilet. If it’s damaged, consider replacing the flange as well. This can prevent future leaks and ensure a secure fit.


    Maintenance Tips

    To keep your new RV toilet in top condition, follow these maintenance tips:

    Regular Cleaning

    Clean the toilet regularly with RV-friendly cleaners to prevent buildup and odors. Avoid harsh chemicals that can damage the seals and components.

    Check for Leaks

    Periodically inspect the water connections for leaks and tighten as needed. Early detection can prevent water damage and save you from more extensive repairs.

    Winterize Properly

    If you’ll be camping in cold weather, take steps to winterize your RV to prevent freeze damage. Drain the water lines, add antifreeze as necessary, and insulate exposed pipes and connectors. If you are RVing in cold weather, be sure that your pipes, tanks, and bathroom have proper ventilation and heating to prevent freezing.


    Conclusion

    Replacing an RV toilet might not be the most glamorous task, but with the right tools, materials, patience, and in some cases, a good sense of humor, it can be a manageable experience for most DIYers. Whether you’re dealing with a frozen water fiasco or just looking to upgrade, this guide has you covered. Happy RVing, and may your travels be filled with adventure and well-functioning toilets!

  • Elite Escapes: Explore RV Trader’s Top Luxury RVs

    Elite Escapes: Explore RV Trader’s Top Luxury RVs

    Everyone knows that RVs come in a wide range of models. Each offers different levels of comfort and luxury, but whether you’re prepared to buy or not, there’s nothing more fun than exploring the top-of-the-line options. (While, of course, dreaming about the high-end glamping these exquisite units would make possible.) No question about it: Viewing the top luxury RVs available on RV Trader is an exhilarating exercise. Quite frankly, these models redefine what it means to travel in style — combining opulent interiors, cutting-edge technology, and unparalleled craftsmanship. 

    In this article, we’ll delve into some of the most luxurious RVs currently listed on RV Trader. And we’ll share a few exquisite photos. But if you want a closer look at the listed model (you do), just follow the link to each listing. 


    Class A 

    2023 Newell P50 Coach Class A RV 

    Price: $1,999,999

    Experience the unparalleled luxury offered by the 2023 Newell P50 Coach. Priced at just under $2 million (one full dollar under), this Class A RV is the epitome of opulence and sophistication on the road. Designed for those who demand the best, the Newell P50 offers an array of high-end features and amenities that set it apart from the rest.


    Class B 

    Storyteller Overland GXV NEXT 

    Price: $446,322

    Discover the epitome of luxury and adventure with the Storyteller Overland GXV NEXT. Priced at $446,322, this Class B RV combines rugged off-road capabilities with high-end comfort and style. Enjoy a premium interior featuring top-quality materials, cutting-edge technology, and versatile living spaces designed for ultimate convenience. The GXV NEXT offers everything you need for both on-road comfort and off-grid adventures.


    Class C 

    New 2024 Elite/NRC Class C RV Quad Slide Bath & Half

    Price: $925,000

    The 2024 Elite/NRC stands out with its sleek all-aluminum smooth exterior shell and sophisticated design. Featuring a powerful Cascadia 600HP engine with a 12-speed transmission, this RV combines high performance with elegant style. Enjoy a host of luxury features including raised recessed ceilings, a glass cooktop, and an Aqua-Hot water and heat system. The interior boasts a mini-King bed, ceramic tile shower with glass door, and heated floors.

    Additional highlights include a Blackstone exterior grille, outside refrigerator/freezer, power awnings with faux matching covers, and a custom bar area with a granite top. The coach also features Villa Hide-A-Bed flip-out sleeper sofas, an electric fireplace, and a ceiling fan in the main salon. With multiple large flat screens, in-motion satellite, and a 21-cubic-foot Whirlpool refrigerator, every detail is designed for comfort and convenience.


    Travel Trailer

    2021 Living Vehicle Travel Trailer RV

    Price: $497,500

    This near-new certified preowned Living Vehicle showcases the latest technology and premium option packages, including a sleek and modern design. Highlights include a solar awning, mobile connectivity, auto-leveling, off-road capability, performance towing, Euro-loft, off-grid spa bath, and an outdoor Sshower. The 2024 LV energy system upgrade offers a 43-kWh all-lithium battery pack, 15,000-watt, pure-sine inverter power, dual air conditioners, and 3,520-watt solar power, making it a pinnacle of luxury and innovation.


    Fifth Wheel

    New 2024 Alliance RV Fifth Wheel Paradigm 380MP

    Price: $1,004,995

    Looking for a luxurious retreat on wheels that offers flexibility for work, entertainment, and relaxation? This fifth wheel is perfect. Featuring a versatile central room that can be used as a guest suite or home office, it also has a sleeper sofa, desk, and a fun loft for extra storage or kids’ play. The private master suite provides a king-sized bed, a spacious wardrobe with washer and dryer prep, and a smart TV, while the spa-like bathroom boasts a large shower and elegant finishes. The heart of the RV features a gourmet kitchen island, a 50-inch smart TV, and a fireplace, surrounded by plush seating, including a dual recliner loveseat and a sleeper sofa, making it one of the top luxury RVs for hosting or unwinding.


    Toy Hauler

    New 2025 Luxe Fifth Wheel Toy Hauler 48FB 

    Price: $277,539

    The Luxe Toy Hauler 48FB offers unparalleled luxury and innovation, featuring a MORryde Independent Suspension System and elegant Hickory cabinetry. Enjoy a 3-season rear veranda, side patio with outside entertainment, and a rear porch/railing package with stairs. Inside, find a vanity slide with a walk-in closet, a 24-inch range oven with four burners, an LED TV in the garage, a half bath, and ample storage including dressers and a shoe rack. The garage boasts an 11K Btu ducted A/C and washer dryer prep.

    Experience top-tier travel with soft-touch finishes in the living room and solid surfaces on the dinette table — all complemented by the superior MORryde Independent Suspension for a smooth ride. Because the top luxury RVs shouldn’t just look smooth in park. They should drive smooth and tow smooth.


    See What Other Campers Are Saying

    Read the best reviews by owners. Search for an RV Model

  • 10 Popular RV Renovation Ideas: Personalizing Your Home on Wheels

    10 Popular RV Renovation Ideas: Personalizing Your Home on Wheels

    So, you bought the RV you’ve been searching months for, but it’s missing those final touches to truly give it that unique feel. That “Now, I’m home!” feeling. Well, no worries. I’m here to help give you some tips and inspiration on how to give your RV a bit of a facelift to make it truly feel like your home on wheels. Whether you’re a weekend warrior or a full-time RVer, these 10 RV renovation ideas can significantly enhance your comfort and enjoyment on the road.

    From simple decor changes to more substantial upgrades, here’s a guide to some of the most common RV renovations that can turn your RV into a cozy and stylish retreat.


    1. Flooring Upgrades

    While many RV manufacturers have listened and improved the flooring on newer units, it can still be a sticking point — no pun intended — for many DIYers looking to make that initial upgrade. Many RVs come with basic linoleum or carpet. Both can wear out quickly and hold onto dirt, stains, and more. Consider replacing these with more durable and stylish options like vinyl planks or laminate flooring. These materials are not only easy to clean but also add a touch of homey elegance to your space.

    DIY Tip: Make sure to choose flooring that can withstand temperature fluctuations and moisture, as these are common in RVs.


    2. Kitchen Remodels

    If food is the key to your heart, like it is for me, then the kitchen is likely the heart of your home. And if that is true, then your RV should be no different. Simple changes like painting cabinets, adding a backsplash, or upgrading your countertops can make a big difference. For a more significant transformation, consider replacing your RV’s appliances with more modern and efficient models.

    DIY Tip: Peel-and-stick tiles are a budget-friendly way to add a stylish backsplash without the hassle of traditional tiling.


    3. Bathroom Upgrades

    Most RV bathrooms are smaller than their sticks-and-bricks counterparts, but that doesn’t mean you can’t make it stylish, cozy, and functional. Simple and inexpensive changes like replacing the showerhead with a high-pressure, water-efficient model go a long way towards looks and saving water when you are out boondocking.

    For looks, installing a new vanity, or even adding some decorative touches like new curtains and towels can create a spa-like feel. OK, maybe not a spa-like feel, but it is definitely cozier than a bare RV bathroom. Trust me when I say that a nice shower rug on your feet when it’s really cold outside can go a long way.

    DIY Tip: Use damage-free adhesive hooks and suction cup organizers to maximize storage and keep everything in place while on the move.


    4. Solar Power Installation

    One of the best RV renovation ideas for just about any RV is adding solar panels and better batteries. Not only does this eco-friendly solution reduce your reliance on campsite power hookups, but it also allows you to enjoy off-grid camping with ease. A basic solar setup can power essential appliances and keep your batteries charged, giving you more freedom to explore remote locations. 

    If DIY solar scares you, then a good solar power station with folding solar panels is a great plug-and-play solution. These tend to be a little cheaper than building your own solar setup, but they are easy and come with a warranty.

    DIY Tip: Start with a smaller solar kit to understand your energy needs before expanding your system. Installation usually involves mounting the panels, running wiring to a charge controller, and connecting to your battery bank.


    5. Painting and Wallpaper

    A fresh coat of paint or some stylish wallpaper can drastically change the look and feel of your RV. While this is admittedly my weak point — I let my wife and her eye for decor make these upgrades — this quick and inexpensive change truly gives your RV a welcoming feel. According to her, light colors can make a small space feel larger. Bold patterns, on the other hand, can add a touch of personality. Don’t forget about the cabinets and furniture. A little paint can go a long way in updating your RV’s interior.

    DIY Tip: Use lightweight materials and ensure proper ventilation when painting to avoid lingering fumes.


    6. Furniture Upgrades

    Swapping out old, uncomfortable RV furniture for more modern, multifunctional pieces can greatly enhance your comfort. Consider installing a convertible sofa bed, a fold-out dining table, or even custom-built storage solutions that maximize every inch of your space.

    DIY Tip: Look for furniture that can be securely fastened to prevent movement while driving, and always consider the weight of old vs new furniture, because WEIGHT MATTERS!


    7. Lighting Improvements

    Good lighting can transform your RV from a dark cave into a warm, inviting space. If you are like me and don’t mind the cave feel, then you can skip to the next idea. But if you are like my wife and need light at all times, then replacing outdated fixtures with energy-efficient LED lights and adding under-cabinet lighting in the kitchen are a game-changer. If you want to go the extra mile, then consider installing dimmers to create a cozy ambiance.

    DIY Tip: Battery-operated LED lights are a great option for adding illumination without complicated wiring.


    8. Exterior Enhancements

    Don’t forget about the outside of your RV! Adding an awning, upgrading your outdoor lighting, or even just giving your RV a good wash and wax can make a big difference. For those who love outdoor living, consider installing an outdoor kitchen or entertainment area, or having an easy and functional setup that you can pull out wherever you go.

    DIY Tip: Portable solar lights can enhance your outdoor space without needing electrical wiring.


    9. Storage Solutions

    Maximizing storage in an RV is always a challenge, but it is essential. With a bit of creativity, you can make the most of your available space. Install shelves, hooks, and organizers to keep everything in its place. Think vertically and use every nook and cranny for storage. For some fun ideas, here is a video of us in our Class B van, maximizing all of our space to be able to stay on the road for months.

    DIY Tip: Over-the-door organizers are perfect for adding extra storage without taking up floor space.


    10. Personalized Decor

    Finally, add some personal touches to make your RV feel like home. I give my wife all the credit in the world. Simply hanging some photos, adding some cozy throw pillows and blankets, and incorporating decor like fake plants have transformed the living space and made it more inviting.

    DIY Tip: Use removable adhesive strips and hooks to hang items without damaging the walls.


    For most of these RV renovation ideas, you can keep your costs fairly low and find some good bang-for-buck options if you do a little research. But regardless of how little (or how much) you spend, renovating your RV to make it feel like your own cozy sanctuary on the road truly changes the RV experience for the better. It has made a world of difference for us. So, whether you’re making small changes or undertaking a major overhaul, these common RV renovation ideas will help you create that comfortable, stylish, and functional home on wheels. Happy renovating, and may your travels be filled with adventure and beautiful memories!

  • Best RVs to Rent for Bachelor and Bachelorette Parties

    Best RVs to Rent for Bachelor and Bachelorette Parties

    When you’re saying goodbye to singledom, your last hurrah has to be memorable. That’s why brides and grooms are increasingly turning to alternatives to the traditional bachelor and bachelorette party options. One growing trend is the destination party, with some industry pros estimating a 40 percent increase in bridal party getaways. Combine that with the growing popularity in rental RVs, and you have a match made in pre-matrimonial heaven. The RV delivers the best of all worlds (presuming, of course, a separation between imbibing and driving). They’re safe, Instagram-friendly, with memorable adventure built in. The question isn’t so much whether it’s a good idea to rent one. Rather, it’s: “Which models are the best RVs to rent for bachelor and bachelorette parties?” Well, we can help you.

    Here are seven fantastic choices for RV rentals for your big night.


    7 RVs to Rent for Bachelor and Bachelorette Parties

    1. Winnebago Minnie Winnie

    Recommended for: Easy driving, easy parking, and a mobile crash pad for eight.

    The Winnebago Minnie Winnie is a classic choice for group travel, and it’s easy to see why. This Class C is as spacious as it is well-designed, perfect for accommodating a larger group. As a Class C, it’s going to be easier to drive than a big diesel pusher, but it still sleeps eight, so everybody has a comfortable place to crash after a night of carousing. It crams a full kitchen and bathroom into its drivable size, so next-morning brunch is plenty doable.


    2. Airstream Interstate 19

    Recommended for: Luxury vibes, and the perfect choice for a do-it-yourself party tour for four.

    Is there a sexier RV than an Airstream? (Definitively no.) Its sleek design and high-end features are going to give your party that luxury splurge vibe that you’re after. It’s smaller, only sleeping four, but your three besties are going to love the ’Gram-worthy backdrops. You’ll also love the drivability, with the Mercedes-Benz Sprinter van chassis driving like a regular consumer vehicle. That means gas stops and parking are easy as pie, ideal for hitting various party destinations without hassle.


    3. Thor Motor Coach Miramar

    Recommended for: Demanding brides and grooms that want to host their big bash in the limousine of RVs.

    If you have an RV-ready driver, there’s nothing like a Class A for luxury, and as the largest manufacturers of RVs in the world, nobody does them quite like Thor. The Miramar combines the glitz and glam of Vegas with the posh adventure of an Aspen. It comfortably sleeps up to ten, so you’ll have plenty of room for your whole party crew. And some models even have multiple bathrooms, which will make getting ready for nighttime activities or next-morning recovery easier for large groups. It also has more than double the storage space of some of the smaller models on our list, ensuring that even your heaviest packers have room to store all of their bags, along with your own stash of questionable party favors.


    4. Forest River FR3

    Recommended for: Big RV bang without the baller-sized, bank-busting budget.

    Another, more affordable Class A choice is the Forest River FR3, a popular choice for parties due to its perfect balance of comfort and functionality. It’s significantly less expensive than Thor’s Miramar, but still brings that Class A vibe and party-friendly amenities like a full-sized fridge and plenty of storage space. The full kitchen should suffice for meal or snack prep, and the FR3 still sleeps up to 10, giving you plenty of flexibility with your guest list.


    5. Mercedes-Benz Sprinter Van

    Recommended for: Easy driving and swanky Mercedes vibes for a smaller, more intimate party of five.

    For a more compact and versatile option, consider renting a Mercedes-Benz Sprinter Van. The manufacturer calls it “the complete package” — tough, powerful, efficient, and flexible. Which is hard to argue with — this van is perfect for smaller groups who want a comfortable and stylish ride. It can accommodate up to five people, one more than some camper vans or Class Bs. Its modern interior, comfortable seating, and advanced technology are going to give your big party some glitz, and the Mercedes brand won’t hurt either. Its size also makes it easy to maneuver and park, allowing you to explore various destinations with ease, including any old gas pump you can find. In short, there’s a reason loads of RVs use this chassis. So whether you want to just go with a standard Sprinter, or get more serious, like the insanely luxurious Grech RV Lusso, you’ll be in great shape.


    6. Jayco Greyhawk

    Recommended for: Solid performance, solid construction, solid memory making.

    Each of the Class Cs in our list brings a solid compromise between drivability and space. The Greyhawk is no exception, delivering a hassle-free driving experience along with accommodations for seven. Jayco is a sub-brand of Thor, which means you’re getting an industry-leading product, with the Greyhawk delivering a great experience at a solid price tag.


    7. Coachmen Freelander

    Recommended for: Middle-of-the-road (in a good way) combination of comfort and reliability without blowing your whole bach budget.

    The Coachmen Freelander is a versatile and budget-friendly option, helping you save more of your party budget for the actual party. This Class C motorhome offers comfortable sleeping arrangements for up to eight people, along with a fully equipped kitchen and bathroom, giving you everything you need for pre- and post-party shenanigans. Its practical design and affordable rental rates make it an attractive choice for those looking to celebrate without breaking the bank. Some Freelander models even include an electric fireplace for setting just the right bachelor or bachelorette mood.


    One Bonus Recommendation

    Many RV parks are going to ask you to abide by neighbor-friendly rules like quiet hours. To make sure your frolicking goes undisturbed by pedantic party poopers, consider finding a party parking spot through a service like Harvest Hosts, which gives members access to unlimited overnight stays at over 5,251 farms, wineries, breweries, and attractions with no camping fees. With many of their locations, which include wineries, farms, and other memory-making locales, you’ll have the whole place to yourself, making sure even the rowdiest of crews can avoid pissing off the neighbors.

  • The Art of Finding the RV-Friendly Gas Station

    The Art of Finding the RV-Friendly Gas Station

    Let’s face it: If the RV life were easy, everybody would do it. Living on the open road is undeniably freeing, with nearly unlimited options for adventure. But there are a few reasons it’s not for everybody. One is that you are inevitably subject to some … uncomfortable feelings. For example, every driver has stared at a fuel gauge and wondered, When do I actually run out of fuel? The front side of the E or the backside? But in a car, any old gas station will do. In an RV, however, it’s not so simple. Because not every gas station loves an RV’s dimensions. Like most RV-specific things, there is an art to finding an RV-friendly gas station.

    Without a doubt, whether you’re in the cockpit of a motorhome or towing a trailer behind your truck, fuel is a resource worth planning for. So, here are a few ways you can stay out of that panic zone and ensure your RV experience is as stress-free as possible.


    Plan ahead. 

    Planning ahead comes naturally to anyone who’s been an RVer for more than a weekend, but for newbies driving their new dream RV, it can be surprising how quickly things can go south without the right kind of prior preparation. Planning ahead takes all kinds of forms, and one of those is sitting down with a map and making a plan. It’s not hard, but missing this step is one of the easiest ways to find yourself in that gas panic. Plan conservatively, knowing that you might need some flexibility when the gas gauge is going down. In other words, don’t plan to roll into a gas station on E.


    Use one of these RV-focused mobile apps to plan out your trip.

    It feels like every week a new app comes out with new RV-specific features. Some of the most popular are from RV Life, Roadtrippers, GasBuddy, and iExit. Each of these apps, and the dozens of others like them, have specific strengths or weaknesses. But each of them helps you plan out your trip, complete with RV-friendly fuel stops. Each of them will let you do pre-planning but also use your mobile device to adjust on the fly (or on the drive, as it were). 


    Ask the RV park when you booking your site. 

    The internet is a great tool for your trip planning. But so is good old-fashioned person-to-person conversation. Each RV park knows its own neighborhood better than anybody else. And direct advice from an actual person is likely to be more current than stale internet content. Unless you’re booking online, you’re going to be making a call anyway, so don’t hesitate to solicit advice about a nearby RV-friendly gas station when you do.


    Go the trucker route. 

    One of the safest bets when picking a fuel stop is on truck stops. They’re built for big rigs, and the country’s entire logistics system relies on them facilitating truckers fueling. Unlike a smaller gas station that might overstate its RV-friendliness, you’re also guaranteed to get plenty of room to maneuver. A truck-friendly gas station is usually an RV-friendly gas station. Any truck stop is also likely to have solid amenities like fast food, a great selection of mini-market staples, and clean bathrooms. Many, like Pilot and Flying J, even have dump stations.


    Try The Next Exit Book.

    I remember when my father used to download paper maps of the entire route of a vacation. Believe it or not, old school books that use real life paper to produce something you can hold in your hand still exist. Here’s the sneaky benefit of The Next Exit book: It requires no cell phone signal. So whether you’re high in the mountains, deep in the jungle, or just rolling through a signal desert, The Next Exit book can give you reliable information on an RV-friendly gas station, even if it’s just one for truckers.


    Get an RV-specific GPS. 

    Companies like Garmin have been harnessing the RV boom by producing GPS systems specific to the needs of RVers, with many including support for fuel stop picking. The systems serve as a backup to cell phones, or can be used as primary fuel planning devices too. Most don’t require cell phone signal, meaning even in those badland boonies you’ll still get reliable data on where to find an RV-friendly gas station.


    Prioritize safe over sorry.

    It can be tempting for some to squeeze every minute of drive time out of each trip, which can lead to some ambitious fuel planning. Just remember that with their higher gross weights, and their higher total drag via large surface areas, RVs have a much wider range of fuel efficiency than cars. The wrong headwind can affect fuel efficiency, as can an incline in altitude. And you only have to be riding that E-line once while searching for a timely fuel stop to know that it’s no fun. So, play it safe and stop before you’re sorry.