Category: RV Advice

  • 6 Off-season RV Projects to Complete Before Spring

    6 Off-season RV Projects to Complete Before Spring

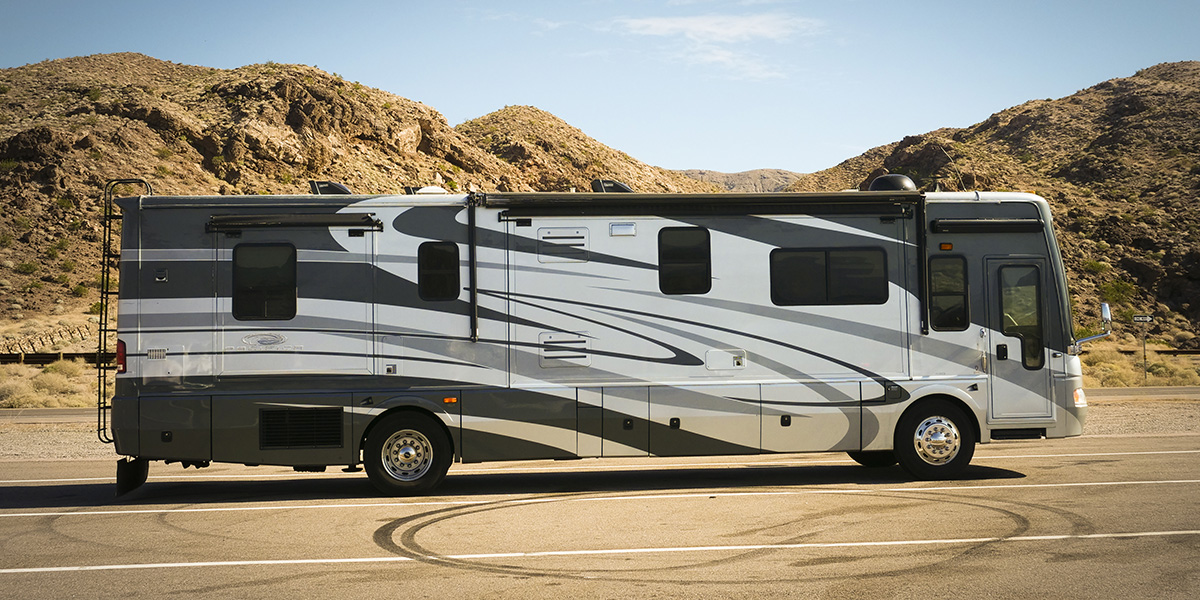
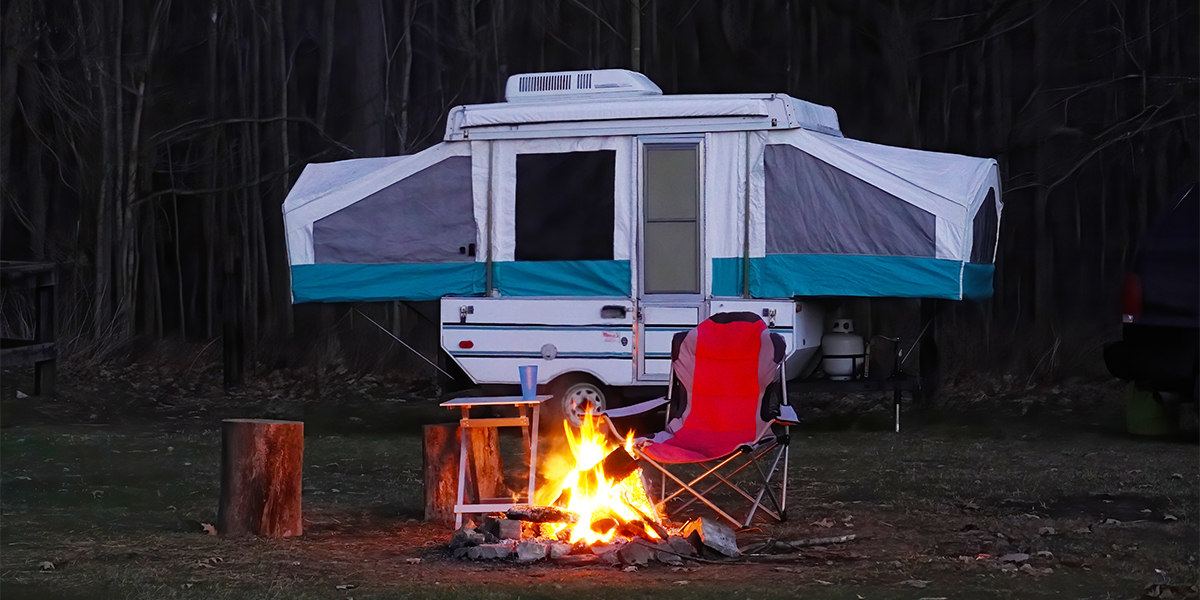
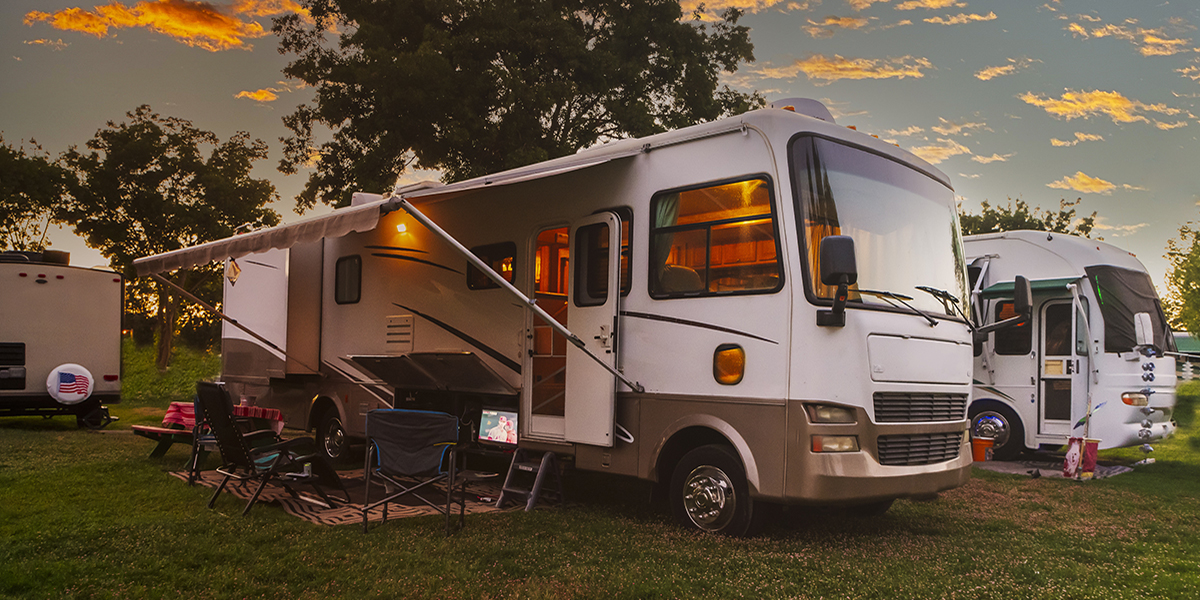
    For many adventuring RVers, wintertime is considered the offseason. But just because it’s colder and you’re not traveling as much doesn’t mean you have to spend less time with your RV. In fact, now is the time to make the most of these winter months by taking care of your vehicle and getting prepared for the fun year ahead! RV Trader is sharing six off-season RV projects to complete before spring.

    1. Maintenance

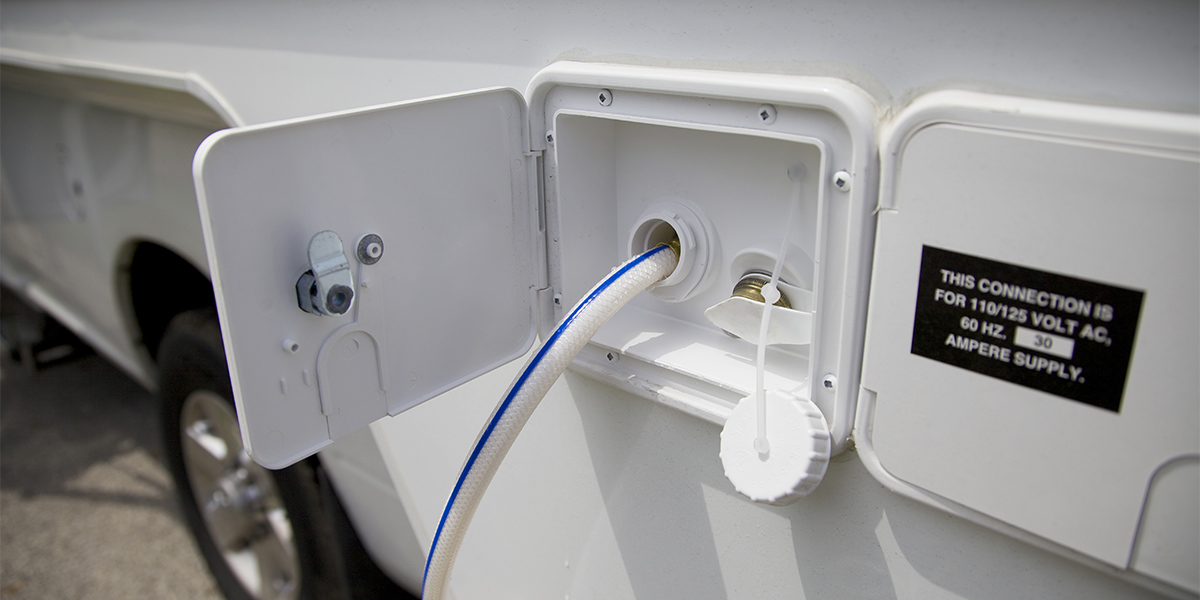
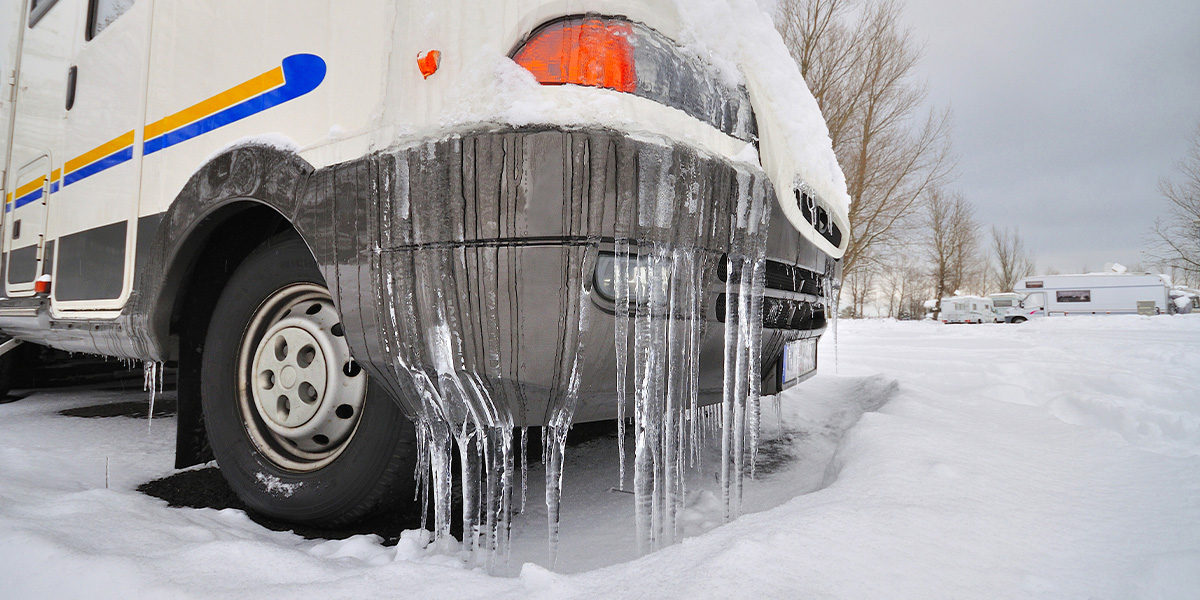
    Maintenance may not be something you’re looking forward to doing, but by giving your RV some TLC during these slow winter months, you can prevent any issues you may encounter further down the road this year. If you haven’t already, be certain to winterize your RV to protect it from harsh conditions. Clean it out, drain tanks, heaters, and lines, add some antifreeze, change the oil, and check your tire pressure and battery’s condition.

    2. Repairs

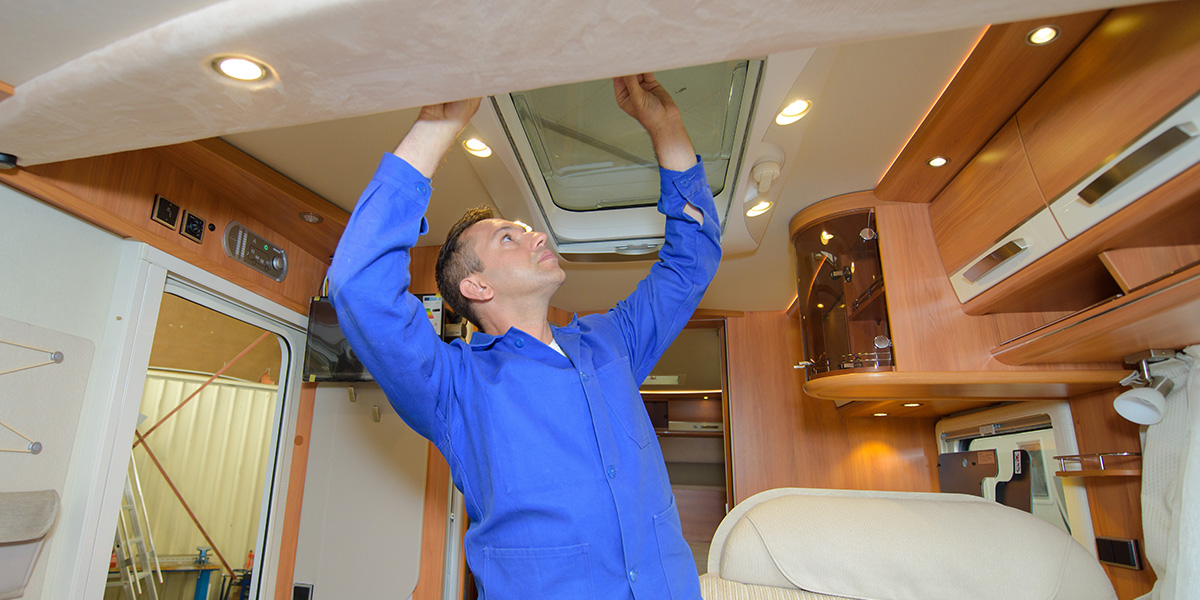
    You can always take your RV to a reliable repair shop, but making DIY repairs to your fifth wheel or other RV can help you save some money. If you take on a repair project yourself, make sure you have the right tools and equipment and follow instructions for repairs in your owner’s manual or from the manufacturer. Whether you need to replace your tires, fix a leaking roof, change out a faulty toilet, or mend an air conditioning unit, doing so now will put you in great shape when warmer weather comes around and you roll out on the road.

    3. Renovations

    Winter is the perfect time to renovate your RV. If you’ve just bought a fixer-upper and are starting from the ground up with renovations, or if you’ve had your RV for a while and are looking to transform a kitchen space or bedroom, you have an opportunity to put your energy into this project before spring. Get some help with RV renovation tips and figure out what you can take on—you may find that you would like to put your efforts into just one renovation project this off-season.

    4. Upgrades

    Now is the time to make improvements to travel trailers and other RVs with upgrades and add-ons. Go green with your RV and put in solar panels. Install a new WiFi hotspot or internet hookups. Make some kitchen upgrades to your cabinets, stove, or fridge. Add some style to your RV with new accessories, from decorative curtains to new dinnerware and cooking supplies. Buy new boondocking or camping gear for going outdoors. Consider what you may need for your RV based on how you may use it, whether that’s camping, roadtrips, or even for work.

    5. Planning Trips

    Set dates in your calendar for when you want to take off, whether that’s around holidays, over the summer, or during the shoulder seasons. You could enjoy stopping in at one of the year’s top RV events. For campgrounds and RV-friendly national parks, plan ahead and get reservations well in advance so you secure a spot—some popular destinations are fully booked months in advance. Set a budget for your trip, coordinate with family and friends to let them know about your travels, and plan fun activities you will look forward to.

    6. Shopping for RVs

    During these off-season months, you may find a great deal on a purchase for an RV! See what the market has to offer this season, as you may be surprised to find deals that aren’t there at busier times in the year when demand is higher. Whether it’s a new or used motorhome, or a towable RV, explore all of your options while you shop to find a lower price on a great vehicle. An RV purchase during the off-season will get you ready for a full year ahead of fun.

    Make the most of the winter off-season by fixing up your RV with maintenance, repair, renovations, and upgrades. Look ahead to the year ahead by planning exciting trips in your vehicle. And when you’re ready to find your next new or used RV, be sure to visit RVTrader.com for the nation’s largest inventory of vehicles!

  • 7 Tips for Buying an RV Sight Unseen

    7 Tips for Buying an RV Sight Unseen

    Over the last few years, consumers have found alternative ways to make big purchases. Instead of visiting local RV dealerships and browsing the lots, there’s been an emergence in buyers shopping outside of their areas and online. For example, in 2021, 41% of RVs sold in the Denver, Colorado area were registered outside of that market, according to Statistical Surveys Inc.

    This trend suggests that shoppers are willing to buy outside their locality. With a record-high demand for RVs and limited supply at local dealerships, many shoppers have been buying campers and motorhomes sight unseen to save time on the process and get on the road faster.

    In fact, we surveyed over 2,500 RV Trader shoppers and 11% said they’ve purchased an RV sight unseen, a noteworthy segment of buyers. Of those who have purchased sight unseen, a remarkable 90% said they had a positive buying experience, with 39% describing it as “great” and 22% as “excellent.”

    Purchasing an RV without seeing it can have several advantages, including a larger selection of inventory and a faster sale. Thinking about buying this way? RV Trader has seven tips for buying an RV sight unseen to help you have a positive and successful experience.

    1. Know What Features You Want

    Before shopping for an RV, you should figure out what features you want the unit to have. Consider how often you’ll travel in your home on wheels, as well as who you’ll be with and the types of experiences you want to have on your mobile getaways.

    How many sleeping areas will you need? Will you need a full kitchen with all the appliances or something simpler? Do you want to expand your space with slide outs? Asking questions like this can help you decide what type of RV is best for you and how much you might have to spend.

    2. Pick a Type of RV

    Once you figure out what bells and whistles you want your RV to have, then you can decide which type of RV is best for you and your travel needs. RVs can be divided into two categories, drivable and towable. From there, they range in size and features.

    If you’re traveling with a family or group that likes amenities, you may consider a large, luxurious Class A motorhome. Or, if you want to explore different attractions and destinations without lugging around your mobile living spaces, a travel trailer may be better since it can detach from your tow vehicle. Research the different types of RVs, picturing yourself on the open road, to determine which will best fit your travel lifestyle.

    3. Determine Your Budget

    To determine your budget for buying an RV, you should do some research on the market you’re shopping in. See how much other units are going for to get an idea of a price range. Consider how much you’re willing to put down for the down payment, along with the cost of the monthly payment, fuel, storage and maintenance.

    When deciding how much you want to spend on a new or used RV, you should also factor in the potential cost for buying outside of your area. You may have to pay to have the RV shipped to you, or pay the sales tax for a different state.

    4. Shop on a Trusted Website

    Online shopping can expose you to scammers who are advertising RVs that don’t actually exist. However, you can easily avoid this by shopping on trusted websites from dealerships and online marketplaces. Start by asking your friends and family for suggestions and reading online reviews. You should also make sure that the website is secured and has HTTPS in the URL.

    If you are considering buying from a private seller, you should confirm that both they and the RV are legitimate. The seller should also have accurate contact information for you to reach them. For more tips for safely shopping online, read our previous article 13 tips for avoiding scams when buying online.

    5. Read the Listing Description

    Online listings should include detailed information about the for-sale RV. While reading these listing descriptions, you should learn the make, model, year, condition, mileage, sleeping capacity, and more of the unit you’re browsing. If there isn’t enough detailed information, don’t be afraid to contact the seller with any questions you may have.

    While this type of buying is technically sight unseen—because you’re not viewing the RV in-person yourself—you can still get a look at the for-sale RV before you buy it. This is where listing photos come in handy. A good listing should have photos of both the exterior and interior of the RV. These allow you to get a pretty good idea of the camper’s condition and features. 

    If not, then be sure to ask the seller for more or better photos. A trustworthy seller should have no problem providing you additional images. You should also consider asking for videos. This can give you a virtual tour of the RV without setting foot in it yourself.

    6. Ask for an Inspection Report

    Descriptions, photos, and videos can only tell/show you so much. An inspection report can give you a comprehensive view of the RV’s condition. There are companies and services that specialize in handling inspections for shoppers, and will travel on your behalf to look at the for-sale RV.

    If you’re shopping for an RV on RVTrader.com, units with inspection reports available will feature an inspection badge. RV Trader Assurance, powered by Lemon Squad, is a great option for consumers who aren’t able to see their prospective purchase in person. You’ll be able to easily request an inspection report that features a comprehensive examination of the internal and external structure, complete mechanical inspection, road test, appliance inspection, and over 40 high-quality photos.

    7. Arrange the Shipment

    If you’re buying an RV sight unseen, chances are that you aren’t able to go pick it up in person. If that’s the case, you should discuss with the seller how you plan to get your potential purchase to your driveway. 

    Some dealerships will work with you to schedule a delivery and charge you a transportation fee. This step typically happens after you sign a purchase agreement and put down a deposit. If this isn’t possible, or you’re buying from a private seller, you can also find a third-party company to handle the shipping and delivery of your RV.

    While buying an RV without seeing it in person is an emerging concept, it can be done safely and successfully. Buying an RV sight unseen can improve your chances of getting your dream camper faster in a competitive marketplace.

    Ready to start shopping? Browse the nationwide selection of new and used RVs at RVTrader.com.

  • How to Fill, Empty, and Clean Your RV Water Tanks

    How to Fill, Empty, and Clean Your RV Water Tanks

    RVing offers the wanderlust of camping with the comforts of home, including running water. However, upkeep for this convenience is different from being in your house. It’s important to know how to manage and maintain the fresh water, gray water, and black water tanks, whether you have a Class A motorhome or travel trailer. To get you started, RV Trader has broken down how to fill, empty, and clean your RV water tanks, as directed by most manufacturers.

    Filling Your Fresh Water Tank

    When filling the fresh water tank, remember to only use a potable water hose. This hose is designated for water that’s safe to drink and use for food preparation. Keep this hose separate to avoid contaminating your drinking water.

    Locate your RV’s intake valve and attach the potable hose to one end, with the other end connected to a water spigot. As water flows into the tank, keep an eye on the tank indicators inside the camper to gauge how full the tank is. Once the tank is full, remove the hose and place the cap back on.

    If water starts to spray from the hose while it’s connected, you could be overfilling your tank. You also want to make sure the water pressure isn’t too high. High pressure can damage your RV’s water systems and bust pipes or cause leaks. An RV water pressure regulator can help prevent this. Most manufacturers recommend maintaining a water pressure less than 45 psi.

    You should decide how much you want to fill your fresh water tank based on where you’re traveling and the hookups available. If you’re boondocking, you might not have access to fresh water, so a full tank makes sense. However, most campgrounds have fresh water fill stations, so you won’t need to travel with a full tank.

    Emptying Your Water Tanks

    After every trip, you should drain your fresh and wastewater tanks. 

    Draining the Fresh Water Tank

    Longtime RVers recommend not leaving water in your fresh water tank for more than two weeks. To empty the fresh water tank, start by turning off the hot water heater. Once the hot water heater has cooled, open all of the faucets. This includes the shower, toilet, and low point drain lines.

    Locate the fresh water tank drain, which is typically under the RV. Open the valve and let the water drain out. You can remove any remaining water by turning on the fresh water pump.

    Draining the Wastewater Tanks

    To empty the wastewater, locate the valves for the black and gray water tanks. You’ll want to start by emptying the black tank. By emptying the black water tank before the gray tank, you’re able to flush any leftover solids from the hose.

    Remember to only drain this water at the designated dump station. Hook your sewer hose up to the black water tank valve, pull the valve, and let the tank drain. When there’s no liquid coming through the hose, close the valve tightly.

    After the black water tank is drained, follow the same steps to drain the gray tank. Once the gray tank is empty, you can flush the tank to remove any stray bits leftover that could develop bacteria. Some RVs have a specialized flushing filter. To perform a manual flush, run the water in your shower, kitchen, and bathroom while you’re still connected to the dump station. 

    Cleaning Your Water Tanks

    If you notice any smells coming from the hoses and faucets, be sure to sanitize your water systems. Your RV’s water tanks can grow mold and odor-producing bacteria.

    Cleaning the Fresh Water Tank

    It’s especially important to clean your fresh water tank. A dirty tank can create an unpleasant smell and give your drinking water a bad taste. We recommend cleaning the tank at least every six months, or more if you’re a full-time RVer. By using a quarter cup of bleach for every 15 gallons of water your tank holds, you can sanitize your tank and fight off any growing bacteria. 

    Add the bleach to your tank then fill it with fresh water. Inside your camper, open all of the faucets until the tank is empty. Once the tank is empty, fill it again with fresh water and let it sit overnight. The next day, drain the tank through the faucets until the bleach smell is gone. You may need to repeat this process a few times. For more step-by-step instructions, watch this video on sanitizing an RV water system.

    Cleaning the Black Water Tank

    It’s a good idea to clean your black water tank at the end of your RV season to remove any buildup that may be inside.

    Start with an empty tank. Run a garden hose down through the toilet, which is typically located above the black water tank. Turn the hose on and move it around to spray throughout the tank. When the tank is full, drain it.

    There are products available to control the odors in wastewater tanks. If you have a bad odor in your tank, get an odor-control product and follow the directions to keep your tank smelling as clean as possible.

    Your camper’s water system can make your time on the road much more comfortable. By knowing how to properly fill, empty, and clean your RV’s water tanks, your water system will be perfectly managed and maintained so you can focus on the adventure ahead. For more specific instructions on filling your camper’s fresh water tank, including component locations and other recommendations, check your owner’s manual.

    If you’re ready to feel at home on the road, browse the new and used RVs available nationwide on RVTrader.com.

  • 13 Steps for Winterizing Your RV

    13 Steps for Winterizing Your RV

    Owning an RV can provide year-round adventures, but for many, the cold weather represents a hiatus from your travel trailer. Knowing how to properly store your RV can save you from a headache once warmer weather returns. Get your rig ready for the season with RV Trader’s 13 steps for winterizing your RV.

    Take our exclusive quiz to discover the autumn road trip destination that’s perfect for you!

    1. Clean the Interior

    Before storing your RV for the winter, perform a bit of housekeeping on the interior. Clean the main living area, kitchen and dining area, bedroom, and bathroom so your camper will be in pristine condition when you’re ready to ride when the weather warms up. Make sure you allow enough time to defrost the freezer compartment and wipe up any melted water. Avoid attracting pests by removing all food products from inside the RV.

    2. Drain the Wastewater Tanks

    Similar to how you drain your black and gray water tanks after a trip, you’ll want to do the same before you store your RV for the winter season. The water in these tanks can freeze when temperatures drop and develop gross bacteria. Drain both tanks, starting with the black water tank. Once the tanks are drained, clean the black water tank with a specialized cleaner that doesn’t contain harsh chemicals.

    3. Drain the Water Heater

    When you start your RV winterization process, turn off your water heater first. This gives the heater time to cool down and not be under pressure. You do not want to drain the water heater if it’s hot or has pressure built up. When it is safe to do so, use a socket wrench to remove the water heater drain plug and open the pressure relief valve to let the water drain out.

    4. Bypass the Water Heater

    When you bypass the water heater, you prevent antifreeze from getting inside. Start by opening the water heater’s screen on the outside of the RV. Remove the panel to access the valves and adjust them to bypass the water heater. To help you out, take a look at this video that shows how to operate the water heater bypass valves.

    5. Drain Other Water Lines

    The Family Motor Coach Association (FMCA) recommends taking several measures to prevent freeze damage to the plumbing system. In addition to your wastewater tanks and water heater, you should fully drain your entire water system by opening the hot and cold faucets, along with the toilet, shower and low point drain lines. Again, you’ll want to make sure that the water pressure is off before draining the freshwater tank.

    6. Empty the Water Lines

    To ensure the lines are clear, blow them out with compressed air. This step can begin after you drain the wastewater tanks and water heater, remove any inline water filters, and bypass the water heater.

    Connect an air compressor to one end of a blowout plug that’s in your water intake valve. Set the air pressure between 30 and 40 psi then blow the air into the lines, opening one line at a time. The air will push out most of the water from the lines.

    7. Add Antifreeze to the Water System

    Another technique for preventing potential plumbing issues is adding RV-specific antifreeze, made with propylene glycol, to your RV’s water system. Start by turning on the water pump and using a siphoning kit to flow antifreeze through your water system. To ensure that the antifreeze is getting into your entire system, you’ll want to see if the water is pink in the external faucets and valves, along with the internal faucets in the kitchen, bathroom and shower.

    Not sure which technique to choose? Read our previous article on winterizing your RV that discussed air vs. antifreeze.

    8. Add Stabilizer to the Fuel

    Just like antifreeze protects the plumbing system, fuel stabilizer can help avoid damage to your RV’s engine. Since fuel goes bad overtime, and can cause oxidation, add a stabilizer to prevent condensation. Once you add the stabilizer, let the engine run for a few minutes so it can make its way through the entire fuel system.

    9. Change the Oil

    After your last trip of the season, change the oil in your RV. The existing oil can become corrosive overtime, especially during your camper’s winter hiatus. Perform an oil change on your RV’s engine and generator before storage, or get it professionally serviced.

    10. Inspect the Exterior

    Give the exterior of your RV an inspection before you store it for the winter. You’ll want to check the condition of the roof, windows, doors, access panels, and sidewalls. Reseal or re-caulk any holes or cracks you find to keep your camper in good condition and prevent water, small animals, and pests from getting inside.

    11. Inflate the Tires

    Overtime, your RV’s tires will slowly deflate while parked. Fill the tires up with air before your rig sits idle to make sure they aren’t completely deflated in the spring. You can also use a lift or blocks to raise the unit and keep the tires from getting pressure damage.

    12. Charge and Maintain the Battery

    Disconnect your RV’s battery and store it in a cool, dry place. Freezing temperatures can cause damage and destroy the battery, so make sure the storage area isn’t too cold. You’ll want your battery to maintain a charge while you aren’t using it. Trickle chargers are designed to cycle off and on and maintain a charge without overheating the battery.

    13. Cover and Store Your RV

    The ideal location to store your camper would be a garage or under a covered car park or shelter. If that’s not possible, make sure your RV is parked on a paved/concrete surface. Protect your rig from potential snow, wind, and ice with a durable, breathable cover that won’t trap moisture.

    When freezing temperatures arrive, you know it’s time to winterize your RV. By following these 13 steps, you could be saving yourself from expensive damage to your rig. Be sure to review your owner’s manual before winterizing for important information about your particular RV and its parts.

    If you decide to set off on a winter getaway in your camper, read our previous article for 10 tips for winter RVing.

    Searching for a new Class A motorhome? Browse the nationwide inventory of new and used models on RVTrader.com.

  • 5 Ways to Sell Your RV Fast

    5 Ways to Sell Your RV Fast

    You always look forward to hopping in your RV and taking a break from the day-to-day hustle and bustle. After a while, you may decide it’s time for a new camper to take on adventures. The selling process can seem overwhelming but, if you’re equipped with the right strategies, you can quickly turn your used fifth wheel, travel trailer, or motorhome into profit. To help you get started, RV Trader has put together five ways to sell your RV fast.

    1. Use a For Sale Sign

    To quickly catch the attention of potential local buyers, using a for sale sign is a tried-and-true method. For the best results, park your RV in a heavily trafficked area with a sign in the windshield or on a window. In large, clear writing, include some information about your camper, such as the make, model, and year, as well as your contact information. If you park in the lot of a private business, make sure you ask permission from the business owner beforehand so your RV doesn’t get towed. If you still want to make memories in your RV as you’re trying to sell it, keep the for sale sign in a spot that won’t obstruct the driver’s view.

    You can also print for sale flyers and hang them on community boards at local businesses, at nearby campgrounds and RV parks, and other places around town. These flyers should provide prospective customers the same helpful information as a for sale sign.

    2. Sell on an Online Marketplace

    Online marketplaces allow you to reach a larger network of shoppers than a for sale sign. To begin, find a consumer-trusted online marketplace to ensure a safe and reliable selling experience. Then, create a detailed listing, which can be done in just minutes. Be sure to include as much information as possible in the description, including the type of RV, sleeping capacity, and vehicle weight. With this information, as well as additional specifics like the make, model, mileage, and more, shoppers can search for the right camper for their needs. The more detailed your listing, the faster you can connect with the best potential customer.

    While some buyers are comfortable with purchasing a unit sight unseen, it’s always helpful to give them a glimpse at what could be theirs. Take high-quality photos at different angles and add them to your virtual listing. You can even record a video of you giving a virtual tour of the RV, which can save you time with a prospective buyer compared to meeting in person.

    3. Utilize Social Media

    Leverage the power and reach of social media platforms to draw more attention to your for-sale RV. You can engage even more shoppers by posting photos and a description of your unit on your personal accounts, as well as community pages and groups for camping and RV enthusiasts. If you’re hoping to reduce or remove shipping and delivery costs, Facebook Marketplace is a great way to connect with local shoppers through your personal account. 

    Take it up a notch by sharing videos of your camper on Facebook, Instagram, and TikTok to get likes and attract potential customers. What better way to sell your Class A motorhome than showcasing how an owner can cruise across the country in style?

    4. Sell to an RV Dealer

    For a quick and easy experience, consider selling your used RV to a dealership. Instead of waiting to find the right buyer, call or email your local dealerships to see which can get you the best deal. If there’s a high demand for campers, you could get an instant cash offer since dealerships are going to resell your unit.

    Along with a faster close and convenient business hours, you’ll also save time compared to listing the unit yourself by not needing to verify a buyer’s credentials and haggling over price. Dealers will even take care of all the transfer paperwork for you.

    5. Trade In for a New RV

    If you’d like to get more for your sale to a dealer, you could trade in your old RV for a new one. Instead of pocketing the profit you make from selling your camper to a dealership, you can put that money towards a down payment for your next one. This is a great option for sellers who are already thinking about their next rig. Make sure you shop your used RV around to see which dealership can offer you the best deal and has the best new (or new-to-you) inventory to choose from. As an added benefit, you could even pay less on sales tax since many states charge the difference between your trade-in value and the price of your new RV.

    Bonus Tip: Rent Out Your RV

    Maybe you’ve decided it’s not the right time to sell, but you don’t want your RV to sit idle. Give someone else the gift of a mobile adventure, and make some extra money, by renting out your camper. Peer-to-peer (P2P) renting allows you to loan out your rig to other couples and families ready to hit the road. If this option interests you, read our previous article for tips on renting out your RV.


    Your RV has brought you joy for a long time, but selling can be less fun. Expedite the process by using a for sale sign, social media, online marketplace, dealership, or trading in your unit to sell your RV fast. Before you list your camper, make sure it’s spotless by giving it a deep clean inside and out.

    If you decide to sell your RV online, list your unit on the trusted, nationwide marketplace at RVTrader.com. And if you need additional resources to help you through the process, check out our RV Seller’s Guide and read our top tips for selling your used RV.

  • 6 Tips for On the Road RV Repairs

    6 Tips for On the Road RV Repairs

    You’re all set for an adventure in your RV: hitting the open road, exploring the great outdoors, and camping with your family and friends. You’re having a great time, but without warning you encounter some trouble with your RV: a flat tire, a mechanical problem, or issues with your appliances. While routine RV maintenance can prevent a lot of wear and tear, there are still things that can go unexpectedly wrong while on a road trip. However, with a little planning ahead, you can be prepared for whatever problem is thrown your way. Here are six tips for on the road RV repairs from RV Trader.

    1. Have RV Repair Resources Ready

    Create a folder for all the important info you need when you’re on the road and need a repair. Have copies of your RV insurance, towing vehicle insurance, any travel or trip insurance you may have purchased, a roadside assistance plan, and all the details for your emergency contacts. Keep the folder organized and nearby so you’re ready when you run into a roadside problem.

    2. Study Your Service Plans

    Know ahead exactly what your vehicle warranty covers. If it’s from a dealer or manufacturer, they may provide an emergency hotline or website chat that can provide an immediate response to help you solve a roadside problem. Warranty and service plan providers may be able to send roadside assistance or steer you in the right direction to a reliable repair shop.

    3. Hire a Mobile Mechanic

    If you’re stuck with a roadside problem that seems complicated, consider hiring a mobile mechanic. These days mobile mechanics can be just as convenient as ride sharing or food delivery services. They’ll come directly to you for routine repairs or maintenance with your oil, battery, filter, and tire issues.

    4. Find Help Nearby

    If you’re out camping at an RV Park, the staff or a fellow RVer might be able to lend a hand. Some RV Parks can provide directions to mechanics or repair shops that are local, trusted partners. If you’re stranded on the road, find a nearby town or city with a service shop for some help. Even with a breakdown, your RV can still provide you with a place to stay while you wait for repairs.

    5. Fix It Yourself

    Even with so many parts, you might be able to fix a roadside problem by yourself. Always check your owner’s manual for any repairs you may be able to do. You can use online resources such as videos, blogs, and forms to take out the guesswork and help you pinpoint a problem if it’s not obvious. Avoid do-it-yourself repairs that would void a warranty. Have your toolkits ready for these repairs:

    • Flat Tire: Pull off to the shoulder, put on your hazards, and put out reflectors or cones. Have a spare tire ready, gloves, towel, ramp jack, wrenches, and a bolt cutter. 
    • Dead Battery: Bring a portable jump starter fitted for your RV engine size. Jumper cables are another option, but they need to be specifically sized for your RV and jump-started by another RV, not a car.
    • Defective Appliances: Propane tanks power many RV appliances. Check the tank’s propane level in case it needs to be refilled or replaced. Check hose connections and fittings for any leaks.
    • Leaks: Roof renew kits can seal up cracks, tears, and holes.

    6. Stay On Top of Repairs

    Keep up with regular RV maintenance and keep track of any repairs you do yourself or any work done by a mechanic. Keep these records in your RV repair folder, so you can stay on top of the most recent work done to each area of your RV. Whenever you pull over at a rest stop or service station, do a visual inspection of your vehicle, checking your tire pressure and oil level.

    By planning ahead, you can take on unexpected problems with your RV that you may face while out on the open road. Whether the repair may be big or small, being prepared can help you problem solve and get moving again. Looking to get moving in your next RV? See a full selection of units on RVTrader.com.

  • 5 Reasons to Have Your For-Sale RV Inspected

    5 Reasons to Have Your For-Sale RV Inspected

    Deciding to sell your RV can raise a few questions. How much should I sell it for? What’s it like to sell on RV Trader? Should I get my unit inspected? If you’re thinking about that last question, you should know that a pre-sale inspection provides sellers and potential buyers upfront information about the condition of the for-sale RV. While there are several different ways to get your unit inspected, RV Trader Assurance powered by Lemon Squad allows private sellers to order pre-purchase inspections for their RVs when listing their unit on RV Trader’s online marketplace. To help you understand the benefits of this service, here are five reasons to have your for-sale RV inspected.

    1. Fast and Convenient

    You won’t need to worry about bringing your RV to a mechanic or dealership, then waiting hours or days for them to perform the inspection. With RV Trader Assurance, an Automotive Service Excellence (ASE)-certified Lemon Squad inspector comes directly to you, the seller, for an on-site inspection. This thorough inspection covers both the mechanical and cosmetic condition of the RV. The inspection report is sent through a digital dashboard that is typically available the following business day. 

    2. Can Help Determine Pricing

    A full inspection can uncover damage or issues with your for-sale RV. If you find problems during the inspection, you’ll be able to determine if it’s worth paying for the repair. Or, you may decide to lower the value of your RV instead of making the repair. In contrast, if an inspection delivers a clean bill of health, you can use that to increase the sale price of your RV and note that in your listing description.

    3. Makes Your Listing Stand Out

    Once your inspection is finished, your listing will receive a certified RV Trader Inspection Badge, which showcases your ability to provide an inspection report to prospective buyers. The Inspection Badge will stand out among the other listings on RVTrader.com, catching the eye of interested customers.

    4. Builds Buyers’ Confidence

    Knowing that an RV has already been inspected by a trusted third party offers buyers peace of mind about the unit they’re browsing. Shoppers can request the inspection report, which includes the following information:

    • Comprehensive examination of the internal and external structure
    • Complete mechanical inspection
    • Appliance inspection
    • Road test
    • Over 40 high-quality photos

    While RV shopping online has increased in popularity, many shoppers still have concerns. This detailed inspection acts as a gesture of goodwill. Potential buyers will feel more informed and confident in their purchase decision, increasing the likelihood that they’ll buy the RV.

    5. Can Lead to a Quicker Sale

    A pre-sale inspection of your RV can eliminate the back and forth between buyers and sellers. If you’ve already completed an inspection of your unit, you’ll be able to say with certainty that your unit is in great condition, or be able to address any issues upfront with a customer. The less negotiation, the faster you can seal the deal and turn your used RV into a profit.


    Owning an RV is an investment, and now it’s time to cash in. Getting an inspection on your for-sale RV is a quick and easy way to figure out the value of your unit and make potential buyers feel more confident about purchasing your camper, which speeds things up when selling your RV

    RV Trader Assurance powered by Lemon Squad is currently available to private sellers nationwide who list their RVs on RVTrader.com.

  • 8 Tips for Pop-Up Camper Maintenance

    8 Tips for Pop-Up Camper Maintenance

    Pop-up campers are a great camping option that allow you to experience the outdoors while avoiding pitching a tent on the hard ground. One of the smallest and lightest RV options, these campers are collapsable and easier to tow and maneuver compared to a full-size trailer. Outside of surface cleaning, proper maintenance is essential to extend the life of your pop-up camper. Keep your unit as good as new with RV Trader’s eight tips for pop-up camper maintenance.

    1. Use RV-Specific Cleaning Products

    When cleaning your pop-up camper, it may be easy to reach for your regular, handy cleaning products. That may work for cleaning some parts of your camper, such as windows and the interior, but some surfaces and fabrics need special products. Using cleaners that are made specifically for RVs is always a safer bet, especially if you don’t know which chemicals could be too harsh.

    2. Don’t Store Your Camper When It’s Wet

    If you get caught in the rain, you’ll want to ensure that your camper is completely dry before storing it. Moisture can lead to mildew and mold on your camper’s canvas. If possible, let your pop-up camper dry in the sun. Or, towel dry as much of the canvas as possible before storing the unit. If you do notice any moisture damage, clean the canvas as soon as possible. Make sure you know what type of material your canvas is made of, since different fabrics require different types of cleaning products.

    3. Waterproof the Canvas and Hard Sides

    Protect your camper in advance from water damage by waterproofing the canvas and hard sides of the unit. Use a water repellent to treat the surfaces of your camper. Check your work by seeing if water beads and rolls off the fabric, as opposed to soaking in. As you’re waterproofing, look for tears in the fabric of your canvas and repair them immediately with an adhesive glue or repair kit.

    4. Inspect the Roof Seals

    Make a habit of inspecting the roof seams and seals every few months. If you notice any cracking, apply a rubber sealant to keep the seams from drying out.

    5. Clean AC Filters

    If you choose to travel with an air conditioning system, remember to clean it out. A clean filter doesn’t have to work as hard as a dirty one, saving your pop-up camper’s battery some energy. How often you clean the AC filter depends on how often you use the unit. It’s beneficial to give the filter a quick look after every trip, especially if you’ve traveled somewhere with more dust in the air.

    6. Maintain Water and Waste Systems

    If you aren’t using the water hookups at a campsite,  you’ll rely on your pop-up camper’s freshwater system for cooking, drinking, and bathing. Before a camping trip, check the water levels in your tank to make sure you always have enough. You’ll want to keep the lines for your water system clean by occasionally sanitizing them during camping season and again at the end of the season.

    Drain any gray water, which is waste water from the sink and shower, with a different hose than you use for freshwater. If you’re camping in a remote area, or don’t have access to full hookups, keep an extra container or portable tank to collect the gray water. If you’re staying at a campsite, read the rules for waste water removal beforehand.

    7. Inspect Tires Regularly

    Nothing is worse than getting a flat tire when you’re cruising down the road while towing your pop-up camper. Your unit uses different types of tires than cars, which are designed with a higher operating pressure and stiffer sidewalls. Maintaining a pop-up camper’s correct tire pressure is critical in preventing flats, so inspect the tires before every trip. Consider purchasing a tire pressure gauge to get a reading no matter where you are.

    Before each trip, you’ll also want to use a torque wrench to check the tightness of the lug nuts. If lug nuts are not properly secured, your camper’s wheel could suddenly fly off.

    8. Check the Battery

    Your pop-up camper’s battery is essential in running anything that uses electricity if you don’t have access to electrical hookups. A battery monitor can help track your usage and let you know how much voltage is  left. To extend the life of your battery, avoid running below 50% of the total voltage. Between trips, recharge your battery. At the end of your camping season, store the battery in a dry environment at a moderate temperature.


    Pop-up campers provide a more affordable way to experience RV life. By following these tips for proper care and maintenance, you can avoid costly repairs and ensure that the unit remains a great investment.

    If you’re ready to buy a pop-up camper of your own, browse the nationwide marketplace at RVTrader.com.

  • How RV One Plans To Impress Buyers at America’s Largest RV Show

    How RV One Plans To Impress Buyers at America’s Largest RV Show

    Every year, thousands of RVers head to Hershey, Pennsylvania for America’s Largest RV Show, excited to see the latest and greatest of what RV manufacturers, dealers, and other suppliers have to offer. This year’s show is being held September 15th through the 20th, and promises to be a thrilling comeback for a show that had to cancel in 2020 due to COVID-19. The pandemic also saw a huge spike in RV sales, adding further momentum to the upcoming show.

    We wanted to know how dealers were planning to take full advantage of the Hershey RV Show, so we connected with RV One Superstores, who have several dealerships as part of parent RV group, RV Retailer. For eight consecutive years, RV Retailer has been named the largest motorhome dealer in the world. RV Retailer’s extensive reach and buying power in the market enables their over 70 dealerships to meet their commitment to taking care of buyers by providing the highest possible value for their money. Here’s how RV One plans to impress buyers at America’s Largest RV Show.

    RV One Will Be In Multiple Locations

    One way to be seen by attendees is to be everywhere at once, and that’s what RV One seems to be trying to accomplish. They have three locations, showcasing Entegra Motorhomes in space A9, Newmar rigs in space D2, and Redwood fifth wheels in space A5.

    RV One Will Offer Exclusive Show Specials

    It’s not an RV show without dealers offering special incentives, and RV One is ready to wow attendees. Here’s what they’ll be offering at the Hershey RV show: 

    • A large selection of America’s favorite brands,
    • Price Lock Guarantee on all new units ordered at the show,
    • RV Complete VIP membership with every RV purchase,
    • Special RV Show interest rates for buyers, and
    • Top-dollar trade-in values.

    Those are some pretty sweet offerings, so let’s dive deeper into a few of them.

    RV One Price Lock Guarantee

    Some dealers will give you an initial quote, but when it’s time to sign and pay, they say the cost has gone up due to rising material costs, fuel prices, and delivery expenses. Sure, those things can happen, but it’s never a pleasant realization. RV One ensures that surprise cost changes are never an issue when you buy from them. RV One locks in the price of your RV on the day it’s ordered. If prices go up between then and the delivery date, the dealership absorbs those costs instead of passing them onto you. That’s what we’d call a strong commitment to buyers.

    RV Complete VIP Membership

    Everyone that buys an RV from RV One will receive RV Complete VIP Membership. This program provides members with exclusive protection for their RV. The all-inclusive benefits can be accessed through a mobile app on your smartphone. RV Complete VIP Membership includes:

    • Roadside Assistance
    • Technical Assistance
    • Lockout Assistance
    • Windshield Repair
    • Paintless Dent Repair

    RV Complete VIP Membership also lets you:

    • Schedule RV Maintenance
    • Contact the Dealership with Questions
    • Find RV Campgrounds, Parks, and Resorts
    • Access the RV LIFE Pro suite of tools, including RV Trip Wizard, RV LIFE GPS & Campgrounds App, and Maintain My RV.

    Trade-In Top Dollar

    Lots of dealers accept trade-ins, but if the rig you’re selling doesn’t happen to be in-demand in the dealership’s market, they can’t give you top dollar. Fortunately, RV One covers a vast market that dramatically increases the odds that your trade-in will be in-demand somewhere. Their larger geographical footprint in the market gives RV One the ability to give you the best and most fair price possible when trading in an RV.

    Schedule Your Private Appointment

    Clearly, RV One is revved up and ready for America’s Largest RV Show. If you’re headed to the Hershey RV Show and want to learn more about buying from their dealership, pre-schedule a private appointment with one of their knowledgeable and friendly associates. And if you’re not headed to the show, browse RV One’s online listings on RVTrader.com.

  • 4 Basics of Routine RV Maintenance

    4 Basics of Routine RV Maintenance

    There’s a lot that goes into RV maintenance — after all, these are big units with lots of parts — but if you commit to keeping your rig properly maintained, it can take you thousands of miles and last for years. Some RV maintenance will need to be done by a seasoned professional, but it’s still important for you, as the owner and operator, to be well versed in the basics. The more you can monitor and service on your own, the less likely you are to end up with a major issue while out on a trip. Starting from the top down, here are four basics of RV maintenance.

    1. Roof

    The biggest thing you’re looking for on the roof is cracks in the sealant around the seams. If your sealant is corroded or cracked, water can soak into the roof’s framework and end up in the ceiling panels. A roof inspection is not something you need to do every day, but try to closely look it over about every three months. When you crawl onto the roof, look around the edges, vents, skylights, air conditioning unit, and any other parts or features to ensure everything is still properly sealed. If you decide to add new sealant to an area, keep in mind that roof materials can range from fiberglass to metal to rubber and more, so make sure to pick a product that’s compatible with the roof’s material. 

    2. Slides & Awnings 

    Maintenance on your slides and awnings starts with regular cleaning. You want to make sure that there isn’t any dirt build up that’s hiding potential problems, particularly around the seals. If you leave dirt caked on for months at a time, you’re sure to run into corroding issues. There are also specific things to look for, depending on the type of slide you have.

    • Schwintek Slides • Check that the gears on the side of your slideroom box work properly.
    • Acu-Slides • Check that there is about one inch of give on the cord when your slide is fully extended.
    • Power Gear Slides • Check that there are no hydraulic leaks and that the motor assembly is fastened correctly.

    Once everything is clean, make sure to lubricate the sliding mechanism so there isn’t any friction during the opening and closing process. This can wear down the apparatus, causing issues over time. When you look for lubricant for your unit, make sure to pick one that’s specifically designed for RVs. Unfortunately, WD-40 often won’t cut it.

    3. Fluids & Filters 

    Keeping your fluids and filters well maintained might seem like a small task, but it’s extremely important. If internal components get too dirty, it can cause major stress on your engine and drivetrain, which can lead to larger issues down the road, which is no fun.

    Fluids

    The owner’s manual of your RV is an excellent resource when it comes to your fluids. It should tell you the correct levels for each fluid, walk you through how to check and change the fluids, and provide intervals for how often to do so. At a minimum, you should always check your fluids before taking a trip, and then every couple weeks while the RV is in use. Also at minimum, change your RV oil at least once a year. The major fluids that should be checked during routine maintenance are:

    • Oil
    • Coolant 
    • Brake Fluid
    • Radiator Fluid
    • Transmission Fluid
    • Power Steering Fluid
    • Windshield Wiper Fluid

    Filters

    Each filter is tied to the performance of a major system within your RV, so it’s important to keep them clean. For instance, if you have a dirty air filter, the air coming out of your vents might not be cool, even if the AC unit is running. Changing these out is a fairly simple process and can be done on a seasonal basis. Check your owner’s manual for exact filter changing instructions and intervals. During your routine maintenance, check the following filters:

    • Air
    • Fuel
    • Coolant
    • Hydraulic

    4. Tires

    Because RVs often sit idle for long periods of time, their tires may be prone to premature deterioration. Luckily, tire maintenance is pretty straight-forward. Regularly make sure the air pressure in your tires matches the manufacturer recommendation. If you’re driving around with deflated tires, it causes more wear and tear than necessary and your tires will wear out more quickly. You’ll also want to keep your tires clean and dry. Make sure to wash them down to remove any dirt or oil you might have picked up on the road. Other than that, you just need to perform regular inspections of your tires to make sure the sidewalls are intact and there is no uneven wear on your tread. These could be signs that you might need a new tire, and it might be a good idea to get it professionally checked so you don’t blow a tire on the road. 


    Keeping your RV in good shape doesn’t have to be an overwhelming process. These are four basic things you can do in between major service appointments to be sure that your unit is always adventure-ready. And if you’re looking for an RV for your next adventure, check out all the new and used RVs available nationwide for-sale and for-rent on RVTrader.com.