Category: RV Advice

  • What It’s Like to Sell an RV on RVTrader.com

    What It’s Like to Sell an RV on RVTrader.com

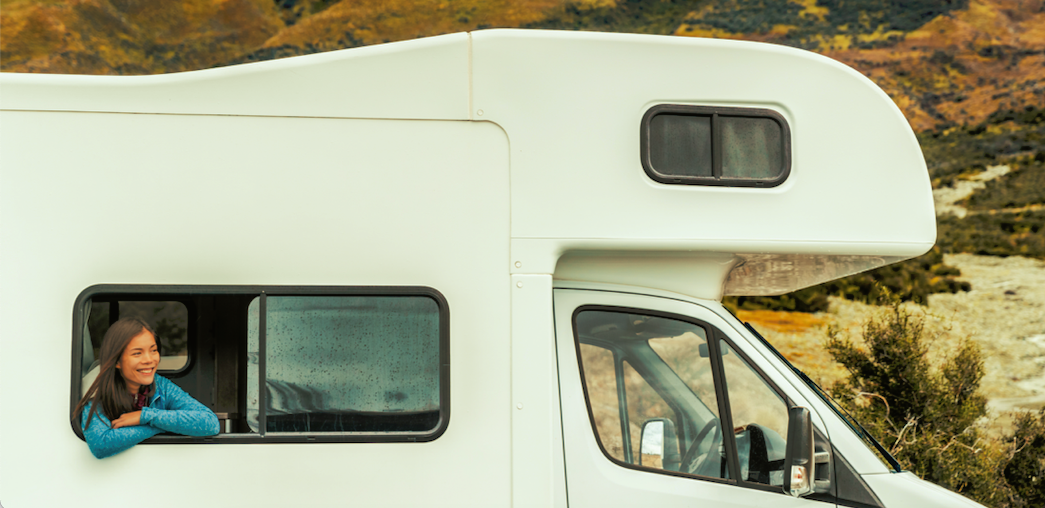
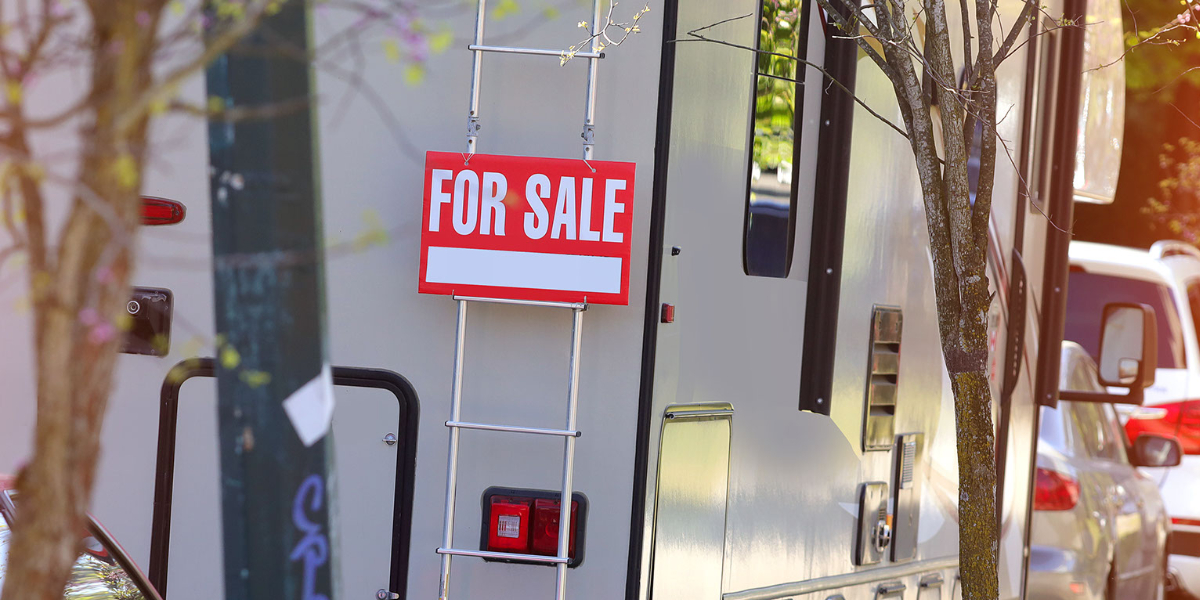
    Once you’ve decided to sell your RV, we hope you head to RVTrader.com to list it. We’re an online marketplace that attracts millions of active buyers every month who are searching for their next unit. Listing with RV Trader is quick, easy, and secure, guaranteeing a smooth and reliable experience. Here’s everything you need to know about selling an RV on RVTrader.com.

    Get Started

    Click the “Sell” button at the top of the RV Trader webpage, or the “Menu” button in the top-right corner, then click “Sell My RV.” Both options will direct you to the page where you can view the listing packages. Simply scroll down or click “Get Started” to browse the package options and make your selection.

    Choose a Package

    RV Trader provides three package options for sellers.

    • Basic: The basic package ensures that your ad will be listed on the website for two weeks. Your listing will allow up to four photos.
    • Enhanced: The enhanced package offers eight weeks on RV Trader’s website, as well as up to 20 photos and a YouTube or Vimeo video.
    • Best: The best package features a one-year-long listing, up to 50 photos, a video, premium placement on the website with a highlight in search results, and a featured spot in carousels on the homepage and search results.

    Log In or Create Your Account

    Once you select your package, a window will pop up and prompt you to log in to your My Trader account. If you don’t have an account yet, it won’t take long to make one. Enter your email and a password, then verify your password and click “Sign Up For My Trader.” Having an account allows you to create, edit, and share listings, save your progress when creating listings, and see leads and activity on your listings.

    Generate Your Listing

    After choosing your package and logging in to your account, you can create your unit listing. Remember, this is the first impression you make with a consumer, so you want the information to be understandable and accurate. You can build your listing in just three simple steps.

    • Enter Your Vehicle Information: Beginning at the first drop down, select the class of your RV. Enter the year, make, model, and trim. Add your price and choose a tagline; this is your opportunity to tell potential buyers if the price is cash, open to trade, negotiable, or firm. In the listing description, you have a maximum of 2,500 characters to tell buyers all about your RV. Below you can provide additional details, including fuel type, measurements, mileage, engine information, and unit color. The more information you give a consumer about your unit, the faster they can make their decision.
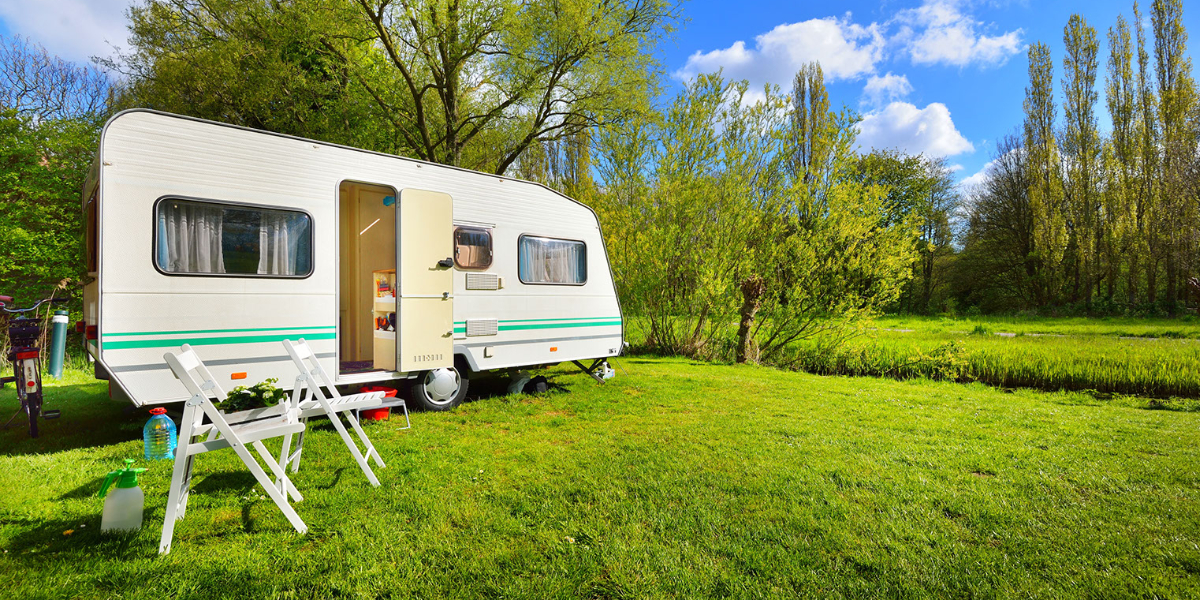
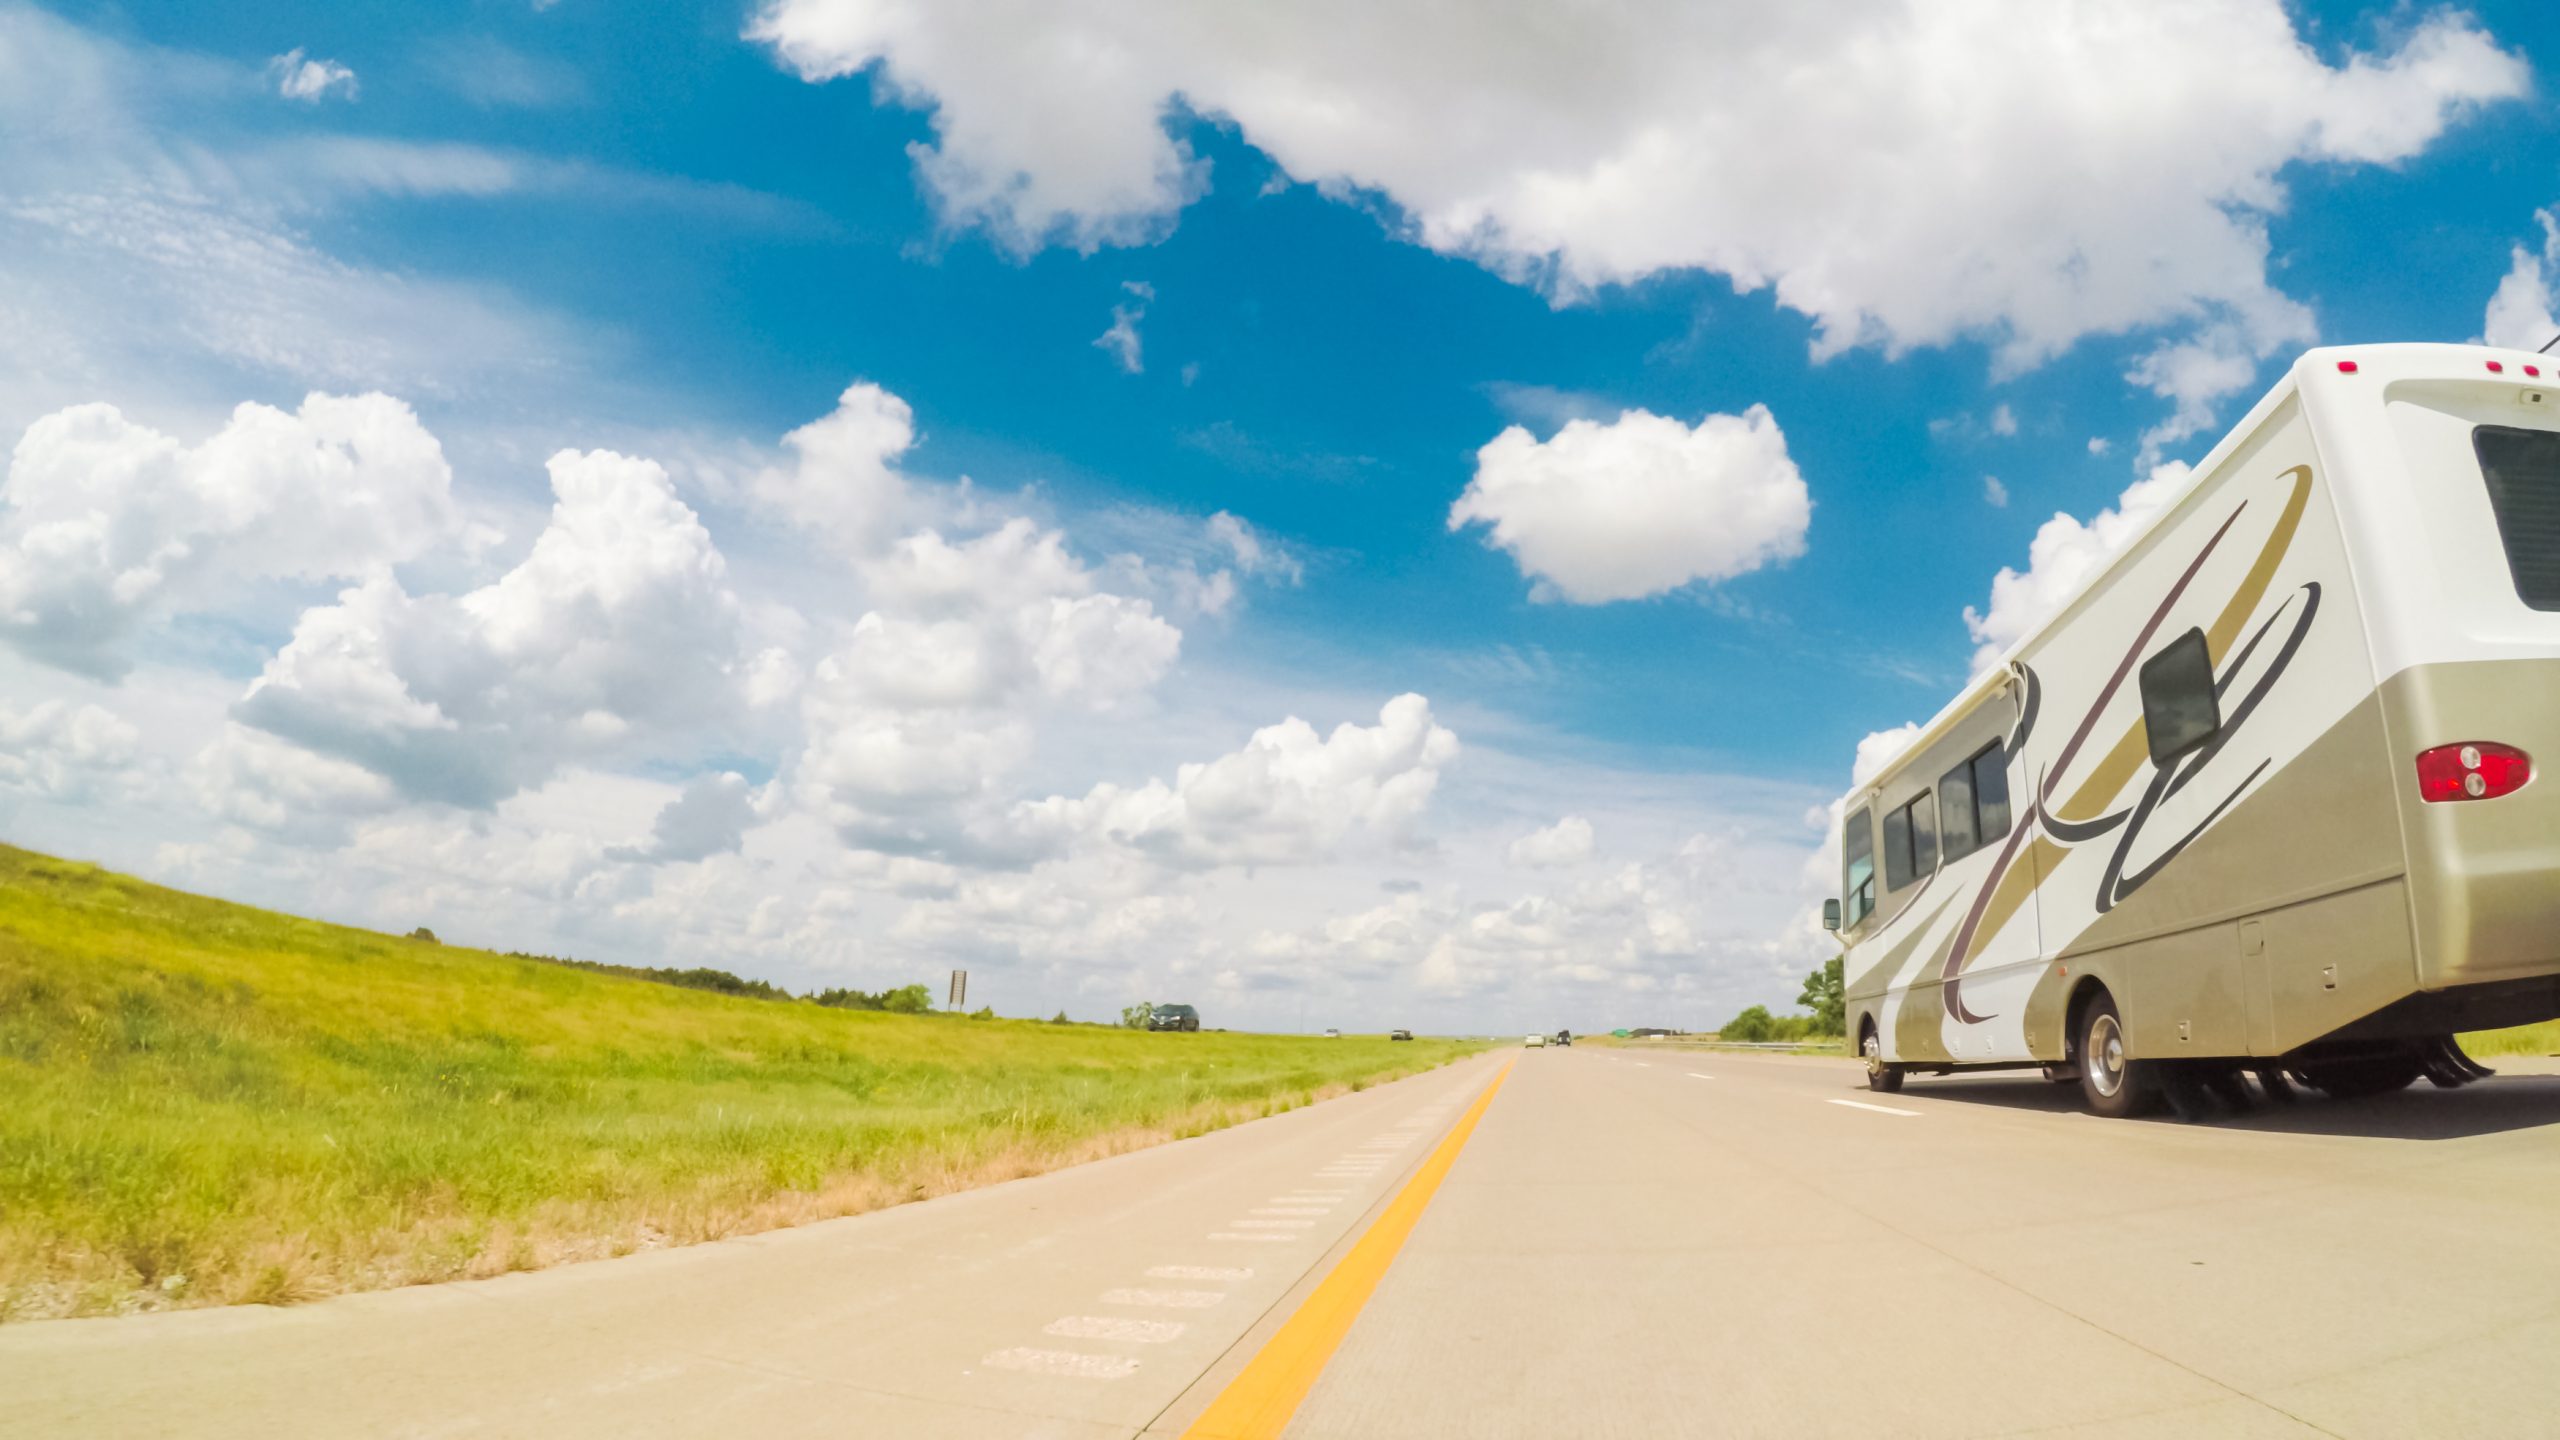
    • Add Photos: Upload up to four, 20, or 50 photos, depending on which package you chose. Listings on RV Trader with pictures generate 2.4X higher search result impressions and 15.8X higher vehicle detail page-views than listings without photos. Make sure your photos are clear and offer different angles of your RV so potential buyers can see as much as possible. For more tips, read our eight tips for taking great listing photos. If you selected an Enhanced or Best package, you’ll also add the link for a video on YouTube or Vimeo here.
    • Enter Your Contact Information: If you’re logged into your My Trader account, some of the contact information may auto-populate. You’ll also need to add your first and last name, address, and phone number. To protect your privacy, only your city, state, and zip code will appear on your listing—not your street address. If you prefer for buyers to only contact you via email, you can also choose to hide your phone number.

    Get an Inspection

    Sellers on RVTrader.comhave the option to get a pre-purchase inspection through RV Trader Assurance powered by Lemon Squad. If you choose this service, an Automatic Service Excellence (ASE)-certified Lemon Squad inspector comes directly to you for an on-site inspection of your for-sale RV. This thorough inspection covers a computer diagnosis of the engine, along with a comprehensive examination of the vehicle condition, mechanical, underbody, tires, wheels, structural integrity, and more. Following the inspection, your listing will receive a certified RV Trader Inspection Badge, which showcases your ability to provide an inspection report to prospective buyers and makes your listing stand out on the marketplace.

    Preview, Review, and Check Out

    At the bottom left of the page, you’ll have the option to preview your listing with the photos. Put yourself in the shoes of a buyer to make sure you’re seeing everything someone would need to know about the RV you’re selling.

    Once you decide it looks good, you can view a receipt for your listing. 

    When you sell your RV on RVTrader.com, you can take advantage of our digital marketing solutions to help advertise and reach more buyers. In just a few quick and easy steps, your listing will be available to consumers nationwide. For more top tips for selling your RV, visit our blog. And for more helpful resources, check out our RV Seller’s Guide!

    Another option for private sellers is to connect with dealers who are buying inventory directly. Skip the listing all together and look for the “We Buy RVs” button on a dealer’s gallery page to sell your unit right to a dealership.

  • 7 Tips for Preparing Your RV for a Hurricane

    7 Tips for Preparing Your RV for a Hurricane

    Traveling in an RV can be an exciting adventure, but one thrill you don’t need is the dread of an impending hurricane! If you plan to travel to an area—or live in an area—that’s prone to hurricanes or tropical storms, it’s important to know how to prepare yourself, family, and unit for this extreme weather. Get a plan in place ahead of time with RV Trader’s seven tips for preparing your RV for a hurricane.

    1. Track the Weather

    Weather patterns and conditions can change quickly, especially during hurricane season. Remain proactive by keeping an eye on weather forecasts. As you’re following the weather alerts online, on TV, or over the radio, make sure you understand what each type of weather condition indicates.

    • Advisory – Advisories are most often used for less severe weather, like wind.
    • Watch – A hurricane is possible. Watches typically span over a large area for a long period of time.
    • Warning – Hurricane conditions are imminent. Warnings cover a smaller, more precise area for a definite period of time. High Wind Warnings are issued for wind speeds of 40 mph for an hour or more, or wind gusts of 56 mph for any duration.

    2. Prepare an Emergency Kit

    RVs aren’t safe to drive in any storm with high winds. Whether you have to hunker down in a storm shelter or safely in your RV, make sure you have everything you need to wait out the storm. Here are some items to keep in an emergency/evacuation kit:

    • Drinkable water
    • Water for brushing your teeth, flushing, and washing
    • Non-perishable food
    • Medication
    • Cash and ATM cards
    • First-aid kit
    • Batteries
    • Battery-operated radio
    • Portable phone charger
    • Flashlight
    • Rain attire, including jackets and boots
    • Insurance information and other important documents

    3. Choose the Right Campsite

    During hurricane season, boondock your RV in an elevated location that’s away from large trees. Pick up any nearby fallen tree branches that could become projectiles and cause damage during high winds. Once you’ve secured the campsite, find the closest storm shelter in or near the campground and determine an evacuation plan.

    4. Do a Safety Check of the RV

    Before a storm, perform a safety inspection of your RV. Fill the fuel tank and check the windshield wipers and tires. If your unit has a gas-burning stove, be sure to check the batteries in your RV’s smoke alarm and carbon monoxide detector. Finally, test your generator to make sure it’s ready for use before, during, or after a storm.

    5. Secure Your RV

    If you aren’t able to store your RV inside a garage or storage facility, do your best to protect it from the effects of the storm. Cover and tie down the unit, board up windows, and make sure the water tank is full in order to add weight, lower the center of gravity and increase stability. If you have items outside your RV, such as lawn chairs, tables, and grills, make sure to tie those down too. Chock the tires of travel trailers in both directions to stop the wheels from rolling. If your RV has slide outs, stow them away.

    6. Check Your RV Insurance

    Before hurricane season, check that the insurance policy on your RV is up to date and covers the effects of hurricanes, such as wind and water damage. Make sure you know if your insurance requires that you follow state or local evacuation mandates in order to access coverage. Before the storm, take photos or videos of your RV and belongings so you’ll have a record to show your insurance agent, if necessary. After the storm, take photos and videos of any damage.

    7. If You Get Caught in a Storm

    If you’re on the road and get caught in a storm without time to prepare, carefully drive to the nearest exit, find a large, sturdy building near to which you can park your RV, and seek shelter inside. Tune into a local weather forecast, or utilize a mobile weather app, to track the storm conditions and determine when it will be safe to get back on the road. When it is safe, NEVER attempt to drive through high standing water or flash floods.


    Safety should always be a priority when traveling in your RV, but even more so during hurricane season. These tips can help prepare your RV for a hurricane, whether you encounter a storm on the road, are using your unit to evacuate, or are simply securing the RV until the storm passes.

    If you’re searching for your next RV, browse the for-sale units available nationwide at RVTrader.com.

  • 6 Benefits of Buying a Used RV

    6 Benefits of Buying a Used RV

    Deciding to purchase an RV can raise many questions. How much time will I spend in my RV? What class should I buy? Should I buy it new or used? While it’s easy to get lured in by the sparkle of a brand-new camper, don’t rule out a pre-owned unit especially if you plan on performing RV renovations. Before you begin your search, check out RV Trader’s six benefits of buying a used RV.

    1. Save Money Upfront

    The biggest benefit of buying a used RV is the savings. With a little patience, and careful research, you can find a used RV model that fits your needs at a lower cost than buying new. An older model even has lower insurance costs. The best part is that you can put the money you saved into your renovation budget.

    2. Less Depreciation

    Much like cars, purchasing a brand-new RV means losing value shortly after you drive off the lot. RVs can depreciate up to 20% during the first year or two of ownership. If you buy new and plan to sell your unit in a few years, you more than likely won’t make back the money you initially spent. Buying used, then, is often the best investment for flipping an RV, whether you’re renovating it for resale or for your own long-term use.

    3. Greater Inventory Options

    When searching for pre-owned units, you will come across lots of RVs from the past few years. And these aren’t only vintage models. Many owners trade-in or sell their campers after the first couple of years of ownership, creating a marketplace of recently manufactured RVs available for sale at a lower price, thanks to depreciation.

    4. More Design Variety

    RVs vary in size, weight, and floor plans. When you look to buy outside of new models, you’ll see that older models can differ in these aspects. Since manufacturers create floor plans that cater to each type of RV owner, browse different layouts to find one that meets your needs. Shop used RVs from recent models, within the last three years, to a retro camper with a nostalgic floor plan and design.

    5. DIY Customizations

    Buying a used RV is a chance to design and remodel your unit exactly how you want it. Whether you want to repaint, add new flooring and fixtures, or completely gut it, a used RV gives you the opportunity to start fresh and make your camper completely one of a kind. With an older RV, you can overlook any cosmetic wear-and-tear and start seeing the unit as your next DIY project.

    6. Increased Resale Value

    If you don’t have long-term plans for your RV, keep in mind the potential resale value of your unit. If you avoid early depreciation by buying a pre-owned unit, then you should be able to sell it a few years later for close to what you originally paid (assuming it’s been well-maintained and depending on market conditions). However, if you’ve renovated the RV, you may be able to sell it for more than you initially paid plus the upgrades, earning you a tidy profit.

    If you’re stuck deciding whether to purchase a new or used RV, consider how you plan to use the unit. Used offers benefits for both long- and short-term ownership even after you renovate. Once you decide to buy used, it’s time to learn everything you need to know about renovations, which you can find on RV Trader’s RV Renovations resource page, with in-depth articles, checklists, and videos. And you can begin browsing pre-owned units at RVTrader.com, the premier virtual marketplace for buying recreational vehicles.

  • 7 Things to Look for When Buying an RV Fixer Upper

    7 Things to Look for When Buying an RV Fixer Upper

    Renovating RVs is a huge trend right now, with people upgrading RVs for their own use or flipping them for resale. Whether you’re renovating an RV to enjoy as a mobile getaway for yourself, or it’s a side business to generate some extra spending money, you want to make sure that you buy the used RV that’s right for you. Here are seven things to look for when buying an RV fixer upper.

    1. A Fair Price

    When considering a fair price for a fixer upper RV, keep in mind all the tools, materials, and time that will go into the repairs and upgrades. After buying the RV, you still need to have leftover budget to actually do the renovation! Luckily, you can search online marketplaces like RVTrader.com to get an idea of the prices for which similar units are being sold.

    2. A Clear Title

    You’ll always get a title when buying from a dealer, but some private sellers may not have a title for a used RV, especially if it’s a fixer upper that’s particularly old, damaged, or even inoperable. RVs like these can often tempt renovators with cheap prices, but we strongly recommend you stay away from RVs without a clear title. Some states have processes to let you claim a title-less RV, but it can be complicated and is not guaranteed to work. Stick to buying from sellers who have a clear title.

    3. An In-Person Inspection

    When shopping on RV Trader, listings will have plenty of photos and videos of the for-sale listing. If you’re buying a new unit, or even a road-ready used RV, that visual evidence may give you all the confidence you need to buy the RV. However, if you’re buying a fixer upper that is going to need some work to give it new life, you really need to inspect the RV in-person. Before buying a fixer upper RV, you need to evaluate the issues you think you can fix or upgrade, the repairs and replacements that are too big to be worth the investment, and the potential hidden problems that could unexpectedly derail a renovation. To get that level of detail, especially to find those hidden issues, you really need the opportunity to inspect the RV in-person.

    Pro Tip: If you may be unavailable to inspect an RV, or don’t feel qualified to evaluate a rig yourself, look for listings on RVTrader.com that are marked with an inspection badge. These are units that are part of RV Trader Assurance, powered by Lemon Squad, which have already been inspected by an RV professional. On these listings, you can easily request the inspection report, which will include a comprehensive examination of the internal and external structure, complete mechanical inspection, road test, appliance inspection, and over 40 high-quality photos.

    4. Water Damage

    Water damage is one key issue to look for while inspecting a used RV, which can damage everything from cabinets and furnishings to the ceiling, walls, and floor. Rot, rust, and mold may not be immediately apparent, but can be expensive and time-consuming to remove and repair, so keep a critical eye out for spots, discoloration, bubbles in paneling, unpleasant smells, and other signs of water damage.

    5. Good Bones

    As someone looking to renovate a used RV, you’re likely prepared to clean up its appearance and basic functionality with new paint, furnishings, appliances, and even tires. Maybe you have the skills needed to make engine, electric, and plumbing repairs. But are you ready to replace the RV frame, ceiling, walls, floors, axles, and so on? The fine line between fixer upper and lost cause is often the condition of the most basic components of the vehicle. At a minimum when inspecting the RV, you need to make sure that the unit has good bones that provide a strong foundation to begin your renovation project.

    6. How to Contact the Seller

    In most markets, there are more interested buyers than there are RVs for-sale, which means that sellers are receiving multiple inquiries every day and will likely sell the unit very quickly. If you find the perfect fixer upper, you need to know how to immediately contact them so you can stop by to inspect the used RV and maybe even write them a check that very day. Review the listing to find the seller’s contact information, including their phone number, address, email, and/or available hours.

    7. Transportation Options

    If you purchase an RV, do you know how to get it back to your driveway? If the fixer upper isn’t road-worthy, you’ll need to find a way to haul it or hire an auto delivery service. If the used RV can be safely driven, you’ll need to get your personal vehicle back home, either by having a friend drive it or hauling it behind the RV. You can also ask the seller if they provide delivery service that will bring the RV right to you.


    If you’re hopping onto the RV renovation trend, there are some key things to look for when shopping for fixer upper RVs. For similar advice, review the RV Renovations resource page, which offers a series of detailed articles, checklists, and videos. And if you’re ready to start shopping for a used RV, check out the nationwide inventory available on RVTrader.com.

  • 8 RV Renovation Tips for Beginners

    8 RV Renovation Tips for Beginners

    You want to renovate your RV, but you don’t know where to start, right? Customizing and fixing up an RV offers nearly endless options, which may seem intimidating at first. The end result will be well-worth it, but without preparation, the remodel process can be full of missteps and unforeseen expenses. Before you start picking out paint samples, get a plan in place with RV Trader’s eight renovation tips for beginners.

    1. Know Your Budget

    Start your remodel journey by planning your finances. Decide how much you’re willing to spend on this process. While it’s always efficient to use a professional contractor, doing the renovations yourself keeps you in control of your money since you decide which supplies to use and you won’t have to pay yourself for labor costs. Don’t forget to leave room in your budget for any unexpected costs along the way. And if you don’t have your entire budget up front, don’t worry. The long renovation process will likely give you time to continue saving for each expenditure along the way.

    2. Assess the Condition of Your RV

    Before you start planning your dream redesign, make a quick assessment of your camper. If you’re purchasing an RV specifically to renovate, check the condition of the appliances, windows, tires, water systems, and electrical. You’ll also want to keep an eye out for engine problems, water damage, and frame damage. If you find an issue with your camper after you buy it, get it fixed before starting your renovation.

    3. Decide What You Can DIY

    Renovations can range anywhere from a complete gut job to simpler aesthetic touch ups, requiring different resources and skill levels. If you decide to go the DIY route and not use a professional, it’s best to do a renovation that allows you to work with your RV’s existing structural, electrical, plumbing, and mechanical systems. You know how much you can take on. If a project becomes too much, reach out for help.

    4. Have a Realistic Timeline

    Remodeling your camper will likely take longer than you expect. Knowing and preparing for this in advance can help you avoid future frustrations. Replacing light fixtures can take a few hours, but painting, building shelves and tables, and installing new appliances can be much more time consuming. If you live in your RV full-time, make a plan for where you’ll stay during parts of your renovation. Remember, you can’t tackle all of your ideas at the same time, so keep in mind how long each project will take before you start a new one.

    5. Figure Out Where to Shop

    Shopping doesn’t have to break the bank, especially when you plan ahead. Define your decorating style, whether it’s modern, rustic, or industrial, and shop retailers that have the widest selection. Shopping at just a few intentionally selected stores, instead of running around to a bunch, will save time that can be spent on designing and renovating. Accessories and fixtures specifically for RVs can cost more than they do for homes, so shop around and price compare to get the quality and style you want at a lower price. Popular household furnishing stores also have lightweight furniture that’s perfect for RVs. 

    6. Make a List of What You’ll Need

    As you plan your projects, make a list of the tools, fabrics, paints, and furnishings you’ll need for your remodel and the quantity you’ll need. Power tools like drill sets can add to your budget, so rent or borrow them when possible. Buy extra renovation essentials like painter’s tape, paper or plastic covers, and sanding paper. These can go quicker than you think so it’s always best to have more on hand.

    7. Measure Everything

    Measuring your RV is a critical step in determining the full scope of your project. Use a measuring tape and go room to room to get the dimensions of your camper. Measure once then do it again to make sure all the sizing is correct before you buy anything. Make a note of where switches and outlets are located to avoid blocking them with any new furniture. Don’t forget to also measure the height and width of your RV door to ensure that you can fit your purchases through the opening.

    8. Connect with Other RV Renovators

    Online forums and Facebook groups are a great way to connect with other people who have renovated their campers. Share your remodeling projects, ask for advice, and get ideas from other RV renovators. Follow DIYers on social media for even more designs and tips. What you see from someone else could spark inspiration for your project.


    Now that you have an idea of how to start, get ready to design and remodel your rig. Putting a plan in place early on can make your RV renovation process easier and help keep you on budget. Before you know it, you’ll be on your way across the country in your chic, updated camper. For similar advice, review the RV Renovations resource page, which offers a series of detailed articles, checklists, and videos.

  • FMCA Tech Tip: RV Roof Replacement

    FMCA Tech Tip: RV Roof Replacement

    A complete roof replacement is one of the biggest repair jobs RV owners may tackle. The procedure has been documented online in numerous articles and videos, often by RV owners with little or no previous experience replacing a roof. In fact, this difficult and time-consuming process requires advanced skills in carpentry and general fabrication. Some people undertake it themselves to avoid the high cost of having it done professionally, but bear in mind the cost is a function of the project’s complexity. Before you undertake this task, please consider the following: 

    • You will need an indoor workshop that can house the RV, a covered outdoor space, or an extended period of good weather without rain, probably at least two weeks straight.


    • You will have to remove all objects from the roof, including air conditioners. Without a forklift, this is a dangerous procedure, as A/C units are extremely heavy. 


    • You will have to lift the roofing materials, including plywood substrate, onto the roof. Again, without a forklift or lifting rig, this is dangerous. 


    • Working on an RV roof is inherently dangerous. 


    • You must obtain the appropriate roofing material, which will cost at least a few thousand dollars. As an experienced RV technician, I have replaced many RV roofs. It is an extremely labor-intensive project. Please consider having the work done by your local RV shop, which has the needed expertise and equipment. That said, if you believe you have the skills and the proper equipment, or you just want a better understanding of what it involves, read on. 


    Be extremely careful at all times while working on an RV roof. Move slowly to avoid a fall. This is not a one-person job, so make sure you have people available to assist.  

    Know Your Roof

    The main RV roofing materials are aluminum, fiberglass, vinyl, and rubber. Know what you have before proceeding with a replacement. You need not use the same material for the new roof, but using a different type will increase the complexity of the job. This article describes replacing rubber with rubber. Replacing another type of material with rubber generally requires extra planning, which is sometimes not evident until the old roof is removed.

    Materials

    Purchase the required materials in the correct quantities before you start the work. You may find you need additional supplies as you go, but be prepared with the basics:

    • EPDM or TPO rubber: Order sufficient length and width to cover the roof in a single piece. The roll of rubber should be long enough to cover the entire length and width of the RV roof, plus at least 6 inches on each side. Rubber roofing generally is available in widths of 8.5 feet and 9.5 feet. 


    • Adhesive: To ensure proper coverage, you need at least one gallon for every 175 to 200 square feet of roof. Be sure to purchase adhesive made specifically for the roof material. Some suppliers offer roof installation kits that include the adhesive, butyl, and lap sealant. This can be an economical way to purchase the supplies, but if you have a larger RV, you may want to purchase two kits. I recommend Dicor products for both the membrane and the installation kit. 


    • Butyl tape: This seals the fixtures to the roof. You need at least 75 feet of tape for every 20 linear feet of roof. Be sure to use butyl tape and not regular putty tape, as the latter can damage the rubber over time. 


    • Self-leveling lap sealant: This is applied generously to every hole and fixture on the new roof. At least three tubes are needed for every 20 linear feet of roof, but it’s very possible that will not be enough. 


    • EternaBond tape: This is expensive, and although not required, I recommend it in place of lap sealant, as it is permanent and less messy. Or, you may choose to use a combination of the two. EternaBond, when properly applied to a clean surface, provides a watertight and permanent seal. If you use EternaBond, be sure to refer to the manufacturer’s directions. 


    • Substrate: Prior to removing the existing roof material, it may not be apparent whether you need to replace the substrate or how much you need to replace. Usually, 1/4-inch plywood is sufficient, although you may choose to use 3/8-inch. Oriented strand board (OSB) also can be used. 


    • Trim strips: You may need new trim strips, or you may need to install them where they don’t currently exist. 


    • Screws: It is a good idea to purchase a few boxes of screws in a variety of styles and lengths, including wood screws and self-tapping sheet-metal screws. I usually use 1-inch, 1 1/2-inch, and 2-inch screws. 


    • Masking tape or drywall tape: A 1-inch-wide roll is used to tape the seams in the wood substrate. One roll should be sufficient. 


    • Miscellaneous: While you are on the roof, inspect all caps and covers for damage. If necessary, replace them.

    Preparation

    Be sure you have plenty of work space around the RV. And make sure you have ample time to complete the project. If the work is being done outside and you encounter a delay, you risk losing the favorable weather. Follow these steps:


    • Ladder: If your RV does not have a ladder, it may be because the roof is not strong enough to support your weight. In that case, lay sheets of plywood on the roof for support. If your RV does have a ladder, you will have to remove it, or at least unscrew the roof brackets, so be sure you have an A-frame or extension ladder long enough to safely access the roof. The ladder also is needed to install and remove the side trim pieces and roll out the membrane. 


    • Remove sealant: All sealant must be completely removed from all roof fixtures. This is a time-consuming process. Use whatever tools work for you, such as putty knives, as well as plastic and gasket scrapers. Take the time to do it carefully, as you don’t want to damage the fixtures. Once you have stripped the fixtures, remove and save all the screws, which you may want to reuse if they are in good shape. Rusted screws are a sign of water damage, so inspect those areas carefully, as explained below. 


    • Remove fixtures: Once all the screws are removed, carefully pry the fixtures off the roof. This can be difficult, because they should be stuck to the roof with butyl putty. Be careful not to damage the fixtures while removing them. 


    • Remove air conditioners: Remove the mounting bolts and ceiling plenum, disconnect all cables, and ensure the air conditioner power supply is turned off. A/C units are extremely heavy, so normally forklifts are used to remove them from the roof. You may be able to leave the A/C on the roof, and simply move it around while you work, but I don’t recommend this, as you risk damaging the new rubber. Always get help when lifting or moving an air conditioner. 


    • Remove the awning: If you are removing a rubber roof, the RV awning must be removed, along with the horizontal trim pieces and awning drip rail. This is because the rubber roof likely is curled over the edge of the roof and secured under these pieces. Before removing the awning, lock the ratchet in the “extend” position. Then remove the screws holding the fabric to the drip rail, as well as the lag bolts holding the upper mounting brackets in place. Remove the awning arms from the lower brackets and have an assistant grab one awning arm while you grasp the other. Have a third person climb a ladder to ensure the fabric slides out of the drip rail without binding or tearing while you and your buddy walk the awning out of the drip rail. Carefully lean the awning against a wall to prevent damage. 


    • Clean the fixtures: I like to clean the fixtures at this point rather than prior to reinstalling them. You may choose to seek assistance with this so you can continue working on the roof. Scrape the remaining sealant and butyl putty from the fixtures. I recommend using an industrial cleaner or silicone remover so they look as nice as the new roof. Further inspect the fixtures for damage and replace them if necessary.

    Removal

    You should find that the rubber is tucked under the front cap, and likely on top of the rear cap. Grab one end of the rubber and pull firmly to release it from the adhesive. You may choose to cut the rubber into smaller pieces to make it easier. Be extremely careful during this step, as the resistance of the rubber against the glue could change at any time. At this point, you should have a bare roof with only substrate exposed.  

    Replacement

    Thoroughly inspect the substrate. If you find rot or damage, consider replacing that section of wood. If any of the substrate is significantly damaged, especially from water, you may need to replace the batt or plastic-foam insulation underneath. In extreme cases with wood-frame RVs, you also may need to do some framing repair. Surprises like this take us back to the recommendation to let professionals tackle roof replacement. If you wish to replace the substrate: 

    • Remove all screws securing the wood to the roof frame. 


    • Carefully lift the substrate off the roof framing. Do so in one piece, if possible. Once the substrate is removed, do not walk between the roof rafters. If a number of boards have been removed, you may want to temporarily lay down plywood across the rafters for easier access to the exposed area. 


    • Be sure to replace substrate in full sheets. Make sure the replacement substrate is the same thickness as the original. 


    • If the substrate has any cutout features, replicate them on the replacement piece. Use the removed piece as a template, or measure on the roof to identify the exact locations for the cutouts. If the feature is a drilled hole for a vent stack or wire access, it must be precisely drilled prior to installing the new substrate piece. If the cutout is a large hole for a vent, air conditioner, etc., mark the location and then drill and rout once the wood is screwed down. 


    • After preparing the substrate section with predrilled holes, install it on the roof by securing it with screws, as per the original piece. Countersink the screws so the heads are flush with the surface or slightly below so the screws don’t protrude into the rubber membrane. 
    • Thoroughly inspect the entire roof for loose or protruding screws, wood splinters, etc. Prior to installing the rubber membrane, make sure the substrate is clean and free of any protrusions or anything that might damage the rubber. 


    • Sand the substrate anywhere you find splinters or other protrusions. 


    • Bevel the perimeter edges of the substrate using a sander or router. 


    • Using drywall tape or masking tape, secure all seams that are wider than 1/16 inch. I generally also tape the perimeter edges. 


    • Sweep the entire roof or blow it clean using compressed air. 


    • Once you are sure the roof is clean and smooth, place the rubber on the roof and roll it out. Make sure it is centered and squared front-to-back and side-to-side, and ensure you have at least 6 inches extra in all directions. 


    • The rubber should lay on top of any roof protrusions such as vent stacks. 


    • Roll the rubber halfway back toward the center of the RV from either the front or rear. The substrate will be exposed on either the front or back of the RV roof. 


    • Use a 9-inch-wide short-nap paint roller to apply the adhesive to the exposed half of the roof according to the manufacturer’s instructions. Some adhesive brands should be applied only to the substrate, while others are applied to both surfaces. Apply it at a rate of one gallon per 175 to 200 square feet. Refer to the manufacturer’s instructions for set-up time. 


    • Using ladders placed on each side of the RV, have an assistant help roll the rubber membrane over the adhesive, being sure not to allow large bubbles or creases. 


    • Roll the unglued half of the membrane over the glued half and repeat the gluing process. 


    • The adhesive remains pliable enough to adjust the membrane, if needed. 
    • For any protrusions such as vent stacks, use a razor knife to cut a small “X” in the rubber and push it down over the protrusion so it goes through the hole made by the “X.”   


    • Use a squeegee or broom to eliminate any bubbles or creases from the membrane. 


    • At the front of the RV, tuck the rubber under the front cap, but lay the membrane over the rear cap. 


    • To prepare the roof cutouts, cut an “X” from corner to corner of each roof cutout. Fold the cut flaps down into the cutout and staple them to the roof framing. You may trim the flaps later. 


    • Stick butyl tape to the original trim pieces, but do not remove the backing paper yet. 


    • Replace the upper horizontal trim pieces by removing the paper butyl backing and placing the trim in the same location as it was originally. If possible, line the screw holes up as well. While positioning the trim, firmly pull down on the rubber membrane, but do not stretch it. 


    • While holding the rubber, attach the trim to the sidewall and replace the screws. This ensures the membrane is taut along the edges and down the side of the RV. Alternately, you may choose to staple the membrane to the sidewall of the RV, using 1/2-inch staples placed every 5 to 6 inches along the sidewall. Make sure to pull on the membrane while you are stapling, and that the staples lie along the trim line so they are not visible. 


    • Replace all roof fixtures, being sure to place butyl tape on the underside along the screw flange. 


    • When replacing skylights, be sure to use sealant specifically formulated for the plastic. I recommend Surebond SB-140. 


    • Replace the pan gaskets on the air conditioners to avoid water leakage. Tighten the A/C screws so the gasket is half its original thickness. Do not tighten past this point. 


    • Using self-leveling lap sealant and/or EternaBond, thoroughly seal all fixtures by generously covering the edges, screw heads, and any other possible point of entry. It’s okay to overcompensate to ensure the roof does not leak. 


    • Reinstall the awning by having two people assist with sliding it back into the drip rail. Center the awning fabric in relation to the roller tube and replace the drip rail screws. Squeeze a generous amount of sealant into the top bracket screw holes and reinstall the top bracket. 
    • Trim the rubber membrane wherever it protrudes beyond trim strips. 


    As a certified RV technician who has replaced many roofs, I still find this a time-consuming and difficult task. I once again urge you to seek professional help to replace your RV roof. If you choose to make it a do-it-yourself project, beware of the numerous online articles and videos that may do more harm than good.

  • 8 Tips for Taking Great Listing Photos

    8 Tips for Taking Great Listing Photos

    It’s no secret that the buying process is changing, and with technology on the rise, online research is becoming increasingly important to buyers before they make a purchase – large or small. That’s why, if you’re selling your used RV, taking high-quality photos is crucial to get more eyes on your listing. In fact, on RV Trader, listings with pictures generate 2.4X higher search result impressions, 6.5X higher click-through rates, and 15.8X higher vehicle detail page-views than listings without photos.

    Interested in upping your photo game? We’ve got 8 easy tips to make sure your listing photos are painting a clear picture to potential buyers.

    Make it Shine

    We know cleaning a fifth wheel or other RV can take time depending on the size, but a deep cleaning can have the potential to make or break a sale. It’s important to know that buyers want to see their potential unit in tip-top shape not just before making a purchase, but even when coming to see it in person. New or used, you’ll want to make sure the outside of the unit is washed, and that the inside of the unit has had a full detailing. Don’t forget simple things like making the beds, decluttering, wiping down counters, etc. 

    Use the Right Camera

    Consumers are likely to move along to the next listing if your photos are grainy or blurry. So our question to you is, are you using a high-quality camera to take your listing photos? You’ll want to make sure that you have a fairly newer camera to ensure that your photos are crystal clear. Keep in mind, most smartphones have incredible cameras and can be great options for taking photos. If you want to take your photos to the next level, consider buying an updated point and shoot camera. They are very simple to use and take extremely clear photos.

    Shoot at the Right Time of Day

    Ask any photographer and they’ll tell you, lighting is everything when it comes to taking photos. That’s why it’s so important to keep in mind the time of day you’re taking your listing photos. We recommend avoiding taking photos midday when the sun is at its brightest and lighting can come across as harsh. Shooting during the morning or late afternoon is ideal for capturing “warmer,” less washed out photos. As long as it’s not raining, cloudy days can also be great photoshoot days – just make sure it’s not too dark outside! While taking photos inside of the unit, highlight the natural light that the unit provides by opening up all of the windows while shooting. If there are darker areas inside, we suggest turning on the cabin lights as needed – avoid flash if at all possible.

    Keep in Mind Positioning and Location

    When taking listing photos, you’ll want to keep in mind where you’ve positioned and parked the RV. Make sure that the unit you are trying to sell is the focal point of your photo. While inside the unit, stand in corners and point the camera outward while taking photos to make the unit feel larger and longer.

    Take a Few Test Photos

    It’s important to take your time while shooting your listing photos, as they are a crucial part of your listing. Take a few test photos of your unit to make sure the lighting is right, the images are clear, and that you are satisfied with the outcome. If you aren’t pleased with the photos you can take a step back and see what might need to change to enhance your photo (positioning, lighting, etc.).

    Have a Variety of Photos

    Consumers want to see photos and LOTS of them. Potential buyers want to see the entirety of your Class B RV or other RV even before coming to see the unit – they want to picture themselves in their new RV on the road to their next destination. To paint your buyer a clear picture, we suggest taking a few full shots of the outside of the unit (showing the whole RV) as well as detailed, close-up shots. When taking indoor shots, we suggest showing all aspects of the unit. We recommend having a full outdoor RV shot as your main listing photo to grab the customer’s attention right off the bat, then they can explore more photo options as desired.

    Be Honest and Authentic

    It’s extremely important to be honest and authentic with your customers. Don’t hide the imperfections of the unit you are trying to sell. If the unit has a few dings or scratches, or if there’s a tear in upholstery, consumers deserve to know. It’s also a good idea to stay away from using stock photos of your unit – consumers appreciate original photos and want to see exactly what their potential unit looks like.

    Highlight Special Features

    Does the unit you’re selling have any special features like extra storage, great natural lighting, or new technology? Make sure you are highlighting them in both your listing photos AND descriptions. As we mentioned earlier, consumers want to picture themselves in their new RV, and showing them unique features will have a higher chance of piquing their interest.

    Bonus Tip: Add Video Features 

    Just like pictures, videos are powerful and persuasive advertising tools. If you are already taking photos, why not record some videos too? You can record a simple walkaround video or even a demonstration of the RV in action.

    Listings with photos have more buyers looking at them, clicking to view additional information, and contacting sellers to pursue a purchase. We hope that these 8 tips have helped you realize taking listing photos doesn’t have to be difficult. Getting the right photo takes some practice, but it will be worth it in the end, trust us.

    If you’re ready to snap some photos and sell your used RV, we encourage you to read through these tips for selling your used RV and list your for-sale unit on RV Trader’s nationwide online marketplace. Check out our RV Seller’s Guide for additional resources!

  • FMCA Tech Tip: What Are Turn Alarms?

    FMCA Tech Tip: What Are Turn Alarms?

    Turn-Alarm can do more than alert drivers that a turn signal is still on.

    It happens to almost everybody. After passing a vehicle on a highway, you forget to turn off the turn signal. Because of distractions such as heavy traffic or sunlight on the dash, you travel a couple of miles without noticing the small blinking arrow on the instrument panel. And if you’re in a motorhome, you don’t hear the faint clicking of the flasher element, because it’s usually mounted on the firewall far under the dash.  

    When we owned a 2007 Allegro Bus motorhome, I eventually began holding on to the turn signal lever when changing lanes so I wouldn’t forget to cancel the signals. Then I heard about a product from Stockton, California-based Daeco, called Turn-Alarm. It replaces an existing turn signal flasher element with one that makes a “beep” sound while the turn signal is on. 

    Later, I found that the Turn-Alarm could have other uses as a warning system, such as alerting me when my satellite dish is up, when the gray-water tank is full, or when the cargo doors are open. But first, let’s focus on Turn-Alarm’s original purpose. I bought a Turn-Alarm that fit my Allegro Bus. Installation was simple — just unplug the original flasher element and plug in the Turn-Alarm. At first, the beep was a bit too loud, but that was easy to solve. A miniature sound transducer is inside the Turn-Alarm’s housing, and sound exits the housing via a 3/16-inch-diameter hole. I reduced the volume by covering part of the hole with a small piece of electrical tape. Twenty-three Turn-Alarm models are available. The Turn-Alarm website shows how to determine the replacement for your original flasher. When in doubt, you can contact Daeco by email or by phone. The basic models are two- or three-pin Turn-Alarms with simple plug-and-play installations. Turn signal flashers either thermally or electronically open and close the circuit, causing the turn signals to flash on and off. Thermal flashers do this by utilizing the resistance in the turn signal circuit, which is why larger flasher elements typically are used when pulling trailers with additional lights. LED lights have extremely high resistance, and they may not function with standard turn signal flashers. For those situations, Turn-Alarm offers a model 262LED flasher.

    Additional Uses

    After we bought our Entegra Coach motorhome, we could rely on a vehicle information display on the instrument panel to warn us, visually and audibly, when the turn signals were left on. So, I did not need a Turn-Alarm for that purpose. However, I found numerous other uses for the device.

    My first task was to add a warning system so that I wouldn’t drive away when my Winegard Trav’ler satellite dish was up. At the time, Winegard offered an optional auto-stow kit (it is no longer being manufactured). Basically, it was a four-wire cable that plugged into the back of the Winegard controller box, and it stowed the dish automatically when the ignition key was on. I didn’t want that, but I did want a warning, and the cable had one wire available for that purpose.   I used a nylon cable tie to place a Turn-Alarm model 262LED flasher behind the dash. I drilled a small hole in the instrument panel and mounted a red LED in it. I then ran 12-volt ignition hot power to the Turn-Alarm’s input tab, connected the ground wire on the 262LED to ground, and ran another wire from the Turn-Alarm’s output tab to the input side of the red LED lamp. I used regular female spade wire connectors to connect to the Turn-Alarm. I then ran another wire from the LED’s output connection to the orange wire labeled “for OEM use” on Winegard’s auto-stow cable. When the ignition key is in the “on” position and the satellite dish is up, the dish’s controller box completes the circuit to ground. The Turn-Alarm sounds the alarm, and the red LED light on the dash flashes on and off. 

    My next task was to add an alarm that sounds when the gray-water tank is full. Our motorhome came with a 709-P3 SeeLevel tank monitoring system. I replaced its display panel with a 709-RVC-PM SeeLevel panel, which includes RV-C communication, as well as a set of programmable alarm contacts that serve as switches to trigger external alarms. I programmed the display to close the contact and act as a switch to activate the alarm when the gray-water tank level rises to 96 percent. I then mounted another red LED lamp in the mud bath area where the monitoring equipment is located, and I added a mini rocker switch so that I can silence the alarm if I want. I placed another 262LED Turn-Alarm behind the panel, and I wired everything in pretty much the same order as in my satellite dish warning scheme, except that I used battery hot power rather than ignition hot power, and I used the SeeLevel contacts to ground the circuit.

    Other Models

    Other Turn-Alarm models offer a remote sound and an LED module that connects via a 3-foot cable to the two- or three-terminal flasher element. Originally designed for motorcycles, the remote models can be used anywhere an operator desires better sound and visibility. In addition, a universal Turn-Alarm, model U-1, is available. It does not require replacement of the turn signal flasher element. The U-1 can be used with newer vehicles that have nonstandard flashers or body control modules. A motion sensor attaches to the turn signal lever via hook-and-loop tabs. A control box, mounted beneath or above the dash, includes the sound transducer orifice and a red LED. An on-off power switch conserves the 9-volt battery’s power when not in use. 

    The Turn-Alarm is an easy way to add an audible alert and flashing warning lamp, whether for turn signals or other applications. In fact, I intend to install a Turn-Alarm for my cargo doors so that I’m warned if they are left open once the engine starts and the park brake is released, or if the doors pop open while I’m driving.

    Daeco Turn-Alarm (209) 952-0923 

  • FMCA Tech Tip: Leveling An RV

    FMCA Tech Tip: Leveling An RV

    One of the first things I do when I enter a new RV park is evaluate the quality of my assigned pad. This inspection is part of the ritual I perform before I pull into a site. Primarily, I assess the site’s length, width, ground type, and exact hookup location, as well as how level the site is. The latter issue is the focus of this article.

    Why Being Level Matters

    One reason an RV should be level is personal comfort. People are used to existing on a horizontal plane. We don’t feel comfortable walking up or down an incline in our RV, or sleeping on an angle (generally speaking, of course). Leveling the RV helps to ensure that your bed is oriented to allow for healthful and restful sleep. It’s hard to cook eggs when the RV is slanted. The list goes on. In addition, an absorption refrigerator can malfunction when it operates outside its manufacturer’s level specifications. According to Norcold, modern fridges work fine at angles of plus or minus 3 degrees side-to-side and 6 degrees front-to-back. Dometic has similar specs. These angles pretty much match what is comfortable to people inside an RV. If you use a bubble level, half a bubble from level should be sufficient for short-term stays, while longer stays should warrant a more concerted effort to center the bubble.

    When To Level

     Generally, an RV should be leveled as soon as you have a suitable pad, although there may be subtle variations as to when leveling fits into the order of operations. For instance, for RVs with powered leveling jacks and slideouts, some manufacturers mandate the slides be extended before the jacks; others specify jacks before slides. Make sure you understand and follow the manufacturer’s recommended order. Also, after extending a slideout, recheck that the refrigerator is level. Before you finalize the RV’s position and begin the leveling procedure, check for clearances for the slideouts, awnings, steps, and entry doors. Look for anything that may interfere, including tree branches and power/water pedestals. Make sure you have enough power cord, fresh-water hose, and sewer hose to reach those services. If you use a satellite dish, be sure you can position it to have a clear view of the sky. Ensure you have enough door-side space for a picnic table and/or eating area. Perform a physical walk-around of the RV prior to final positioning. Look for bumps, dips, and other uneven spots, especially in unpaved areas. Sometimes moving just a few feet can simplify the leveling process.

    How To Level

    First, it is important to understand the difference between stabilizing jacks and leveling jacks. Stabilizing jacks on lighter travel trailers and some motorhomes should never be used to lift the RV. They should be lowered to the ground only until they stabilize the RV, but not enough to take vehicle weight off the wheels and axle. Stabilizing jacks generally utilize a worm-drive shaft with a hand crank (although powered versions are available). If your RV has stabilizing jacks, do not use them to level the vehicle, but lower them to the ground once the unit is level. Leveling jacks, on the other hand, usually are hydraulic or pneumatic (air) rams/pistons (with the notable exception of travel trailer tongue jacks). Make sure you know the difference as indicated by your manufacturer. Both hydraulic and pneumatic systems often incorporate suspension dump capability on RVs with air suspension. This enables the system to evacuate the bags prior to the leveling process, allowing the leveled RV to be closer to the ground.  To level an RV without power levelers, you must carry ramps and/or leveling blocks with you, as well as a bubble level, although good smartphone apps are available for this purpose. If possible, place the level in the freezer compartment, as this is the most significant level surface. Position your ramps or blocks, and then slowly and carefully drive your RV onto them until it is level as indicated on the bubble. Be sure to use a spotter to carefully monitor the tire locations on the ramps/blocks. The biggest risk is driving off the end of a leveling ramp. In addition, be sure the entire tire footprint is supported; otherwise, tire damage can result. With practice, you should be able to identify how many blocks are needed or how far up the ramp you need to go to correct for different off-level conditions. If you have a travel trailer, you often can level the unit using only the tongue jack, but be sure to chock the wheels when you finish the leveling procedure. Indeed, whether you are leveling a motorhome or a trailer, chock all wheels still on the ground, and in the case of a motorhome, set the parking brake. For motorhomes without leveling jacks, position the coach so only the front wheels require raising, as it’s safer and easier to ramp or block the front tires than the rear. If the front wheels must be lifted a significant amount, it may make sense to move to a more level spot.

    Use Of Leveling Jacks

    If your RV is equipped with leveling jacks, be sure to follow the manufacturer’s instructions. You may have auto-leveling or manual jacks. As I noted with manual leveling, it’s important to lift only a motorhome’s front axle. Raising the rear wheels off the ground is dangerous because it negates the parking brake feature. The parking brake on the rear axle prevents vehicles from rolling away. If the rear wheels are lifted off the ground, it’s possible the vehicle can roll off the jacks. While some people may argue that the jacks prevent the motorhome from moving laterally, that may not be the case, as the friction between the jack pad and the ground may be insufficient to keep the RV from moving. That is especially true in the case of kick-down jacks, which may be kicked up if the RV is jolted or otherwise disturbed. If you are using leveling jacks, I recommend the use of jack pads. These can be purchased or homemade. They are usually thick, square blocks of a larger size than the jack feet and they are used to increase the stroke of the jacks and/or protect against soft ground by reducing the force exerted over the area. Make sure you don’t end up in a precarious situation when the leveling is complete. If the RV appears unsafe or is raised too much (to the point you can’t enter your RV without a step stool), I recommend you either reposition your RV more favorably or get a different site. This is true regardless of the leveling method you use — ramps, blocks, or jacks. In extreme cases, I have had to leave campgrounds that did not have any available sites that were even remotely level. 

    On a side note, I often am asked my opinion on storing RVs with powered jacks extended to take the weight off the tires. I don’t store my coach this way, since there is risk of corrosion or rust on the extended ram over time, especially in inclement weather. Therefore, I prefer to leave my jacks retracted. I protect the tires by parking on pavement or pieces of wood. Commercial products made of nylon or similar material are available to insulate the tires from concrete, the ground, or other surfaces. I also move the RV periodically to alter the tire positions. Even if your RV has leveling jacks, it is a good idea to use a bubble level or app occasionally. Leveling jacks can go out of calibration, resulting in an out-of-level condition. The bubble level allows you to properly level your RV and determine whether the jacks require calibration. If the jacks report an out-of-level condition when the bubble level indicates the RV is level, follow the jack manufacturer’s instructions to calibrate the system. Also remember to maintain your jacks according to your manufacturer’s instructions. This includes keeping the reservoir topped off with the correct fluid (often transmission fluid) and ensuring the electrical connections are clean and tight. Significant current is drawn from the batteries to power the hydraulic pump, so loose or dirty connections can cause damaging or dangerous arcing. For a variety of reasons, it’s important to level your RV at a campsite. Be sure to understand the methods that apply to you.

    By: Steve Froese, F276276

  • 7 Quick Tips For Buying in a Virtual World: A Free Checklist

    7 Quick Tips For Buying in a Virtual World: A Free Checklist

    It’s no secret we live in a digital world. We easily buy everyday items with a click of a button and they quickly arrive at our doorstep. Why can’t this process be the same with bigger items like an RV? At RV Trader, we made this shopping dream a reality! 

    It may feel overwhelming to buy larger ticket items virtually, but the process doesn’t have to be complicated. We’ve created an easy-to-follow checklist where you’ll learn the ins and outs of buying an RV online. This checklist includes all the information you’ll need to work through the entire buying process. Thanks to this complimentary resource, you can make the most informed buying decision possible. 

    In the checklist, we cover:

    • Building Your RV Wish List
    • Deciding on a Budget
    • Choosing RV Type
    • The Research Process
    • Connecting With the Seller
    • Reviewing Your Virtual Options, and
    • How to Avoid Scams


    We sprinkle in virtual buying tips throughout so you can feel confident and empowered to buy your first, or next, RV online. This resource was designed with you in mind. Take advantage of it and start your RV search today. Ready to learn more?

    Click Here to Access Our Checklist

    For additional information on virtual buying, visit our resources here.