Category: RV Advice

  • RV Renovations: Renovating a Dinette

    RV Renovations: Renovating a Dinette

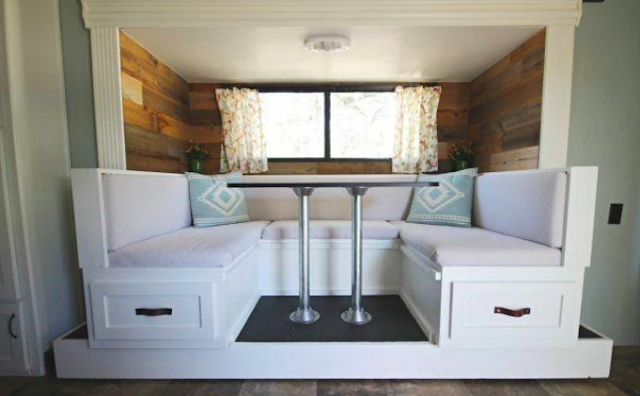
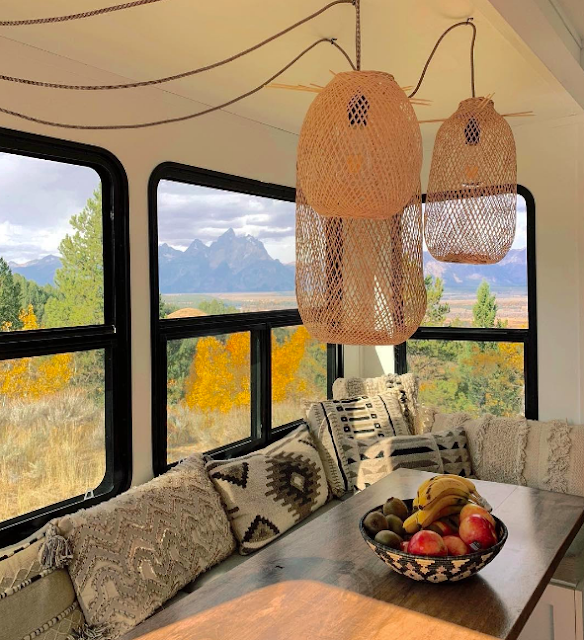
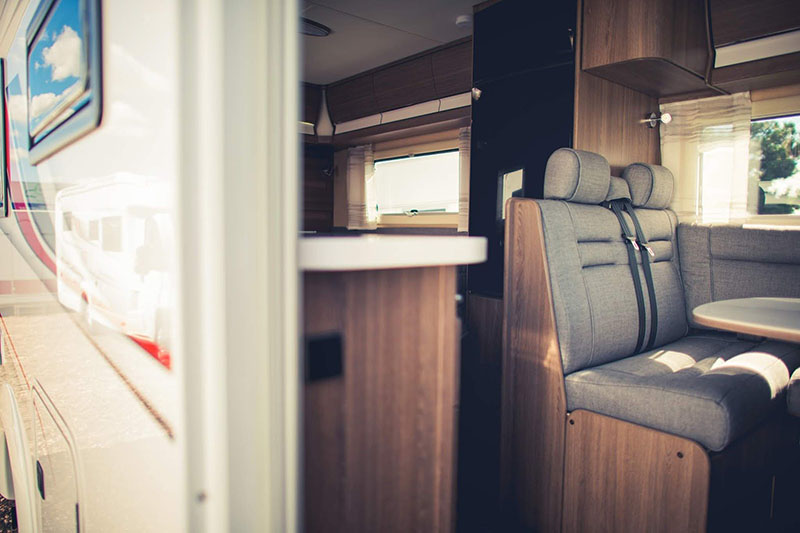
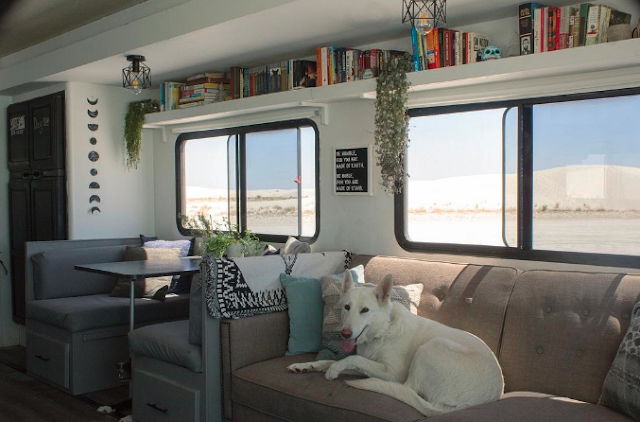
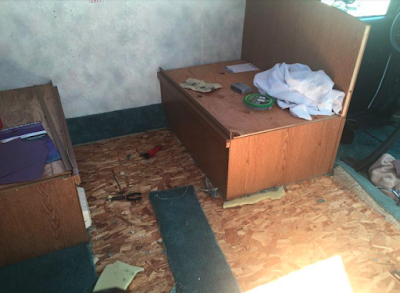
    In an RV, a dinette is one of the most useful and functional spaces you will find. For many people, this centrally-located space can be used as a kitchen table, a desk or office space, a craft center, or even somewhere to hang out and watch movies and relax. Dinettes can come as a booth with two benches or as a table with four chairs and vary in size, shape, and color. However, in some older RVs, dinette areas tend to be a bit outdated. Often, they are covered in tacky fabrics, dark woods, and textured wallpapers, and, for some people, this can be a bit of a disappointment when they are considering a purchase. Yet, with some simple changes, you can easily transform your dinette space into an area that you will enjoy utilizing for years to come. Follow along to learn some simple tips for updating and modernizing your RV’s dinette cushions, updating your table, and decorating tips.

    Credit: Domestic Imperfection

    Updating Your Dinette’s Cushions

    Your very first step in your makeover should be to recover your dinette’s cushions. This will make the biggest overall difference to the dinette space and can provide inspiration for the later steps. If your RV’s dinette is a table and chairs (instead of a booth with cushioned benches), then simply skip this step and move on to the next post, where we will discuss updating your table and decorating your dinette space.

    There are three methods you can use to update your dinette’s cushions, as detailed below.

    Credit: @188sqft

    1. Buy New Cushions or Cushion Covers

    While different RV dinettes are often made with different sized cushions, there are typically a few different sizes in production. Often, manufacturers will sell either entire cushions (the foam plus the cover) or just the covers. In the second case, you would need to remove your current cushion covers from your dinette cushions and keep the foam for the new covers. If your cushions’ foam is dingy or overly worn, you can always purchase new foam for the cushions from a local craft store, using exact measurements from your older cushions.

    Measure your dinette cushions’ height, length and width, and search online for RV cushions. These can often be found on Amazon, eBay, and several different RV supply companies. Keep in mind that you will typically only find solid colors and patterns, and these cannot be customized. Prices will vary depending on the source, so be sure to thoroughly search for the best cushions and best overall deal before making your purchase. This option is not the most customizable, but it certainly entails the least amount of work and the quickest results.

    2. Have Your Cushions Reupholstered Professionally

    This choice is likely the priciest, but it allows the RV owner more options for customization. Utilizing a professional also tends to yield the best overall results. Find a local seamstress or someone who specializes in furniture reupholstery and is up for the task. In some cases, you must purchase your own fabric, but in other cases, the seamstress can often provide you with fabric from their collection, as well. Keep in mind that this option tends to be very pricey. However, if you have an ideal image in mind for how you want your cushions to look, as well as the necessary resources and a great local seamstress, then this option is the best one for you.

    Credit: Sawdust 2 Stitches

    3. Recover Your Cushions Yourself (DIY)

    For those with a crafty side, this option is fun, inexpensive, and can also allow you many different possibilities. There are a few different options available for recovering your own dinette cushions, and your skillset and sewing abilities will determine which option you choose. If you have a sewing machine and are up for a challenge, you can follow a tutorial to make your own zip-on cushions at home. These covers can be removed for easy cleaning anytime and will look beautiful and professionally-made if done correctly.

    For those with a crafty side but fewer sewing skills, there is another simpler method that will turn out just as beautiful with less work and fewer supplies. To cover your cushions using the no-sew method, you will first need to gather your materials. These include a staple gun and plenty of industrial staples, your fabric of choice, and plywood cut to size for each cushion.

    Fabric can be purchased at your local fabric store. Outdoor fabric comes highly recommended, as it is the most durable and easiest to clean. Be sure to purchase more fabric than you need in case of mishaps or inaccurate measurements. When choosing your fabric, keep the overall color scheme and theme of your RV in mind, and be sure to choose a fabric that will match or coordinate nicely. Remember that these cushions are a large piece of your overall space, and choosing a louder or busier fabric could make the space look a bit chaotic. If you choose a simpler fabric, you can always decorate with brighter throw pillows and wall hangings later on.

    The plywood can be purchased from your local hardware store. You will need one piece for each cushion (four pieces total for four cushions). Each piece of plywood should be one inch shorter than your cushion foam in both length and width. Once you have your supplies, you are ready to begin. Follow the steps below for a quick and easy process to recover your cushions without sewing:

    • Lay the plywood out flat, and place the corresponding foam cushion on top of the plywood.
    • Place your fabric over the cushion and plywood.
    • Cut the fabric to size, leaving a minimum of 16-18” extra on each side.
    • Wrap the cushion very tightly (like a present), and use clamps to hold the fabric in place.
    • Flip the cushion over, and staple the fabric directly to the plywood. Use lots of staples to ensure a better hold.
    • That’s it!

    Of the above methods, whichever you choose is sure to look beautiful and bring a more modern and homey vibe to the overall space. Once your dinette cushions are updated, you can move on to makeover your table and decorating the space.

    Follow along for ideas on how to finish up making over your RV’s dinette area.

    Update Your Table

    RV tables come in a variety of shapes and sizes. If you are wanting to update your table, there is no shortage of things you could try. Each of these possibilities yields beautiful results that will have you excited to enjoy a meal at your new table.

    1. Paint + Epoxy

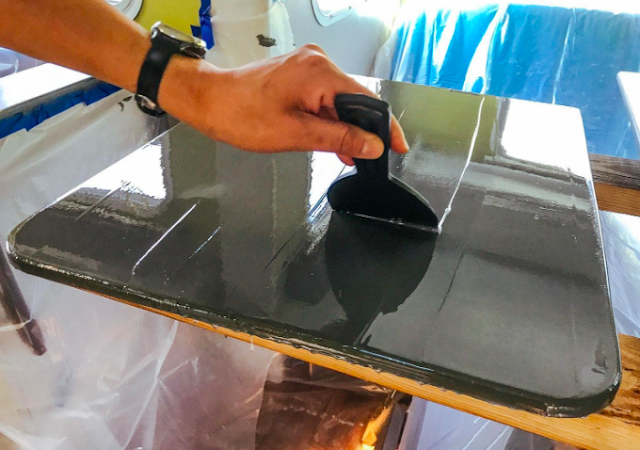
    This option is rather simple in theory but requires plenty of prep work and dry time. It involves painting your table in the same way that you would paint a wall or cabinets, but then adding an epoxy layer over top to seal it and protect it for long-term use. For those who use this method, you must first prep the table by sanding it down to allow the paint to adhere properly. Then you must clean thoroughly before painting. Paint two to three coats, allowing a minimum of twenty-four hours dry time in between each coat. Some people paint one solid color, but others may choose to paint a design into the table or even try a faux marble or wood-look painting style. Once you have painted, you are ready for epoxy.

    Epoxy is a bit difficult to work with and must be poured slowly and leveled before it begins to dry. Follow along with a more detailed tutorial for more ideas on how to use this method on your RV’s table surface.

    Credit: @livesmallridefree

    2. Laminate Countertop Recovering Kit

    If you RV’s table is laminate, this may be a great option for you. Prep work involves sanding and cleaning, as with the previous method. Then, you can use a thick paint to cover the table before applying small paint chips to cover the surface. Next, you must use a sealant to protect the surfaces and ensure your hard work will last. This method is fairly simple and can be completed in just a few days. Kits can be purchased online or at hardware stores and come with all the tools you need for this project.

    3. Butcher Block or Wood

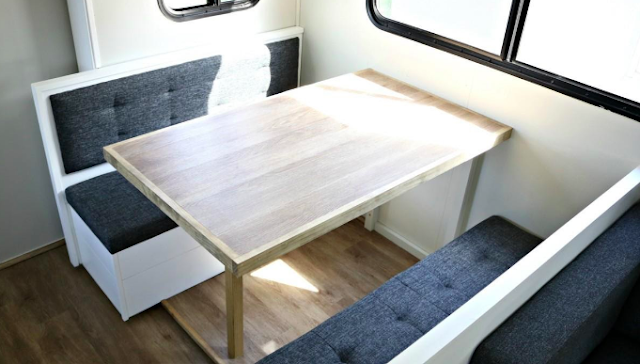
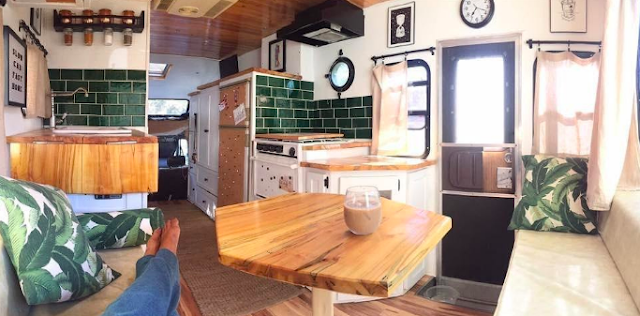
    Butcher block and wooden tables look beautiful in a traditional home, so why not try them out in an RV? For this method, you would need to remove your previous table entirely and build a new one. You can find a variety of woods at hardware stores or through online retailers. You must affix the new wood to the old table post securely. Be sure to seal the wood with a food-safe sealant before finalizing the project.

    Credit: @188sqft

    4. Peel-and-Stick Countertop Covers

    This method is also quite popular and holds up quite well, surprisingly. You can find peel-and-stick materials made for countertops at some hardware stores or through a variety of online retailers. They can come in wood-look, marble-look, granite-look, quartz-look, and more. These are cost-effective, lightweight, and simple to install. Simply clean your table well, and press the cover onto the table, starting at one end and working your way over to the next. Use a credit card to press out all the air bubbles, and cut the cover to size.

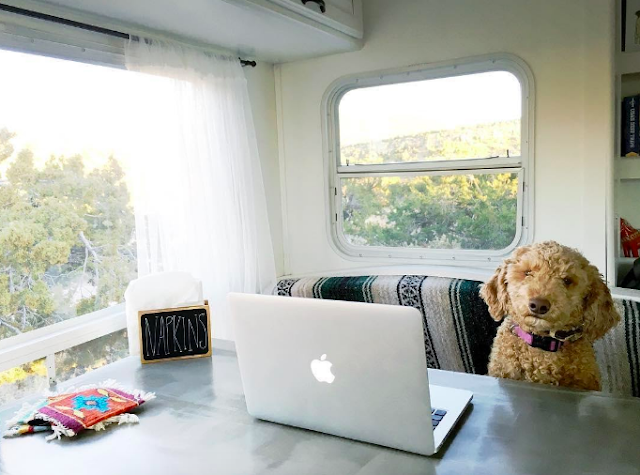
    5. Cover in Metal

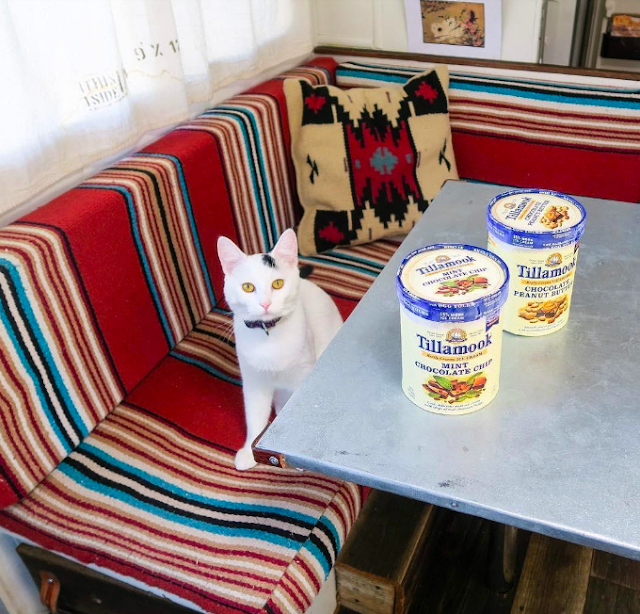
    This method is very artsy and will leave your space with a bit of an industrial look. Thin sheet metal can be purchased at hardware stores and hammered around the edges of the table to cover over the old surface. You must nail the metal into the bottom of the table to ensure longevity.

    Credit: @ourvieadventures

    6. Cover in Leather

    Similar to covering your table in metal, you can also cover your table in leather fabric. The fabric can be purchased at your local fabric store ad comes in a variety of colors. Simply cut it to size, and wrap it around your table. Use fabric glue or to adhere the leather to the table, or nail it to the bottom of the table depending on your preference.

    7. Build Something Custom

    If none of these previous options suit you, you can always build something custom. With this method, options are endless, and you can end up with exactly the look you want. This is great for those who maybe don’t have a dedicated dinette space and want to add one in, or for those who are looking for something a bit more non-traditional. Whatever you try, be sure to keep your RV’s overall weight in mind and always seal with a food-safe sealant before finalizing your project.

    Credit: @slowcarfasthome

    8. Buy a Table

    This option was saved for last because it is often difficult to find an RV-sized table in stores. However, if you shop around, you may be able to find something you like that is professionally-made and of good quality. Be sure to anchor the table to the ground to ensure it does not slide around during travel.

    Finish off your dinette space by decorating the area. Consider adding a plant or two to the table to make it feel more homey. Add candles for a seasonal ambiance. Hang some curtains for additional personality. Hang your favorite photo or piece of art on the wall to make it more personal. Add a few throw pillows to make the dinette comfier. This part is where your personality will really shine through, so be sure to add in items that make you happy and add character to the space. And remember, in a small home, less is often more.

    Renovating your dinette area is a challenging, yet rather rewarding process that will yield beautiful results and add plenty of personality to your overall space. Updating your table and decorating will add brightness and cheer to your space, leaving you even more excited to take your RV on trips all over the country. Be sure to consider these ideas for a brand-new dinette area that your whole family will love and enjoy.

    Have you recovered your RV’s dinette cushions or updated your table? Which method did you choose? Feel free to let us know in the comments below!

    Renovating not for you? That’s okay. Check out some of the latest RVs on RV Trader.
  • Deep Cleaning Your RV, Inside & Out

    Deep Cleaning Your RV, Inside & Out

    Summer is just around the corner—and with it, some of the best camping of the year. While the coronavirus has put many vacation plans on hold, you’ll want to be ready to go when campgrounds reopen. With all this extra time on your hands, there’s truly no better time to deep clean your RV.

    Ready to get your RV in order? We’ve put together a list of tips and tricks to get your RV super shiny and clean, so all you’ll have to do is pack and turn the key when it’s time to hit the road again.

    Let’s start with a few tips on cleaning the inside of your RV.

    Inside:

    • Mold can grow just about anywhere when your RV isn’t being used. Wipe down ceilings, walls, hard surfaces, and appliances with a multi-surface cleaner that is EPA registered to disinfect and remove bacteria, viruses, mold, and other allergens. Choose one that is safe for your whole interior, including finished wood, granite, and stainless steel.
    • Let’s face it—most of us have no idea what is in the back of our RV’s drawers, cabinets, and closets. Now’s the time to empty, vacuum, and wipe out storage areas. Haven’t used an item in a couple of years? Get rid of it. And toss out any old or expired foods or spices. Not sure if that mac and cheese is still safe to eat? Get the USDA’s FoodKeeper app for shelf-life guidelines.
    • With use, cabinet pulls get surrounded by a buildup of oil and dirt. Mix 2 parts baking soda and 1 part coconut or vegetable oil and use an old toothbrush to gently scrub away the gunk.
    • Strip and wash bedding, vacuum the mattress, and spray with an aerosol disinfectant before remaking the bed.
    • Window tracks, valances, blinds, and cloth lampshades all capture dust and dirt. For tracks, vacuum with a thin nozzle, then dip Q-tips in white vinegar or window cleaner and wipe out every nook and cranny. Vacuum blinds, valances, and lampshades with a soft brush, then go over with an adhesive lint roller.
    • Still see signs of last year’s vacation on your carpet and couches? Begin by removing small spots with a damp, soapy cloth. For hard-to-remove grease stains (think pizza), scrape with a knife, then layer paper towels on top of the stain. Using the lowest heat setting, iron the paper towels to lift the grease, then gently scrub the spot with a mix of dish soap, white vinegar, and water. Finish your routine by steam cleaning.
    • To flush your freshwater system lines, connect a clean water hose to your home’s outdoor faucet and connect the other end to your RV city water connection. Open your gray tank, turn on all the faucets, and run until the water looks, smells, and tastes clean. Use an RV freshwater deodorizer to flush your freshwater tank.
    • Smell something? It could be dried waste stuck to the sides and sensors in your black water holding tank. Some campers swear by the ice method—dump a few buckets of ice cubes down the toilet, then drive along and let the ice clean the sides. For a proven fix, purchase a wand-style tank rinser, hook up to a hose or faucet, and lower into the tank to wash away debris. For tanks mounted directly under the toilet, get a straight wand. If you have bends in your plumbing or an offset tank, choose a flexible wand.

    Outside:

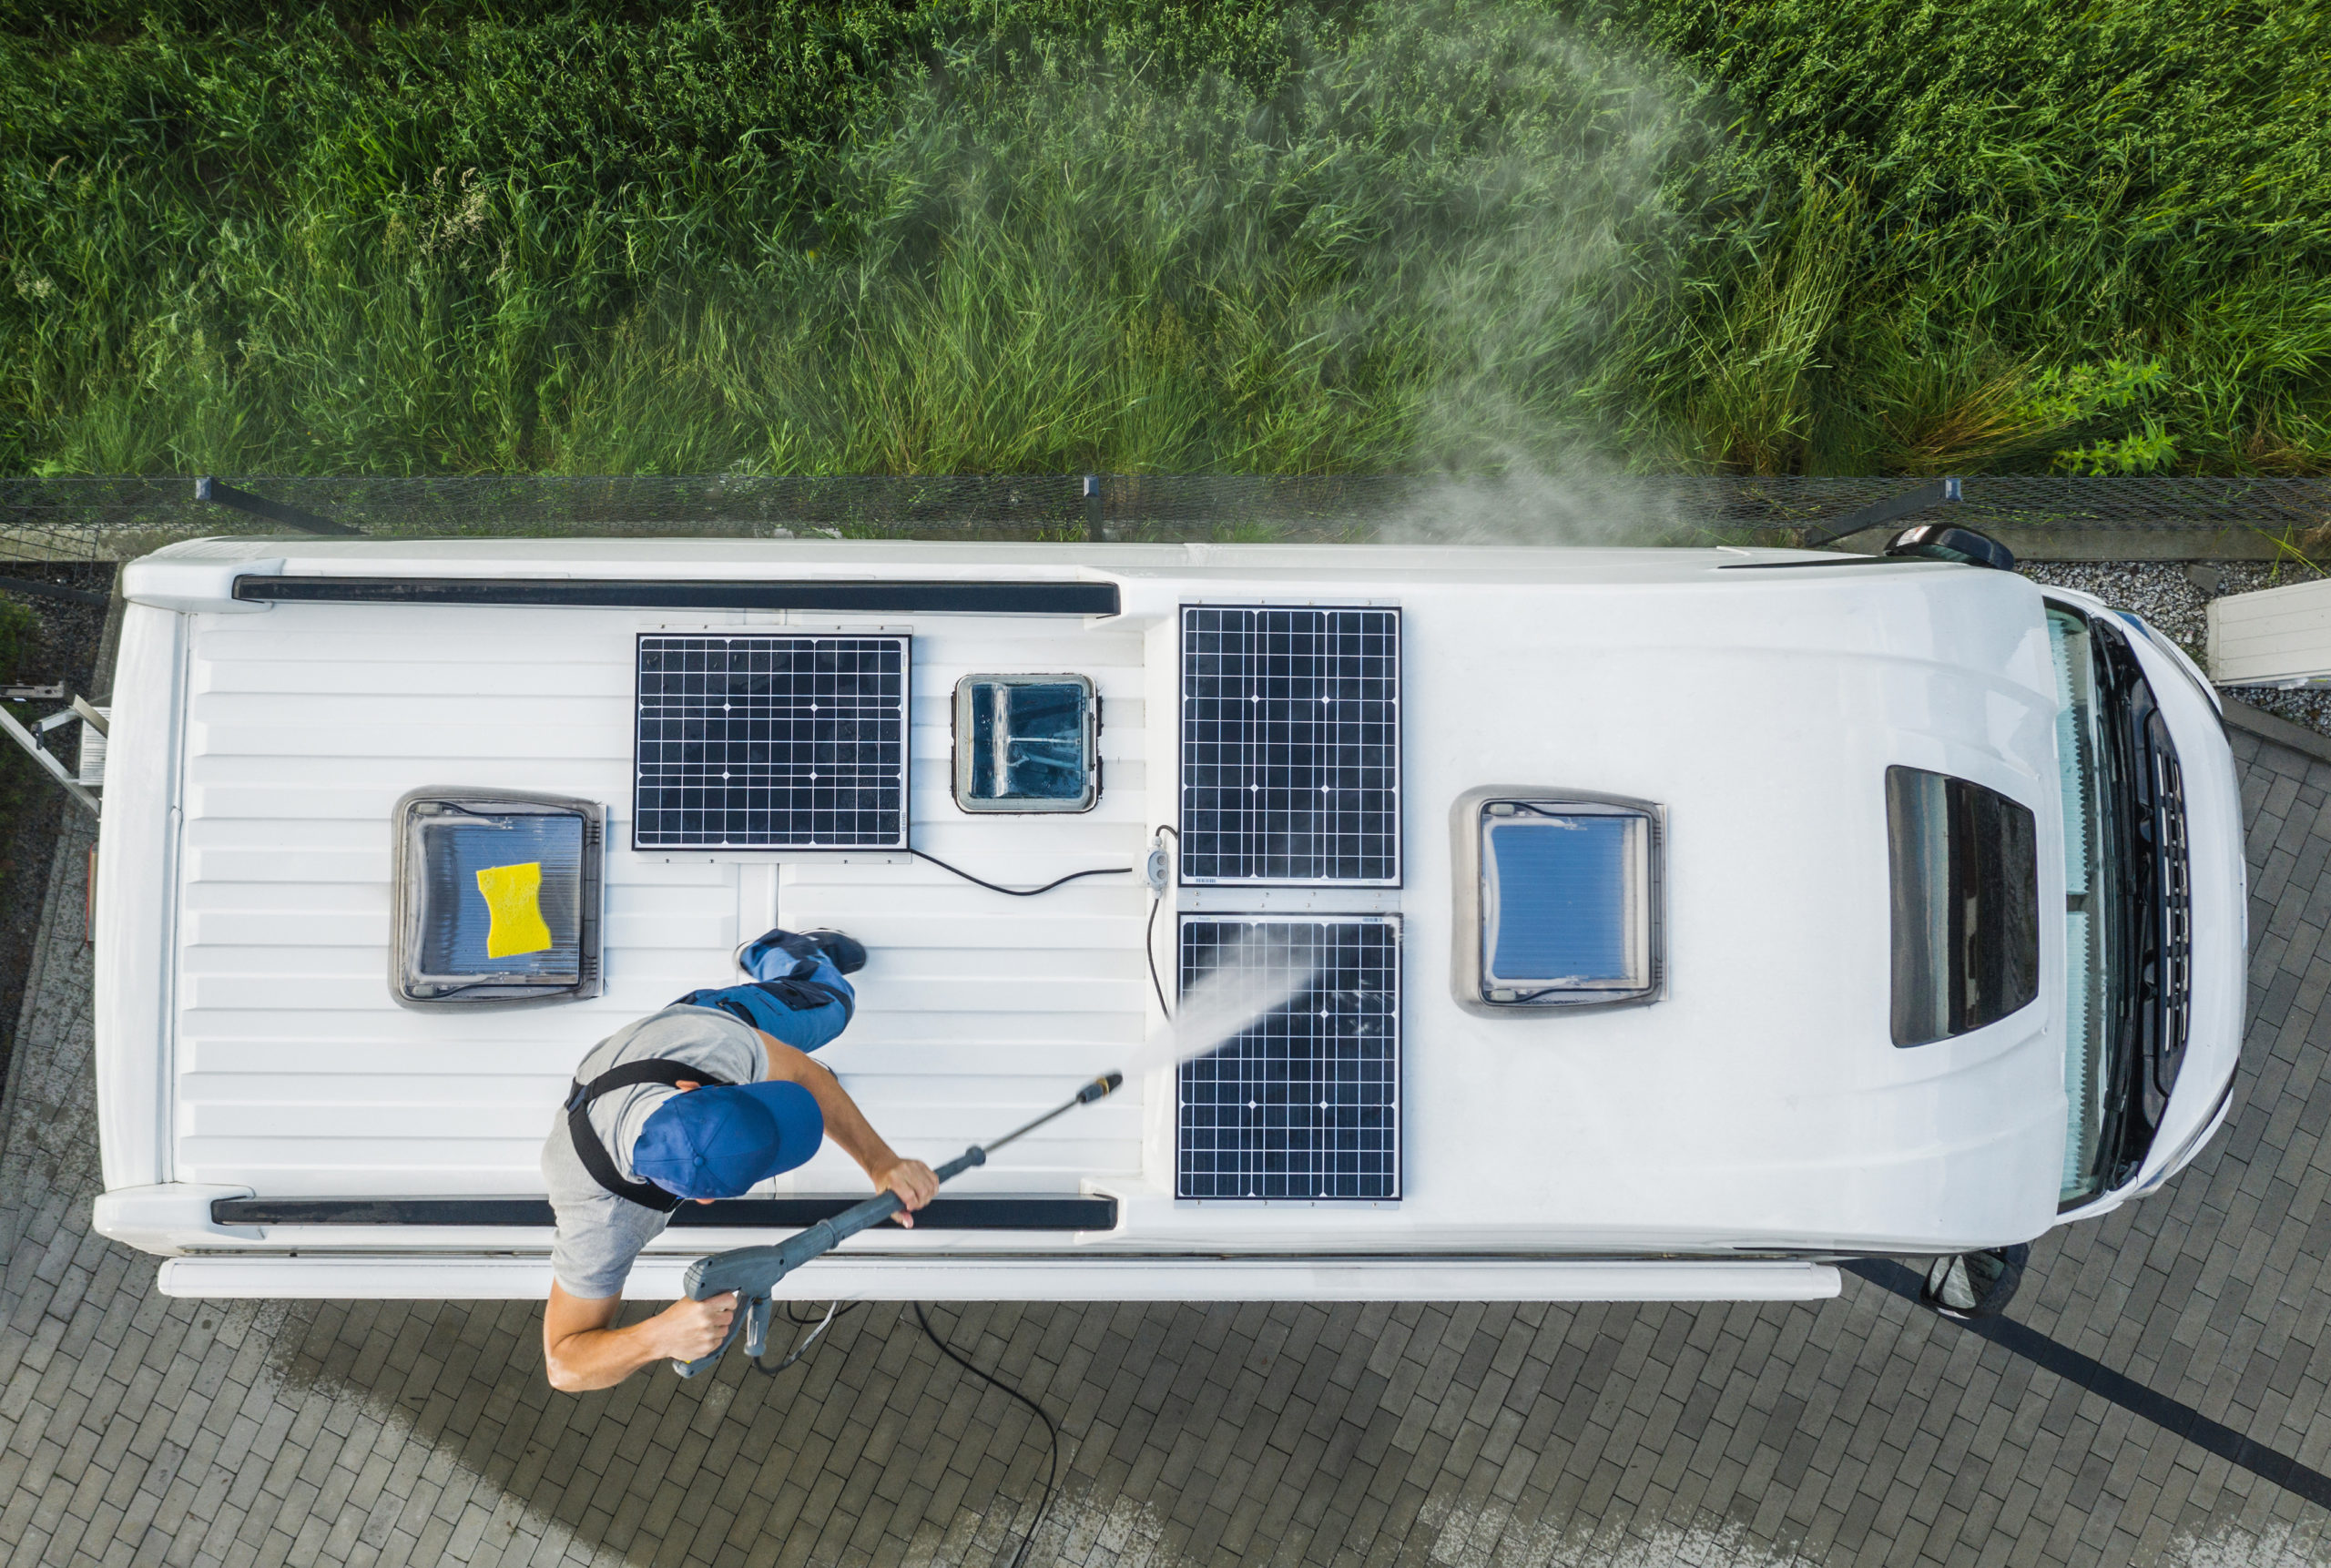
    • Start at the top. For fiberglass roofs, use a soft brush, hose, and any wash-and-wax product to remove grime. While you’re up there, look for any loose or cracked sealant and follow the manufacturer’s directions to remove old caulking and repair. If you have an older RV with a rubber roof, you’ll need specific rubber roof cleaning products.
    • Know what you’re made of – metal or fiberglass. For painted or polished metal bodies, use a pre-wash to remove grime and grit, then clean with a non-abrasive cleaner, soft-bristled brush, and microfiber cloth or mitts. High-pressure washing is not recommended because these RVs are clad and riveted, and water can seep in between the seams. For fiberglass, use a wash-and-wax product with UV protection. Again, beware of the high-pressure washer—it can damage slideout seals and peel exterior decals. For seriously faded decals, gently scrub with a wet no-scratch fiberglass pad. This will brighten them but also shorten their lifespan.
    • Use a silicone-based cleaner on all window, door, and slide-in gaskets or flexible weather sealants. Most spray on and don’t require any wiping or additional cleaning. Don’t neglect your awnings—they need a rinse, too. Extend and hose off, but don’t scrub—it can weaken fabric and remove protective finishes.

    Before tackling any cleaning jobs, check your owner’s manual for specific recommendations. Remember, spring cleaning is an opportunity to look for any problems and give your RV the attention it deserves. And considering we all have a bit of extra time on our hands, let’s use it to our advantage. A little TLC now equals comfortable, worry-free vacations in the months ahead. Happy cleaning!

    Have any cleaning tips of your own? Let us know your methods in the comments below.

    Ready for a new RV instead? Check out our newest inventory.

  • What to Know Before Buying a Class A RV

    What to Know Before Buying a Class A RV

    Travel is usually at the top of almost anyone’s bucket list, but the cost alone often holds people back. This is where buying an RV can come into the picture. RVs allow travelers to reduce the cost of travel by eliminating the price of a plane ticket, hotel, and the frequency of eating meals out. Because of this, and other reasons, the RV lifestyle has become more and more popular for both travel solutions and for full time living.

    If you’re considering buying an RV for full time or part time use, or if you already own one and are considering switching to a different type, then follow along with this multi-part series to become an expert on all the different types of RVs. Let’s start with Class As.


    What is a Class A?

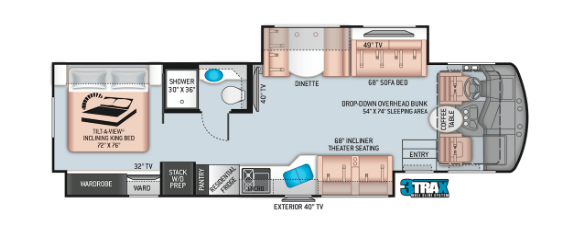
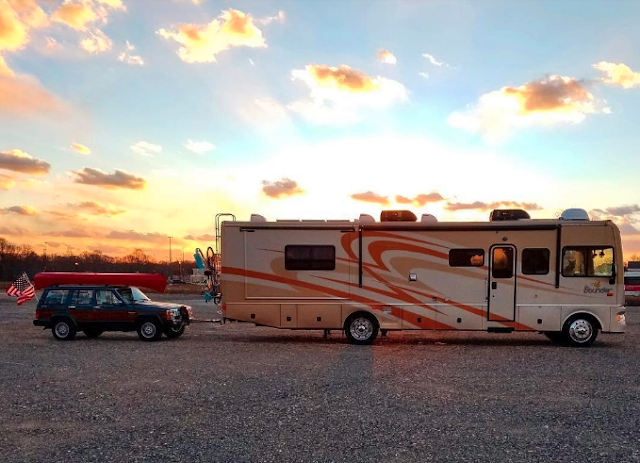
    One of the most common RVs seen on the road is called a Class A Motorhome. These are the large, self-contained rigs that are similar in size and shape to buses. The idea of operating such a large and heavy vessel can be intimidating, but like with driving any new vehicle, there are several designs to increase visibility for the driver. Class A rigs also tend to have onboard generators, which is a huge advantage.

    It’s important to note that Class As come in both gas or diesel varieties. Diesel engines are typically more powerful and tend to last longer and are a common choice for many RVers. Another benefit of diesel-powered Class A RVs is that the placement of the engine is in the back of the rig, making for a quieter ride. But with convenience, power, and longevity comes a higher price tag, not to mention that diesel fuel is more expensive than gasoline. Gas-powered motorhomes use regular fuel and the engine is situated up front, which can make for a noisier ride.


    Features

    Class A RVs come with a variety of premium features, most of which are dependent on when the RV was manufactured. Amenities can include propane stoves, propane ovens, convection ovens, couches, queen and king-sized beds, recessed lighting, recliners, TVs, and much more. Some are quite luxurious and others have a more humble and home-like feel. If you have the funds to purchase a brand new RV, the floorplans and colors are customizable. If you’re looking to purchase a used Class A, reputable websites, RV shows, and third-party sellers are your best choice, and it’s entirely possible to find the refurbished RV of your dreams.


    Traveling and Set-Up

    One of the many perks of traveling in a Class A is having full access to both the kitchen and bathroom. Instead of finding an exit with restrooms and food options, you simply pull off at an exit of your choice and can conveniently access your entire home on wheels. It’s also much more comfortable to travel with pets in a Class A, versus a truck towing a trailer.

    For many reasons, Class A motorhomes are a popular choice for full-timers or anyone using their RV for long stints. One favorite feature is the ease of set-up. Once you find your campsite, you can simply park, level the RV, open the slide outs, and connect your utilities.


    Long Term

    If you plan to use your Class A long term or to visit places other than campgrounds, then you will most likely need to tow a personal vehicle. There are many factors to take into account when towing and some of these factors can be quite costly.

    Because Class A motorhomes are self-contained units, they require more maintenance and upkeep. The maintenance and any work that needs to be done is much pricier than that of an automobile and requires specialty RV repair shops. Not to mention, if the rig breaks down for any reason, towing can be expensive – but if you’re looking for a true home on wheels – then a Class A might still be a great fit for your lifestyle.


    Other Considerations

    The intended use of an RV is one of the most important factors. Knowing your size and spacing needs will give you an idea of how much space your RV requires. For instance, a couple using an RV full time or a large family traveling part time would have different space requirements. Another important factor to consider is traveling with infants or young children that require car seats. Special safety accommodations must be made in order to provide a safe travel area for them.

    Another consideration is the amount of space the RV takes up. Parking can be a challenge, as not all areas can accommodate such a large vehicle. Campgrounds also only have limited sites that can accommodate big rigs. If you ever choose to forego campgrounds, then boondocking can also be a challenge because of the size, and also the lack of off-roading capabilities. These are all important factors to consider when considering a class A motorhome for your next rig.

    When choosing an RV, it’s crucial to decide what works best for your intended use and comfort. Bigger rigs mean more amenities, space, storage, and comfort, but that’s met with spacial challenges and cost. Class A motorhomes are the all-in-one rig that can give you, your family, and your pets the right amount of space for your next dream vacation. If you have decided that a Class A motorhome is the RV for you, take a look at the selection of new and used Class A RVs available on RV Trader.

    Pro Tip: When you shop for a Class A RV on RVTrader.com, you can find units that have received a complete inspection from RV Trader Assurance powered by Lemon Squad. Look for the RV Trader Inspection Badge on our online marketplace to view a full inspection report, which covers a computer diagnosis of the engine, along with a comprehensive examination of the vehicle condition, mechanical, underbody, tires, wheels, structural integrity, and more.

    Do you have a Class A motorhome? What other factors did you take into consideration before purchasing? Feel free to share in the comments below!

  • FMCA Tech Tip: Exterior Maintenance

    FMCA Tech Tip: Exterior Maintenance

    Keep your RV exterior looking its best with these tips from FMCA and the “RV Doctor” Gary Bunzer. Take pride in your home on wheels!

    RV Exterior Tip #1: The Roof

    Get into the habit of inspecting the RV exterior once a month, with special attention given to the roof. Examine the seams, edges, moldings, caps, and anything else attached to the roof. Any screw or mounting method used on the roof can become an entry point for moisture. Water intrusion is the largest threat to any RV.

    Small problems will not go away on their own. Left unaddressed, small problems will only worsen and quickly move (along with their associated cost) from the preventive maintenance stage. So follow these steps to manage small problems:

    • Keep the roof clean. Use a soft broom every couple of weeks to sweep away leaves, dirt, and road grime.
    • Look closely for evidence of mold and mildew, especially on synthetic surfaces.
    • Remove bird droppings or tree sap as soon as it is spotted.
    • Wash the roof with the appropriate cleaning agent four or five times each year. A clean roof is simply easier to inspect!

    And, finally, know what material forms your RV’s roof. Use products that are safe for your RV’s roof surface material.

    RV Exterior Tip #2: Sidewalls

    Likewise, learn what material is used on the exterior of your RV’s sides. Is it painted aluminum? Fiberglass? Filon or another FRP derivative? ABS or PVC plastic? Are steel components used? If you own a Type C motorhome, don’t forget about the cab portion and its exterior surface.

    Scan the sides of your RV and start counting how many components are attached: storage bay doors, refrigerator vents, furnace vents, city water inlet, etc. Every attachment point is a potential source for a water leak.

    Inspect all seals around the sidewall openings. At the first sign of a deteriorating sealant, reseal! In severe cases, it may be necessary to completely remove the component and reinstall using fresh sealant. In other cases, a quick but correct application of a silicone sealant over the suspected gap may be all that is required.

    Next, check for black streaks. Unfortunately, every RV is susceptible to those nuisance black streaks caused by four elements: dirt, moisture, time, and neglect. This video explains how these streaks form and how to remove them.

    When using any type of black streak remover, never apply the solution directly to the surface of the sidewall. Moisten a clean, soft cloth with the remover and try to keep within the boundaries of the black streak. All black streak removers contain components that will remove existing wax, so areas treated with the remover will need to be re-waxed.

    Unless the black streak is deep-seated and has become oxidized, it eventually should come off or at least be minimized. If the black streak has oxidized into the finish, other products exist that can address this specific type of problem. But, remember, it’s crucial to use a product compatible with your RV’s exterior surface to prevent further damage – read those labels!

    RV Exterior Tip #3: Fiberglass Caps

    Many RVs have some form of plastic caps covering their front or rear ends. Over time and with exposure to UV rays and ozone, the appearance of these fiberglass caps can become dull or fade to a certain extent. This is the first degree of oxidation. Whenever sunlight, heat, and moisture collide, oxidation can be expected.

    The second level of oxidation results in a pronounced chalking of the finish. You’ve probably seen front and rear caps that display a distinct, blotch-like chalky residue that can be wiped away with a moist rag. Neglected further, the cap surface eventually can crack and deteriorate and, in the process, cross the line between restorative maintenance and damage repair. If individual fibers become visible in the fiberglass, it may require a repair out of the DIYer’s realm.

    Fiberglass front and rear caps must be protected with wax or polish. Plain old car wash soap is a good option because it does not remove wax as detergents do. Polish is similar to wax, but some polishes and polishing compounds actually contain trace amounts of abrasives.

    RV Exterior Tip #4: Undercarriage

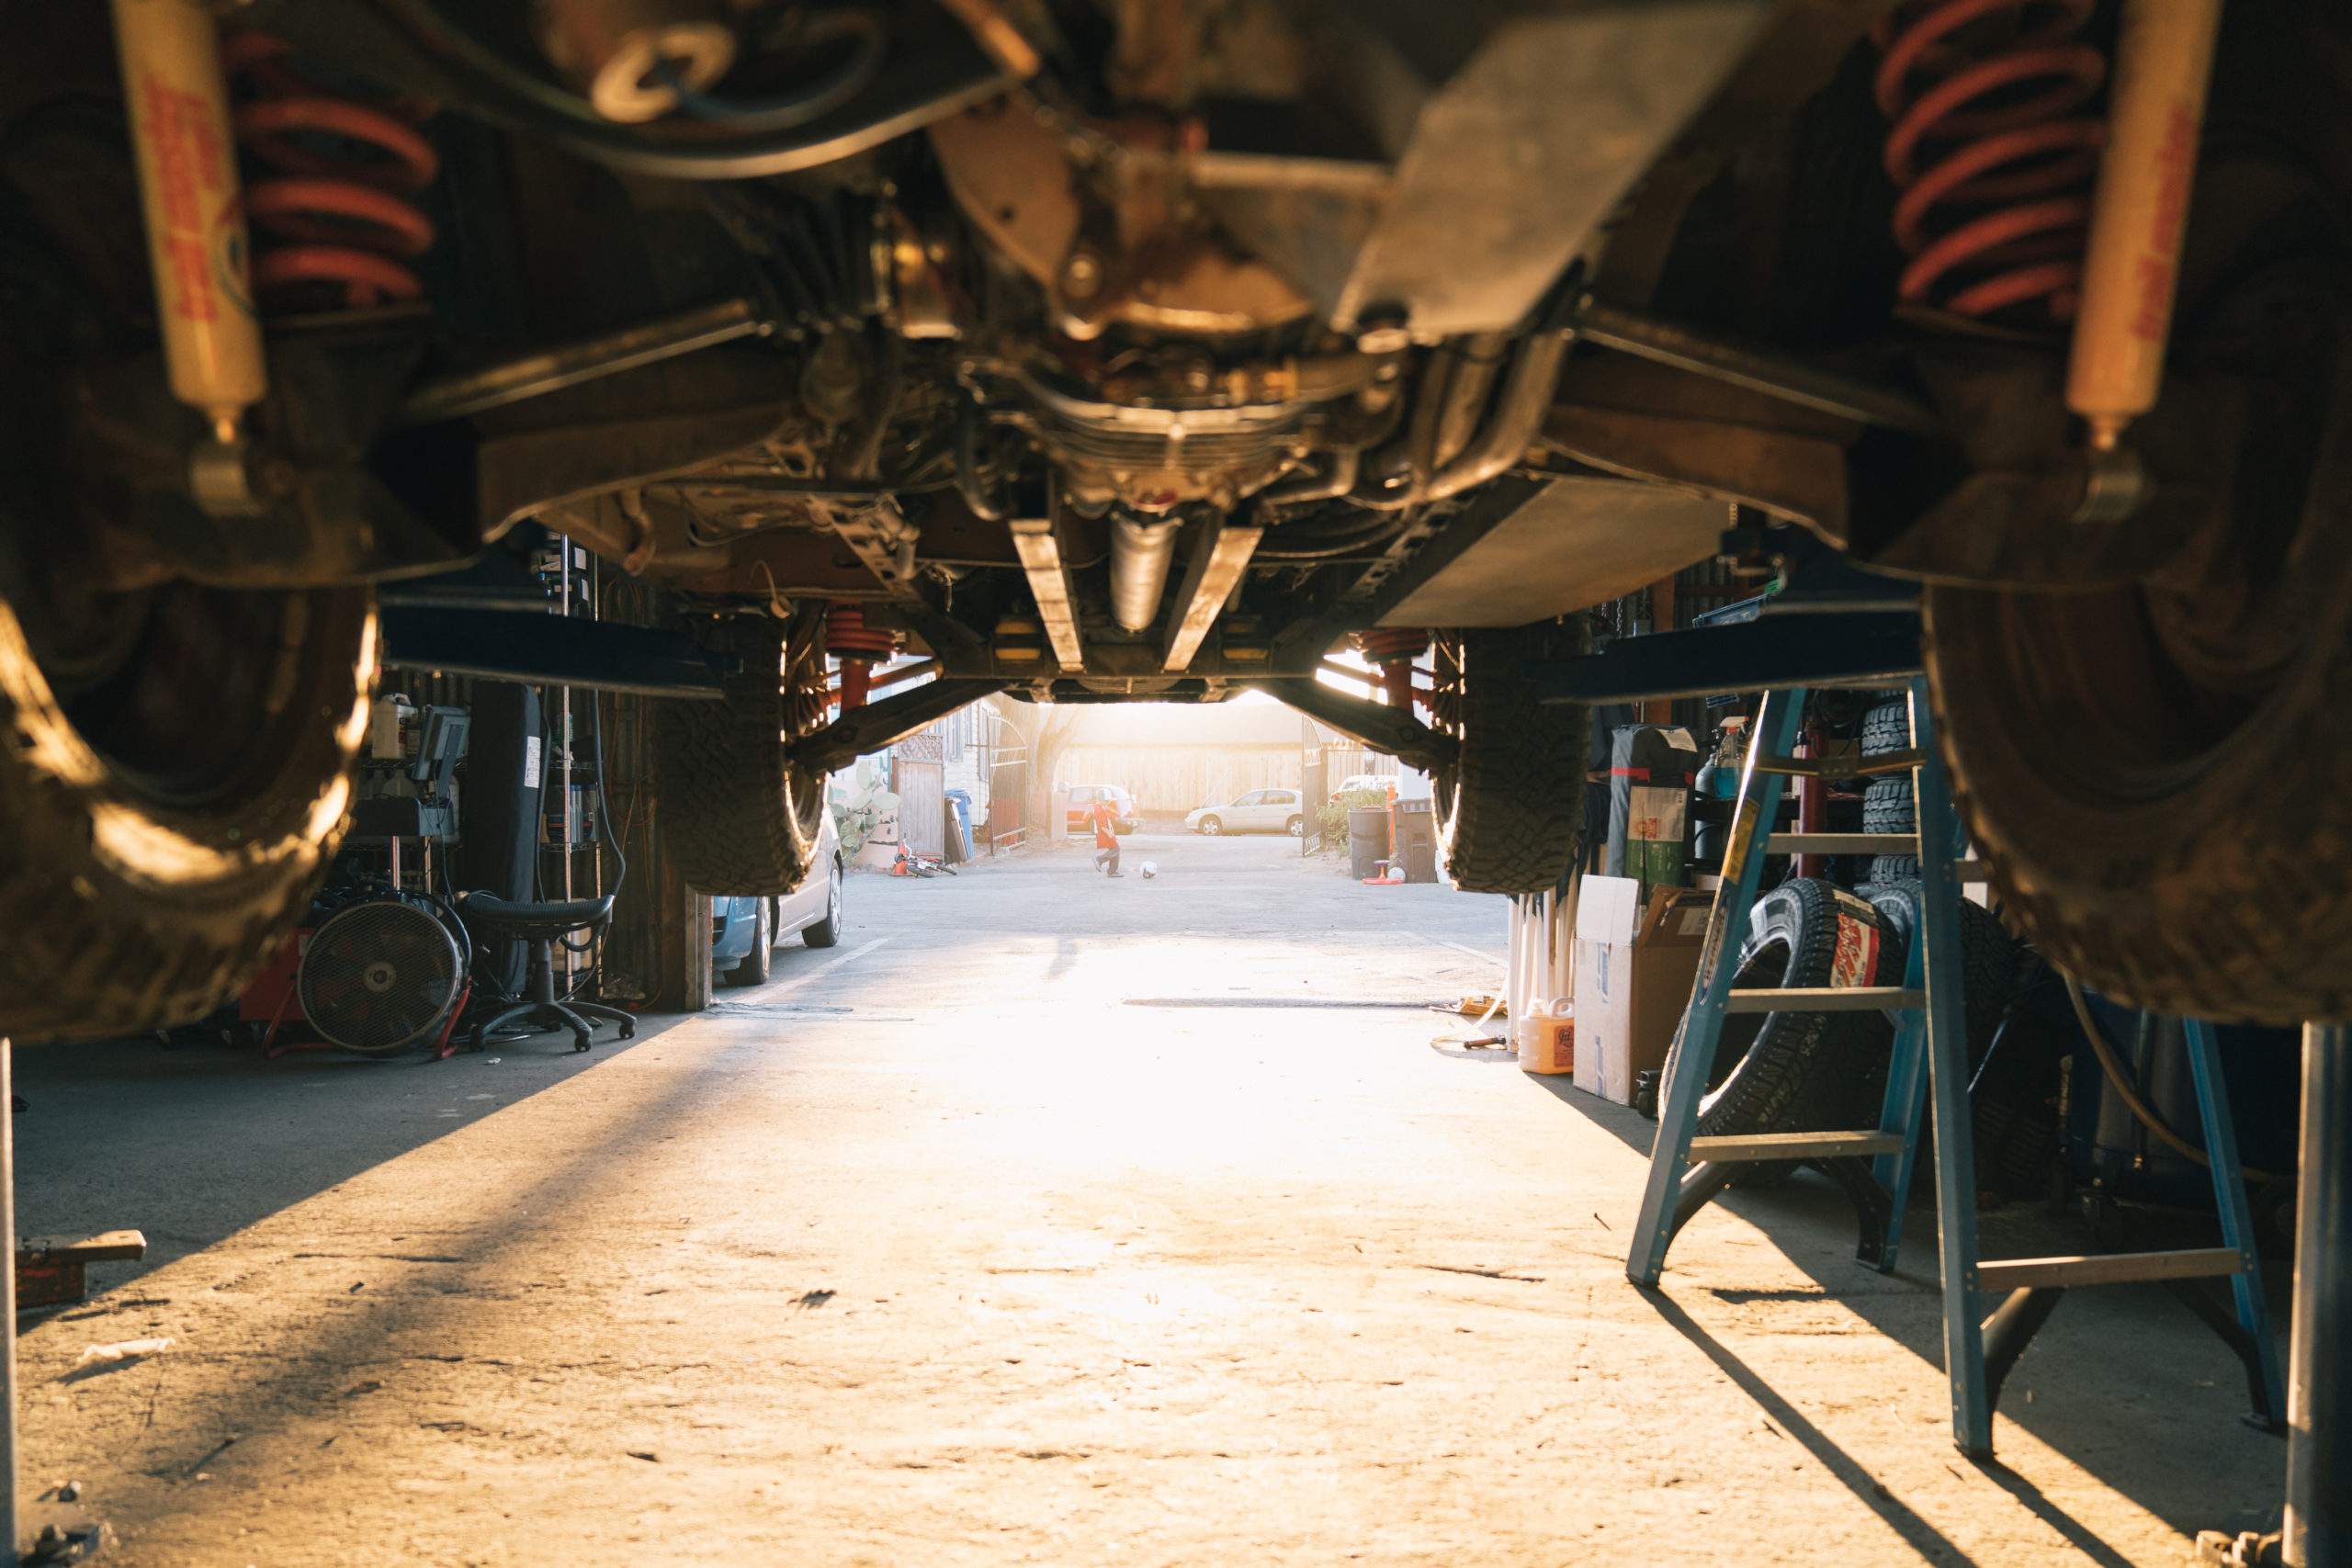
    The underneath surface of the RV is the “forgotten” exterior surface. The main concern is critter infestation. Look for large gaps around exposed plumbing that may pass through the floor and subfloor. It’s important to seal around all gaps that can trap moisture and road debris.

    Look for loose or damaged sections of the underbelly, regardless of the types of materials used under there. Some RVs have sealed underbellies, while other RVs may be open to the bottom of the subfloor. Others may have only a soft plastic wrap encasing the floor insulation. Look for anything that appears out of the norm. While you’re down there, check all chassis and suspension components for damage or irregularities, and look for evidence of water leaks. If you use the RV in winter conditions where salt is used on the roads, check for rust.

    For more RV exterior maintenance tips, visit Family RVing magazine.

    This information is for educational purposes. FMCA shall not be responsible nor retain liability for RVer’s use of the provided information. Prior to making any RV service decision, you are advised to consult with an RV professional.


  • How to Find the Perfect RV for You

    How to Find the Perfect RV for You

    When you buy an RV, you aren’t just purchasing a camper—you’re investing in a future full of open roads, scenic vistas, and crackling campfires. But choosing the wrong unit could turn those vacation dreams into more of a nightmare. With all of the options out there, how do you know which RV is right for you?

    To Tow or Not to Tow?

    RVs fall into two categories, motorhomes and towables. Motorhomes are self-contained units and come in three types: Class A (built on a commercial bus or truck chassis), B (a camper van), and C (built on a van chassis with an over-cab bunk). Their main advantage of motorhomes is the flexibility while traveling, since passengers can move around the cabin, prepare food, and even use the bathroom while in motion. Another benefit is ease of set-up—turn off the engine and just like that, you’re camping.

    But there can be cons to motorhomes, too. Because you’re paying for both a vehicle and a living space, motorhomes are more expensive than towables. Even mid-sized motorhomes are often too large or cumbersome to maneuver easily in small towns, so you may need to tow a separate vehicle for sight-seeing and shopping. If you already own (or need) a large SUV or truck, a towable is a more economical option, and you’ll have wheels to move around town or take day trips after you set up camp.

    Towables come in a wider variety of shapes and sizes, from compact teardrop and pop-up campers to travel trailers and fifth wheels. While many motorhomes can sleep six or eight, most still have only one rear bedroom. Most motorhomes rely on fold-out couches and convertible dinettes for extra beds, while many trailer layouts include separate bunkrooms, giving large families an added measure of private space.

    Bottom line: Motorhomes win for convenience and comfort while traveling, but trailers are designed with families—and their budgets–in mind.

    Camping or Glamping?

    Do you like the idea of “roughing it”? Do you plan to camp in areas where electricity won’t be available? For dry camping (also known as boondocking), you’ll want features like solar panels, an ample battery bank, a generator, and dual fuel/propane systems and appliances.

    If glamping is more your style, the only limits to your RV’s amenities are your budget and imagination. Modern units include options like extra baths, kitchen islands, electric fireplaces, outdoor kitchens and entertainment systems, and most are equipped with multiple slides for spacious indoor living.

    Does your idea of fun include getting out on the water or going off-road? If you have kayaks, a jet ski, an ATV, golf cart, or a motorcycle, consider a built in toy-hauler. Available in both motorhomes and towables, these RVs include a rear garage to store whatever you need to make your vacation complete.

    Bottom Line: The kind of camping experience you want should guide your choice of RV.

    Is Bigger Always Better?

    Not necessarily. There’s a cost that comes with size, both in a higher purchase price and in the expenses of use. Plus, driving a big rig isn’t for everyone, and the differences in turning radius, braking distance, and sway in a heavy travel trailer can make towing challenging. Accessibility is another problem. Many state and national parks were designed decades ago, when RVs were smaller. In fact, 27% of national parks don’t have sites for RVs over 35 feet, and only 7% of national parks can accommodate RVs longer than 40 feet. In many cases, even if you meet this criteria, you will also need available space to park your tow or towed vehicle in a separate lot.

    Bottom Line: Choose an RV you are comfortable handling, and one that can take you where you want to go. We highly recommend taking a test drive before you get too far down the path to purchase.

    New or Used?

    That depends on two things—your budget and your mechanical skill. Depreciation of recreational vehicles in the first year is estimated to be about 21% and increases to between 35 and 40% by year five. This makes purchasing a used RV an economical choice—if it was well-maintained. Otherwise, you could be looking at high repair costs unless you can do the work yourself. Before buying a used unit, go online, check reviews, and look on forums for any issues with the manufacturer or model. And consider hiring an expert to do a survey of the RV before you buy—it will be money well spent.

    Bottom Line: Used RVs make financial sense, but you have to do your homework.

    Ready to Shop?

    Before you buy:

    • Research different manufacturers and models.
    • Look for owner review on reliability, workmanship, customer service, and warranty coverage.
    • Go to an RV show.
    • Compare types and sizes of units. Sit inside, try out the kitchen, lie on the bed. Imagine living in that space for a week of rainy days.
    • Rent an RV. Nothing beats firsthand experience!
    • Make a wish list. Write down five features that are MUST-HAVES and five that are WANT TO HAVES. Use those as your guide. Don’t be talked into a unit that doesn’t fit your needs.

    Take the time to find the right unit for you and your family—and let the adventure begin!

  • 5 Things to Consider When Financing an RV

    5 Things to Consider When Financing an RV

    RVs make for the ultimate road trip vehicles, allowing owners to bypass hotels, restaurants, and other costly vacation expenses. This can make vacations more affordable, fun, and convenient. For these reasons, more people than ever are hitting the road in their tiny vacation home on wheels and loving every second of it. However, this freedom and relaxation comes at a price.

    The average RV can cost anywhere from $50,000 to $1.5 million and most people don’t have the means to purchase an RV outright, so they look to financing options to make their dreams come true. With an expenditure of this size, it’s crucial to know all of the details before you commit. Financing an RV is a big life decision and should be treated as such.

    Consider these five principles before taking out a loan on an RV.

    1. Securing funding for an RV loan could be difficult

    Before obtaining a loan, it’s best to have the mindset that you are purchasing a second house. If you’ve ever purchased a home, you understand what a hassle securing a loan can be. Purchasing an RV poses an even bigger challenge because it’s considered a luxury loan. Unlike an auto or home loan, it is not a necessity, so lenders do not hand these loans out as easily. But don’t worry! Securing a loan can be tricky, but it is not impossible. Lenders look at a variety of factors when determining loan eligibility.

    2. RV loans can look a lot like mortgage loans

    Many of the factors that determine eligibility for purchasing a house also determine eligibility for purchasing an RV. This means that you will need a good debt-to-income ratio to qualify and lenders may want to use collateral to secure the loan. Sometimes the collateral could be the RV itself. Unsecured loans are also an option, but they typically require higher interest rates and longer loan length.
    As with any loan, a good or excellent credit score will help you seem more desirable to lenders. This will also secure lower interest rates and better terms. With a purchase of this size, a ten to thirty-year loan is common, depending on the final sale price. In addition, you will want to have ten to twenty percent of the total RV cost as a down payment. It may be possible to secure a loan without a down payment, but it is rather unlikely. The larger your down payment, the lower your monthly payments will be and this will affect your total amount spent in the long run. If you are looking to become a full-time RVer, selling your current house or vehicle can often be a great way to create an influx of cash for your new home on wheels.

    Additionally, please know that your total monthly payment could be fairly high, similar to a mortgage. It will vary based on a number of factors, including sale price, total cost after your down payment, interest rates, and more. It will likely not be as low as an auto loan, but an RV is an investment and is surely worth the overall cost.

    3. Depreciation could mean you owe more than you paid for your RV

    Just like cars, new RVs depreciate tremendously in the first year of ownership. Brand new RVs lose fifteen to twenty percent of their value as soon as they’re driven off the lot, and this can be rather hard to swallow. Buying a one to three-year-old RV can help reduce the initial depreciation, while still often getting the feel of a brand new vehicle, but with a significantly-lowered cost.

    Still, interest rates and continued deprecation mean that, over time, you will likely pay back more than just the RV’s sale price, just as you would with a mortgage or car loan.

    4. There are many types of RV loans

    Your RV dealership may be able to secure a loan for you, which is often the easiest approach, but this is not your only option. Be sure to do all your research and consider a few loan companies before making your final decision. Dealerships, banks, credit unions, and online lenders all offer RV loans. Be sure to review rates and terms from a variety of sources to ensure you are getting the best long-term deal.

    5. You will need to show lenders that they are making a good investment

    If your RV is totaled in an accident or suddenly needs costly repairs that you cannot afford, the lender may lose a substantial amount of money. For this reason, you may need to show lenders that you are willing to protect their investment with a few important steps.

    First, you will likely need to purchase an RV that is in good condition. Typically, your lender will want to see a full inspection report (provided by most dealers), as well as a list of past and future maintenance. In addition, loans are usually only offered for RVs that are ten years or younger. This is because younger RVs are less likely to experience extensive mechanical failures that could result in a loss for the lender.
    Buying a warranty could help lenders to see that you are serious about protecting your RV. Many RV warranties will protect your rig bumper to bumper for three to five years, or a certain amount of miles. The warranty price can often be rolled into the total loan amount, protecting your new rig and increasing your chances of securing a loan.

    Lastly, most lenders will require you to insure your new RV with both comprehensive and collision auto insurance. This will protect your RV to the highest extent, ensuring that it is protected, even in the event of an accident caused by the owner. This will be fairly costly but will likely be less expensive than comp and collision insurance on a car that is driven daily.
    Obtaining financing for your RV is no small choice and should not be taken lightly. Future RV owners should plan to do lots of research before shopping for their new rig. And once you’ve found the perfect RV, be sure to consider any and all options and scenarios before securing a loan. Planning ahead can save you time, money and frustration in the long run when financing the RV of your dreams.

  • FMCA Tech Tip: 5 Tips to Make RV Service Less Stressful

    FMCA Tech Tip: 5 Tips to Make RV Service Less Stressful

    It’s time again for RV service. You explain your problem to the service writer, sign the repair order, grab a cup of coffee and wait. And wait, and wait and wait.

    Within the realm of RV repair facilities, time equates to dollars, especially for those non-warranty invoices. It stands to reason that if you can help speed up the diagnostic period, you, the RV owner, will save money and time in the long run. Here are five items that any RV owner can do to help save money and time while helping provide a roadmap for the service shop to follow.

    1. Record All Identifying Numbers

    Keep a list of your RV’s brand names, models numbers, serial numbers, and spec numbers. Your dealer or service center will be able to rapidly transfer the necessary numbers to service orders and avoid having to track down records located in hard to reach places. Additionally, the service writer will be able to identify appliances and devices that may be under recall.

    Here is a sample form to get started. Download now: RV Records Template 

    2. Organize a Repair History of Your RV

    Gather any receipts, warranty forms and repair invoices for work completed on your RV. If you are like most people, you’ve lost some, stuffed some in a storage compartment, or maybe put some in a box subconsciously thinking you might need them someday.

    Try to develop a plan for the safekeeping of these documents. At the very least, keep your paperwork in a three-ring binder arranged in chronological order. If a service writer can quickly scan your repair history and find a specific trend, it may help speed up the time spent in the shop.
    Besides, a detailed and chronological record of repairs and services shows you have taken care of your RV. This simple recordkeeping could possibly add to your RV’s resale value.

    3. List All Add-On Components

    Similar to the previous item, this one suggests you maintain a list of all after-market accessories that have been installed. Not only does it provide a detailed account of how you have increased the value of your rig, it could also save troubleshooting time.

    4. Look for the Obvious

    Once it’s apparent that something is not quite right with your RV, do yourself a favor and perform a little inspection. Look for obvious signs that something may be amiss:

    • Stains or discolorations
    • Water pooling or dripping
    • Burned wires
    • Broken hardware
    • Fuel dripping
    • Missing components
    • Disconnected or loose wires
    • Cracked fittings

    Your assertiveness to “look for the obvious” might save you money and put you back on the road that much quicker.

    5. Document the Exact Specifics

    This one takes a little more effort on your part. Whenever a symptom develops, begin to write down specific aspects that pertain to it. You know your RV best – pass that knowledge on to the service facility.

    Start with the basics:

    • Does the problem occur every time?
    • Only at night?
    • Or only after start-up?
    • Only after shut-down?
    • When you drive a certain speed?

    Note any geographical attributes at the time of the occurrence:

    • High elevation
    • Steep incline
    • Humid weather
    • Dusty conditions
    • Or maybe you only notice the problem on trips to a certain location – lake, desert, mountains, etc.

    Additionally, use your product knowledge to further pinpoint a possible cause. For instance, if you are experiencing a refrigerator problem, does the problem exist during both gas and electric operation? While driving or while parked? Only during the heat of the day or at night also? Document the specifics.

    Remember, these tips are for your best interest. The more information that can be provided to the technician, the better! When you follow these five tips, your RV’s visits to the service bay will be less stressful for everyone involved.

    This information is for educational purposes. FMCA shall not be responsible nor retain liability for RVer’s use of the provided information. Prior to making any RV service decision, you are advised to consult with an RV professional.


  • RV Renovations: Backsplash Installation

    RV Renovations: Backsplash Installation

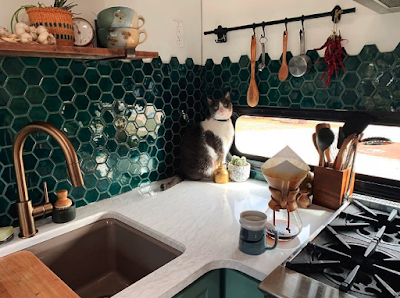
    Renovating an RV is an incredibly demanding yet rewarding process. Many people want to enjoy the RV lifestyle but are turned off by older, outdated interiors. For them, remodeling has become a way to create the homey and personalized space of their dreams in a home on wheels. Previously, we discussed the first two steps in the renovation process: painting and adding in new flooring. Once you have completed these two steps, you will be ready to move onto the next step: adding in a backsplash (or two!).

    Adding a backsplash into a moving home is a bit of a tricky process, but if you follow the right steps, you should have excellent results. Stick to the following six steps for RV backsplash results that will last for years to come.

    1. Determine where you want backsplash and placement

    Before beginning any preparation or purchasing for this project, you need to determine exactly where you will be placing your backsplash. Many RVers like to place a backsplash in the kitchen, for both aesthetic and functional purposes. Besides looking pretty, backsplashes tend to minimize mess in the kitchen and make for easier cleanup.

    If you decide to place one in your kitchen, you need to determine how much of the kitchen wall it will cover. Do you want it behind the stove only, or do you want it behind the stove and the sink? Or do you want your backsplash behind the entire kitchen, including your stove, sink, and any additional counter space. This is something only you can decide, and it may help to sketch your kitchen with the backsplash placed in different sections throughout. This way you can see exactly what it will look like before you begin.

    Some RVers decide to place a backsplash in their bathroom as well. Typically, this would be placed on the wall, between the mirror and the sink. If you decide to install a backsplash in your bathroom, you will need to decide if you want it above the sink only, or if you want it to wrap around the sides of the walls. Use the same method detailed above to help you decide.

    2. Decide on backsplash materials

    Once you have decided where to place your backsplash, it’s time to choose your materials. The main choices are deciding between a ceramic backsplash and a peel-and-stick backsplash. Many RVers go with peel-and-stick because it’s lightweight, easy to install & remove, and holds up well through travel. Still, it should be noted that not all types of peel-and-stick backsplashes fare well being near heat sources. If you choose to install a peel-and-stick backsplash, be sure to choose one with maximum heat resistance for best results and longevity.

    That being said, many RVers have also successfully installed ceramic backsplashes in their kitchens and bathrooms. While it is more work and maintenance, it is certainly possible to have a beautiful, ceramic tile backsplash in an RV, and it may even give your RV interior a homier overall feel.

    Once you have chosen your desired type of backsplash, it’s time to pick your choice of color and style. Subway tile is beautiful and classic, but there are also many more shapes, colors, and styles possible. Some companies make custom backsplash tiles in a myriad of shapes and colors, so really anything is possible. You will also need to select a matching grout color for ceramic tiles. Whatever you envision for your RV backsplash should be color-coordinated with the rest of your RV for best aesthetic results.

    3. Purchase materials

    Once you have decided what type of backsplash you want and where it will be placed, it’s time to measure your walls so that you know how much material to purchase. Measure the long side in its entirety, and then measure the height, starting under the cabinets and ending just above the countertop. Add a few extra inches to each side in case of errors – it’s always better to have more than you need than not enough.

    If you’re going with a ceramic backsplash, you will need to purchase tiles, grout, and mortar, as well as a bucket for mixing, spacers, and tools for mixing and applying mortar and grout. If you are installing a peel-and-stick backsplash, you’ll just need to purchase the tiles and extra spray adhesive if you decide to use it.


    4. Prep the wall for backsplash placement

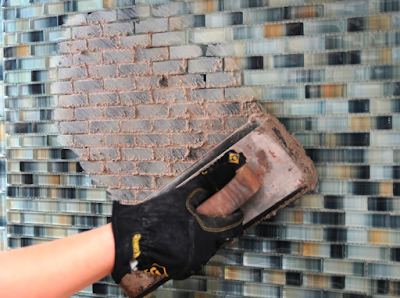
    Once you have everything you need, you will need to ensure that your wall is prepped before beginning the installation. All this means is that you need to ensure that the wall is flat so that the backsplash can sit correctly. If the wall is uneven or bumpy, the backsplash will have difficulty holding up over time. Fill any bumps or nicks in the all with putty and allow it to dry for twenty-four hours before sanding it down flat.

    Likewise, ensure that any wallpaper borders have been removed from the wall. This can be accomplished by using a tool, such as a scraper or a flathead screwdriver, to pull the border away from the wall. Once part of the wallpaper has been lifted, you can begin gently peeling the entire border away. This may take some effort, and you will want to move slowly to avoid tearing the border before it has been removed from the wall.

    Once your walls have been flattened and sanded down, it is finally time to begin installing your backsplash.

    5. Install backsplash

    The process of installing your backsplash will look different for those who decide to use peel-and-stick tiles, versus those who decide to use ceramic tiles. If you are using peel-and-stick, you will want to begin in the lower left corner and work your way across the bottom of the space where you are adding tiles. Spraying additional adhesive on the tiles before placing them may help them to hold up longer, but it is not entirely necessary. Place each block of tiles as close as possible to the tiles next to it. This will help the tiles to lock together for better function and aesthetic purposes. Once you have completed the installation of the bottom row, move on to the next row and continue on until the entire area has been tiled. Take measurements and make cuts for the windows, outlets, and anything else in the space precisely for best results.

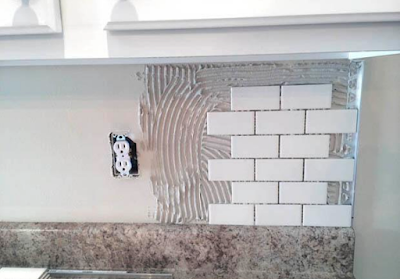
    If you are installing a ceramic backsplash, your process will be a bit lengthier and more labor-inducive. Most likely, your tiles will come in sections of pieces, and you should begin in the lower left corner. Before placing tiles, you will need to apply a layer or mortar to hold the tiles in place. Only mix small amounts of mortar at a time, as it dries very quickly. Follow the exact directions on the mortar packaging to ensure your mortar has the proper consistency.

    Apply a layer using a mortar application tool, then smooth out the mortar with a smoothing tool. Once the mortar is smooth, you may place your tiles. Apply mortar, smooth it, and place one section of tiles at a time. Place spacers in between the sections of tile for even positioning. Once you have finished one row, move on to the row above and then the row above that until you are finished.

    Make cuts for rounded edges, windows, outlets or anything else that is on the all is trickier with ceramic tile. You will need to rent or purchase a tile cutting tool for this part of the project. The stationary machine cutters are usually more accurate and effective then the handheld tile cutters. Mark the exact place to be cut with a sharpie and make cuts carefully and accurately for best results. Once your backsplash has been laid properly, you will need to allow it to dry for twenty-four hours before grouting.

    Mix your grout the same way you mixed your mortar and spray grout sealant before applying grout with a smoothing tool in small sections. There will be a thin layer of grout on the tiles while you are applying it. This is okay and can be easily wiped off the grout after it has dried for an additional twenty-four hours.

    6. Let “rest” and enjoy!

    Your RV should remain stationary for at least a week after installing a new backsplash.This way, the tiles will have time to dry and set before they are taken up to seventy miles per hour down the road. Once your tiles have had time to dry, you are all set to move your RV if need be.

    Installing a backsplash in the kitchen and/or the bathroom of your RV makes a world of difference. With each additional detail, your RV will begin to look homier and more modern. Once your backsplash is installed, you are ready to begin the next round of renovation projects: updating window treatments.

    Have you added a backsplash to your RV kitchen or bathroom? How did it turn out? Feel free to share in the comments below!
  • RV Renovation: Flooring Swap

    RV Renovation: Flooring Swap

    Traveling in an RV is a fun experience that anyone of any age or background can enjoy. There’s nothing like road tripping with a kitchen, bathroom, bedroom, and more at your constant disposal, and more people than ever are hitting the road to see just what it’s all about. But what happens when you want to buy an RV, but you don’t care for the interior style? Your best solution is to take on some renovations.

    Renovating an RV interior is a challenging and time-consuming project, but it results in a finished product that you will love because you designed it yourself. Painting is typically the first project in remodeling an RV, and there are many steps to painting, as discussed in the two previous posts.

    After painting, you will want to replace your RV’s flooring next. This is another tricky yet satisfying project that yields fantastic results. Follow along with these seven basic steps for a fool-proof guide to laying new floors in your RV.

    1. Remove the old floor

    Before you can even envision the new flooring in your RV, you will need to remove the old floor. Most RVs are carpeted, and if we’re being honest, removing the carpet can be a pain. First, you will need to pull the carpet away from the walls using pliers. Once the carpet is no longer sealed around the corners and edges of the room, you can begin to pry it up. You may need to cut the carpet in parts to remove it in several pieces. Beware of the many, many staples you will find beneath the carpet, as some of these will be sharp.

    Once the carpet is removed, you will need to remove all the staples that once held it in place. This is best done using a flathead screwdriver or needle nose pliers. Double check to ensure that all staples have been removed before moving on to the next step. Once the old carpeting is completely removed, you will be left with a plywood subfloor.

    2. Clean and prepare for the new flooring

    Removing the carpet makes a lot of mess, and you will want to clean up well before laying a new floor. Sweep up all the carpet particles and staple pieces, and vacuum up and dust and dirt particles that may be floating around.

    You will also need to move any furniture that is covering the floor, such as the couch, table dinette, and/or arm chairs. If you have a booth dinette, it is not necessary to replace the flooring under the benches. Simply move the table to another area when laying new flooring beneath it.

    Finally, be sure to fill any holes or imperfections in the sub-floor to ensure that the new floor has a flat surface to rest on. Sand down any bumps or nicks, and be sure to check over the whole floor to make sure you haven’t missed anything.

    2. Measure your RV’s square footage

    Next you will need to measure the square footage of your RV so that you know how much flooring to buy. Your measurements do not need to be perfect, but they should be close to avoid inaccuracies. Don’t forget to measure each individual room, including the main room, bathroom, bedroom, and/or cab area (if you are in a motorhome).

    3. Choose your new flooring

    The biggest choice in this whole process is selecting your new flooring. Your first decision must be between wood floors and carpet. Since RVs are typically used for messy camping trips, many renovators opt for hardwood floors, since these make for less mess and easier clean-up. It is also much simpler to lay your own hardwood flooring than it is to install your own new carpeting. If you do choose to go with carpeting, you may want to hire a professional to install it for you.

    Because you have to consider the overall weight of the RV, most people avoid laying real hardwood floors. However, wood-look laminate flooring is much lighter than real hardwood, and it tends to hold up very well in RVs. When choosing laminate flooring, you must then choose between peel-and-stick floors and click-and-lock floors.

    Peel-and-stick flooring simply involves peeling the backing off of adhesive pieces of flooring and pressing them onto the subfloor. The process is easy, and the results are great. However, sometimes these floors can shrink over time, and they can occasionally get caught in your slideouts when they are moving in and out.

    Click-and-lock flooring is a bit pricier than peel-and-stick, and the process for laying it is more involved. However, it is known for being higher quality and lasting longer. Each type of flooring has its pros and cons, so you will want to do your own research before making your final choice.

    Once you have narrowed down the flooring type you want, you can head to the hardware store to look at brand, colors, and samples. Be sure to pick a color that coordinates with the paint and color scheme, and choose a high quality brand for best results. Consider buying a single piece from your favorite types of flooring and bringing it back to the RV to see how it looks in your space.

    Once you have made your final choice, be sure to purchase more flooring than you need to allow for inaccuracies in measuring and potential mistakes.

    5. Plan for the slide

    For many people, laying new floor in their RV’s slideouts is the most intimidating part of this whole process. However, laying floors on your slideouts is really no different than laying it anywhere else in your RV. Once there is no furniture or carpeting in the way, you will just need to ensure you have a flat surface, and that the flooring will not extend past the end caps on the slideout. Once you have planned for your slides, you are finally ready to begin.

    6. Lay floor

    With all the preparation out of the way, you are finally ready to lay your new floors. You will want to watch plenty of Youtube videos before beginning this step so that you can see exactly how it’s done. If you are using peel-and-stick flooring, you may want to consider spraying extra adhesive onto each piece for better results.

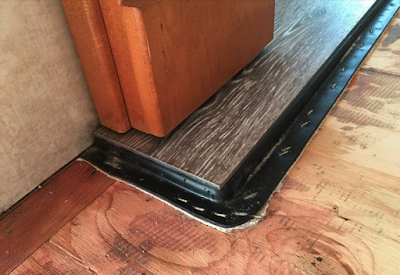
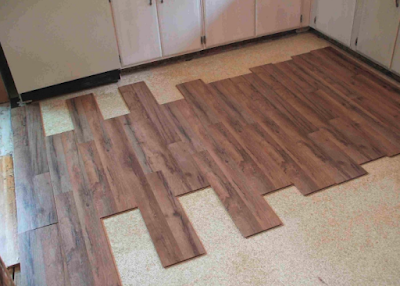
    No matter which type of flooring you use, (peel-and-stick or click-and-lock), be sure to pick a corner to start in, and work your way around the room accordingly. Work in a cohesive pattern to avoid mistakes, and stagger the floors for the best overall look. When making cuts, use exact measurements and ensure the piece will stick before applying adhesive or locking it into place. Consider using transitions or thresholds between rooms for the smoothest overall look.

    Do not rush this step. Take your time to ensure that the floors turn out as best as they can. This process may take a few days to complete.

    7. Let the floors cure

    Once you have laid new floors, you must give them a few days to rest without walking over them. This will ensure that all adhesive properly sticks and that the new floor has time to adjust to the subfloor. Once a few days have passed, you can safely walk across the new floors and enjoy your handiwork.

    Laying new flooring is fairly simple and makes a world of difference in an RV and will increase value if you are looking to sell. Replacing the carpet is also an especially good idea in older RVs, where the same carpet has been laid for many years. Laminate flooring is great for those who travel with pets and small children and is sure to last for years of use when installed properly. With the flooring replaced, you are all set to begin the next task in your renovation project: installing new trim and moulding throughout.

    Have you replaced the flooring in your RV? What steps did you follow? Feel free to drop a comment below!

  • 13 Tips for Avoiding Scams When Buying Online

    13 Tips for Avoiding Scams When Buying Online

    As the leading online marketplace for buying and selling RVs, RV Trader understands just how useful the Internet can be in finding your next recreational vehicle. However, it is essential that online shoppers always be on the lookout for scams. Spikes in scams occur around the holidays in retail, but they can happen all year round. Because we always want our customers to be safe, we’ve put together a list of 13 tips for avoiding scams when buying online.

    1. Confirm the Seller is Real

    A seller should always clearly provide the name of their company, as well as their physical address, telephone number, and email address (1). If they don’t provide that information, that’s an immediate warning sign. If they do provide the information, you need to check that it is accurate.

    • Plug the physical address into Google Maps to make sure the location is where a legitimate business might operate.
    • Do a search online for the phone number provided to see if it returns the company or if people report getting spam calls from the number.
    • Ensure that any email or telephone number you are given is an exact match of the contact information on the Contact Page of the seller’s official website. For example, anyone contacting you from RV Trader directly will have an @rvtrader.com or @traderinteractive.com email address – never a Gmail, Yahoo, or any other personal email provider domain.

    2. Check Online Reviews

    Leaving and reading company and product reviews has become a huge aspect of online shopping, and continues to grow. People who have been scammed by a company are very likely to have left an online review about their experience. Search for the company’s name along with the keyword “reviews” or “scam” and see what other people have said.

    3. Ask Your Peers

    Instead of only seeing what strangers have said online, ask your friends, coworkers, and industry peers if they have used the company in the past and what their experience was working with the seller. They can not only let you know if the seller would be a quality partner, but also how the seller typically communicated with them so you can know if anything seems off about their communications.

    4. Evaluate the Website

    Thoroughly review the seller’s website to make sure it looks professional (1). Most fake websites will look somewhat strange, with spelling and grammar mistakes, low-quality product images, and other oddities. This can help them naturally filter out cautious shoppers; they know that if you don’t catch simple mistakes on a website, then you’re not likely to catch their scam either. Avoid being pegged as an easy target by evaluating their content with a critical eye. You should also look for other claims on the website that could be verified. For example, if they have seals of approval or endorsement badges from a company you trust, like the Better Business Bureau, contact that company or view their website directories to check if they really have worked with or endorsed the seller.

    5. Confirm the Product is Real

    You may want to verify that any pictures of inventory are of the actual for-sale product and are not stock images from online (1). To make sure you are buying the specific product in the pictures, ask the seller for a photo of the unit that includes the seller holding a piece of paper with their name and the date, or anything else you ask for. It may be a slight inconvenience to them, but you should be suspicious if they refuse to provide the photo.

    6. Confirm the Deal is Real

    Sometimes companies really do offer amazing deals, but most of the time when something sounds too good to be true, it probably is. Scammers will often say you’ve won a prize, but claim you have to provide sensitive information and/or send them money for the taxes, fees, or shipping costs. Typically prizes don’t come with any charges to the winner, so that’s already a big red flag, but also ask yourself if the prize is reasonable or if it seems over the top. Finally, ask yourself if any deal or giveaway fits the pattern of typical behavior for the company and if they’ve offered similar deals or prizes in the past. If you’ve never signed up for a contest, or heard of the company making comparable deals to the one they’re offering you, that’s another huge warning sign.

    7. Use Caution When Clicking Links

    Sometimes a scam goes beyond tricking you into sending money, but instead involves directly stealing your identity and/or hacking your computer and online accounts. This is why you should be wary of clicking unknown links in emails or on websites. Scam links could redirect you to an unsafe site or may download a virus onto your computer. Always hover your mouse over links, which will cause a link preview to appear either by the mouse icon or near the bottom of the browser, letting you know where a link would really redirect you. It’s also a good idea to right-click on the link, copy the website address, and then search for it online to see what comes back. Only click links when you know and trust the site it leads to.

    8. Don’t Give Out Too Much Info

    When making an online purchase, typically the only information required will be your name, credit card details, and address, as well as possibly your phone number (1). If the website asks you for anything additional, especially including sensitive data like your social security number, you should be suspicious.

    9. Only Enter Info on Secure Sites

    When providing personal information, only do so on websites with an SSL or TLS encryption. These encryptions create a secure connection between your web browser and the server of the company you are interacting with, with no outside observation or interference. Websites with secure encryptions will display a padlock symbol in the address bar of your browser, and the first letters in the address bar will be “https” instead of simply “https.” Be sure you see those signs, especially when you reach the payment stage.

    10. Only Use Secure Payment Methods

    When you pay for something online, you should follow three security guidelines (1). First, always pay on a page that is secured, as we just discussed. Second, pay by credit card as you may be able to recover your money from the credit card company if fraud occurs. Third, avoid direct money transfers, as it can be nearly impossible to get your money back if you are scammed or have issues with the product.

    11. Use Credit Card Protection Services

    Many credit card companies will offer a unique credit card number that you can use for specific websites (2). These card protection services ensure that if somebody gets hold of your credit card information from a transaction on those select websites, they can’t use it on any other sites, saving you from being scammed out of significant money.

    12. Regularly Check Bank Statements

    Use your banking website or app to review the electronic statements for your credit and debit cards and checking accounts regularly instead of waiting for the physical bill to arrive (if you even still get a paper bill anymore). This helps you control any fraudulent charges and take immediate action by calling your bank or card issuer (1).

    13. Check Privacy Policies & Consumer Rights

    Seller’s should always have a page on their website detailing their privacy policy. Check this policy to make sure the company will not use your personal info for anything other than the purchase. Online businesses also must provide clear and correct information about your rights as a consumer (1). A seller should clearly describe your rights regarding returns or warranties. If a seller lacks these statements, use caution.

    We hope these tips are able to help you successfully avoid online scams, whether you’re buying a Class A on RV Trader, or any other inventory online. And we want to hear from you – what are your tips for avoiding online scams? Let us know in the comments below.