Category: RV Advice

  • Top Tips For Selling Your RV

    Top Tips For Selling Your RV

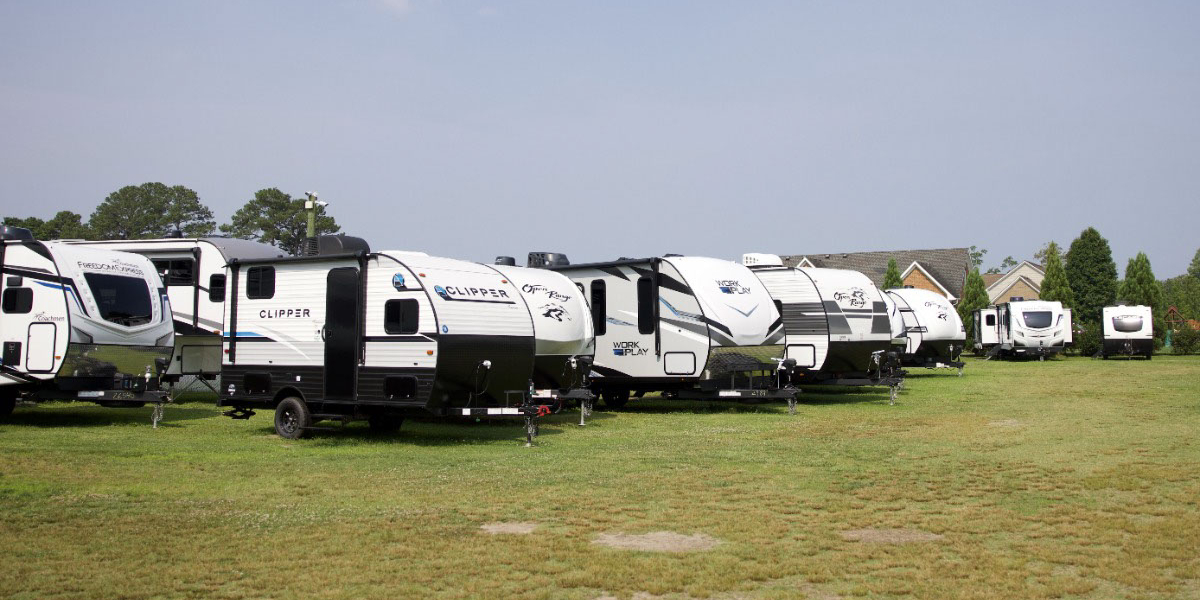
    Online research is crucial to many buyers today, and if selling your RV is a top priority for you, posting it on RV Trader is a great place to start to reach those buyers. We have millions of visitors actively looking for their next RV on our site each month – so you’re sure to get plenty of eager eyes on your unit. Check out our top tips for making sure your RV Trader listing stands out from the rest.

    1. Take High-Quality Photos

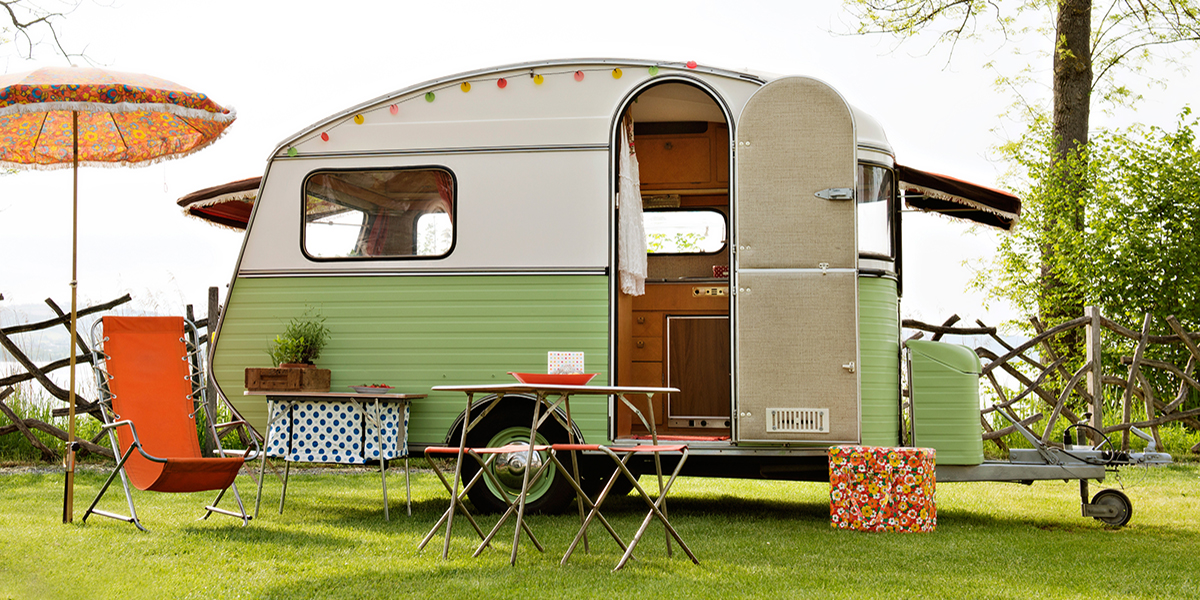
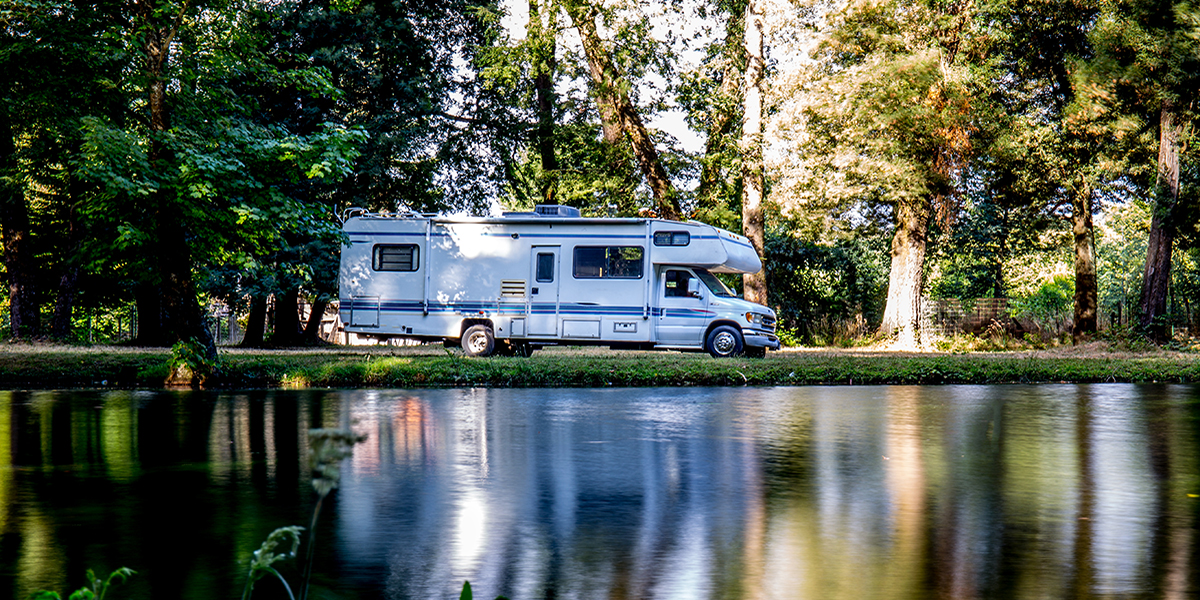
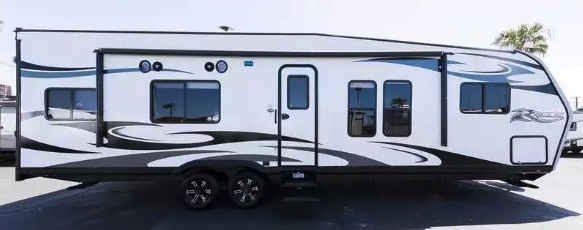
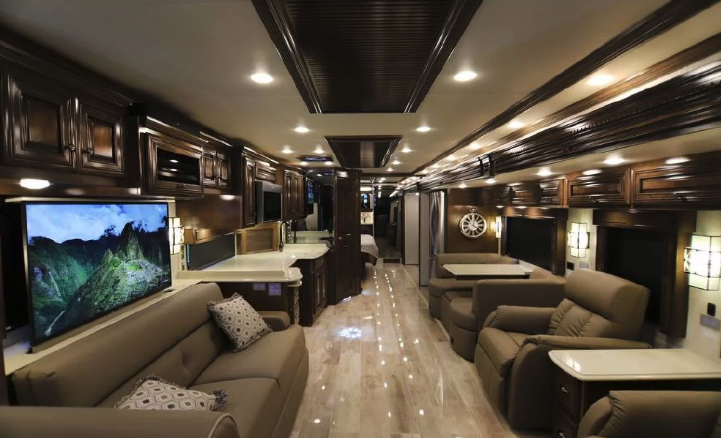
    Photos have the power to draw buyers in – so make sure yours are the best they can be. Buyers want to see authentic photos when they are searching for listings, so do your best to avoid stock photography. We suggest including a wide variety of photos on your listing of both the inside and outside of the RV. Take your listing photos in natural daylight so they are not washed out and make sure to use a camera that takes top-notch photos buyers want to click on.

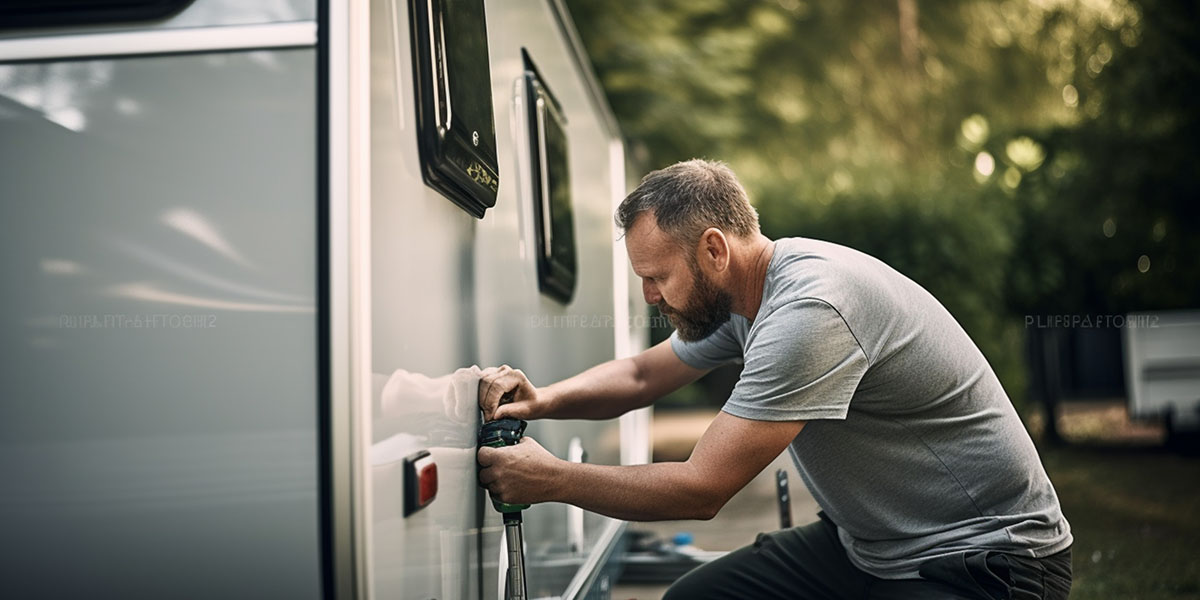
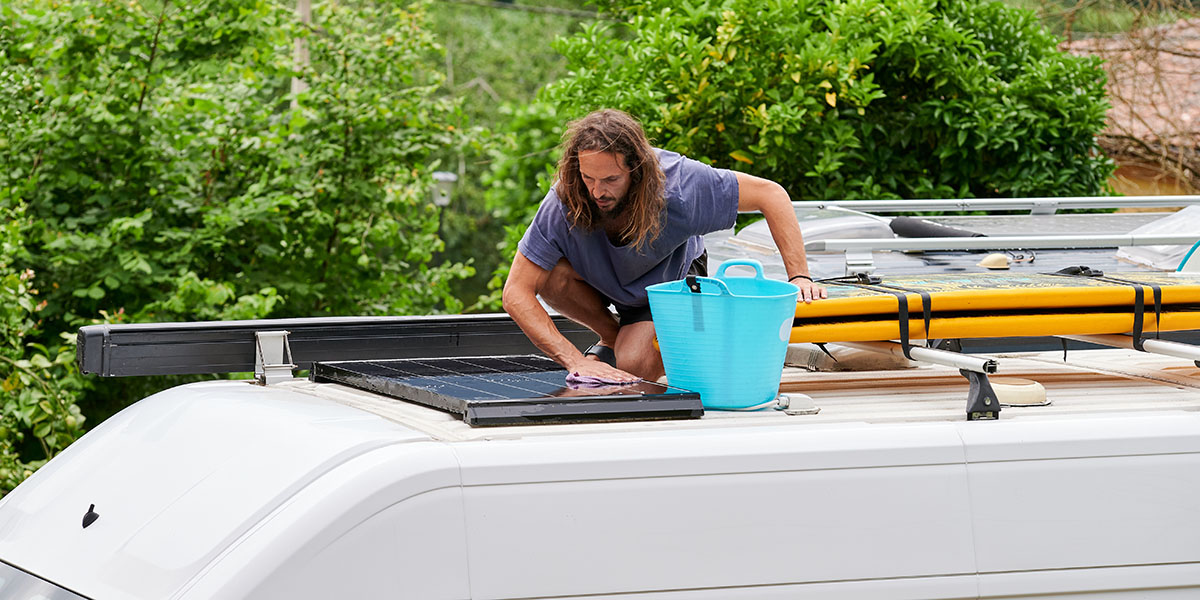
    2. Clean Your Unit Thoroughly

    Make sure the RV you’re selling is spotless, both inside and out. Buyers want to see their potential RV in tip-top condition, so you should give the unit a detailed wash and declutter the interior before you take photos or invite potential buyers over to tour/test drive the unit.

    3. Be Honest About Your Unit

    You’ll want to photograph and describe any and all damage your toy hauler or other RV has right off the bat. It’s important to be open and honest with buyers so you don’t lose credibility and, potentially, the sale. Buyers appreciate honesty – so keep that in mind when creating your listing.

    4. Include a Price

    Including a price in your listing is crucial. Buyers want to know this information upfront to determine if your unit fits into their budget – and we can all relate to that! It’s been proven that units listed with a price get 8X more clicks and 3X more connections on RV Trader than listings that don’t. This simple addition can make a big difference.

    5. Put Yourself in the Buyer’s Shoes

    When crafting a listing, or even giving a tour of your Class A RV or other RV, it’s important to put yourself in the buyer’s shoes – which should be easy since you were once a buyer. Ask yourself, “What did I want to know before purchasing my RV?” or “What advice/knowledge can I share since I’ve been through the process before?” Providing this type of information is extremely helpful for potential buyers – especially if they are new or just getting into the RV lifestyle.

    6. Write a Detailed Listing Description

    While descriptions can be tedious to write – they are so important, particularly for the first-time buyer. Buyers need your help deciphering how this particular RV is going to fit into their lifestyle, and you have the opportunity to be the expert. We recommend highlighting all the key features of your unit, how many it sleeps, its length, and how you’ve used the unit previously. The more details, the better!

    7. Consider Getting an Inspection

    Another way to get your listing to stand out in a competitive marketplace is to get a pre-purchase inspection on your RV before listing it. When selling on RVTrader.com, you can choose to have a certified inspector do an on-site inspection of your RV with RV Trader Assurance powered by Lemon Squad. This quick and easy inspection delivers a report typically the following business day. An RV Trader Inspection Badge will be displayed on your listing, catching a prospective buyer’s attention and letting them know that you can provide a detailed inspection report of your for-sale RV.

    8. Respond to Potential Buyers in a Timely Fashion

    We live in a world where instant gratification is the norm, so you’ll want to keep that in mind when RV inquiries come rolling in. We encourage you to check your messages regularly so you can respond to an interested buyer quickly after being contacted. Buyers can move fast so they will likely move along to another listing if you don’t respond in a timely fashion.

    9. Include Relevant Keywords

    Make sure to include keywords that are relevant to your specific unit – that way as people are searching online, your unit pops up easily. For example, the word “towable” is a top search word.

    We hope that these nine tips have helped you realize that selling your RV doesn’t have to be difficult. If you follow these tips, you’ll have an even higher chance of getting more eyes on your listing! Check out our RV Seller’s Guide for additional resources to help you through the selling process. And if you’re still undecided about listing your RV on the market or not, read through these benefits of selling your used RV

  • Tips for Buying a Vintage Camper

    Tips for Buying a Vintage Camper

    Vintage campers have the ability to transport us back in time, have an undeniable charm, and are all the rage right now – which is why so many consumers are interested in purchasing them. But the real question is – is a retro trailer the right choice for you? Before you claim a little piece of history, there are a few things to consider when buying vintage. We’ll share a few questions to ask yourself and simple tips you need to know before buying that diamond in the rough.

    Determine usage level

    Before you buy, it’s important to ask yourself how you’ll be using your vintage camper. Are you planning on taking short weekend getaways or cross country road trips? You’ll want to determine what you’ll be using your camper for so you can decide on proper size, quality, and length to best fit your RVing needs. If you’re planning on parking your unit at specific campgrounds or RV parks, you’ll need to see if they have any restrictions on vintage units.

    Gauge your budget

    It’s time to empty out the piggy bank to see what finances you are working with before buying a vintage camper. If you are buying a full restored camper, you might be looking at a higher price up front but this could minimize future repairs in the long run. On the other hand, buying an older model can definitely be a more cost-effective option. But if you plan on renovating your camper, you’ll need to be prepared for any surprises that come up in the process.

    Keep an eye out for water damage

    We’ll say it louder for the people in the back. LOOK FOR WATER DAMAGE. When buying a vintage camper, you need to inspect the unit very carefully because the sad reality is, most vintage models have water damage that can be easily hidden. If there’s too much water damage, there’s a chance the whole unit will need a complete renovation. Anyone else hear a cha-ching? Fixing water damage can cost A LOT of money so here are the big things to look out for:

    • Ripples on the interior walls of the camper
    • Water stains
    • Repainted walls (some sellers will try to mask the water damage by painting)
    • Floor leaks/rotting
    • Window and ceiling vent leaks

    To DIY or to not DIY?

    This is an important question to ask yourself before you consider buying a vintage RV. There are many vintage RVs on the market that have already been completely renovated and restored, so if you’re looking eliminate the DIY work, those units might be your best option. If you’re toying with the idea of buying a true vintage camper, you’ll want to assess your ability level and the time, money, and energy you want to spend on fixing up an older model. Renovations give you the ability to give your camper a custom feel, but it’s important to keep in mind that they also take time and effort to restore.

    Check for any electrical damage

    Electrical damage can be a dealbreaker when it comes to buying a vintage camper because to get to the root of the electrical issue, you will typically need to remove all of the interior walls. Unless you’re extremely handy, you will most likely have to bring in a professional. That’s why it is a good rule of thumb to make sure all the electrical systems are in good working order before making your purchase. It’s also a good idea to double check that the propane systems are working properly as well.

    Fully examine the exterior of the unit

    Before purchasing a vintage unit, you’ll want to take a look around the exterior of the unit to make sure it is in good shape. Check the panels and glass to make sure there are no cracks. A few dents might not be a dealbreaker, but if the exterior of the camper is in bad shape that means there is a higher chance of leaks down the road.

    Know your towing capacity

    It might sound obvious, but if you’re planning on buying a towable vintage unit, you need to make sure you have a vehicle that can actually tow your trailer. Vintage campers come in a variety of sizes, lengths, and weights, so you’ll need to keep that in mind when starting your search. You will also need to find out the towing capacity required and the weight of the specific unit you’re interested in to make sure it’s a fit for your current vehicle.

    Make sure to keep our tips in mind if you’re on the hunt for a “seasoned” model. Vintage campers can be so much fun to own and the renovation process can be exciting, but it’s important to know everything that comes along with purchasing a vintage trailer. If you’re looking for a retro beauty of your own, check out our listings on RV Trader!

  • FMCA Tech Tip: Low-Voltage RV Wiring Repairs

    FMCA Tech Tip: Low-Voltage RV Wiring Repairs

    Low-voltage wiring repairs to your RV can be tackled by RV owners who have some basic knowledge and a few specialized tools. Learn how to perform simple electrical wiring repairs to your RV, thanks to the experts at FMCA.

    Overview

    Wiring is the backbone of an RV’s electrical system. Wires must be the proper size to handle the rated current flow for each device. If a wire is too small in diameter or makes too long of a run, the powered device will starve for voltage or current, and both the wiring and the device will overheat.

    Think of wiring as you would a plumbing system. As the flow rate of water increases, so must the diameter of the water pipe to overcome the restriction of a smaller pipe. As the pipe length increases, a larger diameter may be required to compensate for the loss in pressure as a result of friction within the pipe. Electrical wiring operates on the same principle, so it’s important to use the proper wire gauge for the designated load. A circuit that runs fine on a 16-gauge wire may not be suitable if more devices are added to that wire. A larger wire gauge may be needed to handle the increased loads.

    The wire gauge is not dependent on the voltage but on current flow, which is measured in amperes. A 15-amp circuit requires a 14-gauge wire, but if that load increases to 20 amps, a larger diameter, 12-gauge wire is needed. When choosing a wire size for a particular application, it’s important to determine the total current draw for that circuit and compare that with a wire-gauge chart.

    Stranded wire, rather than solid wire, is used for low-voltage DC wiring in RVs. A big advantage of stranded wire is its flexibility. It also holds up better when subjected to vibration.

    It’s important to understand that the insulation surrounding the conductor is sensitive to voltage. The insulation in low-voltage wiring is rated at a maximum of 50 volts and should never be used for high-voltage applications. Wiring specifically designed for higher voltage should be used exclusively on 120-volt-AC circuits.

    Most low-voltage wiring insulation consists of two varieties, GPT and GXL. GPT wiring has a PVC jacket that is good for interior wiring and is rated to 176 degrees Fahrenheit. GXL wiring costs a bit more, because it has a cross-linked polyethylene jacket and is rated for 257 degrees Fahrenheit. GXL is required for use in hotter locations, such as engine compartments, but can be used anywhere.

    Wire insulation prevents electricity from jumping out of the conductor to the surrounding environment. Insulation also provides some protection to the conductor. Eventually, though, a wire that is subject to vibration and is in contact with another object can rub through its insulation and may short to another conductor. If the short occurs to ground, the breaker or fuse should trip, but if it shorts to another hot circuit, you may experience any number of electrical anomalies. If the conductor shorts to the chassis or other metal component, the result may be a hot-skin condition, which in a high-voltage instance can be a serious, even fatal, hazard.

    To prevent abrasive wear, wiring should be placed inside a protective wiring loom. The most common is corrugated split-nylon loom, which is available in various sizes. Rated at up to 300 degrees Fahrenheit, the loom protects the wire from damage caused by abrasion, chemicals, and heat. The split in the loom allows for easy access when inserting wires. The loom is easy to cut to the desired length with a utility knife. Nylon cable ties should be used to fasten the loom to the RV at suitable points.

    Overcurrent Protection

    Wires heat up as current flow increases. If a short circuit develops, the amperage spikes and the wire gets so hot that it burns off its insulation. That can start a fire, which in the worst case could consume an RV. That’s why overcurrent protection is needed for every circuit. Such protection can be in the form of a fuse or a circuit breaker. Fuses are disposable, so once they blow, they must be replaced.

    Circuit breakers are more costly, but for critical circuits they can be reset and used again. Type I circuit breakers automatically reset once they cool and are the most common. Type III circuit breakers have a small reset button that must be manually pushed to restore power to the circuit. Remember that the portion of wire between the battery and the fuse or circuit breaker is unprotected, so it’s important to position the circuit breaker as close to the power source as possible to achieve the best possible protection. Circuit breakers must be matched to the wire gauge as well. Adding a larger fuse or breaker to a wire that isn’t designed to carry that much current defeats the purpose of the protection.

    Connections

    Proper connections must be made to securely attach wiring to the destination equipment or device. Simply wrapping a wire around a screw head invites failure. When a screw connection is needed, a loop-end wiring terminal should be attached to the end of the wire so that it can be securely fastened to the screw. Most auto parts stores carry an assortment of wire terminal ends that contain loop-end terminals. Stores also sell butt-end and flat-blade connectors, which are used to join two wires.

    A PVC or nylon insulation collar surrounds the crimp barrel of each connector and is color-coded to identify the size of wire each terminal requires. A red collar signifies a terminal designed for 18-gauge or 20-gauge wire. A blue collar is designed for 14-gauge or 16-gauge wire, while yellow is rated for 10-gauge or 12-gauge wire. Selecting the correct terminal for a particular wire size ensures a tight connection that won’t detach.

    You’ll need to use a crimping tool, but be careful, because some of the inexpensive ones do a poor job and the connection may pull apart. I suggest a crimp tool such as the Paladin Tools PA1308 or the S&G Tool Aid 18900. These tools, which have a die with three barrel sizes, perform a complete roll crimp on the fitting, rather than a single indent, producing crimps that won’t pull apart.

    Many connections require running a wire to ground. Loose, damaged, or missing ground connections are some of the most prevalent issues when chasing down an electrical problem. Such ground connections attach to the vehicle’s frame to complete the circuit. Often, the connections are in a location that is subject to corrosion. As a preventive measure, protect the connection with battery terminal sealant. A ground connection should be to clean, bare metal. Remove paint that could hinder the connection, and use a star lock washer to help bite into the frame and make better contact with the terminal ring. If you use a bolt rather than a screw, a nylon lock nut or lock washer will prevent the nut from vibrating loose.

    Soldering wires together makes a solid connection. However, battery and inverter cables pass large amounts of current, which can melt the solder. Such high-capacity connections should have crimped connectors. Crimping tools for large connectors are expensive, so your best option may be to find a truck or RV service center that can perform the crimps for you.

    Corrosion Protection

    When electrical current passes through two dissimilar metals, galvanic corrosion can occur. When moisture attacks connections, rust can form. Salt water and acidic vapor from nearby batteries hasten these forms of corrosion and inhibit the ability of the connection to pass current.

    When making a soldered splice of two wires, it’s important to seal the connection and protect it from corrosion. Polyolefin shrink tubing is ideal; it forms a seal that protects the connection from the elements. Shrink tubing is placed over the wires prior to soldering and then slides over the connection after it has been soldered. Then, a hair dryer or heat gun warms the tubing and shrinks it to seal the wire.

    Shrink tubing also can be used to seal the barrel ends of ring-style terminals to prevent corrosion from rotting the wire inside the barrel. This is especially important for battery terminal connections. Large-diameter shrink tubing for these cables is available in both red and black to identify positive and negative cables. When making a connection in a clean environment, such as behind a vehicle’s instrument panel, standard insulated butt connectors or flat-blade connectors generally are adequate.

    Top-post batteries can receive further protection against corrosion. For example, to each post, add a felt washer that contains NOCO Company’s NCP2 corrosion preventative compound. NCP2 also is available in spray cans and can be useful for coating ground connections or terminal studs in areas that are exposed to the elements.

    By investing a little time learning some electrical basics and having a few small tools, you’ll be able to handle most of your wiring repairs.

    FMCA RV Club brings you this monthly tech tip to Enhance Your RV Lifestyle. FMCA delivers RV know-how to its members. Join today for just $50 — a savings of $10 just for RV Trader readers. Learn more at https://join.fmca.com/trader18.

    This information is for educational purposes. FMCA shall not be responsible nor retain liability for RVer’s use of the provided information. Prior to making any RV service decision, you are advised to consult with an RV professional.

  • Winnebago: New Uses For An Old Favorite

    Winnebago: New Uses For An Old Favorite

    For many years, the Winnebago Adventurer was not only the flagship gas-powered model for the brand, it was one of the most-recognized nameplates in RVing.

    Then, for a brief period, the model took a hiatus from the Winnebago lineup. “Over the years, the product moved further upmarket, and we felt like we needed to hit ‘pause’ for a bit,” noted Niles Whitehouse, Product Manager for Winnebago’s Class A gas lineup.

    The Adventurer Returns

    Now the Adventurer is back at a lower price point, with five floorplans ranging from 29 to 37 feet and a pair of available options that distinguish it from most other RVs on the road today.

    The first is the All-Weather Upgrade Package, which adds a second high-efficiency air conditioner with heat pump as well as a 5,500-watt Cummins Onan® Marquis Gold™ gas generator, 50-amp. power cord and automatic changeover switch.

    “The Adventurer uses our trademark Thermo-Panel construction, so it’s already very well-insulated. The All-Weather Package adds some extra oomph to the cooling, so folks will be comfortable just about anywhere you can take an RV,” said Whitehouse. “And of course, when it’s cool out, the electric fireplace (in the 35F and 36Z floorplans) will take the chill out of the air.”

    Wheelchair Accessible


    The second option is actually a series of modifications that turn the Adventurer into a fully accessible home on wheels for wheelchair users.

    Part of Winnebago’s Accessibility Enhanced model lineup, the Adventurer 30T AE includes a platform wheelchair lift on the passenger side, plus a powered roll-up lift door to make independent entry and exit simple and easy. Inside, the hallway and bath areas have been expanded to accommodate wheelchairs, there’s a roll-in shower with assist bar — even the appliances and switches have been relocated to make RV travel and living easier.

    Winnebago has been modifying their motorhomes to make them wheelchair-accessible for more than three decades. But according to Jamie Sorenson, the company’s Director of Specialty Vehicles, the new Accessibility Enhanced Adventurer is part of a whole new approach.

    “In the past, we would start by taking a fully built coach just off the line, and extensively modifying and customizing it afterward. Now, we are building three models — the Adventurer 30T, the Intent 30R, and the Forza 34T — as Accessibility Enhanced models right from the start. That saves time and materials, and allows us to price them pretty attractively.

    “We’re doing this both for long-time RVers who may be facing some new mobility issues, as well as for wheelchair users who may not be RVers currently, but who want to maximize their comfort and flexibility as they travel.”

    The three Accessibility Enhanced models will make their debut at the Tampa RV show, after which they will be available through select Winnebago dealers.

  • A Guide for Great Listing Photos

    A Guide for Great Listing Photos

    It’s no secret that the buying process is changing, and with technology on the rise, online research is becoming increasingly important to buyers before they make a purchase – large or small. That’s why taking high-quality photos is crucial to get more eyes on your listing when selling your RV. Interested in upping your photo game? We’ve got 8 easy tips to make sure your listing photos are painting a clear picture to potential buyers.

    Make it Shine

    We know cleaning an RV can take time depending on the size, but a deep cleaning can have the potential to make or break a sale. It’s important to know that buyers want to see their potential unit in tip-top shape not just before making a purchase, but before even coming to see it in person. New or used, you’ll want to make sure the outside of the unit is washed, and that the inside of the unit has had a full detailing.

    Use the Right Camera

    Consumers are likely to move along to the next listing if your photos are grainy or blurry. So our question to you is, are you using a high-quality camera to take your listing photos? You’ll want to make sure that you have a fairly newer camera to ensure that your photos are crystal clear. Keep in mind, most smartphones have incredible cameras and can be great options for taking photos. If you want to take your photos to the next level, consider buying an updated point and shoot camera. They are very simple to use and take extremely clear photos.

    Shoot at the Right Time of Day

    Ask any photographer and they’ll tell you, lighting is everything when it comes to taking photos. That’s why it’s so important to keep in mind the time of day you’re taking your listing photos. We recommend avoiding taking photos midday when the sun is at its brightest and lighting can come across as harsh. Shooting during the morning or late afternoon is ideal for capturing “warmer”, less washed out photos. As long as it’s not raining, cloudy days can also be great photoshoot days – just make sure it’s not too dark outside! While taking photos inside of the unit, highlight the natural light that the unit provides by opening up all of the windows while shooting. If there are darker areas inside, we suggest turning on the cabin lights as needed – avoid flash if at all possible.

    Keep in Mind Positioning and Location

    When taking listing photos, you’ll want to keep in mind where you’ve positioned and parked the RV. Make sure that the unit you are trying to sell is the focal point of your photo. While inside the unit, stand in corners and point the camera outward while taking photos to make the unit feel larger and longer.

    Take a Few Test Photos

    It’s important to take your time while shooting your listing photos, as they are a crucial part of your listing. Take a few test photos of your unit to make sure the lighting is right, the images are clear, and that you are satisfied with the outcome. If you aren’t pleased with the photos you can take a step back and see what might need to change to enhance your photo (positioning, lighting, etc.).

    Have a Variety of Photos

    Consumers want to see photos and LOTS of them. Potential buyers want to see the entirety of the unit even before coming to see the unit – they want to picture themselves in their new RV on the road to their next destination. To paint your buyer a clear picture, we suggest taking a few full shots of the outside of the unit (showing the whole RV) as well as detailed, close-up shots. When taking indoor shots, we suggest showing all aspects of the unit. We recommend having a full outdoor RV shot as your main listing photo to grab the customer’s attention right off the bat, then they can explore more photo options as desired.

    Be Honest and Authentic

    It’s extremely important to be honest and authentic with your customers. Don’t hide the imperfections of the unit you are trying to sell. If the unit has a few dings or scratches, or if there’s a tear in upholstery, consumers deserve to know. It’s also a good idea to stay away from using stock photos of your unit – consumers appreciate original photos and want to see exactly what their potential unit looks like.

    Highlight Special Features

    Does the unit you’re selling have any special features like extra storage, great natural lighting, or new technology? Make sure you are highlighting them in both your listing photos AND descriptions. As we mentioned earlier, consumers want to picture themselves in their new RV, and showing them unique features will having a higher chance of piquing their interest.

    We hope that these 8 tips have helped you realize taking listing photos doesn’t have to be difficult. Taking the right photo can take some practice, but your buyer will thank you in the end when selling your RV.

  • FMCA Tech Tip: Charging RV Batteries

    FMCA Tech Tip: Charging RV Batteries

    Is your RV battery fully charged? Learn how to check, thanks to FMCA and the “RV Doctor” Gary Bunzer.

    About RV Batteries

    Batteries used in RVs are lead acid batteries, which means they have several cells connected in series. Lead acid batteries do not physically make electricity; instead, they store electricity. The size of the lead plates and the amount of electrolyte the battery contains determines the amount of charge a battery can store.

    Batteries are the heart of any RV. They provide power for lighting, fans, water pumps, and other 12-volt accessories. Eventually, though, batteries discharge. How long they hold a charge depends on how much they’ve been used and their condition. Boondocking, in particular, places demands on batteries and requires a bit of power management to ensure they retain their charge long enough to allow plenty of use between recharge cycles.

    How to Tell When a Lead-Acid Battery Is Fully Charged

    • Monitor the specific gravity of the electrolyte in each cell as the battery accepts the current from the charger.
    • As the battery charges, the specific gravity will continue to rise in each cell. At some point, the specific gravity will stop its ascent and remain stable at one reading (hopefully around 1.260).
    • When the specific gravity remains at its highest reading (regardless of the value of that reading) for a period of two to three hours, the battery is fully charged. It simply cannot accept any more current.


    Note: If it plateaus at a much lower reading than 1.260, further troubleshooting is in order; it may be time to replace that battery.

    Further Reading

    Inexpensive digital voltmeters can help RVers avoid costly repairs. A DC meter indicates whether the RV batteries are properly charged, and such information can prolong battery life. Read more about these devices: https://familyrvingmag.com/2018/03/01/rv-voltmeter-installation/

    FMCA RV Club brings you this monthly tech tip to Enhance Your RV Lifestyle. FMCA delivers RV know-how to its members. Join today for just $50 — a savings of $10 just for RV Trader readers. Learn more at https://join.fmca.com/trader18.

    An important safety note: Whenever you’re working with RV batteries, make sure to wear gloves and safety glasses to prevent injury.

    This information is for educational purposes. FMCA shall not be responsible nor retain liability for RVer’s use of the provided information. Prior to making any RV service decision, you are advised to consult with an RV professional.

  • Tech Tip: RV Furnace Maintenance

    Tech Tip: RV Furnace Maintenance

    RV owners — especially those who embrace winter travel — should be proactive in preparing the forced-air heating system when the thermometer dips. Know how with these tips from FMCA and the “RV Doctor” Gary Bunzer.

    About RV Furnaces

    An RV forced-air furnace is a sealed combustion system, so it is relatively easy for owners to perform a few maintenance procedures to ensure that warm air will circulate when needed. This is not to say the need for professional attention is eliminated altogether. As with any propane-burning appliance, it is still vital the delivery line pressure be measured and adjusted, the regulator be tested, and a deeper cleaning be performed periodically. Also, it is imperative the complete propane piping system be tested for leaks at least once per camping season.

    There are, however, a few simple steps all RV owners can follow to avoid shop labor costs. I’ve always maintained the four crucial areas regarding the RV forced-air furnace are as follows:

    • Cleanliness of the furnace
    • Proper routing of the ductwork
    • Return airflow
    • DC voltage supply

    All RVers should carry a decent digital multimeter (DMM), a few hand tools, and standard cleaning supplies so these four areas can be addressed before the onslaught of winter.

    Furnace Cleanliness

    • Vacuum and wipe down all portions of the furnace you can easily access. Simply keeping the unit free of accumulated dust and dirt will help ensure proper operation.
    • Vacuum in and around all areas of the furnace compartment, including the floor ducts. In some cases, it may be possible to remove a front panel to gain access to the interior portions of the furnace enclosure. In other cases, access may be gained through a panel from outside the RV. Use a soft, damp cloth to wipe down all metal components.
    • Take time to fully inspect the intake and exhaust vents on the exterior of the motorhome. The fireside stories you’ve heard of wasps, spiders, mud daubers, and birds possibly building a nest inside that intake/exhaust assembly are true. Obstructions in the intake tube will cause an overly rich mixture at the burner, resulting in incomplete combustion. Obstructions in the exhaust tube can be a fire hazard. Neither situation is good for you, the furnace, or the motorhome.

    Ductwork Routing

    Some RVs have flexible runs of ducting; others are built with rigid in-floor ductwork. Most flex ducts are routed above the floor, inside cabinets, under sofas, etc.

    Inspect the routing of every run, since they’re usually easily accessible. Look for extended runs and collapsed or pinched ducts. Longer-than-necessary branch ducts sometimes can be shortened to eliminate heat buildup. Excessive heat can cause the furnace to short cycle. Try to vacuum or wipe away dirt or dust inside each duct as far as you can reach.

    Inspect all adjustable heat outlet registers, making sure most of them are fully open. The number of ducts routed throughout the RV is determined by the BTU rating of the furnace. In order for the furnace to operate properly, a certain number of ducts must be connected to its manifold. If too many of those ducts are closed (or not enough ducts are installed), the chance of a short-cycling sequence increases.

    Return Airflow

    For proper operation, all forced-air furnaces require a specific amount of fresh air be returned to the furnace enclosure. This is accomplished through a grille or a set of louvers mounted somewhere within the RV’s living space. Do not block or modify this grille in any manner. Be sure the return grille and the area immediately behind it are free and clear of obstacles.

    DC Voltage Supply

    The proper amount of DC voltage is crucial to the safe and efficient operation of the forced-air furnace.

    Most modern furnaces operate at a voltage input between 10.5 and 13.5 volts DC. Of course, 10.5 volts is basically a dead battery (100 percent depth of discharge), so more than likely, the conscientious RVer will keep the battery bank at a higher level of charge. I stress the 50 percent rule; never discharge to below 50 percent of capacity, unless necessary. But it’s not uncommon for a somewhat-depleted battery to provide less-than-sufficient voltage, especially during a dry camping endeavor. Low voltage causes the blower wheel to spin slower, perhaps too slow to properly close the sail switch. The sail switch initiates the heating cycle by powering the circuit board, which in turn opens the gas valve and creates the spark that ignites the main burner.

    On the flip side, too-high voltage coming into the furnace also can cause problems. Never power the furnace directly from a battery-charging device, converter, or off-line power supply. The incoming voltage must be “filtered” somewhat. This is accomplished by connecting the furnace to a battery circuit within the RV. Maintaining a clean, properly charged battery bank is essential for optimum operation of the furnace.

    Summary

    Serious and seasoned RV owners understand the importance of proper preventive maintenance. Following these few quick and easy procedures will give your heating system an advantage in the cooler months.

    FMCA RV Club brings you this monthly tech tip to Enhance Your RV Lifestyle. FMCA delivers RV know-how to its members. Join today for just $50 — a savings of $10 just for RV Trader readers. Learn more at https://join.fmca.com/trader18.

    An important safety note: RV owners should never remove any component on the sealed system that is held in place with a gasket. Breaking the seal on any gasket potentially can cause a dangerous carbon monoxide leak.


    This information is for educational purposes. FMCA shall not be responsible nor retain liability for RVer’s use of the provided information. Prior to making any RV service decision, you are advised to consult with an RV professional.

  • Why Choose a Class C Motorhome? (And What to Look for When You Do)

    Why Choose a Class C Motorhome? (And What to Look for When You Do)

    Mention that you’re looking at a motorhome and most non-RVers think of a Class A — the bus-style coach built on a specially designed commercial chassis.

    Yet the reality is that the majority of motorhomes sold every year are Class C’s, which are built on an automotive van or truck frame, with the motorhome body appended to the original cab.

    According to Niles Whitehouse, Product Manager at Winnebago, there are some very good reasons these motorhomes are so popular.

    Class C Advantages

    “For one thing, many people are more comfortable driving a Class C coach, because the experience is similar to driving a large pickup. In addition, Class C coaches are typically more economical to buy and to operate, as they tend to be more fuel-efficient.

    “And because they’re smaller than a Class A, they’re easier to maneuver in campgrounds and can go some places you might not want to tackle in a Class A motorhome,” Whitehouse noted.

    When it comes to floorplans, modern Class C’s make the most of available space. Most have a sleeping space over the cab; that bed, coupled with a bed in the rear, plus a sofa or dinette that converts to another bed, means that a Class C coach will often have more sleeping capacity than a typical Class A, so it’s no wonder Class C’s are popular with families.

    Many C’s have slideouts that add to the living space. For example, Winnebago’s Outlook 27D floorplan has two slideouts, allowing Winnebago to put both a walkaround queen bed and a roomy bathroom in a 28’8″ long coach.


    A New Approach
     
    Outlook Exterior

    The Outlook, introduced last year and debuting dynamic new exterior graphics this year, represents a new approach for Winnebago. “Our ‘voice of the customer’ research told us what most people wanted in a C, and we pretty much took everything on that wish list and made it standard. That really simplified production for us, and allowed us to bring the Outlook in at a lower price point,” Whitehouse explained.

    Outlook Interior

    Each of the five Outlook floorplans (which range in length from 24’2″ to 31’10”) features a full galley, overhead bed, convertible dinette, and a long list of standard amenities

    “They’re fully equipped, right out the door,” said Whitehouse.

    Finding the Right “C”

    When it comes to choosing the right Class C for your family, choosing the floorplan is important — but so is the build quality.

    Looking at things like fit and finish can tell you a lot. Do the drawers glide smoothly? Do the doors close solidly? Is that bead of caulk being used to hide sloppy workmanship?

    Also, consider the quality of the ‘support systems’ — things like the plumbing and electrical systems. Is the generator the right size for the coach? How about the holding tanks? Does it include or is it pre-wired for solar power?

    Finally, consider the things you can’t see: how solid is the framework around the coach? How solid is the warranty? And how solid is the company that’s standing behind the warranty?

    The answers to those questions will help you find the perfect Class C motorhome. Happy hunting!

    Learn more about the Winnebago Outlook here.
  • FMCA Tech Tip: Should I Perform Preventive Maintenance On My RV?

    FMCA Tech Tip: Should I Perform Preventive Maintenance On My RV?

    There’s a choice every RV owner must face – preventive maintenance or crisis repairs. There is no third option. To help cut costs, many RVers attempt to perform preventive maintenance on their RVs themselves.

    Know your options with these tips from FMCA and the “RV Doctor” Gary Bunzer.
     
    $$$ 

    Consider this: A typical RV with a generator, two roof air conditioners, and a slide-out or two has a minimum of 18 to 22 retail hours of mandated maintenance that needs to be performed each and every year! At an average retail labor rate of $120 per hour, that’s more than $2,600 spent per year just trying to avoid a major problem.

    Alas, it’s important to note that not all components on your RV will automatically self-destruct if these hours of maintenance are not performed, but it is highly recommended. If systems are maintained and checked periodically, you will gain additional life from these products.

    DIY Preventive Maintenance


    There are several seasonal maintenance tasks that you may want to consider doing yourself to cut costs.

    Some of these DIY maintenance tasks include:

    Is there a task that definitely requires a trip to the service center? Read this before scheduling your appointment.

    A little time and effort now can prevent major expenses down the road. Happy RVing!
    FMCA RV Club brings you this monthly tech tip to Enhance Your RV Lifestyle. FMCA delivers RV know-how to its members. Join today for just $50 — a savings of $10 just for RV Trader readers. Learn more at https://join.fmca.com/trader18.
    This information is for educational purposes. FMCA shall not be responsible nor retain liability for RVer’s use of the provided information. Prior to making any RV service decision, you are advised to consult with an RV professional.
  • Tech Tip: Choosing the Best RV Exterior Care Products

    Tech Tip: Choosing the Best RV Exterior Care Products

    Did you catch our article last month about maintaining your RV’s exterior? FMCA and the “RV Doctor” Gary Bunzer are here to help you find the perfect products for your RV.

    Five Conditions That Affect Product Performance

    Did that polish work great for you, living in a colder climate, but not so great for your friend who lives on the beach? Simply put, some exterior products simply work better in different conditions.

    There are five factors to consider when choosing a product to maintain your RV’s exterior:

    Climate

    Variations in temperature, relative humidity, rainfall, and even the proximity of the sun can have an effect on how well a certain product will perform.

    Location

    Whether the RV spends an abundance of time parked in an industrial area, a wilderness area, the city, or out in the country can have a significant impact.

    Environment

    Air quality, in particular, can have an impact. How much smog or airborne pollutants are present in the air?

    Age of the RV

    Certainly, the older the RV, the more chance of it sustaining a deeper level of oxidation.

    Amount of effort exerted during the cleaning process

    The elbow grease you employ when using a particular product may be directly proportional to your success.

    Five Steps to Choose the Perfect Product for Your RV

    Know Your Material 

    First of all, be sure you know the type of material you are attempting to protect or restore. Some products, when applied to an incompatible surface, may actually cause more damage than any pre-existing condition. For instance, never use petroleum products or wax on vinyl stripes or design elements.

    Read the Label

    Second, read the label carefully and follow the directions explicitly before applying the product. Understand the supplier probably knows more about its product than you do. It can be difficult to succumb to “reading the directions,” but in this case, it is the best advice.
    Test!

    Try the product on an inconspicuous location first. See whether you can obtain a small sample of the surface you wish to clean, polish, wax, or otherwise protect or restore and test the product on that piece. If that’s not possible, try the product in an area that is hidden or not readily visible, such as inside a wheel well, behind a bumper, etc. Better to discover its effectiveness, or lack of, prior to slathering it on the entire sidewall.

    Pick a Reputable Brand

    Stick with a reputable brand name. Check for contact information printed on the label or container. Notable product suppliers will have their address, phone number, and website info prominently placed on the product. The good companies will have a toll-free phone number. Any reputable firm will welcome feedback, whether pro or con.
    Don’t mix!

    This is your RV, not a cocktail. DO NOT MIX PRODUCTS! Find the preventive maintenance products that work best for you and stick with them. Avoid switching products every time you hear of something new. If your travel habits or home base changes, then it may be necessary to switch to a different product; however, until one no longer works for you, staying loyal will have a positive outcome most of the time.

    Take it from the experts – maintaining your RV’s exterior surfaces can be a challenge if the products you choose don’t have the intended results. Hopefully these tips will help you maintain that showroom look for many years or at least reap the return on your investment come trade-in time.

    FMCA RV Club brings you this monthly tech tip to Enhance Your RV Lifestyle. FMCA delivers RV know-how to its members. Learn more at https://join.fmca.com/trader18


    This information is for educational purposes. FMCA shall not be responsible nor retain liability for RVer’s use of the provided information. Prior to making any RV service decision, you are advised to consult with an RV professional.