Category: RV Advice

  • Finding a Pet-Friendly RV: 8 Tips for Dog Owners

    Finding a Pet-Friendly RV: 8 Tips for Dog Owners

    Being able to travel with your four-legged kiddos is one of the best parts of RV life — but it can also be one of the most chaotic. Our two pups, Wilson and Journey, have been road-tripping with us for years, and they’ve helped us learn what really matters when choosing a pet-friendly RV as a dog owner. From muddy paw prints and surprise zoomies to snuggling up with them for a good movie on a cold night, we’ve seen it all throughout our 100,000-plus miles on the road.

    So, whether you’re a dog owner shopping for your first rig or looking for a more pet-friendly RV, here’s what to look for when choosing a model that keeps both you and your canine companions comfortable, safe, and happy.


    1. Consider Floorplan Flow: The Dog Traffic Test

    We’ve experienced nearly every size and style with Wilson and Journey. From cavernous fifth wheels to a class B campervan, we’ve made it work with them because we’ve managed this key aspect.

    When you travel with dogs, space matters — especially on rainy days when everyone’s inside and you’ve just come back from a wet and muddy bathroom walk. Because at that point, the last thing you want is them having to share bed or couch space with you or track mud all over your rig.

    Look for floorplans that allow for easy movement. Slides can be a huge bonus, creating extra room for a dog bed or allowing your pets to stretch out without blocking every path to the bathroom or fridge.

    We find that open layouts and passthrough hallways often work best. Rear or easy access bath layouts can also help if you need a spot to dry off muddy paws before you do let them jump back up on the couch with you.

    Pro Tip: When walking through RVs, imagine your dog pacing alongside or just behind you. Is there room to move freely without stepping on tails or bowls? We chose a more open twin-bed layout with a rear bath for our campervan days, and that worked great for us. We could even convert the twins to a king bed and still have room for everyone.


    2. Check for Durable Flooring: Say No to Carpet

    Carpet and dogs? Let’s just say it’s a relationship that rarely ends well. After years of full-time travel, we got rid of the carpet at the house we bought quickly, because the difference is night and day. And the same goes for RVs.

    Between shedding, drool, mud, sand, and the occasional accident, it’s smart to prioritize flooring that’s easy to clean. Vinyl or laminate floors are durable, quick to sweep, and more forgiving when it comes to pet hair or muddy paws. Bonus points for textured flooring that doesn’t get slippery when wet.

    Pro Tip: Having a hand vacuum and cleaning wipes in easy reach of the entrance can make your life a lot cleaner and easier to manage. And if you can fit a nice entrance rug to clean feat and paws, your golden.


    3. Ease Pup Access: Pet-Friendly RV Entryways

    Some RVs have high or narrow steps that can be tough for senior dogs or short-legged breeds. If you’re traveling with an older pup (or one that just thinks they’re royalty), wider steps or lower profiles can make a big difference.

    Class C motorhomes and travel trailers tend to have lower entry points compared to fifth wheels or motorhomes with air suspension. Look for an pet-friendly RV with a solid, stable step system — or plan to upgrade with a pet ramp or foldable stair cover.

    Pro Tip: Look for models with grab handles near the door. You’ll use them too, but they’re also helpful for dogs who need a little assist on the way in or out.


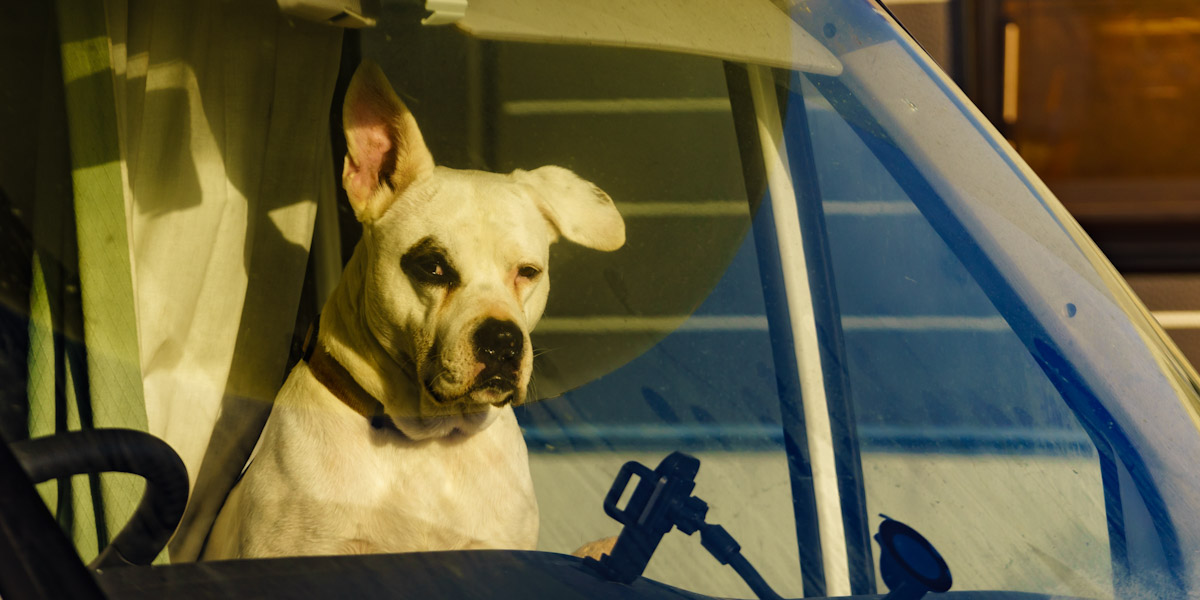
    4. Choose Climate Control: Dogs Can’t Sweat It Out

    We all know how dangerous it can be for pets left in hot vehicles — even for a few minutes. In RVs, that danger can extend to your entire house-on-wheels during summer heat or shoulder-season sun.

    Look for RVs with strong insulation and quality AC, or multiple AC units in larger models, so that cooling and keeping the RV cool is not an issue. If you’re planning on boondocking then having a good generator that has the ability to run your cooling system is a must. You may be able to run some A/C systems on a big battery and solar system with the right inverter and setup, but that can be expensive and unwise to try unless you really know what you are doing. Backup power in the form of a good generator is usually the best option.

    Ducted air and ceiling fans (like MaxxAir or Fantastic Fans) can make a huge difference in airflow as well, especially if you have open layouts with good windows. So, these are good to look for when purchasing your pup-friendly home on wheels. 

    On the flip side, having a good heating system like a furnace or heat pump if you plan on partaking in some cold-weather camping is also a must. Because just like overheating can be a big issue, so can freezing temperatures.

    Pro Tip: Consider installing a temperature monitor in your RV that alerts your phone if things get too hot or too cold. Peace of mind is priceless. We have one, and when connected to our Starlink, we can check on the pups’ comfort level while out and about if we have cell signal.


    5. Think Outdoors Too: Shade and Tie-Outs

    If your dog loves lounging outdoors as much as ours do, pay close attention to the exterior of your RV.

    • Does it have a large awning for shade?
    • Are there outdoor power outlets for a fan or pet monitor?
    • Is there a convenient place to attach a leash or tie-out?

    Some rigs even have built-in exterior sprayers — perfect for rinsing off dirty paws after a hike or beach day.

    Pro Tip: A small outdoor mat can help keep sand, dirt, and pine needles from getting tracked into the RV. 


    6. Dig into Storage: For All Their Stuff (and Yours)

    We’ve learned the hard way that dog gear adds up fast. Travel bowls, extra leashes, waste bags, food containers, medications, beds, toys, towels—you get the idea.

    Look for RVs with ample storage space. Under-bed compartments, pantry closets, and pass-through bays give you flexibility to stash both pet gear and your own essentials.

    Pro Tip: Use clear plastic bins to organize your pet’s things. Label them and tuck them under the dinette, under the bed, or in the outside pass-through. That way, everything has a place — and nothing smells like dried kibble in your living space.


    7. Sniff Out Dog-Safe Features: A Few Pointers

    While not every RV comes with a “dog package,” here are a few bonus features that can make your life easier:

    • Window placement at nose level. Dogs love to look out the window. A low window in the living area can keep them entertained during downtime.
    • Screen doors with pet guards. If your pup likes to paw at the door, a reinforced screen will help avoid accidental jail breaks.
    • Built-in feeding drawers. Some high-end models offer pull-out pet feeding stations under the fridge or cabinets. Not necessary — but pretty neat. Our Class B van came with one, and it was great.

    Pro Tip: If your RV doesn’t come with these extras, a little DIY goes a long way. 


    8. Consider Travel Safety: Harnesses and Crates

    Your dog may love riding shotgun — but safety should still come first. Look for rigs that have safe areas for traveling pets, especially during long driving days. Some RVers use seat-belt-compatible harnesses or soft-sided crates anchored to furniture.

    If your dog is crate-trained, measure your crate and make sure it fits in the rig before you buy. Dinette benches, under-bed spaces, and slide-out areas are good options.

    Pro Tip: Practice drive days with short trips before a big adventure, because not all pets passengers are the same. You want to know what their travel style and comfort level is before heading out on a big adventure. If you can rent a pet-friendly RV before purchasing one, then that is a great idea.


    Tail-Wagging Travel Starts with the Right Rig

    At the end of the day, a pet-friendly RV doesn’t need to be custom-built for dogs to be a great home on the road. It just needs to work for your unique crew. Whether you’re boondocking in the desert or parked at a campground near the beach, a pet-friendly setup can make travel smoother, more comfortable, and a lot more fun for everyone involved.

    And while your dog might not care about the layout or solar setup, they’ll definitely appreciate having a cozy spot to curl up near you after a long hike, a safe place to nap while you’re on the road, and a view out the window to see the cool places you’ve brought them to.

    So, as you’re evaluating your next RV, take a moment to think like a dog. (No, seriously — get down on their level.) You might be surprised at how a few thoughtful features can make all the difference you and them on you travels.

  • Cleaning Bug Splatter Off Your RV: A Step-by-Step Guide

    Cleaning Bug Splatter Off Your RV: A Step-by-Step Guide

    If you’ve driven more than ten minutes in your RV — especially in the warmer months — you’ve probably been gifted with a splattered windshield and bug-caked front cap. It’s one of those unavoidable realities of life on the road. (And at least for us, if feels like it is inevitable the moment you leave a truck/RV wash.) More times than we can count, we’ve pulled into campgrounds plastered with bug splatter so thick on the front of our rig, it looked like a horror movie scene.

    But while bug splatter might be inevitable, leaving it there isn’t. Nor is it advisable, even for the laziest RVer. Those juicy little missiles can actually damage your RV’s finish, paint, and even headlights if ignored.

    So, let’s walk through what bug guts do to your rig, how to get them off safely, and how to prevent buildup in the first place.


    Why Bug Splatter Is More Than Just Gross

    It’s not just about looks. Bug splatter contains enzymes and acids that start breaking down surfaces quickly — especially in the sun. Letting it sit too long can cause:

    • Etched paint and decals,
    • Pitted or stained fiberglass,
    • Cloudy headlights, and
    • Reduced visibility through windshields.

    Some bugs are especially acidic (looking at you, lovebugs). And the longer they bake onto your RV’s front end, the more damage they can do.


    Step-by-Step: How to Clean Off Bug Splatter

    Like a new stain on a favorite shirt, time really is of the essence here. Letting bug splatter sit for days or weeks makes it much harder to remove. Here’s how to tackle it effectively.


    1. Soak the area.

    Start by soaking the front cap or affected surfaces with water to loosen things up. A hose with a spray nozzle or a foam cannon works well. If you’ve been driving all day, let the rig cool down before applying water to avoid streaking.


    2. Use a bug-specific cleaner.

    There are tons of RV-safe bug removers on the market. Look for one that’s safe for gel coat, fiberglass, paint, and decals. Apply it generously and let it sit for the recommended time — usually a minute or two.

    Some RVers swear by DIY options like diluted vinegar or dryer sheets, but we recommend using products designed for the job to protect your finish.


    3. Gently scrub.

    Use a microfiber cloth, soft sponge, or bug sponge (not steel wool or harsh pads) to gently wipe away the splatter. Avoid circular motions that could grind grit into your paint.


    4. Rinse thoroughly.

    Rinse the area well to remove residue from the cleaner and loosened splatter. If needed, repeat the process for stubborn spots.


    5. Wash the RV.

    Once the bug splatter is off, wash your entire rig as usual. This helps remove any leftover cleaner and keeps the finish protected.


    What Not to Do

    • Don’t use abrasive scrubbers. These can scratch your finish.
    • Don’t use high-pressure washers. Using one too close to seals, decals, or paint can cause unexpected damage.
    • Don’t wait too long. The sooner you clean, the easier it is and the less damage bugs can do.


    A Few Products For The Job

    A quick search online shows some of the following as good options for this fun job:

    Pro Tip: Keep a basic cleaning kit in your RV’s exterior storage so you can tackle splatter at your next stop instead of waiting until you’re home.


    Prevention Tips: Keep Bugs from Sticking

    While you can’t avoid bugs entirely, a few strategies can make them easier to clean off:

    • Apply a protective wax or sealant. The prime real estate here is your RV’s front cap and windshield. This creates a slick surface that makes bugs less likely to bond.
    • Install a bug screen or bra. This is specially helpful on Class A or Class C motorhomes with large front ends.
    • Use Rain-X or similar treatments. Using this on windshields to help dead bugs wash off more easily during rain or a rinse.
    • Park strategically. When stopped, park with your bug-covered side away from direct sun to reduce baked-on splatter.
    • Hit up truck/RV drive-through washes. These stops are your friend. We love passing through a Blue Beacon or similar truck wash made for semis, because they are usually fairly priced, do a decent job of cleaning your rig, and they apply several of the items on this list.

      Pro Tip: Always ask and know what chemicals they are applying, if they are RV safe, and explain what you want and don’t want them to do. Sometimes you have sensitive electronics like a generator that you don’t want to get soaked if they do an undercarriage wash.
      ALWAYS KNOW YOUR RIG!!!


    Buggin-Out on Bug Splatter

    Bug splatter is an unavoidable part of RV life — but it doesn’t have to become a permanent part of your paint job. With the right tools and a little regular maintenance, you can keep your rig looking fresh, protect your investment, and avoid the pain of repainting or restoring damaged fiberglass.

    Whether you’re prepping for your next road trip or cleaning up from your last one, a few extra minutes spent removing those buggy reminders will keep your RV in tip-top shape for years to come.

  • Driving Your RV on a Steep Grade: A Safety Guide

    Driving Your RV on a Steep Grade: A Safety Guide

    Summer is coming and cooler mountain temps are calling! But are you ready to drive your RV on a steep mountain grade? The fact is that if you are new to driving a big rig or pulling a trailer, those winding mountain roads may seem a bit intimidating.

    After nearly 13 years of full-time RVing all over the North American continent, we’ve definitely experienced a few white-knuckle grades and narrow winding roads! So, we thought we’d provide some basic tips for making these incredible journeys a bit less scary and a lot more safe.


    Do a Road Trip Safety Check — Before You Go

    Before starting out on any road trip, it’s a good idea to have your brakes, axle, tires, and hitch inspected. (And repaired, as necessary.) Be sure to top off all fluids, flush your radiator, and check the condition of your oil as well. Understanding your towing capacity and making sure you are towing with the correct hitch and sway bars are also keys to safety on steep grades! 


    Make Sure You Understand Road Grade Percentage 

    Road grade refers to the amount a road rises or drops over a specific distance. In case it’s been a minute since your last driver’s license test, road grades signs in the U.S. are bright yellow with black letters, have a truck depicted on them, and include a percentage. A five percent grade means the road will rise or fall five feet for every 100 linear feet. This means if you see a sign warning of a five percent grade for the next four miles, you’re going up or down 1,056 feet in the next four miles.  

    The maximum grade for a federally funded road in the United States is six percent. However, this increases to seven percent in mountainous areas — as long as the speed limit is below 60 miles per hour. However, noninterstate roads do not have grade limits. While most public roads are under 10 percent, there are a few upwards of 20 percent!

    If you are reading this and beginning to conjure up memories of Ricky and Lucy driving their “Long, Long Trailer” up some ridiculously steep grades, we can assure you that you will likely never encounter anything quite that steep. While the Rockies, Sierra Nevadas, and Cascades certainly have some steep roads, the roads in North America with the steepest terrain may surprise you!

    If you aren’t a thrill seeker, here are some resources that’ll help you plan your route to avoid steep grades (and save money on fuel): Mountain Directory and Road Grades USA and Canada.


    Uphill vs. Downhill: Important Considerations

    There are some different driving tactics to consider when driving uphill versus downhill. Let’s take a minute to break these tips down a bit.


    Driving Uphill with Your RV

    Stay in Your Lane

    If you are able to safely drive at the same speed as other traffic, use the left lane to pass, then move back to the right lane. But, if you are moving more slowly than other vehicles on the road, stay to the right. Settle in. And maintain a safe speed. Just allow faster vehicles to pass you. Consider using your emergency flashers if you need to go very slow. Take your time — an RV roadtrip should not be a race!


    Listen to Your Vehicle

    Turn off music, podcasts, and limit conversations around you so you can listen to your vehicle as you are heading uphill. If it sounds like it’s struggling or the engine is changing tones regularly, adjust your speed or gears to accommodate.


    Turn Off Overdrive

    To keep the engine from “bounding” (i.e., trying to find the right gear), turn off your vehicle’s overdrive.  This will also reduce strain on the vehicle’s transmission.


    Watch Your Vehicle’s Engine Temperature

    Even if you’ve done all the safety checks and topped off all the fluids, you may run into road grades which could cause your engine to overheat. (Especially in the summer.) Turn off your vehicle’s air conditioner before heading through steep terrain to reduce strain on the engine. If your vehicle’s engine temperature is running a bit higher than usual, pull over in a safe spot and let the engine cool down before starting off again. Some roads with very steep grades have designated spots for vehicles to park while they cool down.

    Don’t push the limits of your vehicle as you could do a tremendous amount of damage. And, if you see another rig in this situation, be sure to give them plenty of space as you pass. If overheating becomes a regular issue for your vehicle, consider these options:

    • Double check your towing capacity versus the weight of the vehicle that you are towing. Take your rig to a weigh station if you want to know the exact weight of your fully loaded vehicles.
    • Double check your radiator fluid (when the engine is cool!) to make sure you don’t have a leak.
    • Add a transmission cooler to help dissipate the heat in the engine.
    • Avoid driving during the heat of the day in the summertime. Rather, drive steeper grades in the morning or evening..
    • Have your rig inspected by a mechanic who understands the impact of steep grades on your vehicle.


    Driving Downhill with Your RV

    Utilize Engine Braking

    Always keep in mind that your RV is heavier than your passenger vehicle. While this is obvious, you’d be amazed at how many people forget this simple fact. That extra weight means more momentum. Which means that you need more breaking power and a longer breaking distance to safely manage curves in the road — as well as safe distances between other vehicles.  

    Drivers should avoid using their brakes for extended amounts of time. It can cause them to heat up, as well as increase wear and tear on them. In extreme situations, this overheating can result in total brake failure and leave you unable to stop your vehicle. Drivers should think about applying the brakes more strongly with intervals of no brakes, rather than a consistent weaker dragging of the brakes which can allow heat to build up.   

    Start a downhill section by slowing down — before the grade. Then gear down before the steep section. This can help manage the vehicle’s speed without wearing out the brakes.  Moving down in gears slowly is the name of the game here. You never want to go from fifth gear to second gear immediately. Rather, moving from fifth to fourth and then to third is a good practice. While downshifting, listen to the revving of the engine to determine if the RPMs are too high or too low, and adjust the gears accordingly.


    Watch for Curves Ahead

    Many graded roads also have curves. So, be sure to keep an eye out for signs indicating “curves ahead” and adjust your speed as needed. These signs will indicate the recommended speed for safely navigating the curve, and often indicate if it’s different for trucks (including RV’s) as there is a greater danger of rollover when your vehicle is tall.

    We often drive a bit less than the speed limit on curvy roads to remain completely in control. If traffic builds up behind you, gently pull over only when it’s safe to do so to allow them to pass.  


    Stay in Your Lane

    If you are able to safely drive at the same speed as other traffic, use the left lane to pass, then move back to the right lane. But, if you are moving more slowly than other vehicles on the road, stay to the right, maintain a safe speed, and just allow the other smaller vehicles to go around.


    Watch for Speed Demons

    Be sure to keep your eyes peeled for fast moving cars, especially those whipping in and out of their lane in heavy traffic. They can quickly cause a dangerous problem as they recklessly maneuver along the highway. Focus on your own speed, stay to the right, and just let them pass you. Everyone will be happier and safer.


    Understand Runaway Ramps

    When driving a large vehicle on steep grades or long descents, brake failure can be both terrifying and extremely dangerous. Runaway ramps can be a true lifesaver if you experience brake failure on your RV or tow vehicle.  There are typically signs indicating you’re approaching a runaway ramp. They are not just for semi-trucks. Runaway ramps are designed as a safety feature for any vehicle whose brakes have failed. Most runaway ramps are filled with sand or gravel and the vehicle’s axles sink into them to stop the vehicle’s forward momentum. In some cases, they have cables designed to slow your speed and then breakaway as you plow through. Stopping can be rather abrupt and violent, but they are definitely effective! 


    Know the Signs of Brake Failure

    • Spongy or soft brake pedal? If you notice that your brake pedal feels unusually soft or spongy when you depress it, the cause may be air in the brake lines or leaking brake fluid. Either problem can become dangerous quickly. Pull over immediately.
    • Smell something burning? A burning smell coming from your brakes can indicate that they are overheating due to constant use or that there is a mechanical issue causing friction such as a stuck caliper. Stop immediately!
    • Dashboard warning lights? Most vehicles are equipped with sensors that can detect issues with the braking system. If you see a warning light on your dashboard that looks like a brake symbol, it’s important to pull over and inspect your brakes immediately. 
    • Loss of braking power? If your brakes do not respond properly and you are unable to slow down or stop, this is definitely brake failure. Downshift quickly in order to use the engine to slow down, and pull up on the emergency brake if necessary. Honk your horn to alert other drivers and use your emergency flashers if other vehicles are present.


    Other Key Additions to Improve Steering Control When Heading Downhill

    • Electronic Trailer Brakes 
      Most modern trailers have electric brakes which help slow the trailer. These are applied through a sensor in your towing vehicle, commonly installed below the steering wheel, so that when you depress the brake pedal, the brakes engage in a relative way. They can also be applied independently by using the hand lever on the brake sensor. This is especially helpful and can prevent disaster in a trailer sway situation.  
    • Remote Tire Air Pressure Monitors 
      Good tire pressure will mean safe and effective braking. Most modern vehicles have these on the towing vehicle, but you may not have these on the trailer, or on your “toad” (the small vehicle towed behind a Class A or Class C motorhome). Being aware of any low pressure in any of your tires can prevent catastrophe when descending a steep hill or highway gradient.  


    RV Those Steep Grades — and Enjoy the View


    If you follow these tips, stay alert behind the wheel, and maintain your vehicle appropriately, steep road grades don’t have to be intimidating. Just take it slow and steady.  Extreme road grades demand a driver’s full attention and respect. You should always be cautious when driving on them to ensure that everyone arrives at their destination safely. But, at the same time, don’t stress out. You’re in the mountains for the view. Enjoy it.

  • What to Look for in an RV Oven — and 4 Models with Great Ones

    What to Look for in an RV Oven — and 4 Models with Great Ones

    If you’re like many RVers, you’ve probably learned the hard way that pizza just isn’t the same in a microwave. I don’t know about you, but no RV Trip is complete without an oven-baked pizza. But for that crispy crust and melted gooey goodness on top, you are going to need a proper oven. Which, can be a conundrum, if the RV oven was last thing you think when buying a new model. So, do yourself a favor: Think about your RV on the front-end — before you buy your next RV.

    We all know that in space is more precious than gold in an RV. Creature comforts get weighed in the balance. Even so, let me share a few tips to help guide you find that right balance — one that will keep bellies full and hearts warm. (Because not all RV ovens are created equal!)

    So, I think we’re adequately preheated now. Here’s what to look for in an RV oven. 


    Start with RV Oven Size

    Size is going to be a huge factor in the type of oven you choose. If you go too big, you could be sacrificing precious countertop space. (Or maybe that farmhouse style sink you always dreamed of.) Decide which is going to bring you more joy: a bigger sink to clean the dishes, or an oven to bake brownies in? A typical RV oven and combination range is about 21-inches wide. That varies of course, depending on the space in — and specific type of — RV). Another factor is the attention given to amenities by manufacturers.

    Not everyone wants to do a lot of baking inside. (Although almost everyone wants to cook a pizza at some point!) So, for some folks, a propane cooktop or induction top will do just fine. (Maybe they’re ordering their pizza.) But for the rest of us, let’s explore some size options. 

    • 21-inch range. A 21-inch RV range will generally yield 1.8 cubic feet of baking space. That is quite a squeeze compared to a residential oven. But a roast chicken will fit just fine — or a loaf of bread, pizza, and cookies. (Not all at once though.)
    • Convection oven microwave. If you can’t find an RV with the space for an oven, consider a convection oven microwave. The difference between a microwave and a convection oven microwave are the heating elements. Traditional microwaves use electromagnetic waves to cook their food. Convection microwaves have an additional heating element and fan to circulate heat throughout the cavity. If you activate the convection setting on your microwave, your food will cook similar to a convection oven. The convection feature will basically transform your microwave into a little convection oven. (So, maybe you can have your cake and eat it too! Albeit, a slightly smaller cake.)

    Hot Model: For an oven with a whopping residential size, and a four burner range, check out the Palomino Puma 403 LFT


    Look for Autoignition

    This newer feature on ranges and ovens is very enticing. If you have ever spent an extended period of time in an RV, you are probably familiar with the time wasted looking for the stove igniter. (Or maybe that’s just us!) Autoignition for an RV oven is a luxury that will save you time — and countless stove igniters.

    Personally, when I finally do find the ignition tool, it’s usually low on fuel. I end up frantically trying to ignite a spark before the propane floods the element.  The anticipation gets me every time, like a twisted game of jack in the box. I never know if my eyebrows are going to get singed when the waiting is done. The autoignition switch is one of those little luxuries that can change your daily experience in an RV. Don’t discount it.


    Hot Model: Jayco’s 2024 Greyhawk Class C line come equipped with a Furrion range and autoignition switches. 


    Go for a Glass Oven Door

    If you are looking at a range new enough to have the autoignition feature, then it will likely come with this feature as well: a glass oven door. In the past, RV oven doors were solid metal, and you needed to open them to see what was happening inside.

    Smaller ovens come with a difficult task of temperature regulation. Opening the oven door releases precious heat, making heat regulation even more difficult than it already is. This can create hot spots in your cooking, as the propane flame has to reignite to regulate the heat. The clear glass with oven lighting gives you the opportunity to check on your cooking without having to open the oven door. 


    Check for a Range Hood 

    I would have thought this was obvious. Believe it or not, a range hood above a propane stove isn’t always required in the RV industry. Codes, corner cutting, and price cuts have a way of stopping short of the obvious sometimes.

    If you have a propane oven or stove, you should have a ventilation hood no more than four feet above your cooktop. New research is pointing to the long term health effects of cooking indoors on a gas or propane stove. If you are going to do it, better to have proper ventilation at all times. 

    Hot Models: Some models, like Jayco’s Eagle half-ton fifth wheels, have ventilation available underneath the microwave. This is a good solution for safe cooking, while utilizing the space for an additional appliance. Other models, like Jayco’s 2025 Jay Feather, have a separate Furrion ventilation hood installed above the range. Both options offer proper ventilation, with modern and efficient RV ovens. 


    Inspect — or Add — Safety Features

    Propane ovens come with a few extra recommended safety precautions. 

    • LED nobs for the burners and the oven will let you know right away if your flame is lit. This feature comes with most auto ignition switches. 
    • Flame Failure Devices are worth considering if there isn’t already one installed. It will stop the flow of gas to the burner if your flame has gone out for whatever reason. 
    • Get a combination smoke alarm that detects propane leaks and other potentially fatal leaks.  


    Shopping

    Searching for anything in the RV industry can be overwhelming. But don’t stress. With today’s technology and your resourcefulness, you can find the perfect combination for your kitchen needs. Just open your laptop, pop in a pizza, and start your research. Your family will thank you. (And, if they don’t say it out loud, know that it’s in their hearts … somewhere.) Your work in the kitchen is what brings harmony to the whole experience. 

  • Evaluating Your RV Braking System: A Make or Break Task

    Evaluating Your RV Braking System: A Make or Break Task

    Everyone knows that we live in a fast-paced world. We’re always on the go, always moving forward. Working for the weekend we can’t wait to go on the next trip. And there’s absolutely nothing wrong with that. That is unless our go-go-go attitude neglects the necessity of the stop. With the weight of our RV behind us, taking good care our our RV braking system couldn’t be more important.

    Even so, you might ask: Where do I start when checking the brake system on my RV? (Not a bad question at all.)

    Everything starts with identifying the type of RV braking system you own. So, let’s start by discussing the different types of RV braking systems. Then we’ll dive into preventive maintenance, checks, and what you should relegate to your local RV dealer. 


    3 Types of RV Braking System

    Basically, you can divide RV braking systems down into a three categories: hydraulic, electrical, or air-assist braking systems. Here’s what you should know about each.


    Hydraulic Systems

    Hydraulic RV braking systems are usually found on RVs and campers that are smaller in size and or weight. Still, it is possible to find a hydraulic system on a larger RV. These braking systems are the most common type of braking system on small RVs, campers, and some trailers. These systems use a master cylinder and hydraulic fluid to stop the vehicle or towed rig. When activated by the brake pedal, the fluid is slightly pressurized and then moves through the lines. This causes the brakes to apply pressure on the drum or brake rotor. Another type of hydraulic braking system is a surge break. A urge break is attached directly to the trailer hitch, but  it operates independent of the tow vehicle.


    Air-Assist Systems

    Air-assist braking systems are mainly found on larger and or heavier RVs such as a Class A and Class C motorhomes. Simply put, air braking systems work in a similar way that a hydraulic braking system works. The big difference is that instead of hydraulic fluid being pushed through to activate the brakes, the air braking system pushes air through activating the brake pads on the RV through brake chambers.


    Electrical Braking Systems

    You will find electrical braking systems mainly on towables, like fifth wheels and travel trailers. This system can be activated by a brake controller located in the cab of the tow vehicle. Electrical braking systems also can be controlled or activated solely through the brake pedal of the tow vehicle. There, it send a signal through the seven-pin connector to the trailer when plugged in to the tow vehicle.


    Auxiliary Systems

    Also, as a sidenote on brakes, these three systems are only the main categories of RV braking systems. But there are auxiliary braking systems that augment the main braking systems of an RV. Among the auxiliary systems are things like antilock braking systems, transmission retarders, and exhaust brakes. However, in my opinion, checking these systems and diagnosing any type of issue during a preventive maintenance check should be left to the pros.


    Maintenance on Your RV Braking System

    Universal Checks

    Now, let’s talk about maintenance on those brakes. If you haven’t figured it out yet, your RV is one of the largest vehicles on the road. So, it takes more time to stop — especially when you are also towing. To tackle maintenance of its vital braking system, start at the end of the system: the pads, discs, drums, and rotors. Starting here is best because regardless of the type of system you have, they are all basically the same systems at the tire. If you have disc brakes, you will have brake pads which will need to be checked on a regular basis especially before and after long trips. As a rule of thumb, I would recommend that you check them out at least every six to seven months.)


    Discs, Pads, and Rotors 

    Many of you out there that are shade-tree mechanics. You’re pretty comfortable with the basics. If you fall into that category, you should be able to replace your own pads easily saving lots of time and money. While you’re at it, you should also rotate your rotors. In an RV, they do see a lot of wear and tear. So, it’s a good idea to rotate them at every other pad change.

    Also, it is a good idea to take them periodically to your local brake shop to have them turned. While there, the pros can ensure that they are not warped or wearing non-uniformly. Your local brake shop should also be able to tell you when it’s time to replace your rotors. As a reminder, each time you turn them it takes a little bit more of the metal away from the rotor. Your local shop will be able to tell you at what point they are non-usable.


    Drum Brakes

    Along the same lines, if your RV has drum brakes, there are some standard checks that you will want to perform. These usually include checking the brake shoes on your drums for any deep grooves. It’s also important to check the remaining parts of the drum system —  the self-adjusters, brake shoe spring holders, and cables and parts associated with the emergency brake.

    Drum brake systems are usually associated with RVs of a vintage nature. Brake drums need to be turned just like brake rotors. Likewise, they have a certain number of times they can be turned before they need to be replaced. Shade-tree mechanics should be able to complete this type of maintenance as well since drum brake systems are less complex.


    Hydraulic-Specific Checks

    Regardless if you have drums or discs on your hydraulic or electric or air braking system, it’s good to remember that they can come under extreme pressure. At times, they can also see very high temperatures due to the amount of braking necessary. (Which, of course, may depend on the terrain or traffic conditions.) But this is especially true when talking about hydraulic braking systems. The fact of the matter is that the amount of heat and pressure does not typically affect hydraulic fluid, but. it does affect any condensation that gets absorbed overtime in the system. (A good symptom of this is when you have a soft or spongy brake pedal.)

    Therefore, you should check your hydraulic brake fluid levels regularly. When you  see condensation or water present (or every 10,000 miles or per your owner’s manual recommendations), completely change out your brake fluid in your entire system. Other items to inspect while you were already there are the wheel cylinders for any weeping of hydraulic fluid. Check the brake lines themselves for any kinks or leaks and any power brake booster items that depend on vacuum from the engine. 


    Air-Assist-Specific Checks

    An air-assist RV braking system includes an air compressor, an air tank, and (in some systems) multiple air tanks or reservoirs. Added to this are brake chambers which convert the compressed air into mechanical force to operate the brake shoes or pad, a brake pedal with linkages, and brake drums, discs, shoes or pads. (There’s a lot going on here.) The compressor builds and maintains air pressure. The tanks store compressed air. And the chambers convert air pressure into mechanical force to apply the brakes. The brakes themselves will be either brake drums or disc brakes as we have discussed previously.

    On a regular basis, you should drain your air reservoirs. The bad news about this system is that this reservoir that holds your compressed air also tends to collect water and oil. Ultimately, that will degrade air braking functions. (Also, it’s always a good idea good to check your owner’s manual for instructions that are specific for your rig.) Inside of this component, is also a filter which is there to collect the moisture and oil. It should be replaced about every two years. Or, if you drive more often and have further trips, it’s always good to be on the safe side of things and check your filter sooner than later.


    Making RV Braking System Checks Regular

    As with many other RV maintenance tasks, you as the RV owner have the capability of checking out your own braking system. It’s similar to the way  you would check out your electrical system. Uses your owner’s manual to determine specifically the schedules you should follow.

    However, we would be remiss to mention that many of the items in your braking systems should be checked by your local RV shop especially if you are unfamiliar with this type of inspection on your own. It’s always better to be safe than sorry, especially when you’re far from home trying to relax in the great outdoors of our beautiful country.

    While both failing to brake and accelerating too quickly can contribute to accidents, failure to brake is more frequently cited as a contributing factor. Inadequate brakes can lead to rear-end collisions due to inability to stop in time. Conversely, while speeding and sudden acceleration can also cause accidents, studies have shown that faulty brakes are a more direct cause of accidents than speeding.

    So, check those brakes and enjoy every stop — no matter where you roam!

  • Got a Road Trip Checklist for Your RV? You Need One

    Got a Road Trip Checklist for Your RV? You Need One

    Hitting the road for a big RV road trip always comes with a rush of excitement. But let’s be honest: It can also come with a bit of angst. And truthfully, it doesn’t even matter whether you’re a newbie setting out on your first trip or just getting back on the road after a break. Everyone feels it. Because no one wants to  face-palm 200 mile. The fact is that a road trip checklist isn’t just helpful — it’s essential.

    After nearly seven years on the road, living full-time in various RVs (everything from a fifth wheel to a Class B van and now a Class C motorhome), we’ve learned this lesson more than once. It usually goes something like this. We’re setting up at a remote boondocking spot, proud of how smoothly things are going, and then we open a drawer and realize … we forgot something basic. The towels. The dog food. Replacing the sewage hose that started leaking last trip and you put off replacing. Yeah, not ideal.

    But happily, it is preventable. So, if you’re getting ready for that weekend getaway or planning your summer RV adventure, I highly recommend preparing a go-to road trip checklist — or even having more than one road trip checklist. (We’ll talk about that in a minute.) Quite simply, it’s one of the easiest ways to make your trip safer, smoother, and way more enjoyable.

    Let’s break down why a road trip checklist matters — and what should be on yours.


    A Road Trip Checklist … Because We’re All Human

    There are two kinds of people in the RV world: Those who swear by their checklist, and those who eventually become those people. (Usually after a painfully memorable oversight.) RVing isn’t like tossing a duffel into the backseat and grabbing drive-thru on the way. Your rig is your transportation, lodging, kitchen, and bathroom all in one. If something goes wrong (or gets left behind), it can affect multiple parts of your trip.

    Here’s what a solid checklist helps you do:

    • Avoid forgetting essentials (like a new black tank hose).
    • Prevent costly damage (did you check your tire pressure before pulling out?)
    • Improve safety (because double-checking your hitch setup is never overkill)
    • Reduce departure-day stress (which is a real gift to your future self)

    Plus, when you’re on the road often, it’s surprisingly easy to get overconfident. A checklist keeps even experienced RVers in check. 


    The Pretrip Essentials: Before You Hit the Road

    A road trip checklist starts before your tires even leave the driveway. This is the time to focus on prep, packing, and rig readiness.

    Mechanical Musts

    • Check tire pressure and tread (including your spare).
    • Test brake lights, turn signals, and headlights.
    • Inspect propane tanks for leaks and ensure they’re filled.
    • Verify fluid levels (oil, coolant, windshield washer).
    • Confirm tow connections and weight distribution (if towing).

    If you’ve ever had a sway issue on the freeway or struggled with uneven weight distribution, you know how important it is to dial this in. Safety and comfort depend on it.


    Interior Readiness

    • Secure loose items (inside cabinets, fridge, countertops).
    • Stock toilet paper (RV-safe only!), soap, and cleaning supplies.
    • Ensure batteries are charged (house and engine).
    • Fill freshwater tank and sanitize if needed.
    • Double-check fridge and pantry stock.

    And please, do yourself a favor: Make sure you’re stocked on coffee or whatever your go-to morning ritual requires. We’ve definitely had to make an emergency grocery detour for that morning coffee.


    Your Never-Leave-Behind List: A Supply Check

    There are some RV items that aren’t just nice to have — they’re vital. If they’re not already part of your road trip checklist, add them now.


    Gear You’ll Actually Use

    • Water pressure regulator
    • Sewer hose and elbow adapter (bonus: sewer hose support)
    • Leveling blocks or auto-leveler tools
    • Surge protector or EMS (electrical management system)
    • Freshwater hose (bonus if it’s heated for winter travel)
    • Extension cords and adapters (30/50 amp depending on your rig)
    • Wheel chocks and jack pads

    Forget one of these, and you might find yourself MacGyvering a setup with duct tape and prayers, which is never fun. (If this reference doesn’t make sense, feel free to Google it and send me a message here so I can feel that much older … lol.)


    Your Road-Ready List: Ensuring Safety and Comfort

    Once you’re rolling, you’ll want to make sure you have everything to stay safe and comfortable on the road.


    Safety First

    • Roadside emergency kit (reflectors, jumper cables, tools)
    • First aid kit
    • Fire extinguisher (up to date!)
    • Extra fuses and bulbs
    • Emergency contact info in an easy-to-find spot


    Comfort Boosters

    • Cozy bedding, blackout shades, and good pillows
    • Battery-powered fans or portable heater depending on weather
    • Outdoor rug and camp chairs
    • Headlamps, lanterns, and flashlights
    • Travel-friendly entertainment (books, games, downloaded shows)

    Pro tip: If you travel with pets like we do, remember to pack their essentials too. Wilson (our mellow Cairn terrier) and Journey (our high-energy staffy mix) each have their own checklist — food, leashes, meds, and favorite toys. Because you don’t want to be the human who forgot the chew bone.


    Departure Checklist: Before You Break Camp

    The departure checklist is crucial and often overlooked — especially when you’re ready to get going and skip the whole pack-up process. Your already out on the road or off-grid. Surely, you can now kick checklists to the curb. Wrong. You need a campsite checklist to consult any time you depart. (But trust us, this is the moment when something always tries to go sideways.)


    The Ready-to-Roll List

    • Retract slides and awnings
    • Disconnect utilities (water, electric, sewer)
    • Secure all cabinets and doors
    • Close roof vents and windows
    • Lock external compartments
    • Store outdoor gear and trash
    • Check tire pressure one more time


    Bonus: Your RV Travel Day Checklist

    Even once you’re rolling, having a travel-day checklist helps things go smoothly.


    Don’t Forget

    • Maps and/or GPS app is set up (and offline backups downloaded)
    • Know your route (and low clearance warnings!)
    • Snacks and water within reach
    • Entertainment for passengers
    • Fuel level and next planned gas stop

    And yes, bathroom breaks. Map them out. Not every gas station has an RV-friendly setup — or a working bathroom. Plan accordingly.


    Make It Personal: Customize for Your RV Life

    Every RVer’s checklist is a little different — and that’s how it should be. Your rig type, travel style, pets, kids, and destination all affect what you’ll need.

    Here are a few custom additions you might consider:

    • For boondockers: solar panel setup, portable power station, gray tank monitoring
    • For full-timers: mail forwarding setup, mobile internet gear, spare parts
    • For cold-weather campers: heated hoses, window insulation, space heaters

    Over time, your checklist becomes like a pretrip ritual. You can even laminate it and keep it by the door — or go digital with checklist apps or RV-specific tools. If you go through the checklist in the same order enough times, the process becomes second nature and the stress levels lower.


    Preserving Peace of Mind

    RV life is full of incredible moments — sunsets at the coast, spontaneous roadside attractions, cozy evenings around a fire. But those moments are a lot easier to enjoy when you’re not scrambling to fix something you forgot.

    A road trip checklist might not sound glamorous, but it’s one of the most powerful tools you can have in your RV toolkit. It helps you stay ready, feel confident, and (hopefully) avoid that awkward moment when you roll into a campsite only to realize you forgot something.

    So, whether you’re a full-timer, a weekend warrior, or just hitting the road for the first time—make the checklist. Use it. Love it. Because nothing says “I’m ready for adventure” like knowing your sewer hose is exactly where it should be.

  • A New RV Customer Service Standard: Inside Grech RV

    A New RV Customer Service Standard: Inside Grech RV

    If you’re looking for a Class B and want something exceptional, Grech RV is going to be a hard company to ignore. Coming out of the limousine and luxury bus building business, Grech returned to RVs when COVID almost completely eliminated demand for buses and limos. But they didn’t just step into the RV industry gingerly. They went in feet first and really set themselves apart. In fact, their approach to RV customer service could be revolutionary. (At least, we hope so.)

    Refreshingly, the way Grech RV supports their owners is completely counter to how RV companies normally do it. In an industry in need of a higher customer service standard, Grech RV is clearly doing pioneer work.

    Let’s take a close look at what that new RV customer service standard looks like. 


    How Grech RV’s Origins Led to a New Approach to RV Customer Service

    Before we talk about the new standard for RV customer service that Grech RV is leading, let’s talk about the standard is in the RV industry right now. Basically, what’s typical. Most RV companies handle warranty claims through dealerships. From the start, owners are expected to exhaust that channel (the dealership) before considering calling the manufacturer. This process has proven less popular with some RV customers. (Especially those whose local RV dealerships may be unenthused about helping them with the repairs once the RV has left their property.)

    That kind of customer service was completely foreign to Grech’s origins in the luxury people mover business. In that business, professional contractors whose vehicle was inseparable from their business demanded quality and responsive service. That kind of service is in the Grech DNA. And when they made their move into the RV industry, they took that same ethic and applied to RV customer service.


    Making RV Customer Service More Personal and Responsive 

    In an incredible contrast with the industry, Grech RV encourages owners to contact them first — and even provides Grech RV customers with an advocate that can help them with any repairs or questions. Remarkably, company provides its owners with a specific telephone number and assigns a team member to the owner. So, you create a personal relationship with the company. 

    What Grech RV has found is that the vast majority of the issues can be simply resolved with a phone call. In fact, most are not a technical issues at all, just an owner that needs a little help. Which is totally normal for new owners of any RV. By talking with owners over the phone, Grech RV saves them time and money — especially with regards to unnecessary services. For those cases where there actually is an issue, Grech RV will even assign an approved technician to repair the issue. 

    On the other side of the coin, there are so many stories where RV owners can often spend months waiting for approval of repairs or awaiting spare parts. It’s not unusual that someone discovers an issue with the RV at the start of camping season and then have that RV awaiting repairs during the entire camping season. 

    Grech RV offers a welcome contrast. It’s no wonder that the company has extremely enthusiastic owners.


    Investing in Class B Build Quality

    Grech RV is a private company with founder Ed Grech at the helm. In my personal experience, I’ve found that these smaller, private companies often have a greater respect for their own names and, thus, produce a better product. I recently got to watch David Reagan, the director of R&D at Grech RV, give a tour of the operation at the company. 

    The materials used in the vans they build are really top notch. Many of the pieces that are installed on the exterior of their vans utilize stainless steel components rather than plastic or less expensive materials. This means that rust won’t be an issue over time. Stainless steel is a much more expensive material than traditional steel but has the advantage of being rust resistant. 

    While the company minimizes any cuts that have to be made to the exterior of the van (more on this in a minute), where holes are necessary they use a pattern system. That keeps each hole exactly where it should be so that it matches up with any interior component, many of which are cut by computer-controlled cutting machines. The upholstery and interiors of Grech RV products are  cut using this precision process. So, everything is precise and matches as it should. 


    What the Wiring Says About the Build

    Another process that has sets the company apart is the wiring. Most automotive manufacturers wire their vehicles in very specific ways according to a specific process. If you look at your personal vehicle (talking cars and trucks here), a red wire on your own vehicle does the same thing as a red wire on any vehicle on the lot. 

    RVs are typically different. Line workers pull wire from a spool and string it according to need. A white wire with a blue stripe on your RV might serve a completely different function on your RV than it does on the one built right after yours. 

    Buy wiring things intentionally results in far fewer issues. When diagnosing an issue, things are much simpler. In fact, Grech RV provides owners with wiring diagrams of their rigs and has them available on their website. 

    As someone who managed an RV dealer warranty department, one of the ways I would get a laugh out of an RV company was to ask for a wiring diagram. (I’m quite serious.) In many cases, they just don’t exist. So, when you do have an issue, you’re paying a technician their hourly rate just to first figure out the wiring on your RV and then diagnose the issue. The way Grech RV does it is smarter. Plain and simple.


    Cutting and Bolting Like Craftsmen

    Regarding those holes in the exterior of the rig, if you look at many even premium Class B RVs, you’ll see multiple holes cut for water and power. On a Grech RV model — like the Strada-ion Lounge — there is a single hole behind a door. That means that, when you’re not hookup to services, there no visible sign that you have these connections. 

    The company also reinforces any seating surface with steel and conducts industry-standard testing on any seat belts installed in the van. 

    Something else I saw in the production process was that there are bolts secured inside the van for things like solar panels and other items on the roof. So, rather than simply using sheet metal screws, Grech RV bolts these items purposely. 

    And once all these bolts and provisions for things like air conditioners have been cut into the rig, Grech RV pulls the van into a wet bay. There, water is sprayed onto the rig for three hours. During that time, a team member looks for any hint of a leak inside the van. 

    On the subject of water, Grech was happy to state that their holding tanks are now 3D-printed. The company explained that this process results in a more consistent tank with more consistency wall thicknesses. It also allows them to create the shapes that they need. The tanks are, of course, also heated and all the plumbing to and from the tank is insulated. 

    A Promising Trend in RV Customer Service

    The whole process that Grech RV uses to build their RVs shows a very strong attention to detail and quality. And it’s smart. After all, the better quality the build, the less customer service a model will likely need. Even so, the fact that they take ownership of the customer service process is miles ahead of where many RV companies are. And it stands out in a big way.

    As an aside, I have some friends who work in another young RV company. And I honestly think that the products they make are pretty good. However, the company seems to have made some poor choices when it comes to dealerships. And, since their customer service goes through the dealership … you guessed it. The drum beat on the internet is not very positive. (At all.) Sure, there are some standout stories, but there’s even more complaints about lack of availability of service. In my opinion, it’s truly damaging the brand.

    Grech RV is the polar opposite.

    Grech RV has taken a really good product and made it even better with the way they handle their RV customer service issues. No RV is perfect. And no company is perfect, but how that company takes ownership of the situations that do arise can make all the difference in the world. 

  • Most-Forgotten RV Maintenance Items

    Most-Forgotten RV Maintenance Items

    Most RV owners know that maintaining your RV is essential for ensuring safe, comfortable, and fun travel. But let’s be honest — not all RV owners do it. (And all too often experience the consequences.) Most RV owners are familiar with the basics. They’ll check tire pressure, inspect the battery, and ensure the brakes are functioning. (All good there.) But there are several often-overlooked aspects of RV maintenance. These forgotten items can lead to significant issues down the road if not addressed properly.

    Working from the outside to the inside (not order of importance), this article will explore some of the most forgotten items in RV maintenance, why they’re essential, and tips on how to keep your RV in top shape.


    No. 1: Exterior Wash and Wax

    Sure, this may seem like extra work (and a small item on your very long checklist), but it’s kind of sad that many RV owners never take the time to give their rig a proper wash and wax. And the fact is, it’s not really just about looks. Failure to at least doing this at least a few times a year, will cause your exterior to break down over time. This will lead to paint damage paint and rust.

    Furthermore, a clean and waxed RV not only has a better appearance (although it definitely does that). It also helps it retain value over time. While cleaning your RV, you should inspect the areas where dirt gathers. Some usual suspects are around your wheel wells, under the awnings, around the RV slides and seals, and around entry points on your roof such as vents and skylights.


    No. 2: Chassis Maintenance

    The RV chassis is the backbone of the vehicle and requires regular maintenance to ensure safe operation. This includes checking the suspension system, steering components, and alignment.

    Despite it’s importance, many RV owners forget about chassis maintenance. And it’s kind of easy to understand why. The living areas of the RV are simply more visible. But don’t let the unseen sneak up on you. Schedule a professional chassis inspection annually to ensure everything is functioning correctly. Also, keep an eye on the fluid levels for the transmission and differential.


    No. 3: Brake System Checks

    Frankly, brake systems are probably the least checked and most neglected part of the RV. That despite this system being one of the most important safety features of an RV. Brake pads and shoes, and rotors and drums can wear down over time leading to reduced braking performance. Depending on the type of braking system you have, there are multiple components from the pedal to the linkages … to the air reservoirs … to the hydraulic master cylinder and wheel cylinders, et cetera. All of these items should be inspected at least visually before any trip. A more detailed inspection can be done whenever you have your tires rotated.

    Additionally, brake fluid should be checked and replaced as needed. One reason is that hydraulic systems seem to take on condensation. (One indicator is that it will cause a soft or spongy brake pedal.) You should have your entire brake system inspected by your local RV shop at least yearly (and more frequently if you travel more often and also frequent hilly areas).


    No. 4: Tire Maintenance

    While it’s a pretty common practice to check tire pressure, RV owners tend to often overlook other areas of tire maintenance. This includes checking the tire tread depth, inspecting for any signs of wear, bulges and cuts and ensuring the tires are rotated on a regular basis.

    Underinflated or overinflated tires can lead to poor fuel efficiency, uneven tire wear, and unsafe driving conditions. Additionally, remember to inspect the spare tire regularly, as it can often be forgotten — and ensure that your rig is properly equipped for RV tire maintenance and repair.


    No. 5: Elastomeric Sealing and Caulking

    The roof, windows, and doors of an RV are highly susceptible to leaks, which can lead to extensive water damage and mold growth. Many RV owners forget to regularly inspect and maintain the seals and caulking around these areas. (Heading into the winter season is always a good time to check your seals.)

    It’s essential to check for cracks, peeling, or deterioration of the sealing material. Inspect the seals and roof at least twice a year, especially before the travel season. If you find any issues, clean the area thoroughly before applying new caulk or sealant.


    No. 6: Propane System Inspection

    The propane system is essential for running appliances. (Think of  ranges and stoves, three-way refrigerators, and heaters.) However, many RV owners forget to inspect the propane system regularly for leaks and proper functioning. A leak can be dangerous and lead to costly repairs.

    Use a soap solution to check for leaks by applying it to the connections and looking for bubbles. When making checks on this system, you want to focus on the connections at the tanks, the connections at the appliances, and the actual lines themselves. You may have flexible and or hard lines. Also, ensure that the propane tanks are secure and certified on a regular basis.


    No. 7: Water and Water Tank System

    One of the most crucial yet often neglected aspects of RV maintenance is the RV water system. Many RV owners forget to sanitize their freshwater tanks and lines regularly. Contaminated water can lead to health issues and can even damage the plumbing system.

    It’s recommended to sanitize the water system at least once a year, especially if the RV has been unused for an extended period. Use a mixture of bleach and water (1/4 cup of unscented household bleach for every 15 gallons of water) to clean the system. After sanitizing, run the water until you can smell the bleach. Let it sit for a few hours. Then flush with fresh water, running the water until you can no longer smell bleach or detect any other product in your system except H2O.

    Flushing of the gray and black water tanks is also important to the health of your water system in your RV. Make sure to also fill your gray and black water tanks up at least ¾ of the way to flush them out every season.


    No. 8: HVAC System Maintenance

    The heating, ventilation, and air conditioning (HVAC) system in an RV is often taken for granted. (Until it stops working — as soon as you need it.) Checking and replacing the air filters should be done on a regular basis. You should check and replace air filters regularly. Not doing this will will negatively affect your RV, just like it would in a house. It can lead to reduced efficiency and air quality issues.

    Inspect the HVAC system at the beginning of each travel season and replace filters as needed. Additionally, clean the exterior unit to remove dust and debris that can hinder performance.


    No. 9: Battery Care

    Another commonly neglected area is your battery banks and associated cables and switches. RV batteries require regular maintenance to ensure they provide the appropriate amount of charge to start your RV. (That in addition to charging other necessary batteries to run all the accessories in your RV that run on a 12-volt or 24-volt system.)

    This includes checking fluid levels, cleaning build up on the terminals, making sure batteries are charging as they should, checking all the cables, switches and busbars. Many RV owners forget about their batteries, as well as the other components of the electrical system (more on that in a second). It’s particularly common when the RV is not in use, which can lead to dead batteries when they are finally ready to hit the road.

    Check the battery fluid levels monthly. Clean the terminals with a mixture of baking soda and water if you notice corrosion. It is also recommended that you use a battery tender to trickle charge your batteries so that you will not be surprised where’s the dead battery when you’re ready to go on your trip.


    No. 10: Electrical System Evaluation

    We’ll admit it: Your RVs electrical system can be a very complex system. Many owners totally forget to perform regular checks. (And others pretend to forget.) These checks include simple inspecting of exposed wiring harnesses, testing your ground on your 120-volt AC system, and testing out all appliances and outlets and lights to ensure functionality.

    RVs typically have either at 12-volt and or 24-volt DC system which is charged by your alternator on your vehicle, solar panels on the roof, or through your on-board generator (if you have one). Make sure to note any lights that may flicker or are in operable, any appliances that do not work properly or intermittently. If you encounter any issues, start with your fuse block and more breaker box to ensure they are properly seated and not trip or blown. Any major issues with either the DC or the AC system should be referred to your local RV shop.


    Perfecting Your RV Maintenance Checklist

    RV maintenance is a task that requires attention to detail. While it’s easy to remember the more prominent aspects of maintenance, it’s often the forgotten items that can lead to significant issues down the road. By staying vigilant and proactive about these commonly overlooked areas, RV owners can ensure their vehicles remain safe, comfortable, and ready for adventure. Regular maintenance not only prolongs the life of the RV but also enhances the overall travel experience, allowing for countless memorable journeys. You know, the stuff we like.

  • Top RV Warranty Companies in the Business

    Top RV Warranty Companies in the Business

    It’s natural for anyone shopping RVs to ask: Who are the top RV warranty companies in the industry? Up front, a warranty represents a brand’s willingness to both stand behind their work and serve their customer. But, as with so many wonderful things in the RV world, it’s complicated. (Because RVs usually have multiple warranties.)

    But just because listing an RV’s many warranties may be exhausting, that doesn’t mean it should be difficult to get a short list of RV brands whose warranty coverage is above average. (Not with the internet and everything, right?)

    So, let’s get you started — first with a little warranty brush up, and then a short list of the top RV warranty companies in the business.


    So, What Does an RV Warranty Cover? (Asking for a Friend)

    When looking at the warranty coverage on any RV, there are a few things to look for in the coverage itself. Technically, RVs are recreational vehicles with many RV manufacturers assuming that you’ll only use them occasionally. So, if you’re a full-time RVer, you should check to make sure that the coverage includes using the RV full-time. Many motorhomes’ coverage and the coverage on some fifth wheels does allow for full-time use. (So ask.) Coverage in many RVs only includes the occasional use that typifies RVing. 

    Very few RV warranties will include use of a mobile tech. (You know, as opposed to taking it back to the selling dealership.) If you’re shopping far from home to get a better price, consider how that might affect warranty coverage. Some RV warranties are only valid at the selling dealership. (So, if you travel for the purchase, you’ll also have to travel for a claim.)

    This is especially important if your RV is being transported to a permanent site. It can be very disappointing to have an RV that is in a permanent spot only to discover that it has to be hauled back to the selling dealership. 

    Another thing to be aware of is that RV dealers are not franchise dealers. So the RV companies cannot dictate that they have to handle your warranty claim if you didn’t buy it at that dealership. While some dealerships and even some independent shops will gladly perform warranty service your rig, you need to be aware that that’s not universally true. 


    Hidden Warranties

    Did you know that even if your RV’s warranty coverage is shorter, some of the components in your RV may have longer coverage? For example, many appliances in the RV including the air conditioner have a two-year warranty on them. 

    When you first get your RV, if it’s not in the manual, write down all the manufacturers and serial numbers of the various components in the RV. Things like air conditioners, water heaters, stoves, refrigerators, and other items that would have a serial number. This also applies to things like axles on towable RVs

    If you do have an issue with one of these components, and it’s outside the RV builder’s warranty period, you may still be covered. 


    Other Warranties

    If you bought a motorized RV, often times the chassis and running gear on that RV are covered by a separate warranty from the portions built by the RV manufacturer. 

    For example, Mercedes-Benz, who manufactures the Sprinter platform, has a five year/75,000 mile warranty on their chassis with the diesel engine being covered for five years or 100,000 miles. If Ford made the chassis, it’s covered for five years or 60,000 miles. Be aware of all those “hidden” warranties on your RV. 

    Also, know that many RV companies are now providing lifetime warranties on roofing. It is a legitimate claim, but what is not covered are all the seals. Generally most RV warranties exclude the sealant used on roofs and walls and brake pads as well. These items are considered to be maintenance items of consumable products rather than structural items, per se. 


    OK! So Who Are the Top RV Warranty Companies?

    No. 1: Pleasure Way

    Without a doubt, the best warranty that we know of comes from Canadian motorhome manufacturer Pleasure Way. Pleasure Way warrants all the components that they’ve placed on the rig for five years or 60,000 miles. This is exceptional.

    Further, Pleasure Way also warrants their installed lithium battery systems for the same five years or 60,000 miles. 

    But this warranty is also for recreational use of the RV. And, like most motorhome makers, the chassis of the RV is warranted by the manufacturer of the chassis and serviced by them. Pleasure Way takes responsibility for the RV portion of the rig. (Be advised though: The warranty is not transferrable. 


    No. 2: Airstream

    As you might expect, one of the top RV warranty companies in the business is Airstream. This iconic brand stands behind their RVs in multiple ways. And the warranty term is three years. Even better, it’s transferrable should you choose to move on from your Airstream. 

    Another nice thing about Airstream’s coverage is that it includes three years of Coachnet roadside assistance. 


    What About Brands with Two-Year Warranties?

    While most RV builders have a one-year warranty some of them do offer a bit longer warranty with two year being a pretty standard benchmark. Here are some RVs that have these longer warranty periods.


    Newell Coach

    If you’re shopping for a Newell Coach, you are a member of a small but elite family of RV owners. Newell Coaches can come in well over $2 million. (Plus, they are generally customized for and by the owner.)

    So, t’s no surprise their warranty is a bit better at two years or 24,000 miles. But the interesting thing is that, if you buy a used Newell from the company, it’s also covered for two years. (You read that correctly!) Newell tends to get a lot of repeat buyers and some of the Newell models can be sold multiple times through the company. 

    Another interesting thing. I have heard multiple times of Newell factory team members traveling to Newell when something isn’t right. The company also offers a 24/7 concierge-type service


    Entegra Coach

    Entegra, a premium RV member of the THOR Industries family, offers two year or 24,000 mile warranties on their coaches as well. To that, they also add a five year structural warranty on their diesel pushers and three years on Entegra’s other offerings. (That includes Odyssey, Esteem, Qwest, Vision, Vision XL, Emblem, Accolade, Reatta, and Reatta XL). 


    Ember RV

    Relative newcomer Ember RV has a good warranty system that is two years overall on their travel trailers. But, notably, it also includes a three year structural warranty. Something unusual about Ember’s warranty is that it also allows for a one-time transfer to a new owner should you choose to trade your Ember. 


    Jayco

    Jayco offers a two-year general warranty on their RVs but with a three-year structural warranty. 


    Oliver and Escape

    Canadian RV companies Oliver and Escape both make the fiberglass-egg-style trailers. And both offer two-year comprehensive warranties as well. 

    Oliver’s warranty goes on to cover their products for five years for structural. Escape’s statement is that you get lifetime support from the company. Both brands have a very loyal following. 


    What About Honorable Mentions?

    Keystone RV

    When I was selling RVs, we sold Keystone products. Around that time, the company upped their structural warranty to three years and had a sticker on their RVs that announced that fact. That warranty was a strong selling point at our dealership. 


    Grand Design

    Recently, Grand Design has found itself in the news quite a bit with claims of structural issues with the frames of some of their trailers and other challenges. While the company was slow to respond to the claims publicly, they ultimately did and upped their warranty coverage. 

    The unusual thing about Grand Design’s warranty is that it’s transferable to the next owner within the warranty period. 

    Grand Design’s base warranty is still only one year, but they upped their structural warranty to three years and five years on the frames of their towable RVs. Interestingly when the company made this announcement, they also made it retroactive to existing owners. 


    Anything Else I Should Know About RV Warranties?

    Whether it’s for your vehicle or your RV, it’s never a bad idea to keep track of any maintenance or repairs you do along the way. I know of a few cases where there were claims for leaks in the exterior of RVs that were denied by the manufacturer who claimed that the owner didn’t do routine inspections of the seals. 

    So, part of doing any routine maintenance might include taking photos along the way. Having this documentation could go a long way to getting your RV warranty claim covered. 

    Also, know that the caliber of the dealership or repair facility you choose to take your RV to for repairs makes a big difference. I was the warranty administrator at the dealership I worked at, and how I filed those claims often influenced how they were addressed by the RV manufacturer.

    RV companies tend to be fairly forthcoming with handling of warranty claims that are filed by the dealership properly. Some of these warranties are pretty great, so we hope this article helps in your decision making on your next new RV. 

  • How an RV Warranty Works: An Owner’s Guide

    How an RV Warranty Works: An Owner’s Guide

    Look, we all know that there are warranties, and there are warranties. And we’ve neatly decided not to waste the time reading the fine print on our $50 printer’s warranty. But when it comes to big-ticket, high-stakes purchases? Of, baby! It pays to to pay attention. Now, no matter how much you’re spending on your RV, it not only classifies as a big purchase — it’s also full of features and amenities that are gonna get some heavy use. So, before you buy, it’s crucial to know how your RV warranty works. (Or, more correctly, how its warranties work. Don’t worry: We’ll explain.)

    Lucky for you, I was formerly a  warranty administrator at an RV dealership, and I have a few insights that I’d like to share about the value of an RV warranty and what you might consider if you’re RV shopping.


    A Little RV Warranty 101: Think Warranties

    Essentially, an RV warranty is a promise by the RV manufacturer to make good on any defects in the manufacturing process. Almost every RV manufacturer handles warranty claims the same way: While the warranty is the manufacturer’s, customer interaction is almost always the responsibility of the dealer. So, if you find that you have an issue with your RV, your dealership is an automatic first stop. 

    Now, one good thing about an RV warranty is that it’s very likely not a warranty. It’s a collection of warranties. So, when you see a shiny new RV with an X-year warranty sticker on it, that may not be the entire thing. RVs are built of components sourced from a number of manufacturers. I’m something of an RV expert, but I don’t know of any RV company that builds their own furnace, stove, refrigerator, air conditioner or many other major systems. (In fact, many RV companies don’t build the frames or axle/suspension systems either.)

    So, even if the RV you’re looking at carries a one-year manufacturer’s warranty on the RV itself, some components could have warranties that are covered long after the general warranty expires. 


    Some Subsystem RV Warranty Examples

    For example, Dexter’s torsion axles carry a 10-year warranty. The Alpha Ply rubber roofing on some RVs actually has a lifetime warranty. Many RV appliances including furnaces, air conditioners, and more have two-year warranties. 

    Often an RV builder will include individual paperwork for the variety of subsystems in the RV. The warranty that covers those systems will be stated in the paperwork. Sometimes the RV builder will also include listings of the various serial numbers of the components in the RV. They’re usually located in a place where they’re easy to find. (You know, like in the manual.)

    I recently bought a 2025 Rockwood Mini Lite and was really taken aback by the manual in this trailer that was put together in a binder with the specific model and serial numbers of all the various components in the RV. This is highly unusual and was a very welcome surprise. 

    The manuals likely also detail how to go about filing a RV warranty claim.


    How RV Warranty Claims Work

    Whether it’s for the RV in general or a system in the RV, all RV warranty claims essentially work the same way. Once you realize that you have a warranty claim, you can deal with the selling dealership — or, in some cases, with the component manufacturer or even the RV manufacturer. But know this: RV manufacturers generally expect warranty claims to come from dealerships. (And not all manufacturers are even set-up to handle warranty claims from individuals.)

    What’s going to happen is that a lot of photos of the issue will get taken and then filed with the RV’s manufacturer. From personal experience, I’ve found that no matter how many photos I took, the claims initially got denied for more photos. So, we take more photos and refile the warranty claim. The photos will also accompany a written description of the issue. I have had some RV companies that had really excellent web-based warranty claim systems. Others actually required that we fax in the claim. (Seemed ridiculous at the time — and more so today.)

    From there, the claim gets approved and almost all RV companies have a set rate for how long — in minutes — they expect the repair to take, which is included in the repair process. 

    One example that really sticks out in my mind was for an electric fireplace, which had failed. The RV company allocated 10 minutes to replace a fireplace. Plus, we got a replacement fireplace shipped to us. At the dealership, that almost covered putting the new fireplace in.


    How Dealerships Handle an RV Warranty 

    In the same fireplace claim that I just described, we spent probably 40 minutes figuring out what was wrong. Some 30-amp RVs have a switch that shuts off the electric fireplace if you turn on the microwave. So, our tech had to figure out if this was the problem — or if it was actually the fireplace itself. Then he had to remove the old fireplace and test it on his test bench. While he was doing all this, we took photos of the process to document what was wrong. Then we took photos of the serial and model number of the fireplace. 

    Now, you have two employees spending time diagnosing this, but our dealership only got paid 10 minutes time to affect the repair. That meant that the dealership had to pay one person, our tech, 40 minutes in time. And then they had to pay me (an employee of the dealership, not the owner) to document the process, file the claim, and then order the new fireplace. But we were only getting reimbursed our shop rate for 10 minutes. 

    As you can see, RV warranty work is generally a money-losing proposition for a dealership. 


    Why It’s Best to Return to the Dealership of Purchase

    So, if you shopped the dealership and then went to the next town over and bought the RV for less money, you can see why the local dealership has no interest in providing warranty service for you. Since RV dealerships aren’t franchised (like car dealerships are), they are also not compelled to provide warranty service to you if you didn’t buy the RV there. 

    Yes, it stinks but that’s the state of RV repair today. 

    This is one of the many reasons I highly recommend shopping your RV dealership first before you make a final buying decision. The caliber of their service department and the ability to complete warranty work is a big factor in your claim. 


    How to Take and Submit Pictures

    I had mentioned that the process of filing an RV warranty claim generally involves a lot of photos submitted to the RV manufacturer. That’s true. Basically, you’re going to want to be besties with your camera — for a lot of reasons. 

    First of all, if the various stickers on your RV’s systems are still in decent shape, you’ll want to take a photo of them. This will give you serial numbers and model numbers for the various parts. I usually snap a photo of things like axles and other items whose stickers can be damaged over time by use. 

    But if you do have an RV warranty claim, some dealers will take your photos and submit the claim on your behalf. This could save them time and also mean you don’t have to bring the RV in for service. (Not all dealers work this way, but remember the statement about shopping your RV dealership first.)


    What an RV Warranty Is Worth

    With a solid dealership ally on your side and reasonable claims, RV companies absolutely honor the warranties. Honestly, as long as I filed the claim properly, I don’t remember ever having a claim denied that was a legitimate claim. 

    In fact, there were times where I filed a claim after the warranty period, and the manufacturer still stood behind the system. This is not expected. (And also not typical.) But some RV manufactures might stretch the rules just a tiny bit depending on the circumstances. Naturally, this also depends on the RV manufacturer. Fortunatelym the dealership I worked at tended to favor brands that serviced our dealership well so we could, in turn, serve the customer well. 

    So, is the warranty on your RV legitimate? Rest easy. I have yet to see a circumstance where it isn’t. 


    When Your RV Warranty Clock Starts

    Know that the coverage of your warranty starts when the paperwork on the sale goes through. So if you’re planning on purchasing an RV, for example during the off-season, and then not using it until the weather is more cooperative, your warranty clock is still ticking. 

    I suggest taking the RV from the dealership right to a campground or a place where you can test as many systems as possible. Perhaps winter’s bite might keep you from using the water system but furnaces, the fridge, and many other systems work year-round.