Category: RV 101

  • Hold On! Do RV Brands Under the Same Company Compete?

    Hold On! Do RV Brands Under the Same Company Compete?

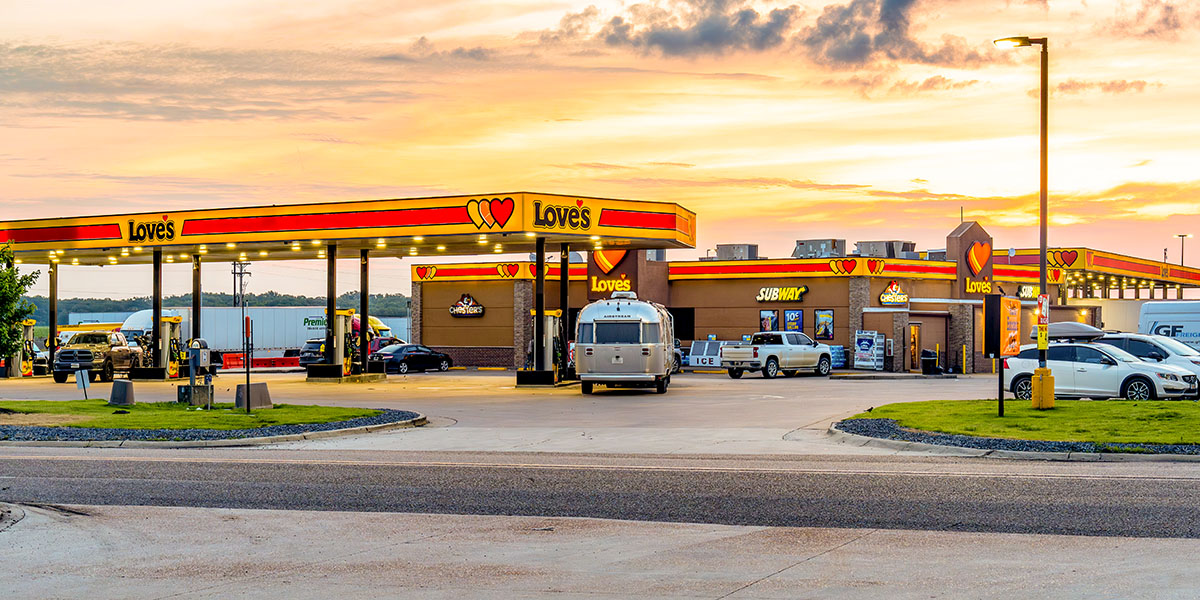
    If you’re here, chances are you’ve shopped for an RV — whether that’s online on or at a dealership. And, in your research journey, you’ve probably noticed a lot of similarities in rigs. Then, if you do some further digging, you may realize something odd: multiple RV brands fall under the same corporate umbrella often offer nearly the same floorplans, features, and layouts. In fact, if you’re not paying attention, you might think you’re looking at the same rig with a different name badge. (I know my wife and I felt this way at first.) This begs the question: Do these RV brands with the same parent company actually compete against each other? Or is it all just one big, coordinated effort?

    It’s a fair (and smart) question. However, the answer about whether these RV brands compete is a little more layered than you might expect. Let’s break it down.


    The Structure of Big RV Brands

    First, a quick look at how the industry is built. Most RVs on the market today fall under just a handful of major parent companies. The biggest players? In alphabetical order, they are Forest River, REV Group, THOR Industries, and Winnebago.

    These aren’t manufacturers themselves—they’re parent corporations that own dozens of individual RV brands. Here are two (limited) examples:

    • THOR Industries owns Airstream, Keystone RV, Jayco, Entegra Coach, Dutchmen, Tiffin Motorhomes, and many others.
    • Forest River Inc. (owned by Berkshire Hathaway) owns brands like Coachmen RV, Palomino, East to West RV, Shasta RV, Rockwood, Salem, and Cedar Creek.

    Each of those individual brands operates semi-independently, with its own product development, marketing, and dealer relationships. But they share resources, supply chains, and sometimes even floorplans.


    So … Do These Sister RV Brands Compete?

    Yes, they absolutely do. And in many cases, it’s by design.

    Think of it like this: Just because Ford owns both Ford and Lincoln doesn’t mean those two brands don’t try to win over the same buyer in different ways. It’s the same with RVs. These brands may operate under the same roof, but they’re built to:

    • Appeal to slightly different types of buyers;
    • Be sold through different dealerships;
    • Hit different price points; and
    • Offer slightly different features, packages, or styling.

    From a business perspective, it’s smart. By creating internal competition, the parent company gets to cover more ground in the market and collect sales across multiple dealership networks without cannibalizing one single brand.

    So yes, when you see a Keystone RV Cougar and a Jayco Eagle going head-to-head on a dealer lot, you’re watching sister brands compete.


    Why Then Are Some Floorplans So Similar?

    You’re not imagining it. Brands under the same parent company often share floorplans, components, or even chassis.

    Common shared elements include:

    • Interior layouts (especially in mid-priced travel trailers and fifth wheels);
    • Components like fridges, stoves, AC units, and slide mechanisms;
    • Furniture suppliers;
    • Frames and chassis; and
    • Manufacturing facilities (some units are literally built in the same plant, side-by-side).

    This isn’t necessarily a bad thing. Sharing platforms can reduce costs, increase production speed, and improve serviceability. But it does mean that buyers need to look closely at build quality, material upgrades, warranty coverage, and after-sale support to distinguish between brands.


    What Actually Sets Them Apart?

    Here’s where things between RV brands under the same parent company can still differ meaningfully. (These are great points of comparison for savvy shoppers.)


    1. Dealer Experience

    Some brands are sold through different dealership chains. A Jayco may be sold by one dealership, while a Keystone is sold by another across town. You might love the unit — but your buying and service experience could vary dramatically based on the dealer, not just the RV itself.


    2. Warranty and Service Support

    Even if two rigs are nearly identical, one brand might offer a better warranty — or be known for stronger factory support. That can make a big difference when you’re a thousand miles from your home base and something breaks.


    3. Construction Method

    One brand might use Azdel in the sidewalls (a lightweight composite panel resistant to rot), while another uses wood. One might have aluminum framing, while another goes with steel or a wood/metal hybrid.


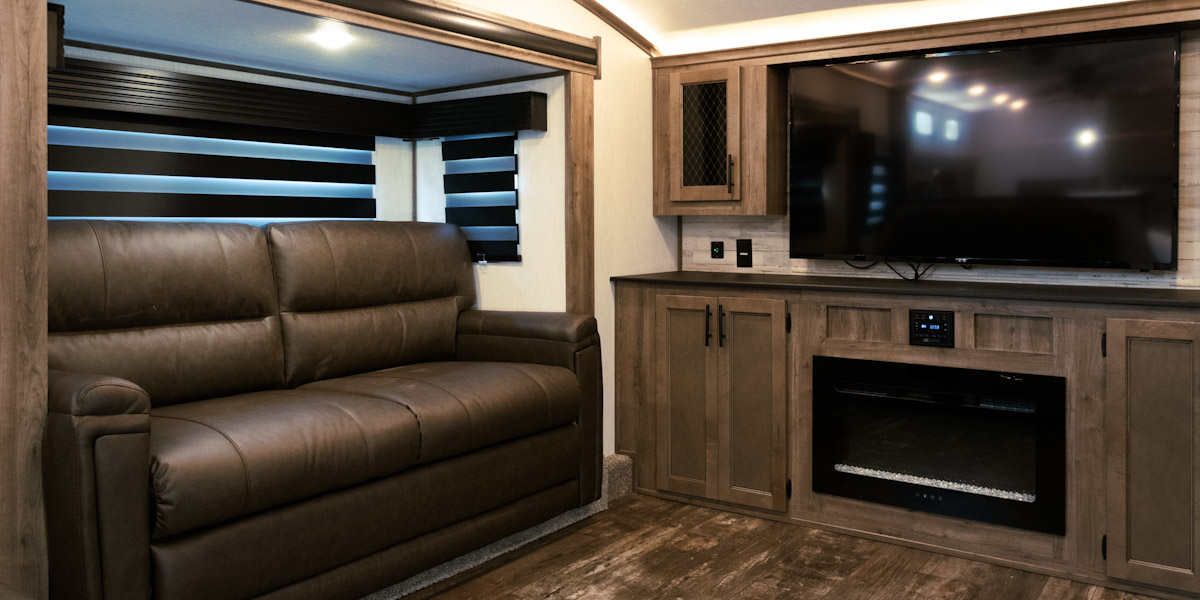
    4. Aesthetic and Finish

    Even when layouts are the same, cabinetry, wall materials, upholstery, and lighting can vary between brands. Some prioritize modern and minimalist interiors, while others may lean towards a traditional and cozy feel, and some may fall somewhere in between.


    5. Factory Location and Build Crew

    Even brands under the same umbrella can be built in different factories with different quality control standards. This sometimes leads to small variations in reliability or attention to detail — even between “twin” units.


    Is Brand Loyalty Still a Thing?

    Yes and no. (Again, it’s complicated.) Some RVers swear by certain brands — especially those that have served them well over many miles and years. But many others simply follow the layout, price, and features they need at the time of purchase.

    Because so many brands are owned by the same handful of corporations, traditional loyalty often gives way to comparing real-world differences: Which model actually fits your lifestyle, budget, and quality expectations?


    What About Independent Brands?

    A few RV manufacturers are still independently owned or operate under a niche model, but these brands don’t compete the same way as the big corporate umbrellas. They often offer more customization, stronger quality control, and unique designs. They also usually come at a higher price point.

    That said, this is a fluid landscape where independent manufacturers can be purchased by parent companies to be part of their overall brand and portfolio. When this happens, the parent company tends to keep a lot of the materials and operations as similar to when they were independent, but that isn’t always the case. There have also been independent brands that have become part of a mega corporation, only to be resold to a smaller group or even go independent again. 

    So if this matters to you, always do a little research about who ones the brand before purchasing.


    Overall, Does It Really Matter?

    By now, you can probably predict this answer: Yes and no.

    • Yes! Because understanding who owns what can help you see through the marketing noise and focus on what matters to you, like build quality, after-sale support, layout, how the rig fits your lifestyle, etc.
    • No! Because even sister brands can vary enough in construction or experience to feel totally different once you live in them. My wife and I have noticed this as well.

    So, next time you’re touring RVs and wonder why two rigs look eerily alike but have different names on the front cap — you’re not crazy. That’s by design.

    The sister RV brands might compete with each other, but either way, their parent company wins. And hopefully, you do too.


    [marketplace_inventory_widget header]

  • Calculating Your Fuel Cost for an RV Road Trip

    Calculating Your Fuel Cost for an RV Road Trip

    Planning a road trip? Whether you’re crossing the country in a diesel-pusher motorhome, towing a fifth wheel across state lines, or simply heading out for the weekend in a camper van, one thing is certain: Fuel will be one of your biggest travel expenses. And with gas and diesel prices fluctuating regularly, calculating your fuel cost for an RV road tip ahead of time can help you budget better — and avoid budgetary surprises mid-trip.

    So, before you hit the road, let’s break down how to estimate fuel costs accurately, what factors affect fuel economy, and how to plan efficiently.


    Why Fuel Cost Planning Matters

    Point blank, fuel is one of the top three recurring expenses for RV travelers. (The other two are camping fees and food.) While some travelers use rough ballpark estimates, taking a little time to run the numbers can make a big difference in how you plan your route, stops, and even your travel pace.

    This is especially true if:

    • You’re towing a heavy trailer or fifth wheel;
    • You drive a Class A or diesel pusher with lower miles per gallon (MPG);
    • You’re planning a long-distance trip with limited fuel stations; or
    • You’re on a tighter travel budget.

    The good news? Once you understand a few simple metrics, calculating fuel costs becomes quick and easy.


    The Formula to Estimate Fuel Costs

    Here’s the basic equation:

    (Total Trip Miles ÷ Miles Per Gallon) × Cost Per Gallon = Estimated Fuel Cost

    Now, let’s turn it into a real-world example from a trip my wife and I are about to take. We’re heading on a weeklong adventure through one of our absolute favorite regions — the Eastern Sierras. We’ll be hitting Mammoth Lakes, Yosemite, and Lake Tahoe, and we’re bringing one of our best friends along for the ride. That means a bit more human weight (very minimal extra weight … so they don’t kill me … lol), a few more miles, and a lot more fun.

    Here’s what I calculated:

    • Distance (with day trips): 1,200 miles round-trip
    • Rig: Diesel Class C towing a Jeep Grand Cherokee
    • Adjusted MPG (mountain terrain + towing): Roughly 9 MPG
    • Diesel cost in California: Approximately $5.25/gallon

    (1,200 ÷ 9) × 5.25 = ~$700

    Yep, it’s a little higher than average — but completely worth it for the experience, the scenery, and the memories. By accounting for terrain, weight, and how we’ll switch to the Jeep for local exploring, the estimate is much closer to what we’ll actually spend. I intentionally left the fuel cost a little higher on the average, so that I would feel comfortable knowing that estimate is likely on the higher end. (I prefer to be a little off and save than be a little off and go over budget.)


    Step-by-Step: Calculating Fuel Cost for a Trip

    1. Know your miles per gallon.

    This is the most important variable. Here’s a general range to give you a rough idea:

    • Class A gas motorhomes get around 6–10 MPG
    • Class A diesel motorhomes average 7–12 MPG
    • Class B vans can get 14–20+ MPG
    • Class C RVs typically get 9–13 MPG
    • Towing a fifth wheel or travel trailer usually yields 8–12 MPG, depending on your tow vehicle

    Not sure what your MPG is? Use your trip computer if equipped, or manually track miles and fuel during a test trip. You’ll quickly get a good average.


    2. Know the distance of your trip.

    I use Google Maps, but other options like RV Trip Wizard, or a similar route planning tool to calculate your total mileage, works. Be sure to factor in any detours, scenic byways, or side-trips.

    Pro Tip: Add 10–15 percent cushion for spontaneous detours or scenic stops. That’s what I did, and by leaving the price per gallon at the higher diesel cost instead of adjusting for lower gas prices in the Jeep, I know that I should be more than good on my budget.


    3. Use current fuel prices.

    Gas and diesel prices vary widely by region, and diesel is often more expensive — especially in places like California. A simple Google search for the specific region can work, but you can also use one of the following apps or sites to check real-time fuel costs along your route:

    • GasBuddy
    • Gas Guru
    • Pilot Flying J or Love’s apps
    • RV LIFE Trip Wizard (includes fuel cost estimator)


    Factors that Affect Fuel Economy

    Even if your rig averages 10 miles per gallon, that number can shift depending on conditions. Consider these variables:

    • Speed: Driving 70 mph vs. 60 mph can reduce fuel efficiency significantly — especially when towing.
    • Wind and Elevation: Strong headwinds or steep climbs = lower MPG.
    • Tire Pressure: Underinflated tires can reduce fuel economy and lead to blowouts.
    • Weight: The more gear or passengers you’re carrying, the harder your engine works.
    • Driving Style: Gentle acceleration and cruise control help improve efficiency.


    Gas vs. Diesel: What’s the Difference?

    There’s a common myth that diesel always saves you money. The truth is more nuanced. Here’s how they compare:

    • Fuel Cost: Gas is usually cheaper per gallon, while diesel can cost significantly more — especially on the West Coast.
    • Miles Per Gallon: Diesel rigs generally go farther on a gallon, averaging 8–12 MPG vs. 6–10 MPG in gas rigs.
    • Maintenance: Diesel engines tend to require more expensive service, but at longer intervals.
    • Power and Torque: Diesel engines have better low-end torque, which makes them ideal for towing and climbing hills.

    So, while diesel may seem like a better deal for long hauls, the higher price per gallon and maintenance costs often balance things out over time.


    Quick Tools to Help You Estimate Fuel Costs

    Instead of doing math manually every time, try one of these:

    • RV LIFE Fuel Cost Calculator: Integrated with trip planning
    • GasBuddy Trip Cost Estimator: Free and easy to use
    • Roadtrippers Plus: Great for mapping and cost planning in one tool
    • Fuelly (App): Tracks your actual MPG and cost data over time


    Budgeting Tips to Save on Fuel

    So, you’re done calculating fuel cost for your trip, but still want to stretch your fuel dollars a bit further? Try these tips.

    • Drive slower: Reducing your speed from 70 to 60 mph can boost MPG significantly.
    • Travel during off-peak hours: Avoid traffic and idle time.
    • Stay longer per stop: Fewer drive days = fewer fill-ups.
    • Use membership cards or apps: Memberships like Pilot Flying J’s RV Plus Card or Good Sam fuel discounts can save you per gallon, while apps like Upside can get you cash back at certain pumps.
    • Travel lighter: Ditch excess gear or empty your tanks before travel days if possible.


    Sample Fuel Budget by RV Type

    Here’s a rough idea of what it might cost to drive 1,000 miles at an average fuel cost of $4.00 per gallon:

    • A Class A gas motorhome averaging 7 MPG would cost around $571
    • A Class A diesel rig getting 10 MPG would cost about $400
    • A Class B van with 17 MPG would come in closer to $235
    • A truck towing a fifth wheel at 9 MPG would cost approximately $444
    • A truck towing a travel trailer and averaging 11 MPG would be about $364

    These are ballpark estimates, but they help you plan with realistic numbers when calculating the fuel cost for your trip.


    Don’t Let Fuel Costs Surprise You

    Calculating fuel costs isn’t about scaring yourself out of traveling—it’s about being informed so you can budget better and make the most of every gallon.

    Planning ahead gives you flexibility. Want to take a longer route with more scenic stops? Go for it. Prefer to boondock and save campground fees? That might help offset the fuel cost.

    Either way, knowing what to expect at the pump means fewer surprises—and more peace of mind while you enjoy the ride.

    And at the end of the day, every mile brings you somewhere new. So, grab your map, run your numbers, and get back to planning the fun stuff. 


  • So, How Long Do Fifth Wheels Last?

    So, How Long Do Fifth Wheels Last?

    When you’re investing in a fifth wheel, especially as a full-time home-on-wheels or as a serious travel companion, one of the first questions you’ll likely ask is: How long do fifth wheels actually last? It’s a fair — and important — question. After all, fifth wheels aren’t cheap. They’re big, heavy, and often packed with the comforts of home. But like any RV, their longevity depends on a mix of factors, from how they’re built to how they’re used and maintained over time.

    So, whether you’re shopping for your first fifth wheel, considering upgrading, or just wondering how much longer your current rig might serve you well, this guide to fifth wheel longevity breaks it all down.

    The Short Answer: 10 to 20 Years (or More)

    Most fifth wheels have an expected lifespan of 10 to 15 years, but with proper care and maintenance, it’s not unusual to see them last 20 years or longer. We’ve seen plenty of fifth wheels on the road still chugging along after over 20 years. (And we’ve also seen some that were only a few years old but falling apart due to neglect, improper use, or poor construction.)

    So, what really determines how long a fifth wheel will last? Let’s dig into the biggest factors.

    Biggest Factors Behind Fifth Wheel Longevity

    1. Build quality: Not all fifth wheels are created equal.

    Fifth wheels span a wide range of price points and build standards. Entry-level models might look great on the showroom floor, but they typically use cheaper material. So, they may not be built to withstand the wear and tear of full-time travel or rough terrain.

    Meanwhile, high-end or luxury fifth wheels are often built with heavier-duty components, residential-grade insulation, better roofing materials, and improved undercarriage support. These models are more likely to stand the test of time.

    Some of the key components that affect longevity include:

    • Roof material (TPO vs. fiberglass vs. EPDM rubber)
    • Subfloor construction (OSB vs. marine-grade plywood)
    • Frame design (aluminum vs. steel vs. wood)
    • Slide-out mechanisms (hydraulic vs. electric)
    • Window and seal quality (which affects long-term water resistance)

    Pro Tip: A high-end used fifth wheel in good condition can often outlast a brand-new budget model.

    2. Usage: How you use your fifth wheel matters — a lot.

    As you might imagine, a weekend warrior who uses their fifth wheel for a few short trips per year will see significantly less wear and tear than a full-time traveler covering thousands of miles per month. If you’re living in your RV year-round, parking in extreme climates, or regularly towing across rough roads and mountain passes, your rig will experience more stress — mechanical, structural, and cosmetic.

    Common issues that appear over time include:

    • Roof leaks and water damage
    • Delamination of fiberglass walls
    • Slide-out motor or seal failures
    • Suspension wear
    • Sagging floors or furniture breakdown
    • Cracked or fading decals and paint

    That’s not to say fifth wheels aren’t built for travel — they absolutely are — but how you use them will directly impact their lifespan.

    3. Maintenance: Upkeep is a make-or-break factor.

    Hands down, the single biggest thing you can do to extend the life of your fifth wheel is stay on top of maintenance. We’ve had fifth wheels in the past, and keeping up with maintenance — especially the roof and seals — was essential. Even small lapses can lead to long-term damage that shortens your RV’s usable life dramatically.

    Here’s what you should do regularly:

    • Inspect and reseal your roof, windows, and slides annually (or more often in harsher weather).
    • Clean and condition seals to prevent cracking and water intrusion.
    • Flush and sanitize your water system a few times a year.
    • Grease wheel bearings and check brakes regularly if you tow often.
    • Keep tires inflated properly and check for signs of dry rot or uneven wear.
    • Check the underbelly and storage bays for insulation, leaks, or pest issues.
    • Protect your rig from UV exposure with a cover or covered storage if it’ll sit for long periods.

    Just like with a sticks-and-bricks house, regular upkeep pays off in longevity and resale value.

    Can You Renovate an Older Fifth Wheel?

    Absolutely. In fact, we’ve seen some renovated RVs in the past and know how a solid rig with a dated interior can be transformed into something that feels brand new. If the frame, roof, and systems are in good shape, renovations can add new life and extend the usability of your fifth wheel for years to come.

    Here are some good upgrades to do just that:

    • Replacing flooring
    • Upgrading the furniture
    • Modernizing light fixtures and cabinetry
    • Replacing slide seals or awnings
    • Swapping out appliances

    Just be honest with yourself about whether or not a fifth wheel (and any RV for that matter) can be fixed with a facelift. Water damage, frame rot, or structural separation from repeated towing are expensive to repair and not always worth the investment.

    Signs a Fifth Wheel Might Be Nearing the End

    Every fifth wheel reaches a point where repairs cost more than it’s worth. Some signs that your rig might be on its last legs:

    • Extensive soft spots in the floor or roof
    • Cracks in the frame or weld points
    • Severe delamination or bubbling on the sidewalls
    • Constant electrical or plumbing issues
    • Mold, musty smells, or water stains that keep returning
    • Broken slide-outs that won’t align or seal properly

    If you’re constantly fixing problems just to stay road-worthy — or avoiding trips because you’re worried something will break — it might be time to move on to something newer.

    How to Make Yours Last Longer

    Want your fifth wheel to go the distance? Here’s a quick longevity checklist:

    • Stick to a regular maintenance schedule. Don’t skip seasonal upkeep.
    • Store it properly. This is especially important during off-seasons (covered or in climate-controlled storage).
    • Avoid overloading. Check your cargo weight and stay within axle/tow limits.
    • Use tire covers. Also remember to use UV protectant on seals, plastics, and decals.
    • Keep up with roof, slide, and seam inspections. Inspecting these spots regularly often tips you off before you have a major maintenance issue on your hands.
    • Tackle small issues before they become big ones. 

    And most importantly? Use it! Fifth wheels are built for adventure, not for sitting still in a driveway. Movement keeps seals lubricated, batteries charged, and systems functioning.

    So, How Long Will Yours Last?

    That depends. Our first fifth wheel was brand new when we bought it, but it sadly had some issues from the start. Things happen, and we were unlucky in that instance. That said, our second fifth wheel was a couple of years old when we bought it, but it was in amazing condition. We full-timed in it for a few years and many thousands of miles without any real issues that maintenance didn’t take care of.

    So, if you take care of it, tow wisely, store it well, and stay on top of maintenance, there’s no reason your fifth wheel can’t last around 15–20 years (or more). Some have even crossed the 25-year mark with a little love and a lot of care.

    And if you’re planning to live in yours full-time, like many do — we did for a few years before going #VanLife — just know that it can definitely serve you well if you treat it right.

    Whether you’re planning to stay put at seasonal campgrounds or cross the country multiple times, a fifth wheel can be one of the most livable and versatile RVs on the market. Just make sure it fits your lifestyle — and you’re willing to take care of it.

    [marketplace_inventory_widget header=”Featured Fifth Wheels”]

  • RV Registration: A Guide for Newbies

    RV Registration: A Guide for Newbies

    So, you bought your first RV, and you’re ready to hit the road! Not so fast. While buying your first RV is a milestone that comes with excitement, it also comes regulations and logistics. So, between dreaming up your first big trip and figuring out how everything works, don’t overlook the paperwork side of ownership — like RV registration. Because before you can cruise down the highway or settle into that perfect campsite, make no mistake: It is your personal responsibility to make sure your RV is properly registered.

    If this is your first RV — or your first time registering a vehicle outside of a traditional car or truck — don’t worry. RV registration isn’t as intimidating as it sounds, but there are a few key things to know upfront to avoid headaches down the line.

    Here’s your newbie-friendly guide to RV registration. Let’s tackle this by answering nine common questions.


    Question 1: What counts as an RV?

    First things first: when we say “RV,” we’re talking about a broad category that includes:

    If it’s designed for recreational use and has living or sleeping space, it likely falls under your state’s RV registration requirements.

    Pro Tip: Some smaller towables, like teardrop trailers or basic utility trailers converted for camping, may have different rules depending on weight or intended use. Always check your state’s DMV guidelines to be sure.


    Question 2: Why do I need to register my RV?

    Just like your daily driver, your RV needs to be legally registered with your state. Registration proves you own the vehicle (or are the legal user, in the case of financed rigs, like ours), and ensures it meets road safety and identification standards.

    Without proper registration:

    • You may not be able to get license plates or legally operate the RV on public roads;
    • You could face fines or penalties if pulled over or caught without proper documentation; and
    • You’ll likely have trouble getting insurance coverage.

    Simply put, registration isn’t optional, and it protects both you and your investment.


    Question 3: What documentation will I need to complete my registration?

    The specific requirements vary slightly by state, but generally, you’ll need:

    • Proof of ownership. This could be the title, manufacturer’s certificate of origin (for new RVs), or the bill of sale.
    • Valid ID. A state-issued driver’s license or ID card.
    • Proof of insurance. Most states require you to carry insurance on motorhomes. For towable RVs, insurance requirements vary by state.
    • Weight certificate. Some states ask for a certified weight slip, especially for towable RVs.
    • Lienholder information. If you financed the RV, the lender’s details will be included.
    • Payment for fees and taxes. Registration fees, sales tax, and any applicable title transfer costs.

    Note: In some states, registering a motorhome may also require proof of emissions compliance or a smog check if applicable. So, do a quick search on your specific state to see if it is necessary.


    Question 4: Where can I register my RV?

    You’ll typically register your RV at your state’s Department of Motor Vehicles (DMV), Department of Transportation (DOT), or equivalent agency.

    Some dealerships will handle the initial registration for you when you purchase a new or used RV from them, but it’s always good to double-check what’s included in your purchase paperwork.

    If you buy from a private seller, the responsibility falls entirely on you.


    Question 5: Is it the same process for full-timers?

    If you’re full-time on the road without an official sticks and bricks home, the registration question gets a little trickier. You’ll need to establish a legal domicile — essentially, your home base for tax, voting, and vehicle registration purposes.

    Popular domicile states for RVers include:

    • South Dakota
    • Texas
    • Florida

    These states are known for RV-friendly policies, no state income tax, and relatively simple registration processes for full-timers. But be prepared to prove residency, even if you live on the road full-time.


    Question 6: Are there differences for motorhomes and trailers?

    The registration process varies slightly depending on what type of RV you own


    Motorhomes

    • Registered similarly to passenger vehicles.
    • Require proof of insurance.
    • You may need to pass inspections (emissions, safety) depending on your state.


    Towable RVs and Trailers

    • Registered like trailers.
    • Insurance requirements depend on the state. For example, states like California, Texas, and Florida generally require insurance on towable RVs.
    • States that currently, as of the writing of this article, do not require insurance for towable RVs include: Colorado, Montana, New Mexico, Oregon, South Dakota, Idaho, Washington State, and Wyoming.

    That said, laws can change, and even if insurance isn’t required for registration, I always recommend carrying coverage. RV insurance protects your investment, your belongings, and your wallet in case of damage, theft, or accidents — whether you’re towing or parked at the campground.

    Pro Tip: If your RV has a built-in engine (motorhome), expect higher registration costs than a towable due to weight and vehicle class differences.


    Question 7:  How often must I renew my RV registration?

    Most states require annual renewal for RV registration, though some may offer multi-year options for trailers. Keep track of your renewal date. Many states impose late fees for expired registration, and you don’t want to be caught with outdated tags halfway through a road trip.


    Question 8: How much does RV registration cost? 

    Costs vary based on the type and size of your RV, vehicle weight; market value (some states base fees on this), and state taxes and additional fees.

    To give you a ballpark, registration fees can range from:

    • $50–$200+ per year for smaller towables
    • $200–$800+ per year for motorhomes

    States like California or New York tend to be on the pricier side, while RV-friendly states like South Dakota or Montana are often more affordable.


    Question 9: Where do I display my RV license plates and tags?

    Once your RV is registered, you’ll receive license plates and registration tags or stickers. Where you display these depends on the RV type:

    • Motorhomes. Plates usually mount like a regular vehicle.
    • Trailers. Plates often go on the rear of the trailer.
    • Truck Campers. Some states exempt them from separate registration—check your local rules.


    Final Tips for a Smooth RV Registration Process

    • Double-check documents before heading to the DMV — missing paperwork means wasted time.
    • Consider making an appointment if your state offers it — lines can be long.
    • Ask your insurance provider to send proof of coverage directly to the DMV if allowed—it saves a step.
    • If you plan to travel internationally (like crossing into Canada), make sure your registration paperwork is easily accessible.

    We’ve crossed into Canada via RV several times, and having clean, organized paperwork (registration, insurance, passports) has saved us from unnecessary stress at border crossings.


    The Bottom Line

    Registering your RV may not be the most exciting part of RV life, but it’s one of the most important. Taking care of the paperwork up front means you can focus on the good stuff: road trips, campfire nights, and all the adventures your RV was built for.

    Whether you’re hitting the road full-time, weekending at nearby campgrounds, or planning your first long-haul journey, understanding the basics of RV registration helps set you up for smoother travels from day one. Safe travels — and welcome to the RV life!

  • Where to Park Your RV in a Jam!

    Where to Park Your RV in a Jam!

    Look, nobody is perfect. It could even be possible that you — wonderful as you are — are nevertheless the king or queen of excuses. (To be sure, we’d have to ask your favorite passenger.) Even so, none of the “what ifs” in life should stop you from enjoying a dream RV trip across the country. (Or, dare we dream big, the continent!) Sure, as you imagine a big trip, it’s also easy to imagine an emergency where you’re caught on the wrong side of the country. And now, you’re scrambling to find a place where to park your RV so you can fly back fast. (Just thinking about it is already stressful.)

    The reality is that what ifs do happen. You could be on a cross-country road trip and get THAT dreaded call. Or suddenly, you could find out that your best friend’s daughter’s wedding lands smack dab in the middle of a preplanned, three-month trip to Alaska. You may even need to have an urgent medical procedure with a preferred doctor near home.

    What do you do — cancel your trip, or fly back for a few days, or weeks? And where on earth can you find a place to park your RV for the duration? (And no, Crack Barrel is not a long-term solution.)

    Take a breath. We have good news. Whatever jam you find yourself in while traveling in your RV, you have many options! So, let’s stop worrying and talk about them.


    Temporary RV Storage Options in an Emergency

    Search for RV storage with your smart phone.

    Look up “rv storage near me” on your preferred smart phone map app. It will bring up a variety of options wherever you are. Some storage facilities offer inside climate-controlled options. Some are covered. And some are just outside in an empty (though usually fenced-in) lot.  This could be a quick and safe option if you need it — usually up to several months if they have available space .


    Talk to nearby hotels and airports.

    Hotels with extended parking are the perfect place to park and fly. Most even offer an airport shuttle. You can almost always count on a Holiday Inn Express near an airport to provide a week of free parking with a night’s stay, but if there isn’t one near you, try the ParkSleepHotels website. 

    Also, organizations like Global Airport Parking will provide some easy parking options near airports.  Just choose the city near you on the website, and several options will pop up. You don’t necessarily need to stay at the hotel. You can just use their parking lot — and these lots are often less expensive than parking at the airport. While they don’t always have dedicated RV spots, they are generally larger than the hotel’s guest capacity. So, it’s easy to take up more than one spot

    Pro Tip! Look up the hotel address on your map app and use the satellite view to determine which parking lot is best for your rig.


    If you have a Boondockers Welcome membership, ask a host.

    Boondockers Welcome is not only an RV club that provides free overnight places to stay the night across the continent. Some BW hosts may be able to help out if they have enough room on their property to babysit your rig for a few days. These hosts are fellow RV travelers. So, they will likely understand your situation and may be able to offer you a place to park for up to a week or so.


    Check with local RV parks and campgrounds.

    Some RV parks may also be able to help out if they have an RV storage area on their property.  Many parks offer seasonal storage where you might be able to park your RV, so it’s always worth a call if you are near an area with several RV parks. Simply do a quick online search for what’s nearby, or use an app like The Dyrt PRO to find RV parks near you.


    Reach out to trusted friends nearby and the RV community.

    If you are a member of an RV Facebook group or forum, reach out to the members with your request for help.  You just might find someone in your neighborhood!

    We always recommend making friends with folks who have property and offering your services as a trade. We can’t tell you how many times we’ve had folks offer their property when we’ve needed to park our rig for a week or two. One new friend in Anchorage, Alaska even offered us a ride to/from the airport!

    Depending on where you are, your rig, and your situation, there are many options to park your rig for a few days or even a few months.  But, if the situation turns out to be longer than expected and you can’t get back to your rig, consider paying someone to drive your RV back home for you. Drivers are paid to deliver RV’s all over the continent, and you can tap into that network of drivers.


    What to Consider When Leaving Your RV Behind

    If you must change your plans and leave your rig on a moment’s notice, you will likely be a bit stressed out. (Right?) It’s easy to forget things. So, make a checklist of what you would need to do to get your rig ready to leave behind. It’s easier to have a premade list on your phone than create one when your brain is muddled with 72 other things.


    Turn off  your appliances.

    Unplug and/or turn off everything electric or gas powered, including your propane tanks.  If your fridge can run on 12V and you have food you’d like to keep, use the 12-volt or “boondocking” setting.  If you have enough solar wattage on your roof, the panels will keep your house batteries topped off and the fridge running while you are away. 

    Leaving your vehicle alarm on will likely drain your starting battery. To prevent this, install a battery maintainer solar panel (usually 10-watt) to keep your starting battery topped up while you are away.


    Prevent theft.

    Lock everything, leave your blinds down and curtains closed, take all unreplaceable/valuable items with you, park under a bright light, and do not leave a spare key accessible on the outside. If possible, store anything hanging off your vehicle inside your vehicle (bikes, etc.) while you are away. If you can’t bring them inside, add an extra lock to make things hard to steal. For added safety, consider putting a GPS tracker detector in your vehicle. If your vehicle is stolen, you can track its location before notifying the police.


    Take winter into consideration.

    If you need to leave your RV behind during the winter and can’t find climate-controlled storage nearby, do these six things to safely winterize your rig.


    Don’t Worry About Where to Park Your RV! Live a Little

    Hopefully, knowing that there are options for where to park your RV in an emergency gives enough comfort to kick fear to the curb. Now, go enjoy your dream RV trip and stop worrying about those what ifs. (You got that!) Fact is that you only live once, and you can’t take your RV with you!

  • Campfire Safety: A Little Refresher for RVers

    Campfire Safety: A Little Refresher for RVers

    As a kid, no camping trip was complete without a nightly campfire — naturally, of course, with a sugar high from heavy doses of a toasted marshmallow, melted chocolate, and graham cracker splendor. (Anyone else prefer the complete charring of the mallow, like me?) Nowadays, even though we rarely break out s’mores anymore, we love a good campfire on a chilly evening. (And, given the number of Hershey bar wrapper corners we find in campsites, it’s obviously still a thing.) Beyond s’mores, there’s something special about a campfire. And part of that is the danger of the flames — which should be a reminder why campfire safety is so important, even if you have an RV closeby.


    You don’t have to be primitive camping to build a fire. There are lots of reasons for a fire. A little evening’s entertainment with a little extra warmth. Or, wisely, to satisfy your 10-year old during a much-needed, zero-screen time weekend in the woods. Our desire for fire lies deep within the human race. It’s primal, it’s fun, and — you guessed it — it also carries a huge responsibility along with it!

    So, since we’re going to have a fire at some point, we need to talk about campfire safety.


    Campfire Safety: As Relevant as Ever

    We might be showing our age a little here, but when we were growing up, there was a Smokey the Bear commercial on TV. In it, a child questions his father about putting out their campfire, to which the father responds, “Nah, it’ll just burn itself out.” Smokey isn’t exactly happy with this response, and the tear rolling out of his eye isn’t from the smoke. Cue the melodramatic music. (Smokey also produced other commercial gems like this.)

    Even today, after decades of Smokey ads, we regularly see tell-tale signs curling from fire rings where the occupants have already headed home. (Perhaps they took away the wrong message from that commercial?) Just walk the loop at any popular campground on a Sunday morning and you’ll see what I mean.  

    Anyone living to the west of the Mississippi valley may not ever remember a full summer without a burn ban. That’s because 85 percent of all wildfires are caused by humans. From discarded cigarette butts to illegal fireworks to dangling safety chains on your trailer, it’s no wonder wildfire managers have resorted to reducing campfires during the driest times of the year.    

    Having a good campfire experience is like having a good camping trip: It just takes a little forethought and preparation.  


    Before Building a Campfire

    • Select the right wood. Always buy your wood where you plan to burn it. Traveling with wood from home is not only illegal in many places, it also gives invasive insects a free ride into a new location increasing their spread and putting our forests in danger.

    • Research restrictions. Check for any fire restrictions or bans in the area before buying your wood.

    • Choose the safest location. Here are a few good examples of how. Nearly every campground provides a campfire ring. Please use it. Also, in dispersed camping areas (aka boondocking), it’s important not to create additional fire rings. Use what’s there, or build a Leave No Trace fire pit using a Solo stove or OTZI grill. Give yourself enough space from any vehicles, tents or tarps.

    • Be beach safe (if relevent). If building a beach fire, always build it below the high tide line. On shore breezes are stronger in the evening and beachside vegetation can easily ignite. So, keeping your fire closer to the water is always better. Also, any unburned remains of your fire will be washed away by the incoming tide. (A great Leave No Trace practice!)

    • Clear flammable debris. Remove any dry leaves, twigs, and other debris within a 10-foot radius of the fire pit.

    • Be ready to extinguish. Keep a bucket of water and a shovel nearby to extinguish the fire quickly, if needed. 


    Maintaining a Campfire

    • Keep it small. A smaller fire is better for cooking and roasting marshmallows.
    • Stay nearby. Never EVER leave a fire unattended.
    • Don’t fuel the fire. Avoid using aerosols or flammable liquids to start or accelerate the fire. Pro Tip: save toilet paper rolls stuffed with dryer lint from home to create instant fire starters!
    • Watch the embers. Keep a close eye on the fire and make sure embers don’t fly away and ignite surrounding materials. Soft woods with a lot of sap (like pine, spruce and fir) are great to start a fire with as they catch quickly, but they can also create more sparks that can spread fire outside of the ring.  
    • Observe the fire observers. Pay close attention to pets and children around any fire, not to mention those flaming balls of marshmallows being waved around on the end of a pointy stick. (I mean, what could go wrong?)

      This photo is not real. This is a joke, a joke, joke. But you get the idea: You don’t want this to happen.


    Extinguishing the Fire

    • Complete the job. Completely extinguish the fire by pouring water on it, stirring the ashes and embers, and then pouring more water. 
    • Double-check. Make sure it’s dead out!  The ashes need to be cool to the touch before leaving the area. 
    • Never bury the fire. Burying the fire can trap heat and cause it to re-ignite later!

    IF things get out of hand: Remember, in emergency situations, it’s all too easy to focus on fighting the fire, but it’s important to get people to safety first and know when to call in reinforcements.  


    Additional Campfire Safety Tips

    • Watch the weather. Be aware of weather conditions and avoid building a fire on windy days, as the wind can easily spread embers very quickly.
    • Instruct the next generation. Teach children and others about campfire safety to prevent accidents. 
    • Offer good advice. If your brother-in-law, Earl, ever asks you to “hold my beer” around a campfire, remember nothing good will come of it. Better to remind him that he isn’t 18 anymore and that he should just sit down and enjoy the campfire. Camping trips should never end in a trip to the E.R.!

    All of these tips and tricks seem common sense for most experienced campers, but it doesn’t take too much time to have a pleasant evening turn into a dangerous situation because of a few moments of inattention or risky behaviors. So, remember what Smokey the Bear said, “Only you …”

  • Stylish Tips for RV Bathroom Remodels

    Stylish Tips for RV Bathroom Remodels

    Who’s ready to create the ultimate throne room on wheels?! Probably more of us than you think. Without question, revamping your RV bathroom can make a huge difference in the feel and comfort level when traveling the open road. Whether you’re looking to add functionality, modernize your design, or simply create a more inviting space, these five tips for RV bathroom remodels will help you do just that. From tiny touches to full-scale transformations, these ideas prove that small spaces can make a big impact.

    That said, just know that when tackling a bathroom remodel, it’s essential to balance aesthetics with practicality. RV bathrooms often come with unique challenges, such as limited space, moisture, and weight restrictions, but the payoff is that cozy and functional retreat on the road. As someone who really prefers using my own space over outside bathroom options on the road, I know how big of an impact personalizing that space can be,

    So, here are five ideas to spark your creativity and bring new life to your RV’s bathroom,. That way, you won’t need to stop at every gas station along the way.


    1. Go bold with wallpaper and color.

    Sometimes all it takes to breathe new life into your RV bathroom is a fresh splash of color and pattern. My wife just did this in our new RV by adding some homey wallpaper, and it really made a difference. Bold wallpaper, paired with complementary paint, can transform the mood of the entire space.

    Tips for Wallpaper in RV Bathroom Remodels:

    • Moisture-Resistant Materials. Use peel-and-stick wallpaper made for high-moisture areas to ensure longevity.
    • Test Small Sections First. Uneven RV walls may require extra smoothing techniques for wallpaper to stick properly.
    • Pair It with Bold Accents. Add small décor pieces like new towel hooks or framed prints to complete the look. These are cheap and easy upgrades that make a big difference.

    Adding wallpaper can also help create an illusion of space. For instance, vertical stripes can make your walls appear taller, while lighter colors can make the area seem larger. 


    2. Upgrade fixtures for a spa-like feel.

    A quick and impactful update comes from swapping out old, plastic fixtures for sleek, modern alternatives. Think brushed nickel or matte black faucets, rainfall shower heads, or sleek vessel sinks. These updates not only improve functionality but also create a high-end feel.

    Top Fixture Upgrade Tips:

    • Stick to Lightweight Materials. Opt for RV-friendly fixtures to keep the weight in check.
    • Invest in Water-Saving Options. Low-flow shower heads and faucets help conserve water without compromising performance.
    • DIY vs. Professional Help. Many fixture replacements can be tackled as a DIY project, but consult a pro for plumbing upgrades.

    Upgraded fixtures also provide an opportunity to infuse your personal style. Whether you prefer a minimalist aesthetic or a rustic farmhouse vibe, choosing the right finishes can tie the entire space together. Check out how a bathroom upgrade can change the game in this inspiring RV remodel.


    3. Maximize storage without compromising style.

    Limited space is one of the biggest challenges in RV bathrooms, but smart storage solutions can help. Built-in shelves, baskets, and over-the-door organizers add functional storage without taking up precious space. For an extra touch, use decorative bins or baskets to keep the aesthetic cohesive.

    Ideas for Optimized Storage:

    • Shower Shelving. Install corner shelves or adhesive shower caddies for toiletries.
    • Under-Sink Organization. Use stackable drawers or pull-out trays to make the most of cabinet space.
    • Wall-Mounted Accessories. Hooks, towel bars, and even hanging planters can double as décor and storage.

    Creative storage solutions aren’t just about saving space — they can also make your bathroom feel less cluttered and more serene. By organizing your essentials and minimizing visual clutter, you create a space that feels both functional and calming. Combining utility and style is a hallmark of great RV bathroom remodels.


    4. Replace the shower or toilet for enhanced comfort.

    If you’re ready to splurge, upgrading your shower or toilet can make a world of difference. A compact but luxurious shower stall with sliding glass doors or a high-efficiency porcelain toilet can elevate your bathroom experience entirely.

    Considerations for Replacements:

    • Water and Power Needs. Ensure your RV’s systems can handle the demands of new appliances.
    • Space-Saving Designs. Look for compact options that maximize room without compromising comfort.
    • Durability Matters. Choose materials built to withstand the unique wear-and-tear of RV life.

    Beyond comfort, these upgrades can also improve your RV’s resale value. A sleek shower or high-quality toilet signals to potential buyers that your RV is well-cared for and modern. With the right upgrades, your bathroom becomes a selling point, not just a functional necessity.


    5. Let your lighting work wonders.

    Good lighting can make your RV bathroom feel more spacious, bright, and welcoming. Replace old, yellowing bulbs with cool-toned LEDs, and consider adding vanity lighting for a functional yet stylish glow.

    Lighting Upgrade Tips:

    • Use Energy-Efficient LEDs. They save power and provide a cleaner, modern look.
    • Stick-On Lights for Flexibility. Great for those wanting temporary updates.
    • Highlight with Dimmers. Adjustable lighting adds versatility and ambiance to your space.

    Lighting isn’t just functional — it’s a mood-setter. By layering different types of lighting, like overhead fixtures, vanity lights, and even decorative sconces, you can create a bathroom that feels luxurious and welcoming. Don’t underestimate the power of good lighting to transform your space.


    Bonus: Think lightweight in RV bathroom remodels.

    As with any RV remodel, weight is a constant consideration. Opt for materials like lightweight MDF for cabinetry, acrylic for shower surrounds, and durable peel-and-stick tiles for walls. Always calculate the weight added to ensure your remodel aligns with your RV’s weight capacity.

    Lightweight materials don’t mean compromising on quality or aesthetics. Many modern options are designed to mimic high-end finishes while remaining RV-friendly. This means you can achieve the look you want without sacrificing your vehicle’s performance or safety.

    By focusing on design and function, these RV bathroom remodels show just how transformative an RV bathroom upgrade can be. Whether you’re tackling a full overhaul or small updates, these tips can guide you toward a space you’ll love using every day. I hope your new throne room is fit for a king or queen.

  • Renovating Your RV Entertainment System

    Renovating Your RV Entertainment System

    Raise your hand if the first upgrade you make to your RV is the TV/entertainment setup! (Sadly, as I’ve found, this is not the best first step.) And if —like me — this happens to be the case for you, then know that you’re not alone. Fact is, an RV entertainment system doesn’t always age gracefully. So, if your rig is more than a few years old, chances are you’ve got a tangle of wires behind the TV. And a DVD or Blu-ray player you haven’t touched in God knows how long. And speakers that sound more like a tin can than a theater. 

    The good news? Upgrading the setup of your RV’s entertainment system is one of the most satisfying, easy, and impactful renovations you can make.

    Whether you want to binge your favorite streaming shows on a rainy day, enjoy surround sound for movie nights at the campsite, or just simplify everything to be more user-friendly, updating your RV’s entertainment gear can make life on the road that much more enjoyable.

    Here’s how to do it right.


    Step 1: Take inventory — what are you working with?

    Before you start ripping out cords and mounting new screens, take a step back and assess your current setup. Most RVs come equipped with a standard TV (sometimes two or three), basic speakers, an outdated head unit, and maybe a DVD or CD player combo.

    Ask yourself:

    • What still works?
    • What’s outdated?
    • What do I actually use?

    Chances are, you’ll find that a lot of the original equipment is unnecessary or underpowered compared to modern alternatives.

    Pro Tip: Take photos of all current wiring before removing anything. It’ll save time during reinstallation or upgrades.


    Step 2: Upgrade the TV (or TVs).

    If your RV still has a bulky, low-res screen or an outdated wall mount, start here. Today’s smart TVs are lighter, thinner, and come packed with built-in streaming apps, Bluetooth, and Wi-Fi capability.

    What to Look For:

    • Size and weight. Choose something that fits your existing space and won’t strain the mounting area.
    • Smart features. Built-in streaming means fewer devices to plug in.
    • Power options. Some RVers prefer 12-volt TVs to save energy while boondocking, but even the regular flat screen option today is fairly power-efficient.

    Pro Tip: If you’re replacing a TV near a window, look for one with an anti-glare screen. (RV interiors can get surprisingly bright.)


    Step 3: Improve the sound.

    Let’s be honest. The factory-installed RV speakers rarely do your favorite shows or playlists justice. Replacing them can drastically improve your sound quality, whether you’re watching Netflix or listening to a podcast while cooking dinner.

    Popular Options:

    • Soundbars. Easy to install and perfect for small spaces.
    • Bluetooth speakers. Great for portability and outdoor use — this is our favorite because of sound quality, portability, price, and they’re battery powered. So, it checks all the boxes for RV life.
    • Built-in speaker upgrades. Swap out old ceiling or wall speakers for better clarity and deeper bass.

    Pro Tip: Choose a soundbar with HDMI ARC or Bluetooth for easier connection to newer TVs.


    Step 4: Cut the cords (if you want to).

    Gone are the days of needing five remotes and a stack of physical media. Today, most RVers opt for simple, wireless systems.

    Consider:

    • Roku, Fire Stick, or Apple TV. Streaming entertainment is great if you’re OK with your TV and just want more shows.
    • Bluetooth pairing. This can work between your TV and sound system or phone and sound system.
    • A central media hub. A hub will help to combine controls in one place. This is good if you really want to do a big time overhaul for a movie theater feel on wheels.

    If you’re boondocking, don’t forget about data usage — streaming eats up bandwidth fast. Some RVers download content while connected to Wi-Fi and watch it later without using mobile data. 

    Pro Tip: A good smartphone with a mirror or wireless capability to your TV or a cable that connects directly to the TV HDMI can sometimes extend your data, because a lot of plans throttle your hotspot way before your phone’s internal data usage.


    Step 5: Don’t forget internet and antennas.

    Speaking of data, streaming content or tuning in to live TV depends on your signal. If you’re relying on campground Wi-Fi or a dated TV antenna, you might need a boost.

    Upgrade Ideas:

    • RV Wi-Fi boosters or cellular routers. That way, you enjoy better streaming.
    • Digital antennas. This will provide access to over-the-air channels
    • Signal amplifiers. These enhance reception in remote areas.
    • Starlink. This is a great solution for heavy-data users and streamers.

    If you work remotely or homeschool on the road, investing in a reliable mobile hotspot or Starlink system could be a game-changer. As digital nomads, my wife and I need options, so we have Starlink and two different phone carriers.

    Pro Tip: Mounting your antenna higher (like on a ladder or roof rack) can improve signal without major installation work. But be careful about how you mount them, because they can be a travel day casualty if you’re not careful.


    Step 6: Simplify the wiring and power setup.

    Many RVers find a rat’s nest of outdated cables behind the entertainment center. Renovating your system is the perfect time to clean that up.

    What to Do:

    • Remove unused A/V and coaxial cables.
    • Label all remaining wires for easy reference.
    • Use cable ties or sleeves to keep things tidy.

    And don’t forget to check power sources. Adding a power strip with USB ports or upgrading to a 12-volt TV could give you more flexibility for off-grid use.

    Pro Tip: If you’re using an inverter, make sure your entertainment system is wired to a circuit that can handle it — especially if you’re off-grid and powering other electronics.


    Bonus: Bring Movie Night Outdoors

    Want to level up your RV entertainment beyond the walls of your rig? Consider a battery-powered projector and speaker combo like the Nebula Capsule 3 Laser Projector, which we personally use and love.

    This compact device offers surprisingly impressive sound and picture quality — and with its built-in Bluetooth speaker, Android TV interface, and long battery life, it’s a plug-and-play option for campsite movie nights without the power drain on your house batteries. Pair it with a portable screen or even a high-quality white sheet, and you’ve got a 120-inch home theater under the stars.

    Pro Tip: Use tent stakes, clips, or magnets if possible, so you can keep your sheet or screen taut for the best picture clarity, and don’t forget the popcorn.


    Enjoying RV Entertainment System Efficiency

    Upgrading your RV’s entertainment system doesn’t have to mean tearing apart your rig or spending a fortune. With a few strategic changes — like swapping in a smart TV, upgrading the sound, and simplifying connections — you can transform your space into a modern, functional home theater on wheels.

    Whether you’re full-timing, weekend tripping, or just want a better setup for family movie night, these upgrades can help your RV feel more like home — and give you a welcome escape after a long day of adventuring.

  • Park Models: An RV Buyer Basics Guide

    Park Models: An RV Buyer Basics Guide

    Park models are a great option if you enjoy RV living, but are looking for a more permanent setup. These less-than-mobile homes are meant for long stays at campgrounds, RV resorts, or private properties. While they can be moved when needed, they’re designed more for relaxation and convenience at a specific site. (Rather than frequent — or even infrequent — travel.) Their residential-style features make them ideal for those who want an affordable, but still cozy and spacious, place to call home.

    While you may see park models and destination trailers listed together, a key difference between them is the lack of holding tanks in park models. Instead, park models need to be connected to full utilities like water, sewer, and electricity at all times. In contrast, destination trailers have holding tanks. That means they can function without being fully hooked up for short stays.

    The external design of park models also often leans toward a more “tiny home” aesthetic. (Think of pitched roofs and even porches.) This lookw further sets them apart from destination trailers, which maintain more traditional RV designs.


    Size and Space

    Park models are some of the largest RVs on the market, typically ranging from 35 to 45 feet long. The emphasis here is on creating a spacious living area, rather than portability. They often feature higher ceilings and a more boxy structure. This makes them feel closer to a small house than an RV.

    The external features of park models often include things like large windows, bay windows, and porches that make the living space feel even larger. These homes are typically placed in one location for months or even years. The design makes them feel more like a fixed structure than something that is meant to be moved frequently.

    While park models are more permanent than other RVs, they still maintain some mobility. However, they usually require professional transportation to move them from site to site. This is a sharp contrast to destination trailers.


    Interior Layout and Amenities

    Inside is where park models benefit from trading their mobility for comfort and functionality. Kitchens are often equipped with full-sized appliances, including refrigerators, stoves, and ovens, allowing residents to prepare home-cooked meals during long stays. Many units also come with ample counter space, storage areas, and even kitchen islands for those who like to entertain.

    Living spaces in park models typically include comfortable seating, whether in the form of couches, chairs, or even recliners. Some models include electric fireplaces or other features that give the space a cozy, homey feel. With large windows offering natural light and great views, park models often feel open and welcoming.

    For sleeping arrangements, park models often feature one or more bedrooms with queen or king-sized beds, along with plenty of closet space and dressers for personal items. (Although you could also find those features in larger Class A motorhomes, fifth wheels, and travel trailers.) Some models even have loft spaces that provide extra storage or sleeping areas for families or guests.

    Bathrooms in park models are spacious and typically include full-sized showers, residential-style toilets, and vanities. The convenience of being connected to water and sewer systems means park models can offer a high level of comfort compared to other RVs, which often have to sacrifice space for holding tanks for waste and water.


    Storage and Utilities

    Storage in park model RVs is designed for long-term stays. Many models include full-sized closets, cabinets, and additional under-bed storage. For those who spend extended time in their park model, this ample storage space ensures that everything can be neatly stored away. Some models also include outdoor storage options like sheds or compartments, ideal for seasonal gear or extra items.

    In terms of utilities, park models require full hookups. This means they must be connected to water, sewer, and electrical systems at all times. Unlike destination trailers, which include holding tanks for fresh and waste water, park models rely on a direct connection to these services. This makes park models ideal for locations with reliable utilities but less suited for off-grid living. They do, however, feature residential-level heating and cooling systems, ensuring that owners are comfortable year-round, no matter the weather outside.


    Towing and Performance

    While park models are technically towable, they aren’t designed for travel. Transporting a park model requires professional help, due to the weight and size of the unit. Once parked, the model is set in place for long periods, and it is often skirted and leveled for stability.


    Durability and Longevity

    Park models are built to last and made with materials that are meant to stand the test of time. These units are designed for extended exposure to the elements, so they often feature durable roofing, reinforced walls, and extra insulation. Park models are more resilient than other RVs and can last for decades with proper care.

    Because they stay in one location for much of their lifespan, park models require less upkeep in terms of wear and tear from frequent movement. Routine maintenance, like checking seals and inspecting the roof, will ensure that the model continues to function properly for years to come.


    Cost and Investment

    The price of park models depends on several factors, including size, materials, and additional features. Entry-level park models typically start around $40,000 to $60,000 and come with basic residential features, such as full-sized appliances and a comfortable living space.

    Mid-range models, which often include higher-end finishes and more space, can range from $60,000 to $90,000. Luxury park models, which come with top-tier appliances, custom layouts, and high-quality materials, can exceed $100,000.

    Though the upfront cost is higher than for standard RVs, park models offer a great value for those seeking a long-term solution to vacation or seasonal living. They provide the amenities of a second home, without the need to commit to a traditional brick-and-mortar structure.


    Target Audience

    Park models are especially appealing to retirees, seasonal vacationers, and anyone looking for a long-term home in a desirable location. They are well-suited for:

    • People looking for a second home or vacation property that is mobile, but still offers comfort and full amenities.
    • Retirees who want a low-maintenance living option in a warm climate during the winter months.
    • Families who enjoy staying at campgrounds, RV resorts, or on private properties for extended periods.
    • RVers who prefer a more permanent setup for long-term stays rather than frequent travel.

    If you’re someone who values both the flexibility of RV life and the comfort of a permanent home, park model RVs offer the best of both worlds. They provide ample space, modern amenities, and a cozy living environment while still offering the option to pick up and move when needed.


    Continue Researching Different Types of RV

    Now that you know the difference between a park model and a destination trailer, why stop now? Discover the difference between a fifth wheel and a travel trailer, the ABCs of motorhomes, and much more. Research different types of RV with these explainer articles.

    Class A Motorhomes: An RV Buyer Basics Guide

    Class B Motorhomes: An RV Buyer Basics Guide

    Class C Motorhomes: An RV Buyer Basics Guide

    Fifth Wheels: An RV Buyer Basics Guide

    Toy Haulers: An RV Buyer Basics Guide

    Travel Trailers: An RV Buyer Basics Guide

    Pop-Up Campers: An RV Buyer Basics Guide

    Teardrop Trailers: An RV Buyer Basics Guide

    Truck Campers: An RV Buyer Basics Guide

    Fish Houses: An RV Buyer Basics Guide

    Destination Trailers: An RV Buyer Basics Guide

    Park Model RVs: An RV Buyer Basics Guide

  • Destination Trailers: An RV Buyer Basics Guide

    Destination Trailers: An RV Buyer Basics Guide

    For RVers looking for a spacious and comfortable home away from home — but still wanting the option to move when the time is right — destination trailers strike the perfect balance. Unlike park models, which require full hookups and professional relocation, destination trailers retain the core features of a standard RV, including holding tanks, making them capable of independent camping. But they’re primarily designed for long-term stays at your favorite campground, private property, or seasonal retreat.

    These trailers swing the travel pendulum toward a more traditional mobile home, trading some of the portability for residence-style features like full-sized appliances, high ceilings, and often large windows or sliding glass doors to create an open, homey vibe. Unlike traditional travel trailers, they aren’t built for frequent travel, but their self-contained systems mean you don’t have to rely on full hookups to function. For those who want the freedom to find the perfect view and stay put, destination trailers offer a unique mix of mobility and comfort.


    Size and Space

    Destination trailers are definitely on the larger end of towables, generally ranging from 35 to 45 feet in length. They’re built with heavier-duty frames and more squared-off profiles, which maximize interior space. While they don’t quite reach the dimensions of some park model RVs, they offer generous living areas thanks to multiple slide-outs, high ceilings, and expansive windows.

    The most prominent feature of destination trailers is they feel more like a residence from the outside than most RVs. Many models, like Forest River’s Cedar Creek Cottage series, have prominent porches, sliding patio doors, and larger windows, embracing the permanent-home aesthetic. This helps them feel more like a true vacation retreat.

    Inside, the added width and height make for spacious living areas, giving owners room to spread out and settle in. Though designed for long-term stays, these trailers retain the holding tanks, battery systems, and propane setups of standard RVs, making them capable of off-grid camping, though not ideally suited for it. 


    Interior Layout and Amenities

    Step inside a destination trailer, and you’ll immediately notice how much it resembles a small apartment or a cabin. Unlike standard travel trailers, where space is optimized for portability, destination trailers lean heavily toward residential design.


    Kitchen & Dining

    Kitchens in destination trailers often come with full-sized appliances, including large refrigerators, ovens, stovetops, and even dishwashers in some models. Counter space is far more generous than in standard RVs, and many units feature kitchen islands for additional prep space. Some even include pantries, a rarity in traditional travel trailers.

    Dining areas typically feature freestanding tables and chairs, moving away from the built-in dinette style common in standard RVs. Large windows often surround these areas, reinforcing the open, home-like atmosphere.


    Living Area

    One of the biggest draws of a destination trailer is its spacious living room. Unlike many RVs, which focus on compact layouts, these trailers prioritize comfort with full-sized sofas, reclining chairs, and entertainment centers. Many models feature electric fireplaces, creating a cozy ambiance for chilly nights.


    Bedroom & Bathroom

    Destination trailers often come with separate, private bedrooms — a major advantage for long-term stays. These bedrooms typically accommodate queen or king-sized beds, full wardrobes, and even washer/dryer hookups in many models.

    Bathrooms are also larger than those found in standard RVs, with residential showers, vanities, and linen storage. The presence of holding tanks means they can function like any other RV bathroom, even without full hookups, which sets them apart from park models.


    Storage and Utilities

    Storage space is another strong suit of destination trailers. Since they are designed for long-term stays, they include:

    • Full closets and wardrobes in bedrooms
    • Kitchen pantries for extended stays
    • Under-bed storage and large overhead cabinets
    • Exterior storage compartments for seasonal gear

    Utilities in destination trailers mirror those of a residential home but maintain the self-sufficiency of an RV. Unlike park models, which must be connected to a sewer system, destination trailers have black, gray, and freshwater holding tanks, making them capable of boondocking or staying at partial hookup sites when needed.

    They also include dual propane tanks, residential HVAC systems, and solar panel options, allowing for greater energy independence. But you won’t find too many of these trailers boondocking. Given their size and weight, most owners choose to park them at a location with full hookups for maximum convenience. 


    Towing and Performance

    While technically towable, destination trailers are not designed for frequent travel. They are built on heavy-duty frames and typically require a three-quarter-ton or one-ton truck for safe towing. Their size and weight make them more challenging to maneuver than standard travel trailers, and they are best suited for occasional relocation rather than regular road trips.

    That said, they do offer an advantage over park models: they can be moved without professional assistance. Their standardized hitch system and independent holding tanks mean that, if needed, they can be taken to a new location with relative ease.


    Durability and Longevity

    Destination trailers are built to withstand long-term exposure to the elements, featuring:

    • Heavy-duty insulation and thermal windows for year-round comfort
    • Reinforced roofing for better durability
    • Aluminum or fiberglass exteriors to resist weather damage
    • Upgraded flooring and cabinetry designed for extended use

    With regular maintenance, these trailers can last for decades, making them a smart investment for those looking for a long-term vacation or seasonal home.


    Cost and Investment

    Prices for destination trailers vary widely based on size, features, and brand. Here’s a general breakdown:

    • Entry-level models. $30,000 – $50,000 (basic residential features, smaller layouts)
    • Mid-range models. $50,000 – $80,000 (full-size appliances, premium furniture, more storage)
    • Luxury models. $80,000 – $120,000+ (high-end finishes, expanded layouts, top-tier amenities)

    While these trailers are an investment, they hold strong resale value, particularly when well-maintained. For those considering a vacation home alternative, a destination trailer offers an affordable way to enjoy a second home without committing to a permanent structure.


    Target Audience

    Destination trailers are likely to appeal most to:

    • Retirees and snowbirds looking for a seasonal retreat
    • Families who want a long-term camping setup at their favorite resort or lake property
    • Full-time RVers who prioritize space and comfort but still want the option to move
    • Vacation property owners looking for a cost-effective alternative to a cabin

    Destination trailers aren’t for the road warriors. They’re for the getaway-lovers. They offer a versatile, long-term solution for those who don’t want to compromise between vacation-ready adventure and flexible parking options. Whether you’re feeling like a lakeside retreat, a mountain getaway, or an escape to a luxury RV resort, these trailers provide a spacious, comfortable landing spot for just as long as you need it. Then, on to the next one!


    Get to Know Other Types of RV

    Looking for an RV with a little more mobility that a destination trailer? Well, friend, let your research journey continue. Learn more about the other different types of RV with the following articles.

    Class A Motorhomes: An RV Buyer Basics Guide

    Class B Motorhomes: An RV Buyer Basics Guide

    Class C Motorhomes: An RV Buyer Basics Guide

    Fifth Wheels: An RV Buyer Basics Guide

    Toy Haulers: An RV Buyer Basics Guide

    Travel Trailers: An RV Buyer Basics Guide

    Pop-Up Campers: An RV Buyer Basics Guide

    Teardrop Trailers: An RV Buyer Basics Guide

    Truck Campers: An RV Buyer Basics Guide

    Fish Houses: An RV Buyer Basics Guide

    Destination Trailers: An RV Buyer Basics Guide

    Park Model RVs: An RV Buyer Basics Guide