Category: RV 101

  • Fish Houses: An RV Buyer Basics Guide

    Fish Houses: An RV Buyer Basics Guide

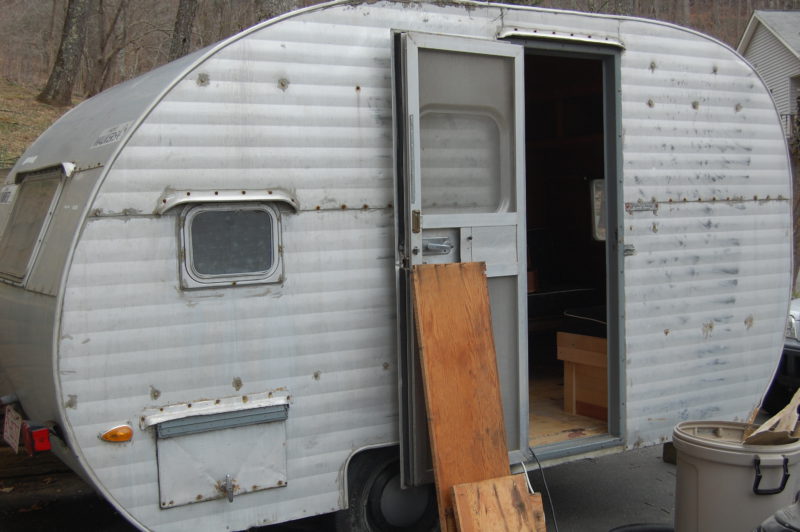
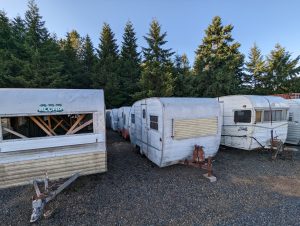
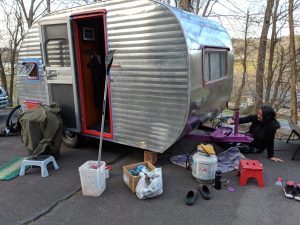
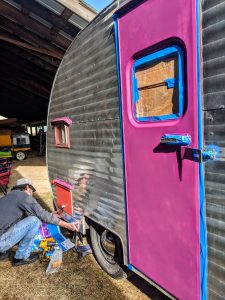
    Nothing says you’re committed to outdoor recreation like spending the night on a frozen lake. But for the relatively few frozen folks who have chozen ice fishing as their go-to hobby, the fish house makes it as palatable as possible. Fish houses are RVs that have been stripped of every extra pound to make them as light as feasible. You get a simple metal frame, some lightweight walls, and minimal insulation, with rudimentary comforts inside, like a TV and a bathroom. The floor has either a single hole or multiple holes in the floor, to give access to the lake for fishing.

    These RVs are built for extreme winter conditions and offer a unique experience for extreme anglers. 


    Size and Space

    Fish houses are compact yet incredibly functional, built for towing and use on ice. Most models are between 16 to 24 feet long, though smaller or larger options are available depending on the manufacturer. Their lightweight construction allows for easy transport, even on icy or snow-covered roads.

    The drop-down axle system is a hallmark of fish house design. This lets the frame of the unit be dropped directly on the ice, providing stability and eliminating drafts that would otherwise slip underneath a raised floor. Despite their compact size, manufacturers make clever use of space, ensuring every square foot (and every ounce of weight) serves a purpose. Some higher end models might include slide-outs, which expand the interior space once the house is set up, accommodating additional occupants or gear. But typical fish houses are intentionally sparse.


    Interior Layout and Amenities

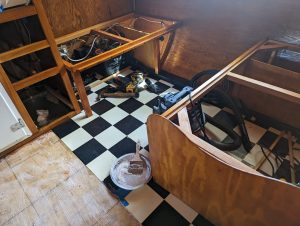
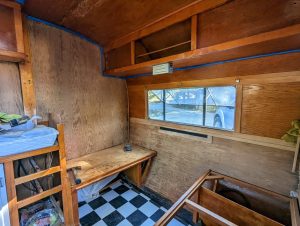
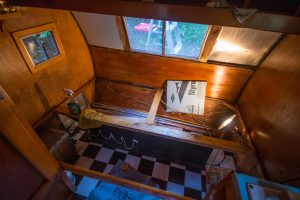
    The interiors of fish houses are thoughtfully designed for the unique needs of ice anglers. The primary distinguishing feature is the floor, which includes strategically placed, insulated fishing holes. It’s these holes, with removable covers, that let you to fish indoors without subjecting yourself to the elements. Some high-end models include built-in lighting above the holes, making nighttime fishing easier and more enjoyable.

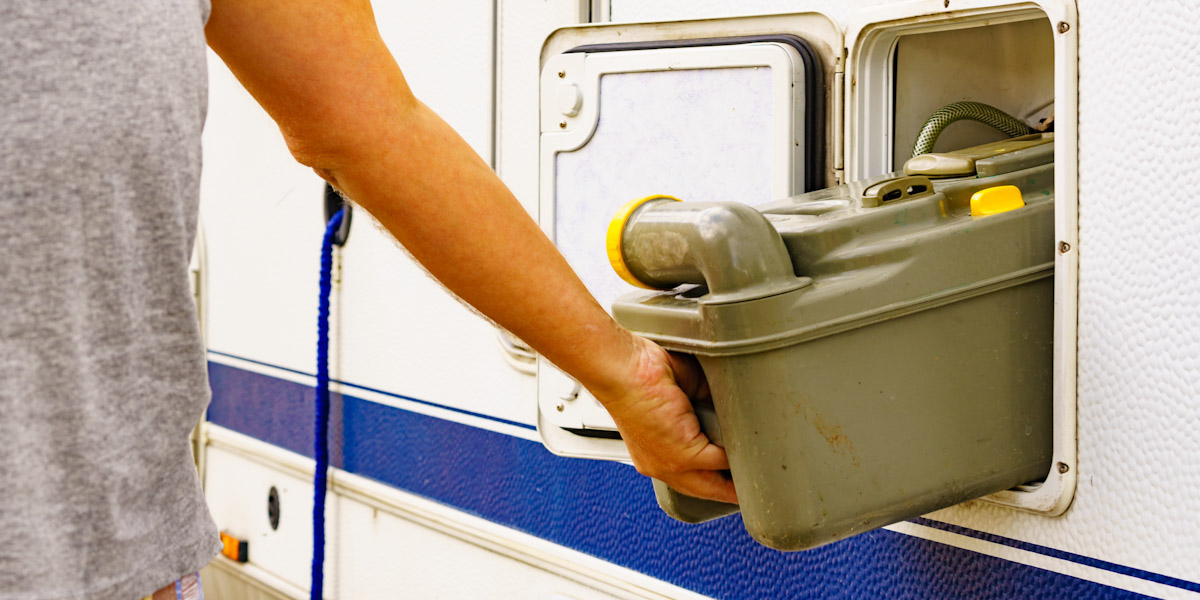
    Seating arrangements vary but usually include benches, reclining chairs, or sofas, many of which can be converted into sleeping bunks. Kitchens are compact yet practical, often featuring a small stove, microwave, and mini-fridge. In some units, you’ll find a countertop with a built-in cutting board for cleaning fish. Bathrooms are common in mid-range and luxury models, with cassette toilets or portable options being the norm.

    Luxury fish houses can come equipped with extra amenities, like entertainment systems, flat-screen TVs, Bluetooth speakers, and even electric fireplaces. These features make the interior feel less like an ice bunker and more like a cozy winter cabin.


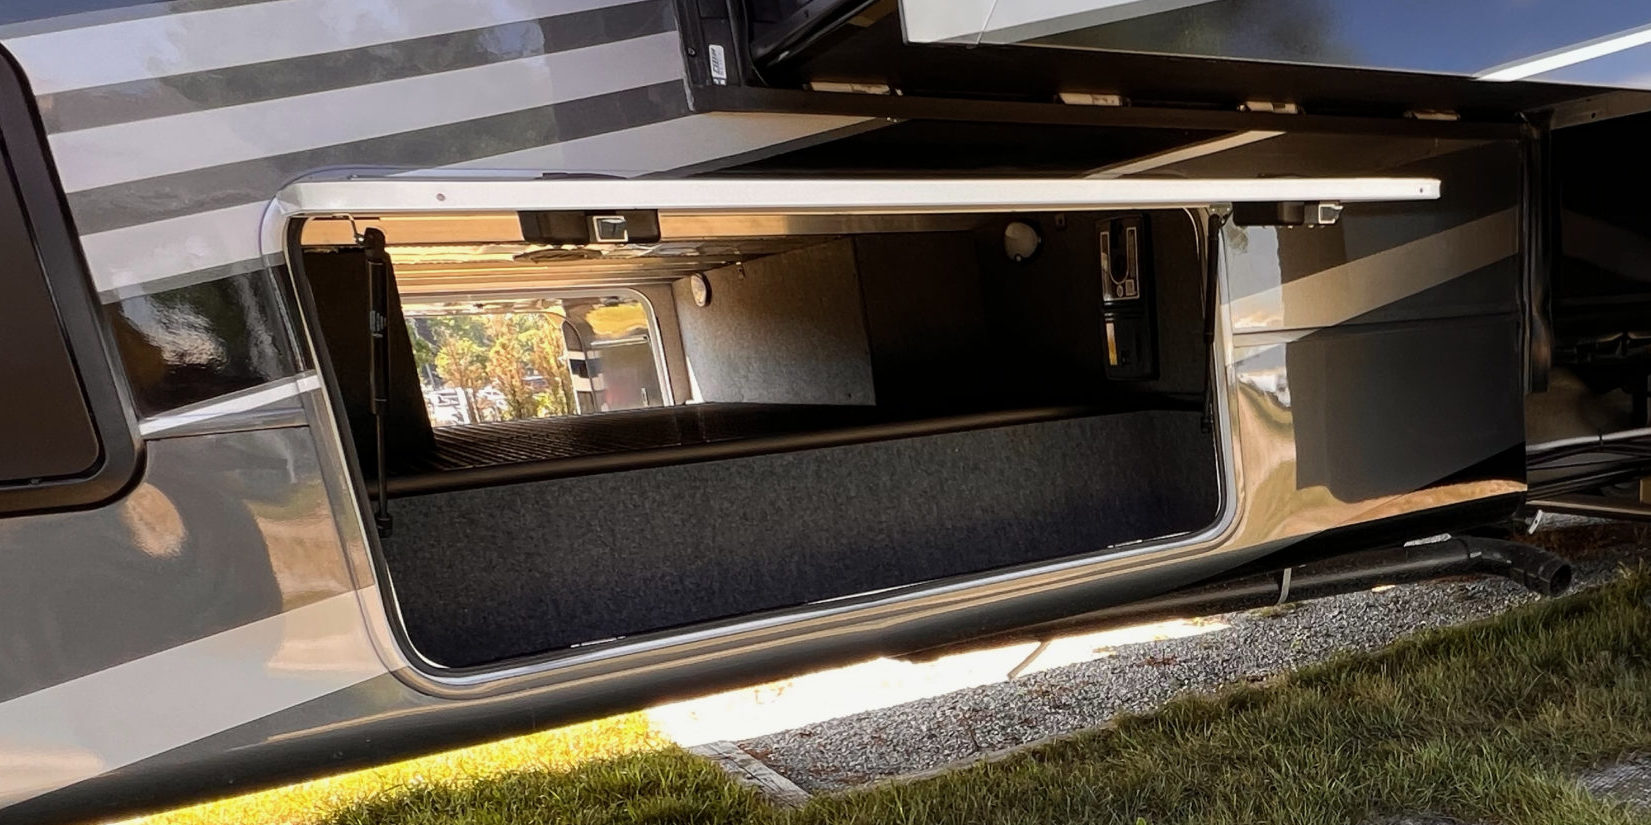
    Storage and Utilities

    Anglers need space for rods, tackle, bait, and ice fishing gear, and manufacturers have responded with clever solutions. Many models feature built-in rod holders, tackle compartments, and overhead bins. External storage compartments provide additional room for bulkier items like ice augers and propane tanks.

    Utilities in fish houses are built for efficiency. Propane is typically used for heating and cooking, with heaters designed to keep the interior warm even in subzero temperatures. Battery packs or small solar panels power lights, fans, and other basic electronics. Some models offer an inverter system, allowing you to run additional appliances or charge devices while off the grid.


    Driving and Performance

    Fish houses are carefully engineered for icy conditions. Their lightweight construction makes them easy to haul with most trucks or SUVs, and the drop-down axle system ensures that the house can be quickly and securely positioned on the ice. Reinforced tires and the utility of their rugged frames add durability, allowing the unit to handle uneven terrain or icy roads without issue.

    Setup is quick and straightforward, with most models designed for single-person operation. Once in place, the house’s stability and insulation will keep you warm and fuzzy, away from whatever kind of weather is raging outside.


    Durability and Longevity

    Built to withstand harsh winter conditions, fish houses feature robust construction and weather-resistant materials. Insulated aluminum or fiberglass exteriors protect against wind and snow, while seals around windows and doors are beefier than typical RV models to prevent drafts. The drop-down axle system, a critical component of the design, is most often built for long-term reliability with proper maintenance.

    Regular upkeep will extend the life house of a fish house significantly. Stay up to date on regular inspections of seals, lubricating moving parts, and checking for rust,  and these units can provide years of reliable service, making them a sound investment for serious anglers.


    Cost and Investment

    Entry-level models with basic amenities typically start around $15,000 to $20,000. These will be basic units that offer just the essential fishing features and insulation, but may lack luxury extras.

    Mid-range fish houses, priced between $25,000 and $35,000, include upgraded interiors, enhanced heating systems, and more advanced storage options. High-end models, which can exceed $50,000, often come with residential-style finishes, advanced entertainment systems, and premium heating and insulation for maximum comfort.

    While the initial cost may seem steep, a well-maintained fish house holds its value and can be resold or used for many years, making it a worthwhile investment for passionate ice anglers.


    Target Audience

    Fish houses are ideal for ice fishing enthusiasts who value comfort and convenience. They cater to solo anglers seeking solitude on the ice, but also families or groups of friends looking for a cozy retreat during freezable fishing trips.

    These units are built just for one type of person: hardcore anglers who spend extended periods ice fishing, whether for recreational or competitive purposes. They particularly attract those who are in it for the social aspect of ice fishing, as the comfortable interior makes it easy to host gatherings or share the experience with others.

    For anyone who loves ice fishing but hates freezing their tackle off, a fish house is the perfect solution. They pack functionality, warmth, and practicality into a specialized RV package that can make the frostiest of fishing trips an adventure to look forward to.


    Check Out Other Types of RV

    Like we said, fish houses are for a very specific kind of RVer with features customized to a very specific season. Want a take a peak at some RVs not built to park on ice? (How broadminded of you!) Learn more about the other different types of RV with the following articles.

    Class A Motorhomes: An RV Buyer Basics Guide

    Class B Motorhomes: An RV Buyer Basics Guide

    Class C Motorhomes: An RV Buyer Basics Guide

    Fifth Wheels: An RV Buyer Basics Guide

    Toy Haulers: An RV Buyer Basics Guide

    Travel Trailers: An RV Buyer Basics Guide

    Pop-Up Campers: An RV Buyer Basics Guide

    Teardrop Trailers: An RV Buyer Basics Guide

    Truck Campers: An RV Buyer Basics Guide

    Fish Houses: An RV Buyer Basics Guide

    Destination Trailers: An RV Buyer Basics Guide

    Park Model RVs: An RV Buyer Basics Guide

  • 7 RV Basement Storage Ideas to Max Out Your Space

    7 RV Basement Storage Ideas to Max Out Your Space

    We’ve all been there: staring into the basement storage of an RV full of the wrong kind of wonder. Dumbfounded, we’re wondering how on earth we’re supposed to fit all our gear, hoses, tools, and adventure essentials into that oddly shaped, underbelly compartment. (All, of course, without turning it into a black hole of clutter.) Staring into that abyss, it helps to have some pretty solid RV basement storage ideas. You know, the kind that have been paid for with experience.

    After seven years on the road, my wife and have seen and personally experienced it all — from fifth wheels (with cavernous passthrough storage that feels like a secret garage) to smaller rigs (where you have to play Tetris just to store a sewer hose). Whether you’re brand new to RVing or knee-deep in your third full-time rig, organizing and maximizing RV  basement storage space can make or break your road trip experience. Because let’s face it: Needing something and not having it when your on the road is the worst. 

    So, let’s dig into some surefire ways to evaluate your RV basement storage — and some ideas to make the most of it.


    1. Understand what you’re working with.

    Every RV’s basement storage is different. Class A motorhomes tend to have massive passthrough compartments, sometimes with slide-out trays or built-in lighting. Fifth wheels often have tall storage spaces up front and smaller compartments scattered along the side. Class C motorhomes and travel trailers? Usually more compact — requiring to show a bit more creativity with your RV basement storage ideas.

    But no matter which RV you own, you can start by taking inventory of your actual storage size and layout.

    • Is your storage passthrough or divided?
    • Do the doors lift or swing open?
    • Is there room to add bins, trays, or hooks?
    • Are any compartments heated or insulated (ideal for sensitive gear)?


    Pro Tip: Measure each compartment’s depth, height, and width — and jot those numbers down. You’ll want them handy when you’re shopping for bins, crates, or drawer systems that actually fit. We’ve definitely tried to wing it and pass by the store to eyeball a purchase and had it backfire because we were lazy and didn’t really measure. So, remember to measure twice and purchase once.


    2. Sort and prioritize what lives below.

    Not everything belongs in your basement compartments. So, before you toss in that folding kayak or bundle of tangled extension cords, ask yourself a few questions:

    • Do I need quick access to this item while traveling?
    • Can this safely ride in the tow vehicle instead?
    • Does it need to stay dry, cool, or protected from dust?

    We break our storage down into categories:

    • Travel day gear: Hoses, leveling blocks, wheel chocks, gloves
    • Camp setup/teardown supplies: Outdoor rug, camp chairs, grill
    • Emergency items: Tool kit, spare fuses, jumper cables, first-aid
    • Outdoor fun: Paddleboards, hammocks, hiking gear
    • Seasonal storage: Extra blankets, off-season clothing, holiday lights


    Pro Tip: If it hasn’t been used in three trips, it probably doesn’t need to ride along.


    3. Use bins — and label everything.

    We’re not exaggerating when we say plastic bins changed our storage life. Not only do they keep everything tidy, but they also make it easier to unload and reload without digging through a pile of chaos. Choose stackable bins with secure lids and handles — ideally clear, so you can see what’s inside.

    Label each bin clearly, and group them by frequency of use:

    • “Daily Use” bins go in front and are easiest to reach.
    • “Occasional Use” bins can live in the back or bottom.
    • “Emergency” gear stays accessible at all times.


    Pro Tip: If you don’t want to label and you have a decent memory, color-coding your bins can help with organization. Personally, we try to separate specific and similar items in different storage locations and keep them in those clear bins. It makes grabbing what we need when we need it that much quicker.


    4. Maximize vertical and wall space.

    You’d be surprised how much space you’re not using in your basement — especially on the walls and ceiling of the compartment.

    A few smart upgrades:

    • Command hooks or bungee cords for hanging hoses, folding tables, or lightweight tools
    • Magnetic strips for metal tools or objects that can bang around if they happen to move or fall of while traveling a crazy off-road adventure.
    • Overhead cargo nets or fabric shoe organizers to hold smaller items
    • Sliding trays or roll-out platforms (if your RV didn’t come with them)

    These can turn even the tightest space into a functional mini-garage.


    Pro Tip: If your storage compartments aren’t lit, consider battery-powered puck lights or LED strips so you’re not fumbling in the dark or using your phone light.


    5. Watch the weight distribution.

    It’s easy to get excited about how much gear you can fit, but don’t forget to keep an eye on your RV’s weight limits — and how that weight is distributed. Too much in one area can throw off your balance and handling, especially if you’re towing.

    Use a simple bathroom scale to weigh bins before loading, and spread the heavier items across multiple compartments. Keep especially heavy stuff low and centered to maintain your rig’s balance.


    Pro Tip: Keep your RV’s GVWR and axle ratings on hand, and use a CAT scale or similar weigh station to check your setup if you’re unsure.


    6. Keep dirty and clean items separate.

    This may seem obvious, but it’s a mistake most RVers make at least once: Storing your sewer hose with your leveling blocks or outdoor rug … that’s not great.

    Designate one bin (or more) for “dirty gear,” and keep it separate from anything you want to stay clean. We use a dedicated clear and black bin for sewer and dump-related items so they don’t contaminate anything else.


    Pro Tip: Use sealable containers with latching lids for anything that might leak, smell, or drip. Thank us later.


    7. Don’t overthink it — but do reevaluate often.

    RV life changes with the seasons, and so does your storage. You might need snow chains and flannel sheets in December, but come July, those can get swapped for sandals and beach umbrellas.

    Set a reminder to clean out and re-organize your basement every couple of months — or before each major trip. We’ve done the mid-trip storage purge more than once, and it’s way better to do it when you’re not hot, tired, and surrounded by mystery extension cords.


    Your Basement, Your Rules

    Maximizing RV basement storage isn’t just about organization or ideas — it’s about convenience, safety, and peace of mind on the road. The right system can mean the difference between a relaxing travel day and digging through three bins of mismatched gear just to find a wrench.

    At the end of the day, your basement setup should serve your travel style. For us, boondocking most of the time means we keep essentials like our water gear, extra power cables, and backup leveling supplies ready to go — but when we do hit a campground for a reset, we’re glad to have an outdoor rug and folding chairs tucked away, too.

    So, whether your storage space is a cavern or a closet, make it work for you. And if you ever find yourself asking, “Do I really need to bring this?”— you probably don’t.

    But don’t worry, the fifth bungee cord always sneaks its way back in anyway. And oh is it satisfying when you use it. 

  • My RV Broke Down! What Should I Do Next?

    My RV Broke Down! What Should I Do Next?

    Imagine: You’ve just crested the hill on a long, winding mountain pass in central Nevada. Then your engine suddenly starts making an unfamiliar noise. The check engine light starts blinking rapidly as  the engine temperature gauge shoots up into the red. You pull over to the side of the road, and it starts to set in: Your RV broke down. Suddenly, your dream road trip takes an undesired turn. 

    You glance at your cell phone signal. Nothing. The last house you saw five miles back down the road looked like it was abandoned during the Dust Bowl era. The last vehicle you saw was even further away from the old house. But, the shoulder along the road where you pulled over is nice and wide. You shut things down, and settle in. (Did I mention that it’s getting darker?)

    What do you do?  


    Being Prepared for an RV Breakdown

    A Cool-Head Mentality

    While this might seem like the set up for a cheap horror flick, keep your head about you. Panic improves nothing. It’s also good to remember: You’re in an RV. That means that you’ve got your home with you. There’s plenty to eat and drink. You have a place to sleep and take care of all your immediate needs for at least one night. By any other vehicle trip standards, you’re already way ahead of the curve.  

    So, while you’re contemplating your next steps, take a minute to congratulate yourself for being where you are, what you have with you, and the great story that you’re going to tell when you get back!  (We promise this helps.)

    Personally, we’ve experienced all kinds of engine and trailer related troubles in our nearly 13 years on the road. We’ve experienced everything from a flat tire in West Virginia to a bearing blow out near Happy, Texas (yes, we see the irony) to multiple engine hiccups from sea to shining sea. Nearly all of these breakdowns have been minor, and for some inexplicable reason, seem to occur on a Friday at about 3:00 p.m. (You know, with just enough time to maybe get to a mechanic, but not enough time to do anything about it until the following week.) We’ve only been involved in one semi-serious collision where we were grateful to be able to walk away, but our towing vehicle … well, not so much. (But that’s another story for another time.)

    In each case, keeping a cool head has made a big difference in how we tackled our problems.


    An RV Insurance Policy

    As Edna from The Incredibles reminds us, “Luck favors the prepared!”  In other words, you have to be ready for what might happen before it happens.

    Starting with good quality insurance is key — whether it’s through your existing auto insurance policy or a separate policy for your RV. While most car insurance covers the liability on anything it tows, it doesn’t necessarily cover anything else like collision or comprehensive. (We nearly found this out the hard way.)

    As full-timers, we carry RV insurance that will not only help us pay for repairs, it also covers the cost of alternative housing (i.e., hotel, apartment, AirBnB) for a short time while our home is being worked on as a result of an incident. We’ve only needed it once in nearly 13 years, but it was incredibly helpful (and put our minds at ease) when we needed to replace our trailer’s axle during the pandemic-induced supply shortage over Thanksgiving week in 2020. What could have been a total nightmare turned into an enjoyable week in Santa Fe!

    Now, returning to our hypothetical situation where your RV broke down, let’s use that to illustrate how to be prepared for the unlikely event of an RV breakdown. This should help in the event you need do a little RV breakdown triage.


    So, your RV broke down. Breathe: Is this something you can repair on your own? 

    Answer: Yes! As long as I have the tools.

    If you’re handy, mechanical, or have earned the wisdom of the wrench, this little hiccup could just be a bump along the way. You’ve got a good collection of tools, and perhaps some frequently worn out parts for your rig along for the ride. Along with those tools, a prepared RVer should have some basic safety supplies. Frankly, if your RV broke down, something is wrong. And now might be the time you need that fire extinguisher.

    Even if you don’t have the right tools, you may still have DIY options. Many auto parts stores have a tool loaner program for those more specific tools that might not fit into your repair kit. In addition, many stores have delivery vehicles which can bring them right to you. Believe it or not, many online auto part retailers have same-day delivery options. (So, just ask.) Simply choose that option when ordering, then select on a map where you are and they’ll bring it right to you. 

    Other options can include delivery services like Doordash or Uber delivery.  While it might be more expensive than getting it delivered to your home, it’s cheaper than a tow from the middle of nowhere!


    Answer: No way. Can’t fix it.

    If you find yourself on the side of the road, with the hood up scratching your head, it’s time to call in some help and there are lots of ways to do it. 


    Can you reach out for assistance? 

    Answer: Yes! I still have cell service or Wi-Fi.

    When cell phone and internet booster gear pays off …

    Many RVers have some sort of internet booster, extra cell phone with a different carrier, Wi-Fi hotspot, satellite internet, or even a spot/personal locator beacon. And frankly, these devices (all designed to function outside of normal cell phone communications) can be super helpful in an emergency and contribute to that prepared feeling. Many of these will allow you to communicate with a towing service, insurance company, or repair shop from anywhere you happen to be.  


    What to look for in a repair shop …

    We’ve mostly had great experiences with tow trucks and repair shop. In 13 years, there are only two that we can think of have made us angry enough to leave a bad review. Vetting the shop before going there might avoid the feeling of being taken advantage of. But let’s get real: When your RV broke down, you didn’t pick the spot. So, it can be hard to get picky when a shop might be the only act in town.

    Even so, reading customer reviews (more than one) can help you get ahead of any problems certain shops may have. And once you’re done, pay it forward. Be sure to leave an honest review so others can take advantage of your experience. Do they generally have a good reputation among customers? Are they associated with a national or regional chain? What are your options if you don’t like the vibe you’re getting? Remember: It might be worth a more expensive towing bill than having to deal with a shady shop. Your RV broke down. You’re likely already pretty stressed, so you don’t need more anxiety.


    Thoughts on national/regional repair chains …

    We’ve had positive (and negative) experiences with both independent and nationally affiliated repair shops. So, we’re not making a comment about quality. Rather, if you choose to go with an independent shop, be sure that they’ll stand by their work if or when something goes wrong with that part or repair.

    Understanding what to do down the road may help give you peace of mind. (And some recourse if the repair doesn’t hold up.) Keep good records (with receipts) of ALL of the work that you have done to your rig — both the work you do or have someone else do. 


    Answer: Nope. No signal in sight.

    Don’t discount the kindness of strangers and fellow travelers.

    If you can’t reach out with modern technology, you might just have to put out a sign and wait for someone to wander by. A few years ago, we traveled to Alaska from Washington state. We were just one of thousands of travelers all generally heading to the same place. (After all, there’s just two roads to get you there.) Along the way we kept seeing the same people. Even though our schedules differed, we seemed to be in a very long game of leapfrog. A small community of travelers developed, one which we knew we could rely upon should we get into a tight spot.  

    Additionally, we’ve been helped by locals when we needed it. Frankly, it’s always been a positive experience that restores our faith in humankind. When we ask for help, we open ourselves up. It’s a place of vulnerability, a recognition that even if we are prepared for many things, we don’t have it all figured out. Allowing someone to help you is actually a gift for them and for you.

    Think about the last time you helped someone. How did it make you feel? Remember that in your moment of trouble that you can also make someone feel that spark of goodness, that joy of helping out. It takes the pressure off and creates a connection — and possibly a friendship. (Don’t forget to pass it on!)


    No Matter What, Stay Confident

    There’s no better feeling than being prepared for the unexpected, and with just a small investment and an adventurous spirit you can be ready for whatever comes your way.  Remember that you got into this activity to have adventures, and unplanned repairs can open you up to a whole new world!

  • Driving Your RV on a Steep Grade: A Safety Guide

    Driving Your RV on a Steep Grade: A Safety Guide

    Summer is coming and cooler mountain temps are calling! But are you ready to drive your RV on a steep mountain grade? The fact is that if you are new to driving a big rig or pulling a trailer, those winding mountain roads may seem a bit intimidating.

    After nearly 13 years of full-time RVing all over the North American continent, we’ve definitely experienced a few white-knuckle grades and narrow winding roads! So, we thought we’d provide some basic tips for making these incredible journeys a bit less scary and a lot more safe.


    Do a Road Trip Safety Check — Before You Go

    Before starting out on any road trip, it’s a good idea to have your brakes, axle, tires, and hitch inspected. (And repaired, as necessary.) Be sure to top off all fluids, flush your radiator, and check the condition of your oil as well. Understanding your towing capacity and making sure you are towing with the correct hitch and sway bars are also keys to safety on steep grades! 


    Make Sure You Understand Road Grade Percentage 

    Road grade refers to the amount a road rises or drops over a specific distance. In case it’s been a minute since your last driver’s license test, road grades signs in the U.S. are bright yellow with black letters, have a truck depicted on them, and include a percentage. A five percent grade means the road will rise or fall five feet for every 100 linear feet. This means if you see a sign warning of a five percent grade for the next four miles, you’re going up or down 1,056 feet in the next four miles.  

    The maximum grade for a federally funded road in the United States is six percent. However, this increases to seven percent in mountainous areas — as long as the speed limit is below 60 miles per hour. However, noninterstate roads do not have grade limits. While most public roads are under 10 percent, there are a few upwards of 20 percent!

    If you are reading this and beginning to conjure up memories of Ricky and Lucy driving their “Long, Long Trailer” up some ridiculously steep grades, we can assure you that you will likely never encounter anything quite that steep. While the Rockies, Sierra Nevadas, and Cascades certainly have some steep roads, the roads in North America with the steepest terrain may surprise you!

    If you aren’t a thrill seeker, here are some resources that’ll help you plan your route to avoid steep grades (and save money on fuel): Mountain Directory and Road Grades USA and Canada.


    Uphill vs. Downhill: Important Considerations

    There are some different driving tactics to consider when driving uphill versus downhill. Let’s take a minute to break these tips down a bit.


    Driving Uphill with Your RV

    Stay in Your Lane

    If you are able to safely drive at the same speed as other traffic, use the left lane to pass, then move back to the right lane. But, if you are moving more slowly than other vehicles on the road, stay to the right. Settle in. And maintain a safe speed. Just allow faster vehicles to pass you. Consider using your emergency flashers if you need to go very slow. Take your time — an RV roadtrip should not be a race!


    Listen to Your Vehicle

    Turn off music, podcasts, and limit conversations around you so you can listen to your vehicle as you are heading uphill. If it sounds like it’s struggling or the engine is changing tones regularly, adjust your speed or gears to accommodate.


    Turn Off Overdrive

    To keep the engine from “bounding” (i.e., trying to find the right gear), turn off your vehicle’s overdrive.  This will also reduce strain on the vehicle’s transmission.


    Watch Your Vehicle’s Engine Temperature

    Even if you’ve done all the safety checks and topped off all the fluids, you may run into road grades which could cause your engine to overheat. (Especially in the summer.) Turn off your vehicle’s air conditioner before heading through steep terrain to reduce strain on the engine. If your vehicle’s engine temperature is running a bit higher than usual, pull over in a safe spot and let the engine cool down before starting off again. Some roads with very steep grades have designated spots for vehicles to park while they cool down.

    Don’t push the limits of your vehicle as you could do a tremendous amount of damage. And, if you see another rig in this situation, be sure to give them plenty of space as you pass. If overheating becomes a regular issue for your vehicle, consider these options:

    • Double check your towing capacity versus the weight of the vehicle that you are towing. Take your rig to a weigh station if you want to know the exact weight of your fully loaded vehicles.
    • Double check your radiator fluid (when the engine is cool!) to make sure you don’t have a leak.
    • Add a transmission cooler to help dissipate the heat in the engine.
    • Avoid driving during the heat of the day in the summertime. Rather, drive steeper grades in the morning or evening..
    • Have your rig inspected by a mechanic who understands the impact of steep grades on your vehicle.


    Driving Downhill with Your RV

    Utilize Engine Braking

    Always keep in mind that your RV is heavier than your passenger vehicle. While this is obvious, you’d be amazed at how many people forget this simple fact. That extra weight means more momentum. Which means that you need more breaking power and a longer breaking distance to safely manage curves in the road — as well as safe distances between other vehicles.  

    Drivers should avoid using their brakes for extended amounts of time. It can cause them to heat up, as well as increase wear and tear on them. In extreme situations, this overheating can result in total brake failure and leave you unable to stop your vehicle. Drivers should think about applying the brakes more strongly with intervals of no brakes, rather than a consistent weaker dragging of the brakes which can allow heat to build up.   

    Start a downhill section by slowing down — before the grade. Then gear down before the steep section. This can help manage the vehicle’s speed without wearing out the brakes.  Moving down in gears slowly is the name of the game here. You never want to go from fifth gear to second gear immediately. Rather, moving from fifth to fourth and then to third is a good practice. While downshifting, listen to the revving of the engine to determine if the RPMs are too high or too low, and adjust the gears accordingly.


    Watch for Curves Ahead

    Many graded roads also have curves. So, be sure to keep an eye out for signs indicating “curves ahead” and adjust your speed as needed. These signs will indicate the recommended speed for safely navigating the curve, and often indicate if it’s different for trucks (including RV’s) as there is a greater danger of rollover when your vehicle is tall.

    We often drive a bit less than the speed limit on curvy roads to remain completely in control. If traffic builds up behind you, gently pull over only when it’s safe to do so to allow them to pass.  


    Stay in Your Lane

    If you are able to safely drive at the same speed as other traffic, use the left lane to pass, then move back to the right lane. But, if you are moving more slowly than other vehicles on the road, stay to the right, maintain a safe speed, and just allow the other smaller vehicles to go around.


    Watch for Speed Demons

    Be sure to keep your eyes peeled for fast moving cars, especially those whipping in and out of their lane in heavy traffic. They can quickly cause a dangerous problem as they recklessly maneuver along the highway. Focus on your own speed, stay to the right, and just let them pass you. Everyone will be happier and safer.


    Understand Runaway Ramps

    When driving a large vehicle on steep grades or long descents, brake failure can be both terrifying and extremely dangerous. Runaway ramps can be a true lifesaver if you experience brake failure on your RV or tow vehicle.  There are typically signs indicating you’re approaching a runaway ramp. They are not just for semi-trucks. Runaway ramps are designed as a safety feature for any vehicle whose brakes have failed. Most runaway ramps are filled with sand or gravel and the vehicle’s axles sink into them to stop the vehicle’s forward momentum. In some cases, they have cables designed to slow your speed and then breakaway as you plow through. Stopping can be rather abrupt and violent, but they are definitely effective! 


    Know the Signs of Brake Failure

    • Spongy or soft brake pedal? If you notice that your brake pedal feels unusually soft or spongy when you depress it, the cause may be air in the brake lines or leaking brake fluid. Either problem can become dangerous quickly. Pull over immediately.
    • Smell something burning? A burning smell coming from your brakes can indicate that they are overheating due to constant use or that there is a mechanical issue causing friction such as a stuck caliper. Stop immediately!
    • Dashboard warning lights? Most vehicles are equipped with sensors that can detect issues with the braking system. If you see a warning light on your dashboard that looks like a brake symbol, it’s important to pull over and inspect your brakes immediately. 
    • Loss of braking power? If your brakes do not respond properly and you are unable to slow down or stop, this is definitely brake failure. Downshift quickly in order to use the engine to slow down, and pull up on the emergency brake if necessary. Honk your horn to alert other drivers and use your emergency flashers if other vehicles are present.


    Other Key Additions to Improve Steering Control When Heading Downhill

    • Electronic Trailer Brakes 
      Most modern trailers have electric brakes which help slow the trailer. These are applied through a sensor in your towing vehicle, commonly installed below the steering wheel, so that when you depress the brake pedal, the brakes engage in a relative way. They can also be applied independently by using the hand lever on the brake sensor. This is especially helpful and can prevent disaster in a trailer sway situation.  
    • Remote Tire Air Pressure Monitors 
      Good tire pressure will mean safe and effective braking. Most modern vehicles have these on the towing vehicle, but you may not have these on the trailer, or on your “toad” (the small vehicle towed behind a Class A or Class C motorhome). Being aware of any low pressure in any of your tires can prevent catastrophe when descending a steep hill or highway gradient.  


    RV Those Steep Grades — and Enjoy the View


    If you follow these tips, stay alert behind the wheel, and maintain your vehicle appropriately, steep road grades don’t have to be intimidating. Just take it slow and steady.  Extreme road grades demand a driver’s full attention and respect. You should always be cautious when driving on them to ensure that everyone arrives at their destination safely. But, at the same time, don’t stress out. You’re in the mountains for the view. Enjoy it.

  • Got a Road Trip Checklist for Your RV? You Need One

    Got a Road Trip Checklist for Your RV? You Need One

    Hitting the road for a big RV road trip always comes with a rush of excitement. But let’s be honest: It can also come with a bit of angst. And truthfully, it doesn’t even matter whether you’re a newbie setting out on your first trip or just getting back on the road after a break. Everyone feels it. Because no one wants to  face-palm 200 mile. The fact is that a road trip checklist isn’t just helpful — it’s essential.

    After nearly seven years on the road, living full-time in various RVs (everything from a fifth wheel to a Class B van and now a Class C motorhome), we’ve learned this lesson more than once. It usually goes something like this. We’re setting up at a remote boondocking spot, proud of how smoothly things are going, and then we open a drawer and realize … we forgot something basic. The towels. The dog food. Replacing the sewage hose that started leaking last trip and you put off replacing. Yeah, not ideal.

    But happily, it is preventable. So, if you’re getting ready for that weekend getaway or planning your summer RV adventure, I highly recommend preparing a go-to road trip checklist — or even having more than one road trip checklist. (We’ll talk about that in a minute.) Quite simply, it’s one of the easiest ways to make your trip safer, smoother, and way more enjoyable.

    Let’s break down why a road trip checklist matters — and what should be on yours.


    A Road Trip Checklist … Because We’re All Human

    There are two kinds of people in the RV world: Those who swear by their checklist, and those who eventually become those people. (Usually after a painfully memorable oversight.) RVing isn’t like tossing a duffel into the backseat and grabbing drive-thru on the way. Your rig is your transportation, lodging, kitchen, and bathroom all in one. If something goes wrong (or gets left behind), it can affect multiple parts of your trip.

    Here’s what a solid checklist helps you do:

    • Avoid forgetting essentials (like a new black tank hose).
    • Prevent costly damage (did you check your tire pressure before pulling out?)
    • Improve safety (because double-checking your hitch setup is never overkill)
    • Reduce departure-day stress (which is a real gift to your future self)

    Plus, when you’re on the road often, it’s surprisingly easy to get overconfident. A checklist keeps even experienced RVers in check. 


    The Pretrip Essentials: Before You Hit the Road

    A road trip checklist starts before your tires even leave the driveway. This is the time to focus on prep, packing, and rig readiness.

    Mechanical Musts

    • Check tire pressure and tread (including your spare).
    • Test brake lights, turn signals, and headlights.
    • Inspect propane tanks for leaks and ensure they’re filled.
    • Verify fluid levels (oil, coolant, windshield washer).
    • Confirm tow connections and weight distribution (if towing).

    If you’ve ever had a sway issue on the freeway or struggled with uneven weight distribution, you know how important it is to dial this in. Safety and comfort depend on it.


    Interior Readiness

    • Secure loose items (inside cabinets, fridge, countertops).
    • Stock toilet paper (RV-safe only!), soap, and cleaning supplies.
    • Ensure batteries are charged (house and engine).
    • Fill freshwater tank and sanitize if needed.
    • Double-check fridge and pantry stock.

    And please, do yourself a favor: Make sure you’re stocked on coffee or whatever your go-to morning ritual requires. We’ve definitely had to make an emergency grocery detour for that morning coffee.


    Your Never-Leave-Behind List: A Supply Check

    There are some RV items that aren’t just nice to have — they’re vital. If they’re not already part of your road trip checklist, add them now.


    Gear You’ll Actually Use

    • Water pressure regulator
    • Sewer hose and elbow adapter (bonus: sewer hose support)
    • Leveling blocks or auto-leveler tools
    • Surge protector or EMS (electrical management system)
    • Freshwater hose (bonus if it’s heated for winter travel)
    • Extension cords and adapters (30/50 amp depending on your rig)
    • Wheel chocks and jack pads

    Forget one of these, and you might find yourself MacGyvering a setup with duct tape and prayers, which is never fun. (If this reference doesn’t make sense, feel free to Google it and send me a message here so I can feel that much older … lol.)


    Your Road-Ready List: Ensuring Safety and Comfort

    Once you’re rolling, you’ll want to make sure you have everything to stay safe and comfortable on the road.


    Safety First

    • Roadside emergency kit (reflectors, jumper cables, tools)
    • First aid kit
    • Fire extinguisher (up to date!)
    • Extra fuses and bulbs
    • Emergency contact info in an easy-to-find spot


    Comfort Boosters

    • Cozy bedding, blackout shades, and good pillows
    • Battery-powered fans or portable heater depending on weather
    • Outdoor rug and camp chairs
    • Headlamps, lanterns, and flashlights
    • Travel-friendly entertainment (books, games, downloaded shows)

    Pro tip: If you travel with pets like we do, remember to pack their essentials too. Wilson (our mellow Cairn terrier) and Journey (our high-energy staffy mix) each have their own checklist — food, leashes, meds, and favorite toys. Because you don’t want to be the human who forgot the chew bone.


    Departure Checklist: Before You Break Camp

    The departure checklist is crucial and often overlooked — especially when you’re ready to get going and skip the whole pack-up process. Your already out on the road or off-grid. Surely, you can now kick checklists to the curb. Wrong. You need a campsite checklist to consult any time you depart. (But trust us, this is the moment when something always tries to go sideways.)


    The Ready-to-Roll List

    • Retract slides and awnings
    • Disconnect utilities (water, electric, sewer)
    • Secure all cabinets and doors
    • Close roof vents and windows
    • Lock external compartments
    • Store outdoor gear and trash
    • Check tire pressure one more time


    Bonus: Your RV Travel Day Checklist

    Even once you’re rolling, having a travel-day checklist helps things go smoothly.


    Don’t Forget

    • Maps and/or GPS app is set up (and offline backups downloaded)
    • Know your route (and low clearance warnings!)
    • Snacks and water within reach
    • Entertainment for passengers
    • Fuel level and next planned gas stop

    And yes, bathroom breaks. Map them out. Not every gas station has an RV-friendly setup — or a working bathroom. Plan accordingly.


    Make It Personal: Customize for Your RV Life

    Every RVer’s checklist is a little different — and that’s how it should be. Your rig type, travel style, pets, kids, and destination all affect what you’ll need.

    Here are a few custom additions you might consider:

    • For boondockers: solar panel setup, portable power station, gray tank monitoring
    • For full-timers: mail forwarding setup, mobile internet gear, spare parts
    • For cold-weather campers: heated hoses, window insulation, space heaters

    Over time, your checklist becomes like a pretrip ritual. You can even laminate it and keep it by the door — or go digital with checklist apps or RV-specific tools. If you go through the checklist in the same order enough times, the process becomes second nature and the stress levels lower.


    Preserving Peace of Mind

    RV life is full of incredible moments — sunsets at the coast, spontaneous roadside attractions, cozy evenings around a fire. But those moments are a lot easier to enjoy when you’re not scrambling to fix something you forgot.

    A road trip checklist might not sound glamorous, but it’s one of the most powerful tools you can have in your RV toolkit. It helps you stay ready, feel confident, and (hopefully) avoid that awkward moment when you roll into a campsite only to realize you forgot something.

    So, whether you’re a full-timer, a weekend warrior, or just hitting the road for the first time—make the checklist. Use it. Love it. Because nothing says “I’m ready for adventure” like knowing your sewer hose is exactly where it should be.

  • How an RV Warranty Works: An Owner’s Guide

    How an RV Warranty Works: An Owner’s Guide

    Look, we all know that there are warranties, and there are warranties. And we’ve neatly decided not to waste the time reading the fine print on our $50 printer’s warranty. But when it comes to big-ticket, high-stakes purchases? Of, baby! It pays to to pay attention. Now, no matter how much you’re spending on your RV, it not only classifies as a big purchase — it’s also full of features and amenities that are gonna get some heavy use. So, before you buy, it’s crucial to know how your RV warranty works. (Or, more correctly, how its warranties work. Don’t worry: We’ll explain.)

    Lucky for you, I was formerly a  warranty administrator at an RV dealership, and I have a few insights that I’d like to share about the value of an RV warranty and what you might consider if you’re RV shopping.


    A Little RV Warranty 101: Think Warranties

    Essentially, an RV warranty is a promise by the RV manufacturer to make good on any defects in the manufacturing process. Almost every RV manufacturer handles warranty claims the same way: While the warranty is the manufacturer’s, customer interaction is almost always the responsibility of the dealer. So, if you find that you have an issue with your RV, your dealership is an automatic first stop. 

    Now, one good thing about an RV warranty is that it’s very likely not a warranty. It’s a collection of warranties. So, when you see a shiny new RV with an X-year warranty sticker on it, that may not be the entire thing. RVs are built of components sourced from a number of manufacturers. I’m something of an RV expert, but I don’t know of any RV company that builds their own furnace, stove, refrigerator, air conditioner or many other major systems. (In fact, many RV companies don’t build the frames or axle/suspension systems either.)

    So, even if the RV you’re looking at carries a one-year manufacturer’s warranty on the RV itself, some components could have warranties that are covered long after the general warranty expires. 


    Some Subsystem RV Warranty Examples

    For example, Dexter’s torsion axles carry a 10-year warranty. The Alpha Ply rubber roofing on some RVs actually has a lifetime warranty. Many RV appliances including furnaces, air conditioners, and more have two-year warranties. 

    Often an RV builder will include individual paperwork for the variety of subsystems in the RV. The warranty that covers those systems will be stated in the paperwork. Sometimes the RV builder will also include listings of the various serial numbers of the components in the RV. They’re usually located in a place where they’re easy to find. (You know, like in the manual.)

    I recently bought a 2025 Rockwood Mini Lite and was really taken aback by the manual in this trailer that was put together in a binder with the specific model and serial numbers of all the various components in the RV. This is highly unusual and was a very welcome surprise. 

    The manuals likely also detail how to go about filing a RV warranty claim.


    How RV Warranty Claims Work

    Whether it’s for the RV in general or a system in the RV, all RV warranty claims essentially work the same way. Once you realize that you have a warranty claim, you can deal with the selling dealership — or, in some cases, with the component manufacturer or even the RV manufacturer. But know this: RV manufacturers generally expect warranty claims to come from dealerships. (And not all manufacturers are even set-up to handle warranty claims from individuals.)

    What’s going to happen is that a lot of photos of the issue will get taken and then filed with the RV’s manufacturer. From personal experience, I’ve found that no matter how many photos I took, the claims initially got denied for more photos. So, we take more photos and refile the warranty claim. The photos will also accompany a written description of the issue. I have had some RV companies that had really excellent web-based warranty claim systems. Others actually required that we fax in the claim. (Seemed ridiculous at the time — and more so today.)

    From there, the claim gets approved and almost all RV companies have a set rate for how long — in minutes — they expect the repair to take, which is included in the repair process. 

    One example that really sticks out in my mind was for an electric fireplace, which had failed. The RV company allocated 10 minutes to replace a fireplace. Plus, we got a replacement fireplace shipped to us. At the dealership, that almost covered putting the new fireplace in.


    How Dealerships Handle an RV Warranty 

    In the same fireplace claim that I just described, we spent probably 40 minutes figuring out what was wrong. Some 30-amp RVs have a switch that shuts off the electric fireplace if you turn on the microwave. So, our tech had to figure out if this was the problem — or if it was actually the fireplace itself. Then he had to remove the old fireplace and test it on his test bench. While he was doing all this, we took photos of the process to document what was wrong. Then we took photos of the serial and model number of the fireplace. 

    Now, you have two employees spending time diagnosing this, but our dealership only got paid 10 minutes time to affect the repair. That meant that the dealership had to pay one person, our tech, 40 minutes in time. And then they had to pay me (an employee of the dealership, not the owner) to document the process, file the claim, and then order the new fireplace. But we were only getting reimbursed our shop rate for 10 minutes. 

    As you can see, RV warranty work is generally a money-losing proposition for a dealership. 


    Why It’s Best to Return to the Dealership of Purchase

    So, if you shopped the dealership and then went to the next town over and bought the RV for less money, you can see why the local dealership has no interest in providing warranty service for you. Since RV dealerships aren’t franchised (like car dealerships are), they are also not compelled to provide warranty service to you if you didn’t buy the RV there. 

    Yes, it stinks but that’s the state of RV repair today. 

    This is one of the many reasons I highly recommend shopping your RV dealership first before you make a final buying decision. The caliber of their service department and the ability to complete warranty work is a big factor in your claim. 


    How to Take and Submit Pictures

    I had mentioned that the process of filing an RV warranty claim generally involves a lot of photos submitted to the RV manufacturer. That’s true. Basically, you’re going to want to be besties with your camera — for a lot of reasons. 

    First of all, if the various stickers on your RV’s systems are still in decent shape, you’ll want to take a photo of them. This will give you serial numbers and model numbers for the various parts. I usually snap a photo of things like axles and other items whose stickers can be damaged over time by use. 

    But if you do have an RV warranty claim, some dealers will take your photos and submit the claim on your behalf. This could save them time and also mean you don’t have to bring the RV in for service. (Not all dealers work this way, but remember the statement about shopping your RV dealership first.)


    What an RV Warranty Is Worth

    With a solid dealership ally on your side and reasonable claims, RV companies absolutely honor the warranties. Honestly, as long as I filed the claim properly, I don’t remember ever having a claim denied that was a legitimate claim. 

    In fact, there were times where I filed a claim after the warranty period, and the manufacturer still stood behind the system. This is not expected. (And also not typical.) But some RV manufactures might stretch the rules just a tiny bit depending on the circumstances. Naturally, this also depends on the RV manufacturer. Fortunatelym the dealership I worked at tended to favor brands that serviced our dealership well so we could, in turn, serve the customer well. 

    So, is the warranty on your RV legitimate? Rest easy. I have yet to see a circumstance where it isn’t. 


    When Your RV Warranty Clock Starts

    Know that the coverage of your warranty starts when the paperwork on the sale goes through. So if you’re planning on purchasing an RV, for example during the off-season, and then not using it until the weather is more cooperative, your warranty clock is still ticking. 

    I suggest taking the RV from the dealership right to a campground or a place where you can test as many systems as possible. Perhaps winter’s bite might keep you from using the water system but furnaces, the fridge, and many other systems work year-round. 

  • Portable Toilets and Cassettes: An Information Dump

    Portable Toilets and Cassettes: An Information Dump

    Let’s be honest: No one gets into RV life for the toilet experience. But if you’ve spent any amount of time on the road (like my wife and I in our seven years RVing), you know just how important a good waste setup can be. Heck, if you’ve road-tripped in a regular vehicle and had to use a gas station or fast-food bathroom, you understand and appreciate a good personal toilet setup. You also come to understand that a good toilet experience can happen in different ways — be that porcelain thrones or portable toilets.

    Personally, we’ve always had a traditional black tank system in our RVs. But over the years, we’ve seen just about every option out there. We’ve walked through countless RV shows. We’ve watch and eventually created more YouTube and Instagram demos than we’d like to admit. (And yes, that includes the awkward dump station how-tos.) Of course, we’ve also seen our fellow campers handling their portable setups at sites across the country. Trust us, we’ve seen it all.

    Now, one of the most frequently asked questions we hear from RV newcomers and weekend warriors is about “those removable toilets.” What are portable toilets? How do they work? And are they actually better than a regular black tank setup?

    So today, we’re giving you the full information dump on cassette, portable, and composting toilets in RV life.


    Portable Toilets: For Mobile Business

    Portable toilets are standalone, self-contained toilet systems that don’t require permanent installation or a plumbing connection. Think of them as upgraded versions of what you’d see at a festival, but cleaner, more efficient, and (hopefully) less disgusting.

    You’ll usually find these in smaller rigs like teardrop trailers, Class Bs, or pop-up campers where space and plumbing are limited. Some folks even add them to their vehicle setup for boondocking or off-grid convenience.


    Pros

    • Lightweight and easy to move
    • Great for tent campers or car campers
    • No complicated plumbing required
    • Ideal for quick overnight stops or off-grid flexibility
    • Simple to clean and affordable to replace


    Cons

    • Small capacity means frequent dumping
    • Manual dump process (yes, you have to carry it)
    • Limited ventilation can cause odors
    • Not ideal for full-time or long-term travel
    • Not designed for long-term heavy use


    Cassette Toilets: A More Manageable Dump

    Cassette toilets are a sort of hybrid. They’re usually permanently built into the RV like a traditional toilet, but they use a removable black tank (called a cassette) that you pull out from an exterior hatch to empty. They’re most common in European rigs and smaller Class Bs, but we’re starting to see them pop up more frequently in other smaller RVs here in the States.

    We’ve toured a lot of rigs with cassette toilets and talked to plenty of owners. While they can be a great space-saver, they definitely come with trade-offs.


    Pros

    • Built-in toilet with minimal space requirements
    • Newer RVs tend to have easy exterior access for removal and dumping
    • Doesn’t require a full plumbing system or traditional black tank setup
    • Great for compact RVs and vans
    • Can be dumped into many public toilets, pit toilets, or dump stations
    • Newer models sometimes include an electric flush and small rinse reservoir


    Cons

    • Small tank size fills quickly
    • Needs to be dumped every couple of days with regular use
    • Public dump stations or restrooms are often required and not always allowed or available
    • Carrying a full cassette through a public area isn’t exactly glamorous
    • Some models don’t have a vent, which can lead to odor
    • Waste tank seals can wear out and need replacing over time


    Composting Toilets: Down-to-Earth Solution

    Another increasingly popular option among #vanlifers, schoolies, and frequent boondockers is the composting toilet. Unlike portable or cassette toilets, composting models separate solids and liquids, using natural breakdown processes instead of chemicals or water.

    We’ve seen composting toilets pop up in a lot of Class B rigs and custom builds at RV shows, and they definitely have a loyal following — especially among off-grid travelers and eco-conscious RVers.

    Pros

    • No black tank required
    • Waterless and chemical-free
    • Solids container can last weeks before needing to be emptied
    • Liquids can be easily disposed of in appropriate facilities
    • Environmentally friendly and great for off-grid use


    Cons

    • More expensive upfront than other options
    • Learning curve for proper use and maintenance
    • Must empty liquids more frequently
    • Venting system requires installation and power
    • Some users find the solids emptying process a bit…personal and disgusting

    Sure: Composting toilets aren’t for everyone, but for those living off-grid or looking to reduce water use, they can be a smart, long-term solution.


    How Portable Toilets Compare to Black Tanks

    This is where we can speak from the most experience. We’ve always traveled with regular black tank systems — and despite the occasional clog, leak, or misread sensor, we’ve appreciated the capacity and convenience they provide.

    Traditional black tanks:

    • Hold significantly more waste (typically 15 to 50+ gallons)
    • Require less frequent dumping (we can usually go a week or more)
    • Can be emptied quickly at any standard dump station
    • Stay permanently connected and vented for less odor

    But they also:

    • Require a full dump station hookup (or macerator setup)
    • Need maintenance, like tank flushing and sensor cleaning
    • Can clog if you’re not careful with TP or water usage (We now use regular TP and have a designated bathroom trash can with a lid for only toilet paper. This has led to—fingers crossed—no clogs in years of use.)
    • Can get messy if hoses or valves malfunction

    Meanwhile, cassette, portable, and composting setups trade long-term ease for short-term simplicity.

    If you’re doing van life, short weekend trips, or traveling solo, these smaller options can be incredibly practical. But for long trips or full-time RVers like us, especially those with pets or extended travel goals that include long boondocking stays, the capacity and convenience of a traditional black tank setup wins out.


    Real-World Observations

    Even though we’ve never owned a cassette, composting, or portable toilet ourselves, we’ve seen plenty in action. We’ve watched folks roll into rest stops with a cassette or composting tank in hand, and while it gets the job done, you definitely need to be comfortable handling your own waste. (And doing it more frequently.) When you’re boondocking for days or weeks at a time, that frequency starts to matter.

    At RV shows, we’ve also noticed that newer builds — especially those aimed at off-grid lifestyles— are leaning toward composting toilets as a space-saving and eco-conscious solution. But again, that system isn’t for everyone, and it takes a bit more involvement to manage.


    Tips for Choosing the Right Setup

    Whether you’re in the market for a new RV or thinking about upgrading your current bathroom situation, here are a few things to keep in mind.

    • Know your travel style. If you’re part-timing or boondocking occasionally, smaller toilet systems can work well. Full-timers? Consider a setup that prioritizes convenience and capacity.
    • Think about where you’ll be dumping. Cassette toilets often require public restrooms, composting systems need thoughtful disposal of both liquids and solids, and traditional black tanks rely on designated dump stations.
    • Check local regulations. Some parks and areas have rules about how and where waste can be dumped.
    • Think about comfort and convenience. Ask yourself how often you want to interact with your toilet — and how okay you are with carrying your waste across a campground or into a public restroom.
    • Watch for wear and tear. Portable and cassette toilets often need new seals, handles, or tanks over time.
    • Consider ventilation and smell. Proper setup, whether black tank or composting, makes a huge difference in odor control.


    In the End, Everyone’s Gotta Go

    RV toilets might not be the sexiest part of RV life or full-time travel, but they are one of the most important. And while we’ll continue rolling with our black tank and clear elbow adapter (seriously, that little transparent piece is a game-changer), we totally get the appeal of cassette, portable, or composting setups — especially for new RVers dipping their toes into the lifestyle.

    At the end of the day, there’s no “right” choice — just the right one for your rig, your travel style, and your comfort level. If you value simplicity, don’t mind frequent dumps, and need something compact, cassette, portable, or composting toilets can absolutely do the job. If you’re looking for convenience, longevity, and less interaction with your waste (we hear you), a traditional black tank might be the way to go.

    Whichever path you choose, just remember: It’s not about the toilet. It’s about the journey — and being able to enjoy it comfortably, confidently, and cleanly.

    And hey, the next time you see someone walking through a gas station towards the restrooms with a weird plastic box in tow… just smile and give them a nod. They’re out there living the dream — one dump at a time.

  • Yes, RV Paint Is Different — Here’s What You Need to Know

    Yes, RV Paint Is Different — Here’s What You Need to Know

    If you’ve ever looked at your RV and thought, “Maybe I’ll just give this thing a fresh coat of paint,” pump the brakes for a second. Because while RVs may look like oversized vehicles or tiny homes on wheels, painting them is a whole different beast compared to your car or living room walls. Yes, RV paint is different. And if you don’t understand how and why, your dream of a DIY facelift could end up turning into a disaster.

    Now, if there’s one thing we’ve learned in our seven years on the road, it’s that many things about an RV — from the plumbing to the paint — is uniquely built for life in this particular lifestyle. It’s not to say that there aren’t any similarities, but some things are simply way different than your normal sticks and bricks home. That includes the exterior paint, which has to put up with way more abuse than your typical vehicle or home ever will.

    So, whether you’re planning a full-on DIY project or just curious why that paint quote was more than your first car, here’s everything you need to know about RV paint, how it differs, and how to make the right decision for your rig.


    Why RV Paint Is Different — and Why It Matters

    Let’s start with the obvious. Your RV is a giant moving box constantly exposed to the elements. Unlike a car that’s parked in a garage or a house that stays still, your RV’s paint job takes a beating. We’re talking sun, rain, dust storms, hail, temperature swings, tree sap, bug splatter, road grime … whew! You name it.

    RV paint is designed to handle all of that. It’s not just about looking pretty, it’s about protection, and here are some of the reasons this isn’t your normal paint job


    RV paint is a specialized composition.

    RVs often use high-end automotive or marine-grade paints, like polyurethane blends or epoxy-based paints. These paints are flexible, UV-resistant, and able to bond to materials like aluminum or fiberglass. That flexibility is key.  Your RV’s exterior expands and contracts with temperature changes, especially if you’re traveling between hot deserts and cool mountains.

    A regular house paint or basic enamel won’t cut it here. It’ll crack, chip, or peel within a season. RV-specific paint, on the other hand, is made to flex and protect over time.


    Surface compatibility requires prep and priming.

    RVs aren’t usually made from the same stuff as your sedan. (And they’re definitely not made like a house.) Most exteriors are fiberglass or aluminum, which both require special prep and paint to adhere properly. Without the right primer and prep work, even the best paint will start bubbling or flaking off before you’ve even made it to your next stop.

    A good bonding primer is crucial — especially if you’re painting over gel coat, which is slick and nonporous. Skip this step, and you’re just wasting time and money.


    UV and weather protection are critical.

    We’re not just talking about color fading. The sun can bake your paint job into a cracked, dull mess. And constant exposure to rain or road salt can lead to corrosion or delamination over time. That’s why high-end RV paints include UV inhibitors, clear coats, and often multiple layers of sealant.

    It’s also why a proper paint job — whether pro or DIY — requires more than just “a good coat.” You’ll need multiple layers and, ideally, a protective topcoat.


    What Kind of Paint You Should 

    Let’s break it down based on your exterior and your goals. (Because not all paint is created equal, and not all RVers have the same needs — or budget.)


    1. Automotive-Grade Polyurethane Paint

    This is the gold standard for most new RVs and professional repaints.

    • Pros: Extremely durable, colorfast, flexible, and resistant to UV damage and chemicals.
    • Cons: Expensive and typically requires a sprayer and a controlled painting environment (i.e., not your driveway or buddy’s garage).

    If you’re going for a full-body paint job at a dealership or RV shop, this is likely what you’re getting.


    2. Marine-Grade Epoxy Paint

    Ideal for fiberglass RVs, especially if you want max durability and weather resistance.

    • Pros: Built for harsh marine environments, excellent adhesion, and resistant to water and salt.
    • Cons: Fewer color options, pricey, and not as glossy as automotive finishes.


    3. Oil-Based Paints

    These are sometimes used on older rigs or for touch-ups and lower-budget projects.

    • Pros: Decent durability, easier for DIYers, and bonds well to metal or aluminum.
    • Cons: Slower drying time, more fumes, and requires regular maintenance.


    4. Latex Exterior Paint (Budget DIY Option)

    A popular choice among RV DIYers looking to freshen up their rig without breaking the bank.

    • Pros: Cheap, easy to work with, lots of color options.
    • Cons: Not built for RV wear and tear, can chip or fade quickly, and often requires frequent touch-ups.

    If you go this route, make sure to use a bonding primer, apply multiple coats, and finish with a UV-protective clear coat. Personally, I would try to stay away from this option unless your RV is in really bad shape paint-wise. (And you’re dead set on the cheapest DIY paint job you can do.) Always remember that in the long run, what starts out as a really cheap option, usually ends up being as expensive, if not more so, in the end.


    Essential, Unskippable Preparation 

    Before you ever open a can of paint, you need to prep your surface like your RV’s life depends on it — because, in a way, it does.

    • Wash thoroughly. Use a degreaser or RV-safe soap to remove dirt, wax, and grime.
    • Sand or scuff. Smooth surfaces like gel coat need to be roughened up to help paint stick.
    • Tape off. Windows, decals, rubber seals — cover anything you don’t want painted.
    • Prime properly. A quality primer designed for RV materials is essential.

    If you’re skipping the prep, you’re just setting yourself up for disappointment and failure.


    DIY vs. Professional RV Paint Jobs

    We’re big fans of a good DIY project, but full transparency — if you’re going for a full-body RV repaint, there’s a reason pro jobs cost up to $10,000. Between the need for equipment, ventilation, multiple coats, and curing time, it’s not a small task. Throw in the fact that if not done properly, you could cause some serious damage to your RV. For us, even though we’re DIYers, we’ve often found that contracting a professional is the way to go.

    That said, if you’re just doing touch-ups or a small cosmetic upgrade, a DIY job with the right prep, materials, and patience can be done.


    What About Custom Graphics?

    If your rig has decals or full-body graphics, repainting becomes a little trickier. Decals can be removed and replaced, but full paint jobs with graphics involve detailed masking and layering that’s best left to pros. The same goes for clear coating and buffing. If you want that showroom finish, it may be worth letting a specialist handle it. (Are you seeing a pattern here?)


    Don’t Forget the Interior

    Interior paint jobs are a different story altogether — and much more beginner-friendly. Because the interior of your RV isn’t exposed to the elements or expanding/contracting as much, you can get away with regular interior latex or enamel paint. Still, prep is important, especially when painting slick cabinetry or laminated surfaces.

    Pro tip: Use a bonding primer and sand lightly before painting cabinets or furniture. You’ll thank yourself later when it doesn’t peel.


    Another Option?

    Another popular option that is not as expensive and can give you that revamped look you’ve been hoping for is a good vinyl wrap. This is a great bang for buck option if you are looking to spruce up your rig for a few more years of use or immediate resale value. If you’d like to read more about this option, just write “More Vinyl Please” in the comments section, and I’ll be happy to write a similar article to this one with a pros and cons comparison section.


    So, Is Repainting an RV Actually Worth It?

    Yes, RV paint is absolutely different. And yes, treating it like you’re repainting your kitchen or touching up your sedan is a fast track to disappointment. But whether you’re looking to refresh your rig, cover up some road rash, or go all out with a custom look, knowing your options can help you get the results you’re after.

    If you’re going the DIY route (which I strongly suggest against unless you’re really confident), take your time, do your research (including the weather, if your RV is outside), and invest in quality materials. And if you decide to leave it to the pros, know that you’re paying for more than just paint. You’re paying for protection, longevity, resale value, and the experience of the professional taking on the project.

    Knowing if it’s ultimately worth it comes down to your budget, skill set, and reason for doing it. Always compare prices on RVTrader.com to see what RVs similar to your rig are selling for, especially in the year and condition you have and are hoping to upgrade to. That said, if you go through with it, here’s to showing off that new look on the open road! 

  • Earth Day Ethics: An RV Guide to Leave No Trace

    Earth Day Ethics: An RV Guide to Leave No Trace

    The freedom to live, work, and play in gorgeous natural places comes with an incredible, but simple, responsibility. Living and traveling in our RV for the past 12 and a half years has afforded us some incredible opportunities to spend weeks — even months — in some of the most beautiful, pristine, and remote areas of this continent. (For those of us who crave both adventure and solitude, this is truly RVing nirvana!) Visiting some of the Earth’s most serene places strikes a cord in the heart of the traveler of admiration and affection. That desire — to preserve, to leave no trace when your RV passes on — is a great place to start.

    There is an ethics to traveling. Earth Day is a great reminder that it’s not a burden so much as joy. Personally, as full-timers, without the office or responsibilities of a house calling us back home, we can work, play, and live wherever we desire. Doing so, however, creates an awareness that extended stays in pristine places can have negative consequences on the environment for others and future generations to enjoy.

    So, how can we balance a desire to be out there with our own sense of stewardship for it. Quite simply, we all must accept our role as caretakers.

    Young scouts learn the importance of picking up trash and leaving a place better than they found it. While that’s an important part of the overall ethic of our collective responsibility to the planet, Leave No Trace principles go far beyond just picking up litter. These principles are a commitment to making a difference for future generations as well as the preservation of the biodiversity of a natural area.  

    Let’s talk about exactly how you can live out Leave No Trace in your RV.


    First: Understand How RVs Can Hurt an Environment

    Without careful management, we can have a negative impact on pristine wilderness areas we seek to explore and enjoy. We can pollute the air and waterways, and disrupt habitats with noisy generators, improper outdoor lighting, careless site selection, and trash.  

    In popular natural destinations that attract many RV campers, the repeated cycle of compaction, habitat disruption, and improper waste disposal can lead to significant environmental impacts. Fragile ecosystems, such as wetlands, meadows, and deserts, are particularly vulnerable as these areas often have unique species that depend on specific conditions to thrive. When their habitats are disrupted, not only is the local flora and fauna affected, but there can also be a ripple effect that impacts the wider ecological web of the area.  

    As RVers, we hold the keys to making a significant difference with each choice we make. From the paths we drive to the ways we manage our waste, we either contribute to the problem or become part of the solution.


    Second: Learn the 7 Principles of Leave No Trace

    Sure, if you haven’t practiced these principles before, these may sound like a lot to think about, especially when you are on vacation!  But really, once you learn the seven principles of Leave No Trace and how you can implement them in your RV, they simply become … second nature.  (Pun intended!)  

    Ask any Boy or Girl Scout to recite these seven principles, and they may even sing you a song that they’ve learned to remember them. But, most adults can only name a few. If it’s been a while since you’ve been a scout or scout leader (or if you’ve never been a scout), here’s a quick overview.

    1. Plan Ahead & Prepare
    2. Travel and Camp on Durable Surfaces
    3. Dispose of Waste Properly
    4. Leave What You Find
    5. Minimize Campfire Impacts
    6. Respect Wildlife
    7. Be Considerate of Others


    Sounds simple, right? While most of these principles are common sense, there are some environmental impacts from RV camping that may surprise you. (And yes, there are real temptations! Who doesn’t want to touch a manatee?!

    Now, let’s take the next step and discuss how Leave No Trace  principles can be easily integrated into a RV camping lifestyle to help preserve our special places and keep our wild places truly wild.


    Third: Reduce Your Impact with 6 Simple Tips

    1. Sharpen your campsite selection.

    • Problems. Soil erosion can be exacerbated by the weight and pressure of large RVs on the land. This can lead to compacted soil, which reduces its ability to absorb water and support plant life. In turn, this can lead to increased runoff and erosion. Also, when RVers wander off of established paths or create new ones, they can destroy and disrupt wildlife habitats, contributing to erosion or soil degradation that may take years or even decades to recover. Recreational off-trail choices in the area — from hiking and cycling to motorcycle and OHV use — can leave a serious impact.
    • Solutions. RVers should use established campsites, boondocking areas, and parking areas to avoid damaging untouched natural areas. When these are not available, look for durable surfaces, such as gravel or sand, that are more resistant to wear, and more porous for ground water saturation. Learn to identify cryptobiotic soil when camping in the desert and steer clear of it. It takes decades to regenerate this precious soil upon which desert plants rely, so “Don’t Bust the Crust!” And always stay on designated trails when hiking to prevent soil erosion and protect plant life as well — and only use motorized vehicles on trails or roads designated accordingly.


    2. Avoid campfire hazards.

    • Problems. Boondocking areas are often littered with numerous campfire rings, many containing half-burned wood, or even worse, smouldering ashes. Also, campers often build very large fires, which can stray out of control and cause forest fires. Or they try to burn objects such as wooden pallets, or metal cans and plastic which give off noxious fumes.
    • Solutions. RVers should bring their own portable fire pit/grill and keep fires minimal, especially in fire prone regions. There are many LNT options made by OTZI, Solo, and Primus which leave absolutely no ashes or wood behind. Or camp next to an existing campfire ring and be sure to burn wood completely down to white ashes. Never try to burn materials in the fire unless they are made from paper or wood. Before leaving the area, make sure your fire is “dead out” by dousing it with plenty of water and stirring it to make sure all ashes have cooled. Never leave a fire until the ashes are cold. And, please clean any fire pits in the area that are littered with trash and recycling!


    3. Game-plan your waste water disposal.

    • Problems. Improper disposal of gray and blackwater tanks can contaminate water and soil, posing health risks to both humans and wildlife. Chemicals from soaps, detergents, and human waste can upset the natural chemistry of ecosystems, leading to algal blooms and other negative environmental issues.
    • Solutions. Use dump stations to dispose of the wastewater in your tanks. If you do dishes in bins to save water, filter out any food particles with a small sieve and scatter the wastewater in a different place each day (but never within 150 feet of a water source). This lessens the impact on a specific area. Throw away any food particles in your trash so as not to attract any critters to the area. If limited facilities make it difficult to dispose of waste properly, plan trips into town that align with dump station locations. It’s all about being proactive and planning ahead!


    4. Carefully monitor your trash disposal.

    • Problems. Littering, whether intentional or accidental, can not only be unsightly, it can lead to the destruction of pristine natural areas and have very negative impacts on wildlife. It teaches wildlife to live off of human food/trash rather than find their own.  Just as deadly is micro-trash like twist ties, bread bag clips, Hershey bar wrapper corners, bottle caps, dental floss, and cigarette butts. Wildlife can confuse these tiny pieces of trash as food, and are often found in the stomachs of dead birds and other marine critters.
    • Solutions. In remote areas, RVers should always pack out what they pack in. This means being prepared with trash bags and recycling containers. One way to minimize your trash is to responsibly burn any used paper products and paperboard boxes. Consider reusable or biodegradable products to minimize plastic waste — think reusable water bottles and jugs instead of disposable ones. In all camping areas, always scour your campsite for all trash (including micro-trash) and make sure it ends up in the trash/recycling before you leave.


    5. Decrease your resource consumption.

    • Problems. RVers often use too much water (especially in desert areas) and consume too much power, causing them to run a gas generator for several hours per day. This creates both air and noise pollution, as well as being a fire risk in drier areas.
    • Solutions. Resource conservation starts with using less water and electricity. An appropriately-sized solar powered system for your RV can silently provide all the power you need by garnering energy from the sun, thus eliminating the need for a gas generator all together. Conserving water is easy by taking shorter showers and using a basin for washing dishes, which reduces water usage. Remember, every small action contributes to the larger goal of preserving the environment, and allows you to stay out longer!


    6. Limit your campsite lighting.

    • Problems. RVers often leave bright outdoor lights on all night. Bright, unshielded lighting can affect bird migration, sea turtle hatchlings (when camped near the beach), and night sky viewing in dark sky areas. They can also bother nearby campers who seek out dark areas.
    • Solution. Only use outdoor lighting when necessary and make sure it is shielded so that it doesn’t point upward. Small solar lights or under RV lights are fine to make it safer to move around the campsite at night, but it’s important to turn them off before you go to bed.


    The Joy of Leave No Trace as You RV

    To truly appreciate nature’s unique gifts and ensure their preservation for future generations, it is crucial to understand the effects that our recreational choices have on our planet. By becoming aware of these impacts, and sharing them with others, we can all make informed decisions that align with the seven principles of Leave No Trace. Before you know it, it’ll become second nature for you and your family!

  • Vintage RV Restoration: Some Expert Dos and Don’ts

    Vintage RV Restoration: Some Expert Dos and Don’ts

    Been bitten by the vintage bug? Welcome to the club! Now, listen to a little advice from a few long-time members: Your vintage RV restoration may not be as easy, cheap, or as linear as you imagine, but what’s beyond it can be even better than what you’ve dreamed. Our story is proof of that.

    Our 1957 camper — who we lovingly refer to as Hamlet — was in quite a state when he rolled into our driveway in the late winter of 2011. While not a complete teardown, he needed moderate-to-major work both inside and outside. (So much so that about half-way through the project, we got in a tiny conflict over the use of the cordless drill.) Once, as Hutch was working on new sheet metal on the roof, Shari wanted to install a wine-glass rack over the sink.

    “I need to see some cute,” Shari said imploringly, “I need to have some hope!”

    After downsizing and renting out our home, we were in deep. And, truth was, we both needed to see some light at the end of the tunnel. Fortunately, the future ahead of our vintage RV restoration was even brighter than expected.


    Day 1 of Hamlet’s renovation.


    The Light at the End of a Vintage RV Restoration

    After traveling approximately over 200,000 miles in 12 and a half years through 49 U.S. States and 10 Canadian Provinces, our lil’ vintage home-on-wheels has proven to be up for just about any road challenge. We look back on those project times with fondness and a feeling that it was all worthwhile. Hamlet has now been to all 51 national parks you can drive to, as well as 13 Parks Canada sites.

    Have we fixed it along the way? Of course! Does it require a lot of maintenance? Some, but nothing really major. (All rigs require maintenance.) Since we know our rig inside and out, we’ve been able to do 99 percent of the work ourselves by using some relatively simple tools, creativity and ingenuity, and a heavy dose of resourcefulness.


    Later on, putting the final finishing touches on Hamlet.


    What to Avoid When Selecting a Vintage Rig

    Jeremy — a vintage camper restorer and owner of Down River Vintage Trailer Restoration in Winlock, Washington — never gives a quote to anyone on their trailer project until he first fully removes the aluminum outer shell and takes a good look at what’s underneath.

    Why is that? If you are seeking an easy to moderate amount of work, you’ll want to find a trailer with good bones. Perhaps it only needs some updating, polishing, painting, or redecorating. If you are up for a major project, no restoration or renovation is impossible. But every vintage is somewhere on that continuum. It just depends on how deep you want to dive in!

    Below are some things to avoid if you are NOT up for a truly challenging and very time-consuming project:
     

    Red Flags for a Vintage RV Restoration 

    • Very strong musty smell (some is normal)
    • Significant damaging leaks (small leaks can be dealt with)
    • Major rust on frame/tongue (surface level is OK)
    • Major structural problems (what’s causing it to lean?)
    • Soft spots in the floor (usually requires a complete tear down!)
    • Electrical/appliances/propane not working (not impossible, just time consuming)
    • Broke windows or door handles (hard to find parts unless it’s a popular model)
    • Exterior dents or damage (will require replacement, very time consuming)
    • Bent tongue or hitch (will need to be replaced before towing)
    • Broken axle/bearings (will need to be replaced before towing)
    • Owner doesn’t have the title (some states will accept a bill of sale for registration, but others are very particular — check out the DMV rules in your state before buying!)
    • Completely stripped down on the inside (no cabinets, etc.)
      *People buy these old rigs, then get overwhelmed and just sell; but often, they’ve already torn the inside apart. While it looks like it could save you time, BUYER BEWARE, as removing all cabinets removes structural integrity!


    Do’s & Don’ts When Diving Into a Vintage Project

    Definitely do …

    • Keep the big picture in mind. Even so, try not to let it overwhelm you. Set small goals along the way and celebrate accomplishments.
    • Determine what you can DIY. Figure out what you can do and what you need to hire out for. There’s no shame in knowing your limits!
    • Research, research, research! Bookmark good resources. Here are some of our favorite websites and social media sites.
    • Secure a long-term workspace. If possible, find a covered / indoor place to do the work. It’ll save you both time and some weather-related anxiety and give you the flexibility to do the work whenever you can.
    • Decide where to start. If you choose a complete teardown, start with the outside. If not, start wherever it makes sense for you – or work on a bit of both depending on the weather and your working location.
    • Make friends with other restorers. This can happen both online and in person. Check out Vintage Camper Trailers BootCamp to learn from experts in the field – all in one place!


    Please don’t …

    • Go for a gutted trailer. Avoid trailers that have been completely gutted on the inside – they lose much of their structural integrity without cabinets, closets, bench seats, etc. They should never be transported in that condition without some serious internal bracing.
    • Be haphazard with material choices. Never use pressure treated wood where it could come into contact with aluminum siding. This type of wood is often treated with copper which can leach out of the wood and actually corrode the softer aluminum.
    • Rush to repaint. To paint or not to paint? That is the question. If the trailer was already painted, definitely have it redone.  But if it was originally unpainted aluminum, it might be better to simply polish, check out this great resource for polishing aluminum.  We chose to paint over our trim, door and window frames and polish the rest of the aluminum.


    Look Past the Ugly — Imagine What’s Possible!

    When our 1957 Sportcraft arrived in our driveway, the siding looked like aged duct tape, with sheet metal screws rusting, mildew and muck all over the exterior, and some small separation issues on the sides. And for, some reason, the previous owner who “restored it to sell” used tubes and tubes of silicone caulk everywhere — which took many days and a lot of elbow grease to remove. Even so, Shari didn’t fail to notice something about our new trailer, “He’s got good bones!”

    To see that, you had to look past some things. The inside had been “updated” with new yet hideous curtains. The two layers of flooring were cracked and peeling. The bed sagged in the middle, and you could feel the springs in the dinette bench seats poking through. Plus, there was some water damage on the wooden walls and ceiling. (See some highlights of where Hamlet started.)

    But Hamlet, as we came to call our trailer, is a success story. We bought Hamlet for $900. And since 2011, we have put about $4,500 into it. Here’s a list of what we did to renovate it over the course of a year and half, as well as some fix-its since we’ve been living in Hamlet full-time.


    Inside Hamlet’s Vintage RV Restoration

    • Removed and rebuilt dinette seats to accommodate storage underneath. We hired a local upholsterer to construct and sew the cushions and pillows. This was money well spent, because neither did we own a sewing machine or have any experience with specialty sewing.
    • Sanded and shellacked all walls, cabinets, drawers, etc.
    • Removed all curtains, replaced with venetian blinds and installed blackout curtains around the bed for good sleeping and to keep the heat out.
    • Rebuilt kitchen cabinet above counter and replaced all the hardware and electrical. (Tip: Don’t completely strip down cabinets; do them one by one for the same reason we mentioned earlier.)
    • Found a replacement for the missing stove. Don’t skimp here and simply put in a camping stove as they burn less efficiently and could release carbon monoxide or noxious fumes inside your camper.
    • Tore out the old bed. We then rebuilt it with a divider and accessible storage baskets underneath and invested in a super comfy mattress. (Seriously, the most comfortable bed we’ve ever slept on!)
    • Replaced faucet and plumbing, and added super helpful dish sprayer.
    • Peeled up two layers of linoleum flooring. We then put down a new thin layer of sub-flooring and replaced with black-and-white checkerboard linoleum tiles.
    • Added new 12-volt LED strip lighting and refurbished existing lights.
    • Removed the old roof vent and replaced it with a 12-volt Fantastic vent fan.
    • Removed the ice tray on the old ice box and installed some shelving to make it a more usable space for dry food.
    • Renovated the main closet to make it more functional. We added shelves and a behind the door pocket rack for easy grab storage.


    Outside Work Restoring Hamlet to Vintage Condition

    • Fabricated new “gearage door” that was previously screwed shut. We hired a local machine shop to make this for us as we didn’t have the tools.
    • Repaired minor dents and scratches in the door with Bondo. Then we painted window trim, frames and door. We weren’t able to restore the finish on these items so decided to add some fun color instead.
    • Replaced windows with Lexan plastic. We outsourced the cutting and shaping.
    • Removed all aluminum from the front to back. We added blue-foam insulation into each space between and sealed with spray foam before installing new aluminum.
    • Replaced every single one of the 957 screws with stainless-steel screws to prevent future rusting.
    • Retained the original pleated sides, which help with heat expansion and contraction. We polished, polished, and polished some more until we could see our reflection!
    • Added a bike rack by welding on a hitch receiver to the frame. (We used the same machine shop that did our “gearage” door.)
    • Replaced trailer brake/turn signal lights with brighter LED lights, and added additional lights below the back window and on the bike rack for higher visibility.
    • Scraped and painted tongue and propane tank tray.
    • Added propane tanks and replaced hoses to run both our two-burner stove and Mr. Heater Portable Buddy.
    • Added diamond plate along bottom to create a more finished look (and hide some of the previous fixit flaws).
    • Replaced axle and bearings, tires, leaf springs, and hubcaps. These were all done post remodel and were outsourced to a shop that specializes in trailers, not RV’s.
    • Installed a basic solar-powered system, which has evolved significantly over the years!


    Whew, and if that list isn’t intimidating enough for you, remember: Take it one step at a time and keep yourself motivated by focusing on that day you will pull out of your driveway!