Category: RV 101

  • RV Acronyms Every Camper Should Know

    RV Acronyms Every Camper Should Know

    If you’re new to the RV world, you’ve probably come across a conversation (or ten) that flourishes RV acronyms like a secret code. “Our TT has a GVWR of 9,000 pounds, but the CCC is only 1,500 pounds. So, we make sure to check the PSI before heading out, especially when boondocking with no hookups.”

    Wait … what?

    OK, that might be a little extreme. (Just a little example for ya.) But it’s not far off. RV lingo is packed with crazy acronyms. Don’t let the alphabet soup overwhelm you though. Having a little guide that helps you know what they mean can make your life on the road much easier. Whether you’re shopping for your first RV, learning about weight limits, or planning your next trip, these acronyms will help you navigate the world of RVing like a pro.

    Let’s break down the most important RV acronyms that every camper should know.


    RV Types and Classes

    One of the first things you’ll encounter in the RV world is different types of RVs. Knowing the lingo will help you determine what kind of RV fits your travel style. (Especially because some folks use the shorthand.)

    A (Class A Motorhome)

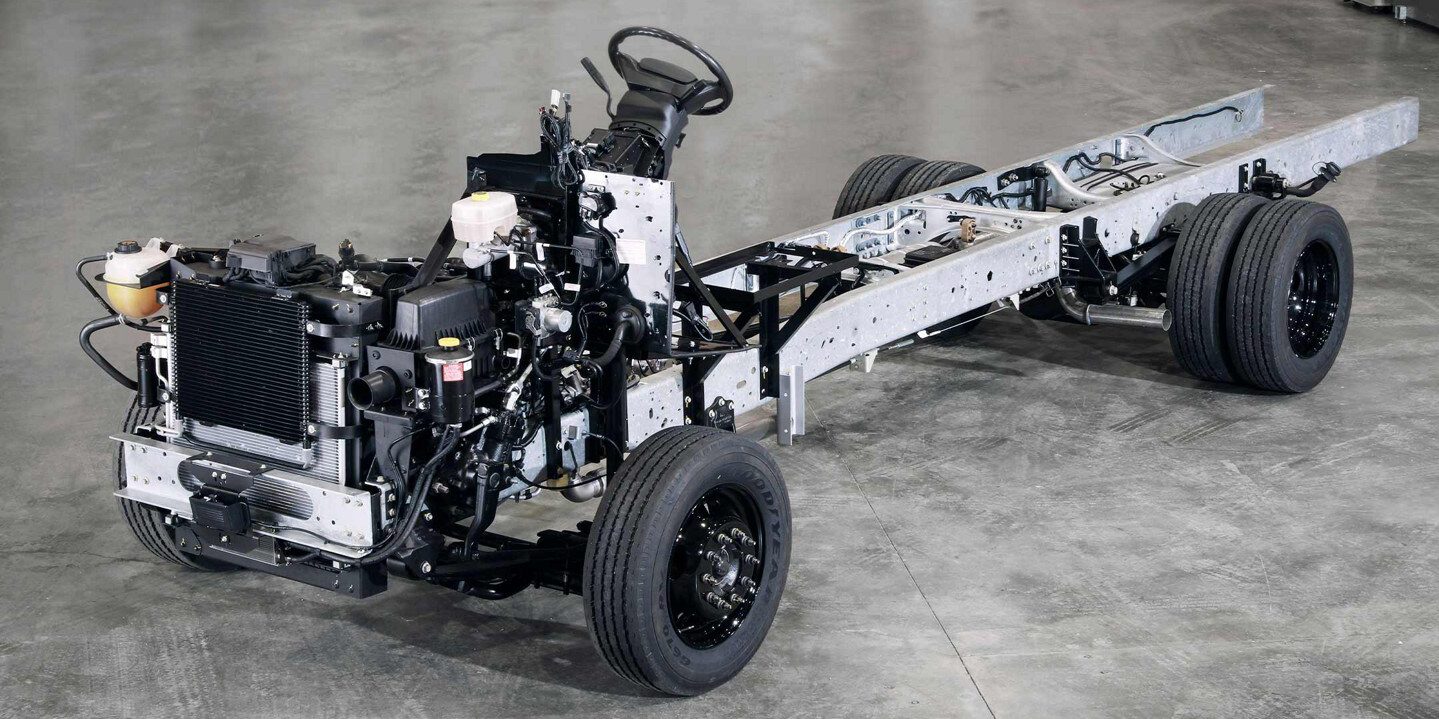
    Class As are typically the largest and most luxurious motorhome type, and they are built on a bus or commercial truck chassis. These are the big guys — perfect for full-time or multi-month RVers who want all the amenities of home but require more maintenance and space to park.

    B (Class B Motorhome)

    Also known as camper vans, these are compact, fuel-efficient, and easy to drive. We have had our B, a THOR Sequence 20L, for a few years now — and we love it. Class Bs fit in standard parking spaces and are great for solo travelers, couples, or those who love van life.

    C (Class C Motorhome)

    These mid-sized motorhomes are built on a van or truck chassis with an overhead sleeping area. Class Cs are a nice balance between Class A and B, offering comfort while still being manageable to drive. We have since let our family travel in our Class B, and we now have a C on a Mercedes van chassis. 

    5W (Fifth Wheel)

    A large towable RV that connects to a special hitch in the bed of a truck. Fifth wheels provide spacious living areas and are a great option for full-time RVers. Just know that these are normally larger in size and can require 2500 or even 3500+ size (HD) heavy duty trucks

    TT (Travel Trailer)

    A towable RV that hitches to the bumper of a vehicle. Available in a variety of sizes, travel trailers are a great entry-level option for those who already own a capable tow vehicle.

    PUC (Pop-Up Camper)

    A small, collapsible trailer that expands into a tent-like RV. These pop-up campers are lightweight, easy to tow, and perfect for occasional campers.

    TC (Truck Camper)

    A compact RV that sits in the bed of a pickup truck. Ideal for off-grid adventures, these truck campers offer a small but mighty option for travelers who love boondocking. Many of these are heavy and can require an HD truck as well. Always refer to the weight capacity of your vehicle and the RV you are considering.

    And that is a great segue to our next category.


    Weight and Towing Terms

    When it comes to towing an RV safely, understanding weight ratings is critical. These acronyms will ensure you’re not exceeding your limits.

    GVWR (Gross Vehicle Weight Rating)

    The maximum weight your RV or tow vehicle is rated to safely carry, including passengers, cargo, fuel, and fluids. Exceeding this can lead to dangerous driving conditions.

    GCWR (Gross Combined Weight Rating)

    The total maximum weight of both your tow vehicle and your fully loaded RV combined. This number is crucial to avoid overloading your setup.

    UVW (Unloaded Vehicle Weight)

    The weight of your RV as it comes from the manufacturer, with no cargo, passengers, or fluids added.

    CCC (Cargo Carrying Capacity)

    The amount of weight you can safely add to your RV, including food, gear, water, and personal items, etc. This is calculated as: GVWR – UVW = CCC

    GAWR (Gross Axle Weight Rating)

    The maximum weight that each axle of your RV or tow vehicle can handle.
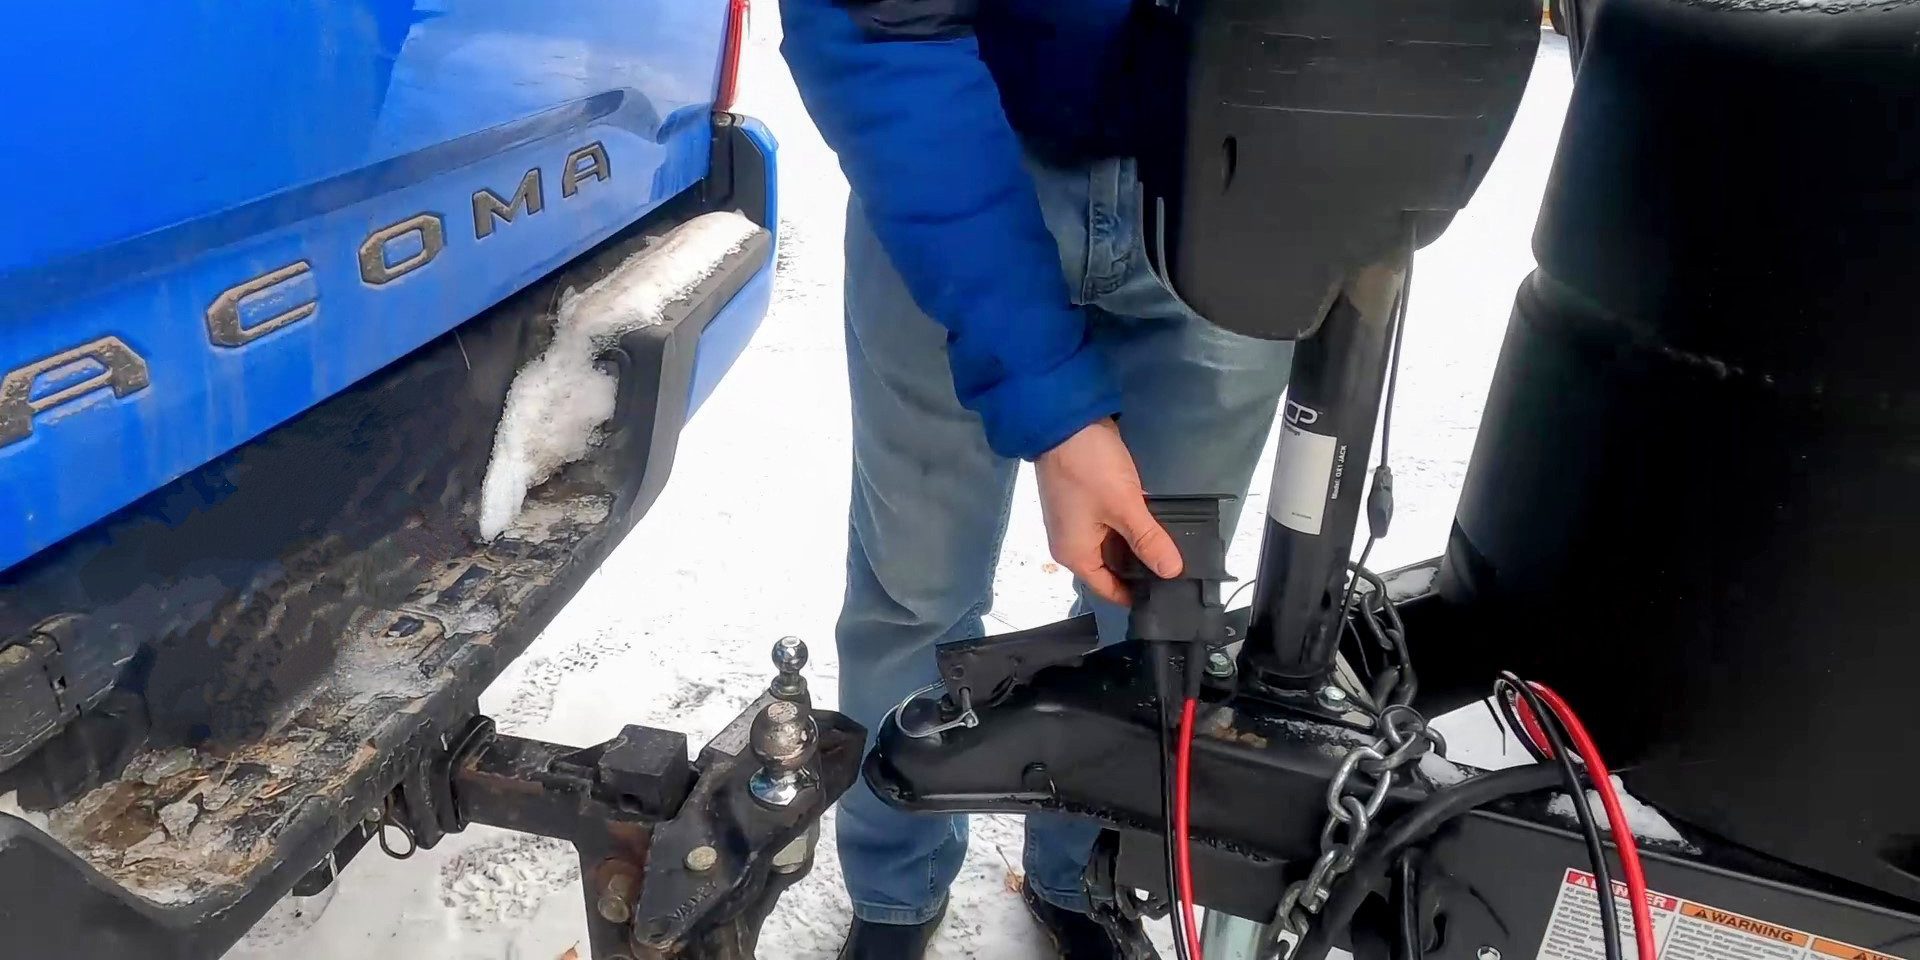
    TW (Tongue Weight)

    The amount of weight that rests on your tow hitch when pulling a travel trailer on your vehicle’s bumber. Proper weight distribution is key to safe towing.

    HW (Hitch Weight)

    The weight a fifth wheel places on the truck bed hitch.

    PC (Payload Capacity)

    How much weight your tow vehicle can carry, including passengers, cargo, and the hitch weight.


    Camping and Travel Terms

    Once you’re on the road, knowing these acronyms will help you navigate campgrounds, hookups, and off-grid adventures.

    FHU (Full Hookups)

    A campsite with electric, water, and sewer connections, making it easy to stay for extended periods without worrying about tank levels.

    W/E (Water and Electric)

    A campsite that offers water and electricity but no sewer hookup—you’ll need to use the dump station for waste.

    DRY (Dry Camping)

    Camping without hookups, meaning you rely on your RV’s battery, water tanks, and propane.

    BLM (Bureau of Land Management)

    Public lands where boondocking is allowed, often free and located in remote, scenic areas.

    NPS (National Park Service)

    Governs national parks and campgrounds. Many NPS sites have strict RV length limits, so check before booking.

    COE (Corps of Engineers)

    Campgrounds managed by the Army Corps of Engineers, often near lakes and rivers, offering beautiful and affordable camping options. These are usually hidden gems in the RV world, because not many people consider them as a first or even second option.

    TT (Thousand Trails)

    A popular membership-based RV park network offering discounted stays. This is great for those looking to have full hook-ups and extended stays.


    RV Maintenance and Systems

    Keeping your RV in top shape means knowing the ins and outs of its systems.

    PSI (Pounds Per Square Inch)

    The recommended air pressure for your vehicle’s tires, be it the RV or tow vehicle. Keeping them at the right PSI prevents blowouts and uneven wear.

    LP (Liquid Propane)

    Used to fuel stoves, water heaters, furnaces, and refrigerators in many RVs. It can sometimes be referred to as gas, so make sure you understand the difference between LP and gas/diesel for your vehicle.

    GFI (Ground Fault Interrupter)

    An electrical outlet safety feature that trips when it detects an issue. If your outlets stop working, check your GFI reset button. Many of them have a little light that indicates it has been tripped/turned off.

    ABS (Anti-Lock Braking System)

    A safety system that prevents skidding when braking hard.

    TPMS (Tire Pressure Monitoring System)

    A device that monitors tire pressure and alerts you to low or high PSI levels to prevent blowouts.


    Boondocking and Off-Grid Living

    For those who love to camp off-grid like my wife and I do, these acronyms will come in handy.

    AGM (Absorbent Glass Mat)

    A type of deep-cycle battery used for RV solar setups and off-grid power storage.

    LiFePO4 (Lithium Iron Phosphate)

    The current king of the deep-cycle battery world used for RV solar setups and off-grid power storage. They are the best option as of the writing of this article, but they are also the most expensive. As avid boondockers, we have found them to be a must have for our lifestyle. 

    MPPT (Maximum Power Point Tracking)

    A solar charge controller that improves the efficiency of solar panels and charges your house batteries faster than PWM.

    PWM (Pulse Width Modulation)

    A solar charge controller that connects your solar panels and charges your house batteries.

    AH (Amp Hours)

    A measurement of battery capacity, showing how much power your battery can store before needing a recharge.

    GPH (Gallons Per Hour)

    Used to measure water pump efficiency and propane usage.


    Don’t Worry! RV Acronyms Soon Become Second Nature

    Now, take a breather and save this list, because learning RV acronyms might save your travels. And once you get the hang of them, they become second nature. Whether you’re shopping for your first rig, planning your next trip, or troubleshooting an issue, knowing these terms will make your RV life smoother and more enjoyable.

    So, next time someone asks about your GVWR, FHU site, or TPMS, you’ll be able to nod knowingly and answer like a seasoned RVer. 

  • 5 Essentials for a Smoother RV Towing Experience

    5 Essentials for a Smoother RV Towing Experience

    Before you tow your RV, I have a small recommendation: Learn from my near-death experience. The first thing I ever towed was a hotdog cart. Then I towed a small U-Haul trailer (that was definitely heavier than I should have been towing). Luckily for me, they were fairly easy and straightforward. But it wasn’t until I jumped directly into two different 40-plus-foot fifth wheels that I learned what towing was really about. My steep learning curb almost killed me, but mastering smoother RV towing doesn’t have to come at that high of a price. But it does take practice.

    Towing — and especially parking — an RV is an art that transforms your vehicle into a mobile gateway to adventure. Art is subjective though. (And if you have a significant other helping you back up into a site, then you know exactly what I mean.) But, while the idea of towing a trailer or fifth wheel may seem intimidating, the right preparation and tools make the process a much smoother RV towing process.

    Whether you’re cruising through coastal highways, navigating mountain passes (this was my experience), or rolling through wide-open plains, these five essentials will enhance your experience, ensuring safety and ease every step of the way.


    1. Prioritize a quality hitch and weight distribution system.

    The hitch is the unsung hero to achieve a smoother RV towing experience. A solid hitch ensures that your RV and tow vehicle remain securely connected, even on uneven roads or during sharp turns. Without it, your journey can quickly go from exciting to stressful. Adding a weight distribution system amplifies this stability, allowing for more balanced towing and reducing strain on your tow vehicle.

    Weight distribution systems are particularly valuable for larger trailers. They help distribute the tongue weight across the axles. This minimizes rear sagging in your tow vehicle and improves steering and braking performance. A well-balanced setup not only keeps you safe but also enhances fuel efficiency — a win-win for long-haul RVers.

    Ensuring that your hitch and weight distribution system are compatible with your RV’s size and weight is critical. Regularly inspecting and maintaining these components can prevent wear and tear, making every journey safer and smoother.


    2. Stay on top of tire safety.

    Your RV’s tires are its lifeline to the road. Keeping them in optimal condition ensures smoother handling, better fuel economy, and a reduced risk of blowouts. When towing, the added weight of the trailer increases stress on your tires, making regular checks essential.

    Proper tire pressure is key to extending tire life and maintaining stability while towing. A tire pressure monitoring system (TPMS) is a game-changer, providing real-time updates on pressure and temperature to alert you to potential issues before they escalate. Pairing this with a portable air compressor ensures you can make adjustments on the go, whether you’re parked at a campsite or miles from the nearest service station.

    Another vital tool is a tire tread depth gauge, which helps monitor wear patterns. Uneven wear could signal alignment or suspension issues, which can impact towing safety. Investing in these tools and checking your tires regularly will keep you rolling smoothly toward your destination — no matter what the weather looks like.


    3. Maximize use of mirrors and camera systems.

    Visibility is a key factor in towing an RV safely. Extended mirrors and camera systems provide a clearer view of your trailer and the surrounding traffic. This helps you navigate lane changes, back up, and park with confidence. When towing a long or wide trailer, these tools become indispensable.

    Extended mirrors are designed to compensate for the additional width of your RV, giving you a better view of vehicles alongside and behind you. Combined with a rearview camera system, they reduce blind spots and make reversing less stressful. Modern systems often include high-definition cameras with night vision, making them useful even in low-light conditions.

    In addition to enhancing safety, proper mirrors and cameras also improve efficiency. They help you navigate tighter spaces, such as campgrounds or gas stations, without unnecessary delays or mishaps. Installing these tools is a small investment that pays off in a safer, more enjoyable towing experience.


    4. Enhance stopping power with brake controllers. 

    A brake controller is one of the most important safety features for anyone towing an RV. It ensures your trailer’s brakes work in tandem with your tow vehicle, providing smooth and controlled stopping power. Without it, the added weight of the trailer could significantly increase stopping distances, putting you and other drivers at risk.

    Brake controllers are particularly useful when descending steep grades or driving in wet conditions. They allow you to customize the braking force applied to the trailer, adapting to varying loads and road conditions. Some models even include features like proportional braking, which adjusts brake force based on the speed and pressure of your tow vehicle’s brakes.

    For optimal performance, always test your brake controller before starting your trip. Ensuring that your trailer’s brakes engage evenly with your tow vehicle will not only enhance safety but also reduce wear and tear on your braking system.


    5. Know your dimensions and weight ratings.

    Before hitting the road, understanding the dimensions and weight ratings of both your tow vehicle and RV is the most crucial step in ensuring a safer and smoother RV towing experience. This knowledge is foundational for selecting the right combination of tow vehicle and RV, planning your routes, and abiding by legal and safety requirements.

    Start by familiarizing yourself with your RV’s gross vehicle weight rating (GVWR), which includes the total weight of the RV when fully loaded with supplies, water, and passengers. Additionally, know the unloaded vehicle weight (UVW), hitch weight, and cargo-carrying capacity (CCC). For your tow vehicle, review its gross combined weight rating (GCWR), payload capacity, and towing capacity as outlined in the owner’s manual. Good practice is hitting a scale at gas station that has one so that you know where you stand fully loaded.

    Why is this critical? Towing an RV that exceeds your vehicle’s capacity can lead to significant safety risks, including poor braking performance, instability, and increased wear on your engine, transmission, and tires. Understanding these ratings also helps you stay compliant with state and federal regulations, as exceeding weight limits could result in fines or voiding your insurance in the event of an accident.

    Before purchasing an RV or tow vehicle, consider these dimensions and ratings alongside your lifestyle and travel plans. If you plan to tow through mountainous terrain or boondock with a fully loaded rig, selecting a vehicle with a higher towing capacity than the minimum required is a wise choice. Remember, safety starts with preparation—and this step sets the foundation for all your towing adventures.


    Bonus: Consider weight distro and water tanks.

    Proper weight distribution is another critical factor in achieving towing stability and safety. An unbalanced load can cause swaying, reduce steering control, and increase the strain on your vehicle’s suspension and brakes. Distributing the weight evenly between your tow vehicle and RV is key to maintaining a smooth and controlled ride.

    When it comes to weight distribution, water tanks often play a pivotal role. Depending on your travel plans, the amount of water you carry can drastically change the overall weight and its placement within the RV. For instance:

    • Full Tanks. While this is ideal for long boondocking trips, full tanks add significant weight, which must be factored into your towing setup.
    • Half-Full Tanks. This can cause water to slosh during transit, creating a shifting load that impacts towing stability.
    • Empty Tanks. Best for short trips or stays at campgrounds with hookups, minimizing extra weight and improving fuel efficiency.

    As I said before, to minimize risks, use a weight distribution hitch and monitor the placement of heavy items inside the RV. Store denser objects low and near the axles to maintain balance. For those planning off-grid adventures, consider how the distribution of fresh, gray, and black water tanks will affect your towing dynamics.

    Understanding and managing your RV’s weight and dimensions ensures safer travels, protects your equipment, and contributes to a more enjoyable towing experience.


    Smoother RV Towing for Every Adventure

    Towing an RV is more than just connecting a trailer to your vehicle—it’s about creating a seamless, stress-free experience that enhances your journey. By investing in the right tools and taking the time to understand your towing setup, you can ensure that every trip is as smooth, safe, and enjoyable as possible. Anything can happen along the way, but at least by following these tips, you have a better chance of minimizing the risk of them happening.

    From choosing the perfect hitch to maintaining your tires and ensuring visibility, these essentials provide peace of mind on the open road. Remember, preparation is key, and a little extra effort before you depart will go a long way in making your adventures truly unforgettable. 

  • How to Reduce Trailer Sway While Towing

    How to Reduce Trailer Sway While Towing

    Towing a trailer can be stressful enough, especially if you’re a newbie. But when you’re out on the road among other drivers and with your friends aboard, trailer sway can be nerve-wracking. You may wonder if you’re hitched up correctly. Or if you’re on the verge of an accident. The bottom line is that you want to reduce trailer sway while towing your RV. (You’ve got other things to consider while driving after all.)

    So, how do you reduce trailer sway when towing? Let’s talk about causes, what to troubleshoot, and the best ways to keep the trailer from controlling the tow vehicle.

    I’ll break it all down into seven simple tips.


    Tip No. 1: Understand why it happens.

    Trailer sway can occur for a lot of reasons. A common experience is the trailer swaying back and forth even as you drive down a straight road. It can be everything from an annoyance to a very dangerous situation. Fortunately, it’s not overly difficult to mitigate.

    The source of trailer sway can come from a number of places. Large vehicles passing the opposite direction on two-lane roads can absolutely cause sway. Sometimes crosswinds can also be a source of sway. But sometimes, it’s your own towing situation. So, if it’s not those other causes that I mentioned, you could be the source. The good news? If it’s you, then you can do something about it.


    Tip No. 2: Take a closer look at your hitch.

    If you’re towing a travel trailer, sometimes called a bumper pull, the hitch can make a huge difference. Many of the hitches sold today have sway control as part of the design of the hitch.

    I have tried a number of hitches and some of them are absolutely better than others in this area. There are also some that can be adjusted each time you tow depending on how much sway control you’d like dialed in. This can be useful if the trailer’s weight changes significantly, such as if you have a toy hauler and you bring a toy sometimes but not others. It can also change whether or not your holding tanks are full, or even partially full.

    I have had hitches installed by RV dealers that were installed incorrectly and really made the towing experience lousy, even though they were great hitches. Following the hitch manufacturer’s directions, I then reinstalled the hitch and it made a huge difference.

    So, the advice here is: 1) to buy (or identify that you own) a high-quality hitch and 2) make sure your RV’s hitch is installed properly.


    Tip No. 3: Sync with those darned computers.

    Most modern vehicles have a good amount of antisway technology built into them. Did you know that there are now trailers coming out with anti-sway technology as well? And you can even buy anti-sway technology to add to your existing trailer.

    In some cases, the sway technology on your tow vehicle is intended to be disabled when you’re towing. Check the owner’s manual and see if there is mention of how these systems work when towing.

    Another possibility is that the hitch you’ve installed is not intended to be used with the sway technology of your tow vehicle. Again, the owner’s manual for the hitch and the tow vehicle should answer this question.


    Tip No. 4: Check the scale.

    One of the easiest ways to diagnose issues with any towing situation is to have your tow vehicle and trailer weighed. Many places that work with commercial trucks have what is called a CAT scale. For under $15, you can usually weigh the your tow vehicle and trailer. Many will also allow you to weigh the combination, and then detach the trailer and go back.
    Depending on the size of your combined rig, you might also be able to determine the weight of the tow vehicle and the trailer individually.

    I would suggest doing this when you’ve got the typical load you carry for camping. (And don’t forget to have all the people you bring with you in the tow vehicle as well. Realistically people count as cargo in this case.)

    Another place where you can get the rig weighed is at an RV rally. In many cases there will be a service where you can have your RV weighed wheel-by-wheel. This can be eye-opening. It can also be expensive. While the weighing process itself didn’t cost much, learning the weight of my RV reinforced my decision to buy a more tow-capable truck.


    Tip No. 5: Assess and adjust the way you load.

    How the trailer is loaded can absolutely affect sway. The ideal situation for a travel trailer is to have about 12-15 percent of the trailer’s weight on the tongue of the trailer.

    If your trailer has more weight toward the back of the trailer, it will cause sway and other handling issues. If possible, shift cargo more to the front of the trailer or even into the tow vehicle depending on space and cargo carrying capacity.


    Tip No. 6: Check your tires.

    Somewhere, I came across a study that stated that a lot of people drive around with underinflated tires. This can cause significant tire wear, reduce your fuel mileage, and even set you up for tire failure.

    If possible, I strongly recommend an in-tire tire pressure monitor. There are also some good choices where the sending units mount right to the valve stems of the tire.

    Of course, the cheapest thing to do is to measure the inflation pressure of the tires on your tow vehicle and trailer in the morning before you head out, and again during the day to watch for uneven warming.Properly inflated tires can truly make a big difference in helping you reduce trailer sway.

    While you’re checking the air pressure, also look at the tread of the tires. Make sure the tires are wearing evenly. If you see that they aren’t, the cause can range from improper inflation pressure to an alignment problem with the trailer to a wheel bearing on the trailer that needs maintenance.


    Tip No. 7: Slow down, Speed Racer!

    Okay, let’s be honest here. If you’re experiencing trailer sway, one of the factors that can cause sway is speed. You can actually travel too quickly for the situation at hand and cause trailer sway.

    If you are experiencing trailer sway, the first thing to do is slow down. While a lot of people will share on social media that “they have to keep up with traffic,” the truth is that the lane furthest to the right is the place to be when you’re towing anyway.

    Another thing to consider is that some trailer tires aren’t rated to go over 65 miles per hour. That could be you, so check the sidewall of the tire. Depending on your speed, try slowing down and see if this solves the problem. I have found that my own truck and trailer behave the best, and get the least lousy fuel mileage, at around 63 miles per hour. But, of course, each situation and vehicle are different.


    So, I’ve done all this. Now what?

    If you’ve gone through this whole article and you’re still experiencing trailer sway, there are a few steps you can take.

    One, there are electronic sway mitigation systems that you can install on your trailer. On example is the CURT True Course sway-control system. This is one of the electronic gadgets that can mitigate sway.

    Something else to consider to help reduce trailer sway. If you have weighed your tow vehicle and trailer, how close to capacity is the tow vehicle? Remember that the tow vehicle actually carries about 15 percent of the trailer’s weight. (And even more in a fifth wheel.) Be honest about the cargo carrying capacity of your tow vehicle. Perhaps, it’s simply not the right choice for the job.

  • Comparing Motorhome Chassis Options for Class Cs

    Comparing Motorhome Chassis Options for Class Cs

    When you step into a motorhome, you need to realize something: What you’re seeing is only half the picture. Motorhomes are unique in that they start with a structure — the chassis —that comes from one of the big vehicle manufacturers. From there, these motorhome chassis are delivered to the RV companies who go to work building the actual camping portion of the rig on the backs of these machines.

    So, you might be wondering: How do I know if a motorhome chassis is a good one? How do the different chassis compare against one another. It’s a big question. (And a good one, you savvy RV buyer you.) For the most part, what we’re going to look at in this article are chassis that sit under Class C motorhomes. (Mostly, anyway. We’ll say a short word on Class As at the end.)

    So, let’s get you started. We’ll start with a few important notes on motorhome chassis themselves. Then we’ll get into some differences in the ones on the RV market.


    A Note on Chassis Builds and Years

    One thing you’ll want to do as part of your research process is find out if the chassis year and model year are the same. Don’t be surprised if you find that the chassis itself is listed for one model year with the camper being from another. In other words, a motorhome chassis may sit on a manufacturer’s grounds for long enough that the model year changes. This isn’t a problem or a something to flag. Quite simply, it’s something to know. I have seen a quite a few people noticing this, so thought it was worth mentioning.

    You should also know that companies that make these chassis sell a lot of them to the trades. They are literally jacks of all trades and no usually RV-specific. You as likely to see a plumber with one of these as an RVer. So, when a chassis manufacturer builds a chassis, the core of their business is to the trades and that’s how these were designed.

    Therefore, I would strongly suggest driving a few examples around. Doing so will help you see if you have a strong preference for one over the other. Also, know that some RV companies have recognized this industrial nature and have taken steps to improve handling and ride. For example, the E-Series chassis in one RV may give a very different driving experience depending on any changes the RV builder employs. There is absolutely a difference in how one RV drives versus another even on the same chassis based on the changes these RV companies make.


    Looking Back on Class Cs

    For many years Chevrolet/GMC, Ford and Dodge built what are called cutaway chassis. Essentially, these could be recognized as the front portion of a van with the back a bare chassis. These would be shipped to RV companies who then built a camper onto the bare chassis portion. The result was a Class C.

    Both Chevrolet/GMC and Ford continue to offer a somewhat modernized version of these vintage chassis. Both are stalwart beasts with big V8 engines and plenty of cargo carrying capacity.What that means for you is that, despite the weight of the camper build on the back of the motorhome chassis, there may be plenty of capacity left over to carry your stuff, your liquids, and potentially even a trailer. That’s quite something.

    Nowadays, Dodge is Ram. And Ram doesn’t really offer one of these traditional platforms. I no longer see RV companies building rigs on the Chevrolet/GMC platform. So that leaves the Ford E-Series as the last of the traditional heavy-duty cutaway chassis.


    Ford E-Series: High on HP and Torque, Low on New Tech

    Definitely the senior member of this bunch, the current version of Ford’s E-Series cutaway debuted in 1992. Though it has seen a decent number of upgrades, including to the engine and transmission, this motorhome chassis doesn’t have many of the latest ergonomic nor technological features.

    What it does offer is a monster 7.3L gasoline V8 — dubbed the Godzilla engine. This big V8 has the benefit of a tremendous amount of horsepower and torque. (Which is great when overcoming the weight and wind resistance of the motorhome body.) Another advantage of this chassis is towing. If that’s something you want in a Class C, a model based on the E-Series platform might be worth looking into.

    On the flip side, if you’re interested in the latest safety technologies this might be one not to focus on. With the age of this platform, a lot of the newer features, like lane assist, predictive braking and other technologies, aren’t even on the options list.

    However, it’s a relatively proven and simple beast of a chassis that has remained popular for it’s durability and capability.


    Ford Transit: Newer Features, Less Cargo Carrying Capacity

    Ford is unusual in that it has two “cutaway” offerings for RV builders. As mentioned, the first is the E-Series; the other is their Transit. Other than the blue oval on the radiator shell, this has almost nothing in common with the E-Series — other than being a cutaway.

    This is a thoroughly modern vehicle. That means that it has newer features. Things like lane-drift warnings and preemptive braking (where a vehicle senses something stopped in front of it and applies the brakes). And it includes one of my favorites: wind-drift assist. All of these are available with a Transit.

    You can also get modern infotainment systems, far more comfortable seating, and many other features that weren’t even a consideration back when the E-Series was conceived.

    Under the hood, Ford’s Transit cutaway uses a 3.5 liter gasoline-fueled twin turbocharged V6 mated to a ten-speed automatic. This driveline does offer good horsepower and torque but uses a lot of technology to accomplish that. The ten-speed automatic, too, is much better suited to finding the right gear and working with the engine. So, that you have a better driving experience.

    Comparing the Transit to the E-Series

    This means that, especially with RVs built on the Transit chassis, you’ll want to look at how much cargo carrying capacity remains as the Transit isn’t quite as capable in this area as the E-Series.

    But the E-Series, being just an old workhorse, has greater cargo carrying and towing capacities. Something else that can be fitted to the Transit chassis from the factory is all-wheel-drive. For those who might like to go where the road can be more challenging, this could be the solution. For example, skiers who want to head into the winter weather or even some off-road conditions.

    But if you want something that’s even more capable, a Super C might be the place to look. Ford has an answer there, too.


    Mercedes-Benz Sprinter: Feature Options and Optimized Fuel Economy

    The Transit is a direct competitor to the Sprinter in many ways. They share a somewhat similar styling and comparable safety technologies available. Like the Transit, Mercedes-Benz offers a slew of safety technologies. Even so, the RV company that orders the chassis has to specify what they want built in. So, careful shopping is the order of the day if this has value to you.

    Also, know that it’s typically the RV company that orders these in fleet orders. That means that the number of features on the chassis can be dictated by what the RV company prioritizes. I’ve seen some with a full complement of safety and driving technologies and some that are much less well equipped.

    The Big Difference Between the Transit and the Sprinter

    Possibly the biggest difference between the Mercedes-Benz Sprinter and the Ford Transit lies under the hood, where currently Mercedes-Benz offerings feature a 2.0 liter twin turbocharged four-cylinder diesel. The incredible technology of this engine means you still get decent performance despite the very small displacement of the engine.

    Being a diesel, it also means that you’ll get decent fuel economy, relatively speaking.
    But that engine can also be a liability as the number of places that are willing to perform even routine maintenance on it is somewhat limited. I’ve been told that even some routine maintenance items can be rather pricey.

    On the plus side, Mercedes-Benz has made a more capable 4500-series chassis available which I’ve seen under the forthcoming Grand Design Lineage. This more capable variant means more capacity for cargo and towing.

    Like the Transit, the Sprinter is also available with all-wheel-drive and Mercedes-Benz has a lot of experience in this field going back to the early days of the Unimog military vehicle.


    Super C Chassis: Employing the Power of the Pickup

    As long as we’re peering beneath the veneer, it’s worth noting that Ford, Chevrolet, and Ram offer what looks like the front of a pickup truck along with a bare chassis back. This is something you may find under a Super C type motorhome.

    These are typically available with the various company’s diesel engines and true four-wheel-drive meaning that they offer some off-road capability. They may also be well-suited to those who like to camp in more challenging weather, such as skiers who need all-wheel-drive
    People are almost as passionate about the brand of their pickup trucks as they are about their religion.

    Do know that all these of these chassis can be had in very capable iterations which is part of the appeal of the Super C motorhome. That means that, properly equipped, some of these Super C rigs can tow a substantial trailer.

    At the Forefront of Four Wheel Drive and Truck Innovation

    For example, we got to see a Jayco Seneca XT 35L recently which was based on the Ford F600 chassis. This meant a big Ford 7.3 liter diesel engine and ten-speed automatic.

    One of the benefits of these being based essentially on pickup platforms is that pickups are the most profitable area for vehicle manufacturers and the companies expend a tremendous amount of effort keeping these at the forefront of ergonomics and design.

    If a manufacturer innovates a feature, it doesn’t take long for the others to follow suit.
    Something else available on these chassis is true four-wheel-drive. While the Transit and Sprinter cutaway chassis offer all-wheel-drive, it is possible to get true four-wheel-drive on these chassis including low range. I’m not sure you’ll be tackling the Rubicon trail in a motorhome but the more capable off-road driving functionality can get you out of some sticky situations.


    Freightliner: Even Bigger Is Out There

    If these pickup-based models aren’t enough, Freightliner offers chassis for use in motorhomes. While it might be assumed that these are big truck companies that make industrial machines better left for moving vans, and that’s certainly one of the customers who buys them, it may surprise you to find how nice these can be to drive.

    Like with the “cutaway” chassis, these can be ordered in trim levels. These range from simple to sensational. They can include things like air seats and many of the safety technologies you might expect in a passenger vehicle. Since these Freightliner rigs initially started out for delivery trucks and school buses, they have remarkably good turning function. After all, commercial vehicles need to be able to get out of tight spots.

    They also offer incredible cargo carrying capability. So, if towing is something that’s a high priority, a Super C based on the Freightliner chassis might be just the answer.


    Class A Motorhomes: New Legislation Putting a Damper on Diesel

    There may be some challenges to the future of the Class A motorhomes based on how pending legislation is going to go. Six states, led by California’s Air Resources Board’s example, are currently slated to outlaw diesel-powered motorhomes and other heavy commercial diesel vehicles.

    There is a lot of information about this and it remains to be seen how deeply this will cut once the dust settles, but we left big Class A motorhome chassis out of this article until we see how that market goes.


    Conclusions on Motorhome Chassis Comparison

    As with any RV purchase, knowing what you want before you start seriously shopping can really help you with the final outcome. Do you want to be able to tow a larger load? Are you planning to go where four-wheel-drive is useful? Do you spend a lot of time in very rural places where service might be more difficult to obtain? Hopefully this article has been a good starting point in your shopping adventure.

  • How to Install a Lagun Table: An RV Mystery Solved

    How to Install a Lagun Table: An RV Mystery Solved

    Maxing out multiuse spaces is an essential part of the RV game. RVs have limited space, but in small RVs in particular, making the most of it is paramount. All of which is why RV models of all sizes frequently come equipped with Lagun tables. (Last year I saw several nicely placed in the Grech RV models I reviewed.) These tables can be mounted on any solid, vertical surface, instantly creating a dining or work area in the RV. But when you need the space for something else, a Lagun table quickly disassembles for storage. Quick and easy. Well, that is unless you have never installed, assembled, or dissembled a Lagun table before. In that case, it may be a riddle wrapped in a mystery inside an enigma. So, if you’re new to this multiuse solution, you may find yourself wondering how to install a Lagun table.

    If that’s you, don’t worry. Those of use who have mastered how to install a Lagun table remember being in your shoes. (Only too well.) So, let’s dive in and get you spun up with everything you need to know about this great  — if initially mercurial — product.


    The Lagun Table: A Short Introduction

    As mentioned, one of the virtues of a Lagun tabletop is that it can seamlessly swivel and adjust to meet whatever need you happen to have. This lets you easily move it out of the way when you need space, but you’re not ready to disassemble it yet. However, when you want a stable work surface or you’re ready to travel, the tabletop can be easily locked in place with a handle.  

    Lagun tables afford you the ability to create a dining area or an adjustable work surface that can be raised or lowered as needed. Upgrading your RV with a Lagun table to your RV (if it doesn’t come with one) lets you have a space that normally serves as a sleeping or lounge area become a comfortable dining table or functional work surface.

    Another big advantage of this style of table is that with no pedestal, there’s more leg room under the table. In addition, when it’s time to hit the road, you have the options of locking it in place, or quickly dismantling and storing it for travel.   

    Versatility of Function, Improvement of Ergonomics

    While this table could easily be considered a must-have for van conversions or small trailers, its versatile design allows it to be used with the existing tabletop in any RV. This makes it easier to get into or out of the dinette seating area. If you’re one of the many campers who use your RV dinette as a work surface, you’ll know that working at a computer on a RV dining table can cause neck and/or shoulder pain. That’s because most RV dinettes are designed low. One of the best features of a Lagun table is that it’s so versatile. Its vertical height is adjustable to whatever height  feels best for you. This in itself can help reduce ergonomics related pain. 

    Where to Buy a Lagun Table

    If all this has piqued your interest but you don’t yet have a Lagun table, here are a few places to purchase one: Lagun USAVanlife OutfittersExpedition Upfitter Canada, and RecPro RV Parts.


    How to Install a Lagun Table

    Lagun table installation requires minimal skills, a measuring tape, a carpenter’s level and a cordless drill. The mounting bracket can be installed on any solid vertical surface that’s five/eighths of an inch or thicker to support the weight of the leg assembly, table, plus anything you put on the table. The Lagun leg assembly comes in several lengths. It’s important to decide which leg length will work best for your intended use before you order your Lagun kit. The mounting bracket is 7 inches high. You must have at least one inch of the leg tightened onto the bracket to ensure stability. 

    Lagun doesn’t include a table top with the table leg kit. However, you can use any lightweight but sturdy table top up to 30 inches by 40inches on the standard table leg kit — or up to 24 inches by 36 inches if you choose the folding leg kit. This leaves a lot of options.  If you have woodworking tools, skills, and patience, it’s easy to make your own custom tabletop. That being said, a cutting board or prefabricated table top offers a simple solution for anyone who doesn’t want to make their own table top. Many RVers have found that a large wood cutting board work.

    While the kit comes with detailed instructions, these are the steps for wall-mounted bracket installation.


    Step-by-Step Installation

    1. Choose a solid vertical surface to install the bracket. Be sure there is enough clearance to allow for vertical adjustment of the leg. You may need to use a spacer to allow for clearance of dinette cushions, et cetera. (Note: The bracket is seven inches high. You must have at least one inch of the slotted leg groove tightened onto the bracket for a stable system.)
    2. Hold the mounting bracket in place on the vertical mounting surface, using a level to ensure it’s perfectly vertical (90 degrees) to the floor. Mark your drilling points.
    3. Drill four holes for included 5/16-inch bolts into surface 
    4. Holding the mounting bracket securely in place, install the bolts.
    5. Install the table top on the table mounting plate.


    How to Set Up the Lagun Table 

    Setting up a Lagun table for the first time ever can be tricky. Always loosen the handles before connecting, disassembling, swiveling or adjusting the table.  


    Step-by-Step Setup

    1. Install the table top on the horizontal arm and tighten the handle clockwise. 
    2.  Now slide the table leg into the mounting bracket and adjust the height to where you want it.
    3. Place the horizontal arm with the table top on it onto the pivot on top of the leg and adjust it to where it will work for you. If you’re not traveling anywhere, you might want to leave the handle in the loosened position to allow the table to swivel.  The handle that allows the table to swivel should always be tightened for travel to avoid damage. 

    It’s important not to over-tighten the plastic handles  or they can break or seize. You want the handles to be snug, but not tight.


    How to Disassemble a Lagun Table

    All handles on the Lagun table turn counter-clockwise to loosen. Disassembly is a simple matter of reversing the steps above.  


    Step-by-Step Disassembly

    1. Loosen the table top handle by turning it counterclockwise to release it from the horizontal arm. Remove the table top and place it in a safe place.
    2. Loosen the handle that connects the horizontal arm to its pivot point at the top of the leg assembly.
    3. Turn the handle at the bottom of table leg counter-clockwise to remove the leg assembly from the mounting bracket.  
    4. The Lagun table is now ready to be stored in a cabinet, on a bed, or wherever works best for your space.


    Conclusion

    Adding a Lagun table is an easy way to create a multifunctional living space in your RV. It’s also easy to use the table in different areas of the RV, by installing a mounting bracket wherever you want to use it. This is a practical upgrade you’ll be glad you added.  

  • Before You Decide to Restore a Vintage Camper …

    Before You Decide to Restore a Vintage Camper …

    Vintage campers provide a journey back in time to the golden age of the American road trip.  With sleek lines, mid-century stylings, shining exteriors, and warm wood interiors, these blasts from the past can offer enthusiasts a way to RV in style. Ranging from fully-restored treasures to models long forgotten in some farmer’s field, the price of a vintage camper can vary as widely as its condition. Very wisely, you may wonder: “Do I have the skills and interest find, purchase, and restore a vintage camper?”

    Well, before you make your vintage dream purchase, let’s clarify a few things everyone who wants to restore a vintage camper should know — from technical terms to the tools and expertise required.


    Renovating vs. Restoring a Vintage Camper

    Renovation – Blending Vintage with Modern

    It’s important to start here, because there is a real difference between renovation and restoration. Renovation attempts to stay true to the vintage aesthetic while including some modern conveniences. With our remodel of our 1957 Sportcraft 15’  canned ham camper (aka Hamlet), we chose to renovate. That meant keeping the 1950’s era look. We went with bright interior colors, a black and white floor, original baby blue countertops, a wood interior, et cetera.  But we also wanted our camper to be functional for everyday use. So, we updated some lighting, added a 12-volt fan/vent/ We also added some other modern technology, as well as introduced plenty of storage on the inside!


    Restoration – Returning to the Original Condition

    Alternatively, restoration attempts to bring a camper back to its original condition. Personally, following that approach would have had us scouring old magazines and online advertisements to make sure that we got the right style of gas lanterns for the inside. Or trying to source restored foldable horsehair bench seat cushions for the dinette. It is all possible, of course. You just need to decide how much time and energy you want to spend as you restore a vintage camper.

    Consider your goals and how you intend to use the camper. Do you want to simply show it off at vintage camper rally weekends? Or do you want to travel extensively with it?  Do you want to use it the same way you might a modern camper? Or are you dedicated to bringing an original piece of history back to life?


    Understanding Throwback Terminology

    Whether restoring or renovating, be prepared to get a lot of questions when you finally roll away from your driveway. Among one of our most frequent; “Hey! Is that camper old, or is it new made to look old?”  

    To be fair, some of the lingo we use for vintage campers sounds synonymous. (And all that is fine conversationally.) But as a buyer, you do want to have firm grasp on throwback terminology — and to verify if the term in a listing was intended that way. So, here’s some quick terminology to sort out some of the accepted definitions for older and older-looking RVs:

    • Retro. New construction designed to look old (for our old friend with the question above)
    • Classic. More than 20 years old
    • Vintage. Made from 1946 to 1969 (the mid-century period before plastic laminate)
    • Antique. 1945 or earlier (lots of different makes and models still kicking around out there … which is awesome)


    Identifying the Tools — and Experience — Needed

    Like anything in life, if you can dream it, you can do it! If you have done work on your house or car, you already have about 90 percent what it takes. You may need to hire out for some things, but you can probably DIY most of it.

    However, realistically, if you haven’t done any construction work previously, your learning curve might be steep! So, you have a choice. Either forge ahead and learn. Or hire a restorer. (Or at the very least, make good friends with someone who has the skills that you lack. Remember, a six-pack of beer and pizza still goes a long way towards making friends.)

    • Essential skills. Ingenuity, creativity, patience, and resourcefulness
    • Basic hand tools. Pliers, wrenches, socket set, hammer, screwdrivers, 5-in-1 tool, cordless drill and charger, palm sander, car buffer/polisher, painting tools, caulk gun and scrapers
    • Power tools. Table saw, skill saw, and chop saw

    We did 95 percent of our renovation ourselves then hired out for a few things we didn’t have the time, skills, or tools to do. These included fabricating a new storage cabinet door, replacing the axle, and adding electric brakes.


    Figuring Out Where to Begin

    While much of this depends on the weather and the season, where to start depends on how much work needs to be done. If it’s a complete teardown, you may need to begin with the outside. But, if it just needs some updating, fixing, and polishing, you may want to start with the inside. (Because it was still winter when we started our renovation, we started on the inside first.)

    Another major consideration is where you are going to do the work. We used our driveway, but wished we’d had a carport or covered area to work under as it would have made doing work in nasty weather a whole lot easier.  

    Finally, it’s important to do an honest assessment of the time you have available. Many newbies bite off a bit more than they can chew, leaving half finished projects sitting in their yard. It took us about six months of nights and weekends over about one and half years. Had we focused solely on the renovation project —and had not been working 60 hours per week and downsizing our home — we probably could have done it in six to eight weeks of very focused work.


    Begin Again Is Your Anthem

    No matter where you find your vintage camper or in what condition you find it, whether you’re going to bring it back to life, or add new modern features to an old relic, the best way to restore a vintage camper is to simply … begin. (And begin again!) Stay tuned for additional vintage camper resources and inspiration from us in the weeks to come!

  • Evaluating the Enclosed Underbelly of an RV

    Evaluating the Enclosed Underbelly of an RV

    If you’ve been shopping for an four-season RV, you’ve probably heard the term enclosed underbelly. Beyond the idea of an RV hiding its #DadBod, the exact image this conjures up for new buyers just may be … a bit vague. Yes, we know it’s supposed make the RV warmer. But what does it really mean when an RV has an enclosed underbelly? Also, does this guarantee that it’ll be great for winter camping?

    Well, don’t sweat. We have some answers on what an enclosed underbelly can mean to each RV. And, even better, we’ll share some things you should look for, particularly if you are considering camping in colder climates. 


    What is an enclosed underbelly? (Asking for a friend.)

    The way an RV is built might be a surprise for new buyers. (Or even ones.) It’s probably different than some people assume. If we’re talking about towable RVs, like fifth wheels and travel trailers, typically the chassis arrives at the RV manufacturer’s assembly line in bare form. From there, it is typically flipped over, and holding tanks, plumbing, and wiring are installed. Being upside down makes it easier for the team to put these items in. In some cases, the suspension and wheels are also put on at this point. 

    Once everything is in place, it had been traditional that the chassis was flipped over. And then the rest of the assembly process proceeds. But, as we’ve become better consumers and demanded more of our RVs, many RV makers go an extra step here. 

    In some cases, a climate barrier is put on under the tanks. Then a plastic material (that looks like plastic cardboard) finishes it all off. The space between the underside of the RV itself and the floor that you walk on is called the underbelly and basically occupies the space between the frame rails. 


    RVs are built from the inside out. The underbelly resides between the floor and underside of the chassis. This photo is from an Alliance RV factory tour.


    So, what’s included in an enclosed underbelly?

    Once again, it’s important to know that RV companies each choose their own processes and systems. So, there isn’t an industry standard for what goes into an enclosed underbelly. Some RV companies take elaborate steps to keep the holding tanks from freezing. Others don’t. So, it’s natural for you to find yourself asking questions, and comparing brands and options. Which is better: arctic package or four-seasons package or … this other one?

    Despite the fact that most RVs are made in Indiana (where temps can get well below freezing), there really isn’t a standard for winter-ready campers. While many RV companies will put a bragging sticker on their RVs that might be arctic package, polar package, or any other branding, that effectively has no actual meaning. (Speaking broadly, of course, across the industry.)


    What’s under an enclosed underbelly? Take a look.


    How can I find out what an RV model has?

    If it’s important to you that your RV is protected from the weather, particularly the cold, then your best bet is to go to the RV manufacturer. (Especially versus a dealership.) Some of them will have a diagram of how their RVs are built. (Some even with cool specifics.) So, if you’re shopping for your next RV, check the RV manufacturer’s website. If they have a great cold-weather package, odds are that they will — wisely — brag about it. You might also reach out to the company itself. Som RV companies even still disseminate information via printed brochures, which you can request. 

    Of course, a well-informed RV dealership may also be able to provide accurate information. But, as with many things, even if you accept their word still verify the information they share with you. And the manufacturer is the best place to do that.


    Here’s a cross-section of an underbelly, courtesy of Grand Design RV.


    What features should I ask about?

    Let’s start with the basics. It’s pretty standard that an all-weather camper will have  a layer of insulation and what is called a radiant barrier. (This looks somewhat like a sheet of aluminum foil.) But some RV companies go beyond this. 

    In some cases, an RV manufacturer will install holding tank heating pads. These pads are typically operated by the 12-volt system in your RV and can provide some heat to the holding tanks. That way, the contents don’t freeze. 

    Many times these heating pads are temperature-activated, so that they only come on when the temps in an underbelly go below a certain point. That temperature is often around 40 degrees Fahrenheit. (Or 5 degrees Celsius.) If your RV has this feature, you can often just leave the tank heaters turned on if there’s a chance of colder temperatures. The heating pads will activate as necessary. 


    Heating Pad Nuances

    Almost always, there will be a switch someone on or near your other RV controls that activates and deactivates these heating pads. Many RVs state that the underbellies of these RVs are heated, and that’s a true statement when they make that claim. But know that this heat is provided by the furnace, so you have to be running that. 

    If your RV has this built in and if you’re comfortable inside the RV, the holding tanks are protected by the furnace. But many RVers choose to use electric space heaters instead of the furnace. That will mean that the enclosed underbelly isn’t benefitting from the furnace’s heat. While an RV’s furnace can certainly have a thirst for propane, this could be partially due to the fact that it’s doing extra duty heating the underbelly. 


    Are there downsides to an enclosed underbelly?

    The climate barriers built into many RV’s underbellies can keep the living space of the RV more comfortable. They provide a climate barrier between the outside world and the interior of the RV. In fact, it’s pretty unusual that I look at any RV, and the holding tanks are exposed to the elements. (Interestingly, that wasn’t true even a few years ago.)

    But one of the downsides to these enclosed underbellies is that, if there is an issue, someone has to crawl under the RV and lower the underbelly material. Often this is screwed right into the frame. 

    From there, you’ll have to battle the underbelly cover. Then the radiant barrier. And then the insulation. All that just to check for leaks or other issues should you suspect something’s awry. 

    If the repair technician is you, then you get to deal with this. Even if you’re paying someone, then you’re paying their hourly rate to deal with all this. 


    California RV specialists hunt for a leak within an enclosed underbelly.


    If you’re four-season camping, it’s the right decision.

    Since there is no one standard for what an RV company does when enclosing the underside of their RVs, the more you know the better off you’ll be. While there are some disadvantages to having the underbelly enclosed, the advantages far outweigh those in most cases. Especially if you plan to be out in the elements. With an enclosed underbelly, your RV is typically more comfortable to be in. And your holding tanks are protected from the elements in some fashion. 

    Being aware of what the manufacturer of your RV has done matter. That includes which materials they’ve used. And whether or not the RV has holding tank heaters. And if the furnace is ducted into the space. 

    There are absolutely RVs that are very well-suited to cold weather camping, but not all are. Knowing the difference can keep you out of hot water — or perhaps make sure that the hot water flows in your RV.

  • Essential Elements of a Four-Season RV

    Essential Elements of a Four-Season RV

    If you’ve been on the lookout for an RV, you’ve probably noticed that each model is rated for three or four seasons. A three-season camper is meant to be used in the relatively mild temperatures spring, summer, and fall. These RVs are built to be winterized and stored for the coldest part of the year. But a four-season RV is a different animal.

    If a camper is rated as a four-season RV, it means that it is meant to be used all year long, anytime you want to go camping. These all-weather campers give you the freedom to take off and embrace the RV lifestyle whenever you want. (And, in embracing winter camping, you’ll discover things other campers will never experience.)

    So, let’s take a look at the elements you need to examine if you’re looking to purchase a four-season RV that you can rely on year-round. 


    Key Features to Pay Attention to in a Four-Season RV

    The point of having an RV is to have access to the amenities and comforts of home, wherever you go. A four-season RV provides a cozy retreat when it’s cold out. (And, let us not forget, a cool oasis when it’s scorching outside.) In addition, all-weather campers offer running water for washing dishes, showers, and flushing the toilet.  

    Plumbing and holding tanks on four-season RVs are usually protected by an enclosed underbelly that also houses furnace ducting. When this isn’t possible (due to the design of the RV), plumbing is protected with heat tape and insulation and holding tanks that have heating pads. It’s all about keeping the water flowing even in sub-zero temperatures. Let’s take a deeper dive into all the ways an all-weather camper lets you enjoy all the comforts and conveniences of RV living, no matter what season it is. Ultimately, these are the things you need to ask about, research, and compare when buying a four-season RV.


    Ask About the Insulation’s R-Rating and Layers   

    Four-season RVs have heavier duty insulation to retain heat inside the RV and keep exterior temperatures outside the RV. An R-value lets you know how well insulation performs. Logically, the higher the R-value,the better the insulation resists heat transfer. Most four-season RVs have insulation that’s rated R6 or more in the walls. However, the highest R-value insulation is found in the roof and beneath floors. Insulation values in the roof of the RV can be anywhere between R-10 and R-20.  Floors in an all-weather camper are often insulated with layers of different insulation materials that add up to  an R-value of 10 or more. 

    There are a lot of variables between makes and models RVs when it comes to insulation materials. For example, four-season campers usually use expanded polystyrene in their sidewalls because it has an R-value of 6-7. For comparison, with few exceptions, the sidewalls of three-season RVs are insulated with extruded polystyrene foam block insulation. This type of insulation has an R-value of R-4 to R-5. However, some RV  manufacturers combine two or three layers of insulation in the ceiling, sidewalls and floor of their four-season RVs to provide even better insulation. (Hint, hint! So, R-level and layers of insulation are something to ask about.)


    Check the Type of Double-Pane or Thermal Window

    Four-season campers designed for all weather use always have double-pane/thermal-pane/thermo-pane windows installed. However, while dual-pane windows in residential homes can make a big difference in temperature transfer, this isn’t necessarily the case in RVs. That’s because double pane windows for RVs are constructed differently than the ones made for residential homes. 

    You’re probably aware that the thermal pane windows used in your home are made with two glass panes that have a layer of argon or other gas sandwiched between them. The layer of gas is what helps to reduce heat transfer and helps give the window an R-value of around 2. By comparison, a single pane window has an R-value of about 0.9.  

    In most RVs, thermal-pane windows have two panes of glass, but don’t have the insulating layer of gas between them. Instead, the two panes may be bonded directly to one another, or may have a layer of ordinary air separating them. In most cases, these windows offer an R-value of between 1.6 and 2,  making them marginally better at reducing heat transfer than single pane RV windows.  

    With that being said, thermal windows made for high-end diesel pushers and all-season fifth wheels often come with residential style thermal pane windows. Therefore, it’s a good idea to ask about dual-pane window construction methods when you’re shopping for an all season camper (and their R-ratings). Whatever the case, you’ll be able to greatly reduce heat transfer from windows with the use of Reflectix or bubble wrap on windows to create an insulating layer of air between the interior and exterior of the RV. Additionally, you can add even more R-value to your RV windows by keeping window treatments drawn when it’s hot or cold outside. 


    Find Out If the Underbelly in Enclosed — and What Heats the Heaters

    A true four-season RV offers insulated hatches on its basement doors and and enclosed underbelly. In addition, a true four-season camper will have furnace ducting that runs through its enclosed underbelly to help protect holding tanks and prevent pipes from freezing. Nothing is exposed here. The water pump may be inside the RV or else in an insulated basement cabinet to keep it from freezing. In addition, waste tank valves are concealed in a basement cabinet because no one ever wants to deal with a frozen tank valve. (Trust me.) 

    There are a lot of campers marketed as four-season RVs that don’t have enclosed underbellies. Instead, they have heating pads on holding tanks. They may also offer heat tape and/or insulation around plumbing lines. The problem with this system is that it uses a lot of 120-volt electricity and requires you to be plugged into shore power. So, it’s not much use when you’re up on the ski hill or ice fishing on a quiet lake. Aside from that, heating pads may offer little protection for exposed tanks when temperatures drop below -10 degrees Fahrenheit and there’s an even colder wind chill factor. 


    Look at the Total Package — Both Heating and Cooling Systems

    The best insulation package won’t help if you don’t have a furnace and air conditioner. If an RV doesn’t have a good heating and cooling system, the interior temperature will quickly resemble the outdoor temperature.  The interior of a four-season RV stays comfortable no matter what the weather is like outside.  

    Almost all four-season RVs offer a propane or diesel furnace. In addition, some RVs also offer a cozy electric fireplace that can be used when the RV is plugged into shore power. Larger RVs may have a heat strip or heat pump as part of the air conditioner. 

    Heat pumps can warm up the interior temperature of the RV when you want to conserve propane. Because they’re powered by electricity, heat pumps give you a heating alternative. They can go to work even if you run out of propane. However, there are drawbacks to heat pumps.

    • The heat they create is usually pumped through ceiling ducts, cooling it as it travels.
    • RV heat pumps don’t work when the temperature is less than 45 degrees Fahrenheit.
    • The RV has to be plugged into 30-amp or 50-amp power.

    Some high end motorhomes may offer hydronic heating systems, like AquaHot, that run tubing containing potable water into heat exchangers that disperse heated air. It’s not unlike the way a residential boiler system works. This system also runs water to faucets and appliances. So, it acts as a built-in on demand hot water heater too. Hydronic heating systems can use different combinations of  the vehicle’s own surplus engine heat, on-board fuel, and/or AC shore power. 


    Don’t Neglect the A/C

    Of course, all-weather camping doesn’t just refer to camping in cold temperatures. So, four-season campers also have between one and three air conditioning units installed to keep the interior of the RV at a comfortable temperature on scorching  summer days. Air conditioners are rated as 13,500 Btus or 15,000 Btus. Either way, they’re power intensive. Most require either hooking up to shore power or a generator to meet their power needs. However, Class B RVs have a less power intensive option when it comes to air conditioning.

    Class B RVs are sometimes equipped with 12-volt air conditioners. These run off any decent sized lithium-ion battery pack. Dometic’s offerings include the RTX2000, which they say can provide up to 6,383 Btus of cooling energy. That’s enough to let most van lifers sleep comfortably through the night, even whenever and wherever temperatures soar.  


    Final Thoughts on Four-Season RVs

    Four-season RVs are perfect for anyone who wants to enjoy all the comforts and conveniences of RV camping all year round. A true four-season RV offers great insulation to help maintain comfortable interior temperatures. If you’re shopping for an RV, consider how you plan to use it. A fireplace will be a waste of space if you plan to be off-grid most of the time. An enclosed underbelly and insulated storage bays are a must for keeping tanks and plumbing from freezing in cold temperatures.

  • The Fine Art of RV Flipping

    The Fine Art of RV Flipping

    The idea of flipping an RV is gaining a lot of attention lately. And it’s easy to see why. There’s something exciting about taking a used RV that’s seen better days and transforming it into a stunning home on wheels — whether you plan to sell it for profit or embark on new adventures. While RV flipping might sound glamorous, let’s be real: It’s no small feat. It requires a keen eye, a good amount of sweat equity, and a touch of patience to pull off a successful flip.

    If you’re interested in learning the ins and outs of RV flipping, this guide will walk you through the key steps and considerations, borrowing insights from other experienced flippers. Whether you’re an RV enthusiast looking for a new challenge or someone with a passion for renovations, here’s what you need to know about the fine art of RV flipping.


    1. Finding the Right RV to Flip

    The first step in flipping an RV is selecting the right vehicle to renovate. Much like with house flipping, finding a diamond in the rough is critical. You want an RV that might need cosmetic or moderate mechanical work—think peeling wallpaper, outdated furniture, or scuffed floors — but isn’t a complete money pit.

    Popular places to search for RVs to flip include online marketplaces like Facebook Marketplace, Craigslist, and, of course, RVTrader.com. RV auctions and local dealerships can also offer great deals. Look for RVs that are structurally sound with functional appliances and no significant water damage — though minor leaks can be manageable if caught early.

    Pro Tip: Before you purchase, conduct a thorough inspection. If you’re not confident in your ability to assess the condition, hire an RV technician to inspect it for you. A little extra money upfront, can save you thousands of dollars on the backend.


    2. Planning Your Renovation and Budget

    Budgeting is crucial when flipping an RV. Without a clear plan, renovation costs can quickly get out of hand. Start by identifying which areas need work. Common renovation projects include new flooring, reupholstering furniture, updating kitchen appliances, or giving the exterior a fresh coat of paint. Decide what’s worth the investment and what you can DIY to save money.

    Experienced flippers recommend making a detailed budget and setting aside a contingency fund for unexpected repairs. Materials like vinyl flooring, peel-and-stick tiles, and RV-specific paints are popular choices for creating an updated look without breaking the bank.

    Pro Tip: Keep the audience for your flipped RV in mind. Are you targeting weekend campers, full-timers, or families? This will guide your design and help you focus on upgrades that add value.


    3. Tackling the Renovation Process

    This is where the real work begins. Depending on the condition of the RV, renovations can range from simple touch-ups to full-scale remodels. Some of the most common projects include:

    • Flooring Replacement. Installing vinyl planks or laminate flooring for a modern look.
    • Painting Cabinets. A fresh coat of paint can brighten the space without replacing cabinetry.
    • Furniture Updates. Consider reupholstering old cushions or replacing dated seating with multi-functional furniture.
    • Lighting Upgrades. Swapping out old fixtures for modern, energy-efficient LED lights.
    • Exterior Touch-Ups. Refresh the exterior with decals or paint for added curb appeal.


    Renovating an RV requires patience and flexibility. Not every project will go as planned, and you may encounter hidden issues along the way — especially with plumbing or electrical components.

    Pro Tip: Document your process with photos or videos. Not only will this serve as a great “before and after” comparison, but it can also increase your RV’s appeal when it’s time to sell.


    4. Navigating Licensing and Legal Requirements

    If you’re planning to flip RVs as a business, familiarize yourself with local regulations. Depending on your state, you may need a dealer’s license if you flip a certain number of RVs per year. Make sure you have all the necessary paperwork — titles, bills of sale, and any repair receipts—to avoid issues when transferring ownership.

    Pro Tip: If you’re only planning to flip one RV as a personal project, double-check your state’s rules to see if you need to register as a dealer. Each state has different thresholds, so it’s better to be prepared than caught off guard. 


    5. Marketing and Selling Your Flipped RV

    Once the renovation is complete, it’s time to find the right buyer. High-quality photos are essential for online listings. Show off the best features of your RV and include detailed shots of any upgrades. Platforms like RVTrader.com, Facebook Marketplace, and specialized RV groups are great places to list your RV. 

    When pricing your flipped RV, research similar models to ensure your asking price aligns with the market. Be transparent about the renovations you’ve done and any known issues — it builds trust with potential buyers.

    Pro Tip: Offer extras like kitchenware or outdoor furniture as part of the sale. These small touches can make your RV stand out and justify a slightly higher price. If you can film a quick video tour in three to five minutes, that goes such a long way.


    6. Profit or Keep? Deciding the Next Step

    For many RV flippers, the ultimate goal is to sell the RV and turn a profit. However, some people find that they’ve fallen in love with their renovated rig and decide to keep it for personal use. Either option is a win. If you choose to sell, you’ll have the satisfaction of knowing your hard work paid off. If you keep it, you have a new adventure vehicle that’s customized to your liking.

    Pro Tip: If you plan to flip another RV, track your expenses, lessons learned, and selling process. This will streamline your next flip and help you maximize profits.


    Lessons from the Experts: What to Watch Out For

    From following stories shared by seasoned RV flippers, there are a few common pitfalls to avoid:

    1. Ignoring Water Damage. Even minor leaks can lead to costly repairs. Always inspect for signs of water damage.
    2. Underestimating Time and Costs. Renovations often take longer and cost more than expected — plan accordingly.
    3. Skipping the Market Research. Understanding what buyers want can help you focus on the right upgrades and sell your RV faster.
    4. Falling in Love with Your Project. It’s easy to get attached, but if your goal is to flip for profit, you’ll need to stay objective about costs.


    Need a Little More Inspiration?

    If you’ve gotten this far, just remember that renovations take time, and unexpected challenges are part of the process. But to show you that anyone can get started, check out this inspiring story of a flipper who built a business from scratch: The Flipping Nomad: Homeless to RV Flipping Boss.


    The Thrill of the Flip

    Flipping an RV is not just about making money — it’s about the thrill of transformation. There’s something incredibly satisfying about taking an older RV and breathing new life into it, whether it’s to sell or to hit the road yourself. While it takes time, effort, and a bit of trial and error, the reward is worth it.

    Whether you’re looking to flip your first RV or have a passion for transforming these rolling homes, remember: each flip is a learning experience. Approach it with patience, flexibility, and a sense of adventure, and you’ll discover that RV flipping isn’t just a project — it’s a journey.

    So, if you’ve ever been tempted to take on an RV flip, why not dive in? Who knows — your next great adventure might start with a little paint, some new flooring, and a lot of creativity!

  • Some Not-So-Obvious RV Energy Savers

    Some Not-So-Obvious RV Energy Savers

    Like many RVers, when we chose full-time RVing, we did so to live more sustainably. For us, it made just made sense from multiple perspectives —  energy, financial, and environmental. Now, after traveling for over 12 years, we’ve learned a lot. Just like we hoped, living smaller allows us to save a ton of energy and save money on utilities. But we’re way better at it now than we were at the start. A big reason? Some not-so-obvious RV energy savers.

    These RV energy savers don’t just work for us. They’ll apply to any-sized rig. And they are especially useful if you plan to camp or boondock off-grid — and don’t want to haul around a noisy gas generator. Best of all, they’re not some big selling point of what to buy. These energy savers are a lot more about what to do.


    Basic RV Energy Savers for Newbies

    Let’s start with some basic off-grid energy savers. If you’re an experienced RVer, you’re likely tracking these already. But for RV newbies, these RV energy savers can be instant game changers.

    • Opt for 12-Volt Power. Use 12-volt-DC instead of 120-volt-AC appliances whenever possible. Quite simply, 12-volt will run directly off your battery without needing to power up the inverter.  
    • Switch Off the Inverter. Turn off your inverter when not running 120-volt-AC appliances. Install an inverter toggle switch next to the door as a visual reminder.
    • Cut Off Phantom Power. Turn off and unplug appliances that draw phantom power. Water pumps and water heaters are notorious energy suckers. Test appliances with a “kill a watt” meter to know what is the biggest draw.
    • Find Low or No Wattage Alternatives. Avoid using high wattage appliances when off-grid, especially if they heat or cool. Use a pan with a lid to reheat food, griddle to toast bread, and French press/kettle for coffee. 
    • Cook Outside. Take cooking to the campfire – it’s both fun and will save energy!
    • Minimize Screen Time. Let nature fill your soul instead of screen time — enjoy a star filled sky or campfire.
    • Put the Sun to Work. Use solar power combined with a DC to DC charger to keep your RV batteries topped off. Learn how to design an RV solar-powered system to meet your energy needs. 
    • Charge While the Going Is Hot. When your solar RV battery bank is fully charged and the sun is still shining, plug in all of your electronics (e.g., laptops, phones, tablets, cameras, headlamps, etc.) and store all of that extra solar energy!


    Seasonal RV Energy Savers

    Stay Warm in Winter 

    Using propane rather than electricity to heat your rig is more efficient. As full-time RVers, we go through about six standard, 20-pound tanks per year. (Around $150 for both cooking and heating annually.) While we like to head to warmer climates for the winter, that’s not always an option. Here are a few tips:

    • Choose a sunny campsite for some powerful, passive heating.
    • Keep the heat in! RVs lose much of their heat through windows, doors, as well as the floor. Cold winter air flowing underneath your RV can make the floor feel like a freezer! Use AirSkirts RV Insulation underneath to block that cold air flow and place rugs in key areas where you sit or stand. Also, insulate windows with shades or covers, and insulate around any gaps in the door.
    • Heat yourself from the inside. Indoor exercises, cozy sweaters, down booties, a warm cup of tea, and your favorite blanket – even a low-wattage heated throw — all help. 
    • If skiing and snowboarding are not your thing, snowshoeing will warm you up quickly and help you enjoy the season outdoors. Traction devices on your hiking boots will also help you get around safely. 
    • RV heaters are notoriously loud and inefficient, while Mr. Heater Propane Buddy is silent and can be used to heat a specific room. 
    • Use a low-wattage mattress warmer plus a down comforter for those really cold nights.


    Stay Cooler in the Summer 

    While we typically head north, coastal, and up in elevation during the summer to stay cool, avoid humidity, and travel without the need for air conditioning, we occasionally spend time in (or traveling through) some very warm areas. These are a few tips to stay cooler:

    • Choose a shaded campsite for some natural, passive cooling.
    • Close RV shades and cover windows when the full sun is pouring in to avoid a “greenhouse effect.”
    • Cook outside with a propane stove or grill so you don’t heat up your RV. Eat easy, cool meals that don’t require much cooking.
    • Enjoy a natural breeze outside and stay in the shade as much as possible. If inside, keep air flowing with small personal fans and a ceiling vent fan to draw warm air out.
    • Get out on the water in a kayak, go for a swim, or put your chairs half way in the water.
    • Cool yourself from the inside out by staying well hydrated. 
    • At night, use a ceiling vent fan, blowing out, and open only one window by the bed — just one — to concentrate the air flow over the sleeping area.


    Saving energy in your RV will make your travels more affordable and enjoyable, no matter what the season!