Category: RV 101

  • Repairing RV Water Damage: Stains, Mold, and More

    Repairing RV Water Damage: Stains, Mold, and More

    RV life on the road is a proverbial roller coaster. One minute you’re enjoying a cup of morning coffee with a view of the crystal-clear waters of the Florida Keys. And the next minute? You’re drying the floor with beach towels, wondering where in the world the water is coming from. Sounds far-fetched, but that’s what happened in my first RV. Even with a major RV water damage scare like that, my love for this life is still as strong as ever. My wife and I are now well into year six of RV life, and we are on our fourth rig.

    For most situations, we have found that with some know-how and a bit of elbow grease, you can tackle many of these problems head-on and keep your RV in tip-top shape. But we have also realized that in some cases, getting a professional is the best option for the job.

    What can you do yourself, and how do you tell when it’s time to call for help? Here’s a guide to dealing with mold and water damage in your RV.


    Recognizing the Signs of Water Damage

    First comes water. Then comes damage. Then comes mold throughout the RV carriage. If you went back and sang that like I did, then you are my kind of people. In all seriousness though, that is the essential order for this process, so we start with the water.

    Water damage can sneak up on you if you’re not paying close attention. What starts as a small leak can quickly turn into a bigger problem, especially if it goes unnoticed. Here are some common signs:

    Common Signs of RV Water Damage
    1. Discoloration or Stains: Water stains on the ceiling, walls, or floors are often the first indicators of a leak. If you notice dark or discolored patches, it’s time to investigate.

    2. Soft Spots: Walk around your RV and press on the walls, floor, and ceiling. If you find any soft or spongy areas, this could indicate water damage beneath the surface.

    3. Musty Odor: Mold loves damp, dark spaces. If you detect a musty smell, it’s a strong sign that there’s moisture trapped somewhere, and mold could already be taking hold.

    4. Peeling Wallpaper or Paint: Water can cause adhesives to break down, leading to peeling wallpaper or bubbling paint. If you see these signs, there’s likely moisture behind the scenes.

    5. Warped or Buckled Materials: Wood or laminate flooring that is buckling, or walls that appear warped, are telltale signs that water has been pooling somewhere it shouldn’t.


    Steps to Address RV Water Damage

    Once you’ve identified the signs of water damage, it’s crucial to act quickly to prevent further issues, including the growth of mold. And trust me when I say they usually aren’t as easy to spot as a beach towel’s worth of water on the floor.


    Step 1: Find and Stop the Source of the Leak

    Before you can begin repairing the damage, you need to stop more water from entering your RV. This could be from any number of sources or weak spots, but three of the more common culprits are a leaking roof, windows, or even plumbing. Inspect the areas where you noticed damage and trace the water back to its source.

    In our beach towel situation, we couldn’t find the leak at all, and that’s when we cut our losses and took it to the professionals. We were lucky enough to have the RV under warranty and they were eventually able to work on it. In our third RV we had a smaller leak from the window and all it needed was a bigger, thicker, seal around the window frame.

    Tip: Don’t forget to check around slide-outs, vents, and any other areas where the RV’s exterior is interrupted by seams or openings. These spots are notorious for letting water in.


    Step 2: Dry Out the Affected Area

    Once you’ve stopped the leak, your next step is to dry out the affected area as thoroughly as possible. Mold can begin to grow in as little as 24 to 48 hours, so time is of the essence.

    Tip: Use fans, a dehumidifier, and open windows and doors to get as much airflow as possible. If the weather is dry, this can be incredibly effective. If you have a chance to get to the west, where the climate is much drier, it can be a huge help. For more severe cases, you may need to use a wet/dry vacuum to remove standing water.


    Step 3: Remove Damaged Materials

    Water damage can weaken materials like wood, insulation, and even drywall. If any part of your RV shows signs of rot, warping, or mold, it’s essential to remove and replace these materials.

    Tip: Be thorough in your inspection and removal. Mold can spread quickly, and if any affected material is left behind, the problem could return. Use mold-resistant replacement material where possible to prevent future issues.


    Dealing with Mold: A Step-by-Step Guide

    While we were lucky with the mold situation in our RV. it was under warranty and was taken care of by professionals – I’ve had to deal with mold in buildings, and let me tell you, it is not a fun or healthy experience. So, if you discover mold in your RV, it’s important to handle it carefully to avoid spreading spores and worsening the problem.


    Step 1: Wear Protective Gear

    Mold can be harmful to your health, so before you begin, make sure you’re wearing gloves, a mask, and protective eyewear. This will help prevent inhalation of mold spores and skin contact. If you are like me and mold can have a truly negative experience on your health or breathing, then I highly suggest hiring a professional to work on the situation.

    Your health is always worth more than trying to save a few bucks with a DIY!


    Step 2: Isolate the Area

    If you are moving forward with a DIY, then the first step after putting on all your protective gear, is to try and seal off the area where the mold is located. Remember to close doors, cover vents, and tape plastic sheeting over doorways to contain any spores that might get kicked up during cleaning. This way the spores don’t spread to other parts of the RV.


    Step 3: Clean the Mold

    Sometimes a mixture of water and detergent as well as a commercial mold cleaner to scrub the affected area can go a long way. Another option to try is a solution of water and bleach (1 cup of bleach to 1 gallon of water) — but be sure to ventilate the area well.

    Tip: Avoid using bleach on porous surfaces like wood or drywall, as it doesn’t always penetrate deeply enough to kill all the mold. For these situations, try using a cleaner specifically designed for these materials.


    Step 4: Prevent Future Mold Growth

    Once the mold is cleaned, take steps to prevent it from returning. Ensure the area is thoroughly dried and consider applying a mold-resistant coating to surfaces prone to moisture. Regularly inspect your RV for any signs of new leaks or dampness and address these issues immediately.


    Restoring or Replacing Damaged Materials: Bringing Your RV Back to Life

    After tackling water damage and mold, the next step is to restore or replace the affected areas to get your RV back in shape. This can seem overwhelming, but breaking it down into manageable steps makes it doable.

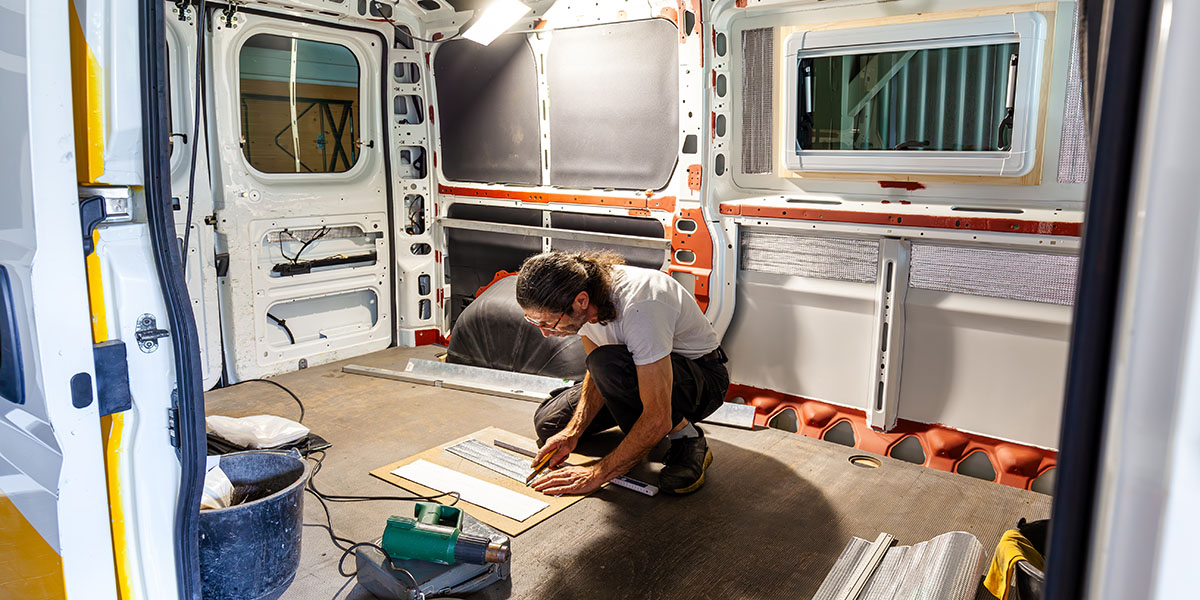
    1. Assess and Remove Damaged Materials: Start by thoroughly inspecting your RV to determine what needs to go — soft spots in the floor, warped walls, or swollen cabinetry. Carefully remove any damaged materials, being sure to cut away all affected areas to prevent future issues.
    2. Replace Subfloor and Wall Structures: If the subfloor or wall framing is compromised, replace these with new materials. Use sturdy plywood for subfloors and fresh wood for framing, ensuring everything is level and secure. Don’t forget to replace any damaged insulation with a mold-resistant option.

    3. Rebuild and Refinish: Once the structural repairs are complete, rebuild and refinish your RV’s interior:

      Walls: Install new wall panels, seal seams, and add a fresh coat of paint or wallpaper.
      • Flooring: Lay down new vinyl, laminate, or carpet, leaving room for expansion and finishing with trim.
      Cabinetry: Refinish or replace cabinets, making sure they’re securely installed.

    4. Final Touches: Finish by adding trim, painting, and decorating to make your RV feel like home again. With some effort, your RV will be ready for more adventures, looking and feeling as good as new

    Staying Ahead of RV Water Damage

    Dealing with water damage and mold in an RV is no fun, but with regular inspections and quick action, you can stay ahead of these issues. My wife and I have learned from experience that catching a leak early can save you a lot of headaches (and money) down the road. By following these steps and keeping a close eye on your RV, you can keep your home on wheels in great shape and focus on enjoying the adventures that lie ahead. Safe travels!

  • 6 Steps to Set Your RV Renovation Budget

    6 Steps to Set Your RV Renovation Budget

    If you’re here, I’m going to assume you are looking to finally pull the trigger on that RV renovation. You know, the one you’ve been putting off. And, since you’re here, I’m also going to assume that you have a burning question about your RV renovation budget: how much should this reno cost?

    For those in the starting phase and looking for ideas, you may want to check out my blog on popular RV renovations ideas. If you’re past that phase (or you just finished reading that blog), then it’s time to figure out the numbers. That’s where I can help. As fun and rewarding as transforming your RV into your dream home on wheels can be, when the costs start to add up, those dreams can turn into nightmares. So, to help you avoid some of the pitfalls, here’s a guide to help you set a realistic budget for your RV renovation.


    Step 1: Determine Your Priorities

    Before you start crunching numbers on your RV renovation budget, take some time to think about what’s most important to you in your RV. Are you focused on functionality, comfort, aesthetics, or maybe a combination of all three? By identifying your priorities, you can allocate your budget to the areas that matter most to you.

    Consider these questions:
    • Which areas of your RV need the most attention? (e.g., flooring, kitchen, bathroom)
    • What are the “must-haves” versus the “nice-to-haves”?
    • Are you planning any major structural changes, or are you mostly focused on cosmetic upgrades?

    Once you’ve got your priorities straight, you can move on to the next step.


    Step 2: Research Costs and Gather Estimates

    The next step is to research the costs associated with your renovation projects. This includes everything from materials and tools to professional labor if you’re not planning to DIY the entire project. For example, if you’re upgrading your flooring, you’ll want to look at the cost of materials like vinyl planks or laminate, as well as any tools you might need for installation. If you’re considering a solar power upgrade, you’ll need to factor in the cost of panels, batteries, and installation.

    DIY Tip: For a more accurate estimate and better pricing, consider visiting various local home-improvement stores and browsing online retailers. Don’t forget to include shipping costs for larger items that aren’t available locally. You can also look on Facebook Marketplace or some similar app to find products that may be in decent condition at a discounted price.


    Step 3: Set a Realistic Budget

    Now that you have a good idea of what each part of your renovation will cost, it’s time to set a budget. Be realistic about what you can afford and make sure to include a buffer for unexpected expenses – because trust me, there will be some. A good rule of thumb is to set aside an extra 15 to 20 percent of your total budget for those unforeseen costs that always seem to pop up during a renovation.

    Sample budget breakdown (not actual prices)

    • Flooring: $1,000 (including materials and tools)
    • Kitchen Remodel: $1,500 (including appliances, cabinets, and paint)
    • Bathroom Upgrades: $500 (including fixtures, paint, and accessories)
    • Solar Power Installation: $2,000 (including panels, batteries, and installation)
    • Miscellaneous: $500 (for smaller projects like painting and decor)
    • 20% Buffer: $1,100 (for unexpected costs)

    Total Budget: $6,600


    Step 4: Consider Financing Options

    If your renovation plans exceed your current financial liquidity, you might want to explore financing options. Some RV owners take out personal loans or use a credit card with an introductory zero-percent interest period to finance their renovations. This is a great tool if you know that you can pay off the entirety of the project in the allotted time for zero interest. A quick internet search for the best zero-percent credit cards can get you upwards of 12 months interest free. If you calculate your monthly payment for the total over that timeframe, and realize that you won’t be able to finish before interest starts accruing, then just be sure to factor in the cost of interest to ensure that your monthly payments fit comfortably within your budget.

    Financing Tip: If you’re planning to sell your RV in the future, consider how much your renovations will increase – or decrease – its resale value. This can help you determine whether financing your renovation is a sound investment.


    Step 5: Track Your Spending

    Once you’ve set your budget and started your renovation, it’s crucial to track your spending to ensure you’re staying within range. Keep all your receipts, and regularly update a spreadsheet or use a budgeting app to monitor your expenses. This will help you identify any areas where you might be overspending and allow you to make adjustments as needed. 

    Tracking Tip: Break down your spending by category (e.g., flooring, kitchen, bathroom) to see exactly where your money is going. This can also help you adjust your budget mid-project if you need to allocate more funds to a particular area.


    Step 6: Be Prepared to Make Adjustments

    Renovations rarely go exactly as planned, so be prepared to make adjustments along the way. If you find that you’re overspending in one area, consider scaling back in another. For example, if your kitchen remodel is costing more than expected, you might decide to delay the installation of that solar power system until a later date.

    Adjustment Tip: Prioritize the projects that are most important to you and be flexible with the rest. Remember, you can always tackle additional upgrades down the road.


    Renovating Your RV Without Breaking the Bank

    Setting an RV renovation budget is a crucial step that will help you turn your dream home on wheels into a reality without emptying your bank account. By determining your priorities, researching costs, setting a realistic budget, knowing your skill level, and tracking your spending, you can keep your renovation on track and enjoy the process. Whether you’re making small changes or tackling major upgrades, careful budgeting will ensure that your RV renovation is a success. Happy renovating, and may your travels be filled with adventure and comfort!

    For more inspiration and tips on RV renovations, check out my story on popular RV renovation projects. It’s packed with ideas that can help you transform your RV into the cozy, stylish retreat you’ve always wanted. Looking for more advice? Check out the RV 101 section on the RVTrader blog.

  • How to Choose the Right Tow Hitch for Your RV

    How to Choose the Right Tow Hitch for Your RV

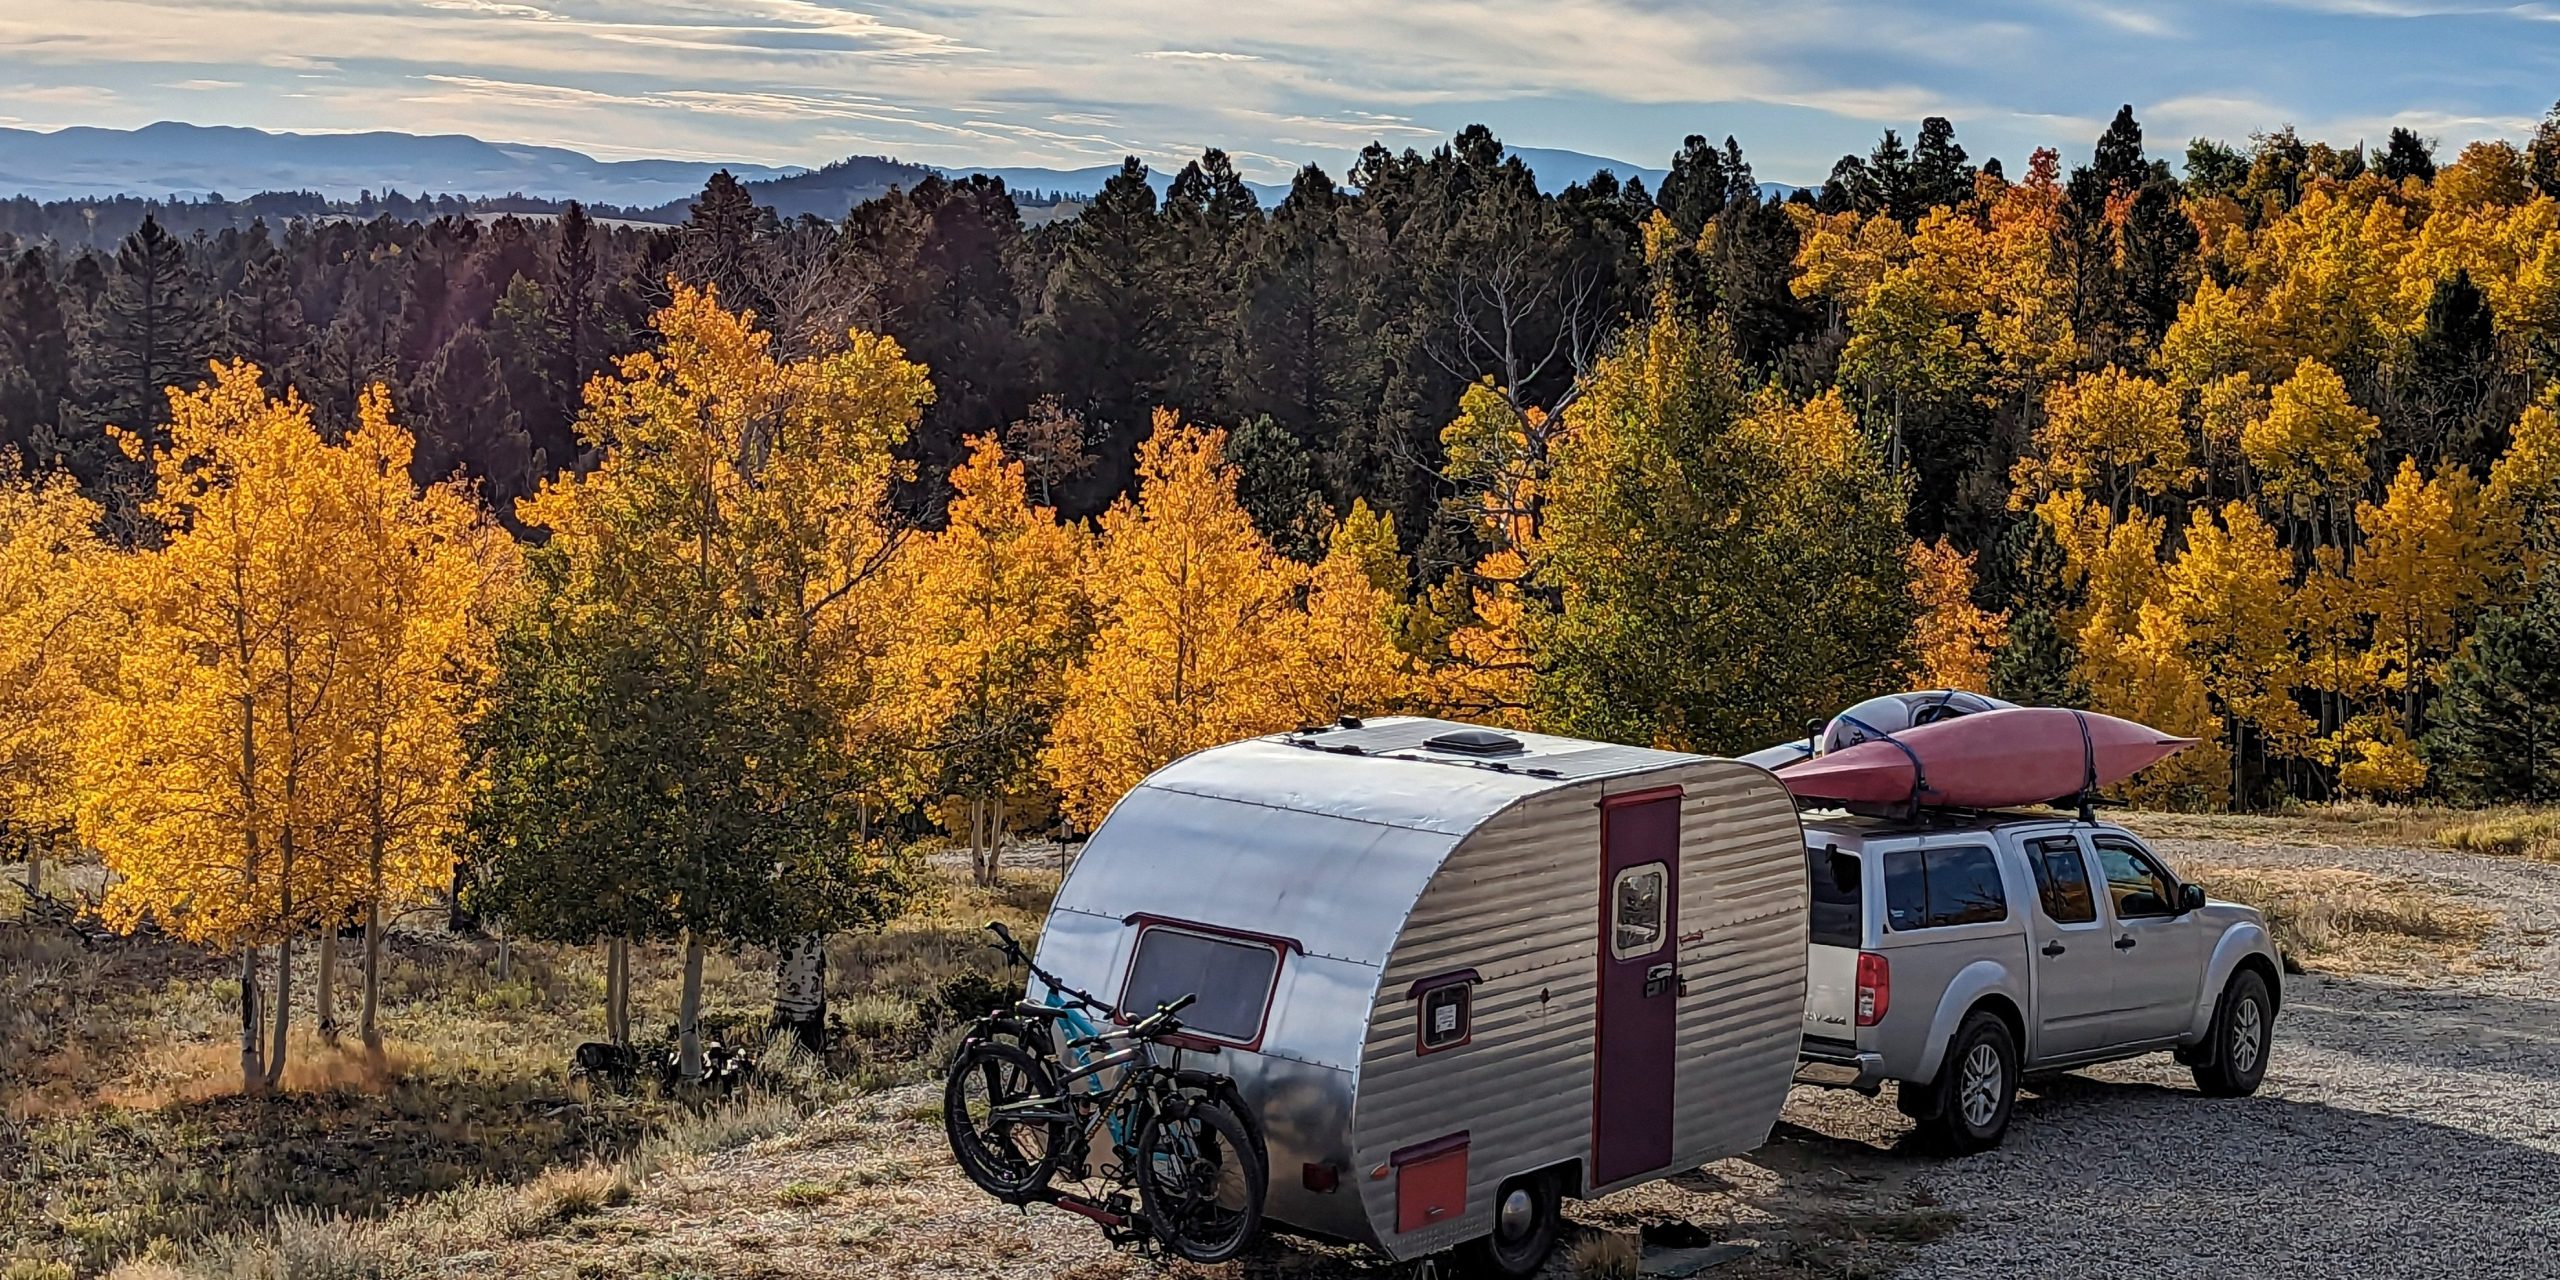
    After 10 years on the road, we updated our towing vehicle to a 2015 Nissan Frontier with a larger engine, more towing capacity, and even a rear bed cover to keep our extra gear out of the weather. But we were surprised when we hooked up our vintage camper, because the truck’s rear axle was riding a little low. Had the trailer gained weight?  Or did we not have the right tow hitch?

    Despite having a preinstalled towing package, our new truck didn’t have the same rear suspension of the former. When we hitched up and loaded our extra gear into the back, it caused the rear suspension to sag.  To remedy this, we added “helper springs.” We’ve ridden along smooth and level for four years now.  

    This experience pointed out a key difference between overloading the suspension and overloading the vehicle’s capacity. Increasing the stiffness of your rear suspension will not increase the total towing capacity or total tongue weight limits of your vehicle. In our case, it helped level our tow and smooth out the ride.  

    In our recent article about hitches, we discussed a few key points about safe driving with a trailer, as well as the different classes of hitches. But how do you choose the right tow hitch for your vehicle?


    4 Things to Know, BEFORE You Tow Our Example: 2015 Nissan Frontier + 15’ Camper
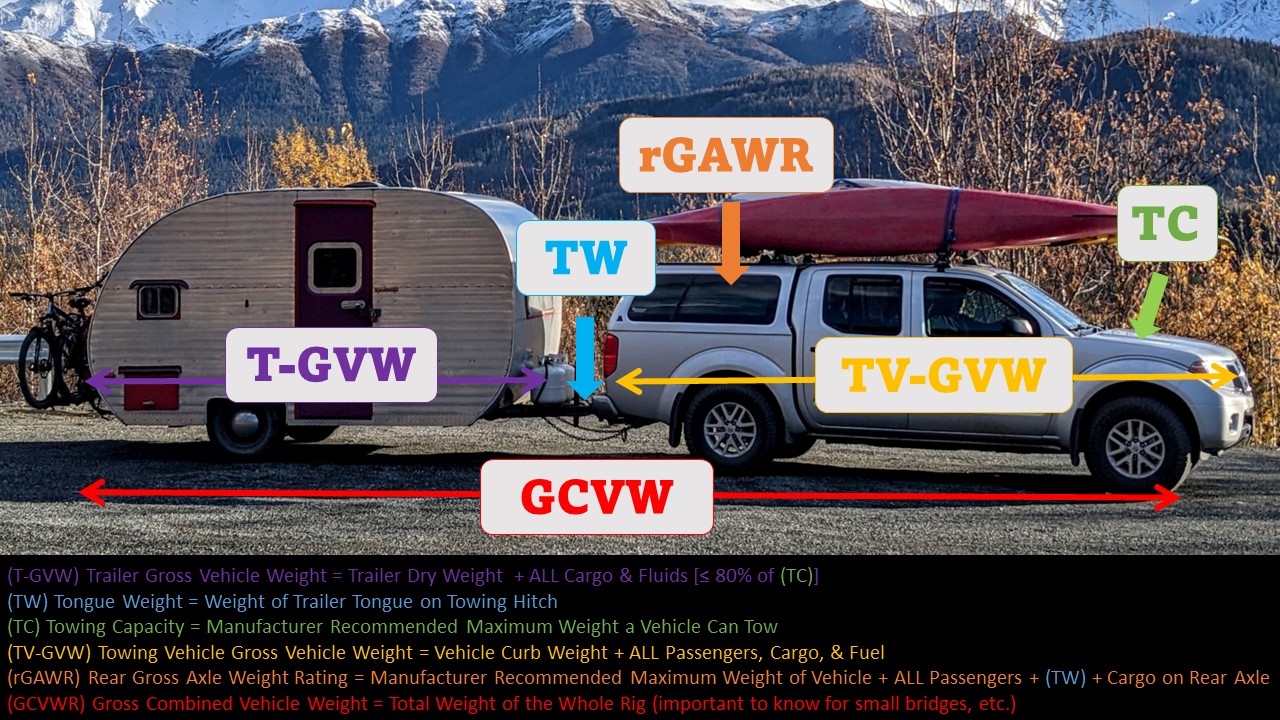
    Tow Vehicle’s Towing Capacity (TC)  6,100 pounds (5,000*)
    T-GVW (Trailer Gross Vehicle Weight) 3,300 pounds [should be less than 80% of (TC)]
    Trailer’s Tongue Weight (TW) 330 pounds
    Rear Gross Axle Weight Rating (rGAWR) 3,331 pounds


    *Our vehicle’s towing capacity is less when using a standard rear hitch (dead weight); a weight distribution hitch allows us to tow closer to the maximum weight of 6,100 pounds.


    Don’t know your numbers? Here are some great resources to determine them for your situation. Each hitch class has a safe range. Below are some considerations that might make your hauling experience even safer!


    RV Hitch Options

    Standard Hitch & Receiver (aka Dead Weight)

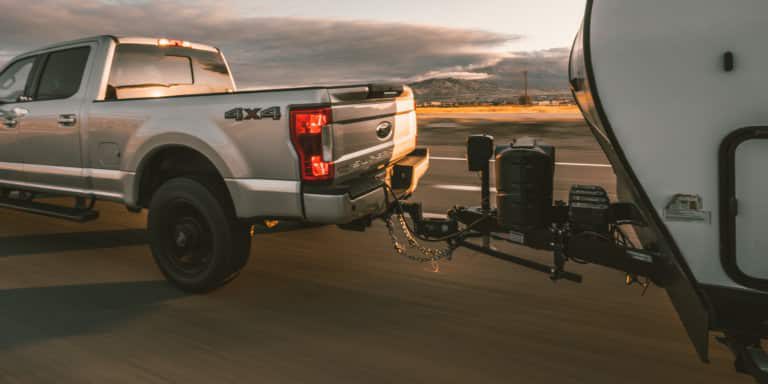
    Class III trailer hitches are the most common. They cover the largest range of vehicles with moderate towing capacity, as well as the largest range of trailers.  With a 2-inch by 2-inch hitch receiver and a 2-inch – 2 5/16-inch ball receiver, this setup will handle many campers.  

    In a standard set-up, the weight of the trailer is primarily resting upon the towing vehicle’s rear axle.  The recommended towing capacity in this configuration is less than the manufacturer’s maximum capacity. 

    It is important to choose the right rise or drop on the hitch insert (ball mount) so that the trailer and tow vehicle ride level.  Measuring the height of your hitch receiver and the height of your trailer hitch coupler (while level and on level ground) should do the trick.  There are several hitch types:

    Standard Hitch Types
    • Riser Hitch. Raises the ball above the hitch receiver.
    • Drop Hitch. Lowers the ball below the hitch receiver. You can turn a riser into a drop by simply flipping it over and reorienting the ball (and vice versa).
    • Adjustable Hitch. This is a good choice if you’re going to be hauling various trailers.  


    Weight Distribution Hitch vs. Sway Bars

    • Weight distribution hitches include metal spring bars that connect to brackets on the trailer tongue. When loaded this helps distribute the weight of the entire rig across both axles of the towing vehicle and the axle(s) of the trailer. Everything rides smoothly and evenly, which maintains performance, braking, and control of the rig. Many modern weight distribution hitches also include sway control. These hitches allow a greater towing capacity. For example our Nissan Frontier has a maximum of 6,100 pounds with a weight distribution hitch. But it has only 5,000 pounds with a standard hitch.
    • Sway bars are a friction device that connects from the side of the trailer tongue to a secondary ball mount on the side of the ball hitch insert. When driving at highway speeds, any crosswinds have to overcome the additional friction of the sway bar in order to push the trailer around. This helps keep everything tracking nicely behind the tow vehicle. To maneuver into a camping spot, it’s a simple matter of releasing the tension on the bar so you can more easily back into a tight spot.  


    Hitches for BIG RIGS

    Class IV and V hitches are for towing the heaviest loads. Both fifth wheels and gooseneck hitches have a connection point in the bed of the towing truck, rather than near the bumper. Either allows for a closer pivot point so that the trailer tracks better when cornering and is generally more maneuverable as a result. The difference between the two is where the coupler mechanism lies.  

    • Gooseneck trailers locate the ball hitch in the truck bed, while the coupler is on the trailer “neck.” As the name suggests, it looks like a bird reaching into the back of the truck. 
    • Fifth wheel hitches locate the “ball” on the trailer, while the coupler is installed in the center of the truck bed. Fifth wheel couplers are more intricate, can handle more weight and generally allow a smoother, and more stable tow, which is why they are preferred over goosenecks for RV applications.    


    In our next blog, we’ll cover some do’s and don’ts when connecting trailers, some common mistakes we’ve made, and discuss the great “grease or no grease” debate. 

    Eager to learn more about hitches? That’s very wise. Read more from our RV Tow Hitches 101 series.

    Hitch Types and Ratings: RV Basics (Part 1)
    How to Choose the Right Tow Hitch for Your RV (Part 2)
    5 Common Mistakes That Lead to RV Trailer Hitch Problems (Part 3)

  • A Few RV Secrets to Help You Save on Camping Fees

    A Few RV Secrets to Help You Save on Camping Fees

    The No. 1 way to cut costs on your next RV road trip is to spend less money on camping fees. (Following your RV purchase, that is. More on cutting purchase costs here.) Out on the road, most RV parks and state parks that offer full or partial hook-ups charge $50 to $100 per night. While still cheaper than a night in a hotel, camping fees on a long road trip can add up as quickly as your bill at the gas pump!

    We’ve traveled the continent with solar as our main source of electrical power, so we don’t need hook-ups and can camp on FREE public land and/or inexpensive campgrounds. We estimate that we’ve saved over $200,000 on camping fees since 2012!

    Where do you find these free and lower cost alternatives? While not an exhaustive list of all available resources, below are our go-to resources for information about free dispersed camping and traditional fee-based campgrounds, as well as boondocking for a couple nights. Most locations have stay limits, so pay close attention to those so you don’t put a strain on resources, or get a ticket. Also, please leave every place BETTER than you found it by following Leave No Trace!


    Website Resources to Save on Camping Fees

    Both the Bureau of Land Management (BLM) and U.S. Forest Service offer numerous options from semi-developed campgrounds (for a small fee) to dispersed camping with nothing but open land (usually free). Most do not offer hook-ups, so being self-contained is key. Some offer potable water and vault toilets. Nearly all offer gorgeous views. While most of the BLM land is found out West, national forests are located throughout the country. Stay limits are typically 14 to 21 days. So, always check the local regulations. If you are 62 or older or are disabled, get an America the Beautiful” Senior Pass or Access Pass which gives you half-off camping on ALL federal properties … saving you even more!

    • BLM: While land use and camping information is available online (by state), stop by the state’s BLM office for a free paper map that outlines the amenities for each area and is helpful when you have no cell service.
    • USFS: This website offers information about 157 national forest and grassland campgrounds! You can search by state, or by a specific forest/grassland area. The only downside is that there is no integrated map function, so you have to triangulate the data with either a road atlas or phone navigation app.

    Smartphone Apps

    iOverlander 2

    iOverlander 2 is the updated version of the original crowd-sourced app that helps you find everything. That could be a spot on the side of the highway for the night. Or a dispersed camping area. A casino. Even a parking lot. Always read reviews before you head to the pinned location on the map. Restrictions change frequently, and some could be marked as closed! Completely free.


    The Dyrt

    The Dyrt is a comprehensive campground locator app, offering the most listings of any app across the U.S. Read reviews and see photos/videos from real people who’ve camped there. Use the helpful filters to find free and inexpensive campgrounds, as well as dispersed areas. Search regions and create lists to plan out your next camping trip.  Even book reservable sites and get discounts through the app. Free; the PRO version provides some bonus features that are well worth the small annual fee!


    Boondockers Welcome

    This app is a collection of 3600+ people across the U.S. and Canada who love to offer their driveway, land, farm, etc. to other self-contained RVers for free. Some hosts do offer hook-ups for a nominal fee, as well as water, local knowledge, and new friendships. Use the availability calendar on the app to request a night’s stay (or up to five nights depending on the host). Annual fee.


    Harvest Hosts

    Harvest Hosts is a network of wineries, breweries, distilleries, farms, and attractions that invite self-contained RVers to stay in 5200+ sites across the U.S. and Canada. The annual fee provides members unlimited access to overnight stays at any one of the hosts’ locations. Members are encouraged to purchase at least $30 of products made by the host. It’s is a great way to support the small business allowing you to park there. The hosts typically do not offer hook-ups, so being self-contained is key. Use the availability calendar on the app to request a night’s stay (usually limited to one night). Annual fee.


    Nice! Now I Can Save on Camping Fees … But What Other Ways Can I Save?

    In addition to these helpful apps, there are several Facebook groups in which members post free and dispersed camping options. Just search Facebook with keywords such as boondocking, free camping, or dispersed camping and request to be part of the group. There’s a whole community ready to help you save on camping fees — and, in turn, ready to hear how you’re doing it yourself. Use these helpful resources on your next RV road trip to save hundreds, if not thousands of dollars! 

    We’ll be back next time with more information about key boondocking essentials that’ll make off-grid camping a breeze!

    Enjoying what you’re learning? This article is part of our Cutting RV Travel Costs 101 series.

    The First Step to Find Your Dream RV (Part 1)
    A Few RV Secrets to Help You Save on Camping Fees (Part 2)
    Boondocking Essentials for RV Newbies (Part 3)
    RV Kitchen Must-Haves: How to Make Memorable Meals That Save Cash (Part 4, Coming Soon)
    Going Deep into Your Backyard (Part 5, Coming Soon)


  • 5 Solar Components Every RVer Should Know

    5 Solar Components Every RVer Should Know

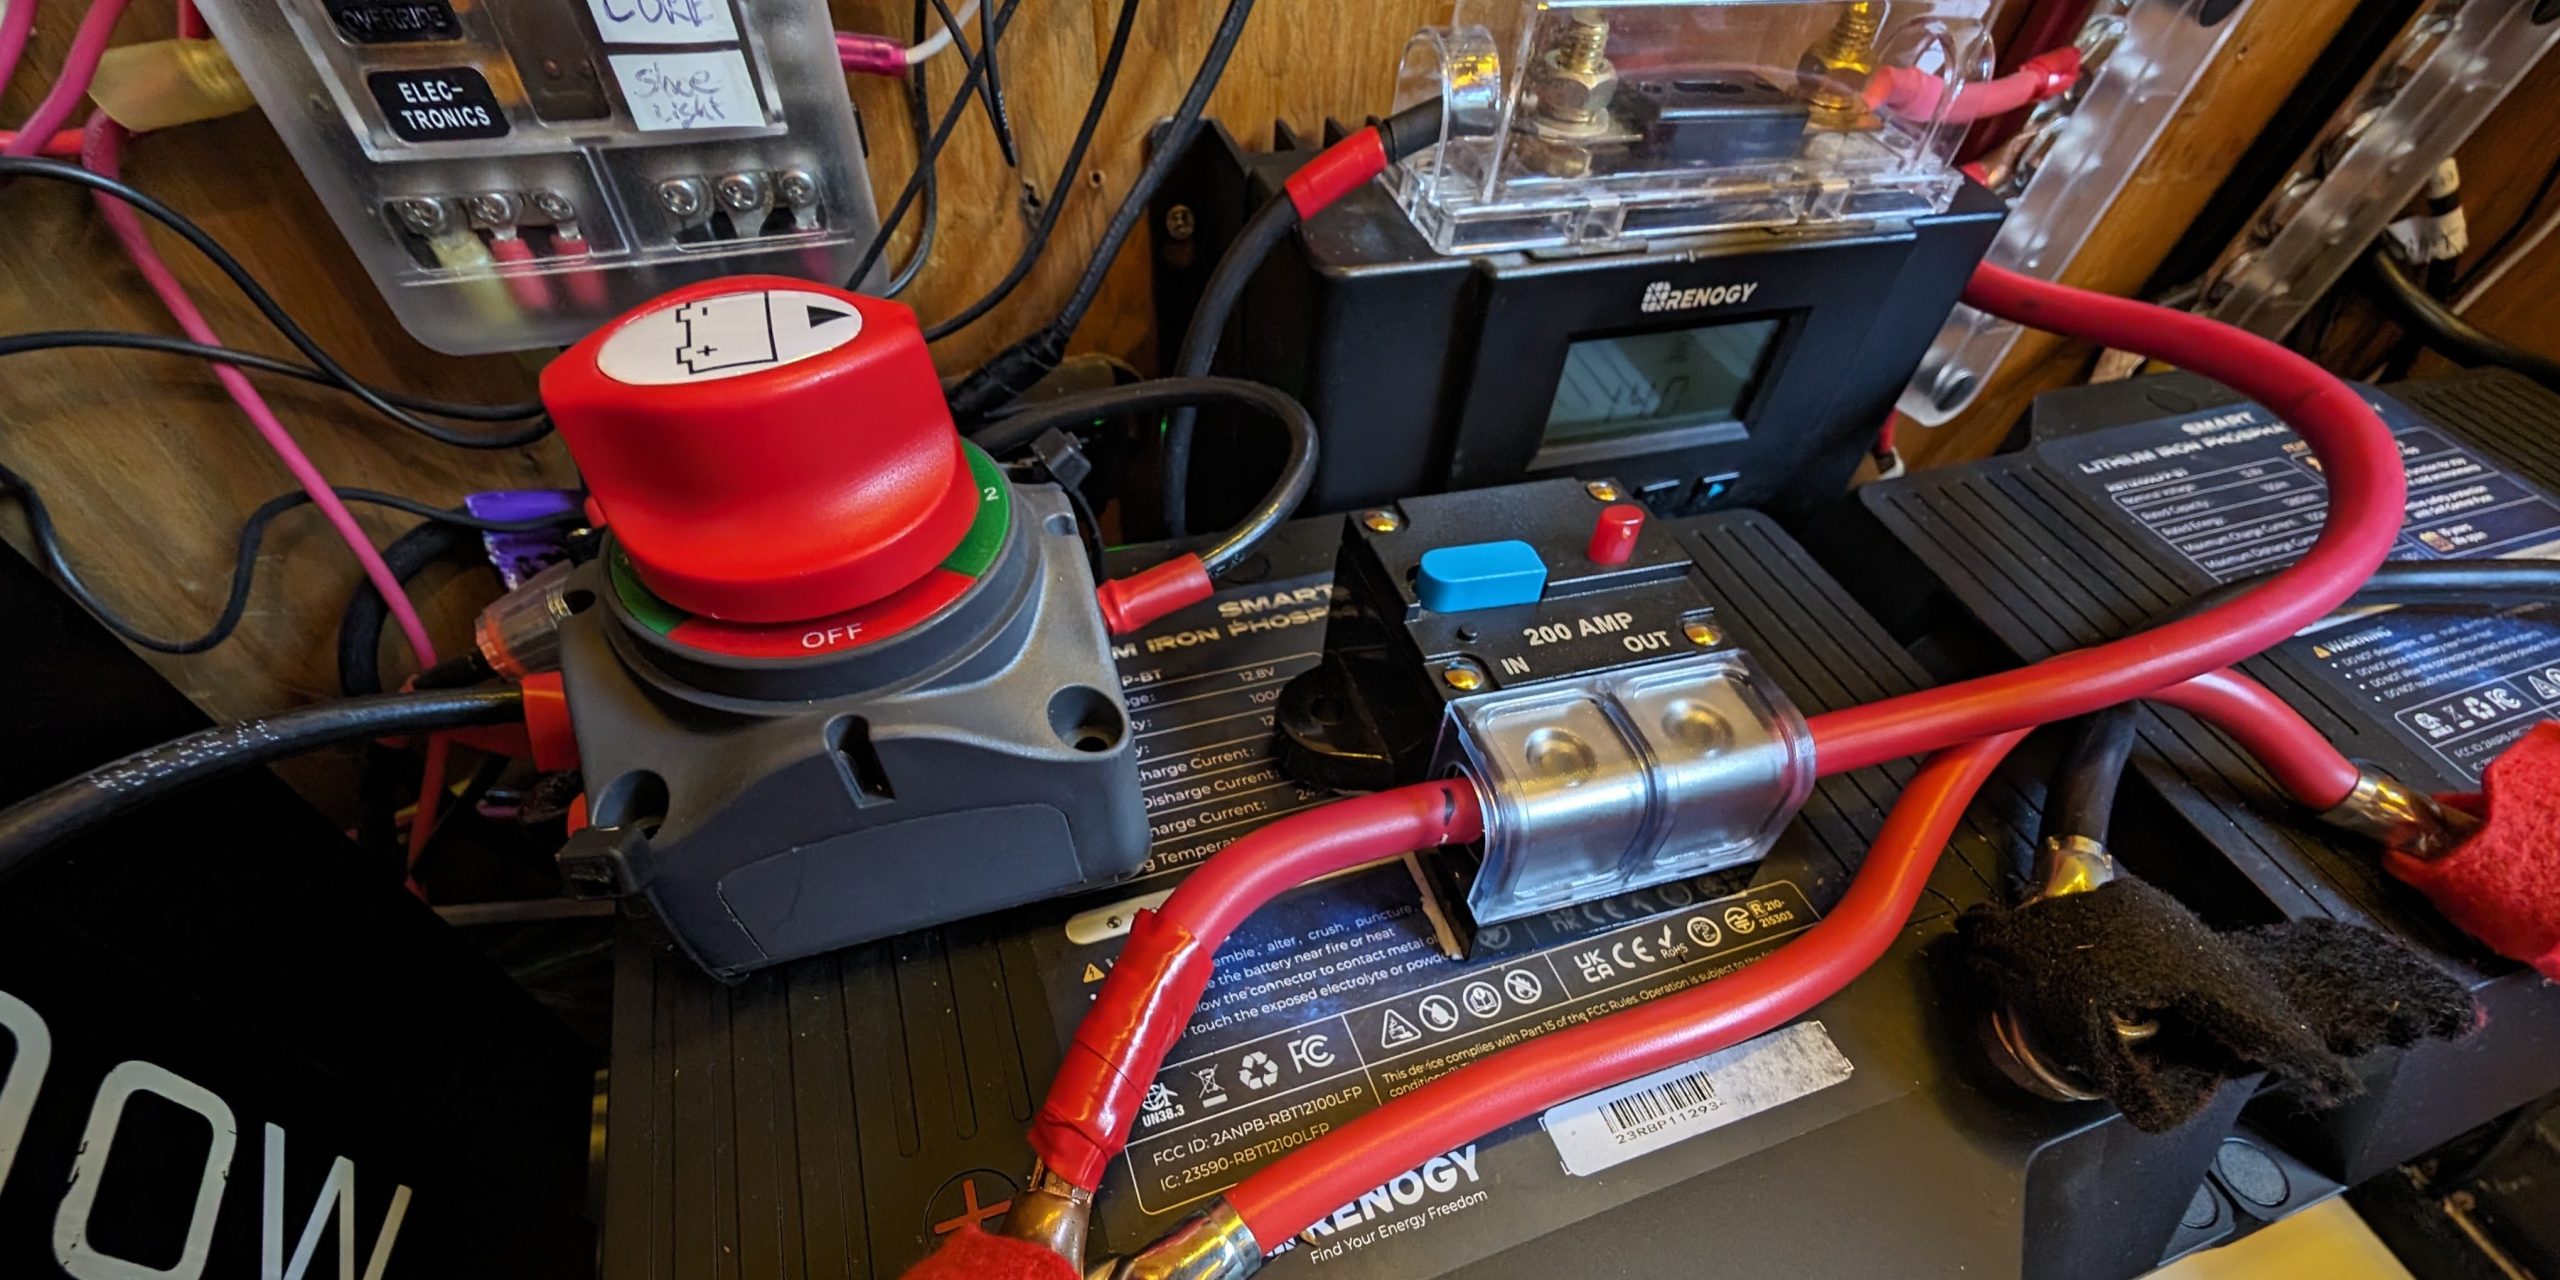
    So, you’ve gotten yourself a solar-ready RV, and now you want harness energy from the sun, huh? And store it for later use, of course. Then make it usable to run ordinary household appliances in your RV, right? Well, that requires four simple solar components: solar panels, charge controller, battery bank, and an inverter. And to really trick out your off-grid RV, let’s throw in a fifth component — the DC to DC charger!


    Important Electrical Terms to Master Solar

    Before diving into the solar components, let’s introduce a few electrical terms that you need to know. To simplify, I’ll use the analogy of water flowing through a garden hose to illustrate. Amperage (A) is the flow of current through the electrical system. Or, in our analogy, the flow of water through the hose. Voltage (V) is the pressure of the electrical system, which is like the force on the water moving through the hose. Wattage (W) is the electrical work being done by an appliance itself. With our analogy, that’d be the overall effectiveness of the hose.

    To increase flow, you need a bigger hose, but the spray will lose pressure. To increase pressure, add a nozzle which restricts the flow but increases the spray power. While either one may still get that bird poop off your RV window, the important thing to remember is that to get power (W) you multiply the flow (A) times the pressure (V) – Amps x Volts = Watts

    One last term to understand is Watt hours (Wh). Watt hours are the amount of time you could do the electrical work with the given energy supply. Or, back to our analogy, how long you could wash the RV with the hose at the same pressure and flow. It is simply watts times hours. (We’ll cover how to determine your RV’s average daily Wh in our next blog.)


    5 Essential Solar Components

    Here’s a quick look at what each of the five major solar components do. I’ve also included how each is rated using the different units of electricity described above.

    1. Solar Panels

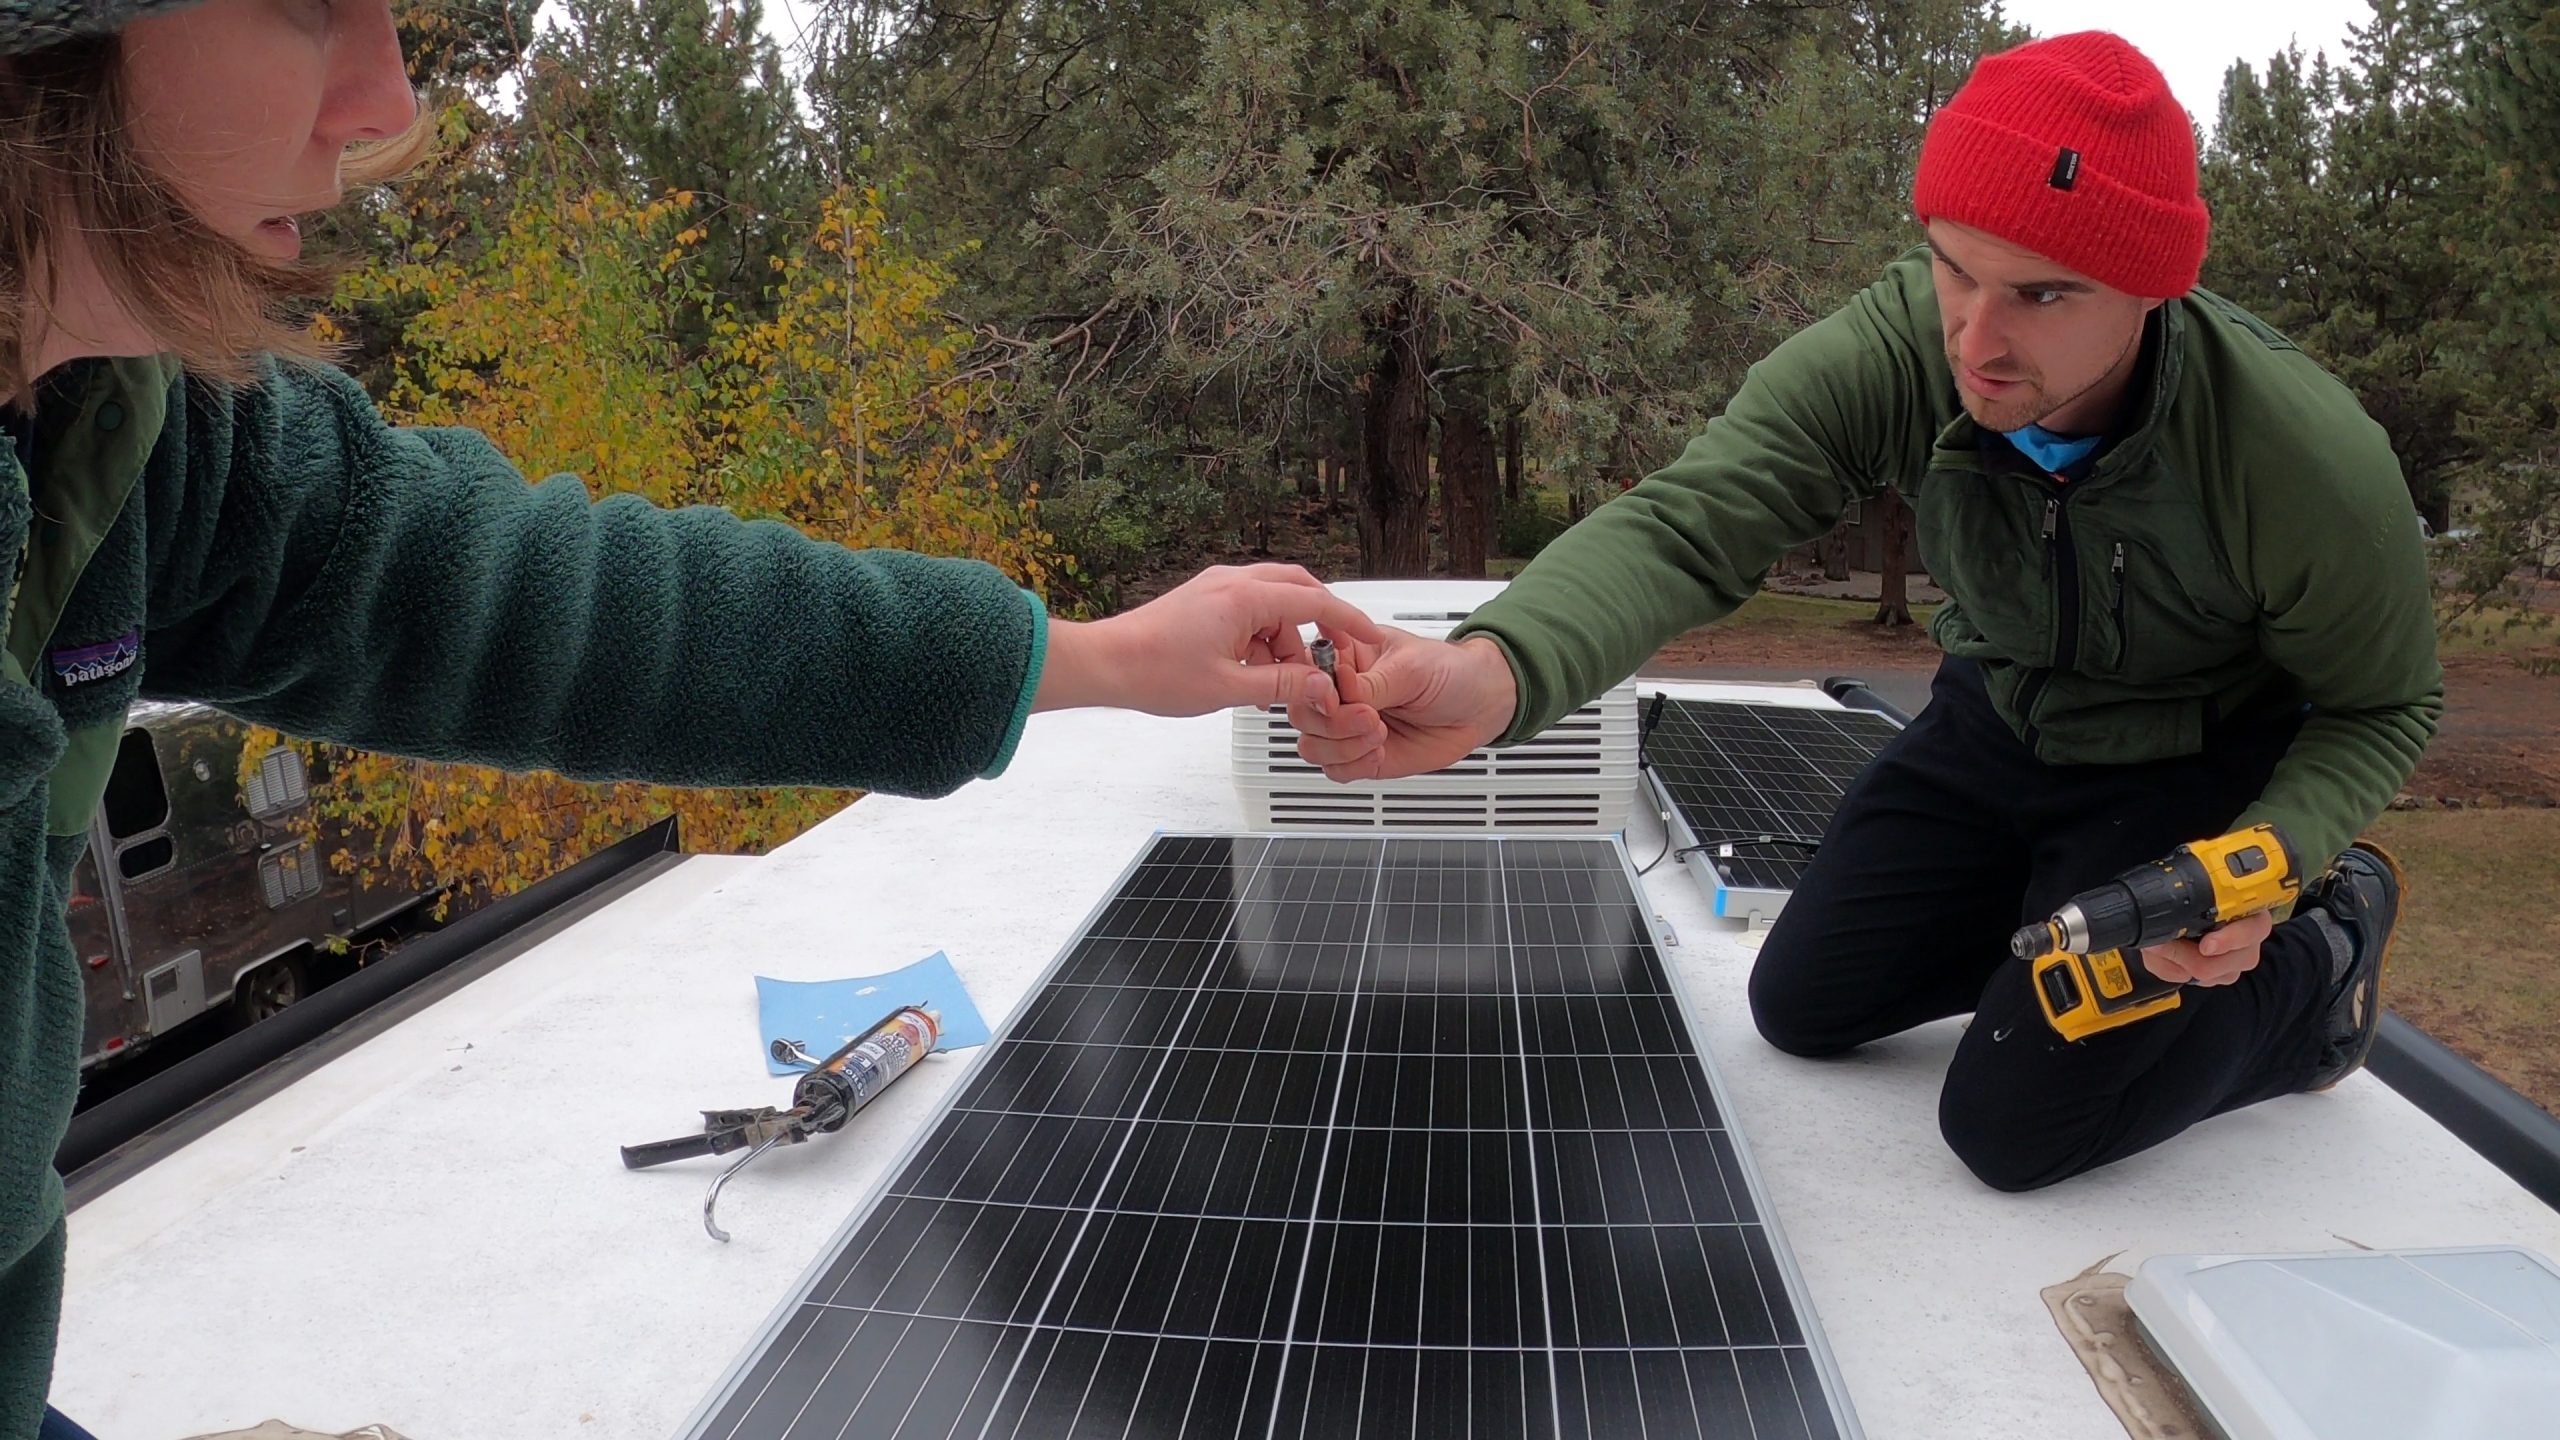
    Solar panels produce an electrical current when sunlight shines upon them. That current can run a DC appliance directly, but most off-grid systems use batteries to store that energy for later use. (For example, when it’s after dark, cloudy, or raining.) Solar panels are rated in watts (W). The watts of a specific solar panel (e.g., 100W, 200W, 300W) indicates the maximum power a panel can produce under optimal solar conditions. Solar panels come in either rigid, flexible, or bifacial varieties. They can also be permanently fixed to the roof or set up on the ground near the RV. (Portable solar panels are made specifically for this purpose.)


    2. Charge Controllers

    The charging current from the solar panels will fluctuate based upon what’s happening in the atmosphere (passing clouds, etc.). Charge controllers manage the charging current between the panels and the battery bank. They act as the “brain” of the system, and ensure that the battery bank is charged appropriately and safely. Charge controllers are rated in amps (A). The specific rating (20A, 40A, 100A) is the upper limit of current that the controller can safely handle. The two different types of charge controllers are PWM (Pulse Width Modulation) and MPPT (Maximum Power Point Tracking) — with MPPT being up to 30 percent more efficient!


    3. Deep Cycle Batteries

    Deep cycle batteries come in various voltages (12V-24V-48V), but their capacity is rated in amp hours (Ah). That way, you will know the length of time you could expect a specific flow in amps. There are four types of solar deep cycle batteries: flooded lead acid, gel, AGM, and lithium-ion phosphate. Deep cycle batteries are designed to be discharged and charged many times over their lifespan. And they can vary significantly with regards to their chemistry, price, lifespan, charging time, cycles, etc.


    4. Inverters

    Inverters are rated in watts (W) because they do the work of changing DC power to AC power for your appliances that have a standard household plug. Their rating (700W, 1000W, 3500W) indicates the maximum power output that an inverter can safely handle. Pure sine wave inverters most closely replicate the type of AC power that is delivered to your home and are less likely to damage sensitive electronics.


    5. DC-to-DC Chargers

    DC-to-DC chargers make use of excess engine power while the vehicle is running to effectively charge the RV battery bank. These chargers serve as an electrical “pump” — taking that trickle charge typically delivered through a 7-pin trailer connection and pumping it up to 30A, 40A, 50A, or 60A. These chargers are rated in amps (A), with this number referring to the possible maximum current that the charger can safely deliver to the RV batteries. Some models even combine a charge controller and DC to DC charger into one unit to save space.


    So, Now You Know the Solar Components … What’s Next?

    As you dive into your own RV solar project, understand that everyone has different energy needs and uses their RV differently. In our next blog, we’ll dive into how to design a solar powered system that will work for you and your energy demands!

    Enjoying what you’re learning? This article is part of our RV Solar 101 series.

    What to Look for in a Solar-Ready RV (Part 1)
    5 Solar Components Every RVer Should Know (Part 2)
    RV Solar Explained … with Middle School Math (Part 3)
    Does a DIY RV Solar System Install Make Sense for Me? (Part 4)
    Choosing the Right Solar Powered System for My RV (Part 5, Coming Soon)

  • What Not to Do When Renovating Your RV (Like Ever, Ever)

    What Not to Do When Renovating Your RV (Like Ever, Ever)

    O, the DIY project, how I love and hate thee! If you are like me, then you mostly prefer to enjoy life, work on what you’re good at, and you try to get a professional to do your home and RV projects. That being said, saving money and time is always a great feeling, and it can be pretty fulfilling to make that cool renovation yourself — until it’s not. Because renovating your RV, while rewarding, is no joke.

    As an avid RVer and DIYer for over six years, I’ve talked before about 10 popular RV renovations that can transform your home on wheels into a personalized haven. However, there are a few common mistakes that can turn your dream renovation into a nightmare, and that is what today’s story is all about. To help you navigate this journey smoothly, here’s a guide on what not to do when renovating your RV.


    1. Don’t Dive Straight Into Renovating Your RV

    One of the biggest mistakes you can make is diving into your renovation without a detailed plan. This often leads to hasty decisions, budget overruns, and a lot of frustration. Trust me, planning and measuring several times before executing is the only way to go.

    With our new solar system, other than some minor wiring issues, the thorough planning thoroughly and measuring everything several times helped the project stay fairly on time and budget. Even then, unexpected things happened. Now, if you haven’t read my freezing toilet mishap, you can check out the link at the end of this post for a good laugh at my expense.

    Tip: Start by outlining your goals, making a budget, and creating a timeline. Sketch out your ideas and list the materials you’ll need before you begin. Once that is done, increase your cost and time estimates by 15 to 20 percent for unforeseen circumstances.


    2. Avoid Using Heavy Materials

    While it might be tempting to use materials like hardwood or granite to create a luxurious feel, these heavy materials can significantly affect your RV’s weight and fuel efficiency.

    Tip: Alternatives like peel-and-stick, vinyl planks, or laminate for countertops, flooring, and the like can offer a similar aesthetic appeal without the added weight.


    3. Don’t Ignore Your RV’s Weight Capacity

    This goes hand in hand with number 2, because every RV has a maximum weight capacity, and exceeding this can lead to safety issues, increased wear and tear, and potential fines.

    Tip: Weigh your RV before and after renovations to ensure you stay within the safe limit. Remember, this includes everything you plan to carry on your trips, including passengers, food, belongings, etc. If you can, try to get a good estimate on the total weight you are taking out and the weight you are adding for your project.


    4. Avoid DIY Electrical Work Without Proper Knowledge

    Tackling electrical work without the necessary expertise can be dangerous and lead to severe problems down the road like burnt fuses, wires, or even a full-blown fire.

    If you’re not confident in your electrical skills, it’s best to hire a professional. Even if you are confident, reading forums and watching YouTube videos are always recommended with these types of projects before beginning.

    Tip: Always disconnect and turn off the power before working on electrical components to avoid shocks and injuries.


    5. Don’t Sacrifice Function for Aesthetics

    It’s easy to get caught up in making your RV look beautiful, but functionality should always come first. A pretty kitchen isn’t much use if it doesn’t have enough storage or counter space. A balance between aesthetics and practicality will make your RV both beautiful and livable.

    Tip: Start by ensuring there’s ample storage, comfortable seating, and functional appliances. No matter where your renovation takes you, these are must-haves for any RV.


    6. Avoid Neglecting Proper Ventilation

    Proper ventilation is crucial in an RV to prevent issues like mold, mildew, and unpleasant odors. Skimping on ventilation can even lead to health problems and costly repairs.

    Ensure your RV has adequate vents and fans, especially in areas prone to moisture like the kitchen and bathroom.

    Tip: Regularly check and clean your ventilation systems and filters to keep them functioning properly.


    7. Don’t Forget About Temperature Extremes

    Materials that work well in a stationary home might not perform as expected in an RV due to temperature fluctuations. Warping, cracking, and other issues can arise if you choose the wrong materials.

    Tip: Consult with experts or fellow RVers for recommendations on the best materials for your climate. This will ensure your renovations last through all your adventures, hot or cold.


    8. Avoid Making Permanent Changes That Reduce Resale Value

    While personalizing your RV is important, making changes that are too specific to your taste can reduce its resale value. Permanent modifications might not appeal to future buyers.

    I took out the dinette and valances on one of our fifth wheels; when it came time to sell, the dealer that was helping us recommended that we reinstall them for the original look. Luckily we had hung onto them, and were able to restore and sell the RV.

    When in doubt, opt for neutral changes that enhance the RV’s appeal to a broader audience. Stick to timeless designs and avoid overly trendy choices.

    Tip: When deciding between two options, if one can be easily reversed, that is usually the best way to go.


    9. Don’t Underestimate the Importance of Quality Tools and Materials

    Using low-quality tools and materials might save you money initially, but they can lead to poor results and frequent repairs in the long run.

    Invest in quality tools and materials to ensure your renovations are durable and long-lasting. It’s worth spending a bit more upfront to avoid headaches later.

    Tip: Quality tools can also make the renovation process smoother and more enjoyable.


    10. Don’t Ignore the Legal and Safety Requirements

    Renovations that don’t comply with safety regulations and legal requirements can lead to fines, insurance issues, and even accidents.

    Familiarize yourself with local and state laws/codes for whatever state the RV is registered in, including safety standards and guidelines. This is especially true for weight limits, as some states have regulations for certain weights and driver license classifications.

    Ensure all renovations meet these requirements to keep your RV safe and compliant. Nothing is ever full proof, but taking these measures will help protect you, and it will likely minimize your risk of financial or legal issues with insurance or law enforcement, should an incident occur.

    Tip: A detailed plan is an invaluable asset when navigating regulations and requirements. Knowing the exact changes you want to make to your RV will help you look up relevant guidelines – or ask the right questions when consulting a professional.


    While jumping into renovating your RV can be exciting and rewarding, taking time to plan, and avoiding these common pitfalls is crucial to ensure a smooth and successful transformation. By planning meticulously, prioritizing functionality, and investing in quality, you can create a beautiful and practical home on wheels. Best wishes with renovating your RV, and remember, don’t be like me and try to fix a frozen toilet in the winter!

  • Easy Rider: How to RV with Your Motorcycle

    Easy Rider: How to RV with Your Motorcycle

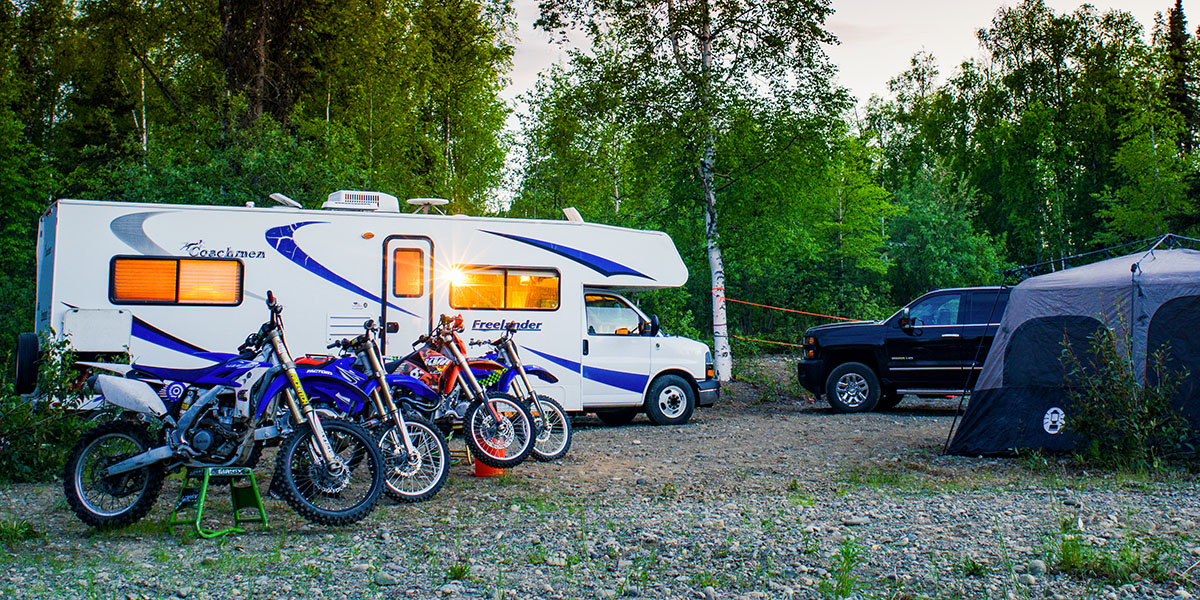
    Traveling by RV sure is great, but it doesn’t replicate the rapturous, untamed freedom that a motorcycle can offer. And if you’ve ever taken a cross-country motorcycle road trip, then you’ve had a taste of that Tom Petty magic. It’s perfectly wild and free, iconic in every way. That is, until it’s time to set up your tent in the rain, in the dark, after a seven-hour ride. You’re tired, cold, hungry and irritable, to say the least. But it’s possible to indulge in the freedom that a motorcycle brings us without having to tough it out in the rough. Because you don’t really have to choose between traveling by RV or by bike. You can RV with your motorcycle.

    For everyone who would like to have your cake and eat it too, this is the dream. With an RV, you can travel with all the comforts of home and bring your motorcycle with you. You can freely explore your destination. Range far and wide —all while having a nice cozy bed to sleep in at day’s end, rain or shine.

    Here’s what you need to know to make that happen — the methods, the key numbers to know, and the best RVs to do it.


    How to RV Your Motorcycle with an RV

    There are a few ways to transport your motorcycle with your RV. You can tow it behind, mount it on the back, or park it inside. With a Class A motorhome, you can either use a lift on the back of the motorhome, or you can tow the bike behind you. With a standard fifth wheel, you’re limited to towing your motorcycle with a lift on the back. While many fifth wheels do not have a frame sturdy enough to support the lift, some do.

    A toy hauler, on the other hand, is an altogether different animal. Toy haulers can come in the form of either a fifth wheel or a travel trailer. With a garage in the rear, a toy hauler can safely store your motorcycle, provided the garage is big enough. In most cases, if you’re buying or renting an RV to transport your motorcycle, toy haulers are the best place to start.


    Key Considerations for Motorcycle Transportation

    When look for the perfect solution to RV with your motorcycle, keep the following key numbers in mind:

    Motorcycle Weight

    Ideally, you’ll want to weigh your bike, but you can use the manufacturer’s stated curb weight as a starting point. Include the weight of any equipment (such as spare tires) that will be riding along with your motorcycle.

    Motorcycle Dimensions

    Every trailer and carrier is different, but you can cover all your bases by measuring your bike’s overall height, width, length, and wheelbase, as well as the width of the tires. If you’re looking at an enclosed trailer, add in a little extra maneuvering space.

    Load Capacity

    When shopping for a trailer or mount, look for a load capacity greater than the combined weight of your motorcycle and any equipment.

    Trailer or Mount Weight

    The weight of the trailer or mount itself, which can be much heavier than you might think.

    Gross Vehicle Weight Rating (Towing capacity)

    If you are mounting your motorcycle to your vehicle, you’ll want to make sure that the total weight —motorcycle, mount, and everything else inside — does not exceed the vehicle’s GVWR. If you are towing your motorcycle, then you want to make sure that the combined weight of the motorcycle and trailer do not exceed your vehicle’s towing capacity. Exceeding these limits will affect vehicle stability. It can also cause excess wear and tear on your vehicle. As result, that could potentially lead to expensive repairs or even an accident.

    Axle Weight Rating

    This is an additional limit to consider if you’re mounting your motorcycle. Because the weight of the motorcycle will be resting entirely on the rear axle of your RV, you’ll need to make sure that it can handle the disproportionate weight.

    State Towing Limits

    There are many rules and regulations on towing. Maximum weight for trailers without their own brake. A reduced speed limit. How many trailers you’re allowed to tow. There are many states where it’s not even legal to tow a motorcycle trailer behind your fifth wheel (called double- or triple-towing). Check the local laws for every state along your itinerary so you aren’t caught off guard.


    The Best RVs to Transport Your Motorcycle

    Toy Haulers

    Toy haulers are designed to RV with your motorcycle (or other large toys). Therefore, they’re built with the towing capacity and space you need. When shopping, factor in storage for accessories and equipment in addition to the toy that you are hauling. Some toy haulers allot the majority of floor space for the main event, leaving little extra room for other items you may want to bring along.

    Grand Design, Forest River, and Keystone consistently stand out among the crowd of toy hauler makes. The Momentum 376TH Toy Hauler has won numerous accolades, a reflection of Grand Design’s consistent attention to detail and quality product.

    Which toy haulers are the most popular within the riding community? The Keystone Raptor Series received great reviews among veteran Sturgis Harley riders.  Why? It boasts a roomy garage with a flexible floor plan.

    The Forest River XLR series offers a variety of toy haulers, both as fifth wheel and travel trailers. The XLR Hyperlite Toy Hauler comes in a variety of models, offering an enclosed garage, open deck, or open passageway. The floor plans are roomy with a spacious garage to boot.

    If you have two full-size Harley-Davidson motorcycles that you need to transport, then you may want to consider something along the lines of a Forest River Series Platinum Salem Fox Toy Hauler. It’ll get the job done and is reasonably light at 6,500 pounds dry.


    Class A Motorhomes

    Generally speaking, gas-powered Class A Motorhomes can tow up to 5,000 pounds, while diesel-powered motorhomes can tow up to 10–15,000 pounds. In many cases, you will be able to tow your secondary car and use a hydraulic lift to transport your motorcycle. A Class A is a heavy-duty vehicle that gives you the many options for your auxiliary travel toys, but you’ll want to double-check your weight limits and towing capacity before deciding.

    If you aren’t towing a secondary vehicle, you can tow your motorcycle behind your Class A motorhome in all 50 states. This is a versatile solution to RV with your motorcycle that is limited only by your towing capacity and trailer configuration.

    A lift can come in handy if you already have something hooked up behind your RV. If you are looking at installing a lift on your Class A motorhome, it’s important to do your research; picking the right lift and the right installation method depends on your needs and your particular RV. Since a lift extends from the back of your motorhome, also check to see how it interacts with your towing setup and that you have the clearance you need to hitch and unhitch a trailer.


    Fifth Wheels

    Of the three types of RV we’re talking about today, this is the trickiest when it comes to accommodating a motorcycle — but it can be done. If you have a fifth wheel and you want to install a lift onto the back, keep in mind that you will need to have a frame that’s sturdy enough to support the load. Alternatively, if you decide to tow your motorcycle behind your fifth wheel, make sure you confirm the legality of double-towing (sometimes called triple-towing) in all states along your journey.

  • Hitch Types and Ratings: RV Basics

    Hitch Types and Ratings: RV Basics

    Looking forward to hitching up and hitting the road in your new RV?  Well, safe to say, RV Towing 101 probably wasn’t covered the last time you took a DMV test. And yet the difference between driving a standard vehicle and driving while towing a trailer is significant. Very significant. And you won’t be able to enjoy that newly purchased RV trailer without understanding hitch types and ratings.

    So, let’s get you hooked up with all the towing know-how you need. In this article, we’ll provide some pointers for the road, a few key hitch facts, and a breakdown of classes of hitch types and ratings. Additionally, we’ll provide follow-on articles (coming soon) on choosing the right hitch and common mistakes.


    Some Considerations Before You Hit Road

    • Stopping distance is increased, perhaps doubled, at highway speeds.
    • Overall vehicle length is doubled, or more.  You need more space in order to pull out into traffic, to merge, pass, to make a turn, and to maneuver in general. 
    • Your total rig weight is much greater, adding more mass and momentum and less mobility in any defensive driving situation.
    • Following distance needs to be greater, perhaps more than twice your usual habit, because of everything above.


    Remember, other drivers may not take your careful planning or weight distribution into consideration. This can become frustrating especially in heavy traffic, but keep in mind that you’re big. You’re visible. And you’re probably in someone’s way, so they’ll have to deal with you.  


    What to Know (About Your RV) Before You Tow

    • Your vehicle’s towing capacity. Can the vehicle you drive safely pull a trailer (fully loaded) and bring everything to a stop safely?  A good rule of thumb is for the GTW (Gross Trailer Weight) to never exceed 80 percent of your vehicle’s maximum towing capacity.
    • Your vehicle’s max tongue weight (MTW). Can the rear axle of your vehicle handle the additional weight of the trailer that isn’t being carried by the trailer axles? Generally this is 10 to 15 percent of the total trailer weight.  


    Having your vehicle and camper evenly matched is incredibly important to safe towing. As you head to the campsite you may have brought extra things: coolers full of food, kids, pets, extra fuel, outdoor adventure toys, and more. All of these need to be considered so you won’t put excess wear and tear on your vehicle nor exceed the safety limits of your rig.  


    Understanding How Hitches Work

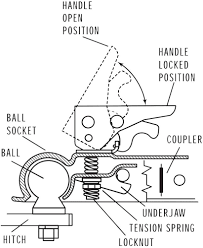
    Most conventional trailers and campers use a ball hitch mechanism to connect. The ball hitch insert connects to the towing vehicle through a hitch receiver which is bolted/welded to the vehicle chassis below the bumper. Here’s a great article that dives deep into trailer hitches. Note: Bumper hitches are NOT recommended for safely towing and are illegal in California. 


    The trailer has a hitch coupler that drops down over the ball when the coupler handle is in the open position.  When closed, it brings a locking device (underjaw) up into position under the lower section of the ball. This prevents the hitch coupler from bouncing off the ball hitch while towing.  The handle can be locked into position with either a pin or a standard lock.  


    Classes of Hitch Types and Ratings

    Class I Hitch

    This is the perfect hitch for lightweight loads like bike racks, cargo carriers, or very small trailers, and works with smaller vehicles.

    • GTW (1,000 to 2,000 pounds); MTW (100 to 200 pounds); Receiver Size 1¼ inch
    • Class I hitch receivers have a tab so that you can only use a Class I hitch accessory with this receiver. Since Class II hitches have the same receiver size, this is necessary so that you don’t unintentionally overload the receiver. 

    Class II Hitch

    Heavier duty than Class I, these are still paired with smaller vehicles, but can accept heavier loads.  

    • GTW (2,000 to 3,000 pounds); MTW (200 to 300 pounds); Receiver Size 1¼ inch
    • Class II can accept Class I hitch accessories. 


    Class III Hitch

    Most traditional travel trailers will fall into this class, it is the most common hitch class across all towing vehicles because of the weight capacity range.  

    • GTW (3,500 to 8,000 pounds); MTW (300 to 800 pounds); Receiver Size 2 inch
    • Typical vehicles include full-sized sedans, minivans, SUVs, and trucks.


    Class IV Hitch

    A much heavier duty load rating than Class III, but retains the 2-inch by 2-inch receiver.  

    • GTW (5,000 to 12,000 pounds); MTW (500 to 1,200 pounds); Receiver Size 2 inch
    • Typical vehicles include large SUVs and trucks.


    Class V Hitch

    The biggest hitch type which is typically welded directly to the vehicle’s frame and offers a very large receiver. Intended to pull the heaviest loads like toy haulers, horse trailers, etc. An adapter can also help you insert Class IV (and lower) accessories into a Class V hitch receiver.

    • GTW (10,000 to 25,000 pounds); MTW (1,000 to 2,500 pounds); Receiver Size 2 ½ to 3 inch
    • Typical vehicles include large trucks with massive towing capacity.


    Next up, we’ll talk about how to interpret your vehicle’s ratings, what sway hitches and drop hitches are all about — and the pros and cons of a fifth wheel trailer.  

    Eager to learn more about hitches? That’s very wise. Read more from our RV Tow Hitches 101 series.

    Hitch Types and Ratings: RV Basics (Part 1)
    How to Choose the Right Tow Hitch for Your RV (Part 2)
    5 Common Mistakes That Lead to RV Trailer Hitch Problems (Part 3)

  • What to Look for in a Solar-Ready RV

    What to Look for in a Solar-Ready RV

    So, those solar-powered RV’s caught your eye, huh? (You’re here, so figured they might have.) Well, if you’re looking for the right solar-ready RV model, you’re going to want to get familiar with the terms. Trust us: We know. We’ve been in your shoes. Before hitting the road full-time in 2012, we added a small solar set-up to our vintage camper so that we could save money and camp off-grid without a noisy gas generator.  What we didn’t realize at the time was that we were on the front end of the RV solar revolution that has swept the world!  For the past 12 years, we’ve been teaching RVers how to go solar while we’ve explored North America.

    So, let’s make this intro lesson short and sweet. We’ll go deeper into more solar specifics in future follow-on articles, but here’s what you need to know —and the questions you need to ask — as you get started.


    What solar options are available on RV’s?

    Ranging from the “solar-ready RV” to full-scale solar system packages with all the bells and whistles, the options are many — and can be confusing for newbies. Below are three common options that you’ll find when shopping:


    1. Solar-Ready

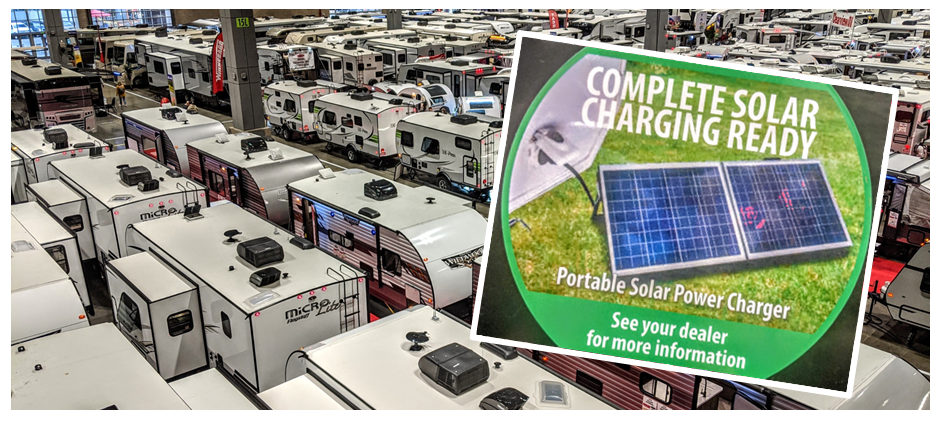
    Some RV manufacturers add a special port to the outside of the rig into which you can easily plug a specific brand’s portable solar panel. It’s helpful because the plug directly connects to the house battery, so set-up is simple.  However, a solar-ready RV does NOT mean that the rig comes with any solar components. Typically, in addition to the panels, you will need to purchase a charge controller as well as an inverter if you want to run more than just lights and 12V DC appliances. Most RV’s come with a single, basic 12V lead acid battery, so you may want to upgrade the battery bank to LiFePO4.


    2. Solar Battery Maintainer

    Many modern rigs boast a small wattage solar panel (<50 watts) and charge controller that are designed to simply maintain the RV/van house battery.  While these battery maintainers are NOT robust enough for off-grid RVing, they can be beneficial if you plan to store your rig outside when not in use. These small panels will keep your batteries topped off, so you are always ready to roll on to your next adventure.


    3. Off-Grid Solar Packages

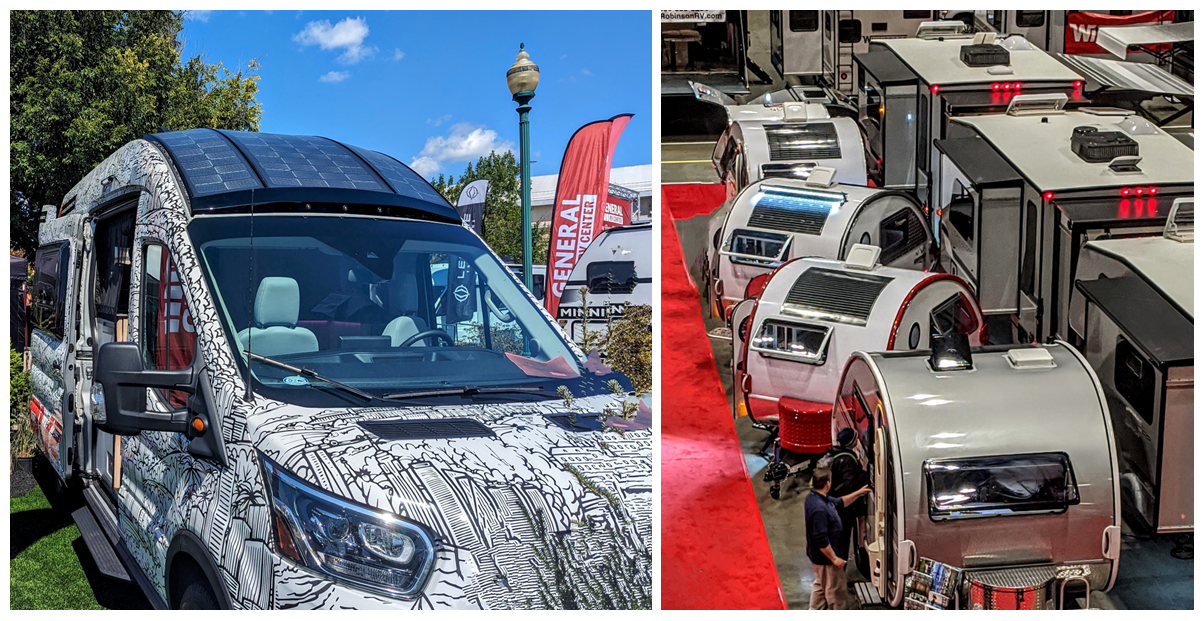
    Some RV manufacturers offer a few models with built-in solar panels integrated into the roof, or as a post-production addition. These systems can provide enough power for average off-grid use of the built-in 12-volt appliances (e.g., lights, slide-outs, water pump, stereo, slides, etc.). However, a few RV manufacturers are now offering robust, large-scale solar packages which include all five of the major solar components. These “off-grid” solar packages range from modest systems on medium-sized travel trailers to huge systems on larger rigs which can add upwards of $15,000 to the RV’s sticker price. The more expensive systems are designed to be able to run the entire RV’s electrical system as well as some of the other “creature comforts” you might want to bring along.  


    Questions to Ask Before Shopping for a Solar-Powered or Solar-Ready RV

    Do you plan to camp off-grid frequently or just the occasional overnight? Do you plan to run additional electric appliances beyond what is preinstalled in the rig?  Like many campers, do you need to be able to work electronically? And how much power will you actually need?  In our next couple of articles, we’ll be discussing how to calculate your energy needs. To get a head start, download our Solar System Sizing worksheet.


    Questions for the RV Dealer

    With the solar-ready RV becoming a popular option, the salesperson should be able to answer these questions, or show you where to find them:

    What brand(s) of solar components are pre-installed in the RV?  RV manufacturers might choose off-brand solar components that are less expensive, and possibly less quality.  Do the research about solar brand(s) so that you know what you are buying. Also, ask about the type and size of the individual solar components, such as:

    • Total solar array wattage and voltage? And also, type (PWM vs MPPT) and size (amps) of solar charge controller
    • Size (total amp hours) and chemistry (lead acid or Lithium Iron Phosphate) of the battery bank?
    • Inverter size, type, and the load (wattage) it can handle?  
    • DC to DC charger size (amps)?
    • Is the converter compatible with Lithium Iron Phosphate batteries?


    Does the RV warranty include the solar components?  Also ask, for how many years? Is it different for the various system components? Does installing additional panels on the roof void the warranty?


    Have we peaked your interest in RV solar?  Hope so. Now, here comes more questions: Which solar components do you need? Can you DIY part or all of a solar powered system? Absolutely! We’ll be discussing these details in the next couple of months, so stay tuned for more resources to build-out a robust solar system that will meet your energy demands no matter what type and size of rig you own or plan to buy.


    What to Look for in a Solar-Ready RV (Part 1)
    5 Solar Components Every RVer Should Know (Part 2)
    RV Solar Explained … with Middle School Math (Part 3)
    Does a DIY RV Solar System Install Make Sense for Me? (Part 4)
    Choosing the Right Solar Powered System for My RV (Part 5, Coming Soon)

  • DIY RV Fixes Any Newbie Can Do

    DIY RV Fixes Any Newbie Can Do

    Hitting the road in an RV is an adventure you’ll never forget, and in most cases, it will be some of the most fun you will have on the open road or in nature. There is a less memorable aspect to RVing though, and that is the dreaded fixes and repairs that are inevitable. To help you make more memories of the fun kind, here are some fairly easy DIY fixes and preventative measures that will keep you on the road with your headlights on, instead of on the side of the road with your hazards on.

    Oh, and for the record, I am far from an RV tech or repairman. This is just based on my experiences over six years and 100,000 miles of RV life on the road.


    Common Issues RVers Face

    As an RVer, you’ll likely face a few common issues that can be easily fixed or prevented with a bit of know-how. These problems range from minor leaks and blown fuses to tire changes and roof repairs. Addressing these issues promptly is crucial to maintaining the functionality and safety of your RV. By learning how to handle these basic repairs, you can avoid unnecessary service calls and keep your adventure on track, all while saving a lot of money in the process.


    Essential Tools and Supplies for DIY Fixes

    Before diving into the specifics of DIY repairs, it’s crucial to have the right tools and supplies on hand. Here are some must-have items for every RVer:

    • Basic Toolkit. Ensure you have a set of wrenches, screwdrivers, and pliers. These tools will cover a wide range of basic repairs.
    • Multimeter. Useful for diagnosing electrical issues, a multimeter can help you identify problems with your RV’s wiring and electrical components.
    • Duct Tape, Zip Ties, and Sealant. These versatile items can temporarily fix leaks and other minor issues until a more permanent repair can be made.
    • Spare Fuses and Bulbs. Electrical problems are common, and having spare fuses and bulbs can quickly resolve many issues without needing professional help.
    • Tire Pressure Gauge and Air Compressor. Maintaining proper tire pressure is essential for safety and fuel efficiency. A tire pressure gauge and good air compressor help ensure your tires are always at the correct pressure. Just make sure that the air compressor you have is strong enough to fill RV tires, which often require a much higher PSI than regular passenger vehicle tires.


    With these tools and supplies, you’ll be prepared to handle a variety of common RV issues. One final tip I can give before diving into a few specific DIYs is that while on the road, my wife and I try to take care of repairs in the parking lot of whatever stores we are buying parts at. If the space is there for you to make the repair comfortably, just realize that Murphy’s law is a real thing, and you will likely have to make another trip into a store to properly fix a problem. It’s easier to just walk back into a store instead of having to find another one to pull into along the way.


    Step-by-Step Instructions for Simple Repairs

    Fixing a Leaky Faucet

    One of the most common issues you will come across while RVing is a leaky faucet, and in most cases, it is relatively simple to fix. Here’s a step-by-step guide:

    1. Identify the Leak Source: Determine if the leak is coming from the faucet handle, spout, or connections underneath the sink.
    2. Gather Necessary Tools: You’ll need a wrench, screwdriver, and possibly replacement parts like washers, O-rings, clamps, or a hose.
    3. Turn Off Water Supply: Ensure the water supply or pump is turned off to avoid any mess. A bucket or something to catch trapped water is usually a smart idea as well.
    4. Disassemble the Faucet: Use the screwdriver and wrench to carefully remove the faucet or other component once you have determined the issue. In some cases, you will have to remove a few parts to get to the specific piece that needs to be repaired.
    5. Replace Damaged Parts: Check for worn-out washers, O-rings, or hoses, and replace them as needed.
    6. Reassemble and Test: Put the faucet back together, turn on the water supply, and test to ensure the leak is fixed.


    Replacing a Tire on an RV

    Changing a tire on an RV is slightly different from a regular vehicle due to the size and weight. Here’s how to do it safely:

    1. Proper Weight Ratings for Jacks. Ensure your jack can handle the weight of your RV. Check the weight rating before purchasing or using a jack. You should also know what the weight rating for your RV is, as it is essential for many aspects of RV travel.
    2. Check for a Spare Tire. Many RVs do not come with a spare tire, so your first step is to ensure whether or not you have one before hitting the road. If you do, make sure it is in good condition before setting out on your trip.
    3. Proper Tire Inflation Levels. Use your tire pressure gauge to check that all tires, including the spare, are inflated to the manufacturer’s recommended levels. Doing this regularly helps prevent blowouts or other issues.
    4. Safety First. Park on a level surface and use wheel chocks to stabilize the RV. If you have stabilizers on your RV that can be easily and safely deployed while changing your tire, that is a bonus. You should also make sure to turn on your hazard lights and place a cone if you have one.
    5. Loosen Lug Nuts. Before lifting the RV, slightly loosen the lug nuts on the wheel that needs to be replaced.
    6. Lift the RV with a Jack. Position the jack under a sturdy part of the RV’s frame and lift the vehicle until the tire is off the ground.
    7. Remove the Old Tire and Install the New One.  Remove the lug nuts and old tire, then place the spare tire on the wheel studs. Tighten the lug nuts in a star pattern by hand until the tire feels securely in place.
    8. Lower the RV and Tighten Lug Nuts. Carefully lower the RV and then fully tighten the lug nuts in a similar star pattern with the respective wrench to ensure proper tightening.


    Replacing a Blown Fuse

    Electrical issues are common in RVs, but replacing a blown fuse is straightforward:

    1. Locate the Fuse Box. The fuse box is usually found near the RV’s control panel.
    2. Determine the Faulty Fuse. Identify the blown fuse by checking for a broken filament or discoloration. This is where a simple multimeter comes in handy to diagnose and confirm.
    3. Replace the Fuse. Remove the faulty fuse and replace it with one of the same amperage. Avoid using a fuse with a higher or lower amperage rating, as this can cause electrical damage, or another blown fuse.


    Patching a Roof Leak

    A roof leak can cause significant damage if not addressed promptly, and the roof is something that I actually suggest you get professionally fixed if you are not confident in your DIY skills. That being said, a temporary patch can save your vacation until a professional can take a look. Here’s how to patch it:

    1. Identify the Leak Location. Look for signs of water damage or moisture inside the RV to pinpoint the leak.
    2. Clean the Area. Clean the area around the leak with soap and water, and let it dry completely.
    3. Apply Sealant and Patch. Use a roof sealant to cover the leak area, then apply a patch over it. Press firmly to ensure it adheres well.
    4. Allow to Dry and Test. Let the sealant dry completely before testing the repair by spraying water over the patched area.
    5. Duct Tape Isn’t Great, but It Can Help. If you don’t have sealant or a patch but you do find yourself with a leak, duct tape can sometimes be a temporary solution. Be sure that the tape will not further damage your roof, paint, or leaky area before applying, but I personally feel that in the case of a leak, that risk is worth it if bad weather is coming.

      *A good idea, if possible, is to check a weather app on your phone. You may be able to simply wait it out if the weather looks OK for the rest of your trip.


    Safety Tips and Precautions

    • Turn Off Power. Always unplug from shore power and turn off the power supply before attempting any electrical repairs to avoid shock or injury.
    • Wear Protective Gear. Use gloves, safety glasses, and other protective gear as needed to prevent injuries.
    • Ensure Proper Ventilation. When working with sealants or other chemicals, ensure the area is well-ventilated to avoid inhaling fumes.
    • Double-Check Work. After completing any repair, double-check your work to ensure everything is secure and functioning correctly. This is especially true if you are on the road and not at home with time and resources readily available for those dreaded multiple trips to the hardware store that I mentioned above.


    Additional Resources

    Just because you’re doing it yourself doesn’t mean you have to do it alone. I have three sources that I regularly use for help.

    • Online Forums and Communities. You would be surprised how a simple Google search for your specific problem can come back with forums or websites where people are discussing your problem and how to fix it.
    • Video Tutorials and Online Courses. YouTube searches can sometimes offer detailed video tutorials on various RV repairs. This is usually my favorite method, because I get a visual aide to reference.
    • Call a Professional. Whether it is a local professional that you may have found in a search or someone you may personally know, sometimes calling someone with more knowledge can lead to a simple cheap fix. This has happened to my wife and I while on the road, and we’ve had professionals walk us through a few possibilities over the phone that ended up saving us a lot of time and money. You’d be surprised how many people, even those that make a living off these kinds of repairs, will be willing to give a little free advice over the phone.


    Understanding and performing basic DIY repairs and maintenance can greatly enhance your RVing experience, giving you the confidence to handle common issues and keep your adventure on track. Practice these skills, learn from each experience, and soon you’ll be tackling more complex repairs with ease. Happy RVing, and hopefully we’ll see you on the road.