Category: Living

  • RV Renovations: Replacing Your RV’s Furniture

    RV Renovations: Replacing Your RV’s Furniture

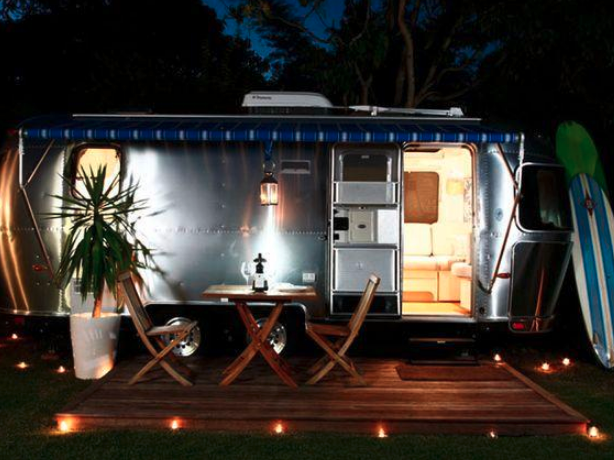
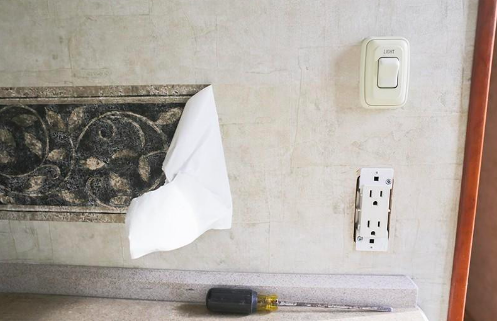
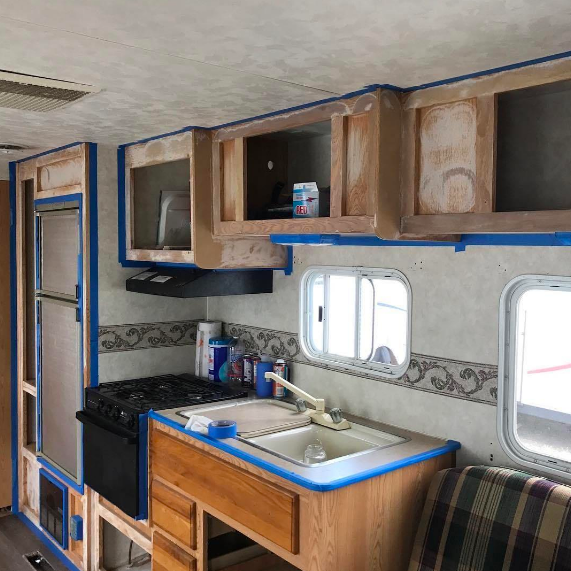
    Renovating your RV’s interior is an excellent way to modernize the space and make it your own. The list of potential RV projects is endless, and, with each individual improvement, you are sure to add more character and personality to your space. When renovating your RV, it’s important to complete each task entirely before moving on to the next one.

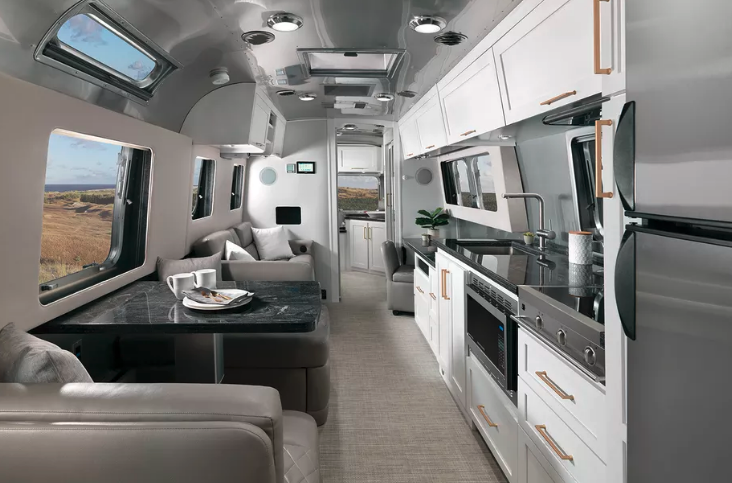
    Once these more technical projects are complete, you will be ready to begin the more aesthetic projects. Once such aesthetic project is replacing the (often) dark, outdated RV furniture with brighter, more modern furniture that you would typically find in a more traditional home. This project will add a final layer of completion to your RV, while making it feel more like a real home away from home. Read on for a full tutorial on how to replace your RV’s furniture and bring a more modern vibe to your space.


    1. Measure current furniture

    Start by measuring your current RV furniture to know what will fit in your space. This typically includes your couch(es), reclining chairs, and maybe even your dinette table and chairs if you also wish to replace those. Be sure to measure the length, width, and height of each piece of furniture.

    Keep in mind that the height and width of the new furniture you choose do not necessarily need to be the exact same as the previous furniture. However, additional width will extend into your living quarters, occupying precious floor space. Additional height is not an issue, as long as the new furniture is not covering part of your windows. Be sure to record your measurements somewhere once you have them.

    Credit: @188sqft

    2. Remove old furniture

    After you have measured your old furniture, you must remove it before you can install new furniture. Removing the old furniture may be fairly simple, but it may be a bit more difficult, depending on the size of your front door. First, you will need to unbolt the furniture from the floor. Next, you will need to have someone help you carry it out of the RV. Since most RV furniture is assembled inside the RV, there is a good chance it will not be able to fit through the door in one singular piece. If this is the case, you must disassemble the furniture before removing it from your RV. Once the old furniture has been removed, you are ready to begin shopping for new furniture.

    3. Shop around, select furniture

    This is perhaps the most important step in replacing your RV’s furniture. There are a number of places where you can find RV-friendly furniture. IKEA has a great line of furniture optimized for small spaces, and many traditional furniture stores also tend to have furniture geared towards those with less space to work with.
     
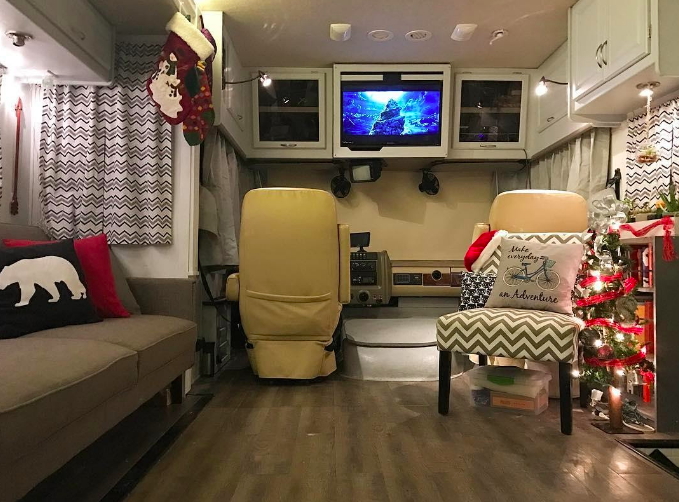
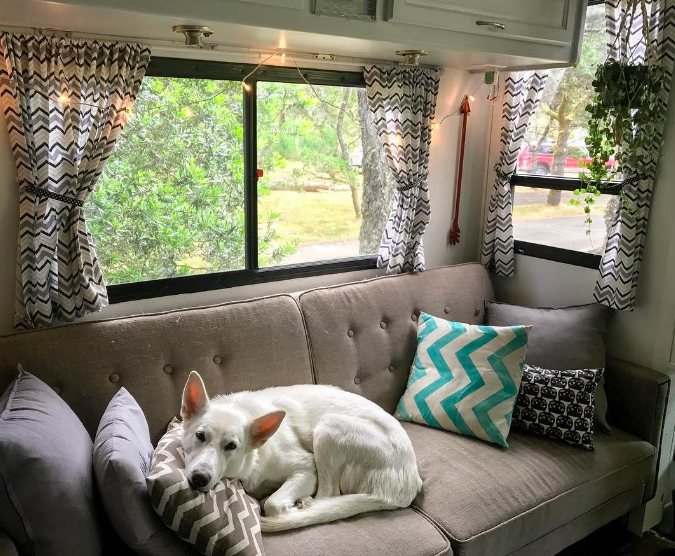
    When replacing your RV’s old couch, many people opt for a futon. These are perfect for RVs because they double as a bed when you have guests or additional family members who need somewhere to sleep. Most RV couches are sleeper sofas, so it is helpful for both your future trip planning and resale value to replace your old couch with a new one that also serves as a bed. Just be sure to find one that fits into your space well. In addition, be sure to find a new couch that compliments the color scheme of your new space. Many people tend to stick with more neutral tones, as these are more subtle and can easily be decorated with brightly-colored throw pillows and blankets. However, if that bright green couch is calling your name and you feel that your space can handle such a bold choice, then go for it. Just be sure to compensate for the statement piece with simpler pillows and decor.
     
    If you are updating your RV’s reclining chair, there are a number of new pieces of furniture that will work well as a replacement. You could replace the old recliner with a new one, or you could replace it with a simpler accent chair. If you choose either of these options, be sure to choose a chair that appropriately coordinates with the new couch and the rest of your space, as well.
     
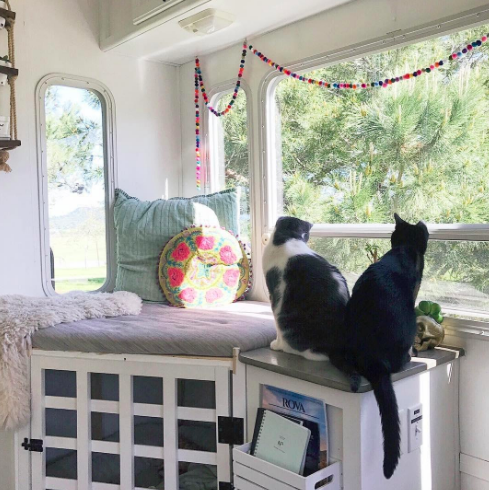
    If you are not wanting to add another recliner or accent chair to your space, you could consider installing a small bookshelf, an ottoman, a bench, or an accent table in place of your recliner. The options are endless, and all that really matters is that your new piece fits into your space and coordinates well with the rest of your decor and colors.

    Finally, you must choose a new dinette set-up if you are replacing your eating area. The most typical replacement is with a table and chairs, but there are a number of other options that will work Be sure to measure everything to make sure it will fit before purchasing it and bringing it home.

    Credit: @188sqft

    4. Assemble new furniture

    Once you have your new furniture, you must bring it inside your RV and assemble it. Simply follow the exact instructions on the packaging, and put your furniture together. Once it has been put together, slide it into whatever place you have chosen for it to reside.

    5. Anchor new furniture

    Lastly, before you take your new furniture for a spin, you must anchor it to the RV floor and/or walls. This will ensure that you can safely move down the road without your furniture sliding all over the place. You can bolt new couches, accent chairs, tables and bookshelves to the floor fairly easily. Kitchen chairs may be a bit more difficult, as these slide in and out when you are sitting or standing. In this case, you can install a hooking system where the chairs can temporarily attach to the table to keep them in place when you are in transit. Whatever method you choose to anchor your new furniture, be sure to double check that it is secured safely before you take it out on the road.

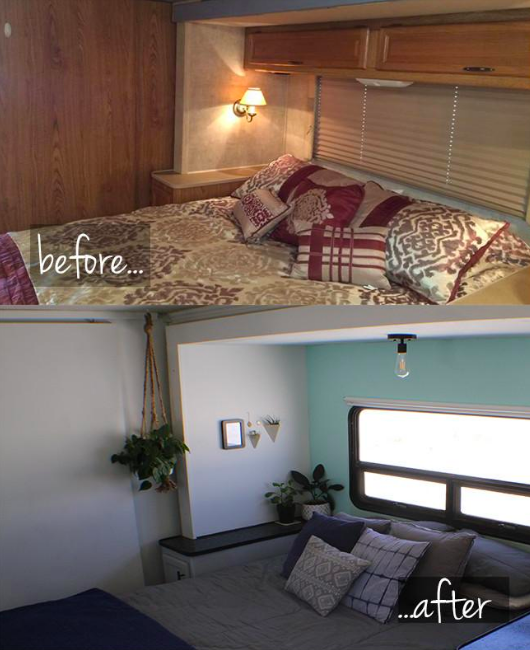
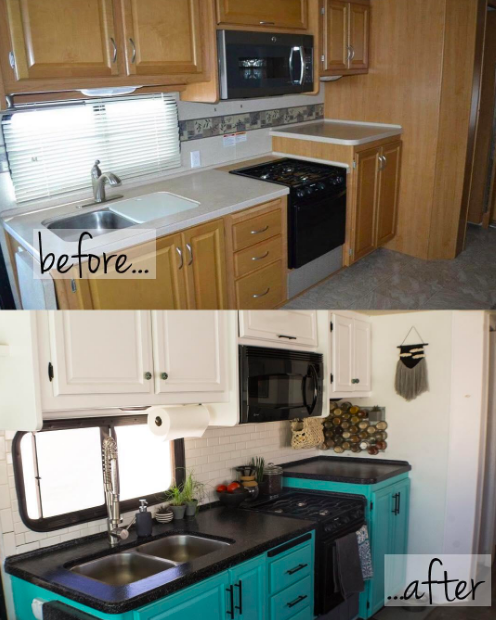
    Adding new furniture to your RV space is one of the final steps to bringing the RV into the modern century. New furniture vastly changes the overall look of the space and adds so much character and personality. Once you have your new furniture installed, you are ready to begin decorating. Stay tuned for our next installment to learn how to put the final finishing touches on your new RV interior.

    Have you installed new furniture in your RV? What process and methods did you use? Feel free to share in the comments below!

  • FMCA’s Sunsets + Saguaros Convention in Tucson, AZ

    FMCA’s Sunsets + Saguaros Convention in Tucson, AZ

    If you’ve never been to an FMCA convention, or any RV convention for that matter, we’d advise checking one out. It is worth your while. You’ll find countless opportunities to learn, network, and enjoy the comradery that makes RVing such a wonderful lifestyle.

    FMCA, a not-for-profit, member-owned association for RV owners, is gearing up for its 101st International Convention and RV Expo. The event will take place at the Pima County Fairgrounds in Tucson, Arizona, March 26 through 29, 2020. Being set on the cusp of spring makes this the ideal end-of-winter outing for snowbirds who are beginning to make their way back north with the warmer weather.

    During the week leading up to the convention, the fairgrounds will be converted into a city of RVs, with all the necessary services, including shopping opportunities. RVers will find items needed to improve, repair, or upgrade their homes on wheels.

    Socialize with other RVers

    If there is one thing that can be said about nearly all RVers, it’s that they are a social group. The festive environment becomes apparent from the moment you enter the convention grounds. The campgrounds are full of travelers who are eager to start making new friends, catching up with familiar faces, and sharing stories from the road. The first-timer opportunities offered help to ensure you feel right at home when you arrive.

    One aspect of FMCA that keeps members social while on the road is chapters. These groups are organized around a common interest, hobby, geographic location, or RV brand. A chapter fair will take place during the convention, where various groups set up information tables, and newcomers are welcome to inquire about the chapter and sign up if they feel inclined to join. Another great opportunity to see what each chapter has to offer will be during the Chapter Block Party, an evening event that takes place within the campgrounds.

    Educational Opportunities

    Over the course of the event, dozens of educational seminars will be held. Topics range from very informative and technical to relaxed and fun. They are taught by industry experts who are seeking to share their knowledge of various aspects of RVing with eager ears.

    If you’re interested in learning about RV driving safety or you want to understand the way RV brakes work, there is a seminar for that. If you’d rather learn a new craft or get tips about boondocking on public land, there is a seminar for that. Some seminars are held more than once throughout the event so that you don’t have to worry about schedule conflicts. A list of all the topics of discussion is available to give you a better idea of the wide spectrum of subjects.

    Shop ´til you Drop

    If you’re looking to make a purchase for your RV, odds are you’ll be able to do so at one of the many vendors who are on-site. You can stroll the aisles of the vendor hall daydreaming about upgrading different aspects of your RV, take the plunge and replace that one thing that you’ve been meaning to replace for months, or even make an appointment to have your RV serviced by one of the companies performing on-site RV service work.

    Besides the vendor booths, there will be multiple RV manufacturers and dealers at the convention inviting you to shop for a new RV. You can browse the newest models from Newmar, Tiffin, Entegra, Jayco, Winnebago, Fleetwood, Airstream, Grand Design, Lance, Renegade, and more. Even if you are just daydreaming, it is a lot of fun to tour the newest, nicest models on display!

    Entertainment & Activities

    The F in FMCA stands for Family, but who says it can’t also stand for Fun? Plenty of fun-filled activities will take place throughout the convention. Registered attendees will enjoy live music from classic rockers Three Dog Night and national country megastar Josh Turner. Aside from the headlining artists, attendees also can enjoy daytime entertainment, starting with coffee and doughnuts each morning.

    Other entertainment includes stand-up comedy, bingo, karaoke, a charity walk-a-thon, and the Mr. Whiskers facial hair competition. Check out the events page on FMCA’s website to see all the scheduled activities.

    Sign up today

    If you haven’t already registered for the convention, there is still time to do so. Online registration is available here or by phone until March 18, 2020. After March 18, registrations will be accepted on-site at the fairgrounds. Daily passports (with no on-site RV parking) also will be available for $50 a person on-site, allowing you to attend seminars, tour the display RVs, shop in the vendor hall, and enjoy the evening entertainment. Day passes ($10 per person; $25 for a family of three or more) also will be available for those who wish to visit the RV displays and indoor booths only.

    So, no matter what type of RV you own, and no matter how long you’ve been participating in the RV lifestyle, there will be something for you to do, learn, and experience at the “Sunsets + Saguaros” convention in Tucson. Will we see you there?

  • Tips and Tricks For Working From Your RV

    Tips and Tricks For Working From Your RV

    When you imagine living in an RV, it might seem like an endlessly exciting adventure. Every day you get to meet new people, see unique parts of the country and work from wherever you want. However, living on the road can bring some challenges, especially if you’re trying to maintain a job or career. But you’re not alone.

    A 2022 RV Trader survey of 2,191 shoppers found that 30% purchased their RV with the intent of using it as a mobile home and 22% have used their RV as a home office. Among those who work out of their RV, 45% do so for more than 20 weeks out of the year. Another 18% work out of their RV between 11 to 20 weeks, 28% between 3 to 10 weeks, and 10% between 1 to 2 weeks.

    Clearly working and traveling don’t have to be competing goals. You just need to find a rhythm that works for you, your business and your schedule. And while everyone’s situation is different, we’ve tried to compile some of the most applicable and useful tips for working from an RV on the road—check them out below!

    Plan Travel for Weekends and Post-Business Hours

    In a world where being a working digital nomad is becoming more and more acceptable, some companies still expect employees and freelancers to be available during regular business hours.

    To avoid being offline during working hours, save your major driving times for weekends and evening hours. That way, you won’t have to worry about potentially losing service along the way and missing an important call. To help layout your route and make the most of your driving time, use a free trip planning app like Roadtrippers. Roadtrippers not only allows you to build and customize a trip, but it also provides useful information about places along the way (does it have WiFi, for example). And for extra long distances, or for times when you know you won’t have service, you can upgrade to Roadtrippers Plus—a paid version of the app that offers added benefits like offline mapping and live traffic updates.


    Set Clear Boundaries

    Time management becomes even more important when you’re balancing a full-time job and traveling. Even if you’re not tied to certain business hours, be mindful of the time you set aside to work and don’t get distracted.

    Try using the Pomodoro technique to stay focused. This strategy has people work for 25 minutes, take a five-minute break and then work for another 25-minute stretch. Even if you want to work for longer stretches of time, it’s always beneficial to take a short 15-minute break every few hours.


    Find Time for Self-Care

    Life in an RV can be exhilarating, but it also makes it easy to stay in your own bubble. Make time for activities like exercise and meditation, which can help keep your mind clear.

    These types of activities—especially when done outside—have been proven to help boost creativity and enhance creative thinking. So if the weather is nice, don’t forget to step outside and breathe for a few minutes. (And boost your Vitamin D levels.)

    Build a Community

    Solving problems in an office is easy—you can share and discuss with colleagues and come up with a solution in just a few minutes. But this type of brainstorming gets a bit harder when you’re on your own.

    If you’re a freelancer or self-employed business owner, find a community of like-minded people to bounce ideas off. You can also try searching various Facebook groups or free public forums such as reddit and TalkFreelance. These online groups are especially useful when you’re faced with urgent IT problems or need advice.

    Find Reliable WiFi

    One thing that nearly every employee can agree on, regardless of where you work, is the importance of strong, reliable internet. Relying on coffee shops or public libraries might be fine for a while, but you should still have WiFi with you in your RV. After all, a coffee shop might be a fine place to work most of the time, but it isn’t ideal when you need to have a private, one-on-one conversation.

    To ensure connectivity, products like Winegard ConnecT 2.0 or Togo Roadlink™ can provide fast, secure hotspots everywhere you go. A lot of cell phone carriers also offer mobile hotspot capabilities or roaming data plans, so you can share your phone’s signal with other devices. Getting a specific WiFi plan for your RV may be an added expense, but it’s worth the peace of mind knowing you won’t drop an important call.

    Build a Remote Office

    If you’re lucky, all you need to get your work done is reliable WiFi and a laptop. But even remote workers sometimes need services they’re not likely to find in the middle of nowhere––think printing, scanning and faxing.

    Try using a compact printer that you can easily store when you don’t need it and won’t pull a lot of power from your RV. You can also download various apps to your smartphone, like the Adobe Scan app, which allows you to scan a printed document and immediately convert it into an image or PDF that you can send digitally. Lastly, helpful websites like HelloSign.com let you sign and fill out documents digitally—an extremely useful tool if you find yourself sending a lot of contracts.

  • Boondocking Basics

    Boondocking Basics

    If you have been a member of the RVing community for any length of time, you may have heard the word “boondocking” tossed around amongst other RVers. If you are wondering what boondocking is, then this post is for you. Here, we’ll be discussing boondocking basics and all the reasons why so many RVers enjoy it so much.

    Simply defined, boondocking, also known as dry camping or wild camping, is a type of free camping where one is not connected to hookups (power, water, sewer, cable) of any kind. For some, boondocking also entails camping on public lands, whether it be in national forests or on land owned by the Bureau of Land Management (BLM). For others, boondocking may take place in parking lots where it is permitted (often called blacktop boondocking), or through membership programs, like Boondockers Welcome, that allow offer free overnight accommodations. With these definitions in hand, there are many more considerations that go along with boondocking.
    Typical considerations when discussing the concept of boondocking include:
    • Why someone would want to camp like this,
    • Where to find boondocking locations,
    • How to boondock, and
    • What tools can be used to find your dream boondocking sites.

    In this post, we will be taking a look at all the reasons why someone would want to try it in the first place. Follow along if you have yet to be convinced on the benefits of boondocking.

    1. Cost

    As an RV owner, there are often so many places one can choose to stay when visiting a new area. From luxurious RV resorts to standard city parks to state and national park campgrounds, the list of possibilities is almost endless. However, each of these camping options has one thing in common: they cost money. In addition to paying for gas, food, activities, supplies, and souvenirs, lodging in a campground can often cost between $25 and $80 a night depending on location, size, and amenities. When boondocking, one forgoes the luxury of hookups and is able to camp entirely for free. The money saved can then be invested back into other elements of your trip, such as restaurant outings, museum and park visits, and more. For many, especially low-budget adventurers, this is the greatest benefit of boondocking.

    2. Views and Proximity to Nature

    When boondocking on public lands, the views are often immeasurable. Instead of looking outside your window at a view of another RV, you will instead catch glimpses of mountains, lakes, rivers, forests, deserts, or whatever other landscape you are camped beside. Not all sites are created equal, so not every view will be the very best, but your chances of being surrounded by incredible beauty are much higher when you venture outside the campground.

    In addition to seeing more beautiful views, boondocking also brings campers closer to nature. Instead of having to drive from your campground campsite to nearby trailheads, many will go for a hike right from their own boondocking site. Even if you do not go for a hike, enjoying your morning coffee while surrounded by nature is truly spectacular.

    Credit: @thejewelledlife 

    3. More options

    When you delve into the realm of boondocking, suddenly your list of potential campsite options grows immensely. Instead of only being able to choose from the campgrounds and resorts near your intended vacation area, you now have the option to stay in the nearby national forest, at chain businesses, or even at people’s homes, through various membership programs, like Boondockers Welcome. The options are endless, and all of this is possible when campers are willing to boondock.

    4. Convenience

    Many campgrounds and RV parks book out months in advance. But what can one do if they decide to plan a last-minute trip, and there are no campgrounds available to them? Being willing to boondock opens up many different options and can be more convenient for those who book last-minute trips. For your next weekend away on a whim, consider choosing a boondocking site. Reservations are not required or necessary.

    5. Better for those with pets

    Those with pets may also find that boondocking is a better option. Campgrounds are notorious for quiet hours and excessive barking rules, but some dogs just have a tendency to bark when left alone. If you cannot bring Fido along, but have a dog who tends to bark at any passersby, perhaps a more quiet location would be better for him.
    Public lands also offer more opportunities for dogs to run and play. Campgrounds typically enforce strict leash laws, but for dogs who can handle it, off-leash play is allowed while boondocking. Just be sure not to let your dog wander off, and pick up any messes your dog may make.
     

    6. More privacy

    Finally, boondocking on public lands offers campers greater privacy. Instead of being packed in close with neighbors on both sides, boondockers typically have no nearby neighbors. You may not have any neighbors at all, depending on your location. While meeting other campers in campgrounds can be a lot of fun, it is sometimes nice to get away from all the noise and just be out in nature with no one else besides you and your family around. Boondocking offers the luxury of privacy that may not always be available in an RV park, especially in peak seasons.
    Boondocking is an excellent camping style that can offer so many benefits for those who are willing to try it. Now that we have discussed what boondocking is and why you should try it, stay tuned for our next article on where to boondock.Have you tried boondocking? What benefits did you enjoy? Feel free to share in the comments below!

  • Your January RV News Fix

    Your January RV News Fix

    A new year brings new RV headlines and – and as always – we’re here to fill you in on the latest and greatest stories. From new towable units to awesome camper vans at this weekend’s Florida RV Supershow – we’ve got all the news you need to know in this edition of “Your RV News Fix.”

    Image: Easy Caravanning
     

    New Pop-Up Camper Can Be Towed by Almost Any Vehicle

    If you’re looking to dip your toe into the RV lifestyle, a pop-up camper is a great place to start. Luckily the designs of these popular models are getting better each year. The Dutch startup Easy Caravanning just debuted the TakeOff – a pop-up camper that sets up under one minute. The ease of set up is ideal for first-time RVers and it comes in at just 1,650 pounds – making it easy to tow for most vehicles. The inside is simple but includes the kitchen basics (stove, electric fridge, and sink), a dining area, and an optional annex tent that lets you sleep a family. Pricing starts from $15,000-$21,000. As a startup company, Easy Caravanning will be launching first in the European markets – but if all goes well, they plan on international distribution. We’ll keep you posted.

    Image: Airstream
     

    2020 Airstream Classics Might be Nicer Than Your Apartment

    The latest design from Airstream has arrived, bringing a lighter and brighter look to RVing. The manufacturer recently announced that the 2020 Airstream Classics will now feature a new “Comfort White” color scheme as opposed to dark wood that is often used in RVs. The 2020 Classics design is beyond sleek with updated brass hardware throughout, and ample use of whites, blacks, and greys in the unit. You could easily style this unit with a modern farmhouse look or coastal chic – or simply leave the Classic as is. We commend Airstream for creating a more modern RV that people of all ages will love.
    Image: Winnebago

    Winnebago Introduces Solis Camper & HIKE Trailer

    The Florida RV Supershow is in full swing and debuts are happening left and right. Speaking of debuts, Winnebago has just revealed their new Solis Camper and HIKE Trailer at the show. The new Solis is a camper van made with a fiberglass pop-top that raises into a sleeping area for two. The van has all-season capabilities and even offers buyers a heated bathroom that doubles as a drying room for wet gear. Russ Garfin, director, product management said, “features on the Solis allow you to easily explore everything from the beach to the ski slopes and locations in-between.” Winnebago also released their new HIKE Travel Trailer. This trailer was designed with offset wheels and off-road tires for rough roads and paths. The HIKE has five different floor plans to choose from so you can be sure to find your perfect fit.

    Thor Motor Coach Showcases More Than 80 Models at FL Supershow

    Among Thor’s 80 different models at the Florida RV Supershow, there are a few new models to brag on including the Tellaro Class B van. This van is ready for anything with its compact & versatile design, along with modern cabinetry, a pop-top with Sky Bunk, and updated technology. The Venetian F42, a new Class A diesel pusher floor plan, is also on display at the show for the first time ever. This model has dual vanities in the rear master en-suite bathroom, a king bed, and an even electric fireplace. We’re excited to see these models and other units Thor brings to the show.
    You are officially caught up on all things RV! Are you at the Florida Supershow this weekend? Have a favorite story? Let us know in the comments below.
  • FMCA Tech Tip: Cold-Weather Camping Tips

    FMCA Tech Tip: Cold-Weather Camping Tips

    Not all RVers go into hibernation or head for warmer climates. Some embrace the winter weather and plan activities that involve RV trips. sledding, skiing, winter hiking… All of these are more pleasant when you know that you have a warm RV waiting for you at the end of the day’s adventure. However, some special preparations and precautions need to be taken. Here a few tips for winter RV trips.

    Water Tips

    Protecting the water system from freezing is of paramount importance. Most RVs aren’t designed for use in colder temperatures. Adding insulation or heat tape may be necessary. Another idea for short outings is to leave the RV water system winterized and then take along bottles of water for drinking and tooth brushing, and bring RV antifreeze for flushing the toilet.

    Cozy and Warm

    To ensure that things stay toasty inside the RV, make sure the furnace is operating properly before you leave home. Fill the propane tanks before you depart, and keep a close watch on tank levels during your outing. If you have a camping spot with electricity, bring along a thermostatically controlled ceramic heater to provide supplemental heat.

    If you’ll be using battery power to keep the furnace running, make sure the batteries are in good condition and stay fully charged. They will be less likely to freeze.

    Safety tips to help ensure a safe winter camping adventure:

    • Try to find a parking spot that is exposed to sunlight during the day and where some type of windbreak is available.
    • If it snows during your stay, make sure to keep the exhaust pipes for the generator or motorhome engine clear to allow gases to dissipate as they should.
    • Don’t allow too much snow to accumulate on the RV roof or allow it to cover vents, the satellite dish, etc.
    • Always test your carbon monoxide alarm before every outing. Carbon monoxide can be deadly, and the symptoms are similar to the flu.

    More Resources

    If your heart is set on cold-weather camping, check out this article for in-depth tips.

    FMCA RV Club brings you this monthly tip to Enhance Your RV Lifestyle. FMCA delivers RV know-how to its members. Join today and save $10 — a special offer for RV Trader readers. Learn more at https://join.fmca.com/trader18.

     
    This information is for educational purposes. FMCA shall not be responsible nor retain liability for RVer’s use of the provided information. Prior to making any RV service decision, you are advised to consult with an RV professional. 
  • Styling an Outdoor RV Space

    Styling an Outdoor RV Space

    When camping in their RVs, many people opt to decorate their interior spaces. In many ways, this simple task can help your home away from home to feel more personalized while you are away on vacation. However, many people forget that when decorating an RV, you can also decorate your outdoor space to add to the overall homeyness.

    Since your outdoor space can be treated like a front porch, decorating this area can make your RV feel more like home, as well as making it appear more welcoming to guests who stop by. So next time you go camping, instead of just setting up two camp chairs outside, consider the following tips for setting up an outdoor space where you will love to spend time relaxing and recharging.

    Image: RV Select


    1. Roll out your awning

    Image: RV Share

    Extending your awning is one of the easiest things you can do to set up your outdoor space. This involves no additional purchases or packing, since your RV should already come with an attached awning. Just simply set up your awning by extending it manually or electrically, depending on the type of awning you have.

    Your awning essentially sets the parameters for the space where you will be adding furniture and decorating. Establishing the exact location of your porch is important because it gives you an idea of what will fit into your porch area and what won’t. Your awning will also provide you with some shade while you are enjoying your outdoor space, so once it is all set up, you are ready to move onto the next step.

    2. Invest in some comfy and cute camp chairs

    Image: RV Select 

    Camp chairs are essential to any outdoor RV set-up. They are used around the firepit, at outdoor tables, and even just to sit outside and enjoy coffee. While there are a multitude of camp chairs on the market, it is best to invest in some that are both comfortable and aesthetically pleasing. This will help your front porch to look clean and polished. Be sure to find chairs that do not clash with your awning or exterior RV color, as this will give you a cohesive space to add to.

    3. Add a table with a tablecloth and clamps

    One of the best things about having a cozy outdoor space is the ability to eat outside. Most people prefer to eat at a table, so this is a must when styling your outdoor area. Choose a table large enough for your family as well as any friends who may periodically join you for dinner. Be sure to find a table that can collapse and stow easily for travel. Many people end up selecting six or eight-foot banquet tables that fold in half. This offers plenty of space and durability, while also while packing up easily.
    Once you have selected a table, be sure to pick out a couple of table cloths that match your outdoor colors. These will help to minimize mess, while also adding to the overall homey vibes of your front porch space. Don’t forget clamps to make sure your table cloth doesn’t blow away.

    4. Select an outdoor rug

    Image: RV Web

    Once your camp chairs and table are in place, you should add a rug to tie the whole space together. If you have chosen simple chairs and table cloths, you can select a rug with a bolder pattern or color. However, if your chairs and tablecloth are already bright and colorful, consider choosing a more subtle rug to avoid clashing. Be sure to select a rug that is optimized for outdoor use, and ensure that you find one large enough to cover a majority of the space under your awning. This will ensure overall cohesiveness and matching in your outdoor area.

    5. Hang some string lighting

    Image: Smart RVing
    While fairly inexpensive and simple, there is just something about string lighting that really adds to a space. Basic strands of edison bulbs or globe lights pulls everything together under a glowy aura that feels magical and even a bit upscale. Grab a couple of packs of your favorite outdoor string lights, and hang them on your awning in whichever way you think looks best. Some folks hang them around the edges of the awning, while others criss-cross them across the center. Whichever way you choose is sure to look beautiful and really pull everything together.

    6. Add additional decorative accents

    Image: Camp Addict

    Finally, be sure to add in some fun decor to really spruce things up. This could include anything from a wreath on your front door, to hanging outdoor plants, seasonal flags, a doorstep rug, garden decor, citronella candles (which double as bug repellant), or anything else that matches your space and makes you happy. If you have a hammock or a grill, these also add to the beauty and functionality of your porch area. Remember that less is often more, and a few simple pieces can really go a long way.

    RV camping is an excellent way to vacation, and it’s even more enjoyable when your RV truly feels like a home. We hope these easy tips have inspired you to start decorating your patio soon!

    Have you decorated your outdoor space? What items and pieces did you use? Feel free to share in the comments below!

  • Your October RV News Fix is Here

    Your October RV News Fix is Here

    Between the Hershey RV Show and RV Open House, we’ve seen A LOT of news break in the RV industry this fall. And as always, we are here to break down the top RV stories you need to know. Check out some of the recent headlines below. Hint hint… get ready for some new models!

    Image: WOF

    First Completely Electric Motorhome is Officially on the Market

    A few months back, the world’s first completely electric RV was revealed at a German trade show, and now this unit – the Iridiumis – is officially on the market in Europe. During the trade show, the unit only had a range of 124 miles, but now the Iridium comes with a 249 mile-range with the motorhome’s highest battery pack. The interior of the Iridiumis is fairly standard including a bathroom and shower, kitchen, and a double bed. The 249-mile Iridium will cost buyers $219,000, while the 186-mile version comes in at $188,000. We’re interested to see how this unit does in the market, and if similar electric versions will make their way to the U.S. Read More.

    L’air Camper Co. Reveals Super-Light Travel Trailer

    L’air Camper Co. just came out with their brand-new fiberglass trailer and it made its debut at this year’s RV Open House Show. The new model is extremely lightweight and easy to tow. The camper weighs in at just over 2,000 pounds due to its fiberglass exterior. The compact camper might be small, but it includes all the comforts of home like a kitchen galley, full bath with shower, and room to sleep up to four people. We’re excited to see this unit out on the open road. Read More.

    Image: Yahoo! 

    CEO of Trader Interactive Highlights the Current State of the RV Market

    Lori Stacy, CEO of Trader Interactive, recently shared her thoughts on the state of the RV industry with Yahoo! Finance. Although the overall RV market has seen a decline in sales over the last year, things are looking up for the industry when it comes to first time and millennial buyers. To learn more, check out her segment here.

    Image: Winnebago

    Winnebago Debuts New Class B RV at Open House

    This year’s Open House was filled with new models and this includes a new Class B from Winnebago. The manufacturer revealed the Solis, their new Class B RV aimed specifically towards the millennial market. The new unit features a “pop-up” sleeping area that extends off of the roof of the vehicle for added space and a murphy-style bed in the lower level. The combined space sleeps up to four people in just less than 20ft of living space – we’re impressed. The unit has a workspace area for all of the full-timers out there as well as a curtained outdoor area to rinse off sand for all of you beach lovers out there. If you’re ready to experience #Vanlife – check this unit out for yourself.

    You’re officially all caught up on the RV news you need to know this month. Which stories interested you? Let us know your thoughts in the comments below and stay tuned for more news.
  • Painting an RV: Part II

    Painting an RV: Part II

    With the increasing popularity of RV ownership, many people choose to renovate their RV interiors. Renovating allows for individuality and personalization, and there are so many projects you can complete in the process of modernizing an RV. Painting your RV walls and cabinets is one such project that, arguably, yields the most results.

    Previously, we discussed how to prep your RV interior for paint. Prep work involves smoothing all walls, sanding, cleaning, and taping and covering all areas you don’t want painted (see previous post for more details). Once your prep work is done, you are ready to begin the task that will show actual results: painting! Follow along with the steps below for best results.

    1. Choose your paint

    This might just be the most important decision in your whole painting process. Paint colors should be chosen alongside the RV’s overall color palette. After all, in a space of less than five hundred square feet, it is even more important to select specific colors that match a cohesive theme. This will ensure that your finished product looks polished and classy.

    Head to the hardware store and select your favorite color swatches from your preferred paint brands. Bring home a variety of swatches and hold them against your RV walls. Envision them filling your space, and ask friends and family for their opinions. Consider taking a few days to think about your choice before you begin. This is a big decision and you don’t want to rush it.

    Paint colors are a personal preference but it is often recommended to stick to neutral tones in tiny spaces. For instance, white is great for opening up a space and making it look bigger – which is why it is a popular choice amongst RV renovators. However, many are wary of choosing white because it can also be a challenge to keep clean and fresh. Paler grays are also popular, as they are easier to keep clean and still brighten up the space while keeping it neutral.

    Bright colors are fun, but they can also make a small space look tacky if used in excess. If you are wanting some color, you may want to consider painting just an accent wall here or there. If you choose to paint in all neutrals, you can always use decorations, furniture, blankets, throw pillows, rugs and more for pops of color.

    Once you have chosen your colors, you will need to choose your desired paint finish. There are many different opinions and preferences, but most agree that cabinets should be painted with a gloss or semi-gloss finish. This makes them more durable and easier to clean. Walls, on the other hand, can be painted in whichever finish you prefer. Eggshell and satin tend to have a lower-gloss look and are easier to clean than matte paint.

    2. Gather your supplies

    Once you have chosen your paint colors, head to the hardware store to gather your supplies. You will need painting trays, disposable paint tray liners, a paint roller handle, disposable rollers, paintbrushes, and, of course, paint and primer. Be sure to purchase a variety of roller sizes for all the different surfaces in your RV. Two and four-inch rollers are great for cabinets and smaller surfaces, while six and eight-inch rollers are excellent for walls and other larger spaces.

    In addition, select the best quality paint brushes and rollers that you can find. This way, you will avoid leaving bristles and lint behind in your paint to ensure a smoother finish. Finally, consider buying more supplies than you need to avoid additional trips to the store. You can always return the extras when you are finished, and this will be less inconvenient than having to pause your project and head to the store multiple times.

    3. Test your colors

    If you carefully selected your colors, pictured them in your RV, and asked friends and family for advice, it may feel unnecessary to test the colors in your RV. However, this step is crucial to ensuring that your final product is exactly as you envisioned it. Paint a small section of a few different areas in your RV, and allow the paint to dry for a few hours. If the dried product looks good, you are all set to move forward with the final steps. If it is darker or lighter than you expected, or if you don’t like the finish, it is time to head back to the hardware store to select and test some more colors.

    4. Apply primer

    Although there are many paint and primer combination products, applying primer separately has many benefits. When covering darker walls or cabinets, you will need a few layers of paint for full coverage. This means that you will likely not paint a single coat of paint and be done with this project, so you might as well take the time to apply primer.

    Primer will serve as a buffer between the walls and your final coat(s) of paint. It will also ensure better paint adherence and durability. For best results, be sure to choose a higher quality primer (such as Kilz or Zinsser Cover Stain) and paint one or two coats. Allow the primer to dry for a minimum of twenty-four hours between coats for the best and longest lasting results.

    5. Paint!

    Once you have completed steps one through four, you are finally ready for paint. To avoid drips and runs, paint during the day when the sun is out. For best visibility, open all windows and turn on all the lights in the RV. If the paint runs or drips, be sure to smooth over it before it dries.

    If all goes well, you will only be painting your RV once. Go slow and take your time to minimize mistakes and imperfections. For full coverage, it is best to apply at least two coats of paint. As with the primer, allow the paint to dry at least twenty-four hours between coats for best results.

    Although it is only the first step in the renovation process, painting yields big results. When you have finished painting, your RV will look like an entirely different space. This may leave you excited to move onto the next step in the process. Be sure to check out the other guides in this renovation series to learn how to replace your floors, install new lighting, and more.

    Have you painted an RV before? What was the process like? Feel free to share in the comments below! And if you haven’t already, don’t forget to check out Part I of our RV painting series.
  • Painting an RV: Part I

    Painting an RV: Part I

    Renovating an RV has become an increasingly popular challenge in recent years. A simple search of the “RVrenovation” hashtag on Instagram will instantly yield photos of thousands of brightly-colored, modernly-designed units all over the world.

    The reasons for remodeling an RV interior differ, but the main motivation stems from a desire to make an RV your own. Many RVs come from the factory turn-key ready, but some people feel that these lack personality and individuality. Additionally, older RVs from different eras (8+ years old) are often outdated in the decor department and in need of some serious sprucing. Still, others may just not match the taste and style preferences of their respective owners. Whatever the reasons for beginning an RV renovation and whatever projects you have planned, your very first project should be painting.

    Painting an RV is no small job. While the surface area of the total space may be small, there are many nooks and crannies, which makes painting time-consuming and labor-intensive. In addition, there is quite a bit of prep work involved. In order to ensure that the paint adheres to the surface, you must sand, clean, and tape, all before beginning the actual paint job. To get started – you’ll want to:

    1. Decide where you want to paint

    The very first step to painting is deciding exactly which surfaces you plan to paint. When renovating an RV, many people paint both the walls and the cabinets. Others decide to paint the walls and leave the cabinets with the original wood-grain look. No matter which surfaces you decide to paint, determining this ahead of time is important because it will let you know which areas to prep. Once you have decided where to paint, you can move on and start your prep work.

    2. Flatten out all surfaces to be painted

    Most people paint right over the wallpaper in RVs. Removing wallpaper is a sticky and messy process, and there is really no reason to complete this extra step prior to painting. However, if there are wallpaper borders present, these must be removed before painting. Failure to remove these will result in a bumpy and uneven surface, and the finished product will not be as polished.

    Most wallpaper borders in RVs can be found in either the kitchen or the bathroom. To remove these, simply slide a thin tool under the border to begin peeling it up, and pull the border away from the wall. There will be some resistance, but it should eventually peel off in one piece. If you are unable to remove the wallpaper, try melting the glue with a heat gun. Scrape any excess glue off the walls once borders are removed.

    Additionally, you must fill any and all holes or nicks in the walls with putty if you want a smooth final appearance. Allow the putty to dry for at least six hours before moving on to step three.

    3. Sand all surfaces to be painted


    Sanding is arguably the most important step of the painting process. Assuming your RV will travel to a variety of climates in its lifetime, it is especially important to ensure that the paint adheres to the walls as best as possible. Since RV wallpaper and cabinets are typically covered in a glossy, laminate finish, you must be sure to remove this before you can paint. Failure to complete this step will result in a finished product that is extremely prone to peeling and does not hold up well over time.

    It is best to sand with an electric sander and some 80 or 120-grit sandpaper. Any size sander will get the job done, but a smaller, hand-held sander will be easier to maneuver into tight spaces. Be sure to sand all surfaces that will be painted. This will take up quite a bit of time, but it is very important and worth every second when your final painted product lasts for years.

    3. Clean thoroughly

    After sanding, everything in the RV will be covered in a thick layer of dust. It is vital that you clean up all of this before painting. If you don’t clean well, residual dust may stick to your paint as it is drying, discoloring it, and leaving the walls looking perpetually dusty. Thoroughly wipe down all countertops, and then vacuum and sweep up all dust particles on the floors.

    Next, wipe down the walls, cabinets, and any other surface that will be painted with TSP. Otherwise known as trisodium phosphate, TSP is a heavy-duty cleaner that is diluted and used for cleaning surfaces that will later be painted. You can find it at any hardware or home repair supply store.

    4. Remove hardware 


    If you are painting your RV cabinets, you will need to remove all cabinet doors and drawer faces before you can begin to paint. It is best to do this after sanding so that you don’t have to sand these on a tabletop or on the ground. In addition, you should remove all hardware (hinges, handles, etc.) to ensure that you can paint as closely as possible.

    NOTE: If you have plastic or metal hardware, it is best to remove the hardware prior to sanding the cabinets.

    You must also remove all outlet covers, lights and light switch covers to ensure they are not accidentally painted. You can complete this step with either a screwdriver or a drill with an appropriately-sized bit.

    5. Tape Before You Paint

    This is the final step of prepwork. Before painting, you must tape off anything that is not going to be painted. This includes the ceiling, floors, baseboards, appliances, windows and anything else that you do not want to accidentally paint. Be sure to tape carefully and as closely as possible for best results. If you are not planning to replace your flooring after painting, be sure to cover the floors in drop cloths to avoid drips.

    Once you have completed all of these steps, you are ready to gather your supplies and begin painting. Keep an eye out for the next post in the series, where we will discuss painting tips and tricks that are sure to leave your RV looking good as new.

    Have you painted an RV? What did you do for prepwork? Feel free to share in the comments below! And don’t forget to check out Part II of our RV painting series.