Category: Living

  • Ultimate RV Newbie Mistakes: Read Up, Rookies!

    Ultimate RV Newbie Mistakes: Read Up, Rookies!

    When my wife and I first started RVing nearly seven years ago, we had no idea just how much there was to learn. We’ve traveled all across the U.S. and Canada in multiple RVs, from two fifth wheels to a Class B van and now a Class C motorhome. All on our own, we made plenty of RV newbie mistakes. But these days, nothing reminds us about the RV learning curve like traveling with first-timers.

    Right now, we’re on a year-long road trip with my wife’s brother and our sister-in-law — who, before this adventure, had never RVed before. Watching them navigate the ins and outs of RV life has been both hilarious and eye-opening. (And, I should add, expected. RV newbie mistakes are part of learning.) Seeing them is a reminder that we were once in their shoes, making some of the same RV newbie mistakes they’re making now.

    And trust me, we’ve all been there. Whether you’re still shopping for your first RV or are already out on the road, chances are you’re going to make mistakes. Some will be funny after the fact (like leaving the sewer cap on when dumping your tanks). Others could be costly or even dangerous.

    So, to save you from the worst of them, here’s a list of RV newbie mistakes that nearly every new RV rookie makes — and how to avoid them.


    Mistake No. 1: Not Understanding Your RV’s Weight Limits

    If there’s one thing that every RVer should know before hitting the road, it’s how much weight their rig can safely handle. Many newbies just pack up and go without considering the following:

    • GVWR (Gross Vehicle Weight Rating). The maximum your RV can weigh when fully loaded.
    • GCWR (Gross Combined Weight Rating). The max weight of your RV plus any tow vehicle or towed trailer.
    • Tongue Weight and Payload Capacity. If you’re towing, these numbers matter a lot to avoid dangerous sway.

    We personally and unwittingly overloaded our second rig without even realizing it, and we suffered through costly mistakes as a result. (The biggest was having to upgrade to a new truck.) Luckily no accidents or serious incidents happened, but this type of situation can lead to poor handling, excessive tire wear, frame or axle damage, and so much more. Check your weight ratings, pack wisely, and don’t forget — water weighs a lot (8.3 pounds per gallon).


    Mistake No. 2: Ignoring Tire Pressure and Maintenance

    One of the most common (and dangerous) rookie mistakes is neglecting tire maintenance. Underinflated or overinflated tires can lead to:

    • Uneven wear
    • Blowouts on the highway
    • Poor fuel efficiency

    Before every trip, check your tire pressure using a quality tire gauge and adjust it to the manufacturer’s recommended PSI. We highly recommend buying a good air compressor that you know can inflate your tires to the recommended weight. And, if possible, invest in a tire pressure monitoring system (TPMS) to keep tabs on your tires while driving.


    Mistake No. 3: Not Leveling Properly at Camp

    When we first started RVing, we thought “good enough” was fine when it came to leveling. Wrong!!! A poorly leveled RV can lead to:

    • Cabinets and doors that don’t close properly.
    • Uncomfortable sleeping arrangements. This one made my wife and I laugh hysterically the next day, after our in-laws ignored our advice not to sleep so slanted on their first night in their Class B van, and they woke up hating life.
    • Poor fridge performance. Some RV refrigerators need to be level to work properly.

    Newbies often assume that leveling means eyeballing it. (And, admittedly, with years at it, my wife and I are pretty good at it.) But a small bubble level and some leveling blocks make all the difference. If you have an auto-leveling system, double-check it before settling in. It’s worth the extra few minutes.


    Mistake No. 4: Underestimating the Importance of the Right Sewer Gear

    Ah, the dreaded black tank mistake known as the poopsie — every rookie’s rite of passage. If you think dumping your tanks is as simple as hooking up and pulling the lever, you’re in for a smelly surprise.

    Mistakes we’ve seen (or made ourselves) include:

    • Not securing the sewer hose properly. (Hello, disaster.)
    • Leaving the black tank valve open at an RV park. This causes the dreaded poo pyramid inside your tank. So …
      • Always close your black tank, add some water and treatment to it, and then when it is near full, you should open the valve and dump. 
      • Never think that you can leave the black tank open during a stay. It is only opened when dumping, and then it should be closed.
    • Not using a clear sewer hose adapter. You need to see when the water runs clear after rinsing.


    A Few Game-Changer Tips

    Invest in disposable gloves, RV-friendly toilet paper, and enzyme tank treatments to keep things clean and minimize the odor. We take it a step further and have a specific trash can with a lid for toilet paper that sits next to the toilet. This allows us to use normal toilet paper, which is way more readily available, and we don’t have to worry about the paper causing a blockage in the tank. Just make sure you have a trash bag, gloves, and disinfectant spray to dispose of the TP properly.


    Mistake No. 5: Not Understanding RV Electrical Systems

    We’ve met a lot of first-time RVers who plug into any power source without checking voltage, polarity, or amperage. This is a great way to fry your electronics.

    Things every RVer should always do:

    • Use a surge protector. Do this. before plugging into shore power.
    • Know your rig’s electrical needs. Do you require 30-amp or 50-amp service?
    • Check campground power pedestals. You want to identify any issues before plugging in.

    Blown fuses and dead batteries are frustrating, but an overloaded system can do real damage.


    Mistake No. 6: Thinking Boondocking is as Simple as Parking Anywhere

    Boondocking is our favorite way to camp, but a lot of rookies assume you can just pull up and park anywhere for free. It doesn’t quite work that way.

    Common newbie boondocking mistakes:

    • Not knowing where it’s legal to camp. Check BLM land, national forests, or other resources for options. We like to use apps like iOverlander and Hipcamp to search places to stay.
    • Running out of water or battery power. You tanks by themselves may run dry after a day or two.
    • Not having a plan for dumping tanks. When you’re off-grid, you need to know where your next dump station is.

    If you’re new to boondocking, start small. Try it for one or two nights near civilization before heading deep into the wild.


    Mistake No. 7: Not Checking the Weather Before Driving

    If you’re towing or driving a big rig, bad weather can ruin your day fast. Rookie RVers often make the mistake of:

    • Ignoring wind speeds.  High winds can push your rig around.
    • Driving in extreme heat. This puts extra strain on your engine and tires.
    • Not watching for icy conditions. A slide-out in winter is no fun.

    A simple weather check for the week and before every travel day can save you a ton of stress and potential damage.


    Mistake No. 8: Forgetting to Secure Everything Before Driving

    It’s easy to forget how much stuff shifts while you’re driving until you hear something crash behind you. Newbies often forget to:

    • Latch cabinets and drawers
    • Secure loose items on counters
    • Lock the fridge

    We’ve all had the moment where we open the fridge or a cabinet after parking and get attacked by flying groceries or supplies. (It only takes once to learn your lesson.)


    RV Newbie Mistakes Happen — Learn From Them

    If you’re new to RVing, don’t stress too much about making mistakes. They will happen. Even after seven years of full-time RV life, we still have moments where we laugh at ourselves for doing something dumb.

    After traveling with my wife’s brother and sister-in-law for the past few months, it’s been fun to see RVing through fresh eyes again. They’ve had their fair share of learning experiences, but they’re getting better every day — and that’s what it’s all about.

    The key is to be prepared, ask questions, and always double-check your setup. Before long, you’ll be laughing at your own early mistakes and passing along advice to the next set of rookies.

    So, whether you’re just getting started or a few trips in — read up, learn from others, and enjoy the journey. Safe travels!
  • Teaching Kids Geography in Motion: Roadschooling 101

    Teaching Kids Geography in Motion: Roadschooling 101

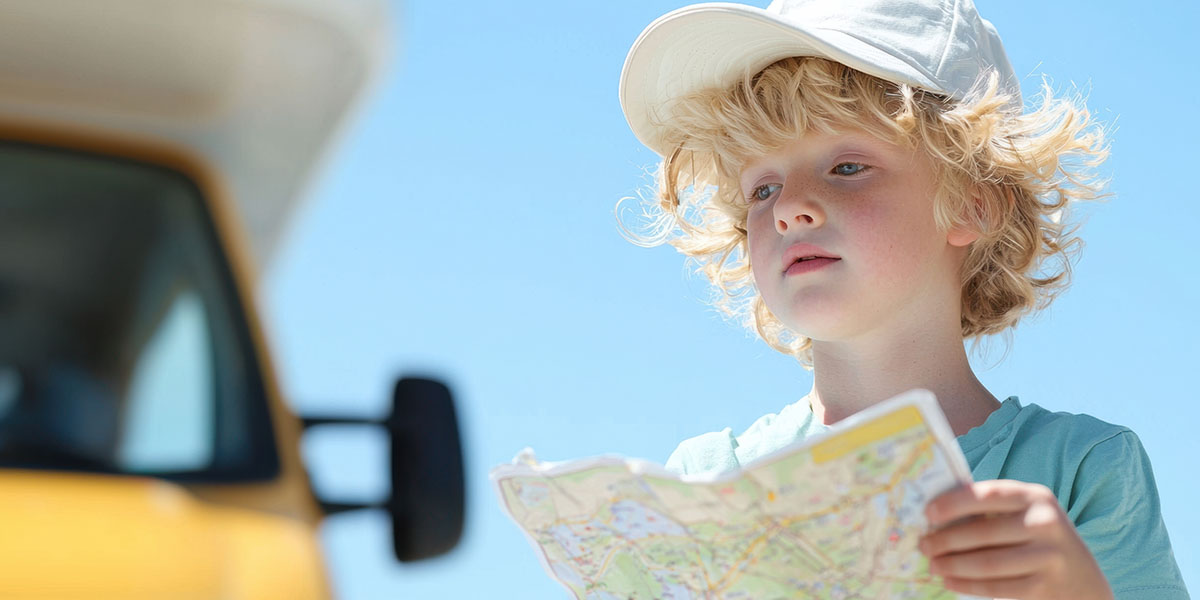
    Driving through Moab, Utah, my daughter stared out the window mesmerized by layers of rock laid bare. Strata of history, millions of years old, are exposed in a dusty rainbow of ancient layers. We walked past fossilized dinosaur tracks, and old dinosaur bones fused into prehistoric rock. After we set up our campsite, we put a pin in our interactive map of America on the wall. On the road, kids can associate all their rich experiences with their geographical location. What could be a better approach for teaching kids geography than through travel? 

    As a parent, roadschooling requires a good dose of intentionality and creativity. But the good news is that the RV life offers plenty of lessons. So, whether you’re teaching your kids about natural sciences, crunching numbers, or learning geography, there’s always something to learn.

    Now let’s talk about how to work geography into your roadschool curriculum.


    Applied Learning on the Road

    Truth be told, not long ago, I was questioning whether or not my kids were learning all the appropriate sciences on our roadschooling agenda. When I was a kid in public school, my locker was filled with text books that covered geology, astronomy, anatomy, meteorology, geography, and so much more. Currently for my young children, our science curriculum requires this many text books: zero.

    We’ve replaced the textbooks with regular field trips and applied learning. When my children show a natural interest in something, then we explore the topic with books at the nearest library. (A great move since RVs don’t have loads of book space.) We also incorporate local knowledge on the subject when applicable. The momentum of a child’s natural curiosity can propel any lesson in science, history, or art. 


    Starting with Interactive Maps and Research

    Whether you are planning to take a year long trip across America, or a weekend away, your lesson in geography can start well before your travels. When our family started planning a trip across the country in our RV, I bought an interactive map of the country. Then we got some little pins to mark our place. We began by marking our intended route. After that, as our journey took flight, we put real time pins in each place. 

    We used a cork map that we hung on the wall with colorful pins. If you have the time and imagination, you can make your own map with just about anything — and use anything to mark your place. 

    If you have sufficient time before you embark, begin teaching your kids about your intended destinations. It will get your kids (and you) excited about the journey. (It will also prepare you for appropriate adventures to take them on when you arrive!) I love diving into the history of a place we intend to visit. I am usually surprised by intriguing historical tales that I never would have known to look for. Follow it up with a trip to a museum after you arrive. Experiences like this all contribute to rich lessons in geography.  


    Using Geography as a Gateway Science

    If you have ever taken a class in geography, you know that it is so much more than knowing where you are on a map. It is the study of the physical features of earth, its atmosphere, and human activity as it affects and is affected by these. That includes the distribution of population and resources, land use, and industries. This is a science that segues beautifully into other sciences like geology, anthropology, mathematics (thinking in time and distance), social studies, and more. 


    Kicking Off Geography 101

    For a simple lesson in “knowing where we are in space,” I like to go on little map-making activities with my kids. You can start with the campground, or even the inside of your RV. Have the kids make a map of a small simple space, and mark where everything is. When kids make a map of a given place, they utilize the hippocampus (an underutilized part of our brain that is going soft in today’s world of GPS). 

    After your kids can show a basic understanding of map making, then you can turn it up a notch. Make a treasure map, or turn it into a more complex scavenger hunt. This will engage them in the natural environment, while developing their geography skills hands on. 


    Why Teaching Kids Geography and Navigation Matters

    It’s easy to let the navigational sides of our brain shrink, while GPS and Apple Maps take us everywhere we need to go. Because that is exactly what is happening, the hippocampus (the part of the brain that is critically involved in navigation) is shrinking.

    Some might ask why it matters. Why should we bother teaching kids geography with outdated skills associated with maps and navigation? After all, everyone is always plugged into our phones, so why should we bother knowing where we are in the big picture?

    For one, there are some new studies out there suggesting a connection between Alzheimer’s disease and dementia, and the disuse of the hippocampus. So, maybe it is a good idea to keep up with our geography and navigational skills, even though it may seem irrelevant with an iPhone in your pocket.

    But even more than that, RV kids should enjoy the benefit of being raising differently — knowing where they are and where they are going without a screen. That skill teaches them to be present in a way that will impact their entire lives.

  • 7 RV Basement Storage Ideas to Max Out Your Space

    7 RV Basement Storage Ideas to Max Out Your Space

    We’ve all been there: staring into the basement storage of an RV full of the wrong kind of wonder. Dumbfounded, we’re wondering how on earth we’re supposed to fit all our gear, hoses, tools, and adventure essentials into that oddly shaped, underbelly compartment. (All, of course, without turning it into a black hole of clutter.) Staring into that abyss, it helps to have some pretty solid RV basement storage ideas. You know, the kind that have been paid for with experience.

    After seven years on the road, my wife and have seen and personally experienced it all — from fifth wheels (with cavernous passthrough storage that feels like a secret garage) to smaller rigs (where you have to play Tetris just to store a sewer hose). Whether you’re brand new to RVing or knee-deep in your third full-time rig, organizing and maximizing RV  basement storage space can make or break your road trip experience. Because let’s face it: Needing something and not having it when your on the road is the worst. 

    So, let’s dig into some surefire ways to evaluate your RV basement storage — and some ideas to make the most of it.


    1. Understand what you’re working with.

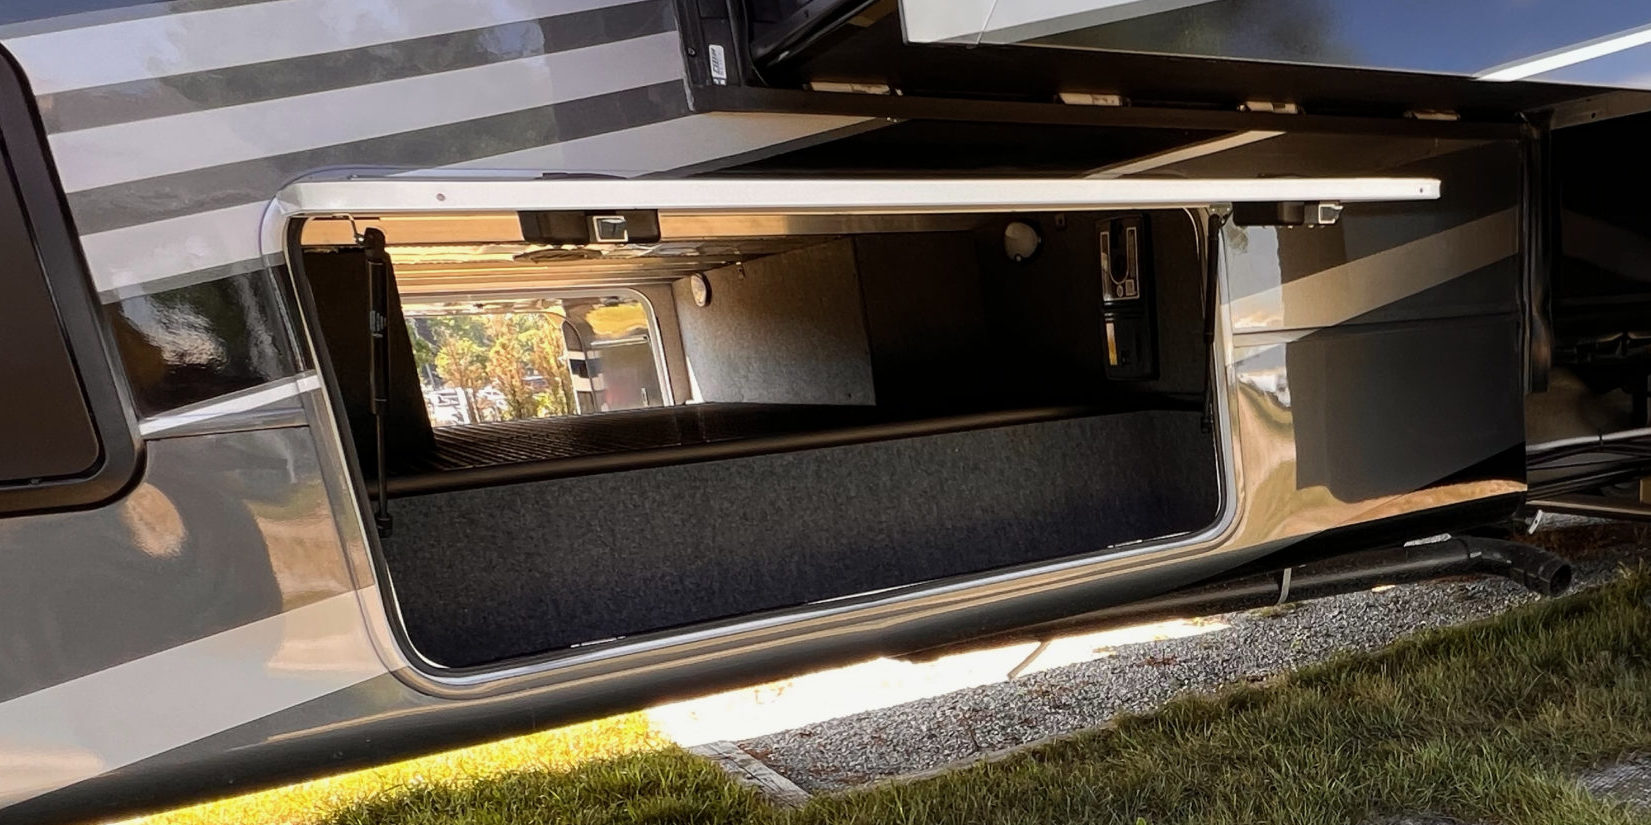
    Every RV’s basement storage is different. Class A motorhomes tend to have massive passthrough compartments, sometimes with slide-out trays or built-in lighting. Fifth wheels often have tall storage spaces up front and smaller compartments scattered along the side. Class C motorhomes and travel trailers? Usually more compact — requiring to show a bit more creativity with your RV basement storage ideas.

    But no matter which RV you own, you can start by taking inventory of your actual storage size and layout.

    • Is your storage passthrough or divided?
    • Do the doors lift or swing open?
    • Is there room to add bins, trays, or hooks?
    • Are any compartments heated or insulated (ideal for sensitive gear)?


    Pro Tip: Measure each compartment’s depth, height, and width — and jot those numbers down. You’ll want them handy when you’re shopping for bins, crates, or drawer systems that actually fit. We’ve definitely tried to wing it and pass by the store to eyeball a purchase and had it backfire because we were lazy and didn’t really measure. So, remember to measure twice and purchase once.


    2. Sort and prioritize what lives below.

    Not everything belongs in your basement compartments. So, before you toss in that folding kayak or bundle of tangled extension cords, ask yourself a few questions:

    • Do I need quick access to this item while traveling?
    • Can this safely ride in the tow vehicle instead?
    • Does it need to stay dry, cool, or protected from dust?

    We break our storage down into categories:

    • Travel day gear: Hoses, leveling blocks, wheel chocks, gloves
    • Camp setup/teardown supplies: Outdoor rug, camp chairs, grill
    • Emergency items: Tool kit, spare fuses, jumper cables, first-aid
    • Outdoor fun: Paddleboards, hammocks, hiking gear
    • Seasonal storage: Extra blankets, off-season clothing, holiday lights


    Pro Tip: If it hasn’t been used in three trips, it probably doesn’t need to ride along.


    3. Use bins — and label everything.

    We’re not exaggerating when we say plastic bins changed our storage life. Not only do they keep everything tidy, but they also make it easier to unload and reload without digging through a pile of chaos. Choose stackable bins with secure lids and handles — ideally clear, so you can see what’s inside.

    Label each bin clearly, and group them by frequency of use:

    • “Daily Use” bins go in front and are easiest to reach.
    • “Occasional Use” bins can live in the back or bottom.
    • “Emergency” gear stays accessible at all times.


    Pro Tip: If you don’t want to label and you have a decent memory, color-coding your bins can help with organization. Personally, we try to separate specific and similar items in different storage locations and keep them in those clear bins. It makes grabbing what we need when we need it that much quicker.


    4. Maximize vertical and wall space.

    You’d be surprised how much space you’re not using in your basement — especially on the walls and ceiling of the compartment.

    A few smart upgrades:

    • Command hooks or bungee cords for hanging hoses, folding tables, or lightweight tools
    • Magnetic strips for metal tools or objects that can bang around if they happen to move or fall of while traveling a crazy off-road adventure.
    • Overhead cargo nets or fabric shoe organizers to hold smaller items
    • Sliding trays or roll-out platforms (if your RV didn’t come with them)

    These can turn even the tightest space into a functional mini-garage.


    Pro Tip: If your storage compartments aren’t lit, consider battery-powered puck lights or LED strips so you’re not fumbling in the dark or using your phone light.


    5. Watch the weight distribution.

    It’s easy to get excited about how much gear you can fit, but don’t forget to keep an eye on your RV’s weight limits — and how that weight is distributed. Too much in one area can throw off your balance and handling, especially if you’re towing.

    Use a simple bathroom scale to weigh bins before loading, and spread the heavier items across multiple compartments. Keep especially heavy stuff low and centered to maintain your rig’s balance.


    Pro Tip: Keep your RV’s GVWR and axle ratings on hand, and use a CAT scale or similar weigh station to check your setup if you’re unsure.


    6. Keep dirty and clean items separate.

    This may seem obvious, but it’s a mistake most RVers make at least once: Storing your sewer hose with your leveling blocks or outdoor rug … that’s not great.

    Designate one bin (or more) for “dirty gear,” and keep it separate from anything you want to stay clean. We use a dedicated clear and black bin for sewer and dump-related items so they don’t contaminate anything else.


    Pro Tip: Use sealable containers with latching lids for anything that might leak, smell, or drip. Thank us later.


    7. Don’t overthink it — but do reevaluate often.

    RV life changes with the seasons, and so does your storage. You might need snow chains and flannel sheets in December, but come July, those can get swapped for sandals and beach umbrellas.

    Set a reminder to clean out and re-organize your basement every couple of months — or before each major trip. We’ve done the mid-trip storage purge more than once, and it’s way better to do it when you’re not hot, tired, and surrounded by mystery extension cords.


    Your Basement, Your Rules

    Maximizing RV basement storage isn’t just about organization or ideas — it’s about convenience, safety, and peace of mind on the road. The right system can mean the difference between a relaxing travel day and digging through three bins of mismatched gear just to find a wrench.

    At the end of the day, your basement setup should serve your travel style. For us, boondocking most of the time means we keep essentials like our water gear, extra power cables, and backup leveling supplies ready to go — but when we do hit a campground for a reset, we’re glad to have an outdoor rug and folding chairs tucked away, too.

    So, whether your storage space is a cavern or a closet, make it work for you. And if you ever find yourself asking, “Do I really need to bring this?”— you probably don’t.

    But don’t worry, the fifth bungee cord always sneaks its way back in anyway. And oh is it satisfying when you use it. 

  • 7 Fresh Picnic Recipes You Can Prep in Your RV

    7 Fresh Picnic Recipes You Can Prep in Your RV

    Sitting by the lake, waterfall, or river while enjoying a picnic lunch or dinner is a simple pleasure in life that many folks have forgotten. And for campers on an RV trip, quite frankly, it’s low-hanging fruit. All you need are a few fresh picnic recipes, a little food prep, and a view worth driving to.

    Now, the driving is up to you (although we could recommend some great camping spots), but we got you covered on picnic recipes. Here are seven easy, no-or-low cook recipes that anyone can tackle in an RV kitchen. They’re fresh, tasty, and perfect to take as a packable picnic that’ll rival anything you can purchase at an upscale deli. (And all for a quarter of the price!) Each recipe makes about four hearty servings. 

    Mix and match the picnic recipes that sound good to you, bring a picnic blanket or hammock, and maybe a bottle of bubbly?  


    Summer Couscous Salad — with Lemon Basil Dijon Dressing


    Couscous Salad

    Ingredients:

    • 2 tablespoons olive oil
    • 1 teaspoon garlic (minced)
    • 1/2 medium onion (finely chopped)
    • 1.5 cups pearl couscous 
    • 1.5 teaspoons veggie bouillon
    • 3 cups of water


    Instructions: In a large skillet, sauté couscous in olive oil for two minutes. Then add onion and garlic and cook until garlic and onions are soft. Add water and veggie bouillon and simmer until liquid is completely absorbed. The couscous should be fully cooked, but still firm and chewy. Set aside and let cool completely.


    Mixin’s:

    • 1/2 English cucumber (diced, about 1 cup)
    • 4 ounces cherry tomatoes (halved, about 1 cup)
    • 1/2 red or orange bell pepper (diced)
    • 4 baby carrots (chopped)
    • 1 cup fresh mozzarella cheese (cubed)
    • 2 cups of arugula 
    • 2 tablespoons mint leaves (finely chopped)


    Instructions: Add chopped vegetables to the cooled couscous and mix in thoroughly.


    Lemon Basil Dijon Dressing

    Ingredients:

    • 4 -5 tablespoons fresh lemon juice
    • 1/4 cup olive oil
    • 2 teaspoons Dijon mustard
    • 1 garlic clove (minced)
    • 1 teaspoon dried basil
    • 1 teaspoon agave syrup 
    • 1 pinch sea salt
    • 1/2 teaspoon black pepper


    Instructions: Mix ingredients together in a small container. Add to salad just before serving. Top with sliced almonds for some extra crunch and protein.


    Asian Pear Waldorf Salad


    A fun twist on an old standby that grandma used to make! Higher in protein, lower in fat, and a delicious bit of sweetness to complement a savory picnic lunch.


    Ingredients:

    • 2 Asian pears (chopped)
    • 1-2 cups coconut and/or plain Greek yogurt (depending on your preferred sweetness level)
    • 1 cup chopped walnuts
    • 1 to 2 celery stalks (chopped)
    • 1/2 cup dried cranberries


    Instructions: Mix all ingredients together in a bowl and serve. 


    Roasted Potato Salad

    Our neighbor brought this potato salad recipe to a potluck almost 20 years ago, and we’ve never made it any other way since! Leaving the skins on the potatoes and roasting them with a bit of garlic, salt, and pepper takes this potato salad to the next level! 


    Ingredients:

    • 20 tiny red potatoes (halved or quartered depending on size)
    • 2 to 3 tablespoons olive oil
    • Salt and pepper (to taste)
    • 1 teaspoon garlic (minced)
    • 1 cup plain Greek yogurt and/or mayonnaise
    • Dijon mustard (to taste)
    • 2 to 3 green onions (diced)
    • 3 hard-boiled eggs (mashed)


    Instructions: Coat the potatoes in olive oil, garlic, salt and pepper. Roast in a large, covered pan until the potatoes are just tender when poked with a fork. This usually takes about 10 to 15 minutes on the stove top, turning regularly to make sure they are lightly browned on each side. Hard boil three eggs while potatoes are cooking. Let potatoes and eggs cool. Peel the eggs and mashed them, then mix together with the potatoes, yogurt/mayo, mustard, and onions. Refrigerate until ready to serve.


    Grilled Veggie Muffaletta 


    This vegetarian version of a New Orleans style sandwich is best made the day before you serve it. The key to this recipe is a high-quality loaf of crusty sourdough bread that will stand up to the ingredients you put inside. No quantities are listed here as it depends on the size of bread loaf you use. Here are some of our favorite ingredients, but you can layer up anything that sounds good to you.


    Ingredients:

    • Large loaf of crusty sourdough bread (unsliced)
    • Olive tapenade
    • Chili crisp (optional, if you’d like some extra spice)
    • Sundried tomatoes (julienned)
    • Marinated artichokes (finely chopped)
    • Cremini mushrooms (sliced)
    • Spanish onion (sliced)
    • Red or orange bell pepper (sliced)
    • Zucchini or summer squash (sliced)
    • Sliced Swiss, Havarti, or provolone cheese (or a combination)

    Instructions: Sauté the mushrooms, onions, and peppers until lightly caramelized. While the veggies are cooking, prepare the bread loaf. Slice the top off the loaf with your knife at a downward angle, remove the inside of the loaf to create a hollow “bread bowl.” Be sure to leave at least 1/2 “ of bread crumb. (Note: Don’t waste the bread you removed from the center. Cut it into chunks and use it to dip in soup, or toast it up and use them as croutons.)

    Start layering the ingredients inside, starting with cheese, then top the entire muffaletta with the large bread slice that you cut off the top.  

    Wrap the loaf in aluminum foil, then place it in a tightly wrapped plastic grocery bag to prevent leakage. Place in the refrigerator overnight with a press on top. Usually, a cast iron skillet or heavy pan works well. After about 12 hours, the layers have transformed into something far greater than the sum of all the ingredients. Slice pie shaped sections of the loaf, toast in a griddle or oven, or consume cold. Enjoy!


    7-Layer Dip


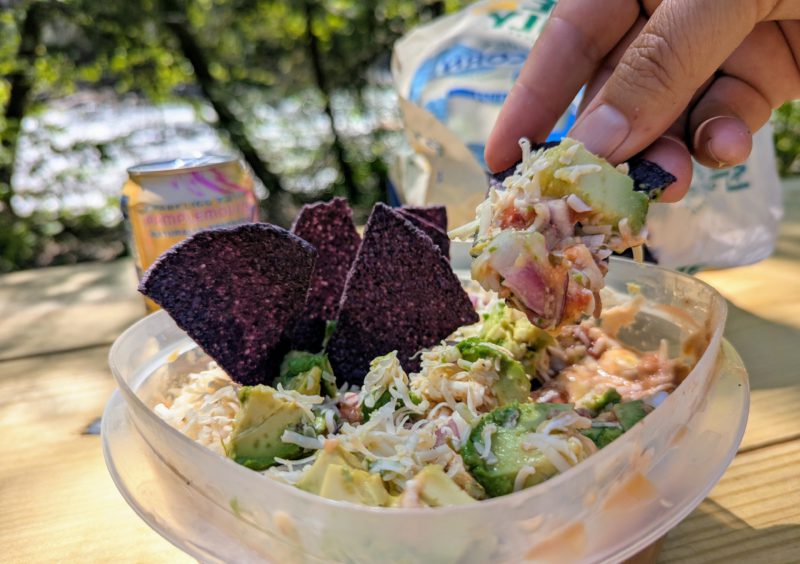
    Another easy layered recipe, but this time no cooking is required! (Who doesn’t love picnic recipes that are easy?) Making this yourself is 10 times better tasting than buying it premade. Open a few tubs and cans, then chop an onion and shred some cheese. No quantities are listed here as it depends on the size of container you use.  


    Ingredients:

    • Chili beans (mashed)
    • Greek yogurt
    • Pub cheese
    • Salsa
    • Cheddar cheese (shredded)
    • Red onion (finely chopped)
    • Guacamole
    • Tortilla cChips

    Instructions: Using a small metal pan, glass baking dish, or plastic leftovers container, layer each ingredient on top of the next, starting with the beans and ending with the guac.  Dig in with your favorite tortilla chips!


    Roasted Brussels Sprouts Salad


    This hearty and healthy salad can be made ahead of time, then dressed just before serving.  You can substitute with broccoli or even asparagus if Brussels sprouts aren’t your thing.


    Brussels Sprouts

    • 1/2 pound of Brussels sprouts, sliced in half
    • 2 tablespoons olive oil
    • 2 cloves fresh garlic, crushed
    • Dash or two of sea salt and black pepper

    Slice Brussels sprouts in half, trim off the stem end a bit, and put them in a large mixing bowl. Coat them with olive oil, salt, pepper, and garlic. Roast the sprouts in a large, covered pan for about 10 to 15 minutes on the stove top, turning regularly to get a good char on each side.  

    When you can easily poke them with a fork, remove them from the heat and let them completely cool. (Note: You are seeking an al dente texture, not mushy.)


    Mixin’s:

    • 20 grape tomatoes (sliced in half)
    • 2 cups of baby kale
    • 1/2 tub of goat or feta cheese
    • 1/4 cup of almonds or pecans (chopped)
    • Balsamic vinaigrette (to taste)

    Instructions: Once the sprouts are cooled, mix in the remaining ingredients. Toss with your favorite Balsamic vinaigrette and serve!


    Asian Ginger Slaw


    This no-cook recipe is a fun twist on an old standby.  The nuts add a bit of extra crunch and some protein as well.


    Ingredients:

    • 2 cups purple or green cabbage (shredded)
    • ¼ cup slivered almonds
    • 3 green onions (diced)
    • Asian sesame dressing (to taste)


    Instructions: Fill your basket, grab a blanket, round up your favorite people and head out to your favorite view. We hope these picnic recipes help freshen up your next adventure!

  • Hard-to-Store Items in an RV  — Plus 5 Models That Can Handle It

    Hard-to-Store Items in an RV — Plus 5 Models That Can Handle It

    If there’s one universal truth my wife and I have learned after nearly seven years on the road and four years as THOR Ambassadors, it’s this: No matter how much you downsize, there’s always that one thing (or more) that’s nearly impossible to store in your RV. What’s worse is that the hard-to-store items in an RV can often be our favorites. Maybe it’s your favorite folding e-bike, a paddleboard, a selection of essential footwear (that somehow multiplies and finds its way beside the front door), or that oddly-shaped kitchen appliance you swore you’d use every day.

    In a lifestyle where every square inch matters, these items often become one of two things. A source of frustration or of creative storage genius!

    So, let’s talk about it by the numbers. What are hard-to-store items in an RV and — since my wife and I are THOR Ambassadors — which THOR models actually give you the space to stash them without sacrificing your sanity or your precious legroom?

    Whether you’re looking for a spacious motorhome or a luxury fifth wheel, I’ve got an RV designed to handle your storage struggles like a pro.


    Notoriously Hard-to-Store Items in an RV

    Before we dive into the rigs, let’s split these into five categories. These are the repeat offenders that we  — and just about every RVer we’ve met — struggle to store:

    • Outdoor gear. Bikes, inflatable paddleboards, folding kayaks. Fact is, if it’s meant for adventure, it’s usually awkward and bulky.
    • Seasonal clothes. This one, somehow, always ends up being a much bigger factor than you’d expect. Whether you’re chasing sunshine or riding out snow, those puffy jackets, hiking boots, or swimsuits don’t store themselves. (And like those shoes, they seem to multiply.)
    • Tools and maintenance equipment: A decent toolkit, leveling blocks, sewer gear, an air compressor, et cetera. You need all or most of them. And they’re rarely small.
    • Pet gear. Travel crates, food bins, toys, grooming supplies. For us, traveling with our dogs Wilson and Journey means a whole extra storage category.
    • Office gear. As digital nomads, we travel with laptops, cameras, tripods, chargers, and more. And we’re not the only ones. It’s a reality for lots of remote workers. Workspace storage is a must.


    5 THOR RV Models — and Types — for a Storage Upgrade

    Now that we’ve identified the culprits, here are five THOR RV models that rise to the challenge and offer surprisingly smart solutions for hard-to-store items in an RV.


    1. Thor Motor Coach Tuscany 45MX | Class A Diesel Motorhome

    Perfect for: Full-timers with big gear and a need for luxury

    The Tuscany 45MX isn’t just a rolling luxury condo — it’s also built to carry everything you need for a lifestyle on the move. With full passthrough basement storage and optional slide-out trays, there’s ample room for bikes, camp furniture, gear bags, and even e-bikes. While you’re likely buying this coach for its high-end residential feel, the oversized storage is a practical bonus that makes bringing the gear for your hobbies simple and seamless.

    Why It Works:

    • Massive exterior storage compartments with optional slide-out trays
    • Ideal for full-timers or long-term travelers with gear-heavy hobbies
    • Combines functionality with luxury-level comfort


    2. Jayco Greyhawk 30Z | Class C Motorhome

    Perfect for: Versatile workspaces, tech gear, and full-time flexibility

    As digital nomads, we know that finding a comfortable and functional spot to work inside your rig can be a challenge. The Jayco Greyhawk 30Z provides just enough flexibility to make it work. The spacious slide-out dinette can double as a workstation, and there’s overhead cabinetry and hidden compartments for laptops, cables, and tech accessories. It’s not a dedicated office, but it’s more than enough to stay productive on the road without sacrificing your living space.

    Why It Works:

    • Roomy dinette area doubles as a reliable workstation
    • Ample overhead and under-seat storage for tech gear
    • Separate bedroom allows for work/life balance on the road


    3. Highland Ridge Open Range OF328BHS | Travel Trailer

    Perfect for: Paddleboards, seasonal gear, and flexible family needs

    This travel trailer line punches well above its weight when it comes to storage. And the Open Range OF328BHS in particular offer a versatile bunkhouse space, expansive underbed storage in the primary bedroom, and an oversized pass-through compartment that’s perfect for inflatables, beach gear, or bulky totes. Whether you’re traveling with kids or not, the additional interior space gives you room to adapt to your needs—whether that’s sleeping arrangements, gear hauling, or hobby storage.

    Why It Works:

    • Large pass-through exterior storage compartment
    • Versatile rear bunkroom that adapts to your travel lifestyle
    • Under-bed storage in the primary bedroom perfect for off-season gear


    4. Thor Motor Coach Sequence 20L | Class B Motorhome

    Perfect for: Minimalist travelers, toolkits, and everyday adventure gear

    We traveled the U.S. and Canada in this nimble little van, and what it lacks in size, it makes up for in smart design. One of the rear twin beds lifts up to reveal a deep compartment that handled our VIAIR air compressor, our small toolkit, and road emergency gear. The rear double doors made access a breeze, and we added a rooftop cargo box for overflow. For longer trips, pairing this van with collapsible shelves, hanging organizers, and dual-use furniture makes a big difference in maintaining your sanity.

    Why It Works:

    • Rear underbed storage compartments with easy access
    • Perfect for small essential gear, tools, and travel extras
    • Optional roof storage box expands capacity on longer trips


    5, Heartland Cyclone 4014C | Fifth-Wheel Toy Hauler

    Perfect for: Big toys, fire pits, camp chairs, and extra living space

    Toy haulers are known for hauling gear, and the Cyclone 4014C does not disappoint. With a 14-foot garage, walk-in pantry, and loft space, there’s enough room for fire pits, full patio sets, portable grills, and even ATVs. And let’s be real. While toy haulers often come with a steeper price tag, their ability to combine storage, flexibility, and livability makes them worth it for many RVers, especially families and adventurers who travel with a lot of “extra toys.”

    Why It Works:

    • 14-foot garage with tie-downs and ramp door
    • Bonus loft space and walk-in pantry for overflow storage
    • Built-in side patio turns into your outdoor lounge or living extension


    Tips for Tackling Tough Storage Challenges

    No matter what rig you’re in, here are a few tips that have helped us store those hard-to-fit essentials:

    • Think vertically. Use wall-hung baskets, hanging organizers, and cargo nets to make use of vertical space.
    • Label and tote it. Clear storage bins make finding gear faster, and labeling saves time and sanity.
    • Use outdoor storage. Don’t underestimate your exterior compartments or hitch/roof racks.
    • Rotate gear by season. Only carry what you need for your current trip — less clutter, more space. If traveling through multiple seasons, then try vacuum sealed/shrink bags to store clothes from different seasons that aren’t in use.
    • Multi-purpose everything. A camp stool that’s also a step. A crate that’s also a table. You get the idea.


    Final Thoughts on Handling Hard-to-Store Items

    Finding storage space in an RV is kind of like playing 3D Tetris — only your pieces are oddly shaped, come in different seasons, and sometimes bark. But when you choose the right rig, it doesn’t have to feel like a constant puzzle.

    Whether you’re hauling adventure toys, building a mobile office, or just trying to keep your RV from turning into a disaster zone, there’s a THOR RV out there built to solve your storage struggles.

    If you’re still searching for your perfect rig, start by thinking about what you need to store and go from there. Because when your RV fits your lifestyle, every trip feels a little more like home (and a lot less like a game of hide-and-seek with your gloves and hiking boots).

  • RV Memberships That Actually Make a Difference

    RV Memberships That Actually Make a Difference

    When you’re on the road as often and as long as my wife and I are, you start to realize just how many RV memberships are out there. (Hint: There’s a lot.) Some sound too good to be true, but others are really too good to pass up. The fact is that whether you’re a weekend warrior or a full-timer clocking miles across the country, certain RV memberships can make a real difference in your travel experience. They can not only save you serious money; they can also unlock campgrounds you wouldn’t otherwise find.

    But here’s the thing: Not all RV memberships are created equal. Some are great for fuel savings. Others for discounted camping. And a few more? Well, let’s just say they’ve collected some dust.

    So, how do you know which memberships are worth it?

    Let’s break down which RV memberships actually make a difference — especially the ones we’ve personally used or seen fellow RVers rave about.


    1. Good Sam Club – Getting All the Discounts

    Who It’s For: Great for RVers who frequently stay at private campgrounds, travel long distances using major fuel stations, or shop at Camping World regularly.


    What It Offers:

    • Fuel discounts (up to 5¢ off at Pilot Flying J)
    • 10 percent off at over 2,000 campgrounds
    • Discounts at Camping World and other retail partners
    • Roadside assistance (if bundled with their extended coverage)


    Our Take: Good Sam was one of the first memberships we signed up for. It’s especially handy when you’re bouncing between private campgrounds and need a quick overnight with hookups — or you want a discount at Camping World while picking up a new water filter or sewer hose.

    We found the gas discount to be hit or miss depending on the area. (Sometimes the discount price was already matched or beat by competitors.) But the campground discounts and retail perks were easy to use.


    Pro Tip: If you’re mostly interested in the fuel savings, apps like GasBuddy or Upside can help you find cheaper gas nearby without needing a membership. Similarly, AAA offers some of the same roadside assistance perks, so if you’re already a member, double-check to avoid paying twice for similar benefits.


    2. Passport America – Paying for Itself

    Who It’s For: Ideal for budget-conscious RVers or road trippers who don’t mind calling ahead and reading campground policies to score deals on overnight stops. Really, since this an inexpensive membership that usually pays for itself on the first or second use, it is a nice one to have for almost anyone.


    What It Offers:

    • 50 percent off nightly rates at thousands of participating campgrounds
    • One of the lowest membership fees in the game


    Our Take: We’ve used Passport America in the past, especially on cross-country travel days where we just needed an overnight stop with hookups in the middle of nowhere. You do have to read the fine print — many campgrounds limit the number of nights you can stay at the discounted rate, and some have blackout dates or restrictions. Still, if you time it right, even one or two stays can recoup your annual fee.


    Pro Tip: If you only need the occasional overnight stay, check out apps like iOverlander, FreeRoam, or Campendium for free or low-cost stays—particularly in rural areas or public land. But if you want something with hookups and more reliability, Passport America offers incredible bang for your buck.


    3. Harvest Hosts + Boondockers Welcome – Enjoying Unique Stays

    Who It’s For: Perfect for self-contained RVers who love off-the-beaten-path experiences and enjoy supporting small businesses or connecting with fellow travelers.


    What It Offers:

    • Overnight stays at wineries, breweries, farms, museums, and private homes
    • Over 5,000 unique places to stay overnight
    • Annual fee for access to thousands of host locations
    • No campground fees (though purchases at host locations are encouraged)


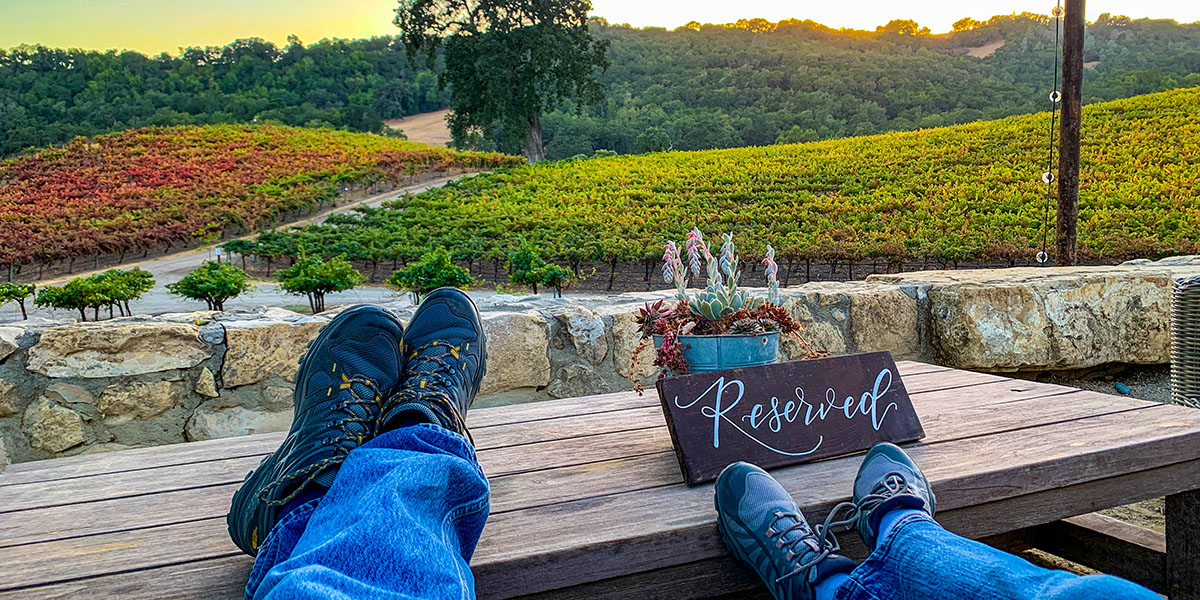
    Our Take: This one’s been a staple in our travel toolkit. As full-time travelers who love boondocking, we appreciate the unique experiences and quieter overnights these memberships offer. We’ve stayed on vineyards, breweries, museums, farms, and more with Harvest Hosts and stay with generous hosts who’ve shared everything from travel tips to a helping hand with Boondockers Welcome.

    Yes, you typically need to be self-contained, and with Harvest Hosts you’re encouraged to make a purchase from the business (which we’re happy to do), but the trade-off is often a peaceful, scenic stay that’s far more memorable than a parking lot or crowded RV park.


    Pro Tip: If you’re only interested in the Boondockers Welcome side, it’s available as a standalone membership at a lower price point. Alternatively, some wineries and farms allow overnight parking through other programs for free—though they may be harder to find without a central platform.


    4. Escapees RV Club – Making RV Logistics Easy

    Who It’s For: Best for full-timers or long-haul travelers who want support with logistics like mail forwarding, domicile planning, or who enjoy learning from and connecting with a deeper RVing community. (Especially if you are a family with children looking to make friends with other kids in the same lifestyle.)


    What It Offers:

    • Discounted campgrounds in the Escapees network
    • Extensive education and community support
    • Mail forwarding, domicile assistance, and legal resources for full-timers
    • Escapees/Xscapers community events


    Our Take: We used Escapees primarily for their mail service in the beginning, which is helpful without a home base. Their educational webinars and online resources are also great if you’re new to RVing or looking for guidance on everything from domicile setup to boondocking skills.


    Pro Tip: If you’re mostly interested in the mail service, you could compare with other RV-specific mail providers or look into USPS General Delivery. Since we’ve been RVing for so long, know the ins and outs, and we have so many wonderful friends in the RV community already, this is membership only appealed to us for the mail forwarding. So we went with a company that specializes in that called iPostal1. That said, few RV memberships offer the level of service and long-standing reliability that Escapees has built over decades.


    5. Thousand Trails – Kissing Nightly Fees Goodbye

    Who It’s For: Great for full-time or seasonal travelers who want access to multiple campgrounds in a specific region or nationwide, especially if they alternate between boondocking and paid stays.


    What It Offers:

    • Prepaid camping in specific regions
    • No nightly fees (after initial membership and annual dues)
    • Optional upgrades for more nationwide access


    Our Take: Right now, we have the annual regional pass for Thousand Trails because it made the most financial sense for our current route. Even though we mostly boondock these days, having access to a network of campgrounds makes it easy to stop, reset, and recharge (literally and figuratively) between dry camping stretches. We’ve used it to dump tanks, catch up on laundry, and have a homebase in different areas.

    Some campgrounds are better than others (read reviews), but when you calculate the savings over time, it can be a smart move—especially if you’re in an area with several participating parks.


    Pro Tip: If you’re on the fence, try a zone pass first — it’s more affordable and lets you test the system. And for those who rarely use paid campgrounds, pairing free sites from apps like Campendium with the occasional state park might offer more flexibility without the upfront cost.


    6. Family Motor Coach Association (FMCA) – Equipping Motorhome Owners

    Who It’s For: Ideal for motorhome owners (especially Class As, Class Bs, or Class Cs) who want access to premium travel services, tire programs, and advanced RV support.


    What It Offers:

    • Tire discounts, mail service, tech resources
    • Travel assistance
    • Community rallies and events
    • FMCAssist emergency travel program


    Our Take: While we haven’t personally used FMCA ourselves yet, we’ve heard positive things from other RVers — especially those who travel in Class A and C motorhomes. The tire discounts alone can save hundreds, and the mobile tech resources are great for digital nomads and remote workers.


    Pro Tip: If you’re mainly eyeing FMCA for internet resources, you may be able to find comparable info in online forums or Facebook groups—though without the same level of tech support. Similarly, roadside assistance is available à la carte from providers like Coach-Net or AAA, depending on your rig and travel style.


    Honorable Mentions

    • KOA Value Kard Rewards. Great if you frequently stay at KOA campgrounds.
    • AAA or CAA. Offers limited but useful RV support and hotel discounts during hybrid trips.
    • RVillage (Community App). Not a traditional membership, but a great way to connect with other RVers and learn about meetups and campgrounds through social sharing.


    Do You Really Need Any RV Memberships?

    The answer to this question really depends on you. If you’re RVing just a few weekends a year, some of the higher-priced RV memberships may not be worth it. But if you’re on the road even a few weeks at a time, a good membership can save you more than it costs — and open the door to experiences that typical campgrounds just can’t match.

    Over the years, we’ve learned to take a “less is more” approach. We started out signing up for every club and discount we could find. Now we stick to the few that really work with how we travel. That’s the key — matching the membership to your style.

    We always recommend starting with one or two and seeing how often you actually use them. It’s easier than trying to track ten different logins and cards, only to realize you’ve forgotten half of them when you pull into the campground.

    So, from winery overnights to roadside tire savings, the right RV membership can do more than just cut costs. It can actually enhance your journey. They’re not one-size-fits-all. But when you find the ones that fit, they become indispensable tools in your travel kit. Overall, they help you get where you’re going cheaper, smoother, and with a few unexpected adventures along the way.

  • RV Dogs Need These 5 Things from Their Owners

    RV Dogs Need These 5 Things from Their Owners

    We RVers love our dogs. And here’s one reason why. A dog doesn’t ask where we’re going, or when we’ll be there. Instead, he’s just happy to come along for the ride. He’s happy, whether he sleeps on the back seat or rides shotgun. He takes in each passing mile with never-ending hope and enthusiasm. Because of our RV dogs, we tend to stop along the way for leg-stretching explorations of cool rest areas and parks. And when we get where we’re going, dogs get us out walking where they take on the important job of campsite security. In that role, they readily alert us to the presence of strangers or wild animals.

    But make not mistake: RV dogs have specific needs. And they are at their very best as traveling companions when those needs are met. 

    Unlike humans, dogs can’t simply tell you what they need in words. Instead, dogs let you know they need something with excessive barking when you go out. Or by acting hyper … or by destroying the sofa … or by urinating on the carpet. (Your dog may wish to add his own special behavior to this list too.) That being said, the biggest single factor in eliminating almost any behavior you don’t want is meeting a basic need. Quite simply, tf you just try to stop unwanted behavior, you’ll be barking up the wrong tree. 

    So, let’s take a look at the top five things RV dogs need from us to be their best.


    No. 1 : Your Patience and Understanding


    Patience and understanding are the primary keys to having a dog who’s ready to take on the road — or go anywhere else. Without a doubt, the dogs we travel and camp with can be some of the most loyal friends we’ll ever have. After hanging out with us for the better part of their lives, dogs can get really good at using their behavior to get things they want (and to avoid things they don’t want). However, it’s important to remember that no matter how clearly your dog communicates or how well he listens, he can only do so as a member of a foreign species.  

    Every dog is born perfectly equipped to be a dog.  What makes dogs so special is that they’ll try really hard to adapt to living with us humans. When we make it easy for them to learn, dogs learn to live with humans  better than any other species.  

    When you think about it, your dog is learning about living with humans the same way anybody would learn to live in an unfamiliar culture. They’re constantly looking for clear cues as to how to best get along. Not only that, but dogs greatly appreciate it if we show them what they need to do. (And then, of course, reward them lavishly for doing it.) If your dog isn’t doing what you want, it’s important to step back and ask yourself what you can do to make it easier for the dog to identify what he needs to do. Do you need to break it into smaller steps? Would fewer distractions help? 


    No. 2: A Predictable Routine


    From a dog’s point of view, RV travel means adjusting to a lot of new environments. This can be hard on dogs if they don’t have a regular routine they can always count on. Having a routine doesn’t mean that everything has to be done at a specific time. But having the same things happen in the same order at roughly the same time can go a long way to creating the predictable routine your dog needs.

    For example, being able to expect that every morning walk is followed by breakfast helps a dog to know he’ll always get fed no matter where he happens to be with you. If he always snoozes on the sofa after breakfast and then you go exploring together, it creates a routine that can help him relax and enjoy the journey wherever you go.


    No. 3: Exercise and Mental Enrichment


    Every RV dog needs both exercise and mental enrichment in order to be at their best. When you think about it, dogs have been bred for thousands of years to work with their humans in some capacity. For example, herding dogs, such as border collies, were bred to help humans move livestock. Gun dogs like Labrador retrievers were bred to find and retrieve birds, and terriers were bred for the purpose of hunting rodents. Each of these jobs provides both exercise and enrichment for the dogs bred to do them. Of course, these days, the reason many people have a dog is for companionship. Sometimes this can mean a pretty boring life for the dog. The result is sometimes a dog that entertains himself by barking at everyone who passes the RV. (Or dissecting  the sofa.)

    That being said, just because your dog’s biggest job is being your loyal companion doesn’t eliminate his genetically imposed need to chase or hunt in some capacity. Of course, that doesn’t mean you need a herd of sheep or a desire to shoot birds to meet his needs for mental enrichment and exercise. If your dog barks excessively, reacts to other dogs, or just acts just plain squirrelly, there’s a good chance he needs more exercise and mental enrichment activities.

    Here are some ideas for activities that can meet both of those needs for any RV dog:


    Great Activities for RV Dogs

    • Leash walks with opportunities to sniff
    • Running free at an off-leash dog parks (SniffSpot lists private dog parks throughout North America that you can rent by the hour. For dogs that are social butterflies with other dogs, the DogPack app is perfect. It has has a similar list of public, fenced off-leash dog parks that anyone can use.)
    • Playing with their humans (games like fetch)
    • Hoop jumps and other trick training
    • Enjoying standard toys, chews, and puzzle toys


    No. 4: A Comfy, Cozy Place to Nap 


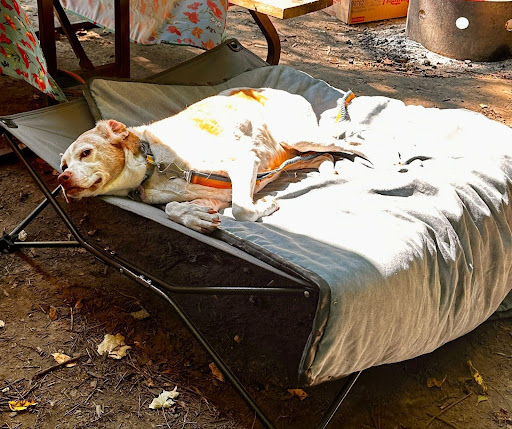
    Dogs love to relax and chill on cushioned surfaces where they have a good view of their surroundings.  This is probably why almost any dog will happily occupy any empty space on a sofa. If sharing your sofa with your four-legged best friend bothers you, all you need to do is raise his undoubtedly cushy bed off the floor.  There are a number of folding dog cots that make perfect platforms for a dog bed.

    Here are a couple that my dogs and I love.


    Coolaroo On The Go Pet Bed

    This fold-up dog bed can be used on itself, or topped with a soft, cushy bed. Either way, it’s handy because it  folds up easily when it’s time to pack up. This dog bed comes in eight colors, and sizes from small for small dogs to king-size for pony-size dogs.


    Ruffwear Mount Bachelor Pad

    This low-profile, portable camping dog bed has a dirt and moisture repellent base. It rolls out into an easy resting place, and it works equally well protecting the RV sofa from dog hair and dirt as it does as a topper for a Coolaroo dog bed. One of the great features of the Mount Bachelor pad is that it’s machine-washable and dries quickly by hanging. When it’s time to go, it’s easy to roll up for easy portability wherever the road takes you. By the way, the Mount Bachelor pad is perfect for lounging at a dog-friendly patio.  


    No. 5: More Potty Breaks


    It’s good to accept a simple fact the moment you bring a pet home: Accidents can happen. However, you should also know this. Accidents can especially happen when the dog doesn’t get predictable potty breaks while we’re traveling or camping.

    So, here are some ways you can provide your dog with the potty breaks he needs to avoid having accidents in the RV.

    • Plan trips that include time to stop for potty breaks along the way.
    • Start and end each day with potty time.
    • Have a predictable routine.
    • Take your dog out to potty before you leave him in the RV to do things that aren’t dog-friendly.
    • Small dogs might appreciate a litter box or puppy pad in the RV for emergency use when you aren’t home.


    Throwing RV Dogs a Bone

    These five needs for RV dogs are really basic, but they are so essential. (And, sadly, often neglected.) Simple as they are, they are also the key to having a canine copilot who’s a fantastic traveling companion, opening up a world of RV adventures that you’ll both love. With a little preparation, you and your dog will be ready to go fetch some great memories together.

  • Hiking with Dogs: A Pet Etiquette Guide for the Trail

    Hiking with Dogs: A Pet Etiquette Guide for the Trail

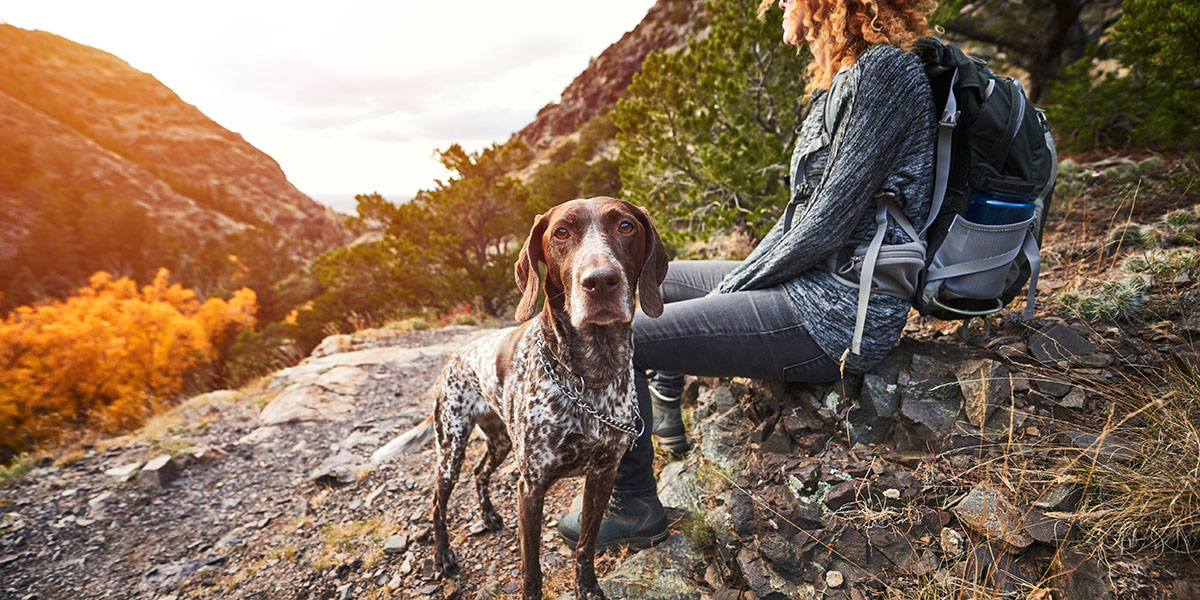
    Sharing adventures and memories with your family, even the four-legged variety, is the best. Personally, some of our favorite memories on the road have involved hikes with our pups, Wilson and Journey. We’ve watched random sunsets at canyon overlooks. We’ve sat under forest canopies after steep climbs. Hiking with dogs adds a whole new level of joy (and sometimes chaos) to the experience. But it also comes with responsibility — especially when it comes to trail etiquette.

    As RVers and full-time travelers, we’ve taken our dogs on hikes in dozens of states, through national forests, desert landscapes, alpine meadows, and even city trails. And along the way, we’ve learned that hiking with dogs isn’t just about bringing water and leashes. It’s also about respecting the land, other hikers, and our pets’ limits.

    So, whether you’re new to hiking with dogs or just looking for a quick refresher, here’s our go-to guide for hitting the trail with your four-legged kiddos — while keeping things respectful, safe, and fun for everyone.


    Rule 1. Know before you go.

    First things first — not all trails are pet-friendly. Also, even dog-friendly parks and trails usually specific rules in place for a reason.

    Before heading out:

    • Check trail regulations. Many national parks don’t allow dogs on hiking trails, while others are more relaxed. (National forests and BLM land tend to be more pet-friendly.) Always verify online or with a ranger station prior to arriving at the park.
    • Know the leash laws. Many trails require dogs to be on a leash no longer than six feet. Others allow off-leash with voice control. But unless your dog has near-perfect recall, we recommend sticking to the leash.
    • Look up trail difficulty and terrain. Steep drop-offs, rocky scrambles, or hot desert stretches might be unsafe or uncomfortable for your pet.

    Pro Tip: Apps like AllTrails and Paw Parks often note if a trail is dog-friendly and what the terrain is like. We also use Instagram to preview what we’re getting into.


    Rule 2. Leash up and bring proper gear.

    Even if your dog is well-behaved off-leash, there’s a good chance you’ll encounter others who aren’t comfortable around dogs — or wildlife that could provoke a chase. That’s why we always have our pups on leash, assess the situation, and keep the leash handy if we ever let our dogs off in approved areas.

    Some of our must-have hiking gear for pups:

    • A strong leash and harness. We prefer harnesses that don’t restrict shoulder movement. Journey’s got power, and Wilson … well, he’s more of a vibe walker who wants to mark everything.
    • Collapsible water bowl and extra water. Don’t rely on creeks or puddles, especially during dry seasons. Bring those pups
    • Pet-safe hiking shoes. Sure, this is optional and specifically for rough, hot, or icy trails. Our pups don’t like doggy boots, so they don’t make it on some hikes that other dogs do. But they are great if you are going into hikes that will be rough on their paws.
    • Doggy pack. This is for longer hikes. If your pup is fit and trained, they can carry their own water or waste bags.
    • ID tags and GPS tracker. Just in case. Better to have it and not need it than to need it and not have it.
    • Muzzle for reactive dogs. Journey is great with people but very reactive to other dogs. So, we try not to take her on hikes we know will likely have high pet traffic. But when she does come with us, we always have a pet-friendly muzzle that doesn’t bother her, as it adds a layer of safety for all parties.


    Rule 3. Pack in, pack out — especially you know what.

    This one’s simple: Pick up after your dog. Always. Leaving dog poop on the trail is one of the biggest etiquette violations we see out there — and it can have serious environmental impacts.

    Even in the backcountry or on wilderness trails, pet waste can alter soil chemistry and affect wildlife behavior. It’s not “natural” just because it came from an animal, because your pet isn’t from the area.

    So, what do we do?

    • Carry extra bags. Bring more than you think you’ll need.
    • Double-bag and stash it. Take an odor-proof pouch to store it until you get to a trash can.

    No, it’s not glamorous — but neither is stepping in it.


    Rule 4. Be aware of other hikers.

    Not everyone loves dogs, and not every dog loves everyone. When hiking with pets, you’re not just responsible for your dog’s safety — you’re responsible for others’ comfort and experience too.

    Here’s what we always try to practice:

    • Yield right-of-way. Step off the trail and let others pass, especially on narrow or steep paths.
    • Leash up when you see others. Especially families with kids, other dogs, or hikers with gear.
    • Don’t assume off-leash is OK. Just because others are doing it (and trust me, they will) doesn’t mean you should.

    One of our biggest pet peeves (pun intended) is seeing pets off leash in areas that are designated leash areas. This is a safety rule for a reason. 


    Rule 5. Respect wildlife and the trail.

    We’re all out there to enjoy the outdoors — and that includes the animals who actually live there. Dogs are natural chasers, barkers, and scent explorers, but it’s our job to keep them from harassing wildlife or damaging sensitive habitats.

    What we do:

    • Keep dogs on trail. This avoids trampling native plants or disturbing nests.
    • Avoid hiking at dawn or dusk. This is especially important on areas with heavy wildlife activity. (Also, always check for bear warnings or other wildlife notices.) These times are usually the most active time for local wildlife.

    Also, remember that wildlife smells linger. Even if your dog doesn’t see the animal, they’re reacting to scent, which can make them pull or bolt unexpectedly. 


    Rule 6. Know your dog’s limits.

    Not every dog is built for every trail. Wilson, our chill Cairn Terrier, loves moderate walks and shaded trails but isn’t trying to summit anything too intense. Journey, our high-energy Staffy mix, will keep going until we make her stop — but even she’s had her limit on hot or exposed hikes.

    Things to consider:

    • Watch for overheating. Panting, drooling, or stopping frequently are signs your dog needs a break.
    • Paw protection. Hot pavement or jagged rocks can cause injury. Touch the ground with your hand. If it’s too hot for you, it’s too hot for them.
    • Hydration and breaks. Stop often, even if your dog isn’t asking for it.

    Some of the hardest hikes we’ve done were in the sand dunes — beautiful, but exhausting, and tough on everyone’s legs and paws. That soft-sinking surface is basically like walking uphill forever. Know when to call it.


    Rule 7. Leave no trace — together.

    As RVers and hikers, we live by the Leave No Trace principles. When hiking with pets, this extends beyond the poop bags and water bowls. It’s about sharing the space responsibly.

    Here’s how we apply it with our dogs:

    • Stay on designated trails.
    • Minimize bark noise, especially in serene areas.
    • Keep dogs from digging, chasing, or damaging the natural area.

    When in doubt, we ask ourselves: If everyone did what we’re doing right now, would this trail still feel the same a year from now?


    Remember: Hiking with Dogs Is a Privilege

    We truly believe that hiking with dogs is one of the best ways to experience the outdoors. Watching our pups light up when they’re on the trail, splashing through streams, or sniffing around a quiet forest boondocking spot reminds us why we live this lifestyle. But it’s also a reminder: Not everyone can or wants to hike with dogs, and we all share the trail.

    Trail etiquette isn’t about rules for the sake of rules. It’s about preserving the spaces we love so we (and our dogs) can enjoy them again and again.

    So, pack that leash, grab the water bowls, and hit the trail the right way. Because when we all do our part, hiking with pets becomes more than just a walk in the woods — it becomes a shared adventure that makes every mile a memory worth wagging about.

  • RV vs. Air Travel: Which is the Better Family Getaway in 2025?

    RV vs. Air Travel: Which is the Better Family Getaway in 2025?

    Family vacations are meant to be fun, not financially stressful. (Right?) So, in 2025, more travelers are asking the same question: Is it cheaper to RV, or fly and stay in a hotel? The RV vs. air travel debate is not entirely new, but numbers change year to year.

    So, which trip is the better value this year?

    Well, we crunched the numbers from trusted sources to compare a seven-day RV road trip with a traditional airplane-plus-hotel vacation for a family of four. The results in the RV vs. air travel contest? RVs are rolling ahead in the value department. 

    Let’s look at how it breaks down.


    RV Vacation: Freedom on Four Wheels

    A family RV adventure offers more than just scenic views — it delivers big savings too. Here’s a breakdown of the major costs.

    Expense Estimated Cost Notes
    RV Rental $1,400 – $2,100 Based on $200 – $300/day for Class B/C Rentals 
    Campground Fees $210 – $350 $30 – $50/night for private sites (Harvest Host)
    Fuel $300 – $600 Based on 10 mpg over 1,000 miles (GetRoadTrip)
    Groceries/Meals $300 – $500 Cooking from the RV saves on dining
    Attractions $200 – $400 Think national parks, museums, outdoor activities
    Insurance & Fees $150 – $300 Rental add-ons, cleaning, mileage caps
    Misc. Supplies $50 – $100 Linens, propane, kitchen items

    Total: $2,610 – $4,350


    Key Perks

    • Cook your own meals
    • Camp under the stars
    • Flexible itineraries and fewer crowds
    • Extra quality time en route


    Air + Hotel Vacation: Familiar but Costly

    Flying gets you there fast, but those speed perks come with a price. Here’s the seven-day estimate.

    Expense Estimated Cost Notes
    Airfare $1,200 – $2,000 $300 – $500 per person (Bankrate)
    Hotel $1,400 – $2,100 ~$200 – $300/night for suite or two rooms (Budget Your Trip)
    Rental Car/Transport $300 – $600 Average daily rate ~$86 (Zubie)
    Meals Out $700 – $1,000 ~$25–$35/person/day (Pacaso)
    Attractions $300 – $600 Parks, tours, museums
    Luggage/Resort Fees $100 – $200 Hidden charges add up

    Total: $4,000 – $6,500


    Watch for:

    • Baggage fees
    • Resort surcharges
    • Lack of kitchen = $$$ on food
    • Time loss at airports and security


    The Verdict: RVing Saves Big

    Trip Style Total Cost Why It Works
    RV Trip $2,610 – $4,350 Lower cost, more flexibility, scenic detours
    Air + Hotel $4,000 – $6,500 Convenience, city-based entertainment

    A family RV vacation can cost 30–40% less than a traditional trip while offering more outdoor adventure, bonding time, and budget control. If you love the idea of waking up next to a lake, roasting marshmallows under the stars, and skipping TSA lines — RVing might just be the upgrade your next vacation needs.

  • Spring Science Adventures for Kids: Roadschooling 101

    Spring Science Adventures for Kids: Roadschooling 101

    Spring unfolds a lush tapestry of sensational delight. Birds are performing their seasonal choir. Woodpeckers are hammering away at green budding trees. It’s time to open the doors and let the kids shake out their cabin fever under the sun. This is a prime opportunity to investigate the natural world. The unfurling season reveals tiny wonders that inspire big questions. For roadschooling parents, it’s a chance to let your children pave their way to science through inquisitive exploration.

    Curiosity is all you need, and kids have more than enough to share in case yours is running thin. Here’s how to make the most of the science of spring when roadschooling your kids.


    Roadschooling Basics

    If you’re reading this article, you are probably about to embark on a roadschooling journey. First, let me congratulate you. Before you start, know that you are giving your children something that is worth more than the stars: time with you. 

    The sacrifices we make to teach our children outside conventional education often go unnoticed. But the journey is one that will pay your family back many times over. In fact, just RVing with your kids is already teaching them a lot.

    So, before you put any ideas of success on a certain curriculum, just remember that you and your kids have already won the prize. Now, it’s just a matter of choosing your path.  


    Make Curiosity the Curriculum

    Let’s be real. It can be so difficult to get our kids to engage in a preplanned activity. And  unfortunately, all curriculums are full of preplanned activities. Meanwhile, your kids will run outside and make their own little games for hours and hours utilizing the very tools we want them to learn about. How do we channel that boundless energy into a productive activity? Curiosity is the key to endless motivation. Kids are overflowing with it, and it’s a great stimulus for learning.

    Spring is full of things to be curious about. Little mushrooms are popping up, bugs are buzzing around, and the birds are filling the air with sweet chatter. Each one of these tiny miracles can be a lesson in science. They may not be interested in learning how to make a barometer today, or memorizing the periodic table of elements tomorrow. But I bet they will find something outside this spring to catch their interest. Whatever calls to them, you can probably transfer it into a science activity. 


    The Natural Science of Roadschooling

    Science can be an intimidating word for some. All those experiments, equations, charts and tables. (Honestly, they leave me questioning my own authority to teach something so complex.) Even so, I eventually realized that historically, scientists had a lot in common with my own wanderlust. They explored the great outdoors, collected samples, and studied nature. Many fields of science were fueled by curiosity and an appreciation for natural beauty.

    By fostering my children’s sense of curiosity in the natural world, I am teaching them independence paired with the ambition to follow their own interests. And what better way to capitalize on your nomadic disposition, than by taking science lessons outside? Each new destination is another lesson in ecology, geography, geology and more! 

    For natural science, spring is simply crawling with science lessons almost anywhere you park. These three are some of the easiest to find.


    Bugs

    If you have a bug book, and a pair of fearless hands, you can study all manner of insects and their habitats. This could be a lesson in entomology, or even ecology, depending on where you decide to take it. 


    Mushrooms

    Don’t even get me started on mushrooms! We spent an entire season going on mushroom hikes in the Appalachian mountains. The more we looked, the more we found — and the more it made us want to look again. There is an entire weird and wonderful world of mushrooms waiting to be discovered.

    For mushroom hunting, bring along my favorite field guide: How to Forage For Mushrooms Without Dying. And for some aesthetic inspiration, this book is like walking into a naturalist exhibit: Fungarium, Welcome to the Museum


    Birds

    Birds can teach us so much. They force us to slow down, stop talking, and wait. This is not something that comes naturally to the more recent generations of our kind. I believe it’s important to expose young children to quiet moments in nature. When observing birds, the reward is fleeting, but worth the wait.

    I like to combine the natural science of bird watching with a lesson in artistic rendering. Books like Audubon’s Animals, or other naturalist illustrative field guides, are a great way to introduce your kids to drawing what they observe. Field guides like these are always hanging around used books stores, libraries, and online. 


    Jump Into the Junior Ranger Program 

    If you are roadschooling, then the National Parks Junior Ranger Program should be on your radar. On my first RV trip, I traveled across the country with my husband and two small children. I lacked confidence and experience in the roadschooling/homeschooling arena. It was too overwhelming. I couldn’t take the first step in any direction. In the midst of my despair the Junior Ranger Program helped me back to my feet.

    These little workbooks led us across the entire country through site specific lessons in history and science. It was the perfect guide to the American landscape. Through various science activities we learned about local plants and animals and their habitat. Geology and archaeology are just a stone’s throw away from most parks in the western US.

    Just pop into the visitors center at any national or state park, or national monument. Ask for a junior ranger packet, and don’t forget to get sworn in when the activities are complete! My kids always hold their heads a little higher after they’ve been sworn in as Junior Rangers. 


    Make Roadschooling a Science Adventure

    Granted, these science lessons aren’t burning down any placement tests, or prepping them for the SATs. But, these simple activities are teaching them to be stewards of the great outdoors. By fostering a deep connection with nature through curiosity and a sense of play, they are making friends with the natural world. I can’t imagine a better lesson in life than that.