Category: Living

  • RVing the Great White North: Winter Camping in Canada

    RVing the Great White North: Winter Camping in Canada

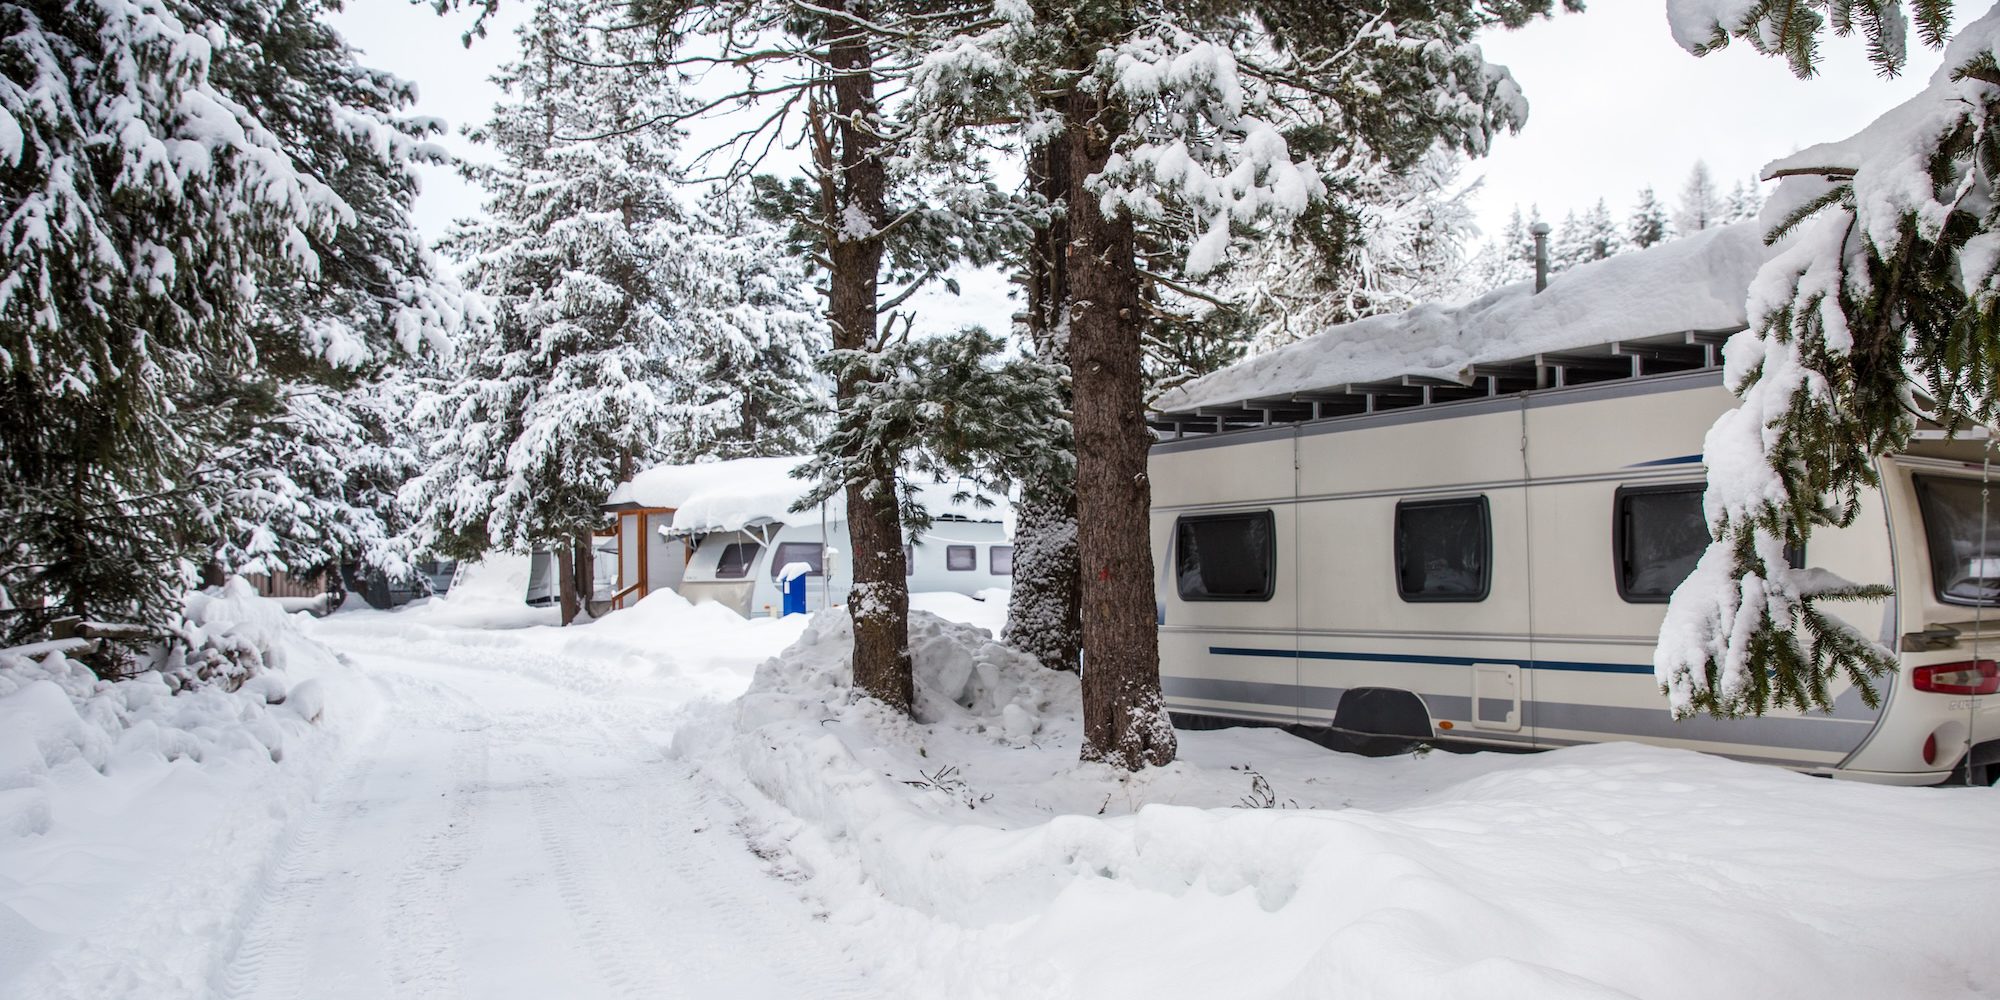
    Canada is known as “the Great White North” for a good reason. Much of this beautiful country is covered under a blanket of snow from November to May. Winter camping in Canada demands a level of preparedness and sense of adventure that RVers won’t need any other time of year.  That’s because although preparation makes RV living better any time of year, a Canadian winter can kill you if you aren’t properly prepared. 


    The Two Big Mistakes People Make 

    Mistake No. 1 – Not Driving Away from Bad Conditions

    The first mistake people make is staying in Canada where winter weather often features  blizzards and temperatures get as cold as 40 degrees below zero. (Especially when there are warmer destinations in the south.) When you think about it, one of the best things about an RV is that it has wheels. That means you can drive it or tow it  to warm places like Florida, Texas, California or Arizona, where you can avoid winter altogether. This, of course, is know as snowbirding.    


    Mistake No. 2 – Assuming It’s Just Too Cold to RV

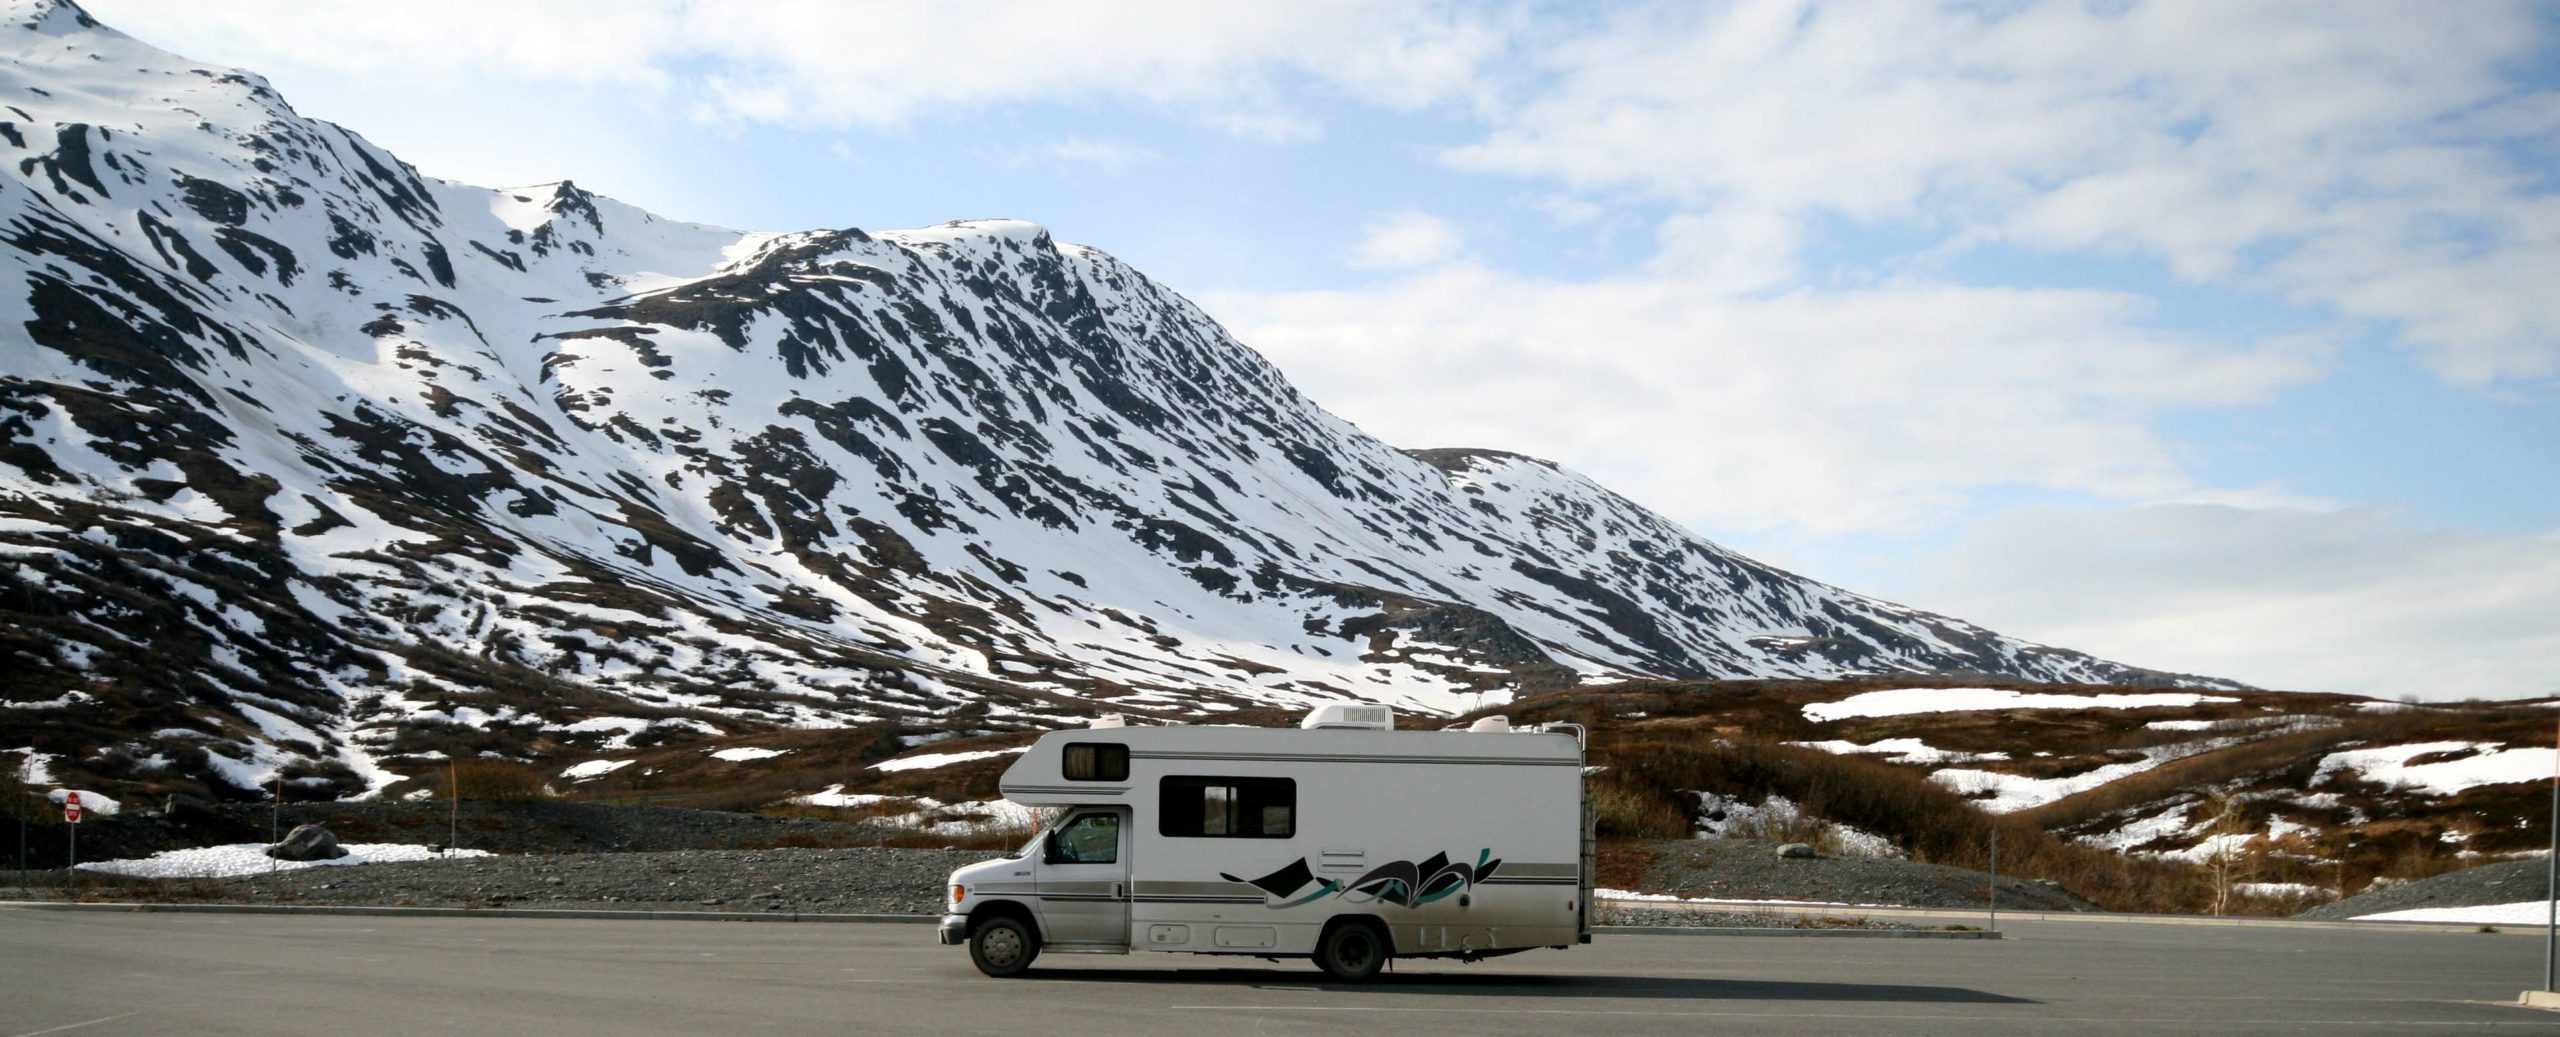
    Alternatively, the second mistake when RVing in Canada is thinking that you can’t RV in Canada in winter because it’s too cold. The truth is frigid winter temperatures aren’t the norm on Canada’s southwest coast. This area is renowned for its mild, rainy winter climate. Not only that, but the further west you go, the milder the climate is. For example, in Victoria, British Columbia, the average winter temperature hovers around 9 degrees Celsius in the winter months. (That’s 48 degrees Fahrenheit my American friends.) That’s as warm as Canada get in winter.

    As a matter of fact, Vancouver Island (as far west as you can go in Canada) offers a mild climate that has made it a popular destination for Canadian snowbirds. But warmer winter temperatures aren’t all that Vancouver Island offers. Snowbirds love this 285 mile long island for its lush rainforests, incredible wildlife viewing, and pristine sandy beaches.  

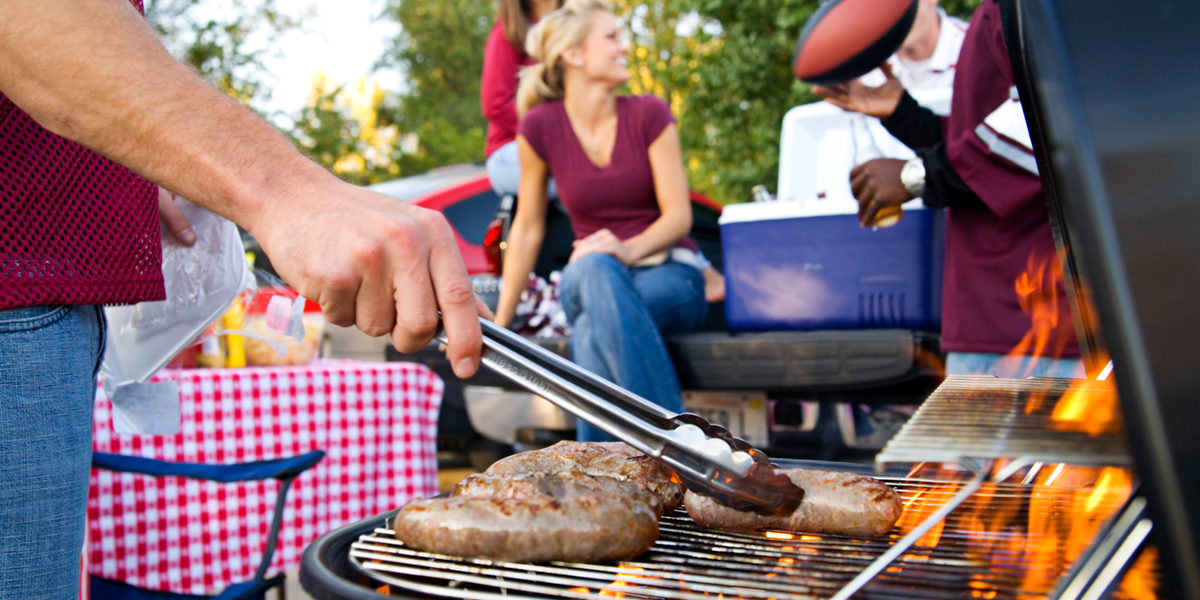
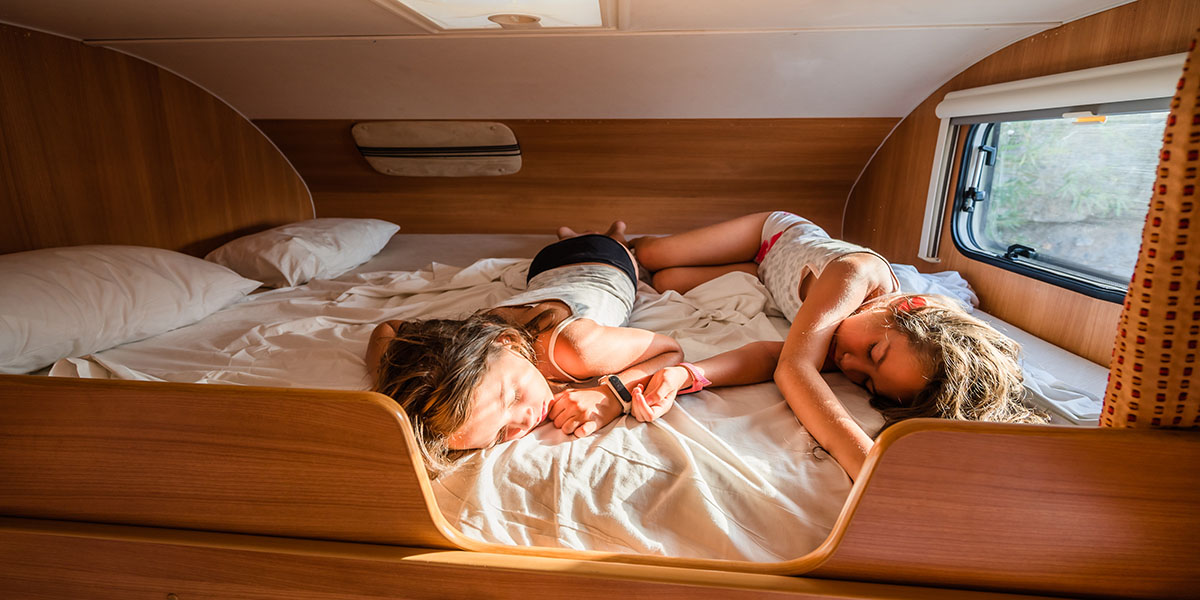
    However, there are still lots of reasons why people choose to RV in the Great White North in winter. Many Canadian snowbirds, who normally head south for winter, may delay their annual migration south until the Canadian dollar increases in value. But with that being said, many skiers, snowboarders, and other  winter sport enthusiasts, find having a cozy “chalet on wheels” very practical. And then there’s the diehard camping fanatics, who enthusiastically brave the elements, to enjoy the peaceful and bug-free atmosphere of winter camping in Canada. Other RVers use their RVs as affordable accommodation at remote job sites. Or as a portable guest cottage. Or as a full-time home on wheels.

    With the right RV, the right equipment,and a lot of preparation, RV camping can be an easy, affordable and fun winter activity, wherever you happen to be in Canada. 

    So, are you ready to discover everything you need to know about winter camping in Canada? Let’s dig in!


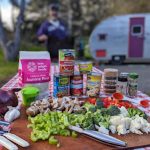
    What to Pack for RV Camping in Winter

    If you’re going winter camping in Canada, there are some items that are essential to have for both comfort and survival. This list includes basic items you need to have, but you’ll want to add to it according to your own specific needs.


    Cold-Weather Clothing 

    Dressing in layers is the most important part of staying warm when it’s cold out. You’ll need a base layer, a mid layer, and an outer layer. Each clothing layer will help trap and retain body heat to keep you warm and toasty. Merino wool is the best choice for your base layer, and every layer on top of that should be wool or synthetic. Your outer layer can be a puffy down or synthetic jacket. 

    For most of Canada, you’ll need to have a hood that has adjustable cords. Moisture absorbing materials should always be avoided since moisture keeps you cool. That means don’t pack cotton clothing (like T-Shirts and jeans) because cotton absorbs moisture instead of wicking it away.  Here’s what each camper in your party will need.  

    • Underwear
    • Moisture wicking Merino socks
    • Moisture wicking Merino long underwear
    • Synthetic fleece or wool clothing for mid layers
    • A puffy, waterproof jacket to retain body heat and protect against external moisture
    • Waterproof snow pants.
    • Knit hat (known as a toque in Canadian)
    • Gloves 
    • Scarf to keep your throat warm.
    • Insulated winter boots 


    Essential Winter Gear

    Here are our recommendations for essential gear you’ll want to have with you when you camp in winter.  This is by no means an exhaustive list, but it has all the essentials specifically geared for winter camping. 

    • Propane
    • Space heater
    • Heated water hose 
    • Heat tape and insulation
    • Tank heater for each holding tank
    • RV skirting
    • Reflectix insulation for windows
    • Dehumidifier
    • Fire extinguisher
    • Smoke and CO detectors
    • First aid kit
    • Extra blankets
    • Fleece sheets
    • Electric blanket
    • A hand held hair dryer or heat gun to thaw frozen pipes.
    • Portable fire pit 
    • Fuel for portable fire pit
    • Tire chains for RV or tow vehicle drive axle wheels and trailer


    Choose the Right RV for Winter Camping

    Winter camping in Canada’s winter temperatures is demanding. Unless you’re camping around Victoria, you’ll want to have a four-season RV. Four-season RVs have specific features which help to ensure you stay cozy while enjoying amenities that include running water in the bathroom and kitchen. Many features of an all-weather camper typically include:

    • Better insulation package
    • Tires rated for snow 
    • Ducted heating systems that keep pipes from freezing
    • Insulated basement cabinet doors 
    • Double-paned windows
    • Heating pads for wastewater, fresh water, and sewage tanks
    • Enclosed underbelly
    • Heated flooring


    Stay on the Road with Snow Tires and Tire Chains

    Snow tires or tire chains help provide traction on roads made slippery by snow and ice. If you plan to drive your rig anywhere in Canada in winter, you should have them. The mountainous province of British Columbia requires all vehicles to have snow tires between October 1 and April 30. Also, tire chains are a legal requirement in the province of British Columbia for vehicles over 16,000 pounds during those same months.  


    Prevent Water from Freezing in Your RV

    Some RVers who camp in colder temperatures winterize their water system and carry bottled water onboard. The question that begs to be asked is: “Where’s the fun in that?” After all, the reason most of us have an RV is to have all the comforts of home with us. The truth is, there are things you can do to keep water flowing in your RV, even when it’s cold outside.

    • Wrap city water connection with heated pipe insulation.
    • Connect to city water using a heated water hose.
    • Use RV skirting to keep the temperature under the RV above freezing .
    • Add tank heating pads to exposed holding tanks.
    • Use an RV sewage hose heater to prevent sewage from freezing and forming the dreaded poopsicle.
    • If you’re camping where there’s no city water connection, keep your freshwater tank full so that it’s less likely to freeze.


    Employ RV Skirting

    Your RV will stay a lot warmer in winter if you use some form of RV skirting to block cold air and wind from getting underneath your RV.  There are different ways to do this and it doesn’t have to cost a lot.  RV skirting can be custom made or constructed of insulating boards.  Here are the top ways to skirt an RV.


    Custom Insulated Vinyl RV Skirting (~ $800-$3,000) 

    Insulated vinyl RV skirting is a fantastic option for RVers who park in one spot for several months over winter and then travel in the RV when it’s warm out. That’s because it can be rolled up and stored in basement cabinets when you travel. However, vinyl RV skirting is usually installed using snaps or twist locks that require drilling into the exterior cladding of your RV. 

    The best skirting is custom fitted to your specific RV make, model, and year, but you can also buy a custom made DIY RV skirting kit online to do the installation yourself.  Here are three companies that custom make RV skirting.


    Air Skirts (~$2,000-$3,000)

    Air Skirts are insulating air bags that resemble giant cigar tubes. They are made to fit snugly underneath RVs of varying dimensions. They’re an easy DIY because you simply put them in place and inflate them using an air compressor. Like custom vinyl skirting, Air Skirts can be a fantastic, portable option for those who spend winter in one place and travel in the warmer months.


    DIY RV Skirting (~ $100-$500)

    It’s easy to make your own RV skirting from insulating foam board, plywood, Reflectix bubble insulation, or any combination of these. This DIY upgrade requires little skill, other than measuring and cutting. Some building supply retailers even offer onsite material cutting services, so you don’t need your own saw or blade.   


    Prioritize a Great RV Heating System

    No matter where you RV in the Great White North, you’ll want to have an operational RV heating system. It’s a good idea to service your RV furnace and propane system before winter hits. This means cleaning the furnace itself as well as air ducts and using a manometer to ensure there are no propane leaks. 

    You’ll also want to have lots of propane on hand and a means to keep propane bottles warm enough to keep the propane from freezing. If you RV in Canada, you owe it to yourself to invest in an RV propane bottle blanket that will keep your propane evaporating (and flowing) even in the coldest weather.


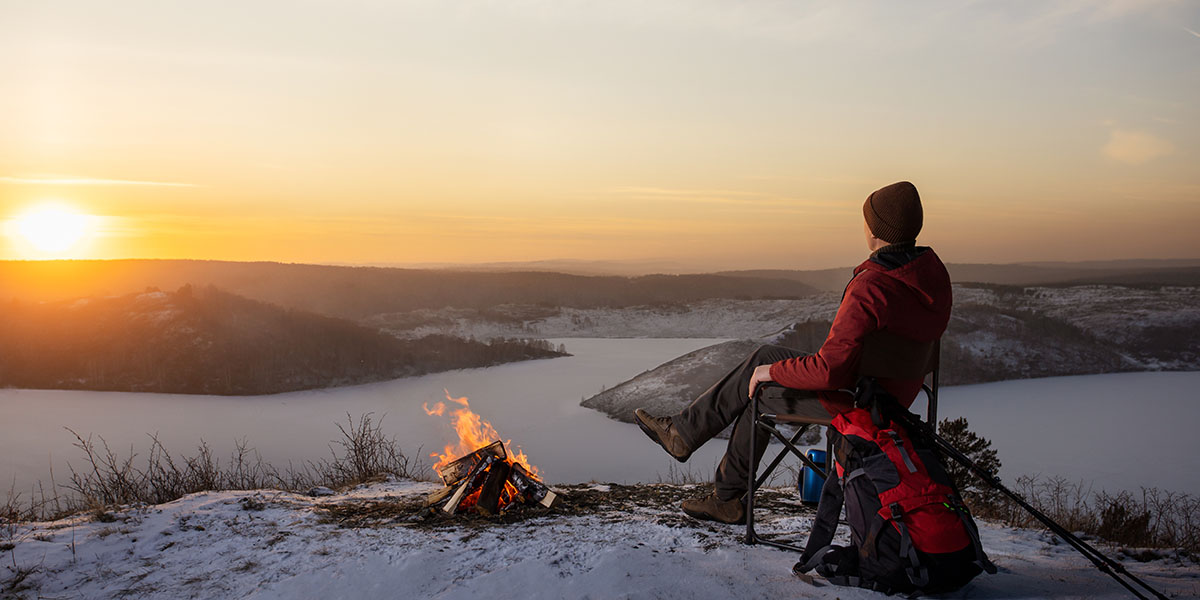
    Why Consider Winter Camping in Canada

    Winter RVing in Canada can be a lot of fun and very rewarding. However, like everything else in life, preparation is key here. When it comes to RVing in cold temperatures, this includes having a four-season RV equipped with snow tires. It’s also important to have the right gear with you, so you can stay comfy and cozy.  

  • Snowbird Comfort Food: 5 Seaside Recipes

    Snowbird Comfort Food: 5 Seaside Recipes

    Traveling in an RV across the regions of America on the interstate can leave a person mystified. Among chain restaurants, there is a distinct lack of diversity of food. Indeed, if you were to drive on Interstate 40 from Wilmington, North Carolina to its western terminus in Barstow, California, there would only be a slight deviation in the food available just off the highway exits. However, if you deviate slightly from your intended route — following the coastline like a good snowbird this winter — you’ll find that the culinary landscape changes dramatically. Suddenly, you have access to locally sourced seafood. Which means that you can fire up some extraordinary seaside recipes — the comfort food of the weary snowbird.

    It’s common knowledge that the best seafood is local. And it’s best consumed where it’s caught, by the seaside. Nothing beats sitting on a rickety picnic table near some boisterous seagulls and diving into a simple but elegantly prepared soft-shell crab sandwich — just outside of the small shack which prepared it only a half mile from the dock it was sold. Pair that with an ice-cold pilsner and some greasy french fries or hush puppies, and you’ll find yourself in the middle of a Jimmy Buffet song! 

    Finding that local seafood dive is part of the fun, but with your own great seaside recipes, you can make this experience happen any time in your RV. (You could even cook the fish you catch.) For us, as a pescetarian and a vegetarian traveling the coastline, we search out places that not only offer great seafood, but also plant-based protein as well.

    These five seaside recipes make both of us happy — and will be great comfort food for any snowbird hugging the coastline


    Impossibly Good Jambalaya

    This low-country favorite, hails from Cajun territory. But it is widely claimed across the Gulf Coast. We jazzed up this basic Jambalaya recipe with some vegetables, beans, additional spices, and plant-based sausage. It’s the perfect base for any type of protein you want – Andouille sausage, blackened tofu, shrimp, chicken, catfish, or plant-based meat. (We really like Impossible spicy Italian sausage for this one!)


    Ingredients

    2 pounds raw peeled shrimp or (4 Impossible sausages*, sliced)
    2 tablespoon olive oil
    1 small red onion, chopped
    1 cup baby bella mushrooms, sliced
    1 red bell pepper (or Green)
    4 garlic cloves, minced
    1/2 cup celery, chopped
    1 cup broccoli, chopped
    1 cup cauliflower, chopped
    1 15-ounce can red beans (or pinto beans), drained
    1 15-ounce can cannellini beans, drained
    1 5-ounce can Hatch green chilies, chopped
    2.5 cups water
    1 teaspoon veggie broth base
    1 15-ounce can tomato sauce, no salt added
    1 15-ounce can fire-roasted diced tomatoes
    1.5 teaspoons Italian seasoning
    1/2 teaspoon fennel seed
    1 teaspoon garlic powder
    1 teaspoon cayenne pepper
    2 teaspoons red pepper flakes
    1 cup long grain white rice


    *We enjoy several plant-based sausage brands, but love Impossible for this dish. One of the major reasons is for its mouth feel. While plant-based, it is not low in fat. The coconut and vegetable oils give this sausage a satisfying burst of juicy richness. It even chars over a grill similar to traditional Andouille sausage.  If you’re looking to cut down on meats, this is one to give a try!


    Instructions

    • Roast sausages, shrimp, or other protein, in a pan or over an open flame. Keep warm, then slice.  
    • In a large Dutch oven over an open fire, heat oil over medium heat. Sauté onion, bell pepper, mushrooms, celery, and garlic, stirring frequently.
    • Add the broccoli and cauliflower to the Dutch oven and sauté until al dente. 
    • Add water, diced tomatoes, tomato sauce, green chilies, and all of the spices.
    • Bring to a boil and add rice. Cover and simmer until rice is tender, stirring frequently so nothing sticks to the bottom.
    • Add beans and protein. Cover and simmer five to seven minutes longer or until well heated, stirring frequently.


    Good Ole Southern Hush Puppies

    No trip to the coast is complete without consuming a basket of these deliciously toothy balls of fried batter. Serve hot enough to burn your fingertips in a heaping basket right in the middle of the table, alongside any number of dipping sauces, or small pats of butter, or just pop them into your mouth whole. The Kitchn recipe gave us our start, but we find that our own recipe is the one we love the best.


    Ingredients

    1 1/2 cups fine- or medium-grind cornmeal
    1/2 cup all-purpose flour
    1 1/2 teaspoons kosher salt
    1 1/2 teaspoons baking powder
    1/2 teaspoon baking soda
    1/2 teaspoon granulated sugar (optional)
    1/2 small yellow onion
    1 large egg
    1 cup buttermilk
    4 cups peanut or vegetable oil, for deep frying
    Salted butter, for serving


    Instructions

    • Prepare a draining plate with several layers of paper towels.
    • Prepare dry ingredients.
    • Prepare wet ingredients and add to the dry.
      Grate onion into the batter, and mix well. Let stand for 15 min. 
    • Add enough peanut oil until you have 1 1/2 inches of oil in the pan, and heat to frying temperature.  
    • With a tablespoon, or small ice-cream scoop. If you want to get fancy, place a golfball-sized lump of batter into the oil. 
    • When golden brown, remove with a slotted spoon or spatula and place on the paper towels to drain excess cooking grease.


    Dutch Oven Maryland Crabcake 

    People will argue about their favorite crab cakes, but I’m a strict East Coaster here and will always go with Maryland. The large lumps of crab seasoned to perfection aren’t overpowered by anything, so their sweet fleshy texture and taste can shine through. Just enough crackers or bread crumbs to hold them altogether and you’ve got yourself a real treat! We made our beginning with a recipe from Chef Dennis, but we’ve made a few changes to suit our tastes.


    Ingredients 

    1 pound fresh jumbo lump crab meat* (vegetarian option below)
    1 large egg
    ¼ cup mayonnaise
    1 teaspoon dijon mustard
    1 teaspoon Worcestershire sauce
    1 teaspoon fresh lemon juice plus more for serving
    1½ teaspoon Old Bay seasoning
    1 teaspoon fresh parsley chopped
    2/3 cup cracker crumbs from around 15 saltines (or panko bread crumbs)


    Instructions

    • Whisk the mayonnaise, egg, mustard, Worcestershire sauce, Old Bay seasoning, and lemon juice in a large bowl.
    • Add the crab meat to the mixture and gently fold it into the sauce just until moistened.
    • Add the cracker crumbs and parsley to the crab meat mixture and continue to gently mix the ingredients until the cracker crumbs have been incorporated into the crab meat mixture.
    • Cover and refrigerate for at least 30 minutes.
    • Divide the crab cake mixture into six portions, again with the ice cream scoop if you’re fancy. Form the crab cakes into round, slightly flattened cakes and place crab cakes on a baking sheet lined with parchment paper.
    • Refrigerate the crab cakes until ready to bake or pan fry.
    • Preheat the Dutch Oven in the fire, with coals on the lid, until it is approximately 400 degrees. (See note at bottom of article for temperature approximations.)  The RV oven is also an option, if your rig has one, or pan fry over medium heat.
    • Place parchment paper into the Dutch oven and return the lid.
    • Bake for 15 to 18 minutes until the crab cakes reach an internal temperature of 165 degrees, using a stick thermometer.
    • Remove from the oven and serve with tartar sauce, spicy aioli, lemon wedges and your favorite sides.


    *Replacing Tofu for Crab Meat

    Many vegetarians love to adapt familiar seaside recipes to accommodate their dietary needs or preferences. And firm tofu is a great stand in. It might be less expensive and satisfy that hometown hankering until you can return to the Chesapeake for the real thing, too.

    • Pat dry a 1 pound block of extra firm tofu with paper towels.
    • Using a box grater on the largest cheese grating side, grate the extra firm tofu.
    • Add the grated tofu into the recipe steps above, substitute veganaise if desired.   
    • You might want to increase the spices slightly to accommodate the tofu.


    Mouth-Watering Crabcake Benedict

    Nothing says “fancy brunch” better than an exceptional bennie. And every Sunday brunch restaurant along the seashore will serve some version of this mouth watering delight. So, why not prepare on of the best seaside recipes at your own campsite? (We adapted this recipe from giant eagle and made it our own.)


    Ingredients

    1 ounce fresh chives
    2 lemons
    1 pound precooked crab meat (or 1 block marinated baked tofu, grated)
    4 English muffins
    10 eggs
    2 sticks of butter
    3/4 teaspoon Old Bay’s seasoning
    1 teaspoon white vinegar (for poaching)


    Instructions

    Prepare the Crab Meat!
    • Slice and chop the chives
    • Juice the lemons
    • Toss the crab meat with half of the lemon juice, a pinch of salt and pepper, and half of the chives. 
    • *Substitute marinated baked tofu for the crab meat: Grate the baked tofu into small pieces, and prepare as you would the crab meat.  


    Whip Up Your Hollandaise Sauce
    • Bring a wide pan with a few inches of water to a rolling boil.
    • Whisk remaining lemon juice, egg yolks, and three tablespoons of water in a metal bowl.
    • Melt butter over medium-high heat. 
    • Place the bowl of the lemon/egg mixture over boiling water and then turn off the heat.
    • Very slowly drizzle the butter into lemon mixture, whisking constantly, then season with 1/2 teaspoon of the old bay seasoning. 
    • Set aside.


    Poach or Coddle the Eggs
    • Turn the pan of water down to a low boil, add 1 teaspoon white vinegar. 
    • Crack the eggs (four at a time) into the pan of water until the whites are cooked, and the yolks are still runny (three to four) minutes, remove with a slotted spoon and let drain on a towel.
    • Alternatively, we find poaching eggs to be a little fussy, so we use small silicon ramekins as the perfect device for getting perfectly shaped and prepared eggs for a benedict, though the cooking time will be longer between six to eight minutes depending on your preferred yolk style.


    Master the Final Assembly
    • Toast the English muffins while cooking the eggs. 
    • Butter the muffins while hot.
    • Top each muffin with a scoop of the crab or tofu mixture
    • Top with one of the finished eggs.
    • Drizzle Hollandaise sauce over the top.
    • Sprinkle with the remaining chives and .
    • Salt and pepper to taste. 


    Serve this delightful dish with a fresh green or fruit salad.  Pair with a mimosa or bloody mary cocktails.  


    Jack Fish — or Jackfruit — Tacos

    Along the warm waters of the Gulf and East Coast, jack fish are a common sport fish. Light in texture and mildly flavored, these make the perfect taco fish. (One of those ideal seaside recipes for snowbirds!)

    Jackfruit is a tropical fruit that when ripe looks like a cross between a watermelon and a hand-grenade. When mature, it has an incredible sweet taste that inspired Juicy Fruit gum. (A great gum, but not the ideal for … you know … seaside recipes.) While still green and unripe, Jackfruit produces a texture akin to shredded pork and a taste that is ready to absorb whatever you season it with, just like tofu. Jackfruit has become a popular meat substitute for vegetarians and vegans alike and several companies sell prepared shredded jackfruit in the produce section of your grocery store. We prefer unprepared jackfruit in a can from Trader Joe’s. 


    Ingredients

    1 medium red onion, chopped
    1 small container of cremini or “baby bella” mushrooms, sliced
    3 or 4 fillets of Jack Fish, or 2 14-ounce cans of Jackfruit
    1/2 cup of Stubbs spicy barbeque sauce (or your favorite)
    1/2 small purple cabbage
    2 ounces spicy ranch dressing
    Sharp cheddar cheese
    Corn tortillas


    Instructions

    • Dice red onion and set aside.
    • Slice mushrooms and set aside.
    • Shred purple cabbage and set aside.
    • Shred enough cheese for six to eight tacos.


    Prepare the Jack Fish
    • Over medium heat cook the Jack Fish fillets for two to three minutes per side. 
    • Ensure that the fish flakes easily, but is still very moist. 
    • Set aside but keep warm and covered so they don’t dry out.
    • Over medium high heat, sauté 2/3 of the onion for three minutes then add mushrooms.
    • Cook until onions and mushrooms have browned.
    • Add barbeque sauce to the pan, turn down heat and simmer for an additional minute.
    • Shred fish separately, add to the pan mix when loading the tacos.


    Or Go with the Jackfruit Option
    • Drain can and pat Jackfruit chunks dry.
    • Shred the chunks using a fork and a knife.
    • Cook the shredded Jackfruit in a pan over medium to high heat with cooking oil.
    • When the fruit has browned, add 2/3 of the chopped onion, after three minutes add the mushrooms.
    • Cook until onions and mushrooms have browned.
    • Add barbeque sauce to the pan, turn down heat and simmer for an additional minute.


    Final Prep
    • Heat the tortillas on a dry pan, 30 seconds per side or until very lightly browned, set aside and keep warm.
    • Dress shredded cabbage with ranch dressing to make a spicy slaw for the top of the tacos. 
    • Load up the tacos with your filling choice. Top with cheddar cheese, spicy slaw, the remaining raw, diced red onion.


    Hand and Heat Testing: A Tip for Seaside Recipes

    We got this little technique from Weber Grills. Extend your palm over the charcoal at a safe distance. Imagine a soda can is standing on the cooking grate, right over the coals. If your palm was resting on the top of the can, it would be five inches from the cooking grate. That’s where you should measure the heat of charcoal, or cooking coals. Always pull your hand away from the heat before it hurts, and be sure that nothing flammable, such as a sleeve, is dangling from your arm.

    If you need to pull your hand away after two to four seconds, the heat is high. Likewise, if you need to pull your hand away after five to seven seconds, the heat is medium. And if you need to pull your hand away after eight to ten seconds, the heat is low.

    • High (450° to 550°F): 2 to 4 seconds
    • Medium (350° to 450°F): 5 to 7 seconds
    • Low (250° to 350°F): 8 to 10 seconds


    We hope you enjoy these seaside recipes and that your future coastal adventures inspire you to try some fantastic culinary feats of your own design!

  • Your Winter Safety Guide for RV Pets

    Your Winter Safety Guide for RV Pets

    For most RVers, instinct would tell us that furry family members are almost a mandatory part of RVing. And, unsurprisingly, the numbers back that up. A recent Go RVing survey found that 68 percent of RVers bring one or more pets on their RV adventures. (Also, not surprising: 92 percent of pet loving RVers share their RV with at least one dog.) As it turns out, RV life just wouldn’t have the same appeal if we had to leave our four-legged friends at home, no matter what time of year it is. After all, our dogs love to be part of whatever we do. (That is, as long as it doesn’t involve a bath.) And all that is great when the weather is nice. But what about when it get’s cold? Winter RVing with pets presents some notable challenges, so we wanted to share a wintery safety guide for RV pets — to keep everyone warm and cozy.  


    Winter Factors to Consider for Furry Friends

    In the RV life, there will come a time when we have to leave our pets in the RV for an extended period. You know, because we need to go out and do “people things.” For example, we might want to take part in winter activities like skiing. Or it might be time to restock the groceries. Whatever we’re doing, it’s important to know that RVs rapidly revert to whatever the outside temperature when the furnace is off.  

    Depending on the outside temperature, it can get too cold for some pets really fast. Small dogs and short haired dogs are especially susceptible to hypothermia, a potentially deadly condition that results from the core temperature dropping just a few degrees. Regulating RV temperatures when you aren’t home is a must to keep pets comfortable and safe. 

    So, how can you best do that? Let’s walk through this winter guide for RV pets. It’s intended to give you everything you need to know to keep your pet warm and cozy — even when you’re not there.


    First, a Few Rules for Leaving Your Pet Alone in an RV

    There are some basics about leaving you pet in an RV. (Forgive me if you already know these, but I have to make sure.) These rules apply whether it is cold or not, and they’re foundational for everything else we’ll discuss.

    1. Avoid leaving your pet in the RV for extended periods.
    2. Tire your pet out with a walk aor play session before you leave the RV.
    3. Never use a space heater in the RV when you aren’t there.
    4. Use a Wi-Fi or Bluetooth-capable temperature monitor to keep an eye on the temperature in the RV.
    5. If you have to be away for more than a few hours, have someone check on your pet every two to three hours and offer them a potty break.


    Follow This Winter Safety Guide for RV Pets

    Bundle Those Pups Up

    Dog sweaters and jackets aren’t just a fashion statement. Some dogs need the extra layer of warmth to be comfortable and safe when temperatures drop. Puppies are also especially susceptible to hypothermia.  However, if your four-legged furbuddy is less than 30 pounds (or has a short coat), he or she’ll probably appreciate some extra help staying warm. This is especially true for dogs with short legs such as dachshunds, basset hounds, and corgis because their low slung bodies are close to the cold ground. Here are some examples of dog breeds that need a little extra help staying warm. (But this list could be longer.)

    Breeds Especially Susceptible to the Cold
    • All toy dog breeds
    • Poodle (all sizes)
    • Shih Tzu
    • Doodle
    • German shorthaired pointer
    • Pointer
    • Boxer
    • English bulldog
    • American Staffordshire terrier
    • American bullies
    • Greyhound
    • Whippet
    • Lurcher
    • Basset hound
    • Daschund
    • Jack Russell terrier
    • West Highland white terrier
    • Dobermann pinscher


    Raise Pet Beds Up Off the Floor

    Unless they’re heated, RV floors can get really cold. This is true even if you use RV skirting and insulation. Cold air can find its way into pet beds that are directly on the floor. To help ensure your pet stays comfy and cozy, raise his bed up onto a couch or chair. He’ll love you for this. If you’re completely against allowing your pet onto RV furniture, a portable raised dog bed could be a perfect alternative. 


    Watch for Signs Of Hypothermia

    Hypothermia occurs when the body’s temperature goes below 98 degrees Fahrenheit. When the body gets this cold, internal organs begin to shut down, with the likely result of death. Since organ shut-down and death can happen very fast in dogs and cats. It’s vital to begin treatment of hypothermia ASAP.   

    Normal body temperature for dogs and cats ranges from 98 degrees and 102 degrees Fahrenheit. However, If your pet is lethargic, shivering, doesn’t have much of an appetite, and has been exposed to cold temperatures, you should suspect hypothermia. Focus on life-saving first treatment immediately. If you happen to have a rectal thermometer in your pet first aid kit, you can take your pet’s temperature after treatment is initiated. 


    Perform Hypothermia First Aid

    No matter what the species, hypothermia treatment is all about warming up the core body temperature. However, this needs to be done gradually. Too much heat can cause superficial blood vessels to dilate, resulting in shock. Therefore, avoid the use of excessive heat from heating pads or other appliances when you’re warming up your pet. 

    • Move your pet to a warm environment. 
    • Bundle your pet in warm blankets You can use an electric blanket set on the lowest setting if you have one. If you have a hot water bottle, wrap it in a towel and bundle it in the blankets (not in contact with your pet) as well.
    • Seek veterinary attention as soon as possible.


    Final Tips for Safe Winter RVing with Pets

    It’s probably worth saying that if you’re pet is going to stay warm in your RV then … you need to prepare your RV for winter and avoid common winter RVing blunders. But here’s an additional checklist to walk through.

    • Use a Reflectix or bubble wrap and draw window coverings to help insulate windows.
    • Install RV skirting to conserve warm air under the RV while keeping cold air out. 
    • Ensure you have an adequate propane supply to keep your RV furnace running.
    • Leave the propane furnace on when you leave the RV.
    • Space heaters present a real fire hazard in RVs. Never leave an electric space heater on when you aren’t there to supervise it. 
    • Include your pet in your plans wherever possible.
    • Boarding your pet at a kennel or enroll him in doggy daycare if you must be away for an extended period.
    • Use a temperature monitoring device with an app that sends an alert to your phone if the RV temperature drops below a preset level. There are now many options to choose from.  Here are a few examples: Temp Stick, Marcell RV Pet Temperature Monitor, and Waggle Pet Safety Monitor.
  • Planning a Last Minute RV Trip to the Big Game

    Planning a Last Minute RV Trip to the Big Game

    Are you ready to turn your football championship experience into an unforgettable adventure? Say goodbye to conventional travel and hello to the ultimate tailgating experience with an RV road trip! RV Trader is sharing invaluable tips that will help enhance your journey. Time is of the essence, so let’s get started!

    Choose the Right RV

    Start off by selecting the perfect RV for your road trip. Whether it’s a spacious motorhome or a cozy camper, ensure it accommodates your group size, provides necessary amenities, and is road-ready for the long haul. Your needs may vary depending on how long you’re planning to be on the road, so take your travel time into consideration.

    Buy Tickets/Book Campsites ASAP

    Score your championship tickets in advance to avoid any last-minute disappointments. Once secured, plan your travel route and book your RV campsite reservations accordingly, factoring in proximity to the stadium and game day festivities. Ultimately, thorough planning will set you up for success.

    Best RV Campsites Within 50 Miles of Caesars Superdome

    • French Quarter RV Resort: With over 700 reviews on Google and a 4.4-star average, this conveniently located RV resort offers full hookups, private baths, laundry facilities, a pool, fitness center, and complimentary Wi-Fi. If you’re trying to get as close to the stadium as possible, this is your best bet, just a mile away from the Superdome. Note that for the dates February 6–9, the rate is $900/night with a three-night minimum.
    • Pontchartrain Landing (New Orleans RV Resort & Marina): Another RV resort, this one on Lake Ponchartrain to the north of the city, with over 1,000 reviews and a 4.3-star average on Google. This pet-friendly resort offers pull-through sites, full hookups, shower and laundry facilities, as well as a restaurant. Its scenic location will put you about 7 miles and 12 minutes from the Superdome, though there is a paid shuttle service. Daily rates range from $68 to $153.
    • New Orleans KOA Holiday: With over 700 reviews on Google and a 4.3-star average, this family-friendly campground offers free WiFi, laundry and shower facilities, and a dog park. Staying here will put you about 12 miles and 20 minutes from the Superdome, but there is also a paid shuttle service. Daily rates vary depending on the dates of your stay, but generally range from $74 to $110.
    • Bayou Segnette State Park: This state park, located south of the Mississippi River along the Bayou Segnette, offers large, open sites with water and electrical hookups along with shower facilities. Away from the hustle and bustle of the city, you’ll be able to go boating and fishing (fresh- and saltwater). This campsite will put you about 13 miles and 20 minutes from the Superdome. Daily rates range from $25 to $33.
    • St. Bernard State Park: Situated just off the Mississippi River to the southeast of the city, this state park features spacious sites for RVs that feature water and electrical hookups at nearly every site. Sitting 15 miles and a 30-minute drive away from the city, it strikes a good balance of serenity and convenient access to the city. Daily rates range from $20 to $28.
    • Fontainebleau State Park and Fairview-Riverside State Park: These state parks, located across Lake Pontchartrain, are almost 40 miles away and will take at least 40 minutes to reach the Superdome. It’s $18 a night if you plan on boondocking, while sites with water and electrical hookups will run you from $20 to $33. Notably, among the state parks mentioned here, Fontainebleau is the only one to offer pull-through sites and sewerage hookups.

    Shop for new and used Class C RVs online.

    Tailgating Essentials

    Pack your RV with essential tailgating gear. Think BBQ grills, comfortable chairs, team jerseys, snacks, drinks, energetic music, and fun games to keep the party going. Don’t forget to deck out your RV with team colors and flags for the ultimate fan experience. The more festive you get, the better!

    Some additional items to consider:

    • Coolers and ice
    • Tables and folding surfaces
    • Trash bags and cleanup supplies
    • Outdoor lighting (if your tailgating celebration extends into the evening)
    • Portable generator (to make sure you have adequate power for cooking, lighting, and other essentials)
    • Weather-appropriate clothing
    • Satellite TV/WiFi to stay connected with the latest sports updates and championship buzz
    • Credit or debit card (Caesars Superdome is cash-free, so you’ll need a card to buy merch or get food and drink on-site)

    Plot Your Route

    Plan your road trip route strategically, considering scenic stops, local attractions, and convenient RV parks along the way. Make the journey as memorable as the destination by exploring interesting landmarks and hidden gems. Tailgating at the big game might be your end goal, but getting there can also be an enjoyable experience.

    Some additional things to consider:

    • Are you planning a quick weekend trip, or are you stopping at the big game in the middle of a longer road trip in your RV?
    • Are there certain routes you should avoid because of inclement weather?
    • Are there any towns, cities, or landmarks you’ve been wanting to visit that are on the way?
    • Do you have friends or family along the way that you’d like to visit? This could be a perfect opportunity to make a quick stop and grab a meal together.
    • Are RV-friendly campsites open along the route you want to drive? Make sure to thoroughly research each campsite because many close down during the off-season, especially in colder climates.

    Game Day Game Plan

    Plan to arrive at your desired tailgating location early to secure the best spot for your celebration. Whip up your game day menu, organize friendly games and competitions, and soak in the pre-game excitement with fellow fans.

    Make sure you have everything prepared the day before. The last thing you want is to be scrambling around town on game day for various items you forgot, running behind all day, and arriving at the stadium significantly later than planned. It’s even helpful to prepare appetizers and snacks the day before – this can save you valuable time.

    Shop for new and used fifth wheels online.

    RV Parking

    Learn about parking laws in New Orleans in advance to prevent you from getting an unexpected ticket during your stay. Keep in mind that onsite parking at Caesars Superdome is not available on game day. You’ll have to park near the stadium and either walk to the stadium, take a taxi, or utilize a rideshare service. Research local parking options before game day and arrive early to ensure you get a spot.

    The Caesars Superdome has multiple entrances, marked A through H clockwise from the main entrance just off Poydras St. – check your ticket for the entrance you should use. Give yourself extra time to figure out where you’re going in case any hiccups arise.

    If you’d prefer to stay at a campground within walking distance so you don’t have to worry about relocating your rig on game day, the French Quarter RV Resort is your only option. Amenities include full hookups, a pool, and a fitness center. Roughly a mile away from the Superdome for the big game, you’re only a short walk away from the action. While normal rates for the French Quarter RV Resort range from $120 to $150 per night, the rate for February 6–9 is $900/night with a three-night minimum.

    Be Safe

    Prioritize safety during your road trip. Conduct a thorough pre-trip inspection of your RV, check your tire conditions, and have emergency supplies on hand. Be mindful of road conditions and weather forecasts as you travel to the big game.

    In addition, theft is a concern in New Orleans. Take safety precautions to ensure your rig is locked up and secure when you’re away for the big game. If possible, park somewhere that has 24/7 security.

    Capture Memories

    Don’t forget to document your RV football championship journey with photos and videos. Share your experiences with friends and family on social media, connect with other RV enthusiasts, and create lasting memories that you’ll remember for years to come.

    Gear up for an epic RV road trip to the big game, where the excitement of football fandom meets the thrill of the open road. Let the countdown to kickoff begin!

    If you’re ready to buy an RV for your journey, check out RVTrader.com and browse our inventory of new and used motorhomes and campers.

  • Cashing in on the Road! How to Make Money with an RV

    Cashing in on the Road! How to Make Money with an RV

    When you think of RVs, images of open roads, scenic campgrounds, and family adventures likely come to mind. But what if your home on wheels could be more than just a leisure vehicle? What if it could also be a cash generator? Well, let us assure you that if you’re thinking this way, you’re onto something. But the question now becomes how to make money with an RV.

    Before we jump into five great monetization strategies, it’s crucial to understand why RVs can be considered investments in the first place. Unlike traditional investments such as stocks or real estate, RVs don’t typically appreciate over time. They offer a unique blend of lifestyle benefits and financial potential that sets them apart. The RV industry has seen a significant popularity surge, especially after the global pandemic. As more people seek safe, flexible travel options, the demand for RVs has skyrocketed. This increased interest has created a ripple effect, opening new avenues for RV owners to capitalize on their vehicles.


    Recent Growth of RV Markets

    The growing RV rental market is a testament to this trend. Travelers are increasingly looking for unique experiences. And renting an RV offers just that — the freedom to explore at their own pace, coupled with the comforts of home. This demand has created a lucrative opportunity for RV owners to earn passive income when not using their vehicles.

    The concept of a “lifestyle investment” is also gaining traction. It’s about finding ways to make your passions and lifestyle choices work for you financially. An RV represents this perfectly — it’s an asset that allows you to enjoy adventures while also having the potential to generate income. This dual-purpose approach makes RVs an intriguing investment option for those who think outside the box.

    Now, let’s explore five ways to make money with an RV. That way, you can turn your RV into a profitable investment and blend the joys of the RV lifestyle with smart financial opportunities.


    Rent Out Your RV When Not in Use

    One of the most straightforward ways to monetize your RV is by renting it out when you’re not using it. (Some folks even do this like an RVBNB — and there are clever ways to do it. But more on that in a bit.) This strategy allows you to offset ownership costs and earn a significant income, all while retaining the ability to use your RV for personal trips.


    The Rental Opportunity

    Platforms like Outdoorsy and RVshare have made it easier than ever for RV owners to connect with potential renters. These peer-to-peer rental marketplaces handle much of the logistics, from booking to insurance, making the process relatively hassle-free for owners.

    The earning potential can be substantial. Depending on factors such as the type of RV, its age, amenities, and location, owners can expect to earn anywhere from $100 to $300 per night. Class A motorhomes and luxury fifth wheels typically command higher rates, while smaller travel trailers or older models might be on the lower end of the spectrum.


    Practical Tips for Success

    To maximize your rental income and ensure a smooth experience for both you and your renters, consider the following tips:

    • Prepare Your RV for Renters. Cleanliness is paramount. Ensure your RV is spotless before each rental. Stock it with basic amenities like linens, kitchenware, and toiletries. Consider adding special touches like local guidebooks or a welcome basket to enhance the renter’s experience.
    • Safety First. Regularly maintain and inspect your RV. Ensure all systems work and safety features like smoke detectors and fire extinguishers are current.
    • Insurance Matters. While platforms like Outdoorsy offer insurance coverage, reviewing your personal RV insurance policy and considering additional coverage for rentals is wise.
    • Clear Communication. Set clear rules and expectations for renters. Provide a comprehensive guide on how to use the RV’s features and systems.
    • Pricing Strategy. Research comparable rentals in your area to set competitive rates. Consider offering discounts for longer rentals or during off-peak seasons to increase bookings.


    Turn Your RV into a Mobile Business

    For the entrepreneurially minded, an RV can be more than just a recreational vehicle — it can be the foundation of a mobile business. This strategy allows you to combine your passion for travel with a profitable venture. In many ways, it’s one of the most natural ways to make money with an RV.


    Mobile Business Ideas

    • Food Trucks or Mobile Cafes. Transform your RV into a gourmet kitchen on wheels. From specialty coffee to artisanal sandwiches, the food truck industry thrives.
    • Mobile Retail Shops. Create a wheel boutique, selling anything from vintage clothing to handcrafted jewelry. Moving your shop to different events and locations can be a significant advantage.
    • Remote Services. Use your RV as a mobile office to offer consulting, tutoring, or photography services. This setup is perfect for freelancers who want to combine work with travel.
    • Mobile Pet Grooming. Cater to pet owners by offering grooming services directly to their homes.
    • Traveling Yoga Studio. Offer yoga classes in scenic locations, using your RV as a changing room and storage for equipment.


    Practical Considerations

    Before jumping into a mobile business, consider these important factors:

    • Legal Requirements. Research local permits and regulations for operating a business from an RV. This may include health department certifications for food-based businesses or vendor licenses for retail operations.
    • RV Modifications. Depending on your business type, you may need to modify your RV. This could range from installing commercial-grade kitchen equipment for a food truck to setting up a mobile office with reliable internet connectivity.
    • Location Scouting. Success often depends on finding the right locations. Research popular events, festivals, and high-traffic areas where your mobile business could thrive.
    • Marketing Strategy. Develop a strong online presence through social media and a website. Use your mobility as a unique selling point, informing customers about your location through regular updates.
    • Financial Planning. Calculate startup costs, including RV modifications and initial inventory. Create a business plan that accounts for the seasonal nature of RV travel.


    Lean into Lifestyle Integration

    One of the most appealing aspects of an RV-based business is the ability to travel while working. This lifestyle allows you to explore new places, meet diverse customers, and adapt your business to different markets. It’s an ideal solution for those who crave variety and adventure in their professional lives. But it’s often not thought of as a way to make money with an RV. So, let’s take a closer look.


    Offer Your RV as a Unique Event Venue

    There’s been a growing trend towards unique and intimate event spaces in recent years. Your RV can tap into this market as a distinctive venue for various occasions.


    Event Ideas

    • Micro-Weddings. With the rise of smaller, more intimate weddings, a well-decorated RV can serve as a charming backdrop for ceremonies or receptions.
    • Photo Shoots. Vintage or luxurious RVs can be perfect settings for fashion shoots, product photography, or even family portraits.
    • Tailgating Parties. For sports enthusiasts, a well-equipped RV can be the ultimate tailgating headquarters.
    • Glamping Experiences. Set up your RV as a luxurious camping option for those who want to experience nature without sacrificing comfort.
    • Pop-Up Dining Experiences. Partner with local chefs to host exclusive dining events in scenic locations.


    Implementation Tips

    To successfully market your RV as an event venue, consider these strategies:

    • Styling and Decor. Invest in versatile decor adapted for different events. For photo shoots, consider retro themes or modern, minimalist setups.
    • Amenities. Ensure your RV has essentials like a good sound system, comfortable seating, and a small kitchenette for catering needs.
    • Location Flexibility. One of the unique selling points of an RV venue is its mobility. Offer clients the option to choose scenic locations for their events.
    • Partnerships. Collaborate with event planners, photographers, and caterers to offer comprehensive packages.
    • Online Presence. List your RV on platforms like Airbnb or create a dedicated website showcasing its potential as an event space.


    Profit Potential

    Event hosting often yields higher returns compared to standard rentals. While a nightly rental might bring in $100 to $300, using your RV as an event venue could command $500 to $1000 or more per day, depending on the type of event and services offered.


    Set Up Your RV as an RVBNB

    Transform your RV into a stationary vacation rental for a unique twist on the traditional Airbnb model — the RVBNB. This clever approach allows you to capitalize on scenic locations without needing constant relocation.


    Getting Started

    • Location Selection. Partner with property owners in desirable locations or secure your spot. Consider areas near national parks, beaches, or popular tourist destinations.
    • Creating the Experience. Set up your RV to offer a full glamping experience. This includes comfortable bedding, outdoor seating areas, and amenities like Wi-Fi and entertainment systems.
    • Permits and Regulations. Research local zoning laws and obtain necessary permits for operating a vacation rental on the chosen property.
    • Pricing Strategy. Research comparable accommodations in the area to set competitive rates. Consider seasonal pricing to maximize earnings during peak travel periods.


    Amenities to Consider

    • Fully-equipped kitchen
    • Comfortable sleeping arrangements
    • Outdoor amenities (fire pit, grill, seating area)
    • Local guidebooks and area recommendations
    • Unique touches like hammocks or outdoor games


    Stationary vacation rentals often command higher rates than mobile rentals due to their curated locations and setup. While a mobile RV rental might average $150 per night, a well-located stationary rental could earn $200 to $400 or more per night, especially in high-demand areas or during peak seasons.


    Partner and Wrap for Advertising

    Turn your RV into a moving billboard and earn passive income through advertising partnerships. RV wrap advertising involves partnering with brands to display their advertisements on your RV’s exterior. This strategy allows you to make money with an RV simply by driving and parking, potentially offsetting maintenance and travel costs.


    Key Benefits

    • Passive Income. Make money with an RV without additional effort beyond your normal RV usage.
    • Cost Offset. Advertising revenue can help cover RV-related expenses like fuel and maintenance.
    • Potential for Long-Term Partnerships. Successful collaborations can lead to ongoing brand relationships.


    Considerations

    • Advertiser Selection. Choose reputable companies whose values align with your own. Consider how the ads might affect your travel experience and public perception.
    • Design and Installation. Work with professional wrap installers to ensure a high-quality application that won’t damage your RV’s exterior.
    • Contract Terms. Clearly define the terms of the advertising agreement, including duration, payment structure, and any travel requirements.
    • Impact on Personal Use. Consider how the advertising might affect your ability to stay in certain campgrounds or attend events.


    Potential Earnings

    Earnings from RV advertising can vary widely based on factors like the size of your RV, the extent of the wrap, and your travel patterns. Some RV owners report earning anywhere from $300 to $1,500 monthly through advertising partnerships.


    Make Money with an RV — and Fuel New Adventures

    RVs offer a unique opportunity to blend lifestyle with investment potential. While they may not appreciate like traditional investments, the strategies we’ve discussed demonstrate how RVs can generate income and offset ownership costs.

    From renting out your RV and turning it into a mobile business to offering it as an event venue, setting up a stationary vacation rental, or using it for advertising, there are numerous ways to monetize your home on wheels. Each strategy from us at RV Trader comes with its considerations and potential returns, allowing you to choose the approach that best fits your lifestyle and goals. But at the core, what is particularly great is that it makes your RV an investment that gives back to the adventure-filled life you want to live. The only question that remains is which way to make money with an RV you will choose.

  • Rest Assured! How to Add More Sleep Space to Your Camper

    Rest Assured! How to Add More Sleep Space to Your Camper

    Who doesn’t love a great family or friend road trip? There’s something about the RV life that simply begs to be shared. But once you begin adding extra RVers to your normal travel group, space can start getting tight — especially if you’re pushing against your RV’s standard sleeping capacity. But this is exactly the kind of challenge we campers love to tackle. And yes, we’ve got some ideas for you that should come in handy if you’re looking to add more sleep space to your camper.

    Rest assured, whether you need extra sleeping areas for kids, friends, or extended family, almost all RVs can be creatively modified to maximize space. So let’s explore a range of clever options — from fold-out beds to portable sleeping solutions — to ensure everyone gets a good night’s sleep without sacrificing comfort or functionality.


    1. Upgrade to Sofa Beds and Convertible Dinettes

    Replacing a standard sofa with a fold-out bed gives you an easy-to-use sleeping area without taking up additional space. Many RVers also upgrade their dinettes to models that transform into beds by lowering the table and rearranging the cushions. These dual-purpose solutions are ideal for compact RVs where maximizing space is key.

    Pro Tip: Opt for sofas with memory foam mattresses to enhance guest comfort. For dinettes, consider cushions with water-resistant covers to protect against spills.

    Expansion Idea: Adding a sleeper sofa with storage underneath can offer even more functionality, providing space to stash linens and pillows. Similarly, you can find fold-out dinette sets that convert faster with fewer cushion adjustments, minimizing setup time when you have tired travelers.


    2. Install Collapsible Bunk Beds or a Loft Area

    Collapsible bunk beds are a great space-saving solution. They fold neatly against the wall during the day, leaving plenty of room for activities. For RVs with higher ceilings, installing a loft bed adds a tucked-away sleeping space for kids or adventurous guests. Toy haulers and Class A motorhomes with raised ceilings are perfect candidates for loft installations.

    Pro Tip: Use lightweight ladders or step stools to provide safe and easy access to lofts or upper bunks.

    Expansion Idea: Consider adding privacy curtains around bunks or loft areas to create personal space. Some RVers install bunk beds with built-in storage cubbies or USB ports for added convenience, making them cozy, tech-friendly sleeping spaces.


    3. Flip Down Murphy Beds and Convertible Front Seats

    Murphy beds are popular because they fold up against the wall, creating open space during the day. These beds offer the benefit of a traditional mattress without permanently occupying floor space. In motorhomes, front captain’s chairs can be converted into temporary beds by using a board or cot between them — perfect for shorter stays or kids.

    Pro Tip: Install a locking mechanism on Murphy beds to ensure they stay secure during travel.

    Expansion Idea: If you install a Murphy bed, consider integrating shelving or a desk that folds on the underside for even more utility. Some RVers take it a step further by adding fold-out nightstands that swing into place when the bed is lowered.


    4. Max Out Inflatable and Flexible Options

    Air mattresses provide a flexible solution, ideal for guests or outdoor use. When deflated, they take up minimal storage space. Fold-out lounge chairs can double as single beds, fitting easily into smaller spaces. For those towing trailers with pickup trucks, the truck bed can serve as an extra sleeping area using an air mattress or sleeping pad, ideal for summer camping.

    Pro Tip: Choose a self-inflating air mattress to reduce setup time and store it in a protective case to prevent punctures.

    Expansion Idea: Consider adding a truck bed tent for privacy and protection if you plan to sleep outside the RV. 


    5. Hang a Hammock — Indoors or Out 

    Hammocks provide a lightweight, versatile sleeping option, both inside and outside the RV. They’re perfect for warm climates or adventurous guests who want to sleep under the stars. Some RVs have built-in anchor points to accommodate indoor hammock setups, adding an extra bed without taking up permanent space.

    Pro Tip: Store a compact hammock stand in your RV for times when trees or other anchor points aren’t available.

    Expansion Idea: Consider using a two-person hammock to increase sleeping capacity. Adding mosquito netting and a rain fly to outdoor hammocks can make them even more versatile, extending their use in various weather conditions.


    6. Embrace Slide-Out Bed Extensions

    RVs with slide-outs provide a perfect opportunity to expand sleeping areas. Some RVs come with couches, recliners, desks, or other options that take up a slide-out, and this is the perfect location to add sleeping through one of the previously mentioned conversions.

    Pro Tip: Add rubber or fabric seals to your slide-outs to prevent drafts from coming in, especially during colder weather.

    Expansion Idea: Use slide-out spaces for multi-use setups — such as adding a slide-out dining area that converts into a bed at night. This dual-purpose setup maximizes both sleeping and dining comfort.


    7. Bring Portable Bed Platforms

    Portable cots are an excellent solution for temporary guests. They are lightweight, easy to set up, and can be stored compactly when not in use. Folding bed platforms are another space-efficient option, providing added support for air mattresses or sleeping pads.

    Pro Tip: Keep a set of travel-friendly bedding with portable cots for a quick and comfortable sleeping solution.

    Expansion Idea: Choose cots with built-in organizers or side pockets for added convenience. Some RVers opt for cots with mosquito netting for outdoor use, making them versatile for both indoor and outdoor sleeping.


    8. Tack on a Tent Extension

    When indoor sleeping arrangements fill up, consider adding a tent, tent extension, or canopy to your RV. While regular tents store and are pretty universal, some tents attach directly to RV awnings, providing a protected space for extra sleepers. This setup is perfect for warm-weather camping and can also serve as a gear storage area. Also, if you’re looking for how to add more sleep space to your camper, most solutions end up subdivided your current RV space. What’s beautiful about this is that it literally adds space instead of subtracting it.

    Pro Tip: Choose a tent that’s easy to set up, and if you want the RV awning version, make sure to research that the option you choose fits your RV and awning.

    Expansion Idea: Add portable heaters or fans to make the tent extension more comfortable during temperature fluctuations. Some RVers also add inflatable mattresses inside the tent for a more luxurious outdoor sleeping experience.


    Bonus Section: Kid-Friendly Sleeping Spaces

    Traveling with kids requires thoughtful planning, especially when it comes to sleeping arrangements. Creating comfortable, fun sleeping spaces can make the journey smoother for everyone. Also, kids do have an inherent advantage — they’re kid-size. So whatever space you have goes further. Another advantage is that kids are usually more eager to embrace the adventure factor of an unconventional sleeping space. When you’re looking how to add more sleep space to your camper, those kinds of things add up. With that being said, here are a few suggestions for young kids.

    • Portable Cribs or Pack-and-Play. These are essential for families with toddlers, providing a familiar place for little ones to sleep. They fit well in slide-outs or closets.
    • Sleeping Cubbies. Use under-table spaces or small nooks to create fun sleeping cubbies for young children. Decorate them with pillows and fairy lights to make them extra cozy.
    • Hanging Bunk Pods. These lightweight fabric pods hang from the ceiling or bunk bed frame, providing a unique sleeping area for kids. They save space and are a big hit with adventurous little ones.


    Pro Tip: Create a bedtime routine to help kids adjust to sleeping in new environments. Small touches, like favorite blankets or bedtime stories, can make all the difference.


    Want to Add More Sleep Space to Your Camper? It’s All About Attitude

    Creating extra sleeping space in your RV doesn’t have to be complicated. As shown above, there are lots of ways to add more sleep space to your camper. From fold-out beds and loft areas to air mattresses and outdoor hammocks, there are countless ways to make your RV comfortable for guests and family. It’s just about thinking through what work for you and your RV. Then getting after it. With thoughtful planning and a few smart upgrades, your RV can become a welcoming home for everyone — no matter how many people hit the road with you. (Just make sure you’re stocked up for everything else you need for a great night’s sleep in your RV.) Safe travels and sweet dreams!

  • 12 Things You’ll Discover While Winter Camping

    12 Things You’ll Discover While Winter Camping

    When I began all-weather camping many years ago, one of the most important discoveries I made was that winter camping can be so rewarding. Don’t get me wrong: Spring, summer and fall each have their own merits when it comes to camping. But I had always avoided camping in winter — mainly because it’s so cold. (Trust me, I live in Canada.) With some degree of wisdom, I’d always avoided temperatures that could result in hypothermia. 

    Yet somehow, one snowy December evening, I found myself cozying up to a campfire in a campsite in the mountains accompanied by three of my best friends. We had chosen this campsite right beside a snow-covered lake. The half-a-dozen other sites were empty along the frozen shore. That magical evening would change the way I looked at camping forever. There wasn’t much talking at all between us. The four of us mainly just sat in awe, sipping hot buttered rum from enamel cups while we gazed past the fire at a spectacular view beneath a twinkling blanket of stars. 

    That night, there was a magnificent full moon that hung just above the top of the mountains beyond the lake. Moonlight was reflected everywhere, making the snow glitter like tiny diamonds across the lake and on the branches of the tall hemlock trees that surrounded us. The whole scene was magical. As the night progressed, coyotes yipped back and forth to one another in a cacophony that came from no particular place. It was a symphony that seemed to echo all around us. It felt like we were witnessing a private show in an epic natural theater.

    Warming Up to Winter Camping

    Well, that was the moment that I decided to add winter to my list of camping seasons. I’ve long since abandoned the spartan freedom of tent camping for the luxurious comfort of an RV. However, I still make a point of camping in some peaceful place every winter. I’m still smitten with the one-on-one connection I get with nature when the campground is devoid of human activity. In this article, I’ll share some of the extraordinary things you might discover while all-weather camping, beyond the mere thrill of braving the elements.


    Cool Things Winter Campers Will Learn

    1. The peace and serenity are breathtaking.

    Who camps in the winter? Nearly no one. That means you’ll probably get an entire campground to yourself. Without noise from other campers, you’ll get to hear a symphony of natural sounds that you’ll probably miss in a busy summer campground. However, when there’s snow on the ground, there’s a magical hush over the landscape. It’s a peaceful serenity that can be hard to find any other time of year due to the sound deadening qualities of snow 


    2. Bugs have vanished from the scene.

    One of the best parts about winter camping is the complete absence of mosquitos, ticks, or any other insects or creepy crawlies. Being able to camp without having to deal with bugs is a good reason to camp in winter in itself.


    3. Wildlife abounds, but bears disappear

    With no humans around, deer, elk, moose, raccoons, wolves, mink, weasels and many bird species come out of hiding. Birds are often more visible than at other times of the year because of the lack of foliage on the trees. Additionally, ne of the best parts about winter camping with regard to wildlife, is that many bears will have disappeared to spend winter in hibernation. As campers, we love bears. But they do have a habit of becoming a nuisance if there is food anywhere nearby. 


    4. More stars become remarkably visible.

    In winter, the skies are especially crisp and clear. This is partly due to a lack of smoke from wildfires and other pollutants, as well as a lack of light pollution. That means more stars become visible. And the result is skies that are blanketed in stars over camping areas. 

    If you camp in Canada, and you’re really lucky, you might see the aurora borealis (otherwise known as the Northern Lights) lighting the sky with their brilliant bands of chartreuse, magenta, and violet. If you’re wondering where the best spot to observe this spectacular phenomenon, check out the NOAA aurora forecast.


    5. Winter activities add to the fun.

    An oft-neglected fact is that winter camping features as many fun activities as summer does. While not a complete list by any stretch of the imagination, here’s are a few activities that I recommend: winter hiking, snowshoeing, cross country skiing, building a snow fort, ice fishing, birdwatching and wildlife viewing, and just cozying up to a warm campfire with a hot beverage.


    6. The challenge creates a sense of accomplishment.

    There’s no denying that camping in winter can give you a sense of accomplishment offered at no other time of year. Among fellow campers who may be wary of winter camping (like I once was), you’ll also earn bragging rights and a little bit of camper clout. But really, the big reward is getting to enjoy a side of the natural world that very few other humans have experienced. 


    7. Awareness of your environment increases.

    A few degrees can make the difference between having an amazing experience and spending a miserable night in the woods. Before you go camping, it’s vital to check the highs, the lows, and the windchill as well as what the chances for precipitation are. Cold-weather camping can be unforgiving and getting caught in a cold snap or winter storm could be deadly. 

    Be prepared for freezing rain or snow. If it snows while you’re camping, driving home on snow-covered roads might be difficult or impossible. If you’re camping in a mountainous area, you’ll also want to check the avalanche risk before you. You should also consider bringing an avalanche beacon if you’re camping in the mountains, just in case. Even though you might not be heading into an area where the avalanche risk is high, the risk level can change unexpectedly. An avalanche beacon helps searchers locate you in the event that you get buried by an avalanche and is considered essential gear for winter backcountry activities.


    8. Specialized cold-weather gear really matters.

    Unlike camping in spring, summer or fall, winter camping requires you to have gear that will keep you warm when it’s extremely cold out. It’s a good idea to consider the temperature you’ll be camping in. You’ll need to bring winter-rated gear that will keep you safe, warm and dry below that temperature. You’ll need to have a waterproof tent that can withstand wind and snow if you plan to leave the RV and get into the elements. Other must-haves for winter camping are a winter-rated sleeping pad and sleeping bag

    Also, if you’re camping in a snow-covered area, it’s a good plan to bring snowshoes for getting around on top of the snow instead of sinking into it. Also, don’t forget to attend to your RV’s winter condition, especially the seals.


    9. Dressing in layers is the best way to keep warm.

    Dressing in layers is the best way to stay warm in winter. When done properly, this method of dressing both keeps warm and helps to prevent sweat from soaking through your base layer and chilling you. Here’s the cold weather clothing layering system that I recommend:

    • Moisture wicking synthetic t-shirt (never cotton)
    • Merino long underwear with long sleeve shirt (never cotton)
    • Synthetic fleece sweater
    • Winter jacket
    • Fleece lined hiking pants
    • Merino socks
    • Mittens or gloves
    • Knit hat (formally known in Canada as a toque) 


    Avoid sweating and getting chilled by removing layers when you’re doing a vigorous activity that warms you up. It’s also good preparation to bring an extra base layer


    10. Being well-prepared has higher stakes.

    Unlike camping at other times of the year, winter camping demands that you be well prepared. Failure to do so can lead to injury and death. But besides that, you’ll want to be warm and comfortable. Here are a few things you’ll need.

    • Warm clothing including winter footwear
    • Food
    • Water
    • A means to warm your food
    • A lighter or ferro to start a fire
    • Firewood
    • Axe or saw
    • Camping knife
    • Tent
    • Tarps and rope
    • Sleeping bag
    • Sleeping pad
    • At least one other person for safety
    • A GPS locator (such as a Garmin inReach Mini)


    11. Some campgrounds are still open.

    Many campgrounds close for the season due to winter weather. However, you’ll still find some fantastic places to camp. Three apps for finding winter camping near you are:


    12. Many unserviced campgrounds are free.

    The best things in life are free. Across the USA and Canada, you’ll find free camping at state parks. Here are a few to consider:

    • Denali National Park, Alaska
    • Skyview RV Campground (Manning Park, BC, Canada)
    • Saint Mary Reservoir, Welling, Alberta


    More Tips For All Season Camping

    • Camp with at least one other person.
    • If tent camping have a good sleeping pad and a zero-degree sleeping bag.
    • Bring plenty of food, water and a stocked first aid kit.
    • Be prepared to have patience building a campfire.
    • Fluff up your sleeping bag before getting into it. Loft is what gives a sleeping bag its insulating properties, So fluffing it up helps it to keep you warm.
    • Sleep with your face out of the sleeping bag to avoid soaking your sleeping bag with moisture from your breath. 


    Final Thoughts on Winter Camping

    Extending your camping season to include the winter months can offer a unique experience that very few other people get to enjoy. Good planning and preparation is key for winter camping — especially as you consider your routes. To be honest, it’s a little more work than camping at any other time of year. But you’ll probably find that the rewards of winter camping are well worth your efforts.

  • Decorate Your RV for the Hap-Hap-Happiest Christmas!

    Decorate Your RV for the Hap-Hap-Happiest Christmas!

    Celebrating any holiday on the road is a unique adventure. It allows you to combine the freedom of RV travel with the warmth of holiday traditions. Clark Griswold would tell us that a big part of the challenge is morale. You gotta decorate your RV to keep things festive as you ho-ho-ho down the road in a smaller space. But with the right decorations and a little creativity, trust me: You can create an inviting, festive atmosphere to make your home-on-wheels feel just like home.

    Here are five must-haves to decorate your RV for Christmas — and a bonus section for cozy holiday activities!


    1. Keep a Christmas Tree in Play

    A full-sized Christmas tree may be out of the question, but that doesn’t mean you have to skip the tradition. Miniature tabletop trees are perfect for RVs — whether artificial or real, prelit, or with music. Alternatively, a wall-mounted tree made from lights, garland, or fabric provides a festive focal point while saving floor space.

    Why You Need It: A Christmas tree is symbolic of the season and adds a sense of tradition, even in the limited space of an RV. A smaller version, like a tabletop tree, allows you to enjoy decorating without clutter. Wall-mounted trees can be creatively customized, doubling as holiday décor and a family project.

    Pro Tip: To prevent your tree from toppling during travel, secure it using adhesive Velcro or command strips. If you opt for a real mini tree, use a spill-proof tree base to avoid messes when driving between destinations. 


    2. Deck the Cabin with String Lights

    String lights are a holiday essential that bring warmth and ambiance inside and outside your RV. Battery-operated or solar-powered lights are ideal to decorate your RV since they reduce reliance on power hookups, making them perfect for boondocking or dry camping.

    Why You Need It: String lights transform even the smallest spaces, adding a twinkling glow to your holiday setup. You can hang them along cabinets, slide-outs, awnings, or even wrap them around outdoor trees and furniture to create an inviting campsite.

    Pro Tip: Choose warm white or multi-colored lights for a cozy look. If space is tight, try LED fairy lights — they’re lightweight, don’t tangle easily, and last longer. Secure the lights using removable adhesive hooks to avoid damage to walls or cabinets. These can also be a multi-season addition to your RV life, because string lights are great and convenient all year round.


    3. Get Festive with Pillows and Blankets

    Swapping out your everyday sheets/covers and pillow cases is easy and fun. It also instantly changes the look and feel of your RV. Use pillows with reindeer, snowflakes, or Santa motifs, and pair them with cozy holiday blankets to create a warm space. 

    Why You Need It: Pillows and blankets are easy to store and can significantly enhance the festive vibe without overcrowding your space. When temperatures drop, wrapping yourself in a soft Christmas throw can make movie nights or morning coffee in the RV even more enjoyable.

    Pro Tip: Instead of purchasing bulky pillows, buy pillow covers with festive designs. These covers fold flat for storage and are easily swapped out for each season, keeping your RV organized and clutter-free. Adding fun themes like the Grinch or your favorite holiday movie is a great conversation starter when friends or family come to visit.


    4. Make Scent a Part of the Experience

    Personally, the smell of a Christmas tree during the season is the perfect mood setter. t always makes me smile. But, since space is at a premium and bringing an actual tree in your rig is a little tough, a pine scent from one of these small additions can really bump up the holiday cheer and feel. If pine isn’t your thing, there are plenty of other options like cinnamon or baked cookies.

    Why You Need It: In a small space, scents can have a big impact. A well-placed diffuser with essential oils or a wax warmer with holiday-themed scents instantly creates a cozy, holiday ambiance without overwhelming the space. 

    Pro Tip: If you’re worried about open flames, opt for battery-operated candles that flicker like real ones. Some even come with built-in timers, so you don’t have to worry about turning them off before bed. They also save your house batteries.


    5. Add Decals — and Garlands — Inside and Out

    Window decals, garland, and other lightweight decorations are perfect for RVs. They don’t require much space and can easily be applied to walls, windows, or furniture. Garland draped over windows or around the door adds a touch of greenery without the hassle of a full wreath or tree.

    Why You Need It: These small touches tie the whole festive theme together. Decals are easy to apply and remove without damage, while garland and ribbons bring in traditional holiday textures. Plus, lightweight decorations won’t add unnecessary weight to your RV—a crucial consideration for travelers.

    Pro Tip: Use artificial garland to avoid messes and keep it compact when storing. Window decals are reusable year after year, making them a practical and festive solution for RV decorating.


    Bonus: Cozy Holiday Activities to Enjoy on the Road

    Let’s be honest: Decorating is just the beginning. Christmas on the road is all about experiences. Here are a few festive activities to make your holiday RV stay even more special.

    • Holiday Movie Marathon. Set up your RV’s TV or projector for a night of classic Christmas films. Grab hot cocoa, popcorn, and some cozy blankets to complete the experience. Then argue about how Die Hard is or isn’t a Christmas movie. 
    • Gingerbread House Building. Use a small gingerbread kit to build your holiday masterpiece. It’s a fun activity that doubles as temporary décor and a tasty treat.
    • Campfire Gatherings. If your campground allows campfires, invite fellow RVers for s’mores, stories, and maybe even a Christmas carol singalong — although, if your singing is like mine, then it may be more of a scary Halloween moment.
    • Christmas Eve Countdown. Hang a simple advent calendar with chocolates or small surprises to enjoy each day leading up to Christmas.
    • Recycle & Craft. Whether online or at a store, if you buy something that comes in a box, then a fun activity for the family is using those boxes to wrap like a chimney for Santa to make his way into your RV. Here is a quick video for inspiration.


    Pro Tip: Stream your favorite Christmas playlist or audiobook through your RV’s sound system to fill your home-on-wheels with holiday cheer. If traveling with kids, consider setting up a “Santa Tracker” to keep the magic alive on Christmas Eve.


    Decorate Your RV in a Way That Inspires Warmth

    Decorating your RV for Christmas is about more than just decorations — it’s about creating an experience that feels like home, even when you’re on the road. With thoughtful touches like miniature trees, string lights, festive blankets, and cozy activities, you can embrace the holiday spirit no matter where your travels take you. Because, in truth, the holidays are more about who you spend them with and the fun you have, than the house — or RV — you have them in.

    The best part? If you decorate your RV with these small touches, they help create a space where you can make and enjoy your own traditions. And that in itself will bring comfort and joy, ensuring that your holiday season is both memorable and magical. Safe travels and happy holidays! 🎄

  • 7 Delicious Holiday Desserts You Can Make on the Road

    7 Delicious Holiday Desserts You Can Make on the Road

    Making delicious holiday desserts can be fun — even in your tiny RV kitchen with limited tools. As full-time RVers and nearly lifelong campers, we’ve used a two-burner propane stove and a campfire Dutch oven for our baking needs for over 25 years. As foodies, we absolutely love to challenge ourselves with new recipes and adapt new ways to make them. Remember: It’s not the size of your kitchen, or number of appliances, but the size of your imagination that truly matters. (For the record, our only electric kitchen appliance is an immersion blender.) 

    With that in mind, we hope that these seven delicious recipes for holiday desserts — with both bake and no-bake options — inspire you to lean into your creativity and discover your own inner pâtissier! While some may sound fancy, they’re all very simple to make. And no matter where you’re going this holiday season, bring one of these holiday desserts in the door, and you’ll get a warm welcome.


    Baking Recipes for the Oven and the Campfire

    Dark Chocolate Cake with Rum Glaze & Raspberry Sauce

    Adapted from the Moosewood Restaurant Cookbook, this six-minute vegan chocolate cake is the perfect campfire cake. It’s a good base for just about anything you want to put on it. We’ve used a German chocolate frosting, a butter cream frosting, as well as just powdered sugar. This rum glaze with raspberry sauce topping came from our former dean of students, with whom we worked in the early 2000s.


    Cake Ingredients
    • 1 1/2 cups unbleached white flour
    • 1/3 cup unsweetened cocoa powder
    • 1 teaspoon baking soda
    • 1/2 teaspoon salt
    • 3/4 cup sugar
    • 1/2 cup vegetable oil
    • 1 cup cold coffee
    • 2 teaspoons pure vanilla extract
    • 2 tablespoons cider vinegar


    Cake Instructions
    • Mix all dry ingredients together. (You can pre-mix these ingredients at home and bring them in a food storage container.) 
    • Mix in all wet ingredients, adding the cider vinegar last. Stirring in the vinegar will lighten the color of the cake batter and cause it to rise and bubble. 
    • Pour into a greased fry-bake pan, or Dutch oven, immediately.
    • Cover and cook over a campfire for approximately 20 minutes, rotating occasionally. Be sure to put coals on the top of the lid to cook from the top down as well.  See this video for details.


    Note: While you can just pour the glaze and sauce below over the cake once it has cooled, you could also make two cakes and layer the icing/topping in between and on top.


    Glaze Ingredients
    • 1/4 cup dark rum
    • 1/4 cup water
    • 1 stick butter
    • 1 cup sugar


    In a sauce pan, stir all ingredients together and bring to a boil for two minutes. Let rest, but keep warm, until the cake is ready. Pour over top.


    Raspberry Sauce Ingredients
    • 1 large package frozen raspberries
    • 3 tablespoons water
    • 2 tablespoons granulated sugar, to taste


    Combine frozen raspberries, water, and sugar into a sauce pan. Stir while the mixture is coming to a boil. Cook until thickened. 


    Turkish Baklava

    Most people associate baklava with slaving in the kitchen and rolling out filo dough all day. But it’s surprisingly simple. (It’s also a real crowd pleaser.) While you might be more familiar with the Greek version with walnuts, the Turks have their variation that uses pistachios. This recipe comes from Shari’s Turkish neighbor in Santa Barbara, California back in the 1990s. Since then, it’s become one of our standard holiday desserts. 


    Ingredients
    • 2 1/2 sticks of butter
    • 1 package of frozen filo dough (these often come two per pack, you just need one of the packages)
    • 12 ounces of pistachio meats (or walnuts if you want to go Greek)
    • 2 cups sugar
    • 2 cups of water
    • 3/4 tablespoon lemon juice


    Instructions
    • Preheat the oven to 350 degrees.  Grind pistachios into a crunchy-powdery form. This is easiest to do in a food processor, but also possible with an immersion blender, or chef’s knife.  
    • Melt butter.  
    • Thaw and unroll the filo dough. Place one- third of the filo dough in the bottom of a rectangular cake pan. Spread half of the ground pistachios over this first filo layer. Add one-third more of the filo dough, then spread the other half of the ground pistachios over the second filo layer. Top with the remaining third of the filo dough.  
    • Using a small, sharp knife, cut into 1-inch-by-3-inch pieces. The filo dough is fragile, so go slowly and make sure to cut all the way through to the bottom. Pour melted butter over the top, making sure to get it into all of the cracks.   Place back in the oven for about 30 minutes (until the top layer is lightly browned).
    • While baking, make a simple syrup by combining water, sugar, and lemon juice in a pot on the stove. Bring to a boil and let simmer for at least one minute (or until all sugar solids dissolve).   
    • Remove baklava from the oven and let cool for about three minutes. Pour the simple syrup over the baklava, making sure to get it into all of the cracks.  Let sit for three to four hours before serving. Enjoy!


    No Bake Recipes

    Chocolate Silk Pie

    Your friends and family seriously won’t believe this one is vegan. (It’s also great for folks with a dairy allergy or sensitivity!) Adapted from Farm Sanctuary in Watkins Glen, New York, we added the raspberry sauce for some bright fruity fun. Alternatively, you can replace the cold coffee with creme de menthe for a chocolate mint flavor and top with regular or vegan whipped cream.  


    Pie Ingredients
    • 2 cups Ghiradelli dark chocolate chips (these are the vegan type)
    • 1/3 cup cold dark roast coffee (or creme de menthe liquer)
    • 1 package silken tofu (if you are not a regular tofu buyer, this is a very different texture than most tofu so be sure it says “silken” on the package)
    • 1 teaspoon vanilla extract
    • 1 tablespoon maple syrup
    • 1 Oreo cookie crust or chocolate nut crust


    Pie Instructions
    • Melt chocolate chips over a double boiler, then stir in vanilla, coffee, and maple syrup.  
    • Combine tofu and chocolate mixture in a blender – we use a plastic pitcher and an immersion blender.  Process until very smooth and creamy.  
    • Pour mixture into cookie crust and refrigerate overnight.  
    • Topping of your choice.


    Raspberry Sauce Ingredients
    • 1 large package frozen raspberries
    • 3 tablespoons water
    • 2 tablespoons granulated sugar, to taste


    Combine frozen raspberries, water, and sugar into a sauce pan. Stir while the mixture is coming to a boil. Cook until thickened. Chill in the refrigerator before serving.  


    Egg Nog Pie 

    This recipe comes from the Smithville Inn in Ohio and has been a holiday tradition in the Hutchison family for more years than Hutch can remember. We added just a bit of bourbon for extra fun and flavor.


    Pie Ingredients:
    • 1 teaspoon gelatin
    • 1 teaspoon cold water
    • 1 cup milk
    • 1/2 cup sugar
    • 2 tablespoon corn starch
    • 1/4 teaspoon salt
    • 3 egg yolks, beaten
    • 1 tablespoon butter
    • 1 teaspoon vanilla
    • 1 teaspoon bourbon
    • 1 cup whipping cream (whipped), measure before whipping
    • Nutmeg and cinnamon/sugar to taste for top
    • Your choice of 9-inch pie crust (Standard crust, graham cracker, chocolate, pecan — all are great!)


    Instructions
    • Soak gelatin in cold water.
    • Scald milk in the top of a double boiler.
    • Combine sugar, corn starch, salt and mix well.
    • Add to scalded milk and cook until thick and smooth.
    • Continue cooking for 15 minutes longer.
    • Stir a small amount of mixture into beaten egg yolks, then return to the double boiler and cook a few minutes longer.
    • Add butter and gelatin and stir.
    • Cool.
    • Add vanilla and bourbon.
    • Fold in whipped cream.
    • Pour into the 9-inch pie crust of your choice.
    • Sprinkle generously with nutmeg and cinnamon.
    • Refrigerate until ready to serve. Can be frozen as well.


    Chocolate Fondue

    A big fondue dinner was a Hutchison family tradition for New Year’s Day. Prior to hitting the road full-time, we carried on this tradition and hosted an annual Holiday Fondue Fest for 40 of our closest friends and colleagues. There were four courses, with this recipe being the grande finale! It’s delicious, fun, and can be made in a fondue pot, over a gas stove, or even over a campfire (watch it closely though!).


    Ingredients
    • 1 bag of dark chocolate chips
    • 1 cup heavy cream
    • Pinch of salt
    • Splash of triple sec


    Optional Flavors

    Instead of triple sec, use a splash of vodka.  Then, spice it up with some flavor options.  You can even have a few different options for a taste test!

    • Add a 1/2 teaspoon each cinnamon and ancho chile pepper for a Mexican hot chocolate spin.
    • Add peppermint extract for peppermint chocolate fondue. Start with 1/4 teaspoon and increase according to taste.


    Dippers

    Strawberries, bananas, apples, Nilla Wafers, angel food cake, brownie bites, pretzels, biscotti, Nutter Butters, graham crackers, you name it!


    Dark Chocolate Tiramisu 

    Most people think of tiramisu as one of the fanciest holiday desserts, but it’s one of the easiest things to make. (The folks in Italy know what’s up.) This original New York Times recipe has been altered to suit Shari’s chocolate tooth — and it’s the best tiramisu we’ve ever had!


    Ingredients
    For the Cream
    • 4 large egg yolks, beaten
    • 1/2 cup granulated sugar, divided
    • 3/4 cup heavy cream
    • 8 ounces mascarpone (room temperature)


    For the Assembly
    • 1 3/4 cup strong coffee or espresso
    • 2 tablespoon rum
    • 2 tablespoon unsweetened cocoa powder
    • 24 ladyfingers (approximately 7-ounce package)
    • Dark chocolate shavings

    Chocolate Lovers Alert! Use some of the leftover chocolate fondue from above (as the middle layer). This is Shari’s addition, and it’s divine.


    Instructions
    • Beat the yolks with the sugar until the mixture is thickened and light lemon colored, then add the mascarpone and beat until thoroughly blended.
    • Whip the cream with a mixer or hand blender, and fold the cheese/egg mixture into it.
    • Combine the espresso and rum together in a small bowl.
    • Carefully dip the ladyfingers into the espresso/rum mixture and arrange half of them on a serving dish (approximately 9-inch-by-13-inch-by-2-inch). It’s just a quick dip and roll, not a full saturation.
    • Pour in half of the cheese/cream mixture and smooth over the top.
    • Pour in a thin layer of warmish chocolate fondue and smooth over the top.
    • Repeat with the other half of the ladyfingers and cheese/cream mixture, then finish with an even dusting of unsweetened cocoa powder (using a small sieve) and dark chocolate shavings.
    • Refrigerate overnight.


    Layered Cheesecake Pie

    Shari grew up eating this deliciously sweet dessert at every family holiday gathering. It’s like a fruit pie, cream pie, and a cheesecake combined into one layered pan. This recipe fills a 9-inch-by-13-inch baking dish.


    Ingredients
    Crust & Topping
    • 1 box graham cracker crumbs
    • 2 sticks butter, melted
    • 1/4 cup sugar


    Mix together to form the crust. Half of this mixture will be pressed into the bottom of the pan; half will be gently patted on top as the final layer. See assembly instructions below.


    Cheese Filling
    • 16 ounces cream cheese, softened
    • 3/4 cup sugar
    • 2 teaspoon vanilla
    • 2 envelopes of Dream Whip
    • 2 envelopes Knox gelatin
    • 1/2 cup cold water


    Instructions for Cheese Filling
    • Dissolve gelatin in water. 
    • Cream sugar, vanilla, and cream cheese together.  
    • Fold in dissolved gelatin.
    • Prepare two envelopes of Dream Whip according to package directions, then fold into cheese mixture.


    Fruit Filling

    2 cans of Comstock pie filling (blueberry, raspberry, cherry — choose your flavor). You can also make your own, but this is the OG from the Seventies.


    Assembly Instructions

    From the bottom up: Press half of the graham cracker mixture firmly into the bottom of the pan. Spread half of the cheese mixture evenly over the top. Then pour in all of the fruit filling and spread evenly then the other half of the cheese mixture. Top with the remaining half of the graham cracker crust, and gently pat down until smooth and covered.  Refrigerate several hours (or overnight) before serving.


    Holiday Desserts Sweeten the Season

    Spending the holidays in your RV never has to mean going without amazing desserts. These sure-to-please holiday desserts will help your family create new traditions. (And be warned: Once you bring one of these holiday desserts, you will will be expected to from here on.) If this is your first year, don’t be surprised if you impress your friends at the holiday potluck. If someone says, “You made this in that tiny kitchen!?!” then you can let them know: Oh yeah you did!


  • Beware These All-Too-Common Winter RVing Blunders

    Beware These All-Too-Common Winter RVing Blunders

    Winter RV camping can be absolutely magical. And if you do everything right, your RV can make a cozy home on wheels. However, there is a flip side. If you don’t do the right things, RVing in winter can be brutal, absolutely miserable. or downright dangerous. To be able to enjoy the winter magic, you need to plan well and have the right winter camping equipment. But the truth is that a lot of campers make the same winter RVing blunders  — especially first timers.

    While planning and equipment are important any time of year, winter really ups the ante. Things can get critical when you and your RV are facing freezing temperatures, snow, and seasonal storms. Together, these can combine to create hazardous condition.

    So, in this article, let’s take a  look at some all-too-common winter RVing blunders — and how to avoid them.


    No. 1: Not Heading Somewhere Warmer 

    It makes good sense to take your RV to a warmer location in the winter. (Lots of snowbirds would argue this is the only mistake!) With that being said, there is a difference in enjoying winter camping  and deciding to stay in a place where winter conditions will guarantee that get you in trouble. You know, places that are synonymous with frigid temperatures. So let your mobility work for you. RVs have wheels. You can take them almost anywhere. So why not choose a place where “winter conditions” include temperatures that consistently drop into a comfortable “Goldilocks” zone? A snowbird translation: Somewhere you can lounge by a pool or beach without being too hot or too cold.  


    No. 2: Not Checking the Weather Forecast — Daily

    Winter weather can be very unpredictable. Atmospheric rivers, bomb cyclones, flash freezes can result in rapid changes to winter weather conditions. In winter, it’s important to check the weather forecast at least every 24 hours and within four hours of travel. Phone apps such as AccuWeather or Instant Weather (in Canada) are helpful when you have a cell signal.  The very cool NOAA Radar and Weather Forecast app gives you a live view of incoming weather patterns.

    It’s a good idea to camp with an NOAA Weather radio with you to receive continuous broadcasts of weather conditions across the country.  The NOAA also broadcasts a special alert signal if there is a hazardous weather situation coming up. NOAA radio receivers are small and wireless, so you can take them anywhere with you. 


    No. 3: Being Confused About Winterization

    “To winterize, or not to winterize?” is the question many RV newbies ask before their first winter with an RV. The truth is, whether you winterize or not depends on what you’ll do with your RV over winter. The big problem for RVs in winter is water freezing in the pipes if they aren’t being kept above 32 degrees.   

    RV winterization means getting all the water out of the pipes and replacing it with food-grade RV antifreeze for the winter. Although winterization is always done on RVs that are being stored for the winter, it’s never done on RVs that will be used throughout the winter, where the pipes can be kept from freezing. This is one of the most common — and frankly understandable — winter RVing blunders. With that being said, if you intend to use your RV for occasional camping in winter, it should be winterized. Not only that, keeping the RV winterized will save you the trouble of dewinterizing and then winterizing again. 

    However, it also means you won’t be able to use the plumbing in the RV, including the toilet. You’ll need to bring bottles of water for drinking, doing dishes and bathing. As a rule of thumb, count on three gallons of water per person per day. (And don’t forget to bring water for pets too.)


    No. 4: Leaving an Unattended Space Heater On

    Many RVers use a space heater in their RV to stave off winter’s chill. That being said, the use of space heaters in eight out of ten fire-related deaths (NFPA). That being said, RV fires are often far more devastating than home fires due to their multitude of highly flammable components. RVs tend to burn in minutes, while it can take hours for a structure fire to consume a building. Because RV fires burn so fast (and tend to have very few egress points), your risk of dying in an RV fire is far greater than it would be in a house fire.

    There are a few things you can do to minimize the fire risk associated with using an electric space heater in your RV.  

    1. Allow at least three feet of space between the space heater and combustible materials.
    2. Never use an electric space heater in a sleeping area designated for kids.
    3. Don’t run the space heater for more than a few hours at a time.  
    4. Frequently check the RV space heater and unplug it if it feels warm. A warm plug is a sign of electrical current resistance. After a while, this current resistance will eventually damage the wires in your RV until they suddenly burst into flames. 
    5.  Never, ever leave the space heater plugged in when you are away or sleeping.


    In addition, because RV fires spread so fast, it’s a good idea to have an ABC fire extinguisher in each area of the RV, always within easy reach. A big part of RV fire safety 101 is also have a plan in place in case of a fire.


    No. 5: Not Having a Generator

    Power outages are common in winter. When there’s no electricity coming into the RV, you could get by using your DC electrical system to power things like lights, the furnace, or the 12-volt refrigerator. However, sooner or later, your house batteries will be depleted. It’s always nice to have a backup power supply. But it’s essential to have a generator in winter when power usage is high compared to other times of the year. While a solar power setup can help meet power needs most of the year, it probably won’t be of use in the winter months. That’s because there won’t be enough direct sun hitting the panels. 


    No. 6: Not Clearing Snow from Your RV Roof

    I’m always surprised at the number of RVers who don’t bother to clear snow from the roof of their RV. Snow is heavy. It’s wet. And it can definitely damage any RV roof. Moisture is your RV’s number one enemy, even when it’s frozen. Rooftop snow can also add hundreds of pounds to your RV, putting your RV well over its cargo carrying capacity.  

    Therefore, it’s a good idea to stash a telescoping ladder and a lightweight snow shovel in your RV or tow vehicle before you head out to winter camp in your RV. That way you can get the snow off your RV roof before it can damage your RV.


    No. 7: Not Keeping Your Propane Warm Enough

    We buy propane as a liquid, but we use it when it evaporates into a gas state. This works really well in summer, when warm temperatures are ideal for propane to evaporate into a gas. However, winter’s cooler temperatures can make it difficult for propane to evaporate. 

    Once the ambient temperature drops to 27 degrees Fahrenheit, propane gas sometimes condenses back into a liquid state when it reaches the regulator. The result is a partial or complete blockage inside the regulator, resulting in low pressure in the propane lines and a low orange colored flame that means incomplete gas combustion. When they burn propane at low pressure, RV appliances don’t operate efficiently and will eventually become damaged.  

    The solution is to keep propane cylinders slightly warm using a propane heating blanket when it’s cold out.  Propane heating blankets are easy to find.  Here are a few places where you can get one: PowerBlanket.com, Amazon.com, HeatAuthority.com.


    No. 8: Ignoring Moisture on RV Windows

    Wet, foggy RV windows are your RV’s way of letting you know you have a humidity problem in your RV. The thing is, nearly everything we do in an RV creates moisture. Breathing, cooking, washing dishes, and bathing all contribute to gallons of microscopic water in the air inside the RV. This moisture works its way into every surface of the RV except for glass or metal. When it gets into a porous material like wood particle board, this moist air condenses into water, expanding and damaging the finish and the wood itself. Not only that but this moist, humid environment provides exactly what mold needs to grow

    In winter, the atmospheric moisture inside the warm RV condenses when it hits cold window glass or outer walls of the RV. The result is foggy, wet windows and wet walls in hidden areas like cabinet interiors. Moisture on your RV windows in winter is a sign of a much bigger moisture problem in your RV. While it’s impossible to get rid of all the atmospheric moisture in your RV, there are a few steps you can take to mitigate excessive humidity.

    • Don’t bring snow or water into the RV on boots or shoes.
    • Don’t dry clothing in the RV.
    • Open a vent and turn on overhead fans when cooking, washing dishes or showering.
    • Open cabinets to allow air to circulate.
    • Dry wet pets that come into the RV.
    • Use an appropriately sized dehumidifier.  


    No. 9. Using Electricity Instead of Propane for Heat

    Dry heat and cost effectiveness are the main reasons many RVers use electric heat in the winter instead of the RV’s propane furnace. However, using electric heat in an RV instead of propane  has a big downside that many people might not be aware of. (And it’s got nothing to do with the heat produced.) The thing is, RVs are built with furnace ductwork sharing the same interior space as plumbing. The ductwork helps prevent water pipes from freezing when it gets really cold out. Electric heaters don’t offer this protection. (Which definitely makes this one of the sneakiest winter RVing blunders.) So, if you use them instead of propane, you could wind up with frozen pipes. 


    No. 10: Not Protecting Your RV with Skirting

    RV skirting can make a big difference to how warm you feel inside your RV. Skirting prevents wind and frosty air from getting underneath the RV and making it cold. The result is warmer floors and lower  heating and propane usage. A popular RV skirting solution is custom-fitted, insulated vinyl skirting that’s installed via snaps or twist locks. However, RV skirting can consist of simple plywood or insulation boards cut to fit your RV. 

     In addition, inflatable Airskirts provide a simple RV skirting alternative that’s easy to set up and pack up. Airskirts resemble giant cigar tubes and are inflated and are tucked around the perimeter of the RV to provide an extra layer of insulation.   


    The Cool Reward of Avoiding Winter RVing Blunders

    The growing number of four-season RV models are proof that RV manufacturers are recognizing that a growing number of RVers don’t want to end the camping season when the leaves drop from the trees.  That’s because winter camping can be a lot of fun. An RV can provide a cozy place to warm up, enjoy a hot beverage, and exchange stories from a day filled with winter activities. Avoiding the common winter RVing blunders that RVers make over winter will help keep winter camping as enjoyable as it should be.