Category: Living

  • Camping Survival Skills That Could Save Your Life

    Camping Survival Skills That Could Save Your Life

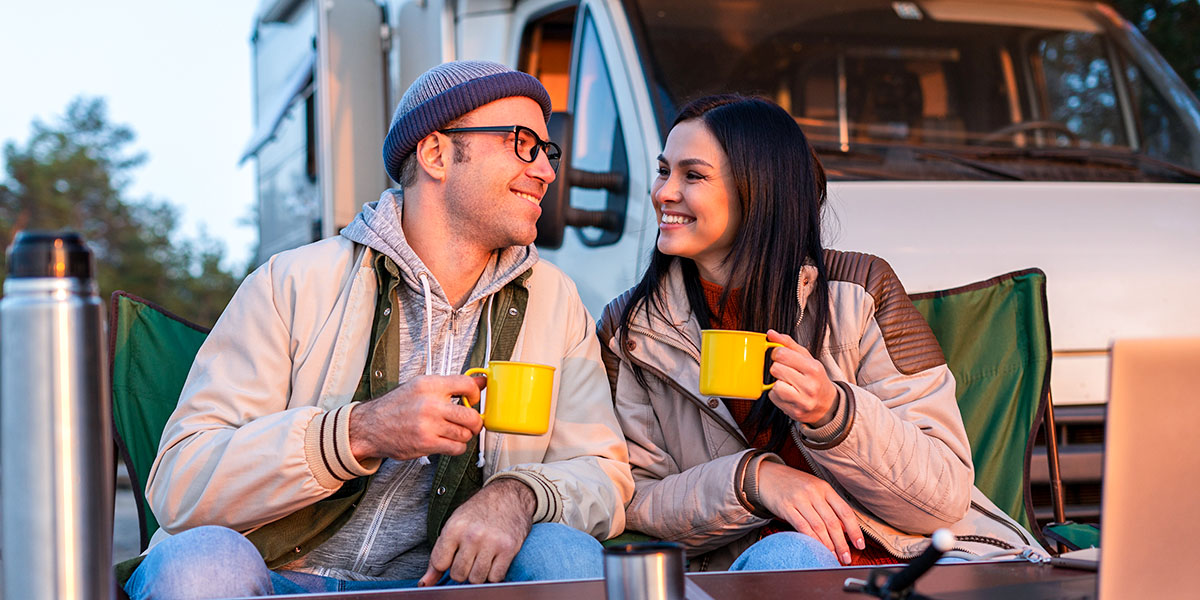
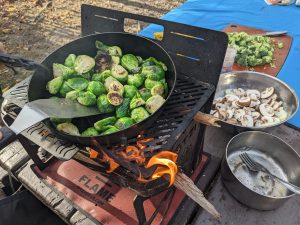
    Camping is basically about two things: getting away from it all and communing with nature. Certainly, nothing helps us relax, reset, and recharge like being heart-to-heart with the natural world. But as much as RVers love nature (and as comforting as having our RV parked nearby can be), it can be easy to forget that when things go wrong, nature doesn’t suffer fools. Because it might only take an instant for an amazing adventure to go sideways, everyone — from dry campers to weekend warriors — needs to know certain camping survival skills. 

    Make no mistake, even having basic understanding of these skills can save your life. But that’s not going to happen by accident. In some cases, you’ll need to train. (But, fortunately, practicing camping survival skills can be a lot of fun on any camping trip.) All this say, everything starts with planning.


    Preventing Problems with Good Planning

    It goes without saying that having a good plan can help you avoid a lot of problems. After all, nobody plans on getting lost or having any kind of health crisis when they are communing with nature, but it happens. Being well-prepared with a good plan not only allows you to avoid problems entirely. It also helps you to deal with any crisis that comes up — calmly and effectively.  

    With that in mind, here are a few camping preparation pointers.

    • Before you leave to go camping, know where you’re headed.
    • Don’t depend solely on GPS for navigation. Use an up-to-date road or trail  map to plan your route.
    • Weather, natural disasters, and road conditions can be difficult to accurately predict. It’s a good idea to check road conditions and weather within 24 hours of your departure.  
    • Consider bringing a NOAA weather radio with you.
    • Tell someone where you’re going, the route you’ll take to get there, and when you intend to be back. If you’re taking a longer road trip, plan to check in periodically with that contact.  
    • Pack enough water, food, weather appropriate clothing for each day of your trip.
    • Be sure to pack more than enough medication for the duration of your trip.
    • Bring suitable footwear for activities like hiking and fishing.
    • Be prepared for emergencies with a standard first aid kit and at least one fire extinguisher.
    • Know emergency evacuation procedures for the area in which you’ll be camping.


    Understanding the Rule of Three

    Even with the best planning, the nature of accidents and emergencies is that they happen when we least expect them.  The “Survival Rule of Three” says that a human could survive for three minutes without air, three hours without shelter (in extremely hot or cold conditions), three days without water (if you have shelter), and three weeks without food (if you have shelter and water). 

    Knowing the Rule of Three will help you to prioritize during emergencies. For example, if your camper  is on fire, your priority for survival is to get out and into fresh air, instead of saving your shelter. However, after you’re out and able to breathe freely, if it’s cold or hot out you’ll need to get into some form of shelter before you develop hypothermia or hyperthermia. 


    Knowing Distress Signals

    If you’re lost, injured, or you get stranded by the side of the road in an area where there’s no cell signal, one of the first things you’ll want to do is attract someone who can help. You’ll never know when you need this skill. It could be when you’re on a long hike or in response to an unexpected medical event. Both could easily happen while you’re away from your RV. Using a distress signal lets people know that there is a problem and allows them to find the person having it.  Distress signals can be auditory or visual, and using the right one for the situation can help save your life or someone else’s.


    Auditory Distress Signals  

    Shouting for help can be effective in a handful of circumstances, when there is someone within earshot. However,  shouting for help uses much needed energy, and your ability to shout will quickly deteriorate with repetitions.  If you need help, and you suspect people may be in the area, using a good quality whistle will allow you to conserve both your energy and your voice. A whistle also has the advantage of being able to carry in a dense forest much better than your voice.  


    Personal Locator Beacon

    A personal locator beacon uses a satellite to send out an SOS or connect with an emergency contact with two way messaging. It’s a good idea to have one of these whether you travel out of cell signal range or if you’re camping off the beaten track.


    Visual Distress Signals

    These will help to send a signal that you need help to overhead aircraft, which can then contact a rescue team.

    • Signal flares (only use when fire danger is low).
    • Build three small fires in a triangle (when there is no fire danger present).
    • Spell out a giant “S.O.S. on the ground using rocks, sticks, or whatever you happen to have at hand.
    • Use a small mirror to reflect the sun and flash a distress signal to aircraft overhead.


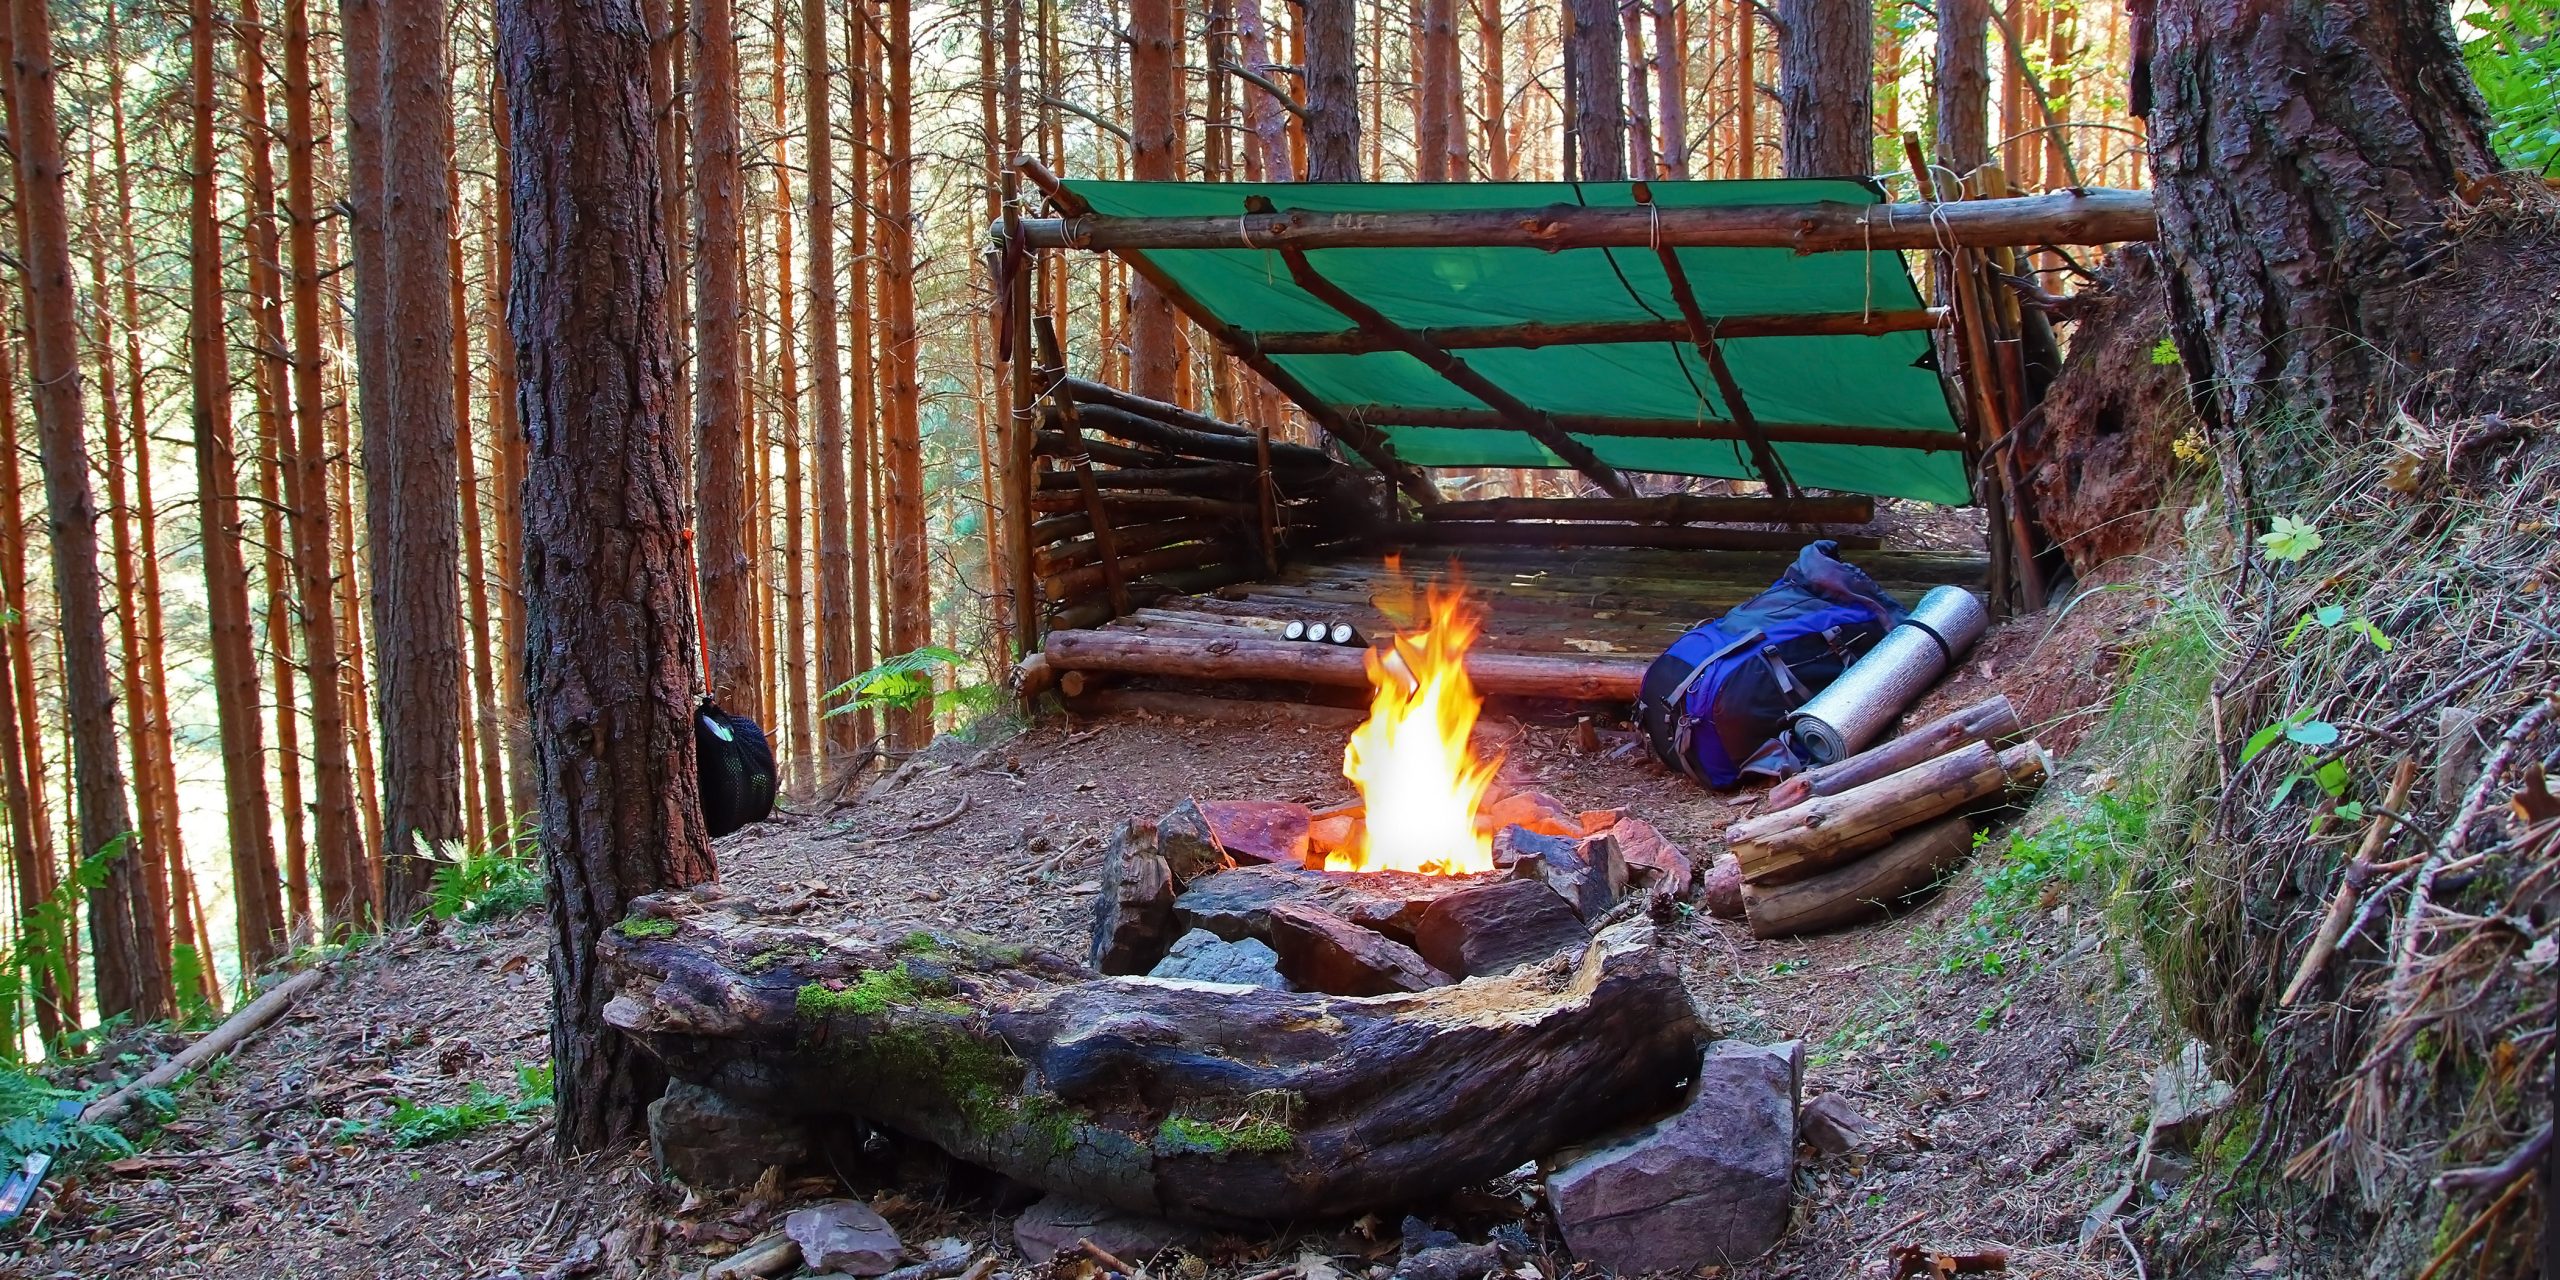
    Building a Makeshift Shelter

    Sure, for most RVers out on a camping trip, your RV is your shelter. But again, things can — and do — happen when you are away from your campsite. Think of the Rule of Three here. If you can’t get back (or get everyone back) to the RV, you or someone else may need a makeshift shelter.

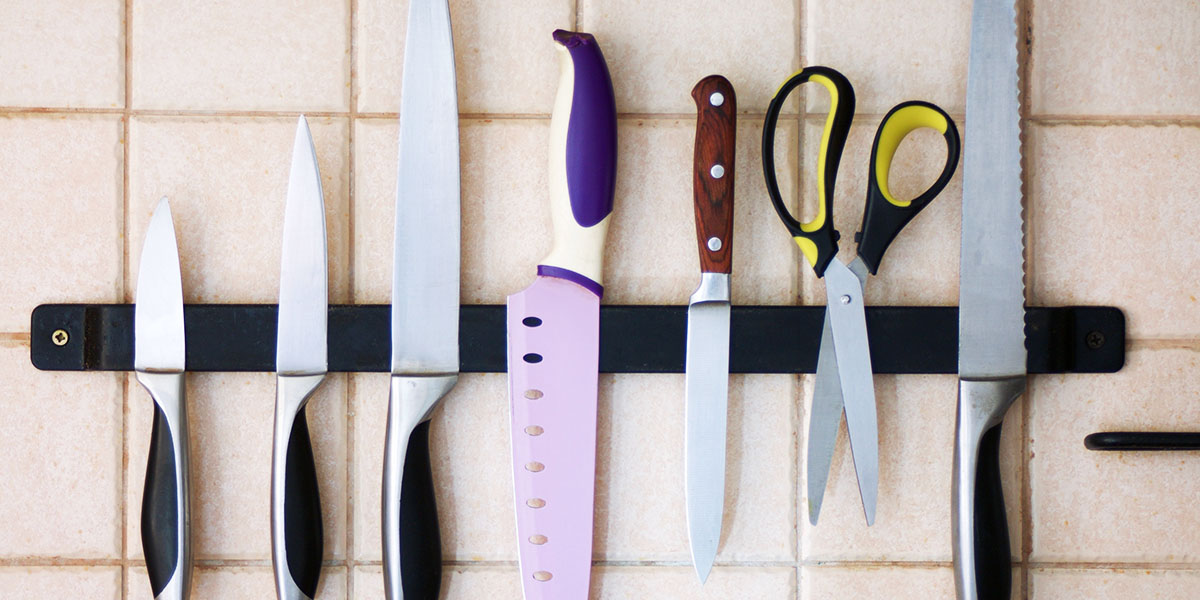
    A shelter should offer protection against weather and predators while offering shade or a means of conserving warmth. It’s good to know how to erect a makeshift lean-to shelter using a small tarp, some paracord or rope, and poles cut from saplings or branches using a camping knife or small axe.  You might never need this skill, but it could be a lifesaver if something happens on a hike — or even to your tent or RV.  


    Accessing Safe Drinking Water

    Being able to make water safe to drink is a survival skill that every camper needs to have. It can be impossible to find safe drinking water after a natural disaster or even when you’re far away from a faucet.  

    Boiling water over a fire for 10 minutes is one way to kill bacteria and microbial organisms. However, there are now numerous products on the market that are designed to purify even the muddiest water. Having any of these in your go-bag or emergency pack can help to secure clean drinking water without building a fire or lighting the camp stove.


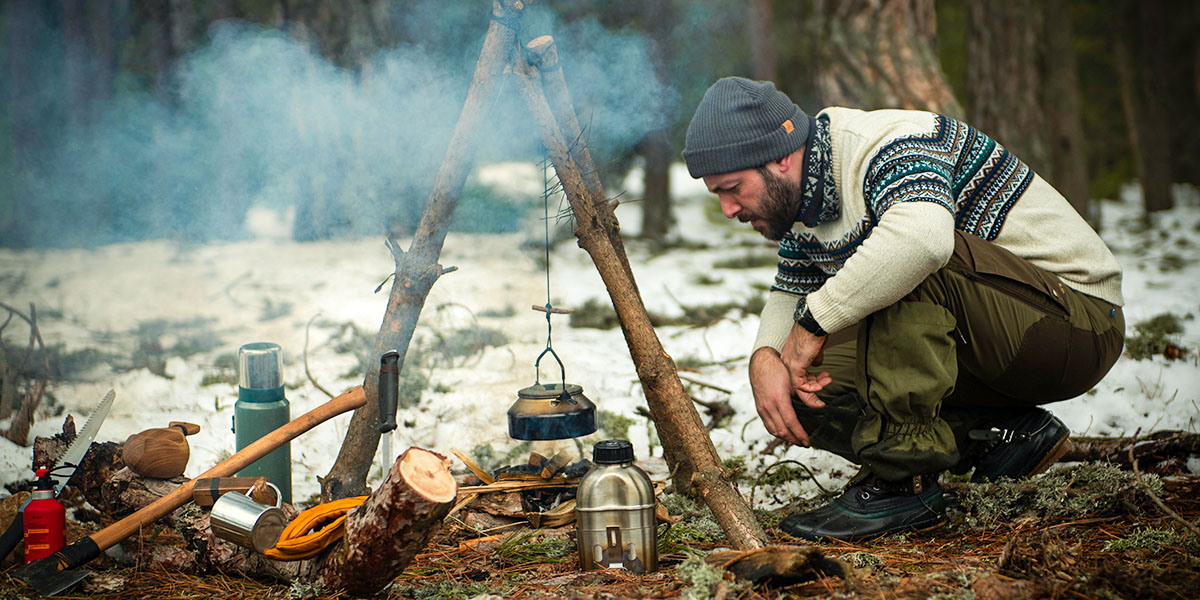
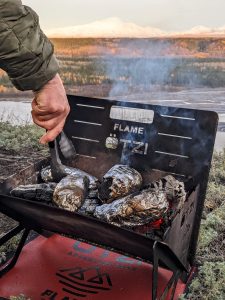
    Building a Fire — with Dry or Wet Wood

    Fire is often the essential tool for survival. This magical element gives you a means to keep warm, send a distress signal, heat food, and make safe drinking water. Almost every camper knows how to build a fire using a lighter or matches, some kind of tinder, and dry wood.  However, knowing about the fire triangle (the 3 elements you need to successfully build a fire), you’ll be able to create a fire, even when wood is scarce.  A balanced combination of fuel (wood), oxygen, and heat are what allows you to ignite and maintain your campfire. 

    Even so, it must be Murphy’s Law that if you really need to build a fire, all the wood will be damp or wet.  What do you do then? That’s when it’s handy to know the tricks to getting a fire going when it’s been raining and all accessible firewood is damp or soaked. Here’s some of the skills experienced bushcrafters use to start fires when it’s raining.  

     Just a Little Bit of Bushcraft
    • Find cedar wood or source resin-soaked pine pitch wood by cutting the stubs of dead branches next to pine tree trunks using a folding saw.
    • Collect several big handfuls of pencil-lead-size and dead-dry twigs and branches from fallen, or damaged trees to use as kindling. And keep them dry .
    • Use a camping knife to split sections of dead pine and cedar branches to expose dry wood inside them.
    • Use peeled birch bark to as tinder
    • The wool made from the inner layer of bark from deadfall poplar works well when used as tinder.
    • Create tinder by using a knife to create shavings from dry wood.
    • Cut some large (3- to 4-inch) sections of dry deadfall branches to use as longer lasting firewood.
    • Clear or dig out a roughly 3-foot by 3-foot area to use as a fire pit.
    • Place four or five 1- to 2-inch sticks on the ground about one inch apart and parallel to one another in the center of the fire pit. This provides a platform that helps to keep air flowing under the fire. Pile your tinder materials on this platform.
    • Use a lighter, match, or ferro rod to ignite the tinder. Wait until it’s burning well before adding the smallest twigs.  When the small twigs are burning well, it will be time to add the next size up. Then begin building a log cabin structure around it with narrow pieces of split wood. Add larger firewood when all of the split wood is burning fiercely.  


    Administering First Aid and CPR

    First aid could help you to save the lives of yourself and others in an emergency situation. It’s crucial to know in any survival situation. Taking a standard first-aid course through the Red Cross or another organization will give you the skills to save lives if and when you need to. First-aid courses teach students how to clear airways, establish breathing, restore critical circulation, stop deadly bleeding, and do emergency care for medical conditions. First-aid certification courses usually include a CPR component as well.


    Employing Basic Mechanical Skills

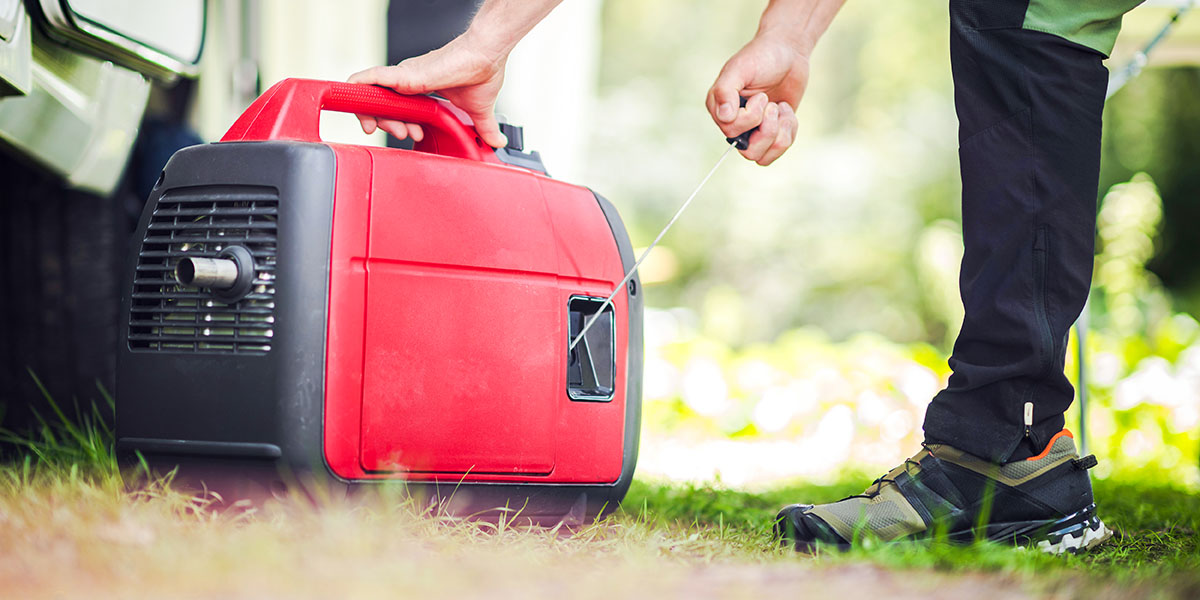
    Basic mechanical skills like changing a flat tire, repairing the furnace, or doing simple repairs to the electrical system in your RV are camping survival skills that all RVer should already have. (They certainly are useful.) But this is especially true if you camp off the beaten track or travel to remote places. Sometimes, being able to change a tire can mean being sidelined for an hour instead of being stick out there for a week. Local colleges frequently have a course in basic mechanics for vehicle owners. The NRVTA has an online course that teaches RV owners the skills they need to do basic RV repairs themselves.


    Handling Wildlife Situations

    It’s a good idea to learn about the animals in the area you plan to travel in. As a rule of thumb, most wild animals will either think you want to eat them, or they’ll want to eat you. This means it’s a good idea to avoid wild animals entirely, or observe wildlife from a safe distance.  Never feed wild animals or attract them to your campsite by leaving food or trash around your campsite.


    Further Thoughts About Camping Survival Skills

    Depending on where your next camping adventure will take you, it’s a good idea to have a plan and let your emergency contact know if anything changes.  It’s always a good idea to learn and practice basic survival skills just in case you need them when you’re camping.

  • The Secret to Finding Your RV Style

    The Secret to Finding Your RV Style

    If you’re new to the RV world or a seasoned RVer thinking about an upgrade, you’ve probably noticed how overwhelming the options can be. With so many choices — travel trailers, motorhomes, fifth wheels, toy haulers, Classes A, B, or C — it’s easy to feel lost. But finding your RV style isn’t just about the size or features. It’s about matching the RV to your lifestyle and how you want to experience life on the road.

    Whether you’re traveling solo, with family, or going full-time, understanding your RV personality is key. Personally, we’ve been through this journey ourselves (more than once). So, let’s dive into how you can discover your RV style.


    What’s Your RV Personality?

    Just like people have different travel styles, RVers have unique personalities that shape how they use their rigs. The RVIA demographic profiles provides a great breakdown of the types of RVers. Let’s explore these categories to help you discover which one matches your style.


    The Happy Camper

    Your Motto: “Keep it simple and cozy.”

    Happy campers love weekends at the campground with family and friends. They aren’t chasing luxury — they want simple comfort, a cozy fire, and the fun of being outdoors. Think: S’mores, board games, and campfire stories under the stars.


    RV Style Fit: Travel Trailer or Class C Motorhome

    • Lightweight and easy to tow or drive
    • Perfect for campgrounds and state parks


    Pro Tip: Look for rigs with outdoor kitchens and awnings for epic campground cookouts.


    The Family Camper

    Your Motto: “The more, the merrier.”

    Family campers know that the best memories are made together. Whether it’s a weekend trip or a full summer adventure, they need space for everyone — kids, pets, and gear. Family-friendly RVs offer bunk beds, large dining areas, and plenty of storage for all the essentials.


    RV Style Fit: Fifth Wheel, Large Class C, or Large Class A Motorhomes

    • Look for bunkhouses and convertible sleeping areas
    • Prioritize storage space for sports gear and toys


    Pro Tip: Find a floorplan with multi-use spaces so everyone can have their own spot to relax.


    The Adventure Seeker

    Your Motto: “Adventure is out there!”

    Adventure seekers love the thrill of discovering off-the-grid locations and are always looking for their next hike, kayak trip, or mountain climb. They prioritize mobility and versatility — if there’s a boondocking spot by a lake or mountain, they’ll find it.


    RV Style Fit: Class B Camper Van or Small Class C Motorhome

    • Boondocking capabilities with solar panels and lithium batteries
    • Compact size for easier parking and backcountry access


    Pro Tip: Apps like Harvest Hosts allow for unique stays at wineries and breweries. Check out this brewery near Frankenmuth, Michigan — a Bavarian-style town perfect for adventure and relaxation.


    The Casual Camper

    Your Motto: “Relax and recharge.”

    For the casual camper, RVing is all about winding down and getting away from daily stress. These campers enjoy scenic weekends in comfortable RV resorts, with access to amenities like pools and showers. They prefer shorter trips but value having the comforts of home nearby.


    RV Style Fit: Travel Trailer or Mid-Size Fifth Wheel

    • Good balance of comfort and convenience
    • Ideal for weekend trips to RV resorts and state parks


    Pro Tip: Sites with full hook-ups make it easy to kick back and enjoy without any hassles.


    The Avid RVer

    Your Motto: “This is a lifestyle, not a vacation.”

    Avid RVers spend months on the road and have mastered the art of RV travel. These experienced road warriors know exactly what they want in an RV, favoring rigs with spacious layouts and practical features for long-term comfort.


    RV Style Fit: Class A Motorhome or Luxury Fifth Wheel

    • Look for residential-style appliances and washer/dryer units
    • Ideal for extended travel


    Pro Tip: Storage is everything. Choose a model with plenty of space for gear and personal belongings.


    The Escapist

    Your Motto: “Escape the ordinary.”

    Escapists hit the road to break free from the daily grind, but they aren’t fully committed to living in their RV full-time. These RVers often spend extended periods on the road — whether it’s a long summer adventure or a few months as a resident snowbird in warmer climates. They need a rig that provides comfort and convenience but doesn’t require the same setup as a permanent home.


    RV Style Fit: Class C Motorhome or Compact Fifth Wheel

    • Look for rigs with slide-outs for space and amenities like solar panels for boondocking
    • Great for seasonal or extended travel without going full-time


    Pro Tip: A smaller motorhome gives escapists the freedom to explore remote areas while still enjoying the convenience of RV park amenities when needed. 


    The Full-Timer

    Your Motto: “Home is wherever I park it.”

    Full-timers have fully embraced the RV lifestyle, living in their rig year-round. Their RV isn’t just a way to travel — it’s their permanent residence. They need a setup that supports everyday living, with features like reliable Wi-Fi, plenty of storage, and residential appliances to make life on the road comfortable and sustainable.


    RV Style Fit: Luxury Fifth Wheel or Class A Motorhome

    • Look for models with residential kitchens, washer/dryer units, and multi-use spaces
    • Ideal for those who travel continuously or stay in one place for extended periods


    Pro Tip: When you’re on the road full-time, finding a community becomes essential. Many RV parks and resorts cater to full-timers with social activities, clubhouses, and long-term site rentals. Take your time exploring different regions — being a full-timer gives you the freedom to follow good weather all year long! We in the life call it “Chasing 70”, as in, chasing 70 degrees all year long.


    Finding Your Perfect RV Style

    Whether you dream of being a happy camper, a part-time escapist, or an all-in full-timer, the right RV will fit your lifestyle and help you get the most out of every journey. For us, we have had 4 rigs – two 5th wheels, a class B, and most recently, we found that a 2021 THOR Delano 24RW  was the perfect fit. For our most recent RV, we wanted something that fell in between the size and mega-comfort of a fifth wheel and the nimbleness/ease of use of a Class B. It had to be something drivable and under 28 feet, with slide-outs to maximize space but not compromise mobility.

    Our journey to find the right RV involved:

    • Creating a list of must-haves
    • Exploring models at RV shows
    • Scouring RVTrader.com
    • Hiring a technician for inspections


    With a bit of planning and patience, we found the perfect rig to expand our RV lifestyle.


    Bonus: Why Knowing Your RV Style Matters

    Remember, your RV style isn’t just about the features. It’s about how your RV supports the life you want to live on the road. Whether you’re in it for weekend escapes, seasonal adventures, or full-time living, finding the right rig is key to enjoying every moment.


    Final Thoughts

    Every RV journey starts by discovering your personal travel style. Whether you’re drawn to the simplicity of casual camping, the thrill of adventure, or the freedom of full-time life, the right RV will enhance every mile of the journey.

    Enjoy the process of exploring what suits you best—because once you find the right RV, the open road will never look the same. And if you’re still figuring it out, check out our other posts for tips and inspiration.

    Happy travels, and may your next adventure be your best one yet!


  • 5 Sneaky-Smart RV Storage Solutions

    5 Sneaky-Smart RV Storage Solutions

    RV life is full of adventure, freedom, and the joy of exploring new places. But let’s be honest: It also comes with the constant battle for space. Finding places to store everything — without feeling cluttered — is a real challenge. So, whether you’re a full-time RVer, a weekend road-tripper, or somewhere in between, maximizing your RV’s storage space makes life smoother, more organized, and more enjoyable. Point blank: You need RV storage solutions. Lots of them.

    Here at RV Trader, we understand the challenge (especially for newbies), and we’re happy to share some clever RV storage solutions to help you keep things tidy while you travel.

    These five storage ideas are designed to make the most of the limited space in your RV. That way, you can bring along everything you need for a comfortable, organized journey.


    Bins that Shrink When You Don’t Need Them

    When storage is limited, bulky bins and totes can feel like they take up more space than they’re worth. That’s where collapsible storage bins come in. They’re perfect for bringing extra items without sacrificing precious storage space. These bins expand to hold whatever you need, from seasonal clothing and extra blankets to pantry staples. But when empty, they fold flat, meaning they can be stashed away almost anywhere.

    • Why They Work: These bins are lightweight and versatile. They’re typically made of durable fabric or plastic, making them easy to clean and resistant to wear and tear. Many come with handles, making them simple to pull from under a bed or high shelf.
    • Perfect Spots: Tuck them under your bed to store out-of-season clothing, slide them into a narrow closet to keep pantry items organized, or use them in the RV’s exterior compartments to hold camping gear, like blankets and portable grills. You can even keep one in the bathroom for extra towels and toiletries.
    • Bonus Tip: Use collapsible bins to pack up laundry. They’re easy to carry to and from the laundromat, and when you’re done, they collapse back down and tuck away without taking up any extra room. For even more organization, label the bins so you can quickly find what you need.


    Imagine pulling out a bin filled with extra bedding for a chilly night, then flattening it to almost nothing when you’re done. It’s a convenient and efficient way to add storage when needed and keep it out of the way when you don’t.


    Turn Doors into Instant Storage Solutions

    Over-the-door organizers are a fantastic way to transform unused vertical space into additional storage. (Vertical space is often a neglected key in finding RV storage solutions.) These organizers hang on the back of doors, giving extra pockets, pouches, or compartments for all items. It’s like adding a mini closet to every door in your RV. Over-the-door organizers come in various sizes and styles, so you can find one that works perfectly for any space and item you need to store.

    • Why They Work: These organizers are all about accessibility and convenience. Instead of reaching into a drawer or rummaging through a cabinet, everything is right there at eye level. Plus, they save space in your cabinets and clear countertops, making your RV feel less cluttered and more spacious.
    • Perfect Spots: Use an organizer on the bathroom door for toiletries, shampoos, and soaps. One can hold spices, cooking utensils, or cleaning supplies in the kitchen, so they’re always close at hand. You can also hang one on your closet door to store shoes, gloves, hats, or other small items that get lost in the shuffle.
    • Bonus Tip: If you’re crafty, try creating a custom over-the-door organizer with pockets sized to fit your specific needs. This could be a great DIY project that allows you to fully customize your storage and add personal flair to your RV decor.


    With these organizers, you’ll find a home for all those little items that usually end up scattered around, keeping your RV neat.


    Slide-Out Drawers: The Secret to Double-Decked Cabinets

    Slide-out drawers let you take full advantage of deep cabinets and under-sink areas that would otherwise be hard to reach. These drawers are easy to install and make it simple to access items stored in the back of your cabinets. By adding slide-out drawers, you’re doubling your cabinet’s storage capacity without any major renovations.

    • Why They Work: Slide-out drawers are ideal for storing items that would otherwise get lost in the depths of a cabinet. Instead of bending down and digging through layers of stuff, you can just pull the drawer out and see everything at once. They’re also great for keeping items separated and organized, reducing clutter risk.
    • Perfect Spots: Try them in kitchen cabinets to keep spices, canned goods, or pots and pans within easy reach. They’re also great for bathroom cabinets, where you can store everything from toiletries and cleaning supplies to spare towels. And if you’ve got a pantry, slide-out drawers make organizing snacks, dry goods, and other essentials easy.
    • Bonus Tip: Look for drawers that come with adjustable dividers or compartments. This way, you can create specific sections for different items, such as small bottles, large containers, or even produce, keeping everything in its place.


    With slide-out drawers, you’ll maximize your space and keep everything accessible, making it easier to stay organized and enjoy the journey.


    Magnetic Strips for Metal Gear

    Magnetic strips are one of the best ways to utilize vertical wall space, and they’re not just for tool sheds. You can mount a magnetic strip in your RV’s kitchen to hold knives, scissors, and other metal utensils or use it in the bathroom for grooming tools like tweezers and nail clippers. These strips are versatile and modern and keep your essentials within reach.

    • Why They Work: Magnetic strips save drawer and counter space, a major plus in an RV. They also help keep items organized and prevent them from shifting around during travel. They add a sleek, modern touch to your RV’s interior.
    • Perfect Spots: In the kitchen, use a magnetic strip to hold cooking utensils, knives, and other metal items. You can hang grooming tools like razors, nail clippers, and scissors in the bathroom. You could even use a magnetic strip in the garage area of your RV to keep small tools organized and accessible.
    • Bonus Tip: If you’re feeling creative, you can paint the magnetic strips to match your RV’s interior. This is an easy way to add a personalized touch while keeping the strip functional and discreet. And don’t stop at just one — install multiple strips in strategic spots around your RV for extra convenience.


    With magnetic strips, you can add storage space in unlikely places and keep necessary tools handy, whether you’re prepping dinner or fixing a loose screw.


    Make Use of Every Inch with Under Furniture Storage

    One of the most overlooked RV storage solutions in an RV is space under the furniture. This area is perfect for stashing larger items you don’t use daily but want to keep handy, like extra blankets, seasonal clothing, or emergency supplies. Using bins with wheels, flat storage bags, or even rolling drawers, you can easily access these items when needed and slide them back into hiding when you don’t.


    • Why They Work: Under-the-furniture storage takes advantage of unused space, helping you keep bulky items out of sight. Rolling bins and drawers make it easy to pull items in and out, while flat storage bags are perfect for storing items you don’t need frequent access to.
    • Perfect Spots: Store extra bedding under your bed, winter clothes under the dinette, or emergency supplies under the couch. You can also use this space for hobby equipment, like camping gear or fishing poles, so it’s always close at hand.
    • Bonus Tip: To keep things tidy, label each bin or bag so you know exactly what’s inside. This way, you won’t have to rummage through multiple containers to find what you want. Add some cedar blocks or moisture-absorbing packets to keep items fresh and protected from humidity.


    With under-furniture storage, you’ll add plenty of hidden storage for those more oversized items, allowing you to bring along more essentials without sacrificing space.


    Maximize Your Space, Maximize Your Adventure

    When you’re living on the road, every inch of storage matters. These five sneaky RV storage solutions help maximize space, reduce clutter, and organize your RV. Whether you want to expand your pantry, make room for extra gear, or keep things tidy, these tips have you covered. For more ideas and products to make RV living easier, visit RV Trader — your trusted resource for RV essentials and lifestyle tips.

  • Yes! You Can RV with a Disability

    Yes! You Can RV with a Disability

    After spending several weeks with my elderly mother, we’ve been reminded how frustrating travel can be for anyone experiencing limited mobility. Navigating airports, parking lots, hotel rooms, public bathrooms, and restaurants is complicated for wheelchairs and walkers alike. What about RVing? Is it possible to RV with a disability? Or to have an RV designed to meet your specific mobility needs?

    These are the questions lots of people face. And, to be honest, for many people with mobility needs, the lure of the outdoors is has an even bigger pull. No one wants to be shut in. But in many cases, an RV is the ideal answer to travel more comfortably. To open up the outdoors. And to kick down old boundaries — all while exploring your bucket-list destinations!

    So, let’s talk about the all-umportant details of how to RV with a disability.


    What to Look for in an RV for People with Mobility Issues

    While most RVs on the market can be customized for someone with impaired mobility, here are some key features to consider if you have mobility issues or want to host someone who does.

    • Hydraulic ramps or a wheelchair lift
    • Lower control panels, and optional hand controls for driving instead of foot pedals (on self-driven RVs)
    • Open floorplans
    • Wide doorways
    • Height adjustable counters, lower sinks, and seating with adjustable headrests
    • Lower beds for easy transfer
    • Spacious bathrooms and roll-in showers that are equipped with seats, handheld shower hoses, and safety bars  


    Class A or Class C motorhomes with an open floorplan might be best. Quite simply, they offer more interior space for wheelchairs or walkers to move around. But, if you have a traveling companion who is able to detach/hook up a trailer, there are also a few models to consider. Manufacturers that offer accessibility features include: Newmar, Winnebago, Harbor View, and Keystone.

    Tip! When shopping for an RV to meet your mobility needs, be sure to bring along the special equipment you use regularly. (At the very minimum, have the dimensions.) You need to make sure the RV can accommodate your needs.


    Special Passes to Smooth Your Path

    National Passes

    The America the Beautiful Pass offers visitors free entrance into all national parks, recreation areas, Bureau of Land Management (BLM), and national forest areas which charge an entrance fee. While folks under the age of 62 pay $80 for this annual pass, folks with a disability (no age limit) can obtain this same pass (known as the Access Pass) for free.  There is no upfront charge. Plus, Access Pass cardholders and their traveling companions get half of camping fees in all federally-owned campgrounds! You can obtain an Access Pass online or in person at many NPS sites.


    State Park Passes

    As you might expect, some states are more tuned into RVers with disabilities than others. Even so,  it never hurts to explore if your state offers discounted passes. For instance, California State Parks offers a Disabled Discount Pass for a whopping $3.50. It also allows persons with permanent disabilities a 50 percent discount on vehicle day use, family camping, and boat use fees.  Washington offers residents who are legally blind, profoundly deaf, or who meet the disability definition by the SSA a free Disability Pass.  This pass offers free parking, watercraft launch, and trailer dump use as Washington State parks. On toipos of that there’s the 50 percent discount on nightly camping and moorage fees. There are plenty of other programs out there, too. So, check your state park’s website for details.


    Campground & Park Accessibility Features 

    Nearly every state park campground and all federally-owned campgrounds offer at least on to two sites specifically designed for folks with mobility challenges. Some county-owned parks and privately-owned parks are ADA-accessible as well. Typically, these campsites are paved, making wheelchair and walker access easier. They are also usually situated next to the bathroom and/or shower house with a paved path in between the campsite and the bathroom. Most bathrooms have at least one bathroom and/or shower stall designed to accommodate a wheelchair. Many modern campground bathrooms offer single-use bathroom/shower combinations which are fully-equipped for disabled access. (But, if you’re planning a trip, it’s always good to call ahead and ask.)

    In addition to campsites and bathrooms, many state parks and national parks offer special accommodations for disabled visitors. Some offer paved trails or boardwalks to popular areas or viewpoints. Others offer special equipment such as all-terrain wheelchairs that can be used on many hiking trails, sand dunes, and beaches. Some chairs are even self-driven and motorized like the ones offered by Minnesota State Parks, while Florida State Parks offer specialized wheelchairs that provide visitors assistance with getting into the ocean. 


    Additional Assistance

    National Park Service visitor centers are designed to accommodate wheelchairs and walkers. (And all of the NPS films offer subtitles for hearing impaired folks.) All national parks that offer a shuttle bus service have wheelchair ramps and designated wheelchair space onboard. Many ranger-led programs can accommodate wheelchairs as well. If you are interested in a tour offered by one of the park’s concessionaires, ask if they can accommodate your mobility needs.  

    When planning your next national park road trip, check the “Plan Your Visit” tab on each park’s website to find information about “Accessibility” at that specific park. Check out Reader’s Digest’s recent article highlighting the eight most accessible U.S. national parks!

    Finally, for senior travelers or those who need to recover from surgery or a serious medical condition, the Escapees C.A.R.E. program is like no other. Exceptionally, it allows RVers to remain in their rolling home in an assisted-living facility type of arrangement in Livingston, Texas.


    The Secret to RV with a Disability

    Regardless of your mobility challenges, take courage: There is an RV and campground that can accommodate your needs! Don’t let your disability hold you back from your traveling and camping dreams. The secret to RV with a disability is one part courage and one part planning. With the right amount of each, you’ll be blown away by the adventures you can access. So, get out there and enjoy the scenic beauty and fascinating history that North America offers!

  • Bushcraft Basics and the RV Ethos

    Bushcraft Basics and the RV Ethos

    What bushcraft is may vary based on who you ask. Some might view it as an outdated and even antiquated recreation full of pseudo-masculine posturing. And sure, in our sprawling civilization of electric grids and iPhones, the likelihood of needing such survival skills seems slim. (At least, we hope. Lately I’ve had my doubts.) But bushcraft, at its core, isn’t about some apocalyptic-preparedness fantasy. Bushcraft is about something deeper. It’s about a connective, immersive, and direct relationship with the natural world. In mastering the bushcraft basics, yes, you will gain survival skills. But what you will really gain is an inner confidence of your primal human abilities. And your ability to be at home in nature, wherever that is. That’s the kind of ethos an RVer can get behind.

    Bushcraft is an opportunity to reclaim the pieces of our humanity that have been swept under the rug of our digitally insulated existence. As an added bonus, you will be the most prepared one in the group on any camping trip. Having recently utilized some of these skills in the thick of Hurricane Helene, I can tell you how fortunate we were to have them when the need was dire.

    Let’s go over what I would consider to be the bushcraft basics. And yes, it’s OK (and smart) to begin practicing these skills with your RV nearby.


    Using Edged Tools

    Most bushcraft activities involving knives will require cutting and carving. You will want a knife suitable for carving, with a fixed blade and ergonomic handle. An uncomplicated blade with a flat bevel will suffice. The Condor Bushlore knife is a step up from the standard Morakniv Companion. Both will serve your purpose. A folding saw should also be considered, to help fill in the task gaps that your knife will struggle to complete. You might want to pick up a pocket sharpening stone to keep your blade up to task. 


    Dressing for the Weather

    Dressing for weather is an underrated skill. In this all-weather camping guide, I go into more detail about dressing appropriately for various climates. Proper attire can save your life, or it can leave you at the mercy of unforgiving elements. Make sure you pack layers to protect you, especially if you are planning to camp overnight or in the rain. Remember to keep your colors dull and muted if you want to spot some wildlife as you hike. Bring extra socks, and waterproof gear when and where appropriate. 


    Knowing First Aid

    If rugged adventure in remote areas is something you plan to do regularly and extensively, it wouldn’t hurt to take a wilderness first aid course. My husband took it many years back, and it gives me so much peace of mind for the sake of our family’s safety, especially on our more exciting adventures. 

    Regardless of your first aid training, a pocket first-aid kit should be a necessary tool in your pack. Here is a thorough list of things that you may want to consider adding to your first aid kit. Side note: Did you know that the most dangerous animal you will encounter in the wild are bees? The amount of fatalities from bee stings are surprising. We have seen first hand what bees can do to someone, and it wasn’t pretty. In that particular situation, an ambulance ride was the saving grace, but in remote areas where you will be going, antihistamines will be your best option. Benadryl can save a life, so don’t forget to pack it. Being prepared for these kind of encounters is important, which is why first aid is one of the most crucial bushcraft basics.


    Making Fire

    Fire is probably the most iconic craft associated with bushcraft. In the eyes of many, from onlooking children to Tom Hanks in “Castaway,” it is the master skill of the bushcraft basics. It sets most outdoor enthusiasts apart from those that have mastered the art of fire starting. Many factors will go into this endeavor. The types of wood at your disposal, the humidity and climate all factor in. Not only do you have to light the spark, you need to nurture it from a delicate flame to an established fire. These skills will require a knowledge of natural tinders and kindling as well as tools to ignite the flame. A Swedish Firesteel will produce hot, large sparks. The more traditional flint and steel will give cooler, smaller sparks, but is very reliable with practiced skill. 


    Replenishing Water

    Regardless of whether you are on a day hike or a prolonged adventure, having a water filtration device should be considered in addition to any water you pack. Boiling water is a good way to kill pathogens, so carrying a pot of some sort would be wise. You can also use camp filters, life straws, or a brown filter bag for drinking water. Keep in mind that the brown filter bag is a coarse filtration method, and would pair well with the boiling method. There are lots of ways to replenish your freshwater. And it is wise to both know how to do it and have the means available.


    Cooking Food

    If you are spending more than a day on your expedition, you will want some proper cookware. A camping pot big enough to boil drinking water will serve for dinner purposes as well. Remember, most camping cookware is sold for the purpose of camp stoves and won’t come with any means of suspension for cooking over a campfire. Find one that can be suspended over your flame. Living off the land also creates some unique cooking opportunities — like cooking the fish you catch.


    Improvising Shelter

    For the more seasoned bushcraftsman, improvising a shelter would be an appropriate undertaking. But if you are just beginning, no one will judge you for packing a tarp and some rope to tie it up with. Remember, it’s more about learning the skill than proving something to someone. (So, it’s perfectly fine you’re still in walking distance of your RV.) Underneath the protection of your tarp, you will want a sleeping bag and a mat. If you can include a waterproof sleeping bag cover, you will thank yourself later should you encounter rain. 


    Additional Bushcraft Basics

    Some other items to be considered are navigational tools, such as a compass and a map. Aand the skills to use them.) Paracord is another tool to consider bringing. You can make your own cordage from natural fibers like yucca, but that is very time consuming (And it won’t help you in a pinch.) Don’t forget a headlamp of some kind, since the night will be especially dark under a forest canopy. Pack an eating utensil as well, unless you want to carve your own out of wood to hone in on your bushcraft skills! 

  • Giving Thanks: 5 Essentials Every RVer Is Grateful For

    Giving Thanks: 5 Essentials Every RVer Is Grateful For

    From coffee pots to card games, many things go into making RV life as cozy as it is adventurous. But anyone who has spent more than a weekend camping out of an RV will tell you that there are a few key things that they’re especially grateful for. These aren’t just “nice-to-haves.” These are the true essentials every RVer is grateful for. You know, the ones that make the difference between an epic trip and one of those “never again” experiences.

    So, since this is the season for it, grab a mug of something warm, and let’s talk about the five things every camper is thankful for. Because without them — whoowee — camping would be a little less delightful.


    1. A Reliable GPS

    The Ain’t-Nobody-Got-Signal-Out-Here Device

    Let’s start with the basics: Nobody — and I mean nobody — wants to get lost in their RV. Sure, getting lost in a regular-people car can be annoying. But try maneuvering a 30-foot land-sub with all your worldly belongings down an “oops, wrong turn” narrow country road. 

    But here’s the kicker: You need a GPS that knows you’re in an RV! Not all roads are RV-friendly, and nothing’s worse than being routed down a “shortcut” that ends up with a 10-foot clearance bridge ahead. Quite simply, mastering navigation is an essential every RVer should master. And a good GPS makes it a breeze.

    Pro Tip: Keep an old-school map around too. You never know when cell service might ghost you!


    2. Solar Panels

    A Sun-Powered Ace in the Hole

    Let’s face it: The RV life isn’t always as “off-the-grid” as it seems. While part of the appeal is getting unplugged, you still need a bit of juice for the essentials. That’s where solar panels come in. And let me tell you, when that generator is on the fritz (or you just can’t listen to that engine drone on and on and on any longer), you’ll be thankful for these power-packed panels. Not only do they keep your gadgets charged, but they also save you from the constant worry of finding a plug-in spot.

    Think of solar panels as your little superpower. They sit up there on your roof, catching rays, doing their thing while you relax. On sunny days, it’s magic. You’ve got endless energy without a single watt of campground electricity. So, when everyone else is rushing to charge their devices at the communal power pole, you’ll be soaking up the rays (and a little smug satisfaction, too) with your sun-powered RV


    3. Storage Space You Forgot About

    Oh, Magical Cubby of Infinite Possibilities

    Space is the ultimate currency in RV life. Every square inch is worth its weight in gold (which you’re clearly going to leave at home), and nothing brings more gratitude than a well-organized storage solution. The first time you open an empty cabinet and realize there’s enough room to stash your whole spice collection? Pure bliss. Same for those under-seat nooks and hidden crannies that somehow fit exactly what you need.

    Then, of course, there’s that moment of joy when you re-discover storage spots you forgot existed. “Wait, we have extra blankets in here??” RV storage is like real-life Tetris: each item has a perfect spot, and you’ll be thankful every time you find one more thing you can squeeze in.

    Pro Tip: Don’t forget vertical space! Command hooks, nets, and organizers are an RVer’s best friend, turning dead wall space into a mini gear locker. For every camper who’s packed, unpacked, and repacked for the perfect fit, storage space is something we can never be grateful enough for.


    4. A Trusty Generator 

    The Portable Powerhouse (When You Need Some Muscle)

    Just imagine. You’ve parked in a remote, picturesque spot with breathtaking views, and you’re ready to settle in for a quiet, off-grid night. You plug into your power hookup, and … nothing. 

    A good generator isn’t just worth its weight in gold for boondockers and campers off the beaten path. If you’ve been on the road for more than a weekend, you’ve had a primary power source go out and had to resort to the generator. That engine cranking up is music to a camper’s ears. (Which is why it is one of the absolute essentials every RVer should have.) Whether it’s keeping the fridge going (may need a little more power than those solar panels), charging up devices, or just keeping the lights on, a generator makes RV life so much easier — especially in those “well, crap” moments.

    Just remember: not all generators are created equal. Invest in a reliable, quiet one that won’t wake the whole campground. That way, you’ll have power when you need it without any side-eye from your camping neighbors. You’ll be extra thankful that you did!


    5. Black Water Tank 

    It’s Gross, but Let’s Get Real … We’re Grateful

    Let’s get real: No list of camping gratitude would be complete without a nod to the black water tank. It’s everyone’s least favorite part of RV life, but imagine life without it. Exactly. Not even the strongest adventurers want to think about that scenario.

    A functioning black water tank is independence-in-a-tank. And sure, dumping it is no one’s favorite chore, but when you think about the alternative, that tank suddenly becomes your new best friend. It’s the unsung hero of the park!


    Honorable Mentions: Essentials Every RVer Also Appreciates

    There are a few other things that campers are grateful for but didn’t make the top five. Bug spray (because mosquitoes love campgrounds), campfire coffee (because there’s no coffee as good as camp coffee), and a sense of humor (because things *will* go wrong, and if you can laugh it off, you’re halfway there).

    RV camping is all about embracing the little things that make life on the road so enjoyable. It’s the freedom, the community, the scenery — and yes, the quirky things like good storage, a generator, and that oh-so-vital GPS. So, here’s to the RV life and all the essentials ever RVer is grateful for.

  • Easy Thanksgiving Recipes for the Modern Pilgrim

    Easy Thanksgiving Recipes for the Modern Pilgrim

    RVers by the millions roll into campgrounds across the United States for Thanksgiving week. Those who have full RV kitchens (and love to cook) often go to the effort to make the whole shabang. At the same time, just as many others simplify the process, cook over a fire, and employ fun and delicious recipes which involve the whole family. No matter which way you choose to roll, cooking some or all of the big meal outside will be memorable. But having some road-friendly, easy Thanksgiving recipes is the real key.

    So, with Thanksgiving just a few weeks away, let’s get started! From meal prep and main dishes to sides and deserts, these easy Thanksgiving recipes are made for the modern pilgrim.


    Making Holiday Meal Prep Easy

    For most families — both at home and on the road — Thanksgiving is the biggest meal of the year. Which means you need to make things easy on yourself. In other words, don’t start late! Meal prep is already a big part mastering the RV life, but it’s critical for a big meal. Many of these easy Thanksgiving recipes can be made up to two days prior. That prep work will make the holiday meal much less intimidating to prepare within a small space. Trust us: Getting ahead of the big day is something you’ll certainly be thankful for.


    Indoor and Outdoor Kitchen Prep

    • If you don’t have a lot of space, split the meal prep between the indoor and outdoor kitchen (grill or propane stove).
    • Clean out your RV fridge so that you have plenty of space.
    • Have several cutting boards and knives at the ready, and a few extra saute and sauce pans that can be used inside or over a fire (cast iron or Dutch ovens are perfect).  
    • Don’t hesitate to decorate the picnic table, but leave the fancy stuff at home.  A holiday-themed tablecloth along with a few candles and small gourds are a great start. Then find some pine cones and greenery for some natural flair.


    Roles and Responsibilities

    • If you are just a small group, downsize your recipes. If you are traveling as just a couple or by yourself, don’t be shy. Round up some nearby campers for a Holiday Potluck!
    • Involve as many people as you can and let them choose their recipe. Many can be made by food motivated kids with some basic cooking skills.
    • Thanksgiving on paper plates just won’t cut it. But everyone knows that all those dirty dishes will make a lot of work on the backend. So, get ahead of it. Use a three-wash bin (hot soapy water, warm rinse water, cold bleach water) method will make washing up a cinch.
    • Don’t forget to Leave No Trace. Eat well, but never feed wildlife.


    A Road-Friendly Main Dish

    Holiday Wreath

    Of all these easy Thanksgiving recipes, this one just may become a family favorite. And that includes any chef that doesn’t have the time, energy, or space to cook a turkey. Inspired by a recipe in the Pampered Chef catalog from Fall/Winter 2000. We used to make this only in a traditional oven, then tried it in a Dutch oven over a campfire while camping in Yosemite one Thanksgiving.  So much fun!

    It’s a vegetarian recipe, but the plant-based meat can be replaced with cooked turkey or sausage. The filling combines many of the flavors of Thanksgiving into one dish and can be made one to two days ahead. Then it’s just a matter of laying out the crescent rolls, adding the filling, and baking — either in the RV oven or over a campfire in a Dutch oven. Best served piping hot with mushroom gravy (see below)!


    Ingredients

    Combine the following ingredients the night before and refrigerate overnight.

    • 1/2 cup chopped celery
    • 3/4 cup dried cranberries or tart cherries
    • 8 ounces Swiss cheese
    • 2 cup chopped pecans (toasted if you want)
    • 1 medium sweet onion, finely chopped and sautéed
    • 8 veggie sausage patties, cooked and crumbled
    • 3/4 cup mayonnaise (or vegan cashew aioli)
    • 2-3 tablespoon honey Dijon
    • 1 teaspoon cracked pepper
    • Salt to taste


    The following ingredients will be used when making the wreath the next day.

    • 4 8-ounce packages of refrigerated crescent rolls (or make your own)
    • Whites of 1 egg, beaten
    Instructions
    • Lay out crescent rolls on a piece of parchment paper over a cutting board, just larger than your Dutch oven.  
    • Carefully spoon pre-made mixture onto dough and fold crescent rolls over mixture to create the wreath. 
    • Transfer the wreath with parchment paper into a large Dutch oven. Brush top with egg white.
    • Bake over a campfire or grill for about 20 to 25 minutes (or until crescent rolls are golden brown and the inside mixture is bubbly). Make sure the bottom doesn’t get too hot, and use coals from the fire to cook from the top down.


    Adding Portobello Mushroom Gravy

    What’s Thanksgiving without gravy? How about a simple portobello mushroom version? Purchase your favorite gravy mix and follow package directions. Saute a couple large handfuls of sliced mushrooms and one large Spanish onion in two to three tablespoons of olive oil. Add some fresh (or dried) sage, garlic powder, and black pepper to taste. Stir until thickened. 


    Sides That Steal the Show! 

    Cook These Easy Thanksgiving Recipes on the Day Itself

    • Fire Roasted Sweet Potatoes. If you want to try something different, wrap some sweet potatoes in foil, poke with a fork, and bake them in the fire pit or on the grill. Serve them like a baked potato, drizzled with honey butter and spiced pecans. The sweet and savory mix is divine!  
    • Garlic Mashed Potatoes. If you must have mashed potatoes, skip the mess of peeling, boiling, and mashing potatoes (not to mention the clean-up). Start with your favorite dehydrated mashed potatoes, add some roasted garlic, fresh butter, and sprinkle the top with some fresh parsley.  Unless you’ve invited Rachel Ray or your fussy Aunt Karen to join you, folks will think it’s scratch-made.  
    • Cornbread Stuffing. If you aren’t making a turkey, no worries. Use your favorite boxed stuffing mix and add some additional spices, walnuts, chopped celery, dried cranberries, and onions, etc.  These additions will turn a boring stuffing mix into something extra special.


    • Parmesan Crusted Roasted Brussel Sprouts. We both hated them as kids, but now crave them anytime those little green balls of fun are in season. This delicious recipe adds some Panko bread crumbs, chopped garlic, and parmesan for extra crunch and flavor. You can make these on the stovetop, over the grill, or in the oven if you have one.
      Inspired by a recipe from RecipeTin Eats.  We spiced this recipe up a bit with red pepper flakes and roasted the sprouts in a Dutch oven on the stove top. This allows you to use a two-burner stove, grill, or campfire instead of an oven.

      Ingredients
      • 1 pound brussels sprouts (trimmed and halved)
      • 2 tablespoons extra virgin olive oil
      • 2 garlic cloves (minced)
      • 1/4 teaspoon salt
      • 1/4 teaspoon black pepper
      • 1/4 teaspoon red pepper flakes
      • 1/3 cup grated parmesan 
      • 1/3 cup panko breadcrumbs
      Instructions
      • Place prepared sprouts in a bowl and coat with oil, toss lightly.
      • Sprinkle with garlic, salt, pepper, parmesan, and breadcrumbs, toss to coat.
      • Heat cast iron pan on stove top and spread sprouts out evenly in the pan.
      • Roast with lid on for about 10 minutes, stirring occasionally to prevent sticking and make sure all sides are browned. Turn heat down a bit and roast for another 8-10 minutes, or until a fork slides in easily.
      • Serve warm and be sure to scrape any loose parmesan breadcrumbs off the pan and sprinkle over the top!  That’s the best part. 


    Make These Sides 1-2 Day Prior

    • Roasted Brussel Sprout Salad. This one is simple and it’s sure to turn Brussels sprouts haters into Brussels sprouts lovers.  Roast the sprouts (described above) and all them to cool. Follow this recipe (one of the best easy Thanksgiving recipes around) to turn them into a delightful salad that can be made the day before. This simple salad is full of crunch, flavor, and texture. It’s sure to turn Brussels sprouts haters into Brussels sprouts lovers. This delightful salad can be made the day before the holiday.
      Ingredients
      • 1 pound of Brussel Sprouts (follow recipe above)
      • 20 grape tomatoes, sliced in half
      • 1/2 tub of goat cheese OR feta cheese
      • 1/4 cup of dried cranberries
      • 1/4 cup of almonds, walnut, OR pecans, chopped
      • Balsamic vinaigrette, to taste
      Instructions
      • Use the recipe above to roast the Brussels sprouts, then allow to cool completely in the fridge, or covered outside on the picnic table.
      • Once cooled, mix in the rest of the rest of the ingredients, toss with your favorite balsamic vinaigrette and serve!


    • Fresh Cranberry Sauce. If you want to keep it traditional, using fresh cranberries couldn’t be easier, and it’s worth the extra few minutes. Bring a small bag of cranberries and 1 cup of water to a boil, then add some raw agave syrup or sugar to taste. 
    • Apple, Cranberry, and Pecan Waldorf Salad. This is a twist on an old standby. Mix equal parts mayo and Greek yogurt, add a couple chopped apples, ½ cup dried cranberries, and ½ chopped pecans, and some lemon juice to taste.  
    • Cranberry Jalapeno Chutney. Warning, this recipe is addicting! It can be served as an appetizer, could be a side dish with fresh bread. Or if you aren’t careful, it could become your whole meal.
      Inspired by a recipe from Mel’s Kitchen Gourmet. We prefer more spice and tartness than Mel’s recipe, so we doubled the jalapeno and significantly reduced the sugar. For camping, an immersion blender takes up so much less space, is much easier to clean, and works just as well.  If you use a Pyrex bowl for blending, just put the lid on, and store it in the same container you blended it in. Super easy clean up!

      Ingredients
      • 12 ounces fresh cranberries
      • 3 green onions, chopped
      • 1/4 cup fresh cilantro, chopped
      • 1 large jalapeno pepper, seeded and diced
      • 1/4 cup sugar, more if you like it sweeter
      • 1/2 teaspoon ground cumin
      • 2 tablespoons lime juice
      • 1/4 teaspoon salt
      • 1 block of light cream cheese, softened
      • Serve with rice crackers, toasted bread (pumpernickel or sourdough), and/or sliced apples.
      Instructions
      • Coarsely chop cranberries with an immersion blender. Add the green onions, cilantro, jalapeno, sugar, cumin, lime juice, and salt. Blend until the ingredients are well combined and finely chopped. 
      • Cover and refrigerate for at least four hours.
      • Spread the cream cheese in an even layer on a serving plate or pie dish and top with the cranberry mixture.


    A Wow Dessert (That You Don’t Have to Bake)

    Pumpkin Latte Cheesecake

    While you could simply purchase a pumpkin pie and no one will bat an eye (especially if you add freshly whipped cream with a little bourbon and vanilla), here is one of the best easy Thanksgiving recipes around: pumpkin latte cheesecake. This homemade pumpkin dessert is fun and easy to make while camping.   

    For those who don’t love pumpkin pie, this recipe is next level… and oh-so-easy because no baking is required! So simple, even the kids can make it on their own. Inspired by a recipe from Kraft-Heintz, we added more spice for more pumpkin pie flavor, less sugar, replaced the standard graham cracker crust with a pecan crust, and added some bourbon vanilla to the Cool Whip topping. These small changes made a BIG difference with both flavor and texture!

    Ingredients
    • 8 oounces cream cheese, softened
    • 1 cup canned pumpkin
    • 1/4 cup sugar, more if you like it sweeter
    • 1 teaspoon pumpkin pie spice
    • 1 teaspoon bourbon vanilla
    • 8 ounces tub Cool Whip, thawed
    • 1 premade pecan crust
    Instructions
    • Beat cream cheese, pumpkin, sugar, and pumpkin pie spice with mixer until blended. Gently stir in 2-1/2 cups Cool Whip.
    • Spoon into pecan crust and level out mixture.
    • Refrigerate for 3 hours or until firm.
    • Mix 1 tsp bourbon vanilla with remaining Cool Whip, and refrigerate.
    • Spread remaining Cool Whip over top of pie and sprinkle with additional pumpkin pie spice for decoration.


    *****


    With some prior planning and some small recipe tweaks, preparing a full Thanksgiving spread at your campsite is not only possible, it may become an annual tradition! Just beware: Afterwards, everyone may be coming to you for easy Thanksgiving recipes!

    For more fun camp cooking techniques and recipes, check out our Gourmet Camp Cooking & Baking Seminar. We wish you a fantastic holiday season ahead! 

  • 7 RV Storage Hacks to Save You From Mess and Clutter

    7 RV Storage Hacks to Save You From Mess and Clutter

    The RV is a capable companion, promising adventure, individuality, and freedom to roam to those willing to take it on. But the freedom it grants has some limits. One of those is in the realm of storage – whether it’s your shoe collection, kitchen appliances, or even the number of bath towels you have on hand for spa night. But with these clever RV storage hacks, you can take advantage of every square inch your RV provides.

    Velcro Is Your Number-One RV Copilot

    You’ll never know just how much you need Velcro – or hook-and-loop fasteners – until you start using it everywhere. It’s incredibly versatile and can be a lifesaver in tight spaces. Stick it on small, everyday items like remotes, flashlights, or kitchen gadgets, and you can attach them to a wall or cabinet when you’re not using them.

    This hack keeps things off the countertops and prevents clutter, all while keeping essentials within reach. It’s also not just a space hack, but an organizational one, giving everything a dedicated space and saving you from rummaging through drawers or accidentally knocking things off surfaces.

    For tricky kitchen items that always seem to shift during travel, Velcro strips inside cabinets keep everything from shifting. Some RVers even use Velcro to secure small appliances like blenders or coffee makers to countertops during travel days, or just a particularly hellacious leveling operation.

    The Power of Magnets

    Magnets are small but mighty when it comes to RV storage – they’re the world’s gift to space mavens of the highest order. We’ve already talked about Velcro, but magnetic spice racks can turn a blank wall or the side of your fridge into a storage haven for your kitchen essentials. Or, use magnetic hooks to hang keys, pot holders, or even hand towels.

    For the crafty types, DIY a magnetic board for holding all the metal tools and supplies you’ll need on your next outdoor adventure. It’s functional, stylish, and saves space all at once! It’s the perfect way to utilize that vertical space that often goes un-optimized.

    Be Your Own Master and (Hook) Commander

    If you’re not already a fan of Command hooks – known for their sturdy yet surface-safe adhesive – prepare to fall in love, and hard. These handy, removable hooks can be placed just about anywhere in your RV without damaging the walls. Use them for hanging towels in the bathroom, hats or coats by the door, or even cooking utensils in the kitchen.

    Pro Tip: Use Command hooks in combination with bungee cords to create a makeshift storage net. This is a great hack for securing lightweight items like paper towels or cleaning supplies, maximizing that magical vertical space we’re always going on about.

    Repurpose a Hanging Shoe Organizer

    According to my sister-in-law, this hack is an absolute game-changer. Over-the-door shoe organizers are lightweight, easy to hang, and can have dozens of pockets – perfect for storing way more than shoes.

    Hang one over a bathroom door for toiletries, towels, or cleaning supplies, or over a bedroom door for socks, underwear, and other small clothing items. In the kitchen, a shoe organizer can store snacks, condiments, or utensils, freeing up valuable cabinet space.

    Don’t stop at hanging them on the door, though. These organizers can also be cut down to fit inside cabinets. Or you can even use them to store shoes – whodathunk?

    Utilize Vertical and Under-the-Table Space

    When it comes to storage space, we usually think about cabinets and drawers – horizontal space – but true RV pros also capitalize on vertical space. We’ve mentioned Velcro, magnets, Command hooks, and shoe organizers. All of these keep your small items within arm’s reach while freeing up drawer and counter space – but we can go further.

    Don’t overlook the area just under your table or counters – no, not the cabinets beneath them, but the actual square footage just under the counters. Adhesive hooks or under-cabinet baskets are great for making use of these often-neglected spaces, which are ideal for sneaking in paper towels, cleaning supplies, or even pots and pans. Alternatively, you can maximize the storage potential of a tall cabinet by adding extra shelves or using stackable bins and racks.

    Collapsible Everything

    When space is limited, bulky items are your enemy. Give them no quarter. Instead, swap them out for collapsible versions. There’s a space-friendly version of just about everything these days – bowls, measuring cups, colanders, even laundry baskets! These take up a fraction of the space of their rigid cousins, and can easily be stored in small cabinets or drawers when not in use.

    And don’t limit yourself to kitchen gear – collapsible water bottles, buckets, and trash cans are just as useful, especially for outdoor adventures. Also look for items that are stackable, expandable, and extendable. This hack maximizes space while ensuring you have all the essentials, and all without compromise.

    Drawer Dividers in Cabinets

    Cabinets in RVs can be deceptively deep, leading to cluttered piles of items that are hard to keep organized. Drawer dividers are a fantastic solution for keeping these spaces tidy. Gone are the days of the junk drawer – the new jam is the randomly collected but highly organized drawer.

    Whether in the kitchen, bathroom, or bedroom, dividers help you sort and group everything from utensils to toiletries in a neat and tidy way, each in their own compartment. They also prevent items from shifting around during travel, which is a bonus.

    Look for adjustable drawer dividers, so they fit snugly in any space, or create your own using old Tupperware or small containers to divide and conquer clutter.

    Divide, Compartmentalize, and Conquer

    These hacks are just the tip of the storage iceberg when it comes to maximizing your RV’s storage potential. With a little creativity and a few inexpensive items, you can transform your RV into a functional, organized space that makes life on the road significantly more zen, with a place for everything and everything in its place.

  • Conjure a Little Campground Trick-or-Treating Magic

    Conjure a Little Campground Trick-or-Treating Magic

    If you’re hitting the road with the family in tow, you’ve probably wondered about October 31. There’s a certain twinge of parental guilt that rides on the tails of holidays away from home. Child-centered holidays, like Halloween, have a special way of extracting that guilt. How exactly can you capture the atmosphere and excitement of Halloween when you’re on the go? (And, for your kids’ sake, how can you score great candy?) No need to worry. I have traveled with my husband and two young children for over a year. And in that time we’ve spent every holiday away from home. It’s all turned out beautifully, including our ventures with campground trick-or-treating.

    Halloween is a great time for RV kids. There are the tricks and the treats. The frights and delights. The entire landscape is transforming — and for one magical night, so are the people. And, of course, there’s the candy. (Perhaps too much candy.)

    But like most things, the magic doesn’t come unbidden. A few things should be considered before heading to a campground at Halloween. So, here are some ways to go the extra mile to make sure your kids get to enjoy the magic of campground trick-or-treating this Halloween.


    Tricks to Master Campground Trick-or-Treating

    Pick Out a Halloween-Friendly Spot

    Before you book your reservation at a campground over Halloween, contact the camp host or campground manager. Ask them if they host or participate in Halloween events. Many private campgrounds have organized events around Halloween, including activities for adults too. And if you’re in a campground for an extended period, and no one is showing off their Halloween flair, you can even start the trend! Carve pumpkins and decorate your site, and see if there are other families with kiddos that want to carve pumpkins with you! Nothing sets the mood for Halloween like a pumpkin-carving party.


    Make a Trick-or-Treat Station

    Setting up a trick-or-treat station at a campground will help to cut down on traffic around the RVs, while advertising your goodie distribution site. You can also decorate your station for added flavor and Halloween flair. If the campground is small, try using the parking lot for a festival-type approach if the campground is amenable to it!


    Dress Up Your Rig!

    The best way to find your people is to advertise your cause. Decorate your rig! You can carve pumpkins, set out some spooky lights, and express yourself! There are countless DIY ideas for RV Halloween costumes. If you’re on the road with your kids, or even just out for an extended weekend, then you probably know the benefits of craft time in the RV. Why not channel that into a Halloween craft-making party? (More on that in a minute.)

    As with any DIY, safety comes first. Try to use battery-operated lights if possible. Avoid live flames. And avoid chaining extension cords. For example, I prefer using tea lights instead of candles inside a jack-o’-lantern. (Plus, they are a lot easier to install and light!)

    If Halloween sneaks up on you (like it does to me every year), you may need to think outside the box for those last-minute costume and decoration ideas. If you can’t find a store that specializes in crafts and costumes or caters to the, uh, specter of the season, why not try a dollar store or a thrift store?

    If you are on the road and want to have something delivered but don’t have an address, don’t forget about the Postal Service’s general delivery service. General delivery allows anyone to receive mail at a participating post office, regardless of their permanent address. (Or even if they don’t have a permanent address at all.) It’s similar to a post office box but without all the setup. Simply call the nearest post office or check online and see if they offer that service.


    Bring the Fun to You!

    Having traveled extensively in an RV, I can tell you first-hand that there aren’t always other kids at campgrounds. If this is the case at your campground, then bring the fun to you! Get on a local social media page – for example, mommy pages or homeschooling groups – and invite some kids to come to you! I’m sure families would love to shake things up a bit and take their Halloween adventures somewhere new. If you can get your fellow campers to agree to hand out some candy, and recruit some local kids to come to your campground, you will have officially succeeded in conquering the holidays with your kids on the road!


    And What to Do with All Those Treats!

    Another Character Who Must Be Fed

    In our family, we receive regular visitations from all of the usual holiday characters: Santa Clause, the Easter Bunny, the Tooth Fairy. But we have another fantastical individual that makes a sneaky appearance late on Halloween. Meet, the Candy Tax Man. HIt may sound awful, but he comes in the wee hours of the night. And he takes his dues. Mercifully, he leaves a little candy left over (and maybe a drawing or a silly note), but generally speaking, he takes a good chunk of the spoils.

    Before you start imagining the rage (like the joy we get from Jimmy Kimmel’s annual Halloween prank), know this: Our kids get thrills from the Candy Tax Man’s shenanigans. Even if all he leaves is a note in exchange for three-quarters of their candy, they still love it. Whether it’s for you or not, this is just an idea. You know, in case you feel that feel multiple pillow cases full of candy are a doctor’s and dentist’s worst nightmare. (Not to mention it’s a great and silly way to introduce fiscal responsibility to young kids.)


    Also, You Can Opt for Toys Instead

    What’s better than a delicious crunchy bar of sweet goodness dipped in chocolate? Well, toys of course! If you’re on the road with your kids, or even just out for an extended weekend, then you probably know the benefits of craft time in the RV. Imaginations soar and creativity abounds when kids spend more time outdoors. Why not channel that into a Halloween craft/toy making party? If you want to add some alternatives to kids’ trick or treat buckets, make it a whole event. The kids can make toys and hand them out as trick or treats.

    Further, this kind of activity will inspire your children’s curiosity and imagination, while instilling resourcefulness and the gift of giving. There’s nothing to set that wondrous spark aglow in a child’s eye, than a handmade object from another child. And if crafting a handmade toy for all the neighborhood campground trick or treaters feels like a stretch, there are so many other alternatives like stickers, glow sticks, puzzles, or pretty much anything in the party favor aisle of Target will do at a low cost.

    The main thing is to have fun while campground trick-or-treating. If you and your RV kids achieve that, it’s a real treat.

  • Campfire Classics: Hot Dogs, S’mores, and More

    Campfire Classics: Hot Dogs, S’mores, and More

    What makes campfire classics so appealing is no mystery. With hot crackle of the fire in the cool air, cooking at a campfire hits all the five senses. The quintessential example? Golden brown marshmallow smashed on a melting Hershey’s bar between crispy graham crackers. An with it comes a wave of nostalgia. The smell of dry old locust wood crackling on the fire brings back memories of a lifetime — and creates new ones for your kids.

    Comfort food brings so much joy and connection with friends and family, especially when we are traveling. Traveling by RV is a way for us to break out of the everyday to escape the security blanket of our four padded walls. It puts us in a more vulnerable and albeit exciting, environment. As our safety nets shrink, our senses become more alive.

    Touch, smell, and fall flavors are in full effect with campfire classics. For many of us, they are the seasonal reminder of the rewards of camping. So, let’s dive into how to fire up some of the golden oldies — and in some cases, give them a new edge.


    S’mores … with a Berry Nice Twist

    I probably should have saved the best for last, but this campfire twist changed my outlook on s’more’s forever. S’more’s are every camper’s go-to. They are classic. Dependable. And always requested. You know pretty much exactly what you’re gonna get. (They are also a sweet lesson for kids on fire safety and marshmallow combustibility. And if they are like my kids, they are learning how to fence each other with red hot marshmallow pokers.)

    Yet, despite everything the s’more has going for it, I have a confession: I get bit bored with them. But I like to use that as a launch point for creativity. For example, what if you inserted a slice of strawberry into the stack? 

    The first time I did that, it blew my mind. My boring old s’more exploded in my mouth with an unexpected delicious flavor. The strawberries and toasted marshmallows work some chemical magic together between those graham crackers. It tastes like a strawberry shortcake, but better. Strawberry s’more’s are still my favorite dessert to this day. 

    And you don’t have to stop at strawberries! You can add bananas, peanut butter, apple slices, bacon (oh my!), Nutella, or caramel sauce just to name a few. 


    An Easy Hot Dog Upgrade for Adults

    We all know what a regular hot dog entails. It’s a camping staple, but … it can also be pretty bland. More likely than not, everyone on your camping trip will be expecting hotdogs on the menu. (Especially the little people.) So, let me make a recommendation: Add some adventure to the typical wiener dinner. 

    How can you achieves this? With two simple ingredients: jalapenos and bacon. Wrap your dog in bacon, and stuff your bun with jalapeños and cream cheese. And if that’s not enough, you can stuff your hot dog with cheddar cheese too. The kids may still want to stick with the plain ole hotdog, but just this little variation adds new texture to one of the campfire classics.


    Freshly Caught Fish Over the Fire

    If you’re camping near the ocean, or in the mountains surrounded by trout streams, you might have some freshly caught fish to put on the table. (If so, we have some recipes and ideas for catching fish near the coast and cooking what you caught.) Truly, nothing tastes better than fish cooked over a fire. If you are camping In the mountains, trout are not hard to come by. Before you toss your trout in a frying pan, consider cooking it over the embers of a campfire instead. 

    After you have cleaned the fish, open the belly and put some lemon slices inside, along with some fresh chopped onion and garlic. Cut a piece of aluminum big enough to wrap the trout in thoroughly and lay the fish on top. Add some hefty pads of butter on top of the fish and wrap it up with foil. Make sure the aluminum is sealed, and lay your foil package over the embers. Your fish should be cooked in about seven to ten minutes.  

    Just one warning: If you do this, of all the campfire classics, this may be the one your friends and family remember the most. So, you’re going to get asked to do it every RV trip.


    Dependable Dutch Oven Classics

    If you really want to utilize a campfire to the fullest, a Dutch oven will take you all the way.

    • Campfire nachos are a great meal to share with family. I especially love this for the timely delivery that it offers. Layer your tortilla chips with black beans, cheese, jalapeños and veggies. Cover it with foil and let it cook over the fire until the cheese is melted. Layer in some grilled chicken or ground beef for added protein. 
    • Dutch oven apple crisp is another cozy classic. Slice some apples and mix them with sugar and cinnamon. Top them with a buttery oat crumble and bake them in the Dutch Oven over your campfire. Add some whipped cream for the ultimate delight of this classic fall dessert. 
    • Dutch oven chili is a great option for feeding a large group of people. Who doesn’t like chili? And Chilli cooked over a cozy fire will only add to the flavor. Cook the ground beef or turkey with beans, tomatoes and spices slowly over the fire. The even distribution of the heat from the Dutch Oven makes it a perfect way to cook chili, for a rich deep flavor. 


    Tools Necessary to Cook Campfire Classics

    Here are some essential outdoor kitchen utensils that will expand your culinary options over the fire. The Dutch oven is our number one pick for necessary campfire cookware. Another handy tool is this telescoping marshmallow skewer from REI. You could always go find a stick to roast your marshmallow, but I personally have never had much luck (or patience) with that.

    A cooking iron is a great way to cook gourmet sandwiches, pies, pizza pockets, and more! A grill grate will be your friend on many campfire cooking adventures. And don’t forget some heat resistant gloves to protect your most valuable culinary asset. And my husband’s favorite: a hatchet. You can’t have a fire without wood. So get to work!