Category: RV Lifestyle

  • Spooky Destinations: Haunted Spots Across the Country

    Spooky Destinations: Haunted Spots Across the Country

    It’s the spookiest time of the year and we’re highlighting the top 4 haunted destinations you’ll want to check out this Halloween. Get ready to pack up the RV and hit the road.

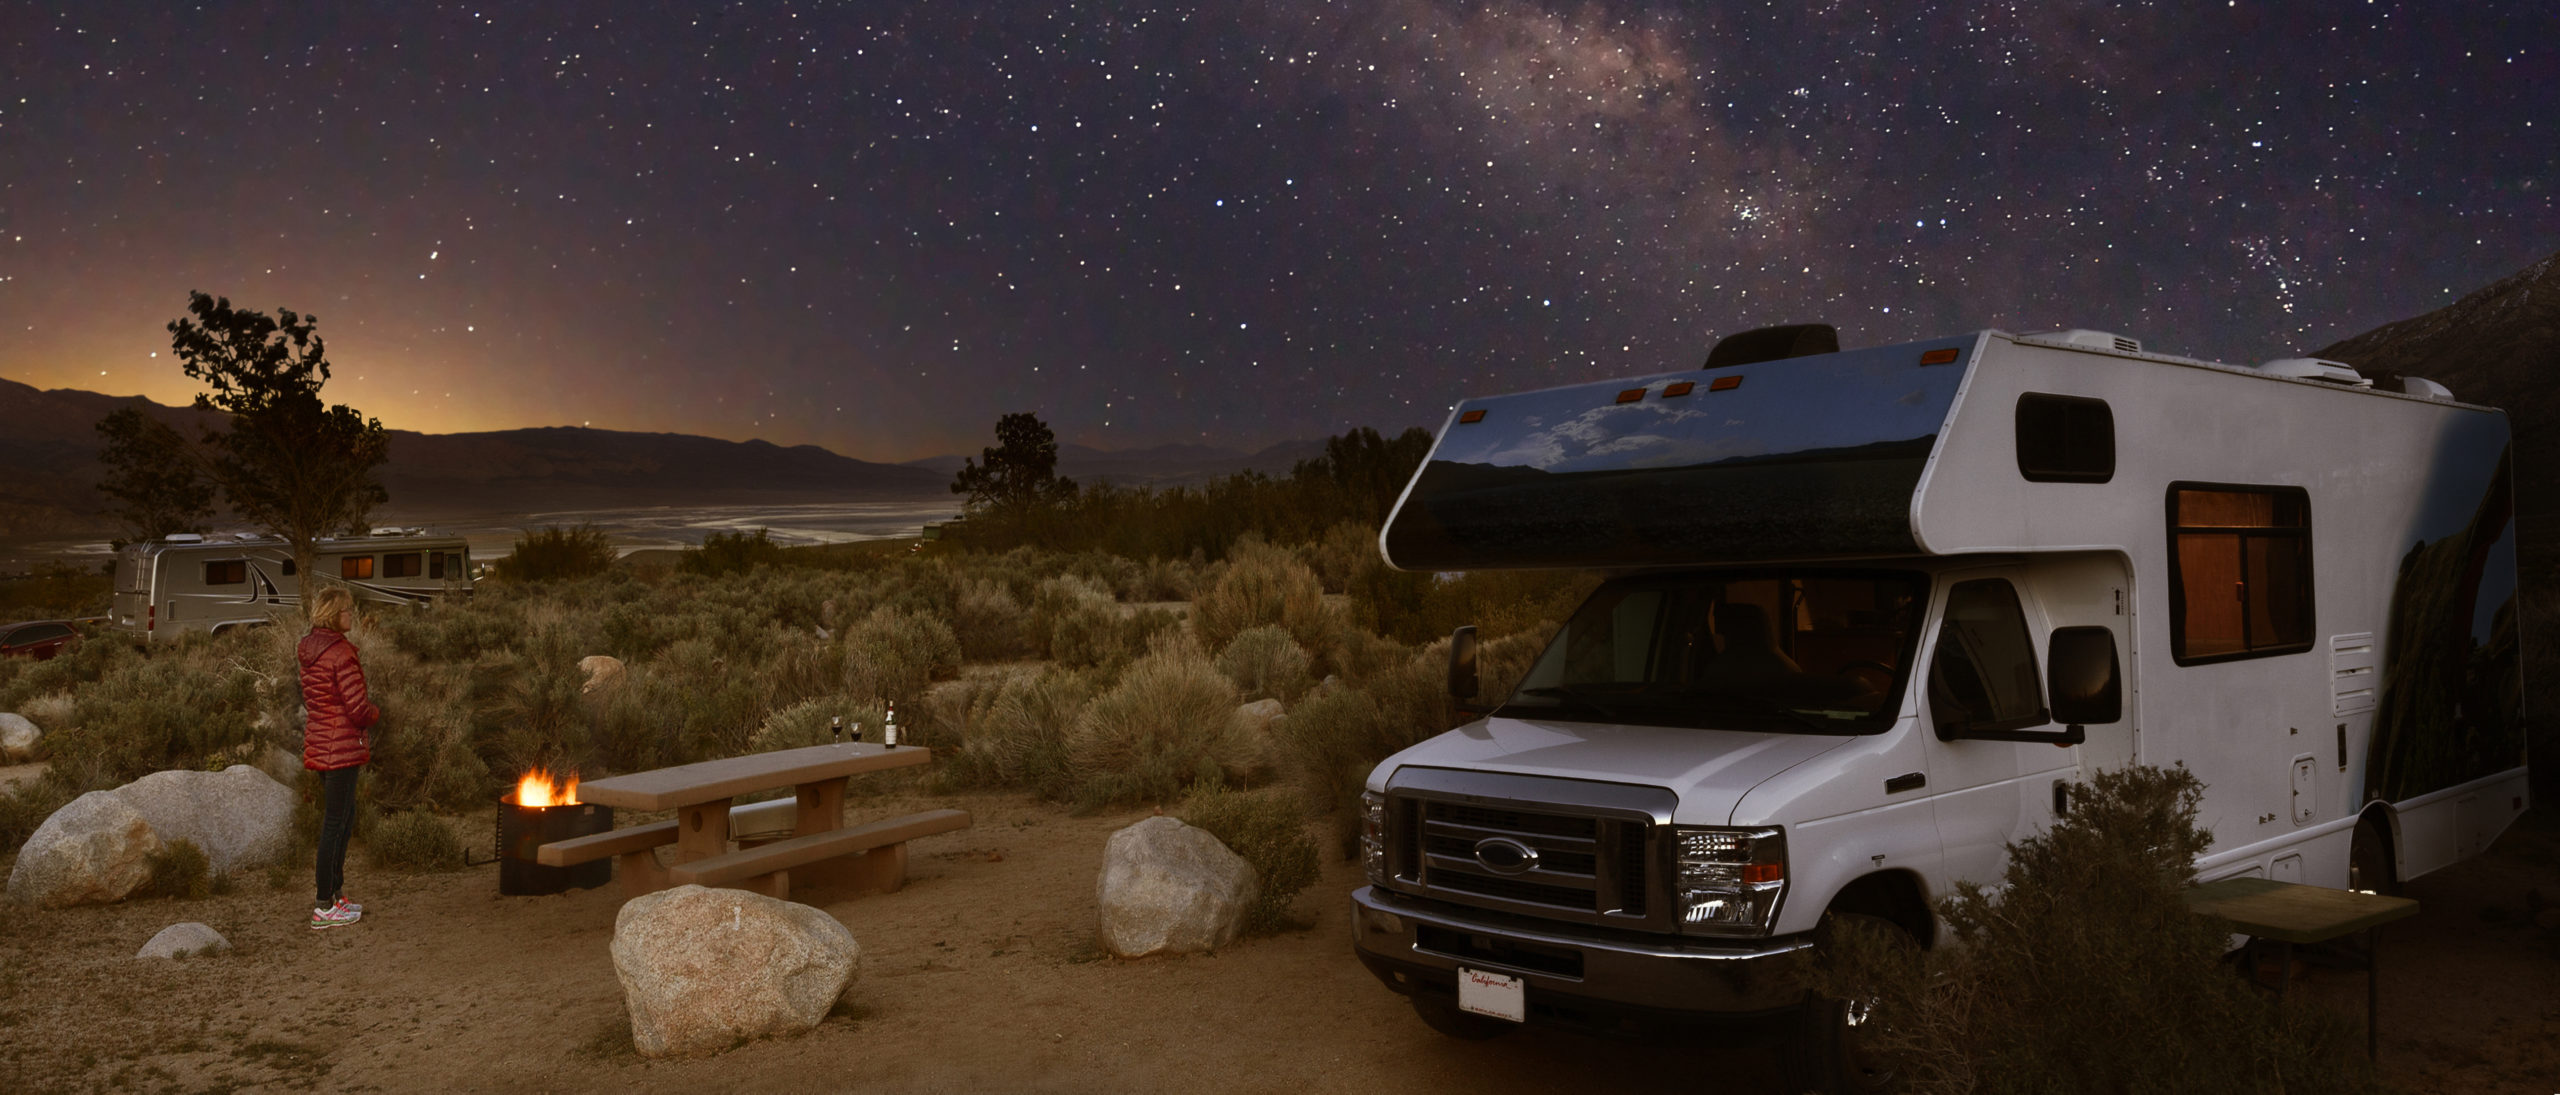
    With Halloween just around the corner, there’s no better time to plan a road trip to somewhere truly terrifying. If you’re not sure where take your RV this season, we’ve got 4 spooky suggestions for you.

    Emily’s Bridge, Stowe, VT

    Golden Brook Bridge is haunted by a ghost named Emily (thus the name) who is known for harassing cars that park there. Drivers have reported hearing noises – like footsteps or screams – even when no one is around. Others have had the ghost of Emily bang on or drag herself across their cars – leaving scratches. She is most active between 12 a.m. and 3:30 a.m. – so if you choose to stop by, make sure it’s late at night.

    Nearby Attractions:

    • Smuggler’s Notch State Park
    • Green Mountain Fine Art Gallery
    • Moss Glen Falls

    Biltmore Estate, Asheville, NC

    Biltmore Estate is a historic mansion located in Asheville on over 8,000 acres that boasts gorgeous gardens, a winery, a small village, an outdoor adventure center, and occasionally – supernatural experiences. The grounds are truly stunning – so much so that their original owner, George Washington Vanderbilt II and his wife decided to never leave. While the ghost of late George Vanderbilt has been seen around the property – many workers and visitors have reported hearing Mrs. Vanderbilt calling to her husband in the library where he will sometimes join her for a chat. Also – keep your eyes peeled for a headless orange cat that is said to roam the gardens.

    Nearby Attractions: 
    • Fork Art Center
    • Pisgah National Forest
    • North Carolina Arboretum

    Texas Ghost Tracks, San Antonio, TX

    These train tracks were the site of a tragic accident back in the 1930s or 40s (depending on the account) where a train collided with a school bus full of children. Unfortunately, all the children perished in the accident – but now it’s their mission to save anyone else who parks on those same tracks by pushing their vehicle to safety. A couple of tips before your visit – make sure to put your vehicle in neutral before you approach the tracks and sprinkle baby powder on your bumper so you can see the handprints of the children that pushed you to safety.

    Nearby Attractions:

    • San Antonio Riverwalk
    • Natural Bridge Caverns
    • The Alamo

    Rio Grande Train Depot, Salt Lake City, UT

    This spooky destination is home to the Purple Lady. This ghostly woman has been seen around the depot – but is most frequently spotted in the ladies restroom. She is said to be beautiful and always appears, dressed in all purple garb from the 1900s, looking quite forlorn. Legend says she was killed at the train station when she dove on to the tracks to retrieve an engagement ring after her fiance threw it there during a heated argument. There have also been reports of phantom parties in the basement of the building and a lone walker’s footsteps can be heard traipsing across the mezzanine every afternoon at the same time.

    Nearby Attractions:

    • Antelope Island State Park
    • Red Butte Garden and Arboretum
    • Temple Square


    Ready for a spine-tingling road trip of your own? No matter which of these destinations you choose to check out – you are sure to get in the Halloween spirit and have a hauntingly good time.

  • Drivers Beware! 9 of the Most Haunted Roads in America

    Drivers Beware! 9 of the Most Haunted Roads in America

    Drivers across the nation have spine-tingling tales of the strange and supernatural, from creepy local folktales to terrifying personal experiences. In the spirit of the Halloween season, we’ve collected accounts from 9 of the most haunted roads in America. If you find yourself driving on any of these roads, beware!

    (And if you want even more scary stories, check out our new 2020 collection of haunted tales from the road — 11 More Haunted Roads in America!)


    Route 2A, Haynesville, ME

    Twin girls were once hit and killed by a semi on Route 2A. Today, drivers say they’ve seen a pair of young girls wandering down the road, lost and confused. Those who stop to offer them a ride report that shortly after the girls get in, they suddenly leap from the moving vehicle! Drivers frantically slam on their brakes and try to find the girls, but the twins are nowhere to be seen.

    Pocahontas Parkway, Henrico County, VA

    Construction of Pocahontas Parkway unearthed a treasure trove of artifacts from the Powhatan and Arrohattoc tribes, dating back as far as 6,000 years. The disruption of sacred land has led truckers and tollbooth workers to see Native Americans apparitions holding torches on the edge of the woods by the road, and hear drum-beats, chanting, and anguished yelling break through the swirling wind on stormy nights.

    Mona Lisa Drive, New Orleans, LA

    According to legend, the rich father of a young woman named Mona forbade her marriage to a sailor. Mona killed herself in grief and the father had a statue built in New Orleans City Park to honor her. But when a group of misbehaving teens destroyed the memorial, Mona – not allowed peace in life or in death – began to haunt those who travel along Mona Lisa Drive, moaning and scratching at vehicle windows.

    Crawford Road, Yorktown, VA

    At the Yorktown battlefields, visitors report seeing ghosts from the Revolutionary and Civil Wars, and also claim to see bodies hanging from the Crawford Road bridge. In some cases, it’s the body of a woman in a white dress; in other cases, multiple bodies are seen swinging. Drivers also report their vehicle engines cutting off when they pass underneath the bridge, then seeing shadows moving and hearing unintelligible whispers.

    Messick Road, Poquoson, VA

    Years ago, a fierce storm flooded Dolly Mammy’s farm. Dolly’s daughters refused to help her round up the cattle, so she trekked out alone into the night. The next day, a neighbor stumbled upon a foot sticking out from a sinkhole; Dolly had suffocated in the bog. Today, drivers on Messick Road still report seeing a lantern-carrying apparition in the marsh – Dolly Mammy looking to rescue her cows, and punish her daughters.

    Clinton Road, West Milford, NJ

    Clinton Road is pitch black at night, with no street lights and several sharp turns, but it’s not just dangerous – it’s also haunted. There are multiple stories of phantom headlights appearing out of nowhere and following drivers before disappearing. The road also includes a bridge, where a young boy once drowned. It is said that if you throw a coin over the bridge, he’ll throw it back at you, then chase you back to your car.

    Bray Road, Elkhorn, WI

    Since the first European settlers reported canine monsters who would attack and disappear without a trace, travelers on Bray Road have continued to glimpse a large creature resembling a bear or wolf. In rare accounts, the Beast of Bray Road runs through the forest parallel with the vehicle, able to keep up not only on all-fours, but also on two legs, before vanishing into the brush. Might the Beast of Bray Road be a werewolf?

    Archer Avenue, Chicago, IL

    As the story goes, a young woman named Mary was walking home from a dance when she was killed in an unsolved hit-and-run incident. Mary’s parents buried her in Resurrection Cemetery. For decades, there have been stories of drivers near the old dance hall picking up a young hitchhiker wearing a party dress. She says nothing except to ask to be let out at the cemetery, where she suddenly vanishes into thin air.

    Kelly Road, Ohioville, PA

    Surrounded by dense, dark woods, Kelly Road sits on land cursed years ago by a sinister cult. When animals traverse Kelly Road, they are said to suddenly turn rabid and violent, attacking anything they see, including their owners. Imagine the horror of driving down the road when your pet unexpectedly lunges at your throat with snarled teeth, forcing you to keep them at bay while trying to maintain control of the moving vehicle.

  • Your October RV News Fix is Here

    Your October RV News Fix is Here

    Between the Hershey RV Show and RV Open House, we’ve seen A LOT of news break in the RV industry this fall. And as always, we are here to break down the top RV stories you need to know. Check out some of the recent headlines below. Hint hint… get ready for some new models!

    Image: WOF

    First Completely Electric Motorhome is Officially on the Market

    A few months back, the world’s first completely electric RV was revealed at a German trade show, and now this unit – the Iridiumis – is officially on the market in Europe. During the trade show, the unit only had a range of 124 miles, but now the Iridium comes with a 249 mile-range with the motorhome’s highest battery pack. The interior of the Iridiumis is fairly standard including a bathroom and shower, kitchen, and a double bed. The 249-mile Iridium will cost buyers $219,000, while the 186-mile version comes in at $188,000. We’re interested to see how this unit does in the market, and if similar electric versions will make their way to the U.S. Read More.

    L’air Camper Co. Reveals Super-Light Travel Trailer

    L’air Camper Co. just came out with their brand-new fiberglass trailer and it made its debut at this year’s RV Open House Show. The new model is extremely lightweight and easy to tow. The camper weighs in at just over 2,000 pounds due to its fiberglass exterior. The compact camper might be small, but it includes all the comforts of home like a kitchen galley, full bath with shower, and room to sleep up to four people. We’re excited to see this unit out on the open road. Read More.

    Image: Yahoo! 

    CEO of Trader Interactive Highlights the Current State of the RV Market

    Lori Stacy, CEO of Trader Interactive, recently shared her thoughts on the state of the RV industry with Yahoo! Finance. Although the overall RV market has seen a decline in sales over the last year, things are looking up for the industry when it comes to first time and millennial buyers. To learn more, check out her segment here.

    Image: Winnebago

    Winnebago Debuts New Class B RV at Open House

    This year’s Open House was filled with new models and this includes a new Class B from Winnebago. The manufacturer revealed the Solis, their new Class B RV aimed specifically towards the millennial market. The new unit features a “pop-up” sleeping area that extends off of the roof of the vehicle for added space and a murphy-style bed in the lower level. The combined space sleeps up to four people in just less than 20ft of living space – we’re impressed. The unit has a workspace area for all of the full-timers out there as well as a curtained outdoor area to rinse off sand for all of you beach lovers out there. If you’re ready to experience #Vanlife – check this unit out for yourself.

    You’re officially all caught up on the RV news you need to know this month. Which stories interested you? Let us know your thoughts in the comments below and stay tuned for more news.
  • Painting an RV: Part II

    Painting an RV: Part II

    With the increasing popularity of RV ownership, many people choose to renovate their RV interiors. Renovating allows for individuality and personalization, and there are so many projects you can complete in the process of modernizing an RV. Painting your RV walls and cabinets is one such project that, arguably, yields the most results.

    Previously, we discussed how to prep your RV interior for paint. Prep work involves smoothing all walls, sanding, cleaning, and taping and covering all areas you don’t want painted (see previous post for more details). Once your prep work is done, you are ready to begin the task that will show actual results: painting! Follow along with the steps below for best results.

    1. Choose your paint

    This might just be the most important decision in your whole painting process. Paint colors should be chosen alongside the RV’s overall color palette. After all, in a space of less than five hundred square feet, it is even more important to select specific colors that match a cohesive theme. This will ensure that your finished product looks polished and classy.

    Head to the hardware store and select your favorite color swatches from your preferred paint brands. Bring home a variety of swatches and hold them against your RV walls. Envision them filling your space, and ask friends and family for their opinions. Consider taking a few days to think about your choice before you begin. This is a big decision and you don’t want to rush it.

    Paint colors are a personal preference but it is often recommended to stick to neutral tones in tiny spaces. For instance, white is great for opening up a space and making it look bigger – which is why it is a popular choice amongst RV renovators. However, many are wary of choosing white because it can also be a challenge to keep clean and fresh. Paler grays are also popular, as they are easier to keep clean and still brighten up the space while keeping it neutral.

    Bright colors are fun, but they can also make a small space look tacky if used in excess. If you are wanting some color, you may want to consider painting just an accent wall here or there. If you choose to paint in all neutrals, you can always use decorations, furniture, blankets, throw pillows, rugs and more for pops of color.

    Once you have chosen your colors, you will need to choose your desired paint finish. There are many different opinions and preferences, but most agree that cabinets should be painted with a gloss or semi-gloss finish. This makes them more durable and easier to clean. Walls, on the other hand, can be painted in whichever finish you prefer. Eggshell and satin tend to have a lower-gloss look and are easier to clean than matte paint.

    2. Gather your supplies

    Once you have chosen your paint colors, head to the hardware store to gather your supplies. You will need painting trays, disposable paint tray liners, a paint roller handle, disposable rollers, paintbrushes, and, of course, paint and primer. Be sure to purchase a variety of roller sizes for all the different surfaces in your RV. Two and four-inch rollers are great for cabinets and smaller surfaces, while six and eight-inch rollers are excellent for walls and other larger spaces.

    In addition, select the best quality paint brushes and rollers that you can find. This way, you will avoid leaving bristles and lint behind in your paint to ensure a smoother finish. Finally, consider buying more supplies than you need to avoid additional trips to the store. You can always return the extras when you are finished, and this will be less inconvenient than having to pause your project and head to the store multiple times.

    3. Test your colors

    If you carefully selected your colors, pictured them in your RV, and asked friends and family for advice, it may feel unnecessary to test the colors in your RV. However, this step is crucial to ensuring that your final product is exactly as you envisioned it. Paint a small section of a few different areas in your RV, and allow the paint to dry for a few hours. If the dried product looks good, you are all set to move forward with the final steps. If it is darker or lighter than you expected, or if you don’t like the finish, it is time to head back to the hardware store to select and test some more colors.

    4. Apply primer

    Although there are many paint and primer combination products, applying primer separately has many benefits. When covering darker walls or cabinets, you will need a few layers of paint for full coverage. This means that you will likely not paint a single coat of paint and be done with this project, so you might as well take the time to apply primer.

    Primer will serve as a buffer between the walls and your final coat(s) of paint. It will also ensure better paint adherence and durability. For best results, be sure to choose a higher quality primer (such as Kilz or Zinsser Cover Stain) and paint one or two coats. Allow the primer to dry for a minimum of twenty-four hours between coats for the best and longest lasting results.

    5. Paint!

    Once you have completed steps one through four, you are finally ready for paint. To avoid drips and runs, paint during the day when the sun is out. For best visibility, open all windows and turn on all the lights in the RV. If the paint runs or drips, be sure to smooth over it before it dries.

    If all goes well, you will only be painting your RV once. Go slow and take your time to minimize mistakes and imperfections. For full coverage, it is best to apply at least two coats of paint. As with the primer, allow the paint to dry at least twenty-four hours between coats for best results.

    Although it is only the first step in the renovation process, painting yields big results. When you have finished painting, your RV will look like an entirely different space. This may leave you excited to move onto the next step in the process. Be sure to check out the other guides in this renovation series to learn how to replace your floors, install new lighting, and more.

    Have you painted an RV before? What was the process like? Feel free to share in the comments below! And if you haven’t already, don’t forget to check out Part I of our RV painting series.
  • Painting an RV: Part I

    Painting an RV: Part I

    Renovating an RV has become an increasingly popular challenge in recent years. A simple search of the “RVrenovation” hashtag on Instagram will instantly yield photos of thousands of brightly-colored, modernly-designed units all over the world.

    The reasons for remodeling an RV interior differ, but the main motivation stems from a desire to make an RV your own. Many RVs come from the factory turn-key ready, but some people feel that these lack personality and individuality. Additionally, older RVs from different eras (8+ years old) are often outdated in the decor department and in need of some serious sprucing. Still, others may just not match the taste and style preferences of their respective owners. Whatever the reasons for beginning an RV renovation and whatever projects you have planned, your very first project should be painting.

    Painting an RV is no small job. While the surface area of the total space may be small, there are many nooks and crannies, which makes painting time-consuming and labor-intensive. In addition, there is quite a bit of prep work involved. In order to ensure that the paint adheres to the surface, you must sand, clean, and tape, all before beginning the actual paint job. To get started – you’ll want to:

    1. Decide where you want to paint

    The very first step to painting is deciding exactly which surfaces you plan to paint. When renovating an RV, many people paint both the walls and the cabinets. Others decide to paint the walls and leave the cabinets with the original wood-grain look. No matter which surfaces you decide to paint, determining this ahead of time is important because it will let you know which areas to prep. Once you have decided where to paint, you can move on and start your prep work.

    2. Flatten out all surfaces to be painted

    Most people paint right over the wallpaper in RVs. Removing wallpaper is a sticky and messy process, and there is really no reason to complete this extra step prior to painting. However, if there are wallpaper borders present, these must be removed before painting. Failure to remove these will result in a bumpy and uneven surface, and the finished product will not be as polished.

    Most wallpaper borders in RVs can be found in either the kitchen or the bathroom. To remove these, simply slide a thin tool under the border to begin peeling it up, and pull the border away from the wall. There will be some resistance, but it should eventually peel off in one piece. If you are unable to remove the wallpaper, try melting the glue with a heat gun. Scrape any excess glue off the walls once borders are removed.

    Additionally, you must fill any and all holes or nicks in the walls with putty if you want a smooth final appearance. Allow the putty to dry for at least six hours before moving on to step three.

    3. Sand all surfaces to be painted


    Sanding is arguably the most important step of the painting process. Assuming your RV will travel to a variety of climates in its lifetime, it is especially important to ensure that the paint adheres to the walls as best as possible. Since RV wallpaper and cabinets are typically covered in a glossy, laminate finish, you must be sure to remove this before you can paint. Failure to complete this step will result in a finished product that is extremely prone to peeling and does not hold up well over time.

    It is best to sand with an electric sander and some 80 or 120-grit sandpaper. Any size sander will get the job done, but a smaller, hand-held sander will be easier to maneuver into tight spaces. Be sure to sand all surfaces that will be painted. This will take up quite a bit of time, but it is very important and worth every second when your final painted product lasts for years.

    3. Clean thoroughly

    After sanding, everything in the RV will be covered in a thick layer of dust. It is vital that you clean up all of this before painting. If you don’t clean well, residual dust may stick to your paint as it is drying, discoloring it, and leaving the walls looking perpetually dusty. Thoroughly wipe down all countertops, and then vacuum and sweep up all dust particles on the floors.

    Next, wipe down the walls, cabinets, and any other surface that will be painted with TSP. Otherwise known as trisodium phosphate, TSP is a heavy-duty cleaner that is diluted and used for cleaning surfaces that will later be painted. You can find it at any hardware or home repair supply store.

    4. Remove hardware 


    If you are painting your RV cabinets, you will need to remove all cabinet doors and drawer faces before you can begin to paint. It is best to do this after sanding so that you don’t have to sand these on a tabletop or on the ground. In addition, you should remove all hardware (hinges, handles, etc.) to ensure that you can paint as closely as possible.

    NOTE: If you have plastic or metal hardware, it is best to remove the hardware prior to sanding the cabinets.

    You must also remove all outlet covers, lights and light switch covers to ensure they are not accidentally painted. You can complete this step with either a screwdriver or a drill with an appropriately-sized bit.

    5. Tape Before You Paint

    This is the final step of prepwork. Before painting, you must tape off anything that is not going to be painted. This includes the ceiling, floors, baseboards, appliances, windows and anything else that you do not want to accidentally paint. Be sure to tape carefully and as closely as possible for best results. If you are not planning to replace your flooring after painting, be sure to cover the floors in drop cloths to avoid drips.

    Once you have completed all of these steps, you are ready to gather your supplies and begin painting. Keep an eye out for the next post in the series, where we will discuss painting tips and tricks that are sure to leave your RV looking good as new.

    Have you painted an RV? What did you do for prepwork? Feel free to share in the comments below! And don’t forget to check out Part II of our RV painting series.

  • 5 Simple Ideas for Renovating Your RV

    5 Simple Ideas for Renovating Your RV

    In the past decade, RV ownership has risen tremendously. From people living and traveling in RVs full time to people taking them on weekend trips and vacations, more people than ever are becoming RV owners and enjoying their vacation homes on wheels. With hundreds of types of RVs available, RV life looks a little different for everybody. One thing remains the same though: many RVs have fairly outdated interiors.

    Some modern RVs have interiors that match current decor trends. However, many from the 90s and early 2000s are dark and covered in floral fabrics. This may be a deterrent to those who would like to buy but do not like certain RV interiors. Some people may not have considered this, but RV interiors are customizable and can be completely renovated.

    The idea of renovating an RV may seem rather daunting and difficult to a first-time owner. However, certain small adjustments can make a huge difference, especially in a tiny space. A little goes a long way, and just a few weeks of work can have your RV looking bright, cozy and modernized in no time. After all, traveling in your tiny home on wheels is much more fun when done in style. Consider these suggestions for simple projects that will make the biggest changes in your RV.

    1. Decorate

    Decorating can completely transform your space without requiring a complete renovation. Simple changes like fresh throw pillows, bedding, curtains, decorative blankets, wall hangings, area rugs, photos and plants can add a ton of character with only a bit of work. Decorating is all about personal preference and taste. Find items that make you happy and incorporate them throughout your RV. You can even utilize items found on your travels to remind you of the places your tiny home as taken you.

    When decorating a tiny space, it is usually best to keep the same theme and color scheme for the entire RV. Be sure to choose a theme that matches your personality, and the rest is up to you! Remember that a little goes a long way in a small space, and just a few items can make a big difference.

    2. Add new window treatments

    Swapping window treatments is one of the simplest things that makes the biggest difference. Window valances in older RVs are typically covered in busy patterns and cover a large portion of the windows. Removing these can instantly brighten up the space, let in more light, and create a much more modern look. They can easily be replaced with roller shades, accordion blinds, or curtains. You could even go with a combination of curtains and shades.

    If replacing the window valances entirely is outside of your comfort zone, they can easily be removed and recovered with a simpler fabric, then returned to their original position. This will allow you to choose a color scheme that matches your new RV design without overly changing the space, if that is what you prefer.

    3. Swap furniture

    Replacing furniture is another fairly easy task that can change an entire space. Sofa beds can be easily replaced with a new futon, and recliners are easily swapped with an accent chair. IKEA has a great line of furniture geared towards small spaces. Be sure to bolt any new furniture to the floor to keep it from sliding around when you are on the move.

    Dinettes can also be transformed fairly easily. If yours is the type with a table and chairs, these can be easily replaced with a modern set. If you have a dinette with a table and benches, consider painting the benches and recovering the cushions. You can even add throw pillows to the dinette benches for extra comfort. This will completely change the overall look and feel of your living and dining room space.

    4. Paint

    Painting an RV is no small task. However, the reward is a beautiful space that will feel much more bright and airy. Many RV renovations are completed with white paint because of the openness it allows the floor plan. However, other neutral colors such as gray and beige also look nice and often stay cleaner-looking.

    If you are thinking about painting with bright colors, consider utilizing accent walls as a pop of color, while keeping the rest of the walls neutral colors. Remember that very bright colors can sometimes feel overpowering in a small space, so they are often best in small doses.

    Before you paint, there is a bit of prep work involved. First you need to decide if you want to paint the walls only or both the walls and the cabinets. Wallpaper and wooden surfaces should then be lightly sanded to remove the outer coating. Next, you should clean the walls and cabinets thoroughly. It is best to use TSP (trisodium phosphate), as it is best at removing all dirt and debris, allowing paint to better adhere to surfaces. Finally, you should begin with a coat of primer before painting with at least two coats of the final color.

    5. Replace the flooring 

    Replacing the flooring in an RV is another task that is time-consuming yet very rewarding. Over time, the carpet in RVs becomes very worn and often somewhat dingy. If you remove the carpet, you are free to install a new floor. The most popular option is wood-look laminate flooring. Real hardwood floors are beautiful, but they are typically too heavy for a standard RV weight limit. Laminate floors are made to look like wood at a fraction of the price and weight.

    When choosing flooring options, you must decide between peel-and-stick floors and click-and-lock floors. Each of these types of flooring has different pros and cons, so you will need to do your research to decide which type is best for you and your RV.

    There are so many more changes that can be made to RVs, but these are some of the most basic concepts. If you are new to the world of RV renovation, the idea alone may seem daunting. However, if you begin with these five steps, you are sure to create a beautiful space that you will love.

    The unit above is for sale! Check it out here on RV Trader. 
  • Top 5 National Parks for 2019

    Top 5 National Parks for 2019

    The United States is home to some of the most beautiful parks in the world – and with so many to choose from, it can be hard to narrow down which one to travel to. To make your job a little easier, we’ve compiled a list of the top 5 national parks you need to add to your 2019 bucket list. Each park brings something amazing to the table from amazing wildlife to stunning views. Check out a few of our favorites below and get ready to pack up your RV and hit the road.


    Acadia National Park, Maine

    This park is the oldest park east of the Mississippi River and is often referred to as the crown jewel of the North Atlantic Coast. In its entirety, this park encompasses more than 40,000 acres of land, giving you plenty of room to roam.

    Where to go from there: Arches is in close proximity to a few of Utah’s other famous national parks known as the “Mighty 5”. We suggest checking out Zion, Bryce Canyon, Canyonlands, and Capitol Reef while you are nearby.

    Why it made our list: Acadia National Park is quintessentially Maine. The park is lined by miles of jagged coastline and lighthouses – making it an ideal place for taking in ocean views.

    Activities: Hiking, biking, swimming, boating, camping, ranger-led programs, and wildlife watching.

    Where to go from there: We suggest checking out the town of Bar Harbor. It’s located on Maine’s Frenchman Bay and has lots of fun shops and restaurants to explore.

    Great Smoky Mountains National Park, North Carolina & Tennessee

    This is America’s most visited national park and is home to more than 100 species of trees and 1,600+ types of flowering plants. This park straddles the North Carolina/Tennessee border so if you’re trying to check a few states off your bucket list, Great Smoky might be just the place for you.

    Why it made our list: If you’re looking for a mountain getaway, this is the national park we suggest. People come from across the country to take in its views, especially during the fall when the foliage is bright and beautiful.

    Not to miss: Clingman’s Dome. This is the highest point in the park, standing at 6,643 ft above sea level. The observation tower boasts incredible 360° views for those who want to make the trek to the top. On a clear day, you can see for up to 100 miles across seven states.

    Activities: Hiking, camping, fishing, wildlife watching, biking, viewing fall foliage, and ranger-led programs. 

    Where to go from there: The Blue Ridge Parkway is 469 miles long and considered “America’s favorite drive”. It’s adjacent to the park (in North Carolina) and you can break up the drive by taking in views of the Appalachian Highlands throughout.

    Glacier National Park, Montana

    This park has more than 700 lakes, a variety of waterfalls, two mountain ranges, over 1,000 plant species, and miles of trails. If you’re looking for adventure, Glacier has you covered. 

    Why it made our list: Glacier is known as “The Crown of the Continent” and for good reason – no matter where you go in the park, you’re sure to take in an incredible view. 

    Not to miss: Highline Trail. One of the most popular hiking trails in Glacier, this 11.8-mile hike follows the west side of the Continental Divide. There are options to hike only a portion of the trail, so don’t be deterred by the length. 

    Activities: Hiking, scenic driving, rafting, ranger-led programs, camping, and nature watching.

    Where to go from there: The Waterton-Glacier International Peace Park is Glacier’s sister park and the scenic drive to the park is worth the trip – trust us.

    Grand Teton National Park, Wyoming

    Located in the northwest corner of Wyoming, this park is home to 310,000 acres of meadows, streams, and incredible views of the Teton mountain range. 

    Why it made our list: Grand Teton is known for its vast amount of hiking trails – 242 miles to be exact. 

    Not to miss: Mormon Row. This line of 6 uniform buildings settled in the 1890s by Mormons from the Salt Lake region is a famous/historic spot located in the southeast corner of the park. 

    Activities: Hiking, rafting, fishing, ranger-led programs, boating, wildlife watching, biking, and camping. 

    Where to go from there: Yellowstone National Park is only 10 miles south of Grand Teton National Park – so if you’re looking to hit two major parks on your trip, this is the place for you.

    Arches National Park, Utah

    Home to over 2,000 sandstone arches, the largest concentration in the country, this is one of the country’s most famous national parks.

    Why it made our list: You can’t find a national park like this one anywhere else in the U.S. The thousands of bright orange and red sandstone arches are truly breathtaking, giving the park its own unique beauty. 

    Not to miss: Delicate Arch. This arch is the most famous and popular arch in the park, and also happens to be the park’s largest free-standing arch – and you’ll probably recognize it from Utah’s license plates. This is a popular photo-op spot that can’t be missed.

    Activities: Hiking, camping, photography, nature watching, ranger-led programs, and scenic driving. Not to miss: Thunder Hole. When the tides are just right, the surf rushes into a narrow cavern and forces out air from beneath the cliffs, creating a thunderous sound.

  • Your Guide to the South Rim of the Grand Canyon

    Your Guide to the South Rim of the Grand Canyon

    Grand Canyon National Park is on just about everyone’s travel bucket list and it’s easy to see why. Millions of people visit the park, located in Arizona’s northwestern quadrant, each year to take in its main feature – The Grand Canyon (you guessed it).

    The Grand Canyon is a massive gorge that was created by constant erosion from the Colorado River over millions of years, and is now considered one of the major wonders of the world. Taking in views of the grandiose canyon is definitely the most popular activity in the park, but there’s SO much more to do and see. We’ll take you on a tour of Grand Canyon National Park’s South Rim and share why you need to load up your RV and head to Arizona, today.

    Image: National Park’s Service

    So, Why Grand Canyon?

    It’s a valid question that we’ve got a few answers to. Grand Canyon National Park is truly breathtaking and is the perfect getaway for families, couples, and solo travelers – anyone and everyone will have something to do and see at this park. Grand Canyon National Park is massive in size, coming in at 1.2+ million acres and parts of the park can be visited year-round. We love the variety of activities this park provides, whether you’re into biking, hiking, or photography – this U.S treasure has got you covered.

    Grand Canyon National Park is broken out into two main areas – the South Rim and the North Rim. Each section of the park offers something different to travelers and, if you have the time, we recommend checking out both. The entrance fee to the park is $35-dollars and is valid for 7 days – this includes access to both the South and North Rims. In this post, we’ll be covering all things South Rim – stay tuned for our post highlighting the less visited, but equally as impressive, North Rim.

    The South Rim

    The South Rim of Grand Canyon National Park is the easiest part of the park to get to and is open year-round to travelers. For this reason, the South Rim is the most developed part of the Grand Canyon and chances are, if you see a photo of the Grand Canyon, you’re seeing the South Rim. There are a variety of attractions, hotels, restaurants, and activities to do in this area of the park. The area is also the most popular part of the park, attracting more than 5 million visitors per year, and includes the iconic views and vistas of the Grand Canyon you’ve been waiting your whole life to see in person (they are worth it – trust us). If it’s your first time visiting Grand Canyon National Park, we recommend checking out this area first.

    Tip Before You Go: Keep in mind that during summer months, the park offers a free shuttle service that many people rely on to get around the grounds. The park’s shuttle operates on four routes and buses come every 15-20 minutes. We suggest utilizing this free service so you can see as much of the park as you can in a timely manner. Check out the park’s website for more information. Now let’s get into all things South Rim.

    South Rim Activities

    Check Out the Viewpoints

    If you’re coming to Grand Canyon National Park, we’d say there’s a good chance you want to see some amazing views of the Grand Canyon. Lucky for everyone, there are a wide variety of lookouts in the South Rim that offer Instagram-worthy views – #nofilter needed. Here are a few of our favorites:

    Image: The American Southwest
    • Mather Point – This viewpoint is one of the most popular destinations in the park, as it is one of the closest viewpoints to the main entrance. Mather Point’s viewing area is extensive and is just over 7,000 feet in elevation. For most, this will be the first viewpoint that they see the Grand Canyon so you’ll be hearing a lot of “Ooos” and “Ahhhs” in this area. You can see almost ¼ of the entire Grand Canyon from Mather Point. This viewpoint is great for families as you can easily relax, take in the magnificent views, and have a quick picnic after the long drive.

    TIP: Try visiting this viewpoint at sunrise or sunset – the colors create unforgettable views that you will cherish for a lifetime. 

     
    Image: Arizona Lesuire 
    • Moran Point – Moran Point was named after famous painter Thomas Moran who was known for his spectacular nature scenes. This particular viewpoint offers sweeping views that almost look like a painting themselves. This viewpoint is a favorite among photographers and painters alike as the stunning, colorful vistas go on for miles. It differs from other viewpoints because you can see a wider variety of rock formations (layered Paleozoic Rocks, the Grand Canyon Supergroup, and the Vishnu Basement Rocks) as well as an incredible view of Red Canyon.

    TIP: You can access this viewpoint by car, there’s no need to take a shuttle from Grand Canyon Village (unless you want to). 

     
    Image: Inspired Imperfection
    • Mohave Point – This viewpoint is located just off of Hermit Road and is another favorite sunrise and sunset viewing location on the South Rim. Instead of just having one main viewpoint location, Mohave has a few, making it feel far less crowded than some of the other scenic lookout areas. Here you will take in views of The Abyss – one of the main locations along Rim where the view into the Canyon is nearly vertical. The drop is almost 3,000 feet into Grand Canyon to the Redwall Formation and will get your heart pumping.

    TIP: This stretch of road closed to private traffic between March 1st and November 30th you’ll need to take a shuttle (they are free!) to this viewpoint.

     
    Image: Sunset Magazine
     

    Hiking

    Hiking is a great way to enjoy the South Rim of Grand Canyon National Park, but you must exercise caution. The National Park’s Service strongly advises hikers to avoid hiking from the rim to the river and back in one day, especially during the months of May to September. There are no easy trails when hiking into or out of the Grand Canyon so be sure to keep that in mind. But there are many day trails we recommend that are located on the rim of the canyon that are great for every level of hiker. Check out a few hikes we suggest:

    • Rim Trail – We highly recommend Rim Trail for outstanding views of the inner canyon and for visitors who are looking for an easy day hike with minimal elevation change. This hike stretches from the South Kaibab Trailhead west to Hermits Rest – a total of 13 miles. Don’t let the length deter you, there’s no need to hike the entirety of the trail if that’s not your cup of tea. There are 14 shuttle stops spread out along its course, so you can head back whenever you’d like. Bring your kids and the pup (if leashed) – all are welcome!
    • Bright Angel Trail – This trail is one of the most popular trails in the South Rim because of its mind-blowing canyon views and it’s easy accessibility. Bright Angel Trail begins near Bright Angel Lodge and turns downhill almost immediately. There are two tunnels along the route and as you descend, the trail becomes steeper and cuts through the canyon’s walls. It’s an entirely different perspective of the canyon and you can turn back any time you wish. For day hikers, we recommend turning back at the 3 mile resthouse. Past that, the trail can become dangerously steep and is only recommended for experts.

    TIP: Stay hydrated! Water is available (year-round) on the South Rim at the Backcountry Information Center located east of Maswik Lodge, in the southern portion of the Village Historic District.

     
    Image: Biking Grand Canyon


    Biking

    The South Rim provides cyclists with 13 miles of roads and Greenway Trails that allow for exploration along the rim. We recommend biking along Hermit Road. The seven-mile stretch is one of the best places to ride in the park due to the stunning views that surround the road. Hermit road also restricts private vehicles, so there is less traffic to worry about. Keep in mind that mountain biking (on trails) is not permitted in most national parks, including Grand Canyon National Park, so we suggest you stick to marked roads. For more information on biking, visit the park’s dedicated page.

    TIP: If you get tired of biking – no worries – the free shuttle buses are bike-friendly. Throw yours on the front and enjoy the ride to your next destination.

    Ranger Programs

    The ranger led programs are amazing at the South Rim of Grand Canyon National Park. Some of the programs include: guided hikes, fossil chats, and programs highlighting the history, geography, and wildlife of the park. For full details on the seasonal ranger led programs at the South Rim, check out the park’s website. We highly recommend checking out Critter Chat – a program covering the Grand Canyon’s diverse wild inhabitants. This could be a great educational activity, particularly if you have kids in tow.

    Image: Headout Blog

    Helicopter Tours

    For all of you adventure seekers out there, or for those of you who just want to take in as much of the Grand Canyon in a short amount of time, you won’t want to miss seeing the South Rim from the view of a helicopter. More than half a million visitors take a Grand Canyon helicopter tour each year, and for good reason. The views from above are unlike anything you’ve ever seen – you can even see deep into the Grand Canyon – don’t’ forget your camera. Tours are available for around $250 per person, and they are worth every penny in our book.

    Explore Grand Canyon Village

    This historic village is the center of activity in the South Rim and is where you will find transportation hubs (including shuttles) along with hotels, restaurants (check out Grand Canyon Pizza and Grill), and ample shopping – get those souvenirs! Grand Canyon Village also features a large variety of historic landmarks – the village itself is even considered a landmark. Check out a few of our top recommendations in the village:

    • Lookout Studio is a perfect spot for sightseeing and was originally opened as a photography studio in 1903. The studio is an enclosed stone building that almost blends in with the cliffs it hangs off of. In present day, Lookout is a gift shop and a popular viewpoint in the park. The studio also has high-powered telescopes located on their outdoor terrace so you can take in the perfect view.
    Image: National Park’s Service
    • Hopi House was designed by architect Mary E.J. Colter and opened in 1905. Colter was one of the first American architects to acknowledge the beauty of Native American design and incorporated it into her own design of Hopi House. The house is now a National Historic Landmark and now serves as both a museum and gift shop.
    Image: National Park’s Service
    • Yavapai Point is another viewpoint in the park and happens to be located within Grand Canyon Village. You’ll see unobstructed views of the gorge here and be sure to check out Yavapai Observation Station for additional information on the geology & history of the park. A favorite lookout for snowy days.

    What’s Nearby?

    National Geographic Visitor Center Craving a little air conditioning or heat after a long day of exploring or want to learn about the Grand Canyon before entering the park? Check out the National Geographic Visitor Center. The visitor center has all the information you’ll need to know before exploring the Grand Canyon and also includes exhibits, restrooms, a gift shop, and cafe along with an IMAX theatre that presents a movie on the hidden secrets of the Grand Canyon – tickets range between $8-$13.

    Cameron Trading Post This historical trading post is just 30-minutes from the Grand Canyon. This trading post was created in 1911 by two brothers and was originally only visited by the Navajo & Hopi locals to barter goods. As years passes and the roads improvedThe Cameron Trading Post’s became more widely frequented. Cameron Trading Post has since grown into a popular destination and has a wide selection of shops, including Native American art and jewels, as well as a restaurant, motel, and RV park.

    Nearest Campsites 

    Desert View – Desert View is located on the east entrance of the park and is first come first served only – no reservations. Keep in mind there are no RV hook-ups at Desert View, and the campground usually fills by 12 noon each day – get there EARLY.

    Trailer Village – Trailer Village is an RV Campground with full hook-ups located near the Grand Canyon Village in South Rim. They permit RVs and trailers up to 50 feet long and include hookups, cable television, 30 and 50 amp electrical service, water, and dump station. We recommend making reservations as soon as possible.

    Mather Campground – Mather Campground is also located next to Grand Canyon Village and is the largest campground in the area. It has 317 campsites and is open all year (weather permitting). The maximum RV length is 30 feet and keep in mind, trailers are considered as 2 vehicles. Hookups are not available at this site and reservations are recommended.

    Camper Village – This site is located in Tusayan, AZ on Highway 64 one mile south of the Main South Entrance to the South Rim. Camper Village is near the shuttle stops to the Grand Canyon so you will have easy access to the park. It offers a variety of hookup options and laundry and shower facilities. Reservations are encouraged and accepted.

    We hope this guide to the South Rim of the Grand Canyon has you excited to start planning your own adventure to the park. Whether you’re looking for a quick visit, or a longer experience – the South Rim of the Grand Canyon has got you covered. Have you visited the South Rim? Let us know your insider tips and tricks in the comments below. Stay tuned for our guide on the North Rim coming later this month!

  • Top Reasons to Work From the Road

    Top Reasons to Work From the Road

    Have you ever wanted to make the full-time RV life a reality? We’ve all thought about it, but sometimes the thought gets brushed off because we think it’s impossible because of work. Well, we’re dreamers around here, and we want to encourage you to grab hold of the full-time vision and run with it. And if you need a little push – we’ve got your back. Check out our top reasons you should consider working from the road.

    Provides Newfound Freedom & Flexibility

    The day you leave the office for good (or maybe just for a little while) will be one of the best days of your life. The sense of freedom you’ll get from working from the road is unparalleled. You can go where you want, whenever you want. If you don’t like where you’re staying, simply gas up your RV and head to a new destination – it really is that easy. Working from the road gives you the freedom to explore new places, meet new people, and try new things.

    Enhances Productivity

    Depending on the type of work you do, working from an RV can significantly increase your productivity. In fact, a survey conducted by Connect Solutions reported that 77% of remote workers who worked both part-time and full-time stated they were more productive when working remotely. In an RV, there’s less distraction (when you’re not out exploring) and less time spent focused on work gossip or chats around the watercooler.

    Lowers Stress

    It’s no secret that in-office work environments can be stressful. And even if you’re not the one stressed out, co-workers can project their stress onto you. A study by Science Daily states that taking at least 20 minutes out of your day to stroll or sit in a place that makes you feel in contact with nature will significantly lower your stress hormone levels, imagine what working outside or taking a hike on your lunch break could do.

    Gets You Out of Your Comfort Zone

    It can be easy to go to a job day in and day out, even if you hate it. It’s nice to be comfortable, but sometimes it’s time for a change that can lead to greater happiness. If you take the plunge and start working from the road you may also have the opportunity to change up jobs or eliminate the need for a full-time position. Check out our tips for working while on the road to see the remote and seasonal opportunities out there – some even include being your own boss, and what’s better than that?

    Tips for Working From the Road

    Are you ready to hit the open road? Check out 4 tips from RV Trader:
    • If you’re worried about having Wi-Fi on the road, we recommend checking out a MiFi. Most of the major wireless carriers offer them and it will free you up from hotspotting off your phone regularly.
    • To make sure you’re being as focused as possible – and balancing your job with your desire to get outside – check out this article about The Power of One Focused Hour a Day.
    • More often than not, when you’re RVing, your destination is a campsite in nature. When you’re working from your RV, try taking your lunch break in the outdoors or enjoy a relaxing hike when you need a brain break.
    • Companies like WorkGenius, Scripted, Upwork, etc. are great companies to look into for short-term work to supplement larger projects you may be working on.

    Interview with a Working RVer

    Want to hear from a working RVer who is living the lifestyle? Sharee Collier is a working RVer and founder of Live Camp Work, an online resource center for those looking to work full time from their RV or with remote careers and location independence. She recently shared her work camping advice and expertise below.

    “What is your favorite part of work/camping?”

    My favorite part of being a working RVer is the freedom to explore! By living and working from the road, your home is your RV and your RV can come and go as often as you want! Seeing new places and experiencing the local flare of each is pretty awesome… working along the way, makes it all possible!

     
    “What is the biggest lesson you’ve learned on the road/working remotely?”

    Plan ahead and plan to adjust as needed. Living a life of travel means you need to be comfortable with change and ready to shift the plan at any given moment. Sometimes things don’t go as you intended and an alternate solution needs to be created and put into place quickly. Giving yourself the flexibility and freedom to change the plan as needed is the biggest and the best thing you can do to avoid stressing out- when you should be enjoying these moments.

    “Any advice/tips for people who want to take the plunge?”

    Go small and go now! Start small and know that it’s not permanent. Test the waters with a small RV that you can buy in cash without financing. Make adjustments to your needs and wants to create a budget you can manage while working on the road and make sure the lifestyle is something you enjoy, before making a huge investment!

    Sharee is hosting a FREE online event August 5-9, called the “Make Money & RV Virtual Summit” designed to help people learn how to RV full-time, part-time or seasonally, and make cash along the way. The online event hosts 30+ diverse keynote speakers highlighting remote work & full-time work camper experience. Click here to reserve your spot and attend live for free!

  • Explore Grand Teton National Park

    Explore Grand Teton National Park

    The United States is filled with incredible national parks, but few capture the true essence of the wild west as much as Grand Teton National Park located in the northwest corner of Wyoming. Millions of people visit Grand Teton each year for a variety of reasons and the park is considered a fan favorite for many. Its epic beauty alone is worth the trip, but this park offers more than just awe-inspiring views. Grand Teton National Park is filled with a rich history, a variety of terrains, vast wildlife, and activities for all different kinds of travelers, from a family with young children or teenagers to a couple or single individual. We’ll take a deep dive into why this park is a favorite and talk about why you should add Grand Teton to your summer RV bucket list.

    So, Why Grand Teton?

    That’s a great question. There are 50+ national parks across the United States, so why add Grand Teton to your list? The park itself is stunning, towering over Jackson Hole Valley, Grand Tetons is perfect for hikers, history buffs, or anyone looking for the perfect photo-op. The park is huge (310,000 acres) and diverse, made up of the famous Grand Teton Mountain range, lush valleys, powerful waterfalls, and meadows as far as the eye can see. One of our favorite aspects of the park is that it has activities for every season, whether you’re into hiking or snowshoeing – there’s truly something for everyone. If you’re into water activities, Grand Teton caters to you as well with the Snake River and Jackson Lake to float or fish to your heart’s delight. You’ll never be bored at Grand Teton National Park, and if you’re looking for adventure, this park is your ideal destination.

    Image: National Park Service

    What to Do While You’re There?

    Hiking & Biking

    Two of the best ways to take in all that Grand Teton National Park has to offer is on foot or by bike. The park is a renown hiking destination with more than 230 miles of trails, so whether you’re an expert hiker or if you prefer a more mellow pace, you’ll find a hike to suit your needs. Check out a few of our favorite hikes:

    • Hidden Falls Trail – This trail is a 4.9 loop that features stunning lake views and, you guessed it, an incredible waterfall. This hike is categorized as easy and good for the whole family. You have the option of taking a boat back if you want to shorten your trip.
    • Cascade Canyon Trail – This trail is one of the most popular in Grand Teton and for good reason – the hike is absolutely stunning. Cascade Canyon is a moderate hike that starts near Jenny Lake and ascends steeply towards Lake Solitude. You will also get a great few of Hidden Falls on this trail and if you continue, you will reach Inspiration Point (a viewpoint where you can see Jenny Lake and the Teton Mountain Range).
    • Death Canyon – Don’t let the name scare you, Death Canyon is a beautiful hike that you can complete in a day. The beginning of the hike is the hardest and about 1.2 miles from the trailhead you’ll hit Phelps Lake Overview where the views are breathtaking.
    Pro-tip: Don’t forget to stay hydrated, dress in layers, and bring bear spray (trust us on that one).
     
    Image: National Park Service

    Water Activities

    During the summer months, Grand Teton is an excellent place for boating or floating. The Snake River allows world-class fishing & rafting and Jackson Lake is a great spot for those that sail, canoe, water ski, or windsurf. Speaking of fishing, Snake River is home to a variety of fish like Mackinaw and Whitefish as well as Rainbow, Brown, Lake, and Cutthroat Trout. Anglers take note: the Snake River Fine-Spotted Cutthroat Trout are indigenous fish to this area, found nowhere else in the world. If your looking to take out a boat, motorboats are permitted at Jenny and Jackson lake (10 horsepower max). If you want to bring a motorboat to the park, you will need to obtain a motorized craft permit for $40.00 at the visitor center. Boat, paddle board and floats are also available for rent. Want to take a quick dip? We suggest visiting String Lake where the water is warm in the summer months and you can picnic along the shore.

    Image: National Park Service

    Wildlife Watching

    The park is home to a vast amount of wildlife including bison, bear, elk, bald eagles, and smaller animals like ducks, otters, and a variety of birds. Grand Teton puts safety as a top priority so if you are watching wildlife, they recommend maintaining a distance of at least 25 yards. Sign up for a wildlife tour at the park and experience all of these amazing creatures for yourself.

    Image: National Park Service

    Catch Up on Your History

    Humans began visiting the Jackson Hole area around 10,000 years ago – so the grounds in and around Grand Teton are rich with history. We suggest attending a ranger-led program to learn more about the native people, explorers, and homesteaders that once inhabited the park. And don’t miss the following historical attraction:

    • Mormon Row is one of the park’s most popular attractions. This line of 6 uniform buildings settled in the 1890s by Mormons from the Salt Lake region can be found in the southeastern corner of the park and is a perfect spot for a photo-op.

    Snow Activities

    While winter in the Tetons is not for the faint of heart, there are activities that cater to all the snow bunnies out there. Skiing, snowboarding, snowshoeing, and cross-country skiing are some of the most popular activities during the winter months.

    Ranger-Led Programs

    A variety of ranger-led programs take place during the summer months (early June through Labor Day weekend) in Grand Teton National Park. During these programs, you have the opportunity to learn about the park’s wildlife, history, and geology. There are also cultural programs as well as hiking and evening activities scheduled.

    Scenic Driving

    If you’re interested in covering a lot of ground in minimal time, we recommend a driving tour of Grand Teton. The park has a 42-mile scenic loop where you can take in its epic beauty and wildlife. Depending on the stops you make along the way, the drive typically takes one to two hours.

    What’s Nearby?

    Yellowstone National Park – Yellowstone National Park, home to Old Faithful, is just 10 miles south of Grand Teton National Park. If you’re looking to cross two major national parks off of your bucket list, Grand Teton is a great place to start.

    Jackson, WY – Jackson is a town located in Wyoming’s Jackson Hole Valley, just 10 minutes from Grand Teton National Park. It includes three widely popular ski areas including Jackson Hole, Grand Targhee Resort, and Snow King Mountain Resort. The town of Jackson also boasts many restaurants and great shopping if you’re looking for a quick break from all things outdoors or in case you forgot some essentials.

    When to Visit / How Long to Stay

    The summer months are the most popular visiting times at Grand Teton National Park because of the great weather. But as we mentioned earlier, there are a variety of year-round activities available depending on what you’re into. The foliage is incredible in the fall and views of the snowy peaks of the Teton Mountains are jaw-dropping in the winter.

    We recommend spending a minimum of three days at Grand Teton National park considering there is SO much to do. If you can swing a longer stay we definitely recommend extending your trip, especially if you plan on visiting Yellowstone National Park.

    Campsites / Where to park your RV

    There are a variety of RV Campgrounds in Grand Teton, but they do fill up quickly in the summer months so we recommend calling well in advance to secure your site. Check out Grand Teton National Park’s helpful comparison chart to find the perfect site to fit all of your RVing needs.

    Image: Grand Teton National Park Serice

    If you’re on the hunt for your next great adventure, we think visiting Grand Teton should be at the top of your list. Do you have any insider tips or tricks you would like to share with your fellow RVers? Share your insights in the comments below and we might feature your tip in a future blog post!