Category: RV Picks

  • Top RV Shades for Every Part of Your Rig

    Top RV Shades for Every Part of Your Rig

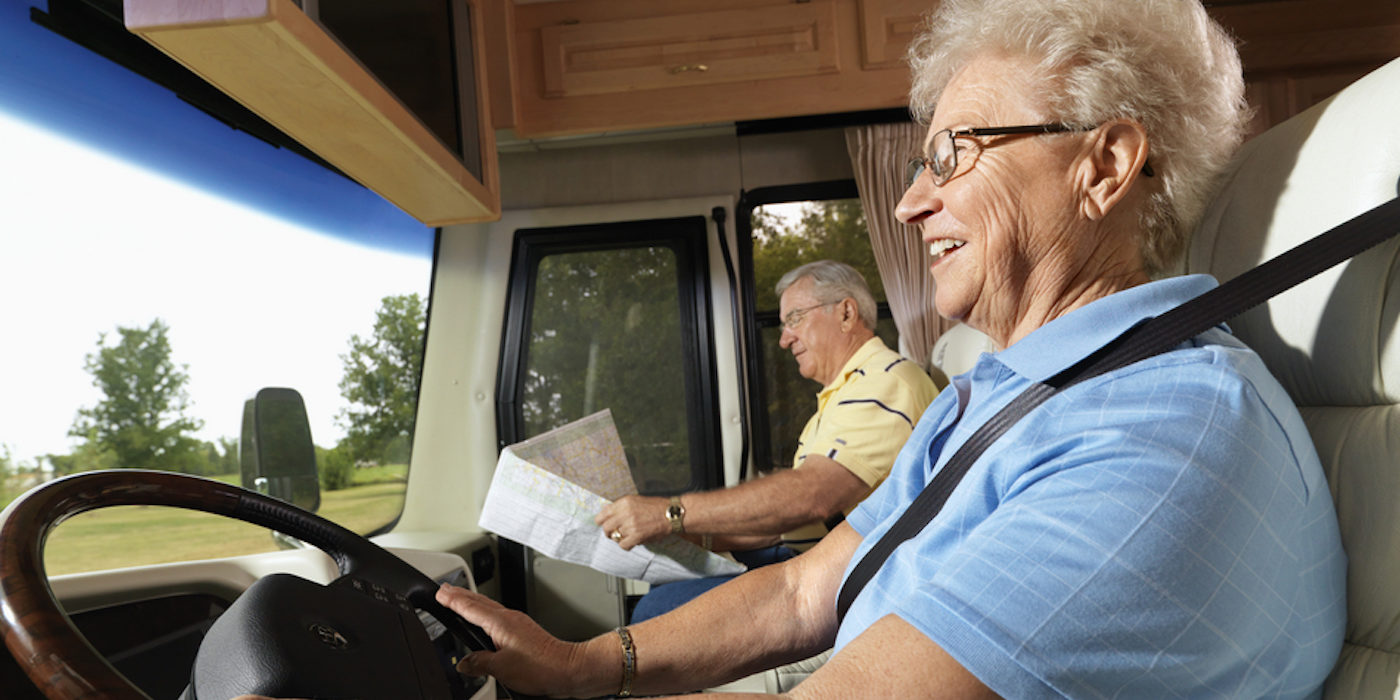
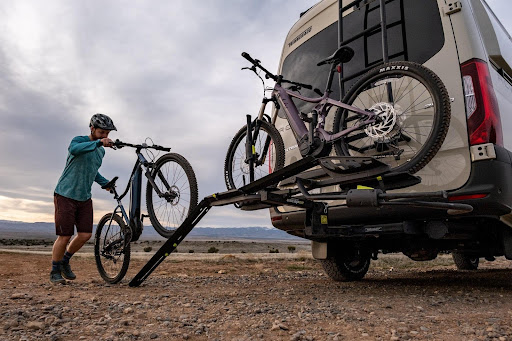
    Living the RV life means embracing freedom, adventure, and the comforts of home all rolled into one. But anyone who’s spent even a single summer afternoon parked under the blazing sun knows just how fast an RV heats up. Glare-filled windows, rising interior temperatures, and faded upholstery? No thanks. That’s where RV shades come in.

    RV shades are a must-have for anyone serious about comfort and protecting their rig. They help control the temperature inside. They offer crucial UV protection for your interior. And, as an added bonus, they add an extra layer of privacy whether you’re parked at a campground or off-grid. So, naturally, different parts of your RV call for different types of shades — and that’s exactly what we’re breaking down today.

    This guide will walk you through RV shade options tailored for each part of your rig, from windshield to tires, with specific product recommendations to help you make smart, experience-backed decisions. (And if you’re shopping for an RV upgrade, don’t forget that RV Trader is always your go-to for top listings and gear advice.)


    RV Windshield Shades: Keeping the Cockpit Cool

    The windshield is often the largest window on your RV. And, as you can imagine, it’s also the biggest culprit when it comes to heat and UV exposure. It’s the first place the sun hits and the fastest way for temperatures to spike inside the cab. Not to mention, when you’re parked, the windshield becomes a wide-open display for any passerby to peek in. Windshield shades can fix all of that.


    EcoNour Car Windshield Sun Shade

    This reflective accordion-style shade is a simple, budget-friendly tool that punches above its weight. Designed to bounce back UV rays and infrared heat, the EcoNour shade helps maintain a cooler interior and protects your dash, steering wheel, and electronics from heat damage. RVers love how easy it is to fold and stow with no fiddling with suction cups or tangled mesh.


    Magne Shade Windshield Shade

    When you’re ready for something custom, the Magne Shade is a serious upgrade. It installs from the outside using high-strength magnets, and offers a precise fit for your specific RV make and model. Not only does it block heat before it enters your cabin, but it also adds privacy without sacrificing your view from the inside. Daytime visibility out, privacy in. It’s perfect for relaxing in your rig without drawing the curtains.


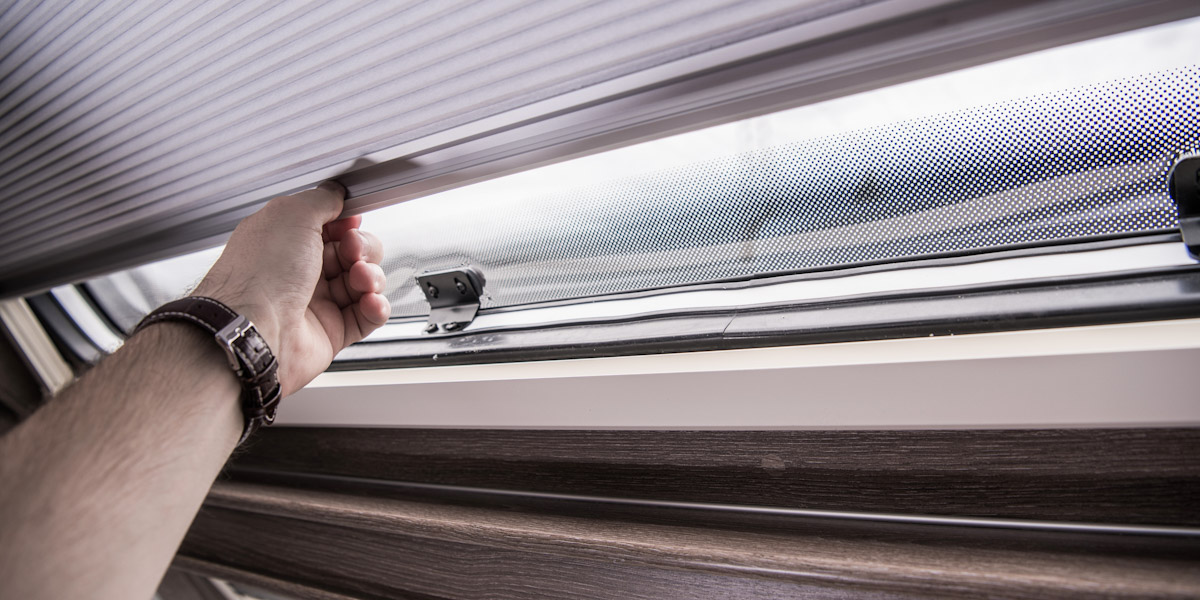
    Side RV Window Shades: Enhancing Privacy and Comfort

    Your side windows let in light, views, and — unfortunately — a whole lot of heat. Without the right shades, they can turn your living space into a greenhouse. Side window shades aren’t just for blocking sunlight. They help keep your furniture from fading, give you privacy, and cut down on the glare that makes screen time or reading a chore.


    ZATOOTO Magnetic Side Window Sun Shades

    If convenience is your thing, ZATOOTO’s magnetic shades are tough to beat. They attach instantly and stay put, thanks to built-in magnets. You can flip them up or down in seconds, and when you don’t need them, they fold up compactly. They also come in sets for both driver and passenger sides, making them ideal for full-cab coverage. These are particularly handy for frequent travelers who want to be able to shade up at a moment’s notice, say, when you’re pulling over for a mid-afternoon nap or shielding your pets from intense sun.


    RecPro RV Camper Pleated Blind Shades

    For a more permanent interior solution, RecPro’s pleated blinds deliver in both function and aesthetics. They come in various sizes and colors, allowing you to match your existing décor while still getting the privacy and sun protection you need. Their fabric design adds a soft, residential feel to your RV. And they’re easy to raise and lower with a simple tug. You’ll especially appreciate these if you’re a full-timer or spend long weekends in campgrounds with minimal tree cover. They look great and perform even better.


    RV Door Window Shades: Balancing Light and Privacy

    Your RV door might be the smallest window in the rig, but it’s often the most exposed — especially when you’re parked in a lot or next to another camper. Anyone walking by can catch a glimpse into your living space. (Which isn’t ideal when you’re trying to relax.) Door window shades provide a much-needed balance between letting in natural light and protecting your privacy.


    Camco RV Door Window Light Blocking Shade

    This is one of those add-ons that seems minor until you use it. This Camco RV door window light blocking shade uses hook-and-loop fasteners to easily attach over the window, blocking direct sunlight and prying eyes alike. It can be rolled up and secured with a strap when you want light and dropped down in seconds when you want privacy. It’s especially useful for RVers with screen doors or glass inserts where light tends to blast in during early mornings or late afternoons.


    Camco Reflective RV Thermal Door Window Cover

    A slightly more versatile option, the Camco reflective RV thermal door window cover can be used for both windows and doors. Its reflective backing repels UV rays, while its neutral interior blends in nicely. It’s a solid choice if you want a lightweight, no-fuss shade you can move around as needed.


    RV Awning Shades: Expanding Outdoor Living Space

    Your awning creates an outdoor room. It’s your hangout zone, your cooking station, maybe even your work-from-campsite corner. Adding an awning shade screen takes that space to the next level by blocking wind, low-angle sun, and even nosy neighbors. It’s a simple way to carve out some privacy and stay comfortable while enjoying the outdoors.


    Tentproinc RV Awning Sun Shade Screen

    Made from high-density mesh, this screen blocks up to 86 percent of UV rays while still allowing airflow and visibility. The Tentproinc RV awning sun shade screen zips on and off your existing awning easily and rolls up neatly when not in use. The added protection from sun and wind makes it ideal for morning coffee or evening cookouts.


    RV Awning Sun Shade Screen

    This RV Awnings Mart version offers wide compatibility with different awning brands and comes with ground stakes and bungees for extra stability. It’s particularly good for longer stays or desert camping, where shade is less of a luxury and more of a necessity. It also adds a little extra privacy without totally closing off your space.


    Protect Your Rig, One Door and Window at a Time

    From the front windshield to your door and more, every part of your RV benefits from a little shade. Whether you’re trying to beat the heat, preserve your interior, or enjoy some peace and privacy, the right RV shades make all the difference. It’s not just about aesthetics. It’s about comfort, efficiency, and taking care of your investment.

    Now’s a great time to evaluate your current setup. Are your RV shades doing their job? Could your outdoor space use a little extra protection? Are your tires baking in the sun? Even a few smart additions can make your rig feel cooler, cozier, and better equipped for adventure. 

  • Top 2 RV Steering Stabilizers for a Smoother Drive

    Top 2 RV Steering Stabilizers for a Smoother Drive

    The raised driving position in a motorhome can make cruising down the highway a phenomenal experience. Quite simply, the elevated view is fantastic. But with the added height, there also come a few disadvantages. Like body roll in gusty conditions. Or adjusting your RV’s steering after every bump or turn in the road. No one wants to have to fight the wheel, and yet white-knuckling can be a common driving experience in a motorhome. It’s not fun, and it doesn’t feel safe. Fortunately, with RV steering stabilizers, it’s also not necessary.

    So, if you find yourself needing to recenter your motorhome after sharp turns or constantly  counter-steering to keep off shoulder of the road, it’s time to do something about it. Let’s talk about how RV steering stabilizers work, their types — and which RV steering stabilizers are the smoothest on the market.


    How RV Steering Stabilizers Work

    An RV steering stabilizer looks more or less like a giant shock absorber. It’s bolted onto the steering linkage of the RV and does indeed absorb shock to help return the RV’s steering to center. (A big help after the wheels hit a bump or engage a turn to around an obstacle.)

    To get the wheels directed forward again after any turns, RV steering stabilizers can use pneumatic, hydraulic, or spring resistance. They automatically return the front wheels of the RV to center after they’re turned by the steering wheel. (Same goes for minor bumps in the road that cause you to turn.) They also help to stabilize the RV during windy conditions. (And yes, this includes the wind turbulence that happens before and after being passed by a tractor-trailer.) By automatically recentering, with no effort from the driver, the steering stabilizer helps create a smoother ride. The result is that the driver doesn’t have to do constant micro-adjustments to steering when the RV is traveling down the road. And it doesn’t have to struggle to stay on the road after a semi passes.  It’s a much more stable, relaxed, and safe driving experience.

    Choosing the Right Steering Stabilizer Type for You

    RV steering stabilizers use one of three mechanisms to dampen road vibration and recenter steering. All motorhomes come with a steering stabilizer that meets safety requirements when the RV is shipped from the factory. Still, too often, this steering stabilizer doesn’t last for very many trips before it begins to fail under the constant stress of heavy use. Which means that it doesn’t take long before the RV handling degrades. 

    There two basic types of RV steering stabilizers: pneumatic and hydraulic/steel-spring. Each of them dampens road vibration and can help with recentering steering. And both help to make the driving experience comfortable while keeping the RV safe on the road. However, some perform better than others under the strenuous conditions of heavy-duty use. 


    Pneumatic RV Steering Stabilizers

    Some RVs on F-53 chassis come with a factory-installed pneumatic steering stabilizer.  Pneumatic steering stabilizers use a gas-charged monotube shock that pushes outward under pressure, rather than returning the wheels to center, even when new.  While they provide stiffness and help dampen road vibration, these steering stabilizers can actually push the RV’s front wheels to the right. The result? Often, it’s road wandering.  

    Unfortunately, pneumatic steering stabilizers can begin to fail relatively quickly, especially when compared to more robust systems (like the hydraulic/steel-spring systems we’re about to discuss). When placed under the heavy demands of RV use, these steering stabilizers can fail in a very short time.  As a result, steering recovery can become noticeably worse in a relatively short timespan. 


    Combination Hydraulic/Steel-Spring Steering Stabilizers

    The second type of steering stabilizer used in RVs uses a combination of a fluid filled tube and a steel spring. Together, this combo helps dampen road vibrations and recenter the steering after you hit a bump or turn a corner. These steering stabilizers combine the smooth, consistent performance of a hydraulic shock with the direct, predictable response and durability of a steel spring. Combination hydraulic/steel-spring steering stabilizers give you all the advantages of hydraulics and steel-coil spring shocks. The result? You get an optimal driving experience that requires minimal maintenance. 

    There are currently two RV steering stabilizers that use this technology: the Safe-T-Plus steering stabilizer and the Roadmaster Reflex steering stabilizer.  The one that’s best for your RV will be a matter of personal preference.  Here’s what to know about each of these highly effective RV steering stabilizers.


    Our Picks: The 2 Smoothest RV Steering Stabilizers

    Safe-T-Plus 

    Safe-T-Plus uses a combination of hydraulics and dual-spring technology to reduce tracking and recenter steering. This gets your vehicle under control with no driver effort. The brand promises that it works so well that it will help you to stay in control in the event of a front tire blowout.      

    The Safe-T-Plus steering stabilizer lineup includes four RV specific models. Each model is color coded to meet the needs of a particular RV type. Safe-T-Plus offers a lifetime warranty on every steering stabilizer they sell.


    Roadmaster Reflex

    The Roadmaster Reflex RV steering stabilizer takes advantage of the benefits of a hydraulic shock and a tough coil spring to help recenter steering. This helps to keep the RV stable on rough roads, in crosswinds and/or when being passed by an 18-wheeler.  

    It’s a neat design because the hydraulic cylinder helps to dampen vibrations and returns the steering to center, while the spring system provides the force for returning it to center. Like Safe-T-Plus, Roadmaster says their product will also help to prevent steering failure after a front end tire blowout.  

    If you’re at all mechanically inclined, the Roadmaster Reflex RV steering stabilizer is an easy DIY install. It requires no special tools or drilling and the estimated installation time is under an hour.


    A Few More Ways to Improve RV Steering 

    There’s no doubt that adding a steering stabilizer is one of the best ways to improve RV steering and handling. However, before you jump in and add one, there are four things you can do that could make a huge improvement in oversteer, 

    • Be sure your RV tires are inflated to recommended RV manufacturer’s  specifications.
    • Have your RV wheels aligned and balanced.
    • Be sure tie rods are in good shape and tight.
    • Reduce body rolls and sway  by replacing bump stops by adding suspension upgrades and/or a sway bar.


    It’s All About Securing a Smoother Drive 

    Driving your RV should be fun. Period. (After all, the acronym“RV” is short for recreational vehicle, right?) If you find yourself gripping the steering wheel with a white-knuckled, death grip every time you get passed by an 18-wheeler, it’s probably time to upgrade your RV’s steering stabilizer.  It may be the only thing between you and a truly enjoyable — and smooth — journey.

  • 5 Products to Improve Your RV Tire Safety

    5 Products to Improve Your RV Tire Safety

    Unfortunately, I can tell you what it’s like to have an RV tire blowout  — naturally, miles from the nearest tow truck capable of towing my RV. So, believe me when I tell you: RV tire safety is no joke. In fact, it’s no exaggeration to say that tire safety is one of the most critical aspects of RV travel. Period.

    With the weight and size of an RV, even minor tire issues can escalate quickly. That can lead to costly delays or —worse — potential hazards. So, equipping yourself with the right tools and knowledge does more than ensure a smooth journey. It also gives you peace of mind.

    At a minimum, equipping yourself means making sure your rig has five essential products. From tire pressure to repair kits, be sure your always hit the road with these RV tire safety products.


    1. Your First Line of Defense – A Tire Pressure Monitoring System (TPMS) 

    A good tire pressure monitoring system (TPMS) is a game-changing tool for RVers. It continuously monitors your tire pressure. Some even check temperature, alerting you to any anomalies in real-time. With the weight distribution of an RV being so vital, a TPMS can help you avoid uneven wear, blowouts, and even improve fuel efficiency by keeping your tires at optimal pressure.

    Why It’s Essential:

    • Real-time alerts. Immediately notifies you of under-inflation, overinflation, or rapid pressure changes.
    • Improved efficiency. Properly inflated tires reduce rolling resistance, leading to better gas mileage.
    • Enhanced safety. Prevents catastrophic blowouts by catching problems early.

    Recommended Use: Look for a system that supports the number of tires your RV has, including towed vehicles or trailers. Some models offer Bluetooth connectivity, making it easy to check your tire status via an app.

    Pro Tip: Choose a TPMS with replaceable batteries for the sensors. It’s more cost-effective in the long run and ensures your system stays operational without needing frequent replacements.


    2. A Handy Never-Deflated Device – Portable Air Compressor

    A portable air compressor is a must-have for maintaining optimal tire pressure on the go. Whether you need a quick top-up or a complete reinflation after repairing a puncture, a good air compressor ensures you’re never stranded without properly inflated tires.

    Why It’s Essential:

    • Immediate access. Saves you from hunting down air pumps, especially in remote locations.
    • Powerful and versatile. Many models are capable of inflating high-pressure RV tires and can also be used for bikes, inflatables, or other equipment.
    • Prevention of uneven wear. Keeping all tires at their recommended PSI levels reduces the risk of uneven tread wear and extends tire life.

    Recommended Use: Invest in a model with a high-end max for PSI, as some models will fall far short of the necessary PSI levels of truck or RV tires. Also make sure that longer hoses and multiple nozzles are included to make it easier to handle large RV tires and other needs.

    Pro Tip: Keep a laminated card in your RV with the recommended PSI for all your tires. This simple reference saves time and ensures you always inflate them to the correct pressure.


    3. Protection from the Elements – Tire Covers 

    Tires are exposed to a variety of harsh conditions, from UV rays to rain and snow. Over time, this exposure can lead to cracks, dry rot, and decreased durability. RV tire covers are a simple yet effective way to extend the lifespan of your tires when your RV is parked.

    Why It’s Essential:

    • UV protection. Prolonged sun exposure is one of the leading causes of dry rot and tire failure.
    • Moisture barrier. Protects against rain, snow, and fluctuating temperatures that can lead to tire degradation.
    • Clean storage. Keeps tires free from dirt, grime, and debris, ensuring they’re ready for the road.

    Recommended Use: Choose covers made of heavy-duty, weather-resistant materials with elasticized hems or adjustable straps for a snug fit. If your RV has dual wheels, opt for covers designed specifically for tandem tires.

    Pro Tip: Clean your tires thoroughly and ensure they’re completely dry before covering them to avoid trapping moisture, which could lead to mold or rust.


    4. Some Stabilizers – Wheel Chocks and Leveling Blocks

    When your RV is parked, wheel chocks and leveling blocks are crucial for safety and comfort. They prevent accidental rolling and ensure your RV remains stable, protecting both your tires and suspension.

    Why They’re Essential:

    • Prevents rolling. Wheel chocks secure your RV in place, especially on sloped surfaces.
    • Protects tires. Evenly distributes weight to prevent flat spots or undue stress on specific tires.
    • Increases comfort. A leveled RV makes for more comfortable living and ensures appliances function properly.

    Recommended Use: Choose durable chocks made of rubber or heavy-duty plastic. For leveling blocks, look for stackable designs that can handle the weight of your RV. Some models even feature nonslip surfaces for added safety.

    Pro Tip: Leave wheel chocks and leveling blocks in easy to reach outside storage if possible, because you will be setting up and putting away so often.


    5.  A Quick Fix – Tire Repair Kits

    Flat tires are an inevitable part of RV travel, but an RV tire repair kit can turn a potential disaster into a minor hiccup. These kits provide the tools needed to patch small punctures, getting you back on the road quickly without waiting for roadside assistance.

    Why It’s Essential:

    • Quick fixes. Perfect for small punctures caused by nails, screws, or other debris.
    • Compact and portable. Easy to store and carry, making them ideal for emergencies.
    • Cost-effective. Saves money on towing or professional repair services for minor issues.

    Recommended Use: Opt for a comprehensive kit that includes plugs, sealants, valve stems, and tools like pliers and a T-handle reamer. For maximum convenience, pair it with your portable air compressor.

    Pro Tip: Practice using your tire repair kit before hitting the road. Familiarity with the tools ensures you can handle a repair quickly and confidently when needed.


    Bonus: The Ultimate Backup – a Spare Tire

    While modern technology and repair tools are indispensable, nothing beats having a spare tire as a safety net. Many RVs don’t come with a spare, so it’s worth checking and investing in one that matches your rig’s specifications.

    Why It’s Essential:

    • Immediate solution. Eliminates the need for roadside repairs when a tire is beyond fixing.
    • Peace of mind. Especially valuable in remote areas where help may be hours away.
    • Compatibility. Ensures you’re prepared for any unexpected flat or blowout.

    Recommended Use: Store your spare tire in an easily accessible spot and check its condition regularly. Make sure it’s inflated to the proper PSI and protected with a storage bag to prevent wear and tear.

    Pro Tip: Keep a set of lug wrenches, a heavy-duty jack, and gloves with your spare tire to streamline the replacement process. It’s also wise to carry a headlamp or flashlight for nighttime repairs.


    More RV Tire Safety, Less Road Stress

    Investing in these essential products will not only enhance your RV’s tire safety but also provide peace of mind on every journey. From preventing blowouts with a TPMS to being ready for emergencies with a repair kit or spare tire, these tools are invaluable for maintaining safe and enjoyable travels. With the right preparation, you’ll be free to focus on the adventure ahead, knowing your tires — and your trip — are in great shape!

  • Top RV Bike Racks: Electric to Ultralight

    Top RV Bike Racks: Electric to Ultralight

    If you’re an RV enthusiast who also enjoys exploring the world by bike, odds are that you need a bike rack. (That is, unless you have a folding e-bike.) Having a bike rack on your RV not only frees up the limited space inside your rig, it also helps keep the dirt out. So, you get both more free storage space and more free time. It’s a win-win. The bigger question is which one to get. What are the top RV bike racks?

    There are so many options out there, it can be hard to know which one is right for you. So, in this guide, we’ll look at everything you need to know about bike racks for RVs — and point out some of our favorite RV bike racks by type along the way.

    Now let’s get this thing spinning!


    Bike Racks vs. E-Bike Racks: Think Weight and Height

    These days, RVers are as likely to get around on an e-bike as a conventional bike. When it comes to RV bike racks, this is an important point. E-bikes generally weigh between 60 and 100 pounds — each. Consequently, e-bike racks are usually built to support two bikes of that weight.  Therefore, they are much more heavy-duty than conventional bike racks, which often support two bikes up to 60 pounds.

    Another consideration that often separates e-bike racks from conventional bike racks is height from the ground. While you might lift a fixed bike up onto a tongue-mount frame without an issue, it’s probably a different story loading an e-bike onto a rack at the same height. But there’s more to consider when it comes to getting any type of  RV bike rack.


    Weighty Considerations for Your RV

    Overloading your RV, RV trailer tongue, hitch receiver, or tow vehicle can have catastrophic repercussions. Therefore, before you load bikes onto any RV, here are a few things you’ll want to consider. The first thing you should do is check:  

    • RV or tow vehicle hitch capacity;
    • Tongue weight capacity of your tow vehicle;
    • Combined occupant and cargo carrying capacity (OCCC);
    • Maximum weight of the bikes you intend carry; and
    • RV bike rack weight and carrying capacity.

    You can find that information in a variety of places. 

    • On the DOT sticker that is located every RV
    • In the specifications section of user manuals
    • On the manufacturer’s website
    • Reddit groups
    • Forums like IRV2

    In addition, any bike rack being used on an RV needs to be engineered specifically to withstand certain extreme conditions. These include being bounced around and subjected to a lot of wind pressure while carrying significant weight.  It’s crucial to ensure any rack you’re considering  was designed and approved for use on an RV.  


    E-Bike Racks for RVs

    Most e-bikes are usually in excess of 60 pounds. This means any bike rack you carry them on will need to be able to withstand their weight, plus the additional stressors that come with being used on an RV. As mentioned, e-bikes naturally require a heavier, beefier rack than conventional bikes do.  Always look for an e-bike rack that’s rated for RVs.  

    Also, be sure to check the size and weight capacity of your RV hitch receiver. If the size of the hitch receiver doesn’t match the size of the hitch tube on the rack, you may be able to use an adaptor to increase the diameter. 


    Other E-Bike Rack Considerations

    • Those who may have trouble lifting an e-bike onto a rack may want to consider getting a rack that includes a ramp for loading e-bikes.  
    • Prevent theft of your e-bike and/or e-bike rack components by locking them with tool resistant locks. 


    Top 3 E-Bike Racks 

    Swagman E-Spec RV Rated Bike Rack


    • Motorhomes and other RVs: Carries up to two bikes with a maximum weight capacity of 80 pounds per bike
    • RV Trailers: Carries up to two bikes with a maximum weight of 70 pounds per bike
    • Rack weight: 63 pounds
    • Fits Class 3, 2-inch hitch receivers
    • Fits tires up to 5 inches wide
    • Fits wheels 20 inches to 29 inches in diameter
    • Locking threaded hitch pin and locking ratchet hooks
    • Can be used with a ramp and bridge set to make loading easier
    • MSRP: $499.00 


    Hollywood RV Rider E-Bike Rack


    • Designed for motorhomes
    • Not to be used on trailers of any type
    • Capacity: 2 x 80-pound e-bikes
    • Rack weight: 63.5 pounds
    • Can be used on front hitches
    • Fits Class 3, 2-inch hitch receivers
    • Maximum wheelbase: 60 inches
    • Minimum wheelbase: 36 inches
    • Maximum tire width: 5 inches
    • Heavy-duty wheel holders
    • No adapters needed for stepthrough bikes
    • Includes small wheel adapter for 20-inch fat tire bikes
    • Limited lifetime warranty
    • MSRP:  $849.99


    Swagman Escapee


    • Designed for RVs of all types
    • Capacity: 2 x 60-pound e-bikes 
    • Not designed for use with front bike wheel fenders
    • Safe for carbon fibre frames
    • Fits Class 3, 2-inch hitch receivers
    • Fits tires up to 5 inches wide
    • Fits 20-inch to 29-inch wheels 
    • Locking arms secure bike to rack
    • Threaded locking hitch pin included
    • Can be used with a ramp and bridge set to make loading easier
    • MSRP $575.00


    RV Bike Racks for Conventional Bikes

    Aside from offering a more intense workout, a key advantage of conventional bikes are that they are often significantly lighter than e-bikes. That means you have more options to choose from with regard to bike racks and mounting locations on the RV. You’ll usually find that the RV bike racks for conventional bikes are priced much lower than e-bike racks too. 

    So, let’s have a look at the four types of RV bike racks: ladder-mounted, bumper-mounted, hitch-mounted, and tongue-mounted. 


    Ladder-Mounted RV Bike Racks

    Ladder-mounted bike racks are hooked onto the RV ladder and secured in place with straps or bolts. They provide an easy-to-install, lightweight alternative to hitch mounted or A-frame mounted bike racks. Ladder-mounted RV bike racks can work well for one or two light conventional bikes, but are not suitable for heavy bikes, and may not work for some mountain bikes depending on frame geometry. (A drawback of this type of bike rack is that if you need access to the roof, the bikes, and sometimes the bike rack, will need to be removed from the ladder.)


    Camco RV Ladder Mount Bike Rack 


    The Camco RV ladder mount bike rack offers a lightweight means of carrying your bikes on the RV.  However, it’s 60-pound load capacity means that bikes mounted on it need to weigh in on the light side, even for conventional bikes. 

    Specs

    • Weight: 9.75 pounds
    • Maximum load capacity: 2 bikes totaling 60 pounds
    • May not work for smaller framed bikes
    • Folds for storage
    • MSRP: $89.99 


    Stromberg Carlson LA102 Bike Rack for Universal Ladder


    The ultralight Stromberg Carlson LA102 ladder-mounted bike rack can store up to two bikes securely. (And it weighs only five pounds!) However, its total weight capacity of just 50 pounds means that bikes transported on the LA 102 need to be very lightweight, even for conventional bikes. That said, this bike rack could work well for transportation of a single bike. 

    Specs

    • Weight: 5 pounds
    • Maximum load capacity: 50 pounds
    • Bolts onto ladder
    • Folds out of the way for ladder access
    • MSRP: $93.80


    Bumper-Mounted RV Bike Racks

    Bumper-mounted RV bike racks bolt onto the RV bumper using a pair of U-bolts. While they can work well for lightweight bikes, most RV bumpers are simply not built to handle much weight. Advantages of this style of bike rack are ease of installation as well as low height, making it easy to get bikes onto the rack.  


    Swagman RV Bumper Rack 2 Bike Bumper Rack


    The Swagman RV Bumper Rack can store up to two 30-pound bikes for transport on the back of any RV bumper that can support up to 110 pounds. It’s simple to install, and its low height makes it easy to load and unload bikes. In addition, it can be adjusted to fit a variety of bike wheel sizes and frame styles. 

    Specs

    • Weight: 50 pounds
    • Load capacity: 60 pounds, 1 or 2 bicycles (maximum 30 pounds per bike)
    • Fits 4-inch to 4.5-inch square RV bumpers
    • Installation uses 6.5-inch and 8-inch long bolts around the RV bumper
    • Heavy-duty steel 
    • Upright bar in the center of the rack offers added support for bikes
    • MSRP: $152.09 


    Hitch-Mounted RV Bike Racks

    Hitch-mounted RV bike racks mount on the hitch receiver of your motorhome or trailer. It’s very important to check your RV hitch receiver’s weight capacity before you mount a hitch mounted bike rack on it. That way you can be confident it’s not going to fail or cause damage to other RV components while you’re driving.    


    Swagman Original RV Bike Rack for 3 Bikes


    The Swagman Original RV bike rack is a tried and true bike rack that carries up to three bikes with minimalistic aplomb. It’s not just about the elegance here.  The Original RV Bike rack is built to withstand all the shaking, rattling, and rolling that comes with being fixed onto the rear hitch of any RV, truck, SUV, or car.  

    Plus, Swagman expects you to take it on adventures, on and off road.  This sets it apart from many other racks. But its sturdy build doesn’t depend on heavy components. It’s all about clever engineering here. There are no moving parts, but also the mast attaches to the shank with steel-reinforced brackets. That being said, this sturdy bike rack weighs just 25 pounds but can handle up to 100 pounds of weight.  

    Specs

    • Weight: 25 pounds
    • Load capacity: 3 bikes totaling 100 pounds
    • Rubber cushioned cradles
    • Fit: Universal with 2-inch hitch receiver
    • Distance between cradles (center to center): 6 inches
    • Ground clearance on fifth wheels: 15 inches
    • Limited lifetime warranty
    • MSRP: $210.35


    Tongue-Mounted Bike Racks

    Tongue-mounted bike racks allow you to carry bikes on the tongue of a travel trailer. Carrying bikes on the tongue of a travel trailer has several advantages. For one thing, it’s an easy rack option for RVs that don’t have a hitch at the back. (or else have a hitch that can’t handle the weight and punishment of carrying bikes.) Getting the bike weight onto the tongue can be a more stable option for many towables too. Last (but not least) many RVers like to have a clear visual on their beloved steeds while they are being transported.  This allows them to get on top of potential issues (like straps loosening) before they turn into bigger problems. 

    That said, tongue-mounted racks have some definite downsides. One of these is that the bike cradles are quite high. Lifting bikes high enough to load them onto a tongue-mounted rack can be a challenge for many RVers.

    Another disadvantage to mounting bikes on the tongue of the RV (that no one ever talks about) is this: Bikes carried on the front of the camper can quickly become thickly coated in bug splatter. (Ew.) Many bike enthusiasts who travel in an RV deal with this by adding a bike cover. However, bike covers on bikes carried on the RV tongue increase vehicle wind resistance and may impact vehicle fuel economy.  

    In any case, before adding a tongue-mounted bike rack, ensure both the RV tongue and the  tow vehicle can handle the extra weight of both the rack and the weight of the bikes.


    Lippert Jack-It Tongue Mounted Bike Carrier


    The Jack-it tongue mount carrier carries up to two bikes over the propane tanks on the trailer’s A-frame. Bikes mount on the rack’s cradles. They can then be strapped into place using a rubber strap system that holds the wheels securely in place.  

    Specs

    • Rack Weight: 25 pounds
    • Load capacity: 2 bikes totaling 80 pounds
    • Fits travel trailers
    • One-year warranty
    • MSRP: $347.95


    Choosing the Right RV Bike Rack

    Ultimately, getting an RV bike rack that fits your RV style and your needs is about more than merely adding a practical upgrade to your RV. Whether you choose a heavy-duty workhorse for hauling e-bikes or a lightweight rack for conventional bikes, adding a bike rack to your RV allows you to combine two of your favorite lifestyles. It offers the opportunity to travel while discovering new cycling destinations wherever you go. 

  • 3 Electric Bikes to Cycle Beyond Your RV Campsite

    3 Electric Bikes to Cycle Beyond Your RV Campsite

    Two of the best things about RV camping are being able to spend time outdoors and getting to  explore new places. Sure, you could always explore on foot. However, seeing the world from the seat of a bike adds a definite element of fun. (Not to mention adventure!) After all, even a trip to the camp store is way more fun on a bike. Cycling allows you to cover a lot more ground — and is easier on the joints.  Especially if the bikes you bring in your RV are electric bikes.

    Cycling makes exploring off-the-beaten-track locations and hidden gems into as adventure that eliminates hassles like finding parking. (Or paying for it.)  Many patios and restaurants now offer some form of  bike parking. That means you can ride your bike there, relax, grab a bite, and enjoy a beer (or two) without worrying about having a designated driver. 

    And just when you think it couldn’t be any better, along come folding e-bikes! These electric bikes fold up to make bringing a bike in your RV easier than ever. You get the normal bike features, but you don’t have to purchase an RV bike rack.

    So, let’s take a look at what to look for when shopping for an electric bike for your RV — and our top three electric bikes for camping.


    Shopping RV Electric Bikes? Here Are a Few Tips

    Determine Watt You Need

    First, consider the type of riding you’ll be doing and your budget. For example, there are e-bikes that are fully equipped for mountain biking adventures. Others are better suited for short rides around the campground. For example, 500-watt e-bikes are a good choice for riding long distances on flat, paved bike paths and/or roads. 

    If you plan to ride in a variety of conditions (but range isn’t a priority), consider a 750-watt e-bike. This will give you enough power to get over hills and through virtually any terrain.  A 750-watt e-bike has  enough power and torque to get you through a range of conditions, making your ride a lot more fun. The drawback here is that since 750 watts uses more energy, your e-bike battery won’t take you quite as far as it would go on a 500-watt bike. However, since 750-watt bikes have ranges of up to 68 km, draining their batteries could still be a challenge.


    Compare These Features

    • Torque sensor. A torque sensor gives you more pedal assistance according to pressure on pedals. This can be helpful for hill climbing or navigating trails.
    • Security. Look for security features, like keyed start, locking battery,  Apple Find My App integration etc.
    • Comfort. Choose a bike that’s a comfortable fit for you. As a general rule, there should be a minimum clearance of 1.5 to 2 inches between the top tube and the top of your inseam when you stand over the bike. Also, a good bike fit lets you enjoy a relaxed, upright posture and a comfortable seat.
    • Height. A low step through frame is perfect for anyone that doesn’t want to hoist a leg up and over the top tube to get on the bike.
    • Folding options. A folding e-bike can offer multiple advantages from low clearance and storage options, fitting neatly into the back of a vehicle, into a basement storage bay, or tucking away inside the RV itself. This not only eliminates the added expense of an e-bike rack, but it ensures you can store your e-bike out of the sight-lines of would-be bike thieves.
    • Assists. Having both pedal assist and throttle lets you either pedal or just enjoy the ride with minimal work..
    • Tires. Pay attention to tire tread patterns. Some tires are designed for efficient use on pavement but will slide out unexpectedly on loose or wet surfaces. A waterproof rating of IPX7 or better on both the battery and bike will allow you to ride in wet or damp conditions without worrying about getting shocked or damaging your bike.
    • Certifications. An e-bike that has safety certification from  UL (Underwriters Laboratories) on battery and bike offers assurance that the bike manufacturer has done everything necessary to meet safety standards.


    Best RV Electric Bikes for Camping

    Each of these bikes has outstanding features coupled with a phenomenal range that takes it miles ahead of the rest of the e-bike pack. All three are 750-watt e-bikes, which we think provide the best value. While two of these are folding bikes, we included one for diehard frame style for traditionalists too. 


    1. Velotric Fold 1 Plus Folding E-Bike


    The feature-loaded Velotric Fold 1 Plus e-bike is designed for getting wild. Its 20-inch, all-terrain wheels, low-step-thru height and three drive modes are designed to give you the confidence and ability to go wherever you want in easy comfort. The stylish Fold 1 Plus folds up so compactly that you could easily store three of them in the back section of an Class B, SUV, or pickup — whatever you’re towing with.

    That means you don’t need to add an expensive and heavy e-bike rack to your cargo weight. At 63 pounds, it’s light enough to be easily lifted into the back of a vehicle or into the RV. On top of that, it comes stock with a comfortable seat and handlebar that can be customized to fit your riding preferences. But that’s just the beginning on this nimble and fun little bike.


    Features 

    • 750-watt, rear -rive motor
    • Range: 68 miles
    • Weight: 63 pounds 
    • Max weight capacity: 450 pounds
    • Tires: 20 inches x 3 inches
    • Folded dimensions: 38 inches (L) x 19 inches (W) x 33 inches (H) 
    • Stepover height: 15.35 inches
    • Torque sensor added
    • Colors: Electric Blue, Mango, Pearl White, Stone Gray
    • Modes: 3 – battery-saving Eco; Trail to give you power when you need it; Boost to help you get up hills (modes and settings can be changed on the fly)
    • Walk-mode setting: keeps the bike from going over 2.6 mph
    • Pedal assist: 5 levels
    • Hydraulic suspension fork that can be locked out
    • Completely waterproof 
    • Battery and bike are UL-certified for safety 
    • Bluetooth-enabled
    • Device charging port
    • Water bottle mounts: 2
    • Apple Find my functionality to locate your bike with an Apple device
    • Rear rack and fenders
    • 8 gear cassette
    • Color monitor display 
    • 200-lumen headlight 
    • Turn signals and brake light
    • Loads of available accessories
    • Adjustable stem lets you customize a comfortable and safe (fit for riders from 4 feet 9 inches to 6 feet 5 inches)
    • Two-year warranty
    • MSRP $1,399 


     2. Biktrix Stunner LT 8


    The aptly named Biktrix Stunner LT 8 is a great choice for a go anywhere camping bike. But there’s more to it than rugged good looks. With that said, those who prefer a more conventional style bike will be impressed by this Stunner’s feature rich design. Front shocks and beefy Kenda tires help give it a comfortable, stable ride in a variety of conditions. The 750-watt, rear0drive motor has a very respectable range of up to 68 miles. This bike comes in two sizes: small (20-inch tires) and medium (24-inch tires).


    Features

    • 750-watt, rear -rive motor
    • Range: 68 miles
    • Weight: 68.5 pounds
    • Max weight capacity: 330 pounds
    • Standover height: 21.3 inches
    • Tires: small (20 inches) or medium (24 inches)
    • Water bottle mounts: 2 
    • LCD dsplay
    • Colors: 8 vibrant options + 192 available  custom colors
    • Integrated 200-lumen headlight
    • Rear rack and fenders
    • 8 gear cassette
    • MSRP $2,199


    3. Rad Power Bikes RadExpand 5 Plus


    If you’re looking for a bike that can take you where you want to go in comfort and style, Rad Power Bikes RadExpand 5 Plus could be the perfect bike to pack into your RV. This nimble little bike has a respectable up to 60-mile range between charges. A  torque sensor measures the pressure you’re putting on the pedals and gives you the perfect amount of pedal assistance.  This bike is similar in many ways to the Velotric Fold 1 Plus, but it’s a little smaller, giving it a smaller footprint when it’s stored. 


    Features 

    • 750-watt motor
    • Ranges: 60 miles
    • Weight: 72.5 pounds
    • Maximum weight capacity: 330 pounds
    • Rider heights: 4 feet 10 inches to 5 feet 10 inches
    • Stepover height: 16 inches 
    • Folded dimensions: 29 inches (H) x 25 inches (W) x 41 inches (L)
    • Colors: Stone Tan and Slate Blue
    • Torque sensor
    • Hydraulic suspension fork
    • Device charging port
    • Waterproof
    • Full lineup of accessories
    • Integrated 200-lumen headlight
    • Turn signals and brake light
    • Half-twist throttle
    • 7 gear cassette
    • UL-certified for safety
    • Two-year warranty
    • MSRP: $1,899


    RV Electric Bikes: Another Way to Extend Your Range

    Cycling is a fantastic way to get exercise and fresh air as you explore new places or run errands— which makes electric bikes and RVs a perfect fit for one another. With an e-bike, walking to the campground store or shower no longer seems like a chore. It’s just fun! Mundane trips become adventures. Not only that, but cycling is a simple and easy way to explore local attractions, wineries, farmer’s markets and anywhere else you want to go.

  • 5 RV Cat Accessories for Feline Felicity

    5 RV Cat Accessories for Feline Felicity

    Taking a feline friend on the open road can be a wonderful experience. Everyone assumes that dogs love RV travel. (And, of course, RV dogs have their own needs.) But cats accustomed to RV life can also be purrfect traveling companions. What’s more, many actually love joining their humans for road trip adventures. Cats that are familiar with the RV enjoy taking in the new sights, sounds, and scents from the comfort of their home on wheels. However, just like humans, cats have specific needs that must be met to ensure a safe and comfortable RV life. And there are certain RV cat accessories that a feline friend simply can’t do without.

    So, if you’re thinking about taking your cat on the road for the first time, we’ll give you the skinny on the five RV cat accessories that are absolute must-haves.


    1. Identification: Microchip and a Collar with ID Tags


    As you might expect, it’s always best to keep cats safe inside the RV. Keeping them inside will eliminate the hazards presented by predators, vehicles, and other dangers. (Especially in the strange and unfamiliar environment of an RV park or campground.) 

    However, you can (and should) provide a second line of defense for your feline friend by having your cat microchipped by your vet — and having them wear two identification tags on a well-fitted collar.  One ID tag, like this one on Etsy, should have his name and your phone number.  The other tag can be a small writable tag on which you can write your campground with your campsite address. Having ID on your cat can be a lifesaver if they happen to make a quick (and inevitably sneaky) exit from the RV.  


    2. A Familiar Litter Box with the Same Kitty Litter


    Most cats do best in the RV with familiar items. Be sure to pack their favorite food and water dishes along with the food they know and love. Also, it’s also a good idea to set up the litter box with same the kitty litter he has at home. You can prevent potential messes in the RV by setting it up on a litter mat.  


    3. An Oversized Carrier They’re Comfortable In

    The safest way for your cat to travel is in a kennel that’s inside the vehicle with you. (It goes without saying that no one should be inside the trailer while it’s moving, including your kitty.) In addition, it’s always safest for your cat to ride in a travel kennel that’s big enough for them to move around in. Not only does a  kennel provide a safe, familiar place for your cat. It also provides an easy means of locating your pet should you be involved in an accident.   

    With that being said, cat carriers are tiny, because they’re designed for short trips to the vet, not for spending hours in. Instead of a cat carrier, consider setting your cat up with a travel crate designed for a medium size dog. Be sure to outfit it with his favorite bedding and toys. The idea is to make it into a space he loves being in.  

    On that note, be sure to train your cat to love his travel kennel before he goes anywhere in it.  You’ll need to familiarize him in three stages:  With the door open, with the door closed, and going on short trips in the crate.

    Remember: Always work within your cat’s comfort zone. The goal here is to have your cat run into the crate on cue or whenever he wants to feel safe and cozy.  Rushing the process can lead to a permanently bad association with the crate.  


    How To Kennel Train Your Cat

    1. Make the crate irresistibly comfy. Start by lining it with familiar bedding. Add some favorite toys. Maybe even a little catnip and some of their favorite kitty treats. At this stage, don’t try to get them into the crate. (You want them to think it’s all their idea.)
    2. Feed them near the crate. Start by feeding your cat close to the crate with the door open. Do this for up to a week, until you can see he is more curious about the crate than worried about it, perhaps even going into the crate on his own.
    3. Sneak the food into the crate. Now you can up the ante by putting his food dish just inside the door of the crate. Feed a few meals this way and gradually move the dish further back in the crate an inch or two at a time.
    4. Make it fun. In the meantime, start playing a game with your cat. Toss a treat into the crate, and when he goes in to get it, say “Kennel!” and quickly toss another one in.
    5. Casually close the door. When your cat is obviously comfortable going into the crate, perhaps running in at the mere mention of the word “kennel!” It’s time to close the door, briefly at first because your work will be undone if he thinks he’s been tricked and is now trapped in the kennel. 
    6. Extend the time. Gradually extend the period of time your cat spends in the kennel, working gradually towards 10 minute periods.

    Transitioning to Your RV

    1. Look for the sign. When your cat really wishes you’d stop opening the door to the crate, it will be time to take this show on the road.
    2. Try a short drive. Secure the crate with cat in it into the tow vehicle or motorhome, and go for a short drive. This should be 15 minutes or less.
    3. Make a maiden voyage. When your cat is completely comfortable riding in the vehicle, he should be ready for his first RV adventure.


    4. A Small Post for Legal Scratching

     Clawing and scratching objects is a natural feline behavior. However, you can prevent your cat from using his claws to damage your RV furniture by providing him with a “legal” way to express his instinctive scratching behavior. Giving your cat a small scratching post in the RV can help him to feel  at home in the RV — while saving your RV furniture. 


    5. A Comfy, Cozy Perch for Cat Naps


    Cats appreciate a comfortable spot with a nice view  just as much as we do.  From a cat’s point of view, what could be better than a comfortable bed that mounts directly on an RV window, perfect for bird watching or just keeping tabs on his kingdom.   


    Beyond RV Cat Accessories: A Few Road Tips

    Cats learn to love RV travel when it’s introduced slowly, and they’re surrounded with the  familiar items they have at home. But having the right RV cat accessories isn’t your only key to success. Here are a few other tips and tricks that are handy to know when traveling with your cat.  

    • Careful with the slide-outs. Be sure all cats are in their carriers before bringing slide-outs in. Cats can fit into tiny spaces, and it can be difficult to crate them after the slide-out comes in. Not only that, but there is a chance your cat could be injured if they don’t get out of the way of the slide-out.
    • Add kitty breaks. Give your kitty frequent breaks when you’re traveling so they can have all the access they need to food, treats, water and his litter box.
    • Control the climate. Use a bluetooth enabled temperature monitoring system if you need to be away from the RV for an extended period.
  • Fishing Tackle No RVer Wants to Be Caught Without!

    Fishing Tackle No RVer Wants to Be Caught Without!

    It’s an open secret. RVing can open a door to some of the best fishing holes and hot spots in the country. Interestingly, though, it’s not always intentional. Just taking an RV trip into the wild may land you in the perfect spot to cast a line. Imagine camping near a quiet river at the base of an isolated mountain. There’s not a soul in sight. The water laps against the river bed as you set up your rig. A glance into the cool stream reveals a big beautiful trout waiting for its next meal. But if you don’t have some RV fishing tackle at the ready for such an occasion, it all becomes one enormous tease.

    You don’t want this scenario to catch you unprepared. And you don’t have to. By keeping five essential pieces of  fishing tackle in your RV, you will always be ready to cast a line — even if you stumble unexpectedly into the perfect spot.


    No. 1: A Ready-to-Go Rod

    Amateur anglers might be surprised to discover that there are so many types of fishing rods. Each type caters to a genre of the sport, with variations branching out from here. Unfortunately, there isn’t any one rod to serve them all. Instead, when shopping for the right rod, consider the specific styles of fishing you’d like to master. 


    Telescoping Fly Rod

    Simplicity for the Fisherman on the Fly

    Telescoping and collapsible fly rods are widely popular for traveling fisherman. Each type meets a specific performance or fishing style. We chose the Tenkara Telescoping Fly Rod for its rugged simplicity and time tested effectiveness. The methodology is rooted in traditional Japanese fly fishing. Similar to traditional fly fishing, the Tenkara approach is much simpler and sometimes more effective. 


    Spinning Rod

    Universality for the Everyman Angler

    Some heavier waters require more than a fly rod for landing big fish. A medium-weight spinning rod, like the St. Croix Triumph Spinning Rod, can cross a variety of water types. It’s the most versatile of all rod types. These rods can be used in lakes, ponds, rivers, creeks, inland coastal waters, and even the ocean surf.  


    Saltwater Rod

    Heavy-Duty to Reel in the Big One

    If you enjoy fishing on the ocean, you will want to consider a travel surf rod. The Okuma Traveling Surf Rod is a heavy duty collapsible rod. You can cast further and reel in heavier fish through the surf. It will also accommodate a heavier line. Since RVs aren’t known for having a lot of space, this 4 piece construction will fit nicely into almost any compartment. 


    No. 2: A Variety of Fishing Lines

    Traveling in an RV offers the opportunity to fish in a variety of habitats. It also hinders your ability to carry all the different types of fishing rods and recommended equipment due to space limitations. You can make up for this by having a good index of line weights and types. In the grand scheme of things, fishing line doesn’t take up much space. (That is, if you can keep it from getting tangled in your RV fishing tackle box.)


    Fly Fishing Lines

    Three types of fly lines are essential for fly fishing. 

    • Floating lines. This line is essential to keep your line “floating.” 
    • Sinking line. This line differs from the floating line by the rate at which it sinks. You can get a range of different sinking lines. 
    • Sink-tip fly lines. This line is a combination of the floating line, and the sinking fly line. Generally speaking, the first eight to 16 feet of the tip line will be sinking, with the remainder of your line floating. 


    Spinning Rod Lines

    For your versatile spinner rod, you can have anything from a two-pound line for spooky creek trout, or as heavy as an eight- to 10-pound line for big lake fish.  


    Heavier Surf Lines

    For ocean fishing, including ocean surf and brackish fishing, you will want a variety of heavier lines depending on what’s biting. I can’t tell you how many times I felt the tug of a big juicy fish, only to have it bite my line in two. If you are fishing for a toothy catch like snook or blue fish, consider a steel leader on the end of your line. 

    Also keep in mind:

    • A medium surf rod line weight is going to be around 12 to 25 pounds. 
    • A heavy surf rod line weight will be 17 to 40 pounds. 


    No. 3: An Essential-Only Tool Box

    Your essential tool kit can be simple enough to fit in a small fanny pack, or it can spill over into several 5 gallon buckets. Since RVers don’t have the luxury of space, it’s probably best to stick with the necessities. A medium/small RV fishing tackle box, like the Lure Lock Deep with Trays, would be prudent to keep your hooks, sinkers, lines, and lures. A few basic tools should be added to the mix: 

    • Hemostats and pliers. Hemostats will remove the hook from the fish, and sometimes needle nose pliers will be required to pull out a heavy hook. Pliers are also better for squeezing sinkers onto your line. 
    • Line cutters. Finger nail clippers often work better than scissors for this task.
    • Pocket knife: A dedicated fishing knife is essential for bait cutting without double dipping into your silverware drawer. Your wife will thank you. 


    No. 4: Time-Tested Lures and Bait

    Bait encompasses many different categories depending on what your habitat is. After years of fishing in a variety of watery ecosystems, we have found the best bait to be live and native. Minnows, earthworms, stoneflies, crickets, and other living fish food can usually be sourced at your location. However, there are plenty of scenarios in which a lure or fly will be what’s required.  


    Lures

    Lures can include a variety of spinners including jigs, spoons, crank baits, spinnerbaits, plastic worms, and much more. Your habitat and experience level will determine which of these you choose to carry. 


    Flies

    Flies are lures specific to fly fishing. There are thousands of varieties, but generally speaking they imitate flies, nymphs, and various life stages. Flies will either float or sink. It can be expensive to procure a good collection because they are usually hand tied. Each habitat will pair with a specific fly variety for that type of year. 


    Live Bait

    For inland fishing, live bait doesn’t require any specific tools. Just turn over some rocks or logs, or dig up some worms with your own two hands. If you are near the ocean, you should consider investing in a cast net, like the BasicGear cast net. This investment requires more time than money. Learning how to catch bait fish with a cast net is a humbling journey in patience and practice. But if you love to fish on the coast, it could be the best investment of time and money you’ve ever made. 


    No. 5: Some Bring-It-Home Gear

    No matter what you catch, you’re going to need to put it somewhere. Unless you’re fishing from the window of your rig, you need to store the fish that you’ve caught. This could be as small as a Bass Pro Shops Trout Net for your catch and release trout or a bucket or cooler for your intended dinner. A 15-inch stringer is a compact tool for collecting your fish in one spot, in or out of the water. If you’re catching bait fish you will want a bucket to keep the bait, and an aerator to keep them alive. (And don’t forget to bring extra batteries for the aerator!). 


    In Addition to Your RV Fishing Tackle …

    It would be prudent to study the regulations pertaining to any specific area you intend to fish in. These regulations could include catch limits, size limits, open seasons for specific species, delayed harvests, and about a thousand other rules you will be expected to recite backwards. Local bait shops and fishing stores are a good place to get informed.

    Don’t forget to bring your fishing license wherever you bring your pole. A separate fishing license will likely be required for every state you intend to fish in. It can be quite an investment, but a worthwhile expenditure. What better place to put your money than something that brings you joy?  

  • 5 Watercraft You Can Stow in Your RV

    5 Watercraft You Can Stow in Your RV

    There’s two kinds of people in this world: those who are content to sit idly by a peaceful watery landscape — and those that have to get wet. And make no mistake about it, traveling by RV will allow you access to so many awesome aquatic settings. So, for those of us who can’t just sit in front of body of water (I’m one of you), we need a way to get in and explore. Fortunately, there are five types of watercraft you can easily bring in your RV. 

    So, from kayaking to paddleboarding and beyond, let’s dive right into the best RV watercraft to stow in your rig.


    No. 1: Hard-Shell Kayaks 

    Also known as “sit-on-top” kayaks, hard-shell kayaks are a reliable and durable option for exploring the water. They are difficult to sink or swamp, and punctures are rare. These kayaks are also easy to launch with no set up required. 

    Depending on what kind of water you prefer to delve into, a kayak will give you access to a range of aquatic landscapes. If you are traveling with a partner, a two-seater kayak will be great, but they do take up more linear space. However, keep in mind that, ultimately, having one double kayak will take up less space than two smaller kayaks. My husband and I travel with a two person sit-on-top kayak that we tie to the roof of our tow rig. We have just enough clearance to make solid turns while still towing our travel trailer behind us. 

    If you like to fish in your kayak, consider one with pedals. Pedal kayaks are incredibly versatile for traveling long distances and against strong currents or winds. 


    Pros

    • Ability to cover long distances and move faster
    • Able to paddle against a solid current or wind
    • Tracks better in the water and moves straighter, making it easier to navigate
    • Creates fishing opportunities (some rigid kayaks — especially two-seaters and pedal kayaks — are big enough to bring a small bait bucket, cast net, and fishing poles along)
    • Durable during transit and storage


    Cons

    • Large, so not every RVer will have the space to store one
    • Heavy, which can be cumbersome to carry from your parking spot to a suitable launch location 


    No. 2: Inflatable and Folding Kayaks

    A hard-shell, sit-on-top kayak is a luxury not every RVer can afford — especially space-wise. If you lack the space to bring one along, consider an inflatable or folding kayak.


    Folding Kayaks

    Contrary to their modern appearance, folding boats have a long history. They can be found in historical context as far back as Norse mythology. Today’s folding kayaks have undergone major technological advancements. They are more durable, portable, lightweight, and user-friendly than ever before. Some modern folding kayaks are derived from origami inspired designs, folding from a single sheet of corrugated plastic. Others are derived from a hybrid of rigid and folding elements. 


    Pros

    • Enhanced portability 
    • Compact storage opportunities
    • Lightweight design 


    Cons

    • Come at a higher price point than many other forms of kayaks
    • Make performance trade offs, like performing well in calm conditions but not offering the same level of rigidity and speed when paddling in rough waters
    • Require extra care to avoid wear and tear on the fabric skin and joints
    • Need to be properly stored to avoid UV damage (and salt and debris needs to be cleaned off of them after each use)
    • May have weight limits compared to their rigid counterparts, which could impact the amount of gear and passengers you intend to bring along


    Inflatable Kayaks

     An inflatable kayak is a great way to get in the water, without utilizing any precious storage space in your rig. You will save loads of space and weight. 


    Pros

    • Incredibly light
    • Space-saving
    • Affordable


    Cons

    • Need to be inflated
    • More susceptible to spring a leak, especially in aquatic environments where you need to be careful not to scrape sharp objects like oyster shells or barnacles
    • Need to avoid shallow water in case the bottom poses a threat of puncture
    • Do not track as well in the water 
    • Subject to windage without the weight and rigidity of a hard-shell boat and may be blown around by heavy winds


    No. 3: Paddleboards

    I remember when paddleboards first came out. I thought for sure they would lose their popularity and fade away like so many sporty inventions. But they didn’t. And if you’ve ever been on one, you might understand why. They offer a surprising amount of versatility, while requiring a certain level of skill and physical capability to master. After the initial learning curve, a paddleboard can be your best friend on a variety of waterways. And they require very little space for storage. 


    Inflatable Stand-Up Paddleboards

    Inflatable stand-up paddle boards are a great option for RV watercraft. They are compact and can roll up to the size of a sleeping bag! Many of them are sturdy enough for fishing, and even come with little chairs to sit on. Some models can carry an additional small passenger. 


    Pros

    • Portability and storage 
    • Lightweight and easy to transport 
    • Durable in transit (compared to their rigid counterpart)


    Cons

    • Longer set-up time with inflation
    • Sacrifice some performance with less rigidity, responsiveness, and glide
    • Potential for puncture with any inflatable RV watercraft


    Rigid Stand-Up Paddleboards

    A rigid stand-up paddleboard should be considered for performance versatility. If you intend to use your board competitively, or traverse especially rough waters or rapids, a rigid stand-up paddleboard might be worth considering if you have the space to store it. 


    Pros

    • Offers better rigidly speed and responsiveness to the waters due to solid construction
    • Durable with no risk of puncture 
    • Enhanced control as the stiffer surface translates into improved maneuverability and control, especially in windy or rough water


    Cons

    • Bulkier to transit
    • Require more storage space
    • Risk of damage when going over big bumps on the road — or dropping them by mistake
    • Come at a higher price point
    • Repairs are costly 


    No. 4: Hydrofoil Boards

    For those who are less interested in exploring the water, and more interested in playing on it, a hydrofoil board is worth investigating. A hydrofoil board has a wing-like structure attached to the bottom that lifts the vessel above the water, reducing drag and increasing speed.

    Basically, the board is akin to a stand up paddleboard or a surfboard, combined with a wing that extends below the board. 


    Pros

    • Minimizes water resistance, which can make outings faster and less physically taxing
    • Offers an exhilarating and unique experience on the water.
    • Designed with portability in mind 


    Cons

    • Comes with higher price point
    • Can be costly to repair
    • Delicate and may require extra care
    • Need to be stored securely to avoid damage, as well as cleaned of salt and debris after each use
    • Demands more skill and practice than a traditional stand up paddleboard or surfboard. 


    No. 5: Windsurfing and Kitesurfing Boards

    In a similar vein of water sports, windsurfing and kitesurfing open a world of water sports that can be enjoyed in oceans and lakes. Both rigs come in compact packages ideal for RV watercraft transit. 


    Windsurfing Boards

    Windsurfing is a water sport that merges elements of sailing and surfing. The sail is mounted on a mast of a windsurfing board to capture the wind. This allows you to propel the board forward as you stand up right and grip the sail directly. This is a physically demanding sport that requires strength and technique


    Pros

    • Offers a more streamlined setup that can be more straightforward to learn on (direct connection between the sail and the board provides immediate feedback, offering a strong sense of control over direction and speed)
    • Requires a full-body workout, building strength and coordination
    • Can be used in varying wind conditions


    Cons

    • Can be cumbersome and sizable
    • While intuitive, still takes time and practice to master the sport of windsurfing
    • Requires a minimal amount of wind to perform
    • Setting up the sail and mast demands some extra time


    Kitesurfing Boards

    Kitesurfing is a dynamic water sport where a large, controllable kite is used to harness the wind and pull the rider across the water on a board. Unlike windsurfing, on the kitesurfing board, the kite is not attached to the board, but is flown overhead and controlled with a bar and lines. 


    Pros

    • Offers an especially high speed thrill, lifting you into the air sometimes over 100 feet
    • Most able to be deflated and packed into a travel bag
    • Versatile enough that, with the right setup, it can be adapted to landboarding


    Cons

    • Setup involves separate components that require a bit more space and sometimes assistance to launch appropriately. 
    • Considered dangerous and requires thorough training to perform safely
    • Injury is a solid risk (for every 1,000 hours of kite surfing, about 11 injuries are statistically prevalent) 
    • Requires a certain amount of wind to perform
    • Can be costly to acquire a high-quality kitesurfing setup


    Choosing Your RV Watercraft 

    Picking the right RV watercraft to break out when you spot a body of water can be a real rabbit hole of research. Even so, it’s worth taking the time to explore all your options, pairing them up with your RV’s storage and weight capacity.

    Assess the carrying capacity of your tow vehicle. Do you have ladder racks to tie a rigid boat to? Can you install some? Will it be worth the trouble?

    For us, absolutely. We love having a rigid vessel that we can explore various waterways with. But that’s because our priority is exploring the water. Whatever your priority is, make sure you honor it with a vessel that meets your needs.   

  • Mobile Harbor: Best Kayak Racks for Your RV

    Mobile Harbor: Best Kayak Racks for Your RV

    From long journeys through rivers to a relaxing fishing trip, kayaking allows you to enjoy the freedom of open water. Which is exactly why many RVers consider a kayak to be essential equipment for RV camping. Kayaking provides a peaceful, uncomplicated means of exploring the outdoors. But getting kayaks to that perfect waterfront camping spot can be a little challenging. The question is: With limited space in the RV, where do you put it? Because if you go the hard-back, sit-up-top kayak route, you’ll also need to shop kayak racks for your RV.

    Now, there are a few ways to transport kayaks on an RV. One, of course, is to transport a kayak on the rooftop rack of your tow vehicle. But transporting your kayak on an RV is a whole different story. RVs are typically more than nine feet high. So, if getting a kayak onto the roof is an option at all, it isn’t an easy one. 

    Fortunately, there are other ways to transport kayaks on an RV. We’ll detail a few methods and then list our favorite kayak racks for an RV at the end.


    Kayak Transportation Options for Your RV

    Top of the Tow Vehicle 

    Kayaks that are less than 10 feet can be secured in place in the box pickup — if your RV is a travel trailer. Additionally, some RVers transport kayaks that are under 10 feet long on a rooftop rack on the tow vehicle.

    Be advised: That length matters. Longer kayaks transported on the roof of a tow vehicle can make contact with the trailer when you turn a corner. This can damage the boat and/or the trailer. Also, even if you have a shorter kayak, transporting it on the roof of the tow vehicle has two downsides: 

    1. Kayaks are heavy. Lifting the 40- to 80-pound kayaks onto a rooftop carrier can be difficult.
    2. Kayaks increase wind resistance. Once mounted on top of the roof,  kayaks often result in a noticeable drop in fuel economy


    Back of the RV Ladder 

    Some RVers find creative ways to mount a kayak onto the RV ladder. However, this isn’t always a good idea. Truthfully, RV ladders aren’t designed to carry weight for an extended period of time. (Perhaps especially over all the lumps, bumps and jiggling that happen at the back of an RV during transport.) Also, using the RV ladder as an improvised kayak carrier could damage it or cause its mounting brackets to loosen. 

    Quite simply, it’s possible but risk-prone. I don’t advise it.


    Hitch-Mounted RV Kayak Carriers

    Hitch-mounted RV kayak racks transport kayaks vertically behind your RV. The vertical placement makes the process of loading and unloading kayaks easier than any other method.  Basically, you just need to lean the kayak onto the main cradle of the carrier, then lift it onto the carrier. Once it’s in place, it’s secured there with straps. After that you’re good to go.  

    The benefits of vertical kayak transport don’t end with relatively easy loading and unloading.  Because they’re positioned at the back of the RV, kayaks on hitch-mounted racks don’t create wind resistance like their roof-mounted counterparts. This helps to minimize effects on RV or tow vehicle fuel consumption.  


    Key Considerations for Purchase

    There are a few things you’ll want to consider before you go shopping for an RV kayak carrier.  

    • RV cargo carrying capacity. Ensure the additional weight of kayaks and the kayak carrier itself won’t exceed the cargo carrying capacity for your RV.
    • Hitch receiver size and capacity. RV hitch receiver capacity can be as low as 50 pounds or up to 500 pounds. It’s a good idea to know how much weight your RV hitch receiver can handle before loading it with the weight of a kayak rack along with kayaks.  
    • Kayak length. Be aware that carrying a kayak vertically on an RV might raise your RV’s clearance height. If this is the case, keep it in mind when you’re planning routes or driving. 
    • Fold-up features: Some kayak racks can be folded flat against the RV when not in use.
      • Durability and materials. Look for carriers constructed from robust, weather-resistant materials like powder-coated steel or aluminum to withstand the rigors of travel and outdoor elements. Stainless steel hardware is a plus for longevity.
      • Budget. Kayak racks vary in price according to features and materials. Knowing which features you want and how much you have to spend will help you stay within your budget.
      • Security features. Some carriers come with integrated locking mechanisms for security.
      • Ground clearance. For vertical carriers, ensure that your kayaks will have sufficient ground clearance when mounted to avoid scraping on uneven terrain or during inclines.
      • Will you travel with bikes as well as kayaks? Some kayak racks come with features like bike carriers. If you like to camp with both bikes and kayaks, this can save you from having to get an additional carrier for your bikes.
    • RV approved. Be sure the kayak rack you choose is approved for use on RVs.
    • Vertical clearance. When driving with kayaks mounted vertically be aware of overhead obstacles (low bridges, limbs, etc.).


    Top Picks for Hitch-Mounted Kayak Racks

    Ease of both installation and use have helped make these hitch-mounted RV kayak racks float to the top of the pack. 


    Recpro Vertiyak Vertical Kayak Rack for RVs


    Manufactured in the USA, the Recpro Vertiyak Vertical Kayak Rack for RVs is great for kayaks and paddleboards up to 12 feet. This carrier stacks up to two kayaks securely in place.  Vertiyak recommends users secure kayaks in place with ratchet straps using the holes provided for this purpose.   

    A cool feature is that the bottom cradle can be adjusted to three different heights, making it versatile for a variety of trailers and motorhomes. Another neat thing about this rack is that it folds flush with the back of the RV when not in use, getting it out of the way where it can’t get damaged. These kayak racks come stock with an anti-rattle hitch tightener which reduces movement of the rack during travel. 

    Important Notes: You’ll need to supply your own ratchet straps and hitch pin with this kayak rack. In addition, the manufacturer recommends the use of pool noodles to protect kayaks from scratches.


    At a Glance

    Capacity: 2 kayaks
    Maximum weight capacity: 150 pounds
    Dimensions: Top – 66 inches (H) x 40 inches (D) x 37 inches (W/Top) x 20 inches (W/Bottom)
    Lower cradle opening:  11 ½ inches x 17 inches
    Upper cradle opening:  35 inches
    Weight:  46 pounds
    Mounting: Requires a 2-inch receiver
    Material: Powder-coated, 14-gauge steel (top), 11-gauge steel (lower hoop)
    Mounting height: Lower cradle is adjustable to 3 mounting heights
    Use: Motorhomes and trailers mounting kayaks up to 12 feet long;
    Price: $449.00 at Vertiyak.com 


    Hyperax Iridium RV Approved Kayak Carrier

    RV Proved Hyperax Iridium Hitch Kayak Rack


    The Iridium Hitch by Hyperax provides secure kayak storage on the back of the RV. Reviewers report that it’s easy to install and durable enough to withstand years of use on the back of an RV. Made of carbon alloy steel with integrated foam pads on cradles to help prevent scratches, the Hyperax Iridium uses simple reflective straps to hold kayaks in place. 

    Important Notes: The Hyperax Iridium can only be used on vehicle combinations up to 50 feet long with trailers being only 25 feet long. This makes it unsuitable for use on many fifth wheels and longer travel trailers.  


    At a Glance

    Capacity: 2 kayaks
    Maximum weight capacity: 160 pounds
    Mounting: Requires 2-inch receiver
    Measurements: 65 inches x 5 inches x 76.49 inches
    Weight: 52.5 pounds
    Material: Alloy carbon steel
    Use: Trailers, motorhomes, and SUVs
    Price: 599.95 at Amazon.com


    Honorable Mention: Yakups

    Perhaps surprisingly, there aren’t a lot of options when it comes to vertical kayak racks for RVs. One other popular kayak rack for RVs until recently has been the Yakups kayak rack, which can haul bikes along with your kayaks. The Yakups rack is well-loved by RVers who tote kayaks on their adventures. 


    Ready to Rack and Roll?

    Whether we’re exploring little islands in the middle of a lake, or paddling down a sleepy river, getting out on the water on camping trips is a fun and relaxing way to enjoy the outdoors.

    That said, getting kayaks on (and off) the RV doesn’t need to be difficult. The right RV kayak rack makes loading kayaks simple and easy. Not only that, but you’ll have peace of mind that your kayaks will be safe and secure en route to wherever the road takes you.

  • 6 Eco-Friendly RV Solutions for the Nature Lover

    6 Eco-Friendly RV Solutions for the Nature Lover

    It’s no secret. One of the top reasons for going camping is the opportunity to connect with nature. This connection offers a sense of peace and tranquility that can be hard to find these days. For many RVers, the ability to escape into nature and appreciate its wonders is a vital part of existence. That being said, as outdoor enthusiasts, we have a responsibility to reduce our environmental footprint. Thankfully, it’s becoming easier than ever to find eco-friendly RV solutions. Today, there are plenty of gear and accessories that enable you to level-up your RV camping experience — all while reducing your environmental footprint. 

    So, let’s take a look at six conscience-cleaning, eco-friendly RV solutions that any camper can implement.


    No. 1: Harness renewable energy with solar power.

    One of the best things about RVs is that they allow us to camp while enjoying the benefits of many of the same appliances we have at home. (We all know this.) The downside to this is that we need to have access to electricity to be able to operate them. Solar power systems allow us to recharge batteries and/or use all the appliances in the RV without plugging into shore power.  Solar panels work by converting energy from the sun into useful electrical energy.  Unlike generators, they create electricity silently and require no inputs of fossil fuels in order to function.  

    RV solar power systems are composed of 4 parts, including one or more solar panels, a charge controller, a battery, and an inverter that converts the stored energy into the 120-volt current. This energy is needed to operate appliances such as 110-volt AC outlets, the refrigerator, and rooftop air conditioners. Systems that feature rooftop solar panels have become popular on new RVs, but you don’t need a new RV or even rooftop solar panels to harness electrical energy from the sun.  

    A portable solar panel with a built-in charge controller can offer a simple and affordable solar power solution. It can be plugged into an existing solar power port, connected directly to the house battery, or connected to a portable power station providing all the power you need for a fraction of the cost of rooftop mounted solar power. In addition, a portable solar panel enables you to park in a cool, shady spot, while still being able to collect the sun’s energy.  


    Portable Solar Panels


    No. 2: Protect the planet with your cleaning products.

    The cleaning products you use in your RV make a real difference to lakes, rivers, and drinking water. That’s because phosphates used in many cleaning products can help to propagate blue-green algae, also known as cyanobacteria. Blue-green algae thrives on any type of phosphates. This toxic algae has become a growing problem throughout the United States.  Its slimy overgrowth pollutes lakes, rivers and streams making the water toxic, undrinkable, and gross. Not only that, but blue green algae is an oxygen hog that chokes out native plants and animals.  

    Fortunately, some manufacturers are getting away from including phosphates in their products entirely. As it turns out, phosphate free products can have just as much cleaning power as their counterparts without the negative environmental impacts.

    Avoiding phosphates in cleaning and personal care products is as easy as becoming a label reader. Phosphate-free detergents and cleaning product labels usually advertise their phosphate free status. With that being said, it can be a little trickier to find out whether personal care products (like soap or shampoo) contain phosphates. However, many of these will have an ingredients list that sometimes include phosphate containing additives like sodium phosphate and potassium phosphate. 


    Exhibit A: Nellie’s Dish Butter

    Nellie’s Dish Butter is a zero waste way to get dishes sparkling clean. It’s small footprint makes it a perfect fit for RV life.  It’s also phosphate-free and one block goes a long way. (Also, it’s equivalent to three bottles of liquid dish detergent.) Reviewers love this dish soap’s convenience, outstanding cleaning ability, attractive appearance, and pleasant smell. As an added bonus it comes in a durable ceramic tub that’s easy to repurpose. 


    Nellie’s Dish Butter


    No. 3: Reduce toilet paper use with an RV bidet.

    Close to 27,000 trees are cut down each day just to make toilet paper. In case you’re wondering, that’s 9.8 million trees cut down every year for toilet paper. That’s an awful lot of natural habitat being destroyed. Additionally, toilet paper contains carcinogenic compounds found in perfluoroalkyl and polyfluoroalkyl substances (aka PFAS).  These chemicals are often referred to as “forever chemicals” because they remain in the environment long after we flush toilet paper into the sewage system. Bidets offer an environmentally responsible alternative to toilet paper. 

    That’s because bidet use can reduce toilet paper usage by a minimum of 80 percent. With a bidet, water does all the cleaning and toilet paper is only needed for drying, if at all. While they’re still an anomaly in North American bathrooms, bidets have long been familiar bathroom fixtures throughout most of the world.  

    With that being said, many RVers are discovering the advantages of having a bidet in the RV.  Many of them are delighted to discover that aside from saving forests, having a bidet in the RV eliminates toilet paper-related system clogs (including the dreaded poop pyramid). An RV bidet is simple to add to most existing RV toilets. 


    Clean Camper Ultra Premium RV Bidet


    No. 4: Switch to rechargeable batteries.

    Batteries are used to power flashlights, lanterns, smoke detectors and other essential devices when we’re camping. With that being said, close to five billion disposable batteries are sold in the United States every year. And although these batteries can be recycled, the majority wind up in landfills, where they leach heavy metals into the environment. While it’s true that disposable batteries can be recycled, only about 10 percent of them make it into recycling bins. 

    Rechargeable batteries have the potential to keep billions of batteries out of landfills. Not only that, but today’s rechargeable batteries might outlast the device they’re used to power. That’s because most rechargeable batteries can be drained and recharged more than 2,000 times before being recycled. That makes them one of the easiest eco-friendly RV solutions. Here are a few things to consider when shopping for rechargeable batteries:

    • Battery chemistry. This makes a difference. In general, it’s best to avoid nickel-cadmium batteries due to high discharge rates as well as environmental concerns.  Instead, look for either lithium-ion (Li-ion) or nickel-metal-hydride (NiMH).  Either of these will last for thousands of charge/discharge cycles and aren’t as damaging to the environment as NiCD batteries. (Note: Lithium-ion batteries are generally considered the best option for most applications due to high energy density, light weight, and low self-discharge; nickel-metal hydride batteries are good for high-drain applications, but may have higher self-discharge compared to Li-ion.
    • Capacity  The mAh rating lets you know how long the battery will last before it needs to be recharged. 
    • Voltage. Be sure this number matches or exceeds device requirements
    • Charge cycle life. How many times can you discharge and recharge them?


    Panasonic eneloop Rechargeable Batteries


    No. 5: Choose plastic-free alternatives. 

    Plastic is one of the most versatile materials ever invented. It’s used to manufacture or package nearly everything we have in our homes, vehicles, and RVs.  Manufactured using fossil fuels and environmentally damaging processes, it’s estimated that plastics take up to 600 years to break down. However, it will never completely disappear. Problems with plastics began shortly after it came into popular use in the 1970s.  

    Since then, landfills have been overwhelmed with the stuff. In a bid to deal with at least some of this discarded plastic, recycling programs were set up as early as the 1980s. In the decades that followed, this provided little relief. Not only were landfills still filling up, but a lack of demand has led to tons of discarded plastic being surreptitiously dumped in the ocean. Over the last 20 years, ocean tides and currents have swept this plastic into a growing 1-million-square-mile  island, known as the Great Pacific Garbage Patch. Reducing the use of plastics appears to be the only way out of the plastic crisis,

    But the problem is that we’ve grown dependent on the plastic. The result is that most of the mainstays of modern life are either plastic, packaged in plastic, or both. Familiar items like detergents, cleaning products, and even personal care products are packaged in bulky plastic containers. However, plastic-free, eco-friendly RV solutions are available. Here are some examples that are so convenient and effective, you might wonder why you didn’t try them sooner. 


    Garnier Whole Blends Shampoo Bar 

    Reviewers love this shampoo bar for its convenience, pleasant scent, luxurious lather, and its ability to get hair squeaky clean. But an additional benefit is its zero plastic packaging.


    Laundry Detergent Sheets

    Concentrated laundry detergent sheets make lugging around a plastic jug of laundry detergent a thing of the past. They come in an easy to pack, convenient cardboard envelope but reviewers love them for their eco-friendly yet effective cleaning power as well as convenience,  


    Sustainables Laundry Detergent Sheets


    Reusable Beeswax Wraps

    Beeswax wraps and bags are an environmentally sustainable food storage alternative to plastic wrap and bags. They’re made with cotton that’s been soaked in a mix of  beeswax, jojoba oil, and tree resin, making them malleable to create an airtight seal around wrapped food or dishes. Aside from keeping food perfectly fresh,  beeswax wraps are easy to wash so they can be used over and over again.    


    No. 6: Cut coffee waste with a Moka Pot.

    Coffee capsules create 576,000 metric tons of waste per year. Although this number includes all the coffee capsules disposed of around the world, the number of K-cups disposed of in 2014 alone could circle the earth 12 times. Enter the humble and durable Moka pot.  This little coffee maker offers a completely waste-free way to brew coffee. Unlike most other coffee makers, a Moka pot doesn’t require anything but coffee and water to create what could possibly be the best coffee on the planet. And with a brew time of under six minutes, it’s also one of the fastest ways to make coffee.


    Final Thoughts on Eco-Friendly RV Solutions

    It doesn’t take a lot of effort to make a significant positive impact on the environment. A single act like reducing toilet paper use with an RV bidet can save a whole forest over the lifetime of your RV. Choosing eco-friendly RV solutions is an easy way to upgrade your RV living experience while helping the planet.