Tag: FMCA

  • 110th FRVA Convention: New Branding, Same Excitement

    110th FRVA Convention: New Branding, Same Excitement

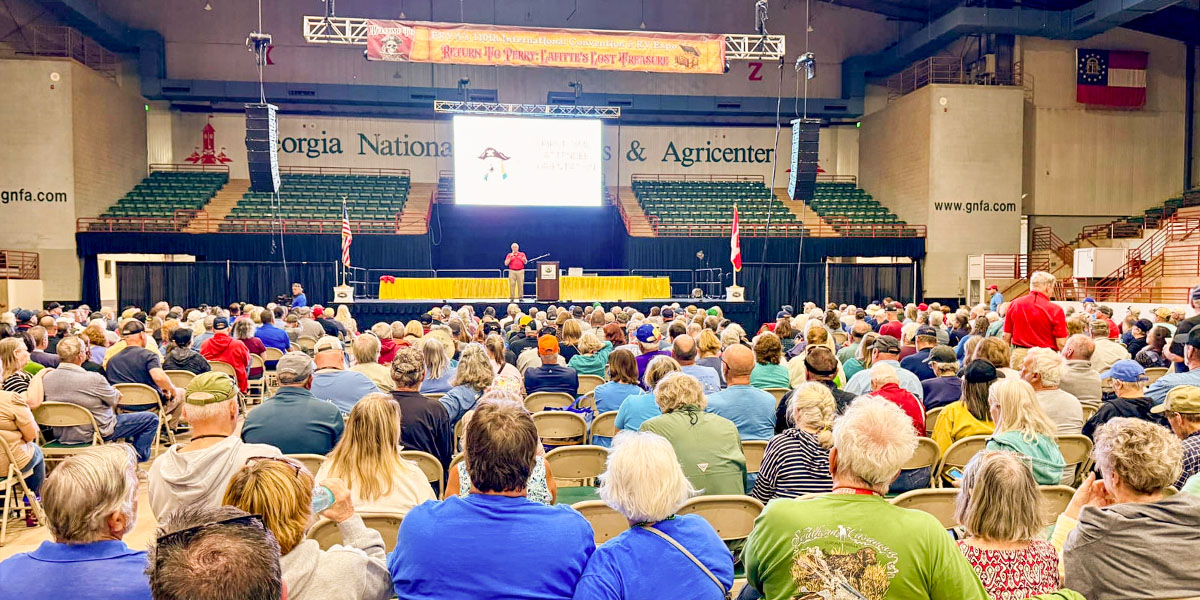
    Almost 1,500 RVs participated in the Family RV Association’s 110th International Convention and RV Expo in Perry, Georgia. At the four-day event, the organization acknowledged industry challenges, its rebrand, and its renewed focus on community.

    Though overall membership is down, there were 352 first-time attendees at the gathering, according to FRVA president Paul Mitchell, who feels the association is on the right track. “I really got some great vibes out of everyone I’ve talked to. I feel this is one of the best conventions we’ve done in a few years.”


    What Is the FRVA?

    The Family RV Association (FRVA) is a member-driven organization that offers discount programs, organizes gatherings, and provides resources such as an encyclopedic web-based learning center.

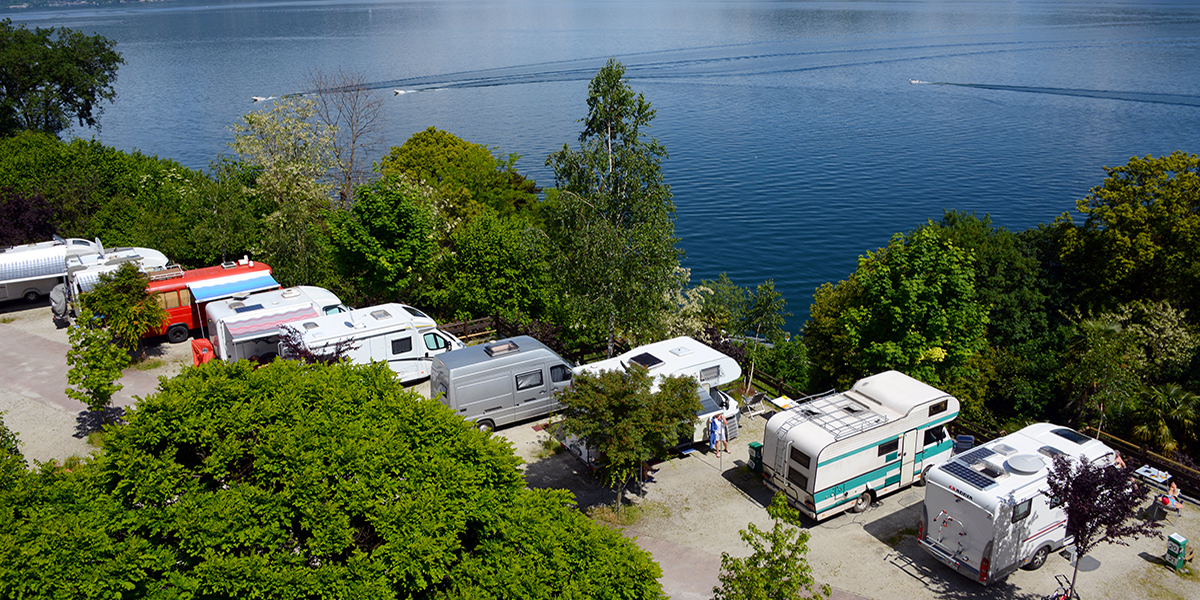
    One of the most popular – and most unique – member programs is the Medical & Travel Assist insurance benefit which, in addition to standard travel coverage, also transports a member’s RV and family back home if there is a medical emergency on the road. Also popular among members are the significant savings across all aspects of camping life, including tires, campgrounds, maintenance, and repair. But the sense of community and fellowship is what keeps members coming back to its national conventions and many regional gatherings.

    Founded as the Family Motor Coach Association in 1963 by a gathering of bus conversion owners, the organization previously catered exclusively to motorhome owners. Shifting industry trends prompted a vote in 2017 to include owners of other types of RVs, culminating in an official rebranding in September 2024.

    Like many in-person all-volunteer organizations, membership is down. With well over 100,000 members at its height, the FRVA currently has about 55,000 and is losing about 1,000 members per month. While some members simply age out of the lifestyle, there are many reasons why others don’t renew.

    “Things are expensive – driving around in a diesel pusher isn’t cheap,” said vendor Jim Metry of SoftCell water softeners. “Tampa is the worst Tampa I have ever had – there were some changes and the vendors really felt it,” he added, referring to the Florida RV SuperShow in January that saw roughly 10 percent fewer attendees this year.


    What’s at the FRVA Convention?

    Vendors and booths run the gamut at the FRVA convention, with everything from travel clubs, caravans tours, to upfits and gadgets – and of course, brand-new RVs. Need a break from shopping? You’ll find seminars on topics such as personal safety, boondocking, crafts, and many other topics besides.

    In attendance at the convention in Perry, Georgia, were Patrice and Kevin McCabe from the TV show RV There Yet? in a separate hall with additional vendors, RVs and seminars. “We were delighted that they gave us an entire building,” said Patrice McCabe, “We believe a better-educated consumer can make better decisions with their money. Our concept is to educate the consumer so they can make better decisions. It can be daunting for someone walking up to a booth whereas the seminars can really help people.”

    Bernie Culliton of Camper’s Inn RV expressed a positive outlook, noting many serious intenders among those taking tours of the RVs on the show floor. “Typically we see a lot of trade-ins here. The people at an FRVA Convention are generally RVers so they’ve already arrived with something.” The only wrench in the works? The current economic uncertainty surrounding tariffs, which has an enormous impact on the cost and operation of motor vehicles.

    When’s the Next FRVA Convention?

    The FRVA has two major national conventions per year with the second one this year scheduled for Gillette, Wyoming, on July 16–19. There are also regional and special-interest chapters across North America with their own gatherings and organized caravans.

  • FMCA: 7 Ways to Learn More About RVs

    FMCA: 7 Ways to Learn More About RVs

    Getting out into the world in an RV can provide exciting adventure, casual relaxation, lifelong memories, and an all-around good time. Yet as simple as these pleasures are, actually driving, setting up, and living in an RV does require a fundamental understanding of the unit’s parts, systems, and operations. Whether you’re new to owning a home-on-wheels or are a veteran RVer, there’s lots to know, from how to level your RV to understanding RV weights, to operating the awning and slideouts, to emptying the holding tanks, and so much more.

    Yes, it can be a lot. The great news is that there are many ways to educate yourself about your RV. To help you understand all the educational tools available to you, FMCA is breaking down seven ways to learn more about RVs.

    1. Classroom Learning

    If you’re interested in classroom-style learning, it’s good to know that RV shows and rallies often engage experts to present seminars. FMCA takes it one step further with a course called RV Basics. This two-and-a-half-day program will acquaint (or reacquaint) you with your RV’s operation and systems. RV Basics is conveniently scheduled right before each FMCA International Convention & RV Expo. Knowledgeable presenters share how-tos and instructions to help keep RV adventures in your motorhome, travel trailer, or fifth wheel safe and trouble-free.

    2. Hands-On Learning

    What better way to learn how to maneuver and drive an RV than hands-on training? FMCA, in partnership with the RV Driving School, offers a pair of programs for those wishing to become safer and more confident drivers. All training is done using YOUR RV. The RV Driving Class is a two-day program with classroom instruction on day 1 and behind-the-wheel training on day 2. The RV Backing Class is a one-day session with 2 hours of training in the morning and 3.5 hours of individual backing practice in the afternoon. Seats are limited for each class.

    3. Online Classes

    Maybe you’re more of an online learner? A wealth of information is available on the internet, but you need to consider the source. FMCA is a trusted organization that provides an online hub of RV-related resources exclusively to its members through FMCA University. Members can log on to FMCA University 24/7 to take classes about things such as winterizing an RV, RV entertainment systems, motorhome chassis, RVing tips, and so much more, provided by RV industry experts.

    4. Online Articles

    Of course, you don’t have to only learn about RVs while in a classroom. The Internet is a never-ending source of information, including about RV maintenance and operation. Online articles can teach you everything from general overviews and checklists to incredibly specific instructions and tips for making the most out of your RV. Again, you do need to carefully consider the trustworthiness of the source before taking any action. For example, the RV Trader blog provides many trusted, helpful articles.

    5. Online Forums

    Perhaps you enjoy interacting with other RV owners and prospective owners. Online forums provide a place for RV enthusiasts to exchange information. Say, for instance, you have started to hear an unusual sound while backing your RV. Forums are a great way to reach out and chat with others to see whether they have experienced the same thing and to learn how they might have handled the issue.

    6. YouTube Videos

    You could spend days on end watching YouTube videos related to RV life. RV manufacturers and various other RV organizations provide a wide variety of educational YouTube videos. With content intended for everyone from beginning RVers to veteran RV travelers, topics include DIY project tips; camping hacks; propane, plumbing, and brake systems; and much more. The great thing about YouTube videos is that they are free and easy to access. Plus, you can learn at your own pace. 

    7. Magazines

    RV magazines are another useful educational resource. Not only can you read articles written and published by RV industry experts, but you can browse through the classifieds to find a fit to your needs. Or read about the latest recall news that you may have missed. It’s important to stay abreast of RV information. Read the latest RV lifestyle and tech tips, learn about places to visit, etc. 


    No matter how you choose to educate yourself, the bottom line is that RV education is important and should not be taken lightly. Simple mistakes can be very costly to fix or repair, so be careful when educating yourself. Make sure that you are pursuing information from credible sources. Check the facts. Ask yourself the following questions: How timely is the information? Is it current and relevant? What is the source of the information? Is the source reliable and the information accurate? As we all know, not everything we read on the internet is true. So, take care when searching for RV-related information.

    And if you’re looking for your next fifth wheel or any other type of RV, be sure to check out all the inventory available for-sale and for-rent on RVTrader.com.


    FMCA educates, equips, and empowers RV owners in their journey to creating, experiencing, and benefiting from the outdoor lifestyle they dream of and deserve. FMCA is your ally to the outdoor lifestyle you love and enjoy.

  • FMCA: The Benefits of Joining an RV Club

    FMCA: The Benefits of Joining an RV Club


    Whether you are new to the RV world or have been RVing for a while, at some point you may ask yourself, “Should I join an RV club?” As a consumer, you also may have wondered, “What will I get in return?” These are great questions, so RV Trader reached out to FMCA to break down all the benefits of joining an RV club.

    Built-In Benefits

    It’s human nature—if we are spending our hard-earned money, we enjoy getting more bang for our buck, including incentives and free stuff. Along those lines, RV clubs usually offer specials that are included in your annual membership dues. For example, FMCA automatically enrolls you in an emergency medical evacuation and repatriation coverage plan. This plan was established to provide RVers peace of mind while out enjoying the open road. We all know that the unexpected can happen, and this plan helps cover those worries. If accidents, injuries, or worse were to occur while you’re traveling, a worldwide coverage plan ensures that you, your family, cat or dog, RV, and car will be returned home safely.

    Savings & Discounts

    RV clubs have an advantage with membership numbers. With a large membership base, they are able to receive group rate discounts from companies. If you join an RV club, these discounts can be passed along to you! Most of them are for top-dollar items such as RV, home, and auto insurance; roadside assistance; major savings on name-brand tires; internet access deals for on the go; overnight stays at campgrounds; and fuel savings, just to mention a few.

    RV Support Systems

    Another benefit of belonging to an RV club is having access to a large support system for RVers. That support network is usually made up of RV dealers, RV repair shops, RV manufacturers, well-known RV advocates, and so much more. Plus, RV clubs make it easy for you to connect to your RV community. These support systems are very valuable to an RV owner, because they create awareness and confidence in the expertise, products, and services being offered. Along with these great resources, most of them will also offer group-rate club discounts!

    Community & Involvement

    RV clubs provide a great opportunity for owners and enthusiasts to gather and socialize with other like-minded RVers. One way of getting involved is by joining a chapter based on shared hobbies and interests, RV types, RV brands, or even general geographic location. Another way to become involved in the RV community is by attending a group’s conventions or rallies, whether national, regional, or local. These are attended by RVers of all types who are ready to socialize, seek educational opportunities, talk shop, and simply have a great time. Of course, we can’t always meet up in person, so RV clubs offer online forum platforms, social media pages, and blogs that allow you to interact or simply read about RV-related adventures.

    Information & Advocacy

    Education for RV owners is imperative. Whether it is basic RV owner knowledge or in-depth DIY repair and upgrade guidance, information is readily available when you join an RV club. By offering a wealth of knowledge, RV clubs help keep you up-to-date on what is happening in the RV world. This information is provided through many different outlets, like monthly magazines, e-newsletters, blogs, social media, educational opportunities, club-owned apps, and advocacy channels.


    As this is just a high-level overview of what RV clubs offer, we encourage you, the consumer, to do your own research. Call around, ask questions, seek out social media sites, and speak with club members and paid employees. Do your due diligence. Most importantly, keep in mind that the RV club you choose should be your ally to navigating the RV world with confidence.


    FMCA educates, equips, and empowers RV owners in their journey to creating, experiencing, and benefiting from the outdoor lifestyle they dream of and deserve. FMCA is your ally to the outdoor lifestyle you love and enjoy.

  • FMCA Tech Tip: RV Roof Replacement

    FMCA Tech Tip: RV Roof Replacement

    A complete roof replacement is one of the biggest repair jobs RV owners may tackle. The procedure has been documented online in numerous articles and videos, often by RV owners with little or no previous experience replacing a roof. In fact, this difficult and time-consuming process requires advanced skills in carpentry and general fabrication. Some people undertake it themselves to avoid the high cost of having it done professionally, but bear in mind the cost is a function of the project’s complexity. Before you undertake this task, please consider the following: 

    • You will need an indoor workshop that can house the RV, a covered outdoor space, or an extended period of good weather without rain, probably at least two weeks straight.


    • You will have to remove all objects from the roof, including air conditioners. Without a forklift, this is a dangerous procedure, as A/C units are extremely heavy. 


    • You will have to lift the roofing materials, including plywood substrate, onto the roof. Again, without a forklift or lifting rig, this is dangerous. 


    • Working on an RV roof is inherently dangerous. 


    • You must obtain the appropriate roofing material, which will cost at least a few thousand dollars. As an experienced RV technician, I have replaced many RV roofs. It is an extremely labor-intensive project. Please consider having the work done by your local RV shop, which has the needed expertise and equipment. That said, if you believe you have the skills and the proper equipment, or you just want a better understanding of what it involves, read on. 


    Be extremely careful at all times while working on an RV roof. Move slowly to avoid a fall. This is not a one-person job, so make sure you have people available to assist.  

    Know Your Roof

    The main RV roofing materials are aluminum, fiberglass, vinyl, and rubber. Know what you have before proceeding with a replacement. You need not use the same material for the new roof, but using a different type will increase the complexity of the job. This article describes replacing rubber with rubber. Replacing another type of material with rubber generally requires extra planning, which is sometimes not evident until the old roof is removed.

    Materials

    Purchase the required materials in the correct quantities before you start the work. You may find you need additional supplies as you go, but be prepared with the basics:

    • EPDM or TPO rubber: Order sufficient length and width to cover the roof in a single piece. The roll of rubber should be long enough to cover the entire length and width of the RV roof, plus at least 6 inches on each side. Rubber roofing generally is available in widths of 8.5 feet and 9.5 feet. 


    • Adhesive: To ensure proper coverage, you need at least one gallon for every 175 to 200 square feet of roof. Be sure to purchase adhesive made specifically for the roof material. Some suppliers offer roof installation kits that include the adhesive, butyl, and lap sealant. This can be an economical way to purchase the supplies, but if you have a larger RV, you may want to purchase two kits. I recommend Dicor products for both the membrane and the installation kit. 


    • Butyl tape: This seals the fixtures to the roof. You need at least 75 feet of tape for every 20 linear feet of roof. Be sure to use butyl tape and not regular putty tape, as the latter can damage the rubber over time. 


    • Self-leveling lap sealant: This is applied generously to every hole and fixture on the new roof. At least three tubes are needed for every 20 linear feet of roof, but it’s very possible that will not be enough. 


    • EternaBond tape: This is expensive, and although not required, I recommend it in place of lap sealant, as it is permanent and less messy. Or, you may choose to use a combination of the two. EternaBond, when properly applied to a clean surface, provides a watertight and permanent seal. If you use EternaBond, be sure to refer to the manufacturer’s directions. 


    • Substrate: Prior to removing the existing roof material, it may not be apparent whether you need to replace the substrate or how much you need to replace. Usually, 1/4-inch plywood is sufficient, although you may choose to use 3/8-inch. Oriented strand board (OSB) also can be used. 


    • Trim strips: You may need new trim strips, or you may need to install them where they don’t currently exist. 


    • Screws: It is a good idea to purchase a few boxes of screws in a variety of styles and lengths, including wood screws and self-tapping sheet-metal screws. I usually use 1-inch, 1 1/2-inch, and 2-inch screws. 


    • Masking tape or drywall tape: A 1-inch-wide roll is used to tape the seams in the wood substrate. One roll should be sufficient. 


    • Miscellaneous: While you are on the roof, inspect all caps and covers for damage. If necessary, replace them.

    Preparation

    Be sure you have plenty of work space around the RV. And make sure you have ample time to complete the project. If the work is being done outside and you encounter a delay, you risk losing the favorable weather. Follow these steps:


    • Ladder: If your RV does not have a ladder, it may be because the roof is not strong enough to support your weight. In that case, lay sheets of plywood on the roof for support. If your RV does have a ladder, you will have to remove it, or at least unscrew the roof brackets, so be sure you have an A-frame or extension ladder long enough to safely access the roof. The ladder also is needed to install and remove the side trim pieces and roll out the membrane. 


    • Remove sealant: All sealant must be completely removed from all roof fixtures. This is a time-consuming process. Use whatever tools work for you, such as putty knives, as well as plastic and gasket scrapers. Take the time to do it carefully, as you don’t want to damage the fixtures. Once you have stripped the fixtures, remove and save all the screws, which you may want to reuse if they are in good shape. Rusted screws are a sign of water damage, so inspect those areas carefully, as explained below. 


    • Remove fixtures: Once all the screws are removed, carefully pry the fixtures off the roof. This can be difficult, because they should be stuck to the roof with butyl putty. Be careful not to damage the fixtures while removing them. 


    • Remove air conditioners: Remove the mounting bolts and ceiling plenum, disconnect all cables, and ensure the air conditioner power supply is turned off. A/C units are extremely heavy, so normally forklifts are used to remove them from the roof. You may be able to leave the A/C on the roof, and simply move it around while you work, but I don’t recommend this, as you risk damaging the new rubber. Always get help when lifting or moving an air conditioner. 


    • Remove the awning: If you are removing a rubber roof, the RV awning must be removed, along with the horizontal trim pieces and awning drip rail. This is because the rubber roof likely is curled over the edge of the roof and secured under these pieces. Before removing the awning, lock the ratchet in the “extend” position. Then remove the screws holding the fabric to the drip rail, as well as the lag bolts holding the upper mounting brackets in place. Remove the awning arms from the lower brackets and have an assistant grab one awning arm while you grasp the other. Have a third person climb a ladder to ensure the fabric slides out of the drip rail without binding or tearing while you and your buddy walk the awning out of the drip rail. Carefully lean the awning against a wall to prevent damage. 


    • Clean the fixtures: I like to clean the fixtures at this point rather than prior to reinstalling them. You may choose to seek assistance with this so you can continue working on the roof. Scrape the remaining sealant and butyl putty from the fixtures. I recommend using an industrial cleaner or silicone remover so they look as nice as the new roof. Further inspect the fixtures for damage and replace them if necessary.

    Removal

    You should find that the rubber is tucked under the front cap, and likely on top of the rear cap. Grab one end of the rubber and pull firmly to release it from the adhesive. You may choose to cut the rubber into smaller pieces to make it easier. Be extremely careful during this step, as the resistance of the rubber against the glue could change at any time. At this point, you should have a bare roof with only substrate exposed.  

    Replacement

    Thoroughly inspect the substrate. If you find rot or damage, consider replacing that section of wood. If any of the substrate is significantly damaged, especially from water, you may need to replace the batt or plastic-foam insulation underneath. In extreme cases with wood-frame RVs, you also may need to do some framing repair. Surprises like this take us back to the recommendation to let professionals tackle roof replacement. If you wish to replace the substrate: 

    • Remove all screws securing the wood to the roof frame. 


    • Carefully lift the substrate off the roof framing. Do so in one piece, if possible. Once the substrate is removed, do not walk between the roof rafters. If a number of boards have been removed, you may want to temporarily lay down plywood across the rafters for easier access to the exposed area. 


    • Be sure to replace substrate in full sheets. Make sure the replacement substrate is the same thickness as the original. 


    • If the substrate has any cutout features, replicate them on the replacement piece. Use the removed piece as a template, or measure on the roof to identify the exact locations for the cutouts. If the feature is a drilled hole for a vent stack or wire access, it must be precisely drilled prior to installing the new substrate piece. If the cutout is a large hole for a vent, air conditioner, etc., mark the location and then drill and rout once the wood is screwed down. 


    • After preparing the substrate section with predrilled holes, install it on the roof by securing it with screws, as per the original piece. Countersink the screws so the heads are flush with the surface or slightly below so the screws don’t protrude into the rubber membrane. 
    • Thoroughly inspect the entire roof for loose or protruding screws, wood splinters, etc. Prior to installing the rubber membrane, make sure the substrate is clean and free of any protrusions or anything that might damage the rubber. 


    • Sand the substrate anywhere you find splinters or other protrusions. 


    • Bevel the perimeter edges of the substrate using a sander or router. 


    • Using drywall tape or masking tape, secure all seams that are wider than 1/16 inch. I generally also tape the perimeter edges. 


    • Sweep the entire roof or blow it clean using compressed air. 


    • Once you are sure the roof is clean and smooth, place the rubber on the roof and roll it out. Make sure it is centered and squared front-to-back and side-to-side, and ensure you have at least 6 inches extra in all directions. 


    • The rubber should lay on top of any roof protrusions such as vent stacks. 


    • Roll the rubber halfway back toward the center of the RV from either the front or rear. The substrate will be exposed on either the front or back of the RV roof. 


    • Use a 9-inch-wide short-nap paint roller to apply the adhesive to the exposed half of the roof according to the manufacturer’s instructions. Some adhesive brands should be applied only to the substrate, while others are applied to both surfaces. Apply it at a rate of one gallon per 175 to 200 square feet. Refer to the manufacturer’s instructions for set-up time. 


    • Using ladders placed on each side of the RV, have an assistant help roll the rubber membrane over the adhesive, being sure not to allow large bubbles or creases. 


    • Roll the unglued half of the membrane over the glued half and repeat the gluing process. 


    • The adhesive remains pliable enough to adjust the membrane, if needed. 
    • For any protrusions such as vent stacks, use a razor knife to cut a small “X” in the rubber and push it down over the protrusion so it goes through the hole made by the “X.”   


    • Use a squeegee or broom to eliminate any bubbles or creases from the membrane. 


    • At the front of the RV, tuck the rubber under the front cap, but lay the membrane over the rear cap. 


    • To prepare the roof cutouts, cut an “X” from corner to corner of each roof cutout. Fold the cut flaps down into the cutout and staple them to the roof framing. You may trim the flaps later. 


    • Stick butyl tape to the original trim pieces, but do not remove the backing paper yet. 


    • Replace the upper horizontal trim pieces by removing the paper butyl backing and placing the trim in the same location as it was originally. If possible, line the screw holes up as well. While positioning the trim, firmly pull down on the rubber membrane, but do not stretch it. 


    • While holding the rubber, attach the trim to the sidewall and replace the screws. This ensures the membrane is taut along the edges and down the side of the RV. Alternately, you may choose to staple the membrane to the sidewall of the RV, using 1/2-inch staples placed every 5 to 6 inches along the sidewall. Make sure to pull on the membrane while you are stapling, and that the staples lie along the trim line so they are not visible. 


    • Replace all roof fixtures, being sure to place butyl tape on the underside along the screw flange. 


    • When replacing skylights, be sure to use sealant specifically formulated for the plastic. I recommend Surebond SB-140. 


    • Replace the pan gaskets on the air conditioners to avoid water leakage. Tighten the A/C screws so the gasket is half its original thickness. Do not tighten past this point. 


    • Using self-leveling lap sealant and/or EternaBond, thoroughly seal all fixtures by generously covering the edges, screw heads, and any other possible point of entry. It’s okay to overcompensate to ensure the roof does not leak. 


    • Reinstall the awning by having two people assist with sliding it back into the drip rail. Center the awning fabric in relation to the roller tube and replace the drip rail screws. Squeeze a generous amount of sealant into the top bracket screw holes and reinstall the top bracket. 
    • Trim the rubber membrane wherever it protrudes beyond trim strips. 


    As a certified RV technician who has replaced many roofs, I still find this a time-consuming and difficult task. I once again urge you to seek professional help to replace your RV roof. If you choose to make it a do-it-yourself project, beware of the numerous online articles and videos that may do more harm than good.