Tag: RV Maintenance

  • Leveling Your RV Fridge

    Leveling Your RV Fridge

    Does My RV Need to Be Level for the Fridge to Work?

    We were preparing to go camping one weekend and, as usual, I turned on the RV fridge the night before we were leaving to make sure it nice and cold. However, it didn’t get cold. In fact, it actually got warmer!

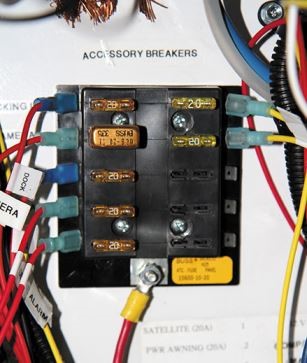
    I was so bummed! I thought my fridge was broken. So, I grabbed the manual to troubleshoot the situation. I checked and rechecked the on-off switch. I made sure the fridge was getting electricity and even made sure the propane was turned on.

    But nothing worked, and I feared the worst. I thought my fridge was dead and started thinking about packing a cooler for our weekend trip.

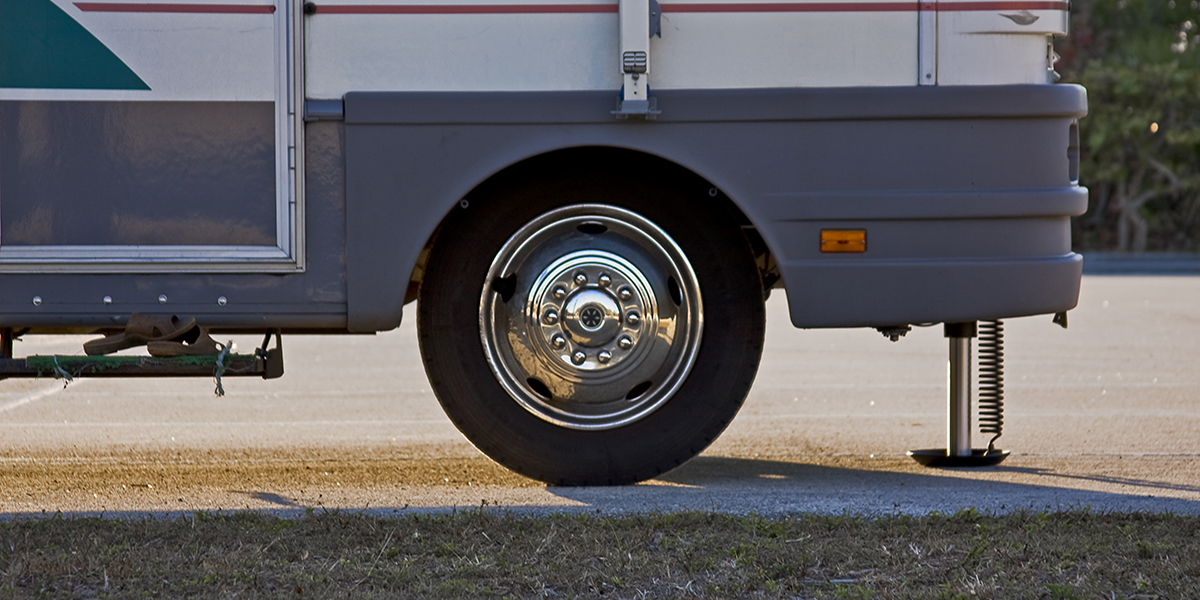
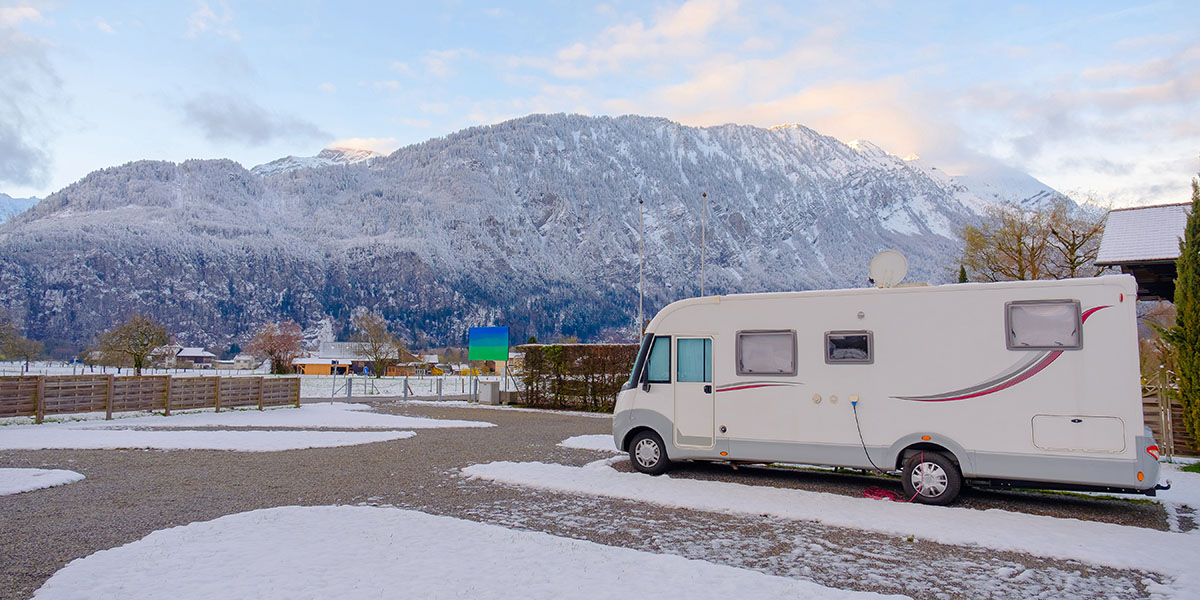
    But then I remembered that an RV fridge should to be level to operate correctly – or in my case operate at all. And my driveway, where the RV was parked, is at a fairly steep slope.

    So, I pulled the RV out of the driveway and parked it in the street in front of our house where the road is more level. It wasn’t perfectly level, but it was more level than our driveway.

    And, sure enough, the fridge began to cool rather quickly! So, it turns out that yes, your RV needs to be level for the refrigerator to work correctly.

    Can I Damage the Fridge if My RV is Not Level?

    Yes, you can damage your RV fridge if you run it for more then 30 minutes when it is not level. If the refrigerator is operated when it is not level and the vehicle is not moving, liquid ammonia will accumulate in sections of the evaporator tubing. This will slow the circulation of hydrogen and ammonia gas, or in severe cases, completely block it, resulting in a loss of cooling.

    Some RV refrigerators have an automatic shut off if this occurs, but most do not. The fridge just continues to try to cool, and eventually, the cooling unit will heat up, burn out, and fail. And it doesn’t matter if the fridge is running on electric or propane. The result will be the same.

    How Do I Know if My RV is Level Enough?

    The official answer is that every refrigerator has its own specifications, but in general, your RV is considered level if it is within 3 degrees side to side and 6 degrees front to back. So, what does that mean and how do I figure it out?
    What I have found is that your RV should feel like it is level when you walk inside. You can fill a cup with water and place it on your dinette top or, and as long as the water looks pretty close to level, you should be in good shape.

    You can also place a level on the floor of your RV and make sure at least half of the air bubble remains inside the level markers. These are just rules of thumb, but they should work for most RV refrigerators.

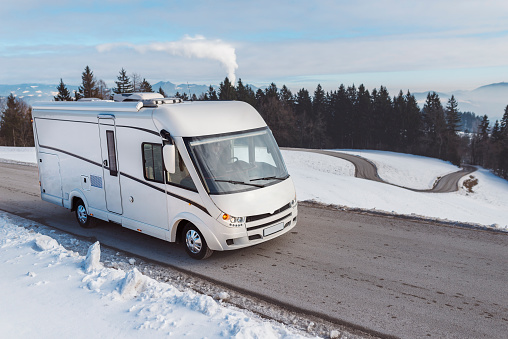
    Can I Run the Fridge While Driving?

    You can run the fridge while you are driving under normal conditions. And you should, especially if you have food in it. Even though the fridge will be out of level at times when you are driving the motion of the RV will allow the cooling gasses to flow within the coils and not overheat the cooling element.

    However, if you are driving up or down steep inclines for more than a few minutes, you should actually turn off the fridge until you get to more level terrain. For example, if you are going up or down a 10% slope for more than 10 minutes, you could do some damage to your cooling unit. So, it’s best to turn off the fridge under these extreme circumstances.

    In summary, your RV refrigerator needs to be as level as possible to operate as efficiently as possible. Just use good common sense and a cup of water on the counter to make sure you are level when parked. And turn off the fridge while you are driving on roads with steep grades of 10% or more for more than 10 minutes. Just remember to turn the fridge back on once you are driving on more level roads!


    Author: Mike Scarpignato, Founder of RVBlogger 
  • FMCA Tech Tip: Steps to Maximize Your RV’s Tires

    FMCA Tech Tip: Steps to Maximize Your RV’s Tires

    For many RVs, tires can be the weak link that disrupts travel if not properly maintained. Quite often, overloading is the cause of tire failure. Follow these simple steps provided by tire expert and FMCA member Roger Marble to increase your chances of problem-free travel.

    Initial Steps

    Once you take these two initial steps, you’ll only need a few minutes each month to maintain your properly inflated tires.

    1. Know the proper tire inflation pressure for your RV.

    2. Ensure that your tires are always inflated to that level.

    But how do you find out what your proper inflation number should be?

    Determining the Correct Tire Inflation Pressure

    First, it’s important to note that the proper inflation level is unique to your RV. Following the suggested inflation levels provided by the manufacturer on the tire certification label is only the beginning. The manufacturer’s suggested tire inflation pressure is based on an assumption, but only you are able to determine the true weight of your RV during travel.

    To learn your RV’s true weight, pack it with all the items you expect to carry on your trip – clothes, fuel, food, water, family members, and pets. Then visit a scale that can weigh your RV and provide weights by individual wheel position. This is important because the required air pressure is based on the load on each individual tire. You also can book an appointment with the Recreation Vehicle Safety and Education Foundation (RVSEF) at most FMCA events to obtain individual wheel weights.

    Once you know the load being carried by each wheel position, you can determine the minimum inflation pressure needed to carry that load. We recommend visiting www.rvsafety.com to help guide you.

    In addition, you can find a “helping hand” by visiting the FMCA forums, where you can find threads specifically dedicated to RV tire maintenance .

    Determining the Cold Inflation Pressure

    You will also want to be sure to determine your tires’ minimum cold inflation pressure (CIP). Visit tire manufacturer websites to find your tire brand and a table that has your tire size. Once you find that, look for the inflation level that carries your load or greater. This is the minimum cold inflation pressure, and it is recommended you go up in inflation by about 10%. Changes in air temperature, for example, can cause minor fluctuations in tire pressure, and increasing the CIP will help to eliminate the need to adjust tire pressure each time these fluctuations occur.

    Measuring Tire Pressure

    When measuring your RV’s tire pressure, try to make sure the tire is cool and in the shade. Ideally, the tires will have not been driven on or exposed to sunlight for at least 2 to 3 hours. That usually means the best time to check your tire pressure is first thing in the morning or late in the evening once you’ve settled in after a day of travel.

    Getting started is always the hardest, but by making tire maintenance — and measuring the PSI of your tires — part of your travel routine, you can greatly reduce the risk of experiencing tire failure while on the road.

    And don’t forget — FMCA members are eligible for discounts on Michelin, BF Goodrich, Hankook and Continental tires. Members have reported saving hundreds on replacement tires! Learn more.

    FMCA RV Club brings you this monthly tech tip to Enhance Your RV Lifestyle. FMCA delivers RV know-how to its members. Join today for just $50 — a savings of $10 just for RV Trader readers. Learn more at https://join.fmca.com/trader18.

    This information is for educational purposes. FMCA shall not be responsible nor retain liability for RVer’s use of the provided information. Prior to making any RV service decision, you are advised to consult with an RV professional.

  • FMCA Tech Tip: RV Spring Cleaning Tips

    FMCA Tech Tip: RV Spring Cleaning Tips

    Spring is in the air! FMCA has gathered a few less-routine RV spring cleaning tips that are easy to overlook when you’re excited to prepare for the season ahead.

    Exterior Cleaning

    • Insects, especially mud dauber wasps, like to build nests in refrigerator burner tubes, rooftop tank vents, water heater vents, and furnace chimneys. Check and remove any obstructions.
    • Spring is a good time to seal your RV’s exterior with a wax or poly sealant. This will provide a barrier to the elements and protect your rig throughout the year. Consult your RV owner’s manual for recommendations for the particular finish of your RV.
    • Windows, door frames, vents, and any rooftop protrusions (plumbing, air conditioner, satellite, or antennas) should all be cleaned. They also need a good bead of sealant to prevent water intrusion. Check for any cracked caulking, and re-caulk any problem areas.
    • Don’t forget to check your RV storage areas. Odds are that dust and dirt have settled here. Sweep out and, if needed, wash these compartments.

    Carpet and Furniture

    • Carefully check your RV’s carpet and furniture. Unfortunately, an RV can be a haven for insects, mice, or other rodents during the cold winter months. Mice have been known to chew through carpet or furniture to make their nests.
    • Wash items that you may just spot-clean throughout the year, such as heavy bedding, rugs, pillows, etc. Before you hit the road this spring, now is the time to take care of items that can be difficult to clean while on the road.
    • Clean upholstery and furniture per your RV owner’s manual instructions. Some finishes, such as suede or leather, need special care. Leather can keep its beautiful finish for years if properly maintained.
    • Spring is a good time to vacuum and steam-clean the carpet. This will help prevent odor problems and is another task that is more difficult to complete while you’re in the midst of the RV season.

    Kitchen

    • Clean the air filters on the microwave oven and stove hood exhaust. Replace as needed.
    • Speaking of filters…there may also be filters on your water lines for incoming water. Check filters for the sink or ice maker, and clean as needed.
    • Clean the interior of the refrigerator with a good disinfecting cleaner. Leave the doors open to allow for air circulation.

    Bathroom

    • Clean the toilet, sink, and shower with a mild cleaner such as lemon juice and baking soda. Try to avoid bleach products, as they can degrade the seals in your holding tanks over time.
    • Check your bathroom cabinets for expired medications and products. Make sure your first aid kit is stocked.

    Removing RV Odors

    The need for odor and moisture control is greatest when an RV is closed up and placed in storage during the off-season. Mold, mildew, and bacteria love to grow in enclosed spaces where the air is not refreshed. Air fresheners help, but they merely mask odors rather than remove them. To remove odors that have a foothold in your RV, consider using an activated charcoal odor removal substance, such as Bad Air Sponge.

    And Don’t Forget…

    Spring cleaning is the perfect time to check the batteries in your fire detector and carbon monoxide detector. This is a simple and important step to protect your family throughout the year.

    Hopefully these less common tips provide ideas as you begin your RV’s spring cleaning. Happy travels!

    FMCA RV Club brings you this monthly tech tip to Enhance Your RV Lifestyle. FMCA delivers RV know-how to its members. Join today for just $50 — a savings of $10 just for RV Trader readers. Learn more at https://join.fmca.com/trader18.

    This information is for educational purposes. FMCA shall not be responsible nor retain liability for RVer’s use of the provided information. Prior to making any RV service decision, you are advised to consult with an RV professional.

  • FMCA Tech Tip: Low-Voltage RV Wiring Repairs

    FMCA Tech Tip: Low-Voltage RV Wiring Repairs

    Low-voltage wiring repairs to your RV can be tackled by RV owners who have some basic knowledge and a few specialized tools. Learn how to perform simple electrical wiring repairs to your RV, thanks to the experts at FMCA.

    Overview

    Wiring is the backbone of an RV’s electrical system. Wires must be the proper size to handle the rated current flow for each device. If a wire is too small in diameter or makes too long of a run, the powered device will starve for voltage or current, and both the wiring and the device will overheat.

    Think of wiring as you would a plumbing system. As the flow rate of water increases, so must the diameter of the water pipe to overcome the restriction of a smaller pipe. As the pipe length increases, a larger diameter may be required to compensate for the loss in pressure as a result of friction within the pipe. Electrical wiring operates on the same principle, so it’s important to use the proper wire gauge for the designated load. A circuit that runs fine on a 16-gauge wire may not be suitable if more devices are added to that wire. A larger wire gauge may be needed to handle the increased loads.

    The wire gauge is not dependent on the voltage but on current flow, which is measured in amperes. A 15-amp circuit requires a 14-gauge wire, but if that load increases to 20 amps, a larger diameter, 12-gauge wire is needed. When choosing a wire size for a particular application, it’s important to determine the total current draw for that circuit and compare that with a wire-gauge chart.

    Stranded wire, rather than solid wire, is used for low-voltage DC wiring in RVs. A big advantage of stranded wire is its flexibility. It also holds up better when subjected to vibration.

    It’s important to understand that the insulation surrounding the conductor is sensitive to voltage. The insulation in low-voltage wiring is rated at a maximum of 50 volts and should never be used for high-voltage applications. Wiring specifically designed for higher voltage should be used exclusively on 120-volt-AC circuits.

    Most low-voltage wiring insulation consists of two varieties, GPT and GXL. GPT wiring has a PVC jacket that is good for interior wiring and is rated to 176 degrees Fahrenheit. GXL wiring costs a bit more, because it has a cross-linked polyethylene jacket and is rated for 257 degrees Fahrenheit. GXL is required for use in hotter locations, such as engine compartments, but can be used anywhere.

    Wire insulation prevents electricity from jumping out of the conductor to the surrounding environment. Insulation also provides some protection to the conductor. Eventually, though, a wire that is subject to vibration and is in contact with another object can rub through its insulation and may short to another conductor. If the short occurs to ground, the breaker or fuse should trip, but if it shorts to another hot circuit, you may experience any number of electrical anomalies. If the conductor shorts to the chassis or other metal component, the result may be a hot-skin condition, which in a high-voltage instance can be a serious, even fatal, hazard.

    To prevent abrasive wear, wiring should be placed inside a protective wiring loom. The most common is corrugated split-nylon loom, which is available in various sizes. Rated at up to 300 degrees Fahrenheit, the loom protects the wire from damage caused by abrasion, chemicals, and heat. The split in the loom allows for easy access when inserting wires. The loom is easy to cut to the desired length with a utility knife. Nylon cable ties should be used to fasten the loom to the RV at suitable points.

    Overcurrent Protection

    Wires heat up as current flow increases. If a short circuit develops, the amperage spikes and the wire gets so hot that it burns off its insulation. That can start a fire, which in the worst case could consume an RV. That’s why overcurrent protection is needed for every circuit. Such protection can be in the form of a fuse or a circuit breaker. Fuses are disposable, so once they blow, they must be replaced.

    Circuit breakers are more costly, but for critical circuits they can be reset and used again. Type I circuit breakers automatically reset once they cool and are the most common. Type III circuit breakers have a small reset button that must be manually pushed to restore power to the circuit. Remember that the portion of wire between the battery and the fuse or circuit breaker is unprotected, so it’s important to position the circuit breaker as close to the power source as possible to achieve the best possible protection. Circuit breakers must be matched to the wire gauge as well. Adding a larger fuse or breaker to a wire that isn’t designed to carry that much current defeats the purpose of the protection.

    Connections

    Proper connections must be made to securely attach wiring to the destination equipment or device. Simply wrapping a wire around a screw head invites failure. When a screw connection is needed, a loop-end wiring terminal should be attached to the end of the wire so that it can be securely fastened to the screw. Most auto parts stores carry an assortment of wire terminal ends that contain loop-end terminals. Stores also sell butt-end and flat-blade connectors, which are used to join two wires.

    A PVC or nylon insulation collar surrounds the crimp barrel of each connector and is color-coded to identify the size of wire each terminal requires. A red collar signifies a terminal designed for 18-gauge or 20-gauge wire. A blue collar is designed for 14-gauge or 16-gauge wire, while yellow is rated for 10-gauge or 12-gauge wire. Selecting the correct terminal for a particular wire size ensures a tight connection that won’t detach.

    You’ll need to use a crimping tool, but be careful, because some of the inexpensive ones do a poor job and the connection may pull apart. I suggest a crimp tool such as the Paladin Tools PA1308 or the S&G Tool Aid 18900. These tools, which have a die with three barrel sizes, perform a complete roll crimp on the fitting, rather than a single indent, producing crimps that won’t pull apart.

    Many connections require running a wire to ground. Loose, damaged, or missing ground connections are some of the most prevalent issues when chasing down an electrical problem. Such ground connections attach to the vehicle’s frame to complete the circuit. Often, the connections are in a location that is subject to corrosion. As a preventive measure, protect the connection with battery terminal sealant. A ground connection should be to clean, bare metal. Remove paint that could hinder the connection, and use a star lock washer to help bite into the frame and make better contact with the terminal ring. If you use a bolt rather than a screw, a nylon lock nut or lock washer will prevent the nut from vibrating loose.

    Soldering wires together makes a solid connection. However, battery and inverter cables pass large amounts of current, which can melt the solder. Such high-capacity connections should have crimped connectors. Crimping tools for large connectors are expensive, so your best option may be to find a truck or RV service center that can perform the crimps for you.

    Corrosion Protection

    When electrical current passes through two dissimilar metals, galvanic corrosion can occur. When moisture attacks connections, rust can form. Salt water and acidic vapor from nearby batteries hasten these forms of corrosion and inhibit the ability of the connection to pass current.

    When making a soldered splice of two wires, it’s important to seal the connection and protect it from corrosion. Polyolefin shrink tubing is ideal; it forms a seal that protects the connection from the elements. Shrink tubing is placed over the wires prior to soldering and then slides over the connection after it has been soldered. Then, a hair dryer or heat gun warms the tubing and shrinks it to seal the wire.

    Shrink tubing also can be used to seal the barrel ends of ring-style terminals to prevent corrosion from rotting the wire inside the barrel. This is especially important for battery terminal connections. Large-diameter shrink tubing for these cables is available in both red and black to identify positive and negative cables. When making a connection in a clean environment, such as behind a vehicle’s instrument panel, standard insulated butt connectors or flat-blade connectors generally are adequate.

    Top-post batteries can receive further protection against corrosion. For example, to each post, add a felt washer that contains NOCO Company’s NCP2 corrosion preventative compound. NCP2 also is available in spray cans and can be useful for coating ground connections or terminal studs in areas that are exposed to the elements.

    By investing a little time learning some electrical basics and having a few small tools, you’ll be able to handle most of your wiring repairs.

    FMCA RV Club brings you this monthly tech tip to Enhance Your RV Lifestyle. FMCA delivers RV know-how to its members. Join today for just $50 — a savings of $10 just for RV Trader readers. Learn more at https://join.fmca.com/trader18.

    This information is for educational purposes. FMCA shall not be responsible nor retain liability for RVer’s use of the provided information. Prior to making any RV service decision, you are advised to consult with an RV professional.

  • FMCA Tech Tip: Charging RV Batteries

    FMCA Tech Tip: Charging RV Batteries

    Is your RV battery fully charged? Learn how to check, thanks to FMCA and the “RV Doctor” Gary Bunzer.

    About RV Batteries

    Batteries used in RVs are lead acid batteries, which means they have several cells connected in series. Lead acid batteries do not physically make electricity; instead, they store electricity. The size of the lead plates and the amount of electrolyte the battery contains determines the amount of charge a battery can store.

    Batteries are the heart of any RV. They provide power for lighting, fans, water pumps, and other 12-volt accessories. Eventually, though, batteries discharge. How long they hold a charge depends on how much they’ve been used and their condition. Boondocking, in particular, places demands on batteries and requires a bit of power management to ensure they retain their charge long enough to allow plenty of use between recharge cycles.

    How to Tell When a Lead-Acid Battery Is Fully Charged

    • Monitor the specific gravity of the electrolyte in each cell as the battery accepts the current from the charger.
    • As the battery charges, the specific gravity will continue to rise in each cell. At some point, the specific gravity will stop its ascent and remain stable at one reading (hopefully around 1.260).
    • When the specific gravity remains at its highest reading (regardless of the value of that reading) for a period of two to three hours, the battery is fully charged. It simply cannot accept any more current.


    Note: If it plateaus at a much lower reading than 1.260, further troubleshooting is in order; it may be time to replace that battery.

    Further Reading

    Inexpensive digital voltmeters can help RVers avoid costly repairs. A DC meter indicates whether the RV batteries are properly charged, and such information can prolong battery life. Read more about these devices: https://familyrvingmag.com/2018/03/01/rv-voltmeter-installation/

    FMCA RV Club brings you this monthly tech tip to Enhance Your RV Lifestyle. FMCA delivers RV know-how to its members. Join today for just $50 — a savings of $10 just for RV Trader readers. Learn more at https://join.fmca.com/trader18.

    An important safety note: Whenever you’re working with RV batteries, make sure to wear gloves and safety glasses to prevent injury.

    This information is for educational purposes. FMCA shall not be responsible nor retain liability for RVer’s use of the provided information. Prior to making any RV service decision, you are advised to consult with an RV professional.

  • Tech Tip: RV Furnace Maintenance

    Tech Tip: RV Furnace Maintenance

    RV owners — especially those who embrace winter travel — should be proactive in preparing the forced-air heating system when the thermometer dips. Know how with these tips from FMCA and the “RV Doctor” Gary Bunzer.

    About RV Furnaces

    An RV forced-air furnace is a sealed combustion system, so it is relatively easy for owners to perform a few maintenance procedures to ensure that warm air will circulate when needed. This is not to say the need for professional attention is eliminated altogether. As with any propane-burning appliance, it is still vital the delivery line pressure be measured and adjusted, the regulator be tested, and a deeper cleaning be performed periodically. Also, it is imperative the complete propane piping system be tested for leaks at least once per camping season.

    There are, however, a few simple steps all RV owners can follow to avoid shop labor costs. I’ve always maintained the four crucial areas regarding the RV forced-air furnace are as follows:

    • Cleanliness of the furnace
    • Proper routing of the ductwork
    • Return airflow
    • DC voltage supply

    All RVers should carry a decent digital multimeter (DMM), a few hand tools, and standard cleaning supplies so these four areas can be addressed before the onslaught of winter.

    Furnace Cleanliness

    • Vacuum and wipe down all portions of the furnace you can easily access. Simply keeping the unit free of accumulated dust and dirt will help ensure proper operation.
    • Vacuum in and around all areas of the furnace compartment, including the floor ducts. In some cases, it may be possible to remove a front panel to gain access to the interior portions of the furnace enclosure. In other cases, access may be gained through a panel from outside the RV. Use a soft, damp cloth to wipe down all metal components.
    • Take time to fully inspect the intake and exhaust vents on the exterior of the motorhome. The fireside stories you’ve heard of wasps, spiders, mud daubers, and birds possibly building a nest inside that intake/exhaust assembly are true. Obstructions in the intake tube will cause an overly rich mixture at the burner, resulting in incomplete combustion. Obstructions in the exhaust tube can be a fire hazard. Neither situation is good for you, the furnace, or the motorhome.

    Ductwork Routing

    Some RVs have flexible runs of ducting; others are built with rigid in-floor ductwork. Most flex ducts are routed above the floor, inside cabinets, under sofas, etc.

    Inspect the routing of every run, since they’re usually easily accessible. Look for extended runs and collapsed or pinched ducts. Longer-than-necessary branch ducts sometimes can be shortened to eliminate heat buildup. Excessive heat can cause the furnace to short cycle. Try to vacuum or wipe away dirt or dust inside each duct as far as you can reach.

    Inspect all adjustable heat outlet registers, making sure most of them are fully open. The number of ducts routed throughout the RV is determined by the BTU rating of the furnace. In order for the furnace to operate properly, a certain number of ducts must be connected to its manifold. If too many of those ducts are closed (or not enough ducts are installed), the chance of a short-cycling sequence increases.

    Return Airflow

    For proper operation, all forced-air furnaces require a specific amount of fresh air be returned to the furnace enclosure. This is accomplished through a grille or a set of louvers mounted somewhere within the RV’s living space. Do not block or modify this grille in any manner. Be sure the return grille and the area immediately behind it are free and clear of obstacles.

    DC Voltage Supply

    The proper amount of DC voltage is crucial to the safe and efficient operation of the forced-air furnace.

    Most modern furnaces operate at a voltage input between 10.5 and 13.5 volts DC. Of course, 10.5 volts is basically a dead battery (100 percent depth of discharge), so more than likely, the conscientious RVer will keep the battery bank at a higher level of charge. I stress the 50 percent rule; never discharge to below 50 percent of capacity, unless necessary. But it’s not uncommon for a somewhat-depleted battery to provide less-than-sufficient voltage, especially during a dry camping endeavor. Low voltage causes the blower wheel to spin slower, perhaps too slow to properly close the sail switch. The sail switch initiates the heating cycle by powering the circuit board, which in turn opens the gas valve and creates the spark that ignites the main burner.

    On the flip side, too-high voltage coming into the furnace also can cause problems. Never power the furnace directly from a battery-charging device, converter, or off-line power supply. The incoming voltage must be “filtered” somewhat. This is accomplished by connecting the furnace to a battery circuit within the RV. Maintaining a clean, properly charged battery bank is essential for optimum operation of the furnace.

    Summary

    Serious and seasoned RV owners understand the importance of proper preventive maintenance. Following these few quick and easy procedures will give your heating system an advantage in the cooler months.

    FMCA RV Club brings you this monthly tech tip to Enhance Your RV Lifestyle. FMCA delivers RV know-how to its members. Join today for just $50 — a savings of $10 just for RV Trader readers. Learn more at https://join.fmca.com/trader18.

    An important safety note: RV owners should never remove any component on the sealed system that is held in place with a gasket. Breaking the seal on any gasket potentially can cause a dangerous carbon monoxide leak.


    This information is for educational purposes. FMCA shall not be responsible nor retain liability for RVer’s use of the provided information. Prior to making any RV service decision, you are advised to consult with an RV professional.

  • FMCA Tech Tip: Should I Perform Preventive Maintenance On My RV?

    FMCA Tech Tip: Should I Perform Preventive Maintenance On My RV?

    There’s a choice every RV owner must face – preventive maintenance or crisis repairs. There is no third option. To help cut costs, many RVers attempt to perform preventive maintenance on their RVs themselves.

    Know your options with these tips from FMCA and the “RV Doctor” Gary Bunzer.
     
    $$$ 

    Consider this: A typical RV with a generator, two roof air conditioners, and a slide-out or two has a minimum of 18 to 22 retail hours of mandated maintenance that needs to be performed each and every year! At an average retail labor rate of $120 per hour, that’s more than $2,600 spent per year just trying to avoid a major problem.

    Alas, it’s important to note that not all components on your RV will automatically self-destruct if these hours of maintenance are not performed, but it is highly recommended. If systems are maintained and checked periodically, you will gain additional life from these products.

    DIY Preventive Maintenance


    There are several seasonal maintenance tasks that you may want to consider doing yourself to cut costs.

    Some of these DIY maintenance tasks include:

    Is there a task that definitely requires a trip to the service center? Read this before scheduling your appointment.

    A little time and effort now can prevent major expenses down the road. Happy RVing!
    FMCA RV Club brings you this monthly tech tip to Enhance Your RV Lifestyle. FMCA delivers RV know-how to its members. Join today for just $50 — a savings of $10 just for RV Trader readers. Learn more at https://join.fmca.com/trader18.
    This information is for educational purposes. FMCA shall not be responsible nor retain liability for RVer’s use of the provided information. Prior to making any RV service decision, you are advised to consult with an RV professional.
  • Tech Tip: Choosing the Best RV Exterior Care Products

    Tech Tip: Choosing the Best RV Exterior Care Products

    Did you catch our article last month about maintaining your RV’s exterior? FMCA and the “RV Doctor” Gary Bunzer are here to help you find the perfect products for your RV.

    Five Conditions That Affect Product Performance

    Did that polish work great for you, living in a colder climate, but not so great for your friend who lives on the beach? Simply put, some exterior products simply work better in different conditions.

    There are five factors to consider when choosing a product to maintain your RV’s exterior:

    Climate

    Variations in temperature, relative humidity, rainfall, and even the proximity of the sun can have an effect on how well a certain product will perform.

    Location

    Whether the RV spends an abundance of time parked in an industrial area, a wilderness area, the city, or out in the country can have a significant impact.

    Environment

    Air quality, in particular, can have an impact. How much smog or airborne pollutants are present in the air?

    Age of the RV

    Certainly, the older the RV, the more chance of it sustaining a deeper level of oxidation.

    Amount of effort exerted during the cleaning process

    The elbow grease you employ when using a particular product may be directly proportional to your success.

    Five Steps to Choose the Perfect Product for Your RV

    Know Your Material 

    First of all, be sure you know the type of material you are attempting to protect or restore. Some products, when applied to an incompatible surface, may actually cause more damage than any pre-existing condition. For instance, never use petroleum products or wax on vinyl stripes or design elements.

    Read the Label

    Second, read the label carefully and follow the directions explicitly before applying the product. Understand the supplier probably knows more about its product than you do. It can be difficult to succumb to “reading the directions,” but in this case, it is the best advice.
    Test!

    Try the product on an inconspicuous location first. See whether you can obtain a small sample of the surface you wish to clean, polish, wax, or otherwise protect or restore and test the product on that piece. If that’s not possible, try the product in an area that is hidden or not readily visible, such as inside a wheel well, behind a bumper, etc. Better to discover its effectiveness, or lack of, prior to slathering it on the entire sidewall.

    Pick a Reputable Brand

    Stick with a reputable brand name. Check for contact information printed on the label or container. Notable product suppliers will have their address, phone number, and website info prominently placed on the product. The good companies will have a toll-free phone number. Any reputable firm will welcome feedback, whether pro or con.
    Don’t mix!

    This is your RV, not a cocktail. DO NOT MIX PRODUCTS! Find the preventive maintenance products that work best for you and stick with them. Avoid switching products every time you hear of something new. If your travel habits or home base changes, then it may be necessary to switch to a different product; however, until one no longer works for you, staying loyal will have a positive outcome most of the time.

    Take it from the experts – maintaining your RV’s exterior surfaces can be a challenge if the products you choose don’t have the intended results. Hopefully these tips will help you maintain that showroom look for many years or at least reap the return on your investment come trade-in time.

    FMCA RV Club brings you this monthly tech tip to Enhance Your RV Lifestyle. FMCA delivers RV know-how to its members. Learn more at https://join.fmca.com/trader18


    This information is for educational purposes. FMCA shall not be responsible nor retain liability for RVer’s use of the provided information. Prior to making any RV service decision, you are advised to consult with an RV professional.
  • Tech Tip: Maintaining Your RV’s Exterior

    Tech Tip: Maintaining Your RV’s Exterior

    Take pride in your home on wheels! Read these tips from FMCA and the “RV Doctor” Gary Bunzer to keep your RV’s exterior looking its best.

    The Roof

    Get into the habit of inspecting the roof often, preferably once a month. Pay special attention to the seams, edges, moldings, caps, and anything else attached to the roof. Realize that any screw or mounting method used on the roof can become an entry point for moisture. Water intrusion is the largest threat to the integrity of any RV.

    Keep the roof clean. Use a soft broom every couple of weeks to sweep away leaves, dirt, and road grime. Look closely for evidence of mold and mildew, especially on synthetic surfaces. Remove bird droppings or tree sap as soon as it is spotted. Small problems will not go away on their own. Left unaddressed, small problems will only worsen and quickly move (along with its associated cost) from the preventive maintenance stage. Wash the roof with the appropriate cleaning agent four or five times each year. A clean roof is simply easier to inspect!

    And, finally, know what material forms your RV’s roof. Be sure the products you employ are safe for that roof surface material.

    Sidewalls

    Learn what material is used on the exterior of your RV’s sides. Is it painted aluminum? Fiberglass? Filon or another FRP derivative? ABS or PVC plastic? Are steel components used? If you own a Type C motorhome, don’t forget about the cab portion and its exterior surface.

    Scan the sides of your RV and start counting how many components are attached: storage bay doors, refrigerator vents, furnace vents, city water inlet, etc. Every attachment point is a potential source for a water leak.

    Inspect all seals around the sidewall openings. At the first sign of a deteriorating sealant, reseal! In severe cases, it may be necessary to completely remove the component and reinstall using fresh sealant. In other cases, a quick but correct application of a silicone sealant over the suspected gap may be all that is required.

    Next, check for black streaks. Unfortunately, every RV is susceptible to those nuisance black streaks caused by four elements: dirt, moisture, time, and neglect. This video explains how these streaks form

    When using any type of black streak remover, never apply the solution directly to the surface of the sidewall. Always moisten a clean, soft cloth with the remover and try to keep within the boundaries of the black streak. All black streak removers contain components that will remove existing wax, so areas treated with the remover will need to be re-waxed.

    Unless the black streak is deep-seated and has become oxidized, it eventually should come off or at least be minimized. If the black streak has oxidized into the finish, other products exist that can address this specific type of problem. But, remember, it’s crucial to use a product compatible with your RV’s exterior surface to prevent further damage – read those labels!

    Fiberglass Caps

    Many RVs have some form of plastic caps covering their front or rear ends. Over time and with exposure to UV rays and ozone, the appearance of these fiberglass caps can become dull or fade to a certain extent. This is the first degree of oxidation. Whenever sunlight, heat, and moisture collide, oxidation can be expected.

    The second level of oxidation results in a pronounced chalking of the finish. You’ve probably seen front and rear caps that display a distinct, blotch-like chalky residue that can be wiped away with a moist rag. Neglected further, the cap surface eventually can crack and deteriorate and, in the process, cross the line between restorative maintenance and damage repair. If individual fibers become visible in the fiberglass, it may require a repair out of the DIYer’s realm.

    It is imperative that fiberglass front and rear caps be protected with wax or polish. Plain old car wash soap is a good option because it does not remove wax as detergents do. Polish is similar to wax, but some polishes and polishing compounds actually contain trace amounts of abrasives.

    Undercarriage

    The underneath surface of the RV is the “forgotten” exterior surface. The main concern is critter infestation. Look for large gaps around exposed plumbing that may pass through the floor and subfloor. It’s important to seal around all gaps that can trap moisture and road debris.

    Look for loose or damaged sections of the underbelly, regardless of the types of materials used under there. Some RVs have sealed underbellies, while other RVs may be open to the bottom of the subfloor. Others may have only a soft plastic wrap encasing the floor insulation. Look for anything that appears out of the norm. While you’re down there, check all chassis and suspension components for damage or irregularities, and look for evidence of water leaks. If you use the RV in winter conditions where salt is used on the roads, check for rust.

    Stay Tuned

    Next month we’ll cover the best products to use on your RV’s exterior. Stay tuned!

    FMCA RV Club brings you this monthly tech tip to Enhance Your RV Lifestyle. FMCA delivers RV know-how to its members. Learn more at FMCA.com.

    This information is for educational purposes. FMCA shall not be responsible nor retain liability for RVer’s use of the provided information. Exercise caution when working on the roof. Prior to making any RV service decision, including roof maintenance, you are advised to consult with an RV professional.

  • Tech Tip: Keep Rolling! Tires 101

    Tech Tip: Keep Rolling! Tires 101

    Have questions about your RV’s tires? Wondering if other RVers have the same concerns? Hesitant to ask your tire dealer?

    FMCA and the “RV Doctor” Gary Bunzer are here to help with some WHEEL-y good advice! Read on for our round-up of popular tire questions.


    Is replacing my tires with the same brand and size really necessary?
    It’s important to stay with the same size and load range based on your RV manufacturer’s recommendations. We always recommend staying with a brand you are familiar with, but there is no reason one cannot change brands, just not the size.

    Remember: Before purchasing any tire, be sure to check the age code on the tire’s sidewall. It is important that new tires be truly “new.” It is the actual date of manufacture that is important, even though the warranty time typically begins at the time of installation.


    My tires seem to be wearing unevenly. What is causing this?
    It’s important to determine why your tires are wearing unevenly. Becoming aware of weight and balance issues is key to longer tire life.

    It is highly recommended to have your RV properly weighed using individual scales by an accredited RV entity such as the RV Safety and Education Foundation (RVSEF). RVSEF provides this weighing service at most FMCA RV Expos .

    By weighing each individual tire, you can determine if a side of the RV is exceeding a tire or axle rating. An RV can appear to be sitting level but can be out of balance in terms of weight. If this is the case, look for items that you can move to help distribute the weight. Every item packed in your RV adds up!

    Another cause for uneven tire wear could be what’s called “spring sag.” When vehicles remain loaded over a period of time, the springs can be affected. For instance, if a trailer has had a 500-pound higher load on one side for several years and many miles, it would lead to uneven tire wear. However, this is not a difficult or expensive issue to address; simply have new springs installed and adjust your RV’s load to prevent future issues.

    Can I swap LT tires with ST tires, or vice versa, on my travel trailer?

    LT stands for “Light Truck” and ST stands for “Special Trailer.” Although both tires are rated for trailer use, there are distinct differences. Most manufacturers use LT tires because they too are rated for trailer use and are simply cheaper than ST tires.

    For passenger tires (including LT tires), ride, traction, and handling are the key design elements and are achieved primarily by adding flex to the tire’s sidewall. This maximizes tread contact with the road, thus increasing traction and allowing the driver to maintain better control over the vehicle.

    However, sidewall flexing is not a desired effect because it can cause trailer sway. The stiffer sidewalls and higher operating pressures common with ST tires help control and reduce the occurrence of trailer sway.

    It is important to match the tires to the application and payload. Since ST tires are constructed with heavier materials, they are tougher and more bruise-resistant than typical passenger car tires. This is a plus because trailer suspension systems are generally stiffer and less sophisticated than automotive suspension systems. A tire designed to operate in the more demanding trailer environment will provide longer service life and be able to withstand added abuse.

    The bottom line: trailers are more stable and pull better on tires designed specifically for trailer use, so it recommended to switch to the ST type.

    Should something be used to separate my tires from the ground while parked to help extend tire life?
    Protecting your tires during periods of non-use will help preserve and protect the rubber. Though wooden blocking is commonly used, we also suggest placing a separation between the wooden blocks and the tires to avoid excessive moisture and/or heat build-up. Plastic, web-like blocks are readily available in the aftermarket. Look for a type that will drain and not trap moisture.

    I’ve heard the sun can damage my RV’s tires. Is that true? 

    The damage caused by ultraviolet (UV) radiation virtually effects all tires. RV tires, in general, are more susceptible to this type of damage since they are considered a slow-wearing tire, meaning they typically are not driven as far or as often as regular automobile tires.

    The effect of unprotected UV exposure on rubber includes cracking, discoloration, and lack of physical mechanical properties. Tire makers use a carbon substance to combat the effects of UV radiation. Contrary to what some suppliers may say, there is no such thing as a permanent UV protector. However, here are a few ideas to help extend tire life:

    Keep RV tires clean. Avoid heavy build-up of mud, sand, or dirt. Dirt on tires may act as an abrasive of sorts that could inhibit the natural wax protection achieved through normal tire flexing. Wash your tires regularly with mild, soapy water and a soft brush.

    Inspect the tires regularly.

    Inflate the tires to the exact requirement based on the actual weight of that tire position.

    During short periods of non-use, keep the tires completely covered. When possible, remove and store the tires completely out of the sun and temperature extremes.

    Regularly apply a non-petroleum-based preservative to all surface areas of each tire.

    Purchasing quality tires and, thus, maintaining your tires will lead to safer and more fun RV trips. Always take the time to do your tire research to keep your rig rolling!

    FMCA RV Club brings you this monthly tech tip to Enhance Your RV Lifestyle. FMCA delivers RV know-how to its members. Learn more at FMCA.com.