Tag: RV Renovation

  • 6 Steps to Set Your RV Renovation Budget

    6 Steps to Set Your RV Renovation Budget

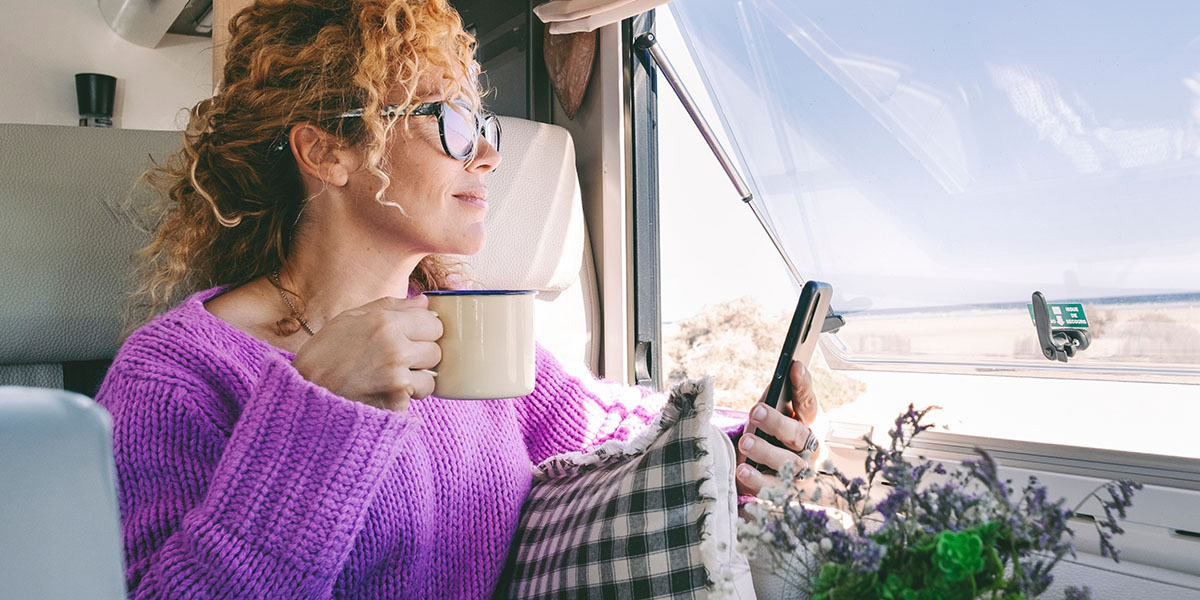
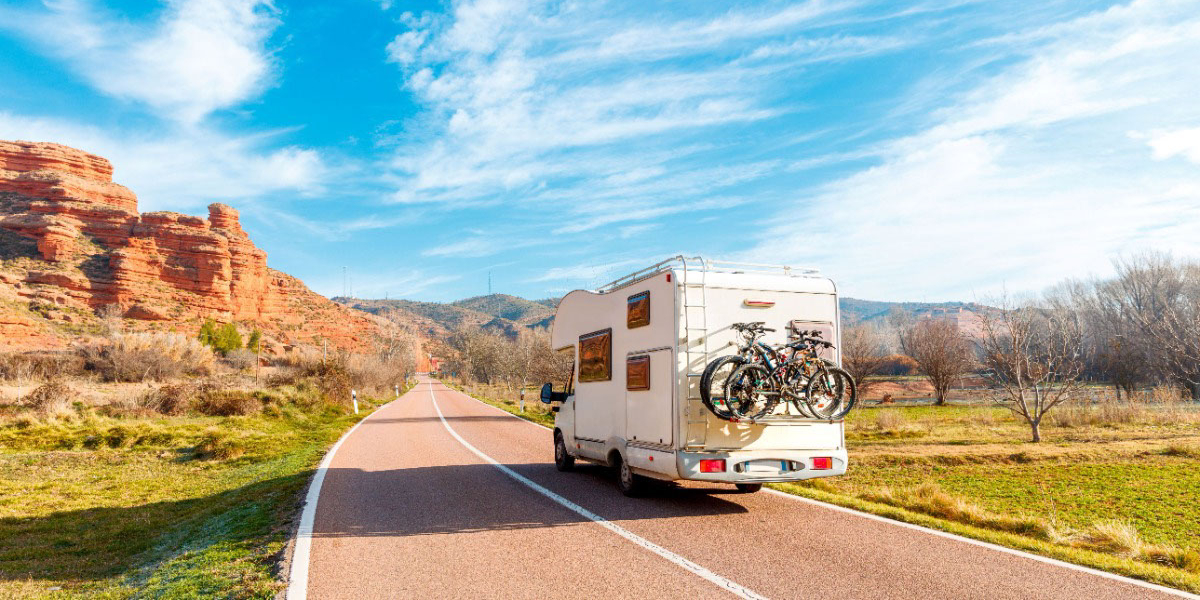
    If you’re here, I’m going to assume you are looking to finally pull the trigger on that RV renovation. You know, the one you’ve been putting off. And, since you’re here, I’m also going to assume that you have a burning question about your RV renovation budget: how much should this reno cost?

    For those in the starting phase and looking for ideas, you may want to check out my blog on popular RV renovations ideas. If you’re past that phase (or you just finished reading that blog), then it’s time to figure out the numbers. That’s where I can help. As fun and rewarding as transforming your RV into your dream home on wheels can be, when the costs start to add up, those dreams can turn into nightmares. So, to help you avoid some of the pitfalls, here’s a guide to help you set a realistic budget for your RV renovation.


    Step 1: Determine Your Priorities

    Before you start crunching numbers on your RV renovation budget, take some time to think about what’s most important to you in your RV. Are you focused on functionality, comfort, aesthetics, or maybe a combination of all three? By identifying your priorities, you can allocate your budget to the areas that matter most to you.

    Consider these questions:
    • Which areas of your RV need the most attention? (e.g., flooring, kitchen, bathroom)
    • What are the “must-haves” versus the “nice-to-haves”?
    • Are you planning any major structural changes, or are you mostly focused on cosmetic upgrades?

    Once you’ve got your priorities straight, you can move on to the next step.


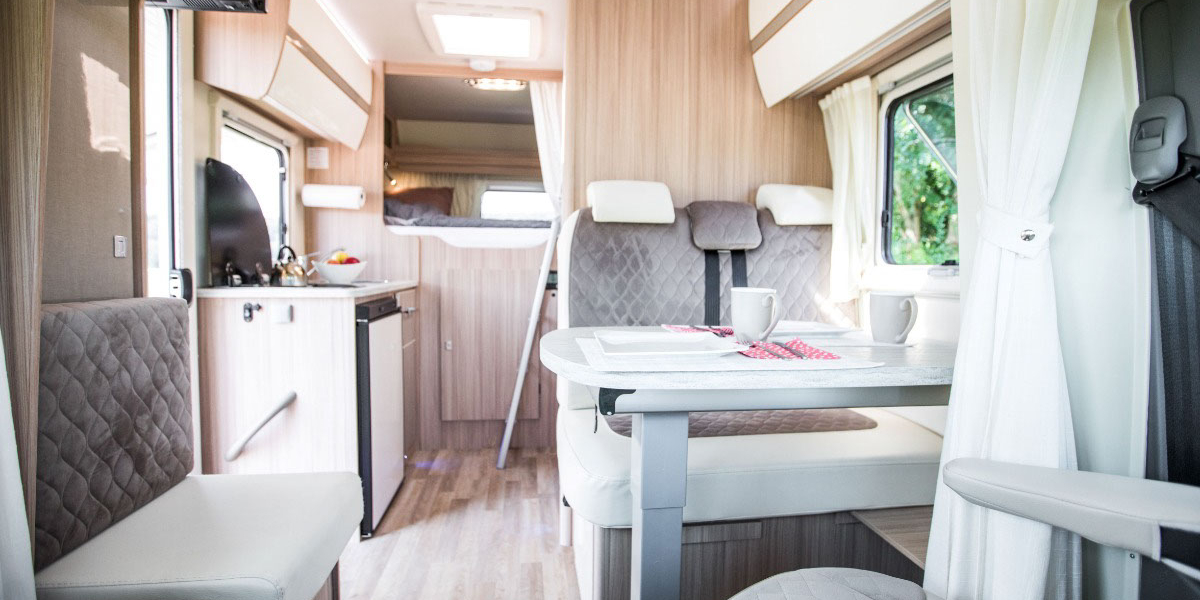
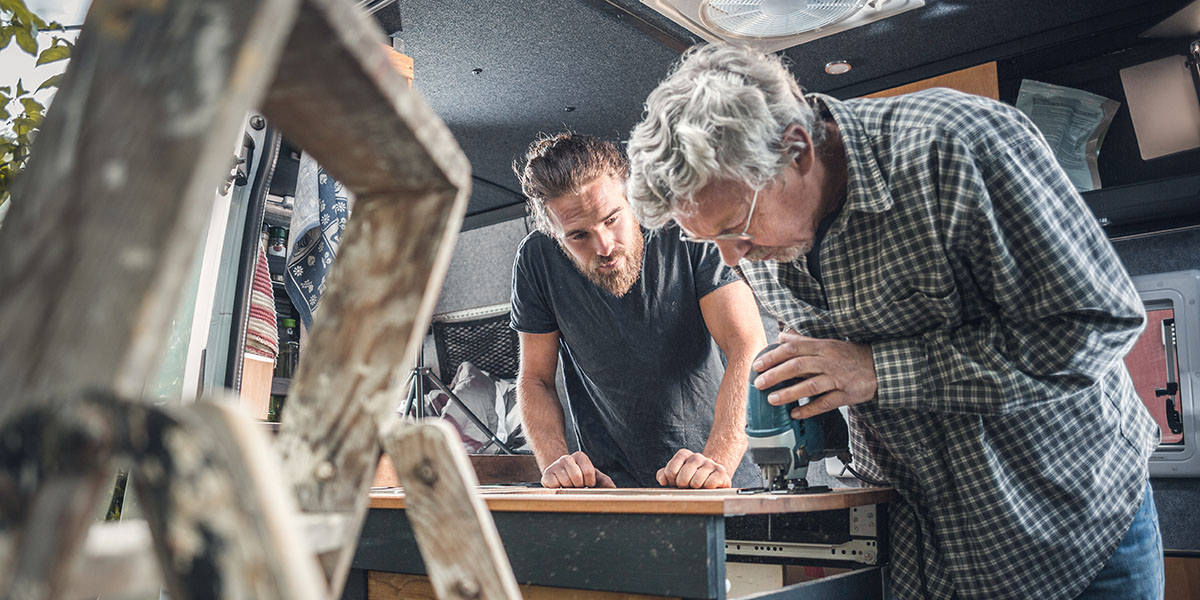
    Step 2: Research Costs and Gather Estimates

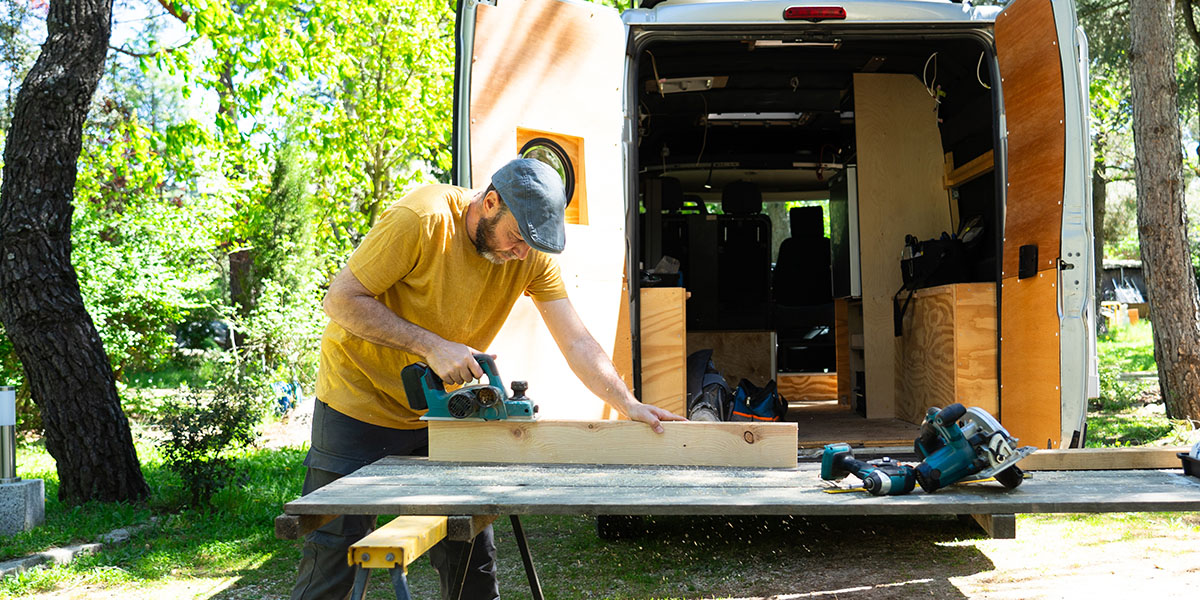
    The next step is to research the costs associated with your renovation projects. This includes everything from materials and tools to professional labor if you’re not planning to DIY the entire project. For example, if you’re upgrading your flooring, you’ll want to look at the cost of materials like vinyl planks or laminate, as well as any tools you might need for installation. If you’re considering a solar power upgrade, you’ll need to factor in the cost of panels, batteries, and installation.

    DIY Tip: For a more accurate estimate and better pricing, consider visiting various local home-improvement stores and browsing online retailers. Don’t forget to include shipping costs for larger items that aren’t available locally. You can also look on Facebook Marketplace or some similar app to find products that may be in decent condition at a discounted price.


    Step 3: Set a Realistic Budget

    Now that you have a good idea of what each part of your renovation will cost, it’s time to set a budget. Be realistic about what you can afford and make sure to include a buffer for unexpected expenses – because trust me, there will be some. A good rule of thumb is to set aside an extra 15 to 20 percent of your total budget for those unforeseen costs that always seem to pop up during a renovation.

    Sample budget breakdown (not actual prices)

    • Flooring: $1,000 (including materials and tools)
    • Kitchen Remodel: $1,500 (including appliances, cabinets, and paint)
    • Bathroom Upgrades: $500 (including fixtures, paint, and accessories)
    • Solar Power Installation: $2,000 (including panels, batteries, and installation)
    • Miscellaneous: $500 (for smaller projects like painting and decor)
    • 20% Buffer: $1,100 (for unexpected costs)

    Total Budget: $6,600


    Step 4: Consider Financing Options

    If your renovation plans exceed your current financial liquidity, you might want to explore financing options. Some RV owners take out personal loans or use a credit card with an introductory zero-percent interest period to finance their renovations. This is a great tool if you know that you can pay off the entirety of the project in the allotted time for zero interest. A quick internet search for the best zero-percent credit cards can get you upwards of 12 months interest free. If you calculate your monthly payment for the total over that timeframe, and realize that you won’t be able to finish before interest starts accruing, then just be sure to factor in the cost of interest to ensure that your monthly payments fit comfortably within your budget.

    Financing Tip: If you’re planning to sell your RV in the future, consider how much your renovations will increase – or decrease – its resale value. This can help you determine whether financing your renovation is a sound investment.


    Step 5: Track Your Spending

    Once you’ve set your budget and started your renovation, it’s crucial to track your spending to ensure you’re staying within range. Keep all your receipts, and regularly update a spreadsheet or use a budgeting app to monitor your expenses. This will help you identify any areas where you might be overspending and allow you to make adjustments as needed. 

    Tracking Tip: Break down your spending by category (e.g., flooring, kitchen, bathroom) to see exactly where your money is going. This can also help you adjust your budget mid-project if you need to allocate more funds to a particular area.


    Step 6: Be Prepared to Make Adjustments

    Renovations rarely go exactly as planned, so be prepared to make adjustments along the way. If you find that you’re overspending in one area, consider scaling back in another. For example, if your kitchen remodel is costing more than expected, you might decide to delay the installation of that solar power system until a later date.

    Adjustment Tip: Prioritize the projects that are most important to you and be flexible with the rest. Remember, you can always tackle additional upgrades down the road.


    Renovating Your RV Without Breaking the Bank

    Setting an RV renovation budget is a crucial step that will help you turn your dream home on wheels into a reality without emptying your bank account. By determining your priorities, researching costs, setting a realistic budget, knowing your skill level, and tracking your spending, you can keep your renovation on track and enjoy the process. Whether you’re making small changes or tackling major upgrades, careful budgeting will ensure that your RV renovation is a success. Happy renovating, and may your travels be filled with adventure and comfort!

    For more inspiration and tips on RV renovations, check out my story on popular RV renovation projects. It’s packed with ideas that can help you transform your RV into the cozy, stylish retreat you’ve always wanted. Looking for more advice? Check out the RV 101 section on the RVTrader blog.

  • Amazing RV Renovation Influencers to Inspire You

    Amazing RV Renovation Influencers to Inspire You

    You’ve seen these RV renovation influencers and all their drama. Like their HG channel counterparts, they  do all these things at the last minute while counting down days — and all while having the gall to pretend to have no idea how to complete projects on time. Yet somehow end up doing exactly that. And we can’t help watching. Because they have the skills, and they get the results.

    Truth is, these creators — can we coin the term “renovenfluencers” (eh … let’s workshop it) — are onto something very real. Because renovating your RV really does involve a lot of drama. The effort. The money. The complications. And if you’re a full-timer, time out of your RV really is a countdown. So, any advice (or video) you can get on how to take make your dream RV reno happen and happen quickly is super valuable.

    Whether you’re dreaming of a new reno project or just game-planning how to get it done, here are five RV renovation influencers to follow. So their skills will become your skills. And you can get that stunning renovation result — on time.


    The Flippin’ Tilbys

    Making the Old New

    The Flippin’ Tilbys have made a name for themselves among RV renovation influencers through their incredible projects. Like many “renovancers” (meh … that maybe sounds a little too Dungeons-and-Dragons), they left behind the conventional 9-to-5 to embark on a full-time RV living adventure several years ago, but what sets them apart is their ability to transform old, outdated RVs into modern, stylish, and functional spaces. Their videos are well-produced, and Olivia especially shines on camera, with confident and clear delivery. They focus on creating practical, yet aesthetically pleasing interiors that meet the needs of full-time RVers.

    The Flippin’ Tilbys document every step of their renovation projects on social media. That includes long-form compilations on YouTube  which offer followers detailed insights into the challenges and triumphs of RV renovation. They are particularly known for their use of reclaimed materials and innovative design solutions. Both make their renovations both eco-friendly and unique. Their Instagram feed is filled with before-and-after photos, DIY tips, and inspiration for anyone looking to renovate their own RV.

    One thing you won’t find much of is detailed how-tos, as their editing style tends more toward the old-school reality TV style of “we only have X days to do Y.” But their renos have a distinctively high quality to them. With plenty of custom touches, of course.


    Mountain Modern Life

    Bringing the Outdoors In

    Katie and Eric of Mountain Modern Life have become prominent RV renovation influencers, particularly for those who appreciate rustic, cozy, and nature-inspired interiors. Their passion for high-end design shines through, as their renos deliver stunning, cabin-like interiors that scream Magnolia Home mixed with Restoration Hardware.

    Mountain Modern Life is all about bringing the beauty of the outdoors inside. Their renovations feature natural materials, earthy tones, and thoughtful layouts that maximize space and comfort. Katie and Eric deliver an enormous amount of attention to detail, like the copious amounts of twinkly lighting in their most recent Christmas spread. They share their projects on social media, providing step-by-step guides, DIY tutorials, and plenty of inspiration for those looking to remodel their own RVs.

    They recently acquired their own mini-RVer, so you’ll find plenty of newborn baby pics mixed into their mountainy feed. But the little one is right at home amongst the high-end mountainy trappings of this beautiful couple’s journey.

    Fifth Wheel Living

    Modernizing Trailer Life

    Kirsten and Devin, the dynamic, Nashville-based duo behind Fifth Wheel Living, have a TikTok-friendly style. Kirs narrates most videos with husband Devin featuring prominently. What started as a practical decision to live more affordably has turned into a passion for transforming fifth wheels into stylish, comfortable homes on wheels.

    Kirs and Devin have a slightly more lifestyle-heavy feed than some “reno-influencers” (hmm … this does seem easier to say). But you can tag along as they explore RV spaces that are both functional and beautiful, often incorporating modern design elements that make their fifth wheel feel more like a home than a vehicle.

    Their reno work has been praised for its creativity and attention to detail. And they’ve built a loyal following of fans who appreciate their design expertise and adventurous spirit. Kirs and Devin’s story is a testament to the possibilities of RV living and the joy of creating a home on the road.


    All About RVs

    Teaching Us How to Customize Our RVs

    Matt, the face behind All About RVs, has become a go-to expert in the RV renovation community on YouTube. Over the years, Matt and his wife have not only embraced the RV lifestyle but also mastered the art of renovating and customizing RVs to suit the needs of modern travelers.

    All About RVs is known for its practical approach to RV renovation. Matt focuses on creating functional spaces that enhance the RV living experience. Their renovations often include upgrades that improve the comfort, safety, and efficiency of the RV. Examples include installing solar panels, upgrading insulation, and modernizing interiors. They offer more detailed tutorials and product reviews than many reno channels, serving as a great resource for viewers who are new to RVs and looking to improve their technical knowledge.

    Fallen Into Camping

    Getting Into the Dirtiest Details

    Heather Fallen is the face of this brand, which has a huge YouTube following based on her DIY-focused videos. This channel is more centered around projects, upgrades, and how-tos than some of the lifestyle-focused channels, delivering technical advice on everything from ripping out floors to evaluating used RVs for common mechanical problems.

    Heather gets down and dirty in her projects, fully hands-on as she delivers tips and tricks for some of the dirtier jobs in renovations. Tips videos are the go-to, with heavy emphasis on avoiding common errors and making sure you get things right the first time.


    Ready to Go Beyond RV Renovation Influencers?

    There always comes that time. You know, where you have to put the legal pad down. And turn the screen off. Then head out to buy supplies and get this thing done! Just don’t make these big RV renovation mistakes. Avoid those, and you may be one your way to becoming an RV renovation influencer in your own right. (At least in your own sphere of influence.)

  • What Not to Do When Renovating Your RV (Like Ever, Ever)

    What Not to Do When Renovating Your RV (Like Ever, Ever)

    O, the DIY project, how I love and hate thee! If you are like me, then you mostly prefer to enjoy life, work on what you’re good at, and you try to get a professional to do your home and RV projects. That being said, saving money and time is always a great feeling, and it can be pretty fulfilling to make that cool renovation yourself — until it’s not. Because renovating your RV, while rewarding, is no joke.

    As an avid RVer and DIYer for over six years, I’ve talked before about 10 popular RV renovations that can transform your home on wheels into a personalized haven. However, there are a few common mistakes that can turn your dream renovation into a nightmare, and that is what today’s story is all about. To help you navigate this journey smoothly, here’s a guide on what not to do when renovating your RV.


    1. Don’t Dive Straight Into Renovating Your RV

    One of the biggest mistakes you can make is diving into your renovation without a detailed plan. This often leads to hasty decisions, budget overruns, and a lot of frustration. Trust me, planning and measuring several times before executing is the only way to go.

    With our new solar system, other than some minor wiring issues, the thorough planning thoroughly and measuring everything several times helped the project stay fairly on time and budget. Even then, unexpected things happened. Now, if you haven’t read my freezing toilet mishap, you can check out the link at the end of this post for a good laugh at my expense.

    Tip: Start by outlining your goals, making a budget, and creating a timeline. Sketch out your ideas and list the materials you’ll need before you begin. Once that is done, increase your cost and time estimates by 15 to 20 percent for unforeseen circumstances.


    2. Avoid Using Heavy Materials

    While it might be tempting to use materials like hardwood or granite to create a luxurious feel, these heavy materials can significantly affect your RV’s weight and fuel efficiency.

    Tip: Alternatives like peel-and-stick, vinyl planks, or laminate for countertops, flooring, and the like can offer a similar aesthetic appeal without the added weight.


    3. Don’t Ignore Your RV’s Weight Capacity

    This goes hand in hand with number 2, because every RV has a maximum weight capacity, and exceeding this can lead to safety issues, increased wear and tear, and potential fines.

    Tip: Weigh your RV before and after renovations to ensure you stay within the safe limit. Remember, this includes everything you plan to carry on your trips, including passengers, food, belongings, etc. If you can, try to get a good estimate on the total weight you are taking out and the weight you are adding for your project.


    4. Avoid DIY Electrical Work Without Proper Knowledge

    Tackling electrical work without the necessary expertise can be dangerous and lead to severe problems down the road like burnt fuses, wires, or even a full-blown fire.

    If you’re not confident in your electrical skills, it’s best to hire a professional. Even if you are confident, reading forums and watching YouTube videos are always recommended with these types of projects before beginning.

    Tip: Always disconnect and turn off the power before working on electrical components to avoid shocks and injuries.


    5. Don’t Sacrifice Function for Aesthetics

    It’s easy to get caught up in making your RV look beautiful, but functionality should always come first. A pretty kitchen isn’t much use if it doesn’t have enough storage or counter space. A balance between aesthetics and practicality will make your RV both beautiful and livable.

    Tip: Start by ensuring there’s ample storage, comfortable seating, and functional appliances. No matter where your renovation takes you, these are must-haves for any RV.


    6. Avoid Neglecting Proper Ventilation

    Proper ventilation is crucial in an RV to prevent issues like mold, mildew, and unpleasant odors. Skimping on ventilation can even lead to health problems and costly repairs.

    Ensure your RV has adequate vents and fans, especially in areas prone to moisture like the kitchen and bathroom.

    Tip: Regularly check and clean your ventilation systems and filters to keep them functioning properly.


    7. Don’t Forget About Temperature Extremes

    Materials that work well in a stationary home might not perform as expected in an RV due to temperature fluctuations. Warping, cracking, and other issues can arise if you choose the wrong materials.

    Tip: Consult with experts or fellow RVers for recommendations on the best materials for your climate. This will ensure your renovations last through all your adventures, hot or cold.


    8. Avoid Making Permanent Changes That Reduce Resale Value

    While personalizing your RV is important, making changes that are too specific to your taste can reduce its resale value. Permanent modifications might not appeal to future buyers.

    I took out the dinette and valances on one of our fifth wheels; when it came time to sell, the dealer that was helping us recommended that we reinstall them for the original look. Luckily we had hung onto them, and were able to restore and sell the RV.

    When in doubt, opt for neutral changes that enhance the RV’s appeal to a broader audience. Stick to timeless designs and avoid overly trendy choices.

    Tip: When deciding between two options, if one can be easily reversed, that is usually the best way to go.


    9. Don’t Underestimate the Importance of Quality Tools and Materials

    Using low-quality tools and materials might save you money initially, but they can lead to poor results and frequent repairs in the long run.

    Invest in quality tools and materials to ensure your renovations are durable and long-lasting. It’s worth spending a bit more upfront to avoid headaches later.

    Tip: Quality tools can also make the renovation process smoother and more enjoyable.


    10. Don’t Ignore the Legal and Safety Requirements

    Renovations that don’t comply with safety regulations and legal requirements can lead to fines, insurance issues, and even accidents.

    Familiarize yourself with local and state laws/codes for whatever state the RV is registered in, including safety standards and guidelines. This is especially true for weight limits, as some states have regulations for certain weights and driver license classifications.

    Ensure all renovations meet these requirements to keep your RV safe and compliant. Nothing is ever full proof, but taking these measures will help protect you, and it will likely minimize your risk of financial or legal issues with insurance or law enforcement, should an incident occur.

    Tip: A detailed plan is an invaluable asset when navigating regulations and requirements. Knowing the exact changes you want to make to your RV will help you look up relevant guidelines – or ask the right questions when consulting a professional.


    While jumping into renovating your RV can be exciting and rewarding, taking time to plan, and avoiding these common pitfalls is crucial to ensure a smooth and successful transformation. By planning meticulously, prioritizing functionality, and investing in quality, you can create a beautiful and practical home on wheels. Best wishes with renovating your RV, and remember, don’t be like me and try to fix a frozen toilet in the winter!

  • 10 Popular RV Renovation Ideas: Personalizing Your Home on Wheels

    10 Popular RV Renovation Ideas: Personalizing Your Home on Wheels

    So, you bought the RV you’ve been searching months for, but it’s missing those final touches to truly give it that unique feel. That “Now, I’m home!” feeling. Well, no worries. I’m here to help give you some tips and inspiration on how to give your RV a bit of a facelift to make it truly feel like your home on wheels. Whether you’re a weekend warrior or a full-time RVer, these 10 RV renovation ideas can significantly enhance your comfort and enjoyment on the road.

    From simple decor changes to more substantial upgrades, here’s a guide to some of the most common RV renovations that can turn your RV into a cozy and stylish retreat.


    1. Flooring Upgrades

    While many RV manufacturers have listened and improved the flooring on newer units, it can still be a sticking point — no pun intended — for many DIYers looking to make that initial upgrade. Many RVs come with basic linoleum or carpet. Both can wear out quickly and hold onto dirt, stains, and more. Consider replacing these with more durable and stylish options like vinyl planks or laminate flooring. These materials are not only easy to clean but also add a touch of homey elegance to your space.

    DIY Tip: Make sure to choose flooring that can withstand temperature fluctuations and moisture, as these are common in RVs.


    2. Kitchen Remodels

    If food is the key to your heart, like it is for me, then the kitchen is likely the heart of your home. And if that is true, then your RV should be no different. Simple changes like painting cabinets, adding a backsplash, or upgrading your countertops can make a big difference. For a more significant transformation, consider replacing your RV’s appliances with more modern and efficient models.

    DIY Tip: Peel-and-stick tiles are a budget-friendly way to add a stylish backsplash without the hassle of traditional tiling.


    3. Bathroom Upgrades

    Most RV bathrooms are smaller than their sticks-and-bricks counterparts, but that doesn’t mean you can’t make it stylish, cozy, and functional. Simple and inexpensive changes like replacing the showerhead with a high-pressure, water-efficient model go a long way towards looks and saving water when you are out boondocking.

    For looks, installing a new vanity, or even adding some decorative touches like new curtains and towels can create a spa-like feel. OK, maybe not a spa-like feel, but it is definitely cozier than a bare RV bathroom. Trust me when I say that a nice shower rug on your feet when it’s really cold outside can go a long way.

    DIY Tip: Use damage-free adhesive hooks and suction cup organizers to maximize storage and keep everything in place while on the move.


    4. Solar Power Installation

    One of the best RV renovation ideas for just about any RV is adding solar panels and better batteries. Not only does this eco-friendly solution reduce your reliance on campsite power hookups, but it also allows you to enjoy off-grid camping with ease. A basic solar setup can power essential appliances and keep your batteries charged, giving you more freedom to explore remote locations. 

    If DIY solar scares you, then a good solar power station with folding solar panels is a great plug-and-play solution. These tend to be a little cheaper than building your own solar setup, but they are easy and come with a warranty.

    DIY Tip: Start with a smaller solar kit to understand your energy needs before expanding your system. Installation usually involves mounting the panels, running wiring to a charge controller, and connecting to your battery bank.


    5. Painting and Wallpaper

    A fresh coat of paint or some stylish wallpaper can drastically change the look and feel of your RV. While this is admittedly my weak point — I let my wife and her eye for decor make these upgrades — this quick and inexpensive change truly gives your RV a welcoming feel. According to her, light colors can make a small space feel larger. Bold patterns, on the other hand, can add a touch of personality. Don’t forget about the cabinets and furniture. A little paint can go a long way in updating your RV’s interior.

    DIY Tip: Use lightweight materials and ensure proper ventilation when painting to avoid lingering fumes.


    6. Furniture Upgrades

    Swapping out old, uncomfortable RV furniture for more modern, multifunctional pieces can greatly enhance your comfort. Consider installing a convertible sofa bed, a fold-out dining table, or even custom-built storage solutions that maximize every inch of your space.

    DIY Tip: Look for furniture that can be securely fastened to prevent movement while driving, and always consider the weight of old vs new furniture, because WEIGHT MATTERS!


    7. Lighting Improvements

    Good lighting can transform your RV from a dark cave into a warm, inviting space. If you are like me and don’t mind the cave feel, then you can skip to the next idea. But if you are like my wife and need light at all times, then replacing outdated fixtures with energy-efficient LED lights and adding under-cabinet lighting in the kitchen are a game-changer. If you want to go the extra mile, then consider installing dimmers to create a cozy ambiance.

    DIY Tip: Battery-operated LED lights are a great option for adding illumination without complicated wiring.


    8. Exterior Enhancements

    Don’t forget about the outside of your RV! Adding an awning, upgrading your outdoor lighting, or even just giving your RV a good wash and wax can make a big difference. For those who love outdoor living, consider installing an outdoor kitchen or entertainment area, or having an easy and functional setup that you can pull out wherever you go.

    DIY Tip: Portable solar lights can enhance your outdoor space without needing electrical wiring.


    9. Storage Solutions

    Maximizing storage in an RV is always a challenge, but it is essential. With a bit of creativity, you can make the most of your available space. Install shelves, hooks, and organizers to keep everything in its place. Think vertically and use every nook and cranny for storage. For some fun ideas, here is a video of us in our Class B van, maximizing all of our space to be able to stay on the road for months.

    DIY Tip: Over-the-door organizers are perfect for adding extra storage without taking up floor space.


    10. Personalized Decor

    Finally, add some personal touches to make your RV feel like home. I give my wife all the credit in the world. Simply hanging some photos, adding some cozy throw pillows and blankets, and incorporating decor like fake plants have transformed the living space and made it more inviting.

    DIY Tip: Use removable adhesive strips and hooks to hang items without damaging the walls.


    For most of these RV renovation ideas, you can keep your costs fairly low and find some good bang-for-buck options if you do a little research. But regardless of how little (or how much) you spend, renovating your RV to make it feel like your own cozy sanctuary on the road truly changes the RV experience for the better. It has made a world of difference for us. So, whether you’re making small changes or undertaking a major overhaul, these common RV renovation ideas will help you create that comfortable, stylish, and functional home on wheels. Happy renovating, and may your travels be filled with adventure and beautiful memories!

  • Easy DIY Tips For Personalizing Your Adventure Van

    Easy DIY Tips For Personalizing Your Adventure Van

    Your adventure van is your home away from home, whether you’re taking off for the weekend or traveling full-time around the country. So, why not make it feel a little more like a home than simply a unit of transportation?

    If you’re good at skilled trades, such as carpentry, electrical, plumbing, and welding, you can pretty much gut the interior of your van and start from scratch, creating a unique layout and design that works best for you and your needs.

    However, we want to make things easy for you. With that being said, RV Trader is sharing a few DIY tips that anyone can do to make their Class B RV/adventure van more personalized and aesthetic. 

    The Walls

    There are a number of peel-and-stick options available for decorating an adventure van interior that include everything from a wallpaper-like product that looks like wood, brick, or tile, to actual tile that comes in a variety of colored patterns.

    Each pack of tile comes with a number of 6” x 12” self-stick rectangles that have interlocking ends to make installation easier. Simply cut each piece to size with a utility knife, peel off the backing, and stick it to the wall. No grout or caulk needed. Most kits also include a piece of matching molding you can also cut to size to give the edges of your project a professional and finished look.

    Feel free to mix and match patterns. For example, you might want one pattern for the backsplash of your kitchen area, something different for your bath area, and a third option for your dining/sleeping area.

    Another idea is to add plywood panels or shiplap to the walls so you can hang artwork, plant holders, or shelves. If you want to create a feeling of greater space, the panels can be painted with neutral colors like white, beige, or tan.

    You can also paint or add backsplash to the walls of your RV.

    The Floor

    The floor is generally the most overlooked area of a conversion van, but it doesn’t have to be. Similar to the peel-and-stick tiles that can be used on the walls, a flooring version is available that simulates the look of wood or tile. Once upon a time, the sticky backing on these tiles was not very robust and the tiles would pull up after a relatively short time frame. New advancements in adhesives are making them more durable. You could also go the traditional route and swap out your flooring, though that’s typically a difficult and time-consuming project.

    If you’re feeling ambitious, you could opt to put in a floating floor using interlocking strips. Each sheet is generally about four feet long and nine to 10-inches wide. Since you would likely only need a box of two for your van (depending on how much open floor space you have to cover), it wouldn’t be an expensive investment. Be sure to get something that’s water and scratch resistant to keep the appearance of your floor looking good for years to come. There are also some underlayment pads and flooring that help to reduce both thermal transfer and noise, which will help keep the inside of your van guarded from outside elements.

    Next, think about adding some throw rugs to finish the look. It may sound counterintuitive to put rugs over new flooring, but they also add a layer of thermal protection, help to absorb noise inside the van to avoid an “echo” effect, and can easily be thrown in the laundry if they get dirty.

    Light It Up

    Another ambiance element you can add to your adventure van is lighting. You may want to add something decorative that hangs from the walls or roof to brighten up your food prep area, or you might opt to hang a string of Christmas lights that you can run around the upper edges of your walls. Be sure to use LED lights so they don’t draw too much from your battery. LED lights will also significantly cut down on the amount of heat the bulbs put off. Some lighting is available as solar, so you won’t even have to worry about where to plug them in.

    Make It Your Own

    Little enhancements to your adventure van make a big difference, so feel free to experiment and have some fun. Add in some throw pillows or new blankets to add a touch of extra color. Collect postcards from the spots you visit and hang them on the walls. Put a curtain between the kitchen area and your sleeping area to add the illusion of “room.” Add some extra storage space to make things easier to find. Add some accessories to give your RV a retro look.

    There are dozens of things you can do to personalize your van space. Let your imagination be your guide and you’ll feel like you’re always home, no matter where you may roam. Check out these renovation tips for beginners to get started. If you’re ready to purchase your own adventure van to DIY, check out our nationwide inventory of new and used RVs at RVTrader.com.

    By Barrett Baker

  • The Cost of Renovating a Motorhome in 2023

    The Cost of Renovating a Motorhome in 2023

    If you’re a fan of the RV lifestyle, you know that renovating and maintaining your motorhome can be a significant expense. As the cost of living continues to rise, it’s important to have a clear understanding of the expenses involved in renovating an RV in 2023.

    In this article, we’ll supplement RV Trader’s Renovation Guide with a discussion of all things related to reno costs, covering everything from the price of materials and labor to helpful tips that will help you save money along the way.

    Whether you’re a seasoned RV enthusiast or just starting out, keep reading to learn more about the cost of renovating an RV in 2023.

    Popular RV Renovation Trends for 2023

    As we head into 2023, there are several RV renovation trends that are becoming increasingly popular. One of the most exciting trends is the use of designs that are similar to a modern modular home with loft space.

    This trend allows RV enthusiasts to create a living space that is both functional and stylish, with ample storage and comfortable sleeping quarters. These designs often feature clean lines, modern finishes, and an open-concept layout that maximizes space and creates a sense of flow. The modular design of these RVs allows for easy customization and reconfiguration, making it possible to create a truly unique and personalized space.

    Additionally, many RV owners are incorporating innovative technology into their renovations, such as automated lighting and climate control systems, to make their home on wheels more convenient and comfortable.

    Other popular trends include the use of eco-friendly materials, which help to create a more sustainable and efficient living environment. As more and more people embrace the RV lifestyle, these trends will continue to shape the way we think about mobile living spaces.

    Understanding the Cost of RV Renovations

    When renovating your travel trailer or other RV, the cost can vary based on several different factors. The age and condition of your RV are significant factors that will impact the renovation cost. The extent of the required renovations and the materials and labor involved are also crucial cost drivers.

    There are a few common renovation projects that RV enthusiasts might consider, including upgrading the kitchen, bathroom, and dinette. For example, renovating the kitchen may require installing new countertops, cabinets, and appliances, which can cost between $2,000 and $4,000.

    Upgrading the bathroom may involve replacing the toilet, shower, and sink, which can cash in between $1,500 and $3,000. Lastly, renovating the sleeping area may require upgrading the bed, adding storage, or installing a Murphy bed, which can cost between $1,000 and $3,000.

    Budgeting for RV Renovations

    Creating a realistic budget is a crucial step when renovating your toy hauler or other RV. The first step is to research the cost of materials and labor. This research will provide a clearer picture of how much the renovation may cost and help you make informed decisions about which materials to use and the extent of the renovation project.

    It’s essential to prioritize necessary repairs to avoid overspending on luxury upgrades. To save money, consider doing some of the work yourself and buying used or recycled materials. For instance, repurposing a wooden pallet into a headboard for the bed or using repurposed kitchen cabinets for extra storage can save you a lot of money.

    Choosing the Right Motorhome Renovation Professional

    Working with a qualified RV renovation expert is crucial. With specialized knowledge and experience in handling RV-specific issues, they can help you save time and money in the long run. Here are some factors to consider when selecting an RV service technician:

    • Credentials. Check the credentials, including their licenses,certifications, and training. You want to work with someone with the proper training and experience to handle your RV renovation project.
    • Reviews. Read reviews and testimonials from past clients to get a sense of the quality of work the RV service technician provides.
    • References. Request references and contact past clients to ask about their experience working with the service center.

    The advantages of working with a reputable RV renovation expert include access to specialized tools and equipment, which can save you time and money in the long run, and the ability to troubleshoot and fix any unexpected issues that may arise during the renovation process.’

    Small damages here and there can be fixed by yourself without outsourcing help. However, if the damage is substantial, you’ll have to factor in the price of the new parts, plus labor costs. Labor costs can range from $65 to $129 per hour. It’s important to factor in these variables while determining the total renovation cost.

    Budgeting for Ongoing RV Maintenance

    In addition to renovation costs, it’s essential to budget for ongoing RV maintenance. Regular maintenance can help you avoid costly repairs down the road and keep your RV in good condition for years to come. The cost of ongoing RV maintenance varies depending on the age and condition of your fifth wheel or other RV. However, setting aside a budget of around $300 per year can help cover routine maintenance costs.

    Renovating a motorhome in 2023 can be a costly investment, but it can also provide endless opportunities for fun and adventure. By understanding the cost of renovation, budgeting for necessary repairs, and choosing the right RV service center, you can enjoy your RV for years to come. Don’t forget to budget for ongoing maintenance, as this can help you avoid costly repairs and keep your RV in great condition.

    Ready to look for a used RV to purchase? Check out RV Trader’s nationwide inventory at RVTrader.com to begin your renovation journey.

    By Kevin Fagan, Editor at NextModular 


  • What Real RV Shoppers Are Saying About Renovating RVs

    What Real RV Shoppers Are Saying About Renovating RVs

    RV travel is all the rage right now, and for good reason. Traveling in an RV is affordable, flexible, and offers a special way to connect with both your travel companions and nature. RVs are also great investment projects for those who love to fix up and renovate. 

    RV Trader recently surveyed over 1,000 RV shoppers and asked them about buying and renovating RVs. We found that the majority of shoppers (64%) are looking to buy an RV that’s totally ready to roll. However, nearly a quarter (24%) are open to renovating depending on the RVs they find on the market. Finally, 12% of RVers specifically intend to buy an RV in order to renovate, with either minor updates (8%) or a full overhaul (4%). 

    Among those who are open or actively seeking to renovate (36% of all shoppers), virtually everyone wanted to renovate an RV for personal use, with only 2% of potential renovators hoping to flip the RV for resale.

    When asked which spaces had the highest priority when renovating, respondents said they were most interested in renovating their living space (40%), kitchen (39%), and sleeping space (36%). This makes sense, as the aesthetic of those areas largely determines the vibe of the entire RV. The bathroom was also a popular choice (29%). Some of the less popular renovation areas were creating storage space (16%), the driver cab (10%), and outdoor appliances (7%).

    It was also eye-opening to learn about the specific projects renovators are hoping to tackle. The top two planned projects were painting (41%) and refurbishing seating and bedding (41%). Kitchen renovations were the third most popular response (35%). Beyond that, respondents were also interested in replacing flooring (29%), replacing upholstery (28%), refurbishing bathrooms (27%), replacing appliances (26%), and replacing roofing (11%). 

    And what about those shoppers who have no interest in renovating an RV? Among those who don’t want to renovate, exactly half (50%) say that’s because they simply want a travel trailer or other RV that already meets their needs. They’d prefer to make their purchase and hit the road immediately. The second most common response (31%) was that they don’t want to go through the hassle of renovating. That’s fair enough, as renovations require a significant amount of time, money, and patience. Finally, a smaller percentage of respondents said they don’t have the skills (10%) or the spare time (8%) needed to renovate an RV. 

    Taken as a whole, the survey results are very insightful into today’s RV shoppers. First of all, relatively straightforward renovation projects that can be learned and completed without much skill or experience ranked as the most popular projects. Tasks like painting, refurbishing seating, and refurbishing bedding can be time-consuming, but they’re not extremely difficult. 

    Second, respondents prioritized completing renovations in areas where they tend to spend the most time. The living room, kitchen, sleeping space, and bathroom were all top choices. Meanwhile, side projects that don’t affect main RV spaces ranked much lower. It makes sense to tackle major areas that will immediately make a huge difference in your space and leave smaller projects for later. However, if you’re just starting out and intimidated by the renovation process, small wins can give you the confidence to move forward with larger projects. That’s something to keep in mind while planning your renovation timeline.  

    Third, it makes sense for some RVers to buy a camper that’s already road-ready. If you don’t feel like dealing with the logistics of renovating a used Class B RV or other RV, that’s more than okay. There are plenty of great new motorhomes on the market that will fit your needs and budget. Ultimately, you have to make the decision that’s right for you. 

    Whether you’re eager to renovate a used RV, or purchase a brand new RV from a dealership, you can find exactly what you’re looking for on RVTrader.com. Our nationwide inventory of new and used campers offers a make and model for every budget. 

  • Learning From Experience: Valuable Insight From a First-Time RV Renovator

    Learning From Experience: Valuable Insight From a First-Time RV Renovator

    When it comes to renovating an RV, it can be helpful to seek guidance from a fellow RVer who’s currently in the midst of renovating their own motorhome. Speaking to a seasoned member of the RV community can give you invaluable insight into the renovation process, along with tips and tricks they learned during their own experience. 

    RV Trader had the chance to speak to AJ Harless, a Trader Interactive team member who’s currently renovating a travel trailer with his wife. He gave us the low down on which projects he’s already tackled, currently working on, and planning to complete in the future. He also provided us with some amazing insider knowledge and advice that can benefit both beginners and those who are more experienced with renovations. If you want to get some fun project ideas or hear a firsthand account of the RV renovation process, check out our interview with AJ below!

    1. What type of RV are you renovating?

    We are renovating a 2021 Coleman Lantern 17B. It’s a relatively affordable, entry-level travel trailer that is great for first-time buyers. It has pretty standard features but is a very popular unit with a great community of buyers who like to customize and upgrade their RVs.

    2. Were you already familiar with renovating, or did you start out as a beginner? 

    We are brand new to RV renovations. This is our first RV so we’re learning a lot as we go in terms of how the trailer is constructed, what we’re able to customize, and what our limitations are. However, we’ve tackled a number of home renovation projects, so we’re able to apply some of those learnings to the projects inside of the RV.

    3. Which renovation projects have you tackled so far?

    We’ve knocked out quite a few projects already. The first project we tackled was to wallpaper the wall that separates the dinette from the twin bunk beds at the back of the unit. This was a really easy win to start. From there, we decided to re-upholster the cushions for the dinette to brighten up the space with a lighter vinyl cover as opposed to the stock brown vinyl.

    Our next project was to apply stick-on backsplash to the kitchen area of the RV. We’re both fans of black textures so we went with black herringbone pattern. Since the RV’s interior is primarily a shade of white, this added some nice contrast.

    To really make the unit feel like our own, we painted all of the cabinets in the kitchen area a darker shade of green. This color complimented the black backsplash very well and makes it feel unique.

    The most recent project that we completed was replacing the dinette tabletop. The original table was constructed with low-grade materials and covered in a marbled vinyl. We wanted something a little more appealing. Fortunately, my father-in-law has 30+ years of woodworking experience and was able to hand-craft a solid Hickory tabletop. We detached the stock fold-up table legs and used them on the new tabletop. Soon, we hope to replace the legs as well for something with a little more high-quality.

    4. What projects were the most challenging? What projects were the easiest?

    Due to the pattern and the aluminum material, the stick-on backsplash was our toughest project so far as we had to do a lot of trimming to fit the backsplash around the window with rounded corners. We anticipated this would be an easy project since it was stick-on, but the pattern added a level of complexity to keep the backsplash straight.

    Our easiest project so far was the wallpaper for the dinette wall. It’s a very small space, but adding the wallpaper really livens up the area and adds some visual interest.

    5. Is there anything you learned along the way that would have made your first projects easier to complete?

    I would say one thing that we learned is that you should always make sure you have the right tools for the job. With the backsplash project in particular, it would have been much easier had we started with the cutting tools we needed, especially given that the backsplash is made from aluminum instead of vinyl. Instead of trying to power through with what we had, we should have started out with the appropriate tools.

    6. Which renovation projects are you planning to tackle in the future? Which ones are you most excited about?

    We are currently in the process of replacing the shelf above the queen bed. The stock shelf isn’t quite deep enough to hold most standard-size baskets. Given the smaller size of our unit, we need to make sure that every storage space is functional and practical. My dad will actually be custom-building a shelf from poplar wood so that it’s much stronger and visually appealing, similar to that of the custom tabletop. 

    At the same time, we will also be applying wallpaper to the wall on which that shelf is mounted. This is the largest wall in the unit and it comes standard with a faux wood wallpaper. We’re excited to see how a brighter, more modern wallpaper will add to the aesthetic of the space.

    7. Do you have any helpful advice for RV renovation beginners?

    When it comes to achieving a cohesive aesthetic in the RV, start by picking one statement piece from which you can build everything else around. This could be wallpaper, bedding, etc. Find something that you love the look of, and then allow that to inspire the look over everything else around it.

    My wife, Shaina, owns her own business, HartwoodDesign.co, in which she designs and creates custom laser cut and engraved decor. With our space, she was able to draw from the various patterns and themes and create custom pieces to accentuate the overall design.

    Once you have your style solidified, it’s important to not let perfection get in the way of good. What I mean by that is don’t stress over the little imperfections that come along with your DIY projects. Tiny wrinkles in your wallpaper, a scratch on your backsplash, a run line in your paint; at the end of the day, these will be invisible and become part of the story behind your renovation.

    8. What is your favorite part about renovating your RV?

    Our favorite part of this renovation is the experience of customizing the unit and making it our own. Spending time together, figuring out how to overcome the obstacles, and being able to admire our work in the end is the most rewarding part so far. We’re excited to take the RV out this season and get to adventure in our custom unit and show it off to friends, family, and those we meet on the road.

    9. Is there anything else I didn’t ask about that you think would be helpful for RV renovators to know? 

    If you’re renovating your RV, there’s a good chance that there are others like you out there doing very similar projects, or who have completed those same projects and are willing to share their tips, the tools they used, etc. We’ve been fortunate to find a good community of Coleman Lantern 17B owners who frequently share their projects in a Facebook group. We’re able to consult this group for any specific measurements, questions about the unit, tips, etc. This has been invaluable in our renovation process.

    Lastly, I would say to anyone thinking about starting a renovation – your RV is your home on the road. Make it feel that way. Make it your own!

    Are you ready to look for a used RV and get started on your own renovation projects? Check out our nationwide RV inventory on RVTrader.com

  • How to Give Your Used RV a Classic, Retro Look

    How to Give Your Used RV a Classic, Retro Look

    Retro campers that have been flawlessly renovated are hard to ignore. They’re bold, lively, and fun. The best part? They look vintage, but they offer modern conveniences and appliances. If you’re eager to stand out on the road with groovy patterns, bold paint colors, and appliances that offer a blast to the past, you’ve come to the right place. RV Trader is sharing seven helpful tips that will help you transform your used motorhome into a retro paradise.

    1. Paint the exterior. 

    Renovating the exterior of your RV will make a huge difference in how your motorhome is perceived. If you want to add an obvious retro edge to your travel trailer or other camper, choose your favorite retro colors, brainstorm a bold pattern, and get to work. 

    Before you paint, wash the outside of your RV thoroughly, remove old decals, and caulk any exterior joints that show cracks or gaps. In addition, make sure you have all the necessary supplies, such as painter’s tape, a sanding block, acetone, a microfiber cloth, and more. 

    Ultimately, painting your RV will give it an opportunity to shine in all its retro glory.

    2. Use retro kitchen appliances.

    There are so many retro appliances to use in your Class A RV or other motorhome these days. Your options are truly endless! Here are some fun items to consider.

    3. Incorporate retro colors. 

    Before you begin your RV renovation, decide which nostalgic color palette you want to use. Are you drawn towards warm browns, oranges, and golds of the 1970s? Or do you prefer softer pastels that were all the rage during the 1950s? This decision will help guide your renovation projects moving forward. 

    Your cabinets, walls, and trim are all great painting projects to tackle. You can also choose furniture and decor that fit into your chosen color scheme. Ultimately, incorporating vintage colors and accents will help give your space a groovy, retro feel.

    4. Install funky wallpaper. 

    Patterned wallpaper is a great way to transform the vibe of your RV’s interior. Bold prints, kitschy designs, and colorful florals are all great options for a retro theme. 

    Nowadays, wallpaper application is simple. With peel-and-stick options, you can change up your chosen design as often as you want. This is a great way to keep the interior of your fifth wheel or other RV fresh and interesting. Fortunately, since RVs don’t have an extensive amount of wall space, this renovation project is a quick and easy one.

    5. Get creative with lighting. 

    Swapping out your old bulbs and light fixtures for new ones is a great way to enhance the retro feel of your RV. From accent lighting to table lamps, your options are infinite. 

    First things first, remove any fluorescent bulbs from your RV. Manufacturers typically install these in brand new motorhomes, and for some RVers, they’re perfectly fine. However, they give off a bluish tint and can make your space feel unnaturally bright. Instead, opt for warmer bulbs that add a cozy factor to your space. 

    Second, consider adding a fun table lamp or two to your bedroom or living room. This mushroom lamp from Urban Outfitters is a great option, along with this green ceramic lamp from JCPenney. 

    Third, brainstorm creative ways to add textured, retro lighting to your RV’s interior. For example, stick-on glow stars can be installed on your ceiling for an extra pop of light after dark. Many RVers also string fairy lights around the interior of their space for a cozy, late-night glimmer.

    6. Have fun with textures and fabrics. 

    Incorporating texture and a variety of fabrics will bring your retro RV to life and transform it into a cozy, functional home. Shag carpets and crushed velvet pillows are fantastic options for this. You can even DIY your RV’s seating and swap out the fabric for something that aligns with your chosen theme and color palette. Tie dye prints, checkered fabrics, and paisley designs are popular options for a retro look. Don’t be afraid to mix and match different colors and patterns. This will only enhance the retro feel of your RV.

    7. Decorate with vintage accents. 

    Get creative with your retro RV renovation. Add a lava lamp, a vintage fan, or a neon sign to your space. If you’re a music lover, invest in a record player. Once again, your options are endless. Decorate in a way that feels authentic for you.

    The first step towards renovating a camper is finding the perfect used model for your project. If you’re ready to search for a used RV to renovate, check out our nationwide inventory at RVTrader.com.

  • Flip or Flop: 7 Tips for Selling Your Renovated RV

    Flip or Flop: 7 Tips for Selling Your Renovated RV

    We’ve all seen stunning photos and videos of mind-blowing RV renovation projects that are all over Facebook, Instagram, and TikTok. If you’re interested in flipping an RV to sell, you’re certainly not alone. While renovating an RV is a big job that takes a lot of time and dedication, there are even more things to consider when the renovation is a flip to sell. If you approach your renovation project the right way, the experience will likely be a rewarding one. But if you try to cut corners and complete the job quickly, you’ll likely have trouble selling your motorhome. RV Trader is sharing seven helpful tips that will ensure your renovation is a flip and not a flop.

    1. Follow current design trends and aesthetics.

    When it comes to renovated RVs, aesthetics are important. If the interior of your fifth wheel or other RV is trendy, incorporating popular designs, paint colors, and hardware, it will generate significantly more interest and sell for more cash. 

    Keep in mind that popular design trends may not align with your particular taste or style. But at the end of the day, you’re renovating your RV to sell, not to keep. Do plenty of research before you begin your renovation project, and look for stylish updates that would be possible for your RV. Social media is a great place to find ideas and inspiration, since many RVers enjoy documenting their renovation processes online.

    Ultimately, it’s important to identify your target audience, step into their shoes, and figure out what they want. Is modern, trendy furniture more important than comfort? Are light paint colors more popular than dark paint colors? Is kitchen space and function a priority? Once you can nail down some specific answers, you’ll be ready to get started with your renovation.

    2. Look for vintage models.

    Finding and renovating a vintage camper isn’t absolutely necessary, but it will definitely increase your odds of selling for a great price. Vintage campers can usually be purchased for cheap, since they’re so old and outdated. They also have an irresistible charm that many RVers appreciate. If you decide to go this route, make sure you inspect the camper thoroughly before you buy it. If there are any major issues with the RV that may prevent it from running smoothly or will cost a fortune to be fixed, those are important things to consider. You don’t want to get stuck with an old RV that’s beyond repair because it wasn’t properly inspected.

    3. Snag a great deal on a used RV.

    If you’ve decided to flip an RV but you don’t know where to start, check out our used listings on RVTrader.com. This will give you a good idea of what’s available on the market, along with which models fit comfortably into your budget. Eventually, you’ll have to narrow down your search if you want to find the perfect used RV for your renovation project. There are many different types of RVs, and each comes with its own set of pros and cons. Teardrop trailers are great for weekend travelers, while Class A RVs and Class C RVs are great for those who wish to live on the road full-time. 

    Once again, this is where it becomes important to know your target audience. It’s not only about the aesthetic they want, but also about how they plan to use their RV. Once you’ve determined the make and/or model you want, you’ll be able to keep an eye on the market until you find one at your preferred price point.

    4. Consider the cost of materials and labor when you list the RV for sale.

    Time is money, and you should be compensated for it. It can be difficult to calculate the cost of labor, especially if this is your first renovation job. The best thing you can do is track all the time you spend working on your renovation from the very beginning. If you plan to make a business out of flipping RVs, this will be a huge help down the road and help ensure you’re making a profit from each sale. 

    Overall, your purchase price should include the cost of labor, the cost of physical materials and furniture/decor, and the purchase price of the used RV. It’s wise to head into each sale having an “ideal price” in mind and a “quick sale” price that you’d be willing to accept. This will take some pressure off of the sale and give you a bit more flexibility.

    5. Make sure your renovation job is high quality.

    Your RV might look ultra trendy for social media photos, but if the workmanship is subpar and the materials used are cheap, it’s going to be harder to sell. Make sure you pay attention to both large and small details. Tiny imperfections, such as uneven paint brush strokes, flooring that doesn’t align perfectly with the wall, and cheap hardware, will turn a lot of buyers away. If you don’t think you have the skill set to complete a project, consider paying the extra cost to hire a professional.

    6. Time your renovation project with the RV community’s busy season. 

    Peak season for RV traveling is generally during the summer, from late June to mid August. This is because families often wait until their kids are out of school to embark on scenic vacations across the United States. Even for those without kids, the warmth of summer tends to attract more RV travelers that are eager to get outside. 

    If you can, time the end of your renovation project to wrap up during the spring. This way, you’ll have a larger pool of interested potential buyers.

    7. Create an attractive listing. 

    Your renovation job might be done, but your work is not complete! The last step of the process is to create an eye-catching listing that will entice potential buyers. Take high-quality photos and videos, and include as much detail in the listing as possible. This includes make, model, weight, mileage, number of beds, kitchen amenities, if there’s a toilet, the updates you’ve made, and more. The more detail you can provide, the better. 

    For renovation projects, before and after photos are the best way to show how drastically the interior has changed. Make sure you capture some before photos so you compare them side by side in your listing. 

    If you’re ready to start shopping for an RV to flip this spring, browse our nationwide inventory at RVTrader.com. And once you’ve finished your renovation and are ready to flip it, sell your renovated RV with RV Trader. With over 6.5 million site visits to our marketplace every single month, you’re likely to find an interested buyer faster than anywhere else online.