Tag: RV Renovation

  • 6 Quick RV Makeover Tips

    6 Quick RV Makeover Tips

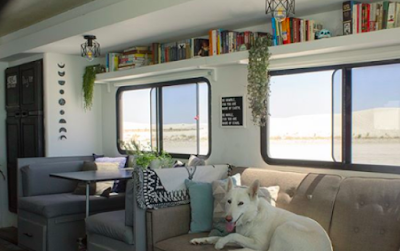
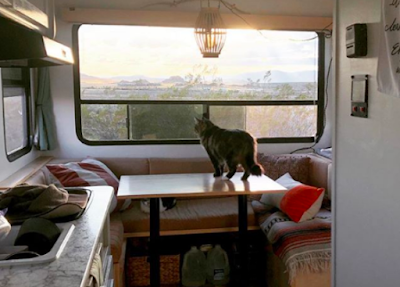
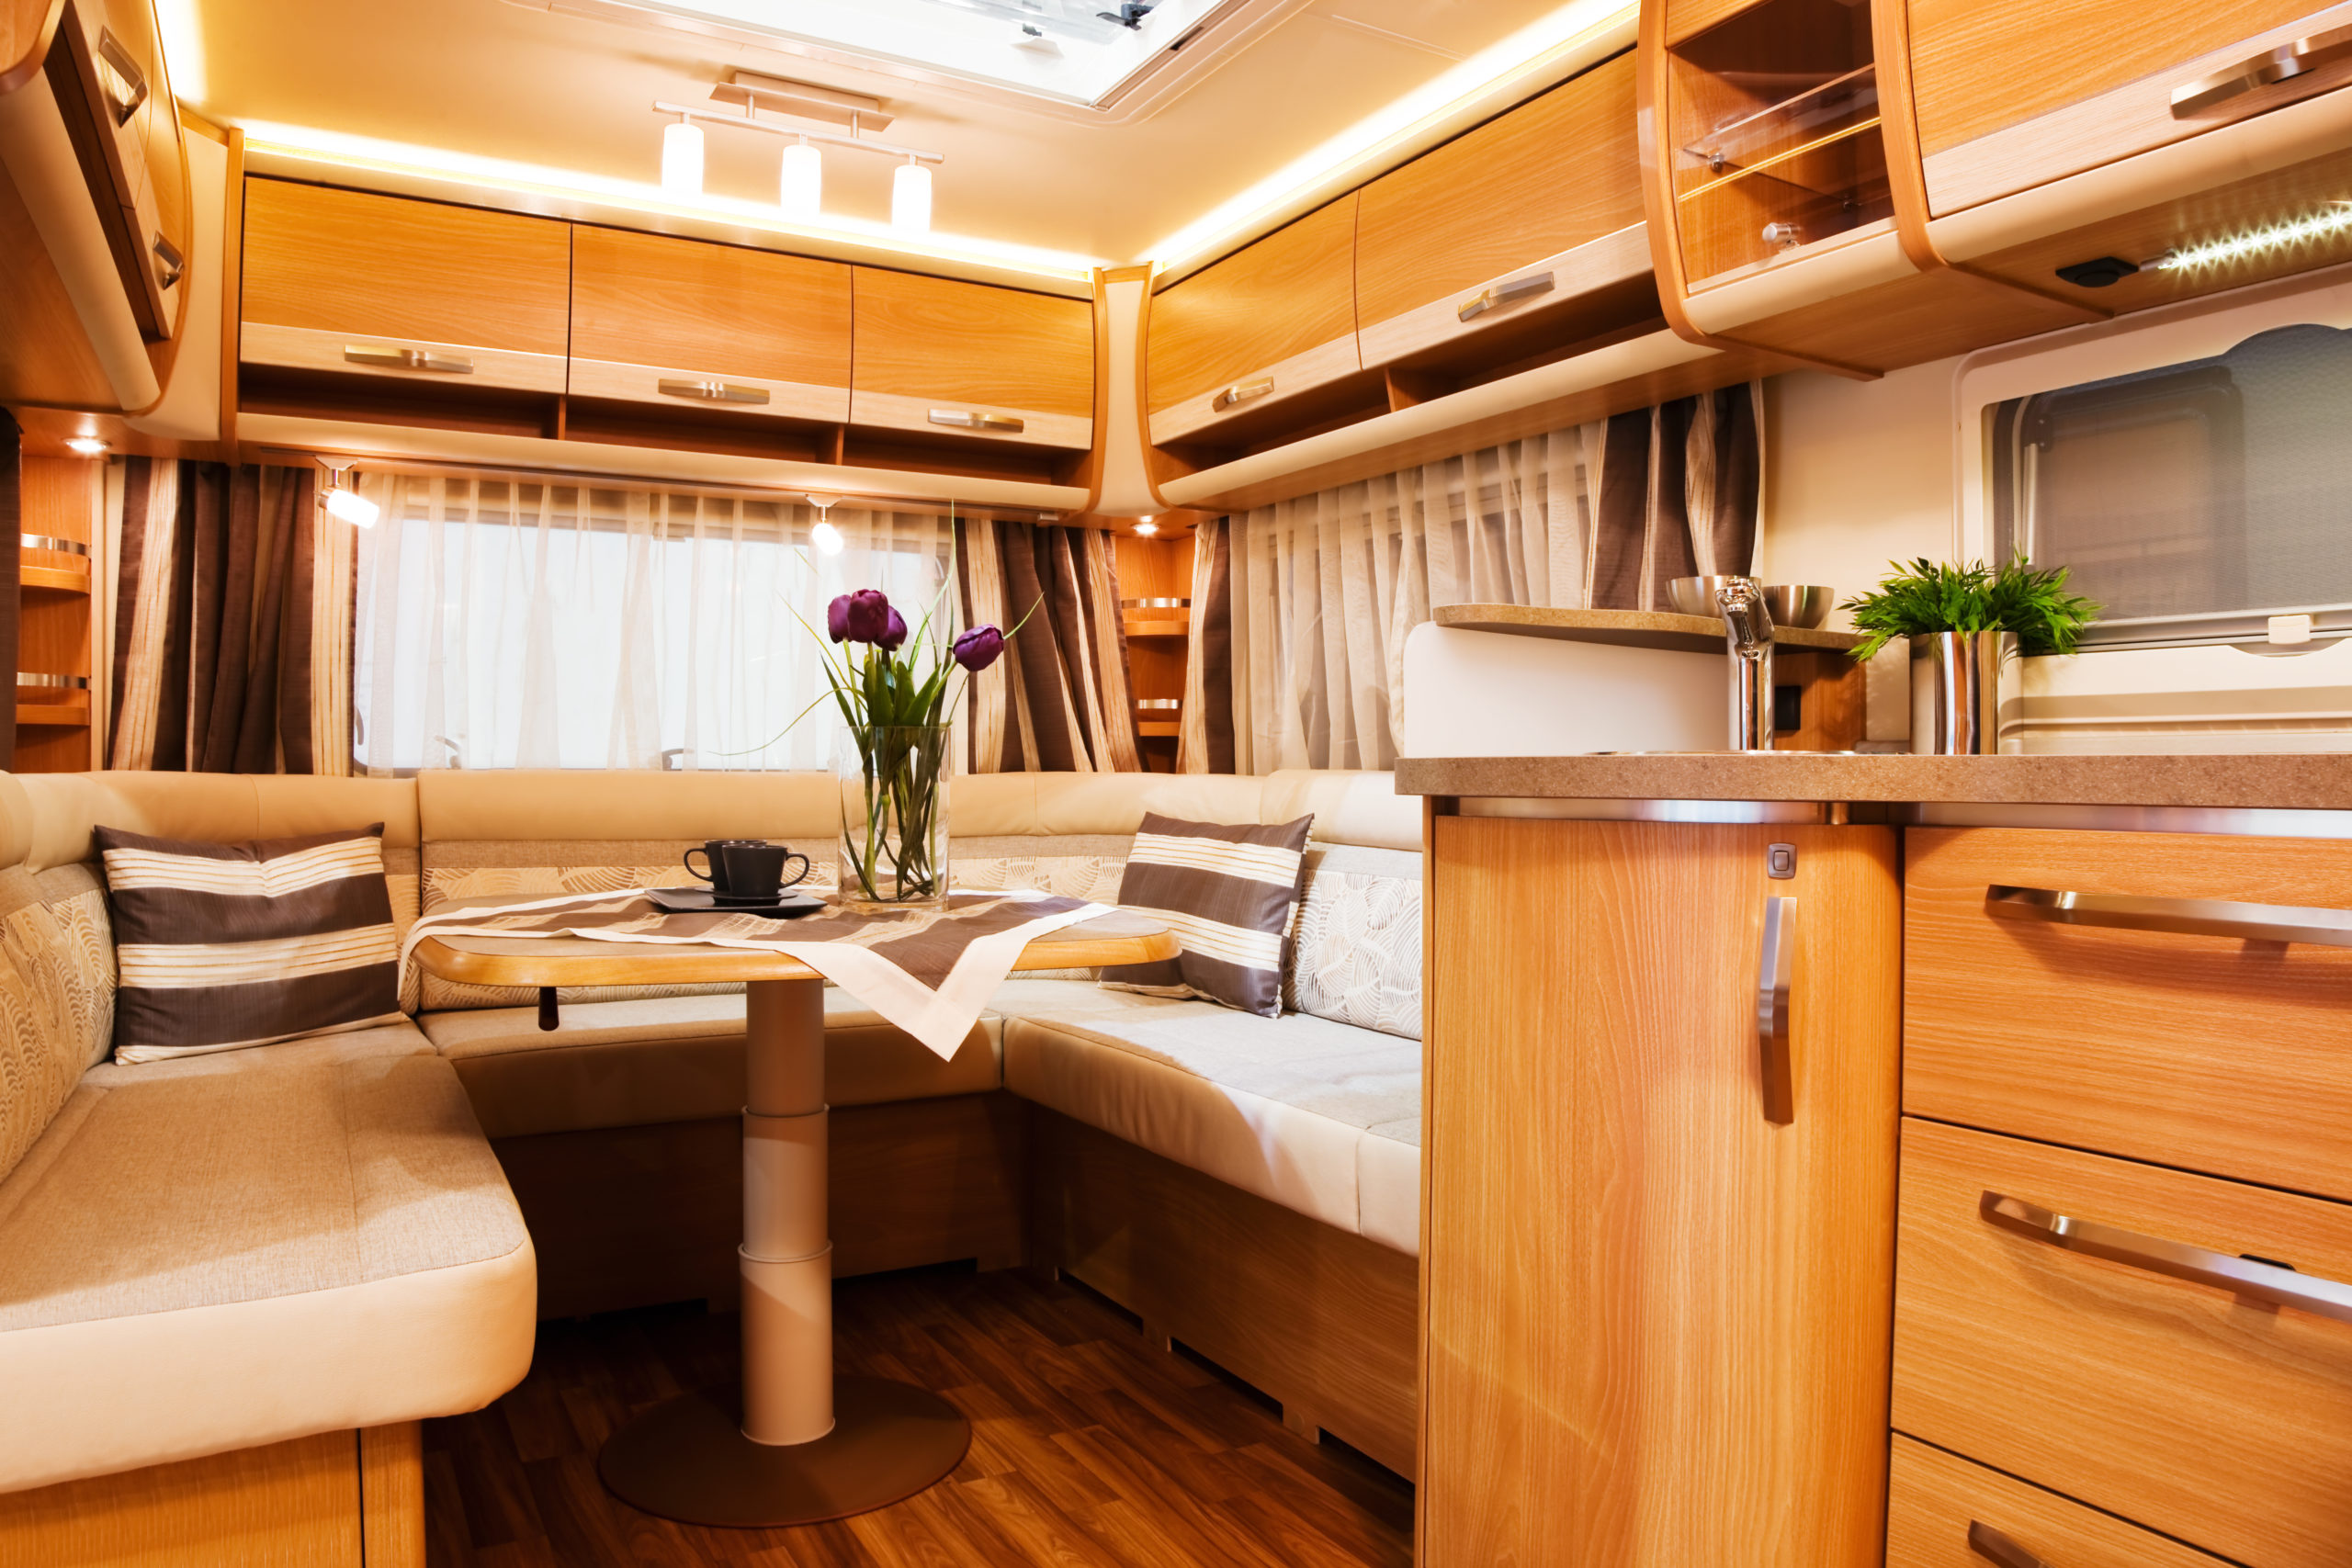
    Life on the road is an exciting adventure, especially when you can settle in one place for a few days or more. Your destination’s scenery may even inspire you to makeover your motorhome or travel trailer. No matter where you take your home away from home, add some flair and cozy touches with RV Trader’s six quick RV makeover tips.

    1. Plant a Garden

    You’ll find a lot of makeshift gardens in RV parks. In addition to flowers, a number of colorful vegetables thrive here, such as peppers, tomatoes, and beans. Don’t know how long you’ll stay? Plant in containers so when you’re ready to move on, just take your garden with you. Styrofoam ice chests make great travel planters. Having a portable garden also makes it easier to eat healthy on the road. Instead of pulling into the next fast-food restaurant, grab a few tomatoes off the vine.

    2. Repair or Refresh Outdated Parts

    Make your RV as fresh as your garden. Do you need new windows or tires? When was the last time you painted, cleaned windows, or inspected the steps that lead into the trailer? Safety is everything, and rotted or rusted steps and light fixtures can be dangerous. 

    You can also breathe new life into an old camper by adding new cabinets and appliances. Add shelves for more storage space so you can declutter your living areas.

    3. Replace Worn Flooring

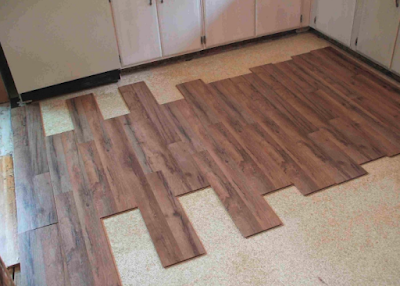
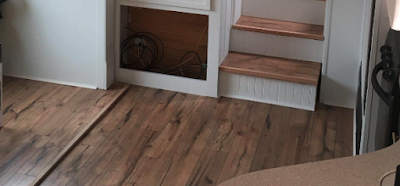
    If your RV is an older model, chances are your linoleum flooring is dingy and ripped. Replace it with new vinyl flooring, tile or laminates for a fresher look. Before tearing out your RV’s old flooring, beware: linoleum flooring often contains formaldehyde. 

    Formaldehyde is an odorous, colorless gas used in building materials and household products. If you do start to feel nauseous, or if your eyes and throat are irritated, open your camper’s windows and doors to release the gas.

    While we’re talking about flooring, take some time to assess the condition of your carpeting. You can replace the carpeting or install tile, stone, or laminate that are easy to mop to avoid mold. Uncarpeted surfaces are easy to maintain, especially if you spend a lot of time at the beach or in the woods.

    4. Add New Upholstery

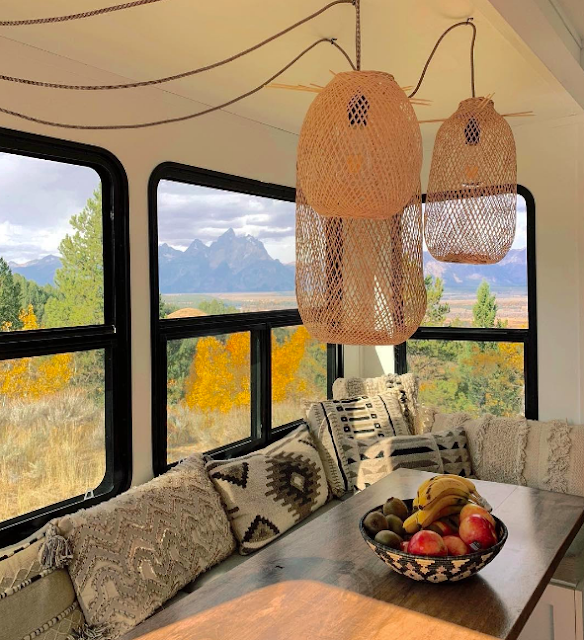
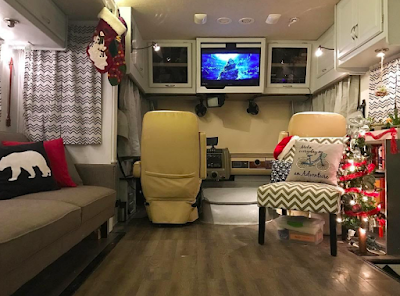
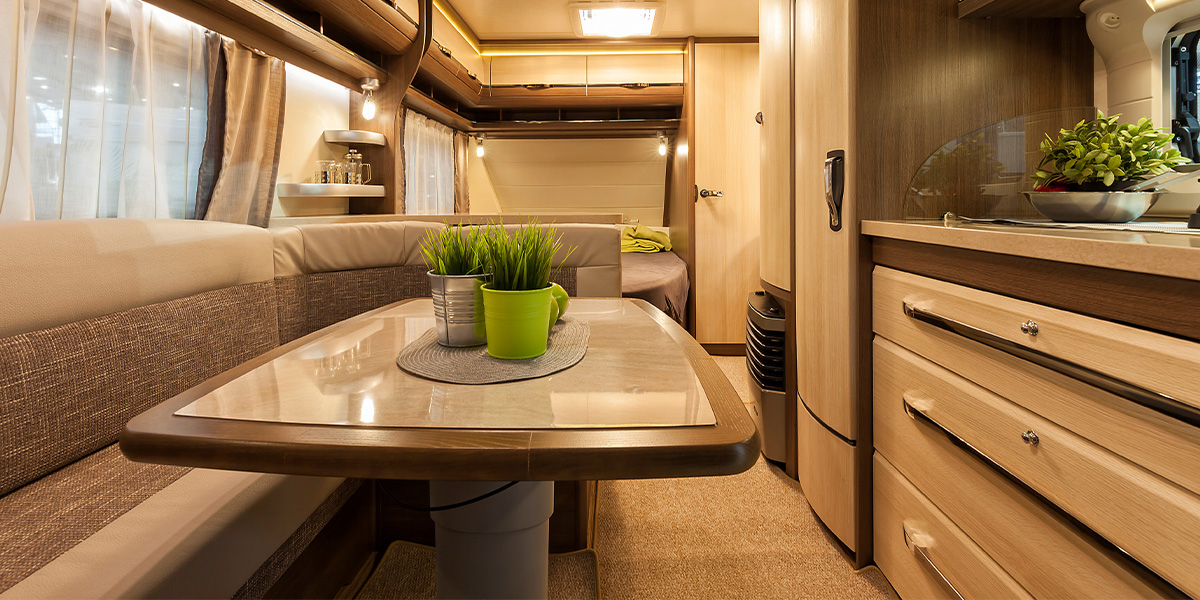
    Toss out your old, moveable furniture for something new. Now is your chance to match your driver and passenger seats to the rest of your decor. Revive old chairs and couches with new upholstery. Shop around to get various quotes or sew the pieces yourself. 

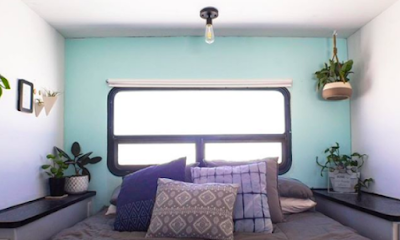
    5. Freshen Up the Walls

    Instead of repainting, consider wallpaper or wood paneling. Wainscot is half-height paneling, usually in wood, but there are plenty of options to bring a classic look to the inside of your RV. With no hard and fast decorating rules in mind, you can alternate between paint and wallpaper at the top areas of the wainscoting.  Keep in mind that RV wallpaper is NOT the same kind that you see in houses, so choose carefully.

    6. Hang Curtains

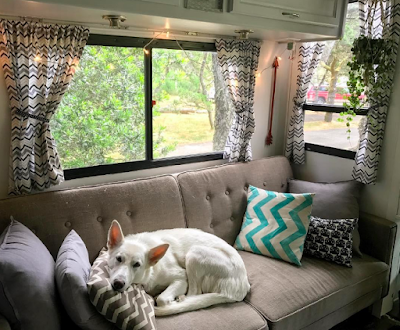
    Indoor curtains can really transform an RV into a proper home. Whether you make your own drapery or buy it from a store, be sure to measure all windows carefully to determine the type of hardware you can use. When it comes to availability in recreational vehicles, there is no one-size-fits-all.

    Your RV is more than just a camper, it’s your home away from home. Make it as comfortable as possible with these quick makeover tips. Don’t forget to add throw pillows, oil diffusers, and other comforting touches that can turn your RV into a romantic getaway. And, if you’re ready to find your next home on wheels, browse the nationwide inventory of new and used RVs for sale on RVTrader.com.


    Paul Colbert is a travel blogger and nature enthusiast. He loves exploring new places and new ways to enjoy the outdoors – knowing that he can return to the comfort of his portable home.

  • 7 Things to Look for When Buying an RV Fixer Upper

    7 Things to Look for When Buying an RV Fixer Upper

    Renovating RVs is a huge trend right now, with people upgrading RVs for their own use or flipping them for resale. Whether you’re renovating an RV to enjoy as a mobile getaway for yourself, or it’s a side business to generate some extra spending money, you want to make sure that you buy the used RV that’s right for you. Here are seven things to look for when buying an RV fixer upper.

    1. A Fair Price

    When considering a fair price for a fixer upper RV, keep in mind all the tools, materials, and time that will go into the repairs and upgrades. After buying the RV, you still need to have leftover budget to actually do the renovation! Luckily, you can search online marketplaces like RVTrader.com to get an idea of the prices for which similar units are being sold.

    2. A Clear Title

    You’ll always get a title when buying from a dealer, but some private sellers may not have a title for a used RV, especially if it’s a fixer upper that’s particularly old, damaged, or even inoperable. RVs like these can often tempt renovators with cheap prices, but we strongly recommend you stay away from RVs without a clear title. Some states have processes to let you claim a title-less RV, but it can be complicated and is not guaranteed to work. Stick to buying from sellers who have a clear title.

    3. An In-Person Inspection

    When shopping on RV Trader, listings will have plenty of photos and videos of the for-sale listing. If you’re buying a new unit, or even a road-ready used RV, that visual evidence may give you all the confidence you need to buy the RV. However, if you’re buying a fixer upper that is going to need some work to give it new life, you really need to inspect the RV in-person. Before buying a fixer upper RV, you need to evaluate the issues you think you can fix or upgrade, the repairs and replacements that are too big to be worth the investment, and the potential hidden problems that could unexpectedly derail a renovation. To get that level of detail, especially to find those hidden issues, you really need the opportunity to inspect the RV in-person.

    Pro Tip: If you may be unavailable to inspect an RV, or don’t feel qualified to evaluate a rig yourself, look for listings on RVTrader.com that are marked with an inspection badge. These are units that are part of RV Trader Assurance, powered by Lemon Squad, which have already been inspected by an RV professional. On these listings, you can easily request the inspection report, which will include a comprehensive examination of the internal and external structure, complete mechanical inspection, road test, appliance inspection, and over 40 high-quality photos.

    4. Water Damage

    Water damage is one key issue to look for while inspecting a used RV, which can damage everything from cabinets and furnishings to the ceiling, walls, and floor. Rot, rust, and mold may not be immediately apparent, but can be expensive and time-consuming to remove and repair, so keep a critical eye out for spots, discoloration, bubbles in paneling, unpleasant smells, and other signs of water damage.

    5. Good Bones

    As someone looking to renovate a used RV, you’re likely prepared to clean up its appearance and basic functionality with new paint, furnishings, appliances, and even tires. Maybe you have the skills needed to make engine, electric, and plumbing repairs. But are you ready to replace the RV frame, ceiling, walls, floors, axles, and so on? The fine line between fixer upper and lost cause is often the condition of the most basic components of the vehicle. At a minimum when inspecting the RV, you need to make sure that the unit has good bones that provide a strong foundation to begin your renovation project.

    6. How to Contact the Seller

    In most markets, there are more interested buyers than there are RVs for-sale, which means that sellers are receiving multiple inquiries every day and will likely sell the unit very quickly. If you find the perfect fixer upper, you need to know how to immediately contact them so you can stop by to inspect the used RV and maybe even write them a check that very day. Review the listing to find the seller’s contact information, including their phone number, address, email, and/or available hours.

    7. Transportation Options

    If you purchase an RV, do you know how to get it back to your driveway? If the fixer upper isn’t road-worthy, you’ll need to find a way to haul it or hire an auto delivery service. If the used RV can be safely driven, you’ll need to get your personal vehicle back home, either by having a friend drive it or hauling it behind the RV. You can also ask the seller if they provide delivery service that will bring the RV right to you.


    If you’re hopping onto the RV renovation trend, there are some key things to look for when shopping for fixer upper RVs. For similar advice, review the RV Renovations resource page, which offers a series of detailed articles, checklists, and videos. And if you’re ready to start shopping for a used RV, check out the nationwide inventory available on RVTrader.com.

  • 8 RV Renovation Tips for Beginners

    8 RV Renovation Tips for Beginners

    You want to renovate your RV, but you don’t know where to start, right? Customizing and fixing up an RV offers nearly endless options, which may seem intimidating at first. The end result will be well-worth it, but without preparation, the remodel process can be full of missteps and unforeseen expenses. Before you start picking out paint samples, get a plan in place with RV Trader’s eight renovation tips for beginners.

    1. Know Your Budget

    Start your remodel journey by planning your finances. Decide how much you’re willing to spend on this process. While it’s always efficient to use a professional contractor, doing the renovations yourself keeps you in control of your money since you decide which supplies to use and you won’t have to pay yourself for labor costs. Don’t forget to leave room in your budget for any unexpected costs along the way. And if you don’t have your entire budget up front, don’t worry. The long renovation process will likely give you time to continue saving for each expenditure along the way.

    2. Assess the Condition of Your RV

    Before you start planning your dream redesign, make a quick assessment of your camper. If you’re purchasing an RV specifically to renovate, check the condition of the appliances, windows, tires, water systems, and electrical. You’ll also want to keep an eye out for engine problems, water damage, and frame damage. If you find an issue with your camper after you buy it, get it fixed before starting your renovation.

    3. Decide What You Can DIY

    Renovations can range anywhere from a complete gut job to simpler aesthetic touch ups, requiring different resources and skill levels. If you decide to go the DIY route and not use a professional, it’s best to do a renovation that allows you to work with your RV’s existing structural, electrical, plumbing, and mechanical systems. You know how much you can take on. If a project becomes too much, reach out for help.

    4. Have a Realistic Timeline

    Remodeling your camper will likely take longer than you expect. Knowing and preparing for this in advance can help you avoid future frustrations. Replacing light fixtures can take a few hours, but painting, building shelves and tables, and installing new appliances can be much more time consuming. If you live in your RV full-time, make a plan for where you’ll stay during parts of your renovation. Remember, you can’t tackle all of your ideas at the same time, so keep in mind how long each project will take before you start a new one.

    5. Figure Out Where to Shop

    Shopping doesn’t have to break the bank, especially when you plan ahead. Define your decorating style, whether it’s modern, rustic, or industrial, and shop retailers that have the widest selection. Shopping at just a few intentionally selected stores, instead of running around to a bunch, will save time that can be spent on designing and renovating. Accessories and fixtures specifically for RVs can cost more than they do for homes, so shop around and price compare to get the quality and style you want at a lower price. Popular household furnishing stores also have lightweight furniture that’s perfect for RVs. 

    6. Make a List of What You’ll Need

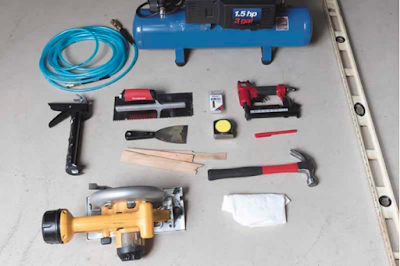
    As you plan your projects, make a list of the tools, fabrics, paints, and furnishings you’ll need for your remodel and the quantity you’ll need. Power tools like drill sets can add to your budget, so rent or borrow them when possible. Buy extra renovation essentials like painter’s tape, paper or plastic covers, and sanding paper. These can go quicker than you think so it’s always best to have more on hand.

    7. Measure Everything

    Measuring your RV is a critical step in determining the full scope of your project. Use a measuring tape and go room to room to get the dimensions of your camper. Measure once then do it again to make sure all the sizing is correct before you buy anything. Make a note of where switches and outlets are located to avoid blocking them with any new furniture. Don’t forget to also measure the height and width of your RV door to ensure that you can fit your purchases through the opening.

    8. Connect with Other RV Renovators

    Online forums and Facebook groups are a great way to connect with other people who have renovated their campers. Share your remodeling projects, ask for advice, and get ideas from other RV renovators. Follow DIYers on social media for even more designs and tips. What you see from someone else could spark inspiration for your project.


    Now that you have an idea of how to start, get ready to design and remodel your rig. Putting a plan in place early on can make your RV renovation process easier and help keep you on budget. Before you know it, you’ll be on your way across the country in your chic, updated camper. For similar advice, review the RV Renovations resource page, which offers a series of detailed articles, checklists, and videos.

  • Vintage Trailer & RV Restoration Hazards

    Vintage Trailer & RV Restoration Hazards

    Traveling in an RV or with a travel trailer can be a great experience. It’s a great way to cover a lot of ground and have a comfortable place to stay after hiking, getting out on the lake, or just enjoying the serenity of your campsite.

    Brand new RVs and travel trailers can cost a fortune, and can depreciate quickly. This is why many travel and camping enthusiasts are instead restoring old RVs and camper trailers to enjoy their ventures. Not only do vintage RVs and travel trailers often cost a fraction of the price, they’re also packed with charm and style. In addition, restoring old campers is an excellent way to customize it with an interior of your choice. Before you get started on your restoration, though, there are some hazards to consider.

    Tires, Bearings, Brakes, and Driveline

    When buying an older RV or camper trailer you should always bring someone along who can inspect the mechanical components. For RVs, this is especially important since you’re buying a vehicle, not just a camper. You should always inspect the frame, tires, axles, and bearings. It’s pertinent to make sure the tires and bearings are in good shape before moving the trailer or RV very far.

    Tires & Bearings

    If grease seals have failed, bearings can overheat in a matter of minutes, causing your tires to stop rotating. This shouldn’t need an explanation, but once a tire wears unevenly they must be changed. Driving on a worn tire could lead to a blowout. If they’ve sat in the same place for an extended period of time, tires can easily succumb to dry rot creating unsafe driving conditions that could be catastrophic at highway speeds.

    Brakes & Driveline

    The brakes and driveline should be inspected prior to purchase. For RVs, U-joints should be inspected and replaced if any play is found. U-joint failure can compromise the driveshaft and leave you stranded. If brakes are worn or not in working order, a heavy RV can be very dangerous to drive. Travel trailers weighing more than 3500 lbs are often equipped with drum brakes that should be inspected as well. Brake pads and linings were often made with asbestos, and precautions should be taken if you plan to perform the work yourself. Transmission gaskets and clutch plates were made with asbestos as well. If your RV requires a new clutch or brakes, it may be best to leave it to a professional if the RV or trailer was made before the 1980s.

    Many automotive parts and building materials utilized asbestos before the partial ban in 1987 because it was inexpensive, heat resistant, and strong. When airborne, asbestos containing dust can become trapped in the linings of the lungs, causing pleural mesothelioma. Too often, the presence of asbestos in older vehicles is overlooked before undergoing a restoration process. Exposure to asbestos should not be taken lightly as a staggering 12,000-15,000 people die from asbestos-related diseases each year in the United States.

    Interior Restoration

    The interior restoration of vintage travel trailers and RVs is the most exciting part of bringing an old camper back to life. Redoing the interior allows you to customize the space any way you’d like and it also gives you the opportunity to check for water damage and leaks as well as install better insulation. This is also a good time to inspect the electrical system and components, propane hoses, and plumbing. Ensuring these items are in usable condition and updating insulation for a higher R-value will make your camping experience more comfortable and enjoyable.

    The Demolition

    Before tearing out the old interior of your vintage RV or camper trailer, you should be aware that some of these parts could contain asbestos. Commonly used in vinyl tile and adhesives to add strength, these items should be removed with caution. If possible, you can leave vinyl tile in place and go over top of the material with your new flooring or backsplash. However, on some campers, the subfloor itself may need to be replaced or you may want to redo the insulation underneath.

    If you do remove the vinyl tile and its adhesive, you should wear a respirator that fits well, a dust mask from the hardware store won’t protect you against exposure. You should also wear a Tyvek suit or clothing that can be hosed down or discarded with the tiling. Remove the clothing immediately after leaving the demo area. Don’t go inside before thoroughly washing your hands and showering. There are many resources available on how to safely remove asbestos, but if you don’t have the capabilities to do so, you may want to hire a professional for the demolition.

    Old insulation could also pose a threat, as loose-fill insulation of times past often contained asbestos. Most of the time, however, travel trailers and RVs used a batt style insulation instead of loose-fill. You should still proceed cautiously and inspect the insulation for asbestos contamination. If you’re not sure how to identify asbestos, there are many abatement professionals that will test materials that have the potential of containing asbestos.

    Inspecting Old Components

    Now that you’ve demoed the walls, floor, and safely removed old insulation, it’s imperative that you inspect all electrical lines, gas hoses, and plumbing. If you’re not familiar with what these components should look like, this is another opportunity to hire a professional. Many DIY’s don’t want to pay the professional price, but doing so for electrical, plumbing, and gas can save you countless hours, and eliminate the potential for serious failures down the road.

    If propane or plumbing lines have become dry rotted or have been tampered with by animals while sitting, a tiny leak could become disastrous. Damaged plumbing lines could ruin all the hard work you put into redoing the interior, especially if that leak is in a line for grey or black water. All plumbing hoses and holding tanks should be thoroughly inspected and replaced if damaged. Often, a do-it-yourselfer can undertake minor plumbing. Propane repairs, however, should be performed by a professional, as a propane leak can lead to a buildup of gas in your camper. Not only can propane cause serious harm to the body if inhaled, it can also lead to an explosion. A propane leak detector should be installed as low as possible, as propane is heavier than air.

    Electrical wiring and components should also be inspected. Electrical faults are one of the main causes of fires in camper trailers and RVs. Electrical wiring can become dry and brittle with age, causing the wire insulation to crack—exposing bare metal. Should two bare wires come into contact with one another, a spark can occur and potentially ignite a fire. Electrical systems should be inspected and installed by a professional as well. This can save you wasted time and provide peace of mind that you don’t have an unknown fire hazard.


    Restoring a vintage camper trailer or RV can be rewarding in many ways. It will certainly bring years of enjoyment and adventure. It can also help you to build or hone in skills that you’ll find useful for many other projects. With all the benefits it can provide, you should never take shortcuts or compromise your safety in the process. As eager as you’ll be to get out on the open road, it’s vital to tackle every step with diligence and thorough knowledge so that you won’t be left stranded, injured, or unhealthy along your journey.

    Ready to find a vintage RV of your own? Start your search on RV Trader today.

  • How To Customize Your RV To Be More Energy Efficient

    How To Customize Your RV To Be More Energy Efficient

    RVs provide an excellent means of cost-effective travel. Whether you are living in your RV or taking your recreational vehicle out for an adventure, energy efficiency is a must.

    With optimization in mind, we bring you some of the best tips and tricks on how to retrofit your RV to maximize energy efficiency on the road.

    Before Customizing

    Before we jump into the physical alterations we can make to our RVs; we should consider all the things we can do to optimize our energy usage beforehand. Taking these factors into consideration, we begin to improve the baseline energy efficiency of our RVs.

    Creating a Schedule for Routine Maintenance

    RV upkeep and maintenance go hand in hand with energy-efficient travel. RV fuel efficiency is dependent upon regular maintenance, and the absence of regularly scheduled check-ups can lead to large tabs at the pump.

    Make use of apps like the free RV Owner App that allows you to keep track of your RV’s last tune-up and stay on top of your next recommended service appointment.

    Checking Tire Pressure

    Did you know that a tire in good condition can lose one to two pounds of pressure every month? Studies show that almost half of RV owners go an average of up to six months without checking their tire pressure.

    Low tire pressure will not only reduce the number of miles you get for the gallon but also put you and all of your passengers at risk of a dangerous tire blowout. Make sure to check your tire pressure regularly and do your best to distribute RV weight evenly between all four tires so that you do not put any undue strain on one tire over the others.

    Optimizing Heating and Insulation

    One of the best ways to increase energy efficiency is to make sure that your RV is well insulated. Keeping an RV cool in the summer and warm in the winter can be difficult when your RV is not adequately sealed and insulated.

    Here are some easy ways to address potential issues with heating and insulation.

    • Sealing Vents and Windows – Rather than letting your air conditioning or heating seep out of your RV, take the time to seal up any vents or windows to increase overall energy efficiency. You can use EternaBond Roof Repair Tape to seal the seams of your vents and windows, ensuring that your RV is impervious to the elements.You can also consider installing double pane glass windows and glazing them to reduce any heat or cold coming into or escaping out of your RV. Adding a digital thermostat to your RV’s central air system will allow you to control the temperature of your ride down to the degree.
    • Insulating Water Pipes – RVs use a lot of energy, heating your water supply. Consider how much energy you might be wasting pumping hot water through tubing that is not adequately insulated. By adding a layer of pipe wrap or insulation to the lines that get your water from the heater to the faucet, you can cut down on the time and energy your RV would otherwise exhaust. Consider purchasing a solar shower for the summer months to eliminate any unnecessary water waste and energy usage.

    Optimizing Electrical Utility

    RVs use a lot of electricity, but savvy travelers will always find ways to reduce and eliminate unnecessary electrical costs. Consider turning off your power inverter while on shorter trips or utilizing alternative power supplies to get all the juice you need for your gadgets.

    Installing Solar Panels

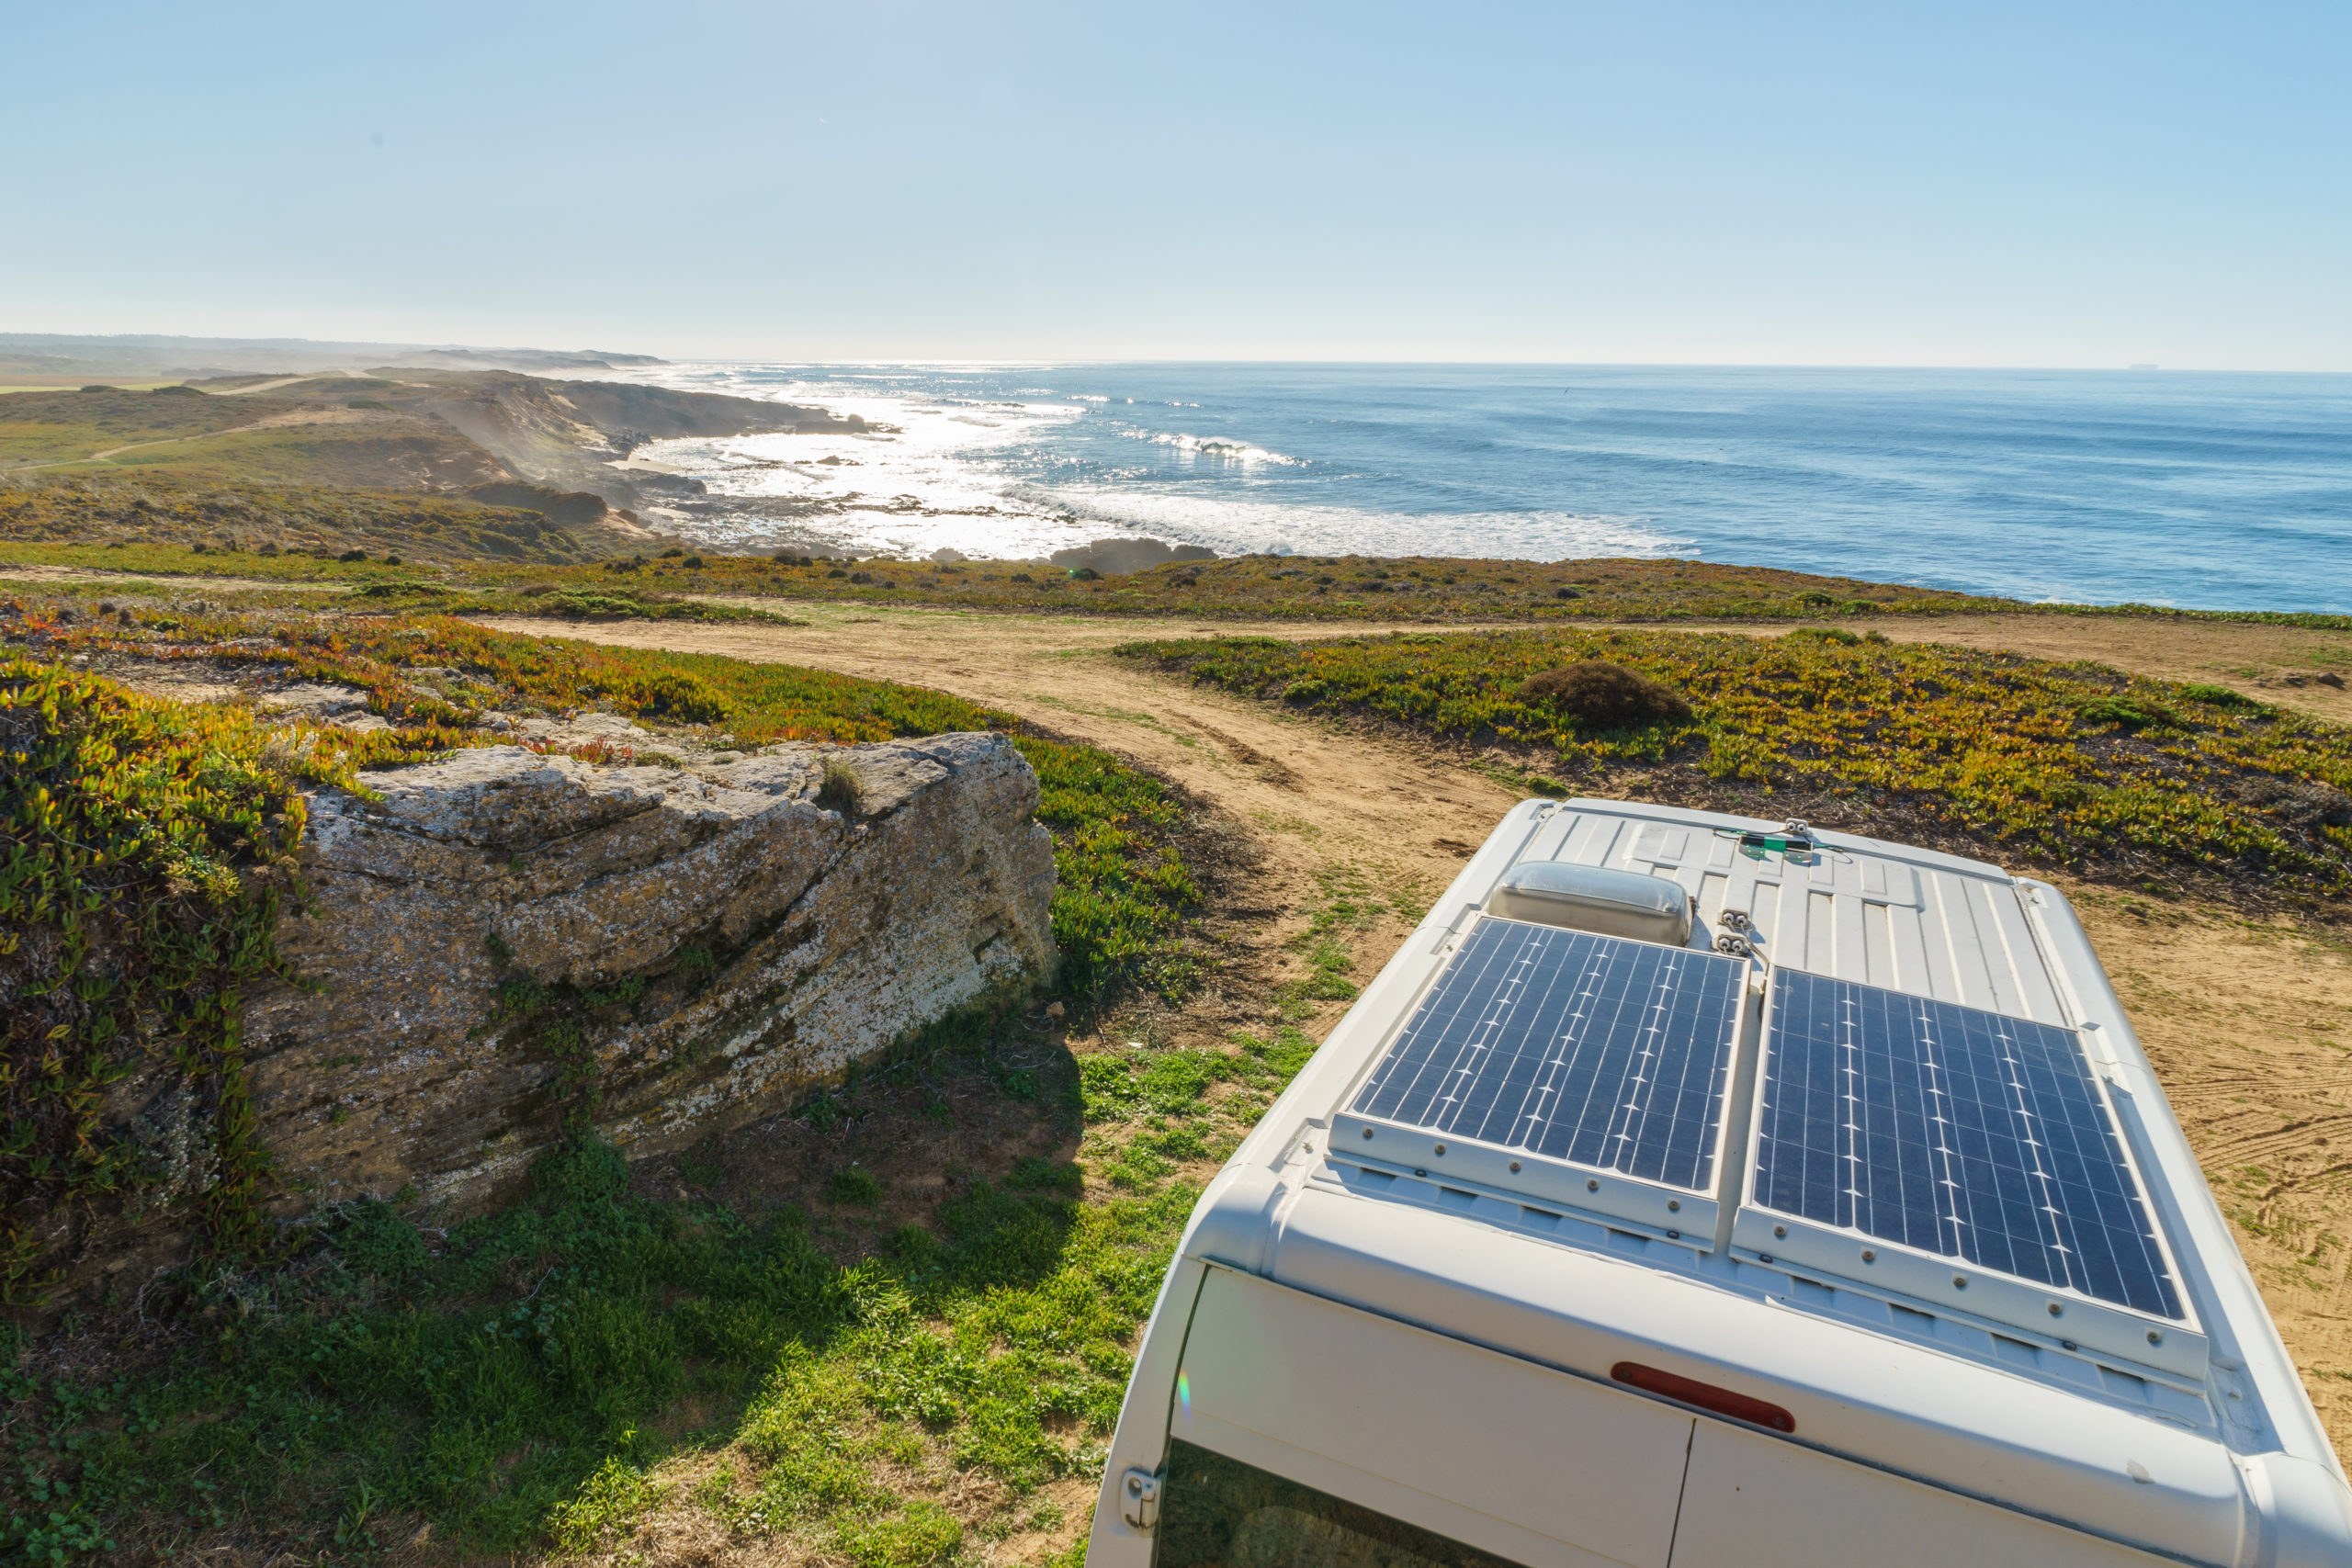
    One of the best ways to customize your RV for optimal energy efficiency is by installing solar panel roofing. You might not always have access to a direct power source, and solar panels will allow you to take your RV anywhere that has a decent amount of sunlight. Solar panel installation may seem costly and confusing at first glance.

    When you consider the amount of electricity and generator fuel, you would otherwise spend powering your RV, you may realize that solar panels are just the thing you need for your next getaway. Link your solar panels up to backup batteries and turn that passive solar gain into a constant source of power.

    Final Thoughts

    There is no end to the number of cost-effective alterations that you can make on your RV. We have gone into just a few of the ways that you can customize your RV to be more energy-efficient, and most of the methods are cost-effective and easy to do on your own.


    Browse for a newer more energy-efficient RV here
    .

  • RV Renovations: Updating RV Light Fixtures

    RV Renovations: Updating RV Light Fixtures

    When renovating your RV interior, there are so many projects that you can tackle to update and revamp your space. And considering most of us have a bit of extra time on our hands, now is a great time to tackle any renovations or updates you’ve been wanting to make. Each of these projects ranges in difficulty, with some being fairly easy and others being trickier. As you begin to complete each task, your RV will start to look more and more modern over time. If you want your RV to look truly modern and like a traditional home, it could be a great idea to replace your current light fixtures with newer ones.
    Many RV light fixtures are made of plastic and tend to look cheap and outdated. Most are covered in cloudy globes, tacky patterns, and brassy metal colors. Replacing these with chic, modern fixtures will transform the entire look of your space and bring it into the current era. Although replacing your lighting sounds like a difficult project, it is totally possible to do yourself if you plan ahead, move slowly and carefully, and follow this simple set of instructions.

     
    Disclaimer: Before we begin, please note that we are not electricians, and any electrical work you complete yourself should always be examined by a professional before repeated use. All electrical projects are considered dangerous and should be handled and completed with care. If you are not comfortable with tackling this project yourself, an electrical contractor could easily accomplish this for you. Now that you know the risks, let’s dive in.


    1. Gather your materials

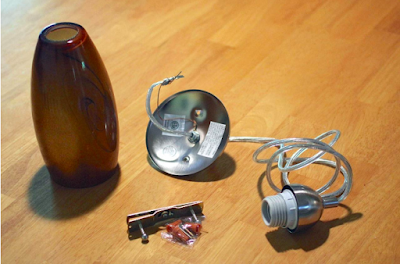
    This tutorial assumes that your lighting is wired for DC power, which is the case for almost all RVs. Finding DC light fixtures that look modern and cost a reasonable price tends to be difficult. For this reason, many RVers purchase and install AC light fixtures that are made for traditional homes. This requires some additional wiring but is totally doable.

    When collecting your materials, purchase your favorite AC light fixtures in whichever style you are decorating your RV. Then, purchase DC light bulbs that will fit those fixtures. These can be found in a variety of home goods stores, online RV catalogs, or even on Amazon. Once you have your materials, you are ready to begin.

    2. Disconnect your house batteries and all other power sources

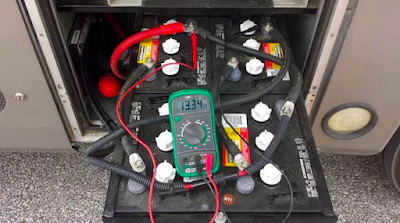
    Start by disconnecting your house batteries that power your RV and anything else that connects it to power. Unplug from shore power, and double-check that nothing is switched on. This step is absolutely essential to keep you safe while you are completing this project.


    3. Remove the existing DC light fixture that you will be replacing

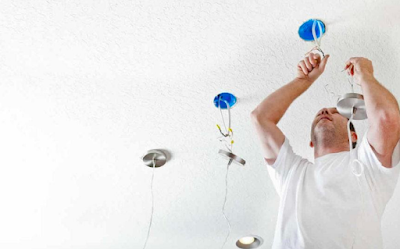
    RV light fixtures are typically mounted with a couple of screws, so removing your old fixtures with a screwdriver should be fairly simple. Once you have unscrewed them, they will likely just be hanging on by their wiring.
    Credit: DIY Network

    4. Remove any fittings on the DC lines that were connected to the old fixture

    Next, you will need to disconnect the old light fixture. Disconnect all the lines, and remove any fittings that were part of the old fixture. This is important in preparing to install the new fixtures.
    Credit: John Moore Services

    5. Strip back the wire insulation

    Using a sharp tool, strip back the insulation on the wiring that will connect your new light fixtures. This is necessary to connect the new fixtures to your current RV electrical system.

    6. Connect the lighting

    Next, you will need to connect the positive and negative DC lines to the white and black “AC” lines of the new fixture using whatever fittings you like. This is best completed using wire nuts. The DC socket light bulbs only tend to work when wired one way, contrary to simpler DC bulbs, due to their transformer. Therefore, it is a good idea to connect everything, then turn the power back on and check that the bulb is lighting before fully installing the new fixtures.

    Credit: @wheres.mal.now

    7. Add on/off switches

    This is an optional step, but completing it will make your lighting situation much simpler. Many older DC light fixtures have on/off switches built into them. The new AC fixtures may not have on/off switches, so it is a good idea to retrofit switches into them. You can accomplish this by removing the switches from the old DC fixtures and installing those in the AC fixtures.

    If reusing your old switches is not possible in your situation, you should be able to pick up small, simple switches at your local hardware store. These newer switches will just need to be installed inline on one side of the power feed. Typically, the negative line is used. Simply wire the negative line through the new switch, and you will have an on/off feature for your new light fixture.

    8. Finish mounting the new fixture

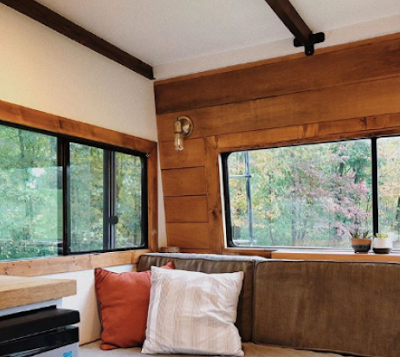
    Once your new lights are wired in, the hard part is over. It is imperative that you double-check that the power is properly connected and the switches are in good working order before moving on to install the light fixtures. Since your new light fixtures are likely very different from your old ones, you may need to drill new holes to affix them to their new positions. If the new fixtures do not cover over the holes from the old fixtures, you may need to fill in the old holes with putty, and sand and paint over them. This step will look different for everyone, so just be sure your new lighting is properly mounting before moving on to your final steps.
    Credit: @wheres.mal.now

    9. Install the DC bulb and enjoy!

    Once your lighting is hardwired and installed, all that’s left is to install your new DC light bulb. Make sure the new bulb is screwed in tightly, and then flip your power back on, and turn on your lights. Then, sit back and admire your hard work and your newly-modernized RV lighting.

    Installing new lighting fixtures in your RV is fairly simple if you have any sort of prior electrical experience. Even without prior experience, beginners should be able to complete this project by closely following these steps. Again, do not attempt this if you are not confident in your abilities, as any electrical professional could easily complete this if you gather the correct tools tools for them. Once your new lighting is installed, you are ready to move on to the next project: making over your cab area. Stay tuned for the next update!

     
    Have you updated your RV interior’s light fixtures? What process and methods did you use? Feel free to share in the comments below!
  • RV Renovations: Renovating a Dinette

    RV Renovations: Renovating a Dinette

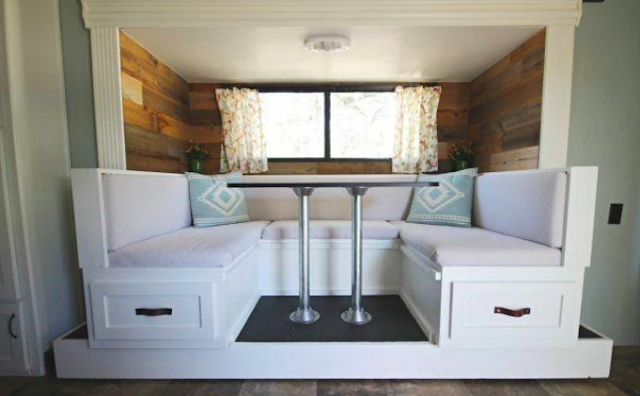
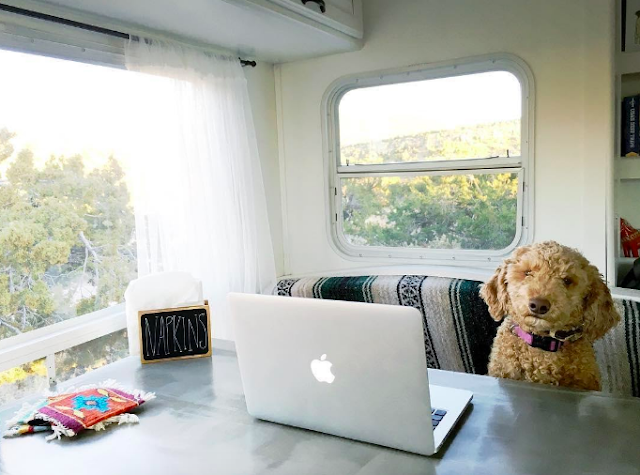
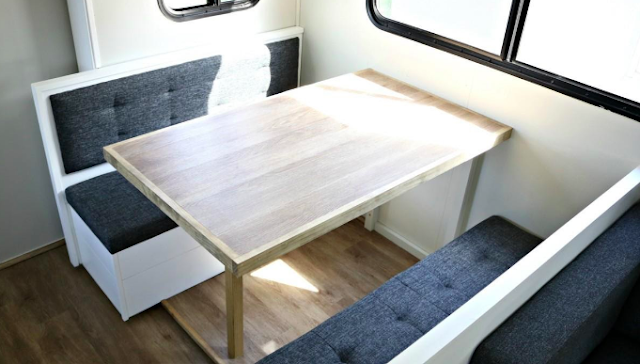
    In an RV, a dinette is one of the most useful and functional spaces you will find. For many people, this centrally-located space can be used as a kitchen table, a desk or office space, a craft center, or even somewhere to hang out and watch movies and relax. Dinettes can come as a booth with two benches or as a table with four chairs and vary in size, shape, and color. However, in some older RVs, dinette areas tend to be a bit outdated. Often, they are covered in tacky fabrics, dark woods, and textured wallpapers, and, for some people, this can be a bit of a disappointment when they are considering a purchase. Yet, with some simple changes, you can easily transform your dinette space into an area that you will enjoy utilizing for years to come. Follow along to learn some simple tips for updating and modernizing your RV’s dinette cushions, updating your table, and decorating tips.

    Credit: Domestic Imperfection

    Updating Your Dinette’s Cushions

    Your very first step in your makeover should be to recover your dinette’s cushions. This will make the biggest overall difference to the dinette space and can provide inspiration for the later steps. If your RV’s dinette is a table and chairs (instead of a booth with cushioned benches), then simply skip this step and move on to the next post, where we will discuss updating your table and decorating your dinette space.

    There are three methods you can use to update your dinette’s cushions, as detailed below.

    Credit: @188sqft

    1. Buy New Cushions or Cushion Covers

    While different RV dinettes are often made with different sized cushions, there are typically a few different sizes in production. Often, manufacturers will sell either entire cushions (the foam plus the cover) or just the covers. In the second case, you would need to remove your current cushion covers from your dinette cushions and keep the foam for the new covers. If your cushions’ foam is dingy or overly worn, you can always purchase new foam for the cushions from a local craft store, using exact measurements from your older cushions.

    Measure your dinette cushions’ height, length and width, and search online for RV cushions. These can often be found on Amazon, eBay, and several different RV supply companies. Keep in mind that you will typically only find solid colors and patterns, and these cannot be customized. Prices will vary depending on the source, so be sure to thoroughly search for the best cushions and best overall deal before making your purchase. This option is not the most customizable, but it certainly entails the least amount of work and the quickest results.

    2. Have Your Cushions Reupholstered Professionally

    This choice is likely the priciest, but it allows the RV owner more options for customization. Utilizing a professional also tends to yield the best overall results. Find a local seamstress or someone who specializes in furniture reupholstery and is up for the task. In some cases, you must purchase your own fabric, but in other cases, the seamstress can often provide you with fabric from their collection, as well. Keep in mind that this option tends to be very pricey. However, if you have an ideal image in mind for how you want your cushions to look, as well as the necessary resources and a great local seamstress, then this option is the best one for you.

    Credit: Sawdust 2 Stitches

    3. Recover Your Cushions Yourself (DIY)

    For those with a crafty side, this option is fun, inexpensive, and can also allow you many different possibilities. There are a few different options available for recovering your own dinette cushions, and your skillset and sewing abilities will determine which option you choose. If you have a sewing machine and are up for a challenge, you can follow a tutorial to make your own zip-on cushions at home. These covers can be removed for easy cleaning anytime and will look beautiful and professionally-made if done correctly.

    For those with a crafty side but fewer sewing skills, there is another simpler method that will turn out just as beautiful with less work and fewer supplies. To cover your cushions using the no-sew method, you will first need to gather your materials. These include a staple gun and plenty of industrial staples, your fabric of choice, and plywood cut to size for each cushion.

    Fabric can be purchased at your local fabric store. Outdoor fabric comes highly recommended, as it is the most durable and easiest to clean. Be sure to purchase more fabric than you need in case of mishaps or inaccurate measurements. When choosing your fabric, keep the overall color scheme and theme of your RV in mind, and be sure to choose a fabric that will match or coordinate nicely. Remember that these cushions are a large piece of your overall space, and choosing a louder or busier fabric could make the space look a bit chaotic. If you choose a simpler fabric, you can always decorate with brighter throw pillows and wall hangings later on.

    The plywood can be purchased from your local hardware store. You will need one piece for each cushion (four pieces total for four cushions). Each piece of plywood should be one inch shorter than your cushion foam in both length and width. Once you have your supplies, you are ready to begin. Follow the steps below for a quick and easy process to recover your cushions without sewing:

    • Lay the plywood out flat, and place the corresponding foam cushion on top of the plywood.
    • Place your fabric over the cushion and plywood.
    • Cut the fabric to size, leaving a minimum of 16-18” extra on each side.
    • Wrap the cushion very tightly (like a present), and use clamps to hold the fabric in place.
    • Flip the cushion over, and staple the fabric directly to the plywood. Use lots of staples to ensure a better hold.
    • That’s it!

    Of the above methods, whichever you choose is sure to look beautiful and bring a more modern and homey vibe to the overall space. Once your dinette cushions are updated, you can move on to makeover your table and decorating the space.

    Follow along for ideas on how to finish up making over your RV’s dinette area.

    Update Your Table

    RV tables come in a variety of shapes and sizes. If you are wanting to update your table, there is no shortage of things you could try. Each of these possibilities yields beautiful results that will have you excited to enjoy a meal at your new table.

    1. Paint + Epoxy

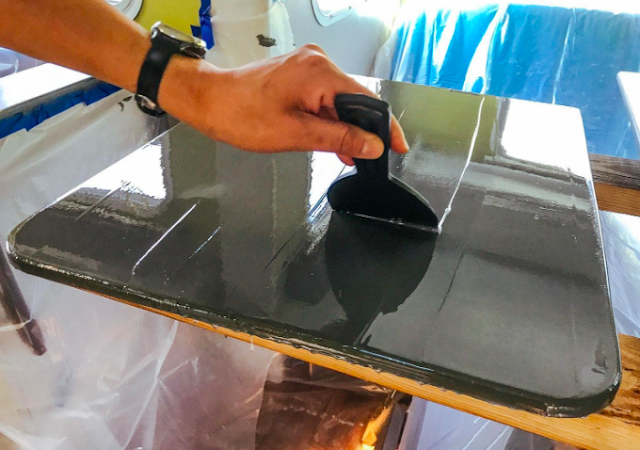
    This option is rather simple in theory but requires plenty of prep work and dry time. It involves painting your table in the same way that you would paint a wall or cabinets, but then adding an epoxy layer over top to seal it and protect it for long-term use. For those who use this method, you must first prep the table by sanding it down to allow the paint to adhere properly. Then you must clean thoroughly before painting. Paint two to three coats, allowing a minimum of twenty-four hours dry time in between each coat. Some people paint one solid color, but others may choose to paint a design into the table or even try a faux marble or wood-look painting style. Once you have painted, you are ready for epoxy.

    Epoxy is a bit difficult to work with and must be poured slowly and leveled before it begins to dry. Follow along with a more detailed tutorial for more ideas on how to use this method on your RV’s table surface.

    Credit: @livesmallridefree

    2. Laminate Countertop Recovering Kit

    If you RV’s table is laminate, this may be a great option for you. Prep work involves sanding and cleaning, as with the previous method. Then, you can use a thick paint to cover the table before applying small paint chips to cover the surface. Next, you must use a sealant to protect the surfaces and ensure your hard work will last. This method is fairly simple and can be completed in just a few days. Kits can be purchased online or at hardware stores and come with all the tools you need for this project.

    3. Butcher Block or Wood

    Butcher block and wooden tables look beautiful in a traditional home, so why not try them out in an RV? For this method, you would need to remove your previous table entirely and build a new one. You can find a variety of woods at hardware stores or through online retailers. You must affix the new wood to the old table post securely. Be sure to seal the wood with a food-safe sealant before finalizing the project.

    Credit: @188sqft

    4. Peel-and-Stick Countertop Covers

    This method is also quite popular and holds up quite well, surprisingly. You can find peel-and-stick materials made for countertops at some hardware stores or through a variety of online retailers. They can come in wood-look, marble-look, granite-look, quartz-look, and more. These are cost-effective, lightweight, and simple to install. Simply clean your table well, and press the cover onto the table, starting at one end and working your way over to the next. Use a credit card to press out all the air bubbles, and cut the cover to size.

    5. Cover in Metal

    This method is very artsy and will leave your space with a bit of an industrial look. Thin sheet metal can be purchased at hardware stores and hammered around the edges of the table to cover over the old surface. You must nail the metal into the bottom of the table to ensure longevity.

    Credit: @ourvieadventures

    6. Cover in Leather

    Similar to covering your table in metal, you can also cover your table in leather fabric. The fabric can be purchased at your local fabric store ad comes in a variety of colors. Simply cut it to size, and wrap it around your table. Use fabric glue or to adhere the leather to the table, or nail it to the bottom of the table depending on your preference.

    7. Build Something Custom

    If none of these previous options suit you, you can always build something custom. With this method, options are endless, and you can end up with exactly the look you want. This is great for those who maybe don’t have a dedicated dinette space and want to add one in, or for those who are looking for something a bit more non-traditional. Whatever you try, be sure to keep your RV’s overall weight in mind and always seal with a food-safe sealant before finalizing your project.

    Credit: @slowcarfasthome

    8. Buy a Table

    This option was saved for last because it is often difficult to find an RV-sized table in stores. However, if you shop around, you may be able to find something you like that is professionally-made and of good quality. Be sure to anchor the table to the ground to ensure it does not slide around during travel.

    Finish off your dinette space by decorating the area. Consider adding a plant or two to the table to make it feel more homey. Add candles for a seasonal ambiance. Hang some curtains for additional personality. Hang your favorite photo or piece of art on the wall to make it more personal. Add a few throw pillows to make the dinette comfier. This part is where your personality will really shine through, so be sure to add in items that make you happy and add character to the space. And remember, in a small home, less is often more.

    Renovating your dinette area is a challenging, yet rather rewarding process that will yield beautiful results and add plenty of personality to your overall space. Updating your table and decorating will add brightness and cheer to your space, leaving you even more excited to take your RV on trips all over the country. Be sure to consider these ideas for a brand-new dinette area that your whole family will love and enjoy.

    Have you recovered your RV’s dinette cushions or updated your table? Which method did you choose? Feel free to let us know in the comments below!

    Renovating not for you? That’s okay. Check out some of the latest RVs on RV Trader.
  • RV Renovations: Replacing Your RV’s Furniture

    RV Renovations: Replacing Your RV’s Furniture

    Renovating your RV’s interior is an excellent way to modernize the space and make it your own. The list of potential RV projects is endless, and, with each individual improvement, you are sure to add more character and personality to your space. When renovating your RV, it’s important to complete each task entirely before moving on to the next one.

    Once these more technical projects are complete, you will be ready to begin the more aesthetic projects. Once such aesthetic project is replacing the (often) dark, outdated RV furniture with brighter, more modern furniture that you would typically find in a more traditional home. This project will add a final layer of completion to your RV, while making it feel more like a real home away from home. Read on for a full tutorial on how to replace your RV’s furniture and bring a more modern vibe to your space.


    1. Measure current furniture

    Start by measuring your current RV furniture to know what will fit in your space. This typically includes your couch(es), reclining chairs, and maybe even your dinette table and chairs if you also wish to replace those. Be sure to measure the length, width, and height of each piece of furniture.

    Keep in mind that the height and width of the new furniture you choose do not necessarily need to be the exact same as the previous furniture. However, additional width will extend into your living quarters, occupying precious floor space. Additional height is not an issue, as long as the new furniture is not covering part of your windows. Be sure to record your measurements somewhere once you have them.

    Credit: @188sqft

    2. Remove old furniture

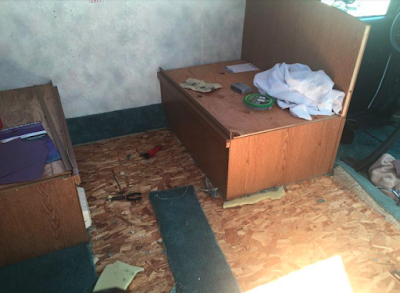
    After you have measured your old furniture, you must remove it before you can install new furniture. Removing the old furniture may be fairly simple, but it may be a bit more difficult, depending on the size of your front door. First, you will need to unbolt the furniture from the floor. Next, you will need to have someone help you carry it out of the RV. Since most RV furniture is assembled inside the RV, there is a good chance it will not be able to fit through the door in one singular piece. If this is the case, you must disassemble the furniture before removing it from your RV. Once the old furniture has been removed, you are ready to begin shopping for new furniture.

    3. Shop around, select furniture

    This is perhaps the most important step in replacing your RV’s furniture. There are a number of places where you can find RV-friendly furniture. IKEA has a great line of furniture optimized for small spaces, and many traditional furniture stores also tend to have furniture geared towards those with less space to work with.
     
    When replacing your RV’s old couch, many people opt for a futon. These are perfect for RVs because they double as a bed when you have guests or additional family members who need somewhere to sleep. Most RV couches are sleeper sofas, so it is helpful for both your future trip planning and resale value to replace your old couch with a new one that also serves as a bed. Just be sure to find one that fits into your space well. In addition, be sure to find a new couch that compliments the color scheme of your new space. Many people tend to stick with more neutral tones, as these are more subtle and can easily be decorated with brightly-colored throw pillows and blankets. However, if that bright green couch is calling your name and you feel that your space can handle such a bold choice, then go for it. Just be sure to compensate for the statement piece with simpler pillows and decor.
     
    If you are updating your RV’s reclining chair, there are a number of new pieces of furniture that will work well as a replacement. You could replace the old recliner with a new one, or you could replace it with a simpler accent chair. If you choose either of these options, be sure to choose a chair that appropriately coordinates with the new couch and the rest of your space, as well.
     
    If you are not wanting to add another recliner or accent chair to your space, you could consider installing a small bookshelf, an ottoman, a bench, or an accent table in place of your recliner. The options are endless, and all that really matters is that your new piece fits into your space and coordinates well with the rest of your decor and colors.
    Finally, you must choose a new dinette set-up if you are replacing your eating area. The most typical replacement is with a table and chairs, but there are a number of other options that will work Be sure to measure everything to make sure it will fit before purchasing it and bringing it home.

    Credit: @188sqft

    4. Assemble new furniture

    Once you have your new furniture, you must bring it inside your RV and assemble it. Simply follow the exact instructions on the packaging, and put your furniture together. Once it has been put together, slide it into whatever place you have chosen for it to reside.
    5. Anchor new furniture

    Lastly, before you take your new furniture for a spin, you must anchor it to the RV floor and/or walls. This will ensure that you can safely move down the road without your furniture sliding all over the place. You can bolt new couches, accent chairs, tables and bookshelves to the floor fairly easily. Kitchen chairs may be a bit more difficult, as these slide in and out when you are sitting or standing. In this case, you can install a hooking system where the chairs can temporarily attach to the table to keep them in place when you are in transit. Whatever method you choose to anchor your new furniture, be sure to double check that it is secured safely before you take it out on the road.

    Adding new furniture to your RV space is one of the final steps to bringing the RV into the modern century. New furniture vastly changes the overall look of the space and adds so much character and personality. Once you have your new furniture installed, you are ready to begin decorating. Stay tuned for our next installment to learn how to put the final finishing touches on your new RV interior.

    Have you installed new furniture in your RV? What process and methods did you use? Feel free to share in the comments below!

  • RV Renovations: Backsplash Installation

    RV Renovations: Backsplash Installation

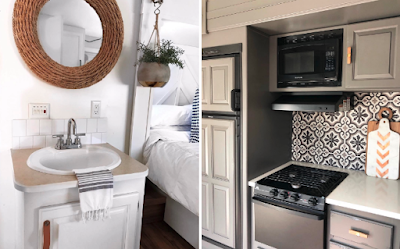
    Renovating an RV is an incredibly demanding yet rewarding process. Many people want to enjoy the RV lifestyle but are turned off by older, outdated interiors. For them, remodeling has become a way to create the homey and personalized space of their dreams in a home on wheels. Previously, we discussed the first two steps in the renovation process: painting and adding in new flooring. Once you have completed these two steps, you will be ready to move onto the next step: adding in a backsplash (or two!).

    Adding a backsplash into a moving home is a bit of a tricky process, but if you follow the right steps, you should have excellent results. Stick to the following six steps for RV backsplash results that will last for years to come.

    1. Determine where you want backsplash and placement

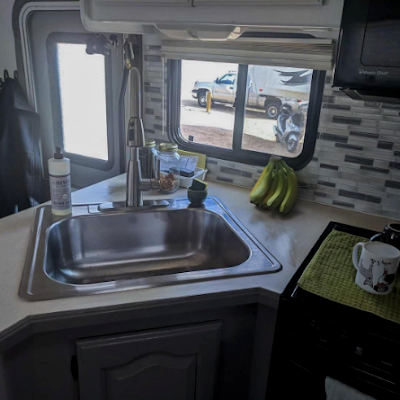
    Before beginning any preparation or purchasing for this project, you need to determine exactly where you will be placing your backsplash. Many RVers like to place a backsplash in the kitchen, for both aesthetic and functional purposes. Besides looking pretty, backsplashes tend to minimize mess in the kitchen and make for easier cleanup.

    If you decide to place one in your kitchen, you need to determine how much of the kitchen wall it will cover. Do you want it behind the stove only, or do you want it behind the stove and the sink? Or do you want your backsplash behind the entire kitchen, including your stove, sink, and any additional counter space. This is something only you can decide, and it may help to sketch your kitchen with the backsplash placed in different sections throughout. This way you can see exactly what it will look like before you begin.

    Some RVers decide to place a backsplash in their bathroom as well. Typically, this would be placed on the wall, between the mirror and the sink. If you decide to install a backsplash in your bathroom, you will need to decide if you want it above the sink only, or if you want it to wrap around the sides of the walls. Use the same method detailed above to help you decide.

    2. Decide on backsplash materials

    Once you have decided where to place your backsplash, it’s time to choose your materials. The main choices are deciding between a ceramic backsplash and a peel-and-stick backsplash. Many RVers go with peel-and-stick because it’s lightweight, easy to install & remove, and holds up well through travel. Still, it should be noted that not all types of peel-and-stick backsplashes fare well being near heat sources. If you choose to install a peel-and-stick backsplash, be sure to choose one with maximum heat resistance for best results and longevity.

    That being said, many RVers have also successfully installed ceramic backsplashes in their kitchens and bathrooms. While it is more work and maintenance, it is certainly possible to have a beautiful, ceramic tile backsplash in an RV, and it may even give your RV interior a homier overall feel.

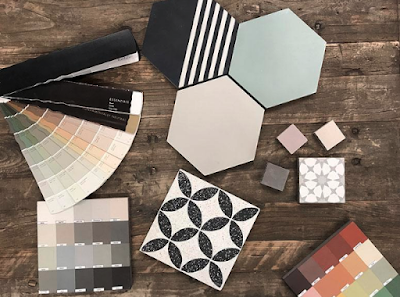
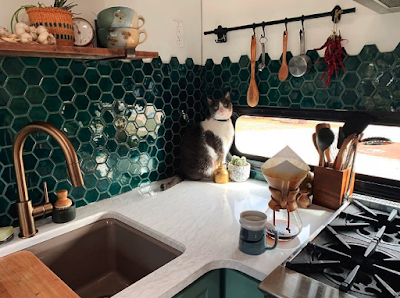
    Once you have chosen your desired type of backsplash, it’s time to pick your choice of color and style. Subway tile is beautiful and classic, but there are also many more shapes, colors, and styles possible. Some companies make custom backsplash tiles in a myriad of shapes and colors, so really anything is possible. You will also need to select a matching grout color for ceramic tiles. Whatever you envision for your RV backsplash should be color-coordinated with the rest of your RV for best aesthetic results.

    3. Purchase materials

    Once you have decided what type of backsplash you want and where it will be placed, it’s time to measure your walls so that you know how much material to purchase. Measure the long side in its entirety, and then measure the height, starting under the cabinets and ending just above the countertop. Add a few extra inches to each side in case of errors – it’s always better to have more than you need than not enough.

    If you’re going with a ceramic backsplash, you will need to purchase tiles, grout, and mortar, as well as a bucket for mixing, spacers, and tools for mixing and applying mortar and grout. If you are installing a peel-and-stick backsplash, you’ll just need to purchase the tiles and extra spray adhesive if you decide to use it.


    4. Prep the wall for backsplash placement

    Once you have everything you need, you will need to ensure that your wall is prepped before beginning the installation. All this means is that you need to ensure that the wall is flat so that the backsplash can sit correctly. If the wall is uneven or bumpy, the backsplash will have difficulty holding up over time. Fill any bumps or nicks in the all with putty and allow it to dry for twenty-four hours before sanding it down flat.

    Likewise, ensure that any wallpaper borders have been removed from the wall. This can be accomplished by using a tool, such as a scraper or a flathead screwdriver, to pull the border away from the wall. Once part of the wallpaper has been lifted, you can begin gently peeling the entire border away. This may take some effort, and you will want to move slowly to avoid tearing the border before it has been removed from the wall.

    Once your walls have been flattened and sanded down, it is finally time to begin installing your backsplash.

    5. Install backsplash

    The process of installing your backsplash will look different for those who decide to use peel-and-stick tiles, versus those who decide to use ceramic tiles. If you are using peel-and-stick, you will want to begin in the lower left corner and work your way across the bottom of the space where you are adding tiles. Spraying additional adhesive on the tiles before placing them may help them to hold up longer, but it is not entirely necessary. Place each block of tiles as close as possible to the tiles next to it. This will help the tiles to lock together for better function and aesthetic purposes. Once you have completed the installation of the bottom row, move on to the next row and continue on until the entire area has been tiled. Take measurements and make cuts for the windows, outlets, and anything else in the space precisely for best results.

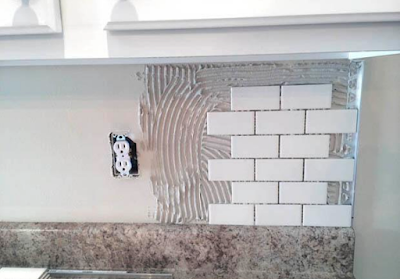
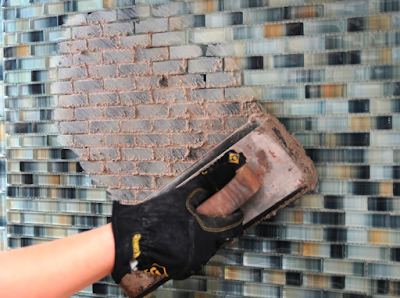
    If you are installing a ceramic backsplash, your process will be a bit lengthier and more labor-inducive. Most likely, your tiles will come in sections of pieces, and you should begin in the lower left corner. Before placing tiles, you will need to apply a layer or mortar to hold the tiles in place. Only mix small amounts of mortar at a time, as it dries very quickly. Follow the exact directions on the mortar packaging to ensure your mortar has the proper consistency.

    Apply a layer using a mortar application tool, then smooth out the mortar with a smoothing tool. Once the mortar is smooth, you may place your tiles. Apply mortar, smooth it, and place one section of tiles at a time. Place spacers in between the sections of tile for even positioning. Once you have finished one row, move on to the row above and then the row above that until you are finished.

    Make cuts for rounded edges, windows, outlets or anything else that is on the all is trickier with ceramic tile. You will need to rent or purchase a tile cutting tool for this part of the project. The stationary machine cutters are usually more accurate and effective then the handheld tile cutters. Mark the exact place to be cut with a sharpie and make cuts carefully and accurately for best results. Once your backsplash has been laid properly, you will need to allow it to dry for twenty-four hours before grouting.

    Mix your grout the same way you mixed your mortar and spray grout sealant before applying grout with a smoothing tool in small sections. There will be a thin layer of grout on the tiles while you are applying it. This is okay and can be easily wiped off the grout after it has dried for an additional twenty-four hours.

    6. Let “rest” and enjoy!

    Your RV should remain stationary for at least a week after installing a new backsplash.This way, the tiles will have time to dry and set before they are taken up to seventy miles per hour down the road. Once your tiles have had time to dry, you are all set to move your RV if need be.

    Installing a backsplash in the kitchen and/or the bathroom of your RV makes a world of difference. With each additional detail, your RV will begin to look homier and more modern. Once your backsplash is installed, you are ready to begin the next round of renovation projects: updating window treatments.

    Have you added a backsplash to your RV kitchen or bathroom? How did it turn out? Feel free to share in the comments below!
  • RV Renovation: Flooring Swap

    RV Renovation: Flooring Swap

    Traveling in an RV is a fun experience that anyone of any age or background can enjoy. There’s nothing like road tripping with a kitchen, bathroom, bedroom, and more at your constant disposal, and more people than ever are hitting the road to see just what it’s all about. But what happens when you want to buy an RV, but you don’t care for the interior style? Your best solution is to take on some renovations.

    Renovating an RV interior is a challenging and time-consuming project, but it results in a finished product that you will love because you designed it yourself. Painting is typically the first project in remodeling an RV, and there are many steps to painting, as discussed in the two previous posts.

    After painting, you will want to replace your RV’s flooring next. This is another tricky yet satisfying project that yields fantastic results. Follow along with these seven basic steps for a fool-proof guide to laying new floors in your RV.

    1. Remove the old floor

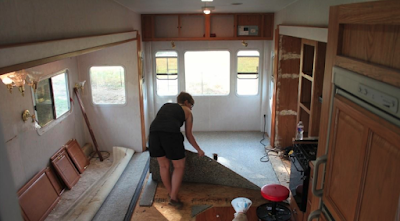
    Before you can even envision the new flooring in your RV, you will need to remove the old floor. Most RVs are carpeted, and if we’re being honest, removing the carpet can be a pain. First, you will need to pull the carpet away from the walls using pliers. Once the carpet is no longer sealed around the corners and edges of the room, you can begin to pry it up. You may need to cut the carpet in parts to remove it in several pieces. Beware of the many, many staples you will find beneath the carpet, as some of these will be sharp.

    Once the carpet is removed, you will need to remove all the staples that once held it in place. This is best done using a flathead screwdriver or needle nose pliers. Double check to ensure that all staples have been removed before moving on to the next step. Once the old carpeting is completely removed, you will be left with a plywood subfloor.

    2. Clean and prepare for the new flooring

    Removing the carpet makes a lot of mess, and you will want to clean up well before laying a new floor. Sweep up all the carpet particles and staple pieces, and vacuum up and dust and dirt particles that may be floating around.

    You will also need to move any furniture that is covering the floor, such as the couch, table dinette, and/or arm chairs. If you have a booth dinette, it is not necessary to replace the flooring under the benches. Simply move the table to another area when laying new flooring beneath it.

    Finally, be sure to fill any holes or imperfections in the sub-floor to ensure that the new floor has a flat surface to rest on. Sand down any bumps or nicks, and be sure to check over the whole floor to make sure you haven’t missed anything.

    2. Measure your RV’s square footage

    Next you will need to measure the square footage of your RV so that you know how much flooring to buy. Your measurements do not need to be perfect, but they should be close to avoid inaccuracies. Don’t forget to measure each individual room, including the main room, bathroom, bedroom, and/or cab area (if you are in a motorhome).

    3. Choose your new flooring

    The biggest choice in this whole process is selecting your new flooring. Your first decision must be between wood floors and carpet. Since RVs are typically used for messy camping trips, many renovators opt for hardwood floors, since these make for less mess and easier clean-up. It is also much simpler to lay your own hardwood flooring than it is to install your own new carpeting. If you do choose to go with carpeting, you may want to hire a professional to install it for you.

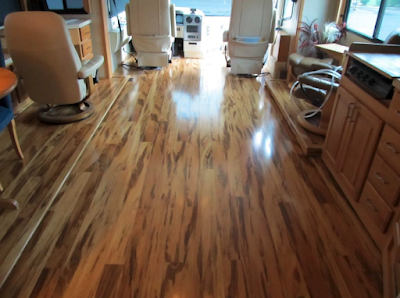
    Because you have to consider the overall weight of the RV, most people avoid laying real hardwood floors. However, wood-look laminate flooring is much lighter than real hardwood, and it tends to hold up very well in RVs. When choosing laminate flooring, you must then choose between peel-and-stick floors and click-and-lock floors.

    Peel-and-stick flooring simply involves peeling the backing off of adhesive pieces of flooring and pressing them onto the subfloor. The process is easy, and the results are great. However, sometimes these floors can shrink over time, and they can occasionally get caught in your slideouts when they are moving in and out.

    Click-and-lock flooring is a bit pricier than peel-and-stick, and the process for laying it is more involved. However, it is known for being higher quality and lasting longer. Each type of flooring has its pros and cons, so you will want to do your own research before making your final choice.

    Once you have narrowed down the flooring type you want, you can head to the hardware store to look at brand, colors, and samples. Be sure to pick a color that coordinates with the paint and color scheme, and choose a high quality brand for best results. Consider buying a single piece from your favorite types of flooring and bringing it back to the RV to see how it looks in your space.

    Once you have made your final choice, be sure to purchase more flooring than you need to allow for inaccuracies in measuring and potential mistakes.

    5. Plan for the slide

    For many people, laying new floor in their RV’s slideouts is the most intimidating part of this whole process. However, laying floors on your slideouts is really no different than laying it anywhere else in your RV. Once there is no furniture or carpeting in the way, you will just need to ensure you have a flat surface, and that the flooring will not extend past the end caps on the slideout. Once you have planned for your slides, you are finally ready to begin.

    6. Lay floor

    With all the preparation out of the way, you are finally ready to lay your new floors. You will want to watch plenty of Youtube videos before beginning this step so that you can see exactly how it’s done. If you are using peel-and-stick flooring, you may want to consider spraying extra adhesive onto each piece for better results.

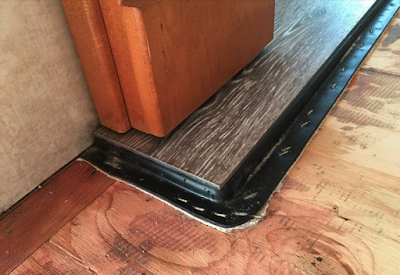
    No matter which type of flooring you use, (peel-and-stick or click-and-lock), be sure to pick a corner to start in, and work your way around the room accordingly. Work in a cohesive pattern to avoid mistakes, and stagger the floors for the best overall look. When making cuts, use exact measurements and ensure the piece will stick before applying adhesive or locking it into place. Consider using transitions or thresholds between rooms for the smoothest overall look.

    Do not rush this step. Take your time to ensure that the floors turn out as best as they can. This process may take a few days to complete.

    7. Let the floors cure

    Once you have laid new floors, you must give them a few days to rest without walking over them. This will ensure that all adhesive properly sticks and that the new floor has time to adjust to the subfloor. Once a few days have passed, you can safely walk across the new floors and enjoy your handiwork.

    Laying new flooring is fairly simple and makes a world of difference in an RV and will increase value if you are looking to sell. Replacing the carpet is also an especially good idea in older RVs, where the same carpet has been laid for many years. Laminate flooring is great for those who travel with pets and small children and is sure to last for years of use when installed properly. With the flooring replaced, you are all set to begin the next task in your renovation project: installing new trim and moulding throughout.

    Have you replaced the flooring in your RV? What steps did you follow? Feel free to drop a comment below!