Blog

  • My RV Broke Down! What Should I Do Next?

    My RV Broke Down! What Should I Do Next?

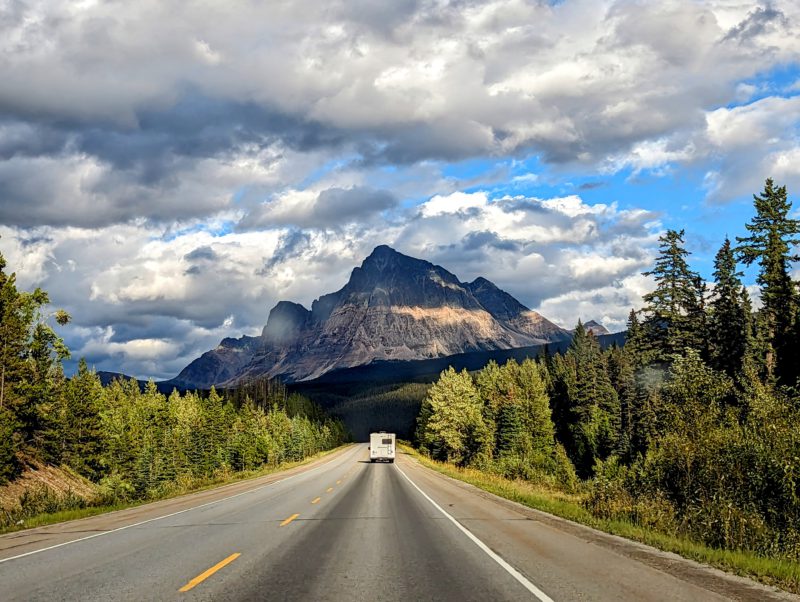
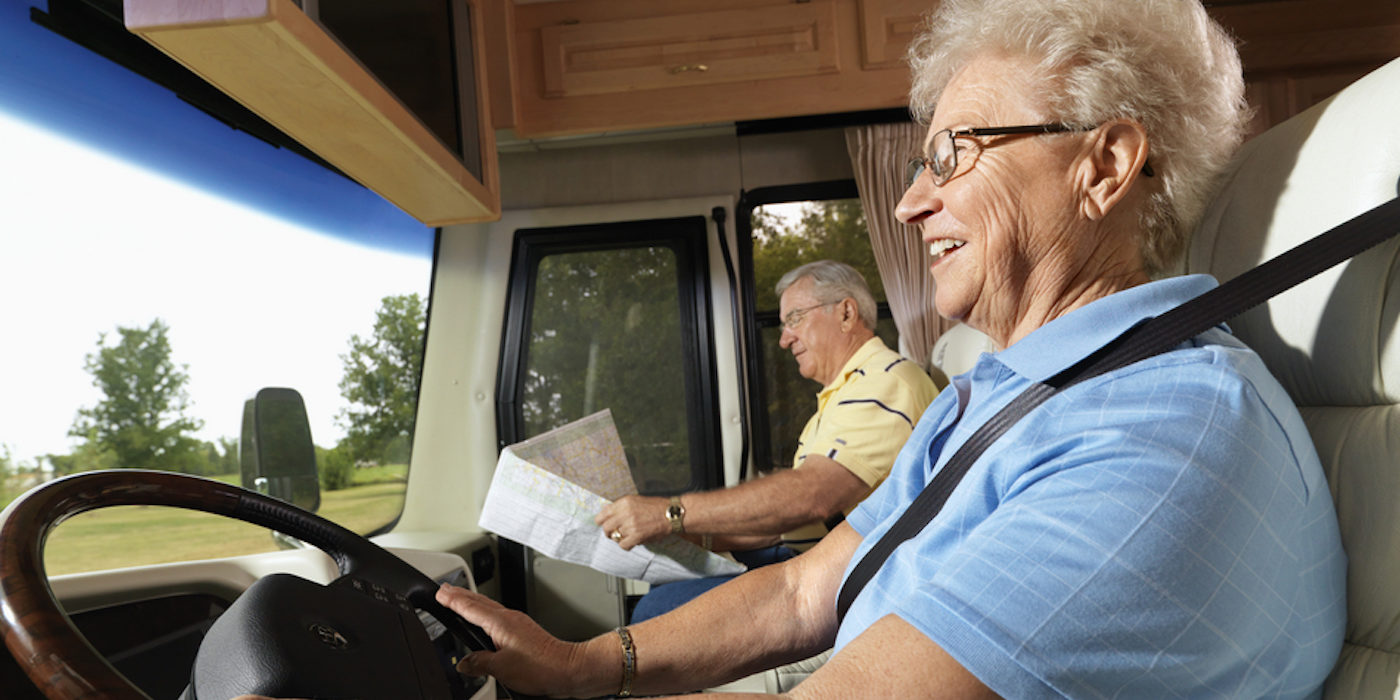
    Imagine: You’ve just crested the hill on a long, winding mountain pass in central Nevada. Then your engine suddenly starts making an unfamiliar noise. The check engine light starts blinking rapidly as  the engine temperature gauge shoots up into the red. You pull over to the side of the road, and it starts to set in: Your RV broke down. Suddenly, your dream road trip takes an undesired turn. 

    You glance at your cell phone signal. Nothing. The last house you saw five miles back down the road looked like it was abandoned during the Dust Bowl era. The last vehicle you saw was even further away from the old house. But, the shoulder along the road where you pulled over is nice and wide. You shut things down, and settle in. (Did I mention that it’s getting darker?)

    What do you do?  


    Being Prepared for an RV Breakdown

    A Cool-Head Mentality

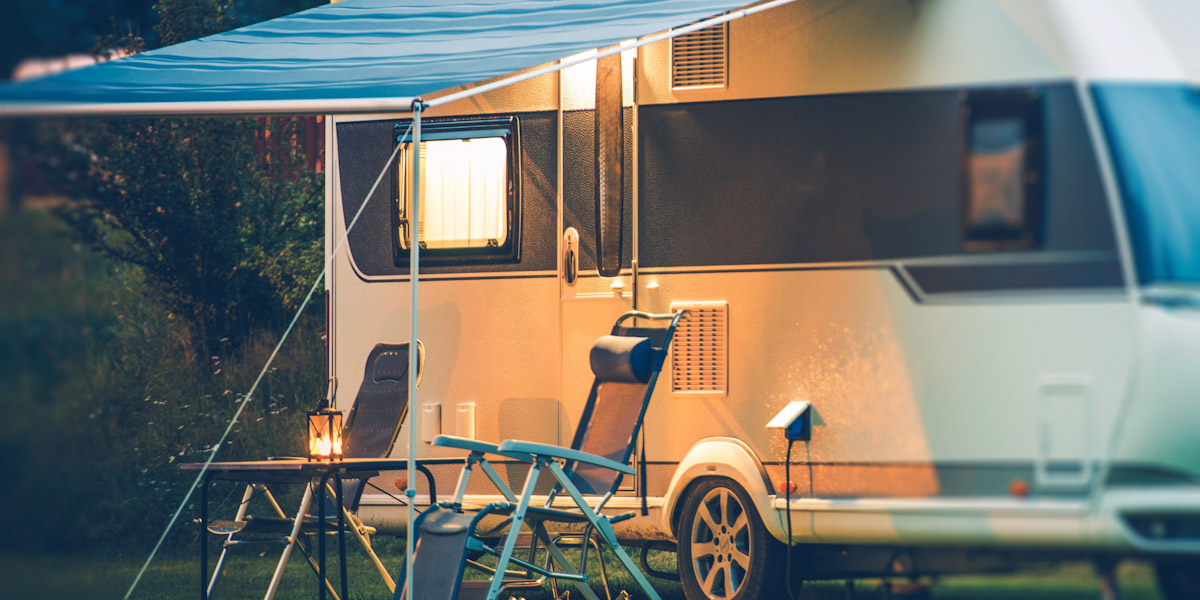
    While this might seem like the set up for a cheap horror flick, keep your head about you. Panic improves nothing. It’s also good to remember: You’re in an RV. That means that you’ve got your home with you. There’s plenty to eat and drink. You have a place to sleep and take care of all your immediate needs for at least one night. By any other vehicle trip standards, you’re already way ahead of the curve.  

    So, while you’re contemplating your next steps, take a minute to congratulate yourself for being where you are, what you have with you, and the great story that you’re going to tell when you get back!  (We promise this helps.)

    Personally, we’ve experienced all kinds of engine and trailer related troubles in our nearly 13 years on the road. We’ve experienced everything from a flat tire in West Virginia to a bearing blow out near Happy, Texas (yes, we see the irony) to multiple engine hiccups from sea to shining sea. Nearly all of these breakdowns have been minor, and for some inexplicable reason, seem to occur on a Friday at about 3:00 p.m. (You know, with just enough time to maybe get to a mechanic, but not enough time to do anything about it until the following week.) We’ve only been involved in one semi-serious collision where we were grateful to be able to walk away, but our towing vehicle … well, not so much. (But that’s another story for another time.)

    In each case, keeping a cool head has made a big difference in how we tackled our problems.


    An RV Insurance Policy

    As Edna from The Incredibles reminds us, “Luck favors the prepared!”  In other words, you have to be ready for what might happen before it happens.

    Starting with good quality insurance is key — whether it’s through your existing auto insurance policy or a separate policy for your RV. While most car insurance covers the liability on anything it tows, it doesn’t necessarily cover anything else like collision or comprehensive. (We nearly found this out the hard way.)

    As full-timers, we carry RV insurance that will not only help us pay for repairs, it also covers the cost of alternative housing (i.e., hotel, apartment, AirBnB) for a short time while our home is being worked on as a result of an incident. We’ve only needed it once in nearly 13 years, but it was incredibly helpful (and put our minds at ease) when we needed to replace our trailer’s axle during the pandemic-induced supply shortage over Thanksgiving week in 2020. What could have been a total nightmare turned into an enjoyable week in Santa Fe!

    Now, returning to our hypothetical situation where your RV broke down, let’s use that to illustrate how to be prepared for the unlikely event of an RV breakdown. This should help in the event you need do a little RV breakdown triage.


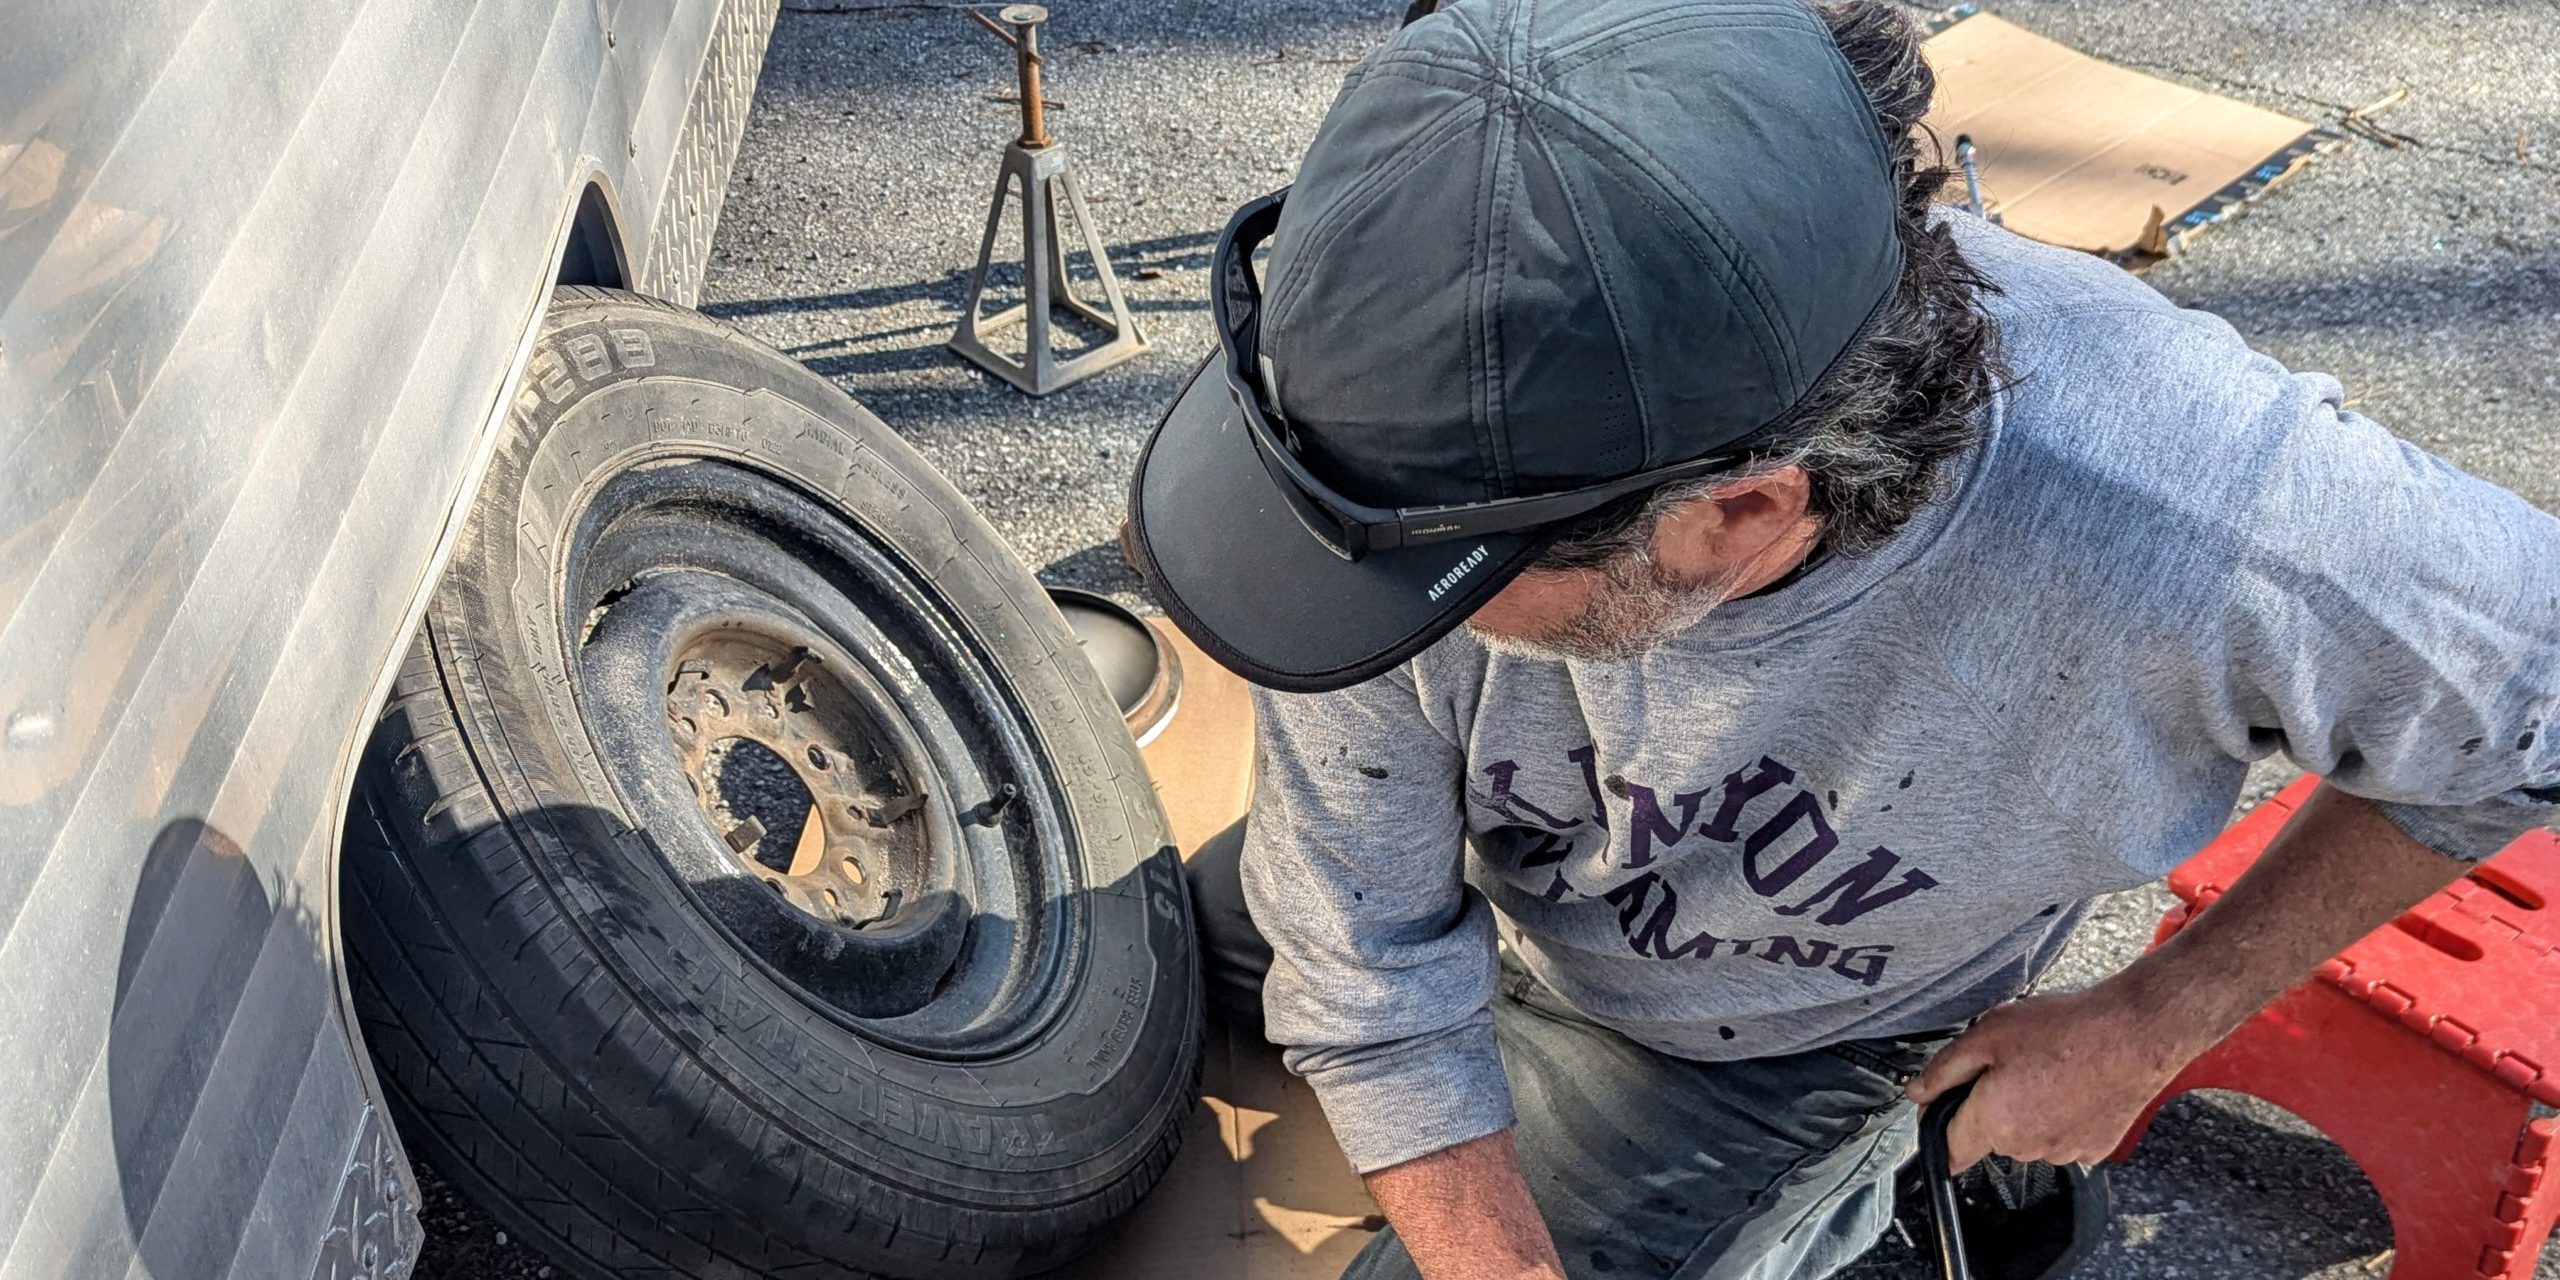
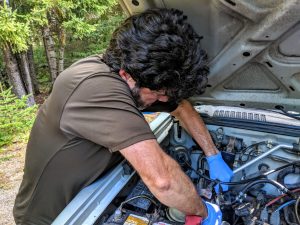
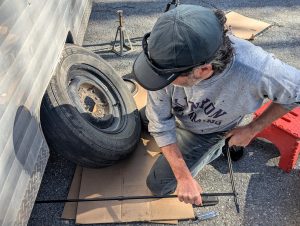
    So, your RV broke down. Breathe: Is this something you can repair on your own? 

    Answer: Yes! As long as I have the tools.

    If you’re handy, mechanical, or have earned the wisdom of the wrench, this little hiccup could just be a bump along the way. You’ve got a good collection of tools, and perhaps some frequently worn out parts for your rig along for the ride. Along with those tools, a prepared RVer should have some basic safety supplies. Frankly, if your RV broke down, something is wrong. And now might be the time you need that fire extinguisher.

    Even if you don’t have the right tools, you may still have DIY options. Many auto parts stores have a tool loaner program for those more specific tools that might not fit into your repair kit. In addition, many stores have delivery vehicles which can bring them right to you. Believe it or not, many online auto part retailers have same-day delivery options. (So, just ask.) Simply choose that option when ordering, then select on a map where you are and they’ll bring it right to you. 

    Other options can include delivery services like Doordash or Uber delivery.  While it might be more expensive than getting it delivered to your home, it’s cheaper than a tow from the middle of nowhere!


    Answer: No way. Can’t fix it.

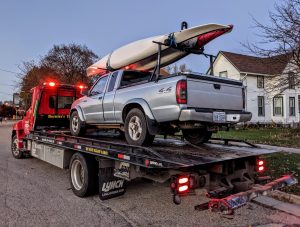
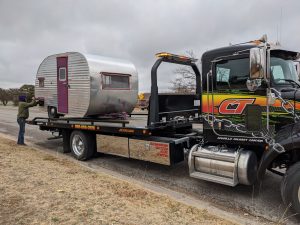
    If you find yourself on the side of the road, with the hood up scratching your head, it’s time to call in some help and there are lots of ways to do it. 


    Can you reach out for assistance? 

    Answer: Yes! I still have cell service or Wi-Fi.

    When cell phone and internet booster gear pays off …

    Many RVers have some sort of internet booster, extra cell phone with a different carrier, Wi-Fi hotspot, satellite internet, or even a spot/personal locator beacon. And frankly, these devices (all designed to function outside of normal cell phone communications) can be super helpful in an emergency and contribute to that prepared feeling. Many of these will allow you to communicate with a towing service, insurance company, or repair shop from anywhere you happen to be.  


    What to look for in a repair shop …

    We’ve mostly had great experiences with tow trucks and repair shop. In 13 years, there are only two that we can think of have made us angry enough to leave a bad review. Vetting the shop before going there might avoid the feeling of being taken advantage of. But let’s get real: When your RV broke down, you didn’t pick the spot. So, it can be hard to get picky when a shop might be the only act in town.

    Even so, reading customer reviews (more than one) can help you get ahead of any problems certain shops may have. And once you’re done, pay it forward. Be sure to leave an honest review so others can take advantage of your experience. Do they generally have a good reputation among customers? Are they associated with a national or regional chain? What are your options if you don’t like the vibe you’re getting? Remember: It might be worth a more expensive towing bill than having to deal with a shady shop. Your RV broke down. You’re likely already pretty stressed, so you don’t need more anxiety.


    Thoughts on national/regional repair chains …

    We’ve had positive (and negative) experiences with both independent and nationally affiliated repair shops. So, we’re not making a comment about quality. Rather, if you choose to go with an independent shop, be sure that they’ll stand by their work if or when something goes wrong with that part or repair.

    Understanding what to do down the road may help give you peace of mind. (And some recourse if the repair doesn’t hold up.) Keep good records (with receipts) of ALL of the work that you have done to your rig — both the work you do or have someone else do. 


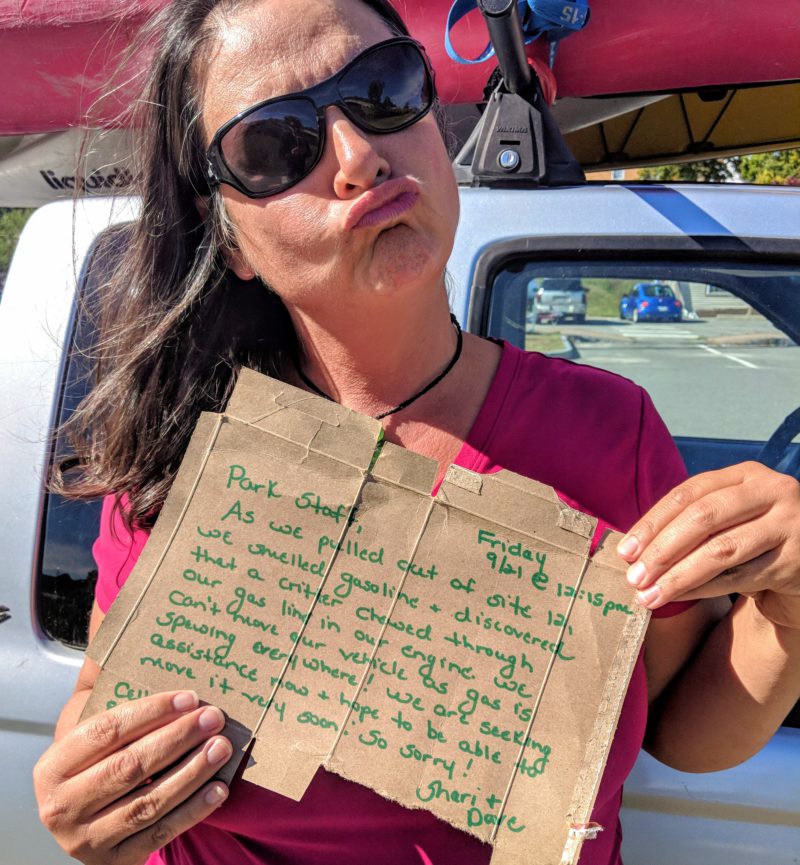
    Answer: Nope. No signal in sight.

    Don’t discount the kindness of strangers and fellow travelers.

    If you can’t reach out with modern technology, you might just have to put out a sign and wait for someone to wander by. A few years ago, we traveled to Alaska from Washington state. We were just one of thousands of travelers all generally heading to the same place. (After all, there’s just two roads to get you there.) Along the way we kept seeing the same people. Even though our schedules differed, we seemed to be in a very long game of leapfrog. A small community of travelers developed, one which we knew we could rely upon should we get into a tight spot.  

    Additionally, we’ve been helped by locals when we needed it. Frankly, it’s always been a positive experience that restores our faith in humankind. When we ask for help, we open ourselves up. It’s a place of vulnerability, a recognition that even if we are prepared for many things, we don’t have it all figured out. Allowing someone to help you is actually a gift for them and for you.

    Think about the last time you helped someone. How did it make you feel? Remember that in your moment of trouble that you can also make someone feel that spark of goodness, that joy of helping out. It takes the pressure off and creates a connection — and possibly a friendship. (Don’t forget to pass it on!)


    No Matter What, Stay Confident

    There’s no better feeling than being prepared for the unexpected, and with just a small investment and an adventurous spirit you can be ready for whatever comes your way.  Remember that you got into this activity to have adventures, and unplanned repairs can open you up to a whole new world!

  • Shopping for an RV Awning Upgrade? Find the Best Fit

    Shopping for an RV Awning Upgrade? Find the Best Fit

    There’s something magical about stepping out of your RV in the morning with coffee in hand and nothing but blue sky overhead. But when that sun starts blazing or a drizzle interrupts your downtime, a good awning transforms your setup from tolerable to total relaxation. Whether you’re making breakfast under its cover or lounging with your feet up after a hike, an RV awning upgrade can create a true sweet spot between inside and out.

    The fact is: A high-quality awning isn’t just a nice-to-have; it’s an upgrade that can change how you use — and enjoy — your RV.

    So, wonder which RV awnings are worth the upgrade? Well, we’ve done the digging, the comparing, and the nerding-out on specs to bring you the best options for shade, comfort, and a little more peace on the patio.


    What to Look for in an RV Awning Upgrade

    Before we get into our product recommendations, let’s talk about what actually makes an awning better, because not all shade is created equal.


    Manual vs. Automatic

    • Manual Awnings. Think hand-crank operation. They are often cheaper and less likely to fail, but let’s be honest: you’ll work up a sweat getting them set up. Great if you like to tinker or are worried about draining your battery.
    • Automatic (Motorized) Awnings. Push a button and boom — instant shade. These are perfect for solo travelers, full-timers, or anyone who prefers ease over elbow grease. The trade-off? Higher cost and the possibility of electrical issues.


    Retractable vs. Fixed

    • Retractable. Most RVers go this route for a reason. They’re convenient, space-saving, and you can tuck them away in bad weather or when hitting the road.
    • Fixed. More permanent, more stable, but way less flexible. Unless you’re setting up a long-term site, fixed awnings might be more hassle than help.


    Material Matters

    • Fabric. You want something UV-resistant, waterproof, and durable enough to handle a rogue tree branch or surprise gust of wind. Vinyl is popular for being tough and easy to clean, while acrylic breathes better and resists mildew.
    • Frame. Aluminum is your best friend. It’s strong, lightweight, and rust-resistant. Steel is a beast but may add more weight than you want.


    Size and Coverage

    This is one of those “measure twice, buy once” moments. Consider:

    • The length of your RV’s sidewall (not the full length of the RV).
    • How far out you want the awning to extend (eight feet is common).
    • Whether you want full-patio shade or just enough cover to keep the door dry during a drizzle.

    Installation Considerations

    • DIY or Professional Installation. Some awnings are plug and play if you’re handy with tools and know your way around your rig. Others, especially motorized units, might need a technician (or at least an extra pair of hands).
    • Mounting Hardware. Always check compatibility with your RV model and ensure the kit includes everything or you know exactly what extras to buy.


    Our Top Picks for RV Awnings

    Carefree of Colorado Eclipse Awning

    If you’ve ever pulled into a sunny campsite after a long drive and wished your shade could appear at the push of a button, the Eclipse might just be your dream come true. Designed for RVers who crave both convenience and sleek aesthetics, this awning is all about modern function with a minimalist twist. Whether you’re full-timing or heading out for the weekend, the Carefree Eclipse takes the work out of setting up camp and lets you enjoy the outdoors faster.


    Key Features

    • Power Operation. A single switch deploys or retracts the awning in seconds. This is a game-changer for those who want fast, reliable shade without manual cranking, especially helpful for solo travelers or those with limited mobility.
    • No Vertical Arms. Unlike traditional awnings, the Eclipse uses lateral scissor arms. That means your patio area stays open and unobstructed, making it easier to move around, set up chairs, or open doors without bumping into hardware.
    • Adjustable Pitch Models Available. Choose between traditional or adjustable pitch models to tailor the awning’s angle. This flexibility helps you control sun exposure or direct rain runoff exactly where you want it.


    Dometic 8500 Manual Awning

    For RVers who prefer simple, durable gear without all the high-tech fuss, the Dometic 8500 is a solid pick. This manual awning delivers classic function with rugged build quality, making it a favorite among weekend warriors and full-timers alike. It’s especially appealing if you’re budget-conscious but still want an awning that holds up to the elements.


    Key Features

    • Manual Hand-Crank Mechanism. A time-tested crank lets you open and close the awning without needing electricity. It’s intuitive, reliable, and doesn’t rely on batteries or circuits that might fail.
    • Weather-Resistant Materials. The scratch-resistant vinyl canopy is UV-treated to resist sun damage and protect your outdoor area from heat. This makes it perfect for hot summer days or prolonged use in exposed campsites.
    • Variety of Sizes. Available in multiple lengths to suit different RVs, from compact trailers to large fifth wheels. It ensures a custom-like fit with enough coverage to shade your outdoor setup.


    ALEKO Retractable RV Awning

    Looking for something that covers the basics without burning a hole in your budget? The ALEKO retractable awning brings shade and shelter without all the bells and whistles. It’s perfect for newer RV owners, occasional travelers, or anyone who wants simple shade without splurging on top-tier tech.


    Key Features

    • 100-Percent PVC Fabric. UV-resistant and water-repellent, this fabric helps protect you from both harsh sun and surprise showers. The PVC material is also easy to clean, so road dust and grime won’t become a permanent feature.
    • Retractable Design. Easily adjust how far out the awning extends to customize your shade. It’s flexible enough for morning sun or full coverage at high noon.
    • Lightweight and Compact. The aluminum frame is light enough to reduce stress on your rig’s sidewall and easy to stow away when not in use. This makes it a great option for travel trailers or camper vans with limited storage capacity.


    Thule HideAway Awning

    The Thule HideAway is tailor-made for minimalists and adventurers alike. Its low-profile design keeps your RV’s look clean while providing reliable protection from the sun and elements. Whether you’re parked at a music festival or camped in the backcountry, this awning helps you stay shaded without drawing too much attention to itself.


    Key Features

    • Manual Option. When you want the simplicity of hand operation, Thule makes it easy for you to get your awning into position compared to other manual awnings on the market.
    • Durable Materials. Built to withstand intense sun, wind, and rain, this awning uses quality fabrics and strong components to keep going trip after trip. It’s built for serious use, not just weekend getaways.
    • Compact Design. When retracted, the awning tucks neatly into a roof-mounted housing that blends in with your RV’s lines. This helps reduce drag on the road and maintains a tidy exterior appearance.


    Solera Universal Fit Heavy-Duty Vinyl RV Patio Awning

    Maybe you already have a frame and hardware in place, and you’re just looking to upgrade that tired, weather-worn awning fabric. The Solera Universal Fit kit lets you refresh your shade without replacing the whole system. It’s a cost-effective solution that brings new life to your setup with durable, colorful vinyl and wide compatibility.


    Key Features

    • Universal Fit: Designed to work with most existing awning brands and systems, making replacement simple and frustration-free. Just slide the new fabric into your current roller tube and you’re set.
    • Heavy-Duty Vinyl Fabric: Built to last through heavy use and varied weather, this vinyl holds up well under UV rays, rain, and wind. It’s also easy to clean and resists fading over time.
    • Trimmed Edges: Not just decorative. The trimmed edge adds a bit of extra shade and enhances your RV’s look. It’s a small design touch that adds polish to your patio space.


    The Right RV Awning Upgrade Can Change Everything

    Here’s the thing. The right RV awning upgrade is less about brand and more about the fit. Not just physical fit but lifestyle fit. Are you someone who loves gadgets and creature comforts? Power up with something like the Carefree Eclipse. Prefer simplicity and saving cash? A manual Dometic or a budget ALEKO could be it.

    At RV Trader, we’re invested in helping RVers get more out of their travels and that includes the time you spend parked, shaded, and making memories just outside your door. Whether you’re sipping cold drinks with friends, watching the rain fall without getting soaked, or just kicking back with a good book, a quality awning adds that extra comfort layer that turns your RV from good to great.

  • Top RV Shades for Every Part of Your Rig

    Top RV Shades for Every Part of Your Rig

    Living the RV life means embracing freedom, adventure, and the comforts of home all rolled into one. But anyone who’s spent even a single summer afternoon parked under the blazing sun knows just how fast an RV heats up. Glare-filled windows, rising interior temperatures, and faded upholstery? No thanks. That’s where RV shades come in.

    RV shades are a must-have for anyone serious about comfort and protecting their rig. They help control the temperature inside. They offer crucial UV protection for your interior. And, as an added bonus, they add an extra layer of privacy whether you’re parked at a campground or off-grid. So, naturally, different parts of your RV call for different types of shades — and that’s exactly what we’re breaking down today.

    This guide will walk you through RV shade options tailored for each part of your rig, from windshield to tires, with specific product recommendations to help you make smart, experience-backed decisions. (And if you’re shopping for an RV upgrade, don’t forget that RV Trader is always your go-to for top listings and gear advice.)


    RV Windshield Shades: Keeping the Cockpit Cool

    The windshield is often the largest window on your RV. And, as you can imagine, it’s also the biggest culprit when it comes to heat and UV exposure. It’s the first place the sun hits and the fastest way for temperatures to spike inside the cab. Not to mention, when you’re parked, the windshield becomes a wide-open display for any passerby to peek in. Windshield shades can fix all of that.


    EcoNour Car Windshield Sun Shade

    This reflective accordion-style shade is a simple, budget-friendly tool that punches above its weight. Designed to bounce back UV rays and infrared heat, the EcoNour shade helps maintain a cooler interior and protects your dash, steering wheel, and electronics from heat damage. RVers love how easy it is to fold and stow with no fiddling with suction cups or tangled mesh.


    Magne Shade Windshield Shade

    When you’re ready for something custom, the Magne Shade is a serious upgrade. It installs from the outside using high-strength magnets, and offers a precise fit for your specific RV make and model. Not only does it block heat before it enters your cabin, but it also adds privacy without sacrificing your view from the inside. Daytime visibility out, privacy in. It’s perfect for relaxing in your rig without drawing the curtains.


    Side RV Window Shades: Enhancing Privacy and Comfort

    Your side windows let in light, views, and — unfortunately — a whole lot of heat. Without the right shades, they can turn your living space into a greenhouse. Side window shades aren’t just for blocking sunlight. They help keep your furniture from fading, give you privacy, and cut down on the glare that makes screen time or reading a chore.


    ZATOOTO Magnetic Side Window Sun Shades

    If convenience is your thing, ZATOOTO’s magnetic shades are tough to beat. They attach instantly and stay put, thanks to built-in magnets. You can flip them up or down in seconds, and when you don’t need them, they fold up compactly. They also come in sets for both driver and passenger sides, making them ideal for full-cab coverage. These are particularly handy for frequent travelers who want to be able to shade up at a moment’s notice, say, when you’re pulling over for a mid-afternoon nap or shielding your pets from intense sun.


    RecPro RV Camper Pleated Blind Shades

    For a more permanent interior solution, RecPro’s pleated blinds deliver in both function and aesthetics. They come in various sizes and colors, allowing you to match your existing décor while still getting the privacy and sun protection you need. Their fabric design adds a soft, residential feel to your RV. And they’re easy to raise and lower with a simple tug. You’ll especially appreciate these if you’re a full-timer or spend long weekends in campgrounds with minimal tree cover. They look great and perform even better.


    RV Door Window Shades: Balancing Light and Privacy

    Your RV door might be the smallest window in the rig, but it’s often the most exposed — especially when you’re parked in a lot or next to another camper. Anyone walking by can catch a glimpse into your living space. (Which isn’t ideal when you’re trying to relax.) Door window shades provide a much-needed balance between letting in natural light and protecting your privacy.


    Camco RV Door Window Light Blocking Shade

    This is one of those add-ons that seems minor until you use it. This Camco RV door window light blocking shade uses hook-and-loop fasteners to easily attach over the window, blocking direct sunlight and prying eyes alike. It can be rolled up and secured with a strap when you want light and dropped down in seconds when you want privacy. It’s especially useful for RVers with screen doors or glass inserts where light tends to blast in during early mornings or late afternoons.


    Camco Reflective RV Thermal Door Window Cover

    A slightly more versatile option, the Camco reflective RV thermal door window cover can be used for both windows and doors. Its reflective backing repels UV rays, while its neutral interior blends in nicely. It’s a solid choice if you want a lightweight, no-fuss shade you can move around as needed.


    RV Awning Shades: Expanding Outdoor Living Space

    Your awning creates an outdoor room. It’s your hangout zone, your cooking station, maybe even your work-from-campsite corner. Adding an awning shade screen takes that space to the next level by blocking wind, low-angle sun, and even nosy neighbors. It’s a simple way to carve out some privacy and stay comfortable while enjoying the outdoors.


    Tentproinc RV Awning Sun Shade Screen

    Made from high-density mesh, this screen blocks up to 86 percent of UV rays while still allowing airflow and visibility. The Tentproinc RV awning sun shade screen zips on and off your existing awning easily and rolls up neatly when not in use. The added protection from sun and wind makes it ideal for morning coffee or evening cookouts.


    RV Awning Sun Shade Screen

    This RV Awnings Mart version offers wide compatibility with different awning brands and comes with ground stakes and bungees for extra stability. It’s particularly good for longer stays or desert camping, where shade is less of a luxury and more of a necessity. It also adds a little extra privacy without totally closing off your space.


    Protect Your Rig, One Door and Window at a Time

    From the front windshield to your door and more, every part of your RV benefits from a little shade. Whether you’re trying to beat the heat, preserve your interior, or enjoy some peace and privacy, the right RV shades make all the difference. It’s not just about aesthetics. It’s about comfort, efficiency, and taking care of your investment.

    Now’s a great time to evaluate your current setup. Are your RV shades doing their job? Could your outdoor space use a little extra protection? Are your tires baking in the sun? Even a few smart additions can make your rig feel cooler, cozier, and better equipped for adventure. 

  • Finding a Pet-Friendly RV: 8 Tips for Dog Owners

    Finding a Pet-Friendly RV: 8 Tips for Dog Owners

    Being able to travel with your four-legged kiddos is one of the best parts of RV life — but it can also be one of the most chaotic. Our two pups, Wilson and Journey, have been road-tripping with us for years, and they’ve helped us learn what really matters when choosing a pet-friendly RV as a dog owner. From muddy paw prints and surprise zoomies to snuggling up with them for a good movie on a cold night, we’ve seen it all throughout our 100,000-plus miles on the road.

    So, whether you’re a dog owner shopping for your first rig or looking for a more pet-friendly RV, here’s what to look for when choosing a model that keeps both you and your canine companions comfortable, safe, and happy.


    1. Consider Floorplan Flow: The Dog Traffic Test

    We’ve experienced nearly every size and style with Wilson and Journey. From cavernous fifth wheels to a class B campervan, we’ve made it work with them because we’ve managed this key aspect.

    When you travel with dogs, space matters — especially on rainy days when everyone’s inside and you’ve just come back from a wet and muddy bathroom walk. Because at that point, the last thing you want is them having to share bed or couch space with you or track mud all over your rig.

    Look for floorplans that allow for easy movement. Slides can be a huge bonus, creating extra room for a dog bed or allowing your pets to stretch out without blocking every path to the bathroom or fridge.

    We find that open layouts and passthrough hallways often work best. Rear or easy access bath layouts can also help if you need a spot to dry off muddy paws before you do let them jump back up on the couch with you.

    Pro Tip: When walking through RVs, imagine your dog pacing alongside or just behind you. Is there room to move freely without stepping on tails or bowls? We chose a more open twin-bed layout with a rear bath for our campervan days, and that worked great for us. We could even convert the twins to a king bed and still have room for everyone.


    2. Check for Durable Flooring: Say No to Carpet

    Carpet and dogs? Let’s just say it’s a relationship that rarely ends well. After years of full-time travel, we got rid of the carpet at the house we bought quickly, because the difference is night and day. And the same goes for RVs.

    Between shedding, drool, mud, sand, and the occasional accident, it’s smart to prioritize flooring that’s easy to clean. Vinyl or laminate floors are durable, quick to sweep, and more forgiving when it comes to pet hair or muddy paws. Bonus points for textured flooring that doesn’t get slippery when wet.

    Pro Tip: Having a hand vacuum and cleaning wipes in easy reach of the entrance can make your life a lot cleaner and easier to manage. And if you can fit a nice entrance rug to clean feat and paws, your golden.


    3. Ease Pup Access: Pet-Friendly RV Entryways

    Some RVs have high or narrow steps that can be tough for senior dogs or short-legged breeds. If you’re traveling with an older pup (or one that just thinks they’re royalty), wider steps or lower profiles can make a big difference.

    Class C motorhomes and travel trailers tend to have lower entry points compared to fifth wheels or motorhomes with air suspension. Look for an pet-friendly RV with a solid, stable step system — or plan to upgrade with a pet ramp or foldable stair cover.

    Pro Tip: Look for models with grab handles near the door. You’ll use them too, but they’re also helpful for dogs who need a little assist on the way in or out.


    4. Choose Climate Control: Dogs Can’t Sweat It Out

    We all know how dangerous it can be for pets left in hot vehicles — even for a few minutes. In RVs, that danger can extend to your entire house-on-wheels during summer heat or shoulder-season sun.

    Look for RVs with strong insulation and quality AC, or multiple AC units in larger models, so that cooling and keeping the RV cool is not an issue. If you’re planning on boondocking then having a good generator that has the ability to run your cooling system is a must. You may be able to run some A/C systems on a big battery and solar system with the right inverter and setup, but that can be expensive and unwise to try unless you really know what you are doing. Backup power in the form of a good generator is usually the best option.

    Ducted air and ceiling fans (like MaxxAir or Fantastic Fans) can make a huge difference in airflow as well, especially if you have open layouts with good windows. So, these are good to look for when purchasing your pup-friendly home on wheels. 

    On the flip side, having a good heating system like a furnace or heat pump if you plan on partaking in some cold-weather camping is also a must. Because just like overheating can be a big issue, so can freezing temperatures.

    Pro Tip: Consider installing a temperature monitor in your RV that alerts your phone if things get too hot or too cold. Peace of mind is priceless. We have one, and when connected to our Starlink, we can check on the pups’ comfort level while out and about if we have cell signal.


    5. Think Outdoors Too: Shade and Tie-Outs

    If your dog loves lounging outdoors as much as ours do, pay close attention to the exterior of your RV.

    • Does it have a large awning for shade?
    • Are there outdoor power outlets for a fan or pet monitor?
    • Is there a convenient place to attach a leash or tie-out?

    Some rigs even have built-in exterior sprayers — perfect for rinsing off dirty paws after a hike or beach day.

    Pro Tip: A small outdoor mat can help keep sand, dirt, and pine needles from getting tracked into the RV. 


    6. Dig into Storage: For All Their Stuff (and Yours)

    We’ve learned the hard way that dog gear adds up fast. Travel bowls, extra leashes, waste bags, food containers, medications, beds, toys, towels—you get the idea.

    Look for RVs with ample storage space. Under-bed compartments, pantry closets, and pass-through bays give you flexibility to stash both pet gear and your own essentials.

    Pro Tip: Use clear plastic bins to organize your pet’s things. Label them and tuck them under the dinette, under the bed, or in the outside pass-through. That way, everything has a place — and nothing smells like dried kibble in your living space.


    7. Sniff Out Dog-Safe Features: A Few Pointers

    While not every RV comes with a “dog package,” here are a few bonus features that can make your life easier:

    • Window placement at nose level. Dogs love to look out the window. A low window in the living area can keep them entertained during downtime.
    • Screen doors with pet guards. If your pup likes to paw at the door, a reinforced screen will help avoid accidental jail breaks.
    • Built-in feeding drawers. Some high-end models offer pull-out pet feeding stations under the fridge or cabinets. Not necessary — but pretty neat. Our Class B van came with one, and it was great.

    Pro Tip: If your RV doesn’t come with these extras, a little DIY goes a long way. 


    8. Consider Travel Safety: Harnesses and Crates

    Your dog may love riding shotgun — but safety should still come first. Look for rigs that have safe areas for traveling pets, especially during long driving days. Some RVers use seat-belt-compatible harnesses or soft-sided crates anchored to furniture.

    If your dog is crate-trained, measure your crate and make sure it fits in the rig before you buy. Dinette benches, under-bed spaces, and slide-out areas are good options.

    Pro Tip: Practice drive days with short trips before a big adventure, because not all pets passengers are the same. You want to know what their travel style and comfort level is before heading out on a big adventure. If you can rent a pet-friendly RV before purchasing one, then that is a great idea.


    Tail-Wagging Travel Starts with the Right Rig

    At the end of the day, a pet-friendly RV doesn’t need to be custom-built for dogs to be a great home on the road. It just needs to work for your unique crew. Whether you’re boondocking in the desert or parked at a campground near the beach, a pet-friendly setup can make travel smoother, more comfortable, and a lot more fun for everyone involved.

    And while your dog might not care about the layout or solar setup, they’ll definitely appreciate having a cozy spot to curl up near you after a long hike, a safe place to nap while you’re on the road, and a view out the window to see the cool places you’ve brought them to.

    So, as you’re evaluating your next RV, take a moment to think like a dog. (No, seriously — get down on their level.) You might be surprised at how a few thoughtful features can make all the difference you and them on you travels.

  • Cleaning Bug Splatter Off Your RV: A Step-by-Step Guide

    Cleaning Bug Splatter Off Your RV: A Step-by-Step Guide

    If you’ve driven more than ten minutes in your RV — especially in the warmer months — you’ve probably been gifted with a splattered windshield and bug-caked front cap. It’s one of those unavoidable realities of life on the road. (And at least for us, if feels like it is inevitable the moment you leave a truck/RV wash.) More times than we can count, we’ve pulled into campgrounds plastered with bug splatter so thick on the front of our rig, it looked like a horror movie scene.

    But while bug splatter might be inevitable, leaving it there isn’t. Nor is it advisable, even for the laziest RVer. Those juicy little missiles can actually damage your RV’s finish, paint, and even headlights if ignored.

    So, let’s walk through what bug guts do to your rig, how to get them off safely, and how to prevent buildup in the first place.


    Why Bug Splatter Is More Than Just Gross

    It’s not just about looks. Bug splatter contains enzymes and acids that start breaking down surfaces quickly — especially in the sun. Letting it sit too long can cause:

    • Etched paint and decals,
    • Pitted or stained fiberglass,
    • Cloudy headlights, and
    • Reduced visibility through windshields.

    Some bugs are especially acidic (looking at you, lovebugs). And the longer they bake onto your RV’s front end, the more damage they can do.


    Step-by-Step: How to Clean Off Bug Splatter

    Like a new stain on a favorite shirt, time really is of the essence here. Letting bug splatter sit for days or weeks makes it much harder to remove. Here’s how to tackle it effectively.


    1. Soak the area.

    Start by soaking the front cap or affected surfaces with water to loosen things up. A hose with a spray nozzle or a foam cannon works well. If you’ve been driving all day, let the rig cool down before applying water to avoid streaking.


    2. Use a bug-specific cleaner.

    There are tons of RV-safe bug removers on the market. Look for one that’s safe for gel coat, fiberglass, paint, and decals. Apply it generously and let it sit for the recommended time — usually a minute or two.

    Some RVers swear by DIY options like diluted vinegar or dryer sheets, but we recommend using products designed for the job to protect your finish.


    3. Gently scrub.

    Use a microfiber cloth, soft sponge, or bug sponge (not steel wool or harsh pads) to gently wipe away the splatter. Avoid circular motions that could grind grit into your paint.


    4. Rinse thoroughly.

    Rinse the area well to remove residue from the cleaner and loosened splatter. If needed, repeat the process for stubborn spots.


    5. Wash the RV.

    Once the bug splatter is off, wash your entire rig as usual. This helps remove any leftover cleaner and keeps the finish protected.


    What Not to Do

    • Don’t use abrasive scrubbers. These can scratch your finish.
    • Don’t use high-pressure washers. Using one too close to seals, decals, or paint can cause unexpected damage.
    • Don’t wait too long. The sooner you clean, the easier it is and the less damage bugs can do.


    A Few Products For The Job

    A quick search online shows some of the following as good options for this fun job:

    Pro Tip: Keep a basic cleaning kit in your RV’s exterior storage so you can tackle splatter at your next stop instead of waiting until you’re home.


    Prevention Tips: Keep Bugs from Sticking

    While you can’t avoid bugs entirely, a few strategies can make them easier to clean off:

    • Apply a protective wax or sealant. The prime real estate here is your RV’s front cap and windshield. This creates a slick surface that makes bugs less likely to bond.
    • Install a bug screen or bra. This is specially helpful on Class A or Class C motorhomes with large front ends.
    • Use Rain-X or similar treatments. Using this on windshields to help dead bugs wash off more easily during rain or a rinse.
    • Park strategically. When stopped, park with your bug-covered side away from direct sun to reduce baked-on splatter.
    • Hit up truck/RV drive-through washes. These stops are your friend. We love passing through a Blue Beacon or similar truck wash made for semis, because they are usually fairly priced, do a decent job of cleaning your rig, and they apply several of the items on this list.

      Pro Tip: Always ask and know what chemicals they are applying, if they are RV safe, and explain what you want and don’t want them to do. Sometimes you have sensitive electronics like a generator that you don’t want to get soaked if they do an undercarriage wash.
      ALWAYS KNOW YOUR RIG!!!


    Buggin-Out on Bug Splatter

    Bug splatter is an unavoidable part of RV life — but it doesn’t have to become a permanent part of your paint job. With the right tools and a little regular maintenance, you can keep your rig looking fresh, protect your investment, and avoid the pain of repainting or restoring damaged fiberglass.

    Whether you’re prepping for your next road trip or cleaning up from your last one, a few extra minutes spent removing those buggy reminders will keep your RV in tip-top shape for years to come.

  • Driving Your RV on a Steep Grade: A Safety Guide

    Driving Your RV on a Steep Grade: A Safety Guide

    Summer is coming and cooler mountain temps are calling! But are you ready to drive your RV on a steep mountain grade? The fact is that if you are new to driving a big rig or pulling a trailer, those winding mountain roads may seem a bit intimidating.

    After nearly 13 years of full-time RVing all over the North American continent, we’ve definitely experienced a few white-knuckle grades and narrow winding roads! So, we thought we’d provide some basic tips for making these incredible journeys a bit less scary and a lot more safe.


    Do a Road Trip Safety Check — Before You Go

    Before starting out on any road trip, it’s a good idea to have your brakes, axle, tires, and hitch inspected. (And repaired, as necessary.) Be sure to top off all fluids, flush your radiator, and check the condition of your oil as well. Understanding your towing capacity and making sure you are towing with the correct hitch and sway bars are also keys to safety on steep grades! 


    Make Sure You Understand Road Grade Percentage 

    Road grade refers to the amount a road rises or drops over a specific distance. In case it’s been a minute since your last driver’s license test, road grades signs in the U.S. are bright yellow with black letters, have a truck depicted on them, and include a percentage. A five percent grade means the road will rise or fall five feet for every 100 linear feet. This means if you see a sign warning of a five percent grade for the next four miles, you’re going up or down 1,056 feet in the next four miles.  

    The maximum grade for a federally funded road in the United States is six percent. However, this increases to seven percent in mountainous areas — as long as the speed limit is below 60 miles per hour. However, noninterstate roads do not have grade limits. While most public roads are under 10 percent, there are a few upwards of 20 percent!

    If you are reading this and beginning to conjure up memories of Ricky and Lucy driving their “Long, Long Trailer” up some ridiculously steep grades, we can assure you that you will likely never encounter anything quite that steep. While the Rockies, Sierra Nevadas, and Cascades certainly have some steep roads, the roads in North America with the steepest terrain may surprise you!

    If you aren’t a thrill seeker, here are some resources that’ll help you plan your route to avoid steep grades (and save money on fuel): Mountain Directory and Road Grades USA and Canada.


    Uphill vs. Downhill: Important Considerations

    There are some different driving tactics to consider when driving uphill versus downhill. Let’s take a minute to break these tips down a bit.


    Driving Uphill with Your RV

    Stay in Your Lane

    If you are able to safely drive at the same speed as other traffic, use the left lane to pass, then move back to the right lane. But, if you are moving more slowly than other vehicles on the road, stay to the right. Settle in. And maintain a safe speed. Just allow faster vehicles to pass you. Consider using your emergency flashers if you need to go very slow. Take your time — an RV roadtrip should not be a race!


    Listen to Your Vehicle

    Turn off music, podcasts, and limit conversations around you so you can listen to your vehicle as you are heading uphill. If it sounds like it’s struggling or the engine is changing tones regularly, adjust your speed or gears to accommodate.


    Turn Off Overdrive

    To keep the engine from “bounding” (i.e., trying to find the right gear), turn off your vehicle’s overdrive.  This will also reduce strain on the vehicle’s transmission.


    Watch Your Vehicle’s Engine Temperature

    Even if you’ve done all the safety checks and topped off all the fluids, you may run into road grades which could cause your engine to overheat. (Especially in the summer.) Turn off your vehicle’s air conditioner before heading through steep terrain to reduce strain on the engine. If your vehicle’s engine temperature is running a bit higher than usual, pull over in a safe spot and let the engine cool down before starting off again. Some roads with very steep grades have designated spots for vehicles to park while they cool down.

    Don’t push the limits of your vehicle as you could do a tremendous amount of damage. And, if you see another rig in this situation, be sure to give them plenty of space as you pass. If overheating becomes a regular issue for your vehicle, consider these options:

    • Double check your towing capacity versus the weight of the vehicle that you are towing. Take your rig to a weigh station if you want to know the exact weight of your fully loaded vehicles.
    • Double check your radiator fluid (when the engine is cool!) to make sure you don’t have a leak.
    • Add a transmission cooler to help dissipate the heat in the engine.
    • Avoid driving during the heat of the day in the summertime. Rather, drive steeper grades in the morning or evening..
    • Have your rig inspected by a mechanic who understands the impact of steep grades on your vehicle.


    Driving Downhill with Your RV

    Utilize Engine Braking

    Always keep in mind that your RV is heavier than your passenger vehicle. While this is obvious, you’d be amazed at how many people forget this simple fact. That extra weight means more momentum. Which means that you need more breaking power and a longer breaking distance to safely manage curves in the road — as well as safe distances between other vehicles.  

    Drivers should avoid using their brakes for extended amounts of time. It can cause them to heat up, as well as increase wear and tear on them. In extreme situations, this overheating can result in total brake failure and leave you unable to stop your vehicle. Drivers should think about applying the brakes more strongly with intervals of no brakes, rather than a consistent weaker dragging of the brakes which can allow heat to build up.   

    Start a downhill section by slowing down — before the grade. Then gear down before the steep section. This can help manage the vehicle’s speed without wearing out the brakes.  Moving down in gears slowly is the name of the game here. You never want to go from fifth gear to second gear immediately. Rather, moving from fifth to fourth and then to third is a good practice. While downshifting, listen to the revving of the engine to determine if the RPMs are too high or too low, and adjust the gears accordingly.


    Watch for Curves Ahead

    Many graded roads also have curves. So, be sure to keep an eye out for signs indicating “curves ahead” and adjust your speed as needed. These signs will indicate the recommended speed for safely navigating the curve, and often indicate if it’s different for trucks (including RV’s) as there is a greater danger of rollover when your vehicle is tall.

    We often drive a bit less than the speed limit on curvy roads to remain completely in control. If traffic builds up behind you, gently pull over only when it’s safe to do so to allow them to pass.  


    Stay in Your Lane

    If you are able to safely drive at the same speed as other traffic, use the left lane to pass, then move back to the right lane. But, if you are moving more slowly than other vehicles on the road, stay to the right, maintain a safe speed, and just allow the other smaller vehicles to go around.


    Watch for Speed Demons

    Be sure to keep your eyes peeled for fast moving cars, especially those whipping in and out of their lane in heavy traffic. They can quickly cause a dangerous problem as they recklessly maneuver along the highway. Focus on your own speed, stay to the right, and just let them pass you. Everyone will be happier and safer.


    Understand Runaway Ramps

    When driving a large vehicle on steep grades or long descents, brake failure can be both terrifying and extremely dangerous. Runaway ramps can be a true lifesaver if you experience brake failure on your RV or tow vehicle.  There are typically signs indicating you’re approaching a runaway ramp. They are not just for semi-trucks. Runaway ramps are designed as a safety feature for any vehicle whose brakes have failed. Most runaway ramps are filled with sand or gravel and the vehicle’s axles sink into them to stop the vehicle’s forward momentum. In some cases, they have cables designed to slow your speed and then breakaway as you plow through. Stopping can be rather abrupt and violent, but they are definitely effective! 


    Know the Signs of Brake Failure

    • Spongy or soft brake pedal? If you notice that your brake pedal feels unusually soft or spongy when you depress it, the cause may be air in the brake lines or leaking brake fluid. Either problem can become dangerous quickly. Pull over immediately.
    • Smell something burning? A burning smell coming from your brakes can indicate that they are overheating due to constant use or that there is a mechanical issue causing friction such as a stuck caliper. Stop immediately!
    • Dashboard warning lights? Most vehicles are equipped with sensors that can detect issues with the braking system. If you see a warning light on your dashboard that looks like a brake symbol, it’s important to pull over and inspect your brakes immediately. 
    • Loss of braking power? If your brakes do not respond properly and you are unable to slow down or stop, this is definitely brake failure. Downshift quickly in order to use the engine to slow down, and pull up on the emergency brake if necessary. Honk your horn to alert other drivers and use your emergency flashers if other vehicles are present.


    Other Key Additions to Improve Steering Control When Heading Downhill

    • Electronic Trailer Brakes 
      Most modern trailers have electric brakes which help slow the trailer. These are applied through a sensor in your towing vehicle, commonly installed below the steering wheel, so that when you depress the brake pedal, the brakes engage in a relative way. They can also be applied independently by using the hand lever on the brake sensor. This is especially helpful and can prevent disaster in a trailer sway situation.  
    • Remote Tire Air Pressure Monitors 
      Good tire pressure will mean safe and effective braking. Most modern vehicles have these on the towing vehicle, but you may not have these on the trailer, or on your “toad” (the small vehicle towed behind a Class A or Class C motorhome). Being aware of any low pressure in any of your tires can prevent catastrophe when descending a steep hill or highway gradient.  


    RV Those Steep Grades — and Enjoy the View


    If you follow these tips, stay alert behind the wheel, and maintain your vehicle appropriately, steep road grades don’t have to be intimidating. Just take it slow and steady.  Extreme road grades demand a driver’s full attention and respect. You should always be cautious when driving on them to ensure that everyone arrives at their destination safely. But, at the same time, don’t stress out. You’re in the mountains for the view. Enjoy it.

  • What to Look for in an RV Oven — and 4 Models with Great Ones

    What to Look for in an RV Oven — and 4 Models with Great Ones

    If you’re like many RVers, you’ve probably learned the hard way that pizza just isn’t the same in a microwave. I don’t know about you, but no RV Trip is complete without an oven-baked pizza. But for that crispy crust and melted gooey goodness on top, you are going to need a proper oven. Which, can be a conundrum, if the RV oven was last thing you think when buying a new model. So, do yourself a favor: Think about your RV on the front-end — before you buy your next RV.

    We all know that in space is more precious than gold in an RV. Creature comforts get weighed in the balance. Even so, let me share a few tips to help guide you find that right balance — one that will keep bellies full and hearts warm. (Because not all RV ovens are created equal!)

    So, I think we’re adequately preheated now. Here’s what to look for in an RV oven. 


    Start with RV Oven Size

    Size is going to be a huge factor in the type of oven you choose. If you go too big, you could be sacrificing precious countertop space. (Or maybe that farmhouse style sink you always dreamed of.) Decide which is going to bring you more joy: a bigger sink to clean the dishes, or an oven to bake brownies in? A typical RV oven and combination range is about 21-inches wide. That varies of course, depending on the space in — and specific type of — RV). Another factor is the attention given to amenities by manufacturers.

    Not everyone wants to do a lot of baking inside. (Although almost everyone wants to cook a pizza at some point!) So, for some folks, a propane cooktop or induction top will do just fine. (Maybe they’re ordering their pizza.) But for the rest of us, let’s explore some size options. 

    • 21-inch range. A 21-inch RV range will generally yield 1.8 cubic feet of baking space. That is quite a squeeze compared to a residential oven. But a roast chicken will fit just fine — or a loaf of bread, pizza, and cookies. (Not all at once though.)
    • Convection oven microwave. If you can’t find an RV with the space for an oven, consider a convection oven microwave. The difference between a microwave and a convection oven microwave are the heating elements. Traditional microwaves use electromagnetic waves to cook their food. Convection microwaves have an additional heating element and fan to circulate heat throughout the cavity. If you activate the convection setting on your microwave, your food will cook similar to a convection oven. The convection feature will basically transform your microwave into a little convection oven. (So, maybe you can have your cake and eat it too! Albeit, a slightly smaller cake.)

    Hot Model: For an oven with a whopping residential size, and a four burner range, check out the Palomino Puma 403 LFT


    Look for Autoignition

    This newer feature on ranges and ovens is very enticing. If you have ever spent an extended period of time in an RV, you are probably familiar with the time wasted looking for the stove igniter. (Or maybe that’s just us!) Autoignition for an RV oven is a luxury that will save you time — and countless stove igniters.

    Personally, when I finally do find the ignition tool, it’s usually low on fuel. I end up frantically trying to ignite a spark before the propane floods the element.  The anticipation gets me every time, like a twisted game of jack in the box. I never know if my eyebrows are going to get singed when the waiting is done. The autoignition switch is one of those little luxuries that can change your daily experience in an RV. Don’t discount it.


    Hot Model: Jayco’s 2024 Greyhawk Class C line come equipped with a Furrion range and autoignition switches. 


    Go for a Glass Oven Door

    If you are looking at a range new enough to have the autoignition feature, then it will likely come with this feature as well: a glass oven door. In the past, RV oven doors were solid metal, and you needed to open them to see what was happening inside.

    Smaller ovens come with a difficult task of temperature regulation. Opening the oven door releases precious heat, making heat regulation even more difficult than it already is. This can create hot spots in your cooking, as the propane flame has to reignite to regulate the heat. The clear glass with oven lighting gives you the opportunity to check on your cooking without having to open the oven door. 


    Check for a Range Hood 

    I would have thought this was obvious. Believe it or not, a range hood above a propane stove isn’t always required in the RV industry. Codes, corner cutting, and price cuts have a way of stopping short of the obvious sometimes.

    If you have a propane oven or stove, you should have a ventilation hood no more than four feet above your cooktop. New research is pointing to the long term health effects of cooking indoors on a gas or propane stove. If you are going to do it, better to have proper ventilation at all times. 

    Hot Models: Some models, like Jayco’s Eagle half-ton fifth wheels, have ventilation available underneath the microwave. This is a good solution for safe cooking, while utilizing the space for an additional appliance. Other models, like Jayco’s 2025 Jay Feather, have a separate Furrion ventilation hood installed above the range. Both options offer proper ventilation, with modern and efficient RV ovens. 


    Inspect — or Add — Safety Features

    Propane ovens come with a few extra recommended safety precautions. 

    • LED nobs for the burners and the oven will let you know right away if your flame is lit. This feature comes with most auto ignition switches. 
    • Flame Failure Devices are worth considering if there isn’t already one installed. It will stop the flow of gas to the burner if your flame has gone out for whatever reason. 
    • Get a combination smoke alarm that detects propane leaks and other potentially fatal leaks.  


    Shopping

    Searching for anything in the RV industry can be overwhelming. But don’t stress. With today’s technology and your resourcefulness, you can find the perfect combination for your kitchen needs. Just open your laptop, pop in a pizza, and start your research. Your family will thank you. (And, if they don’t say it out loud, know that it’s in their hearts … somewhere.) Your work in the kitchen is what brings harmony to the whole experience. 

  • 7 Fresh Picnic Recipes You Can Prep in Your RV

    7 Fresh Picnic Recipes You Can Prep in Your RV

    Sitting by the lake, waterfall, or river while enjoying a picnic lunch or dinner is a simple pleasure in life that many folks have forgotten. And for campers on an RV trip, quite frankly, it’s low-hanging fruit. All you need are a few fresh picnic recipes, a little food prep, and a view worth driving to.

    Now, the driving is up to you (although we could recommend some great camping spots), but we got you covered on picnic recipes. Here are seven easy, no-or-low cook recipes that anyone can tackle in an RV kitchen. They’re fresh, tasty, and perfect to take as a packable picnic that’ll rival anything you can purchase at an upscale deli. (And all for a quarter of the price!) Each recipe makes about four hearty servings. 

    Mix and match the picnic recipes that sound good to you, bring a picnic blanket or hammock, and maybe a bottle of bubbly?  


    Summer Couscous Salad — with Lemon Basil Dijon Dressing


    Couscous Salad

    Ingredients:

    • 2 tablespoons olive oil
    • 1 teaspoon garlic (minced)
    • 1/2 medium onion (finely chopped)
    • 1.5 cups pearl couscous 
    • 1.5 teaspoons veggie bouillon
    • 3 cups of water


    Instructions: In a large skillet, sauté couscous in olive oil for two minutes. Then add onion and garlic and cook until garlic and onions are soft. Add water and veggie bouillon and simmer until liquid is completely absorbed. The couscous should be fully cooked, but still firm and chewy. Set aside and let cool completely.


    Mixin’s:

    • 1/2 English cucumber (diced, about 1 cup)
    • 4 ounces cherry tomatoes (halved, about 1 cup)
    • 1/2 red or orange bell pepper (diced)
    • 4 baby carrots (chopped)
    • 1 cup fresh mozzarella cheese (cubed)
    • 2 cups of arugula 
    • 2 tablespoons mint leaves (finely chopped)


    Instructions: Add chopped vegetables to the cooled couscous and mix in thoroughly.


    Lemon Basil Dijon Dressing

    Ingredients:

    • 4 -5 tablespoons fresh lemon juice
    • 1/4 cup olive oil
    • 2 teaspoons Dijon mustard
    • 1 garlic clove (minced)
    • 1 teaspoon dried basil
    • 1 teaspoon agave syrup 
    • 1 pinch sea salt
    • 1/2 teaspoon black pepper


    Instructions: Mix ingredients together in a small container. Add to salad just before serving. Top with sliced almonds for some extra crunch and protein.


    Asian Pear Waldorf Salad


    A fun twist on an old standby that grandma used to make! Higher in protein, lower in fat, and a delicious bit of sweetness to complement a savory picnic lunch.


    Ingredients:

    • 2 Asian pears (chopped)
    • 1-2 cups coconut and/or plain Greek yogurt (depending on your preferred sweetness level)
    • 1 cup chopped walnuts
    • 1 to 2 celery stalks (chopped)
    • 1/2 cup dried cranberries


    Instructions: Mix all ingredients together in a bowl and serve. 


    Roasted Potato Salad

    Our neighbor brought this potato salad recipe to a potluck almost 20 years ago, and we’ve never made it any other way since! Leaving the skins on the potatoes and roasting them with a bit of garlic, salt, and pepper takes this potato salad to the next level! 


    Ingredients:

    • 20 tiny red potatoes (halved or quartered depending on size)
    • 2 to 3 tablespoons olive oil
    • Salt and pepper (to taste)
    • 1 teaspoon garlic (minced)
    • 1 cup plain Greek yogurt and/or mayonnaise
    • Dijon mustard (to taste)
    • 2 to 3 green onions (diced)
    • 3 hard-boiled eggs (mashed)


    Instructions: Coat the potatoes in olive oil, garlic, salt and pepper. Roast in a large, covered pan until the potatoes are just tender when poked with a fork. This usually takes about 10 to 15 minutes on the stove top, turning regularly to make sure they are lightly browned on each side. Hard boil three eggs while potatoes are cooking. Let potatoes and eggs cool. Peel the eggs and mashed them, then mix together with the potatoes, yogurt/mayo, mustard, and onions. Refrigerate until ready to serve.


    Grilled Veggie Muffaletta 


    This vegetarian version of a New Orleans style sandwich is best made the day before you serve it. The key to this recipe is a high-quality loaf of crusty sourdough bread that will stand up to the ingredients you put inside. No quantities are listed here as it depends on the size of bread loaf you use. Here are some of our favorite ingredients, but you can layer up anything that sounds good to you.


    Ingredients:

    • Large loaf of crusty sourdough bread (unsliced)
    • Olive tapenade
    • Chili crisp (optional, if you’d like some extra spice)
    • Sundried tomatoes (julienned)
    • Marinated artichokes (finely chopped)
    • Cremini mushrooms (sliced)
    • Spanish onion (sliced)
    • Red or orange bell pepper (sliced)
    • Zucchini or summer squash (sliced)
    • Sliced Swiss, Havarti, or provolone cheese (or a combination)

    Instructions: Sauté the mushrooms, onions, and peppers until lightly caramelized. While the veggies are cooking, prepare the bread loaf. Slice the top off the loaf with your knife at a downward angle, remove the inside of the loaf to create a hollow “bread bowl.” Be sure to leave at least 1/2 “ of bread crumb. (Note: Don’t waste the bread you removed from the center. Cut it into chunks and use it to dip in soup, or toast it up and use them as croutons.)

    Start layering the ingredients inside, starting with cheese, then top the entire muffaletta with the large bread slice that you cut off the top.  

    Wrap the loaf in aluminum foil, then place it in a tightly wrapped plastic grocery bag to prevent leakage. Place in the refrigerator overnight with a press on top. Usually, a cast iron skillet or heavy pan works well. After about 12 hours, the layers have transformed into something far greater than the sum of all the ingredients. Slice pie shaped sections of the loaf, toast in a griddle or oven, or consume cold. Enjoy!


    7-Layer Dip


    Another easy layered recipe, but this time no cooking is required! (Who doesn’t love picnic recipes that are easy?) Making this yourself is 10 times better tasting than buying it premade. Open a few tubs and cans, then chop an onion and shred some cheese. No quantities are listed here as it depends on the size of container you use.  


    Ingredients:

    • Chili beans (mashed)
    • Greek yogurt
    • Pub cheese
    • Salsa
    • Cheddar cheese (shredded)
    • Red onion (finely chopped)
    • Guacamole
    • Tortilla cChips

    Instructions: Using a small metal pan, glass baking dish, or plastic leftovers container, layer each ingredient on top of the next, starting with the beans and ending with the guac.  Dig in with your favorite tortilla chips!


    Roasted Brussels Sprouts Salad


    This hearty and healthy salad can be made ahead of time, then dressed just before serving.  You can substitute with broccoli or even asparagus if Brussels sprouts aren’t your thing.


    Brussels Sprouts

    • 1/2 pound of Brussels sprouts, sliced in half
    • 2 tablespoons olive oil
    • 2 cloves fresh garlic, crushed
    • Dash or two of sea salt and black pepper

    Slice Brussels sprouts in half, trim off the stem end a bit, and put them in a large mixing bowl. Coat them with olive oil, salt, pepper, and garlic. Roast the sprouts in a large, covered pan for about 10 to 15 minutes on the stove top, turning regularly to get a good char on each side.  

    When you can easily poke them with a fork, remove them from the heat and let them completely cool. (Note: You are seeking an al dente texture, not mushy.)


    Mixin’s:

    • 20 grape tomatoes (sliced in half)
    • 2 cups of baby kale
    • 1/2 tub of goat or feta cheese
    • 1/4 cup of almonds or pecans (chopped)
    • Balsamic vinaigrette (to taste)

    Instructions: Once the sprouts are cooled, mix in the remaining ingredients. Toss with your favorite Balsamic vinaigrette and serve!


    Asian Ginger Slaw


    This no-cook recipe is a fun twist on an old standby.  The nuts add a bit of extra crunch and some protein as well.


    Ingredients:

    • 2 cups purple or green cabbage (shredded)
    • ¼ cup slivered almonds
    • 3 green onions (diced)
    • Asian sesame dressing (to taste)


    Instructions: Fill your basket, grab a blanket, round up your favorite people and head out to your favorite view. We hope these picnic recipes help freshen up your next adventure!

  • Congaree National Park: RV Travel and Camping Guide

    Congaree National Park: RV Travel and Camping Guide

    A place unlike any other, Congaree National Park may not drive the same traffic as the biggest national park names. But since when has RVing been about following the crowd? Even more importantly, where else can you experience the largest intact expanse of old-growth bottomland hardwood forest left in the Southeast? Here, huge trees with giant knees thrive in a swamp, where muck is so thick that it filters out pollutants. In the early days of summer, there’s a synchronous firefly festival — otherworldly enough to filter out the muck of disenchantment and reawaken your sense of wonder.

    Small yet mighty, this national park is a special place. And it’s also less than an hour-long drive of Columbia, South Carolina, making it a very accessible day trip! So, whether you are planning a short summer trip or plotting a longer stay in your RV, here’s what you need to know to RV at Congaree National Park.


    Scenic Drives

    There are some national parks that are just made for long scenic drives. Unlike it’s Tennessee-North Carolina neighbor, Great Smoky Mountains National Park, Congaree isn’t one of them. Since most of this park is only accessible by foot or boat, there are no designated scenic drives within this park. With that said, the drive in from any direction is quiet, peaceful, and beautiful – especially in the season for those autumn colors!


    Must-Hike Trails 

    The park’s terrain is generally very flat with only slight elevation changes. Congaree National Park lies within a floodplain the size of Maryland, which means that all trails are subject to seasonal flooding. So, be sure to check the park’s alerts page before heading out on any hike. Most trails begin from the Harry Hampton Visitor Center, and the following are some of our absolute favorites — for any difficulty level.


    Easy

    Boardwalk Trail. This elevated trail meanders through the forest and swamp areas, offering access during higher water. It is wheelchair-accessible, making it a great option for visitors with limited mobility or families with strollers. Distance: 2.6 miles roundtrip

    Bates Ferry Trail. Following a historic colonial road, this is a great option for hikers seeking a shorter path out to see the Congaree River. Distance: 2.2 miles roundtrip


    Moderate

    Weston Lake Trail. This hike provides access to an old-growth cypress-tupelo forest. Following the edges of Weston lake and Cedar Creek, you may see otters and wading birds. The eastern portion of this trail follows a cypress-tupelo slough (dried-up river bed) where many cypress knees can be seen sticking up out of the water. Distance: 4.5 miles roundtrip


    Challenging

    Oakridge Trail. Passing through a stunning stretch of old-growth forest, this trail allows hikers to explore towering oak trees and cross several small creeks. The number of low-lying sloughs makes this trail great for viewing wildlife like deer and wild turkey. Distance: 7.1 miles roundtrip


    Hutch walking the famous Boardwalk Trail.


    RV Parks & Campgrounds

    Park Campgrounds

    Inside of Congaree National Park itself, there are no accommodations for any vehicle, RV, or van camping. The only campgrounds within the park are by reservation only and can only accommodate tents or hammocks. These are Longleaf Campground (a walk-in from parking lot) and Bluff Campground (a one-mile hike further). Backcountry camping is also available within park boundaries and is available by wilderness permit only.


    Public and Private Campgrounds

    Within a 30- to 45-minute drive, you will find several South Carolina state parks and local county parks. Check the Experience Columbia website for private campgrounds in the area that can accommodate RVs and vans.


    Seasonal Advice

    With a humid subtropical climate, Congaree National Park experiences mild winters and very warm, wet summers. The park is accessible in all seasons but is best experienced in the spring and fall when temperatures are at their most comfortable. (And when the insects are generally not a problem.) With that said, this is the only national park we’ve ever seen with a mosquito meter prominently displayed outside the visitor center! If you want to avoid these pesky insects and high humidity, avoid a summertime visit.


    Spring

    March to May can be one of the best times to visit the park. Temperatures are generally warm, with average daily highs reaching the mid to upper 70s. Rainfall averages around three inches per month, with insects generally not a problem.


    Summer

    June to August is normally the hottest and most humid time of the year. Daily temperatures regularly reach into the upper 90s, with high humidity making it feel like it’s 110! Thunderstorms are common and often happen with little or no warning. Precipitation is approximately four and a half inches per month.


    Autumn

    September to November is also a wonderful time to visit Congaree National Park. Temperatures are in the 70s with low humidity.  Fall colors peak between the end of October and early November. Average rainfall is around three inches per month, and water levels are ideal at this time of year for taking a paddling trip on Cedar Creek.


    Winter

    November to February is mild, with average daytime temperatures reaching the mid 50s, though nighttime temperatures can dip below freezing. Snow is not typical, though it can occur. Flooding is most frequent at this time of the year as the park lies in a huge watershed, so any significant rain in upstate South Carolina can cause a quick rise in water levels. 


    Unique Programs & Opportunities

    Kayaking & Canoeing

    Paddling trips are a great way to experience the heart of the park and the Congaree swamp ecosystem! If you are not equipped with your own boat, local outfitters offer guided trips.


    Cedar Creek

    This waterway offers boaters various trip options ranging from a few to 20 miles, depending on where you put in and take out (three different designated landings). Some sections can be done as an easy out-back paddle when the current is slow. Longer paddling trips will likely require several portages over downed trees, depending on the water level.  You’ll experience swamp life at its best with jumping fish, various snakes curled up in the trees, and a variety of bird life flying through the trees and across the creek. Riverbanks will likely be very muddy and slippery, so caution and appropriate footwear are necessary.


    Congaree River Blue Trail

    As compared with a creek, this river is a bigger paddle challenge, offering a 50-mile, multi-day experience. The Blue Trail starts in the city of Columbia and ends at Route 601 Landing near the confluence of the Congaree and Wateree, and travels past diverse habitats, offering paddlers the opportunity to see bald eagles, alligators, and a variety of other wildlife.

    No designated campsites are provided, but boaters can camp along the river, using the sandbars that are available during times of low water, or backcountry camp (permit required) when they reach river mile 26 within the park. Riverbanks will likely be very muddy and slippery, so caution and appropriate footwear are encouraged.

    Fun Facts!  Swamps are incredibly important ecosystems!  They protect dry lands from excessive flooding, as floodwater is diverted into swamps before reaching dry land and claiming the lives of people and destroying property. Some Baldcypress trees in this region are more than 2000 years old and the forest floor is made up of Dorovan Muck — up to eight feet or a muddy mixture of clay and old leaf debris that filters water by trapping and detoxifying harmful pollutants.  


    More Outdoor Fun!


    Synchronous Firefly Festival

    With over 2,000 species of synchronous fireflies worldwide, only three species live in North America. Every year, synchronous fireflies come out for approximately two weeks between mid-May and mid-June. During this time, visitors can experience a fascinating display of synchronous flashing while the fireflies search for a mate. There is an annual lottery for this fascinating phenological event, as it is an extremely popular time to visit the park.


    Fishing

    Fishing is allowed within the park with a valid South Carolina fishing license. Catch and release is encouraged to preserve the quantity and biodiversity of the fish population. All fishing must be from the shore or nonmotorized boats.


    Ranger-Led Programs

    Guided walks and talks are a great way to learn about the park. Generally held from November-February, many different programs are offered daily. Check their online calendar for details.

    *****

    While this unique park is relatively small, there are some fascinating things to see and do.  Time your visit wisely, come prepared for whatever nature brings your way. You’ll have a wonderful time exploring this fascinating national park in the heart of the Southeast!

  • Top 2 RV Steering Stabilizers for a Smoother Drive

    Top 2 RV Steering Stabilizers for a Smoother Drive

    The raised driving position in a motorhome can make cruising down the highway a phenomenal experience. Quite simply, the elevated view is fantastic. But with the added height, there also come a few disadvantages. Like body roll in gusty conditions. Or adjusting your RV’s steering after every bump or turn in the road. No one wants to have to fight the wheel, and yet white-knuckling can be a common driving experience in a motorhome. It’s not fun, and it doesn’t feel safe. Fortunately, with RV steering stabilizers, it’s also not necessary.

    So, if you find yourself needing to recenter your motorhome after sharp turns or constantly  counter-steering to keep off shoulder of the road, it’s time to do something about it. Let’s talk about how RV steering stabilizers work, their types — and which RV steering stabilizers are the smoothest on the market.


    How RV Steering Stabilizers Work

    An RV steering stabilizer looks more or less like a giant shock absorber. It’s bolted onto the steering linkage of the RV and does indeed absorb shock to help return the RV’s steering to center. (A big help after the wheels hit a bump or engage a turn to around an obstacle.)

    To get the wheels directed forward again after any turns, RV steering stabilizers can use pneumatic, hydraulic, or spring resistance. They automatically return the front wheels of the RV to center after they’re turned by the steering wheel. (Same goes for minor bumps in the road that cause you to turn.) They also help to stabilize the RV during windy conditions. (And yes, this includes the wind turbulence that happens before and after being passed by a tractor-trailer.) By automatically recentering, with no effort from the driver, the steering stabilizer helps create a smoother ride. The result is that the driver doesn’t have to do constant micro-adjustments to steering when the RV is traveling down the road. And it doesn’t have to struggle to stay on the road after a semi passes.  It’s a much more stable, relaxed, and safe driving experience.

    Choosing the Right Steering Stabilizer Type for You

    RV steering stabilizers use one of three mechanisms to dampen road vibration and recenter steering. All motorhomes come with a steering stabilizer that meets safety requirements when the RV is shipped from the factory. Still, too often, this steering stabilizer doesn’t last for very many trips before it begins to fail under the constant stress of heavy use. Which means that it doesn’t take long before the RV handling degrades. 

    There two basic types of RV steering stabilizers: pneumatic and hydraulic/steel-spring. Each of them dampens road vibration and can help with recentering steering. And both help to make the driving experience comfortable while keeping the RV safe on the road. However, some perform better than others under the strenuous conditions of heavy-duty use. 


    Pneumatic RV Steering Stabilizers

    Some RVs on F-53 chassis come with a factory-installed pneumatic steering stabilizer.  Pneumatic steering stabilizers use a gas-charged monotube shock that pushes outward under pressure, rather than returning the wheels to center, even when new.  While they provide stiffness and help dampen road vibration, these steering stabilizers can actually push the RV’s front wheels to the right. The result? Often, it’s road wandering.  

    Unfortunately, pneumatic steering stabilizers can begin to fail relatively quickly, especially when compared to more robust systems (like the hydraulic/steel-spring systems we’re about to discuss). When placed under the heavy demands of RV use, these steering stabilizers can fail in a very short time.  As a result, steering recovery can become noticeably worse in a relatively short timespan. 


    Combination Hydraulic/Steel-Spring Steering Stabilizers

    The second type of steering stabilizer used in RVs uses a combination of a fluid filled tube and a steel spring. Together, this combo helps dampen road vibrations and recenter the steering after you hit a bump or turn a corner. These steering stabilizers combine the smooth, consistent performance of a hydraulic shock with the direct, predictable response and durability of a steel spring. Combination hydraulic/steel-spring steering stabilizers give you all the advantages of hydraulics and steel-coil spring shocks. The result? You get an optimal driving experience that requires minimal maintenance. 

    There are currently two RV steering stabilizers that use this technology: the Safe-T-Plus steering stabilizer and the Roadmaster Reflex steering stabilizer.  The one that’s best for your RV will be a matter of personal preference.  Here’s what to know about each of these highly effective RV steering stabilizers.


    Our Picks: The 2 Smoothest RV Steering Stabilizers

    Safe-T-Plus 

    Safe-T-Plus uses a combination of hydraulics and dual-spring technology to reduce tracking and recenter steering. This gets your vehicle under control with no driver effort. The brand promises that it works so well that it will help you to stay in control in the event of a front tire blowout.      

    The Safe-T-Plus steering stabilizer lineup includes four RV specific models. Each model is color coded to meet the needs of a particular RV type. Safe-T-Plus offers a lifetime warranty on every steering stabilizer they sell.


    Roadmaster Reflex

    The Roadmaster Reflex RV steering stabilizer takes advantage of the benefits of a hydraulic shock and a tough coil spring to help recenter steering. This helps to keep the RV stable on rough roads, in crosswinds and/or when being passed by an 18-wheeler.  

    It’s a neat design because the hydraulic cylinder helps to dampen vibrations and returns the steering to center, while the spring system provides the force for returning it to center. Like Safe-T-Plus, Roadmaster says their product will also help to prevent steering failure after a front end tire blowout.  

    If you’re at all mechanically inclined, the Roadmaster Reflex RV steering stabilizer is an easy DIY install. It requires no special tools or drilling and the estimated installation time is under an hour.


    A Few More Ways to Improve RV Steering 

    There’s no doubt that adding a steering stabilizer is one of the best ways to improve RV steering and handling. However, before you jump in and add one, there are four things you can do that could make a huge improvement in oversteer, 

    • Be sure your RV tires are inflated to recommended RV manufacturer’s  specifications.
    • Have your RV wheels aligned and balanced.
    • Be sure tie rods are in good shape and tight.
    • Reduce body rolls and sway  by replacing bump stops by adding suspension upgrades and/or a sway bar.


    It’s All About Securing a Smoother Drive 

    Driving your RV should be fun. Period. (After all, the acronym“RV” is short for recreational vehicle, right?) If you find yourself gripping the steering wheel with a white-knuckled, death grip every time you get passed by an 18-wheeler, it’s probably time to upgrade your RV’s steering stabilizer.  It may be the only thing between you and a truly enjoyable — and smooth — journey.