Blog

  • Bachelor Party Road Trip: Activated! Your RV Guide

    Bachelor Party Road Trip: Activated! Your RV Guide

    There’s a new option for the ultimate bachelor bash: Hit the road. After all, you or your friend’s freedom to roam will soon be saddled with marital responsibility. So now’s the perfect time to enjoy a mobile party, where your crew gets tighter with every mile. No Ubers. No crowds (unless you really want them). Just your squad, the road, and enough space to stock all the bacon and beer for a bachelor party road trip!

    While we kid about bachelor parties being a last hurrah, the reality is that there are certainly more getaways in your future. That means renting an RV for your bachelor party road trip is more than just great planning — it’s also savvy research for a future getaway vehicle. (Later on, when you’ve purchased the perfect RV, you’ll thank me.)

    But for now, here’s everything you need to plan an awesome guys’ trip — RV-style. We’ll talk through great routes, off-grid options, eligible beaches, and the best RV types to get you there.


    3 Killer Routes for a Bachelor Party Road Trip

    Nothing says “bachelor sendoff” like grabbing a shortlist of your best men and hitting the highway. Here are three absolutely unforgettable short(ish) road trips that are easy on the driving, but deliver big-time on scenery and party potential.


    1. Pacific Coast Highway, California

    From San Fran to San Diego, the PCH is the gold standard for cruising. Check out Big Sur’s rugged cliffs, pull over for wine tastings in Paso Robles, and post up at Santa Barbara’s beachfront campgrounds. This route lets you mix upscale stops with wild nights in beach towns like Santa Cruz and Venice. Plus, it’s California. Sunshine and surf are practically guaranteed.


    2. Austin to Fredericksburg, Texas

    Start in Austin for live music, brisket, and a bar scene hotter than a sizzling summer sidewalk. Then steer west, young man, to Fredericksburg for Hill Country charm and more wineries than you can shake a cork at. Wrap things up with a night under the stars at Enchanted Rock — just don’t try to hike it in flip-flops after too many Lone Stars.


    3. Asheville to the Smokies, North Carolina

    This is the perfect mix of craft brews and backcountry adventure. Start with Asheville’s iconic brewery scene, which is unparalleled on either side of the Mississippi. Then point the RV toward the Smokies for campfires, waterfalls, and Appalachian vibes. Ideal for the crew that wants equal parts nature and nightcap.


    Boondocking Bachelors: Off-Grid and On Point

    You’re in the wild. You’re unplugged. And you’re saving coin you can blow on better beer or a bigger honeymoon. Boondocking bachelor parties ditch the campground noise and throw the party wherever you want. Think cliffside views, forest clearings, or deserts under the stars. And the best part: No neighbors to complain about your karaoke choices or ask you to turn down the grill smoke. Just you and the guys — and whatever chaos unfolds.


    Top 3 RV Spots for a Bachelor Beach Party

    When in doubt, head for sand and surf. These three beaches are perfect for letting loose — swimsuits and sunscreen mandatory.


    1. South Padre Island, Texas

    This beach town knows how to party. With RV parks right near the beach. (Check out Isla Blanca Park.) You can go from beach volleyball to grill-master mode in seconds. Bonus: Spring Break energy all year long.


    2. Hunting Island State Park, South Carolina

    Tucked just outside Beaufort, this park offers miles of quiet beach, tall pines, and oceanfront campsites at Hunting Island Campground. It’s a laid-back spot perfect for bachelor parties that want more whiskey-by-the-fire vibes and less clubbing downtown.


    3. Pismo Beach, California

    One of the few spots where you can legally camp your RV on the beach. Oceano Dunes SVRA is where off-roading meets oceanfront bonfires. If your crew likes dune buggies, beers, and sunsets, it’s an easy yes.


    Picking the Right Rig

    Time to talk wheels. Not all RVs are built for bachelor glory. Here’s your breakdown if you’re shopping RV types. (And we have a short guide to some great road-trip models too.)


    The Land Yacht – Class A

    • Pros: Class As feel like a hotel on wheels. Room for everyone, two TVs, full kitchen, leather recliners. You’ll feel like the mobile version of a Vegas high roller.
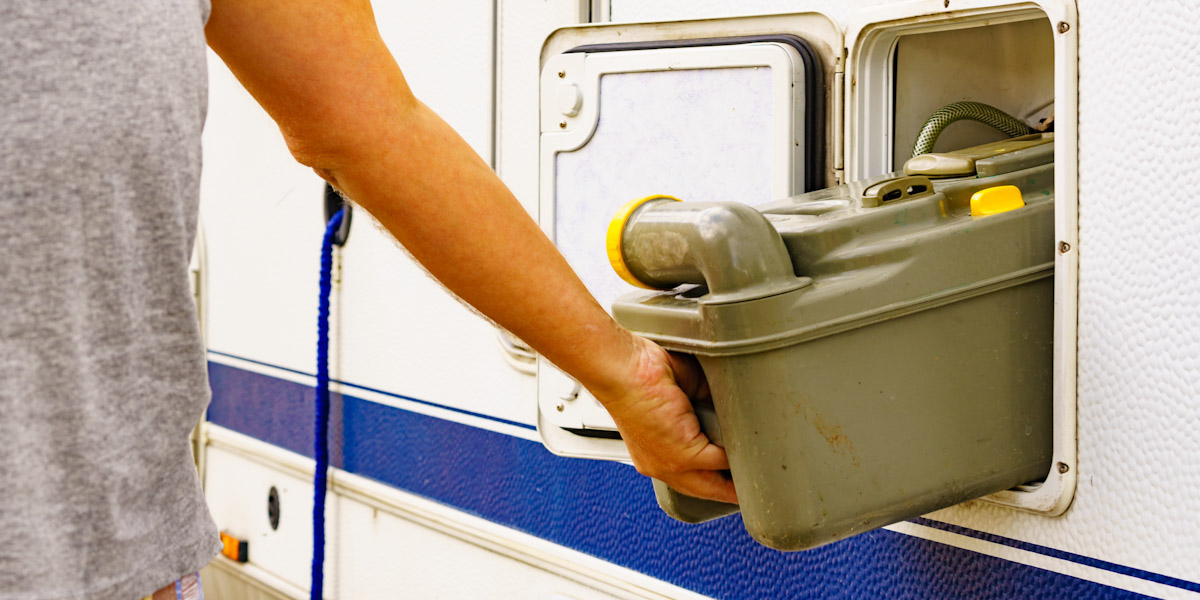
    • Cons: You’ll need a separate budget just for gas. Plus, someone has to drive this bus — which means somebody’s always on water duty.
    • Bachelor Vibe: Rich uncle rented it. You’re just along for the ride (and the mimosa bar). Somebody brought an espresso machine.


    The Stealth Van – Class B

    • Pros: Class Bs are easy to drive, park anywhere, and great for a more low-key adventure crew.
    • Cons: Sleeps two, maybe three — so unless your crew is very cozy, you’ll need a convoy of these. And good luck with bathroom logistics.
    • Bachelor Vibe: Indie film road trip. Lots of flannel. Somebody brought a ukulele.


    The Sweet Spot – Class C

    • Pros: Class Cs have enough room to party without feeling like a tank. Sleeps four to six easy, and still fits into most campsites. The built-in, over-the-cab crash pad is perfect for literal hangovers.
    • Cons: Gas mileage is meh. And once it’s parked, it’s parked—you’re not taking it to run errands.
    • Bachelor Vibe: College reunion energy. Big cooler, loud music, somebody brought a guitar.


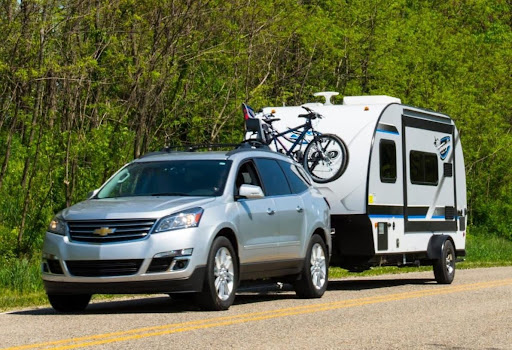
    Basecamp on a Hitch – Travel Trailer

    • Pros: Tow the travel trailer with a truck, drop it at camp, then drive your tow vehicle to explore. You get the best of both worlds.
    • Cons: Somebody has to know how to back it in. If not, expect shouting, hand signals, and what is it called when friends get divorced?
    • Bachelor Vibe: Bonfires, beer pong, and somebody brought a banjo. And another guy brought fireworks “just in case.”


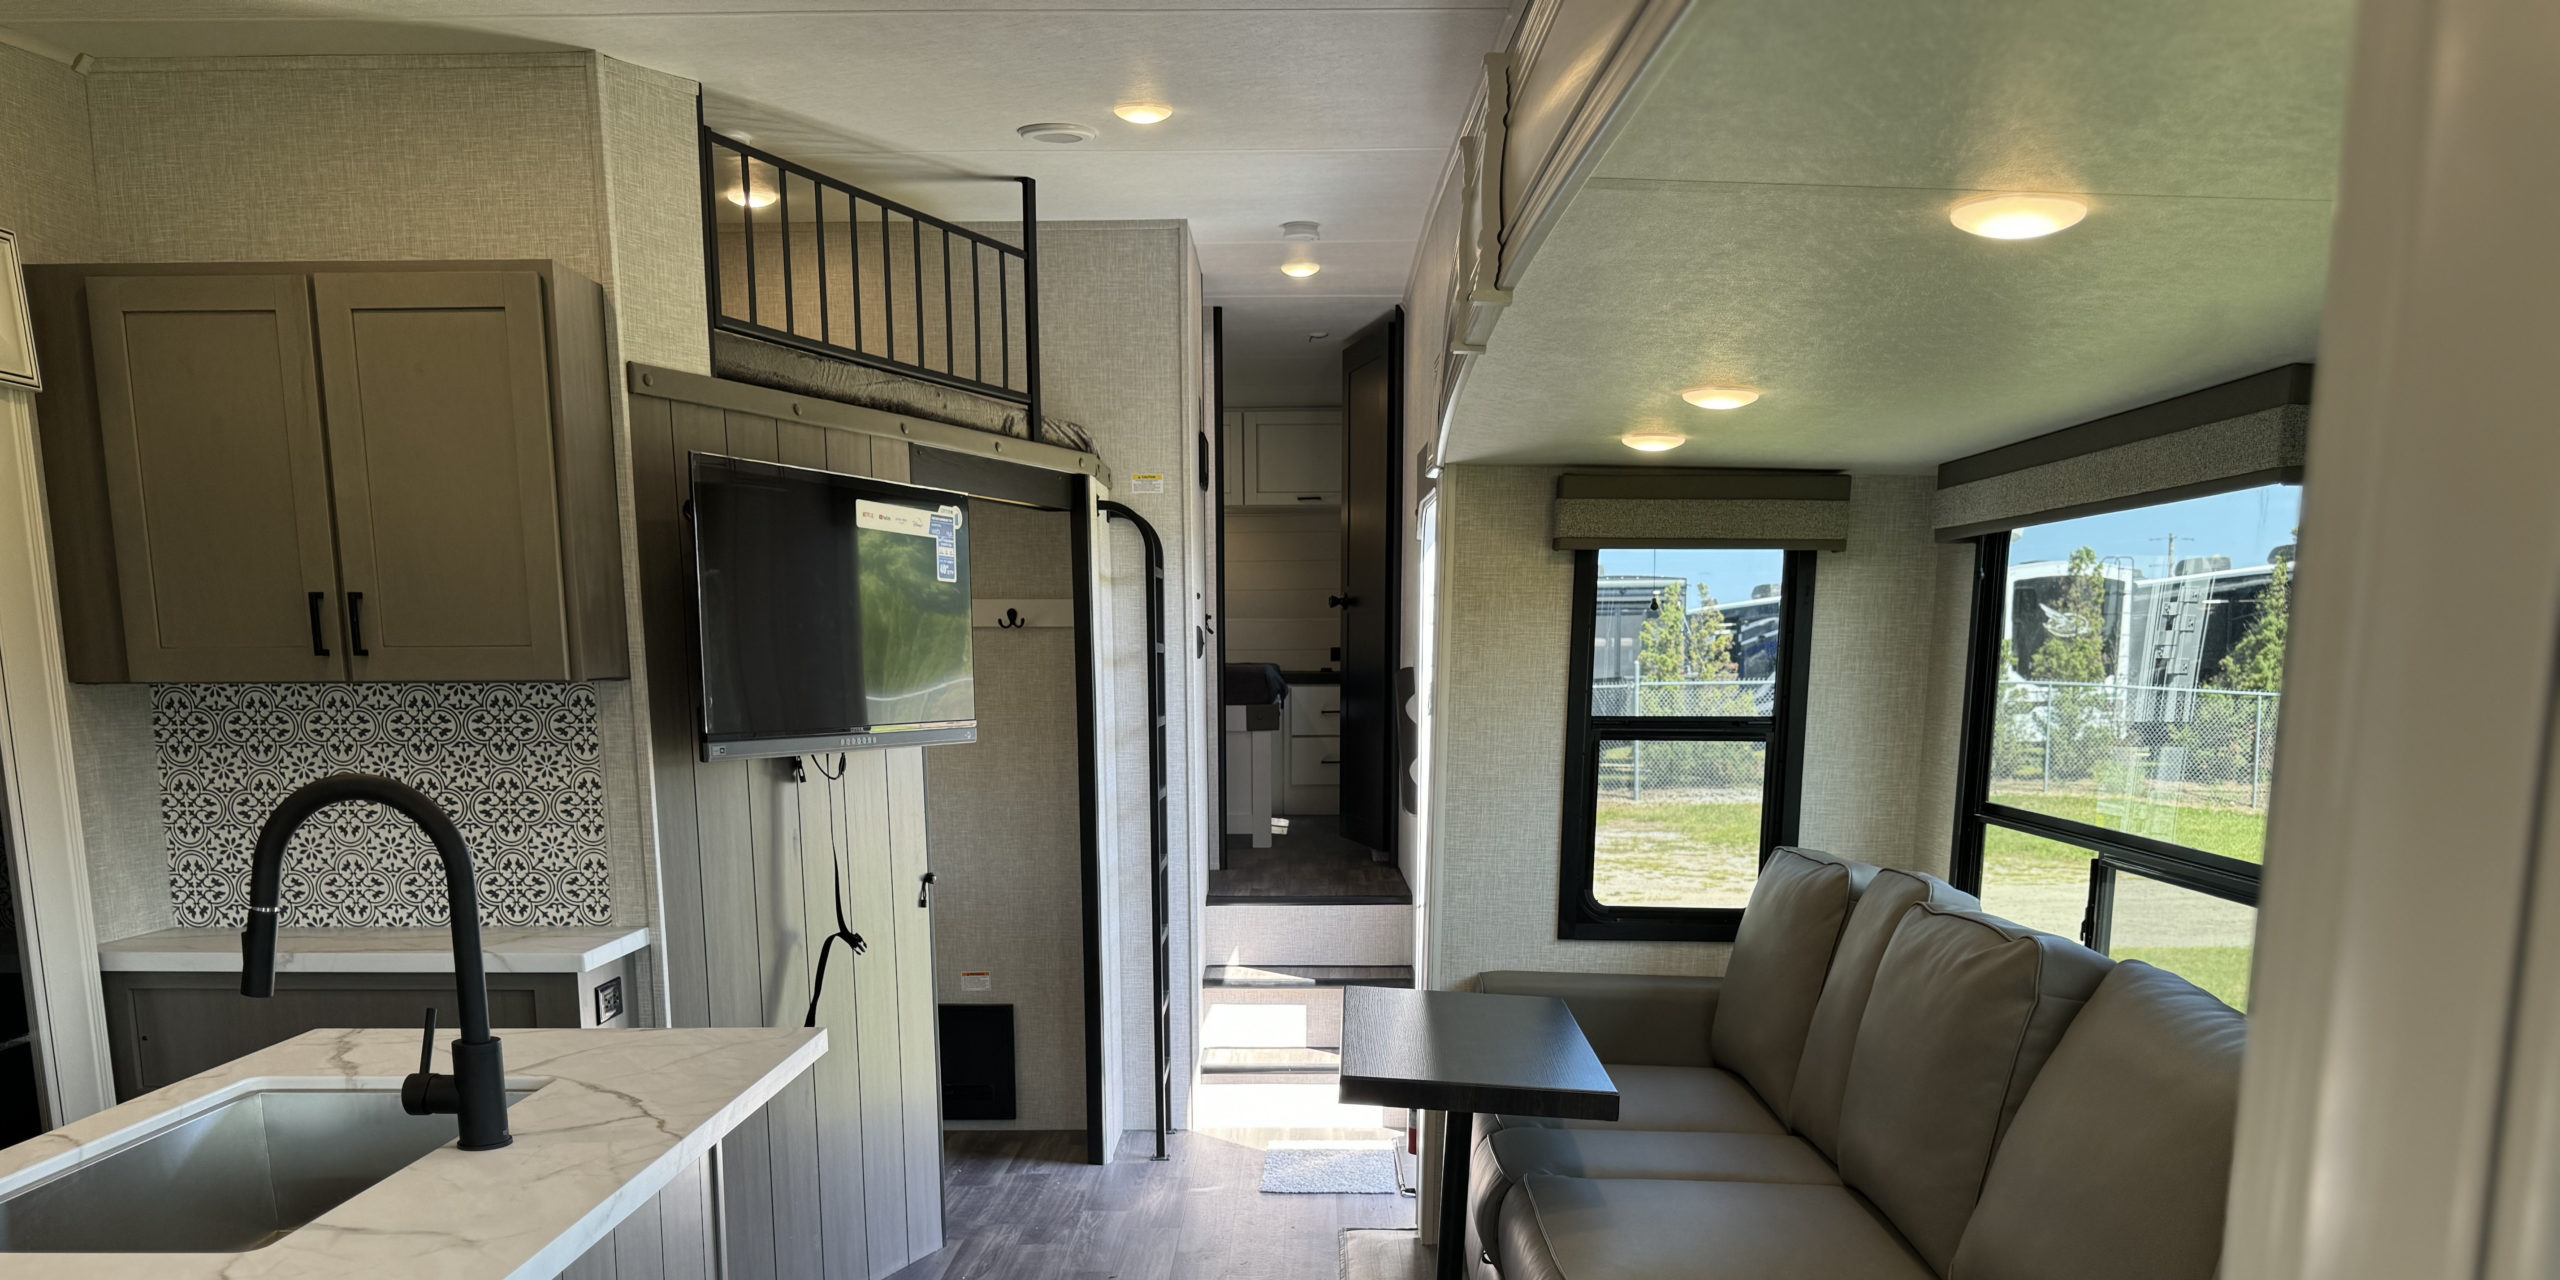
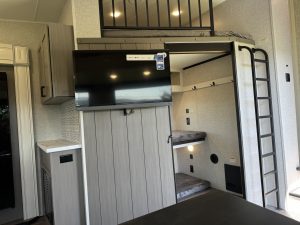
    Big, Bad, and Bougie – Fifth Wheel

    • Pros: Fifth wheels give you an apartment-on-wheels amount of space. Slide-outs. Fireplaces. Walk-in closets. Camping like a king, or at least his favorite nephew.
    • Cons: You need a heavy-duty truck and at least two YouTube tutorials to hitch it right.
    • Bachelor Vibe: The groom’s brother sells crypto and funded the trip. Somebody brought a nine iron and a bag of balls. There’s a kegerator onboard.


    What Makes a Great Bachelor Party Road Trip

    Your bachelor party doesn’t have to follow the same tired script. If you want to blend adventure with chaos, and create a weekend your crew will be talking about until the wedding’s silver anniversary, go RV. Whether you’re camping in the desert, ripping down the PCH, or camping on the beach with hot dogs in hand, there’s no better way to send off single life. So gas up, pack light, and remember: What happens in the RV… might end up on the group chat. Forever.

  • RV Memberships That Actually Make a Difference

    RV Memberships That Actually Make a Difference

    When you’re on the road as often and as long as my wife and I are, you start to realize just how many RV memberships are out there. (Hint: There’s a lot.) Some sound too good to be true, but others are really too good to pass up. The fact is that whether you’re a weekend warrior or a full-timer clocking miles across the country, certain RV memberships can make a real difference in your travel experience. They can not only save you serious money; they can also unlock campgrounds you wouldn’t otherwise find.

    But here’s the thing: Not all RV memberships are created equal. Some are great for fuel savings. Others for discounted camping. And a few more? Well, let’s just say they’ve collected some dust.

    So, how do you know which memberships are worth it?

    Let’s break down which RV memberships actually make a difference — especially the ones we’ve personally used or seen fellow RVers rave about.


    1. Good Sam Club – Getting All the Discounts

    Who It’s For: Great for RVers who frequently stay at private campgrounds, travel long distances using major fuel stations, or shop at Camping World regularly.


    What It Offers:

    • Fuel discounts (up to 5¢ off at Pilot Flying J)
    • 10 percent off at over 2,000 campgrounds
    • Discounts at Camping World and other retail partners
    • Roadside assistance (if bundled with their extended coverage)


    Our Take: Good Sam was one of the first memberships we signed up for. It’s especially handy when you’re bouncing between private campgrounds and need a quick overnight with hookups — or you want a discount at Camping World while picking up a new water filter or sewer hose.

    We found the gas discount to be hit or miss depending on the area. (Sometimes the discount price was already matched or beat by competitors.) But the campground discounts and retail perks were easy to use.


    Pro Tip: If you’re mostly interested in the fuel savings, apps like GasBuddy or Upside can help you find cheaper gas nearby without needing a membership. Similarly, AAA offers some of the same roadside assistance perks, so if you’re already a member, double-check to avoid paying twice for similar benefits.


    2. Passport America – Paying for Itself

    Who It’s For: Ideal for budget-conscious RVers or road trippers who don’t mind calling ahead and reading campground policies to score deals on overnight stops. Really, since this an inexpensive membership that usually pays for itself on the first or second use, it is a nice one to have for almost anyone.


    What It Offers:

    • 50 percent off nightly rates at thousands of participating campgrounds
    • One of the lowest membership fees in the game


    Our Take: We’ve used Passport America in the past, especially on cross-country travel days where we just needed an overnight stop with hookups in the middle of nowhere. You do have to read the fine print — many campgrounds limit the number of nights you can stay at the discounted rate, and some have blackout dates or restrictions. Still, if you time it right, even one or two stays can recoup your annual fee.


    Pro Tip: If you only need the occasional overnight stay, check out apps like iOverlander, FreeRoam, or Campendium for free or low-cost stays—particularly in rural areas or public land. But if you want something with hookups and more reliability, Passport America offers incredible bang for your buck.


    3. Harvest Hosts + Boondockers Welcome – Enjoying Unique Stays

    Who It’s For: Perfect for self-contained RVers who love off-the-beaten-path experiences and enjoy supporting small businesses or connecting with fellow travelers.


    What It Offers:

    • Overnight stays at wineries, breweries, farms, museums, and private homes
    • Over 5,000 unique places to stay overnight
    • Annual fee for access to thousands of host locations
    • No campground fees (though purchases at host locations are encouraged)


    Our Take: This one’s been a staple in our travel toolkit. As full-time travelers who love boondocking, we appreciate the unique experiences and quieter overnights these memberships offer. We’ve stayed on vineyards, breweries, museums, farms, and more with Harvest Hosts and stay with generous hosts who’ve shared everything from travel tips to a helping hand with Boondockers Welcome.

    Yes, you typically need to be self-contained, and with Harvest Hosts you’re encouraged to make a purchase from the business (which we’re happy to do), but the trade-off is often a peaceful, scenic stay that’s far more memorable than a parking lot or crowded RV park.


    Pro Tip: If you’re only interested in the Boondockers Welcome side, it’s available as a standalone membership at a lower price point. Alternatively, some wineries and farms allow overnight parking through other programs for free—though they may be harder to find without a central platform.


    4. Escapees RV Club – Making RV Logistics Easy

    Who It’s For: Best for full-timers or long-haul travelers who want support with logistics like mail forwarding, domicile planning, or who enjoy learning from and connecting with a deeper RVing community. (Especially if you are a family with children looking to make friends with other kids in the same lifestyle.)


    What It Offers:

    • Discounted campgrounds in the Escapees network
    • Extensive education and community support
    • Mail forwarding, domicile assistance, and legal resources for full-timers
    • Escapees/Xscapers community events


    Our Take: We used Escapees primarily for their mail service in the beginning, which is helpful without a home base. Their educational webinars and online resources are also great if you’re new to RVing or looking for guidance on everything from domicile setup to boondocking skills.


    Pro Tip: If you’re mostly interested in the mail service, you could compare with other RV-specific mail providers or look into USPS General Delivery. Since we’ve been RVing for so long, know the ins and outs, and we have so many wonderful friends in the RV community already, this is membership only appealed to us for the mail forwarding. So we went with a company that specializes in that called iPostal1. That said, few RV memberships offer the level of service and long-standing reliability that Escapees has built over decades.


    5. Thousand Trails – Kissing Nightly Fees Goodbye

    Who It’s For: Great for full-time or seasonal travelers who want access to multiple campgrounds in a specific region or nationwide, especially if they alternate between boondocking and paid stays.


    What It Offers:

    • Prepaid camping in specific regions
    • No nightly fees (after initial membership and annual dues)
    • Optional upgrades for more nationwide access


    Our Take: Right now, we have the annual regional pass for Thousand Trails because it made the most financial sense for our current route. Even though we mostly boondock these days, having access to a network of campgrounds makes it easy to stop, reset, and recharge (literally and figuratively) between dry camping stretches. We’ve used it to dump tanks, catch up on laundry, and have a homebase in different areas.

    Some campgrounds are better than others (read reviews), but when you calculate the savings over time, it can be a smart move—especially if you’re in an area with several participating parks.


    Pro Tip: If you’re on the fence, try a zone pass first — it’s more affordable and lets you test the system. And for those who rarely use paid campgrounds, pairing free sites from apps like Campendium with the occasional state park might offer more flexibility without the upfront cost.


    6. Family Motor Coach Association (FMCA) – Equipping Motorhome Owners

    Who It’s For: Ideal for motorhome owners (especially Class As, Class Bs, or Class Cs) who want access to premium travel services, tire programs, and advanced RV support.


    What It Offers:

    • Tire discounts, mail service, tech resources
    • Travel assistance
    • Community rallies and events
    • FMCAssist emergency travel program


    Our Take: While we haven’t personally used FMCA ourselves yet, we’ve heard positive things from other RVers — especially those who travel in Class A and C motorhomes. The tire discounts alone can save hundreds, and the mobile tech resources are great for digital nomads and remote workers.


    Pro Tip: If you’re mainly eyeing FMCA for internet resources, you may be able to find comparable info in online forums or Facebook groups—though without the same level of tech support. Similarly, roadside assistance is available à la carte from providers like Coach-Net or AAA, depending on your rig and travel style.


    Honorable Mentions

    • KOA Value Kard Rewards. Great if you frequently stay at KOA campgrounds.
    • AAA or CAA. Offers limited but useful RV support and hotel discounts during hybrid trips.
    • RVillage (Community App). Not a traditional membership, but a great way to connect with other RVers and learn about meetups and campgrounds through social sharing.


    Do You Really Need Any RV Memberships?

    The answer to this question really depends on you. If you’re RVing just a few weekends a year, some of the higher-priced RV memberships may not be worth it. But if you’re on the road even a few weeks at a time, a good membership can save you more than it costs — and open the door to experiences that typical campgrounds just can’t match.

    Over the years, we’ve learned to take a “less is more” approach. We started out signing up for every club and discount we could find. Now we stick to the few that really work with how we travel. That’s the key — matching the membership to your style.

    We always recommend starting with one or two and seeing how often you actually use them. It’s easier than trying to track ten different logins and cards, only to realize you’ve forgotten half of them when you pull into the campground.

    So, from winery overnights to roadside tire savings, the right RV membership can do more than just cut costs. It can actually enhance your journey. They’re not one-size-fits-all. But when you find the ones that fit, they become indispensable tools in your travel kit. Overall, they help you get where you’re going cheaper, smoother, and with a few unexpected adventures along the way.

  • Portable Toilets and Cassettes: An Information Dump

    Portable Toilets and Cassettes: An Information Dump

    Let’s be honest: No one gets into RV life for the toilet experience. But if you’ve spent any amount of time on the road (like my wife and I in our seven years RVing), you know just how important a good waste setup can be. Heck, if you’ve road-tripped in a regular vehicle and had to use a gas station or fast-food bathroom, you understand and appreciate a good personal toilet setup. You also come to understand that a good toilet experience can happen in different ways — be that porcelain thrones or portable toilets.

    Personally, we’ve always had a traditional black tank system in our RVs. But over the years, we’ve seen just about every option out there. We’ve walked through countless RV shows. We’ve watch and eventually created more YouTube and Instagram demos than we’d like to admit. (And yes, that includes the awkward dump station how-tos.) Of course, we’ve also seen our fellow campers handling their portable setups at sites across the country. Trust us, we’ve seen it all.

    Now, one of the most frequently asked questions we hear from RV newcomers and weekend warriors is about “those removable toilets.” What are portable toilets? How do they work? And are they actually better than a regular black tank setup?

    So today, we’re giving you the full information dump on cassette, portable, and composting toilets in RV life.


    Portable Toilets: For Mobile Business

    Portable toilets are standalone, self-contained toilet systems that don’t require permanent installation or a plumbing connection. Think of them as upgraded versions of what you’d see at a festival, but cleaner, more efficient, and (hopefully) less disgusting.

    You’ll usually find these in smaller rigs like teardrop trailers, Class Bs, or pop-up campers where space and plumbing are limited. Some folks even add them to their vehicle setup for boondocking or off-grid convenience.


    Pros

    • Lightweight and easy to move
    • Great for tent campers or car campers
    • No complicated plumbing required
    • Ideal for quick overnight stops or off-grid flexibility
    • Simple to clean and affordable to replace


    Cons

    • Small capacity means frequent dumping
    • Manual dump process (yes, you have to carry it)
    • Limited ventilation can cause odors
    • Not ideal for full-time or long-term travel
    • Not designed for long-term heavy use


    Cassette Toilets: A More Manageable Dump

    Cassette toilets are a sort of hybrid. They’re usually permanently built into the RV like a traditional toilet, but they use a removable black tank (called a cassette) that you pull out from an exterior hatch to empty. They’re most common in European rigs and smaller Class Bs, but we’re starting to see them pop up more frequently in other smaller RVs here in the States.

    We’ve toured a lot of rigs with cassette toilets and talked to plenty of owners. While they can be a great space-saver, they definitely come with trade-offs.


    Pros

    • Built-in toilet with minimal space requirements
    • Newer RVs tend to have easy exterior access for removal and dumping
    • Doesn’t require a full plumbing system or traditional black tank setup
    • Great for compact RVs and vans
    • Can be dumped into many public toilets, pit toilets, or dump stations
    • Newer models sometimes include an electric flush and small rinse reservoir


    Cons

    • Small tank size fills quickly
    • Needs to be dumped every couple of days with regular use
    • Public dump stations or restrooms are often required and not always allowed or available
    • Carrying a full cassette through a public area isn’t exactly glamorous
    • Some models don’t have a vent, which can lead to odor
    • Waste tank seals can wear out and need replacing over time


    Composting Toilets: Down-to-Earth Solution

    Another increasingly popular option among #vanlifers, schoolies, and frequent boondockers is the composting toilet. Unlike portable or cassette toilets, composting models separate solids and liquids, using natural breakdown processes instead of chemicals or water.

    We’ve seen composting toilets pop up in a lot of Class B rigs and custom builds at RV shows, and they definitely have a loyal following — especially among off-grid travelers and eco-conscious RVers.

    Pros

    • No black tank required
    • Waterless and chemical-free
    • Solids container can last weeks before needing to be emptied
    • Liquids can be easily disposed of in appropriate facilities
    • Environmentally friendly and great for off-grid use


    Cons

    • More expensive upfront than other options
    • Learning curve for proper use and maintenance
    • Must empty liquids more frequently
    • Venting system requires installation and power
    • Some users find the solids emptying process a bit…personal and disgusting

    Sure: Composting toilets aren’t for everyone, but for those living off-grid or looking to reduce water use, they can be a smart, long-term solution.


    How Portable Toilets Compare to Black Tanks

    This is where we can speak from the most experience. We’ve always traveled with regular black tank systems — and despite the occasional clog, leak, or misread sensor, we’ve appreciated the capacity and convenience they provide.

    Traditional black tanks:

    • Hold significantly more waste (typically 15 to 50+ gallons)
    • Require less frequent dumping (we can usually go a week or more)
    • Can be emptied quickly at any standard dump station
    • Stay permanently connected and vented for less odor

    But they also:

    • Require a full dump station hookup (or macerator setup)
    • Need maintenance, like tank flushing and sensor cleaning
    • Can clog if you’re not careful with TP or water usage (We now use regular TP and have a designated bathroom trash can with a lid for only toilet paper. This has led to—fingers crossed—no clogs in years of use.)
    • Can get messy if hoses or valves malfunction

    Meanwhile, cassette, portable, and composting setups trade long-term ease for short-term simplicity.

    If you’re doing van life, short weekend trips, or traveling solo, these smaller options can be incredibly practical. But for long trips or full-time RVers like us, especially those with pets or extended travel goals that include long boondocking stays, the capacity and convenience of a traditional black tank setup wins out.


    Real-World Observations

    Even though we’ve never owned a cassette, composting, or portable toilet ourselves, we’ve seen plenty in action. We’ve watched folks roll into rest stops with a cassette or composting tank in hand, and while it gets the job done, you definitely need to be comfortable handling your own waste. (And doing it more frequently.) When you’re boondocking for days or weeks at a time, that frequency starts to matter.

    At RV shows, we’ve also noticed that newer builds — especially those aimed at off-grid lifestyles— are leaning toward composting toilets as a space-saving and eco-conscious solution. But again, that system isn’t for everyone, and it takes a bit more involvement to manage.


    Tips for Choosing the Right Setup

    Whether you’re in the market for a new RV or thinking about upgrading your current bathroom situation, here are a few things to keep in mind.

    • Know your travel style. If you’re part-timing or boondocking occasionally, smaller toilet systems can work well. Full-timers? Consider a setup that prioritizes convenience and capacity.
    • Think about where you’ll be dumping. Cassette toilets often require public restrooms, composting systems need thoughtful disposal of both liquids and solids, and traditional black tanks rely on designated dump stations.
    • Check local regulations. Some parks and areas have rules about how and where waste can be dumped.
    • Think about comfort and convenience. Ask yourself how often you want to interact with your toilet — and how okay you are with carrying your waste across a campground or into a public restroom.
    • Watch for wear and tear. Portable and cassette toilets often need new seals, handles, or tanks over time.
    • Consider ventilation and smell. Proper setup, whether black tank or composting, makes a huge difference in odor control.


    In the End, Everyone’s Gotta Go

    RV toilets might not be the sexiest part of RV life or full-time travel, but they are one of the most important. And while we’ll continue rolling with our black tank and clear elbow adapter (seriously, that little transparent piece is a game-changer), we totally get the appeal of cassette, portable, or composting setups — especially for new RVers dipping their toes into the lifestyle.

    At the end of the day, there’s no “right” choice — just the right one for your rig, your travel style, and your comfort level. If you value simplicity, don’t mind frequent dumps, and need something compact, cassette, portable, or composting toilets can absolutely do the job. If you’re looking for convenience, longevity, and less interaction with your waste (we hear you), a traditional black tank might be the way to go.

    Whichever path you choose, just remember: It’s not about the toilet. It’s about the journey — and being able to enjoy it comfortably, confidently, and cleanly.

    And hey, the next time you see someone walking through a gas station towards the restrooms with a weird plastic box in tow… just smile and give them a nod. They’re out there living the dream — one dump at a time.

  • 4 RV Bunkhouses to Bump Up Your Sleep Space

    4 RV Bunkhouses to Bump Up Your Sleep Space

    Sometimes life gives you an unmistakable signal. And if you’re an RV family, a moment may be coming for you — the moment you realize you’re gonna need a bigger RV. And, more specifically, that RV bunkhouses were the solution. I certainly remember when that moment happened to us.

    We were boondocking with our RV in Moab in the summer. My husband and I were traveling with our two small kids, a dog, and a hamster. Moab’s summer heat is like a fiery volcano. Before the dog could go on her walk she needed little boots on her paws so they wouldn’t burn on the sidewalk. She even needed a white shirt over her black body so she wouldn’t overheat in the sun. Everyone was hot, tired, and feeling claustrophobia set in. And while, as RVers, our intention may be to spend most of our time outside, you simply have to accept the obvious sometimes: It’s too brutal to be stay out. You need to get inside.

    On this occasion, that was when I realized: We need more living space in our RV. These kids need an RV with a bunkhouse. 


    The Double Bonus of RV Bunkhouses

    When shopping for RV bunkhouses, it’s important to remember that sleeping arrangements aren’t just for sleeping. Remember, if you are anywhere hot, cold, or rainy, you might be spending a lot of time inside the RV. Your kids will want a space to call their own — somewhere they can decompress from you, each other, and the harsh elements outside. It makes sense. Traveling has a way of pulling the rug out from under a child’s sense of stability. As parents, it’s always healthy to mindful of that, and it’s smart to address it if your kids are going to spending any significant time on the road.

    A big way to make up for a child’s lack of routine and security, is to give them their own space. It doesn’t have to be big. It just has to be their own. And there are some great RV bunkhouses out there that are perfect for a kid’s imagination.

    With that being said, let’s look at four of our favorite RV bunkhouses, starting with one of the best models we’ve seen to combine adult and kid needs.


    Top RV Bunkhouse Combo: Remote Work + Kid Space

    2025 Starcraft GSL Light Duty 304BHS


    The Starcraft GSL Light Duty 304BHS is a heart stopper for traveling families. It combines a beautiful duality of functional living spaces here that check all the boxes — including a place to work remote. 

    Not every family wants to purchase an RV to live full-time in. BUT, if that was ever on your bucket list, this one is worth a look. This RV bunkhouse has three levels. The bottom level doubles as a spacious work table. Remember that thing I said about kids having their own independent space? They can have it here, even if you’re using the work table. The way it is arranged, you can work on the bunk bed while it’s converted to table space, and, at the same time, the kids access the larger top bunk. It has its own little ladder to climb aboard. You can even close the door to your work space while the kids play up top.

    In my humble opinion, it’s quite dreamy. Just picture it, like the perfect sandwich: a triple-tiered bunk with a work table and a top bunk with a separate entrance?! Yes please.  


    Let There Be Light

    My favorite attribute of the space is the natural light that floods the space. A healthy-sized window lives above the table/middle bunk. As a remote-working traveling mother, I find myself drawn to a work space with natural light. (To get the creative juices flowing, I need the help of vitamin D.) Another asset in this workspace/bunk room is the door behind it. It is a surprisingly large area with a door that slides shut to keep the littles from hijacking your brain space. They are adorable distractions, I know, but the sooner you finish your work the sooner you can give them your fullest attention! 

    Added Bonus: For such a large unit, it is quite light and can be towed with a half-ton vehicle! 


    3 More Impressive RV Bunkhouses

    Grand Design Imagine XLS 25DBE

    The Grand Design Imagine XLS 25DBE travel trailer is another showstopper. If your kids are older, they might prefer a larger bunkhouse than the ones that come in so many RVs. In this floorplan, the bunkhouses are each double beds. (A true luxury in the RV world!) The sleeping arrangements are on opposite sides of the trailer. The bunkhouses are at the rear, and the master is in the front of the unit. Living in such tight quarters, having the sleeping areas far apart can be really beneficial for privacy when you’re living in tight quarters. (And sometimes its just nice to have a little breathing room.)


    Highland Ridge Open Range 390TBS

    The 2025 Highland Ridge Open Range 390TBS is a model of luxury. It checks the boxes for decadent living spaces and sleeping arrangements. The open floorplan includes a clever loft space with three sleeping areas for kids. With narrow mattresses and a low headspace, this room is definitely intended for children. Kids need only their imagination to make a space their own, headroom is not a requirement. (My kids seem to prefer tiny awkward spaces for their imaginative fort dwellings. )

    With three mattresses, and possibly space for another, your kids can bring their friends along for a weekend away. There are storage compartments in the loft, so they can keep their belongings in their own space. 

    One thing that often goes unchecked in an RV is the bathroom situation. Sure, more than one designating sleeping space is nice, but, with a sleeping capacity of eight, do you all want to share one bathroom? In the Open Range 390TBS, there are two bathrooms for your daily ablutions. 


    Entegra Coach Odyssey 31F

    The Entegra Coach Odyssey 31F is a motorhome bunkhouse with sleeping spaces in spades. Class Cs are known for their over-the-cab bunk. But this model features a bunkhouse, a master bed, a converting dinette, a tri-fold sofa (that doubles as a bed), and an over-the-cab bunk. If you’re looking for a bunkhouse for your kids, and you want to have visitors, take a look at this floor plan. All those beds mean you can sleep 10 people in this 31-foot Class C! 

    Wow. 


    Set Yourself Up for Success 

    Everyone has a different threshold, and getting to know yours (and not someone else’s) is all part of the journey. For example, the same day I realized we needed a bigger rig, I passed a small van parked at a local market. The sliding door was open. A toddler came tumbling out, followed by a mother with a newborn strapped to her chest. She was simultaneously making breakfast for everyone in her microscopic kitchen, like some sort of Marvel superhero. 

    How does she make it look so easy? Her, and about 2 million other people living their best #vanlife under sunshine and rainbows on social media. (Of course, it’s also possible that those picture perfect moments aren’t so perfect.)

    Regardless of what everyone else’s story is, the key to success is to know your story. Know what your needs are, and don’t be afraid to own them. Be curious about what makes you happy on your adventure, and what makes you mad, scared, tired, and sad. You can’t avoid the latter, but you can try to find a happy place of equilibrium. And RV bunkhouses are a great way to achieve it.

  • Top RV Bike Racks: Electric to Ultralight

    Top RV Bike Racks: Electric to Ultralight

    If you’re an RV enthusiast who also enjoys exploring the world by bike, odds are that you need a bike rack. (That is, unless you have a folding e-bike.) Having a bike rack on your RV not only frees up the limited space inside your rig, it also helps keep the dirt out. So, you get both more free storage space and more free time. It’s a win-win. The bigger question is which one to get. What are the top RV bike racks?

    There are so many options out there, it can be hard to know which one is right for you. So, in this guide, we’ll look at everything you need to know about bike racks for RVs — and point out some of our favorite RV bike racks by type along the way.

    Now let’s get this thing spinning!


    Bike Racks vs. E-Bike Racks: Think Weight and Height

    These days, RVers are as likely to get around on an e-bike as a conventional bike. When it comes to RV bike racks, this is an important point. E-bikes generally weigh between 60 and 100 pounds — each. Consequently, e-bike racks are usually built to support two bikes of that weight.  Therefore, they are much more heavy-duty than conventional bike racks, which often support two bikes up to 60 pounds.

    Another consideration that often separates e-bike racks from conventional bike racks is height from the ground. While you might lift a fixed bike up onto a tongue-mount frame without an issue, it’s probably a different story loading an e-bike onto a rack at the same height. But there’s more to consider when it comes to getting any type of  RV bike rack.


    Weighty Considerations for Your RV

    Overloading your RV, RV trailer tongue, hitch receiver, or tow vehicle can have catastrophic repercussions. Therefore, before you load bikes onto any RV, here are a few things you’ll want to consider. The first thing you should do is check:  

    • RV or tow vehicle hitch capacity;
    • Tongue weight capacity of your tow vehicle;
    • Combined occupant and cargo carrying capacity (OCCC);
    • Maximum weight of the bikes you intend carry; and
    • RV bike rack weight and carrying capacity.

    You can find that information in a variety of places. 

    • On the DOT sticker that is located every RV
    • In the specifications section of user manuals
    • On the manufacturer’s website
    • Reddit groups
    • Forums like IRV2

    In addition, any bike rack being used on an RV needs to be engineered specifically to withstand certain extreme conditions. These include being bounced around and subjected to a lot of wind pressure while carrying significant weight.  It’s crucial to ensure any rack you’re considering  was designed and approved for use on an RV.  


    E-Bike Racks for RVs

    Most e-bikes are usually in excess of 60 pounds. This means any bike rack you carry them on will need to be able to withstand their weight, plus the additional stressors that come with being used on an RV. As mentioned, e-bikes naturally require a heavier, beefier rack than conventional bikes do.  Always look for an e-bike rack that’s rated for RVs.  

    Also, be sure to check the size and weight capacity of your RV hitch receiver. If the size of the hitch receiver doesn’t match the size of the hitch tube on the rack, you may be able to use an adaptor to increase the diameter. 


    Other E-Bike Rack Considerations

    • Those who may have trouble lifting an e-bike onto a rack may want to consider getting a rack that includes a ramp for loading e-bikes.  
    • Prevent theft of your e-bike and/or e-bike rack components by locking them with tool resistant locks. 


    Top 3 E-Bike Racks 

    Swagman E-Spec RV Rated Bike Rack


    • Motorhomes and other RVs: Carries up to two bikes with a maximum weight capacity of 80 pounds per bike
    • RV Trailers: Carries up to two bikes with a maximum weight of 70 pounds per bike
    • Rack weight: 63 pounds
    • Fits Class 3, 2-inch hitch receivers
    • Fits tires up to 5 inches wide
    • Fits wheels 20 inches to 29 inches in diameter
    • Locking threaded hitch pin and locking ratchet hooks
    • Can be used with a ramp and bridge set to make loading easier
    • MSRP: $499.00 


    Hollywood RV Rider E-Bike Rack


    • Designed for motorhomes
    • Not to be used on trailers of any type
    • Capacity: 2 x 80-pound e-bikes
    • Rack weight: 63.5 pounds
    • Can be used on front hitches
    • Fits Class 3, 2-inch hitch receivers
    • Maximum wheelbase: 60 inches
    • Minimum wheelbase: 36 inches
    • Maximum tire width: 5 inches
    • Heavy-duty wheel holders
    • No adapters needed for stepthrough bikes
    • Includes small wheel adapter for 20-inch fat tire bikes
    • Limited lifetime warranty
    • MSRP:  $849.99


    Swagman Escapee


    • Designed for RVs of all types
    • Capacity: 2 x 60-pound e-bikes 
    • Not designed for use with front bike wheel fenders
    • Safe for carbon fibre frames
    • Fits Class 3, 2-inch hitch receivers
    • Fits tires up to 5 inches wide
    • Fits 20-inch to 29-inch wheels 
    • Locking arms secure bike to rack
    • Threaded locking hitch pin included
    • Can be used with a ramp and bridge set to make loading easier
    • MSRP $575.00


    RV Bike Racks for Conventional Bikes

    Aside from offering a more intense workout, a key advantage of conventional bikes are that they are often significantly lighter than e-bikes. That means you have more options to choose from with regard to bike racks and mounting locations on the RV. You’ll usually find that the RV bike racks for conventional bikes are priced much lower than e-bike racks too. 

    So, let’s have a look at the four types of RV bike racks: ladder-mounted, bumper-mounted, hitch-mounted, and tongue-mounted. 


    Ladder-Mounted RV Bike Racks

    Ladder-mounted bike racks are hooked onto the RV ladder and secured in place with straps or bolts. They provide an easy-to-install, lightweight alternative to hitch mounted or A-frame mounted bike racks. Ladder-mounted RV bike racks can work well for one or two light conventional bikes, but are not suitable for heavy bikes, and may not work for some mountain bikes depending on frame geometry. (A drawback of this type of bike rack is that if you need access to the roof, the bikes, and sometimes the bike rack, will need to be removed from the ladder.)


    Camco RV Ladder Mount Bike Rack 


    The Camco RV ladder mount bike rack offers a lightweight means of carrying your bikes on the RV.  However, it’s 60-pound load capacity means that bikes mounted on it need to weigh in on the light side, even for conventional bikes. 

    Specs

    • Weight: 9.75 pounds
    • Maximum load capacity: 2 bikes totaling 60 pounds
    • May not work for smaller framed bikes
    • Folds for storage
    • MSRP: $89.99 


    Stromberg Carlson LA102 Bike Rack for Universal Ladder


    The ultralight Stromberg Carlson LA102 ladder-mounted bike rack can store up to two bikes securely. (And it weighs only five pounds!) However, its total weight capacity of just 50 pounds means that bikes transported on the LA 102 need to be very lightweight, even for conventional bikes. That said, this bike rack could work well for transportation of a single bike. 

    Specs

    • Weight: 5 pounds
    • Maximum load capacity: 50 pounds
    • Bolts onto ladder
    • Folds out of the way for ladder access
    • MSRP: $93.80


    Bumper-Mounted RV Bike Racks

    Bumper-mounted RV bike racks bolt onto the RV bumper using a pair of U-bolts. While they can work well for lightweight bikes, most RV bumpers are simply not built to handle much weight. Advantages of this style of bike rack are ease of installation as well as low height, making it easy to get bikes onto the rack.  


    Swagman RV Bumper Rack 2 Bike Bumper Rack


    The Swagman RV Bumper Rack can store up to two 30-pound bikes for transport on the back of any RV bumper that can support up to 110 pounds. It’s simple to install, and its low height makes it easy to load and unload bikes. In addition, it can be adjusted to fit a variety of bike wheel sizes and frame styles. 

    Specs

    • Weight: 50 pounds
    • Load capacity: 60 pounds, 1 or 2 bicycles (maximum 30 pounds per bike)
    • Fits 4-inch to 4.5-inch square RV bumpers
    • Installation uses 6.5-inch and 8-inch long bolts around the RV bumper
    • Heavy-duty steel 
    • Upright bar in the center of the rack offers added support for bikes
    • MSRP: $152.09 


    Hitch-Mounted RV Bike Racks

    Hitch-mounted RV bike racks mount on the hitch receiver of your motorhome or trailer. It’s very important to check your RV hitch receiver’s weight capacity before you mount a hitch mounted bike rack on it. That way you can be confident it’s not going to fail or cause damage to other RV components while you’re driving.    


    Swagman Original RV Bike Rack for 3 Bikes


    The Swagman Original RV bike rack is a tried and true bike rack that carries up to three bikes with minimalistic aplomb. It’s not just about the elegance here.  The Original RV Bike rack is built to withstand all the shaking, rattling, and rolling that comes with being fixed onto the rear hitch of any RV, truck, SUV, or car.  

    Plus, Swagman expects you to take it on adventures, on and off road.  This sets it apart from many other racks. But its sturdy build doesn’t depend on heavy components. It’s all about clever engineering here. There are no moving parts, but also the mast attaches to the shank with steel-reinforced brackets. That being said, this sturdy bike rack weighs just 25 pounds but can handle up to 100 pounds of weight.  

    Specs

    • Weight: 25 pounds
    • Load capacity: 3 bikes totaling 100 pounds
    • Rubber cushioned cradles
    • Fit: Universal with 2-inch hitch receiver
    • Distance between cradles (center to center): 6 inches
    • Ground clearance on fifth wheels: 15 inches
    • Limited lifetime warranty
    • MSRP: $210.35


    Tongue-Mounted Bike Racks

    Tongue-mounted bike racks allow you to carry bikes on the tongue of a travel trailer. Carrying bikes on the tongue of a travel trailer has several advantages. For one thing, it’s an easy rack option for RVs that don’t have a hitch at the back. (or else have a hitch that can’t handle the weight and punishment of carrying bikes.) Getting the bike weight onto the tongue can be a more stable option for many towables too. Last (but not least) many RVers like to have a clear visual on their beloved steeds while they are being transported.  This allows them to get on top of potential issues (like straps loosening) before they turn into bigger problems. 

    That said, tongue-mounted racks have some definite downsides. One of these is that the bike cradles are quite high. Lifting bikes high enough to load them onto a tongue-mounted rack can be a challenge for many RVers.

    Another disadvantage to mounting bikes on the tongue of the RV (that no one ever talks about) is this: Bikes carried on the front of the camper can quickly become thickly coated in bug splatter. (Ew.) Many bike enthusiasts who travel in an RV deal with this by adding a bike cover. However, bike covers on bikes carried on the RV tongue increase vehicle wind resistance and may impact vehicle fuel economy.  

    In any case, before adding a tongue-mounted bike rack, ensure both the RV tongue and the  tow vehicle can handle the extra weight of both the rack and the weight of the bikes.


    Lippert Jack-It Tongue Mounted Bike Carrier


    The Jack-it tongue mount carrier carries up to two bikes over the propane tanks on the trailer’s A-frame. Bikes mount on the rack’s cradles. They can then be strapped into place using a rubber strap system that holds the wheels securely in place.  

    Specs

    • Rack Weight: 25 pounds
    • Load capacity: 2 bikes totaling 80 pounds
    • Fits travel trailers
    • One-year warranty
    • MSRP: $347.95


    Choosing the Right RV Bike Rack

    Ultimately, getting an RV bike rack that fits your RV style and your needs is about more than merely adding a practical upgrade to your RV. Whether you choose a heavy-duty workhorse for hauling e-bikes or a lightweight rack for conventional bikes, adding a bike rack to your RV allows you to combine two of your favorite lifestyles. It offers the opportunity to travel while discovering new cycling destinations wherever you go. 

  • 3 Electric Bikes to Cycle Beyond Your RV Campsite

    3 Electric Bikes to Cycle Beyond Your RV Campsite

    Two of the best things about RV camping are being able to spend time outdoors and getting to  explore new places. Sure, you could always explore on foot. However, seeing the world from the seat of a bike adds a definite element of fun. (Not to mention adventure!) After all, even a trip to the camp store is way more fun on a bike. Cycling allows you to cover a lot more ground — and is easier on the joints.  Especially if the bikes you bring in your RV are electric bikes.

    Cycling makes exploring off-the-beaten-track locations and hidden gems into as adventure that eliminates hassles like finding parking. (Or paying for it.)  Many patios and restaurants now offer some form of  bike parking. That means you can ride your bike there, relax, grab a bite, and enjoy a beer (or two) without worrying about having a designated driver. 

    And just when you think it couldn’t be any better, along come folding e-bikes! These electric bikes fold up to make bringing a bike in your RV easier than ever. You get the normal bike features, but you don’t have to purchase an RV bike rack.

    So, let’s take a look at what to look for when shopping for an electric bike for your RV — and our top three electric bikes for camping.


    Shopping RV Electric Bikes? Here Are a Few Tips

    Determine Watt You Need

    First, consider the type of riding you’ll be doing and your budget. For example, there are e-bikes that are fully equipped for mountain biking adventures. Others are better suited for short rides around the campground. For example, 500-watt e-bikes are a good choice for riding long distances on flat, paved bike paths and/or roads. 

    If you plan to ride in a variety of conditions (but range isn’t a priority), consider a 750-watt e-bike. This will give you enough power to get over hills and through virtually any terrain.  A 750-watt e-bike has  enough power and torque to get you through a range of conditions, making your ride a lot more fun. The drawback here is that since 750 watts uses more energy, your e-bike battery won’t take you quite as far as it would go on a 500-watt bike. However, since 750-watt bikes have ranges of up to 68 km, draining their batteries could still be a challenge.


    Compare These Features

    • Torque sensor. A torque sensor gives you more pedal assistance according to pressure on pedals. This can be helpful for hill climbing or navigating trails.
    • Security. Look for security features, like keyed start, locking battery,  Apple Find My App integration etc.
    • Comfort. Choose a bike that’s a comfortable fit for you. As a general rule, there should be a minimum clearance of 1.5 to 2 inches between the top tube and the top of your inseam when you stand over the bike. Also, a good bike fit lets you enjoy a relaxed, upright posture and a comfortable seat.
    • Height. A low step through frame is perfect for anyone that doesn’t want to hoist a leg up and over the top tube to get on the bike.
    • Folding options. A folding e-bike can offer multiple advantages from low clearance and storage options, fitting neatly into the back of a vehicle, into a basement storage bay, or tucking away inside the RV itself. This not only eliminates the added expense of an e-bike rack, but it ensures you can store your e-bike out of the sight-lines of would-be bike thieves.
    • Assists. Having both pedal assist and throttle lets you either pedal or just enjoy the ride with minimal work..
    • Tires. Pay attention to tire tread patterns. Some tires are designed for efficient use on pavement but will slide out unexpectedly on loose or wet surfaces. A waterproof rating of IPX7 or better on both the battery and bike will allow you to ride in wet or damp conditions without worrying about getting shocked or damaging your bike.
    • Certifications. An e-bike that has safety certification from  UL (Underwriters Laboratories) on battery and bike offers assurance that the bike manufacturer has done everything necessary to meet safety standards.


    Best RV Electric Bikes for Camping

    Each of these bikes has outstanding features coupled with a phenomenal range that takes it miles ahead of the rest of the e-bike pack. All three are 750-watt e-bikes, which we think provide the best value. While two of these are folding bikes, we included one for diehard frame style for traditionalists too. 


    1. Velotric Fold 1 Plus Folding E-Bike


    The feature-loaded Velotric Fold 1 Plus e-bike is designed for getting wild. Its 20-inch, all-terrain wheels, low-step-thru height and three drive modes are designed to give you the confidence and ability to go wherever you want in easy comfort. The stylish Fold 1 Plus folds up so compactly that you could easily store three of them in the back section of an Class B, SUV, or pickup — whatever you’re towing with.

    That means you don’t need to add an expensive and heavy e-bike rack to your cargo weight. At 63 pounds, it’s light enough to be easily lifted into the back of a vehicle or into the RV. On top of that, it comes stock with a comfortable seat and handlebar that can be customized to fit your riding preferences. But that’s just the beginning on this nimble and fun little bike.


    Features 

    • 750-watt, rear -rive motor
    • Range: 68 miles
    • Weight: 63 pounds 
    • Max weight capacity: 450 pounds
    • Tires: 20 inches x 3 inches
    • Folded dimensions: 38 inches (L) x 19 inches (W) x 33 inches (H) 
    • Stepover height: 15.35 inches
    • Torque sensor added
    • Colors: Electric Blue, Mango, Pearl White, Stone Gray
    • Modes: 3 – battery-saving Eco; Trail to give you power when you need it; Boost to help you get up hills (modes and settings can be changed on the fly)
    • Walk-mode setting: keeps the bike from going over 2.6 mph
    • Pedal assist: 5 levels
    • Hydraulic suspension fork that can be locked out
    • Completely waterproof 
    • Battery and bike are UL-certified for safety 
    • Bluetooth-enabled
    • Device charging port
    • Water bottle mounts: 2
    • Apple Find my functionality to locate your bike with an Apple device
    • Rear rack and fenders
    • 8 gear cassette
    • Color monitor display 
    • 200-lumen headlight 
    • Turn signals and brake light
    • Loads of available accessories
    • Adjustable stem lets you customize a comfortable and safe (fit for riders from 4 feet 9 inches to 6 feet 5 inches)
    • Two-year warranty
    • MSRP $1,399 


     2. Biktrix Stunner LT 8


    The aptly named Biktrix Stunner LT 8 is a great choice for a go anywhere camping bike. But there’s more to it than rugged good looks. With that said, those who prefer a more conventional style bike will be impressed by this Stunner’s feature rich design. Front shocks and beefy Kenda tires help give it a comfortable, stable ride in a variety of conditions. The 750-watt, rear0drive motor has a very respectable range of up to 68 miles. This bike comes in two sizes: small (20-inch tires) and medium (24-inch tires).


    Features

    • 750-watt, rear -rive motor
    • Range: 68 miles
    • Weight: 68.5 pounds
    • Max weight capacity: 330 pounds
    • Standover height: 21.3 inches
    • Tires: small (20 inches) or medium (24 inches)
    • Water bottle mounts: 2 
    • LCD dsplay
    • Colors: 8 vibrant options + 192 available  custom colors
    • Integrated 200-lumen headlight
    • Rear rack and fenders
    • 8 gear cassette
    • MSRP $2,199


    3. Rad Power Bikes RadExpand 5 Plus


    If you’re looking for a bike that can take you where you want to go in comfort and style, Rad Power Bikes RadExpand 5 Plus could be the perfect bike to pack into your RV. This nimble little bike has a respectable up to 60-mile range between charges. A  torque sensor measures the pressure you’re putting on the pedals and gives you the perfect amount of pedal assistance.  This bike is similar in many ways to the Velotric Fold 1 Plus, but it’s a little smaller, giving it a smaller footprint when it’s stored. 


    Features 

    • 750-watt motor
    • Ranges: 60 miles
    • Weight: 72.5 pounds
    • Maximum weight capacity: 330 pounds
    • Rider heights: 4 feet 10 inches to 5 feet 10 inches
    • Stepover height: 16 inches 
    • Folded dimensions: 29 inches (H) x 25 inches (W) x 41 inches (L)
    • Colors: Stone Tan and Slate Blue
    • Torque sensor
    • Hydraulic suspension fork
    • Device charging port
    • Waterproof
    • Full lineup of accessories
    • Integrated 200-lumen headlight
    • Turn signals and brake light
    • Half-twist throttle
    • 7 gear cassette
    • UL-certified for safety
    • Two-year warranty
    • MSRP: $1,899


    RV Electric Bikes: Another Way to Extend Your Range

    Cycling is a fantastic way to get exercise and fresh air as you explore new places or run errands— which makes electric bikes and RVs a perfect fit for one another. With an e-bike, walking to the campground store or shower no longer seems like a chore. It’s just fun! Mundane trips become adventures. Not only that, but cycling is a simple and easy way to explore local attractions, wineries, farmer’s markets and anywhere else you want to go.

  • 5 RV Cat Accessories for Feline Felicity

    5 RV Cat Accessories for Feline Felicity

    Taking a feline friend on the open road can be a wonderful experience. Everyone assumes that dogs love RV travel. (And, of course, RV dogs have their own needs.) But cats accustomed to RV life can also be purrfect traveling companions. What’s more, many actually love joining their humans for road trip adventures. Cats that are familiar with the RV enjoy taking in the new sights, sounds, and scents from the comfort of their home on wheels. However, just like humans, cats have specific needs that must be met to ensure a safe and comfortable RV life. And there are certain RV cat accessories that a feline friend simply can’t do without.

    So, if you’re thinking about taking your cat on the road for the first time, we’ll give you the skinny on the five RV cat accessories that are absolute must-haves.


    1. Identification: Microchip and a Collar with ID Tags


    As you might expect, it’s always best to keep cats safe inside the RV. Keeping them inside will eliminate the hazards presented by predators, vehicles, and other dangers. (Especially in the strange and unfamiliar environment of an RV park or campground.) 

    However, you can (and should) provide a second line of defense for your feline friend by having your cat microchipped by your vet — and having them wear two identification tags on a well-fitted collar.  One ID tag, like this one on Etsy, should have his name and your phone number.  The other tag can be a small writable tag on which you can write your campground with your campsite address. Having ID on your cat can be a lifesaver if they happen to make a quick (and inevitably sneaky) exit from the RV.  


    2. A Familiar Litter Box with the Same Kitty Litter


    Most cats do best in the RV with familiar items. Be sure to pack their favorite food and water dishes along with the food they know and love. Also, it’s also a good idea to set up the litter box with same the kitty litter he has at home. You can prevent potential messes in the RV by setting it up on a litter mat.  


    3. An Oversized Carrier They’re Comfortable In

    The safest way for your cat to travel is in a kennel that’s inside the vehicle with you. (It goes without saying that no one should be inside the trailer while it’s moving, including your kitty.) In addition, it’s always safest for your cat to ride in a travel kennel that’s big enough for them to move around in. Not only does a  kennel provide a safe, familiar place for your cat. It also provides an easy means of locating your pet should you be involved in an accident.   

    With that being said, cat carriers are tiny, because they’re designed for short trips to the vet, not for spending hours in. Instead of a cat carrier, consider setting your cat up with a travel crate designed for a medium size dog. Be sure to outfit it with his favorite bedding and toys. The idea is to make it into a space he loves being in.  

    On that note, be sure to train your cat to love his travel kennel before he goes anywhere in it.  You’ll need to familiarize him in three stages:  With the door open, with the door closed, and going on short trips in the crate.

    Remember: Always work within your cat’s comfort zone. The goal here is to have your cat run into the crate on cue or whenever he wants to feel safe and cozy.  Rushing the process can lead to a permanently bad association with the crate.  


    How To Kennel Train Your Cat

    1. Make the crate irresistibly comfy. Start by lining it with familiar bedding. Add some favorite toys. Maybe even a little catnip and some of their favorite kitty treats. At this stage, don’t try to get them into the crate. (You want them to think it’s all their idea.)
    2. Feed them near the crate. Start by feeding your cat close to the crate with the door open. Do this for up to a week, until you can see he is more curious about the crate than worried about it, perhaps even going into the crate on his own.
    3. Sneak the food into the crate. Now you can up the ante by putting his food dish just inside the door of the crate. Feed a few meals this way and gradually move the dish further back in the crate an inch or two at a time.
    4. Make it fun. In the meantime, start playing a game with your cat. Toss a treat into the crate, and when he goes in to get it, say “Kennel!” and quickly toss another one in.
    5. Casually close the door. When your cat is obviously comfortable going into the crate, perhaps running in at the mere mention of the word “kennel!” It’s time to close the door, briefly at first because your work will be undone if he thinks he’s been tricked and is now trapped in the kennel. 
    6. Extend the time. Gradually extend the period of time your cat spends in the kennel, working gradually towards 10 minute periods.

    Transitioning to Your RV

    1. Look for the sign. When your cat really wishes you’d stop opening the door to the crate, it will be time to take this show on the road.
    2. Try a short drive. Secure the crate with cat in it into the tow vehicle or motorhome, and go for a short drive. This should be 15 minutes or less.
    3. Make a maiden voyage. When your cat is completely comfortable riding in the vehicle, he should be ready for his first RV adventure.


    4. A Small Post for Legal Scratching

     Clawing and scratching objects is a natural feline behavior. However, you can prevent your cat from using his claws to damage your RV furniture by providing him with a “legal” way to express his instinctive scratching behavior. Giving your cat a small scratching post in the RV can help him to feel  at home in the RV — while saving your RV furniture. 


    5. A Comfy, Cozy Perch for Cat Naps


    Cats appreciate a comfortable spot with a nice view  just as much as we do.  From a cat’s point of view, what could be better than a comfortable bed that mounts directly on an RV window, perfect for bird watching or just keeping tabs on his kingdom.   


    Beyond RV Cat Accessories: A Few Road Tips

    Cats learn to love RV travel when it’s introduced slowly, and they’re surrounded with the  familiar items they have at home. But having the right RV cat accessories isn’t your only key to success. Here are a few other tips and tricks that are handy to know when traveling with your cat.  

    • Careful with the slide-outs. Be sure all cats are in their carriers before bringing slide-outs in. Cats can fit into tiny spaces, and it can be difficult to crate them after the slide-out comes in. Not only that, but there is a chance your cat could be injured if they don’t get out of the way of the slide-out.
    • Add kitty breaks. Give your kitty frequent breaks when you’re traveling so they can have all the access they need to food, treats, water and his litter box.
    • Control the climate. Use a bluetooth enabled temperature monitoring system if you need to be away from the RV for an extended period.
  • How Do I Check My RV Electrical System?

    How Do I Check My RV Electrical System?

    Compared to brick-and-mortar houses, an RV electrical system can be much more complex and diverse. Up front, you should know that that increases the importance of regular checks and maintenance by you the owner. And frankly, that can feel like a lot if you’re not naturally mechanically minded.

    The good news is that you don’t have to be an electrician or engineer to do these checks. You just need to master a few basics and be diligent with your maintenance. And to help you do that, we’ll walk through this step by step.


    The Basic Elements of an RV Electrical System

    RVs will have a 12- or 24-volt DC system. This system powers ceiling vents, water pumps, some lighting, sensors and gauges for water tanks, some small appliances, and your RV starting system. Also, your RV has a 120-volt AC system to provide power for major appliances. (Think of things like refrigerators, televisions, microwaves, air conditioners and coffee machines.) Your electrical system could also be supplemented by solar power through an inverter and batteries and your RV may also be equipped with an onboard generator. 


    Getting Started: Inspecting Your AC System

    The main component of the RV electrical system is the 120-volt AC system. This system, as mentioned, provides power for your larger appliances. Periodically, if possible, you should start your checks with the outlets where your appliances plug-in.

    First, checking for previous evidence of arcing and discoloration of the plugs. The AC system also drives the DC system through a converter charger that keeps your 12/24-volt DC direct current system functioning. Therefore, periodic inspection of the converter charger and the wires that go to and exit the component is recommended. Depending upon the total AC requirements of your RV, you will experience between a 30-amp or 50-amp power cord, an external receptacle or your power cord (that could be hardwired), and an internal breaker panel with matching rated breakers appropriate for your system requirements.

    Personal maintenance and checking of the AC system involves inspecting and checking certain items. These include the power pedestal or other outlet, your shore power cord, and the point at which the cord makes its connection to your RV for previous evidence of arcing. This point of inspection for your power cord and adapters is important prior to going to a new site. That’s because you want to ensure that you have the proper cable or adapter. (A quick phone call to the facility where you’ll be staying is recommended.)

    Also, periodically, you should inspect your breaker panel and breakers for any damage to the breakers. Damage can be indicated by previous evidence of arcing here, along with the wires that connect to them. Look also at your transfer switch that switches between your sources of power: shore power, generator, or batteries through an inverter. Other items to consider when conducting your electrical system inspection are your smoke detectors, carbon monoxide detectors, and your GFCI outlets.


    Backup Checkup: Checking the On-Board Generator

    Besides shore power, another way to power your RV’s AC electrical system is through an on-board generator. RVs with this capability are able to provide their own power. On-board generators can generate AC power. They come in a variety of models. They can run on anything from gasoline to diesel to propane depending upon the manufacturer.

    Personal maintenance on this subcomponent of your RV electrical system first includes the batteries. During this inspection, you are looking for corrosion around the battery terminals, loose connections for evidence of arcing and any loss of battery cable insulation.

    The next item you should check is your air filter to check for any debris and to make sure it has not met its life expectancy. You also want to go ahead and check the levels of each battery, the condition of the oil. Also check the coolant level, the hoses, lines, and radiator, if it has one. Regarding its electrical output, you will want to visually inspect the cord which provides the current from the generator and is attached to the power transfer switch. As mentioned, this switch will automatically select between power sources such as the generator, shore power, or DC to AC inverter. 


    DC Power: Assessing Fuses, Corrosion, and More  

    As we had already discussed, your RV will obtain power by either plugging into an external source such as a house receptacle or a campsite power pedestal, or from a generator. From one these sources, DC voltage is created via a converter charger hooked into the battery bank. The charger converter could have its own set of fuses usually mounted on the outside of the unit. From there, voltage will flow into a centralized fuse box where voltage is distributed throughout the RV to all the DC run items.

    When experiencing any fault at a part of your DC system, always check the fuses first. As a note, many modern RVs have a power control center which houses both DC fuses and AC breakers. Where DC direct current is concerned and depending on the size and class of your RV), you could have either a 12-volt DC or a 24-volt DC system. (The latter can be more efficient than a 12-volt DC system.)

    During an inspection, you are looking for corrosion around the battery terminals, previous evidence of arcing, loose connections, and any loss of battery cable insulation. (As well as the fuses in the fuse block.) In either system, your DC systems will draw power from a bank of 12-volt and or 6-volt, deep-cell batteries that provide a sustained discharge. As mentioned, they will either be charged by a solar power system or a DC charger converter or your vehicles alternator in some applications.

    Just like many other things, no one thinks about the RV electrical system until it breaks down at the most inconvenient time. A good rule of thumb where checking your DC system is concerned is to go ahead and plan it for the same time your oil change. 


    Next: Evaluating the Solar Power System

    If you have an solar RV electrical system, you have the ability to generate electricity to be stored in a bank of batteries. The basic system has the following components: panels, controllers, batteries, inverters, battery isolators, busbars, shunts, and fuses. When checking this part of your RV electrical system, you want to conduct a visual inspection of the panels themselves, the wiring harness, and connections to the charge controller before and after each trip.

    The charge controller regulates the flow of electricity preventing overcharging and ensuring an efficient energy transfer. Next on the list to inspect is the inverter. (That is, if you have not already inspected it in a previous part of your inspection. It will be probably installed near the charger.) The reason we want to check this part of our system more often is because these systems are very expensive and are always exposed to the elements.


    Additional Solar Items to Inspect

    The remaining parts of this system to be inspected are battery isolators, busbars, shunts, and fuses. You should inspect each connection at each isolator on a regular basis. An evergreen example is during the time you change your oil. The battery isolators separate batteries in multi battery applications. This allows each battery to charge alone. What this does for the system is that it protects each battery from discharging into another battery in the bank. You should inspect each connection at each isolator on a regular basis. (Wanna guess my recommendation when that should be? When you change your oil. No surprise there.)

    Another part of your solar system are busbars. These are metal strips that allow multiple wires of the same charge to be connected to a central point. The shunt allows you to measure the amount of electrical current in your circuits. This is installed after your bank of batteries before your charge controller, which monitors your batteries charge and capacity.

    Next in your system, you have fuses. These are tiny but necessary circuitry insurance made up of small pieces of wire that are designed to break the circuit when reaching a level beyond its capacity — circuit rating. Even though these are typically the smallest as part of your system, you should check your fuses first. It could be the simplest cause of an electrical breakdown.


    Regularizing Your RV Electrical System Checks

    Whatever type of RV that you have, you should develop a maintenance checklist. This is always good to break out you before and after your trips. (Also, you know, when you get your oil checked.) The reality is that electrical issues can be very frustrating. However, with a little bit of preventive maintenance and checks, you can avoid many issues. And issue avoidance is key to enjoy your time in your RV.

  • RV Dogs Need These 5 Things from Their Owners

    RV Dogs Need These 5 Things from Their Owners

    We RVers love our dogs. And here’s one reason why. A dog doesn’t ask where we’re going, or when we’ll be there. Instead, he’s just happy to come along for the ride. He’s happy, whether he sleeps on the back seat or rides shotgun. He takes in each passing mile with never-ending hope and enthusiasm. Because of our RV dogs, we tend to stop along the way for leg-stretching explorations of cool rest areas and parks. And when we get where we’re going, dogs get us out walking where they take on the important job of campsite security. In that role, they readily alert us to the presence of strangers or wild animals.

    But make not mistake: RV dogs have specific needs. And they are at their very best as traveling companions when those needs are met. 

    Unlike humans, dogs can’t simply tell you what they need in words. Instead, dogs let you know they need something with excessive barking when you go out. Or by acting hyper … or by destroying the sofa … or by urinating on the carpet. (Your dog may wish to add his own special behavior to this list too.) That being said, the biggest single factor in eliminating almost any behavior you don’t want is meeting a basic need. Quite simply, tf you just try to stop unwanted behavior, you’ll be barking up the wrong tree. 

    So, let’s take a look at the top five things RV dogs need from us to be their best.


    No. 1 : Your Patience and Understanding


    Patience and understanding are the primary keys to having a dog who’s ready to take on the road — or go anywhere else. Without a doubt, the dogs we travel and camp with can be some of the most loyal friends we’ll ever have. After hanging out with us for the better part of their lives, dogs can get really good at using their behavior to get things they want (and to avoid things they don’t want). However, it’s important to remember that no matter how clearly your dog communicates or how well he listens, he can only do so as a member of a foreign species.  

    Every dog is born perfectly equipped to be a dog.  What makes dogs so special is that they’ll try really hard to adapt to living with us humans. When we make it easy for them to learn, dogs learn to live with humans  better than any other species.  

    When you think about it, your dog is learning about living with humans the same way anybody would learn to live in an unfamiliar culture. They’re constantly looking for clear cues as to how to best get along. Not only that, but dogs greatly appreciate it if we show them what they need to do. (And then, of course, reward them lavishly for doing it.) If your dog isn’t doing what you want, it’s important to step back and ask yourself what you can do to make it easier for the dog to identify what he needs to do. Do you need to break it into smaller steps? Would fewer distractions help? 


    No. 2: A Predictable Routine


    From a dog’s point of view, RV travel means adjusting to a lot of new environments. This can be hard on dogs if they don’t have a regular routine they can always count on. Having a routine doesn’t mean that everything has to be done at a specific time. But having the same things happen in the same order at roughly the same time can go a long way to creating the predictable routine your dog needs.

    For example, being able to expect that every morning walk is followed by breakfast helps a dog to know he’ll always get fed no matter where he happens to be with you. If he always snoozes on the sofa after breakfast and then you go exploring together, it creates a routine that can help him relax and enjoy the journey wherever you go.


    No. 3: Exercise and Mental Enrichment


    Every RV dog needs both exercise and mental enrichment in order to be at their best. When you think about it, dogs have been bred for thousands of years to work with their humans in some capacity. For example, herding dogs, such as border collies, were bred to help humans move livestock. Gun dogs like Labrador retrievers were bred to find and retrieve birds, and terriers were bred for the purpose of hunting rodents. Each of these jobs provides both exercise and enrichment for the dogs bred to do them. Of course, these days, the reason many people have a dog is for companionship. Sometimes this can mean a pretty boring life for the dog. The result is sometimes a dog that entertains himself by barking at everyone who passes the RV. (Or dissecting  the sofa.)

    That being said, just because your dog’s biggest job is being your loyal companion doesn’t eliminate his genetically imposed need to chase or hunt in some capacity. Of course, that doesn’t mean you need a herd of sheep or a desire to shoot birds to meet his needs for mental enrichment and exercise. If your dog barks excessively, reacts to other dogs, or just acts just plain squirrelly, there’s a good chance he needs more exercise and mental enrichment activities.

    Here are some ideas for activities that can meet both of those needs for any RV dog:


    Great Activities for RV Dogs

    • Leash walks with opportunities to sniff
    • Running free at an off-leash dog parks (SniffSpot lists private dog parks throughout North America that you can rent by the hour. For dogs that are social butterflies with other dogs, the DogPack app is perfect. It has has a similar list of public, fenced off-leash dog parks that anyone can use.)
    • Playing with their humans (games like fetch)
    • Hoop jumps and other trick training
    • Enjoying standard toys, chews, and puzzle toys


    No. 4: A Comfy, Cozy Place to Nap 


    Dogs love to relax and chill on cushioned surfaces where they have a good view of their surroundings.  This is probably why almost any dog will happily occupy any empty space on a sofa. If sharing your sofa with your four-legged best friend bothers you, all you need to do is raise his undoubtedly cushy bed off the floor.  There are a number of folding dog cots that make perfect platforms for a dog bed.

    Here are a couple that my dogs and I love.


    Coolaroo On The Go Pet Bed

    This fold-up dog bed can be used on itself, or topped with a soft, cushy bed. Either way, it’s handy because it  folds up easily when it’s time to pack up. This dog bed comes in eight colors, and sizes from small for small dogs to king-size for pony-size dogs.


    Ruffwear Mount Bachelor Pad

    This low-profile, portable camping dog bed has a dirt and moisture repellent base. It rolls out into an easy resting place, and it works equally well protecting the RV sofa from dog hair and dirt as it does as a topper for a Coolaroo dog bed. One of the great features of the Mount Bachelor pad is that it’s machine-washable and dries quickly by hanging. When it’s time to go, it’s easy to roll up for easy portability wherever the road takes you. By the way, the Mount Bachelor pad is perfect for lounging at a dog-friendly patio.  


    No. 5: More Potty Breaks


    It’s good to accept a simple fact the moment you bring a pet home: Accidents can happen. However, you should also know this. Accidents can especially happen when the dog doesn’t get predictable potty breaks while we’re traveling or camping.

    So, here are some ways you can provide your dog with the potty breaks he needs to avoid having accidents in the RV.

    • Plan trips that include time to stop for potty breaks along the way.
    • Start and end each day with potty time.
    • Have a predictable routine.
    • Take your dog out to potty before you leave him in the RV to do things that aren’t dog-friendly.
    • Small dogs might appreciate a litter box or puppy pad in the RV for emergency use when you aren’t home.


    Throwing RV Dogs a Bone

    These five needs for RV dogs are really basic, but they are so essential. (And, sadly, often neglected.) Simple as they are, they are also the key to having a canine copilot who’s a fantastic traveling companion, opening up a world of RV adventures that you’ll both love. With a little preparation, you and your dog will be ready to go fetch some great memories together.

  • Hiking with Dogs: A Pet Etiquette Guide for the Trail

    Hiking with Dogs: A Pet Etiquette Guide for the Trail

    Sharing adventures and memories with your family, even the four-legged variety, is the best. Personally, some of our favorite memories on the road have involved hikes with our pups, Wilson and Journey. We’ve watched random sunsets at canyon overlooks. We’ve sat under forest canopies after steep climbs. Hiking with dogs adds a whole new level of joy (and sometimes chaos) to the experience. But it also comes with responsibility — especially when it comes to trail etiquette.

    As RVers and full-time travelers, we’ve taken our dogs on hikes in dozens of states, through national forests, desert landscapes, alpine meadows, and even city trails. And along the way, we’ve learned that hiking with dogs isn’t just about bringing water and leashes. It’s also about respecting the land, other hikers, and our pets’ limits.

    So, whether you’re new to hiking with dogs or just looking for a quick refresher, here’s our go-to guide for hitting the trail with your four-legged kiddos — while keeping things respectful, safe, and fun for everyone.


    Rule 1. Know before you go.

    First things first — not all trails are pet-friendly. Also, even dog-friendly parks and trails usually specific rules in place for a reason.

    Before heading out:

    • Check trail regulations. Many national parks don’t allow dogs on hiking trails, while others are more relaxed. (National forests and BLM land tend to be more pet-friendly.) Always verify online or with a ranger station prior to arriving at the park.
    • Know the leash laws. Many trails require dogs to be on a leash no longer than six feet. Others allow off-leash with voice control. But unless your dog has near-perfect recall, we recommend sticking to the leash.
    • Look up trail difficulty and terrain. Steep drop-offs, rocky scrambles, or hot desert stretches might be unsafe or uncomfortable for your pet.

    Pro Tip: Apps like AllTrails and Paw Parks often note if a trail is dog-friendly and what the terrain is like. We also use Instagram to preview what we’re getting into.


    Rule 2. Leash up and bring proper gear.

    Even if your dog is well-behaved off-leash, there’s a good chance you’ll encounter others who aren’t comfortable around dogs — or wildlife that could provoke a chase. That’s why we always have our pups on leash, assess the situation, and keep the leash handy if we ever let our dogs off in approved areas.

    Some of our must-have hiking gear for pups:

    • A strong leash and harness. We prefer harnesses that don’t restrict shoulder movement. Journey’s got power, and Wilson … well, he’s more of a vibe walker who wants to mark everything.
    • Collapsible water bowl and extra water. Don’t rely on creeks or puddles, especially during dry seasons. Bring those pups
    • Pet-safe hiking shoes. Sure, this is optional and specifically for rough, hot, or icy trails. Our pups don’t like doggy boots, so they don’t make it on some hikes that other dogs do. But they are great if you are going into hikes that will be rough on their paws.
    • Doggy pack. This is for longer hikes. If your pup is fit and trained, they can carry their own water or waste bags.
    • ID tags and GPS tracker. Just in case. Better to have it and not need it than to need it and not have it.
    • Muzzle for reactive dogs. Journey is great with people but very reactive to other dogs. So, we try not to take her on hikes we know will likely have high pet traffic. But when she does come with us, we always have a pet-friendly muzzle that doesn’t bother her, as it adds a layer of safety for all parties.


    Rule 3. Pack in, pack out — especially you know what.

    This one’s simple: Pick up after your dog. Always. Leaving dog poop on the trail is one of the biggest etiquette violations we see out there — and it can have serious environmental impacts.

    Even in the backcountry or on wilderness trails, pet waste can alter soil chemistry and affect wildlife behavior. It’s not “natural” just because it came from an animal, because your pet isn’t from the area.

    So, what do we do?

    • Carry extra bags. Bring more than you think you’ll need.
    • Double-bag and stash it. Take an odor-proof pouch to store it until you get to a trash can.

    No, it’s not glamorous — but neither is stepping in it.


    Rule 4. Be aware of other hikers.

    Not everyone loves dogs, and not every dog loves everyone. When hiking with pets, you’re not just responsible for your dog’s safety — you’re responsible for others’ comfort and experience too.

    Here’s what we always try to practice:

    • Yield right-of-way. Step off the trail and let others pass, especially on narrow or steep paths.
    • Leash up when you see others. Especially families with kids, other dogs, or hikers with gear.
    • Don’t assume off-leash is OK. Just because others are doing it (and trust me, they will) doesn’t mean you should.

    One of our biggest pet peeves (pun intended) is seeing pets off leash in areas that are designated leash areas. This is a safety rule for a reason. 


    Rule 5. Respect wildlife and the trail.

    We’re all out there to enjoy the outdoors — and that includes the animals who actually live there. Dogs are natural chasers, barkers, and scent explorers, but it’s our job to keep them from harassing wildlife or damaging sensitive habitats.

    What we do:

    • Keep dogs on trail. This avoids trampling native plants or disturbing nests.
    • Avoid hiking at dawn or dusk. This is especially important on areas with heavy wildlife activity. (Also, always check for bear warnings or other wildlife notices.) These times are usually the most active time for local wildlife.

    Also, remember that wildlife smells linger. Even if your dog doesn’t see the animal, they’re reacting to scent, which can make them pull or bolt unexpectedly. 


    Rule 6. Know your dog’s limits.

    Not every dog is built for every trail. Wilson, our chill Cairn Terrier, loves moderate walks and shaded trails but isn’t trying to summit anything too intense. Journey, our high-energy Staffy mix, will keep going until we make her stop — but even she’s had her limit on hot or exposed hikes.

    Things to consider:

    • Watch for overheating. Panting, drooling, or stopping frequently are signs your dog needs a break.
    • Paw protection. Hot pavement or jagged rocks can cause injury. Touch the ground with your hand. If it’s too hot for you, it’s too hot for them.
    • Hydration and breaks. Stop often, even if your dog isn’t asking for it.

    Some of the hardest hikes we’ve done were in the sand dunes — beautiful, but exhausting, and tough on everyone’s legs and paws. That soft-sinking surface is basically like walking uphill forever. Know when to call it.


    Rule 7. Leave no trace — together.

    As RVers and hikers, we live by the Leave No Trace principles. When hiking with pets, this extends beyond the poop bags and water bowls. It’s about sharing the space responsibly.

    Here’s how we apply it with our dogs:

    • Stay on designated trails.
    • Minimize bark noise, especially in serene areas.
    • Keep dogs from digging, chasing, or damaging the natural area.

    When in doubt, we ask ourselves: If everyone did what we’re doing right now, would this trail still feel the same a year from now?


    Remember: Hiking with Dogs Is a Privilege

    We truly believe that hiking with dogs is one of the best ways to experience the outdoors. Watching our pups light up when they’re on the trail, splashing through streams, or sniffing around a quiet forest boondocking spot reminds us why we live this lifestyle. But it’s also a reminder: Not everyone can or wants to hike with dogs, and we all share the trail.

    Trail etiquette isn’t about rules for the sake of rules. It’s about preserving the spaces we love so we (and our dogs) can enjoy them again and again.

    So, pack that leash, grab the water bowls, and hit the trail the right way. Because when we all do our part, hiking with pets becomes more than just a walk in the woods — it becomes a shared adventure that makes every mile a memory worth wagging about.