Blog

  • Fishing Tackle No RVer Wants to Be Caught Without!

    Fishing Tackle No RVer Wants to Be Caught Without!

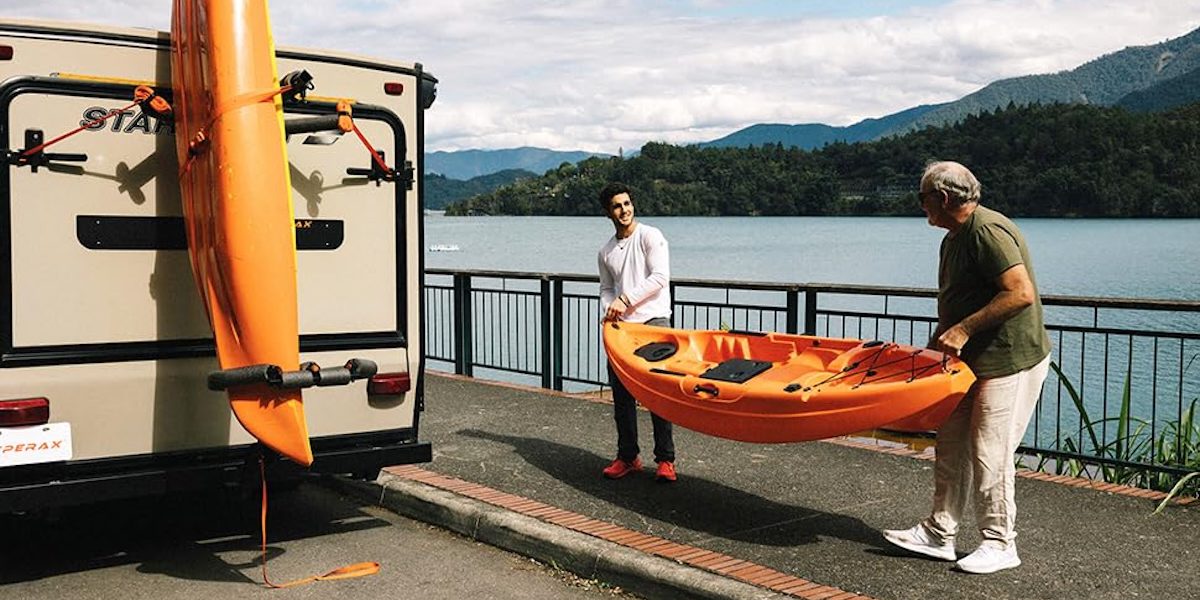
    It’s an open secret. RVing can open a door to some of the best fishing holes and hot spots in the country. Interestingly, though, it’s not always intentional. Just taking an RV trip into the wild may land you in the perfect spot to cast a line. Imagine camping near a quiet river at the base of an isolated mountain. There’s not a soul in sight. The water laps against the river bed as you set up your rig. A glance into the cool stream reveals a big beautiful trout waiting for its next meal. But if you don’t have some RV fishing tackle at the ready for such an occasion, it all becomes one enormous tease.

    You don’t want this scenario to catch you unprepared. And you don’t have to. By keeping five essential pieces of  fishing tackle in your RV, you will always be ready to cast a line — even if you stumble unexpectedly into the perfect spot.


    No. 1: A Ready-to-Go Rod

    Amateur anglers might be surprised to discover that there are so many types of fishing rods. Each type caters to a genre of the sport, with variations branching out from here. Unfortunately, there isn’t any one rod to serve them all. Instead, when shopping for the right rod, consider the specific styles of fishing you’d like to master. 


    Telescoping Fly Rod

    Simplicity for the Fisherman on the Fly

    Telescoping and collapsible fly rods are widely popular for traveling fisherman. Each type meets a specific performance or fishing style. We chose the Tenkara Telescoping Fly Rod for its rugged simplicity and time tested effectiveness. The methodology is rooted in traditional Japanese fly fishing. Similar to traditional fly fishing, the Tenkara approach is much simpler and sometimes more effective. 


    Spinning Rod

    Universality for the Everyman Angler

    Some heavier waters require more than a fly rod for landing big fish. A medium-weight spinning rod, like the St. Croix Triumph Spinning Rod, can cross a variety of water types. It’s the most versatile of all rod types. These rods can be used in lakes, ponds, rivers, creeks, inland coastal waters, and even the ocean surf.  


    Saltwater Rod

    Heavy-Duty to Reel in the Big One

    If you enjoy fishing on the ocean, you will want to consider a travel surf rod. The Okuma Traveling Surf Rod is a heavy duty collapsible rod. You can cast further and reel in heavier fish through the surf. It will also accommodate a heavier line. Since RVs aren’t known for having a lot of space, this 4 piece construction will fit nicely into almost any compartment. 


    No. 2: A Variety of Fishing Lines

    Traveling in an RV offers the opportunity to fish in a variety of habitats. It also hinders your ability to carry all the different types of fishing rods and recommended equipment due to space limitations. You can make up for this by having a good index of line weights and types. In the grand scheme of things, fishing line doesn’t take up much space. (That is, if you can keep it from getting tangled in your RV fishing tackle box.)


    Fly Fishing Lines

    Three types of fly lines are essential for fly fishing. 

    • Floating lines. This line is essential to keep your line “floating.” 
    • Sinking line. This line differs from the floating line by the rate at which it sinks. You can get a range of different sinking lines. 
    • Sink-tip fly lines. This line is a combination of the floating line, and the sinking fly line. Generally speaking, the first eight to 16 feet of the tip line will be sinking, with the remainder of your line floating. 


    Spinning Rod Lines

    For your versatile spinner rod, you can have anything from a two-pound line for spooky creek trout, or as heavy as an eight- to 10-pound line for big lake fish.  


    Heavier Surf Lines

    For ocean fishing, including ocean surf and brackish fishing, you will want a variety of heavier lines depending on what’s biting. I can’t tell you how many times I felt the tug of a big juicy fish, only to have it bite my line in two. If you are fishing for a toothy catch like snook or blue fish, consider a steel leader on the end of your line. 

    Also keep in mind:

    • A medium surf rod line weight is going to be around 12 to 25 pounds. 
    • A heavy surf rod line weight will be 17 to 40 pounds. 


    No. 3: An Essential-Only Tool Box

    Your essential tool kit can be simple enough to fit in a small fanny pack, or it can spill over into several 5 gallon buckets. Since RVers don’t have the luxury of space, it’s probably best to stick with the necessities. A medium/small RV fishing tackle box, like the Lure Lock Deep with Trays, would be prudent to keep your hooks, sinkers, lines, and lures. A few basic tools should be added to the mix: 

    • Hemostats and pliers. Hemostats will remove the hook from the fish, and sometimes needle nose pliers will be required to pull out a heavy hook. Pliers are also better for squeezing sinkers onto your line. 
    • Line cutters. Finger nail clippers often work better than scissors for this task.
    • Pocket knife: A dedicated fishing knife is essential for bait cutting without double dipping into your silverware drawer. Your wife will thank you. 


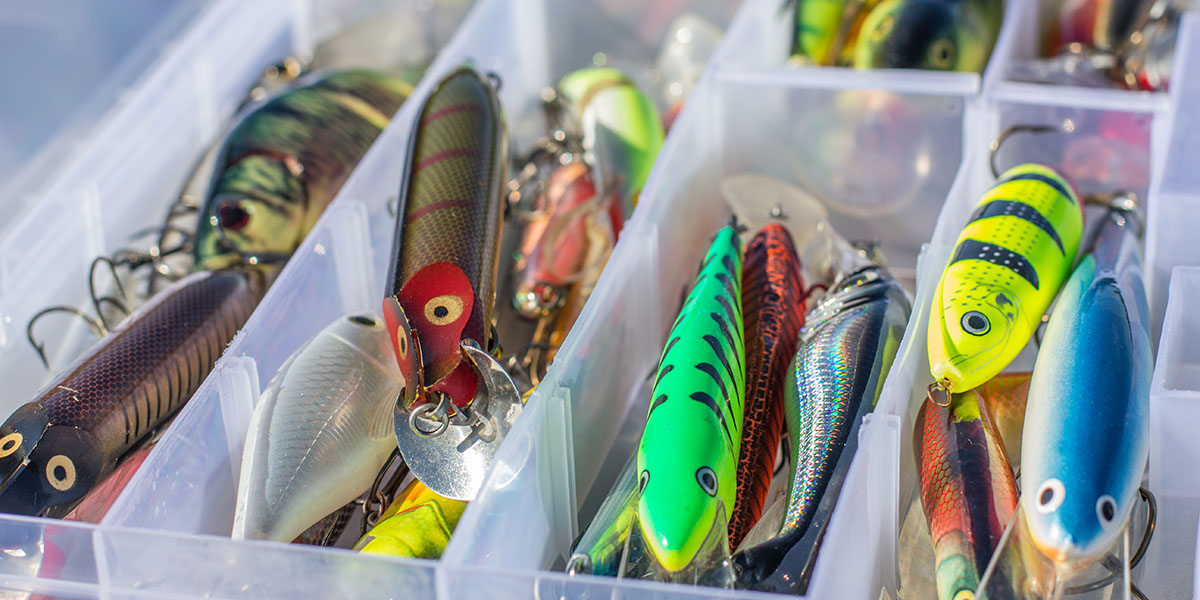
    No. 4: Time-Tested Lures and Bait

    Bait encompasses many different categories depending on what your habitat is. After years of fishing in a variety of watery ecosystems, we have found the best bait to be live and native. Minnows, earthworms, stoneflies, crickets, and other living fish food can usually be sourced at your location. However, there are plenty of scenarios in which a lure or fly will be what’s required.  


    Lures

    Lures can include a variety of spinners including jigs, spoons, crank baits, spinnerbaits, plastic worms, and much more. Your habitat and experience level will determine which of these you choose to carry. 


    Flies

    Flies are lures specific to fly fishing. There are thousands of varieties, but generally speaking they imitate flies, nymphs, and various life stages. Flies will either float or sink. It can be expensive to procure a good collection because they are usually hand tied. Each habitat will pair with a specific fly variety for that type of year. 


    Live Bait

    For inland fishing, live bait doesn’t require any specific tools. Just turn over some rocks or logs, or dig up some worms with your own two hands. If you are near the ocean, you should consider investing in a cast net, like the BasicGear cast net. This investment requires more time than money. Learning how to catch bait fish with a cast net is a humbling journey in patience and practice. But if you love to fish on the coast, it could be the best investment of time and money you’ve ever made. 


    No. 5: Some Bring-It-Home Gear

    No matter what you catch, you’re going to need to put it somewhere. Unless you’re fishing from the window of your rig, you need to store the fish that you’ve caught. This could be as small as a Bass Pro Shops Trout Net for your catch and release trout or a bucket or cooler for your intended dinner. A 15-inch stringer is a compact tool for collecting your fish in one spot, in or out of the water. If you’re catching bait fish you will want a bucket to keep the bait, and an aerator to keep them alive. (And don’t forget to bring extra batteries for the aerator!). 


    In Addition to Your RV Fishing Tackle …

    It would be prudent to study the regulations pertaining to any specific area you intend to fish in. These regulations could include catch limits, size limits, open seasons for specific species, delayed harvests, and about a thousand other rules you will be expected to recite backwards. Local bait shops and fishing stores are a good place to get informed.

    Don’t forget to bring your fishing license wherever you bring your pole. A separate fishing license will likely be required for every state you intend to fish in. It can be quite an investment, but a worthwhile expenditure. What better place to put your money than something that brings you joy?  

  • Open Water: Spring Kayak Spots to RV This Spring

    Open Water: Spring Kayak Spots to RV This Spring

    One of the best ways to experience a place and get away from crowds is on the water. RVing gives you access to innumerable bodies of water. And kayaking allows you to get out into the natural environment — all without having to share a narrow trail or path with thousands of other people. Which is why RVing and kayaking go so well together. There are so many spring kayak spots to drop your boat in for a day. Or, even more adventurous, you could leave your RV behind for several days and stay at paddle-in campsites that allow you to experience some more remote wilderness areas. 

    We’ve lived full-time on the road since 2012. In that time, our vintage camper, Hamlet, has put in a lot of miles. But so have our boats. In fact, our kayaks have traveled over 200,000 miles to 49 U.S. states and 10 Canadian provinces as we’ve explored this gorgeous North American continent.

    Depending on the type of kayaking you’d like to do, you have many options. These range from rivers to inland lakes and the open waters of the ocean. What follows are just a few of our favorite spring kayak spots, and we’re certain you’ll love them too.


    Saltwater Spring Kayak Spots


    Island Hopping Along the Maine Coast

    Maine – Late Spring to Early Summer

    The “Vacationland” of Maine includes over 4,000 islands located in its Gulf, and boasts one of the longest coastlines of any state in the nation. While it can still be pretty chilly in the early to mid spring, the later spring can offer some gorgeous days without the crowds or heavy lobster boat traffic. (Remember that water is always cold — even in the height of summer.)  While Mt. Desert Island and the Porcupine Islands are popular places to kayak while visiting Acadia National Park, the entire coast of Maine offers one beautiful inlet to explore after the next.

    If you are new to kayaking, local guide services offer both small group and private tours which highlight the best sights of this spectacular coast. Or, bring your own kayak and create a multiday kayak camping adventure on the numerous public islands in the area.

    Tips: The Maine Island Trail Association is a great resource for locating public islands and getting maps of the area. Get to know the tides as they can be extreme, where you can expect to be able to land at various tide levels, and watch out for lobster boats!  


    Subtropical Shores of Southern Florida

    Florida – Late Winter to Early Spring

    After a long winter with freezing temperatures, no spring trip can really compare to the warm relief of a wilderness trip to the Everglades in Florida. While most people think of the “River of Grass” and a flat bottomed fan boat skimming above the surface, a multitude of deserted beaches actually pervade here.  

    Adventures in your kayak could last from a few hours to a few weeks. Paddle the inside routes threading between islands of mangrove trees and camp at “chickees” (elevated platforms) along the way. Or take the outside route and find some of the Gulf Coast’s most pristine beaches on the most seaward islands. These barriers between Gulf and inland fresh water take a pounding during storm season and create an ideal sandy camping spot.  

    Biscayne Bay National Park offers ideal paddling conditions on the Atlantic side of the Florida peninsula.  The protected waters of the bay allow paddlers to explore mangrove covered islands, shipwrecks, or overnight camping experiences.  

    Tips: Winter (November through March) is the best season to experience the tip of Florida, as soon as the likelihood of hurricanes has diminished. Check out the local paddling guides that operate in each park to discover what might be of interest, or head straight to the national park ranger stations to secure your paddling permits.  


    More Than Meets the Eye in Mono Lake

    California – Late Spring to Early Summer

    Just east of the Sierra Nevada Mountains of California, lies one of the most unique lakes we’ve ever paddled. Situated inland near the California/Nevada border, you might expect this lake to be fresh water, but the nature of its location and the water flowing into it (with no exits) has created one of the most alkaline and salty inland lakes you may ever encounter.

    Along the southwestern shoreline are fascinating Tufa formations. Kayaking near these formations allows you a much closer look at the nesting osprey who return to their spring homes every year. Bring your binoculars, though, as it’s important to give the birds the space they need. (At least 300 feet, so about the length of a football field.) They will definitely let you know if you get too close!

    Tips: Stop at the Mono Lake Visitor Center for more information and education about the area. This is a remote lake with plenty of boondocking and camping nearby. Winds pick up in the afternoon, so it’s best to get on the water early and off the water before noon. Come prepared with fresh water to rinse your boats and gear as they will be covered in white deposits after kayaking.


    Wildlife Lover’s Refuge at Point Reyes 

    California – Late Winter to Early Spring

    Just a few hours drive to the north and west of San Francisco Bay, Point Reyes National Seashore offers a wide variety of paddling opportunities for all skill levels. The protected waters of Tomales Bay, on the east side of Point Reyes offer abundant paddling opportunities, from a lazy afternoon to an adventurous overnight.  Be sure to check out Drakes Beach to view Elephant Seals by the thousands!  (Note: This area near this beach and all of Drakes Estero Marine Sanctuary are only open to paddling from July 1 to February 28 to protect seal populations.)  

    The ocean side of the point provides the experienced paddler with challenging surf and wind potential, so know your skill set. Most paddlers will stick to the relatively protected waters of Drake’s Bay, but be aware of seasonal closures.  

    While there are few RV camping opportunities nearby, and none within Point Reyes, Bodega Dunes Campground is less than 40 miles away and offers stunning camping and additional boating opportunities. 

    Tips: The National Seashore has some excellent resources for kayaking in the area.  March also marks the end of Dungeness Crab season, so if you like your crustaceans fresh, plan accordingly.  


    Freshwater Spring Kayak Spots


    Salt River Canyon Surprises in the Superstition Mountains

    Arizona – Late Winter to Early Spring

    While you might expect this area to be listed among the saltwater spots above, don’t let the name deceive you! Cutting through the spectacular Superstition Mountains located east of Phoenix is a series of reservoirs which supply the greater Phoenix area with a fresh water supply and hydroelectric power. Kayaking from the shores of Canyon Lake and up the Salt River Canyon is a spectacular day trip filled with fascinating landscapes and an absolute oasis of the best flora that the Sonoran Desert has to offer!  Keep your eyes peeled along the cliffs above for bighorn sheep, too.  

    Tips: It tends to get rather warm and somewhat busy in the late spring/early summer. So, we recommend enjoying this lake in the early spring and during weekdays in order to avoid crowds. Launch from the shore near the picnic area on Canyon Lake, then proceed up the river as far as you can.

    The flow is minimal and the river is wide, so it’s very easy to attain. The further up you go, the more beautiful and fascinating the canyon becomes, with plenty of places to pull off for a picnic lunch, or even camp overnight. Winds can pick up in the late afternoon, so plan accordingly.  The camping and boondocking in and around this area is plentiful and beautiful.  


    Slithering Through Side Canyons 

    Utah – Mid to Late Spring 

    While the reservoir in the Glen Canyon National Recreation Area (just above the Grand Canyon) is jam-packed with house boats and parties during the summer months, mid to late spring offers kayakers a place to wander in peace and quiet. The landscape of the Navajo Sandstone formation looks a bit like melting Neapolitan ice cream, with side canyons that allow kayakers to paddle deep into the inlets and go back in time to Ancient Puebloan ruins and sandstone cathedrals. If you are seeking a multiday kayak camping adventure, there are dispersed campsites along the lake with no permits required.

    Tips: Stop by the Glen Canyon Visitor Center to get a map of the area, so you know where to find launching/landing spots, as well as find those “secret” side canyons.


    Turquoise Glacial Waters of North Cascades National Park

    Washington State – Late Spring to Early Summer 

    Spring runoff from the surrounding glaciers turns this series of reservoirs from green to iridescent blue in the spring, making for a surreal and stunningly beautiful scene! Three reservoirs lie along the Skagit River which cuts through the Skagit Valley: Ross Lake, Diablo Lake, and Gorge Lake. While Gorge Lake and Diablo Lake offer easy access to day paddles, Ross Lake is a bit more of a mission and offers numerous paddle-in campsites that are reservable (in-person only) at the backcountry ranger office in Marblemount. 

    On the east side of the North Cascades park complex lies the second largest glacially carved body of water on the west coast, Lake Chelan. With dozens of small, boat-in USFS campgrounds around the lake, your first-come, first-served options are nearly limitless.

    Tips:While the water is ice cold, late spring weather can offer gorgeous sunny days before “fire season” fully kicks in. Be prepared for anything though, as the weather can change drastically over the course of a single day. There is plentiful RV camping in the national park.


    Unforgettable Voyages in Voyageurs National Park

    Minnesota – Late Spring to Early Summer 

    Some parks are simply best experienced from the water. And Voyageurs, along the Canadian border in northern Minnesota, is most definitely one of them.  Named after French Canadian canoe traders in the Seventeenth through Nineteenth Centuries who plied these canoe trails hauling furs and raw materials eastward, this park offers a private island camping experience that few others can provide.  

    A day trip on these lakes is a gorgeous way to get away from it all for a short time. And, the options for backcountry kayak/canoe camping are so numerous that you can choose the adventure level which suits your desires. Backcountry camping reservations and permits must be made in advance of arriving at the park, so knowing your skills and abilities are crucial to establishing an itinerary. The lakes can be both serene and rough, depending on the time of day, but the numerous islands typically provide some shelter from the wind.

    Tips: Summertime can be crowded and buggy, but late spring (and early fall) are often pleasant, if not a bit chilly. If you can fit your trip in before/after fishing season, you’ll have the lakes to yourself.  There are no RV campgrounds in the park itself, but there are private campgrounds in the area.


    A Final Word on Kayaking Tips and Best Practices  

    • Life jackets. ALWAYS wear an appropriate life jacket while kayaking.
    • Communications. Bring a device to reach someone in case of an emergency. (Like an inReach or Marine radio AND cell phone in waterproof case.)
    • Provisions. Bring enough food and water for your time on the water. Even on the water, it’s easy to get dehydrated.  
    • Float plans. If you are going on a multi-day adventure, always leave a float plan behind with a friend or family member.

    New to kayaking? We talk more about kayaking for beginners elsewhere, but another easy way to get started on how to paddle is through the American Canoe Association. They lead and instruct courses to develop greater skills and experience — wherever you want to park.

    Getting out on the water can be one of the best ways to avoid crowds and see an area from a different perspective. With some preparation and the appropriate equipment for the body of water, kayaking is an activity that is perfect for every age group — from five to 75!

  • Cuts to USACE Recreation Facilities Hit the Dakotas

    Cuts to USACE Recreation Facilities Hit the Dakotas

    Beginning this month on May 1, 2025, several U.S. Army Corps of Engineers (USACE) recreational areas both North Dakota, South Dakota, Nebraska, and Montana will be temporarily closed or experience service reductions, according to the USACE Omaha District release. According to the agency, staffing shortages and resource limitations following the cuts to USACE will limit the ability to “safely open and maintain all recreation sites at normal levels of service.”

    Many RVers like these places for the generally pleasant surroundings and very affordable pricing. These facilities typically have large recreational reservoirs and are also popular for fishing or boating. The release also warned that safety patrols in these areas that do remain open may be reduced.

    In addition, janitorial services will also be reduced meaning restrooms and other common facilities could be less pleasant. For those who wish to visit any USACE site, the agency suggests that one should contact the location before planning a visit. 


    Areas Affected by Cuts to USACE

    Campground Closures

    The following campgrounds will be fully or partially closed for the 2025 season:

    • East Totten Trail Campground, North Dakota
    • Wolf Creek Campground, North Dakota
    • Hazelton Campground, North Dakota
    • Cattail Bay Authorized Camping Area, North Dakota
    • Beaver Creek Campground (partial loop closure), North Dakota
    • North Shore Campground, South Dakota

    These closures will also impact supporting services. Those services include the following: janitorial services, refuse removal, mowing, park attendants, fire ring cleaning, and weed control. At each location, USACE will post closure signage. For any reservations that have been made through Recreation.gov, full refund will be processed.


    Day Use Area Closures and Reductions

    Several comfort stations and vault toilets will be closed at day use areas. These include:

    • Good Soldier Day Use/Boat Ramp, South Dakota – one vault toilet closed
    • North Shore Beach Day Use/Boat Ramp, South Dakota – one comfort station and one vault toilet closed
    • Old Fort Thompson, South Dakota – one comfort station closed
    • Left Tailrace, South Dakota – one comfort station and one vault toilet closed


    Visitor Center Impacts

    Educational and interpretive programs at the following visitor centers will be affected:

    • Fort Peck Interpretive Center and Museum, Montana – reduced to one day per week (from five)
    • Oahe Visitor Center, South Dakota – closed
    • Fort Randall Visitor Center, South Dakota – closed
    • Lewis and Clark Visitor Center at Gavins Point, Nebraska – reduced hours (Wednesday-Saturday)


    Powerhouse Tour Suspensions

    Powerhouse tours at the following project sites will be suspended beginning mid-May:

    • Garrison, North Dakota
    • Oahe, South Dakota
    • Fort Randall, South Dakota
    • Big Bend, South Dakota
    • Fort Peck, Montana – available only during Fort Peck Interpretive Center hours

    The release goes on to say these temporary adjustments following the cuts to USACE are being made to ensure visitor safety, protect environmental resources, and sustain critical hydropower and dam operations across the Missouri River Basin.

    Speaking about the cuts to USACE, Col. Robert J. Newbauer, Omaha District commander, says,“We understand these closures may disrupt plans, and we sincerely appreciate the public’s flexibility as we take the necessary steps to provide safe and sustainable recreation experiences this summer,” 


    About the U.S. Army Corps of Engineers

    The U.S. Army Corps of Engineers has approximately 37,000 civilian and military personnel delivering engineering services in over 130 customers, according to the agency. Among the tasks they are charged with include building and maintaining America’s infrastructure including maintaining water ways for use within communities including flood control. 

    Where the Corps oversees these facilities there are generally very affordable and rather pleasant camping facilities which are enjoyed by many. Cuts to the Army Corps of Engineers budgets will likely affect more of these facilities. 

  • 5 Watercraft You Can Stow in Your RV

    5 Watercraft You Can Stow in Your RV

    There’s two kinds of people in this world: those who are content to sit idly by a peaceful watery landscape — and those that have to get wet. And make no mistake about it, traveling by RV will allow you access to so many awesome aquatic settings. So, for those of us who can’t just sit in front of body of water (I’m one of you), we need a way to get in and explore. Fortunately, there are five types of watercraft you can easily bring in your RV. 

    So, from kayaking to paddleboarding and beyond, let’s dive right into the best RV watercraft to stow in your rig.


    No. 1: Hard-Shell Kayaks 

    Also known as “sit-on-top” kayaks, hard-shell kayaks are a reliable and durable option for exploring the water. They are difficult to sink or swamp, and punctures are rare. These kayaks are also easy to launch with no set up required. 

    Depending on what kind of water you prefer to delve into, a kayak will give you access to a range of aquatic landscapes. If you are traveling with a partner, a two-seater kayak will be great, but they do take up more linear space. However, keep in mind that, ultimately, having one double kayak will take up less space than two smaller kayaks. My husband and I travel with a two person sit-on-top kayak that we tie to the roof of our tow rig. We have just enough clearance to make solid turns while still towing our travel trailer behind us. 

    If you like to fish in your kayak, consider one with pedals. Pedal kayaks are incredibly versatile for traveling long distances and against strong currents or winds. 


    Pros

    • Ability to cover long distances and move faster
    • Able to paddle against a solid current or wind
    • Tracks better in the water and moves straighter, making it easier to navigate
    • Creates fishing opportunities (some rigid kayaks — especially two-seaters and pedal kayaks — are big enough to bring a small bait bucket, cast net, and fishing poles along)
    • Durable during transit and storage


    Cons

    • Large, so not every RVer will have the space to store one
    • Heavy, which can be cumbersome to carry from your parking spot to a suitable launch location 


    No. 2: Inflatable and Folding Kayaks

    A hard-shell, sit-on-top kayak is a luxury not every RVer can afford — especially space-wise. If you lack the space to bring one along, consider an inflatable or folding kayak.


    Folding Kayaks

    Contrary to their modern appearance, folding boats have a long history. They can be found in historical context as far back as Norse mythology. Today’s folding kayaks have undergone major technological advancements. They are more durable, portable, lightweight, and user-friendly than ever before. Some modern folding kayaks are derived from origami inspired designs, folding from a single sheet of corrugated plastic. Others are derived from a hybrid of rigid and folding elements. 


    Pros

    • Enhanced portability 
    • Compact storage opportunities
    • Lightweight design 


    Cons

    • Come at a higher price point than many other forms of kayaks
    • Make performance trade offs, like performing well in calm conditions but not offering the same level of rigidity and speed when paddling in rough waters
    • Require extra care to avoid wear and tear on the fabric skin and joints
    • Need to be properly stored to avoid UV damage (and salt and debris needs to be cleaned off of them after each use)
    • May have weight limits compared to their rigid counterparts, which could impact the amount of gear and passengers you intend to bring along


    Inflatable Kayaks

     An inflatable kayak is a great way to get in the water, without utilizing any precious storage space in your rig. You will save loads of space and weight. 


    Pros

    • Incredibly light
    • Space-saving
    • Affordable


    Cons

    • Need to be inflated
    • More susceptible to spring a leak, especially in aquatic environments where you need to be careful not to scrape sharp objects like oyster shells or barnacles
    • Need to avoid shallow water in case the bottom poses a threat of puncture
    • Do not track as well in the water 
    • Subject to windage without the weight and rigidity of a hard-shell boat and may be blown around by heavy winds


    No. 3: Paddleboards

    I remember when paddleboards first came out. I thought for sure they would lose their popularity and fade away like so many sporty inventions. But they didn’t. And if you’ve ever been on one, you might understand why. They offer a surprising amount of versatility, while requiring a certain level of skill and physical capability to master. After the initial learning curve, a paddleboard can be your best friend on a variety of waterways. And they require very little space for storage. 


    Inflatable Stand-Up Paddleboards

    Inflatable stand-up paddle boards are a great option for RV watercraft. They are compact and can roll up to the size of a sleeping bag! Many of them are sturdy enough for fishing, and even come with little chairs to sit on. Some models can carry an additional small passenger. 


    Pros

    • Portability and storage 
    • Lightweight and easy to transport 
    • Durable in transit (compared to their rigid counterpart)


    Cons

    • Longer set-up time with inflation
    • Sacrifice some performance with less rigidity, responsiveness, and glide
    • Potential for puncture with any inflatable RV watercraft


    Rigid Stand-Up Paddleboards

    A rigid stand-up paddleboard should be considered for performance versatility. If you intend to use your board competitively, or traverse especially rough waters or rapids, a rigid stand-up paddleboard might be worth considering if you have the space to store it. 


    Pros

    • Offers better rigidly speed and responsiveness to the waters due to solid construction
    • Durable with no risk of puncture 
    • Enhanced control as the stiffer surface translates into improved maneuverability and control, especially in windy or rough water


    Cons

    • Bulkier to transit
    • Require more storage space
    • Risk of damage when going over big bumps on the road — or dropping them by mistake
    • Come at a higher price point
    • Repairs are costly 


    No. 4: Hydrofoil Boards

    For those who are less interested in exploring the water, and more interested in playing on it, a hydrofoil board is worth investigating. A hydrofoil board has a wing-like structure attached to the bottom that lifts the vessel above the water, reducing drag and increasing speed.

    Basically, the board is akin to a stand up paddleboard or a surfboard, combined with a wing that extends below the board. 


    Pros

    • Minimizes water resistance, which can make outings faster and less physically taxing
    • Offers an exhilarating and unique experience on the water.
    • Designed with portability in mind 


    Cons

    • Comes with higher price point
    • Can be costly to repair
    • Delicate and may require extra care
    • Need to be stored securely to avoid damage, as well as cleaned of salt and debris after each use
    • Demands more skill and practice than a traditional stand up paddleboard or surfboard. 


    No. 5: Windsurfing and Kitesurfing Boards

    In a similar vein of water sports, windsurfing and kitesurfing open a world of water sports that can be enjoyed in oceans and lakes. Both rigs come in compact packages ideal for RV watercraft transit. 


    Windsurfing Boards

    Windsurfing is a water sport that merges elements of sailing and surfing. The sail is mounted on a mast of a windsurfing board to capture the wind. This allows you to propel the board forward as you stand up right and grip the sail directly. This is a physically demanding sport that requires strength and technique


    Pros

    • Offers a more streamlined setup that can be more straightforward to learn on (direct connection between the sail and the board provides immediate feedback, offering a strong sense of control over direction and speed)
    • Requires a full-body workout, building strength and coordination
    • Can be used in varying wind conditions


    Cons

    • Can be cumbersome and sizable
    • While intuitive, still takes time and practice to master the sport of windsurfing
    • Requires a minimal amount of wind to perform
    • Setting up the sail and mast demands some extra time


    Kitesurfing Boards

    Kitesurfing is a dynamic water sport where a large, controllable kite is used to harness the wind and pull the rider across the water on a board. Unlike windsurfing, on the kitesurfing board, the kite is not attached to the board, but is flown overhead and controlled with a bar and lines. 


    Pros

    • Offers an especially high speed thrill, lifting you into the air sometimes over 100 feet
    • Most able to be deflated and packed into a travel bag
    • Versatile enough that, with the right setup, it can be adapted to landboarding


    Cons

    • Setup involves separate components that require a bit more space and sometimes assistance to launch appropriately. 
    • Considered dangerous and requires thorough training to perform safely
    • Injury is a solid risk (for every 1,000 hours of kite surfing, about 11 injuries are statistically prevalent) 
    • Requires a certain amount of wind to perform
    • Can be costly to acquire a high-quality kitesurfing setup


    Choosing Your RV Watercraft 

    Picking the right RV watercraft to break out when you spot a body of water can be a real rabbit hole of research. Even so, it’s worth taking the time to explore all your options, pairing them up with your RV’s storage and weight capacity.

    Assess the carrying capacity of your tow vehicle. Do you have ladder racks to tie a rigid boat to? Can you install some? Will it be worth the trouble?

    For us, absolutely. We love having a rigid vessel that we can explore various waterways with. But that’s because our priority is exploring the water. Whatever your priority is, make sure you honor it with a vessel that meets your needs.   

  • Cortes 18 Announces New Lightweight Possibilities for RVs

    Cortes 18 Announces New Lightweight Possibilities for RVs

    RV maker Cortes Campers recently announced a limited production run of their new Cortes 18 model, which replaces the traditional metal frame with one made of composite. According to the company’s website, replacing a traditional steel chassis with our new patented advanced composite materials, such as fiberglass or carbon fiber, can result in significant weight savings and enhanced performance.


    The Unique Building Process of the Cortes 18

    Using fiberglass makes the Cortes 18 chassis approximately 68 percent lighter. Further, the carbon fiber option achieves an even greater weight reduction — around 80 percent. 

    The composite materials also result in superior durability, with the benefit of being corrosion-resistant. The lighter weight can enable less-capable vehicles to tow the diminutive Cortes 18 and the lack of corrosion implies a longer life span for the trailer.  Other unique aspects of the model include the fat that the holding tanks are actually molded into the camper itself. The company has applied for a patent on the build process, referred to as monocoque construction. 

    The idea is that the body and frame form a single structural unit, eliminating the need for a separate frame and making the entire structure stronger. Interestingly, this evokes a process similar to that of many exotic vehicles and airplanes, which undergo a similar build. 

    This Cortes 18 model — the 18BB — features all the usual things found in a fully equipped travel trailer, including toilet, shower, and a full kitchen. The dry weight of the trailer is 1,885 pounds which is remarkably light. 

    The exterior is molded fiberglass utilizing vacuum infusion. The company first sprays gelcoat, then adds all the dry fiberglass and core. After that is complete, they inject resin under vacuum pressure, which vacuum-infuses and cures in one process. The process is commonly known as “vacuum infusion”. Many others use what’s called a chopper gun to shred up fiberglass which is applied by hand to the mold. That results in inconsistencies and also a great deal of labor cost. The process Cortes uses is less expensive and more precise.


    About Cortes Campers

    Cortes is a subsidiary of U.S. Lighting Group which builds a variety of products including products or the RV industry. 

    “When we started this company, we said we were going to build campers the same way they build airplanes, except with 21st Century materials,” U.S. Lighting Group CEO Paul Spivak said after touring various RV manufacturers. 

    The company only plans to build 100 of the new models which are available now through the company’s dealer network.

  • Mobile Harbor: Best Kayak Racks for Your RV

    Mobile Harbor: Best Kayak Racks for Your RV

    From long journeys through rivers to a relaxing fishing trip, kayaking allows you to enjoy the freedom of open water. Which is exactly why many RVers consider a kayak to be essential equipment for RV camping. Kayaking provides a peaceful, uncomplicated means of exploring the outdoors. But getting kayaks to that perfect waterfront camping spot can be a little challenging. The question is: With limited space in the RV, where do you put it? Because if you go the hard-back, sit-up-top kayak route, you’ll also need to shop kayak racks for your RV.

    Now, there are a few ways to transport kayaks on an RV. One, of course, is to transport a kayak on the rooftop rack of your tow vehicle. But transporting your kayak on an RV is a whole different story. RVs are typically more than nine feet high. So, if getting a kayak onto the roof is an option at all, it isn’t an easy one. 

    Fortunately, there are other ways to transport kayaks on an RV. We’ll detail a few methods and then list our favorite kayak racks for an RV at the end.


    Kayak Transportation Options for Your RV

    Top of the Tow Vehicle 

    Kayaks that are less than 10 feet can be secured in place in the box pickup — if your RV is a travel trailer. Additionally, some RVers transport kayaks that are under 10 feet long on a rooftop rack on the tow vehicle.

    Be advised: That length matters. Longer kayaks transported on the roof of a tow vehicle can make contact with the trailer when you turn a corner. This can damage the boat and/or the trailer. Also, even if you have a shorter kayak, transporting it on the roof of the tow vehicle has two downsides: 

    1. Kayaks are heavy. Lifting the 40- to 80-pound kayaks onto a rooftop carrier can be difficult.
    2. Kayaks increase wind resistance. Once mounted on top of the roof,  kayaks often result in a noticeable drop in fuel economy


    Back of the RV Ladder 

    Some RVers find creative ways to mount a kayak onto the RV ladder. However, this isn’t always a good idea. Truthfully, RV ladders aren’t designed to carry weight for an extended period of time. (Perhaps especially over all the lumps, bumps and jiggling that happen at the back of an RV during transport.) Also, using the RV ladder as an improvised kayak carrier could damage it or cause its mounting brackets to loosen. 

    Quite simply, it’s possible but risk-prone. I don’t advise it.


    Hitch-Mounted RV Kayak Carriers

    Hitch-mounted RV kayak racks transport kayaks vertically behind your RV. The vertical placement makes the process of loading and unloading kayaks easier than any other method.  Basically, you just need to lean the kayak onto the main cradle of the carrier, then lift it onto the carrier. Once it’s in place, it’s secured there with straps. After that you’re good to go.  

    The benefits of vertical kayak transport don’t end with relatively easy loading and unloading.  Because they’re positioned at the back of the RV, kayaks on hitch-mounted racks don’t create wind resistance like their roof-mounted counterparts. This helps to minimize effects on RV or tow vehicle fuel consumption.  


    Key Considerations for Purchase

    There are a few things you’ll want to consider before you go shopping for an RV kayak carrier.  

    • RV cargo carrying capacity. Ensure the additional weight of kayaks and the kayak carrier itself won’t exceed the cargo carrying capacity for your RV.
    • Hitch receiver size and capacity. RV hitch receiver capacity can be as low as 50 pounds or up to 500 pounds. It’s a good idea to know how much weight your RV hitch receiver can handle before loading it with the weight of a kayak rack along with kayaks.  
    • Kayak length. Be aware that carrying a kayak vertically on an RV might raise your RV’s clearance height. If this is the case, keep it in mind when you’re planning routes or driving. 
    • Fold-up features: Some kayak racks can be folded flat against the RV when not in use.
      • Durability and materials. Look for carriers constructed from robust, weather-resistant materials like powder-coated steel or aluminum to withstand the rigors of travel and outdoor elements. Stainless steel hardware is a plus for longevity.
      • Budget. Kayak racks vary in price according to features and materials. Knowing which features you want and how much you have to spend will help you stay within your budget.
      • Security features. Some carriers come with integrated locking mechanisms for security.
      • Ground clearance. For vertical carriers, ensure that your kayaks will have sufficient ground clearance when mounted to avoid scraping on uneven terrain or during inclines.
      • Will you travel with bikes as well as kayaks? Some kayak racks come with features like bike carriers. If you like to camp with both bikes and kayaks, this can save you from having to get an additional carrier for your bikes.
    • RV approved. Be sure the kayak rack you choose is approved for use on RVs.
    • Vertical clearance. When driving with kayaks mounted vertically be aware of overhead obstacles (low bridges, limbs, etc.).


    Top Picks for Hitch-Mounted Kayak Racks

    Ease of both installation and use have helped make these hitch-mounted RV kayak racks float to the top of the pack. 


    Recpro Vertiyak Vertical Kayak Rack for RVs


    Manufactured in the USA, the Recpro Vertiyak Vertical Kayak Rack for RVs is great for kayaks and paddleboards up to 12 feet. This carrier stacks up to two kayaks securely in place.  Vertiyak recommends users secure kayaks in place with ratchet straps using the holes provided for this purpose.   

    A cool feature is that the bottom cradle can be adjusted to three different heights, making it versatile for a variety of trailers and motorhomes. Another neat thing about this rack is that it folds flush with the back of the RV when not in use, getting it out of the way where it can’t get damaged. These kayak racks come stock with an anti-rattle hitch tightener which reduces movement of the rack during travel. 

    Important Notes: You’ll need to supply your own ratchet straps and hitch pin with this kayak rack. In addition, the manufacturer recommends the use of pool noodles to protect kayaks from scratches.


    At a Glance

    Capacity: 2 kayaks
    Maximum weight capacity: 150 pounds
    Dimensions: Top – 66 inches (H) x 40 inches (D) x 37 inches (W/Top) x 20 inches (W/Bottom)
    Lower cradle opening:  11 ½ inches x 17 inches
    Upper cradle opening:  35 inches
    Weight:  46 pounds
    Mounting: Requires a 2-inch receiver
    Material: Powder-coated, 14-gauge steel (top), 11-gauge steel (lower hoop)
    Mounting height: Lower cradle is adjustable to 3 mounting heights
    Use: Motorhomes and trailers mounting kayaks up to 12 feet long;
    Price: $449.00 at Vertiyak.com 


    Hyperax Iridium RV Approved Kayak Carrier

    RV Proved Hyperax Iridium Hitch Kayak Rack


    The Iridium Hitch by Hyperax provides secure kayak storage on the back of the RV. Reviewers report that it’s easy to install and durable enough to withstand years of use on the back of an RV. Made of carbon alloy steel with integrated foam pads on cradles to help prevent scratches, the Hyperax Iridium uses simple reflective straps to hold kayaks in place. 

    Important Notes: The Hyperax Iridium can only be used on vehicle combinations up to 50 feet long with trailers being only 25 feet long. This makes it unsuitable for use on many fifth wheels and longer travel trailers.  


    At a Glance

    Capacity: 2 kayaks
    Maximum weight capacity: 160 pounds
    Mounting: Requires 2-inch receiver
    Measurements: 65 inches x 5 inches x 76.49 inches
    Weight: 52.5 pounds
    Material: Alloy carbon steel
    Use: Trailers, motorhomes, and SUVs
    Price: 599.95 at Amazon.com


    Honorable Mention: Yakups

    Perhaps surprisingly, there aren’t a lot of options when it comes to vertical kayak racks for RVs. One other popular kayak rack for RVs until recently has been the Yakups kayak rack, which can haul bikes along with your kayaks. The Yakups rack is well-loved by RVers who tote kayaks on their adventures. 


    Ready to Rack and Roll?

    Whether we’re exploring little islands in the middle of a lake, or paddling down a sleepy river, getting out on the water on camping trips is a fun and relaxing way to enjoy the outdoors.

    That said, getting kayaks on (and off) the RV doesn’t need to be difficult. The right RV kayak rack makes loading kayaks simple and easy. Not only that, but you’ll have peace of mind that your kayaks will be safe and secure en route to wherever the road takes you.

  • Spring Science Adventures for Kids: Roadschooling 101

    Spring Science Adventures for Kids: Roadschooling 101

    Spring unfolds a lush tapestry of sensational delight. Birds are performing their seasonal choir. Woodpeckers are hammering away at green budding trees. It’s time to open the doors and let the kids shake out their cabin fever under the sun. This is a prime opportunity to investigate the natural world. The unfurling season reveals tiny wonders that inspire big questions. For roadschooling parents, it’s a chance to let your children pave their way to science through inquisitive exploration.

    Curiosity is all you need, and kids have more than enough to share in case yours is running thin. Here’s how to make the most of the science of spring when roadschooling your kids.


    Roadschooling Basics

    If you’re reading this article, you are probably about to embark on a roadschooling journey. First, let me congratulate you. Before you start, know that you are giving your children something that is worth more than the stars: time with you. 

    The sacrifices we make to teach our children outside conventional education often go unnoticed. But the journey is one that will pay your family back many times over. In fact, just RVing with your kids is already teaching them a lot.

    So, before you put any ideas of success on a certain curriculum, just remember that you and your kids have already won the prize. Now, it’s just a matter of choosing your path.  


    Make Curiosity the Curriculum

    Let’s be real. It can be so difficult to get our kids to engage in a preplanned activity. And  unfortunately, all curriculums are full of preplanned activities. Meanwhile, your kids will run outside and make their own little games for hours and hours utilizing the very tools we want them to learn about. How do we channel that boundless energy into a productive activity? Curiosity is the key to endless motivation. Kids are overflowing with it, and it’s a great stimulus for learning.

    Spring is full of things to be curious about. Little mushrooms are popping up, bugs are buzzing around, and the birds are filling the air with sweet chatter. Each one of these tiny miracles can be a lesson in science. They may not be interested in learning how to make a barometer today, or memorizing the periodic table of elements tomorrow. But I bet they will find something outside this spring to catch their interest. Whatever calls to them, you can probably transfer it into a science activity. 


    The Natural Science of Roadschooling

    Science can be an intimidating word for some. All those experiments, equations, charts and tables. (Honestly, they leave me questioning my own authority to teach something so complex.) Even so, I eventually realized that historically, scientists had a lot in common with my own wanderlust. They explored the great outdoors, collected samples, and studied nature. Many fields of science were fueled by curiosity and an appreciation for natural beauty.

    By fostering my children’s sense of curiosity in the natural world, I am teaching them independence paired with the ambition to follow their own interests. And what better way to capitalize on your nomadic disposition, than by taking science lessons outside? Each new destination is another lesson in ecology, geography, geology and more! 

    For natural science, spring is simply crawling with science lessons almost anywhere you park. These three are some of the easiest to find.


    Bugs

    If you have a bug book, and a pair of fearless hands, you can study all manner of insects and their habitats. This could be a lesson in entomology, or even ecology, depending on where you decide to take it. 


    Mushrooms

    Don’t even get me started on mushrooms! We spent an entire season going on mushroom hikes in the Appalachian mountains. The more we looked, the more we found — and the more it made us want to look again. There is an entire weird and wonderful world of mushrooms waiting to be discovered.

    For mushroom hunting, bring along my favorite field guide: How to Forage For Mushrooms Without Dying. And for some aesthetic inspiration, this book is like walking into a naturalist exhibit: Fungarium, Welcome to the Museum


    Birds

    Birds can teach us so much. They force us to slow down, stop talking, and wait. This is not something that comes naturally to the more recent generations of our kind. I believe it’s important to expose young children to quiet moments in nature. When observing birds, the reward is fleeting, but worth the wait.

    I like to combine the natural science of bird watching with a lesson in artistic rendering. Books like Audubon’s Animals, or other naturalist illustrative field guides, are a great way to introduce your kids to drawing what they observe. Field guides like these are always hanging around used books stores, libraries, and online. 


    Jump Into the Junior Ranger Program 

    If you are roadschooling, then the National Parks Junior Ranger Program should be on your radar. On my first RV trip, I traveled across the country with my husband and two small children. I lacked confidence and experience in the roadschooling/homeschooling arena. It was too overwhelming. I couldn’t take the first step in any direction. In the midst of my despair the Junior Ranger Program helped me back to my feet.

    These little workbooks led us across the entire country through site specific lessons in history and science. It was the perfect guide to the American landscape. Through various science activities we learned about local plants and animals and their habitat. Geology and archaeology are just a stone’s throw away from most parks in the western US.

    Just pop into the visitors center at any national or state park, or national monument. Ask for a junior ranger packet, and don’t forget to get sworn in when the activities are complete! My kids always hold their heads a little higher after they’ve been sworn in as Junior Rangers. 


    Make Roadschooling a Science Adventure

    Granted, these science lessons aren’t burning down any placement tests, or prepping them for the SATs. But, these simple activities are teaching them to be stewards of the great outdoors. By fostering a deep connection with nature through curiosity and a sense of play, they are making friends with the natural world. I can’t imagine a better lesson in life than that. 

  • Savory Southwestern RV Recipes with a Chili-Powered Kick!

    Savory Southwestern RV Recipes with a Chili-Powered Kick!

    The concept of food from heaven is a cross-cultural concept — especially to the hungry! And if there’s one type of regional food — aside from pizza — that everyone loves, it’s gotta be from the Southwest and the land of roasted chiles. Call it Mexican, Southwestern, Tex-Mex, what you will, these Southwestern RV recipes by any other name taste just as sweet. (Or maybe Shakespeare would allow us, “spicy.”) Moreover, you can enjoy them any time of year — whether you’re snowbirding through the winter or getting festive for Cinco de Mayo

    Now, when I say chiles, I’m not talking about devouring a stack of jalapeno poppers. (Or, about playing with fire and eating a Carolina Reaper.) I’m talking about fresh Hatch chiles and an open flame for some of the best Southwestern RV recipes you’ll ever taste.

    So, here are a few of our favorite recipes from our Southwestern camp cooking collection. Now, let’s get cookin’!


    Hatch Chili Enchilada Sauce


    A Quick Word on Chili Sauce Choices

    It’s a simple question that stands in for the state motto of New Mexico: Red? Green? Or Christmas? For those not in the know, this question, asked at just about any kind of New Mexican restaurant, is about chili sauce.

    For the uninitiated, here’s a translation: Do you want just one kind of chili sauce (red or green) or a more festive blend of red and green together (Christmas)? For the record, there’s no wrong answer. 


    Lessons from New Mexico

    We were making dinner with a friend in Taos, New Mexico, and when she suggested enchiladas, we admitted that we might need to run to the store for some sauce. Right away, she stopped what she was doing. She looked right at us like we’d just suggested McDonald’s for dinner. Then she said, “Ummm … so, we don’t eat chili sauce from a can here in New Mexico.”

    Now fortunately, after reprimanding us, she then reached for her stash of Hatch chili powder and introduced us to a whole new world. We’ve never gone back to canned sauce since because we always have these simple ingredients with us.


    Ingredients

    3 cups water
    1.5 teaspoons garlic powder
    1.5 teaspoons onion powder
    1 veggie bouillon cube
    1 teaspoon salt
    ½ cup all-purpose flour
    ¼ cup Hatch red or green chile powder 


    Prep Instructions

    Put all ingredients in a medium sauce pot and use an immersion blender to mix until silky smooth. Cook over medium heat, stirring until thickened. Can be made ahead of time and stored in a jar. If using green chili powder, add some roasted chopped chili peppers to the sauce after mixing with the blender.  

    *Recipe adapted from the “Blonde Chicana Bride’s Mexican Cookbook” by Helen C. Keen.


    Cheesy Enchilada Pie


    Enchiladas are the perfect way to end a chilly day at camp. Or after a long hike or bike ride. You know — when you are really hungry! Many of the ingredients can be prechopped, mixed, or made before heading out for a camping trip. All that makes it a simple heat, layer, and cook process when you’re ready to dig in. Make it in the RV kitchen or outside on the campfire. No oven required.


    Ingredients

    1 16-ounce can black beans
    1 can diced tomatoes (with chili and onion)
    1 16-ounce can seasoned pinto beans or chili beans
    1 sweet onion, small
    1 red or yellow bell pepper, large
    5 baby Portobello mushrooms
    ½ lb of sharp cheddar cheese, shredded
    12 corn tortillas
    Enchilada sauce ingredients (from recipe above)

    Suggested Toppings: Avocado, sour cream or Greek Yogurt, chopped green onions, and spicy ranch dressing. Then make the enchilada sauce using recipe above and set it aside.


    Prep Instructions

    For a 10-inch, deep-dish pan.

    • Mix and warm – cans of black beans, pinto beans, and diced tomatoes
    • Chop and saute – peppers, onions, mushrooms
    • Shred – sharp cheddar cheese
    • Lightly grill – 12 corn tortillas


    Layer the Ingredients as Follows

    Think of this like a lasagna.

    • Lightly cover the bottom of the pan with sauce.
    • Place three corn tortillas over the sauce (overlapping).
    • Cover the tortillas with a 1/3 of bean/tomato mixture.
    • Add 1/3 of sauteed veggies.
    • Cover with 1/3 shredded cheese.
    • Add another thick layer of sauce.
    • Repeat these layers two to three more times, depending on the depth of your pan, ending with a heavy ladle of sauce, and sprinkled with cheese.

    Since all of the ingredients are warmed or cooked before layering, just cover and heat thoroughly to melt the cheese and heat the sauce until it is bubbling. This usually takes 15 to 20 minutes, turning regularly to even out the heat. This can be cooked over an open fire or on a two-burner stove (resting in between the two burners). Makes enough for six to eight hungry campers!


    Spicy Cheesy Corn Fritters


    Spicy and savory, balanced with a hint of sweetness from the corn and loaded with texture, we devoured this side dish as the main event — topped with spicy chili or black beans, and hearty doses of sour cream, salsa, and green onions.  

    Ingredients

    Mix These WET …

    1 egg
    3/4 cup milk
    1/2 cup cheddar cheese, grated
    1 15.5-ounce can of corn, drained
    1 small can of diced Hatch green chilies, mild or spicy (or 1 or 2 chipotle peppers in adobo sauce for a smoky rich flavor)
    1/4 red onion, chopped and sautéed


    Then Mix These DRY

    1/4 cup yellow cornmeal
    3/4 cup all purpose flour
    1/2 teaspoon baking powder
    2 teaspoon oregano
    1 teaspoon cayenne pepper
    2 teaspoon garlic powder
    2 teaspoon crushed red pepper flakes


    Thoroughly mix wet and dry ingredients together. Generously grease pan or griddle with olive oil. Pour 1/4 cup of batter on griddle, much like you are making pancakes. Cook three to five minutes per side, and flip when set-up and browned. Flip again when other side is browned and cook for a couple more minutes until middle is firm. Makes about eight fritters.

    Suggested Toppings: Chili beans, Greek yogurt or sour cream, chopped green onions, diced avocado, salsa and/or hot sauce


    Portobello Mushroom Poblano Pesto Enchiladas … with Chipotle Cream Sauce! 


    Back in the early Nineties (and just outta college), Hutch slung burritos at a popular Mexican restaurant in Boulder, Colorado to make money to support his triathlon training and racing habit. This recipe is adapted from one of his favorite dishes on their menu. (Which, truth be told, he used to woo Shari during their first few months of dating.) Like any good meal, it’s a bit time-consuming, but worth every messy pot it takes! 


    Ingredients

    3-4 poblano peppers (or jar of roasted peppers)
    1 medium Spanish onion
    3 large Portobello mushrooms
    12 white (or blue) corn tortillas
    3 cups 2% or whole milk
    4 tablespoon butter or olive oil
    4 tablespoon all-purpose flour
    1 lbs white sharp cheddar cheese, grated
    2 chipotle peppers in adobo sauce
    1 8-ounce jar of prepared pesto
    Salt and black pepper, to taste


    Prep Instructions

    You’ll make all the parts of this recipe separately then layer like you would a lasagna in this order (from the bottom up of course) in a Dutch oven, lasagna pan, or Banks Fry-Bake. Then, reheat the entire casserole over the fire, grill, or in the oven until the top layer is bubbling. If using a campfire, be sure to add hot coals to the top in order to heat from the top down. Makes eight healthy servings!  As one of our favorite Southwestern RV recipes, we serve this dish with spicy slaw and chili beans on the side.  


    Step 1: Roast 3-4 Poblano Peppers (over a fire or propane flame). When skin is charred and blistered, wrap hot peppers in a wet paper towel then store in a large plastic bag for about 10 minutes. (This helps with removing the skin.)  Then remove all of the blackened skin. It’s a bit messy — but worth it.


    Step 2: Make Veggie Filling

    1 medium-large Spanish onion, sliced
    3 large portobello mushrooms, sliced
    3 medium-large poblano peppers, roasted, skinned, seeded, and sliced
    1-2 tablespoons olive oil

    Combine olive oil, mushrooms, and onions in a large pan.  Sauté until vegetables begin to soften, then add pre-roasted poblano peppers. Cook for about two to three more minutes, or until all veggies are tender. Set aside but keep warm.


    Step 3: Lightly Toast 12 White Corn Tortillas. Set aside but keep from drying out.


    Step 4: Prepare Chipotle Cream Sauce. Make this sauce last because it needs to stay warm to not separate.  

    3 cups 2% or whole milk, warmed (until you see the small bubbles forming on the sides)
    4 tablespoons butter or olive oil
    4 tablespoons all-purpose flour
    1 cup white sharp cheddar cheese, grated
    2 chipotle peppers in adobo sauce
    Salt and black pepper, to taste

    Melt butter in a saucepan. Stir in the flour and cook, stirring constantly, until the paste cooks and bubbles a bit, but don’t let it brown (about two minutes). Add the WARMED milk, continuing to stir as the sauce thickens. Bring it to a boil. Add the cheese, cook, stirring for two to three more minutes. Using an immersion blender, blend in the chipotle peppers with about one to two tablespoons of the adobo sauce.


    Step 5:  Layer All Ingredients 

    Begin layering your baking pan, dutch oven or Bank’s Fry Bake pan in the following order:

    • Chipotle cream sauce (enough to coat the pan)
    • Corn tortillas (pre-toasted and overlapping, some gaps will happen)
    • Pesto sauce (small smear on top of tortillas)
    • Veggie filling
    • Cheddar cheese
    • Repeat layers at least 3-4 times, depending on the depth of your baking dish
    • Final layer: Chipotle cream sauce then sprinkle remaining cheese on top.  


    Ridiculously Easy Veggie Chili 


    It happens all the time. Your amazing hike took longer than expected, and you arrive back at camp ravenous. Bust out the beans and have a warm, hearty dinner on the table in 20 minutes.  Before everyone has changed their clothes and settled in, dinner will be served.  Serves four hungry campers — in a hurry!


    Ingredients

    2 cans of chili beans in mild or medium sauce
    2 cans of seasoned black beans
    1 can sweet corn
    1 can of fire roasted chopped tomatoes (or 2 cans of Rotel)
    1 medium onion, chopped
    ½ pound of Impossible burger or veggie crumbles, cooked
    1-2 tablespoon olive oil
    1 bag of shredded cheddar cheese
    1 small tub of plain Greek yogurt
    Hot sauce

    Note: Don’t forget the can opener for this one!


    Prep Instructions

    • Make this on the campstove or over a campfire.
    • In a large pot (or Dutch oven if cooking over a campfire), saute onion in olive oil.  
    • When translucent, add burger or crumbles and saute until browned.   
    • Add all beans and chopped tomatoes. 
    • Add hot sauce if you want it spicy. 
    • Simmer for about 12 minutes. 
    • Serve up and top with cheese, sour cream or Greek yogurt, and tortilla chips.


    Spicy Tamale Bowls


    A few years ago, we were living the #vanlife in Hawaii for a few weeks. We rented a classic V-dub Vanagon. It was slow, underpowered, smelled a little funny, and if you took a left turn just a little too fast, the oil sensor alarm would go off. (In other words, it was AWESOME!)

    We cruised the island, boondocked in some places, camped at Haleakala, and found some simply stunning roadside tamales. Outside of the Southwest, these were seriously the best we’ve ever eaten. But no matter where you get (or make) your tamales, once they are prepared, this has got to be one of the easiest and tastiest Southwestern RV recipes around. 


    Prep Instructions

    • Steam tamales, two per person
    • Heat 1 can of black or chili beans (a can works for two people).
    • Top with beans, salsa, avocado, diced Hatch green chilies, and Greek yogurt or sour cream.


    Enjoy Southwestern RV Recipes on the Road

    We hope these Southwestern RV recipes spice up your RV camp cooking and your future desert adventures inspire you to try some fantastic culinary feats of your own design! S

  • “Fork in the Road” Decimates National Parks Service Staff

    “Fork in the Road” Decimates National Parks Service Staff

    An estimated 2,400–2,500 National Park Service employees, representing about 12.5 percent of the agency’s staff, have taken offers to retire or resign according to the National Parks Conservation Corporation and reported in National Parks Traveler. Among those who reportedly took either an early retirement buyout or “fork in the road” offer, which had them either resign immediately but remain on the payroll through the end of the fiscal year, were some of the heads of the Park Service’s cultural and natural resources divisions.

    The offers are but one of several government measures to reduce the number of federal employees across a number of departments. Earlier this year, seasonal and probationary employees were affected by a separate cut. This time, early retirement was offered to more established employees who qualified and others were offered the “fork in the road”. An estimated 1,100 employees took the latest “fork in the road” offer adding to the 700 employees who did the same in February. Another 700 took the early retirement offer.

    National Parks Facing Sell-Off of Lands

    It is no exaggeration to say that National Parks are facing an existential crisis, not only with crippling staffing shortages, but with the lands themselves potentially going up for sale.

    The Public Lands in Public Hands Act has been drafted to prevent the sale of pub lands as a means to balance the federal budget. A bipartisan effort, the act is sponsored by U.S. Reps. Gabe Vasque and Ryan Zinke, the latter having served as Interior secretary during President Donald Trump’s first term. “What we’ve seen in the U.S. Senate is that they want to put public lands on the ledger to essentially balance this tax giveaway to billionaires. So we have to have some courage. We have to have folks speaking up,” Vasquez said.

    How Visitors Can Support National Parks

    Gregg Bafundo – a former U.S. Forest Service wilderness ranger who was fired, reinstated, and fired again, all in the past two months – said that rather than boycotting the parks, the best way to support the National Park system and other public lands is to show up. “What we need the American people to do is to use their public lands. We need the American people to not be afraid to get out there. We need the American people to show up and swarm their national parks and their national monuments and their national forests to show the value that these lands have. I don’t think we’re going to change the course of this administration by saying, ‘Oh, please don’t do that.’

    “Because the fear is that when these lands are gone, they’re gone forever.”

  • 6 Southwestern RV Campsites to Celebrate Cinco de Mayo

    6 Southwestern RV Campsites to Celebrate Cinco de Mayo

    There’s no better excuse to roll your rig into the sun-drenched Southwest than Cinco de Mayo. It’s a holiday blending rich Mexican heritage with a festive, food-filled atmosphere — perfect for road warriors who crave vibrant culture and a good reason to clink a cerveza under the stars. And these six Southwestern RV campsites are all sure bring out the fun fiesta vibes for Cinco de Mayo.


    1. Rincon Country East RV Resort – Tucson, Arizona

    Tucson doesn’t mess around when it comes to celebrating Mexican culture, and Rincon Country East puts you right in the heart of it. This 55-plus resort serves up resort-style amenities. Think shuffleboard courts, a billiards room, and a massive community center where Cinco de Mayo events often pop up. You’ll be minutes from downtown Tucson, where the streets light up with live music, folklórico dancers, and street tacos so legit you’ll swear they were made by your abuela. And on top of all that — yes, there’s more — you’re only 12 minutes away from the piercing splendor of cacti-covered Saguaro National Park.

    General Pricing: Monthly sites range from $700 to $900 depending on hook-ups and seasonality.

    What Makes It Great: Tucson’s blend of desert beauty and authentic border-town culture makes this spot a spicy pick for a May road trip.


    2. Hacienda RV Resort – Las Cruces, New Mexico

    This place doesn’t just sound like it belongs on a Cinco de Mayo itinerary—it feels like it. Located in southern New Mexico, Hacienda RV Resort delivers upscale vibes without ditching desert authenticity. Pull into one of their oversized pull-thrus, then explore nearby Old Mesilla for mariachis, margaritas, and chile-smothered everything. The region’s blend of Mexican, Native, and Spanish influences makes for a culturally rich celebration that goes beyond party decorations.

    General Pricing: $50 to $70 per night. Discounts for weekly and Good Sam members.

    What Makes It Great: The ambiance! Everything from the adobe-style architecture to the view of the Organ Mountains says “celebración.”


    3. Oasis Las Vegas RV Resort – Las Vegas, Nevada

    Las Vegas isn’t shy about celebrations — and Cinco de Mayo is no exception. Oasis Las Vegas RV Resort sits just minutes from the Strip and becomes an ideal launchpad for party-minded road trippers. Whether you’re hitting a tequila tasting downtown or indulging in a Latin-inspired buffet at one of the casinos, you’ll be in the thick of the action. The resort itself has a tropical pool, tiki bar, and palm-lined roads that’ll put you in a vacay mindset fast.

    General Pricing: $70 to $100 per night depending on space type and hookups.

    What Makes It Great: Vegas brings the fiesta grande — and you can sleep it off in your rig without leaving the city.


    4. Santa Fe Skies RV Park – Santa Fe, New Mexico

    Santa Fe’s artistic, historic, and culinary charms make it a flavorful destination year-round, but it turns up the spice for Cinco de Mayo. The city’s Plaza hosts performances, parades, and family-friendly events, while restaurants serve up next-level enchiladas and sopapillas. Santa Fe Skies RV Park gives you a front-row seat to those desert sunsets and sits just minutes from the action.

    General Pricing: $55 to $75 per night depending on lot and season.

    What Makes It Great: Culture runs deep here — this is a town where history and flavor dance together, perfect for a holiday with Mexican roots.


    5. Lost Dutchman State Park – Apache Junction, Arizona

    If your idea of celebrating includes fresh air with a side of salsa, this is your jam. Lost Dutchman State Park is nestled at the foot of the Superstition Mountains and offers stunning Sonoran Desert views. While it’s more primitive than a resort-style stay, it offers full and partial hookup sites, plus hiking trails that will have you saying “¡Vamos!” to adventure. The area leans into local culture with nearby cantinas and low-key community celebrations.

    General Pricing: $25 to $40 per night depending on hookups.

    What Makes It Great: A quiet, natural Cinco that still puts you within reach of Arizona’s rich Mexican-American heritage.


    6. Rio Guadalupe Resort – New Braunfels, Texas

    Texas brings its own flavor to Cinco de Mayo, and few places blend it better than New Braunfels. Originally settled by Germans, the town now embraces its multicultural flair — especially when it’s time for a fiesta. Rio Guadalupe Resort offers riverfront sites perfect for tubing, fishing, or relaxing with tacos y cervezas in hand. The nearby town comes alive in early May with festivals, food trucks, and festive floats on the Comal River.

    General Pricing: $55 to $85 per night for riverfront sites.

    What Makes It Great: A laid-back Cinco celebration where you can say “salud” between float trips on the Guadalupe River.


    Tips for Making the Most of Your Cinco de Mayo RV Trip

    Cinco de Mayo commemorates the Battle of Puebla — not Mexican Independence Day — but it’s widely celebrated in the U.S. as a chance to honor Mexican heritage. Here are a few quick ways to bring that spirit into your rig:

    • Decorate. Papel picado banners, mini piñatas, and bright tablecloths can bring the fiesta energy.
    • Cook a traditional meal. Tacos al pastor, tamales, or elote are campsite-friendly favorites. Don’t forget the salsa roja or verde.
    • Support local. Hit up a local Mexican bakery (panadería) or taquería—many offer Cinco specials that’ll make your taste buds bailar.


    Sync Your RV Trip with Cinco de Mayo

    Whether you’re parked under the neon glow of Vegas or the shadow of the Superstitions, the Southwest delivers bigly on both desert beauty and cultural flavor. Som load up your rig. Cue the mariachi playlist. And toast to a holiday that turns an ordinary road trip into a fiesta para recordar.