Blog

  • Rules to Respect Aquatic Wildlife

    Rules to Respect Aquatic Wildlife

    The ocean is a living cathedral, pulsing with rhythm and color and the muffled chatter of aquatic harmony. This enigmatic world stirs curiosity and adventure in us all. It’s is yet another testament to why so many campers and RVers become wildlife enthusiasts. Our mobile lifestyle and nomadic habits put us in contact with some of the most breathtaking spots on the map. But once there, we begin to realize that only through mindful exploration can we honor the natural inhabitants. And this is especially true of the beautiful yet often fragile aquatic wildlife we encounter.

    As travelers passing through, we have a responsibility to protect and respect the natural world that lies beneath the watery depths. But for those of us moving for campsite to campsite, that can be a challenge. The fact is, we aren’t always informed of local rules and regulations for the endemic species that we’re suddenly next to. Many aquatic species are members of a delicate ecosystem. And that ecosystem is one that we must endeavor to conserve and protect.

    So, let’s share some nearly universal ground rules when encountering aquatic wildlife — guidelines that will help prevent injury to ourselves and the remarkable wildlife we encounter. 


    Responsible Fishing

    Fishing is a marvelous way to immerse yourself in the scenery. (And hopefully score a delicious meal in the meantime.) The hushed silence over the water surrounded by nature is unsurpassed. Until, of course, you feel a tug on the line. But what happens under the surface between your fishing pole and aquatic wildlife often goes unchecked. Fishing can be harmful in ways you may not expect. The good news is that it’s largely preventable. Here are some easy methods to prevent needless injury.


    Prefer sustainable fishing gear.

    I can’t tell you how many injured animals I have encountered with fishing hooks lodged inside them. Sting rays, sharks, turtles, manatees and even birds get tangled up in hooks and line. Biodegradable fishing gear is a great way to address this problem. These hooks, fishing lines, and lures break down quickly (for the wildlife) while maintaining the same performance characteristics as other fishing gear. If you’ve ever seen a sea turtle tangled up in this stuff, you might think twice about the fishing gear you use. Another thing to consider is the type of weight you use. The lead weights are toxic not only to humans but to fish. If possible, opt for a nontoxic fishing weight. Circle hooks instead of J hooks are another more sustainable alternative.


    Check local regulations.

    Know the fishing regulations where you intend to fish. Experienced fishermen always do this. In addition to getting good bait and tips at the local bait shop, you’ll often be able to pick up an illustrated guide of what you can fish depending on the season, as well as size and quantity limits. Breaking these rules isn’t just harmful to the fishing environment, it can get you in some pretty deep trouble. Fines are only the beginning of the consequences in many places. 
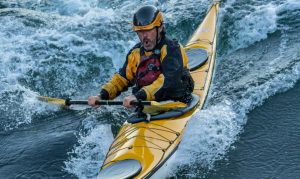
     

    Smart Snorkeling

    I can’t think of a better way to actively explore the aquatic landscape than snorkeling. But there are some measures you should take before diving beneath the surface. 


    Choose reef-safe sunscreen.

    I know this may seem strange, but something as seemingly benign as your choice of sunscreen can have devastating effects on coral reefs. But choosing a sunscreen that won’t harm the reef you’re swimming in? Let’s face it. That’s not common knowledge. Fortunately, SaveTheReef.org has an easy guide to choosing a reef-safe sunscreen. However, generally speaking, you’re best off choosing a sunscreen that contains mineral UV-blocking ingredients like oxide and titanium dioxide. 


    Wash your dive gear.

    Before jumping into that beautiful blue water, make sure you wash your gear. This may sound laughable since you’d think that the water itself would wash your gear off. But that’s not the case. Sony Coral Tissue Loss Disease (SCTLD)has spread across coral reefs in over 22 Caribbean countries as well as the Florida Reef. You can help stop the spread by washing your gear of any potentially contaminated bacteria before you get in the water. 


    Look, don’t touch.

    You’ve heard this a million times. But it bears repeating — because the temptation is very strong. The oils on our hands can be harmful to many aquatic species. Touching a coral reef can remove the protective outer layer and expose them to foreign bacteria. You want to avoid touching aquatic wildlife for your own safety as well. Something that resembles part of the reef could be a well-camouflaged creature packed with a painful sting. 


    Follow Shark 101.

    They are everywhere. And contrary to popular belief, most sharks are not overtly dangerous. That being said, there are some steps that should be taken in order to respect and avoid a negative confrontation.

    1. Don’t swim away or splash wildly if you see one. This kind of behavior could mark you as prey. The best thing you can do is remind yourself that you’re a predator too, and keep eye contact with the shark. Then calmly remove yourself from the water. (Ideally while maintaining eye contact — swimming backwards if possible.) 
    2. Don’t swim or snorkel near anyone that is spear fishing. If you are the one spearfishing and you encounter a shark with a fish on the end of your spear, you will have to make a choice depending on the type of shark. If it’s a nurse shark, just ignore it or push it away. If it’s a bull or tiger shark (two of the most dangerous species), you will need to drop your catch. 
    3. Avoid snorkeling or swimming in murky water. 
    4. Don’t swim in areas where fishing guides chum the water to attract fish. Not familiar with chumming? You must have missed the past few decades of Shark Week. It’s where fish blood and guts are tossed in the water to attract sharks.
    5. If you see a shark, count yourself lucky. Remember, sharks kill around 10 people a year. Humans kill over 100,000,000 sharks a year. You are more likely to get hit in the head by a falling coconut than be attacked by a shark. Enjoy the moment.


    Get involved with reef conservation.

    The Coral Reef Restoration Project is working to ‘reproduce’ coral reefs, to help mitigate their recent devastating decline. You can be an active part of this by volunteering with them in the water or on the ground! 


    Some Boat Notes

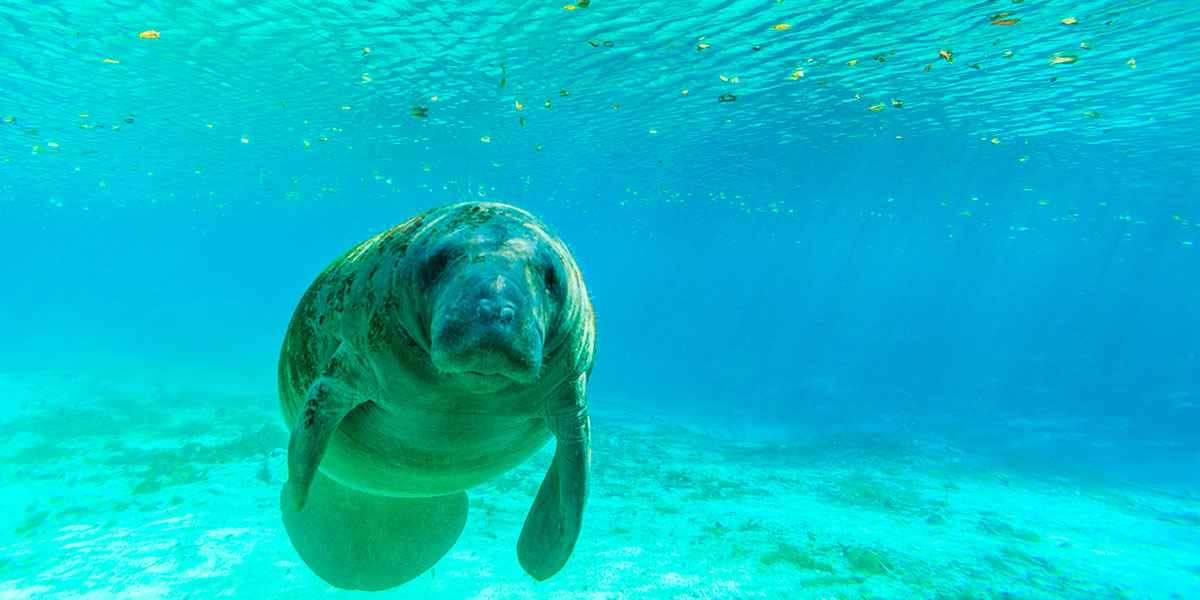
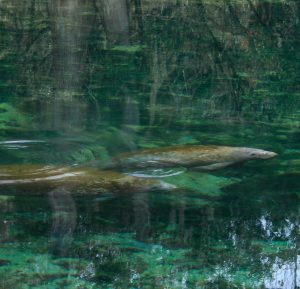
    Follow manatee protocol.

    The first time I saw a manatee was in Florida. A motor boat captain was running a fresh water hose directly into the manatee’s mouth. I don’t know why, but manatees love fresh water. And so many people, especially boaters, give it to them. This isn’t just harmful to the manatees — it’s against the law. Manatees often associate boaters with fresh water and will approach boats regularly for it. But more often than not, it results in a propeller encounter. Know the signs that a manatee makes in the water if you are boating in their habitat. You can easily spot them if you know what to look for. This can prevent a potentially fatal encounter. Their tails and body mass make a pattern of pancake bubbles on the water that are unique to manatees. Heed the signs, and go slow when you are in a no wake zone. 


    Abide reef rules.

    Coral reefs are a fragile ecosystem, home to many endangered species. The reef is precious in so many ways. And the delicate chemical and aquatic balance can be easily upset. When you are boating, slow down if you are near any shallow reefs. Keep an eye on the tide so you don’t hit them when the water is low. If you are anchoring, make sure you don’t drag into a reef, or catch a reef after you drop the hook. The mooring balls at many popular coral reefs can fill up quickly. That often results in amateur boaters dropping anchor directly on the coral reef. Make sure you find a sandy patch to drop your anchor on, and ensure it’s set in sand, not coral. 


    Respect the seagrass.

    Seagrass is an underrated habitat full of biodiversity. A single hectare of grass can support 80,000 fish and over 1 million invertebrates. Seagrass is also an efficient nitrogen stripper, removing chemical elements that cause algae blooms. This is yet another example of a fragile and delicate aquatic ecosystem. The seagrass is so important in parts of the coast that, if you run your boat aground on top of it, you will be subject to a fine of up to $1,000.

    So, what is a sailor to do? Go slow. Watch your depths. And avoid boating over shallow waters with seagrass below when possible. 


    River and Swamp Reminders

    The ocean isn’t the only body of water with a tenuous habitat. Swamps and rivers also harbor aquatic wildlife that warrant a little extra care and attention. Things you may not even know exist could be living quietly beneath a mundane rock by the riverbed near your campsite.


    Be a gentle observer.

    In the Blue Ridge Mountains of North Carolina, rivers and streams are home to endangered amphibians. Generally speaking, if you are walking around a river or creek, it’s good practice to keep the rocks in place and avoid disturbing the creek bed. An elusive Hellbender might be curled up underneath an unsuspecting rock or branch. Crawfish, salamanders, and trout dominate the mountain rivers and streams. If you lift the rocks carefully to inspect what’s beneath, you will be shocked at the amphibious little campsites underneath. Be sure to gently put the stones back in place after you are done investigating. 


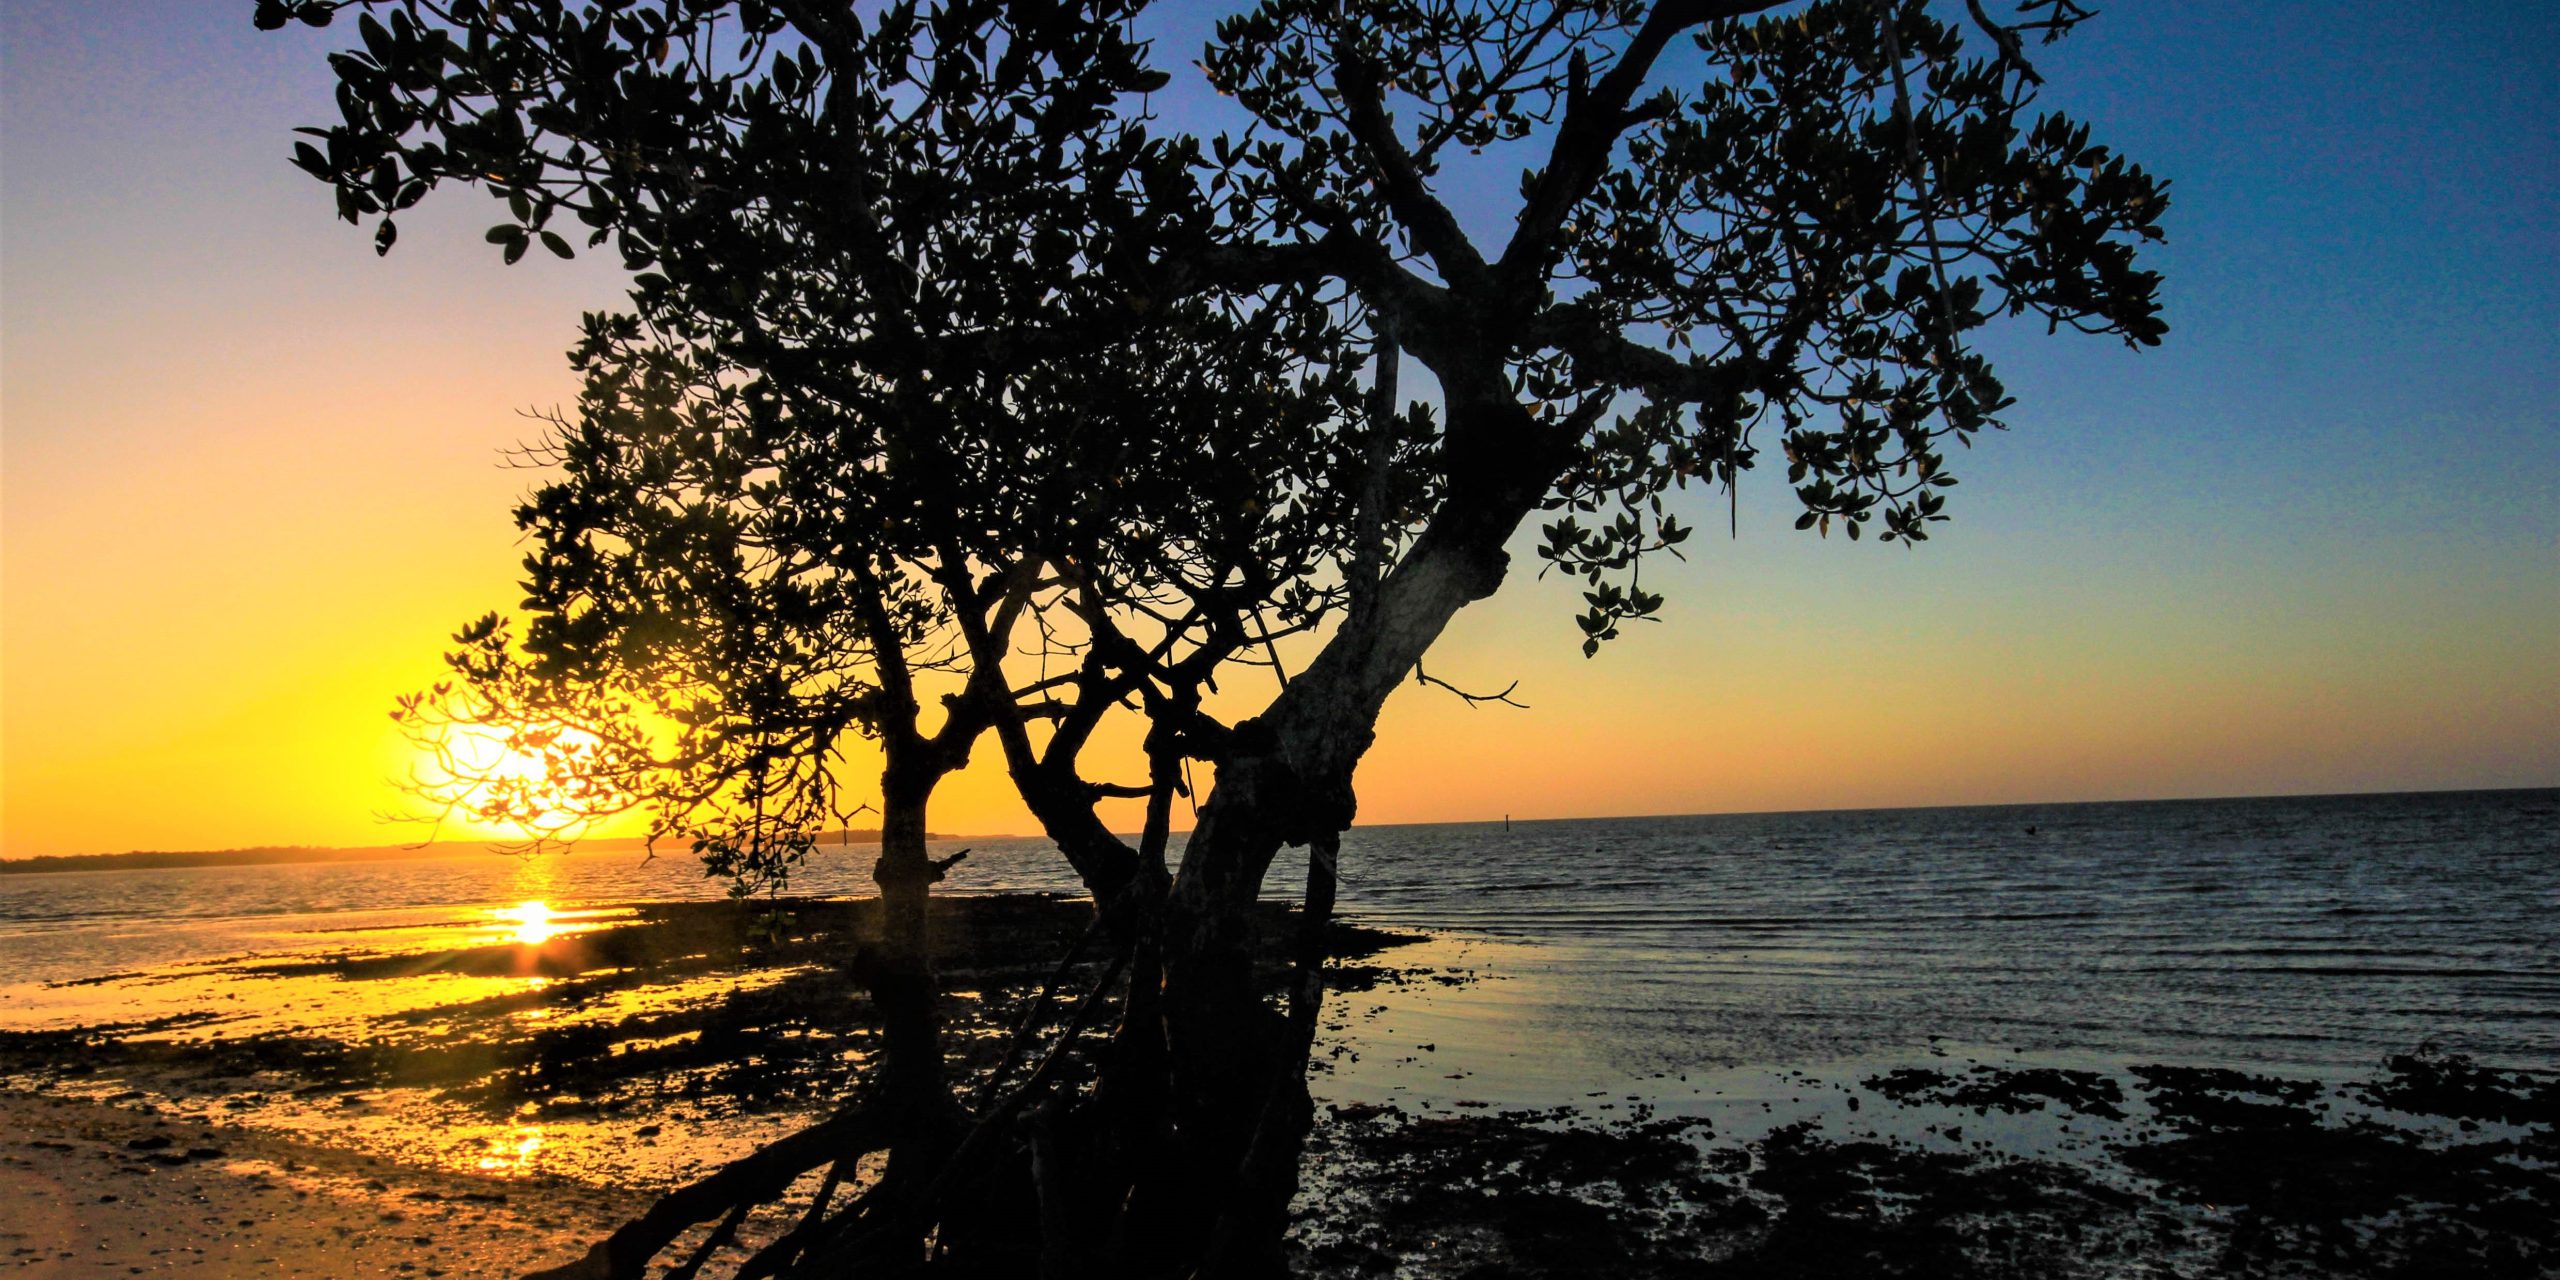
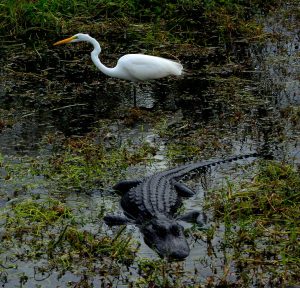
    Use good swamp sense.

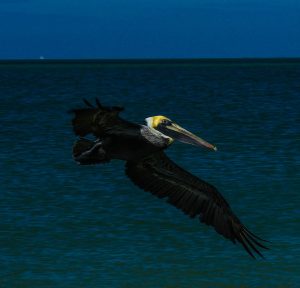
    Swamps are a unique habitat thriving with biodiversity. This is one of my favorite places to observe aquatic wildlife. Paired with flat, low-lying grasslands, swamps are home to some of the most interesting animals — not to mention breathtaking sunsets. Eagles, ospreys, herons, storks, snakes, manatees, and yes, alligators all inhabit swamplands. 

    Want to know if there are alligators lurking around? Let me make it easy for you: If you are in a salty or brackish body of water near the southeastern coast, and the water is wet, then yes, there are alligators in the water. Are they dangerous? No. At least not in the Lake Placid sense.

    But, as with sharks, a little common sense is appropriate. If you are walking around a body of water that might harbor alligators or crocodiles, you should refrain from bringing your dog along. Small children should always be attended. And, if you see an alligator, lying still as a stone statue, don’t try to feed it. To most of us that might sound crazy obvious, but I have witnessed with my own eyes tourists feeding wild crocodiles. Once wild predators start to associate humans with food, the subsequent order of events is obvious. And of course, it’s the animal that ends up with the bad reputation, not the naive tourist that decided to feed it. When observing aquatic wildlife in any habitat, it’s always good practice to keep them wild. 


  • Biscayne National Park: RV Camping and Travel Guide

    Biscayne National Park: RV Camping and Travel Guide

    Located offshore between Miami and the Florida Keys, Biscayne National Park is a boater, angler, and diver’s paradise that is not to be missed! (Especially if you are snowbirding in Florida for the winter.) The park preserves a stunning combination of crystal clear ocean waters, emerald islands, and diverse, yet vulnerable, coral reefs.

    Within this fascinating 250-plus square miles, the National Park Service protects at least 10,000 years of human history. So, from native tribes and pineapple farmers to famous shipwrecks, there is so much for an RVer to explore at Biscayne National Park. (Even if you have to exit the RV and enter the water to see most of it.)


    Scenic Trips

    With 95 percent of Biscayne National Park covered by sparkling ocean water, boating (of all types) is one of the most popular activities in the park. Canoeing and kayaking are perfect ways to explore the shallow bays and mangrove-lined shores. You can even join a Park Ranger for a 90-minute paddling clinic if you’ve never paddled a canoe. (Or if you simply need a refresher.)

    In good weather, more experienced kayakers can cross the 7-mile expanse of Biscayne Bay to Elliott or Boca Chita Keys. Among the keys, Adams Key is a popular launching spot for accessing these areas from the south. Using the islands as a base camp allows time for exploring the lagoons, creeks, and channels south of Caesar Creek. Since many of these more remote areas are too shallow for motorized vessels, canoeists and kayakers are likely to have these stunning remote places to themselves.

    If viewing marine wildlife is on your list, Shallow Jones Lagoon is a great place to explore. There, you can see rays, upside-down jellyfish, tropical fish, and wading birds. Hurricane Creek, named for the fact that old-timers would tie their boats here during big storms, provides spectacular canoe and kayak opportunities as well. It also offers excellent snorkeling beneath mangrove roots. Under the surface, snorkelers can observe sea squirts, crabs, anemones, and endless marine wildlife.


    Must-Visit Trails — Above and Below Water

    Hiking Trails

    As you might expect at Biscayne National Park, most of the exploration is by water. Even so, there are two fun hiking trails that tunnel through the tropical hardwood forest of Elliott Key. One runs across the entire seven miles of the Key. Another one-mile-long loop trail runs between the bay and ocean sides of the Key, beginning and ending at the marina. In each, be prepared for overgrown trails, as foliage grows quickly in a year-round warm and humid climate.


    Underwater Exploration

    Unique to the national parks, the Maritime Heritage Trail offers the opportunity to explore six documented shipwreck locations. The underwater trail takes you through a wide variety of vessel sizes and types, in addition to Fowey Rocks Lighthouse.  Each site has been documented by archaeologists, and the NPS has installed vessel moorings to prevent damage from anchoring. These six sites, spanning nearly a century of history, were chosen to highlight the park’s maritime heritage. They also were selected for ease of access, quality of diving, and known history. To get the most from your visit, be sure to take advantage of the NPS educational materials. All are available in print and online — and can also be found on in-water plaques.

    Of the six shipwreck sites, the Erl King, Alicia, and Lugano are best suited for scuba diving. However, the other three sites — Arratoon Apcar, Keel Showing Wreck, and Mandalay — can easily be enjoyed by snorkelers. Mandalay offers an incredible opportunity for snorkelers to experience a shipwreck in a beautiful natural setting. 

    Launching your own kayak or canoe is also allowed from the designated area adjacent to the parking lot. (And yes, it is free of charge.) Leaving a vehicle in the parking lot overnight is permitted while camping on one of the park island. Jus remember to stop in the visitor center to fill out a free parking permit. (And always leave a float plan behind with a friend or family member as a safety precaution.)


    RV Parks & Campgrounds 

    As you might expect, the only campgrounds in the park are tent-only and are located on islands: Boca Chita Key and Elliott Key. That makes a lot of sense considering they can only be accessed by boat. Camping is first-come, first-serve, and it islimited to 14 consecutive nights. (Fees are nightly.)  If you’re arriving by water in a personal motorized vessel, there is also a required docking fee. Both camping and docking fees can be paid via the Recreation.gov mobile app.  

    • Boca Chita Key is the park’s most popular island. It features beautiful waterfront views, a grassy camping area, picnic tables and grills. Toilets are available, but there are no showers, sinks, or drinking water. The harbor entrance at low tide is approximately four feet.
    • Elliott Key is the park’s largest island. Restrooms with sinks and cold water showers, picnic tables and grills are available. Drinking water is available, but bring water as a precaution if the system goes down. Elliott Key harbor is approximately 2.5 feet at low tide. There are 33 boat slips in the marina.  


    While there are no RV campgrounds within the park boundaries, RV camping is available in the greater Homestead/Florida City areas – approximately eight to 10 miles from the park. While most are private campgrounds, a good public option is Long Pine Key Campground. (It’s located in nearby Everglades National Park). There are also a handful of Harvest Hosts and Boondockers Welcome options in the area for self-contained RVers.


    Seasonal Advice 

    Biscayne National Park lies in a subtropical climate with sunshine year-round. Winters are normally dry and mild, with occasional fronts bringing wind and a bit of rain. Summertime brings hot and humid weather with scattered thunderstorms in the afternoons. The average high temperature in January is 77 degrees Fahrenheit. In August, it is typically around 90 degrees Fahrenheit. The average rainfall for the area is nearly two inches in January, but can be upwards of nine inches in August. So, come prepared with rain gear. Hurricane season is June 1 through November 30. Mosquitoes and other pesky insects can be present year-round. As with many parks, one visit is often not enough to see and explore all of what Biscayne has to offer. We recommend at least a few days for first-time visitors, allowing you the opportunity to also identify what you might do during a return visit!


    Insider Tips!

    Guided Tours

    Snorkeling, Paddling, & Sailing. If you prefer to join a tour, unique combinations of these water-based, eco-adventures are offered by the Biscayne National Park Institute.  Tours vary from a couple of hours to a full day accommodate different abilities, ages, and experience levels. Wildlife is typically quite abundant!

    Boat Cruises. Those looking for a less active adventure in the park can hop aboard a motorized vessel to enjoy the scenery and history from the deck of a boat. Also offered by the Biscayne National Park Institute are tours of the Stiltsville “floating” houses and evening sunset cruises (November to March). 


    Popular Activities

    Volunteer Clean-Ups/ If conservation work is up your alley, join the BNPI on a volunteer marine debris cleanup trip. Enjoy a day paddling while making a meaningful contribution to coastal habitats.

    Fishing. Don’t forget this big one: AFlorida saltwater fishing license is required to cast a line. Fishing is allowed in various locations throughout the park, but off-limits in others. So, it’s important to check regulations. The park rangers even offer a Fishing Clinic during certain times of year.

    Public Marina Access. If you plan to bring your own boat, Miami-Dade County operates marinas and boat ramps adjacent to the park — with Homestead Bayfront and Black Point marinas feeding directly into the park. 

    Indoor Activity. Artists have always played a crucial role in increasing awareness and inspiring stewardship of national parks. The Dante Fascell Visitor Center gallery provides a space where contemporary artists, inspired by the beauty of Biscayne National Park and South Florida, display their work. 

  • Kayaking: A Beginners Guide for RVers

    Kayaking: A Beginners Guide for RVers

    “Where’re ya putting in those kayaks?” is a common question we get from curious bystanders. (We hear it wherever we go, whether that is near some body of water, or, a little more earnestly, when we’re parked in the middle of a desert.) As full-time RVers, having our kayaks with us at all times means that we can paddle away from the shore whenever and wherever the opportunity arises. Part of the beauty of kayaking is portability, which is why kayaks pair perfectly with RVs.

    In my 20 years of teaching kayaking, we often hear the question, “What kind of kayak should I get?” With a little humor, we usually reply with, “the one you will paddle.” But the reality is that for RV owners, kayak selection is twofold. You need to select the right kayak for your style of paddling. And you have to look at the realistic storage situation in/on/with your RV. Ultimately, you want to minimize any barriers to getting on the water. 

    And there’s good reason for that.

    Kayaking takes us to remote places away from noisy motorboats. Easier to maneuver and cut through headwinds better than stand up paddle boards, they can be the very definition of outdoor relaxation. At the same time, kayaking can be the apex of adrenaline pumping, razor-edge, adventure. As a general rule of thumb, the smaller the boat, the easier the turning and the slower the hull speed. The longer the boat, the easier the tracking (going straight) and the faster it can move through the water. Favoring one often means sacrificing the other.  

    Now, let’s talk about which kayak is right for you and your rig.


    Learn the Types of Kayaks

    Sea Kayaks

    Seas kayaks are 14 to 22 feet long, with an enclosed cockpit. This allows paddlers to stay drier through the use of a nylon or neoprene spray skirt. Dry hatches for both storage and buoyancy are also common. Made from injected plastic, fiberglass, or even carbon fiber, these boats can range from heavy and durable to ultra lightweight and costly. They track much better than shorter boats, especially into the wind and allow a faster hull speed. This sacrifices easy turning. And that can be frustrating in heavy seas or cross-winds. While sold as sea kayaks, they are quite versatile. We use ours in lakes (and even slow rivers) quite often.


    Fishing Kayaks

    Also known as “sit on tops,” fishing kayaks are six to 14 feet long. They are very popular with anglers because of their open design, stability, and higher seat. (The latter allows a better angle of what’s under the water.) The double-hull design provides storage areas and stability, but can be difficult to paddle long distances. They are also much heavier than single-hull boats of the same length. 


    White Water Kayaks

    White water kayaks are six to nine feet long, with an enclosed cockpit and spray skirt. Short boats with flat bottoms are considered “play” boats and facilitate surfing and acrobatic maneuvers in fast moving water. Longer boats with more rounded hulls can be better for steep rivers with difficult rapids. These boats can turn on a dime, but track less easily when kayaking.


    Recreational Kayaks

    These 8-to-14-foot kayaks combine many of the better features into one all-around boat. Often, this makes perfect for beginners who are planning to do more flat water paddling. The cockpit is usually very open, but cit an incorporate a spray skirt. Lighter than a sit on top, they track better than a white water boat. But their open cockpit can mean more water splashing in. 


    Foldable Kayak

    Who needs roof racks? Taking up no more space than a large suitcase, these boats can be a great option for those with fewer over-vehicle storage options or solo travellers.  

    *****

    The variety of RV or vehicle storage options are as vast as the types of boats available, from assisted-lifting roof racks to custom cradles. Often, simply asking your local kayak dealer to help solve your storage solution is the fastest way to get a solution for your specific kayak.   


    Stock the Necessary Gear 

    While you can rent a boat near just about any body of water, it’s worth the small investment to have your own gear that fits you and your style of kayaking. At a minimum, you’ll need:


    1. Personal Floatation Device (PFD, aka lifejacket). Between 80 to 90 percent of all boating related drowning victims were not wearing a PFD.  In short: ALWAYS wear it! Get a comfy one designed for the sport, and you’ll forget it’s even there.
    2. Paddle. Two bladed paddles allow alternating paddle strokes on either side for good forward momentum and maneuverability. The paddle you need depends on the style of boat you choose.
    3. Spray Skirt. If paddling a closed cockpit kayak, spray skirts can help to keep water out.  Skirts are sold by waist size and cockpit size, so are very specific to the paddler and the boat.
    4. Signaling/Communication Device. These can range from having a cell phone in a dry case, VHF radio, or flares, to highly visible clothing at a minimum.


    Prepare to Get Started

    • Learn from a Guide. Taking a guided tour with a professional instructor is a good way to see what kayaking is all about. Another benefit is that you don’t have to worry about the gear, the paddling plan, and safety.  
    • Start with a Rental. Renting a boat in a recreational area is also a great way to try things out, and see what you like (or don’t like) about their boats.  
    • Take a Class. Enrolling in an instructional course can meet you where you are. The ACA (American Canoe Association) offers courses for beginners to expert instructors.  
    • Connect with a Club. Joining a local paddle club will introduce you to others who share your interests, and is also a great way to get insider knowledge about the area.


    Visit Awesome Kayaking Destinations

    While our list of favorite places to kayak is at least a mile long, here are a few of our faves. All of which are very accessible for beginners.


    Unsalted (aka Freshwater) Kayaking

    North Cascades, Washington. Two main reservoirs lie along the Skagit River — Ross Lake and Diablo Lake. The nearly iridescent blue water created by glacial run-off creates a surreal and stunningly beautiful scene. (Don’t believe us? Check out the image at the top of this blog!)

    Grand Canyon, Arizona. Spending 10 to 21 days paddling the Grand Canyon is beyond most people’s skill level, but there is a section of the river that is a perfect day trip for beginners. Hire a back-haul service to take you up to the Glen Canyon Dam, then paddle/float the 16 miles back to Lee’s Ferry.

    Lake Powell, Utah. Exploring the narrow side canyons away from the main lake provides a more serene experience as you’ll be away from most of the motorboat traffic.  It also affords you the opportunity to explore Ancient Puebloan ruins and sandstone cathedrals.  

    Voyaguers, Minnesota:  A day trip on these lakes is a gorgeous way to get away from it all for a short time. The lakes can be both serene and rough, depending on the time of day, but the numerous islands typically provide some shelter from the wind.


    Salted (aka Saltwater) Kayaking

    Maine Coast, Maine. One of the best ways to explore Maine is from the water surrounding it. With over 5,000 miles of shore line and over 4,000 islands, you could kayak in a different area every season and never see it all. Local guide services offer both small group and private tours which highlight the best sights of this spectacular coast. It’s a great way for beginners to become more familiar with ocean kayaking.

    Biscayne, Florida. Kayaking is the perfect way to explore the shallow bays and mangrove-lined shores of this national park. Guided trips offer beginners a great introduction to some of the more popular lagoons and keys, while more experienced kayakers can cross the 7-mile expanse of Biscayne Bay to Elliott or Boca Chita Keys. See our recent blog on Biscayne National Park for more info.


    *****

    Our RV travels have led us all across the continent and included many world-class paddling destinations. With our boats up top and gear in the back of our truck, we’ve made many memorable moments in our travels from the cockpit of our boats!

  • 2025 Jayco Precept 31UL Review

    2025 Jayco Precept 31UL Review

    Where do you want to go? That’s the only issue Jayco wants you to have with the luxurious Precept 31UL. This road-trip-ready RV was built in response to extensive customer feedback. The 2025 Jayco Precept 31 UL starts with a bold floorplan and adds everything you need for safe, comfortable road trips — with family or without. 

    This smaller Class A is designed to give you a premium driving and handling experience, one that even those who are new to driving a larger vehicle will enjoy. Navigating most state parks or grocery store parking lots won’t be a problem in the Precept 31UL due to its nimble size and its JRide Plus handling system. 

    So, let’s get this review on the road and have a look at this brand-new offering from Jayco.


    At a Glance: Precept 31UL

    If you’re looking for a great Class A motorhome for under $225,000, the Jayco Precept 31UL is a great value at $219,265. The Precept 31UL has a lot going for it, which is why I have rated it at four and half out of five. To start with, it’s a nimble, powerful beast that would be genuinely fun to cruise down the highway in. It has a living area that features a TV on a televator that rises above the four-seat dinette. It’s just fun to press a button and have a TV that pops up, seemingly out of nowhere. 

    But that’s just the beginning of a spectacular amenities package here. We’ll get more into that later. Instead let’s talk about safety features. The Precept has a smoke detector, propane leak detector, and a carbon monoxide alarm. 

    However, one safety feature that it does lack is a second door for egress. I’ll give Jayco credit for an emergency egress window, but given that the majority of people buying Class As are over 50 years old (and probably not as mobile as they once were), climbing out a window in an emergency egress may be slow going at best. It would make better sense to add a second door somewhere on the RV. (Perhaps on the driver’s side.)


    Check the Specs

    • Sleeping capacity: 6
    • GVWR: 22,000 pounds 
    • GCWR: 24,000 pounds 
    • Exterior length: 33 feet
    • Exterior height: 12 feet 10 inches
    • Exterior width: 8 feet 5 inches
    • Fresh/Gray/Black: 72/40/50 gallons
    • Fuel tank: 80 gallons
    • Propane (on board): 56 pounds 
    • Awning: 16 feet
    • Exterior cargo capacity: 108 feet of storage


    Features We Love

    On the Exterior
    • 2- to 3-year warranty on everything in the motorhome
    • New front cap with LED headlights lights and accent lights
    • Bilsteen steering stabilizer
    • JRide Plus handling
    • Quiet ride technology (in a smaller Class A — what?!)
    • Koni FSB shocks to improve ride and reduce body roll
    • 22.5-inch tires
    • 22,000-pound Ford F53 chassis 7.3 liter engine
    • 120-inch windshield with 32-inch wipers for great visibility 
    • Backup camera and side cameras
    • 108 feet of storage in exterior storage bays
    • Side-mounted, slam-latch doors on exterior storage bays
    • 200-watt solar panel on roof
    • 6000-watt Yamaha generator
    • Walkable fiberglass roof
    • Built-in ladder 
    • Vacuum-bonded laminated materials used in exterior walls that have been vacuum pressed with 144 tons of pressure for 16 to 18 minutes (so that delamination becomes impossible)
    • Cage-around catalytic converter to deter theft


    On the Interior
    • Big camera/navigation monitor screen
    • Plush, comfortable, and power-adjustable driver and passenger captain’s chairs
    • Pull-out passenger-side desk
    • Firefly total control system with app controls all functions remotely
    • Winegard Wi-Fo booster and 4G mobile hotspot on roof
    • 15,000-Btu-ducted air conditioner with heat pump at front and 13,000-Btu AC with heat pump in bedroom area
    • 50-amp power cord
    • Sirius-XM prepped
    • Windows have residential-style wood trim and day night shades
    • JBL sound bar 
    • Big farmhouse-style sink with flexible rubber faucet
    • Three-burner gas stove 
    • 21-cubic-foot fridge/freezer with French doors and water dispenser
    • Solid-surface countertops
    • King bed with CPAP ready nightstand on each side
    • Roomy shower
    • Nightstands with wireless charging pads and USB ports
    • Cassette blinds that are super easy to deploy 
    • Lippert 4000 series windows 
    • Solid hardwood cabinets
    • Front seats swivel and have a shared cocktail table
    • Outside shower for rinsing dirty people and dogs
    • 24-inch TV in master bedroom
    • Power theater seats with USB ports
    • 40-inch TV on a lift system next to dinette 


    Benefits

    • Luxurious Class A experience for under $225,000
    • Small enough to navigate campgrounds easily and get into most campsites 
    • Gas chassis will be less expensive to maintain/repair than a diesel
    • No tag axle or air brakes
    • Mid-sized but well designed so it’s easy, fun, and intuitive to drive
    • Cockpit is well laid out with everything within easy reach
    • Backup camera makes backing into campsites a breeze
    • Insulated for a quiet drive 
    • Front seats swivel to add extra seating 
    • Boondocking ready with big storage tanks and a generator that’s plumbed to the gas tank.
    • Efficient 10-gallon water heater replaces up to 30 gallons of hot water per hour
    • Loads of exterior and interior cabinet storage space lets you have it all with you
    • Window seals are protected from sun damage
    • Residential feeling tinted windows offer privacy
    • Roll-down shades in cockpit area make it easy to block out the sun and enjoy privacy
    • Pull-out passenger side desk allows passenger to work from the road
    • Televator TV stores out of the way when not in use
    • Sink cover converts sink into counter space and/or hides dirty dishes
    • Power theater seats are perfectly positioned for watching 40-inch TV
    • Well insulated for winter camping
    • Comes with a winterization package
    • Powder room allows guests to use the toilet and sink without going into the main bedroom area


    Challenges

    • TV in the living area will be difficult to watch from the dinette
    • So comfortable and easy to drive that it might be hard to stop traveling


    Best For

    • Couples or families that want to take extended road trips/vacations in a luxurious Class A that doesn’t break the bank
    • Couples or families that want to use it for weekend trips 


    Key Areas That RV Trader Reviews

    RV Trader asked RV shoppers what was most important to them in their RV buying process. Potential buyers — like you — helped us to identify a list of six key areas that camping and travel enthusiasts always look at when they’re searching for the perfect RV: sleeping space, bathroom, living area, four-season capabilities, and storage space.

    The RV Trader team then got to work providing you with an honest and unbiased evaluations. And that’s where I come in. I’m Lynne Fedorick, RV expert and enthusiast. I provide an honest look at RVs from an RV industry insider perspective. That way, you can learn the good, the bad, and the intriguing about any RVs I review. I inspect each RV with the buyer’s perspective at the forefront. And I always evaluate those six key areas that buyers have told us that they have in mind.

    So, that said, let’s take a closer look at the 2025 Jayco Precept 31UL.


    Sleeping Space

    In the master bedroom, there’s a fantastic king bed with CPAP=ready night stands on either side. Wireless chargers and USB ports for electronic devices help keep you connected. Storage cabinets above the bed, storage underneath, and a massive wardrobe on the opposite wall help ensure that you can bring all your necessities with you wherever you decide to go.

    The Precept 31UL also has a power drop-down bunk in the living area, which gives overnight guests a comfortable queen size bed that is rated for 750 pounds. In addition, the legless dinette folds into a comfortable sleeping area for two. There are also storage benches underneath that could hold bedding or guest luggage. 


    Bathroom

    The bathroom in the Precept 31UL gives you either one or two comfortable spaces, depending on how you configure it. The bathroom has a powder room with a vanity sink and porcelain toilet behind a wide door located across from a spacious glass-enclosed shower. The door can be opened across the hallway to create one big open bathroom with a shower. 

    The shower is definitely roomy enough that anyone under 6 foot 4 inches will have plenty of headroom. Ample storage space for towels, toiletries, and toilet paper is available in hardwood vanity cabinets and drawers. There’s plenty of space for smaller items in the oversized medicine cabinet above the vanity. 

    Light from the bathroom window is reflected by the mirrors on the medicine cabinet, creating the illusion of a big space in what might otherwise seem like a very cozy little half bath. Privacy from the outside shouldn’t be a problem. Both privacy glass and a dark window shade work with the height of the RV to help maintain both modesty and privacy (and everyone’s composure). 


    Living Area

    Jayco offers a choice of either a sofa bed or theater seats. The model I reviewed had power-adjustable, reclining twin theater seats with cup holders and USB ports for charging devices. The theater seats are right across from the TV. This works perfectly for cozy nights with a good movie and a big bowl of fresh popcorn.

    The cushy driver and captains’ chairs spin to join the living area and have good vantage points for watching TV too. Both of these power adjustable chairs can share a snack table/work surface that can be set up to use when needed. Campers on the queen bunk also get a view of the TV.

    The legless dinette features a 38-inch-by-70-inch table and can seat up to four people comfortably. I love that the upholstery Jayco chose for the Precept 31UL living area is family- and dog-friendly. That’s because it’s both stain- and spill-tested. And it’s resistant to both.

    A 16-foot awning provides a sheltered outdoor living area complete with an entertainment center that includes outside speakers and a 40-inch LED HD smart TV mounted on a swivel bracket for viewing from multiple angles. An outdoor LPG connection for an outdoor grill or fireplace eliminates the need to bring a portable tank along. 


    Kitchen

    The L-shaped kitchen in the Precept 31UL has a surprising amount of both counter space and storage. It’s an impressively efficient little kitchen with a super-efficient work triangle. The 21-cubic-foot, 12-volt refrigerator/freezer is located on the wall opposite to the kitchen sink, so you can take produce from the refrigerator, take a step to wash it in the sink and then turn prepare it for cooking on the three-burner gas cooktop, in the microwave, or in the RV-size gas oven. I love the innovative long flexible rubber spout on the kitchen faucet as an alternative to the pull-down faucets used in most RVs. 

    Food, dishes, utensils, and cooking tools could all be stored within easy reach in plenty of solid hardwood cabinets and drawers. 


    Four-Season Capabilities

    The Precept 31UL is definitely four-season capable. Having said that, a Class A would not be my first choice of RV for navigating challenging surfaces like snowy mountain roads. This RV has lots of all-weather amenities to get you through the heat of summer and chilly winter temperatures. Jayco responded to customer suggestions by adding extra insulation to keep both hot and cold weather out of the RV. Inside, two ducted air conditioners with heat strips move cool or warm air around inside. The heat strip is especially handy for quickly taking the chill off on fall or winter mornings. If it’s really chilly you can use the 30,000-Btu gas furnace to get the interior of the Precept 31UL nice and cozy. 

    Outside, tank valves are in an enclosed compartment and heating pads on holding tanks help to keep everything flowing when temperatures drop below 32 degrees.


    Storage Space

    This little Class A boasts an impressive amount of storage. Storage starts with lots of exterior passthrough storage. Outside, cabinet storage bays open with hassle-free, side-mounted doors with keyed alike locks. Side-mounted doors let you store and access everything in the cabinets easily. 

    Inside, the Precept 31UL has storage throughout. Both the living area and cockpit get overhead cabinets that could allow easy access to board games or road trip snacks. There’s also lots of cabinet and drawer space in the kitchen, bathroom, and bedroom. Lift up the king bed, and you’ll find a respectable amount of storage underneath. I was surprised that there aren’t any struts under the bed to keep it in place while items are stored or removed. Having to lift and hold a bed to access stored items can be pretty annoying.

    The dinette bench seats also provide storage for bedding or other items underneath. Other than the lack of struts under the king bed, I was really impressed with how Jayco fit so much storage into this mid-size Class A.


    Closing Notes on the Precept 31UL

    The Jayco Precept 31UL is a fun RV that’s clearly designed for carefree road trips or extended camping vacations. Inside and outside, the aesthetic is fun, lighthearted, and ready for adventure. Jayco’s kept everything in the cockpit convenient and within easy reach and given this RV features like easy handling, sway control, and beefy 22-inch tires. All of this adds up to an RV that promises to be so intuitive and fun to drive that you just might have a hard time going back home. 


    Make Your Move

    Start shopping for the year, make, and model. Find Your Precept 31UL


    What Other Campers Are Saying

    Read the best reviews by owners. Search for an RV Model

  • Some Not-So-Obvious RV Energy Savers

    Some Not-So-Obvious RV Energy Savers

    Like many RVers, when we chose full-time RVing, we did so to live more sustainably. For us, it made just made sense from multiple perspectives —  energy, financial, and environmental. Now, after traveling for over 12 years, we’ve learned a lot. Just like we hoped, living smaller allows us to save a ton of energy and save money on utilities. But we’re way better at it now than we were at the start. A big reason? Some not-so-obvious RV energy savers.

    These RV energy savers don’t just work for us. They’ll apply to any-sized rig. And they are especially useful if you plan to camp or boondock off-grid — and don’t want to haul around a noisy gas generator. Best of all, they’re not some big selling point of what to buy. These energy savers are a lot more about what to do.


    Basic RV Energy Savers for Newbies

    Let’s start with some basic off-grid energy savers. If you’re an experienced RVer, you’re likely tracking these already. But for RV newbies, these RV energy savers can be instant game changers.

    • Opt for 12-Volt Power. Use 12-volt-DC instead of 120-volt-AC appliances whenever possible. Quite simply, 12-volt will run directly off your battery without needing to power up the inverter.  
    • Switch Off the Inverter. Turn off your inverter when not running 120-volt-AC appliances. Install an inverter toggle switch next to the door as a visual reminder.
    • Cut Off Phantom Power. Turn off and unplug appliances that draw phantom power. Water pumps and water heaters are notorious energy suckers. Test appliances with a “kill a watt” meter to know what is the biggest draw.
    • Find Low or No Wattage Alternatives. Avoid using high wattage appliances when off-grid, especially if they heat or cool. Use a pan with a lid to reheat food, griddle to toast bread, and French press/kettle for coffee. 
    • Cook Outside. Take cooking to the campfire – it’s both fun and will save energy!
    • Minimize Screen Time. Let nature fill your soul instead of screen time — enjoy a star filled sky or campfire.
    • Put the Sun to Work. Use solar power combined with a DC to DC charger to keep your RV batteries topped off. Learn how to design an RV solar-powered system to meet your energy needs. 
    • Charge While the Going Is Hot. When your solar RV battery bank is fully charged and the sun is still shining, plug in all of your electronics (e.g., laptops, phones, tablets, cameras, headlamps, etc.) and store all of that extra solar energy!


    Seasonal RV Energy Savers

    Stay Warm in Winter 

    Using propane rather than electricity to heat your rig is more efficient. As full-time RVers, we go through about six standard, 20-pound tanks per year. (Around $150 for both cooking and heating annually.) While we like to head to warmer climates for the winter, that’s not always an option. Here are a few tips:

    • Choose a sunny campsite for some powerful, passive heating.
    • Keep the heat in! RVs lose much of their heat through windows, doors, as well as the floor. Cold winter air flowing underneath your RV can make the floor feel like a freezer! Use AirSkirts RV Insulation underneath to block that cold air flow and place rugs in key areas where you sit or stand. Also, insulate windows with shades or covers, and insulate around any gaps in the door.
    • Heat yourself from the inside. Indoor exercises, cozy sweaters, down booties, a warm cup of tea, and your favorite blanket – even a low-wattage heated throw — all help. 
    • If skiing and snowboarding are not your thing, snowshoeing will warm you up quickly and help you enjoy the season outdoors. Traction devices on your hiking boots will also help you get around safely. 
    • RV heaters are notoriously loud and inefficient, while Mr. Heater Propane Buddy is silent and can be used to heat a specific room. 
    • Use a low-wattage mattress warmer plus a down comforter for those really cold nights.


    Stay Cooler in the Summer 

    While we typically head north, coastal, and up in elevation during the summer to stay cool, avoid humidity, and travel without the need for air conditioning, we occasionally spend time in (or traveling through) some very warm areas. These are a few tips to stay cooler:

    • Choose a shaded campsite for some natural, passive cooling.
    • Close RV shades and cover windows when the full sun is pouring in to avoid a “greenhouse effect.”
    • Cook outside with a propane stove or grill so you don’t heat up your RV. Eat easy, cool meals that don’t require much cooking.
    • Enjoy a natural breeze outside and stay in the shade as much as possible. If inside, keep air flowing with small personal fans and a ceiling vent fan to draw warm air out.
    • Get out on the water in a kayak, go for a swim, or put your chairs half way in the water.
    • Cool yourself from the inside out by staying well hydrated. 
    • At night, use a ceiling vent fan, blowing out, and open only one window by the bed — just one — to concentrate the air flow over the sleeping area.


    Saving energy in your RV will make your travels more affordable and enjoyable, no matter what the season!

  • Hail to the Chief: RVing the Inauguration

    Hail to the Chief: RVing the Inauguration

    Regardless of what side of the aisle you may fall on politically, the change of power in our beautiful country is something to be celebrated. That collective respect for rule of law is a big reason why our constitutional republic is a bastion of light for democracy around the world. The presidential inauguration may be the best occasion to celebrate the principles that guarantee our freedom. And RVing the inauguration just may be the most appropriate — and American — way to attend. 

    Presidential inauguration historically combine historic speeches, and star-studded performances. For families with young children especially, it can be a great learning experience. Whether you’re a political enthusiast, a history buff, or simply want to witness history in the making, RVing the inauguration in Washington, D.C. offers an adventurous and flexible way to attend.

    Here’s your ultimate guide to planning the trip.


    Why Attend an Inauguration

    Attending a presidential inauguration is about more than politics. It’s about experiencing a moment where tradition meets the future. It’s a moment that is meant for citizens to experience. Over the years, inaugurations have featured memorable moments like John F. Kennedy’s inspiring speech where he said, “Ask not what your country can do for you,” and where Ronald Reagan optimistically shared his vision of a “shining city on a hill.” 

    These events offer a chance to witness history in person, alongside thousands of others united by a shared sense of occasion. While the majority of attendees tend to be aligned politically with the winner of the election, it can still be enjoyed and attended peacefully by all.

    With performances from world-renowned artists, speeches designed to inspire unity. With the picturesque backdrop of the National Mall, the inauguration is truly a once-in-a-lifetime experience. And it can be even more special when paired with an RV adventure.


    Where to Park Your RV

    While Washington, D.C. itself isn’t designed for RV camping, nearby areas offer excellent options. (And because of the extraordinary number of things to see, this year we even declared it RV City U.S.A.) Just keep in mind that reservations are essential and fill up quickly for inauguration week.

    1. Cherry Hill Park (College Park, MD). Located about 12 miles from downtown D.C., this full-service RV park offers easy access to the city via public transit. Amenities include Wi-Fi, a shuttle to the Metro, and on-site laundry facilities.
    2. Greenbelt Campground (Greenbelt, MD). This national park campground offers a more rustic experience with fewer amenities. But it’s a budget-friendly option close to the Metro. Important Note: Ensure your RV can fit within their size restrictions (30 feet).
    3. Capitol KOA (Millersville, MD). Roughly 30 miles from the Capitol, this KOA offers a quieter, family-friendly atmosphere. The campground features a shuttle service to downtown D.C. during busy times.
    4. Bull Run Regional Park (Centreville, VA). Situated about 30 miles west of D.C., this park offers spacious campsites and a peaceful setting away from the bustle.
    5. Harvest Host or BoonDockers Welcome: Sometimes a change of pace and simple local spot to call home can be fun experience.


    How to Attend the Inauguration

    Tickets

    This year, Inauguration Day is January 20, 2025. While general admission to the National Mall is free, tickets are required for reserved sections near the Capitol. A quick Google search will help get you started, but most tickets originate with a request to your respective congressman or congresswoman. Plan ahead though, because these tickets are limited, and they can go quickly.


    The National Mall

    Arrive early to secure a good viewing spot. Gates typically open around 6 a.m., and screenings at security checkpoints can take time due to the importance of the occasion and the attendees. Remember, anything that involves politicians, especially the President of the United States, will have extremely heightened security — and for good reason. The National Mall fills quickly. So, bring snacks, warm clothing, and comfortable shoes for a day of standing and walking.


    Transportation

    RVing the inauguration doesn’t mean parking your rig on the National Mall in your best Cousin Eddy style. Driving into D.C. on Inauguration Day is not recommended due to road closures and heightened security. I highly suggest you avoid driving yourself for several days before and after the event, especially if you are visiting and are not familiar with the area. D.C. is known for its mass transit, and they have a lot of experience dealing with this particular event. So, just arrive early and let experts shuttle you around the city stress free. The two best options are probably the Metro and biking or walking.

    • Metro. Use the Metro system, which offers direct access to the National Mall. Stations like Smithsonian, Federal Center SW, and Capitol South are ideal for getting close to the action.
    • Bike or Walk. If you’re camping nearby, consider biking or walking into the city for added flexibility. Electric bikes or scooters can be a fun and amazing experience for an event like this.


    What Else to Do in D.C.

    Washington, D.C., transforms into a hub of activity during the inauguration, but there’s more to explore before and after the big day.

    1. Smithsonian Museums. Free and world-class, these museums are ideal for filling downtime. Favorites include the National Museum of American History and the National Air and Space Museum.
    2. National Monuments. Visit iconic landmarks like the Lincoln Memorial, Washington Monument, and Martin Luther King Jr. Memorial.
    3. Georgetown. This historic neighborhood offers charming streets, boutique shopping, and excellent dining options.
    4. Dining in D.C. From food trucks on the National Mall to Michelin-starred restaurants, D.C.’s culinary scene caters to all tastes. It is a foodie lover’s paradise!


    What to Pack When RVing the Inauguration

    • Cold-Weather Gear. January in D.C. often brings freezing temperatures, so pack layers, gloves, and hats. Know that it might even snow.
    • Portable Chairs. Essential for long waits on the National Mall.
    • Snacks and Water. Food options can be limited during the event, so bring a little something to eat and drink — especially if your health needs require snacks or water.
    • Charging Supplies. Keep devices charged with portable power bank like this to capture and navigate the day without worry that your battery will die.
    • Extra Cash. D.C. is among the most expensive cities in the US, so know that things may be more expensive than you’re used to. And cash is king, especially when you pass by any street vendor.


    Bonus Tips for RVers

    1. Secure Your Campsite Early. Many RV parks near D.C. book up as soon as inauguration dates are announced.
    2. Plan Your Routes. Be aware of road closures and adjust your travel plans accordingly.
    3. Know the Rules. Security measures are strict, so familiarize yourself with what is and isn’t allowed on the National Mall.
    4. Have Fun … and Patience. This event is meant to be fun and memorable for the right reasons. So, try to remember that when you inevitably find yourself in a long line or little turned around with so many people and road closures.


    RVing the inauguration really is a memorable and special experience. It combines the freedom of the open road with the excitement of being part of history. From finding the perfect campsite to exploring the cultural and culinary treasures of Washington, D.C., planning ahead ensures a smooth and enjoyable trip. So, pack your RV, and get ready to hail to the chief in the most adventurous way possible!

  • The Unwritten Rules of Snowbirding

    The Unwritten Rules of Snowbirding

    Ah, that seasonal migration that sees thousands, maybe even millions, of birds heading south for the winter. What a sight to behold — on the highways. And see it you will if you join flocks of RVs in adjusting their latitude for a friendlier clime. In the RV world, we call this snowbirding. In the winter, many RVers seek a warmer, cozier nest to park at during the cold months. But if you’d like to do the same, you might have a few questions as a first timer. How can you make your seasonal RV migration the perfect mix of adventure, relaxation, and exploration?

    Well, as with any lifestyle, there are unwritten rules to help snowbirds maintain harmony with others and ensure a smooth journey. While some may ascribe these rules to instinct, we’ll take a moment to write down the unwritten for the uninitiated. So, whether you’re headed for the sunny beaches of Florida, the deserts of Arizona, or exploring unique stops along the way, following these guidelines can make your experience (and those of your fellow travelers) even better.


    1. Respect Your Neighbors and Their Space

    When RV parks and campgrounds are packed with snowbirds, shared respect becomes essential. Keep noise levels low, especially during early mornings and late evenings. This includes ensuring that generators are used responsibly and that loud activities, like music or social gatherings, don’t disturb others.

    Tip: Always park your RV and set up equipment — such as awnings, tables, and chairs — within your designated space. Try not to walk through anyone else’s site either. Encroaching on neighboring spots or common areas can lead to tension. And since you may be neighbors for a season, tension is best avoided from the get go. A little spatial awareness goes a long way! 


    2. Book Early and Stay Flexible

    Popular snowbird destinations like Florida, Texas, and Arizona fill up quickly, especially during peak season from November to March. Reserving sites in advance ensures you won’t be left scrambling for a place to stay. However, flexibility is equally important — whether it’s adjusting your route due to weather or switching campgrounds for better amenities.

    Tip: Keep your itinerary fluid and have a backup plan. Sometimes, the unexpected turns out to be the most memorable part of the journey. I can’t tell you how many times we have had more fun with the unexpected than the planned.


    3. Keep Your Site Clean and Tidy

    One of the simplest ways to be a good snowbird neighbor is to keep your space neat and follow campground guidelines for trash disposal and recycling. This not only creates a welcoming environment but also shows respect for the park staff and other RVers.

    Tip: Implement the Leave No Trace principle by ensuring your site is clean when you leave. Keeping outdoor areas tidy also helps prevent wildlife from scavenging near campsites.


    4. Introduce Yourself and Share Resources

    While snowbirding offers plenty of quiet moments, it also provides great opportunities to meet new people. A simple introduction to your neighbors can lead to new friendships or valuable tips about the area. Additionally, sharing tools or resources — like a ladder, grill, or even extra supplies — encourages a sense of community.

    Tip: Participate in campground activities, such as potlucks, bingo nights, or local outings. These events foster camaraderie and help create lasting memories on the road.


    5. Stay Connected and Prepared for Emergencies

    Staying in touch with family and monitoring weather or road conditions are essential parts of snowbirding. Equip your RV with mobile hotspots, Starlink, or some personal Wi-Fi. Try to keep campground Wi-Fi as a final option to stay connected, because more often than not, campground Wi-Fi can be slow or spotty. Preparation for emergencies — such as carrying a first aid kit, spare parts, and essential tools — ensures you’ll be ready for the unexpected.

    Tip: Use navigation apps like Google Maps or RV-specific tools to plan routes and avoid low-clearance bridges or challenging roads. Regular maintenance checks on your RV help prevent breakdowns on the journey.


    6. Respect Local Wildlife and Nature

    Snowbirding often takes you through nature-rich areas. While encounters with wildlife can be exciting, it’s essential to keep a respectful distance. Feeding animals or leaving food scraps out can create dangerous situations for both you and the animals, and you should never do that without the supervision and encouragement of local rangers or professionals that deal with animals.

    Tip: Follow local guidelines about wildlife safety and be mindful when hiking or exploring. Always store food securely to avoid attracting unwanted critters.


    7. Embrace a Minimalist Approach to Packing

    When RV living becomes your seasonal lifestyle, packing smart is key. Focus on multiuse items, such as convertible furniture or seasonal clothing that can be layered. The more organized you are, the less clutter you’ll need to manage. Remember that it is usually easier to stop and buy something as needed than to overpack and be forced to get rid of something if space becomes an issue.

    Tip: Invest in storage solutions like bins, organizers, or vacuum-sealed bags to make the most of your space. Having a “one-in, one-out” rule for new items helps prevent overcrowding. 


    8. Adapt to the Campground Culture

    Each RV park or campground has its unique vibe. Some might bustle with activities, while others might cater to those seeking peace and solitude. Take the time to observe and adapt to the culture of each location.

    Tip: If a campground promotes quiet time, embrace it. If it encourages social events, join in! Understanding the rhythm of your environment ensures an enjoyable experience for everyone. If you prefer a specific type of activity or culture, do some research well in advance to find a couple of campground options that meet your criteria.


    9. Know and Follow the Rules

    Every campground or RV park has specific rules — covering everything from quiet hours and pet policies to check-in/check-out procedures. Following these guidelines ensures smooth operations for the park and keeps you in good standing with management. If you are in one campground for a long time, it is always good to be in good standing with the staff, as they can make or break your stay.

    Tip: If traveling with pets, familiarize yourself with pet-friendly parks and follow leash laws. Bring waste bags and be diligent about cleaning up after your furry companions — this always gives bonus points with staff and fellow RVers alike.


    10. Enjoy the Journey

    Snowbirding is more than just escaping the cold — it’s about embracing a lifestyle of exploration and having fun. Take time to savor the small moments, whether it’s enjoying a sunrise at the beach or sharing stories around a campfire.

    Tip: Keep a travel journal or start a photo blog to document your adventures. Celebrating each step of the journey helps you stay present and appreciate the unique experiences snowbirding offers.


    Bonus Section: Winterizing for the Journey South

    Even though snowbirds head for warmer climates, winterizing your RV before departure may still be necessary if you will be traveling through freezing temperatures before arriving to your desired final destination. Freezing temperatures can damage pipes, tanks, and hoses, so preparation is crucial.

    • Winterize Plumbing. Drain your freshwater and wastewater systems if traveling through freezing zones. Use RV antifreeze to protect pipes from damage.
    • Heated Water Hose. Bring a heated water hose if you’ll need water connections during chilly stops.
    • Monitor Temperatures. Keep an eye on the weather forecast, and consider using tank heaters or insulation to prevent freezing.
    • Interior Warmth. A portable heater can help maintain interior comfort during travel through colder regions.


    Snowbirding offers the opportunity to escape the winter chill and explore new destinations, all while building a sense of community on the road. By following these unwritten rules — respecting neighbors, planning ahead, staying flexible, and embracing nature — you can make the most of your snowbirding adventure. And who knows, you may just come away with some new lifelong friendships.

    So, now that the temps are dropping, prepare your RV, stay connected, and enjoy the journey south, one sunny destination at a time. Safe travels!

  • “What Am I Doing Out Here?” One Man’s Winter in a Tipi

    “What Am I Doing Out Here?” One Man’s Winter in a Tipi

    Time in nature can take the mind to unexpected places. Even primal places. Years back, as I was working full-time in land survey, I began to wonder: What would it be like to live in a tipi? Not just tent camping or setting out in an RV. I imagined a life that would be more simple — and viscerally natural. Life in a tipi had a romance to it in my mind. I imagined the warmth of the fire, the cozy space, and the relaxation of being one with nature. It was an imagining so compelling that I made a decision to try it.

    As you might expect, I discovered that imagination and reality don’t always align. Nature is a stern and effective teacher. But what she teaches, you keep forever.


    “I found a clearing in the woods”

    For me, there was something about the tipi itself. About that place being my residence. Sure, I could have just rented a room in a house or a small apartment somewhere. But then cooking, bathing, and simple tasks would have been a monotonous bore. I wanted a place that provided shelter as well as adventure. Something just past the fringe of civilization. And living in a tipi in the Appalachian Mountains of Western North Carolina suited that purpose. It was my ideal option — not to mention the cheapest.

    Letting my sense of adventure prevail, I ordered an $1,100 handmade canvas tipi from Oregon. The tipi came with a small canvas door, an inside liner for insulation, and some rope to tie the poles together at the top. But in order to properly set up a 16-foot tipi, you need fairly long tipi poles — 22 feet in my case. And those did not come with the tipi. Rather, the best option was to make them out of young poplar trees and a few pines. Tulip poplar is a sun loving hardwood tree that grows fast and requires a lot of sunlight. As a result, it grows tall and straight in order to quickly dominate a young forest canopy. The forest had these in abundance.

    I found a clearing in the woods inside a local national forest that was growing 5- to 7-year old poplars. From these, I was able to secure about 20 straight poles. Then I spent the next two weeks working. I shaved the bark off of the poles to keep them dry and prevent rot. I shaved each individual knot off to keep the rain water running smoothly down the pole. Ultimately, I dedicated my free time after work to the preparation and completion of the poles. Some nights, I’d stay overnight camping to complete the work. Other nights, I’d head back to my regular residence at dark.

    One night though, I remember working out there. It was getting dark, and then I heard this person coming the brush and I kinda freaked out. I jerked around, and there was a big bear coming down the mountain — just to check me out. Frozen, I stared at the bear trampling through the oncoming dark, looking back at me, and moving on. I remember thinking in that moment, “What am I doing out here?”


    “Then the magic began”

    After the first week, I was finally ready to raise the tipi. I laid three poles down and secured them together near the top. The structure went up, balanced like a tripod. Rather meditatively, I laid all the other poles in place, working my way around the circle until the framework created a circular shape. Then the magic began. From this point on, I was mesmerized. The skeleton of my home was complete, and I was ready to move in.

    Following native tradition, I danced three rotations around the framework, pulling the cordage snugly as it tightened the poles together near the top. I felt like I traveled back in time, to a forgotten era. My life and my age melted away, and my earthly experiences waned. The ritual began to color my portfolio with life’s richest moments to date. Describing it with too many words would probably diminish my actual experience. And it would likely be different for someone else. But I lived a certain freedom. I experienced my own masculinity. In that time, I saw creation and death all at once. Really, I felt like I had completed something true for the first time. The physical world had a greater weight here.

    Using the strongest pole, I raised 60 pounds of canvas and secured it to the top and bottom of my tipi. I carefully unfolded the material onto the surrounding poles until the entire structure was covered. I spent the next few hours pulling, stretching, and tightening the canvas around and down toward the ground. The goal was to get a tight, skin-like texture on the dwelling. The work became effortless in time as this ancient structure took shape. In no time, it decorated the landscape as if it always belonged.  


    “Not an hour goes by unnoticed”

    Now fast forward about four months. The fall is dying into winter. And the cold rain is turning into snow. At night the temperatures dropped into the mid-20s. After experimenting with different heating mechanisms — from a wood stove, to a big fire pit, to a small fire pit — I eventually found that the best option was, ironically, a small, smokeless fire set deep into a pit surrounded by flat reflective rocks. (Super dry, healthy wood burns a clean, bright, and smokeless fire.) This flame-rich fire created a mysterious and hypnotic mood that warmed my soul. In turn, it also helped with my internal blood flow to the extremities. 

    The more time I stayed out there, I began to notice something. Feeling became a daily activity. It became an hourly activity, almost minute to minute in some cases. Making dinner, using the bathroom, washing my hands, all required constant focus and commitment. These things are lost in a comfortable life. In a life of luxury and comfort, days are lost to weeks, and weeks can be lost to years. But here, outside, looking up at the crowded collection of poles tied together, surrounded by cream canvas, and the pervasive wood-smoke aroma, I could hear the sounds of the night. Wind. Raindrops. Spider cricket hopping beside me. And even black bear rummaging around in their heavy, speechless visitations. 

    Out there, with only canvass between you and the physical world, not a day is lost. Not an hour goes by unnoticed.


    “The challenge of existing”

    Looking back, it’s hard to define what happened to me out there in those woods. Why I went. Whether I found what I was looking for or not. But what it is clear is that the tipi lost the romance of its appeal in the winter. Because the challenge of existing outside in a primitive fashion is truly one’s own. If it’s not giving back to you, then it’s not sustainable. If it is giving back, then you are beginning to experience the natural phenomenon of equilibrium.

    As the winter wore on, I realized that the tipi didn’t actually keep me warm at night. The fire only warmed my heart and my perspective. So too, the thin canvas walls became something distinguishable — a symbol of togetherness that houses my life. In that time, it gave me purpose, but even that  had to be left behind for the most primal of reasons: It no longer provided any calorie-saving protection. I started to appreciate shelter in a new way, what houses and RVs provide.

    Even so, from that winter, I think my skin actually thickened from the elements. Maybe something under the skin too. With nature, I was ready for my winter to end. And when the spring finally returned, it was undoubtedly most beautiful thing. 

  • 5 Ways to Make a Wow-Worthy RV

    5 Ways to Make a Wow-Worthy RV

    There’s something about stepping into an RV that feels like you’ve opened the door to adventure – literally and figuratively – as that door, once secured behind you, can whisk you away to some of the most memorable experiences of your life. Trust me, I know. After six years of RVing, you would think that my wife and I would be ready to hand in our keys, but we know that the open road and RV travel will always be in our blood.

    But what if your RV could be more than just a means to travel – what if it could be a showstopper and head turning event unto itself? How do you actually wow everyone who steps inside (or catches a glimpse from the outside)? Whether you’re looking to enhance the interior for your own comfort or want to turn heads at the campground, we’ve got five great ways to transform your RV into a jaw-dropping, wow-worthy home on wheels. Let’s get started!

    1. Upgrade Your Flooring

    One of the easiest ways to give your RV an instant “wow” factor is by upgrading the flooring. While some manufacturers are listening to us long-time RVers about stepping their interior game up to feel more like a true home, many older RVs feel dated and come with basic linoleum or carpet that can wear down quickly and hold onto dirt, stains, and odors. Switching to something more durable and stylish like vinyl plank flooring or laminate can completely transform the space, making it feel more like a true home. Plus, these options are easy to clean and maintain, which is essential for life on the road.

    Pro Tips

    Make sure to calculate the weight difference between your old and new floors so that you know what your final weight capacity will be, and that you’re not going over your suggested weight with a new heavier material.

    Also, choose a flooring material that can handle the temperature fluctuations and constant earthquake-like conditions inside your RV. You don’t want something that will warp or crack due to weather changes or washboard roads!

    DIY Suggestion

    Check out this video from The Flippin’ Tilbys about RV floor replacement by an expert DIY couple for good options and a detailed walkthrough.

    2. Revamp the Kitchen Space

    Whether you have a huge fifth-wheel or a Class B van, your RV kitchen can make a big impression! To jumpstart a kitchen upgrade, begin with updating the cabinetry with a fresh coat of paint or new hardware to give it a modern feel. Consider adding a peel-and-stick backsplash for a quick and easy pop of color or texture. If you’re willing to invest a bit more, upgrading the countertops or installing more efficient appliances (think compact microwaves or induction cooktops) can make a world of difference.

    Pro Tip

    Opt for lightweight materials when doing any kitchen renovations to avoid adding unnecessary weight to your rig. You’ll see this as a common theme, because weight is always at a premium in RVs and can make the difference between safe and fun ride or a dangerous experience.

    DIY Suggestion

    Peel-and-stick backsplash tiles are not only affordable but also give your kitchen an updated, custom look without a major renovation effort. You can also swap out dated handles and knobs for a sleek new look.

    3. Brighten It Up with Lighting

    Nothing says “wow” like walking into a bright, well-lit space – or so my wife loves to tell me. If your RV feels a little dark and dingy, upgrading the lighting can make a huge impact. Replace old, dated fixtures with modern LED lighting, and consider adding battery-operated under-cabinet lights in the kitchen or reading lights in the bedroom area. For a more dramatic effect, install dimmable LED strip lights around the ceiling or furniture to create a cozy atmosphere at night. There are even some that come with colors and connect to apps on your phone. This is a fun mood changer that is easy to install and adds a little flair.

    Pro Tip

    Battery-operated LED lights are a great option for RVers who want to avoid complicated wiring and want to save power when boondocking. They’re easy to install and perfect for creating ambiance without using shore power.

    DIY Suggestion

    If you have a cabinet or pantry that you know you will be using during dark hours and don’t want to wake anyone up, then you can look into some smaller motion-sensor LED lights.

    4. Add Personalized Decor

    Your RV should reflect your personality, and adding personal touches can make it feel more like home. Think about adding things like throw pillows, cozy blankets, artwork, or even some greenery (faux plants work well if you don’t want to worry about maintenance). A few strategically placed decor items can really elevate your space and make it feel inviting and warm. My wife has done this in every RV we’ve had, and you can’t imagine what a welcome atmosphere just a few of these can create.

    Pro Tip

    Use removable hooks or adhesive strips like Command strips to hang your decor and avoid damaging your RV walls. It’s important to keep things lightweight and easily removable for when you’re rolling down the road.

    DIY Suggestion

    Consider framing some of your favorite travel photos or printing out a custom map of places you’ve visited to create a fun, travel-themed gallery wall. Check out my wife’s picture experience wall in our newest RV.

    5. Upgrade the Exterior with an Awning or Outdoor Space

    Let’s not forget the outside of your RV! Creating a functional and stylish outdoor space can take your RV setup from basic to amazing. If your RV doesn’t already have an awning, adding one can create a perfect shaded space for lounging, cooking, or hanging out with friends and family. You can also create an inviting outdoor area with outdoor furniture, string lights, a portable grill, and a few outdoor rugs. Let’s face it, when you are out RVing in the middle of nature with friends and family, the goal is to be outside, and if you make the outside that much more inviting, you’ll find yourself lounging around a campfire, sharing stories with your loved ones, late into the night.

    Pro Tip

    Opt for lightweight, foldable outdoor furniture to save space and reduce your RV’s weight. A portable fire pit is also a great addition for evenings spent under the stars.

    DIY Suggestion

    Check out this easy-to-install awning shade for an instant outdoor upgrade. Adding some solar string lights – make sure they are lightweight and plastic – for an RV safe and eco-friendly glow at night!

    Bonus Tip: Regular Maintenance Goes a Long Way

    While these upgrades will wow your guests, keeping your RV in top condition with regular maintenance is just as important to make sure your home on wheels is functioning smoothly while you’re adding all the bells and whistles.

    Making your RV a wow-worthy space doesn’t have to break the bank. With a few key upgrades and some creativity, you can create an inviting, personalized home on wheels that will impress everyone at the campground – and make your travels even more enjoyable. Happy renovating, and may your RV adventures always be filled with great memories!

  • How to Master Essential Maneuvers in a Motorized RV

    How to Master Essential Maneuvers in a Motorized RV

    When shopping for a larger motorized RV, one of the challenges many people fear is just driving the thing around. But it’s surprisingly less challenging than you might anticipate.

    As with so many things, practice makes perfect. Whether it’s a large motorhome or even a small trailer, putting in the hours behind the wheel can mean the difference between nerves of steel and chattering teeth.

    Read on to learn how to safely practice driving a motorized RV, and what you should focus on to help you go from mystery to mastery behind the wheel even of the largest rigs.

    Before You Start: Adjust Your RV’s Mirrors

    You already know how to adjust the mirrors on your daily driver, but adjusting the mirrors on your RV is another thing altogether. To help explain the difference, I reached out to Peter Knize of The RV Geeks, who has been a professional bus driver and is a recognized leader in training people to drive larger RVs.

    “The two mirrors – flat and convex – need to be used together as a team,” says Knize, because neither mirror on its own provides all the information you need from behind the wheel. The convex mirror lets you keep an eye on objects beside your RV, while the flat mirror lets you look farther away. When adjusting your mirrors, you want to see vehicles and terrain transition from one mirror to another – setting the “crossover point” – near the rear corner of the vehicle.

    The flat mirror on the passenger side of the RV, meanwhile, should be adjusted with the horizon visible near the top and the awning arm just visible at the edge of the glass. Read Knize’s full article for photos and illustrations to show what you should be able to see in the mirrors and what the effective field of view is, seen from overhead.

    Many newer RVs will have blind spot or proximity sensors to tell you that there may be a vehicle in the lane next to you. Though these notifications are handy, they do not take the place of your own visual confirmation using properly adjusted mirrors.

    Practice in a Parking Lot – With Cups

    When I worked at a RV dealership, something I would do with the more nervous drivers is go to an open parking lot with a package of plastic disposable cups. These things make quite a loud sound when you run them over, yet the consequences of doing so are nothing to worry about.

    We would outline the borders of a typical camp site and parking lot with the cups, then the driver would practice maneuvers that were challenging for them – with the radio off and the windows open so they could absolutely hear if they smashed one of the cups. Then it was practice, practice, practice.

    Turning: Radius and Clearance

    Large vehicles, whether they be a Class A or a towable, will obviously require more maneuvering around corners, especially in tight circumstances. Knowing how much space to give your rig around a bend is a key maneuver to master.

    If you’ve ever watched a city bus navigate a corner, it’s not much different in a larger RV where you may have to drive a bit past the corner before you start to make your turn.

    This is where the plastic cups can be very helpful in getting the exact distance down. Knowing where to start your turn can make the difference between an unremarkable change in direction and a trip-ruining run-in with local flora.

    Turning, Part 2: Off-Tracking

    This is a common term for truckers and something RV owners should learn. When driving in a straight line, the rear wheels follow the same path as the front wheels. However, off-tracking occurs when you turn the RV and the rear wheels follow a different path than the front wheels. If you’ve ever towed a trailer, you’ve seen this in action.

    A number of things affect this, but it’s primarily the distance between the centers of the axles on your RV, known as the wheelbase, and how tightly the front wheels can steer, known as wheel cut.

    So, even if you’ve navigated the front wheels around a corner, the rear wheels take a different path and can jump the curb or worse if this isn’t taken into account. According to another article from The RV Geeks, one of the most common places to see damage on larger rigs is right in front of the rear wheels where a driver didn’t account for off-tracking sufficiently.

    Again, the plastic cups can help you learn how the rear wheels of your RV follow the fronts.

    Low-Speed Maneuvering: Rear Overhang

    Even though the plastic cups are very good at letting you know when your tires aren’t where they’re supposed to be, your RV can extend quite a distance beyond its wheelbase. One of the first things operators of any larger vehicle should be aware of is their vehicle’s rear overhang. This is the portion of the RV behind the rear axle of the rig.

    When you’re turning the front of the RV one way, the back end swings the opposite direction. This is also true of larger trailers, too, and can be an area where drivers can get into trouble at filling stations and the like.

    Knowing how the back of your RV swings when completing any turning maneuver is one of the techniques absolutely worth mastering. This, again, can be practiced in a large parking lot, but you’ll want to have a spotter to point out where the outside corner of the RV goes when turning, and when it goes out of bounds for your simulated camp site.

    Keep a Departure Checklist

    Recently I was camping with a group from a rally and one of the attendees was happily setting off and waving at all of us while towing his Jeep – that was still in park. Yikes.

    The first thing I do when leaving the campground is turn off the radio and open the windows. This lets me hear anything that might be amiss, such as a vehicle being towed in park. Or even the sounds the engine and hitch – if there’s a hitch – are making.

    I also firmly believe that, no matter how experienced you are, having checklists is essential. This can really come in handy at those rallies and gatherings where you’re greeting old friends as you arrive and bidding new friends adieu when you leave. Getting caught up in all the hustle and bustle can be distracting and cause you to forget your usual process.

    As for the guy with the Jeep, I literally ran behind him for almost the whole length of the campground yelling and waving my arms like a madman. So, here’s a bonus tip: Be aware of what’s around you as you’re coming and going.

    Go to an RV Rally

    Speaking of which, one of the places where you can get experience with a professional is at some of the larger RV rallies. Many of the bigger gatherings feature hands-on driving workshops and classes that can be very worth the time.

    If you haven’t attended an RV rally yet, this might be the perfect reason.

    Hire a Coach

    If you have the budget, consider hiring someone familiar with the type of vehicle you’re driving. If it’s a large Class A, reaching out to a transit bus company and hiring one of their better drivers to sit in the passenger seat and share their tips could be a great option.

    Another idea might be to reach out to a local RV dealership and hire one of the transport drivers for the day.

    Lastly, you may even be able to reach out to the local school district and hire one of their bus drivers. If they can haul around dozens of screaming students while making all their stops without incident, they can certainly help you master your nice, quiet RV.

    Practice, Practice, Practice

    If you want to learn more about driving a large RV, the two articles Peter shared with us will help fill in a lot of the mechanics behind these maneuvers.

    Once you’re ready to put the theory into practice, setting up a closed course in an empty parking lot, attending a class at a rally, or even hiring a professional commercial driver are all ways to get time behind the wheel to help you assuage your fears and head out on the road to adventure with confidence and a big smile.