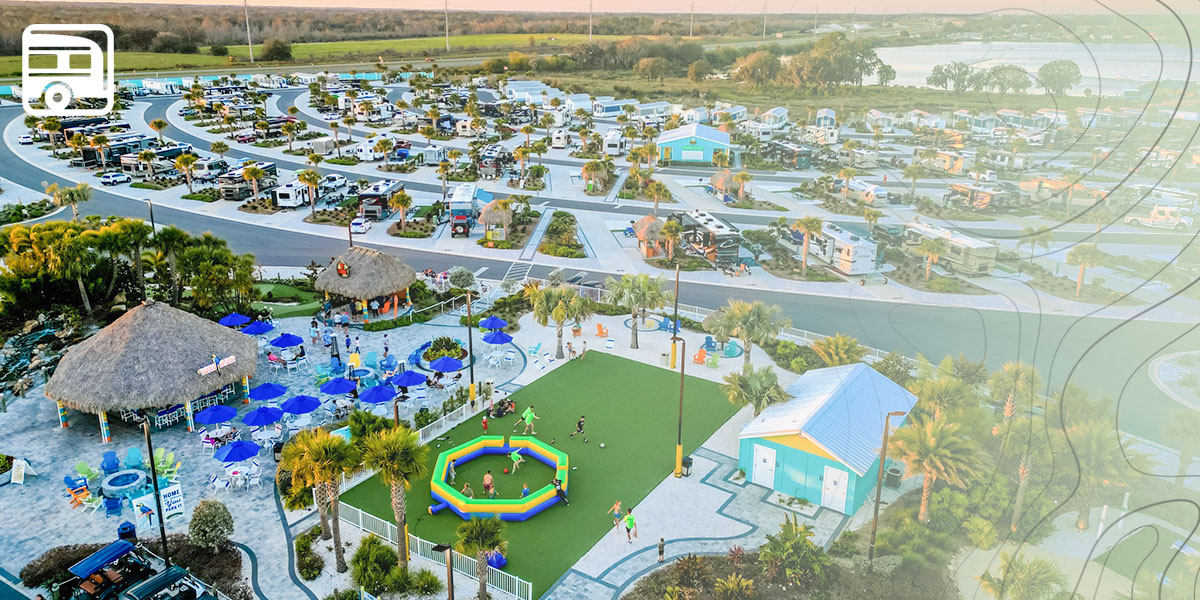
When it comes to premier camping, frequent RVers say there’s nowhere like the South to hitch up and enjoy the outdoors. Campgrounds in Georgia, Florida, North Carolina, and Tennessee were among the top winners in the 2024 RVshare.com Campies awards, based on an August 2024 public vote.
Taking the top spot as the best luxury RV resort and best winter escape campground is Camp Margaritaville Auburndale, located between Orlando and Tampa Bay. This unique campground offers 326 RV sites, including 11 “Motorhome Suite” sites. Each space offers full hookups for travelers, along with free cable and Wi-Fi throughout the campground. In addition to easy access to Central and Western Florida attractions, amenities include two pools and a waterslide, a kids park, pickleball and basketball courts, and a fitness center.
For those looking to get out in the summer with their pets, the public survey says there’s no better place than the RiverWalk RV Park in Jonesville, N.C. Earning awards as the best summer escape campground and best pet-friendly campground, the campground is located in Yadkin Valley Wine Country, within driving distance to three state parks. The campground itself features riverside RV spaces and a beachfront dedicated for dogs to play in the water.
Two other North Carolina RV parks earned honors in the awards. The ever-popular Jellystone Park Golden Valley in Bostic, N.C, just west of Charlotte, won the award for best campground views. The Cape Hatteras / Outer Banks KOA Resort in Rodanthe, N.C., won for the best waterfront campground for its location on the Outer Banks peninsula along the Atlantic Ocean.
When it comes to traveling throughout the nation’s parks, Skidaway Island State Park in Savannah, Ga., was named the best state park campground. Among national parks, Elkmont Campground – situated in the heart of the Great Smoky Mountains in Gatlinburg, Tenn. – won honors for the best national park campground.
The only campground in the north to earn honors was the Mendota Hills Campground in Amboy, Ill. Located west of Chicago, the campground features regular weekend events across their 130 acres of wooded and open land. Small wonder, then, that it was voted the best family-friendly campground.
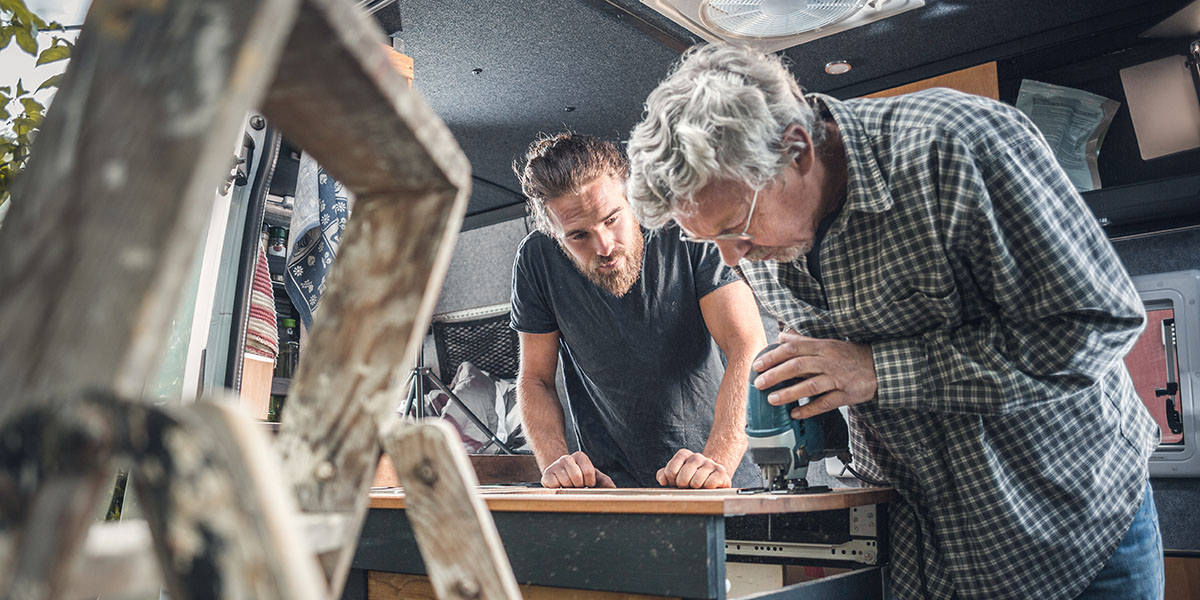
When we first hit the road in 2012, we met just a handful of folks working online jobs from their RVs. Eight years later, as a result of COVID, it seemed that anyone who had dreamed of working remotely bought an RV and became our neighbors. While the pendulum has swung back in the other direction a bit, there are still several million people who work remotely. Not all of those work remotely from an RV. But all of them have either kept their existing online job, found one, or — like us —created their own mobile business.
If you’re thinking about working remotely from your RV, we have some wisdom to share. From the equipment you’ll need to how to set up yourself as a business entity, we’ll cover that all here.
Mobile & Online Jobs
Do you already have a job that allows you to work from anywhere with an internet connection? With reliable Fi-Fi and a robust solar-powered system, you’re good to go! If you are seeking to do online work while traveling, no one knows this type of work better than the folks at Escapees RV Club. It’s who they are.
At the beginning of your remote job hunt? Looking in the right places will be essential. While there are thousands of remote work opportunities listed on various websites, be sure to check out the RVer Job Exchange. We also recommend joining the Xscapers Communityif you plan to move around the country.
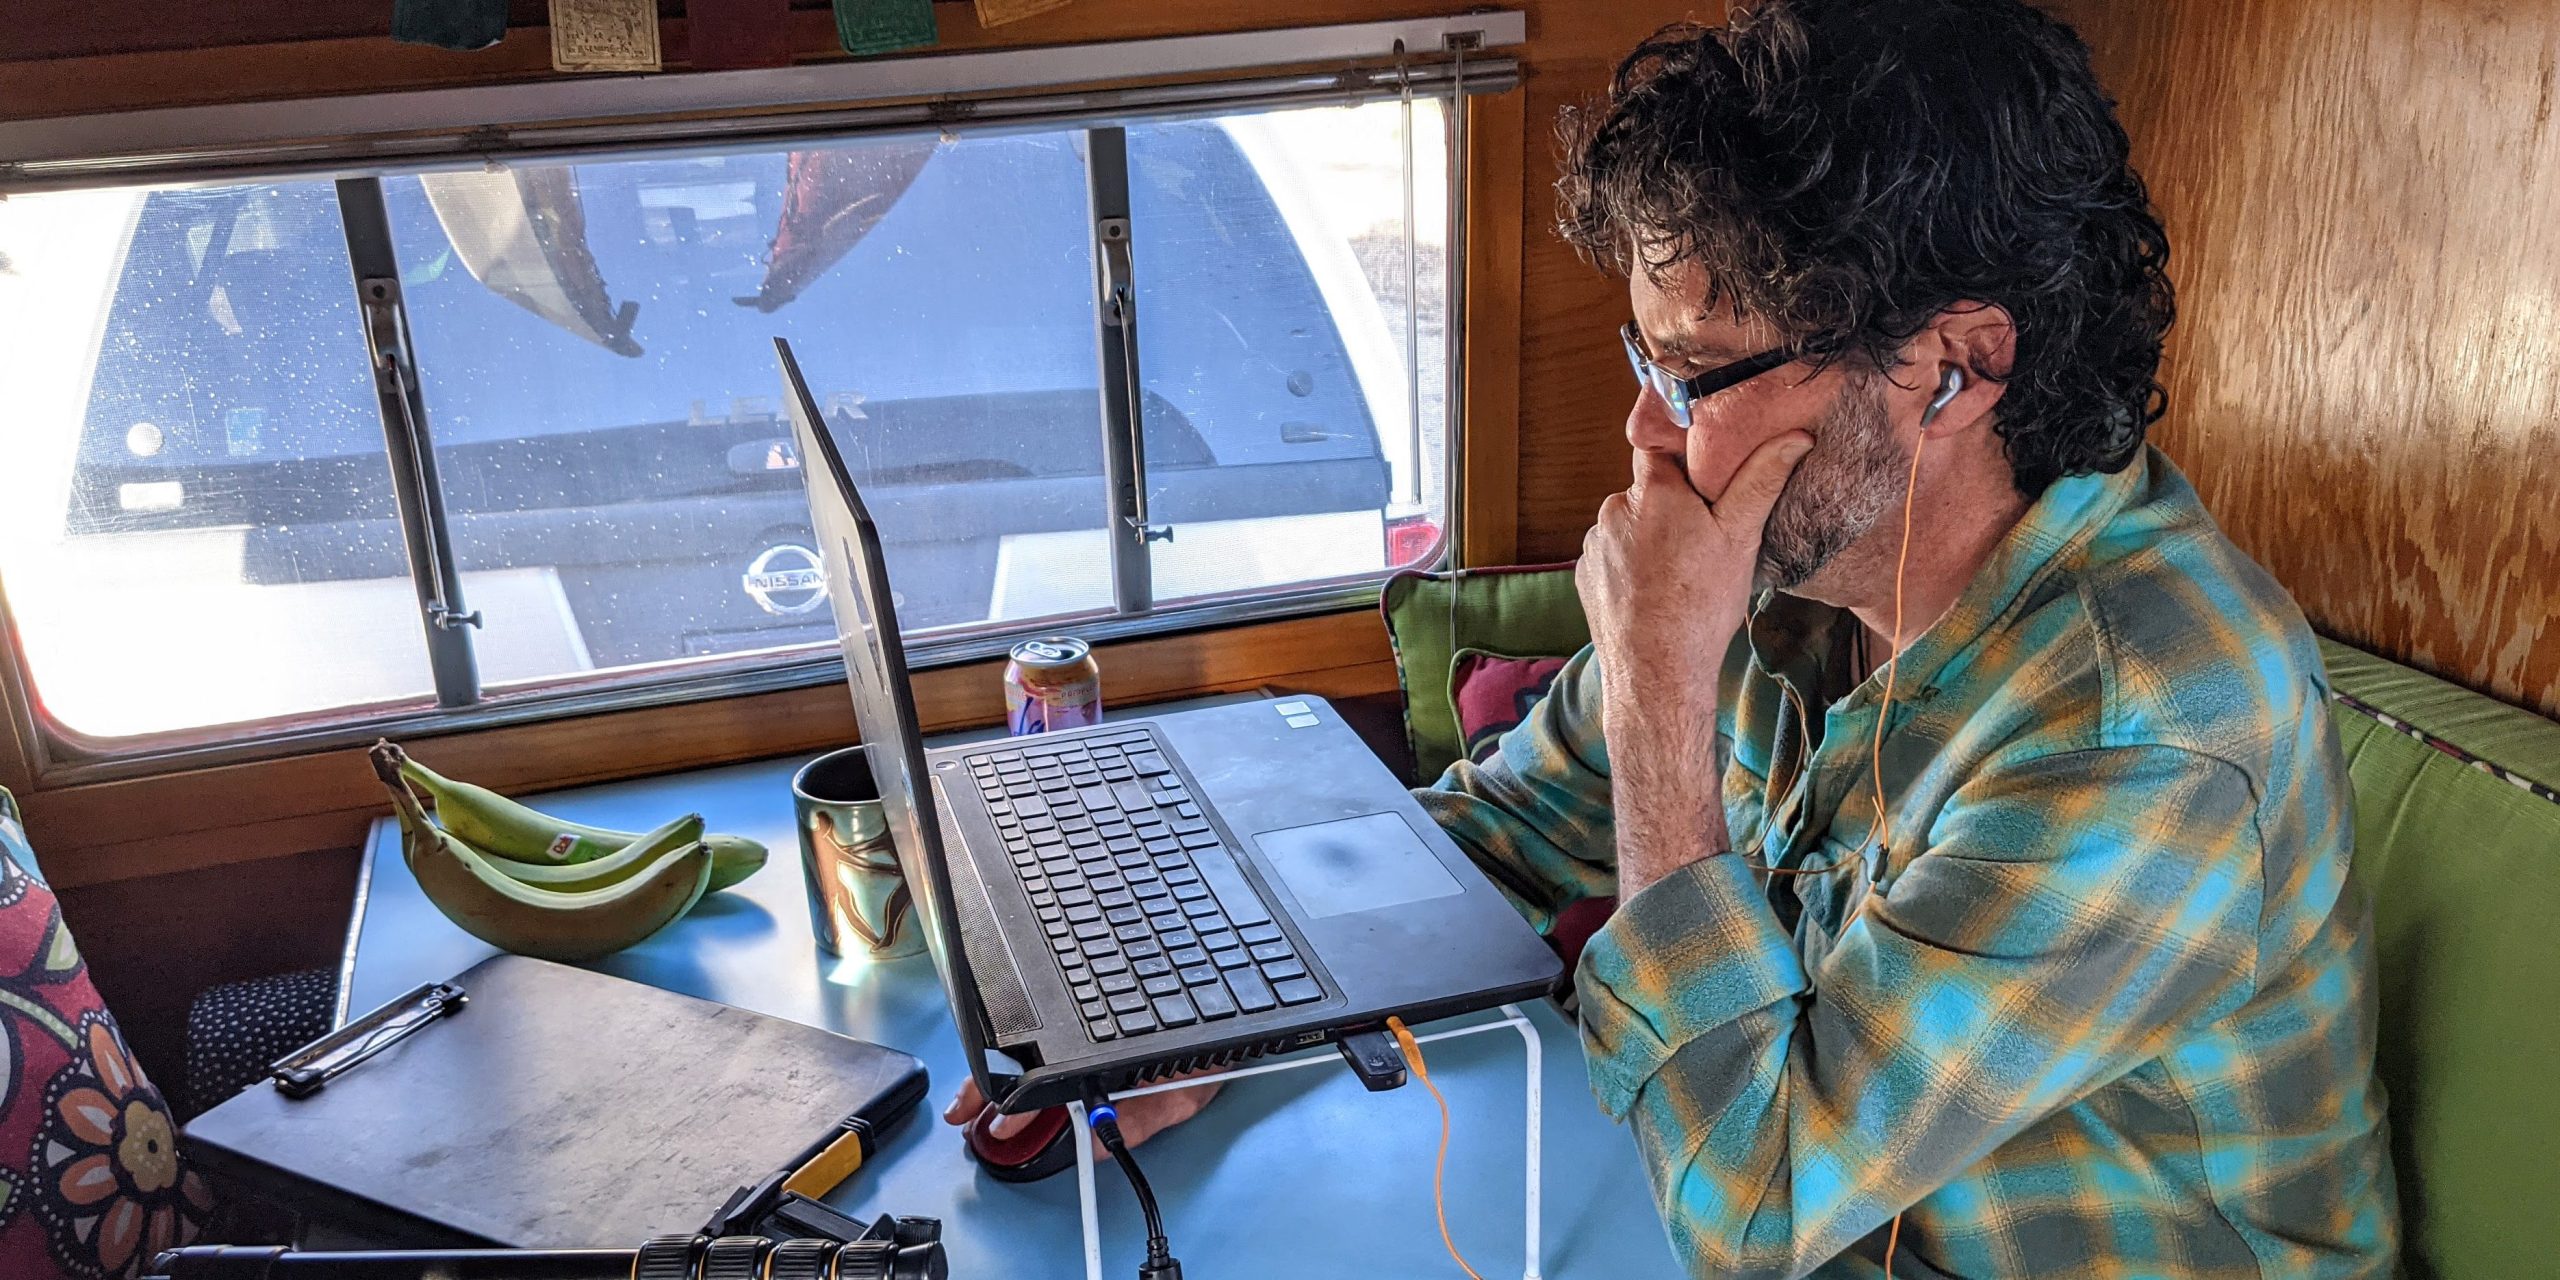
Equipment to Work Remotely from Your RV
Does your RV or van have a usable work space? For us, having a table and a place to store our laptops and other business equipment when not in use is all we need. Others prefer a dedicated office space in their RV. In addition to a workspace that works for you, you’ll likely need some sort of internet connection and prices range widely. We used a mobile hotspot for many years, and have recently added satellite-based internet as service has become more widespread. It’s been a complete game changer!
Mobile hotspot allows you to use your smartphone as a Wi-Fi connection. It’s included with most cell carrier plans. Still, you must have a strong signal for it to work properly. $
Weboost is an antenna that is designed to boost a weak cell phone signal. So, remember: There has to be some signal for it to work. $$
Starlink Roam is very reliable and uses a small satellite dish that you can mount on your RV or set out when you need it. With a clear shot to the sky, it works all over the US, Canada, and Mexico. $$$
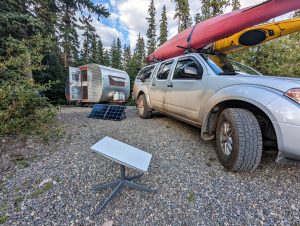
Starlink plus solar is a great combo for working remotely from your RV.
Solar Power + Self-Contained
While adding an off-grid solar powered system isn’t a necessary part of working remotely, it sure is helpful. Doing so will save you a ton of money. Which, you may note, will allow those paychecks to go much further. We estimate that we’ve saved over $200K in camping fees over the past 12 years by camping on public land and in off-grid campgrounds. If you’ve missed our blogs about how to run your RV on solar, start here.
If you are going to boondock, being self-contained is not always necessary. But it’s good to practice all Leave No Trace principles. It’s also good to know key boondocking skills. Like how to filter water. And identifying where you can dispose of your waste appropriately – especially if you plan to be “out there” for a while. There are some helpful RV travel apps that will direct you to water refills, showers, dump stations, and dumpsters.
Starting Your Own Gig!
If you’d told us in 2012 that we’d be running a mobile business 12 years later, we would have thought you were crazy. After working seasonally for many years, we decided to give our own mobile business a go. Since then, we have discovered just how great it is to be more in control of our own schedule so that we can be where we want to be — when we want to be there. It may sound overwhelming to those non-business types, but honestly, a few days of research and paperwork, and we were on our way. You can learn more about our sustainable RV lifestyle business at FreedomInCan.com.
Start with the secretary of state website in your state to learn the necessary steps of establishing an LLC, and getting an understanding of state tax laws and rules. Then, head over to IRS.gov to get a federal tax ID number (EIN), and away you go! We also highly recommend hiring an accountant that understands the nature of your business. We can’t say enough about our accounting team. They are RVers themselves, and have helped us interpret and make sense of the appropriate tax laws. (Check out our website for more details!)
Finding work that will sustain your lifestyle is often the first step in fulfilling your RV traveling dreams! Next up, we’ll discuss how to stretch your traveling budget and meet like-minded people by doing work trade and volunteering while living in your RV.
Want to learn more about working from the road? This article is part of our Working from the Road 101 series.
Living in an RV year-round means facing the elements head on. But you won’t be the only one facing the elements: Your appliances will face them as well. Most RV’s rely entirely on propane for fuel. (Although this is starting to change with hybrid and all-electric RVs.) Propane is a clean-burning fuel and safe. It is an environmentally friendly choice compared to gas or diesel, since it releases negligible amounts of fossil fuels. Many RVs use propane to power a stove, oven, heater, refrigerator, outdoor stove, and hot water heater. That means that the majority of our creature comforts are almost entirely dependent on propane. Therefore, in winter weather, precautions need to be taken to prevent malfunctions. You need to prepare your propane tanks for the cold.
There are lots of good reasons to take on the challenges of four-season RV camping. To do that (and keep you and your RV warm), let’s start with the basics.
Propane Fundamentals
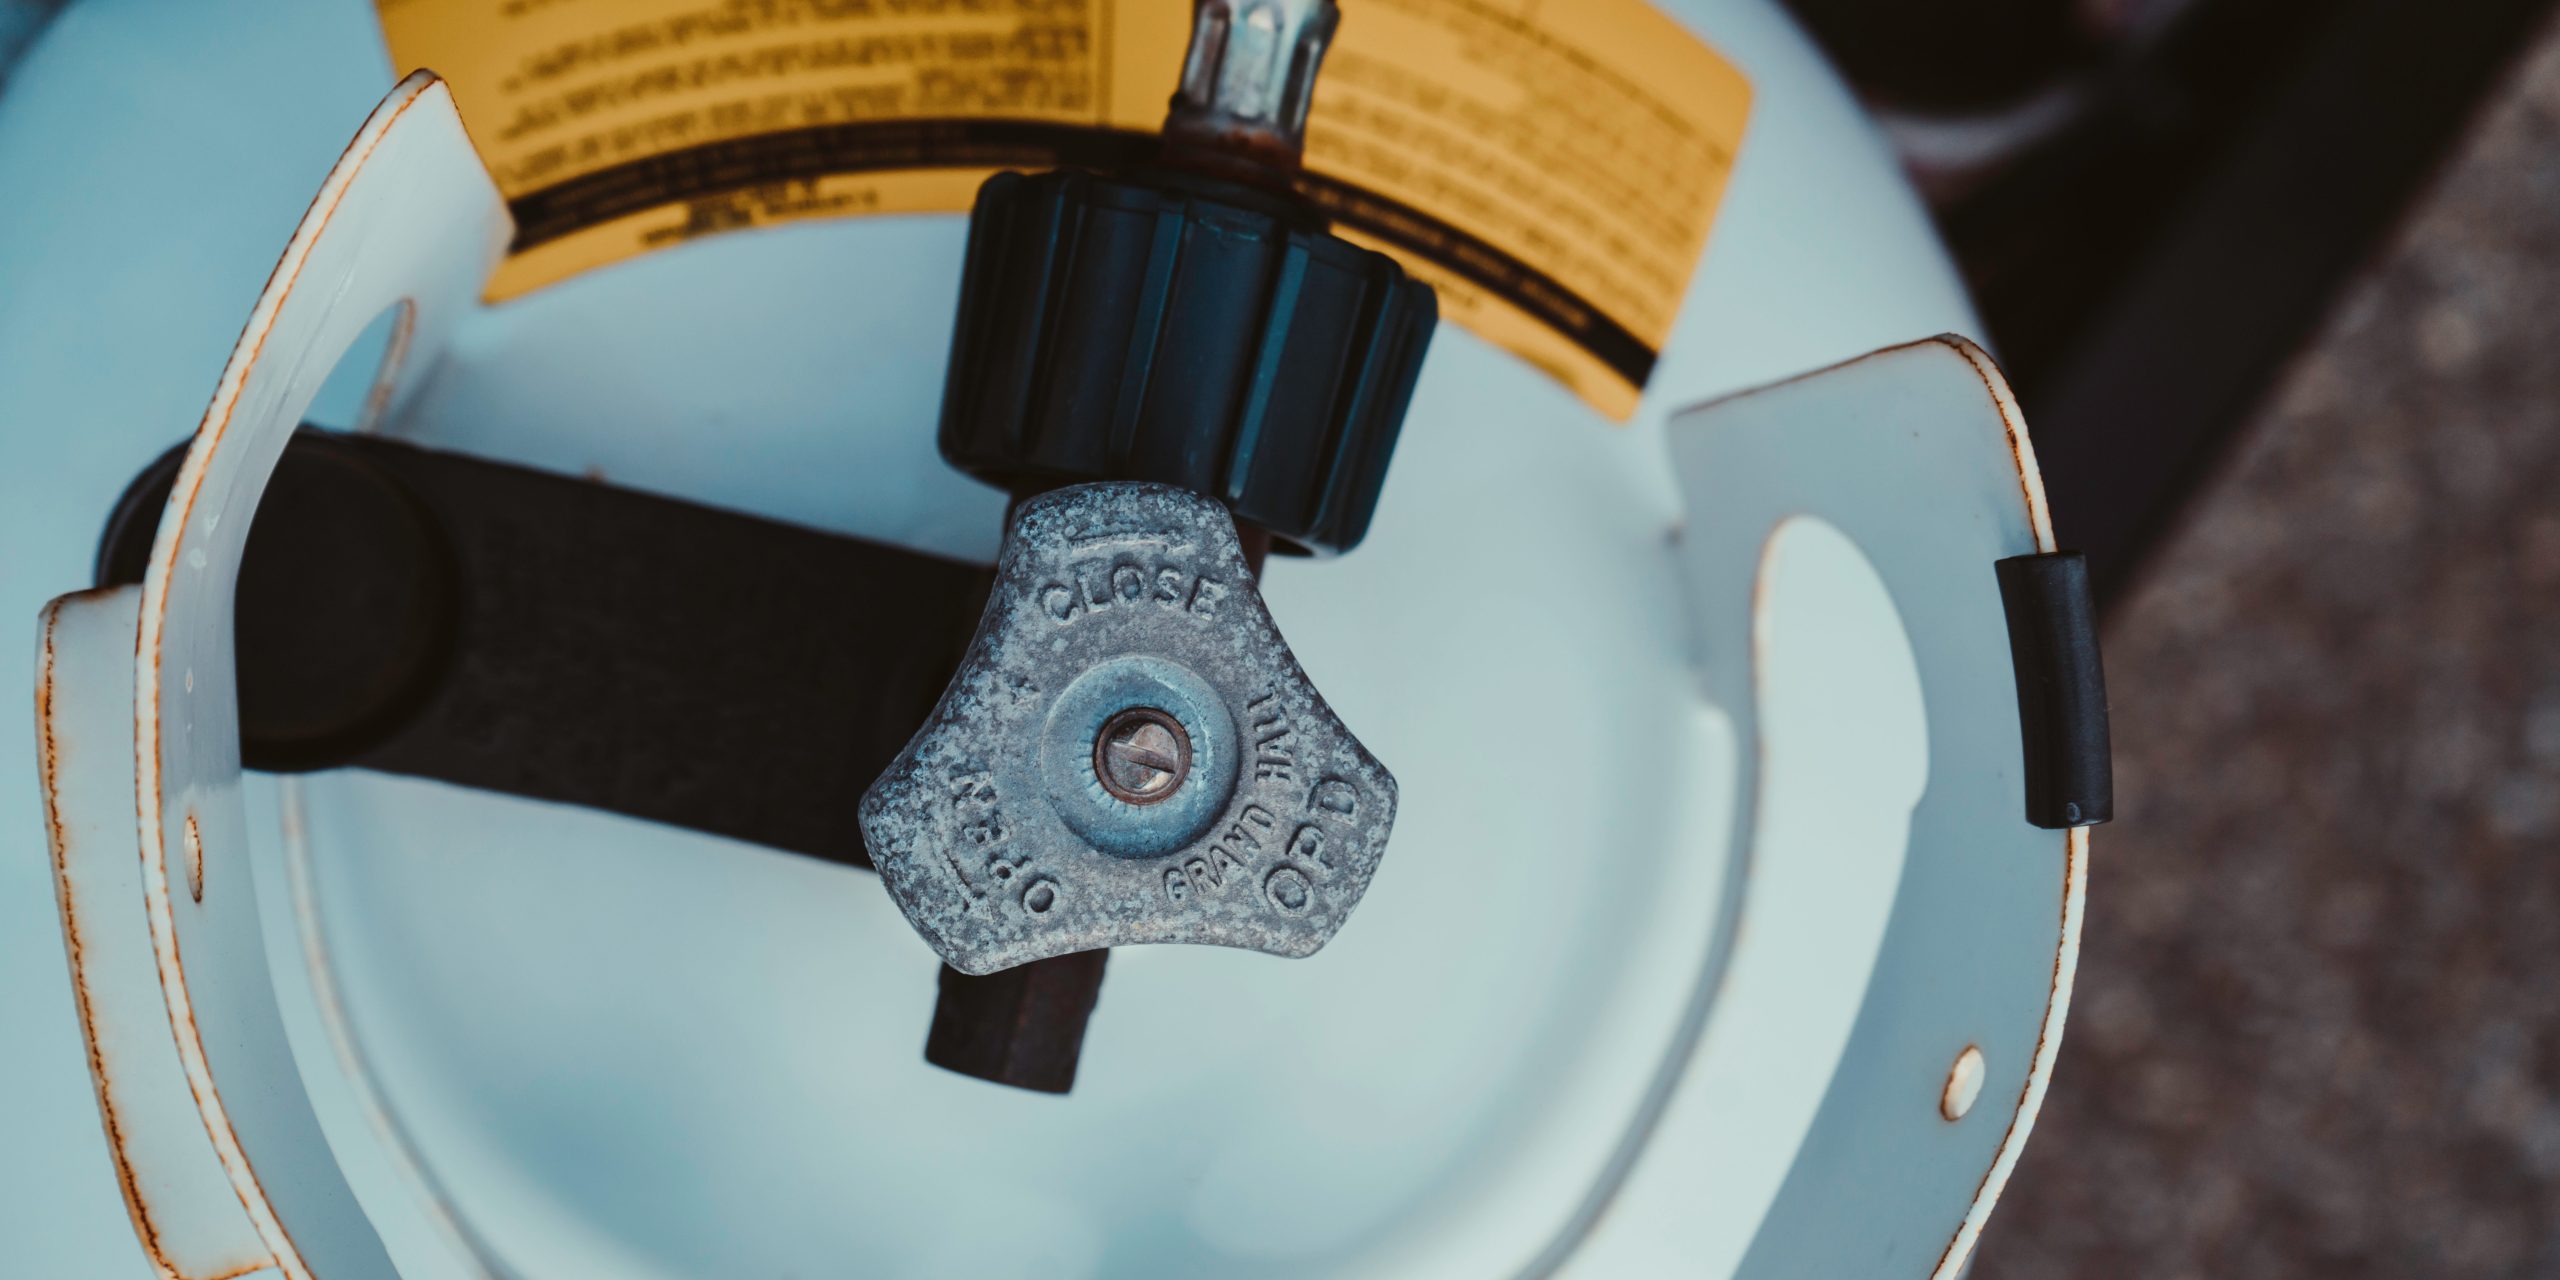
Propane is a flammable hydrocarbon gas. It’s made up of carbon and hydrogen, C3H8. In its natural state, propane is colorless and odorless. For safety reasons, an odor is added to easily detect a leak. It is a gas, but under pressure it is liquified. This makes it relatively simple to transfer in bulk form. So, to simplify this, the propane inside your tank is a liquid. As pressure in the tank is released, the liquid boils, or vaporizes, into gas that is released into your appliances.
Propane Problems in Cold Weather
In its liquid form, propane can technically freeze, but it only does so in -44 degrees Fahrenheit. The main issues you will face in low temperatures are pressure related. A liquid propane tank functions with a reservoir of gas at the top of the heater. The gas is what is used in your appliances. The liquid boils, replenishing the gas reservoir at the top of your tank. In cold weather, the pressure inside your tank will decrease, and the boiling process will slow down.
The problem most people have with their propane in cold weather is exhausting their reservoir of gas at the top of the tank before it can be replenished by the boiling process. When the reservoir of gas is used up before the boiling process can replenish it, the propane system malfunctions. This is often referred to as a “frozen tank,” although the propane isn’t actually frozen. It is a result of a slowed down “rebound” of the gas made by the boiling propane. This is the main issue that can result in the lower pressure of your propane tank caused by cold temperatures. On a night when it’s cold enough to have these effects on your tank, you may be depending on your propane heater to warm you up! Because these malfunctions can happen, it doesn’t hurt to have a small backup space heater in your RV just in case.
Prepare Your Propane Tanks for the Cold
If you’re about to embark on a cold weather RV trip, consider getting a bigger propane tank. It’s a good way to prepare your propane for the cold. You probably won’t burn all that propane, but the larger tank size might prevent the “frozen-tank” issue by increasing the size of the gas reservoir at the top of your tank.
Another way to ensure proper functioning of your propane tanks in the winter is to keep the tank at least 30 percent full. If the tank is full, the pressure might not drop enough to affect the flow of gas to your appliances. Being conscientious of your propane intake will help ensure your tank stays somewhat full. You can turn your thermostat down at night, and turn your water heater off when you aren’t using it.
The only problem with keeping your tank at least 30 percent full, is that most places that fill propane, charge the same amount no matter what is left in the tank. If you can find someone who fills propane by volume, that will save you some money in the long run.
And if you’re in an area with a lot of snow and ice accumulation, step outside in the mornings and evenings and brush the snow and ice off your tanks.
Finicky Tank Moments
Sometimes tank regulators and safety shut-off devices can be finicky in cold weather due to pressure differences. If you open your tank too quickly, it may trigger a safety shut off feature on your regulator. Before you take your RV to the shop, try this: Shut your tank off, and disconnect the line that goes from the regulator to the tank. Let it sit for a minute or two, and then reconnect the line and open the tank up slowly. You may find your problem has magically resolved itself.
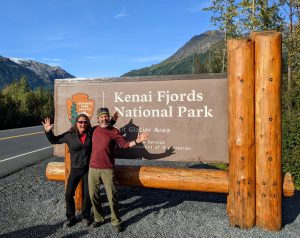
Every RVer knows that some places in the world are simply more special than others. And for a lot of those places, you have to make sacrifices to get there. And in Alaska, there is a place like that. A place where you can drive your RV, camp along the ocean with glacier views, hike to a massive icefield, watch tidewater glaciers calve into the sea, and gasp as breaching whales perform their aquatic ballet. All within the same U.S. national park: Kenai Fjords.
After a decade of full-time RVing, we finally made it to our 50th U.S. state. With our trusty vintage camper in tow, we spent five months exploring Alaska and western Canada. One of our many life goals has been — and remains — to explore each of the 63 U.S. National Parks. There are 51 to which you can drive an RV. The other 12 parks require a ferry, plane, and/or one heck of a backcountry hike or paddle.
Our 55th Park … the 51st with Hamlet, our vintage camper.
Scenic Drives
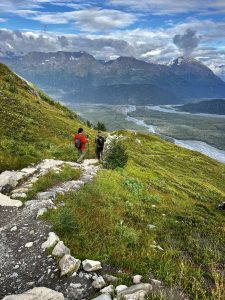
Kenai Fjords National Park lies on the edge of a remote peninsula. Uniquely, much of it is only accessible by plane or boat with just one road in and out. While not a traditional park loop road, the drive through the Kenai Peninsula is one of the most picturesque in Alaska. With views of the Cook Inlet, Turnagain Arm, Coastal Range, gorgeous rivers, and alpine glaciers in nearly every direction, the 125-mile drive down the Sterling Highway from Anchorage to Seward offers some of the most amazing scenery Alaska has to offer.
Picnic Beach at Caines Head.
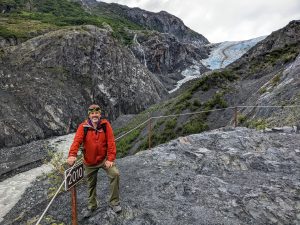
Exit Glacier.
Must-Hike Trails
The park maintains hiking trails within the Exit Glacier area. This includes one of our favorite day hikes in ANY U.S. national park! There are several options to suit any interest, time, and ability.
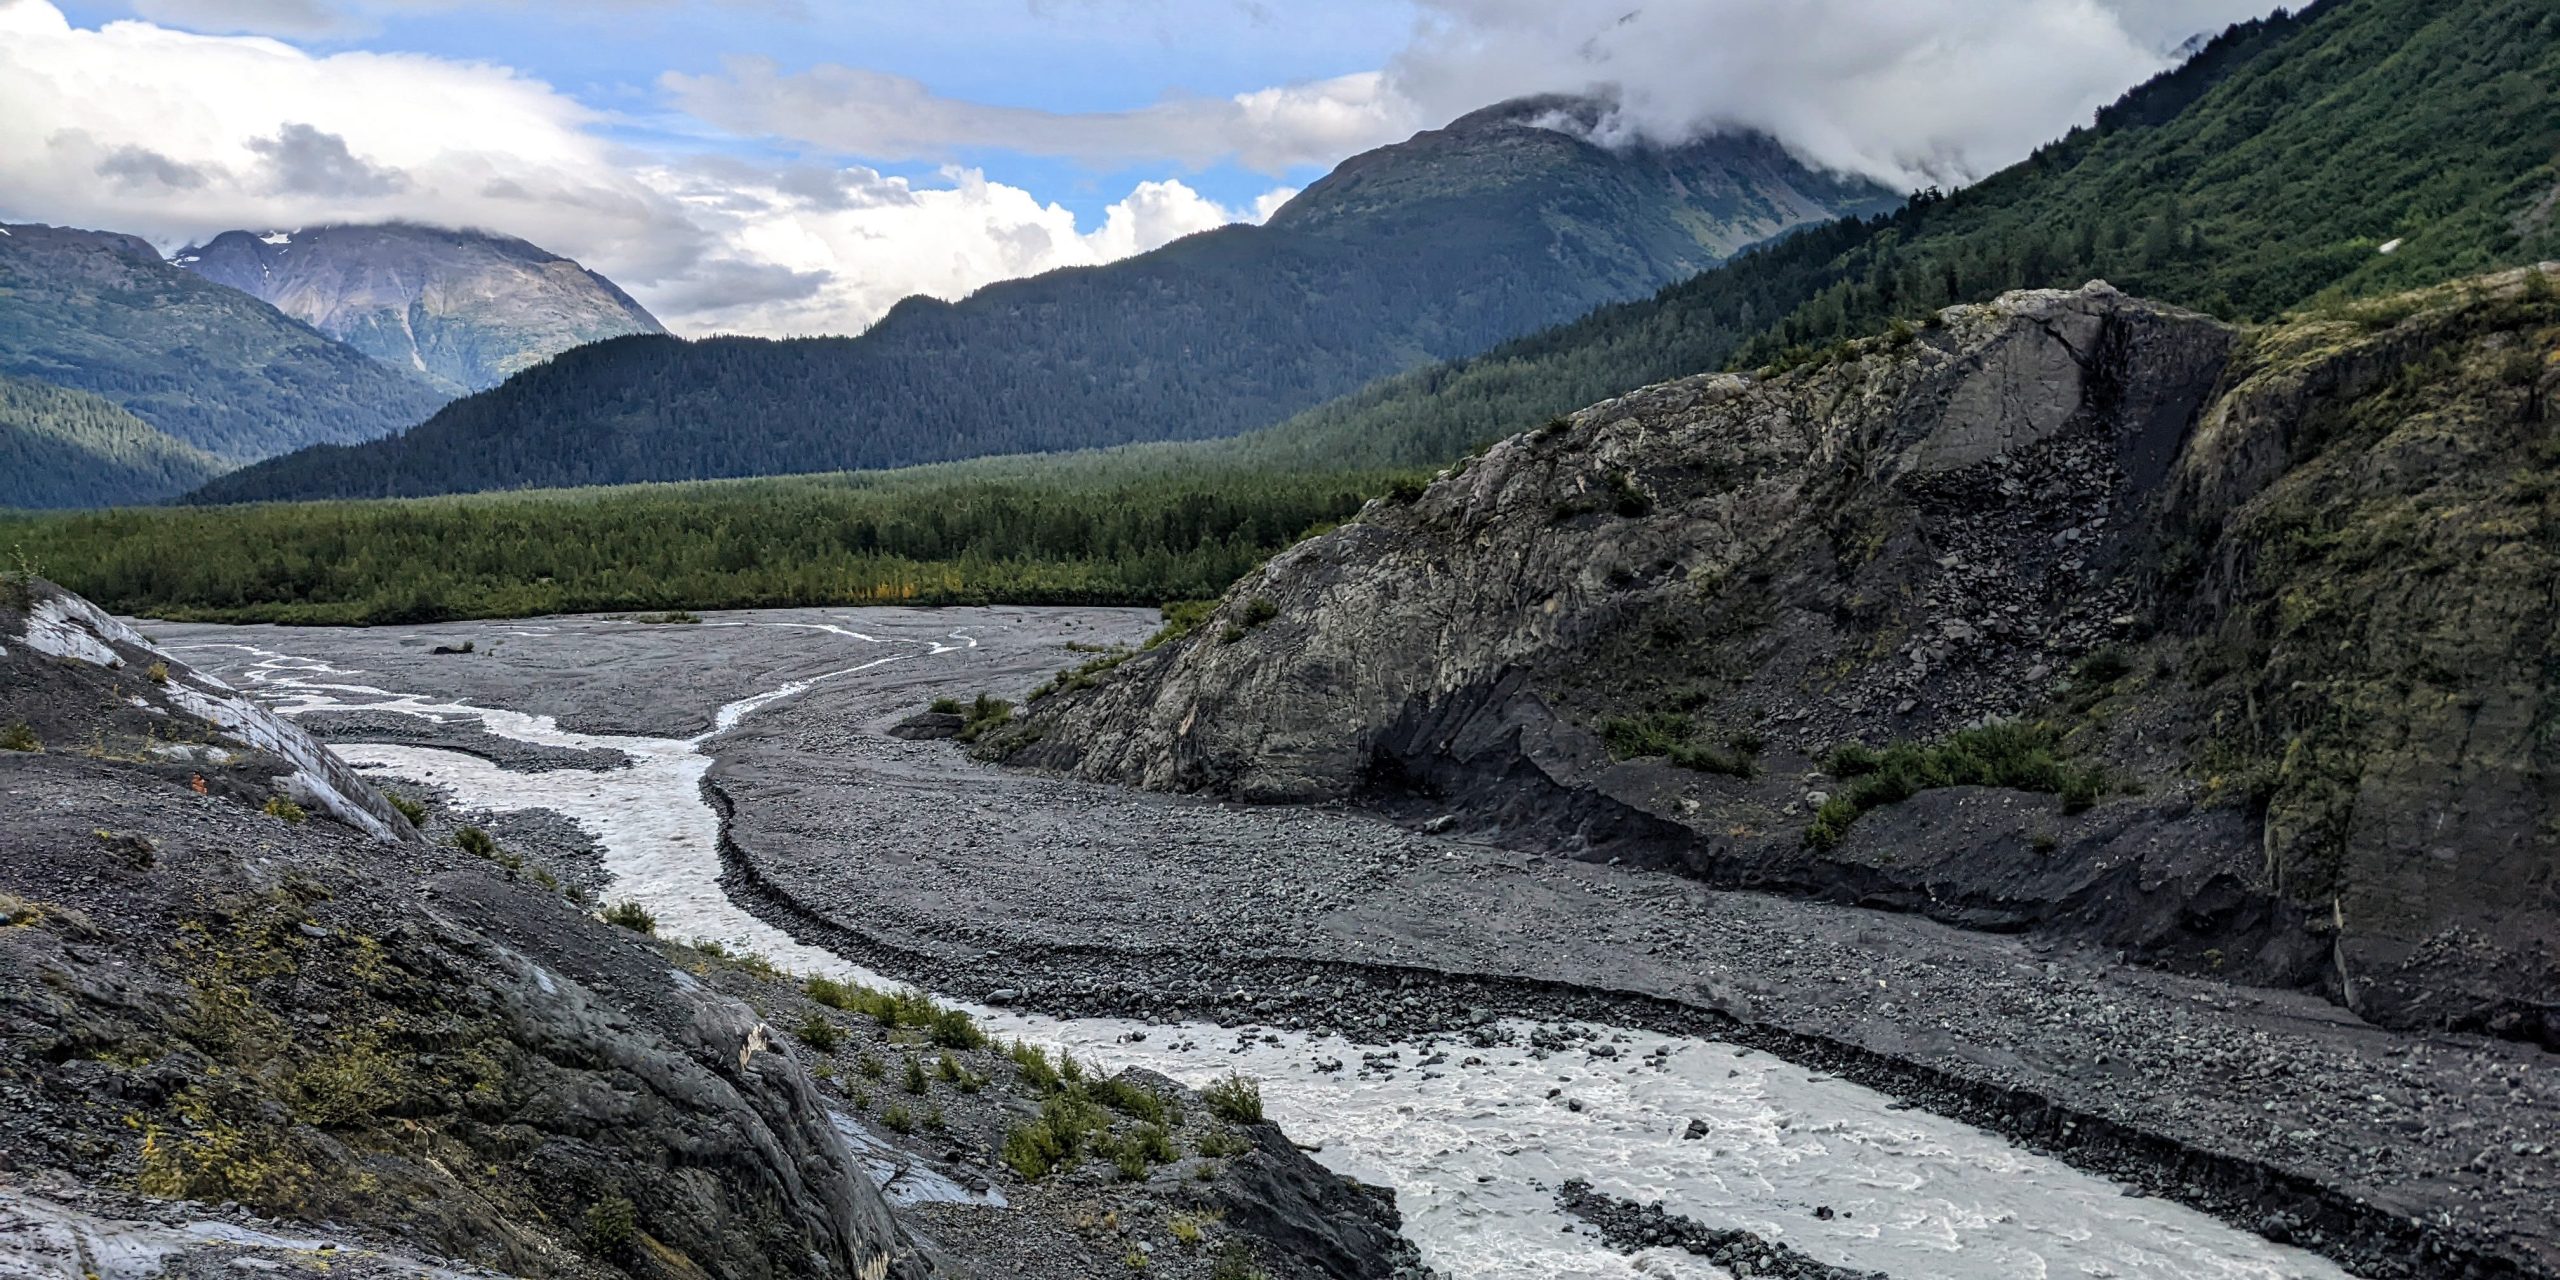
Glide Along the Alluvial Plane. Take an easy stroll through the alluvial plane and along the Resurrection River, which is formed by meltwater from Harding Icefield and Exit Glacier.
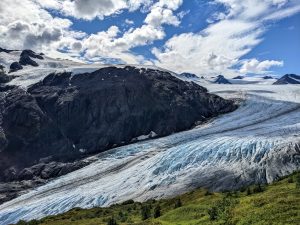
Track Glacial Time Travel. A slightly longer trail takes you up to the overlook of Exit Glacier’s current terminus. The view provides a historical timeline of the receding ice.
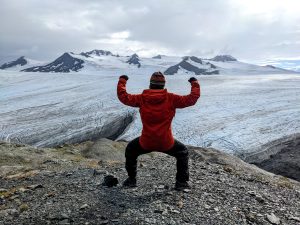
Elevate Your Level. A more serious option (this is one of our top 10 hikes) is along the Harding Icefield Trail. This hike takes you on a 9-mile out and back trip with an elevation gain/loss of nearly 6,400 feet. It’s a true stunner from start to finish!
Take the Tour. Join a ranger-led walk on Exit Glacier. Doing so allows you the unique opportunity to walk on the ice, learn about the geological and climatic forces which shape glaciers, and understand the dos and don’ts of exploring glaciers on your own.
Hiking along Harding Icefield Trail.
The temperate rainforest sports massive devil’s club leaves.
Exit Glacier Overlook.
We made it to the top of the Harding Icefield!
Just outside of the park, Caines Head State Recreation Area offers some gorgeous, moderate hiking trails. These will lead you through the temperate rainforest and down to the shores of Resurrection Bay. There, you’ll be greeted with glacier views and a perfect beach for a picnic.
RV Parks & Campgrounds
While there is only one first-come, first-served tent-only campground in Kenai Fjords National Park, the adorable town of Seward (adjacent to the park) offers RVers everything they need. There are also several options in their Parks and Recreation Department campgrounds. Most even have ocean views and electrical hook-ups. There are also a handful of private RV parks in the immediate area that offer full services, as well as some camping options in the Chugach National Forest.
Camping reservations are probably only necessary during the salmon run (July thru early August) and on summer holiday weekends. If you prefer to keep your plans flexible, any other time of the year will likely offer you numerous first-come, first-served options.
If you are equipped with solar power and up for some off-grid camping or boondocking to save some money and get away from the crowds, check out the iOverlander app for some good options.
Seasonal Advice
The best time to visit Kenai Fjords is June-September, though the months of May and October could offer some unique beauty, and virtually no crowds. This peninsula gets a lot of rain, as it is situated in a temperate rainforest along the ocean. Bring quality rain gear and comfortable muck boots to stay dry when Mother Nature decides to dump!
Insider PRO Tip!
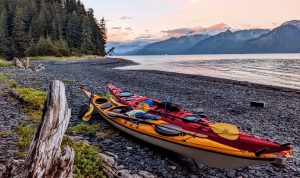
Hands down, the very best way to explore and experience this stunning park is from the water. Whether you choose a fishing charter, wildlife cruise, or kayaking tour, get out on the water into Resurrection Bay and beyond. For boat tours in the early or late part of the season, bring full winter gear along with rain gear if you want to spend time out on the deck of the boat.
Kayaking is one the best — and most scenic ways to get around.
Kayaking in Resurrection Bay.
Glacier Margaritas on the Wildlife Cruise in Kenai Fjords.
A look at the Tidewater Glaciers.
Visiting Kenai Fjords was a momentous occasion for us as it was our final (51st) “drive-to” park where we celebrated a decade of full-time RVing. Need we say more? Start planning your 2025 road trip! Check out the abundant resources on our website and YouTube channel for planning your RV road trip to Alaska.
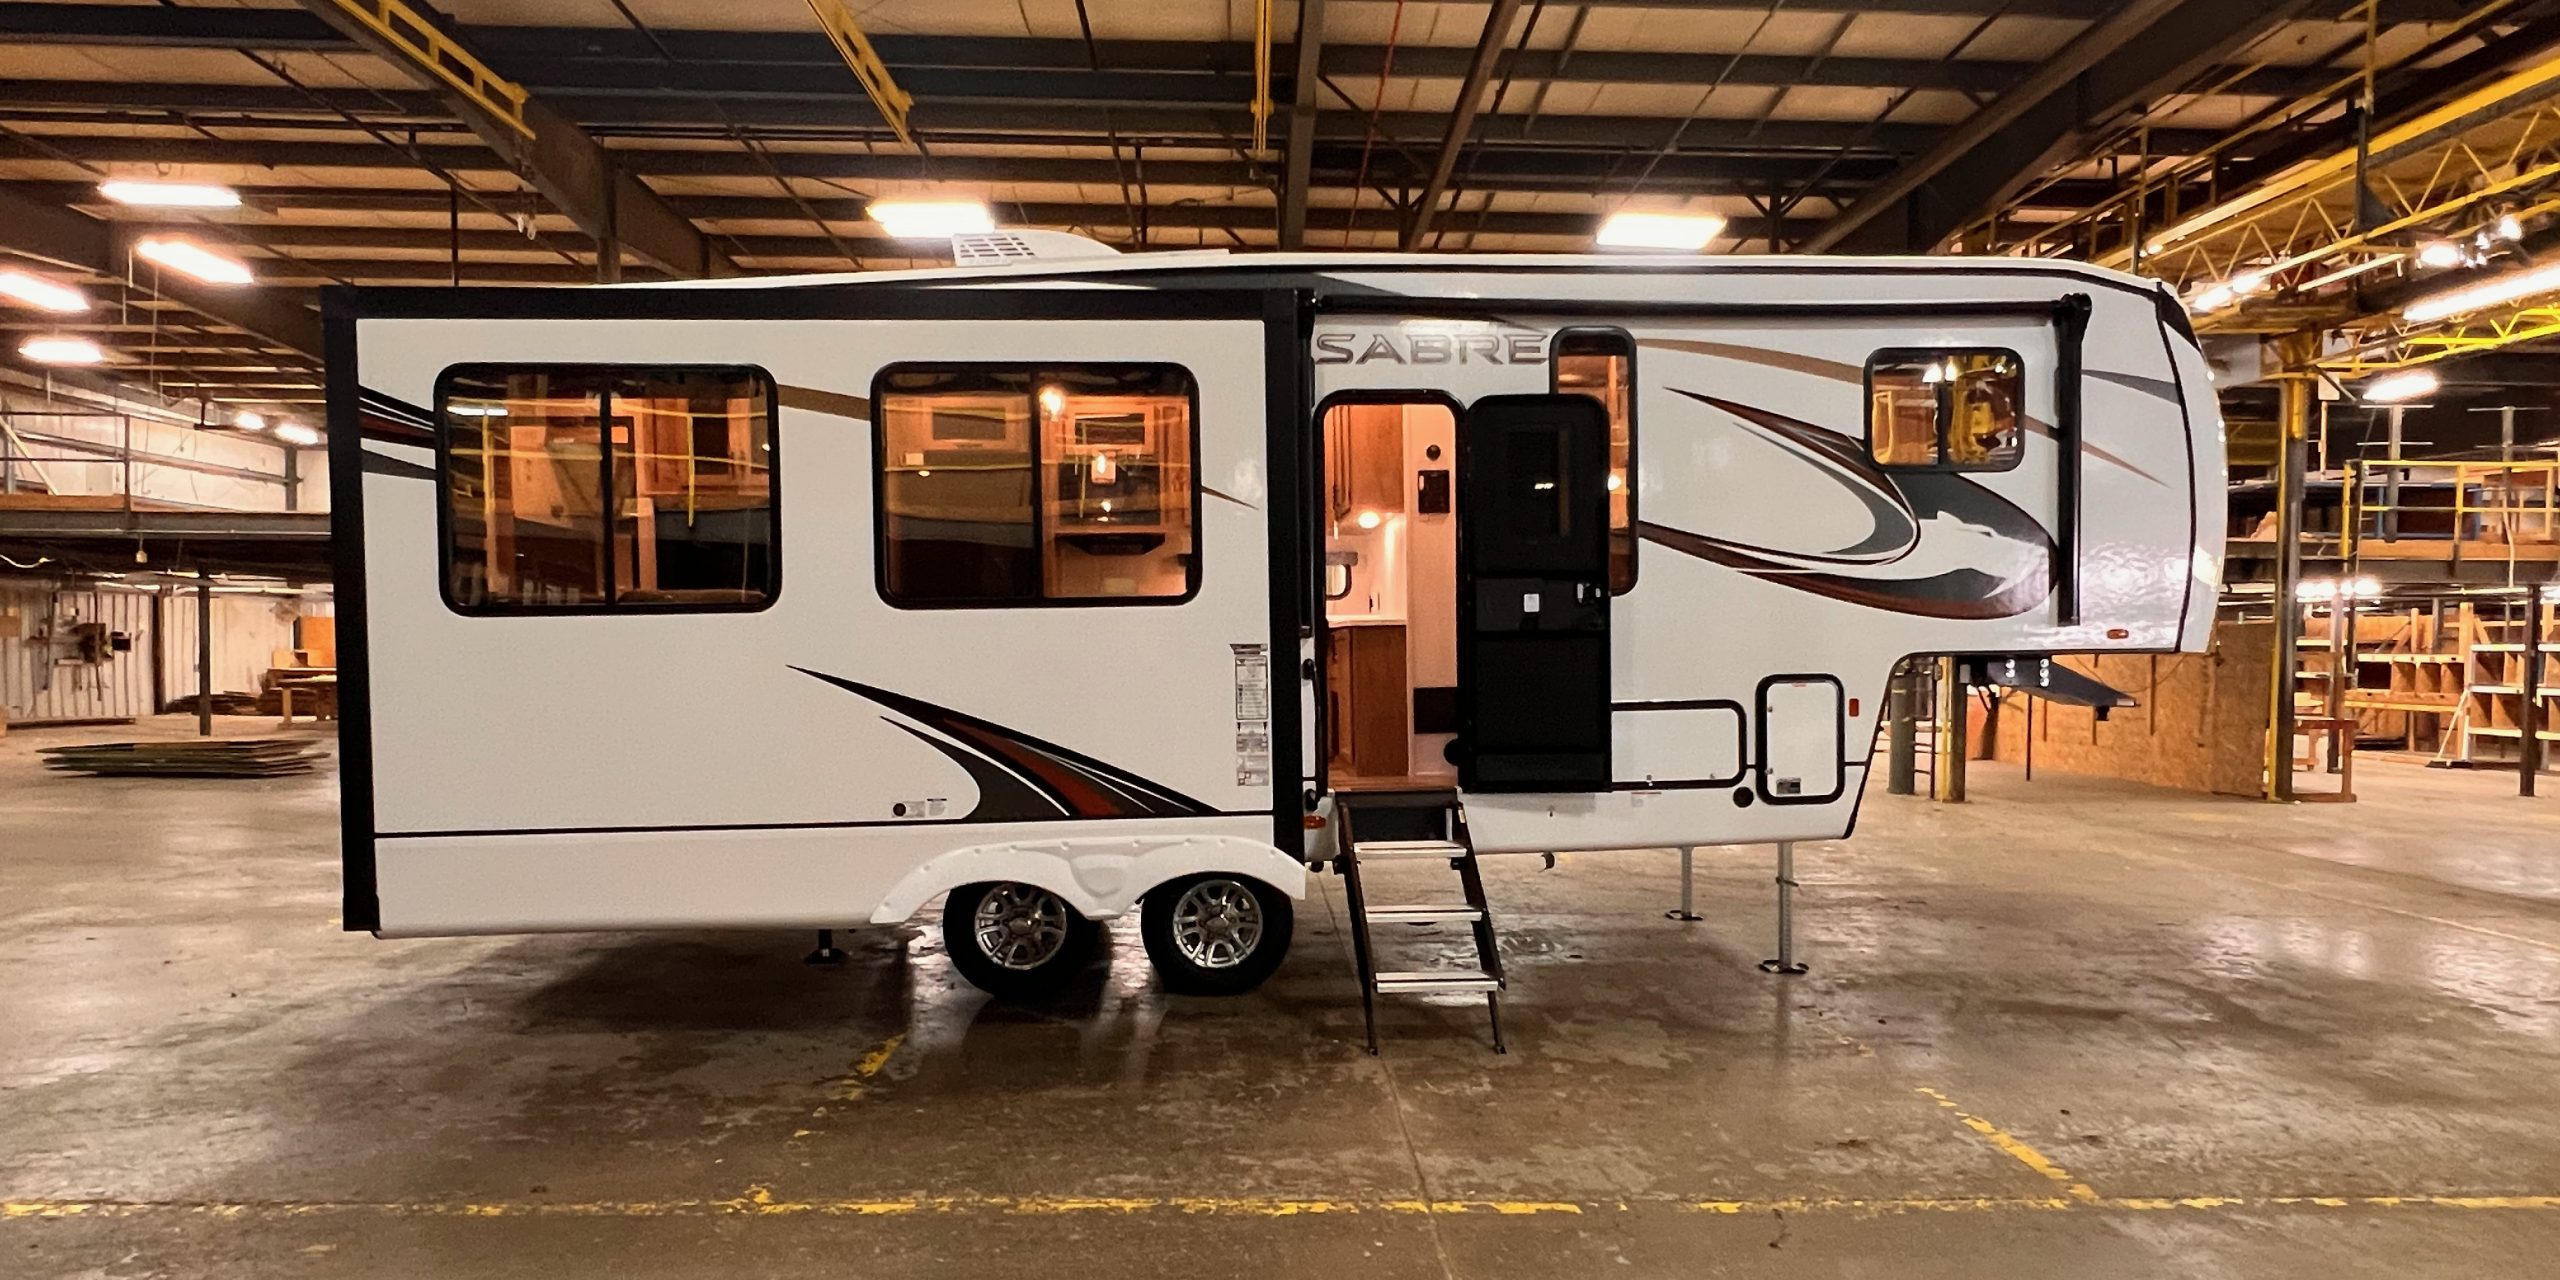
The Forest River Sabre 26BBR is a fifth wheel that contains a few really pleasant surprises. And while it would be accurate to define it as a bunkhouse, it’s definitely not the whole story. With an overall length under 30 feet and weighing fewer than 8,000 pounds, this model is intended to be compatible with a wider range of vehicles. The smallish nature of this fifth wheel not only makes it more manageable. It makes it more affordable. Even so, the versatility of the Forest River Sabre 26BBR may surprise you.
At a Glance: Sabre 26BBR
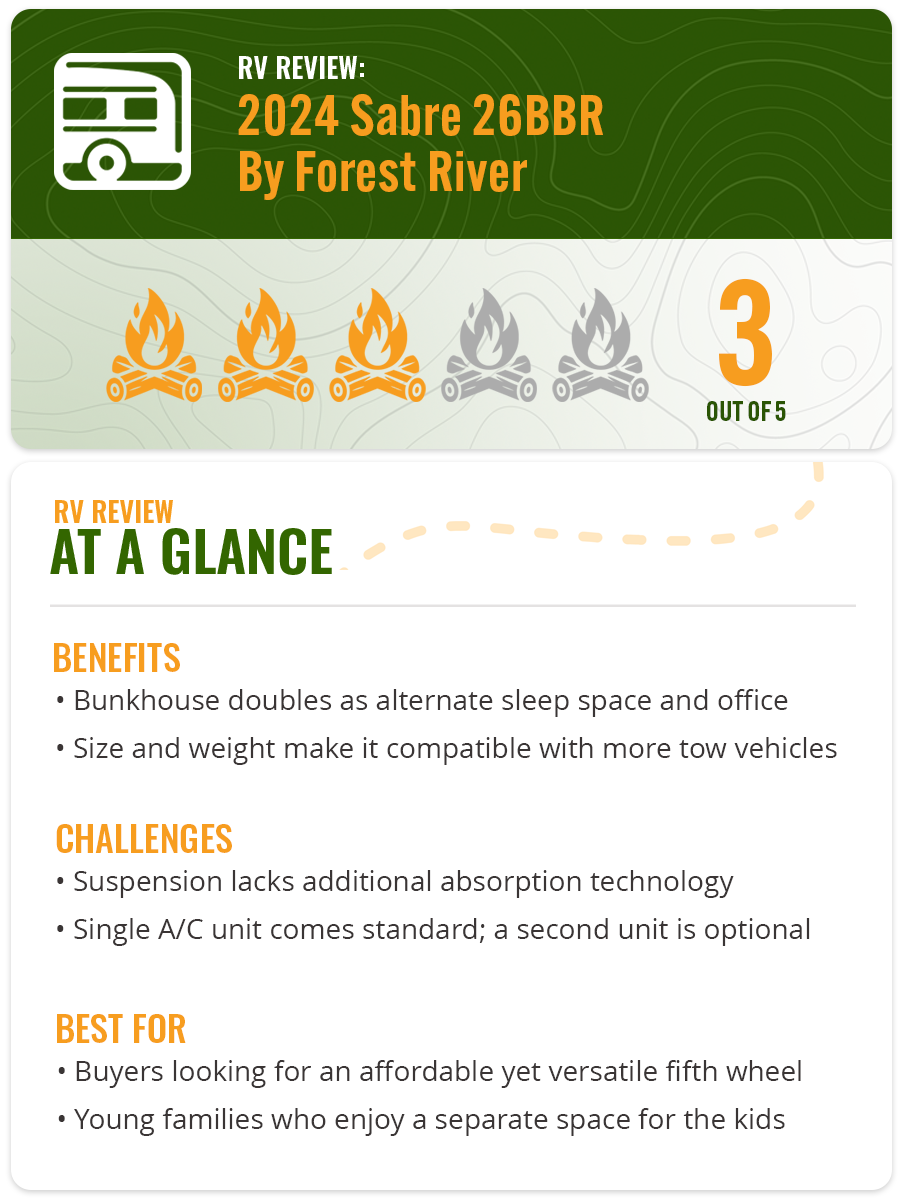
I gave the Sabre 26BBR a score of three, which is average. In looking at this, things like the unique bedroom earn bonus points, but the small oven and entry-level suspension bring the overall score down. There is a great bathroom with that pull-out storage though.
Check the Specs
Sleeping capacity: 7
Hitch weight: 1,565 pounds
UVW: 7,823 pounds
CCC: 2,177 pounds.
Exterior length: 29 feet 10 inches
Exterior height 13 feet 5 inches
Exterior width: 8 feet
Fresh/Gray/Black: 49/30/30 gallons
Propane: 2 x 30 pounds
Awning: 12 feet
Benefits
Bunkhouse doubles as alternate sleep space and office
Size and weight make it compatible with more tow vehicles
Challenges
Suspension lacks additional absorption technology
Single A/C unit comes standard; a second unit is optional
Best For
Buyers looking for an affordable yet versatile fifth wheel that doesn’t sacrifice quality for size
Young families who enjoy a separate space for the kids
The RV Trader Process
RV Trader asked RV shoppers what was most important to them in their RV buying process. Potential buyers — like you — helped us to identify a list of six key areas that camping and travel enthusiasts always look at when they’re searching for the perfect RV: sleeping space, bathroom, living area, four-season capabilities, and storage space.
The RV Trader team then got to work providing you with an honest and unbiased evaluations. And that’s where I come in. I’m Tony Barthel, RV expert and enthusiast. I provide an honest look at RVs from RV industry insider perspective. That way, you can learn the good, the bad, and the intriguing about any RVs I review. I inspect each RV with the buyer’s perspective at the forefront. And I always evaluate those six key areas that buyers have told us that they have in mind.
So, that said, let’s take a closer look at the 2024 Forest River Sabre 26BBR.
Sleeping Space
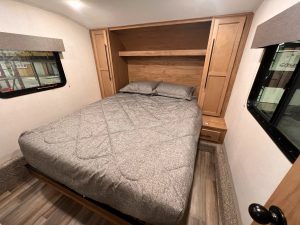
The master bedroom over the cap has a walkaround queen bed. The room itself connects with bathroom, which is also on the upper deck. But really, for sleeping space, one of the biggest surprises of this rig is the bunk room. It’s so much more than a bunkhouse model.
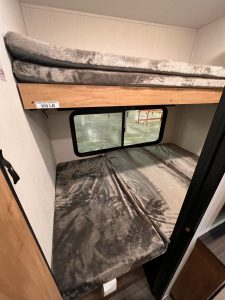
As you might expect the bunk room features a fold-down upper bunk which is rated for 300 pounds. Depending on how you have it all configured, there’s also a desk in here with a cubby on the sides which means you can use this as a private office as well.
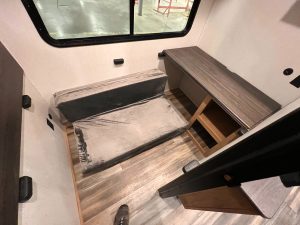
There’s a cushion that is the mattress for the middle bunk, and that cushion can be folded so that you now have a couch or futon of sorts. But flip the top of the desk over, drop down the panel from the back wall and now you have a second bunk. That cushion that was a couch is now the mattress for this second bunk.
But wait, there’s more. Up on the top bunk are two cushions and you can lay one of those on the floor so now you have a third bed. To be honest this space would be tight with three people here, but it’s certainly possible — more so if your occupants are smaller, younger human beings. But make no mistake: The fact that this is a whole separate room that can be an office or a bedroom or just a den is really unusual in a fifth wheel of this length.
Main bedroom of the Sabre 26BBR featuring a queen-size bed. Nice to have walkaround space.
Bunk room with the upper and mid-bunks deployed for sleeping in the Sabre 26BBR. If not deployed as a bunk room, it can also be configured for an excellent remote work space.
Here’s a look at the office configuration. A desk and a cushion that can fold to be a couch.
Bathroom
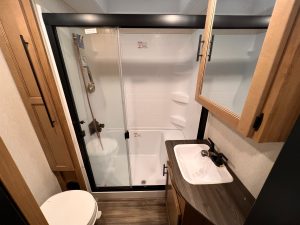
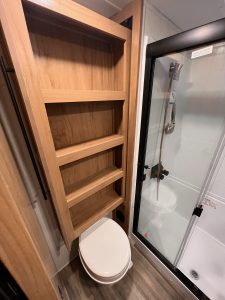
The bathroom, on the upper deck, has some nice surprises in it. There is a porcelain foot flush toilet (rather than plastic), and the cabinet on which the sink is placed leaves space for a small waste basket. A proper medicine cabinet is here as well.
Behind the toilet is a pull-out cabinet that really has a lot of shelf space and is quite a nice find here. There’s a high-performance vent fan overhead. and the shower in here is pretty large. It has a seat-step as well. There’s also an Oxygenics shower head, which is what many owners buy after realizing what comes with most RVs is lousy. No need to make that upgrade to this RV. The Sabre 26BBR did it already.
While we’re all in the bathroom, one more thing to note is that the controls for the tankless water heater are here, which seems convenient.
A large shower with a high-end shower head and step-seat. Take note of the depth of the medicine cabinet.
Always wonderfully convenient to have extra storage in the bathroom. You know, for towels and such.
Living Area
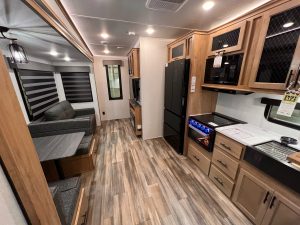
There is still a lot of living space in the Sabre 26BBR. The only slide in this trailer, featuring a rack-and-pinion slide mechanism, is on the main deck on the camp side. With a bunkhouse model, this makes so much sense because there are huge windows on the camp side of this rig in the slide as well as in the hallway up to the upper deck and in the door. If you do have littles, this allows you to keep an eye on them more easily.
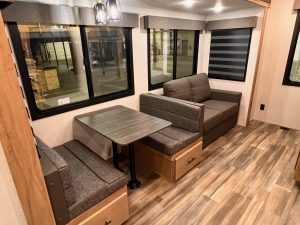
In the slide is a traditional booth-style dinette and a hide-a-bed sofa. The sofa faces a TV and fireplace. The dinette faces the kitchen.
Nice look at the main living space in the cabin.
A booth dinette and hide-a bed in the shadow of large windows that bring in lots of natural light (that you can, of course, block with shades if desired).
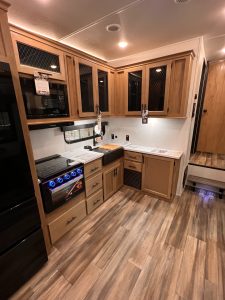
Kitchen
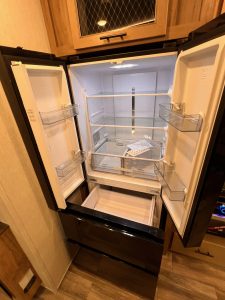
The kitchen is a large L-shaped affair with a counter that spans the width of the bulkhead at the front of this space and extends down to the edge of the fridge. That fridge is a 12-volt DC model with 16 cubic feet of storage, including a two-drawer freezer and side-by-side refrigerator. It’s pretty fancy.
The stove and oven are a new item in the RV industry featuring a convection air fryer oven and three-burner propane cook top. The oven operates on 120-vac, so shore power or a generator are needed to make it work. That’s true of the microwave above it but that’s common. This oven is something new.
The sink here is also a new item and features a number of drop-in, stainless-steel accessories. Those drop-in items include a strainer for washing veggies, a dish rack, and cutting board. There’s even a device to allow you to wash cups and glasses by inverting them and pressing down. (That’s pretty nifty.) The faucet on the sink is also pretty nice with a restaurant-style sprayer faucet on a flexible mount.
As you can see here, there’s good counter and storage in the L-shaped kitchen.
A new electric convection oven with three-burner propane stove.
A larger 16-cubic-foot fridge with two freezer drawers means you have lots of space to stock up.
Four-Season Capabilities
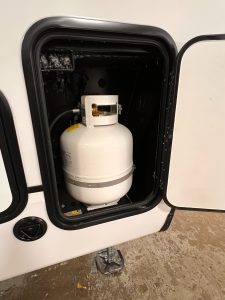
I was told that the Sabre 26BBR specifically provides space for 30-pound propane tanks in the compartments on the front of this rig. However, it includes 20-pound tanks. The reason is that 20-pound tanks are easier to deal with through exchanges all over. Those who wish to can upgrade to 30-pound tanks or remain with the convenience of these 20-pound models.
This trailer features a completely enclosed underbelly with heat provided by the furnace of the camper. Further, there are 12-volt heating pads on all the tanks. Another thing worth noting is that the gate valves for the holding tanks are all enclosed in that heated underbelly.
There is also a reflective material in the underbelly as well as on the ceiling and in the nose cap to keep outside temperatures outside. What this means is that more of the plumbing and holding tank system is protected in a heated space, so you have fewer issues with freezing. While there is no rating of temperature range for this fifth wheel, these features do stack the deck more in your favor in shoulder season (as things start to cool down).
Tinted Windows, Vacuum Lamination, and PVC Roofing
The windows have an amber tint to them from the outside which is a sun-reflecting coating on the glass to help keep the sun’s rays from heating things up inside. Another thing worth noting is that the walls of this fifth wheel including the walls of the slide boxes are all vacuum laminated. The significance of this is that vacuum lamination provides a more even and consistent glue distribution than being rolled through rollers as some companies do but is a costlier process, partially because the equipment is expensive.
They also use a PVC roof membrane which has the advantage of being repairable using simple PVC solvents available at local hardware stores. It also carries a lifetime guarantee, but it’s important to note that the seals around breaches in the roof for things like vents, antennas and the like are all things that should be inspected quarterly and are not covered under this guarantee.
These 20-pound propane tanks are easily swapped for 30-pound tanks if you desire.
Storage Space
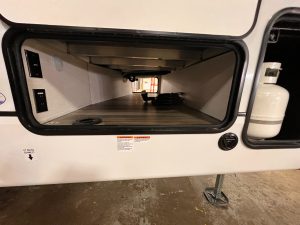
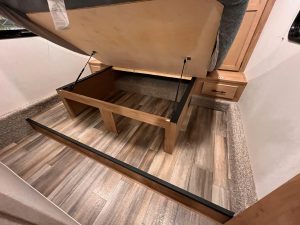
Like many fifth wheels, the Sabre 26BBR offers a commodious cargo bay at the front. But storage surprises are on the inside. There, you’ll find a slide-out set of shelves in the bathroom — a space where storage is often neglected. There is also decent storage in the kitchen area with plenty of cabinets and drawers. Lastly, the upstairs bedroom features a space for totes under the bed and good-sized closets plus drawers on either side of the bed, which lifts up to reveal more storage.
A look at the passthrough storage.
There’s hidden storage under the bed that can support things like totes.
Closing Notes on the Sabre 26BBR
Outside and Underside
While the nifty office/bedroom/bunk is certainly a distinguishing feature in this trailer, other things worth noting. And important ones start at the bottom. I often recommend shopping for an RV by starting at the underside and seeing how it’s made before ever stepping inside. In this case, the Sabre 26BBR uses a Norco frame. The significance of this is that it’s huck bolted together rather than welded. While I have no proof of this fact, the frame company claims that this is stronger and more consistent than welds.
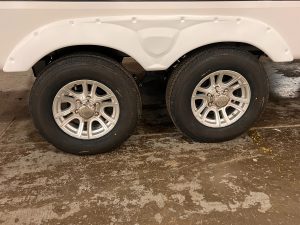
While I’m a fan of Goodyear Endurance tires and suspensions with additional absorption technologies, this model has neither. There is a rudimentary tire pressure system where the valve stems on the tires actually change the displayed color based on tire pressure, so you can easily see if they are properly inflated. (I’ll take it!)
Something you often find optional on RVs that is a standard feature here is a back-up camera which uses Bluetooth and the Lippert OneControl app. This is certainly an unexpected feature since it’s optional on most other RVs.
Entry-level tires and suspension in the Sabre 26BBR.
The valve stems of the Sabre 26BBR reflect tire pressure.
Extra Features and Value of the Sabre 26BBR
This fifth wheel packs a lot of value and features into a relatively small and affordable package. It would be worth noting that this unit does come with a single 15,000 BTU air conditioner but a second unit is available.
There’s also 100 watts of solar and Sabre has wired the trailer with a 30-amp charge controller so you could add more solar if you wanted. There is also wiring in place so that you could power some of the outlets through an inverter. Speaking of wiring there is a household outlet in the pass-through storage on the camp side with a port to run an extension cord to the outside. This would also be an ideal place for a Starlink router with that port being used for the cable to the dish.
This rig is also relatively light with the model I saw weighing 7,966 pounds dry. RV and truck makers might advertise certain types of trucks this would be compatible with, but I urge you to know how much cargo carrying capacity your truck has and be aware of pin weights on any fifth wheel. This is still a large trailer and controlling such a vehicle is paramount, especially since this is a model intended for families.
If the Sabre 26BBR is not on your radar, and you’re looking for an affordable fifth wheel with an innovative bunk space, this model certainly merits consideration. It has a lot of features and a unique design along with a strong value proposition that should put it on more shopping lists.
When it’s time to sell your RV, one of the biggest decisions you’ll face is whether to sell it privately or trade it in to a dealer. While going directly to a dealer might seem more convenient, you might be surprised that if you sell your RV online might be easier. And more profitable. Selling your RV on a marketplace like RV Trader can help you pocket significantly more money. In this post, we’ll break down the benefits of listing your RV on a private seller marketplace versus selling to a dealer — and show how private sellers more often come out ahead.
Why Do Dealers Pay Less?
To make the sale more lucrative, dealers are in the business of buying low and selling high. When you sell your RV to a dealer, they will offer a price that works for them. Their price will leave room for them to recondition the vehicle, market it, and sell it at a profit. *As a result, dealer offers are often 10–20 percent lower than the RV’s true market value.
While selling to a dealer can save time, it comes at a cost: less cash in your pocket.
The Benefits of Selling on a Marketplace
By listing your RV on an online marketplace such as RV Trader, you gain direct access to motivated buyers looking for an RV just like yours. When you sell your RV online, this enables you to command a higher price than you would receive from a dealer. Here are five reasons why selling your used RV on an online marketplace is the smarter choice to help you maximize your earnings.
1. Get Full Market Value
By using an online marketplace, you’re able to see the prices of comparable RVs. And you can set your own price accordingly. Since you’re selling directly to consumers, there’s no middleman marking up the price for resale. You get what your RV is worth. That price is often thousands more than what a dealer would offer.
2. Nationwide Audience
By listing with a top online marketplace, your listing will have access to a massive audience of interested buyers. That’s not only locally, but from all across the country. An expansive nationwide reach increases the chances of finding the right buyer who’s willing to pay top dollar for your RV.
3. Increased Buyer Demand
Demand for used RVs has skyrocketed, with more people turning to RVing for travel and adventure. By listing your RV online, you can take advantage of this high demand, ensuring more eyes on your listing and a better chance of selling at or near your asking price.
4. You Control the Sale
Selling privately through an online marketplace gives you complete control. You set the price, negotiate with potential buyers, and get to decide ultimately who gets to purchase your RV. Being in charge allows you to maximize your profits by cutting out dealer commissions and fees.
5. Trusted Marketplace
RV Trader is a leading trusted marketplace for buying and selling RVs. Listing your RV on our marketplace lends credibility to your sale, making buyers feel more confident in purchasing from a verified platform rather than a smaller, less secure option.
Real-Life Example: Dealer vs. Private Sale
Let’s take a real-world scenario. Imagine you have an RV worth $50,000 based on its market value. Here’s how the numbers break down:
Selling to a Dealer: The dealer might offer you $35,000 or $40,000, taking into account their need to make a profit after resale.
Selling on RV Trader: You can list your RV at its full market value of $50,000, or even slightly higher if there’s strong demand for your model – the profit is all yours.
In this scenario, by selling your RV privately online, you could make $10,000 to $15,000 more compared to a dealer trade-in.
Take High-Quality Photos: RV buyers want to see clear imagesof both the interior and exterior of your RV. Make sure to showcase your RV from all angles.
Write a Detailed Description: Include all relevant details such as the year, make, model, mileage, condition, and any upgrades or maintenance records.
Be Responsive to Inquiries: Promptly answer questions from potential buyers to keep the sales process moving smoothly.
Conclusion: More Money, More Control
Selling your RV privately through an online marketplace offers a significant financial advantage over selling to a dealer. By cutting out the middleman and tapping into a national network of buyers, you’re likely to earn thousands more for your RV, all while maintaining full control over the selling process.
Thor Motor Coach introduced new 2025 model year floorplans during America’s Largest RV Show in September 2024.
The first new floorplan is available for the company’s popular 2025 Pasadena Super-C motorhome, sleeping as many as six people. The 38XL plan features two restrooms on board – one in the community area, and another in the master suite featuring a shower. For ultimate relaxation, the master suite features an inclining king-size bed, closet, and a stackable washer and dryer. For guests traveling with you, there’s also a cab-over bunk sleeper and two bunk beds.
A kitchen featuring a full-sized refrigerator, microwave, cooktop, and sink is the centerpiece of the entertainment area. Travelers can unwind around the 78-inch dream dinette with optional fireplace or take in a movie or the latest television with theater seating.
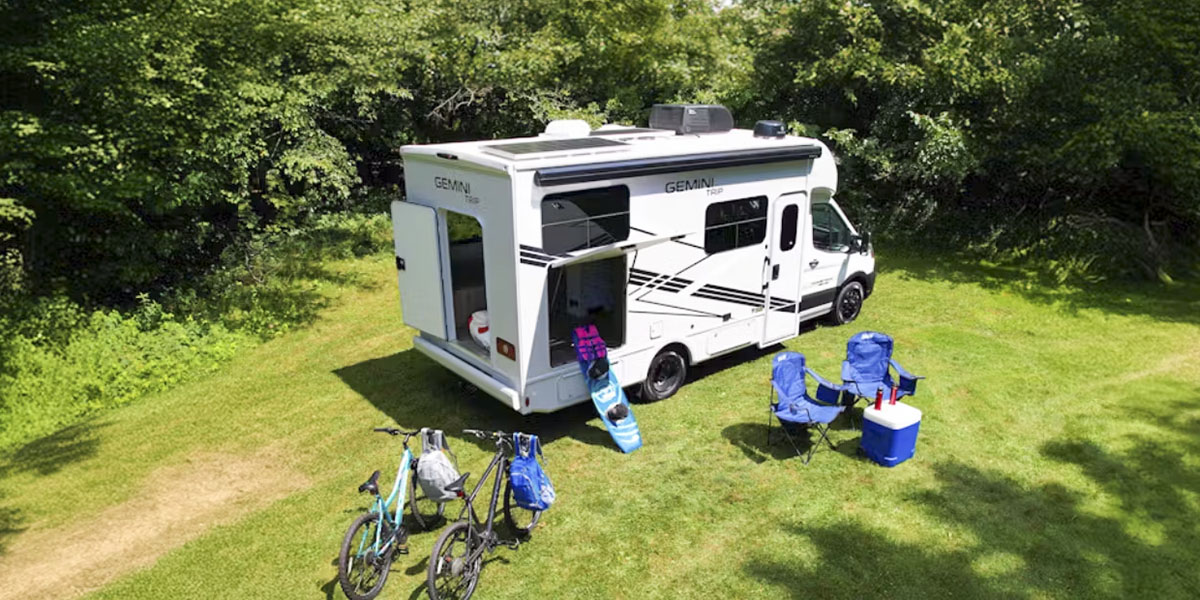
On the Gemini TRIP Class B+ motorhome, the new 22MT floorplan maximizes space in an easy-to-drive platform. In addition to adding more storage space and rear garage area, the floorplan offers a queen-size drop-down bunk and a private bathroom. Adding to the comfort is an Aqua-Hot hydronic heating system to ensure hot water at every stop. Powering everything is up to 600 watts of solar power, 200-amp hours of lithium battery power, and a four-kilowatt generator.
For those who are looking for simplicity, the Tranquility 24A and Tellaro 20H are built with van chassis without skimping on the amenities. The Tranquility is built on the Mercedes-Benz Sprinter 3500, offering all-wheel drive for easy travel over the road. Inside is a king-size bed, multiple table configurations, and a kitchen with portable cooktop, refrigerator, and microwave.
On the Tellaro 20H van, based on the RAM ProMaster 3500 XT, travelers can find an expanding sleeper sofa, pull-out bench, and portable cooktop that gives you the versatility to outfit the van the way you see fit. Combined with swiveling captain’s chairs, open living area, and restroom in the rear, the van is designed to maximize space on an easy-to-drive platform.
Although Thor has not provided a timeline for their new floorplans to arrive at dealers, all of their available models available to order can be browsed on their website.
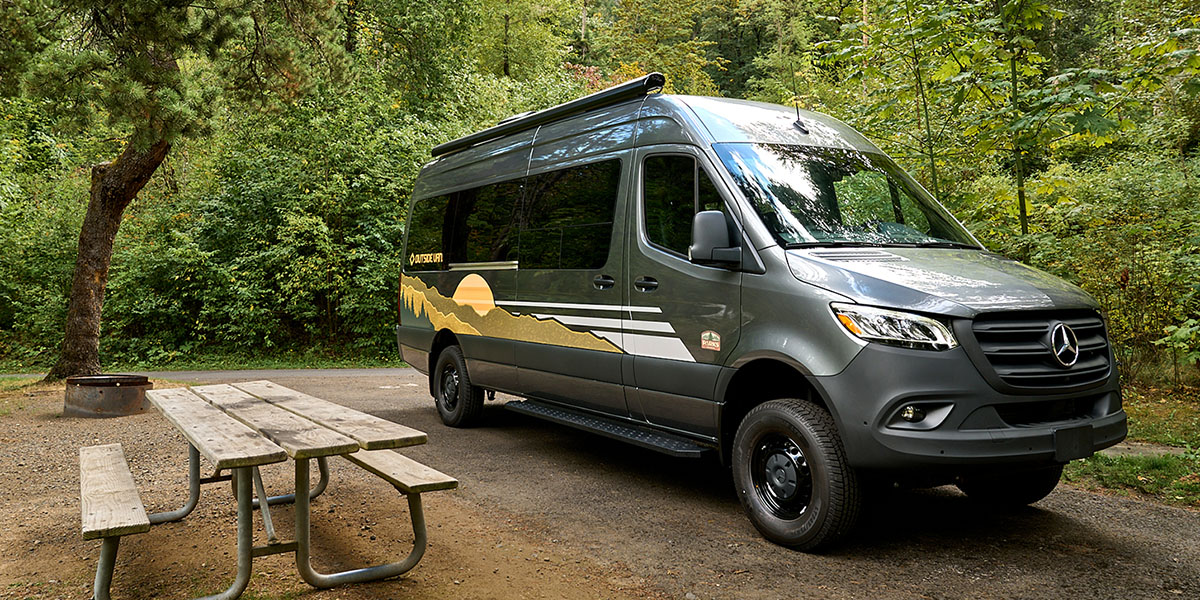
For some, traveling the country in an RV is about having the convenience of technology in an easy-to-drive package. Portland’s Outdoor Van is targeting this segment of the market for the 2025 model year with its new Parks van.
The Parks van is built around an all-wheel drive chassis and is designed to sleep up to two adults. It is designed for travelers who want to have all the travel convenience of a full-size RV, but in an maneuverable package that can fit in both campgrounds and national parks.
Inside the van is a full restroom and shower, including a “High Top” shower designed to accommodate taller travelers. The cassette-based toilet offers electric flushing so it can be used anytime, complete with a wash sink and vanity.
During the day, the van features a dinette area with two bench seats and a small table to share. At night, it is easily converted to a sleeping area for both travelers to enjoy the night.
An improvement from similar vans in the category, the Parks van features a full galley kitchen to allow RVers access to their food anywhere. The galley offers a refrigerator, cooktop, and stainless-steel sink. Storage cabinets keep everything well organized between stops.
The entire power system is managed by a smart control system powered by Garmin. On the control panel, travelers can see their current power usage, battery life, power inverter status, as well as manage fuses. The control panel is also the center for the entertainment system. For added convenience, a pre-drilled passthrough is available to install any roof-based communications devices.
Outside Van says they will debut their van at the Elkhart Dealer Open House but have not set a MSRP for the new package. It will be available through their nationwide dealer network by the beginning of October 2024.
RV life on the road is a proverbial roller coaster. One minute you’re enjoying a cup of morning coffee with a view of the crystal-clear waters of the Florida Keys. And the next minute? You’re drying the floor with beach towels, wondering where in the world the water is coming from. Sounds far-fetched, but that’s what happened in my first RV. Even with a major RV water damage scare like that, my love for this life is still as strong as ever. My wife and I are now well into year six of RV life, and we are on our fourth rig.
For most situations, we have found that with some know-how and a bit of elbow grease, you can tackle many of these problems head-on and keep your RV in tip-top shape. But we have also realized that in some cases, getting a professional is the best option for the job.
What can you do yourself, and how do you tell when it’s time to call for help? Here’s a guide to dealing with mold and water damage in your RV.
Recognizing the Signs of Water Damage
First comes water. Then comes damage. Then comes mold throughout the RV carriage. If you went back and sang that like I did, then you are my kind of people. In all seriousness though, that is the essential order for this process, so we start with the water.
Water damage can sneak up on you if you’re not paying close attention. What starts as a small leak can quickly turn into a bigger problem, especially if it goes unnoticed. Here are some common signs:
Common Signs of RV Water Damage
Discoloration or Stains: Water stains on the ceiling, walls, or floors are often the first indicators of a leak. If you notice dark or discolored patches, it’s time to investigate.
Soft Spots: Walk around your RV and press on the walls, floor, and ceiling. If you find any soft or spongy areas, this could indicate water damage beneath the surface.
Musty Odor: Mold loves damp, dark spaces. If you detect a musty smell, it’s a strong sign that there’s moisture trapped somewhere, and mold could already be taking hold.
Peeling Wallpaper or Paint: Water can cause adhesives to break down, leading to peeling wallpaper or bubbling paint. If you see these signs, there’s likely moisture behind the scenes.
Warped or Buckled Materials: Wood or laminate flooring that is buckling, or walls that appear warped, are telltale signs that water has been pooling somewhere it shouldn’t.
Steps to Address RV Water Damage
Once you’ve identified the signs of water damage, it’s crucial to act quickly to prevent further issues, including the growth of mold. And trust me when I say they usually aren’t as easy to spot as a beach towel’s worth of water on the floor.
Step 1: Find and Stop the Source of the Leak
Before you can begin repairing the damage, you need to stop more water from entering your RV. This could be from any number of sources or weak spots, but three of the more common culprits are a leaking roof, windows, or even plumbing. Inspect the areas where you noticed damage and trace the water back to its source.
In our beach towel situation, we couldn’t find the leak at all, and that’s when we cut our losses and took it to the professionals. We were lucky enough to have the RV under warranty and they were eventually able to work on it. In our third RV we had a smaller leak from the window and all it needed was a bigger, thicker, seal around the window frame.
Tip: Don’t forget to check around slide-outs, vents, and any other areas where the RV’s exterior is interrupted by seams or openings. These spots are notorious for letting water in.
Step 2: Dry Out the Affected Area
Once you’ve stopped the leak, your next step is to dry out the affected area as thoroughly as possible. Mold can begin to grow in as little as 24 to 48 hours, so time is of the essence.
Tip: Use fans, a dehumidifier, and open windows and doors to get as much airflow as possible. If the weather is dry, this can be incredibly effective. If you have a chance to get to the west, where the climate is much drier, it can be a huge help. For more severe cases, you may need to use a wet/dry vacuum to remove standing water.
Step 3: Remove Damaged Materials
Water damage can weaken materials like wood, insulation, and even drywall. If any part of your RV shows signs of rot, warping, or mold, it’s essential to remove and replace these materials.
Tip: Be thorough in your inspection and removal. Mold can spread quickly, and if any affected material is left behind, the problem could return. Use mold-resistant replacement material where possible to prevent future issues.
Dealing with Mold: A Step-by-Step Guide
While we were lucky with the mold situation in our RV. it was under warranty and was taken care of by professionals – I’ve had to deal with mold in buildings, and let me tell you, it is not a fun or healthy experience. So, if you discover mold in your RV, it’s important to handle it carefully to avoid spreading spores and worsening the problem.
Step 1: Wear Protective Gear
Mold can be harmful to your health, so before you begin, make sure you’re wearing gloves, a mask, and protective eyewear. This will help prevent inhalation of mold spores and skin contact. If you are like me and mold can have a truly negative experience on your health or breathing, then I highly suggest hiring a professional to work on the situation.
Your health is always worth more than trying to save a few bucks with a DIY!
Step 2: Isolate the Area
If you are moving forward with a DIY, then the first step after putting on all your protective gear, is to try and seal off the area where the mold is located. Remember to close doors, cover vents, and tape plastic sheeting over doorways to contain any spores that might get kicked up during cleaning. This way the spores don’t spread to other parts of the RV.
Step 3: Clean the Mold
Sometimes a mixture of water and detergent as well as a commercial mold cleaner to scrub the affected area can go a long way. Another option to try is a solution of water and bleach (1 cup of bleach to 1 gallon of water) — but be sure to ventilate the area well.
Tip: Avoid using bleach on porous surfaces like wood or drywall, as it doesn’t always penetrate deeply enough to kill all the mold. For these situations, try using a cleaner specifically designed for these materials.
Step 4: Prevent Future Mold Growth
Once the mold is cleaned, take steps to prevent it from returning. Ensure the area is thoroughly dried and consider applying a mold-resistant coating to surfaces prone to moisture. Regularly inspect your RV for any signs of new leaks or dampness and address these issues immediately.
Restoring or Replacing Damaged Materials: Bringing Your RV Back to Life
After tackling water damage and mold, the next step is to restore or replace the affected areas to get your RV back in shape. This can seem overwhelming, but breaking it down into manageable steps makes it doable.
Assess and Remove Damaged Materials: Start by thoroughly inspecting your RV to determine what needs to go — soft spots in the floor, warped walls, or swollen cabinetry. Carefully remove any damaged materials, being sure to cut away all affected areas to prevent future issues.
Replace Subfloor and Wall Structures: If the subfloor or wall framing is compromised, replace these with new materials. Use sturdy plywood for subfloors and fresh wood for framing, ensuring everything is level and secure. Don’t forget to replace any damaged insulation with a mold-resistant option.
Rebuild and Refinish: Once the structural repairs are complete, rebuild and refinish your RV’s interior:
• Walls: Install new wall panels, seal seams, and add a fresh coat of paint or wallpaper. • Flooring: Lay down new vinyl, laminate, or carpet, leaving room for expansion and finishing with trim. • Cabinetry: Refinish or replace cabinets, making sure they’re securely installed.
Final Touches: Finish by adding trim, painting, and decorating to make your RV feel like home again. With some effort, your RV will be ready for more adventures, looking and feeling as good as new
Staying Ahead of RV Water Damage
Dealing with water damage and mold in an RV is no fun, but with regular inspections and quick action, you can stay ahead of these issues. My wife and I have learned from experience that catching a leak early can save you a lot of headaches (and money) down the road. By following these steps and keeping a close eye on your RV, you can keep your home on wheels in great shape and focus on enjoying the adventures that lie ahead. Safe travels!
If you’re here, I’m going to assume you are looking to finally pull the trigger on that RV renovation. You know, the one you’ve been putting off. And, since you’re here, I’m also going to assume that you have a burning question about your RV renovation budget: how much should this reno cost?
For those in the starting phase and looking for ideas, you may want to check out my blog on popular RV renovations ideas. If you’re past that phase (or you just finished reading that blog), then it’s time to figure out the numbers. That’s where I can help. As fun and rewarding as transforming your RV into your dream home on wheels can be, when the costs start to add up, those dreams can turn into nightmares. So, to help you avoid some of the pitfalls, here’s a guide to help you set a realistic budget for your RV renovation.
Step 1: Determine Your Priorities
Before you start crunching numbers on your RV renovation budget, take some time to think about what’s most important to you in your RV. Are you focused on functionality, comfort, aesthetics, or maybe a combination of all three? By identifying your priorities, you can allocate your budget to the areas that matter most to you.
Consider these questions:
Which areas of your RV need the most attention? (e.g., flooring, kitchen, bathroom)
What are the “must-haves” versus the “nice-to-haves”?
Are you planning any major structural changes, or are you mostly focused on cosmetic upgrades?
Once you’ve got your priorities straight, you can move on to the next step.
Step 2: Research Costs and Gather Estimates
The next step is to research the costs associated with your renovation projects. This includes everything from materials and tools to professional labor if you’re not planning to DIY the entire project. For example, if you’re upgrading your flooring, you’ll want to look at the cost of materials like vinyl planks or laminate, as well as any tools you might need for installation. If you’re considering a solar power upgrade, you’ll need to factor in the cost of panels, batteries, and installation.
DIY Tip: For a more accurate estimate and better pricing, consider visiting various local home-improvement stores and browsing online retailers. Don’t forget to include shipping costs for larger items that aren’t available locally. You can also look on Facebook Marketplace or some similar app to find products that may be in decent condition at a discounted price.
Step 3: Set a Realistic Budget
Now that you have a good idea of what each part of your renovation will cost, it’s time to set a budget. Be realistic about what you can afford and make sure to include a buffer for unexpected expenses – because trust me, there will be some. A good rule of thumb is to set aside an extra 15 to 20 percent of your total budget for those unforeseen costs that always seem to pop up during a renovation.
Sample budget breakdown (not actual prices)
Flooring: $1,000 (including materials and tools)
Kitchen Remodel: $1,500 (including appliances, cabinets, and paint)
Bathroom Upgrades: $500 (including fixtures, paint, and accessories)
Solar Power Installation: $2,000 (including panels, batteries, and installation)
Miscellaneous: $500 (for smaller projects like painting and decor)
20% Buffer: $1,100 (for unexpected costs)
Total Budget: $6,600
Step 4: Consider Financing Options
If your renovation plans exceed your current financial liquidity, you might want to explore financing options. Some RV owners take out personal loans or use a credit card with an introductory zero-percent interest period to finance their renovations. This is a great tool if you know that you can pay off the entirety of the project in the allotted time for zero interest. A quick internet search for the best zero-percent credit cards can get you upwards of 12 months interest free. If you calculate your monthly payment for the total over that timeframe, and realize that you won’t be able to finish before interest starts accruing, then just be sure to factor in the cost of interest to ensure that your monthly payments fit comfortably within your budget.
Financing Tip: If you’re planning to sell your RV in the future, consider how much your renovations will increase – or decrease – its resale value. This can help you determine whether financing your renovation is a sound investment.
Step 5: Track Your Spending
Once you’ve set your budget and started your renovation, it’s crucial to track your spending to ensure you’re staying within range. Keep all your receipts, and regularly update a spreadsheet or use a budgeting app to monitor your expenses. This will help you identify any areas where you might be overspending and allow you to make adjustments as needed.
Tracking Tip: Break down your spending by category (e.g., flooring, kitchen, bathroom) to see exactly where your money is going. This can also help you adjust your budget mid-project if you need to allocate more funds to a particular area.
Step 6: Be Prepared to Make Adjustments
Renovations rarely go exactly as planned, so be prepared to make adjustments along the way. If you find that you’re overspending in one area, consider scaling back in another. For example, if your kitchen remodel is costing more than expected, you might decide to delay the installation of that solar power system until a later date.
Adjustment Tip: Prioritize the projects that are most important to you and be flexible with the rest. Remember, you can always tackle additional upgrades down the road.
Renovating Your RV Without Breaking the Bank
Setting an RV renovation budget is a crucial step that will help you turn your dream home on wheels into a reality without emptying your bank account. By determining your priorities, researching costs, setting a realistic budget, knowing your skill level, and tracking your spending, you can keep your renovation on track and enjoy the process. Whether you’re making small changes or tackling major upgrades, careful budgeting will ensure that your RV renovation is a success. Happy renovating, and may your travels be filled with adventure and comfort!
For more inspiration and tips on RV renovations, check out my story on popular RV renovation projects. It’s packed with ideas that can help you transform your RV into the cozy, stylish retreat you’ve always wanted. Looking for more advice? Check out the RV 101 section on the RVTrader blog.


 I gave the Sabre 26BBR a score of three, which is average. In looking at this, things like the unique bedroom earn bonus points, but the small oven and entry-level suspension bring the overall score down. There is a great bathroom with that pull-out storage though.