Blog

  • 6 Benefits of Buying a Used RV

    6 Benefits of Buying a Used RV

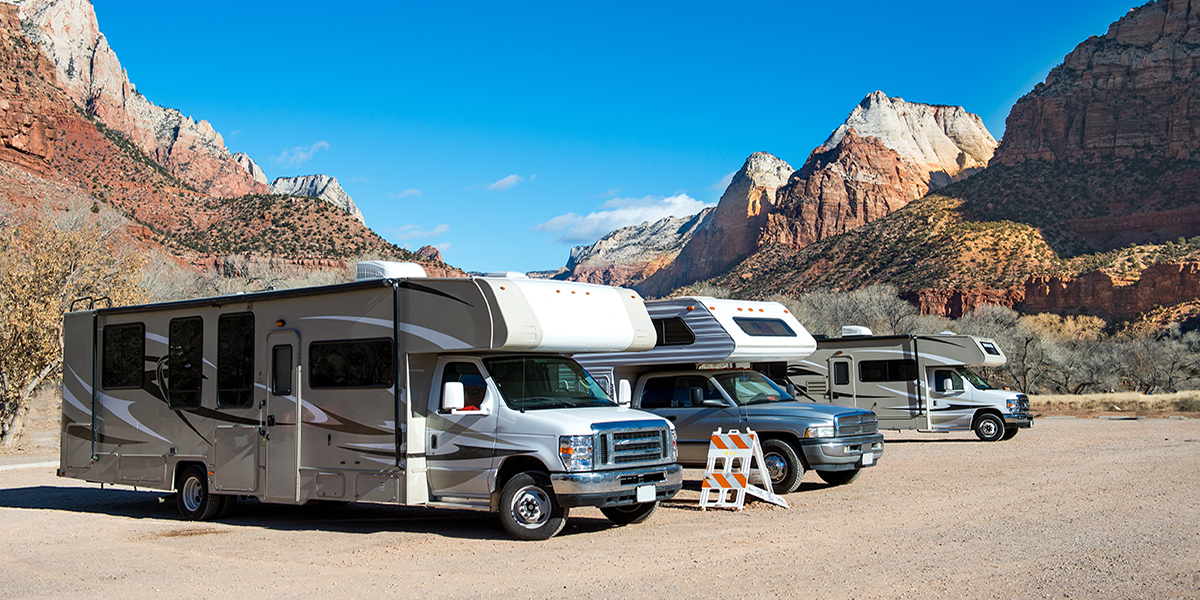
    Deciding to purchase an RV can raise many questions. How much time will I spend in my RV? What class should I buy? Should I buy it new or used? While it’s easy to get lured in by the sparkle of a brand-new camper, don’t rule out a pre-owned unit especially if you plan on performing RV renovations. Before you begin your search, check out RV Trader’s six benefits of buying a used RV.

    1. Save Money Upfront

    The biggest benefit of buying a used RV is the savings. With a little patience, and careful research, you can find a used RV model that fits your needs at a lower cost than buying new. An older model even has lower insurance costs. The best part is that you can put the money you saved into your renovation budget.

    2. Less Depreciation

    Much like cars, purchasing a brand-new RV means losing value shortly after you drive off the lot. RVs can depreciate up to 20% during the first year or two of ownership. If you buy new and plan to sell your unit in a few years, you more than likely won’t make back the money you initially spent. Buying used, then, is often the best investment for flipping an RV, whether you’re renovating it for resale or for your own long-term use.

    3. Greater Inventory Options

    When searching for pre-owned units, you will come across lots of RVs from the past few years. And these aren’t only vintage models. Many owners trade-in or sell their campers after the first couple of years of ownership, creating a marketplace of recently manufactured RVs available for sale at a lower price, thanks to depreciation.

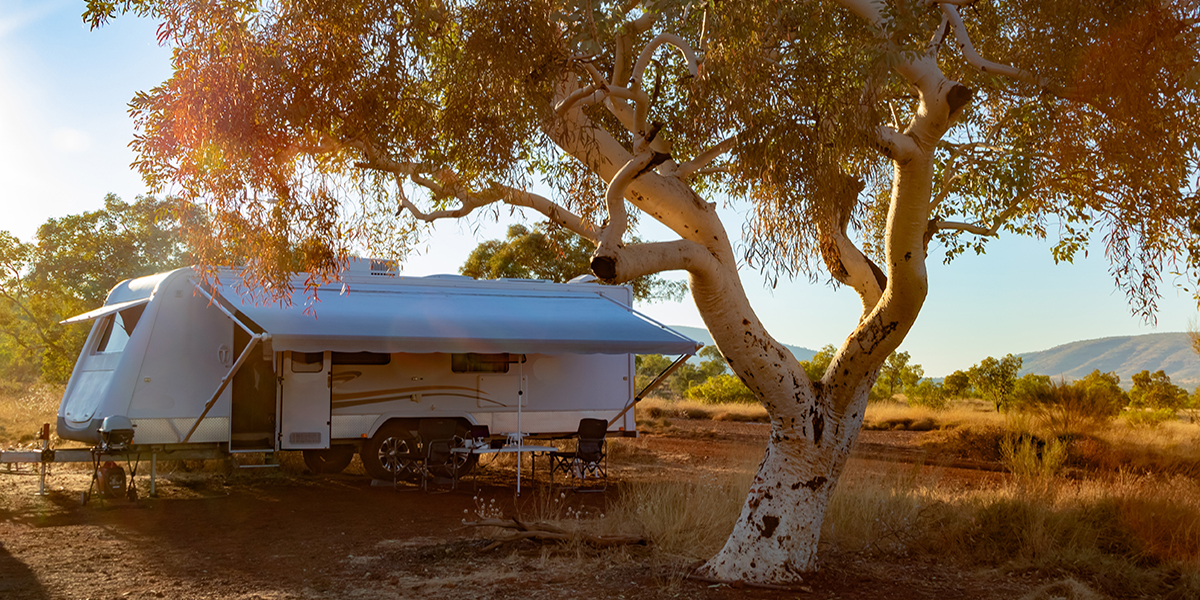
    4. More Design Variety

    RVs vary in size, weight, and floor plans. When you look to buy outside of new models, you’ll see that older models can differ in these aspects. Since manufacturers create floor plans that cater to each type of RV owner, browse different layouts to find one that meets your needs. Shop used RVs from recent models, within the last three years, to a retro camper with a nostalgic floor plan and design.

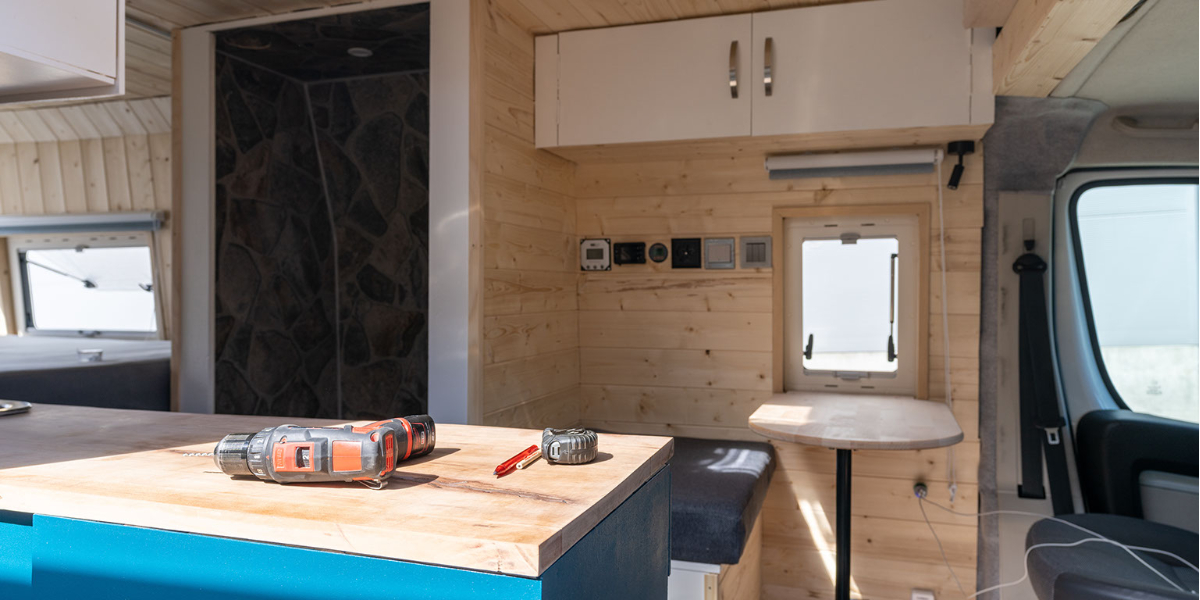
    5. DIY Customizations

    Buying a used RV is a chance to design and remodel your unit exactly how you want it. Whether you want to repaint, add new flooring and fixtures, or completely gut it, a used RV gives you the opportunity to start fresh and make your camper completely one of a kind. With an older RV, you can overlook any cosmetic wear-and-tear and start seeing the unit as your next DIY project.

    6. Increased Resale Value

    If you don’t have long-term plans for your RV, keep in mind the potential resale value of your unit. If you avoid early depreciation by buying a pre-owned unit, then you should be able to sell it a few years later for close to what you originally paid (assuming it’s been well-maintained and depending on market conditions). However, if you’ve renovated the RV, you may be able to sell it for more than you initially paid plus the upgrades, earning you a tidy profit.

    If you’re stuck deciding whether to purchase a new or used RV, consider how you plan to use the unit. Used offers benefits for both long- and short-term ownership even after you renovate. Once you decide to buy used, it’s time to learn everything you need to know about renovations, which you can find on RV Trader’s RV Renovations resource page, with in-depth articles, checklists, and videos. And you can begin browsing pre-owned units at RVTrader.com, the premier virtual marketplace for buying recreational vehicles.

  • 7 Things to Look for When Buying an RV Fixer Upper

    7 Things to Look for When Buying an RV Fixer Upper

    Renovating RVs is a huge trend right now, with people upgrading RVs for their own use or flipping them for resale. Whether you’re renovating an RV to enjoy as a mobile getaway for yourself, or it’s a side business to generate some extra spending money, you want to make sure that you buy the used RV that’s right for you. Here are seven things to look for when buying an RV fixer upper.

    1. A Fair Price

    When considering a fair price for a fixer upper RV, keep in mind all the tools, materials, and time that will go into the repairs and upgrades. After buying the RV, you still need to have leftover budget to actually do the renovation! Luckily, you can search online marketplaces like RVTrader.com to get an idea of the prices for which similar units are being sold.

    2. A Clear Title

    You’ll always get a title when buying from a dealer, but some private sellers may not have a title for a used RV, especially if it’s a fixer upper that’s particularly old, damaged, or even inoperable. RVs like these can often tempt renovators with cheap prices, but we strongly recommend you stay away from RVs without a clear title. Some states have processes to let you claim a title-less RV, but it can be complicated and is not guaranteed to work. Stick to buying from sellers who have a clear title.

    3. An In-Person Inspection

    When shopping on RV Trader, listings will have plenty of photos and videos of the for-sale listing. If you’re buying a new unit, or even a road-ready used RV, that visual evidence may give you all the confidence you need to buy the RV. However, if you’re buying a fixer upper that is going to need some work to give it new life, you really need to inspect the RV in-person. Before buying a fixer upper RV, you need to evaluate the issues you think you can fix or upgrade, the repairs and replacements that are too big to be worth the investment, and the potential hidden problems that could unexpectedly derail a renovation. To get that level of detail, especially to find those hidden issues, you really need the opportunity to inspect the RV in-person.

    Pro Tip: If you may be unavailable to inspect an RV, or don’t feel qualified to evaluate a rig yourself, look for listings on RVTrader.com that are marked with an inspection badge. These are units that are part of RV Trader Assurance, powered by Lemon Squad, which have already been inspected by an RV professional. On these listings, you can easily request the inspection report, which will include a comprehensive examination of the internal and external structure, complete mechanical inspection, road test, appliance inspection, and over 40 high-quality photos.

    4. Water Damage

    Water damage is one key issue to look for while inspecting a used RV, which can damage everything from cabinets and furnishings to the ceiling, walls, and floor. Rot, rust, and mold may not be immediately apparent, but can be expensive and time-consuming to remove and repair, so keep a critical eye out for spots, discoloration, bubbles in paneling, unpleasant smells, and other signs of water damage.

    5. Good Bones

    As someone looking to renovate a used RV, you’re likely prepared to clean up its appearance and basic functionality with new paint, furnishings, appliances, and even tires. Maybe you have the skills needed to make engine, electric, and plumbing repairs. But are you ready to replace the RV frame, ceiling, walls, floors, axles, and so on? The fine line between fixer upper and lost cause is often the condition of the most basic components of the vehicle. At a minimum when inspecting the RV, you need to make sure that the unit has good bones that provide a strong foundation to begin your renovation project.

    6. How to Contact the Seller

    In most markets, there are more interested buyers than there are RVs for-sale, which means that sellers are receiving multiple inquiries every day and will likely sell the unit very quickly. If you find the perfect fixer upper, you need to know how to immediately contact them so you can stop by to inspect the used RV and maybe even write them a check that very day. Review the listing to find the seller’s contact information, including their phone number, address, email, and/or available hours.

    7. Transportation Options

    If you purchase an RV, do you know how to get it back to your driveway? If the fixer upper isn’t road-worthy, you’ll need to find a way to haul it or hire an auto delivery service. If the used RV can be safely driven, you’ll need to get your personal vehicle back home, either by having a friend drive it or hauling it behind the RV. You can also ask the seller if they provide delivery service that will bring the RV right to you.


    If you’re hopping onto the RV renovation trend, there are some key things to look for when shopping for fixer upper RVs. For similar advice, review the RV Renovations resource page, which offers a series of detailed articles, checklists, and videos. And if you’re ready to start shopping for a used RV, check out the nationwide inventory available on RVTrader.com.

  • 8 RV Renovation Tips for Beginners

    8 RV Renovation Tips for Beginners

    You want to renovate your RV, but you don’t know where to start, right? Customizing and fixing up an RV offers nearly endless options, which may seem intimidating at first. The end result will be well-worth it, but without preparation, the remodel process can be full of missteps and unforeseen expenses. Before you start picking out paint samples, get a plan in place with RV Trader’s eight renovation tips for beginners.

    1. Know Your Budget

    Start your remodel journey by planning your finances. Decide how much you’re willing to spend on this process. While it’s always efficient to use a professional contractor, doing the renovations yourself keeps you in control of your money since you decide which supplies to use and you won’t have to pay yourself for labor costs. Don’t forget to leave room in your budget for any unexpected costs along the way. And if you don’t have your entire budget up front, don’t worry. The long renovation process will likely give you time to continue saving for each expenditure along the way.

    2. Assess the Condition of Your RV

    Before you start planning your dream redesign, make a quick assessment of your camper. If you’re purchasing an RV specifically to renovate, check the condition of the appliances, windows, tires, water systems, and electrical. You’ll also want to keep an eye out for engine problems, water damage, and frame damage. If you find an issue with your camper after you buy it, get it fixed before starting your renovation.

    3. Decide What You Can DIY

    Renovations can range anywhere from a complete gut job to simpler aesthetic touch ups, requiring different resources and skill levels. If you decide to go the DIY route and not use a professional, it’s best to do a renovation that allows you to work with your RV’s existing structural, electrical, plumbing, and mechanical systems. You know how much you can take on. If a project becomes too much, reach out for help.

    4. Have a Realistic Timeline

    Remodeling your camper will likely take longer than you expect. Knowing and preparing for this in advance can help you avoid future frustrations. Replacing light fixtures can take a few hours, but painting, building shelves and tables, and installing new appliances can be much more time consuming. If you live in your RV full-time, make a plan for where you’ll stay during parts of your renovation. Remember, you can’t tackle all of your ideas at the same time, so keep in mind how long each project will take before you start a new one.

    5. Figure Out Where to Shop

    Shopping doesn’t have to break the bank, especially when you plan ahead. Define your decorating style, whether it’s modern, rustic, or industrial, and shop retailers that have the widest selection. Shopping at just a few intentionally selected stores, instead of running around to a bunch, will save time that can be spent on designing and renovating. Accessories and fixtures specifically for RVs can cost more than they do for homes, so shop around and price compare to get the quality and style you want at a lower price. Popular household furnishing stores also have lightweight furniture that’s perfect for RVs. 

    6. Make a List of What You’ll Need

    As you plan your projects, make a list of the tools, fabrics, paints, and furnishings you’ll need for your remodel and the quantity you’ll need. Power tools like drill sets can add to your budget, so rent or borrow them when possible. Buy extra renovation essentials like painter’s tape, paper or plastic covers, and sanding paper. These can go quicker than you think so it’s always best to have more on hand.

    7. Measure Everything

    Measuring your RV is a critical step in determining the full scope of your project. Use a measuring tape and go room to room to get the dimensions of your camper. Measure once then do it again to make sure all the sizing is correct before you buy anything. Make a note of where switches and outlets are located to avoid blocking them with any new furniture. Don’t forget to also measure the height and width of your RV door to ensure that you can fit your purchases through the opening.

    8. Connect with Other RV Renovators

    Online forums and Facebook groups are a great way to connect with other people who have renovated their campers. Share your remodeling projects, ask for advice, and get ideas from other RV renovators. Follow DIYers on social media for even more designs and tips. What you see from someone else could spark inspiration for your project.


    Now that you have an idea of how to start, get ready to design and remodel your rig. Putting a plan in place early on can make your RV renovation process easier and help keep you on budget. Before you know it, you’ll be on your way across the country in your chic, updated camper. For similar advice, review the RV Renovations resource page, which offers a series of detailed articles, checklists, and videos.

  • FMCA: 5 Tips for Renting Out Your RV

    FMCA: 5 Tips for Renting Out Your RV

    The idea of renting your RV to a stranger might sound like a far-fetched concept, an invasion of your privacy, and the last thing on earth that you’d want to do. But what if it didn’t have to be?

    In the past few years, the idea of shared economy business models in companies like AirBnB and VRBO has proven that there are safe and lucrative ways to rent out your property when you are not using it. And as time passes, that same business model has moved into other markets including the RV industry.

    If you are like thousands of other RV owners and are considering making some extra cash by renting out your RV, consider these 5 tips from The Family Motor Coach Association (FMCA).

    1. Do Your Research First

    We suggest poking around on a variety of RV rentals websites to get a feel for the way the process works and what an RV listing looks like to a potential renter. You should also check out testimonials from individuals who have rented their RV’s in the past. What was their experience like? What were the pros AND cons?

    You’ll also want to make sure that you are not violating any contracts with your insurance provider by allowing renters to use your RV. The last thing you would want is to lose your insurance!

    2. Be a Good Host

    If you’re reading this blog, you know that the RV lifestyle is not for everybody. One thing that you’ll realize when you enter the world of RV renting is that the people who are looking to rent an RV are on the fence about becoming RV owners themselves. This is their way of testing the waters to find out if they are indeed the RV-type. 

    Use this opportunity to go above and beyond simply providing them with a place to stay. Be a wonderful host and show them how great RVing can be. Share tips and suggestions with them that you think will make their experience truly unforgettable. If there are useful camping items that you don’t mind letting them use, stock your camper with them. If there are tricks or secrets to using features of your RV that may have a learning curve, share them with the renters ahead of time so that they don’t spend their trip wondering how things work.

    3. Develop a System for Removing Your Belongings

    Even though you’ll likely keep some camping gear for the renter to use, you will want to make sure that you clear out any of your personal belongings before passing your rig off to the curious new RVer. This may seem tedious, but a small task to accomplish for the financial payoff of renting your RV. The more you do it, the quicker the chore will become. If you develop a system, it will eventually be no problem at all.

    The first time or two might take some tweaking but create a checklist while you go and designate a space at your home or a storage facility to keep your personal items. If you plan to rent frequently, it might even be worth investing in a nice set of storage bins or shelves.

    This process may help you realize that you’ve been keeping too much unnecessary clutter in your RV anyway. Each time you repack for your own travels you might decide that some items can stay out, making the process shorter and easier in the future.

    4. Invest the Money Back into Your RV

    Renting your RV can be an incredible money-making experience, and could assist in the costly upkeep of your RV. In fact, if you aren’t an RV owner yet, renting could be the answer to finally being able to afford to make your first purchase! Between upkeep and payments, renting your RV out for just three times a year could greatly offset the cost of ownership!

    Once you receive your first payment, feel free to treat yourself to something nice! But as the money keeps coming in, consider reinvesting some of it back into your RV. Are you in a position to pay it off earlier than you thought possible now? Are there upgrades that you’ve always wanted to make but never could afford? Perhaps you have always wanted to visit Fort Wilderness in Disneyland but never were able to justify it to yourself. Now that you have monetized owning your RV, all of these things are possible! It would even be a good idea to start saving some of the money you earn from renting your RV in case general repairs are needed. 

    5. Stay Within Your Comfort Zone

    If you’re still reading this, it must mean that your curiosity has been sparked a little bit. You might not be eager to welcome a stranger into your home on wheels quite yet – and we get that. This business isn’t for everybody. If you are curious but hesitant, we encourage you to stay within your comfort zone. As an RV owner, you can set all your preferences.

    You can choose who you do or do not allow to rent. You can set specific dates and locations also. Maybe you would be better off renting for a weekend at a state park in your home state a few times before you feel comfortable sending your RV on a cross-country road trip with somebody. 

    Have you rented your RV before? What was it like? If not, is it something you would consider? Let us know in the comments below.

  • Top 10 Apps for RVers

    Top 10 Apps for RVers

    Whether you’re road tripping through the mountains or taking a quick weekend getaway to the lake, RVing can show us some of the greatest joys and frustrations that traveling has to give. But now that technology has come such a long way, we have tools that allow us to make the good times even better. The best part? We now have the ability to easily access all of these resources in the palm of our hands.

    Check out these 10 awesome apps to make the most out of planning, executing, and problem-solving on your next RV trip!

    AllStays Camp And RV ($9.99)

    AllStays Camp and RV app is the ultimate app for RVers. This camping app easily lets you find nearby campgrounds and RV parks without the need for internet access. AllStays includes more than 30,000 campgrounds in the U.S. and Canada so you’re sure to find the perfect fit for your needs. You can easily filter your search to look for specific campgrounds or locations, or even parking lots where you can boondock for the night – the options are endless!

    Gas Buddy (free)

    Gas Buddy is helpful no matter what you drive because it helps you find the cheapest gas in your area and makes pit stops quick and painless. You can even refine your search by price, location, brand, and other amenities like restaurants and restrooms which are super helpful during a long trip. This app loves, and rewards, user participation by encouraging you to report prices and leave reviews for the chance to win giveaways. You can even pay for your gas within the app and receive additional discounts.

    Oh, Ranger! (free)

    Oh, Ranger! is an app ideal for helping you plan your trip before you go. If you’re making your way to multiple destinations, Oh, Ranger! eliminates the need to research while you’re on the road or camping. This app works as a database, helping you find the perfect campsite, national park, national forest… the list goes on. Enjoy time with your family in nature without wondering what your next destination is going to be with this app. 

    Roadtrippers (free)

    This app was built for adventure-loving travelers because you’re always minutes away from something awesome with Roadtrippers. Whether you’re planning an epic cross-country road trip or a weekend escape, you can discover millions of places like local diners, quirky roadside attractions, scenic points, national parks and hotels with the click of a button. Plan trips directly from the app, or through the web at roadtrippers.com then share them with your friends. Any trips you’ve saved or places you love will be synced automatically across devices, so you don’t have to worry about manually syncing them yourself. Get your roadtripping on with Roadtrippers today!

    Passport America

    Passport America is a discount camping club and offers 1,800 locations for members to save while camping in the US, Canada, and Mexico. Both members and non-members can browse the directory of participating campgrounds, RV Parks, Resorts, and more. Locate parks near you, or save future parks for later. The app is free, and paid membership with Passport America is surprisingly low cost for the deals you get! 

    Waze (free)

    Waze is a GPS navigation app that suggests multiple routes, provides turn-by-turn directions, route details, and travel times. But this isn’t your average GPS app. It takes navigation to the next level by letting other motorists share information on traffic, police presence, and potential hazards along your route, and as a user, you can share that same information with others along the way.

    Night Sky (free)

    The Night Sky app encourages you to get out of your RV or tent and experience stargazing in a new way. Night Sky helps you quickly identify planets, constellations, and satellites by holding your iPhone, iPad, or even your Apple Watch into the sky. The app has been coined as a “planetarium in your pocket” and lets you explore the night sky with Augmented Reality (AR). As a bonus, it will even tell you optimal times for stargazing. 

    Harvest Hosts (free)

    Are you looking for a unique camping experience? Harvest Hosts can help! The app allows users to find free places to stay ranging from 1900+ wineries, breweries, farms, museums, golf courses, and other unique attractions. If you’re looking to change things up from boondocking in parking lots or staying at traditional campgrounds, you’ll want to check out Harvest Hosts. The app encourages you to support local economies by making purchases from your hosts as a thank you for their hospitality. 

    AllTrails (free)

    As RVers, many of us love to connect with the great outdoors and the app AllTrails lets you do just that. If you’re looking to explore, let AllTrails help you find the best trails near you! The app hosts more than 200,000+ hand-curated trail maps to help guide you along your journey or help you pick your next great adventure. The trails are crowd-sourced from travelers just like you. The app allows you to record your adventures, set your favorite trails, and so much more! 

    RV Trader (free)

    We obviously couldn’t just end this article without mentioning our favorite app of them all – the RV Trader app! Whether you’re actively searching or just browsing for fun, our app has thousands of for-sale motorhomes for you to look through. In the app, you have the option to filter your listing search by type, location, year, make, price, mileage, and so much more, taking the hassle out of finding your new RV. You can also easily save your searches and can quickly calculate payments for the unit of your dreams. If you’re looking to sell your RV, our app also gives you easy access to post a listing on our site.

    Do you have any apps you swear by? Let us know in the comments below! And if you’re in the market for a new RV, don’t forget to check out the most up-to-date models on RVTrader.com. 

  • 7 Tips for Keeping Your RV Cool in the Summer – Updated For Summer 2023

    7 Tips for Keeping Your RV Cool in the Summer – Updated For Summer 2023

    Updated for Summer 2023

    Summer is officially in full swing and that (hopefully) means you’re headed out on a few road trips in your RV. But as temperatures rise, it’s incredibly important to keep your RV as cool as possible in the sweltering summer heat, and RV Trader has a few tips. Check out our top 7 tips for keeping you and your RV cool and comfortable this summer.

    1. Keep the Door Shut

    This one sounds like a no-brainer, but many RVers come in and out of their unit all day long. Try to minimize how often you are keeping your RV’s door open, especially when the AC is running. 

    2. Rest in the Shade

    Shade is an RVer’s best friend in the summer months, so try to select a shady campsite when possible. Resting in shade can keep your rig a few degrees cooler even during the heat of the afternoon sun. Don’t forget, you also have the option of creating your own shade if you have access to tarps or if you have a pull-out awning!

    3. Protect and Insulate Windows

    To block out the heat of the sun, make sure to utilize your window shades or look into tinting options. It’s also a great idea before any trip to ensure your windows are properly insulated and that there are no cracks letting warm air inside. If your shades just aren’t cutting it, try investing in additional insulation like this popular reflective solution. And don’t forget to cover those skylights!

    4. Improve Circulation

    No one likes stagnant air, especially inside of an RV. Luckily, there are a few simple ways to increase air circulation like utilizing indoor fans, making sure your RV is free of dirt and grime build up, or purchasing a portable indoor AC unit. There are many affordable options on the market that will help your RV stay even cooler during extreme heat.

    5. Clean Your Filters and Get Your Unit Serviced

    A lot of RVs have air conditioning these days, but it’s important to keep your filters maintained for optimal results. To keep your AC running efficiently, change or clean your air filters on a regular basis. Manufacturers recommend cleaning at least every two weeks. As a bonus, it’s always a great idea to have your AC unit serviced annually by a licensed professional to ensure your unit is ready to hit the road!

    6. Fire Up the Grill

    Nothing heats up an RV faster than cooking indoors with the oven or stove. If it’s a particularly hot day, consider going outside to fire up the grill or check out a few of our favorite campfire dishes that you can cook over the fire to minimize indoor heat. 

    7. Switch Your Bulbs

    You might not consider it, but indoor RV lighting can produce more heat than you’d expect. Consider swapping your older light bulbs for LED options that give off less heat and are better for the environment – a win-win!

    With our top tips, you’ll be ready to enjoy summer RV trips in no time. Do you have any RV cooling hacks we didn’t cover? Let us know in the comments below.

    Ready to hit the road in an RV of your own? Check out our latest models on RVTrader.com today!

  • 5 Top Fourth of July RV Destinations

    5 Top Fourth of July RV Destinations

    As RVers, we have a deep appreciation and connection to all the beauty found in our nation. We’ve traveled hundreds of miles across the U.S. and many of us have seen the entire country on four wheels. From national parks to monuments to museums, we love having the freedom to roam, and many of us travel to our nation’s greatest cities during the Fourth of July weekend. 

    If you’re looking for inspiration on where to celebrate the red, white, and blue this upcoming holiday, we’ve got you covered. While many of these destinations are in larger cities, we’ve included nearby RV campgrounds where you can park your motorhome and head out for a night on the town. Check out our list of top Fourth of July RV destinations and start planning your trip today.

    1. Boston, Massachusetts

    One of America’s most historical cities had to top our list as an iconic Fourth of July destination. If Boston, Massachusetts is on your travel list, you’ll want to make the trip for the celebratory festivities. People come from all over the world to take in the fireworks spectacular and pops concert during the city’s multi-day Harborfest including amazing food, live music, and so much more. The spectacular is one of the largest Independence Day celebrations in the country and you won’t want to miss it. 

    Nearby RV Parks:

    • Boston/Cape Cod KOA Holiday 
    • Pine Lake RV Resort and Cottages
    • Normandy Farms Family Camping Resort

    2. Washington, D.C.

    Celebrating the independence of our country in our nation’s capital is a bucket list experience for many RVers. With amazing fireworks shows, historical displays, music, museums, and more, you’ll never be bored during the Fourth of July weekend. Enjoy the incredible fireworks show at the National Mall or take time to show respect to those who have paid the ultimate sacrifice for our freedom at Arlington National Cemetery. 

    Nearby RV Parks:

    • Cherry Hill RV Park
    • Capitol KOA
    • Greenbelt Park

    3. Philadelphia, Pennsylvania

    It doesn’t get more patriotic than visiting the city where independence began. So, grab a cheesesteak or hot dog (it is Fourth of July after all) and explore the city where the Declaration of Independence was officially signed. Philly goes all out for the July Fourth holiday and is planning for a 16-day festival, The Wawa Welcome America Festival, that will commemorate both Juneteenth and the Fourth of July. The festival will include free admission to museums, concerts, fireworks, and so much more.

    Nearby RV Parks:

    • Campus Park and Ride
    • Timberlane Campground
    • West Chester KOA

    4. Huntington Beach, California 

    Head on over to Surf City U.S.A to celebrate the red, white, and blue this Fourth of July. Huntington Beach has the largest Independence Day celebration west of the Mississippi! The festivities have been going strong for 117 years and attracts more than 500,000 visitors annually. The Surf City Dreamin’ festival has it all including parades, a 5k race, decorating contents, and, of course, an amazing fireworks display over the ocean. If you’re looking for a Fourth of July beach getaway, make your way to Huntington Beach! 

    Nearby RV Parks:

    • Waterfront RV Park
    • Sunset Vista RV Park
    • Bolsa Chica State Beach RV Camping

    5.Nashville, Tennessee

    Music City is the place to be on Fourth of July where you can expect amazing performances, world-class fireworks, and an all-around great time. This year’s fireworks show will be the largest show in Nashville’s history with pyrotechnics synchronized to a performance by the Grammy-winning Nashville Symphony. You won’t want to miss it! While you’re there, check out the Country Music Hall of Fame or dance your way down Music Row. 

    Nearby RV Parks:

    • Nashville KOA Resort
    • Two Rivers Campground
    • Elm Hill RV Resort

    Are you ready to pack up the RV and head to one of these patriotic destinations this Fourth of July? Already have your trip planned? Let us know where you’re headed in the comments below.

    If you’re looking for an RV of your own this Fourth of July, check out RVTrader.com for the latest and greatest models. 

    *Due to COVID-19 concerns, please check updated event-status before traveling to these destinations. If you do travel, we encourage you to follow CDC guidelines, and if you’re unvaccinated, please wear a mask when required.

  • FMCA Tech Tip: RV Roof Replacement

    FMCA Tech Tip: RV Roof Replacement

    A complete roof replacement is one of the biggest repair jobs RV owners may tackle. The procedure has been documented online in numerous articles and videos, often by RV owners with little or no previous experience replacing a roof. In fact, this difficult and time-consuming process requires advanced skills in carpentry and general fabrication. Some people undertake it themselves to avoid the high cost of having it done professionally, but bear in mind the cost is a function of the project’s complexity. Before you undertake this task, please consider the following: 

    • You will need an indoor workshop that can house the RV, a covered outdoor space, or an extended period of good weather without rain, probably at least two weeks straight.


    • You will have to remove all objects from the roof, including air conditioners. Without a forklift, this is a dangerous procedure, as A/C units are extremely heavy. 


    • You will have to lift the roofing materials, including plywood substrate, onto the roof. Again, without a forklift or lifting rig, this is dangerous. 


    • Working on an RV roof is inherently dangerous. 


    • You must obtain the appropriate roofing material, which will cost at least a few thousand dollars. As an experienced RV technician, I have replaced many RV roofs. It is an extremely labor-intensive project. Please consider having the work done by your local RV shop, which has the needed expertise and equipment. That said, if you believe you have the skills and the proper equipment, or you just want a better understanding of what it involves, read on. 


    Be extremely careful at all times while working on an RV roof. Move slowly to avoid a fall. This is not a one-person job, so make sure you have people available to assist.  

    Know Your Roof

    The main RV roofing materials are aluminum, fiberglass, vinyl, and rubber. Know what you have before proceeding with a replacement. You need not use the same material for the new roof, but using a different type will increase the complexity of the job. This article describes replacing rubber with rubber. Replacing another type of material with rubber generally requires extra planning, which is sometimes not evident until the old roof is removed.

    Materials

    Purchase the required materials in the correct quantities before you start the work. You may find you need additional supplies as you go, but be prepared with the basics:

    • EPDM or TPO rubber: Order sufficient length and width to cover the roof in a single piece. The roll of rubber should be long enough to cover the entire length and width of the RV roof, plus at least 6 inches on each side. Rubber roofing generally is available in widths of 8.5 feet and 9.5 feet. 


    • Adhesive: To ensure proper coverage, you need at least one gallon for every 175 to 200 square feet of roof. Be sure to purchase adhesive made specifically for the roof material. Some suppliers offer roof installation kits that include the adhesive, butyl, and lap sealant. This can be an economical way to purchase the supplies, but if you have a larger RV, you may want to purchase two kits. I recommend Dicor products for both the membrane and the installation kit. 


    • Butyl tape: This seals the fixtures to the roof. You need at least 75 feet of tape for every 20 linear feet of roof. Be sure to use butyl tape and not regular putty tape, as the latter can damage the rubber over time. 


    • Self-leveling lap sealant: This is applied generously to every hole and fixture on the new roof. At least three tubes are needed for every 20 linear feet of roof, but it’s very possible that will not be enough. 


    • EternaBond tape: This is expensive, and although not required, I recommend it in place of lap sealant, as it is permanent and less messy. Or, you may choose to use a combination of the two. EternaBond, when properly applied to a clean surface, provides a watertight and permanent seal. If you use EternaBond, be sure to refer to the manufacturer’s directions. 


    • Substrate: Prior to removing the existing roof material, it may not be apparent whether you need to replace the substrate or how much you need to replace. Usually, 1/4-inch plywood is sufficient, although you may choose to use 3/8-inch. Oriented strand board (OSB) also can be used. 


    • Trim strips: You may need new trim strips, or you may need to install them where they don’t currently exist. 


    • Screws: It is a good idea to purchase a few boxes of screws in a variety of styles and lengths, including wood screws and self-tapping sheet-metal screws. I usually use 1-inch, 1 1/2-inch, and 2-inch screws. 


    • Masking tape or drywall tape: A 1-inch-wide roll is used to tape the seams in the wood substrate. One roll should be sufficient. 


    • Miscellaneous: While you are on the roof, inspect all caps and covers for damage. If necessary, replace them.

    Preparation

    Be sure you have plenty of work space around the RV. And make sure you have ample time to complete the project. If the work is being done outside and you encounter a delay, you risk losing the favorable weather. Follow these steps:


    • Ladder: If your RV does not have a ladder, it may be because the roof is not strong enough to support your weight. In that case, lay sheets of plywood on the roof for support. If your RV does have a ladder, you will have to remove it, or at least unscrew the roof brackets, so be sure you have an A-frame or extension ladder long enough to safely access the roof. The ladder also is needed to install and remove the side trim pieces and roll out the membrane. 


    • Remove sealant: All sealant must be completely removed from all roof fixtures. This is a time-consuming process. Use whatever tools work for you, such as putty knives, as well as plastic and gasket scrapers. Take the time to do it carefully, as you don’t want to damage the fixtures. Once you have stripped the fixtures, remove and save all the screws, which you may want to reuse if they are in good shape. Rusted screws are a sign of water damage, so inspect those areas carefully, as explained below. 


    • Remove fixtures: Once all the screws are removed, carefully pry the fixtures off the roof. This can be difficult, because they should be stuck to the roof with butyl putty. Be careful not to damage the fixtures while removing them. 


    • Remove air conditioners: Remove the mounting bolts and ceiling plenum, disconnect all cables, and ensure the air conditioner power supply is turned off. A/C units are extremely heavy, so normally forklifts are used to remove them from the roof. You may be able to leave the A/C on the roof, and simply move it around while you work, but I don’t recommend this, as you risk damaging the new rubber. Always get help when lifting or moving an air conditioner. 


    • Remove the awning: If you are removing a rubber roof, the RV awning must be removed, along with the horizontal trim pieces and awning drip rail. This is because the rubber roof likely is curled over the edge of the roof and secured under these pieces. Before removing the awning, lock the ratchet in the “extend” position. Then remove the screws holding the fabric to the drip rail, as well as the lag bolts holding the upper mounting brackets in place. Remove the awning arms from the lower brackets and have an assistant grab one awning arm while you grasp the other. Have a third person climb a ladder to ensure the fabric slides out of the drip rail without binding or tearing while you and your buddy walk the awning out of the drip rail. Carefully lean the awning against a wall to prevent damage. 


    • Clean the fixtures: I like to clean the fixtures at this point rather than prior to reinstalling them. You may choose to seek assistance with this so you can continue working on the roof. Scrape the remaining sealant and butyl putty from the fixtures. I recommend using an industrial cleaner or silicone remover so they look as nice as the new roof. Further inspect the fixtures for damage and replace them if necessary.

    Removal

    You should find that the rubber is tucked under the front cap, and likely on top of the rear cap. Grab one end of the rubber and pull firmly to release it from the adhesive. You may choose to cut the rubber into smaller pieces to make it easier. Be extremely careful during this step, as the resistance of the rubber against the glue could change at any time. At this point, you should have a bare roof with only substrate exposed.  

    Replacement

    Thoroughly inspect the substrate. If you find rot or damage, consider replacing that section of wood. If any of the substrate is significantly damaged, especially from water, you may need to replace the batt or plastic-foam insulation underneath. In extreme cases with wood-frame RVs, you also may need to do some framing repair. Surprises like this take us back to the recommendation to let professionals tackle roof replacement. If you wish to replace the substrate: 

    • Remove all screws securing the wood to the roof frame. 


    • Carefully lift the substrate off the roof framing. Do so in one piece, if possible. Once the substrate is removed, do not walk between the roof rafters. If a number of boards have been removed, you may want to temporarily lay down plywood across the rafters for easier access to the exposed area. 


    • Be sure to replace substrate in full sheets. Make sure the replacement substrate is the same thickness as the original. 


    • If the substrate has any cutout features, replicate them on the replacement piece. Use the removed piece as a template, or measure on the roof to identify the exact locations for the cutouts. If the feature is a drilled hole for a vent stack or wire access, it must be precisely drilled prior to installing the new substrate piece. If the cutout is a large hole for a vent, air conditioner, etc., mark the location and then drill and rout once the wood is screwed down. 


    • After preparing the substrate section with predrilled holes, install it on the roof by securing it with screws, as per the original piece. Countersink the screws so the heads are flush with the surface or slightly below so the screws don’t protrude into the rubber membrane. 
    • Thoroughly inspect the entire roof for loose or protruding screws, wood splinters, etc. Prior to installing the rubber membrane, make sure the substrate is clean and free of any protrusions or anything that might damage the rubber. 


    • Sand the substrate anywhere you find splinters or other protrusions. 


    • Bevel the perimeter edges of the substrate using a sander or router. 


    • Using drywall tape or masking tape, secure all seams that are wider than 1/16 inch. I generally also tape the perimeter edges. 


    • Sweep the entire roof or blow it clean using compressed air. 


    • Once you are sure the roof is clean and smooth, place the rubber on the roof and roll it out. Make sure it is centered and squared front-to-back and side-to-side, and ensure you have at least 6 inches extra in all directions. 


    • The rubber should lay on top of any roof protrusions such as vent stacks. 


    • Roll the rubber halfway back toward the center of the RV from either the front or rear. The substrate will be exposed on either the front or back of the RV roof. 


    • Use a 9-inch-wide short-nap paint roller to apply the adhesive to the exposed half of the roof according to the manufacturer’s instructions. Some adhesive brands should be applied only to the substrate, while others are applied to both surfaces. Apply it at a rate of one gallon per 175 to 200 square feet. Refer to the manufacturer’s instructions for set-up time. 


    • Using ladders placed on each side of the RV, have an assistant help roll the rubber membrane over the adhesive, being sure not to allow large bubbles or creases. 


    • Roll the unglued half of the membrane over the glued half and repeat the gluing process. 


    • The adhesive remains pliable enough to adjust the membrane, if needed. 
    • For any protrusions such as vent stacks, use a razor knife to cut a small “X” in the rubber and push it down over the protrusion so it goes through the hole made by the “X.”   


    • Use a squeegee or broom to eliminate any bubbles or creases from the membrane. 


    • At the front of the RV, tuck the rubber under the front cap, but lay the membrane over the rear cap. 


    • To prepare the roof cutouts, cut an “X” from corner to corner of each roof cutout. Fold the cut flaps down into the cutout and staple them to the roof framing. You may trim the flaps later. 


    • Stick butyl tape to the original trim pieces, but do not remove the backing paper yet. 


    • Replace the upper horizontal trim pieces by removing the paper butyl backing and placing the trim in the same location as it was originally. If possible, line the screw holes up as well. While positioning the trim, firmly pull down on the rubber membrane, but do not stretch it. 


    • While holding the rubber, attach the trim to the sidewall and replace the screws. This ensures the membrane is taut along the edges and down the side of the RV. Alternately, you may choose to staple the membrane to the sidewall of the RV, using 1/2-inch staples placed every 5 to 6 inches along the sidewall. Make sure to pull on the membrane while you are stapling, and that the staples lie along the trim line so they are not visible. 


    • Replace all roof fixtures, being sure to place butyl tape on the underside along the screw flange. 


    • When replacing skylights, be sure to use sealant specifically formulated for the plastic. I recommend Surebond SB-140. 


    • Replace the pan gaskets on the air conditioners to avoid water leakage. Tighten the A/C screws so the gasket is half its original thickness. Do not tighten past this point. 


    • Using self-leveling lap sealant and/or EternaBond, thoroughly seal all fixtures by generously covering the edges, screw heads, and any other possible point of entry. It’s okay to overcompensate to ensure the roof does not leak. 


    • Reinstall the awning by having two people assist with sliding it back into the drip rail. Center the awning fabric in relation to the roller tube and replace the drip rail screws. Squeeze a generous amount of sealant into the top bracket screw holes and reinstall the top bracket. 
    • Trim the rubber membrane wherever it protrudes beyond trim strips. 


    As a certified RV technician who has replaced many roofs, I still find this a time-consuming and difficult task. I once again urge you to seek professional help to replace your RV roof. If you choose to make it a do-it-yourself project, beware of the numerous online articles and videos that may do more harm than good.

  • Your RV Road Trip Just Got Easier

    Your RV Road Trip Just Got Easier

    It’s time to hit the road, and you’ve got the RV packed and ready to go. 

    Where to?

    That answer can now be found with a click of a button inside the Togo RV app!

    The ultimate RV companion, it’s got everything you need to travel safely: pre-made checklists so you don’t leave home without the essentials, nearby mobile RV repair technicians that can help you if you get stuck (wherever that may be!), and online courses that help new owners learn the ropes.

    One of the first steps is entering your RV information into the Togo RV app. Entering this info seamlessly downloads your RV user manual, specific to the year/make/model of your unit, which is then easily accessed digitally by you within the app. No need to go hunting through your rig to find the printed manual when you hit a snag, just easily search the digital version right within the app. Togo RV will also notify you of any recall alerts, as they pop up from time to time and you may miss them if you’re on the road.

    So now you can leave the house with confidence — but where should you go?

    A Togo RV Plus membership may be your best bet to hitting the road safely. It’s easy to get a little lost out there, especially on the open road. Its RV GPS navigation keeps you aware of tunnels and bridges to avoid due to low clearance, and it gives you simple directions to get to your destination quickly and easily. 

    Want to schedule a road trip with multiple stops? When you register as a Togo RV Plus member for $39.99 annually, you will have access to Roadtrippers Plus, which helps you plan your adventures and keep everything organized in one place (a standalone $29.99 value). You can even see the various destinations on a map with up to 150 stops included! 

    We all know we have to plan ahead to book stays at RV parks and campgrounds, and Togo RV Plus offers discounts at some of your go-to overnight stops like KOA, Thousand Trails, Harvest Hosts and more. Can’t find an opening at the campground? You’re in luck! Plus members receive access to OvernightRVParking.com, the largest database of free parking locations near you. You’ll never worry about where to stay – Togo RV’s got you covered!

    Now that you can leave for your road trip with Togo RV in your pocket, we’re throwing in one last surprise. You can receive 25% OFF a Togo RV Plus membership just for being a valued RV Trader enthusiast; simply enter promo code RVTRADER25PLUS at checkout.

    Travel with confidence using Togo RV. See you on the road!


    *This post contains affiliate link(s). This means if you click on the link and purchase the item, we will receive an affiliate commission at no extra cost to you.

  • The Basic Safety Tools You Should Keep in Your RV

    The Basic Safety Tools You Should Keep in Your RV


    We all know that RVing is a great way to travel and there are endless benefits to having a home on wheels. From family bonding to enjoying the great outdoors – the RV lifestyle is one of adventure and fun. We also know that the unexpected can happen while out on the road, and it’s important to be prepared. Safety while RVing should be a top priority for every family, and if you keep these basic safety tools on hand, you should be ready if you’re ever caught in a sticky situation.

    Fire Extinguisher

    An RV is essentially a home you can take with you, which means they have more fire-related dangers than an average automobile. Having a fire extinguisher onboard is crucial and will be your first defense should a fire start. Make sure to keep your fire extinguisher in an easy to reach location, and inspect it regularly before traveling to ensure that it’s in good working condition.

    First Aid Kit

    This may seem like a no-brainer, but we couldn’t leave a basic first aid kit off of our list. You can either buy a prepackaged first-aid kit or you can customize your own. Every family is different so before you hit the road, determine what items should be included in your kit to fit your specific needs. Here are a few basic items you can include: BAND-AIDs® (all sizes), scissors, tweezers, latex gloves, thermometer, antibiotic ointment, gauze, cold pack, heat pack, adhesive tape, general medication (pain relief, allergy relief, etc.), antiseptic wipes, ace bandage, aloe vera, flashlight, sunscreen, bug repellent, and hand sanitizer.

    Roadside Emergency Kit

    Being out on the road is just one of the many benefits of RVing, but as any seasoned traveler knows, accidents unfortunately happen. From getting into a slight fender bender to having a flat tire – it’s important to always be ready. Having a roadside emergency kit in your RV can save you time and trouble when you need to pull over. There are tons of kits on the market that include items like flares, flashlights, batteries, jumper cables, and more.

    Tire Pressure Monitoring System

    Tires are the foundation of an RV, so it’s important to keep them in top condition. There are many tire pressure monitoring systems on the market, and these systems are crucial to make sure your RV tires are at their proper pressure. The last thing you want is a tire blowout to occur while driving. A blowout is dangerous and can not only damage your RV, but it has the potential to cause accidents with other vehicles. Avoid stress and gain peace of mind by getting a reliable tire pressure monitoring system.

    Basic Tool Kit

    When you are far from home and a minor mechanical issue happens, what do you do? If you have an RV tool kit onboard you might be able to avoid going to a mechanic or calling a roadside assistance service (though we do recommend being a member of one). We suggest keeping a basic tool kit in your RV including a few basic items such as: a drill, drill bit set, hammer, socket set, wrench set, screwdriver set, pliers, electrical tape, etc.

    SPOT Tracking Device

    As we mentioned earlier, RVing gives many families the opportunity to unplug and simply enjoy the great outdoors. If you are ever in an emergency situation where you do not have cell phone access/service you can use SPOT. This device uses satellite technology to provide location-based messaging and emergency notification technology so you can communicate from remote locations.

    We hope that you continue to stay safe on the road, and have confidence that you’ll be able to tackle a variety of safety issues that may arise with these tools.