Blog

  • Campfire Safety: A Little Refresher for RVers

    Campfire Safety: A Little Refresher for RVers

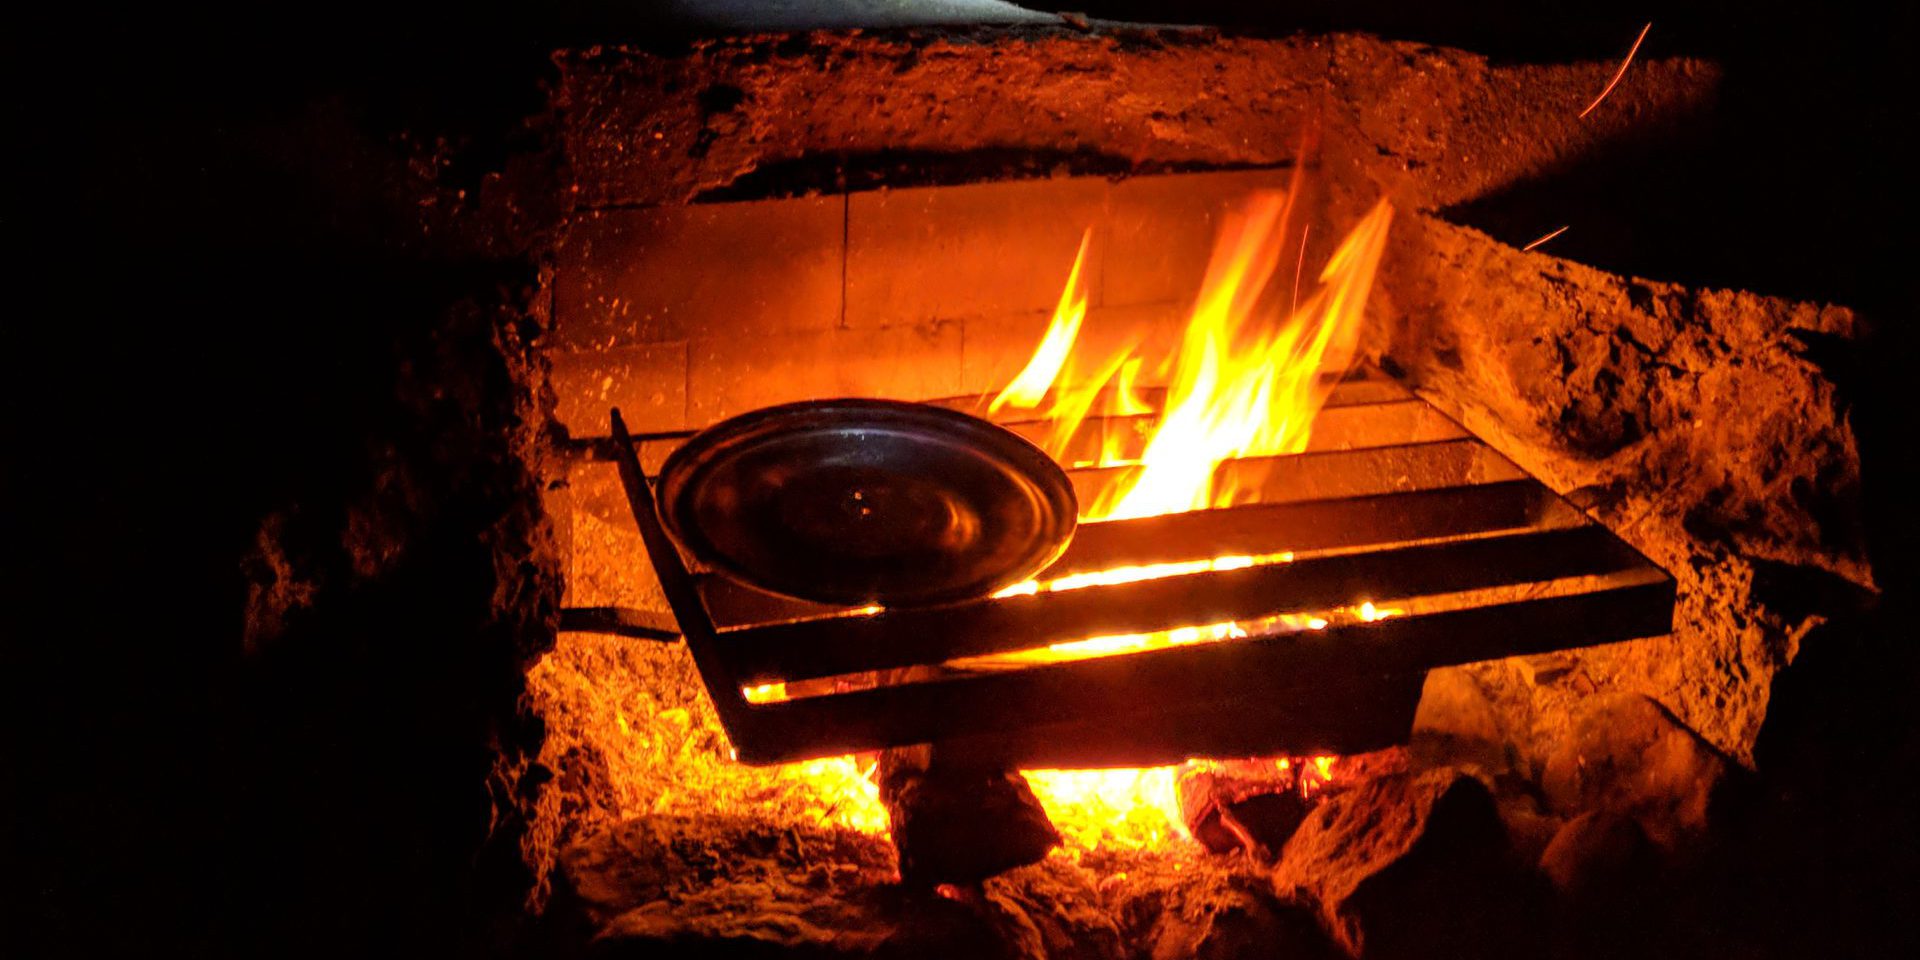
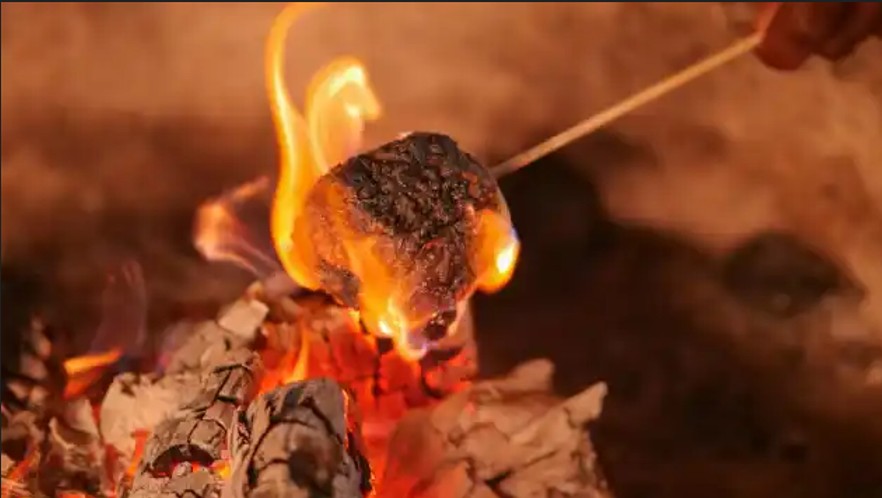
    As a kid, no camping trip was complete without a nightly campfire — naturally, of course, with a sugar high from heavy doses of a toasted marshmallow, melted chocolate, and graham cracker splendor. (Anyone else prefer the complete charring of the mallow, like me?) Nowadays, even though we rarely break out s’mores anymore, we love a good campfire on a chilly evening. (And, given the number of Hershey bar wrapper corners we find in campsites, it’s obviously still a thing.) Beyond s’mores, there’s something special about a campfire. And part of that is the danger of the flames — which should be a reminder why campfire safety is so important, even if you have an RV closeby.


    You don’t have to be primitive camping to build a fire. There are lots of reasons for a fire. A little evening’s entertainment with a little extra warmth. Or, wisely, to satisfy your 10-year old during a much-needed, zero-screen time weekend in the woods. Our desire for fire lies deep within the human race. It’s primal, it’s fun, and — you guessed it — it also carries a huge responsibility along with it!

    So, since we’re going to have a fire at some point, we need to talk about campfire safety.


    Campfire Safety: As Relevant as Ever

    We might be showing our age a little here, but when we were growing up, there was a Smokey the Bear commercial on TV. In it, a child questions his father about putting out their campfire, to which the father responds, “Nah, it’ll just burn itself out.” Smokey isn’t exactly happy with this response, and the tear rolling out of his eye isn’t from the smoke. Cue the melodramatic music. (Smokey also produced other commercial gems like this.)

    Even today, after decades of Smokey ads, we regularly see tell-tale signs curling from fire rings where the occupants have already headed home. (Perhaps they took away the wrong message from that commercial?) Just walk the loop at any popular campground on a Sunday morning and you’ll see what I mean.  

    Anyone living to the west of the Mississippi valley may not ever remember a full summer without a burn ban. That’s because 85 percent of all wildfires are caused by humans. From discarded cigarette butts to illegal fireworks to dangling safety chains on your trailer, it’s no wonder wildfire managers have resorted to reducing campfires during the driest times of the year.    

    Having a good campfire experience is like having a good camping trip: It just takes a little forethought and preparation.  


    Before Building a Campfire

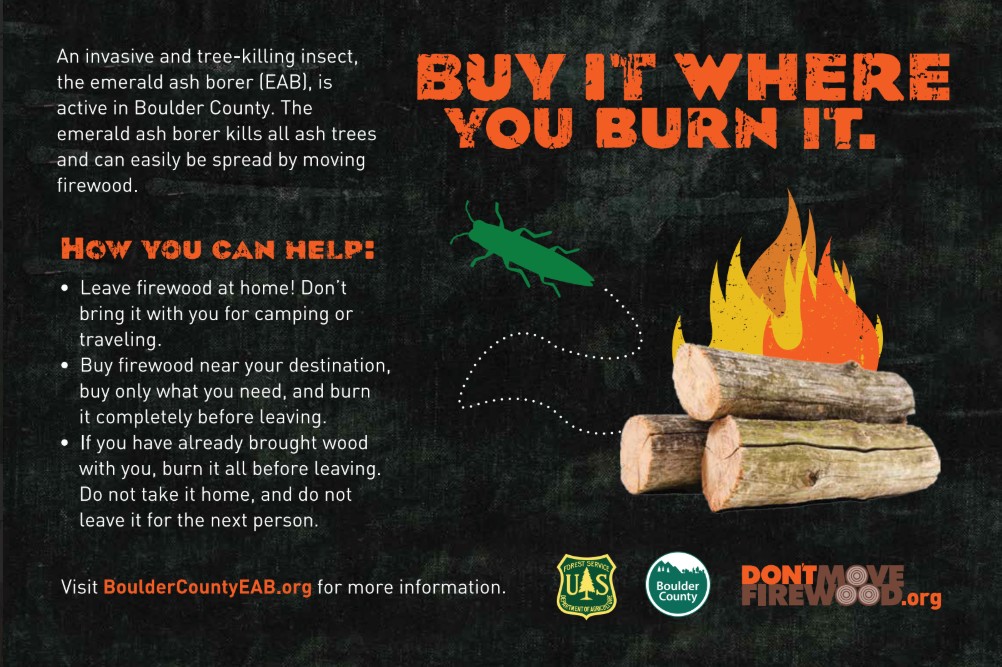
    • Select the right wood. Always buy your wood where you plan to burn it. Traveling with wood from home is not only illegal in many places, it also gives invasive insects a free ride into a new location increasing their spread and putting our forests in danger.

    • Research restrictions. Check for any fire restrictions or bans in the area before buying your wood.

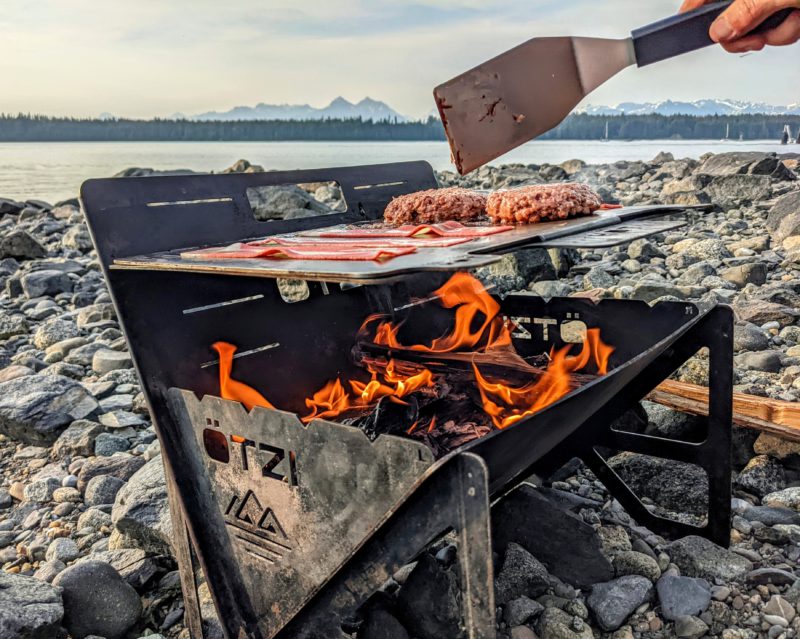
    • Choose the safest location. Here are a few good examples of how. Nearly every campground provides a campfire ring. Please use it. Also, in dispersed camping areas (aka boondocking), it’s important not to create additional fire rings. Use what’s there, or build a Leave No Trace fire pit using a Solo stove or OTZI grill. Give yourself enough space from any vehicles, tents or tarps.

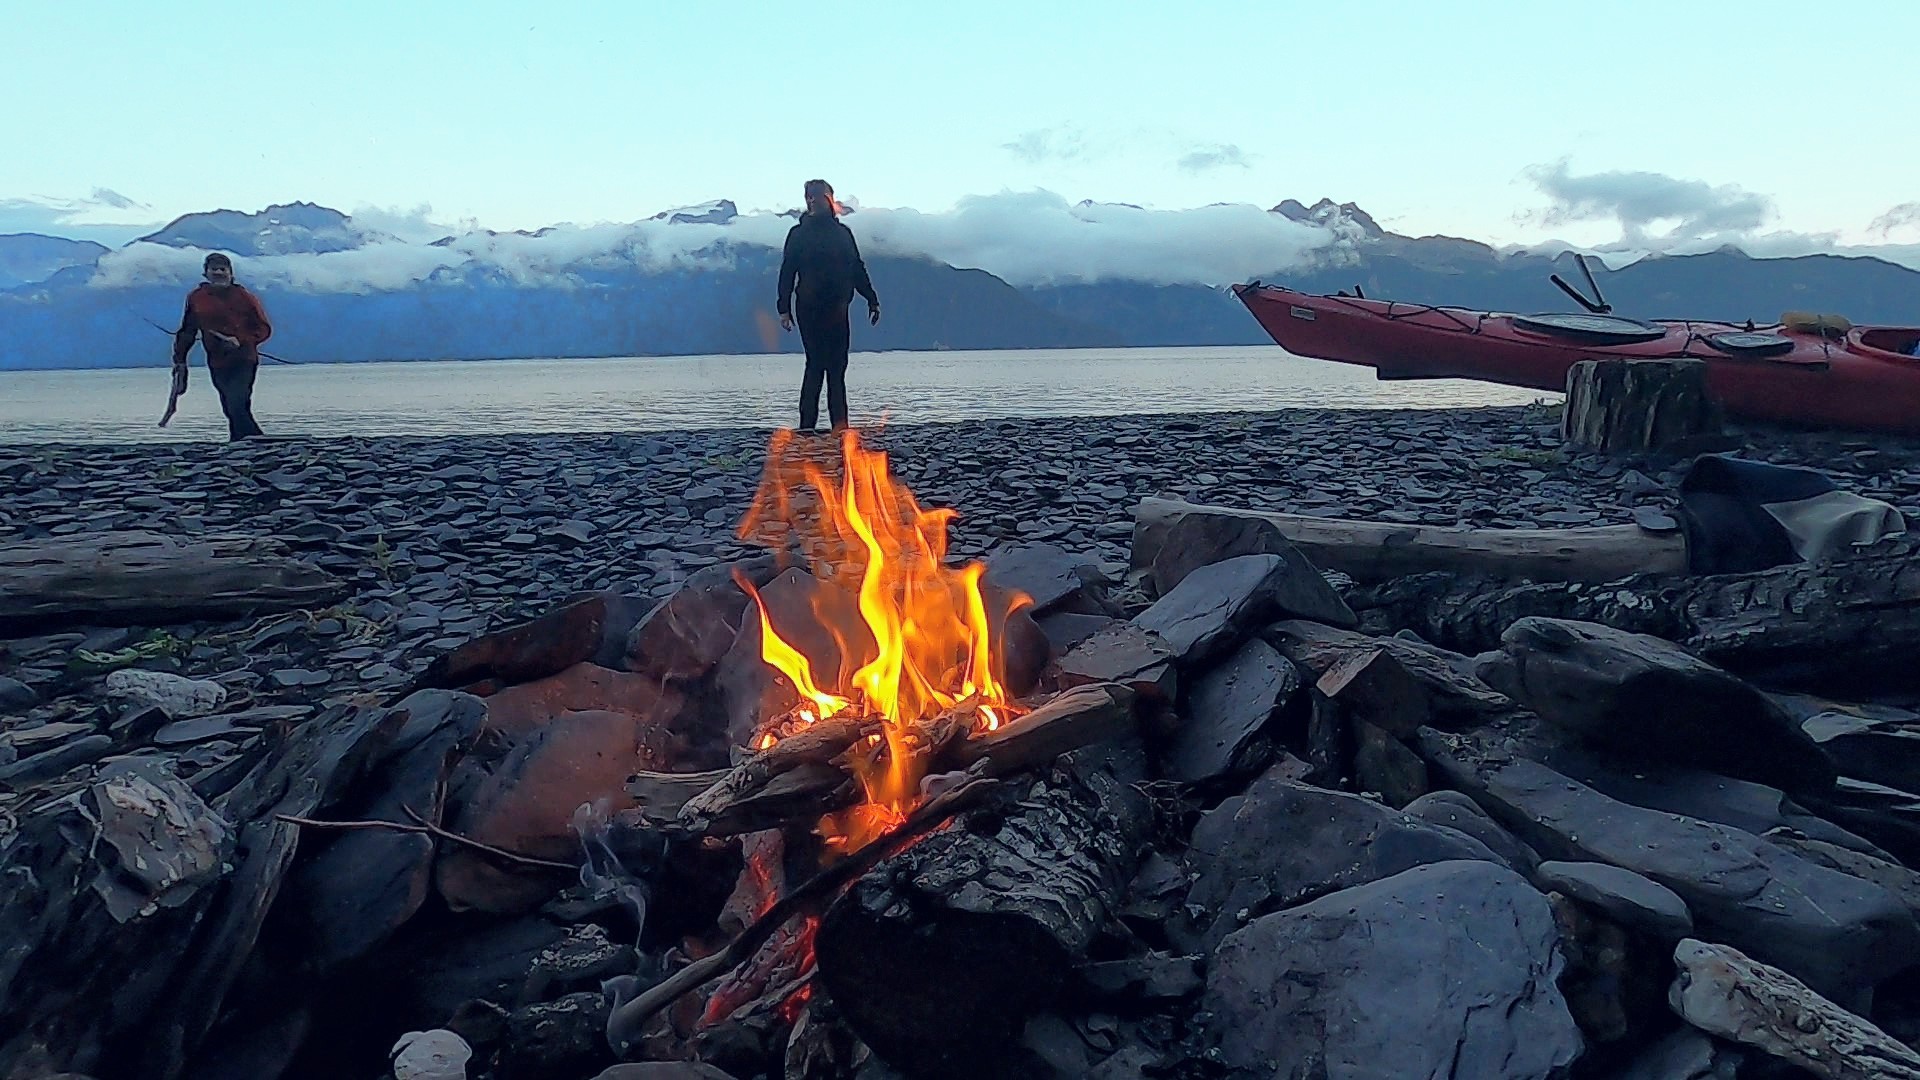
    • Be beach safe (if relevent). If building a beach fire, always build it below the high tide line. On shore breezes are stronger in the evening and beachside vegetation can easily ignite. So, keeping your fire closer to the water is always better. Also, any unburned remains of your fire will be washed away by the incoming tide. (A great Leave No Trace practice!)

    • Clear flammable debris. Remove any dry leaves, twigs, and other debris within a 10-foot radius of the fire pit.

    • Be ready to extinguish. Keep a bucket of water and a shovel nearby to extinguish the fire quickly, if needed. 


    Maintaining a Campfire

    • Keep it small. A smaller fire is better for cooking and roasting marshmallows.
    • Stay nearby. Never EVER leave a fire unattended.
    • Don’t fuel the fire. Avoid using aerosols or flammable liquids to start or accelerate the fire. Pro Tip: save toilet paper rolls stuffed with dryer lint from home to create instant fire starters!
    • Watch the embers. Keep a close eye on the fire and make sure embers don’t fly away and ignite surrounding materials. Soft woods with a lot of sap (like pine, spruce and fir) are great to start a fire with as they catch quickly, but they can also create more sparks that can spread fire outside of the ring.  
    • Observe the fire observers. Pay close attention to pets and children around any fire, not to mention those flaming balls of marshmallows being waved around on the end of a pointy stick. (I mean, what could go wrong?)

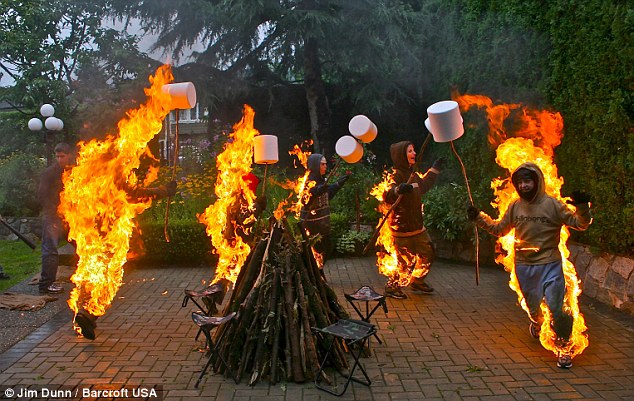
      This photo is not real. This is a joke, a joke, joke. But you get the idea: You don’t want this to happen.


    Extinguishing the Fire

    • Complete the job. Completely extinguish the fire by pouring water on it, stirring the ashes and embers, and then pouring more water. 
    • Double-check. Make sure it’s dead out!  The ashes need to be cool to the touch before leaving the area. 
    • Never bury the fire. Burying the fire can trap heat and cause it to re-ignite later!

    IF things get out of hand: Remember, in emergency situations, it’s all too easy to focus on fighting the fire, but it’s important to get people to safety first and know when to call in reinforcements.  


    Additional Campfire Safety Tips

    • Watch the weather. Be aware of weather conditions and avoid building a fire on windy days, as the wind can easily spread embers very quickly.
    • Instruct the next generation. Teach children and others about campfire safety to prevent accidents. 
    • Offer good advice. If your brother-in-law, Earl, ever asks you to “hold my beer” around a campfire, remember nothing good will come of it. Better to remind him that he isn’t 18 anymore and that he should just sit down and enjoy the campfire. Camping trips should never end in a trip to the E.R.!

    All of these tips and tricks seem common sense for most experienced campers, but it doesn’t take too much time to have a pleasant evening turn into a dangerous situation because of a few moments of inattention or risky behaviors. So, remember what Smokey the Bear said, “Only you …”

  • How to Install an RV Air Conditioner

    How to Install an RV Air Conditioner

    So, you know what you need to do. You’ve analyzed your RV’s airflow. And you’ve resisted the spasmodic urge to skip all other steps and just replace your RV air conditioner. No, no. That’s not you. You know that your RV air conditioner needs replacing, and you’ve found the right model. The big question that remains is: Who is going to install the RV air conditioner? Is that the kind of thing you can DIY, or should you let a professional step in?

    Good questions. And we have good news. Whether you’re replacing a faulty unit or upgrading to a newer model, you can remove and install an RV air conditioner — both rooftops and mini- splits. They just need to be done differently — each with some careful planning and the right tools.

    Whichever option is the one you’re looking at, we can walk you through it.


    Option 1: Install an RV rooftop air conditioner.

    Safety first — turn off the power.

    Turn off all power. (You knew that, right?) You’ll want to disconnect the battery, unplug shore power, and turn off any generators. Ensure the RV is completely powered down before starting. Locate furnace fuse and turn off A/C power. 


    Now, remove the old A/C unit.

    On the inside of the RV, remove the inside cover plate. This is typically found on the ceiling where the A/C unit sits on the roof. Carefully identify and disconnect the wires connected to the controller box. (Tip: Take pictures or notes of the wire connections for easy reference during installation.) Then remove the controller and other parts. Set these aside to refer to later. Next, remove the mounting bolts. These are typically four long bolts located at the corners of the ceiling assembly.

    Heading up top to the roof, make sure you access the roof safely. If your RV doesn’t have a ladder, use plywood to bridge roof joists and provide stable footing. Once in a secure and stable position, remove the rooftop air conditioner cover. (This may be held on by a few screws.) Carefully remove the rooftop A/C unit. It will be heavy, so handle it with caution. You might need to push up from the bottom to loosen it. 


    Follow these instructions to install the new unit.

    Place the new A/C unit on the roof, ensuring it aligns with the existing opening and that the gasket on the bottom is properly positioned over the opening. Dry-fit the frame, adjust the foam divider if necessary, and secure the frame to the ceiling by evenly tightening the bolts to compress the gasket. Next, hook up the electrical wiring, connect the wiring using the provided connectors or terminal block. Attach the air distribution box (ADB). Remove the filter cover and filter from the ADB, and attach it to the mounting frame. Then reconnect control wires and tuck loose wires, reconnect control wires and neatly tuck any loose wires inside the electrical box. Next, you will replace filters and covers. Then power up and test the unit’s various modes.

    When replacing a factory-installed unit, you may need to find the model number for a compatible replacement. If your old unit had an analog controller, a new digital controller and thermostat may be required. Don’t Forget: RV A/C units are heavy, so plan for safe lifting onto the roof. Also, remember that proper sealing is important for efficient operation and airflow optimization. Always use a new gasket and remove the old one when replacing an old unit. 

    Naturally, you should always refer to the specific instructions provided with your A/C unit. (But you already knew that.)


    Option 2: Install mini-split air conditioner.

    Not everyone has — or wants — a rooftop A/C on their RV. Alternatively, installing a mini-split air conditioner in your RV can offer several advantages. These include improved cooling efficiency and lower power consumption compared to traditional RV A/C units. 

    Importantly, as you might have guessed, the installation process is a little different. One that isn’t: the power. Turn. It. Off.


    Pick your spot and mount the indoor unit.

    Choose a location on an interior wall. You want it away from windows, corners, and high-traffic areas to ensure proper airflow and comfort. You also may want to build a supporting shelf. Securely attach the provided mounting bracket to the chosen wall or cabinet. Ensure the bracket is level and has adequate support. Then carefully hang the indoor unit onto the installed bracket. 

    Route the refrigerant lines and electrical wires from the indoor unit through the wall or cabinet to the outside. (You will need to drill a hole for this purpose.) Connect the drain hose from the indoor unit to ensure proper condensate drainage. Use clamps or straps to secure the line set and drain hose along their path. 


    Position the outdoor unit in a convenient spot.

    Common locations for the outdoor unit, compressor, include the rear bumper while some people opt to place it where a generator was previously located. Install a sturdy bracket on the chosen location to support the outdoor unit. Consider the weight capacity of the mounting area, especially if using a bumper mount. Mount the outdoor unit onto the bracket. 

    One big consideration to keep in mind: It’s crucial to cover the outdoor unit’s fan and coils while traveling to protect them from wind damage and bugs. 


    Connect the lines and wiring.

    With your supports in place, now it’s time to connect the refrigerant lines from the indoor unit to the outdoor unit. Connect the electrical wiring between the indoor and outdoor units according to the manufacturer’s specifications. (If you are connecting refrigerant lines yourself, you’ll need to vacuum seal the system to remove air and moisture before charging it with refrigerant.)


    Assign a designated electrical circuit for your mini-split.

    Most mini-split systems require a dedicated electrical circuit for optimal operation. You can run power to the mini-split by utilizing a breaker from one of your existing rooftop AC units. Alternatively, you can power it directly from a solar generator or other suitable power source. 


    Test and finish.

    Turn on the mini-split system and test its operation. Tidy up the refrigerant lines and drain hose. Cover any exposed holes or openings with the appropriate materials. 


    Keep a few other important considerations in mind.

    While some RV owners can install mini-splits themselves, it is recommended to consult a professional RV HVAC installer for the electrical wiring and refrigerant line connections. Mini-splits are simply more difficult than rooftop installations, and if it’s outside your skill set or comfort, there’s no shame in having a pro do it. Either way, always consult the manufacturer’s installation manual for specific instructions and recommendations for your mini-split system. 

    Also, whichever A/C system you decide to install, be prepared to make some minor to major modifications to your RV to accommodate the units, line routing, and wiring. It could even be a good time to check your whole electric system.

  • Before Replacing an RV Air Conditioner, Take These 7 Steps

    Before Replacing an RV Air Conditioner, Take These 7 Steps

    RV air conditioners are designed to provide cooling and comfort while on the road or at campsites. (Not that you really need that reminder if you’re on the road in the U.S. this summer.) However, like so many things, we often don’t really notice the A/C so long as it is working. But when it starts failing to do its job — keeping you cool — it doesn’t take long for you (or your passengers) to start wondering: Is replacing the RV air conditioner the answer?

    I get it. When the air goes down, a quick and easy solution can seem attractive. (Really attractive!) But in reality, you’ll do everyone a service (including possible your wallet) if you slow down.

    RV air conditioners come in different types and sizes to suit different types and sizes of RVs for different RVers with different cooling needs. So, before replacing your RV air conditioner, there a few, key things you should do to make sure it’s truly necessary — and that, if needed, you choose the right replacement.

    First let’s discuss the types of RV air conditioners. Consider it a primer not only to identify what you have — but also what you might get.


    Step 1: Identify your RV air conditioner.

    Rooftop Units

    Rooftop RV air conditioners are a popular and effective choice for lots of campers — especially those who travel frequently in warm weather. These units are mounted on the roof of the RV, which helps conserve interior space and provide powerful, consistent cooling. They operate by drawing in warm air, cooling it using a refrigerant system, and distributing the chilled air back into the RV. The hot air generated by the cooling process is expelled outside through the rooftop unit.


    Under-Bench/Closet Units

    These types of air conditioner are installed under a bench other seating areas or closets within the RV. The benefit of these unit is that they save space. By locating the unit under a bench or a closet, you can free up valuable roof space. The rooftop space could then be used for other things like solar panels or simply reducing the overall height of your RV. (Scraping off your air conditioner at a low vertical clearance is an all-too common hazard.) Additionally, with the main unit tucked away, under-bench or closet air conditioners often run more quietly than rooftop units. This leads to a more peaceful environment inside your RV.

    Another bonus is that the concealed nature of under-bench or closet units often result in a cleaner, less visually intrusive exterior compared to traditional rooftop units. Many under-bench/closet models are heat pumps. These offer both cooling and heating capabilities. It also makes them suitable for use in a variety of climates.


    Mini-Split Units

    Mini-splits are significantly more energy-efficient than traditional RV AC systems. As result, they regularly boast SEER ratings between 20 and 35. (As compared to 8-9 for rooftop units.) This makes them ideal for off-grid camping or boondocking where power is limited.

    Unlike noisy rooftop units, mini-splits are designed to operate quietly. (Again, this helps ensure a peaceful environment inside your RV.) With a separate outdoor compressor and indoor air handler, mini-splits offer more flexibility in placement than rooftop units. This allows for optimized positioning to suit your RV’s layout. Mini-splits eliminate the need for bulky ductwork, saving valuable interior space in your RV.


    Portable Units

    These units are self-contained and can be moved around as needed. This makes them a flexible option for smaller RVs or temporary cooling. They don’t require permanent installation and can be set up in any room with a window. Portable A/Cs can effectively cool down a specific area where you are located, rather than the entire RV. Understandably, this leads to potentially lower energy consumption. Portable units can supplement your existing RV AC during extreme heat. (Or even act as a backup in case the main unit fails.) Many models can run on portable power stations or solar generators, providing cooling even when you don’t have access to shore power. 


    Step 2: Consider the age and condition of your A/C.

    If your A/C is old and showing significant signs of wear, there will be signs. One good examples: reduced cooling capacity even after cleaning and maintenance. If that sounds like your unit, it might be time to consider replacing your RV air conditioner. So, let’s discuss the cost-effectiveness of repair versus replacement.

    When an RV air conditioner malfunctions, the decision to repair or replace it depends on several factors, including the age of the unit, the cost of repairs, and the frequency of past issues.

    Generally, if the A/C is relatively new and the repair cost is low, repair is a good option. However, if the unit is older, experiencing frequent breakdowns, or the repair cost is high, replacement might be more cost-effective in the long run. 


    Step 3: Assess the signs of A/C problems.

    First, does your current air conditioner have reduced cooling capacity If your RV isn’t cooling effectively, especially in warm temperatures, it could be a sign of the A/C unit nearing the end of its lifespan. Also, any of the following may be an indicator that you are AC unit needs to be replaced.

    • Weak or limited airflow can indicate problems with the blower motor, duct blockage, or a failing fan.
    • Loud or unusual sounds, such as grinding or rattling, can signal issues like loose parts or worn-out bearings.
    • Musty or burning smells can suggest underlying issues like mold, mildew, or electrical problems.
    • Leaks in or around the A/C unit can be a strong indicator of trouble, including potential refrigerant leaks. If the unit cycles on and off repeatedly without effectively cooling, it could be caused by thermostat problems, electrical issues, or a malfunctioning compressor.
    • Higher than usual energy consumption could indicate an inefficient or malfunctioning A/C unit.


    Step 4: Perform basic troubleshooting and maintenance.

    Ensure the unit is properly plugged in and check for tripped breakers or blown fuses. Clogged filters can significantly reduce airflow and cooling efficiency. Ice buildup can restrict airflow, so try turning off the unit to allow the coils to thaw. Look for leaks or gaps in the duct collar that might be allowing cold air to escape and loose mounting bolts can cause leaks allowing cold air to escape through the roof of your RV. 


    Step 5: Consider professional help.

    Complex issues like refrigerant leaks, compressor problems, or motor replacement are best handled by certified RV HVAC technicians. We recommend professional services for maintaining the complex pieces of your RV’s AC system such as compressors, refrigerator coolant and condensers it to name just a few components.

    Also, many technicians can come to your location, saving you the hassle of driving to a repair shop. Even though we do recommend seeking out professional services for the more complex problems mentioned above, deinstallation and reinstallation of an A/C unit on top of your RV is definitely doable by anyone. Replacement of a mini-split is a little bit more involved, but under bench and closet units are also easily replaced by the owner.


    Step 6: Think about the replacement unit.

    Not every air conditioner fits every RV. Consult a dealer or service center for advice on selection. Consider factors like Btu cooling capacity, whether a heat pump is desired, and if remote control functionality is needed. Installation can be complex and may require specialized skills, especially for features like cutting roof openings and wiring connections, but we feel that many of you out there have the skills necessary to replace your air conditioner.

    By carefully assessing your current unit’s condition, performing basic maintenance and troubleshooting, and seeking professional help when needed, you can make an informed decision about whether to replace or even upgrade your RV air conditioner.


    Step 7: Research popular brands for replacing an RV air conditioner.

    There are many units out there for your RV and you must do your research to determine what type of air conditioner you want if you just want to go backstock with the same type of air conditioner you already have or doing an upgrade to a mini split. If your replacing an RV air conditioner, here are a few manufacturers that are leaders in the industry.

    • Dometic. Known for energy efficiency and noise reduction, with features like remote control and programmable timers.
    • Furrion. Offers powerful and efficient cooling, with features like dual fans and vibration smart technology.
    • Coleman-Mach. Offers a range of durable models, including low-profile units for improved fuel efficiency.
    • Pioneer. Known for under-bench units with heat pump functionality for year-round comfort. 
  • Your RV and UV Protection: 9 Actions Every Owner Should Take

    Your RV and UV Protection: 9 Actions Every Owner Should Take

    The fact is that the sun — bright orange ball that it is — can sneak up on us. We head outdoors and enjoy the sunny the weather with easy nonchalance. But for your RV, those ultraviolet (UV) rays aren’t just sunny — they can punish different components over time. So, plussing up your RV with UV protection is crucial for extending its lifespan. (In addition to maintaining its aesthetic appeal.)

    Fact is, UV radiation is no joke. And an RV that neglects UV protection can ultimately expect damage to its exterior paint, roof, and interior furnishings. However, by understanding these risks, RV owners can easily boost their UV protection with some pretty simple preventive measures.

    So, let’s name them. The following are nine ways to help you safeguard your investment from the menace of the sun. 


    The Danger of UV Rays for Your RV

    Ultraviolet rays are a type of electromagnetic radiation emitted by the sun. They are categorized into three types: UVA, UVB, and UVC. While UVC rays are absorbed by the Earth’s atmosphere and do not reach the surface, UVA and UVB rays can have detrimental effects on materials, including those used in RV construction. UVA rays penetrate deep into materials and can cause fading and degradation over time. UVB rays, while less prevalent, are responsible for sunburn and can also damage surfaces.

    Both types of UV rays can lead to the deterioration of your RV’s exterior and interior, resulting in costly repairs and a diminished appearance. Some common indicators to recognize the signs of UV damage would be the following.


    Signs of UV Damage

    • Fading Paint. The vibrant colors of your RV may start to fade, leading to a dull appearance. 
    • Cracked Surfaces. The exterior materials, including fiberglass and vinyl, may develop cracks or become brittle. 
    • Deteriorated Seals. UV exposure can weaken the seals around windows and doors, leading to leaks.

    How to Protect Your RV from UV Rays

    1. Use UV-resistant materials.

    When investing in an RV, choose a model that uses UV-resistant materials. Many manufacturers now incorporate materials designed to withstand UV exposure. If you’re planning to customize or repair your RV, look for fabrics, paints, and coatings that specifically state UV resistance.


    2. Regularly wash and wax your rig.

    Keeping your RV clean is essential for protecting it from UV rays. Dirt and grime can trap moisture and lead to mold and mildew, which can exacerbate UV damage. Regularly wash your RV using a mild detergent and water. After cleaning, apply a high-quality wax designed for RVs. Wax acts as a barrier against UV rays and helps to protect the paint.


    3. Use UV-blocking covers.

    When your RV is parked, especially for extended periods, consider using a UV-blocking cover. These covers are designed to shield your RV from direct sunlight. That prevents the UV rays from causing damage. Choose a cover that fits well and is made from breathable material to prevent moisture buildup underneath.


    4. Park your RV in the shade.

    Whenever possible, park your RV in shaded areas. (You already knew that, right?) Trees, awnings, and other structures can provide natural protection against UV rays. If you’re at a campground, look for sites with ample shade. If shade is not available, consider using portable sunshades or canopies to create a shaded space for your RV.


    5. Install window tinting.

    Window tinting can significantly reduce UV exposure inside your RV. Applying a UV-blocking film to your windows helps protect your interior furnishings and occupants from harmful rays. This goes beyond preserving the appearance of your RV. It also keeps the interior cooler and enhances comfort during hot weather.


    6. Make use of awnings and sunshades.

    Awnings are a great addition to any RV. They provide shade and reduce direct sunlight exposure. Ensure your awning is made from UV-resistant fabric. Additionally, consider using side panels or sunshades that can be attached to the awning for extra protection.


    7. Keep regular with your inspections and maintenance.

    Conduct regular inspections of your RV to identify any signs of UV damage. Check for fading, cracking, or deterioration in the exterior materials and seals. Addressing these issues promptly can prevent further damage. (That way, you can avoid costly repairs.) Regular maintenance forever remains essential for the longevity of your RV. It includes resealing joints and applying protective coatings.


    8. Store your RV properly.

    If you plan to store your RV for an extended period (like all winter), choose a location that minimizes UV exposure. Ideally, store your RV in a garage or covered storage facility. If that’s not possible, use high-quality covers. Also, ensure that all windows and vents remain closed to protect against UV rays and potential weather damage.


    9. Apply a protective coating.

    There are various protective coatings available that can be applied to your RV’s exterior to provide an extra layer of UV protection. These coatings can help prevent fading, cracking, and weathering by forming a barrier against the sun’s rays. Always follow the manufacturer’s instructions for application for the best results.


    Defend Your RV with UV Protection

    Understanding UV exposure is key to protecting your RV. Familiarize yourself with the UV index, which indicates the strength of UV radiation on a particular day. On days with high UV indexes, take extra precautions by minimizing exposure and ensuring your RV is adequately protected.

    Remember, just like other maintenance tasks, protecting your RV from UV rays is an essential part of maintaining its value and ensuring a pleasant camping experience. By understanding the risks associated with UV exposure and implementing proactive measures, you can significantly extend the lifespan of your RV. Regular maintenance, use of protective materials, and proper storage practices will help keep your RV looking great and functioning well for many adventures to come. Remember, a little effort in protecting your RV today can save you time and money in repairs tomorrow. Enjoy your travels knowing your RV is well-protected against the sun’s harmful rays!

  • Optimizing Your RV Airflow: A Step-by-Step Guide

    Optimizing Your RV Airflow: A Step-by-Step Guide

    Some things don’t take too long to figure out. And if you’re living in an RV, one thing you figure out pretty quick is that optimizing airflow is crucial to enhance comfort, efficiency, and overall performance. Proper RV airflow does lots of things — all which make life in your RV more enjoyable. It ensure that your rig is maintains  comfortable temperatures you sert. It reduces humidity levels. And down the line, it improves the efficiency of your heating and cooling systems.

    All that sounds great, right? But what’s the key to optimizing RV airflow? Buying a new A/C system? (We’ll talk about that in another article.) The truth is that while a new system can be a helpful addition, the most practical things you can do simply involve awareness and a little maintenance.

    So, let’s talk through some key strategies to optimize airflow in your RV.


    Step 1: Understand the basics of RV airflow.

    Just to make sure everyone is on the same page here, airflow refers to the movement of air within your RV’s interior and systems. Good RV airflow helps in distributing conditioned air (either heated or cooled) evenly throughout the space. Therefore, it’s essential to understand how air moves in and out of your RV, the impact of temperature differences, and how various materials can affect RV airflow.


    Step 2: Assess your current airflow situation.

    Before making any changes, it’s essential to evaluate your RV’s existing airflow. Check for areas that may be obstructing airflow. Take a look at furniture placement, curtains, or other items. Also, identify hotspots or cold spots within your RV. These spots can indicate poor airflow in certain areas. 


    Step 3: Check your ventilation systems.

    Most RVs are equipped with ventilation systems. These systems include roof vents, windows, and exhaust fans. Make sure the following systems are functioning correctly. 

    • Roof Vents. Install or maintain roof vents that can be opened to allow warm air to escape. This is particularly useful in warmer climates.
    • Exhaust Fans. Use exhaust fans in the kitchen and bathroom to remove excess humidity and odors. These fans help in creating a negative pressure that allows fresh air to enter through other openings. Oftentimes, these fans are tiny and ineffective, and ready for replacement.
    • Windows. Open windows strategically to create cross-ventilation. This allows cooler air to flow in while warm air exits.


    Step 4: Evaluate your RV’s insulation.

    Proper insulation is vital for maintaining a comfortable temperature and optimizing airflow. RV insulation helps to keep the conditioned air inside and reduces the need for heating or cooling. Consider these options:

    • Reflective Insulation. Install reflective insulation materials on windows to minimize heat gain from sunlight.
    • Insulated Window Covers. Use insulated curtains or thermal blinds to keep heat in during winter and out during summer.
    • Underbelly Insulation. Ensure the underbelly of your RV is insulated to prevent heat loss and improve overall efficiency.


    Step 5: Consider upgrading your HVAC system.

    If your RV’s heating, ventilation, and air conditioning (HVAC) system is outdated or inefficient, consider upgrading to a more modern system. Newer units often come with better airflow designs, variable speed fans, and improved energy efficiency.

    • Ductless Mini-Split Systems. These systems can provide efficient heating and cooling with better airflow control.
    • High-Efficiency Air Conditioners. Look for units with a high SEER (Seasonal Energy Efficiency Ratio) rating for better airflow and efficiency.


    Step 6: Optimize your air ducts.

    If your RV has a ducted HVAC system, ensure the ducts are clean and unobstructed. Dust and debris can accumulate over time, affecting airflow. Consider the following.

    • Duct Cleaning. Regularly clean the ducts to improve airflow and indoor air quality.
    • Duct Insulation. Insulate your ducts to minimize heat loss or gain, especially if they run through unconditioned spaces.
    • Duct Sealing. Check for leaks in the ductwork and seal them to prevent air from escaping.


    Step 7: Place fans strategically.

    Adding fans can enhance airflow and improve comfort levels within your RV. Consider these types of fans.

    • Portable Fans. Use small fans to circulate air in specific areas, especially in hotter regions.
    • Ceiling Fans. Install ceiling fans to help distribute air evenly throughout the living space.
    • Exhaust Fans. In addition to kitchen and bathroom exhaust fans, consider adding a roof-mounted exhaust fan for additional ventilation.


    Step 8: Maintain your RV’s exterior.

    The exterior of your RV can significantly impact airflow. Regular maintenance can help ensure that air can move freely.

    • Clear Obstructions. Remove any debris, branches, or dirt from vents, exhaust ports, and air intakes.
    • Check Seals and Caulking. Inspect seals around windows, doors, and vents. Replace any worn or damaged seals to prevent air leaks.
    • Aerodynamic Design. If possible, consider upgrades that improve the aerodynamics of your RV, such as streamlined hoods or fairings.


    Step 9: Monitor humidity levels.

    Excess humidity can lead to discomfort and mold growth within your RV. Optimize RV airflow to manage humidity levels effectively with the following.

    • Dehumidifiers. Use portable dehumidifiers to reduce moisture levels in the air.
    • Humidity Sensors. Invest in a humidity sensor to monitor levels and adjust ventilation as needed.


    Step 10: Create a regular maintenance routine.

    Establishing a routine for maintaining your RV’s airflow system is crucial for long-term performance. Regular checks and maintenance tasks include:

    • Inspecting and Cleaning Filters. Replace or clean air filters in your HVAC system regularly.
    • Checking for Leaks. Periodically inspect ducts and vents for leaks and seal them as necessary.
    • Seasonal Maintenance. Before and after camping seasons, perform a comprehensive check of your RV’s ventilation and airflow systems.


    Step 11: Optimize layout and design.

    The layout of your RV can influence airflow significantly. Consider rearranging furniture or using space-saving designs to allow for better air circulation. For example, with furniture placement, avoid placing large pieces of furniture in front of vents or airflow pathways. Common sense stuff like that.


    Step 12: Enjoy improved RV airflow.

    Optimizing airflow in your RV is essential for comfort, energy efficiency, and maintaining a healthy living environment. By understanding the basics of airflow, utilizing ventilation systems, upgrading HVAC equipment, and maintaining your RV regularly, you can enhance the overall performance and enjoyment of your recreational vehicle. Whether you are a weekend camper or a full-time RVer, prioritizing airflow optimization will significantly improve your experience on the road.

  • Want an RV for Beach Camping? Shop These 6 Breezy Models

    Want an RV for Beach Camping? Shop These 6 Breezy Models

    This one’s for the sunset chasers. The beach breeze buffs. The aficionados of barefoot bliss. We know the desire of your heart is to camp as close to the sound of waves as possible. So, let’s just say your destination is spoken for. The real question is about the right RV for the beach.

    So, if you’ve found yourself dreaming that dream and wondering which RV is the best fit for your beach camping adventure, we got you. We’ve collected a list of six of breezy RV made to take you to that sunny shore. Each of these has the coastal vibe, can handle a salty breeze, and keeps you cool when the midday sun hits its peak. And each can park you close to shore where all the beach fun is happening.

    Whether you’re setting up for a weekend on the Gulf Coast or a month of slow travel up the Pacific, these six RV models are built for beach camping. 


    1. Airstream Caravel 19CB

    Price Range: $86,400–$95,000
    Towing Weight (GVWR): 5,000 pounds

    Why We Love It: The Airstream Caravel 19CB is a head-turner in any setting, but it practically belongs on the beach. Nothing says cool like its sleek aluminum shell. And even as this lightweight trailer reflects sunlight, it keeps the cabin chill. Inside, the panoramic front windows make your sunrise coffee quietly whisper luxury. And with marine-grade plumbing and solid insulation, it’s just as happy on the Oregon coast as it is in the Florida Keys. Ideal for couples or solo travelers, this rig is small enough to park at those beachfront spots with tight pads and even tighter turns.


    2. Winnebago Solis Pocket 36A

    Price Range: $100,000–$115,000
    Towing Weight (GVWR): 8,550 pounds

    Why We Love It: Compact, nimble, and made for adventure, the Winnebago Solis Pocket 36A is perfect for spontaneous beach runs and laid-back coastal road trips. It’s a Class B camper van with lots of beachy features. Think built-in solar panels. A raised bed with gear storage underneath. And rear double doors to maximize airflow. The interior layout prioritizes flexibility. Throw a surfboard in the back or a couple folding chairs and a cooler. It also conveniently fits in regular parking spots. So, you can pull right up to the beachside diners or public access points with ease. This is the definition of low-maintenance freedom.


    3. Forest River R-Pod RP-171

    Price Range: $25,000–$30,000
    Towing Weight (GVWR): 3,749 pounds

    Why We Love It: For beachgoers on a budget, the Forest River R-Pod RP-171 delivers more than you’d expect from a lightweight trailer. Its compact size makes it ideal for state beach campgrounds, while the marine-style wet bath and stainless steel kitchen keep cleanup simple. The curved fiberglass exterior is aerodynamic and beach-breeze friendly. We especially love how easily this trailer can be towed by smaller SUVs, making it a great option for spontaneous weekenders or first-timers who don’t want to invest in a heavy-duty truck.


    4. nuCamp TAB 400 Teardrop Camper

    Price Range: $49,000–$55,000
    Towing Weight (GVWR): 3,900 pounds

    Why We Love It: The nuCamp TAB 400 is a teardrop that punches well above its weight. With a panoramic front window and sleek Euro styling, this camper blends perfectly into scenic beachside landscapes. Inside, you’ll find a cozy dinette, full wet bath, and surprisingly spacious kitchen for a teardrop. The clever design features like under-bed storage and a stargazer window above the bed make it easy to stay organized and cool at the same time. Bonus: Its insulated structure and Alde heating/cooling system mean you’re comfortable whether you’re on the breezy Atlantic in May or the muggy Gulf Coast in July.


    5. Jayco White Hawk 25MBH

    Price Range: $50,000–$60,000
    Towing Weight (GVWR): 7,500 pounds

    Why We Love It: For families looking to set up basecamp at the beach, the Jayco White Hawk 25MBH has the space and smart design to make it easy. Murphy beds up front free up floor space during the day, while bunk beds and a full kitchen make it feel more like a beachfront condo than a camper. The exterior kitchen is perfect for post-swim snacks, and Jayco’s Climate Shield means you’ll stay comfy even when the beach sun gets brutal. It’s a great pick for extended stays near the shore or larger groups who want elbow room without sacrificing mobility.


    6. Airstream Interstate 24X

    Price Range: $240,000–$260,000
    Towing Weight (GVWR): 11,030 pounds

    Why We Love It: Luxury meets off-grid grit in the Airstream Interstate 24X. This Class B touring coach is built on a Mercedes-Benz Sprinter chassis and designed for the road less traveled. (Think remote dunes or hidden beach access spots.) It’s outfitted with aggressive tires, a spacious wet bath, rooftop solar, and rugged L-track system to secure gear. Inside, the high-end finishes and clever storage scream “adventure yacht.” This is the ultimate beach-cruiser for the traveler who wants zero compromises and all the freedom. It’s a splurge, sure—but it earns every dollar with performance and polish.


    Find Your RV for the Beach? That’s a Good Vibe

    Beach life is all about flow: from the rolling tide to the crunch of your wheels on sand. Whether you’re solo surfing the coast or bringing the whole crew for some sandcastle glory, these six RVs bring their own brand of breezy charm to the shoreline. Each balances ease of use with creature comforts, so you can focus less on setup and more on soaking up the sun. From sleek aluminum icons to budget-friendly beach bungalows, there’s something here to fit every traveler who wants to take their toes — and their home — closer to the water.

  • Popular Pups! 6 Instagram Dogs Who Love to RV

    Popular Pups! 6 Instagram Dogs Who Love to RV

    If you’re into adventure, you’re already barking up the right tree with life in the RV. But adding a pet — or three!!! — takes it to a whole new level. As you might expect, RVstagram has become a goldmine of furry friend personalities and Instagram dogs who’ve stolen the spotlight from their human travel partners. (And that is A-OK with us — and their many followers.)

    So, we’ve rounded up six of the cutest, fluffiest, good boys and girls from the photogenic world of Instagram dogs (and a few cat companions). These furry passengers prove that the road is always better when shared — especially with something a little wild riding shotgun.


    @henrythecoloradodog | 2.3M Followers


    View this profile on Instagram


    Henry + Baloo (@henrythecoloradodog) • Instagram photos and videos

    The Stars: Henry, a rescue dog, and his feline friend, Baloo, exploring the American West.

    Why We Love Them: The unlikely friendship between a dog and a cat, coupled with breathtaking landscapes, makes their account a must-follow for adventure and animal lovers alike. 


    @camperandleo | 61K Followers


    View this profile on Instagram


    Tricia Souza (@camperandleo) • Instagram photos and videos

    The Stars: Camper the dog and Leo the cat, sharing their unique friendship and adventures.

    Why We Love Them: Their account highlights the bond between a dog and a cat, showcasing their playful interactions and the joy they bring to their human companions.

    RV life is unpredictable enough without adding a furry friend into the mix — but that’s exactly what makes these accounts so endlessly entertaining. Whether they’re hiking the backwoods, sunbathing on the dash, or chewing through another seatbelt, these two have carved out a wildly lovable corner of Instagram. 


    @adventuresofcamper | 13.7K Followers


    View this profile on Instagram


    Camper Delventhal🐶 & “RV”🐕‍🦺 (@adventuresofcamper) • Instagram photos and videos

    The Stars: Camper, a rescue dog, and his human, Nikki Delventhal, traveling full-time in a Prius.

    Why We Love Them: Camper’s journey from being abandoned in the desert to becoming a full-time travel companion is heartwarming — the kind of story Instagram dogs seem made for. Their adventures showcase the bond between a pet and owner, highlighting the joys and challenges of life on the road.


    @bigdogrv | 14.8K Followers


    View this profile on Instagram


    Big Dog RV (@bigdogrv) • Instagram photos and videos

    The Stars: Two Great Danes and a rescued tri-pawed dog traveling full-time with their owners.

    Why We Love Them: Showcasing the challenges and rewards of RVing with large dogs, their account is more than inspiring. It’s also educational for pet owners considering life on the road.


    @rvingdogsandwine | 10.6K Followers


    View this profile on Instagram


    RV’ing Dogs & Wine (@rvingdogsandwine) • Instagram photos and videos

    The Stars: A couple, their dogs, and a shared love for wine, documenting their RV lifestyle.

    Why We Love Them: Their account blends the joys of pet companionship, travel, and wine tasting. As you might expect, they offer a unique perspective on the RV lifestyle.


    cruisingwithcooper | 9.6K Followers


    View this profile on Instagram


    Cooper | RV Life | Travel Dog (@cruisingwithcooper) • Instagram photos and videos

    The Star: Cooper, a travel-loving dog, sharing his RV adventures across the country.

    Why We Love Them: Cooper’s account offers a dog’s-eye view of RV life, complete with tips, tricks, and tales from the road, making it both entertaining and informative.


    Bonus: 3 Tips for Living Life in an RV with a Pet

    1. Prioritize Climate Control

    Dogs don’t sweat like humans, so temperature management is critical. Always make sure your RV stays cool in the summer and warm in the winter — especially if you ever leave your pup alone inside. Invest in vent fans, blackout shades, and a temperature monitor that alerts your phone if things get too hot or cold.


    2. Make Exercise Non-Negotiable

    Campground walks are great, but most dogs need more than a few laps around the RV park. Plan daily outings like hikes, beach runs, or dog-friendly town strolls. It keeps your dog healthy and helps burn off excess energy, which means less chaos back inside the RV.


    3. Stock a Dedicated Go-Bag

    Keep a small, always-ready bag with your pet’s essentials: leash, waste bags, water bowl, treats, vaccination records, and any meds. Whether you’re heading out for a long hike or evacuating in bad weather, having this gear prepped saves time and keeps your furry co-pilot safe.

  • Williamsburg’s Patriotic Parking Spot: Anvil Campground

    Williamsburg’s Patriotic Parking Spot: Anvil Campground

    American history lovers, look no further. Colonial Williamsburg offers a slice of living history. Cobblestone streets and horse drawn carriages will take you on a ride back in time. Located in the Historic Triangle (Jamestown, Yorktown, and Williamsburg), this prime position lends itself to a rich American experience. The appeal for RVing in this destination is massive, and Anvil Campground settles right in the middle of it.

    This award-winning campground is surrounded by family friendly activities where kids and adults alike can carve out some valuable memories learning lessons in history as they go. Here, modern comfort and historical adventure pave the way for a perfect RV getaway in Williamsburg, Virginia. 


    Why Stay at Anvil Campground

    Conveniently located off I-64, Anvil Campground is within easy reach of the D.C. metropolitan area, Richmond, and the coast. It’s just far enough to offer a quiet reprieve from the hustle and bustle of city life. But it’s also close enough to be a common weekend destination for many Virginians. It is also popular for RV travelers making the long trek up the East Coast. 


    Amenities

    See why Anvil Campground has won the National RV Park of the Year Award not once, but twice (2028, 2022). Their amenities include the following. 

    • Full hook ups (30/50-amp service)
    • Picnic areas
    • Fast/reliable Wi-Fi 
    • Large pull through sites, accommodating up to 45 feet
    • Premium patio sites
    • Free game room 
    • Two playgrounds for kids 
    • Beach park
    • Heated swimming pool


    Families with Pets

    Two dogs are allowed per RV site. There are fenced in dog areas, and designated pet pooping stations. Your cat is also welcome, so you can bring along all your furry companions. 


    Laid Back Atmosphere

    Many popular RV destinations feel like their own city center. Not everyone wants that kind of citified energy on a camping trip. Anvil Campground maintains a laid-back, community-oriented feel. They have been family owned for 71 years. 


    Close to Nature

    Located in a peaceful, wooded environment, there is no shortage of trees here. Shaded walking trails are available in the park, and hammock areas are dispersed for quiet reading and relaxation. Adjacent to the campground (a three-minute drive) is Waller Mill Park, a 360-acre lake. There, you can enjoy additional hiking trails, a dog park, boating and fishing. 


    Transportation

    Anvil Campground is the only campground in Williamsburg offering a bus service. This exclusive service will take you to Williamsburg, Bush Gardens, Colonial Williamsburg, and more! With transportation provided, you don’t need to tow a vehicle behind your rig. Just leave it at home and come on over. 


    Booking a Site at Anvil Campground 

    The process to book a site at Anvil Campground is straightforward and convenient. You can make reservations online, or you can call their guest services line (757-565-2300). Before you book, take a look at their site map and choose which site would best suit your needs. Keep in mind that the premium patio sites will be likely to book up the quickest. 

    Tip: While this small and accommodating RV Park will do their best to accommodate your dates, it’s always a good idea to book in advance, especially during their busy seasons. 


    Must-See Attractions Nearby

    Jamestown Settlement

    Fifteen minutes from Anvil Campground, Jamestown Settlement offers a living history museum for the whole family. If you are roadschooling with your kids, this would be a great opportunity for an American history lesson


    Yorktown Battlefield

    Part of the Colonial National Historic Park, Yorktown Battlefield is just 25 minutes from the campground. And in case you are wondering what all the fuss is about, this battlefield is where George Washington defeated the British in 1781 — effectively ending the Revolutionary War. So, it’s a pretty significant place in American History. In addition to seeing the reenactments and Revolutionary War artifacts onsite, you can stroll through the quaint town of Yorktown. 


    Bush Gardens

    Tired of history, and ready for some serious fun? Busch Gardens is a European-themed amusement park. If you love roller coasters and thrill rides, you could spend days here and never tire. Some highlights include The Pantheon (one of the fastest roller coasters in the U.S) and Escape from Pompeii (a fire-and-water-drenched thrill ride). Plus, there are loads of seasonal events around Christmas, Halloween, Easter, and Thanksgiving. 


    Water Country USA

    Water Country USA is Virginia’s largest water park. Only 12 minutes from Anvil Campgrond, enjoy more fun packed adventures on water coasters, play zones, and wave pools. If you are visiting during the warmer months, be sure to check out the Colossal Curl, and Cutback Water Coaster for a thrill. 


    Colonial Williamsburg

    Just 10 minutes from Anvil Campground is another living history museum spanning 300 acres. Restored Eighteenth Century buildings are full of costumed interpreters for your education and entertainment. Colonial Williamsburg offers a beautifully preserved environment to immerse yourself in history. 

  • American History Tour: Roadschooling 101

    American History Tour: Roadschooling 101

    Maybe you’re like me. Personally, I can remember my American History class like it was yesterday — sitting in neat rows under halogen lights trying (desperately) to pay attention. Memories of my American history lessons were buried beneath a pile of heavy textbooks, frantic memorization, and sweaty test-taking. Fast-forward now twenty years, and I can say (gratefully) that American History lessons while roadschooling my children are nothing like that.

    The difference is startling. Let me share a moment with you.

    As we hike along the steep canyon trails of Walnut Canyon National Monument, dusty images of Native American history fill the panorama. My girls rush into the open cliff dwellings, making their own pretend homes behind stone walls. Imagination weaves the lessons of history into their memory through tactile play. Children possess a natural interest in the origins of our culture. Taking history lessons on the road only fans that flame.

    And the road is full of those kind experiential American history lessons.


    History Was Lived, Not Read

    Not that long ago, our children drove through Monument Valley. There, history towered over us like ancient sentinels. Each impossible rock formation shadowed us with ancestral stories and life lessons, unrolling a carpet into America’s past.

    Your children pick up something standing in places like that. Something that books can’t quite fully convey — and that’s the livingness of history. Once, a real person stood in this place. And their experience was real.

    Being in places like this reminds us that history lives in the land and stories told by our predecessors. It lives in the pottery and beaded necklaces that we see under glass in museum gift stores. It also lives behind the bars of native schools on reservation land. No, it isn’t always pretty, but it is undoubtedly American and undeniably rich. Everything we encounter on the road unwinds an endless yo-yo of lessons in history to explore.  


    Discovering Little Known History: An Example

    Our country is full of history-rich places to explore. And a lot of the great ones (no surprise) are the standard ones in the text books. (Think of Williamsburg and Gettysburg and Washington D.C.) But discovering lesser known places can be absolutely captivating for your kids. 

    Once, while exploring American History on the road, we came across a fascinating theme that exists all over the eastern portion of the US — the Underground Railroad. Most of us are familiar with what the Underground Railroad is. But did you know that barn quilts had hidden codes embedded as maps leading to safe havens through the woods? Or that many church sermons had hidden rhythms in their hymns signaling messages to escaped slaves hiding below the floors?

    Stories like this are rich and exciting to a child’s imagination. (Or anyone’s imagination, for that matter.) Hidden passages with pieces of this history exist all over the United States. You can take a tour on the Schooner B as a part of the Waterfront Underground Railroad Musuem in Washington, North Carolina. Here, you can learn about slaves escaping on sailboats in complicated inland waterways. One enslaved woman had letters of passage for ship captains sewed into the seams of a dress made of quilt scraps. The letters were undetectable except for a gold thread sewed into one of the slips as a code, signifying the secret letters hidden within. I don’t think I could make this up if I tried!

    But think about it. By imagining, children internalize the history in a personal way. And, once you have to inevitably return to those bookish lessons, they are way more interested.


    American History Roadschooling Resources

    There are so many resources available to roadschooling families. The number one resource that our family utilized are public libraries. At these locations, you can dive into the local history of each place that you visit. You will be surprised what you find. There are so many pockets of fascinating, and little known history around the U.S. That American history textbook might have felt heavy in your backpack, but it only had the space for the tiniest sliver of our country’s history. So much of it is buried, waiting for you to wipe the dust off and uncover the hidden gems beneath. 

    Also, don’t forget to talk to the librarians! They are a wealth of local knowledge, hidden gems, and lesser known history lessons. Libraries are more than happy to support homeschooling, and they will likely offer many local activities that your children can partake in.


    History as a Gateway to Lifeschooling

    There are an endless number of terms used to describe homeschooling styles. There’s worldschooling and natureschooling. There’s travelschooling and unschooling and roadschooling, of course. Recently, however, I heard a new term that I liked: lifeschooling. To me, something about it stands out from the others. Life is the one thing that can’t be taught to our kids in school. And, honestly, I don’t think we want schools take that responsibility. That job belongs to us.

    All the lessons we learn on the road weave their way into the tapestry of life. It’s my favorite thing about integrating American history while roadschooling. We learn about history in a raw and unseasoned capacity, and we can apply it to life in the now. Sure, history can make us feel proud and patriotic. But, equally important, it can also teach us not to make the same mistakes. Teaching children history in an applied setting means we don’t have to sugarcoat it. We can unravel it all under the same sky where it took place. The first hand impressions these lessons make on our children will lead to a deeper understanding of our country, influencing decisions they make going forward. And that is just as important as science, geography, and mathematics.

  • Which RV Options Are Really Worth It?

    Which RV Options Are Really Worth It?

    The reasons we go RVing are as varied as the places we take our rigs. Perhaps it’s human nature itself that drives us, but the pull of beauty and the longing to explore manifests differently in each camper —from the deep woods to the big-city skyline, from the wide-open desert to the seaside park. And as we evaluate an RV purchase, we’re often left wondering which RV options really matter for in our perfect model?


    Your RV lifestyle makes all the difference.

    The fact is that the RV options that are important to specific buyers are as unique as the 11.2 million households in the U.S. who own RVs. So, diving deeper, we turned to our Facebook and Instagram audiences to see what they thought. Not surprisingly, responses were all over the map. From Class A owners valuing more space to small pop-up campers wanting to fit into the garage (and not offend HOA rules), the RV features that folks can’t live without, reflect how they use their RVs.  

    While most RVs don’t have space for features like a built-in washer and dryer, if you’re going to live full-time at a resort or private RV park with water, electricity, and sewer hookups, it might make sense. On the other hand, simply type “laundromats near me” into your mapping app and get your many loads of laundry done in less than 90 minutes while you make lunch in the parking lot or go grocery shopping. It’s your choice. Each has its pros and cons.  


    RV Features and Options We Heard Strong Opinions About

    • Usable storage
    • Full-time bed and separate dinette area
    • Counter space and functional kitchens 
    • Dry bathrooms
    • Solar capabilities and other boondocking packages with higher clearance or upgraded suspension, low power fridges, etc. 
    • Extras features like gas fireplaces, washer and dryers, reclining chairs vs. sofa loungers, insulated windows and heated spaces below their rigs for winter comfort.    

    Now, whether you want these features depends upon how you want to use your RV, and where you intend to take it. Let’s take a deeper look.


    Storage: Now, where did you pack those jumper cables?

    Smart storage is important in making a small space feel comfortable. (Regardless of how long you’ll be out.) If you’re going full-time, you’ll need storage for not only this season’s clothes and gear, but for all the other seasons too. And speaking of boots, how many do you actually need?

    Ask Yourself …

    • How much food can you reasonably store without looking like you’re setting up a concession stand? 
    • How long do you intend to spend away from a grocery store, or other essential services?  
    • What type of extra equipment, outdoor toys, musical instruments, games or hobbies do you plan to bring with you?  

    Pro Tips!

    Just as storage space is important, so is how you pack it — you’ll need the things you use most often most accessible. Think of your RV like a Swiss Army knife: Everything must have multiple functions, from clothing to cookware. If it’s only got one use (and it’s bigger than a pocket knife), you’d better have a good reason for bringing it. Example: Hutch’s guitar is big, bulky, and you can’t cook on it. But he can’t imagine living without it. So, what’s your guitar?  


    Full-time bed/secret dinette: Can sleeping and eating share a single solution?

    Converting the dinette to the bed makes the space more efficient, but it also adds a daily chore.


    Nothing beats being able to simply pull over after a long travel day, and collapse into your own comfortable bed. Needing to convert the space from suppertown to snoozeville can be one of those tediously repetitive steps that might have you reconsidering your full-time dreams. But for your short RV vacation, this nightly novel ritual could provide the perfect distraction from the routine of daily life. Perhaps that tiny, “cuter-than-cute” RV is what you’ve been looking for after all!

    Ask Yourself …

    • Are you planning on working from the road out of your RV?
    • What do you need to accomplish your work in terms of space, power and equipment?
    • Will you have visitors, how frequently? How many other sleeping areas will you need?
    • Will you bring pets? What are their space needs? How can you keep them comfortable if you leave them for some time alone in the RV?

    Pro Tips: Invest in a quality mattress, regardless of how you set up your bed, quality sleep is priceless. In addition to serving as a dinner table, prep area, and where we have our “serious conversations,” our dinette serves as a computer workspace. We’ve invested in quality laptops that both do their job as well as quickly fold away to convert from office to breakfast nook. 


    Counter space in a functional kitchen: Is there enough room for all the cooks in the kitchen?

    For some RV owners with a lot of people to feed, counter space is a big consideration.


    In our kitchen we have two stations, the chef at the stove. And the sous chef sitting at the dinette. If you think about your counter space the same way as your cookware, with every surface having multiple purposes, you can prepare any dish in just about any sized kitchen.  

    Ask Yourself …

    • How many people will you regularly cook for?
    • What season will you be traveling? 
    • How often will you use an outdoor kitchen? Would a portable camping stove suffice for those times that you want to cook outside?
    • Do you want to focus on an outdoor kitchen as opposed to the inside one? 
    • Do you really need that huge kitchen sink or will stackable tubs do the job just as well?

    Pro Tips!

    Focus less on space and more on quality, versatile cookware. Invest in good quality cookware and kitchen tools that can do their job on the inside stove, on camping stove, or on a campfire.  Find creative recipes that will make you excited to prepare food that’ll rival your scenic locations.  Look for inspiration everywhere to make your meals more of an event.


    Dry bathroom: So you shower where you sh…sit?


    Dry bathrooms provide a separate space for the toilet and shower. In a wet bath setup, the two move in together, saving space, but  there are disadvantages. (Like a higher risk of soaking the toilet paper.)

    How you camp and where you camp will determine your toilet-shower space needs. If you’re going to be at campgrounds with toilets and showers, do you really need a larger bathroom at all?  Many of the folks who camp this way tell us that they rarely even use their toilet beyond nighttime necessity, and have never actually used their shower except as a storage area.

    Ask Yourself …

    • Is the convenience of going closer to home more important to you than the requisite dumping and cleaning of holding tanks?
    • Will you be camping in private RV parks that offer full-hook ups, including sewer?
    • Will you be boondocking for weeks at a time? Hint: You may not even use your built-in toilet.

    Pro Tips!

    If only all small American towns were like those found in Alaska where many gas stations and laundromats offer clean showers for a small fee. Be honest: Are your vacation hygiene standards the same as your 9-to-5 life? If you’re taking a short trip, you’ll probably find that a shower every couple of days will be sufficient.  

    Most of our full-timing friends, even those working full-time jobs, find that they don’t prepare for their day in the same way that they did when going into an office. I’m not saying that we’ve all let ourselves go, but thinking that you’ll carry-on bathing as you have in your house or apartment is probably unrealistic.  

    A 24-hour gym membership to a nationwide chain can also be a great showering option for folks taking longer trips in their RV’s. Also, local recreation centers and community pools have a daily membership fee where you can grab a hot shower – don’t forget your flip flops!


    Solar capabilities: Am I really, really going off-grid?

    If you can DIY your solar install, you could save a lot of money.


    Solar has become so popular with RVs that many manufacturers now offer a solar package or solar-ready models.  This might mean that there is some solar capacity already built-into your model or can be installed as an additional package. (Buyer beware: The price might be four times more than if you do it yourself!)

    Even if you’re planning on parking it at an RV resort offering electrical service, you might need a night or two off-grid when traveling. That’s when even a small solar powered system can be a bridge between plug-ins. If you intend to do any boondocking, installing an appropriately-sized solar system will provide you with years of free electricity!

    Whether you purchase the solar package (or install your own system like many other RVers) might depend upon your skill set, timeline, and comfort with basic math and a crimping tool.

    Ask Yourself…

    • How long do you want to be away from an electrical outlet?
    • Can your current battery capacity provide enough to sustain during that time?
    • How comfortable are you working with electrical wiring? 
    • Do you have an interest in learning how solar works?

    Pro Tips!

    In 2010 when we first got our RV, we had no idea how to install solar power. We just knew that it worked. Since then, we’ve become solar ambassadors and educators. Solar curious? Take our Solar DIY Quiz to see if you have the necessary skills to plan your own solar installation.


    Extra fancy features: Am I going to use it enough to make it worth it?


    Decisions about RV features all go back to how and where you intend to RV. Many of these extras are associated with colder weather camping – gas fireplaces, extra insulation, heated underbelly, etc. If you don’t see yourself taking advantage of late season camping in the autumn or even boondocking in the winter, then perhaps these aren’t worth the extra cost.  However, if you love the idea of being curled up with your favorite throw blanket, a piping mug of tea in your hands, watching the leaves fall from your cozy camper with its quiet gas fireplace, then maybe it’s worth it. Just remember that these winter options have both upfront and secondary costs. 

    Same goes for laundry machine options and living area furnishings — convertible sofa or theater seats? It’s all about how you actually want to live in your RV.

    Just remember that the bigger your RV is, the more you need to plan out your route, your stops, and your campsite reservations. Perhaps the extra space, comforts and features are worth the extra hassle. Or, perhaps you want to go lightweight and fit into any open campsite from sea to shining sea.  Most of us will land somewhere in the middle with a combination of space and features that feel just right — just right for us!