Blog

  • 8 Tips for Taking Great Listing Photos

    8 Tips for Taking Great Listing Photos

    It’s no secret that the buying process is changing, and with technology on the rise, online research is becoming increasingly important to buyers before they make a purchase – large or small. That’s why, if you’re selling your used RV, taking high-quality photos is crucial to get more eyes on your listing. In fact, on RV Trader, listings with pictures generate 2.4X higher search result impressions, 6.5X higher click-through rates, and 15.8X higher vehicle detail page-views than listings without photos.

    Interested in upping your photo game? We’ve got 8 easy tips to make sure your listing photos are painting a clear picture to potential buyers.

    Make it Shine

    We know cleaning a fifth wheel or other RV can take time depending on the size, but a deep cleaning can have the potential to make or break a sale. It’s important to know that buyers want to see their potential unit in tip-top shape not just before making a purchase, but even when coming to see it in person. New or used, you’ll want to make sure the outside of the unit is washed, and that the inside of the unit has had a full detailing. Don’t forget simple things like making the beds, decluttering, wiping down counters, etc. 

    Use the Right Camera

    Consumers are likely to move along to the next listing if your photos are grainy or blurry. So our question to you is, are you using a high-quality camera to take your listing photos? You’ll want to make sure that you have a fairly newer camera to ensure that your photos are crystal clear. Keep in mind, most smartphones have incredible cameras and can be great options for taking photos. If you want to take your photos to the next level, consider buying an updated point and shoot camera. They are very simple to use and take extremely clear photos.

    Shoot at the Right Time of Day

    Ask any photographer and they’ll tell you, lighting is everything when it comes to taking photos. That’s why it’s so important to keep in mind the time of day you’re taking your listing photos. We recommend avoiding taking photos midday when the sun is at its brightest and lighting can come across as harsh. Shooting during the morning or late afternoon is ideal for capturing “warmer,” less washed out photos. As long as it’s not raining, cloudy days can also be great photoshoot days – just make sure it’s not too dark outside! While taking photos inside of the unit, highlight the natural light that the unit provides by opening up all of the windows while shooting. If there are darker areas inside, we suggest turning on the cabin lights as needed – avoid flash if at all possible.

    Keep in Mind Positioning and Location

    When taking listing photos, you’ll want to keep in mind where you’ve positioned and parked the RV. Make sure that the unit you are trying to sell is the focal point of your photo. While inside the unit, stand in corners and point the camera outward while taking photos to make the unit feel larger and longer.

    Take a Few Test Photos

    It’s important to take your time while shooting your listing photos, as they are a crucial part of your listing. Take a few test photos of your unit to make sure the lighting is right, the images are clear, and that you are satisfied with the outcome. If you aren’t pleased with the photos you can take a step back and see what might need to change to enhance your photo (positioning, lighting, etc.).

    Have a Variety of Photos

    Consumers want to see photos and LOTS of them. Potential buyers want to see the entirety of your Class B RV or other RV even before coming to see the unit – they want to picture themselves in their new RV on the road to their next destination. To paint your buyer a clear picture, we suggest taking a few full shots of the outside of the unit (showing the whole RV) as well as detailed, close-up shots. When taking indoor shots, we suggest showing all aspects of the unit. We recommend having a full outdoor RV shot as your main listing photo to grab the customer’s attention right off the bat, then they can explore more photo options as desired.

    Be Honest and Authentic

    It’s extremely important to be honest and authentic with your customers. Don’t hide the imperfections of the unit you are trying to sell. If the unit has a few dings or scratches, or if there’s a tear in upholstery, consumers deserve to know. It’s also a good idea to stay away from using stock photos of your unit – consumers appreciate original photos and want to see exactly what their potential unit looks like.

    Highlight Special Features

    Does the unit you’re selling have any special features like extra storage, great natural lighting, or new technology? Make sure you are highlighting them in both your listing photos AND descriptions. As we mentioned earlier, consumers want to picture themselves in their new RV, and showing them unique features will have a higher chance of piquing their interest.

    Bonus Tip: Add Video Features 

    Just like pictures, videos are powerful and persuasive advertising tools. If you are already taking photos, why not record some videos too? You can record a simple walkaround video or even a demonstration of the RV in action.

    Listings with photos have more buyers looking at them, clicking to view additional information, and contacting sellers to pursue a purchase. We hope that these 8 tips have helped you realize taking listing photos doesn’t have to be difficult. Getting the right photo takes some practice, but it will be worth it in the end, trust us.

    If you’re ready to snap some photos and sell your used RV, we encourage you to read through these tips for selling your used RV and list your for-sale unit on RV Trader’s nationwide online marketplace. Check out our RV Seller’s Guide for additional resources!

  • National Park Camping Guides

    National Park Camping Guides

    One of the biggest advantages of having an RV is having your home on wheels with you while you are traveling. The ability to ditch hotels is not only more comfortable but also more economic. RVing provides the freedom to travel to some of the best bucket list destinations in the country and those include many of our favorite national parks.

    There are a variety of activities you can do in national parks from hiking to sightseeing, and one of our personal favorites – camping. We’ve compiled detailed guides for camping in Glacier National Park, Grand Teton National Park, and Zion National Park. 

    We cover everything you need to know like where to camp, amenities, visitor centers, and so much more. Check out our travel guides below before you hit the road.

    Glacier National Park Travel Guide


    Zion National Park Travel Guide


    Grand Teton National Park Travel Guide


    For more information on planning your next great bucket list adventure, check out our additional bucket list resources.

  • FMCA Tech Tip: What Are Turn Alarms?

    FMCA Tech Tip: What Are Turn Alarms?

    Turn-Alarm can do more than alert drivers that a turn signal is still on.

    It happens to almost everybody. After passing a vehicle on a highway, you forget to turn off the turn signal. Because of distractions such as heavy traffic or sunlight on the dash, you travel a couple of miles without noticing the small blinking arrow on the instrument panel. And if you’re in a motorhome, you don’t hear the faint clicking of the flasher element, because it’s usually mounted on the firewall far under the dash.  

    When we owned a 2007 Allegro Bus motorhome, I eventually began holding on to the turn signal lever when changing lanes so I wouldn’t forget to cancel the signals. Then I heard about a product from Stockton, California-based Daeco, called Turn-Alarm. It replaces an existing turn signal flasher element with one that makes a “beep” sound while the turn signal is on. 

    Later, I found that the Turn-Alarm could have other uses as a warning system, such as alerting me when my satellite dish is up, when the gray-water tank is full, or when the cargo doors are open. But first, let’s focus on Turn-Alarm’s original purpose. I bought a Turn-Alarm that fit my Allegro Bus. Installation was simple — just unplug the original flasher element and plug in the Turn-Alarm. At first, the beep was a bit too loud, but that was easy to solve. A miniature sound transducer is inside the Turn-Alarm’s housing, and sound exits the housing via a 3/16-inch-diameter hole. I reduced the volume by covering part of the hole with a small piece of electrical tape. Twenty-three Turn-Alarm models are available. The Turn-Alarm website shows how to determine the replacement for your original flasher. When in doubt, you can contact Daeco by email or by phone. The basic models are two- or three-pin Turn-Alarms with simple plug-and-play installations. Turn signal flashers either thermally or electronically open and close the circuit, causing the turn signals to flash on and off. Thermal flashers do this by utilizing the resistance in the turn signal circuit, which is why larger flasher elements typically are used when pulling trailers with additional lights. LED lights have extremely high resistance, and they may not function with standard turn signal flashers. For those situations, Turn-Alarm offers a model 262LED flasher.

    Additional Uses

    After we bought our Entegra Coach motorhome, we could rely on a vehicle information display on the instrument panel to warn us, visually and audibly, when the turn signals were left on. So, I did not need a Turn-Alarm for that purpose. However, I found numerous other uses for the device.

    My first task was to add a warning system so that I wouldn’t drive away when my Winegard Trav’ler satellite dish was up. At the time, Winegard offered an optional auto-stow kit (it is no longer being manufactured). Basically, it was a four-wire cable that plugged into the back of the Winegard controller box, and it stowed the dish automatically when the ignition key was on. I didn’t want that, but I did want a warning, and the cable had one wire available for that purpose.   I used a nylon cable tie to place a Turn-Alarm model 262LED flasher behind the dash. I drilled a small hole in the instrument panel and mounted a red LED in it. I then ran 12-volt ignition hot power to the Turn-Alarm’s input tab, connected the ground wire on the 262LED to ground, and ran another wire from the Turn-Alarm’s output tab to the input side of the red LED lamp. I used regular female spade wire connectors to connect to the Turn-Alarm. I then ran another wire from the LED’s output connection to the orange wire labeled “for OEM use” on Winegard’s auto-stow cable. When the ignition key is in the “on” position and the satellite dish is up, the dish’s controller box completes the circuit to ground. The Turn-Alarm sounds the alarm, and the red LED light on the dash flashes on and off. 

    My next task was to add an alarm that sounds when the gray-water tank is full. Our motorhome came with a 709-P3 SeeLevel tank monitoring system. I replaced its display panel with a 709-RVC-PM SeeLevel panel, which includes RV-C communication, as well as a set of programmable alarm contacts that serve as switches to trigger external alarms. I programmed the display to close the contact and act as a switch to activate the alarm when the gray-water tank level rises to 96 percent. I then mounted another red LED lamp in the mud bath area where the monitoring equipment is located, and I added a mini rocker switch so that I can silence the alarm if I want. I placed another 262LED Turn-Alarm behind the panel, and I wired everything in pretty much the same order as in my satellite dish warning scheme, except that I used battery hot power rather than ignition hot power, and I used the SeeLevel contacts to ground the circuit.

    Other Models

    Other Turn-Alarm models offer a remote sound and an LED module that connects via a 3-foot cable to the two- or three-terminal flasher element. Originally designed for motorcycles, the remote models can be used anywhere an operator desires better sound and visibility. In addition, a universal Turn-Alarm, model U-1, is available. It does not require replacement of the turn signal flasher element. The U-1 can be used with newer vehicles that have nonstandard flashers or body control modules. A motion sensor attaches to the turn signal lever via hook-and-loop tabs. A control box, mounted beneath or above the dash, includes the sound transducer orifice and a red LED. An on-off power switch conserves the 9-volt battery’s power when not in use. 

    The Turn-Alarm is an easy way to add an audible alert and flashing warning lamp, whether for turn signals or other applications. In fact, I intend to install a Turn-Alarm for my cargo doors so that I’m warned if they are left open once the engine starts and the park brake is released, or if the doors pop open while I’m driving.

    Daeco Turn-Alarm (209) 952-0923 

  • The Top 10 National Parks in the U.S.

    The Top 10 National Parks in the U.S.


    The United States is filled with jaw-dropping scenery and epic destinations from coast to coast, but nothing beats our national parks. Our country’s national parks educate and inspire. Ready to plan your trip? Check out the top ten most visited national parks of 2020, add a few to your bucket list, and hit the road!1

    Great Smoky Mountains National Park

    This is America’s most visited national park and is home to more than 100 species of trees and 1,600+ types of flowering plants. People come from across the country to take in its views, especially during the fall when the foliage is bright and beautiful. This park straddles the North Carolina/Tennessee border, so if you’re trying to check a few states off your bucket list, Great Smoky might be just the place for you.

    • Not to Miss: Clingman’s Dome. This is the highest point in the park, standing at 6,643 ft above sea level. The observation tower boasts incredible 360° views for those who want to make the trek to the top. 
    • Recreational Visits: 12.1 million

    Yellowstone National Park

    Yellowstone National Park is truly one of the most wondrous places on earth. Established as the first U.S. national park, it spans a region of nearly 3,500 square miles across Northwestern Wyoming, Idaho, and Montana. It features lakes, mountains, waterfalls, rivers, canyons, ample wildlife, and nearly ten thousand geothermal features. There’s something for everyone!

    • Not to Miss: Old Faithful. Few visitors leave the park without seeing Old Faithful herself. While Old Faithful is one of over 500 geysers located here, it is one of just six total that erupt on a predictable schedule.
    • Recreational Visits: 3.8 million

    Zion National Park

    Zion is actually Utah’s first, and most visited, national park. It’s known for its red walls of sandstone surrounding the park, as well as its jaw-dropping views. Zion is a hiker’s paradise with a large variety of trails for all experience levels. Don’t forget to check out Utah’s other four incredibly popular national parks when visiting. They’re called “The Mighty Five” for a reason!

    • Not to Miss: Angels Landing and The Narrows. Angels Landing is considered one of Zion’s more strenuous hikes, but the views are worth every arduous step. The Narrows is another great option if you want to see and experience the crystal clear water of the Virgin River, which runs right through the center of Zion.
    • Recreational Visits: 3.6 million

    Rocky Mountain National Park

    If you enjoy spectacular mountain views, vast hiking trails, and abundant wildlife, Rocky Mountain National Park might be your ideal destination. The park, found in northern Colorado, spans the Continental Divide and is home to more than 300 miles of trails for hikers of every level.

    • Not to Miss: Trail Ridge Road AKA Highway to the Sky. Many popular sights are found along this road, and the road itself is considered one of the most scenic routes in the U.S.
    • Recreational Visits: 3.3 million

    Grand Teton National Park

    Located in the northwest corner of Wyoming, this park is home to 310,000 acres of meadows, streams, and incredible views of the Teton mountain range. Get your hiking boots ready: Grand Teton has many hiking trails for all experience levels – 242 miles of trails to be exact.

    • Not to Miss: Mormon Row. This line of 6 uniform buildings settled in the 1890s by Mormons from the Salt Lake region is a famous/historic spot located in the southeast corner of the park. 
    • Recreational Visits: 3.3 million

    Grand Canyon National Park

    Grand Canyon National Park is massive at 1.2+ million acres and parts of the park can be visited year-round. We love the variety of activities this park provides, whether you’re into biking, hiking, or photography – this U.S treasure has got you covered. This park is on just about everyone’s bucket list, and for good reason.

    • Not to Miss: Mather Point. This is one of the most popular destinations in the park, thanks to its proximity to the main entrance. Mather Point’s viewing area is extensive and is just over 7,000 feet in elevation. For most, this will be the first viewpoint that they see the Grand Canyon so you’ll be hearing a lot of “Oohs” and “Ahhs” in this area. You can see almost a quarter of the entire Grand Canyon from Mather Point.
    • Recreational Visits: 2.9 million

    Cuyahoga National Park

    Between the cities of Cleveland and Akron, Cuyahoga provides relaxation and refuge to many Ohio natives and visitors as the state’s only national park. The park houses a variety of plant and animal species and even a few waterfalls. It’s an ideal location for biking, hiking, and other outdoor activities.

    • Not to Miss: The Ledges. This popular 2.2-mile trail is a must-see for visitors. The moss-covered rock formations that line the trails are breathtaking, but make sure to take your time as there are a few steep spots on this hike.
    • Recreational Visits: 2.8 million

    Acadia National Park

    This park is the oldest park east of the Mississippi River and is often referred to as the crown jewel of the North Atlantic Coast. In its entirety, Acadia encompasses more than 40,000 acres of land, giving you plenty of room to roam. The park is lined by miles of jagged coastline and lighthouses – everything you’d want from a visit to Maine!

    • Not to Miss: Thunder Hole. When the tides are right, the surf rushes into a narrow cavern and forces out air from beneath the cliffs, creating a thunderous sound. 
    • Recreational Visits: 2.7 million

    Olympic National Park

    Olympic National Park is located in Washington state and is home to seventy-three miles of wild, protected coastline, over 600 individual lakes, an entire mountain range, hundreds of miles of dense old growth forests, and a slew of unique water features, such as waterfalls, hot springs, and rivers and streams. 

    • Not to Miss: Hoh Rain Forest. If you’re ready to feel like you’ve been transported to another world, you’ll want to hike through Hoh Rain Forest. This lush, undisturbed forest is home to massive trees covered in moss and stunning views. We recommend starting your adventure at the Hoh Visitor Center.
    • Recreational Visits: 2.5 million

    Joshua Tree National Park

    Ready to experience the wonders of southern California? Look no further than Joshua Tree National Park. This park is home to two fascinating ecosystems – the Mojave and the Colorado – where you’ll find rugged mountains and boulders as well as cacti-filled deserts. 

    • Not to Miss: Hidden Valley. This mile loop might be on the shorter side, but on the trail you’ll see everything from Joshua Trees themselves to fields of boulders to interesting plants and wildlife.
    • Recreational Visits: 2.4 million


    Ready to travel to one of these bucket-list destinations?

    Find your perfect RV on RVTrader.com and start your adventure today!


    Park list and visitor numbers from the National Parks Service

  • 8 Epic RV Resorts To Add to Your Bucket List 

    8 Epic RV Resorts To Add to Your Bucket List 

    Do you have a bucket list written down? If not, there’s no time like the present to start a travel list of your own. If you have an RV, your list can grow to almost anywhere in the country that you can get to by road. With a home on wheels, you don’t have to worry about the added expenses of flying or hotel stays. The options are endless on where you can explore. There are plenty of destinations that are on most of our bucket lists, but did you know that specific campgrounds and RV parks can be bucket list destinations in their own right? We’re breaking down our list of eight luxury RV parks and campgrounds in the U.S. that you might have never considered staying at. While some of these parks come with a higher price tag, they’re worth crossing off your bucket list – trust us.

    Motorcoach Country Club | Indio, California

    Known as the ‘Crown Jewel’ of motorcoach resorts, the Motorcoach Country Club located in Indio, California certainly lives up to its name. This Class A only resort features just about every amenity you’d expect at a luxury resort including 400 landscaped motorhome lots, a private dock on waterfront sites, two miles of waterways, on-site staff, a golf course, clubhouse, a five-star restaurant on-site, fitness centers, pools, and tennis courts… anyone else out of breath? The resort has been voted as USA Today’s #1 Luxury RV Resort and is known for its breathtaking beauty. As an added bonus, the resort typically hosts weekly activities and mixers for guests (note: some activities are paused due to COVID-19). The Motorcoach Country Club is all things luxury and should definitely be included on your bucket list if you’re looking to relax and unwind. 


    Nearby activities and attractions:


    Hilton Head Island Motorcoach Resort | Hilton Head, South Carolina

    Ready to indulge in amenities and relaxation all at the beach? Next, we’re heading south to Hilton Head Island Motorcoach Resort located in South Carolina. This resort, catering to Class A, B, and C owners, is just one mile from Atlantic beaches and some of the island’s most popular attractions. The RV resort itself includes a variety of perks for guests including over 400 paved lots, a pool, spa, tennis courts, pickleball courts, dog park, and full laundry facilities. Each site has full hook-ups, cable TV, Wi-Fi, and more. If you fall in love with the resort and don’t want to leave, there are even options to buy your own lot. Hilton Head has an event calendar that’s filled with fun activities each day for the whole family including tennis, water aerobics, book clubs, food trucks, and more. You’ll never be bored at this exclusive 50-acre woodland resort.


    Nearby activities and attractions:

    Hearthside Grove | Petoskey, Michigan

    Hearthside Grove is located in Petoskey, Michigan and is considered an RVer’s paradise. Hearthside is a luxury motorcoach resort that can be found in the Midwest’s most popular four seasons resort area. It’s situated on Lake Michigan’s Little Traverse Bay with stunning views. The resort includes a variety of luxurious amenities including a pool and hot tub, tennis and pickleball courts, a library, gym, laundry facilities, as well as a beautiful common space. The Ciderpress Club, the premier private club located within Hearthside Grove, also includes a full-size clubhouse theater, outdoor wood fire pits, cooking classes, social events, and more. Hearthside Grove is the only 5 Star Luxury Motorcoach Resort in Michigan so you’ll want to book your stay while they still have openings! 


    Nearby activities and attractions:


    Zion River Resort | Virgin, Utah

    Zion National Park can be found on almost every RVer’s bucket list, and luckily there’s an incredible RV park and campground just minutes away. Zion River Resort is located in Virgin, Utah, and is home to vibrant colored mountains and, of course, the soothing sounds of the Virgin River. Zion River Resort offers guests amenities such as a heated swimming pool and spa, an off-leash dog park, game rooms and social halls, gazebo-style community kitchens, a private shuttle service to Zion National Park, an on-site mining sluice, a full-sized playground, and so much more! At RV-specific campsites, guests will find full hook-ups, beautiful landscaping, a fire pit, large metal picnic table, free Wi-Fi, and cable television. This resort is in a perfect location so you’ll be able to experience the wonders of Zion National Park as well as four additional nearby parks. 


    Nearby activities and attractions:


    Bluewater Key RV Resort | Key West, Florida

    Craving perfect weather and a destination near the beach? Look no further than Bluewater Key RV Resort located in Key West, Florida. This luxury RV resort is found where the Atlantic Ocean and the Gulf of Mexico meet, creating picturesque blue water (no pun intended) for miles. At Bluewater, you’ll have access to your own personal tiki, a temperature-controlled pool, private docks (if your site is located on the water), a dog park, a huge clubhouse, 24-hour security, and more. Bluewater offers RVers full hook-ups, HD cable TV, and High-Speed Wi-Fi so you can stay connected if you’re not busy ‘disconnecting’. There’s nothing like visiting paradise so make sure you add Bluewater Key RV Resort to your bucket list ASAP.


    Nearby activities and attractions:


    Grizzly Bear Resort Denali National Park | Alaska

    Ready to see all the wildlife you could ever dream of with the breathtaking backdrop of mountains and valleys galore? Then Denali Grizzly Bear Resort is the perfect place for you. Alaska is a bucket list destination for many – and for good reason. The views are incredible, the wildlife is abundant, and the activities are endless. At Grizzly Bear Resort guests will find luxury accommodations including a food truck court, a quaint general store, tour desks, fine dining, featured tours, and more. There are options to rent tents, cabins, or RV sites. Each RV Site comes with electric, water, TV, sewage, and WiFi. If you’re ready to have a full-on Alaskan experience, you’ll want to come to Grizzly Bear Resort. 


    Nearby activities and attractions:

    Las Vegas Motorhome Resort | Las Vegas, Nevada

    Las Vegas has many names like “Sin City”, “City of Lights”, and “The Gambling Capital of the World,” but it’s time to add “Top RV Destination” to that list. Las Vegas Motorcoach Resort goes above and beyond your typical RV resort. Once you’ve enjoyed the strip, you can come back to a retreat that includes more than 400 pristine RV sites designed especially for Class As, a 10,000 square foot clubhouse, an on-site 50s themed diner, a putting course, a resort-style swimming pool, two hot tubs, a tanning pool, spa, and more. There are full-time staff on-site to cater to your every need as well as state-of-the-art hookups for water, sewer, power-50 amp electric and telephone access, and free wireless internet. There’s a reason that Las Vegas Motorhome Resort has been voted top five best luxury RV parks in the country for the second consecutive year. You’ll want to see this place for yourself!


    Nearby activities and attractions:


    Camp Gulf | Miramar, Florida

    Is having a beachfront RV site on your bucket list? If so, you’ll definitely want to check out Camp Gulf in Miramar, Florida. This premier RV park is located just ten minutes from popular destinations like Destin and Scenic 30A. The park has unbeatable views of clear blue waters and white sand beaches just steps from your RV. You’ll truly feel like you are in the Caribbean – no flying required. This family-friendly resort has tons of amenities including a super water slide, two solar-heated pools and one spa, basketball and shuffleboard courts, a full playground, personal golf carts, a gift shop and store, fire pits, and so much more. Camp Gulf has 200 RV sites all 20 ft wide and suitable for all size rigs, and each comes equipped with water and electricity. 

    Nearby activities and attractions:


    Ready to add a few of these destinations to your bucket list? We can’t blame you! If you haven’t started an RV bucket list of your own, we highly recommend jotting down a few destinations for future trip planning. 

    Have you been to one of these luxury RV resorts? We want to hear about your experience in the comments below! 

  • FMCA Tech Tip: Leveling An RV

    FMCA Tech Tip: Leveling An RV

    One of the first things I do when I enter a new RV park is evaluate the quality of my assigned pad. This inspection is part of the ritual I perform before I pull into a site. Primarily, I assess the site’s length, width, ground type, and exact hookup location, as well as how level the site is. The latter issue is the focus of this article.

    Why Being Level Matters

    One reason an RV should be level is personal comfort. People are used to existing on a horizontal plane. We don’t feel comfortable walking up or down an incline in our RV, or sleeping on an angle (generally speaking, of course). Leveling the RV helps to ensure that your bed is oriented to allow for healthful and restful sleep. It’s hard to cook eggs when the RV is slanted. The list goes on. In addition, an absorption refrigerator can malfunction when it operates outside its manufacturer’s level specifications. According to Norcold, modern fridges work fine at angles of plus or minus 3 degrees side-to-side and 6 degrees front-to-back. Dometic has similar specs. These angles pretty much match what is comfortable to people inside an RV. If you use a bubble level, half a bubble from level should be sufficient for short-term stays, while longer stays should warrant a more concerted effort to center the bubble.

    When To Level

     Generally, an RV should be leveled as soon as you have a suitable pad, although there may be subtle variations as to when leveling fits into the order of operations. For instance, for RVs with powered leveling jacks and slideouts, some manufacturers mandate the slides be extended before the jacks; others specify jacks before slides. Make sure you understand and follow the manufacturer’s recommended order. Also, after extending a slideout, recheck that the refrigerator is level. Before you finalize the RV’s position and begin the leveling procedure, check for clearances for the slideouts, awnings, steps, and entry doors. Look for anything that may interfere, including tree branches and power/water pedestals. Make sure you have enough power cord, fresh-water hose, and sewer hose to reach those services. If you use a satellite dish, be sure you can position it to have a clear view of the sky. Ensure you have enough door-side space for a picnic table and/or eating area. Perform a physical walk-around of the RV prior to final positioning. Look for bumps, dips, and other uneven spots, especially in unpaved areas. Sometimes moving just a few feet can simplify the leveling process.

    How To Level

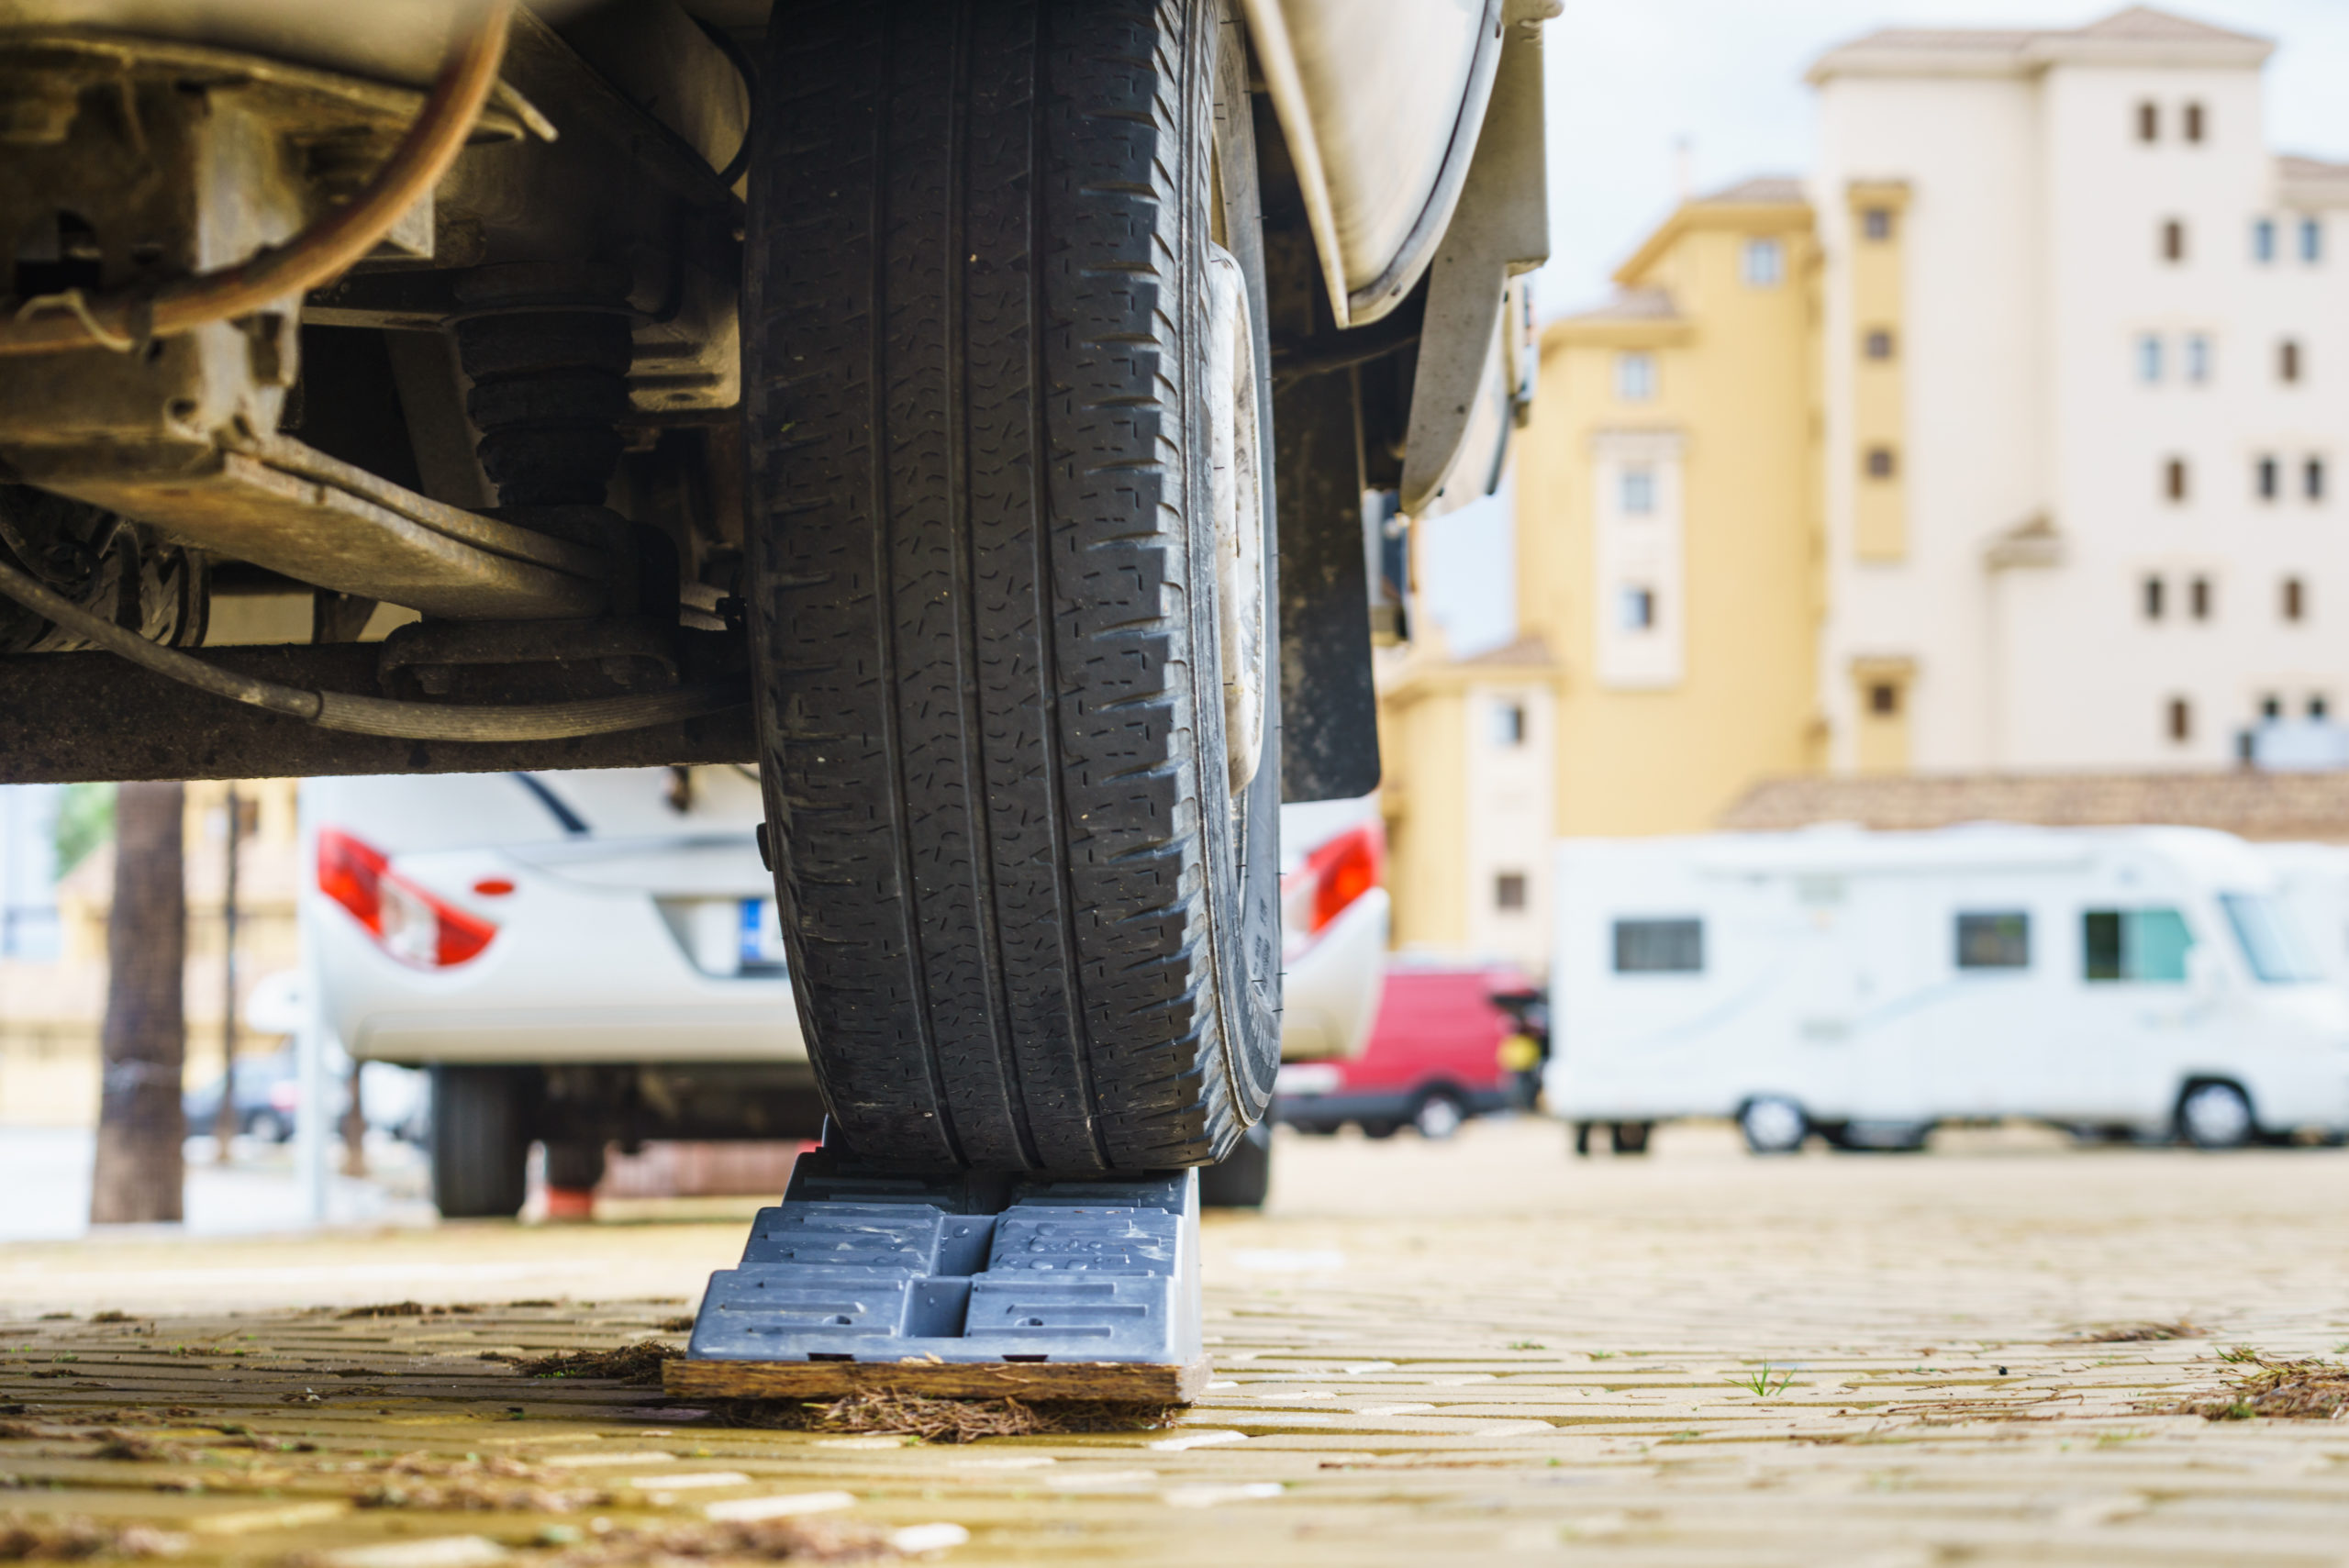
    First, it is important to understand the difference between stabilizing jacks and leveling jacks. Stabilizing jacks on lighter travel trailers and some motorhomes should never be used to lift the RV. They should be lowered to the ground only until they stabilize the RV, but not enough to take vehicle weight off the wheels and axle. Stabilizing jacks generally utilize a worm-drive shaft with a hand crank (although powered versions are available). If your RV has stabilizing jacks, do not use them to level the vehicle, but lower them to the ground once the unit is level. Leveling jacks, on the other hand, usually are hydraulic or pneumatic (air) rams/pistons (with the notable exception of travel trailer tongue jacks). Make sure you know the difference as indicated by your manufacturer. Both hydraulic and pneumatic systems often incorporate suspension dump capability on RVs with air suspension. This enables the system to evacuate the bags prior to the leveling process, allowing the leveled RV to be closer to the ground.  To level an RV without power levelers, you must carry ramps and/or leveling blocks with you, as well as a bubble level, although good smartphone apps are available for this purpose. If possible, place the level in the freezer compartment, as this is the most significant level surface. Position your ramps or blocks, and then slowly and carefully drive your RV onto them until it is level as indicated on the bubble. Be sure to use a spotter to carefully monitor the tire locations on the ramps/blocks. The biggest risk is driving off the end of a leveling ramp. In addition, be sure the entire tire footprint is supported; otherwise, tire damage can result. With practice, you should be able to identify how many blocks are needed or how far up the ramp you need to go to correct for different off-level conditions. If you have a travel trailer, you often can level the unit using only the tongue jack, but be sure to chock the wheels when you finish the leveling procedure. Indeed, whether you are leveling a motorhome or a trailer, chock all wheels still on the ground, and in the case of a motorhome, set the parking brake. For motorhomes without leveling jacks, position the coach so only the front wheels require raising, as it’s safer and easier to ramp or block the front tires than the rear. If the front wheels must be lifted a significant amount, it may make sense to move to a more level spot.

    Use Of Leveling Jacks

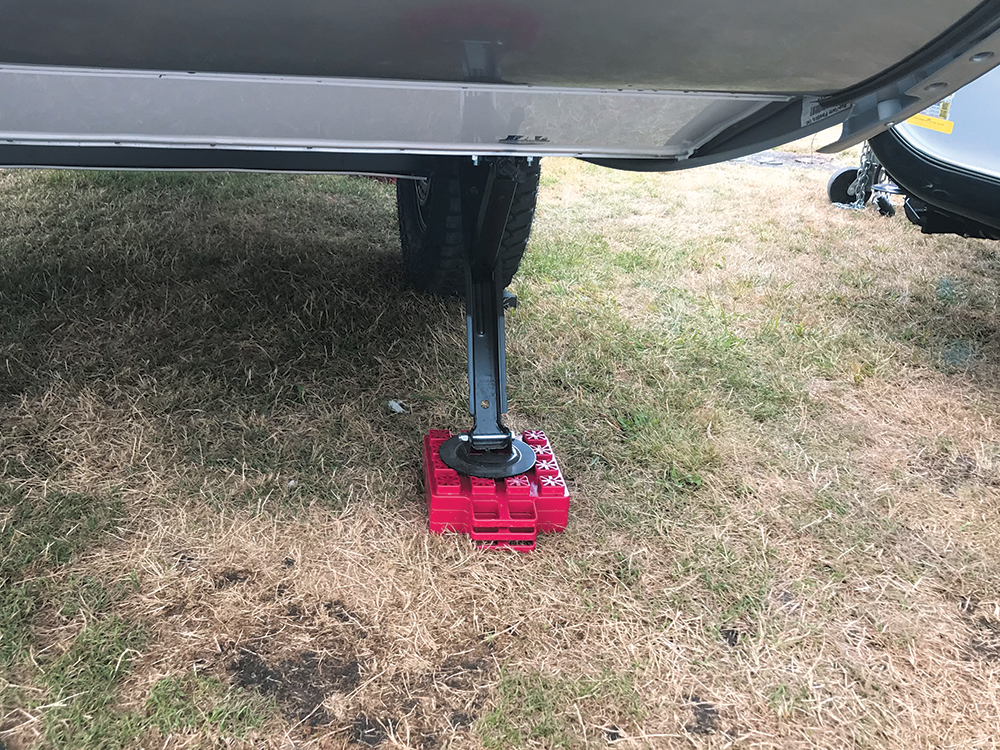
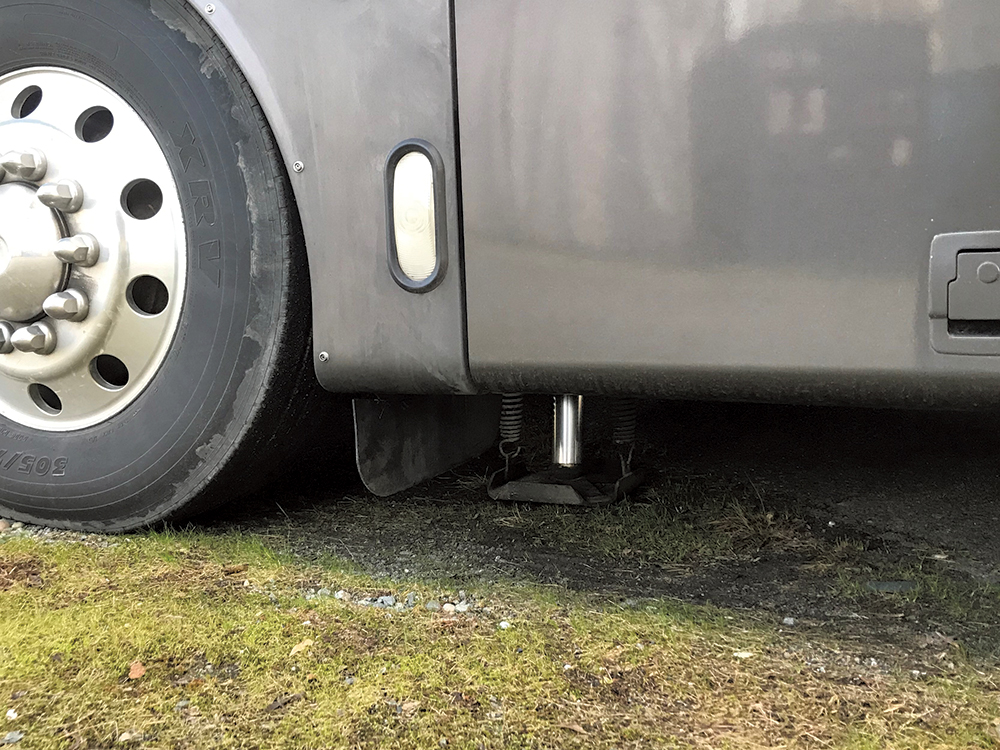
    If your RV is equipped with leveling jacks, be sure to follow the manufacturer’s instructions. You may have auto-leveling or manual jacks. As I noted with manual leveling, it’s important to lift only a motorhome’s front axle. Raising the rear wheels off the ground is dangerous because it negates the parking brake feature. The parking brake on the rear axle prevents vehicles from rolling away. If the rear wheels are lifted off the ground, it’s possible the vehicle can roll off the jacks. While some people may argue that the jacks prevent the motorhome from moving laterally, that may not be the case, as the friction between the jack pad and the ground may be insufficient to keep the RV from moving. That is especially true in the case of kick-down jacks, which may be kicked up if the RV is jolted or otherwise disturbed. If you are using leveling jacks, I recommend the use of jack pads. These can be purchased or homemade. They are usually thick, square blocks of a larger size than the jack feet and they are used to increase the stroke of the jacks and/or protect against soft ground by reducing the force exerted over the area. Make sure you don’t end up in a precarious situation when the leveling is complete. If the RV appears unsafe or is raised too much (to the point you can’t enter your RV without a step stool), I recommend you either reposition your RV more favorably or get a different site. This is true regardless of the leveling method you use — ramps, blocks, or jacks. In extreme cases, I have had to leave campgrounds that did not have any available sites that were even remotely level. 

    On a side note, I often am asked my opinion on storing RVs with powered jacks extended to take the weight off the tires. I don’t store my coach this way, since there is risk of corrosion or rust on the extended ram over time, especially in inclement weather. Therefore, I prefer to leave my jacks retracted. I protect the tires by parking on pavement or pieces of wood. Commercial products made of nylon or similar material are available to insulate the tires from concrete, the ground, or other surfaces. I also move the RV periodically to alter the tire positions. Even if your RV has leveling jacks, it is a good idea to use a bubble level or app occasionally. Leveling jacks can go out of calibration, resulting in an out-of-level condition. The bubble level allows you to properly level your RV and determine whether the jacks require calibration. If the jacks report an out-of-level condition when the bubble level indicates the RV is level, follow the jack manufacturer’s instructions to calibrate the system. Also remember to maintain your jacks according to your manufacturer’s instructions. This includes keeping the reservoir topped off with the correct fluid (often transmission fluid) and ensuring the electrical connections are clean and tight. Significant current is drawn from the batteries to power the hydraulic pump, so loose or dirty connections can cause damaging or dangerous arcing. For a variety of reasons, it’s important to level your RV at a campsite. Be sure to understand the methods that apply to you.

    By: Steve Froese, F276276

  • 7 Quick Tips For Buying in a Virtual World: A Free Checklist

    7 Quick Tips For Buying in a Virtual World: A Free Checklist

    It’s no secret we live in a digital world. We easily buy everyday items with a click of a button and they quickly arrive at our doorstep. Why can’t this process be the same with bigger items like an RV? At RV Trader, we made this shopping dream a reality! 

    It may feel overwhelming to buy larger ticket items virtually, but the process doesn’t have to be complicated. We’ve created an easy-to-follow checklist where you’ll learn the ins and outs of buying an RV online. This checklist includes all the information you’ll need to work through the entire buying process. Thanks to this complimentary resource, you can make the most informed buying decision possible. 

    In the checklist, we cover:

    • Building Your RV Wish List
    • Deciding on a Budget
    • Choosing RV Type
    • The Research Process
    • Connecting With the Seller
    • Reviewing Your Virtual Options, and
    • How to Avoid Scams


    We sprinkle in virtual buying tips throughout so you can feel confident and empowered to buy your first, or next, RV online. This resource was designed with you in mind. Take advantage of it and start your RV search today. Ready to learn more?

    Click Here to Access Our Checklist

    For additional information on virtual buying, visit our resources here.

  • 10 Ways to Go Green While RVing

    10 Ways to Go Green While RVing


    Is green RVing really possible? With our quick tips, you can be on your way to reducing your carbon footprint while on the road just in time for Earth Day! Here are 10 easy ways to help you conserve energy and save money all while having fun on your next RV road trip. 

    Stay In Tune

    Poor performance leads to less fuel efficiency and more pollution. One of the easiest paths to a greener on-the-road lifestyle and energy conservation is to properly maintain and service your RV.

    Rest in the Shade

    Generators use fuel when you’re running them. Reduce how much fuel you’re using by limiting how often you run your unit’s air conditioner in hot climates. We recommend installing shades and awnings on your RV or parking in campsites that are protected by a tree canopy during the day to keep your RV cool without the high environmental price of fuel usage. 

    Improve Circulation

    By strategically using fans and ventilation, it is possible to get more from RV heating and air conditioning systems. When the weather is cold, use your ceiling fans to keep warm air moving through your RV, rather than letting it heat just one room or rise up and accumulate close to the ceiling where you don’t feel it. On those warmer days when air conditioning is not absolutely necessary, just turn it off, open some windows, and use a fan as a ‘cool’ way to conserve energy and save money on fuel. 

    Recycle on the Road

    Recycling is one of the most fundamental ways to stick to a green lifestyle, so maintain a system in your RV for separating and storing those items that can be recycled. The key to recycling successfully on the road is to offload recycling bins frequently. 

    Eat Fresh & Local

    Buying fresh, local food is a great and delicious way to help the environment while RVing. When you eat locally, you can rest assured that the food you’re eating didn’t have to travel a long distance contributing to increased greenhouse gas emissions. Plus, eating fresh food sourced locally is a great way to connect with the area you’re visiting in your RV.

    Use Green Products

    When you’re shopping for any type of cleaning supplies for your RV, take some extra time to read the label to ensure the items you are purchasing are natural and don’t include toxic chemicals. There are entire brands dedicated to environmentally safe cleaning products, find one you like and bring the products on the road! 

    Change Your Lightbulbs 

    Energy-saving fluorescent bulbs are widely available at chain stores and, although they cost more than conventional bulbs, they last 10 times longer while using 75% less energy. While swapping out your lightbulbs, consider using rechargeable batteries in gadgets like flashlights and automatic timers and dimmers to reduce your overall electrical use.

    Use Reusable Items 

    While single-use and paper products are convenient, they create unnecessary pollution and can be problematic in national parks and other nature sites. Instead of using paper towels, plastic utensils, or paper plates, stock your RV with kitchenware that you can use over and over again. It will save you money in the long run, and help you save the Earth! 

    Add Solar Panels 

    Adding solar panels to your RV can be a great way to save money on fuel and benefit the environment. While they can be costly up-front, if you do a lot of dry camping or boondocking, they could be a great fit for your RV lifestyle. 

    Leave No Trace

    One of the main rules of the RV lifestyle is to leave no trace wherever you travel. Why not take it up a notch and leave your campsite or boondocking location better than you found it? Pick up not only your own trash but if you see any in your vicinity dispose of it properly.

    Green RVing is possible and a great way to honor the places you visit. Are you ready to explore the RV lifestyle for yourself? Check out thousands of models on RVTrader.com today!

  • FMCA Tech Tip: Improving the Quality of RV Drinking Water

    FMCA Tech Tip: Improving the Quality of RV Drinking Water

    A variety of products are available to improve the quality of your RV’s drinking water. When you fill your RV with fresh water, it may contain minerals, sediment, and chemicals, as well as bacteria and microorganisms such as cysts that can cause serious health issues. Calcium and lime are minerals that can damage plumbing fixtures. Iron can be equally destructive. Fortunately, water can be treated, but you must determine the type of water-conditioning system that will best meet your needs.

    Filters

    It may be helpful to understand the basics of filters. Filters are rated in microns. One micron equals one millionth of a meter. (For comparison’s sake, the diameter of a human hair can range from about 40 microns to more than 80 microns.) So, a 10-micron filter removes particles that are 10 microns or larger; anything smaller passes through the filter. A 10-micron filter removes smaller particles than a 40-micron filter, for instance. If two filters are similar in size, the filter with the lower numerical rating will restrict water flow more than the filter with the higher rating, because the finer filter media creates more resistance to water flow. Choosing a larger filter with more surface area can restore the water flow to an acceptable level. 

    The material that filters the water — the media — can vary. In a basic filter, pleated paper removes particles much like a vehicle’s air filter does. Once particles fill up the paper pleats, the filter restricts water flow and must be replaced. Other basic filters may employ a blow-molded media that allows the particles to be embedded into the filter with some depth, which results in longer life. Basic water filters are suitable for removing sand and solid particles that are larger than the filter’s micron rating. But they will not remove fine particles or ions that are suspended in the water. So, while they can filter the water, they do not treat it. Granular activated carbon (GAC) filters remove chlorine, sulfur, and other contaminants from water, as well as taste and odor. Some RVers have expressed concern that using carbon filtration to remove chlorine may cause stagnation in fresh-water tanks. 

    A tank’s vent allows chlorine to evaporate anyway. Rather than relying on chlorine to prevent stagnation, make sure the fresh-water tank doesn’t stay filled with the same water for long periods — use the water, or simply drain the tank. Also, sanitize the tank periodically. If the water in the tank is used and replenished regularly, such as when full-timing, you may need to sanitize only annually. But if the RV sits unused for extended periods, you may need to sanitize much more frequently. 

    A drawback to carbon is that bacteria can grow and build up inside the filter. That can be prevented by choosing a bacteriostatic filter with kinetic degradation fluxion (KDF) media, which are high-purity copper-zinc granules interspersed with the carbon. KDF controls the buildup of bacteria, extending the filter’s life. Chlorine, lead, mercury, and hydrogen sulfide are removed, and even iron, to an extent. The GAC/KDF filters cost a bit more than standard GAC filters, but the results are well worth it. Such filters are available from various vendors, including Hydro Life, Pentek, and Flow-Pur. 

    Another option is the Pulsar Quantum Disinfection System by US Water Systems. The filter’s media surfaces have been modified via a patent-pending process. According to the company, tests by the EPA and other certified labs have shown that 99.99 percent of microorganisms such as bacteria, yeast, and algae are immediately destroyed as they come in contact with the media. The drawback is that before water enters the Quantum Disinfection System, it must be prefiltered to remove iron, sulfur, manganese, tannins, turbidity, and suspended solids, which can bind the Quantum Disinfection media.

    Iron

    Iron can affect the color and taste of water, and it can be difficult to remove from water. As noted, KDF-based filters can educe iron to an acceptable level, if the iron content is fairly low. But for water supplies with a fairly high iron content, a dedicated iron filter is required. It also will remove sulfur.

    An iron filter draws air into a chamber where the iron or sulfur is oxidized into particulate. The water then percolates over a bed of filtration media, which traps the iron or sulfur oxides. When it is no longer effective, the iron filter regenerates by backflushing, similar to a water softener. However, no salt or brine tank is required. The filter is simply backflushed with water, and then air is allowed to enter the top of the filter to recharge it. 

    Iron filters can be equipped with manual heads or automatic heads to facilitate regeneration. A drain line must be connected to the gray-water tank or to the sewer to accommodate the wastewater when backflushing, although the water is safe and could be dispersed onto the ground if that is allowed. The media has a long life; it’s likely you’ll never have to replace the filter or its media for as long as you own your RV. Because it does not require disposable filters or salt to operate, it’s basically a zero-cost maintenance item for as long as you own the filter.

    Water Softeners

    Drinking hard water, which is high in mineral content, is not a known health hazard. In fact, the World Health Organization has determined that hard water could be a good supplementary source of calcium and magnesium. However, minerals such as calcium carbonate cause a lime-scale buildup in an RV’s fresh-water system. The scale can restrict flow in cross-linked polyethylene (PEX) water lines and can lead to galvanic corrosion when two dissimilar metals are in contact. Hard water also inhibits soap suds, leaves soap scum after showering, and produces white calcium deposits on dishes and cups after washing. 

    Hard water can’t be treated effectively by conventional filters. Treatment requires a water softener, which consists of a tank filled with polymer resin beads. A softener operates on an ion-exchange principle. The resin is treated with a salt brine that coats the beads with sodium ions. As water passes through the softener, the resin exchanges the calcium and magnesium ions for sodium ions, which effectively neutralizes the hardness in the water. 

    Eventually, the sodium ions become depleted and the resin beads become coated with the calcium and magnesium ions. At that point, the softener can’t treat any more hard water and requires regeneration. During regeneration, the ion-exchange process is reversed. A salt brine passes through the softener, picks up the hard water deposits from the resin media, and carries it into the wastewater through a backwash process. Once these deposits have been removed from the resin, a salt brine runs through the softener to recoat the resin with sodium ions so that it can continue to soften incoming water. 

    Residential softeners have metering systems and regeneration controls that do this automatically, based on the volume of water. But they are too large for use in an RV. Small, portable units for RVs are available but require manual regeneration. 

    To determine when regeneration is necessary, RV owners can use inexpensive test strips to measure water hardness according to a color chart. Regeneration generally involves adding salt crystals like solar salt to a filter housing or chamber, and then running water through the softener to dissolve the salt and carry the brine through the resin beads, treating it as it passes through.

    In my motorhome, I installed a residential-style softener with a fully automated control head from Motor Coach Water Filtration. The compact package fits into an RV’s basement compartment, yet it has the features of large residential softeners, including a separate brine tank. The system is programmable and automatically regenerates the softener when needed. It also uses less salt during the regeneration process than manual systems. Keep in mind that some claims by those selling water softeners can be suspect. Advertising that says a softener will treat a certain number of gallons is misleading. Water softeners treat a given amount of hardness in water. If the water is mildly hard, the softener can treat many more gallons than when treating extremely hard water. Areas such as the Pacific Northwest, the Southeast (except for Florida), and the New England states generally have soft water, while much of the Midwest has moderately hard to extremely hard water, as do portions of the Southwest. Softeners with larger tanks can treat more water between regeneration cycles. 

    For RV owners, storage space is limited, so compromises must be made. If space is not available, you can utilize a large softener and place it outside the RV near the campground water supply. However, to prevent damage to the softener, it must be kept from freezing. Also, softeners should be transported in the vertical position to avoid damaging the strainer basket. 

    Deionized Water

    When you wash and rinse your RV with untreated water, minerals in the water leave spots on the painted finish. Deionized rinse water eliminates those spots. Deionized water has had almost all of its mineral ions removed, such as sodium, calcium, iron, chloride, and sulfate. But deionization does not significantly remove viruses or bacteria. 

    Deionizers are available in a variety of configurations. Like in a water softener, the media in a deionizer eventually gives up its ions and no longer works. It must be replaced or regenerated. Regeneration is feasible only on large-scale applications, because concentrated acid and caustic material are used to strip away accumulated ions through physical replacement. For typical consumer use, such as when washing an RV, replacement cartridges are more desirable. A two-bed system uses separate positively charged and negatively charged ion resin beds. Both types of resin are required to totally deionize water, although mixed-bed systems are available that require only one tank. A mixed-bed system provides the highest water quality, while a two-bed system has a larger capacity. 

    Once the resin has been exhausted, it must be replaced. Some tanks can be refilled with bulk media, while other systems use disposable cartridges. A dual-probe total dissolved solids (TDS) meter, with one probe sampling incoming water and the other sampling the outgoing deionized water, can tell you when the media is no longer functioning. Deionizer media life can be extended by using regular softened water for washing the RV and reserving the deionized water for the final rinse.

    Reverse Osmosis Systems

    In reverse osmosis (RO) systems, water is forced through a semipermeable membrane that filters out contaminants larger than the water molecules; smaller particles remain in the water. An RO system removes contaminants such as arsenic, sodium, nitrates/nitrites, copper, lead, and some organic chemicals. The municipal additive fluoride also is removed. RO systems require pressure to force the water through the membrane. A fair amount of wastewater is involved in the process, and the fairly low water pressure in an RV water system means you expend more water than you purify. Because the filtered water passes through the RO system quite slowly, it goes to a storage tank for use as needed. 

    Water must be reasonably clean before entering an RO system, so prefilters and carbon block filters are used to remove contaminants such as volatile organic chemicals, chlorine, and synthetic chemicals. The end product is RO water that is 95 percent to 99 percent pure. Some experts argue that such water can be too pure, because in addition to harmful contaminants, RO removes calcium and magnesium — minerals that are essential to our health. 

    Reports from the World Health Organization (WHO) point out that while food is our principal source of calcium and magnesium, many people’s diets fail to include the recommended amounts. For some people, “mineral-rich drinking waters may provide substantial contributions to total intakes of these nutrients . . .” a 2009 WHO report said. The report also said it’s worth weighing the potential benefits of systems that remove minerals from water against the potential harm of reducing calcium, magnesium, and fluoride levels below recommended thresholds. 

    You can find experts on both sides of this issue. If you are considering the purchase of an RO system, do some research so you can make a decision that best fits your needs. If you have an RO water system and are con-cerned about the removal of beneficial minerals, you might consider purchasing a remineral-ization kit that adds calcium and magnesium to water. Also be aware that water produced by an RO system has a lower pH, which makes it corrosive to fresh-water plumbing. As a result, brass fittings, faucet fixtures, and water pump components may have shorter lives.

    Sanitation

    Regardless of the filtration method you choose, the system won’t perform its best if bacteria or algae are in the system. You must sanitize the system. Chlorine bleach has its drawbacks. Typically, household bleach is a solution of 5 percent to 7 percent sodium hypochlorite. That concentration drops drastically through gasification — as much as 50 percent in one month — so chlorine as a sanitizer has a short shelf life. Chlorine also penetrates plastic and can harm fresh-water tanks, PEX water lines, and water-pump seals. In addition, when chlorine comes into contact with organic material, it produces trihalomethanes, which are recognized carcinogens. 

    An alternative is Pro Products’ Sani-System, a liquid sanitizer that is EPA-approved for water softeners, RO systems, and water coolers. Sani-System is an ammonium-chloride-based product that is said to kill 99.9 percent of bacteria within 60 seconds, whereas chlorine bleach and peroxides must be in the system much longer to oxidize or kill bacteria. Sani-System is not an oxidizer and won’t harm plastics, rubber, or polyamide RO membranes. And unlike bleach, which leaves a residual chlorine taste and takes time to remove by continued flushing, Sani-System rinses out of the system easily without an aftertaste. It does not harm carbon, but carbon’s porosity makes it difficult to rinse out completely. 

    So, the best practice is to remove carbon filter elements prior to sanitizing and replace them when finished. There is no one-size-fits-all solution to water treatment. Choose a method that works for your situation to ensure that you have a safe water supply and a fresh-water system that runs well.

    Resources:

    CR Spotless Water Systems, C13245 (858) 530-9993 www.crspotless.com

    Motor Coach Water Filtration (239) 776-6002 www.motorcoachwaterfiltration.com

    On The Go (866) 482-9614 www.portablewatersoftener.com

    RV Water Filter Store (602) 625-1875 www.rvwaterfilterstore.com

    Pro Products (Sani-System) (866) 452-7842 www.proproducts.com

    Softcell Recreational Water Systems, C11469 (612) 325-2886 www.softcellwater.com

    US Water Systems (855) 923-6913 www.uswatersystems.com

    Western Water Purifier Co., C7 (800) 559-2837  

  • Spring Break Travel Tips

    Spring Break Travel Tips


    Spring break is just around the corner for millions of Americans – cue the excitement! It’s a time to relax, recharge, and get away with family and friends after a particularly stressful year. But before you set out on your spring break adventure, consider these tips when planning your trip and while you’re out exploring.

    Before You Go… 

    Research Locations

    First, you’ll want to decide where you’d like to go. Are you looking for a local weekend getaway or are you looking for a longer road trip opportunity? Looking to escape to the mountains or the beach? There are so many options out there! Take some time to research different locations and come up with a few ideas to present. Get the whole family involved in the research process and come together to select your destination. 

    Check COVID Restrictions

    When selecting your destination, check any COVID-19 restrictions that may apply to the location you would like to visit. Also be sure to follow any regulations that the state has put in place for your safety.

    Set a Budget

    If you’re looking to get away this spring break, the time to start saving is now. Once you’ve set a maximum budget, stick to it during your planning process. Make a list of the major and minor expenses related to your travels so you can be prepared ahead of time. Start with the basics of gas, food, and campgrounds then go from there. This part of the planning process isn’t the most fun, but it will ensure that you can relax and enjoy your vacation to the fullest.

    Determine How You Will Get There

    There are a few different options when it comes to getting to your destination in an RV. If you have an RV of your own, using it for your vacation could be the ideal option for you and your family. If you don’t, there are options to rent RVs if that’s something you are interested in pursuing. There are options to rent both towable RVs as well as drivable RVs – the choice is completely yours. Drivable RVs are great for larger groups looking for additional amenities and towable RVs give you the flexibility to unhitch from your unit and explore the area in your personal vehicle. As air travel decreases due to safety concerns,  people across the country are turning to RVs to get them to their next destination. It’s a worthwhile – and fun – option to consider.

    Book Early

    As we mentioned, road trips will most likely be on the rise this spring break as many people still want to avoid flying due to the pandemic. You’ll want to make sure you are booking all aspects of your trip well in advance. If you’re renting an RV for your adventure, make sure you book as early as you can. If you plan to stay at campgrounds or RV parks, make sure you reserve your site ASAP. 

    Plan Your Itinerary

    Before you set out to your destination, come up with a game plan for each day. It doesn’t have to be super in-depth, but creating a general itinerary for each day ensures you’ll get to complete as many activities as possible. Research popular activities, restaurants, and reviews in the area you’re traveling. Make reservations where possible and don’t forget to double-check to make sure these destinations are open when you plan on visiting. 

    Packing 

    Before you hit the road, take the time to create a quick packing checklist for each member of your family. Take note of the climate where you are traveling so you pack proper attire and don’t forget to pack the essentials (medications, masks, chargers, toothbrushes, etc.). 

    While You’re There… 

    Capture the Moment

    We encourage you to be in the moment when you’re traveling, but taking a picture or two during the fun is perfectly fine and a great way to look back at memories. You can also re-live your spring break memories by journaling about your favorite moments at the end of each day. 

    Look For Teaching Opportunities

    If you’re traveling with the kiddos, keep in mind that there’s always something new to learn even on vacation. Look for opportunities to teach your kids during your trip. Popular options include visiting national parks, famous landmarks, museums, and more. Check out our roadschooling tips for more creative ideas to learn on the road.

    Are you ready to hit the road this spring break? We’re right there with you! Remember to travel safe and keep these tips in mind when planning your next adventure.