Blog

  • 7 New Year’s Resolutions Perfect for RVers

    7 New Year’s Resolutions Perfect for RVers

    We’re saying good riddance to 2020 (it was a doozy) and making way for 2021! A new year means a fresh start and people across the world are making resolutions for the upcoming year. You might have a few goals already planned out for 2021, but did you include any RV related resolutions into the mix? We’ve rounded up a few of our favorites that are sure to make 2021 great.

    Go on More Trips

    It’s no secret that RVers love to travel, but are you making time for new adventures? Try creating your very own bucket list of short treks and long adventures for the year and involve the whole family in the research process.

    Take the Long Way

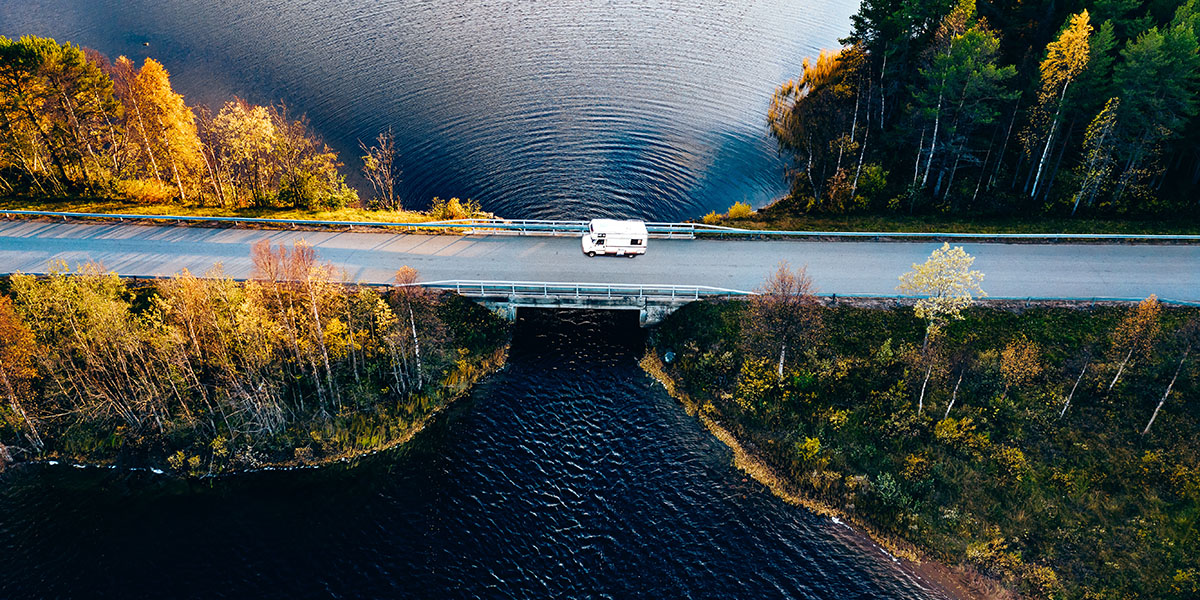
    RVing is all about enjoying the journey, not just getting from point A to point B. It’s often more exciting to take the scenic route as you never know what you’ll find on the road less traveled.

    Attempt Boondocking

    Have you always wanted to try dry camping? Why not try it in 2021? Boondocking can save you money and can be an incredible experience if you’re interested in really going off the grid.

    Make New RV Friends

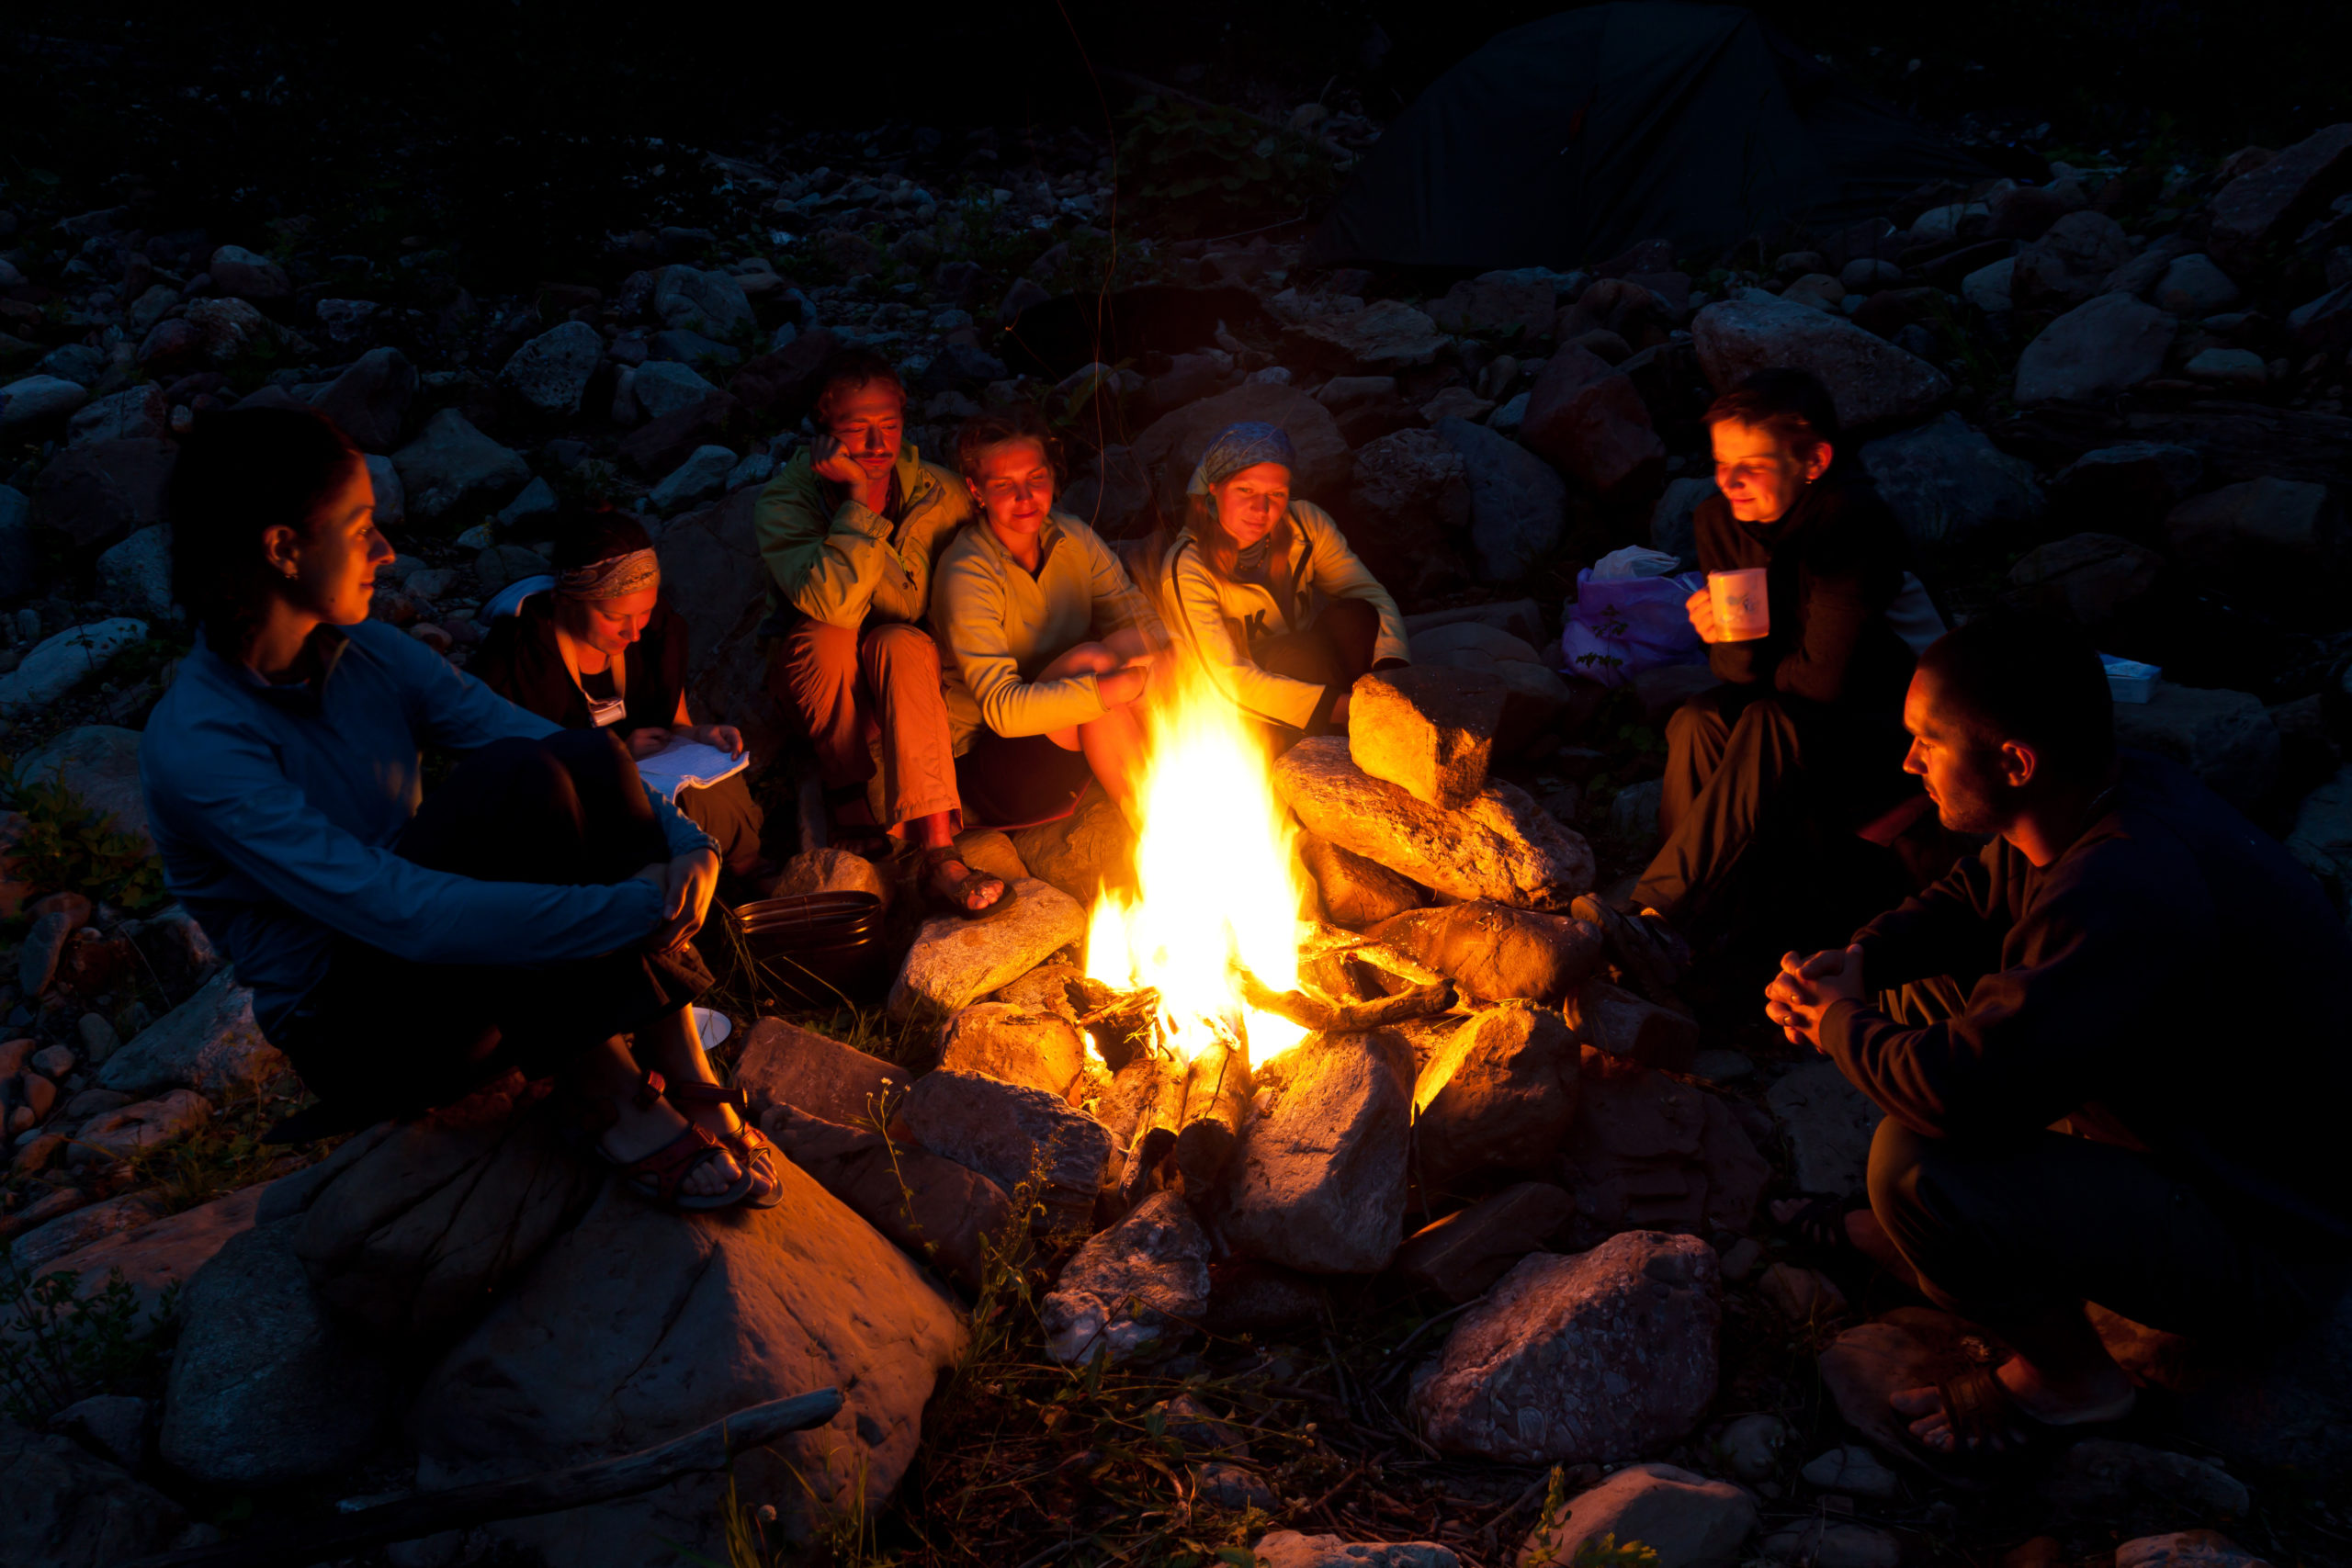
    Building an RV community is one of the best parts of the lifestyle. Host a socially distanced campfire at your campsite or walk around and meet new people who enjoy similar activities as you do. There also are tons of online RV groups on social media that you can join to chat with like-minded people who love RVing just as much as you do. The RV community is BIG – take advantage of it!

    Plan for a Change in Scenery

    Have you been traveling to the same locations year after year? Branch out in 2021 and go to a new destination. Usually travel to the mountains in your RV? Why not try a beach trip this year? Remember, variety is the spice of life.

    Enjoy Nature

    It can be easy to have the go-go-go mentality when you’re an RVer, but take some time to slow down this coming year and really enjoy the beauty of nature. Snap a few photos, but don’t forget to take a few deep breaths of the fresh air and enjoy the silence and beauty of your surroundings.

    Try Something New

    This resolution can apply to just about anything! From going to new restaurants to stopping at exciting pit stops to activities like white water rafting or rock climbing. One of the best parts of RVing is that it allows you to explore new places and try new things.

    Are you ready to buy an RV and make a few resolutions of your own this year?
    Start your search on RVTrader.com today!


  • FMCA Tech Tip: Water Heater Maintenance For Your RV

    FMCA Tech Tip: Water Heater Maintenance For Your RV

    Take care of your water heater and you will be sure to have a reliable supply of hot water during your travels.

    Prolonged showers at home may be taken for granted. While traveling in an RV, a hot shower might involve an interesting test of timing, especially when more than one person is considered. It is truly the experienced RVer who is aware of just how long it takes four to 16 gallons of hot water to trickle down the drain, even while practicing sound water conservation.

    The typical RV water heater, however, like any propane-burning appliance, requires occasional maintenance in order to maximize its potential. Fortunately, the water heater is usually easy to access, with most mandated tasks doable by most RV handypersons. The water heater is typically situated at a comfortable height, and most components are located on the outside of the RV behind a vented door. Some older models may have parts and pieces at the rear of the unit, but for the most part, newer units have their components on the exterior.

    Types Of Water Heaters

    The most common type of water heater found in campers today is the direct spark ignition (DSI) model. To use this fully automatic model, all an owner has to do is to make sure the heater is properly filled with water and then flip a switch. A circuit board controls all its relative functions. Since it’s the most prevalent, the DSI type will be the focus of this article.

    The second most popular choice of RV builders today is the pilot-type heater. Simple in design and function, pilot-type heaters have been an RV industry mainstay for years. Even though they are less expensive than their automatic cousins, they are less popular. It appears that automation wins out over economics.

    Another type of water heater is the electric-only version. Powered by 120-volt-AC electric, these units operate only when plugged into a shoreline or when onboard generator or inverter power is available. As many manufacturers of larger RVs move toward all-electric appliances, this type is sure to become more popular. They are plentiful in the marine world as well.

    Most water heaters today combine propane and electric power. An electric heating element protrudes into the tank portion of the heater, which allows the RV to utilize propane while dry camping, or power the water heater with 120-volt-AC electricity while plugged in. (Quick note: if your heater is a combination gas/electric-type model, and AC electricity is available, you can quickly bring the water temperature up by operating the unit on gas and electric at the same time.) It is not advisable to install an aftermarket electric heating element designed to replace the drain plug. Use only manufacturer-approved replacement parts.

    An internal heat exchanger (motor-aid) is another option offered by water heater makers. This feature allows the motorhome’s engine coolant lines to be routed through tubing inside the storage tank, thereby heating the water while the engine is running. By the time the user reaches a destination, hot water is readily available at the faucets. While this may be convenient, the maintenance factor becomes greater with motor-aid models, because the hoses periodically need to be replaced. On some of the larger Type A motorhomes, this could be an expensive, yet necessary, undertaking. Akin to some models of RV refrigerators, water heaters, too, are available using three different energy sources.

    Yet another type of water heater is making a comeback in the RV industry: the weight-saving tankless heater, which is commonly called an instantaneous water heater. This design does not involve an actual storage tank. Incoming water flows through a coil that is heated by super-sized propane burners. The flame is lit only when there is a demand for water. As soon as the hot faucet is turned off, the burner goes off as well. Activation is automatic via an impeller-type switching valve.

    Finally, many owners of diesel-powered motorhomes may be familiar with hydronic heating systems in which individual zones within the coach are comfort-heated independently, while at the same time domestic water is heated and delivered to all the hot faucets inside the motorhome. Since 1984, hydronic heating systems have been installed in many brands of motorhomes. Because this type of system requires specific, atypical maintenance procedures, we’ll leave hydronic heating maintenance to a future blog. Our focus here will center on the typical DSI propane RV water heater found in thousands of RVs.

    Water Heater Components

    Components found on every propane water heater containing its own storage tank (pilot and DSI-type) include:

    • an inner storage tank
    • a pressure and temperature (P&T) relief valve
    • a drain plug; a main burner orifice
    • a mixing tube
    • the primary air adjustment.

    What follows is a brief description of each of these parts and their maintenance requirements.

    Storage tank

    The inner tank is surrounded by insulation and typically encased with cardboard, foam, or metal. Water heaters are usually installed under a cabinet, so other than the access door, external aesthetics are not necessarily a consideration.

    Flushing the tank is the main task to consider. To extend the life of the tank and to eliminate the buildup of mineral deposits inside, flush the heater at least a couple times each season. Mineral deposits settle to the bottom of the tank, so simply draining it will not completely rinse out these deposits, as the drain outlet is not positioned at the very bottom of the tank.

    Pressure and temperature (P&T) relief valve

    As a safety component, the P&T valve often has been viewed by RVers as an enigma of sorts. Many P&T valves have been unnecessarily replaced, deemed defective simply because they sometimes dripped water. But that is by design. Here’s why:

    As any contained liquid is heated and the temperature rises, the content will expand and become pressurized. Without a means to regulate or control this expansion during the heating cycle, the unchecked pressure and temperature could eventually rupture the tank, resulting in serious injury. Water temps exceeding 210 degrees Fahrenheit are considered unsafe. Therefore, all P&T valves on today’s heaters are preset to open at 210 degrees. In the small confines of the RV water heater, the water is heated relatively quickly, so keeping up with the drastic fluctuations of both temperature and pressure is extremely important.

    It is also important that a cushion of air be maintained inside the tank, above the level of the water. This air pocket acts like an accumulator during hot water delivery and also allows space for the water to expand during the heating cycle. Over time the oxygen in this air pocket is absorbed into the water, with the net result being a completely filled tank, with no void above.

    At this point, there is no place for the expanding water to move into since the tank is literally full. The P&T valve then does its job — it opens. Expelling hot water from the outlet of the P&T valve allows cold water to enter the tank (thus lowering the temperature) and the relief valve closes.

    P&T valves will fail over time, but, by and large, all will drip on occasion. If an adequate air cushion is maintained, the P&T relief valve should not leak. If an adequate air cushion is not maintained, then it is normal for the valve to drip water. If the valve drips or weeps during nonheating phases and the pressure within the fresh water system is regulated properly, then the relief valve may indeed be faulty.

    Drain plug

    All water heaters have a drain of some type. Older models incorporated an actual drain valve, while modern units use a threaded plug. Atwood (www.atwoodmobile.com) installs a plastic pipe plug. Many owners have mistakenly and inappropriately replaced the plastic plug with one made of brass. The plastic plug actually serves as a redundant safety device and should never be replaced with a metallic plug. If the plastic plug becomes damaged, always replace it with an Atwood plastic plug.

    Atwood water heaters, by the way, do not require an anode, since their inner tanks are constructed of aluminum alloy. Do not cave into aftermarket attempts to sell you an anode for an Atwood water heater.

    Suburban (www.rvcomfort.com) incorporates a component called an anode rod into its drain plug. Designed as a sacrificial element, the magnesium anode keeps electrolysis to a minimum and extends the life of the inner tank. All chemical and mineral reactions taking place inside the tank will attack the “weaker” molecules of the magnesium anode instead of the tank walls. Periodically, this sacrificial anode will have to be replaced. A deteriorated anode rod also may produce a less-than-favorable odor that can permeate the water system. Replace the Suburban anode rod/drain plug when it is reduced to 25 percent of its original size. On older American Appliance heaters, the anode will be accessible inside the motorhome at the rear of the heater.

    Main burner orifice

    The main burner orifice is threaded into the gas control valve outlet fitting. It directs a specific amount of propane into the next downstream component, the mixing tube. The orifice can be removed, soaked in acetone, allowed to air dry, and reinstalled. Never insert anything into the orifice. A simple acetone cleaning is all that is necessary to keep the gas flowing properly.

    Mixing tube

    The mixing tube is where the propane and the primary air are mixed just prior to combustion at the main burner. This tube, though not a precision component, must be kept clean, and more importantly, properly aligned.

    As gas is projected through the main burner orifice, air is drawn in through the openings in the mixing tube. This “Venturi effect” brings in air that is needed to mix with the propane in order to have safe and complete combustion.

    Make sure the mixing tube is properly centered on the main burner orifice fitting and that the alignment with the gas control valve is correct. Misalignment is one of the most common reasons for improper combustion in water heaters. The mixing tube should be in line with the flow of gas and positioned so the orifice is aimed at the direct center of the opening to the mixing tube.

    This is the component that’s most prone to critter infestation, such as insect and spider nests, so make sure to check and clean it out often.

    Primary air adjustment

    As mentioned, the opening in the main burner orifice has a specific-size opening, so the only variable in the gas/air ratio is the amount of primary air allowed to enter. The primary air adjustment controls the volume of this incoming air.

    The primary air adjustment is manipulated while the main burner flame is ignited. The flame should appear mostly blue in color with some orange or yellow tinges. Proper adjustment is attained when the flame is the correct color and also when the burner does not produce a loud, roaring flame. If you can hear the burner more than 5 feet away with the water heater door closed, chances are the mixture is incorrect and further adjustment is necessary.

    In addition to the common components listed above, DSI models also incorporate a thermostat, an energy cut off (ECO) switch, a circuit board, a solenoid gas valve, and an electrode assembly.

    Thermostat

    Longtime coach owners might remember when all water heaters were controlled by a manually adjusted thermostat. A lever or knob was manipulated to make the water hotter or colder. With a DSI heater, adjustment of the water temperature is out of the RVer’s hands. On most units the thermostat is a preset, temperature-sensing, normally closed thermal switch that electrically turns off the heating sequence when the preset temperature has been attained. The nonadjustable thermostat is a thermal disc device secured to the front or rear of the water heater in direct contact with the inner tank. Most thermostats for DSI water heaters are preset for temperatures between 120 degrees and 140 degrees Fahrenheit. In some cases, a thermostat can be replaced with one of a higher or lower temperature rating.

    ECO switch

    Wired in-line between the circuit board and the gas valve, in series with the thermostat is the ECO switch. Some may contain a resettable push button; others will automatically reset once the water temperature drops below the preset temperature rating of the ECO switch. The ECO switch and the thermostat are considered high-temperature safety devices to help protect the appliance and the user. Other than keeping the wire connections clean and tight, no maintenance is required for the ECO switch or the thermostat.

    Circuit board

    The circuit board is the heart of any DSI appliance. Similar to a furnace board, the circuit board for a water heater energizes and opens the gas solenoid valve; creates a high-voltage spark that ignites the burner; monitors the flame sense circuit from the electrode assembly; and places the unit into lockout when it fails to detect a flame. Clean the contact strip where the multipin connector plugs in. Consider purchasing a product called DeoxIT (www.caig.com). Small amounts of corrosion, invisible to the naked eye, can prohibit proper current conduction, often resulting in strange operating characteristics. Keeping the board contacts clean and preserved will minimize or eliminate erratic operation.

    Solenoid gas valve

    The solenoid gas valve is controlled by the circuit board. The incoming gas tube attaches to one side of this valve while the main burner fitting and orifice are located at the other end. Energized by a 12-volt-DC electric coming from the circuit board, the gas valve will remain open as long as it is receiving voltage. The gas solenoid valve closes only under the following normal conditions: when the water temperature reaches the maximum thermostat rating; when the ECO trips and opens; and when the 12-volt-DC power supply is interrupted from the circuit board.

    As with the thermostat and ECO, just keep the electrical connections on the gas valve clean, dry, and tight.

    Electrode assembly

    The electrode assembly receives the high-voltage output from the circuit board and creates an electrical arc to ground. At the same time, the gas and air mixture is forced to flow through this electrical arc, initiating fuel ignition at the burner. The electrode probe also “senses” the presence of the flame and sends a micro-amp signal back to the board, allowing the gas valve to remain open. If the flame is extinguished for any reason, the micro-amp circuit between the electrode and board is broken, and the board shuts off the voltage to the gas valve, thereby closing it and stopping the flow of propane.

    This electrode assembly is susceptible to carbon buildup and heat stresses over a period of time. Many circuit boards have been replaced in error when the cause of an outage has simply been a dirty electrode assembly. Periodically removing the carbon deposits and brightening each electrode will help keep the heater working properly.

    Carbon deposits can be cleaned off and the probes brightened with steel wool. Inspect the probes and replace the entire assembly when the probes become pitted or if a portion of the ceramic insulator is broken. Check the gap between the probes. If the electrode assembly has three probes, the gap between the spark probe and the ground probe should be half as large as the gap between the ground probe and the flame sense probe. Manipulate only the center ground probe to achieve this spacing differential. If the arc jumps from the spark probe to the flame sense probe, it will damage the circuit board, which could be an expensive consequence.

    If the electrode assembly has only two probes, the gap between them should measure approximately 1/8-inch. Take care when adjusting these probes. If any portion of the ceramic insulator becomes cracked or broken, the entire electrode assembly will have to be replaced.

    There are also variables outside the water heater unit that need to be maintained and monitored for optimal performance.

    Battery voltage

    To operate correctly, the incoming DC voltage must be maintained between 10.5 and 13.5 volts to all DSI appliances, whether on battery power or through the converter. Also, do not overlook the negative side of DC circuitry. A faulty ground connection at the water heater can cause erratic operation and outages.

    Propane gas pressure

    At least once each year, have a professional RV service technician measure and adjust the propane delivery line pressure, evaluate the regulator lockup pressure, and have the entire propane system checked for leaks. These tests will ensure all the propane-burning appliances are fed the proper gas pressure. Ignoring this can lead to intermittent operation, appliance failure, undetected leaks, and regulator failure. It is a safety issue.

    Additional Water Heater Tips

    At least once (maybe twice) during the camping season, it will be necessary to perform the described maintenance procedures on the water heater. Remember, the heater’s controls are exposed to the elements; therefore road grime, dust, and dirt have ample opportunity to gather in and around the various components. Periodically blowing the exposed areas of the water heater with compressed air will help to minimize this condition. Likewise, soot and remnants of combustion will gather in the flue portion of the heater. Blow through the flue occasionally with compressed air as well. Be sure to wear eye protection when performing this step, as flying debris will be present.

    Though most RVs come from the factory outfitted with a water heater bypass kit, it is advised to install one if yours is not so equipped. Permanently attached to the rear of the water heater, the valve configuration of a bypass kit allows the water heater to be closed off from the rest of the fresh water plumbing system. This is helpful when the RV’s plumbing system is winterized and RV antifreeze is used.

    Purchase a kit equipped with metallic valves. Plastic bypass valves can contribute to water heater operational issues such as intermittent hot water and low hot water pressure, among other symptoms. Brass valves will not distort with prolonged exposure to heat, and they are not prone to failure.

    In addition, there might be a one-way check valve positioned at the cold inlet fitting at the rear of the water heater (there also may be one at the water heater outlet). This prevents heated water from migrating out of the heater and back into the cold water plumbing. Normally, this isn’t an issue, but if there happens to be a cold water tee plumbed into the system fairly close to the rear of the water heater, heated water can be drawn into another fixture, such as the toilet. It can be a bit unnerving to see steam rising from the toilet whenever it’s flushed. You chuckle, but it has happened!

    Although a check valve has no maintenance requirements, it is mentioned in case your water heater does not have one at the cold inlet. It’s relatively easy to install, and it just may save the heater from expending unnecessary energy trying to heat water in the cold distribution piping just outside of the water heater itself.

    The Wrap-Up

    As with many items aboard the RV, preventive maintenance practices will not only extend the life of the water heater, but they can eliminate, or at least minimize, those pesky interruptions during excursions. As usual, if you do not feel comfortable performing any of the procedures listed here, do not attempt them. Simply call your local RV service shop. Service centers employing certified or master certified technicians stand more than ready to perform this service for you. And remember, RVing is more than a hobby; it’s a lifestyle!

    How to Correctly Flush the RV Water Heater

    1. Make sure all energy sources to the water heater are turned off and that the water inside the tank has cooled.

    2. Turn off all sources of water pressure — the demand pump and the city water supply — and bleed off the water system pressure by opening a faucet.

    3. Drain the water heater by removing the plug. To aid in draining, open all the hot faucets throughout the RV.

    4. If water barely trickles out of the drain opening at this point, carefully insert a straightened coat hanger into the tank to help break up any calcified deposits. Take special care not to scrape the inner sides of the tank, or damage may result.

    5. Use a water heater cleanout tool to help flush mineral deposits. When all evidence of cloudy water has been eliminated, close all the hot faucets opened earlier and turn on the city water supply or the demand pump — the higher the pressure, the better. If a pressure regulator is normally used in-line with the city connection, temporarily remove it for this step.

    6. Open the pressure and temperature (P&T) relief valve and allow water to gush from the drain opening as fresh water rushes in.

    7. Allow this flushing to continue for five to 10 minutes. This will remove any stagnant water along with any remaining mineral particles in the tank.

    8. After about 10 minutes of flushing, turn off the water source; reinstall the drain plug; and close the P&T valve by allowing the lever to snap shut.

    9. Turn on a water pressure source once again and open all the hot water faucets inside the coach until water flows freely from all hot faucets. This will automatically fill the water heater and eliminate air pockets in the distribution system.

    10. Finally, turn off the water source but leave the hot faucets open. Then open the P&T relief valve once again to release any water at the top of the tank. This establishes that needed cushion of air on top of the water. Remember, this air gap is necessary so the heated water will have room to expand. When water stops dripping from the P&T valve, close the hot faucets inside the motorhome and the P&T valve. The heater is now ready for operation.

    FMCA RV Club brings you this monthly tech tip to Enhance Your RV Lifestyle. FMCA delivers RV know-how to its members. Learn more at FMCA.com.

    This information is for educational purposes. FMCA shall not be responsible nor retain liability for RVer’s use of the provided information. Prior to making any RV service decision, you are advised to consult with an RV professional.

  • The Ultimate Gift Guide For RVers

    The Ultimate Gift Guide For RVers

    It’s hard to believe the holiday season is already upon us! That means it’s time to start shopping for friends, family, and loved ones. Holiday shopping can often be a daunting task, but with our ultimate gift guide for RVers, it doesn’t have to be. We have compiled a list of our favorite items that any RVer would love to receive during the holiday season. Start making your personal wish list today!

    Home, Hearth & Camper

    Happy Camper Custom Doormat This adorable doormat features a vintage camper and can be customized with your family’s name. This doormat can be taken with you on the road or will make you remember your travels while you’re at home.

    Funny RV Dish Towel It’s no secret that parking an RV can be difficult. The saying on this dish towel (“Sorry for what I said when we were parking the camper”) rings true for many RVers. This would be a perfect stocking stuffer for the RVer in your life!

    Organization, Innovative Tools & Life Hacks

    Spice Gripper Saving space in an RV is crucial and this spice gripper can help with just that! Simply stick the clip strips to the inside of your RV cabinets and your spices will be neatly tucked away for the next time you need them. You can cut the strips to custom fit your specific cabinets.

    Hitch Safe – Keep your keys, cards, and money safe with this hitch safe. It is designed to store up to 9 spare keys, cards, and more. You can easily set a combination to keep your belongings safe even when you’re away from your campsite exploring the great wide somewhere.

    Tech & Gadgets 

    Solar Powered Phone Charger – When you’re out hiking or exploring, the last thing you want to worry about is your phone dying. Now you won’t have to with this solar powered phone charger. This phone charger also comes with a compass kit and can also be used as a flashlight.

    Waterproof Bluetooth Speaker – Get ready for crystal clear music to pump through this waterproof bluetooth speaker. Whether you’re hanging out in your RV or you’re crowded around the campfire, this speaker will set the perfect mood. The COMISO Waterproof Bluetooth Speaker provides 20 hours of high-quality sound, and is both lightweight and easy to use.

    Outdoor & Adventure

    Camping Hammock Enjoy the relaxation of the outdoors with this durable camping hammock. The Wise Owl Outfitters Hammock is made out of heavy-duty 210T parachute nylon which makes it incredibly lightweight and portable – perfect to throw in the RV!

    Outdoor Rocking Camping ChairA quality camping chair is essential for any RVer. This chair has a rocking feature that allows you to fully relax after a long day of traveling or adventuring. It easily folds flat for storage and has a mesh back to keep you cool. You’ll want to get one for each family member!

    Cooking & Grilling

    Outdoor Popcorn Popper With this outdoor popcorn popper, you can easily make the perfect bowl of popcorn over a campfire or grill. The popper is made from a material that is extremely durable and can make 3 quarts of popcorn in just 4-5 minutes. The long handle keeps your hands away from the fire so all you have to worry about is having fun.

    Easy Campfire Cooking Cookbook Cookbooks are always a great holiday gift idea and this one is especially great for the outdoor lover in your life! This campfire cookbook has over 200 family-friendly campfire recipes that are easy to follow.

    Glassware 

    Silicone Wine Glasses – These portable silicone wine glasses should be on everyone’s RV wishlist this year. These glasses are unbreakable, lightweight, and perfect for a crisp glass of wine. They are completely dishwasher safe and worry free!

    YETI Tumbler A YETI is an easy gift that anyone can use and enjoy. They are perfect for enjoying a beverage in the great outdoors and they can keep your drink cool for hours. This tumbler comes in a variety of colors and includes a top to keep your drink from spilling.

    Kitchen

    Over the Sink Drying Rack Saving space is crucial in an RV, so clear up countertops with this over the sink drying rack. It comes in a variety of sizes and is resistant to rust. Not only does this handy rack save space while drying your dishes, it also rolls up for easy, out-of-the-way storage when not in use.

    Trailer Shaped Cutting Board Whether you’re slicing vegetables or creating a charcuterie board, a good cutting board is essential. This trailer shaped cutting board can get the job done all while being super cute. The RVer in your life (including you!) will love this rustic, practical gift.

    Subscriptions and Memberships

    America the Beautiful Passes Give the gift of adventure by purchasing an America the Beautiful Pass. This pass is a ticket to more than 2,000 federal recreation sites. The pass also covers entrance fees at national parks and national wildlife refuges. This is the ultimate gift for any RVer.

    FMCA Membership A membership with the Family Motor Coach Association gives member-only discounts and services specifically designed for RVers. It also includes RV education, attendance at rallies, and so much more!


    Novelty

    Camper’s Journal Looking for a creative way to capture all of your camping memories? Look no further than this camper’s journal. You can document all of your camping activities with its easy-to-fill-in journal format.

    Vintage Camper Address Stamp Let whoever you send mail to know that you are a proud RVer with this customized address stamp. The high-quality stamp features a vintage camper and reminds the recipient that home is where you park it!

    Pets & Animals

    Collapsable Dog Bowls Save additional space in your RV by packing these collapsible dog bowls for your furry friends. They are lightweight and easy to store in a backpack if you plan on taking your dogs on hikes or any other outdoor adventures. They may be geared towards puppies, but these bowls will also work if you brought your cat on the road, too!

    Safety Glow Necklace CollarYour dog will stand out from the other pups at the campground with this LED collar necklace. It allows you and others to easily see your pet at night and is great for walks anywhere you travel.

    Kids

    Happy Camper Onesie Even your littlest camper needs some RV swag! This 100% cotton onesie is super soft and features a bright vintage trailer that will make any RVer smile.

    State Sticker Map – This state sticker map is fun for the whole family. Easily mark off the states you’ve traveled to with colorful stickers. The stickers include beautiful graphics of each state and are ideal for tracking your travels.

  • 6 Holiday Light Shows Across The Country You Can’t Miss—Updated for 2023

    6 Holiday Light Shows Across The Country You Can’t Miss—Updated for 2023

    Updated for 2023
    There’s truly nothing like the holiday season. Formerly bare streets dazzle with festive decorations, and the ooohs and ahhhs of adults and children alike make us all feel warm and fuzzy from the inside out. Holiday light shows bring a sense of nostalgia to many and are definitely considered a tradition for some – but as an RVer, you’re extra lucky because you’re not limited to just the light displays in your area. We’ve rounded up seven of our favorite holiday light displays across the country as well as a few virtual options that are perfect for the whole family. Get ready to unhitch from your trailer or motorhome and experience the festive fun!

    Coastal Maine Botanical Gardens’ Gardens Aglow

    Location: 

    105 Botanical Gardens Drive, Boothbay, ME 04537

    Why We Love It: 

    Gardens Aglow is New England’s biggest and brightest light display with over half a million lights! This magical display will make you feel like you’ve been transported to a winter wonderland.

    Drive or Walk?: 

    Walk

    Campgrounds Near By: 

    Gray Homestead Oceanfront Camping ● 6.4 miles south

    21 Homestead Rd, Southport, ME 04576

    # of Sites: 40

    Shore Hills Campground ● 4.1 miles north

    553 Wiscasset Rd, Boothbay, ME 04537

    # of Sites: 135


    Callaway Gardens’ Fantasy in Lights

    Location: 

    17800 US Hwy 27, Pine Mountain, GA 31822

    Why We Love It: 

    There’s so much to do at Christmas at Callaway from shopping in the heated Christmas Village to driving through the dazzling illuminated forest. Callaway Gardens’ Fantasy in Lights is fun for the whole family and is one of National Geographic’s Top 10 Light Displays in the world – need we say more? The forest is lit up with 8 million lights and is a must-see for anyone looking to feel the magic of the holidays.

    Drive or Walk?: 

    Both

    Campgrounds Near By:

    4 D. Roosevelt State Park, GA ● 4.4 miles east

    32.8375, -84.81556

    # of Sites: 81

    Pine Mountain RV Resort ● 3.8 miles north

    8804 Hamilton Rd, Pine Mountain, GA 31822

    # of Sites: 168


    Zilker Park Trail of Lights 

    Location: 

    2100 Barton Springs Rd, Austin, TX 78704

    Why We Love It: 

    Zilker Park Trail of Lights is an Austin staple and attracts thousands of visitors each year. This year you’ll see over 2 million lights, 90 lighted holiday trees, and more than 70 other displays. This event receives national accolades each year and has become a tradition to many in the area – why not make it one of yours?

    Drive or Walk?:

    Drive

    Campgrounds Near By: 

    Austin Lone Star RV Resort ● 7.3 miles southwest

    7009 Interregional Hwy, Austin, TX 78744

    # of Sites: 150 

    The Oaks RV Park & Campground ● 23.9 miles southeast

    753 Union Chapel Rd, Cedar Creek, TX 78612

    # of Sites: 62 

    Denver Botanic Gardens’ Blossoms of Light

    Location: 

    1007 York St, Denver, CO 80206

    Why We Love It: 

    The Blossoms of Light holiday extravaganza has been a tradition in Denver for more than three decades. Don’t let cold weather deter you! This twinkling winter wonderland looks even more stunning with a fresh layer of snow. There are over half a million individual lights in the entire display. Warm up and enjoy holiday treats and hot drinks at the Hive Garden Bistro. This display is bright, bold, and cannot be missed.

    Drive or Walk?: 

    Walk

    Campgrounds Near By: 

    Cherry Creek State Park Campground ● 14.7 miles southeast

    4201 S. Parker Rd. Aurora, CO 80014

    # of Sites: 136

    Bear Creek Lake Park ● 21.4 miles southwest

    14218 W. Hampden Ave., Morrison, CO 80465

    # of Sites: 47


    New York City Window Wonderland

    Location: 

    Virtual (https://windowwonderland.withgoogle.com/

    Why We Love It: 

    New York City holiday windows are an iconic tradition for many that have been around for more than 150 years. The windows dazzle with bright lights and creative displays that will leave you awe-struck. If you’re not looking to travel or venture out of your home this year, there’s no need. You can view past christmas displays on the comfort of your couch with a tablet, desktop, or smartphone. You’ll walk through the streets of Manhattan to view some of the best holiday displays in the world.


    Northern Lights

    Location:

    Virtual (https://lightsoverlapland.com/virtual-aurora-tours/)

    Why We Love It:

    We’re taking a slightly different twist on holiday lights by taking you to Sweden to check out the natural wonder of the Northern Lights. These lights are stunning to view at any time of year and you’re guaranteed to still feel the magic of the season while you view the lights dancing in the sky. The tour doesn’t just include the Northern Lights, you can also meet huskies and reindeer by taking virtual sledding tours – what’s more festive than that?!


    Ready to hit the road this holiday season in an RV of your own? Start your RV wishlist on RVTrader.com today!

    Happy Holidays!

    Disclaimer: Make sure to confirm with event organizers and websites that the attraction you want to travel to is still on before you hit the road!


  • FMCA Tech Tip: RV Storage – Some Do’s and Don’ts For RV Storage

    FMCA Tech Tip: RV Storage – Some Do’s and Don’ts For RV Storage

    As we move further into fall, memories of our summer RVing excursions may still linger in our minds. But with the coming chill, so too does the thought of putting our faithful RV into storage mode. Though a seemingly mundane task, there is a correct methodology for getting your coach ready for any period of non-use; especially if you are contemplating utilizing one of the available private or public storage facilities. Certain precautions, correctly applied, will guarantee your coach will stand a better chance of surviving its secluded hibernation.

    The first necessary decision is whether to store your rig at home or off-site at a dedicated RV storage facility. If you have a relatively level space at your residence, there’s no need to spend the bucks at a facility unless security is an issue. But keep in mind, many municipalities are cracking down on stored RVs within residential areas, even those parked on the street. It is your responsibility to learn if your home base has any new RV restrictions. Also check your existing Covenants, Conditions, and Restrictions (CC&R’s), if applicable.

    RV Storage Locations

    Everything from a vacant dirt lot to an indoor five-star, temperature-controlled facility can be considered for parking your rig for any period of non-use. When deciding which level of sophistication (and subsequent degree of expense) to evaluate, the primary concern should always be the overall security and welfare of your RV. A nicely paved, inexpensive level lot behind a locked gate might sound appealing, but if its location is remote, it might not be a wise choice. An isolated location might be susceptible to vandals or break-ins. Do your homework when considering such a location.

    Preparing the RV

    Flush and drain every holding tank. The fresher the tanks, the better the chance of minimizing sewer odor build-up and blockages. Don’t forget to flush and rinse the sewer hose as well! If possible, lubricate the termination valves, but leave them in the closed position.

    Some RVers remove every drop of water from the fresh water plumbing system, but if below freezing weather is anticipated, I recommend the wet method of winterizing, whereby RV anti-freeze is pumped throughout the fresh water piping system and poured into every P-trap. Enough anti-freeze should also be flushed down the toilet and sinks; just enough to cover the bottom of each holding tank.

    Ensure the propane container is turned completely off and that all the appliances are off. Check the integrity of the cover over the propane regulator.

    If outdoors, cut cardboard inserts to position inside the water heater and refrigerator exterior access panels to keep the dust and dirt accumulation to a minimum. Cover the furnace intake and exhaust assemblies with blue painter’s tape to keep insects from entering.

    Place an opened box of baking soda or an appropriate desiccant/absorbent inside the refrigerator food compartments and prop open the refrigerator door(s).

    If possible, remove the batteries when expecting sustained below-freezing temperatures or if the coach will be in a remote, unsecured location. Always fully charge all batteries before storing the rig. Once fully charged, employ the battery disconnect device, if so equipped, or at the very least, remove the ground terminals from the batteries to disconnect them totally. Remove all dry cell batteries too!

    Turn off all 120-volt (AC) circuit breakers and unplug any device that plugs into a receptacle, such as the refrigerator, microwave/convection oven, washer, dryer, entertainment centers, icemakers, televisions, etc. Rogue lightning strikes, even a couple hundred yards away, can cause problems. Expensive problems!

    Thoroughly inspect the underneath portions of the RV. Look closely for any cracks or openings into the floor or interior of the coach. Seal around drain piping, propane tubing, and electrical harnesses that extend through the floor into the living areas of the coach.

    When parked on asphalt, use non-absorbing, synthetic blocks under the footprints of the tires. If stored outdoors, cover the tires to minimize UV and ozone contamination and obscure the windows to avoid sun damage and the fading of fabrics. In high moisture locales, place absorbent desiccant inside the two major living sections of the RV.

    Consider using a total coach cover, but take precautions to keep the cover from rubbing on the roof or at the edges. This can be damaging to synthetic roofing materials such as EPDM rubber or TPO. At the very least, it’s a wise decision to install a rooftop air conditioner cover if a coach cover is not used.

    If possible, leave a roof vent cracked open slightly at one end of the RV and a window cracked open at the opposite end. This will induce a bit of convection airflow inside the coach to minimize the progression of mold and mildew.

    Check all window, roof vents and door seals and weather-stripping. As I often mention, moisture intrusion is the biggest cause of RV damage. Also, treat all exposed exterior surfaces with the appropriate protectant.

    Periodic Visitation

    When possible, visit your hibernating rolling home from time to time; especially if the period of non-use extends past just a few weeks. It’s a wise RVer who changes the position of the RV at least once a month, moving it forward or backwards slightly, to alter the footprint of the tires to prevent flat spots from developing. Just a foot or two is usually all that is required.

    It is also recommended to periodically start a gasoline motorhome engine and to exercise a gasoline generator, when so equipped. Consult the owner’s manual for your make of chassis and generator for specific instructions, but the general consensus is to run the generator for a couple of hours at half-load, at least once a month, in order to prohibit varnishing of the fuel. One single two-hour run at half-load is much better than a bunch of short runs. Diesel-powered RVs and generators will likely require different procedures, so be sure to follow the recommendations of the manufacturer to avoid performance issues when it’s time to awaken your resting rig from its respite.

    Once a month, carefully inspect the roof for entry points of water intrusion if a total coach cover is not employed. Always perform roof repairs as soon as leaks are discovered. Do not wait until you remove the coach from storage! Any damage will only get worse over time.

    When it is time to remove your RV from storage, always consult with the facility manager to absolve any dispute or damage issue possibly incurred during the storage period before moving the RV. Be sure to re-activate your full insurance coverage!

    By carefully determining and acknowledging your requirements ahead of time, and wisely choosing the best-suited storage location, your RV will safely endure its period of non-use and present itself ready for the next step, the spring shakedown! And remember, RVing is more than a hobby, it’s a lifestyle!

  • How to Cook Thanksgiving Dinner on a Campfire

    How to Cook Thanksgiving Dinner on a Campfire

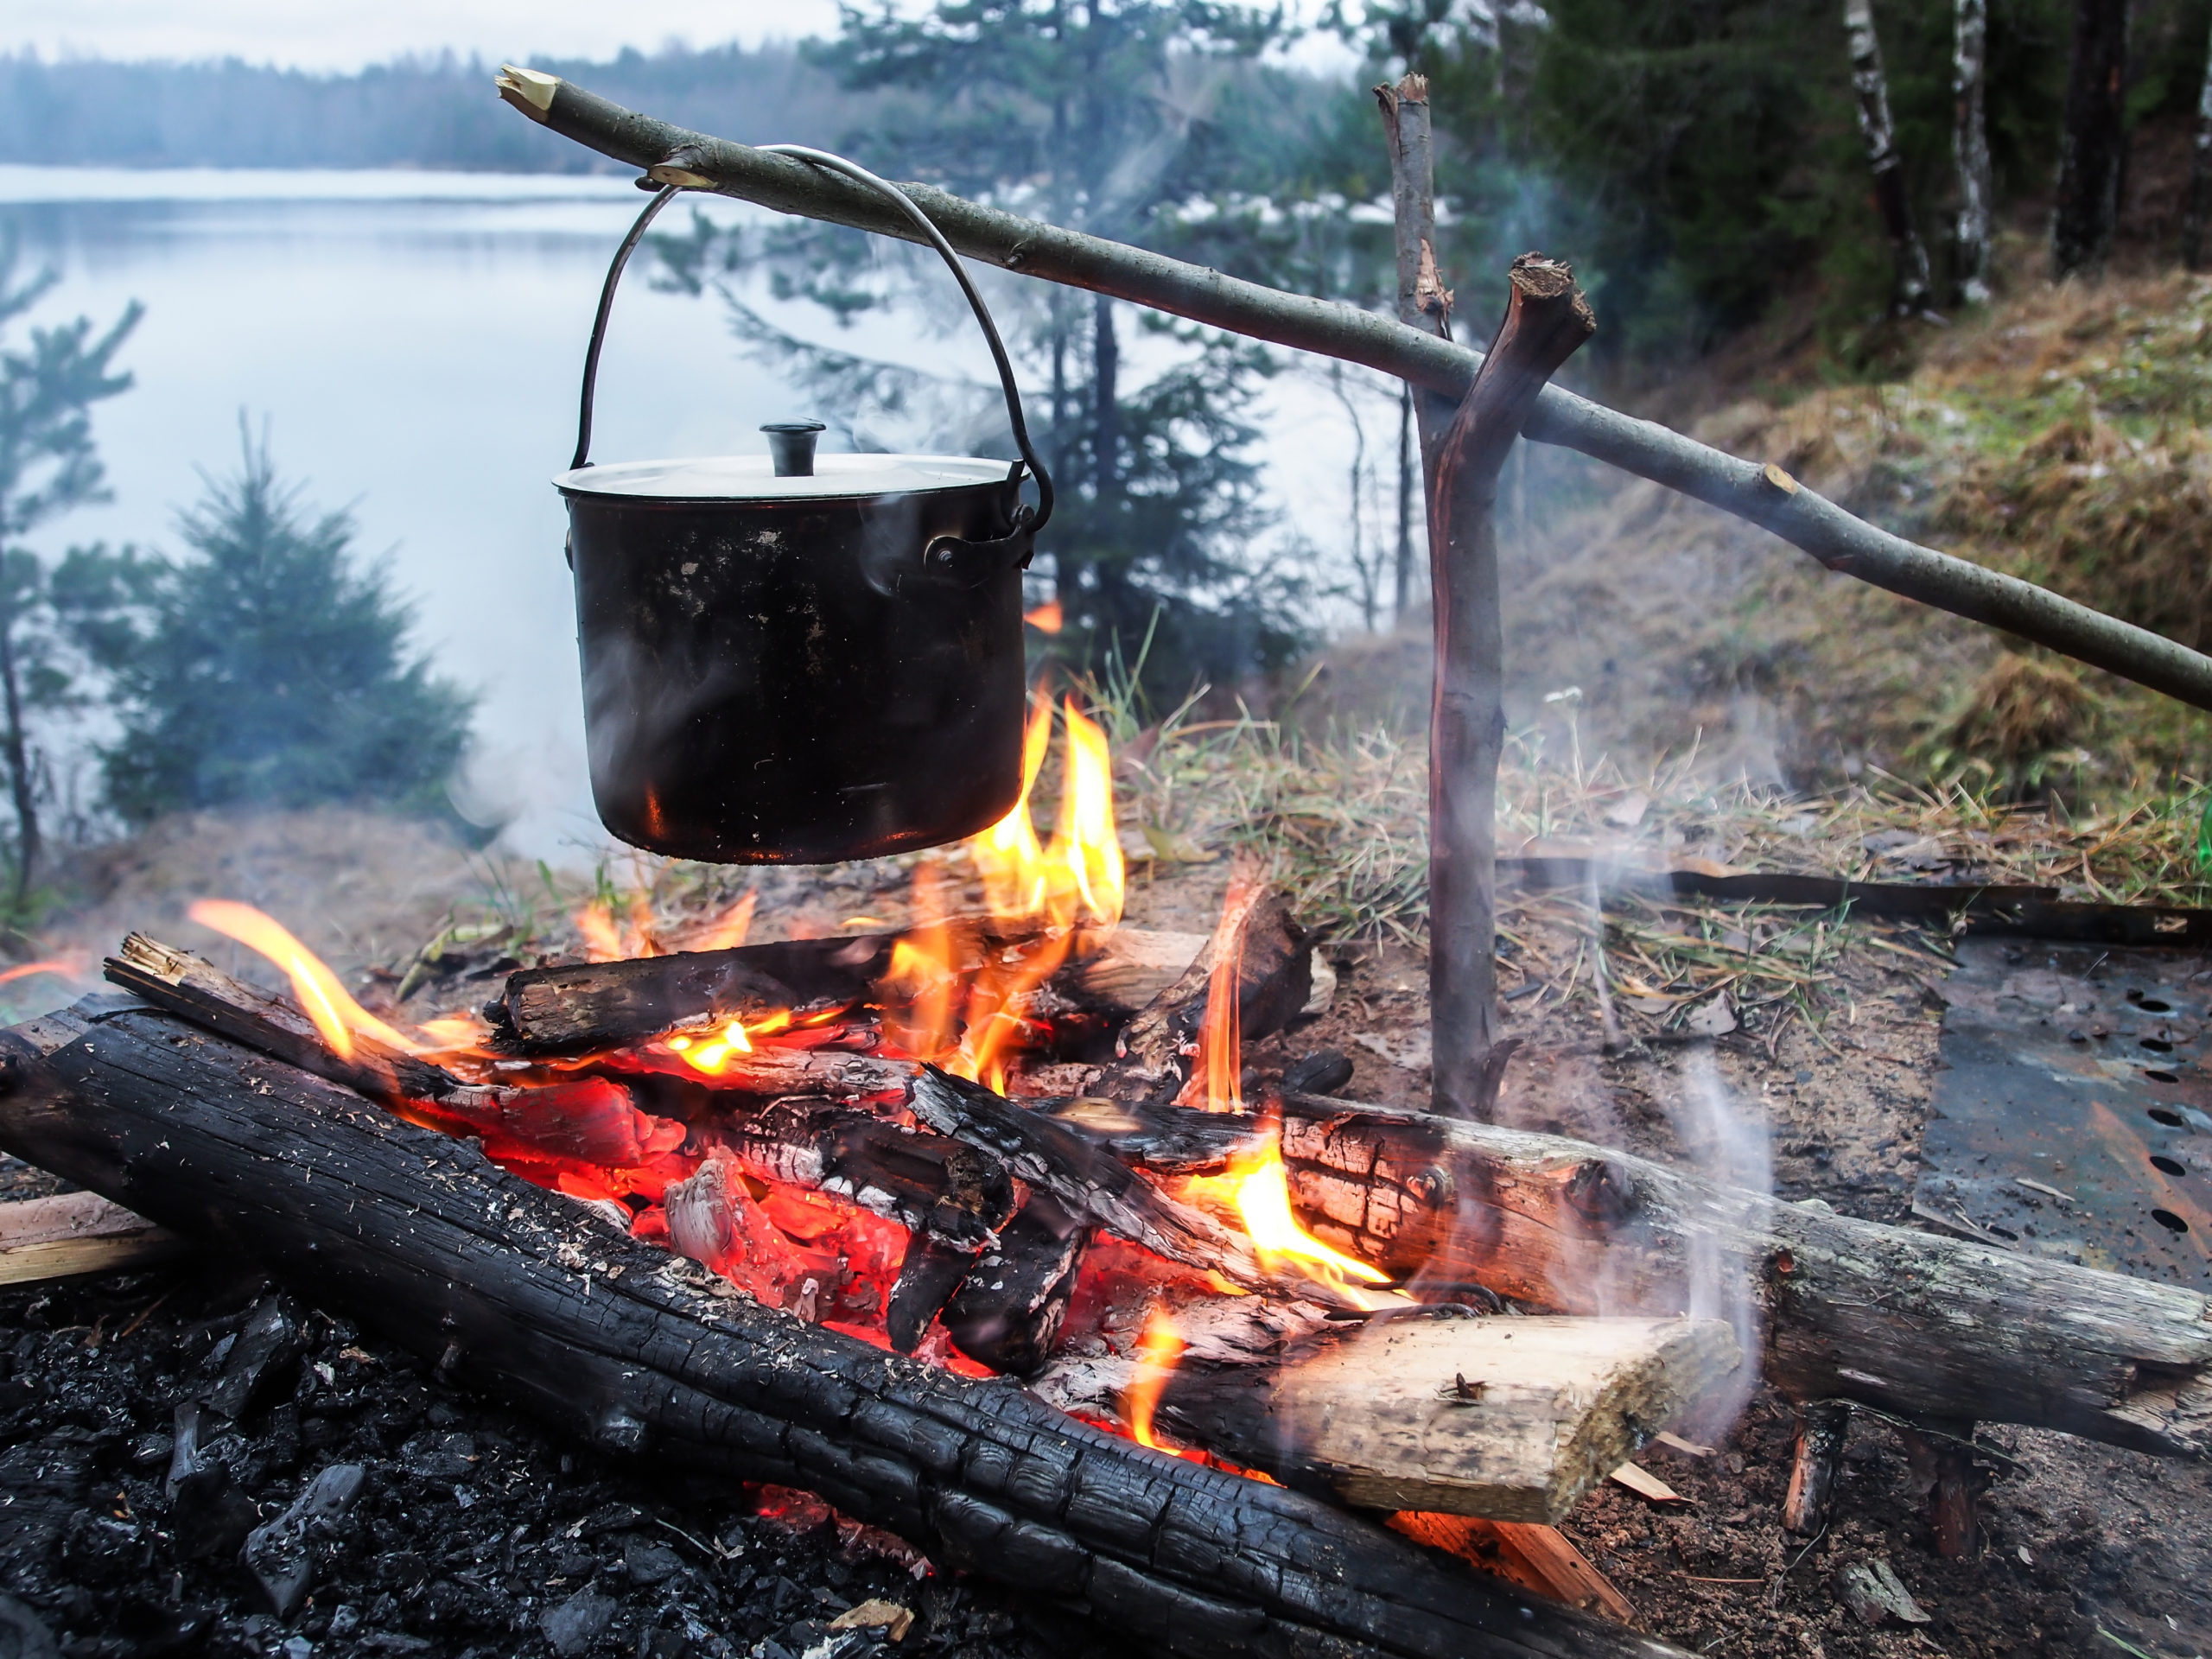
    Are you spending Thanksgiving on the road this year? If you’re feeling cramped in your RV’s kitchen (or if your unit doesn’t have one with the necessary requirements), connect with nature this November and try cooking your Thanksgiving meal over a campfire. Check out a few of our favorite, simple recipes that the whole family will love:

    Turkey 

    What You’ll Need:

    • A heavy-duty grill grate that will cover your fire 
    • A kitchen thermometer 
    • Cast iron dutch oven (standard size)
    • 6-8 lb. turkey 
    • Diced onions, celery, & carrots
    • Fresh herbs (we recommend rosemary & sage) & preferred spices
    • 1 cup of chicken broth
    • Butter 


    Instructions:

    • Thaw the turkey, remove any giblets, and pat dry with paper towels
    • Apply butter and spices to the turkey, including under the skin
    • Chop the onions, celery, and carrots into large chunks, and place them in the bottom of the dutch oven along with the cup of broth
    • Place the turkey in the dutch oven and top with sage and rosemary 
    • Cover the dutch oven and cook over your fire for roughly 2-3 hours depending on size (the general rule for cooking a turkey is usually 20 minutes per pound)
    • Use your thermometer – the turkey is done when the thigh meat reaches an internal temperature of 165 degrees
    • Let your turkey rest for around 30 minutes so the meat juices can redistribute
    • Carve and enjoy!


    Time-saving tip:
    Cook your other side dishes while the turkey is resting.

    Campfire Sweet Potatoes  

    What You’ll Need:

    • Sweet potatoes (one for each person)
    • Olive oil
    • Butter
    • Salt
    • Cinnamon
    • Marshmallows
    • Heavy-duty aluminum foil 


    Instructions:

    • Thoroughly clean the outer sweet potato skin and pat dry
    • Pierce the outside of each sweet potato multiple times with a fork and lightly coat with olive oil
    • Wrap each sweet potato individually with aluminum foil
    • Place sweet potatoes on hot coals for 20-30 minutes or until tender
    • Once the sweet potatoes are tender, slice open vertically and add butter, salt, and cinnamon as desired
    • If you prefer marshmallows on your sweet potatoes, roast as many as you’d like and place them on top

    Green Bean Casserole

    What You’ll Need:

    • Cast iron skillet
    • 1 can of green beans
    • 1 can of cream of mushroom soup
    • ½ can of milk
    • Salt & pepper
    • 1 pack of fried onions
    • 1 pack of bacon bits (optional)


    Instructions:

    • Combine the green beans, cream of mushroom soup, and milk in your skillet
    • Season with salt and pepper as needed
    • Simmer over the fire until thick and hot
    • Sprinkle with bacon bits and fried onions before serving
    • Enjoy! (it doesn’t get easier than that, folks!) 

    Rolls on a Stick

    What You’ll Need:

    • Roasting skewers or a clean stick (remove bark)
    • 1 pack of crescent rolls
    • Butter
    • Optional: Whipped cream or jam 


    Instructions:

    • Grab your roasting stick and butter the clean end 
    • Wrap the crescent roll around buttered part of the stick
    • Sit back, relax, and place your roll on a stick over the fire, turning occasionally 
    • In 10-15 minutes you’ll have a perfectly cooked roll
    • Top with butter or, if you’re craving a sweet, top with whipped cream or jam

    Apple Pie Packets

    What You’ll Need:

    • Apples (one for each person)
    • Butter
    • Brown sugar
    • Cinnamon
    • Chopped nuts 
    • Vanilla ice cream 
    • Heavy-duty aluminum foil 
    • Non-stick spray


    Instructions:

    • Cover a square of aluminum foil with non-stick spray
    • Slice and place thinly cut apples on the square of aluminum foil
    • Top the apples with butter, brown sugar, cinnamon, and chopped nuts
    • Wrap the foil packet securely 
    • Place the wrapped packets on the grate over your fire and cook for 20 minutes
    • Top with ice cream and enjoy!


    Time-saving tip:
    For your stuffing and cranberry sauce, we suggest keeping it simple and grabbing boxed stuffing and canned cranberry sauce. Let’s be honest, we all love those as much as the homemade options. Heat the cranberry sauce over the fire in a saucepan & easily cook the boxed stuffing in a cast iron dutch oven.

    It’s not only possible to cook Thanksgiving dinner on a campfire, it’s also pretty easy! If you’re ready to put on your chef’s hat, but still need a new RV to get you to the campsite, be sure to check out all the new and used RVs for sale and for rent at RVTrader.com.

    *Disclaimer: Please follow all state and local laws and regulations regarding fire restrictions and safety. Be aware of drought and brush conditions, always monitor your campfire, and be prepared with a bucket of water to extinguish it fully at the end of enjoyment.


  • Top Destinations for Fall Foliage

    Top Destinations for Fall Foliage

    Fall is a favorite time of year for many because of the brisk air, seasonal fun, and the endless amounts of fall foliage to view. Bright reds, yellows, and oranges fill the trees just as the leaves begin to fall. There are so many wonderful destinations to view fall foliage, but it can be hard to know exactly where to go. Luckily, we are breaking down a few of our favorites for you. So grab your pumpkin spice latte, and get ready to hit the road in your RV this autumn.

    Take our exclusive quiz to discover the autumn road trip destination that’s perfect for you!

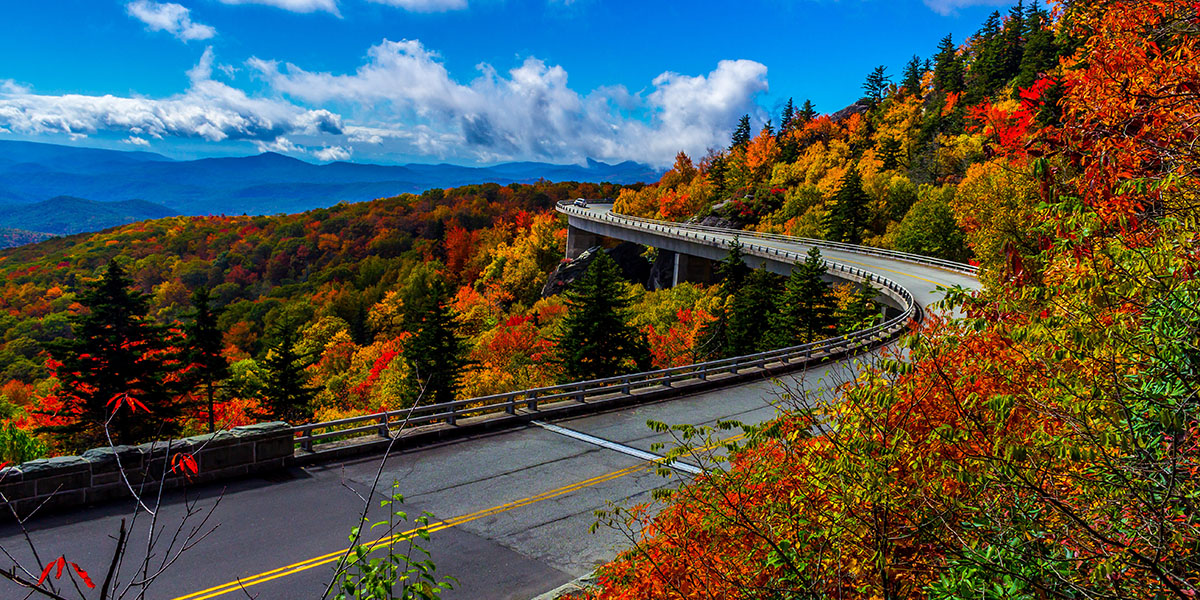
    Blue Ridge Parkway, Virginia & North Carolina


    The Blue Ridge Parkway is an increasingly popular place to take in views of the stunning fall colors autumn brings. The colors peak during late October, so there’s still time to plan your trip! The parkway is long, running from Virginia to North Carolina, so you’re sure to find the perfect viewing locations along your route. October is one of the busiest months to visit, and with extra cars on the road, it’s important to drive slowly and keep your eyes on the road (until you’re ready to pull over to take in the breathtaking sights).

    Must-do: We highly recommend taking a pit stop at Cascade Falls at Milepost 271.9. This waterfall is truly stunning and is located in E. B. Jeffress Park. To get to the falls you’ll need to take a short hike (just over a mile) and there you will find beautiful views and scenic overlooks along the way.

    Route 100, Vermont


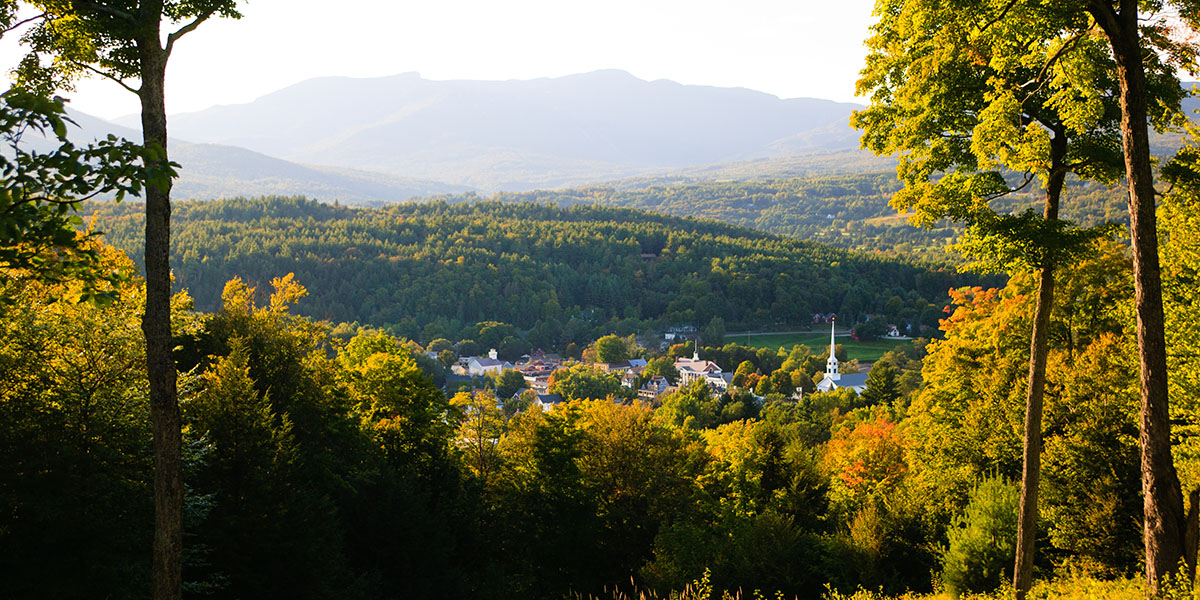
    Route 100 can be found in the center of Vermont and runs over 200 miles from north to south along the Green Mountains (although they are yellow, red, and orange in the fall). This route goes by many nicknames, one of which is “The Skier’s Highway” because it connects to a variety of popular skiing destinations. Many also say it’s one of the most scenic drives in New England and the views are top-notch in the fall. There are plenty of interesting places and fun towns to stop and stretch your legs when you’re taking your fall foliage tour.

    Must-do: Don’t miss Moss Glen Falls in Granville along this route. The 30-ft. waterfall is truly stunning and you can even see it from your RV if you don’t want to step outside (although we encourage you to!) If you have a craving for sweets along your route, you are in luck! One of the most popular destinations along Route 100 is the Ben and Jerry’s Factory in Waterbury. Be sure to check it out if you pass by and let us know your favorite flavor.

    Acadia National Park, Maine


    Acadia National Park is located in Maine and is referred to as the crown jewel of the North Atlantic Coast. This park encompasses more than 40,000 acres of land and is the oldest park east of the Mississippi River. Acadia National Park is quintessential Maine and it’s even more striking in the fall months. The park is lined by miles of jagged coastline, lighthouses, and stunning trees. There are ocean views for as far as the eye can see and the weather in Maine during fall is perfect for hiking and other activities.

    Must-do: Thunder Hole is one of the parks most popular attractions that we recommend checking out. When the tides are just right, the surf rushes into a narrow cavern and forces out air from beneath the cliffs, creating a thunderous sound.

    Aspen, Colorado


    Aspen is one of the top destinations in Colorado to take in views of the fall colors. The golden yellow Aspen Trees are stunning and there are a variety of places to take in the scenic views. But we suggest checking out the Maroon Bells Scenic Area. This open area of land boasts many hiking trails and is one of the most photographed places in Aspen. There are incredible views of Crater Lake and Maroon Lake where the colorful trees mirror off of the clear water.

    Must-do: While you’re in the area, we recommend visiting Ashcroft. Ashcroft is a scenic, abandoned mining town just South of Aspen. It may seem spooky to some, but the views are stunning – don’t forget your camera!

    The Lake of the Ozarks, Missouri


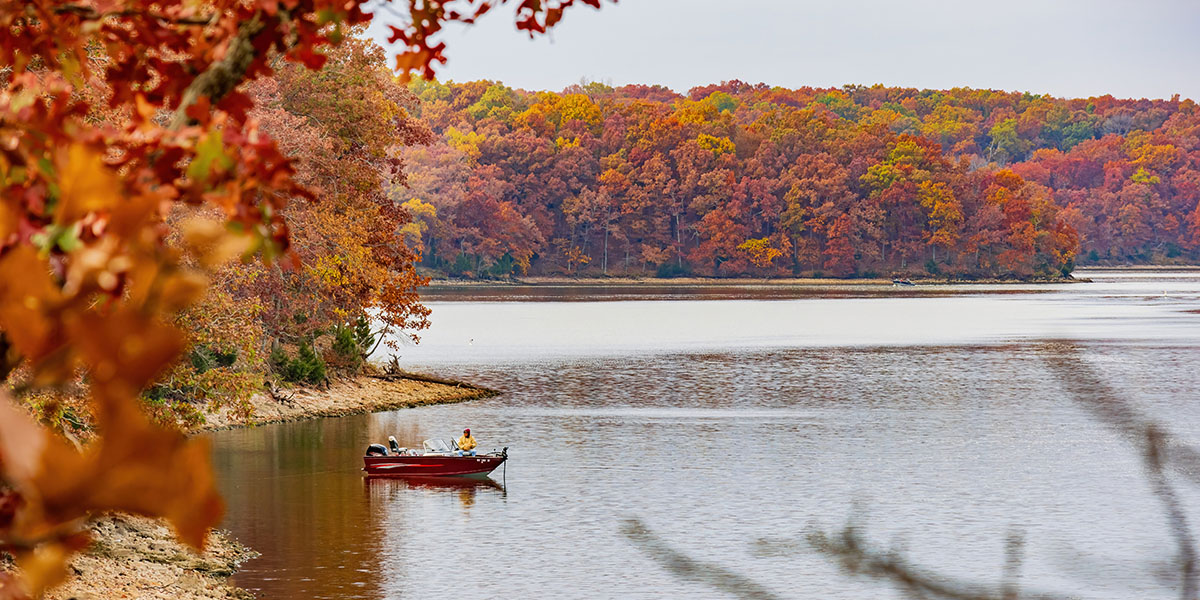
    The Lake of the Ozarks in Missouri rounds out our list of top destinations for fall foliage. The leaves truly show off their vibrance in mid-to-late October and they are not to be missed. The weather starts to get chilly this time of year but is nothing like Missouri’s colder winter months. There are plenty of places to take a boat out to see the beautiful fall colors on the water as opposed to land.

    Must-do: Once you’ve seen your fill of fall foliage, check out some of the most popular caves at the Lake. We recommend taking a trip to Bridal Cave where you’ll see epic rock formations and another underground lake.

    Are you ready to hit the road and take in all of the fall colors this season? We hope these destinations have inspired you to take a trip of your own this autumn. Have you been to any of these destinations? Which was your favorite? Let us know in the comments below.

  • Tech Tip: RV Waste Management 101

    Tech Tip: RV Waste Management 101

    It’s the topic that no RVer enjoys. However, waste containment and odor control are necessary aspects of RVing. FMCA and the “RV Doctor” Gary Bunzer present RV Waste Management 101.

    The Basics

    Your RV’s waste plumbing is made of two components: the gray system (liquid waste) and the black system (solid waste). Gray tanks can be outfitted with a drain opening as small as 1-1/2-inch. Black tanks are required to have a 3-inch outlet. As many RVers know, any accumulation of waste within these drain openings or the holding tank system can lead to odors.

    Nothing can ruin an RV trip faster than having holding tank odors permeate the RV’s interior, so let’s examine the common causes of RV odors…

    P-traps

    The first line of defense against invading fumes is the water lock, which is established by P-traps located below the sinks and tub/shower drains.

    Long a staple in the plumbing industry, the common P-trap works well in residential homes. However, because of the seasonal nature of RVing, P-traps in RVs typically are used less frequently, which can result in the P-trap’s water seal becoming diminished. The jostling that occurs while traveling; improper siphoning action during highway turns and tank evacuations; or simply drying out from non-use can render the water seal ineffective at blocking odors.

    In addition, the P-trap requires diligent maintenance, including frequent cleanings and freeze protection. If neglected, waste residue inside the trap can foster bacteria growth and subsequent odors.

    However, there is an alternative to the common P-trap: the HepvO waterless sanitary valve. Available in the aftermarket and now found on many RVs right from the factory, the HepvO waterless valve replaces the P-trap, creating an effective seal against odors. This sanitary valve is constructed with a self-sealing, flexible, silicone membrane that allows water to flow through it but completely closes off when water flow stops. Therefore, holding tank odors are prevented from migrating up and through the sinks, tub, or shower.

    The Toilet

    As for the toilet, keep water in the bowl at all times, though that may be challenging when the RV is stored. Still, with water in the bowl, you are guaranteed that no holding tank odors can escape into the RV’s living area.

    If your RV’s toilet will not hold water, chances are it is time to replace the internal seals and gaskets. You’d be surprised to see just how many seals are used in an RV toilet! Dry toilet seals are the main sources of black tank odors. Most toilet manufacturers offer gasket repair kits. Most likely, this type of maintenance will be necessary at some point during your RVing career.

    Waste System Venting

    Venting is required for both the black and the gray systems. How do RV manufacturers accomplish this? The common method is to run a length of thermoplastic ABS pipe from the holding tank up and through the roof of the RV.

    The importance of proper venting cannot be overstated, especially as it relates to odor control. Without correct venting, sinks will not drain properly; bacteria can propagate; and holding tanks will not drain as quickly or completely.

    Keep in mind, as a holding tank empties or a sink drains, fresh air must enter the drainage system. Since holding tanks rely solely on gravity for emptying, having air enter the system as sinks and tanks are drained results in a faster and more thorough process. To accomplish proper air flow, there are two types of vents used in RV waste systems: direct exterior vents and anti-siphon trap vent devices.

    Vent Type #1 – Direct Exterior Vents & Maintenance

    Direct exterior vents connect the waste system to the atmosphere outside. As mentioned earlier, most RV manufacturers install a vertical piece of ABS piping up and through the roof for both the black and gray systems. (If you own a small RV, it is possible your RV has a different type of direct vent: a side-mounted vent. Side venting is only permissible in the liquid waste system and only found on compact RVs.)

    Sometimes RV manufacturers cut a large hole in the ceiling and roof during installation of the vertical vent pipe. Oftentimes, this opening is not sealed properly around the outside perimeter of the pipe. In other instances, the vent pipe itself may not extend far enough above the roofline; the industry rule is that the vent pipe must extend at least 2 inches above the roof. If the vent pipe is not sealed properly, tank odors can pass up the direct exterior vent; collide with the underside of the sewer vent cap; be forced back down the sides of the vent pipe; travel into the ceiling area; and then migrate to the living area.

    To ensure this doesn’t happen in your rig, remove the sewer vent(s) on the roof and ensure the space around the vent pipe is sealed tightly. Also, make sure that the pipe itself stands at least two inches above the roof. If necessary, extend the vent by using a common ABS coupling and a short piece of pipe.

    In addition, depending on how the vent is attached to the top of the holding tank, vent pipes have been known to fall down inside the tank below the surface of the waste, nullifying any venting action and allowing odors to exit the tank. By inspecting the vent termination on the roof regularly, this can be avoided.

    Vent Type #2 – Anti-Siphon Trap Vent Devices (ASTVD) & Maintenance

    The second type of vent is the anti-siphon trap vent device (ASTVD), nicknamed “check vents.” These are used as secondary vents to aid in draining sink fixtures. They allow air into the drainage system but prohibit air from passing out of the system. ASTVDs are installed in the liquid drain piping system at or near a P-trap inside a cabinet. Look under your RV’s kitchen and bathroom sink areas to find them. They are mounted at least 6 inches above the P-trap’s horizontal arm. ASTVDs do not allow odors to escape into the living portion of the RV, thanks to a pressure-controlled, rubberized, one-way valve. In other words: air in but not out.

    The rubber membrane employed in ASTVDs can sometimes dry out and become stuck in the open position. If holding tank odors are prominent under a galley or bathroom cabinet near the P-trap, chances are it is time to lubricate the rubber seal inside the ASTVD. Use lubricant to moisten the rubber diaphragm. Since it is located above the actual flow of waste water, the ASTVD is simply threaded into a fitting above the trap arm and can be easily removed for periodic maintenance.

    Tank Additives

    Enzyme-based, bacteria-infused blends have proven to be the most effective type of tank additive. These blends actually digest the odor-causing molecules at the source inside the waste tanks, thereby eliminating odors rather than masking them.

    Some holding tank treatments may consist of harmful chemicals such as formaldehydes. Try to avoid these if possible. The issue of chemical products has prompted many state parks, campgrounds, dump stations, and local municipalities to ban the evacuation of RV holding tanks if such chemicals are used.

    Remember that, to a certain extent, RV holding tanks are living, thriving environments. Anti-bacterial soaps, detergents, or DIY treatments can destroy the “good bugs” that are beneficial in helping the elimination of odors.

    Tank Monitoring and Blockage

    Most RVs today feature some visual method to help owners determine the fluid levels in the holding tanks. This is normally accomplished with “through the wall” monitoring sensors attached to the tanks. Others use externally applied, electronic sensors. It’s those “through the wall” sensors that can be aggravating for RVers. False or inaccurate monitor panel indications caused by tank sludge and debris stuck on the sensor probes are far too common.

    The easiest way to avoid black tank blockages is to use copious amounts of fresh water during each flushing of solid waste. Always be sure to cover the very bottom of each holding tank with fresh water after each evacuation. Do not store the RV for lengthy periods with contents still in the tank.

    A Happy Holding Tank… 

    Being proactive when it comes to your RV’s waste system will reap its rewards for you and also protect the environment. If anything, it will ease offensive smells! A happy holding tank is a healthy holding tank.

    And, remember, when working on your RV’s waste plumbing system, even when simply “dumping” the holding tanks, take safety precautions. Wear disposable gloves when handling sewer hoses and connections. And when using hand tools while working on these systems, be sure to clean and disinfect them after each use.

    FMCA RV Club brings you this monthly tech tip to Enhance Your RV Lifestyle. FMCA delivers RV know-how to its members. Learn more at FMCA.com.

    This information is for educational purposes. FMCA shall not be responsible nor retain liability for RVer’s use of the provided information. Prior to making any RV service decision, you are advised to consult with an RV professional.

  • Drivers Beware! 11 More Haunted Roads in America

    Drivers Beware! 11 More Haunted Roads in America

    Drivers across the nation have spine-tingling tales of the strange and supernatural, from creepy local folktales to terrifying personal experiences. Last year, we reviewed 9 of the most haunted roads in America, which mostly focused on the East Coast. This year we’re back, with 11 more haunted roads stretching across the United States, from Wisconsin to Texas to California. If you find yourself driving on any of these roads, especially around Halloween, take heed of these spooky warnings!


    Jeremy Swamp Road, Southbury, CT

    Try not to break down in Connecticut. There are stories from roads across the state, including Jeremy Swamp Road, of poor souls in stalled vehicles who vanish before their tow truck arrives. Legend attributes these disappearances to attacks by “Melon Heads,” humanoid creatures with bulbous heads who emerge from the woods to attack.

    Owaissa Street, Appleton, WI

    Riverside Cemetery on Owaissa Street is known for supernatural sightings. Phantom mourners have been seen at funerals in old-fashioned clothes and leaving via a carriage that disappears into the street. The cemetery is also home to Kate Blood, an alleged witch who was murdered by her husband. Drivers often say they see her stalking the tombstones in a hooded cloak, and others claim blood flows from her grave on the anniversary of her death.

    Bloody Bride Bridge & Boy Scout Lane, Steven’s Point, WI

    Talk about a haunted town. On the Highway 66 Bridge you can see the bloody ghost of a bride killed on her way to the wedding. Where is she? Just look in your rearview mirror into the backseat. Boy Scout Lane is where a troop of boy scouts were last seen before they vanished. Presumed dead, it’s unclear why they disappeared, but drivers say you can still hear the sound of their laughter floating through the woods.

    Route 66, Villa Ridge, MO

    The abandoned Tri-County Truck-Stop just off Route 66 has been the subject of numerous paranormal investigations. At night, visitors have heard loud banging and unintelligible whispers, and report their electronic devices malfunctioning. Visiting mediums have suggested the truck stop is a portal to the other side of eternity, where souls re-enter our world and attach their spirits to truckers whom they might possess in order to drive themselves home.

    Stagecoach Road, Marshall, TX

    Chased out of New Orleans in the 1800s, a Voodoo queen re-settled in Marshall. She lived there peacefully, selling lucky amulets until the town’s priest, fearful of the occult, killed her on the side of Stagecoach Road.  Today, her spirit has been seen wandering along the road on nights with a full moon, wielding shrunken heads and voodoo dolls, hell-bent on bringing bad luck to the town that betrayed her.

    Goatman’s Bridge, Denton, TX

    The Old Alton Bridge may have been decommissioned in 2001 when a new steel bridge was built, but the original truss bridge from 1884 remains, as does its accompanying legend. According to the stories, when a local goat farmer was murdered on the bridge, he called upon the Devil to save him. Transformed into a demonic satyr, he now guards “Goatman’s Bridge,” stalking those who cross at night without their headlights on.

    Route 666, Douglas, AZ

    The most dangerous stretch of Route 666 lies in Arizona, near the Mexican border. The state may have redesignated the road as Route 191, but residents still know it as The Devil’s Highway. Drivers say their vehicles have been pursued by packs of bloodthirsty feral dogs, referred to as Hellhounds by the locals. Some have even reported the sudden appearance of a spectral big rig, covered in roaring flames and billowing black smoke, that attempts to run them off the road.

    Sandhill Road, Las Vegas, NV

    People who sneak into the flood tunnels underneath Sandhill Road often run out terrified, having heard the echoes of menacing scrapes and ghoulish shrieks. Those who have traveled deepest below Sandhill Road have discovered bones chipped with tooth-marks. However, as the zombie-like shuffling and moaning creeps closer, brave visitors always flee before they can collect any evidence beyond their own haunted memories of the sounds of the undead.

    Route 375, Rachel, NV

    Route 375, known as the Extraterrestrial Highway, is as close as you can get to the highly classified Area 51 facility. Though the government denied its existence until 2013, Area 51 has been rumored to be a lab for military testing on crashed UFOs for decades. Many traveling in Nevada have seen bright lights hovering over their vehicles — and some even report losing consciousness, only to awake in their vehicle days later, apparent victims of alien abduction.

    Prospector’s Road, Garden Valley, CA

    In the midst of the Gold Rush, a drunken miner made the mistake of bragging at the local saloon about striking gold. That night, as he stumbled down the road home, jealous miners ambushed and killed him, stealing his treasure. His ghost now haunts Prospector’s Road, appearing at night as a large, bearded man holding a pickaxe, who suddenly screams at those who drive by, “Get off my claim!”

    Ortega Ridge Road, Montecito, CA

    A century ago, three nuns ventured out from the Santa Barbara Mission to bring food and Bibles to the local village of Chumash Native Americans. Along the way they were robbed and killed by highway bandits. A hundred years later, apparitions of the three Sisters, known locally as Las Tres Hermanas, can still be seen on the side of Ortega Ridge Road, dressed in black and white habits and standing hand-in-hand, seemingly in anguished prayer.

  • Campfire Hacks

    Campfire Hacks

    After a long day of adventure, there’s nothing like coming back to your RV campground to relax by a fire. But if you forgot a traditional fire-starter, you might have a bit of trouble getting one started. Check out our list of campfire hacks that will have your fire blazing just in time to break out the s’mores.

    Corn Chips

    Burning your food usually sounds like a bad thing, but not when it comes to starting a fire. Many chips are made of hydrocarbons and fat, both of which are highly flammable. Kind of makes you wonder why we eat the delicious snack… but to each their own!

    Toilet Paper Rolls & Dryer Sheets

    When you fill a toilet paper roll with dryer sheets, you will have a perfect DIY fire-starter ready to go. You can also use dryer lint instead of sheets. Think twice before throwing out those supplies!

    Wine Corks

    Don’t throw these away after happy hour. Give them a new purpose by tossing them in a sealed container and soaking them in rubbing alcohol. Leave them in the container until you need to light a fire. They are super small and lightweight to carry if you’re on the go.

    Birthday Candles

    No cake required here. Head to the store to stock up on inexpensive birthday candles and wax paper. Wrap each individual candle in wax paper and twist the ends to close. Light the ends of the wax whenever you’re ready and you’ll have a sizzling fire in no time. 

    Duct Tape

    Everyone has duct tape lying around somewhere, but if you don’t already have a roll in your RV, it might be time to head to the store. Duct tape can be used for a huge variety of things, including starting a fire. Just rip up a few small pieces of tape and light them on fire to be used as kindling. 

    Petroleum Jelly & Cotton Balls

    Cover a few cotton balls in generic or branded petroleum jelly and (when lit) you’ve got yourself a guaranteed fire. Cotton alone burns very quickly, but the petroleum jelly slows down the process significantly, allowing your fire to build strength. 

    Hand Sanitizer

    When you’re in a camping setting, having hand sanitizer should always be a packing necessity to keep clean in the great outdoors, but it can also be used as a fire starter. If you put just a little hand sanitizer on a cotton ball or tinder you will see flames quickly due to its alcohol content.


    *Disclaimer: Please follow all state and local laws and regulations regarding fire restrictions and safety. Be aware of drought and brush conditions, always monitor your campfire, and be prepared with a bucket of water to extinguish it fully at the end of enjoyment.