Blog

  • How to Virtually Spring Break in a Pandemic

    How to Virtually Spring Break in a Pandemic

    Ahh, Spring Break. A time for RV road trips across the country, lounging on the beaches, or taking time to travel abroad. A time for students to take a break from their studies, celebrate Spring finally being here and the school semester almost ending. However, with the current COVID-19 situation happening across the entire world, Spring Break will be a bit different this year.

    With social distancing guidelines set in place, and many states requiring mandatory stay-at-home orders, schools across the nation are already closed and will remain that way for weeks to come. So, how do you successfully Spring Break during these difficult times? We’ve put together a few ideas that will make this year’s Spring Break just as magical and memorable – just in a more virtual way.

    Check out a few of our favorite virtual spring break options below:

    Virtual Theme Parks

    • Disney World – There’s nothing like the magic of Disney, and now you don’t even need to leave your house to experience it. Gather the kids around and let them take virtual rides on Space Mountain The Little Mermaid: Ariel’s Undersea Adventure attraction or on the Pirates of the Caribbean ride.
    • Legoland- Legoland has created a virtual experience for the whole family. When you visit their site you can now “walk” through the Great Lego Race and Miniland USA taking in all of the colorful Lego creations. This virtual tour will brighten anyone’s mood.
    • SeaWorld You can almost feel the sunshine on your back as you tour sunny Sea World virtually. SeaWorld offers virtual tours of attractions such as Discovery Cove, Empire of the Penguin, and so much more.

    Virtual Zoos/Aquariums Across America  

    • Oakland Zoo – Zoos might be empty across the country, but the animals are still there. The Oakland Zoo has created a 30-minute live show that will air on the zoo’s website every Monday-Friday and give viewers a behind the scenes look at the zoo and all of its exhibits. While watching you can send in live questions for the hosts to answer and learn the ins and outs of the zoo itself!
    • Houston Zoo Live Cam If you’re looking for more on-demand excitement, the Houston Zoo has seven different live cameras set up across different exhibits. You can check in from 7AM-7PM to see gorillas, elephants, flamingos, giraffes, and more.
    • Monterey Bay Aquarium – If under the sea is more your vibe, Monterey Bay Aquarium also has a variety of live webcams rolling. You’ll be able to see coral reefs, jellyfish, sharks, turtles, and more of your favorite sea life.
    • Atlanta Zoo – Who doesn’t love pandas? These cuddly creatures are so fun to watch and now you can see them up close on your screens. The Atlanta Zoo has a live panda cam where you can watch them play and roll around all day. They will surely bring a smile to your face during these unusual times.

    Virtual National Park Tours

    • Yellowstone – Our nation’s national parks are incredible to see in person, but they are equally as impressive online. Yellowstone National Park is one of the most famous in the country and is offering virtual tours on their website. You can see the Grand Canyon of Yellowstone, Mammoth Hot Springs, their Mud Volcano, and more. We definitely think it’s worth checking out.
    • Google Earth National Parks – We have never been more grateful to Google Earth as we are right now. This platform has SO many of our nation’s parks in their platform including Acadia, Arches, Great Smoky Mountain, Yosemite, Zion, and many more. Just drag your mouse in different directions and you can explore the entire park of your choosing.

    Explore Another Country 

    • The Great Wall of China – Visit China’s most famous attraction – no passport required. The Great Wall of China is one of the Wonders of the World and is truly magical, and now you can now tour this magnificent structure all online.
    • The Louvre Paris, France – The Louvre is one of the most famous museums in the world and now you can visit some of its exhibits from your computer. The Louvre has set up four virtual exhibits including Egyptian artifacts, and an exhibition titled ‘The Advent of the Artist’ where you can discover the works of Delacroix, Rembrandt or Tintoretto, and more.
    • The British Museum – London – Grab some tea and enjoy The British Museum’s online “History of the World” where you’ll see The Rosetta Stone and Egyptian mummies – just to name a few.
    • Africam – This is just about as close as you’re going to get to a live African safari experience. With Africam, you can watch wild animals in the beautiful African bush live and unscripted. You’ll be able to view different animals such as elephants, giraffes, lions, and tons more.

    Visit Classic American Museums  

    • Smithsonian National Museum of Natural History – It’s a great time to catch up on your history and the Smithsonian is the perfect place to do just that. You can explore each room of the museum and access every exhibit. Travel back in time to see the dinosaurs or see the stunning collection of some of the world’s most famous jewels.
    • Metropolitan Museum of Art – Access the institution’s 26 online exhibits just the click of a button. You’ll see works by some of your favorite artists as well as Egyptian artifacts galore.
    • Museum of Fine Arts – This Boston museum hosts 16 virtual exhibitions where you’ll have access to fashion, modern art, stunning photography, and more.
     
    With all of these virtual options, you’re guaranteed to have a fun indoor Spring Break. We hope visiting these destinations online will inspire you to plan a road trip of your own in the future. Ready to start planning your next adventure now? Try renting an RV with RV Trader’s new rental platform.We can’t wait to get back on the road, but in the meantime, we hope these virtual experiences provide a much needed escape. Which of these virtual tours was your favorite? Let us know in the comments below. Have fun exploring!

  • 7 Important Things to Consider in Planning Your Next RV Trip

    7 Important Things to Consider in Planning Your Next RV Trip

    As soon as the coronavirus restrictions are lifted, you’re probably planning to jump in your RV and head off for new adventures in the Great Outdoors. Before you do, here are 7 important things to consider.

    #1. Plan Your Route

    One of the great things about RVing is the freedom it gives you to explore new places. However, it’s always a good idea to plan ahead so you know where you’re headed and when you’re going to get there.

    When planning your route, don’t put yourself under too much time pressure. RVing should be fun and relaxing. Plan the most important stops along your route but leave plenty of time between those to explore. Often, it’s the places you’ve never heard about that prove the most interesting.

    Some destinations are super popular, such as major tourist attractions. If you’re planning to camp somewhere like Mount Rushmore, you can’t just turn up and hope you’ll find somewhere to stay. You need to book ahead for the more important or popular stops along your route.

    It is possible to purchase apps for your smartphone to help you find RV campsites, Bureau of Land Management (BLM) land in the wilderness, and even Walmart parking lots where you can stay along your route. One popular app is ALLSTAYS.

    #2. Plan Your Stops

    If you’re new to RVing, you may feel most comfortable staying in fully developed RV parks that offer hook-ups to sewers, water, and electricity. However, they are not your only choice. If you don’t restrict yourself, you can experience much more of the world.

    Boondocking is awesome. The disadvantage of boondocking is that you can’t hook-up to the usual services. The advantage is that it opens up many more destinations and you can stay in many locations for free.

    Think about distant relatives, internet friends, old college classmates, etc. If any of these live along your route, why not use this opportunity to reconnect and ask them if you can park in their driveway? Many RVers frequently stay in Walmart parking lots. And in more remote locations, you’ll find that a polite conversation with the local gas station or convenience store owner will gain you permission to park on their land.

    #3. Think Ahead About Power and Water

    Before boondocking, you must ensure your batteries are fully charged, your freshwater tank is full, and your grey water tank is empty. Once you get used to your RV, you’ll know when your running low (or high) and need to stay in an RV park with all the services.

    Experienced RVers often use deep-cycle batteries, power generators, and strict water usage policies to decrease the number of stays at expensive, developed campgrounds. You would also benefit from the use of an power inverter that enables you to use standard household appliances while using a DC power source.

    #4. Carry the Right Tools

    If you have to make minor repairs on the road, such as changing a wheel, you need the right tools. If your RV is a trailer (towable RV) then you’ll soon discover that the lug nuts on your RV are not the same size as those on your vehicle. A 4-way wrench and a wrench set are needed to deal with all the different sized nuts on your RV.

    The screw faces used in many RVs are Robertsons, i.e., they have a square hole. You need a set of Robertson’s bits to unscrew them. Other useful tools include leveling blocks for when you’re setting up your trailer on uneven surfaces and a digital tire gauge for checking your tire pressures.

    #5. Check Your Tires

    For a safe and smooth ride, you must ensure your tires are the right pressure. Look-up your RV’s weight and check this against your tires’ load capacity PSI chart.

    Sometimes used RVs are fitted with the wrong kind of tire. It’s a good idea to check that the tires attached to your wheels are rated for use with your RV. Also, ensure that your tires aren’t too old. There should be a 4-digit number on the back of your tires.

    Worn tires or tires over 5 years old should be replaced. Play it safe. If you’re planning on driving from the west coast to the east coast, you’re going to put a lot of miles on those tires. It’s better to replace them now rather than have 2 or more tires let you down in the desert miles away from the nearest auto shop.

    #6. Avoid Accidents

    You probably think this sounds obvious, but there are reasons you must take more care to avoid accidents. You’re likely used to driving a very different kind of vehicle when you’re not on vacation, so you need to be aware of the differences.

    Check the height and length of your RV. Some RVs are tall, and some tunnels are low, especially on the east coast. Low bridges and tunnel entrances have signs to tell you the maximum vehicle height, and you need to ensure that your RV is shorter than this. Similarly, winding roads through mountains, and tunnels along mountain routes, often have maximum vehicle lengths because of extremely tight turns.

    You’re on vacation, so there’s no hurry. Drive slower than you would during the working week and appreciate the beautiful scenery along the way. Also, don’t rush when you’re setting up or packing away in an RV park. Be careful, asks questions, and develop a routine to avoid omissions and errors.

    #7. Be Environmentally Friendly

    If you’re driving an RV, you probably love the Great Outdoors. Please do your best to preserve it for future generations. Consider using solar panels to contribute to your power generation.

    Don’t tip your greywater into streams or the ground. Don’t leave litter. Also, keep your RV well maintained and don’t carry around more stuff than you must to minimize gas consumption.

    It’s all for your benefit. Not only will you be helping the environment, but these actions can also help you save money.

    Article contributed by https://www.outsidepursuits.com/
  • RVs 4 MDs Helps Front Line Healthcare Workers and First Responders During COVID-19

    RVs 4 MDs Helps Front Line Healthcare Workers and First Responders During COVID-19

    With all that’s going on in the world today, it can be hard to find the positive. But in the midst of these trying times, people all over the world are stepping up to show kindness to others in big ways.

    An online movement has recently begun in light of COVID-19, and what started out as a wife’s simple request to help her family, has quickly grown into a global campaign of action. Emily Phillips is married to ER Physician Dr. Jason Phillips and took to Facebook in mid-March to ask family and friends for help in finding a temporary housing solution for her husband. Working in the ER, Jason had been exposed to many germs and infections and that was worrisome to his family. Once Emily’s Facebook post was live, a friend connected her to Holly Haggard and later that same day, the Phillips’ family received an RV from the Haggards for Jason to use as temporary housing during the pandemic.

    From there RVs 4 MDs was born.

    RVs 4 MDs is a now a Facebook group that has grown to 24,000 members (and rising) that is used as a free “matching service” to connect RV owners to front line medical/healthcare workers and first responders that are in need of temporary housing to quarantine due to the coronavirus. Since the Facebook group’s creation on March 24th, RVs 4 MDs is now matching donors and recipients in all 50 states, Canada, Australia, and Dubai.

    “It doesn’t matter how you vote, or what your race, religion, or social status is… this is all about love and kindness,” said Holly Haggard, founder of RVs for MDs. “This is what America should be about. Complete strangers coming together, offering help to someone they’ve never met, and changing lives forever. I didn’t give it a second thought. We had my Mom’s camper in the shop, so I checked with her first to make sure it was ok, and then contacted Emily to tell her she could use it for as long as she liked. The only thing I asked of her, was to please pay it forward.”
     
    RVs for MDs is run entirely by volunteers to help front line heroes during the COVID-19 crisis and we are grateful to see that one simple act of kindness has spread into a global movement.

    Have an RV and Want to help?

    Donors:

    If your RV isn’t currently in use, now is a great time to help others in need. The first step in becoming an RV donor is to join the RVs for MDs public Facebook group, and then complete and submit this designated Google Form.

    Recipients:

    Front line medical workers and first responders who are in need of an RV are also encouraged to join the public Facebook group and complete this Google Form.

    From there, the forms will be viewed by RVs for MDs volunteers and the matching process will begin. While you’re waiting to be matched, RVs for MDs encourages potential donors and recipients to enter their city or state into the search bar in the Facebook group, to start connecting with others in their area. Once they have found a match, the donor and recipient work out the specific details and arrangements together. No money is exchanged, as the group is based solely on donations.

    For more information or to begin the RV matching process, visit: https://www.facebook.com/groups/rvs4mds/

  • Buying a Used RV From Start to Finish

    Buying a Used RV From Start to Finish

    Before You Start Searching for an RV…

    Prior to jumping into your search for a used recreational vehicle, you need to determine what your budget is and what kind of RV you want. An average used RV will cost about $15,000 and up for a smaller used camper or about $50,000 and up for larger motorhomes. You can get RVs for cheaper than this, but it would be considered a rare find.

    If you buy from a dealership, there are usually a variety of financing options available. If you decide to buy from a private seller, you will need to pay in full before you receive the RV or you could choose to let a financing company pay for you and pay them monthly. However, if you choose the latter option, you will then owe the financing company interest thus your overall cost will increase.

    The type of RV that you decide to look into buying is entirely up to you. The types of recreational vehicles that you can choose from include:

    • Class A, B & C Motorhomes
    • Pop-ups
    • Travel trailers
    • Park models
    • Truck campers

    All have their unique advantages and disadvantages. Each of these options listed do offer sleeping areas, but other RVs such as fish houses generally do not have amenities for sleeping.

    Online Research

    Once you have determined your budget and decided what types of RVs interest you, you should start doing your research online and RV Trader is a great place to start. Once you’ve found a unit you like, you’ll want to also look into the history of the RV itself.

    The best way to do this is by getting a vehicle history report. You can do this by visiting rvchecks.com – but there are a couple of limitations on that site. The first is that RVs registered in Oregon or Illinois are not required to provide you with any information. Another limitation is that rvchecks.com only provides info on motorized RVs. So, you will not be able to use the site for information on Travel Trailers, 5th Wheels, Tent Trailers or Campers.

    If you want to get vehicle history information on those types of RVs you will need to contact the DMV or appropriate insurance company with the VIN number.

    Ask Questions

    Once you have gotten some info on the RV, you should contact the owner of the RV again and ask them any questions that you might have. This includes asking to see maintenance records, asking when you or someone in place of you can come inspect it, asking for the complete list of features, asking if it’s under warranty and/or has any service package as well as any other questions you might have.

    Inspect the RV

    You should never buy an RV or any other vehicle “sight unseen.” This means you should always go and inspect it. If for some reason you can’t inspect in-person, you can also connect with the seller to ask for a virtual video walkthrough. And keep in mind, you can always hire someone to do the inspection for you. You can do that by using a site like Lemon Squad.

    For a fee, they will travel to the RV you are considering buying and conduct a thorough inspection for you. This will include a detailed report with more than 40 pictures. This is especially useful if you are buying a used RV from out of state so you will not need to travel just to inspect it.

    If you do choose to inspect the recreational vehicle yourself, there are several things you must be sure that you check. This includes the steering, suspension, brakes, the engine, any body or flood damage, appliances, fluid levels, and taking it for a test drive if possible.

    Make Your Offer

    If you have had the inspection conducted and you are satisfied with the RV, then you can make your offer. If you love the RV and want it right away, you should match the asking price. However, if you want to see if you can save a few bucks, you can see if the seller is open to negotiations. However, make sure that your offer is not insultingly low because then talks could break down. Before you try to negotiate price, you should learn all that you can about the RV. This way you do not come off as uninformed when you are in negotiations.

    Get the RV Home

    Keep your options open by looking for used RVs from all over the country, not just near you. You are limiting the amount of RVs that you can potentially purchase and might end up missing out on the deal of a lifetime.

    If you are worried about having to drive it home hundreds of miles from out of state, you do have another option. You can always have your RV shipped. Many auto transport companies offer oversized car shipping which often includes recreational vehicles.

    Shipping your RV to your home is an option that you can use if the recreational vehicle is a hundred miles away or if it is a thousand miles away. You should just be sure to book your shipment at least a month in advance. Once you do that you will just need to make sure that the seller of the RV is prepared for the shipment.

    By shipping your RV, you are not only saving yourself the trouble of traveling to the RV then driving it all the way home. You are also saving a considerable amount of money as well.

    Clean the RV

    When you finally get your newly purchased RV to your home, the first thing you will want to do is to clean it or have it cleaned for you. You can get your RV cleaned for you with a local RV cleaning and detailing service.

    If you choose to clean the RV yourself, be prepared to spend a few hours doing so. The exact amount of time that you will end up spending cleaning the RV will depend on its size. Just be sure that you have the right supplies to get it cleaned. This will include a hose with a running water source, soap, a vacuum, a general-purpose cleaner solution, and several dry towels. You also might need a ladder so you can clean the top of the exterior properly.

    Matt Osborn is the lead writer for RoadRunner Auto Transport.
  • RV Renovations: Renovating a Dinette

    RV Renovations: Renovating a Dinette

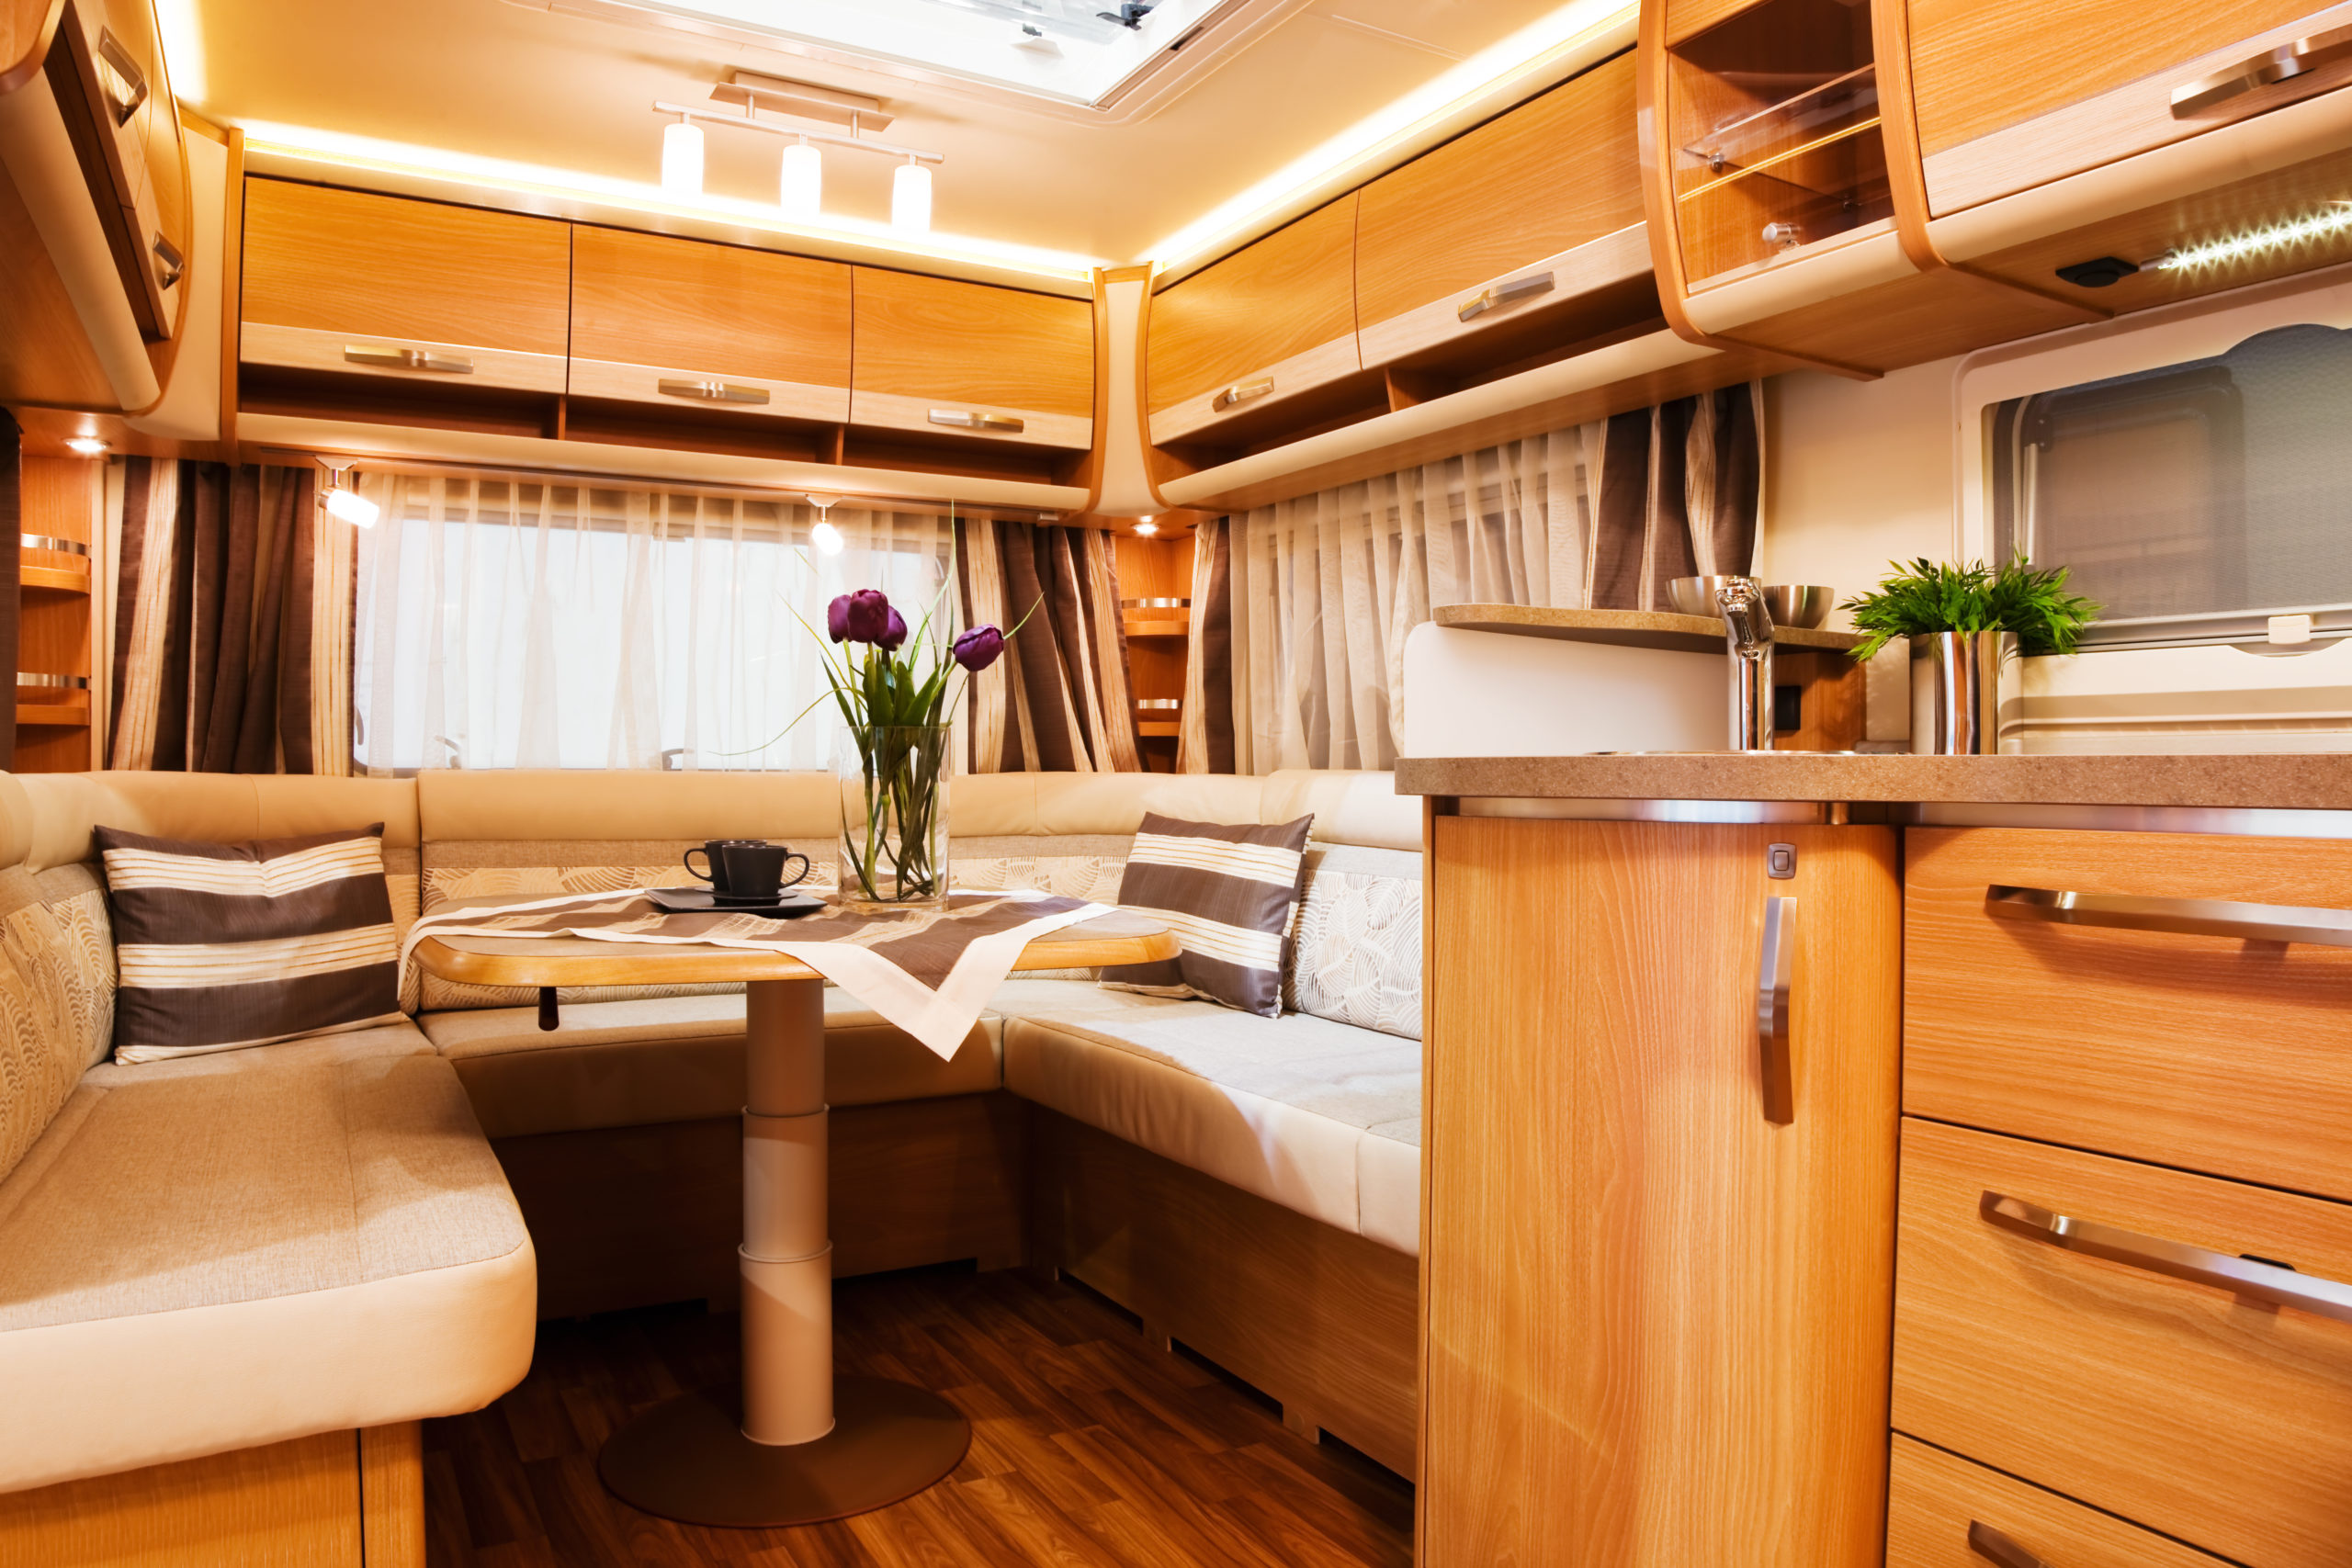
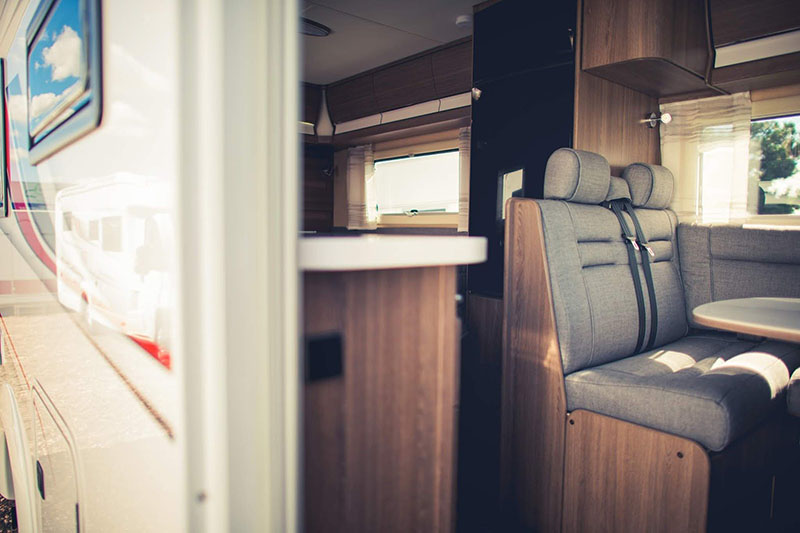
    In an RV, a dinette is one of the most useful and functional spaces you will find. For many people, this centrally-located space can be used as a kitchen table, a desk or office space, a craft center, or even somewhere to hang out and watch movies and relax. Dinettes can come as a booth with two benches or as a table with four chairs and vary in size, shape, and color. However, in some older RVs, dinette areas tend to be a bit outdated. Often, they are covered in tacky fabrics, dark woods, and textured wallpapers, and, for some people, this can be a bit of a disappointment when they are considering a purchase. Yet, with some simple changes, you can easily transform your dinette space into an area that you will enjoy utilizing for years to come. Follow along to learn some simple tips for updating and modernizing your RV’s dinette cushions, updating your table, and decorating tips.

    Credit: Domestic Imperfection

    Updating Your Dinette’s Cushions

    Your very first step in your makeover should be to recover your dinette’s cushions. This will make the biggest overall difference to the dinette space and can provide inspiration for the later steps. If your RV’s dinette is a table and chairs (instead of a booth with cushioned benches), then simply skip this step and move on to the next post, where we will discuss updating your table and decorating your dinette space.

    There are three methods you can use to update your dinette’s cushions, as detailed below.
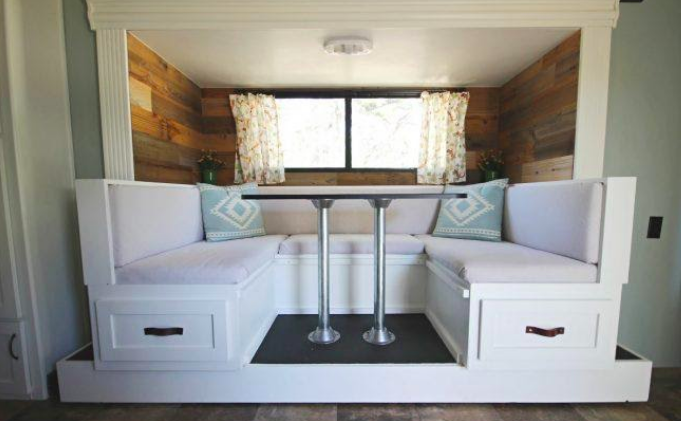
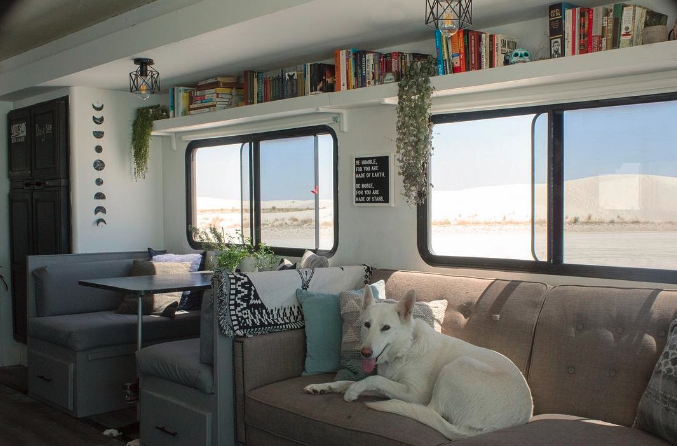
    Credit: @188sqft

    1. Buy New Cushions or Cushion Covers

    While different RV dinettes are often made with different sized cushions, there are typically a few different sizes in production. Often, manufacturers will sell either entire cushions (the foam plus the cover) or just the covers. In the second case, you would need to remove your current cushion covers from your dinette cushions and keep the foam for the new covers. If your cushions’ foam is dingy or overly worn, you can always purchase new foam for the cushions from a local craft store, using exact measurements from your older cushions.

    Measure your dinette cushions’ height, length and width, and search online for RV cushions. These can often be found on Amazon, eBay, and several different RV supply companies. Keep in mind that you will typically only find solid colors and patterns, and these cannot be customized. Prices will vary depending on the source, so be sure to thoroughly search for the best cushions and best overall deal before making your purchase. This option is not the most customizable, but it certainly entails the least amount of work and the quickest results.

    2. Have Your Cushions Reupholstered Professionally

    This choice is likely the priciest, but it allows the RV owner more options for customization. Utilizing a professional also tends to yield the best overall results. Find a local seamstress or someone who specializes in furniture reupholstery and is up for the task. In some cases, you must purchase your own fabric, but in other cases, the seamstress can often provide you with fabric from their collection, as well. Keep in mind that this option tends to be very pricey. However, if you have an ideal image in mind for how you want your cushions to look, as well as the necessary resources and a great local seamstress, then this option is the best one for you.

    Credit: Sawdust 2 Stitches

    3. Recover Your Cushions Yourself (DIY)

    For those with a crafty side, this option is fun, inexpensive, and can also allow you many different possibilities. There are a few different options available for recovering your own dinette cushions, and your skillset and sewing abilities will determine which option you choose. If you have a sewing machine and are up for a challenge, you can follow a tutorial to make your own zip-on cushions at home. These covers can be removed for easy cleaning anytime and will look beautiful and professionally-made if done correctly.

    For those with a crafty side but fewer sewing skills, there is another simpler method that will turn out just as beautiful with less work and fewer supplies. To cover your cushions using the no-sew method, you will first need to gather your materials. These include a staple gun and plenty of industrial staples, your fabric of choice, and plywood cut to size for each cushion.

    Fabric can be purchased at your local fabric store. Outdoor fabric comes highly recommended, as it is the most durable and easiest to clean. Be sure to purchase more fabric than you need in case of mishaps or inaccurate measurements. When choosing your fabric, keep the overall color scheme and theme of your RV in mind, and be sure to choose a fabric that will match or coordinate nicely. Remember that these cushions are a large piece of your overall space, and choosing a louder or busier fabric could make the space look a bit chaotic. If you choose a simpler fabric, you can always decorate with brighter throw pillows and wall hangings later on.

    The plywood can be purchased from your local hardware store. You will need one piece for each cushion (four pieces total for four cushions). Each piece of plywood should be one inch shorter than your cushion foam in both length and width. Once you have your supplies, you are ready to begin. Follow the steps below for a quick and easy process to recover your cushions without sewing:

    • Lay the plywood out flat, and place the corresponding foam cushion on top of the plywood.
    • Place your fabric over the cushion and plywood.
    • Cut the fabric to size, leaving a minimum of 16-18” extra on each side.
    • Wrap the cushion very tightly (like a present), and use clamps to hold the fabric in place.
    • Flip the cushion over, and staple the fabric directly to the plywood. Use lots of staples to ensure a better hold.
    • That’s it!

    Of the above methods, whichever you choose is sure to look beautiful and bring a more modern and homey vibe to the overall space. Once your dinette cushions are updated, you can move on to makeover your table and decorating the space.

    Follow along for ideas on how to finish up making over your RV’s dinette area.

    Update Your Table

    RV tables come in a variety of shapes and sizes. If you are wanting to update your table, there is no shortage of things you could try. Each of these possibilities yields beautiful results that will have you excited to enjoy a meal at your new table.
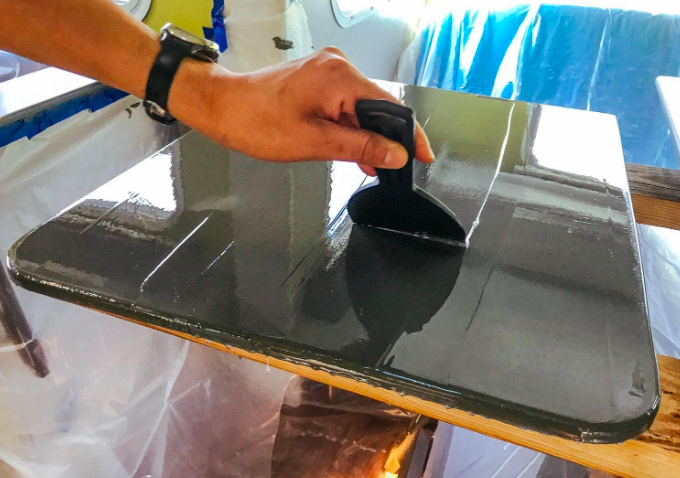
    1. Paint + Epoxy

    This option is rather simple in theory but requires plenty of prep work and dry time. It involves painting your table in the same way that you would paint a wall or cabinets, but then adding an epoxy layer over top to seal it and protect it for long-term use. For those who use this method, you must first prep the table by sanding it down to allow the paint to adhere properly. Then you must clean thoroughly before painting. Paint two to three coats, allowing a minimum of twenty-four hours dry time in between each coat. Some people paint one solid color, but others may choose to paint a design into the table or even try a faux marble or wood-look painting style. Once you have painted, you are ready for epoxy.

    Epoxy is a bit difficult to work with and must be poured slowly and leveled before it begins to dry. Follow along with a more detailed tutorial for more ideas on how to use this method on your RV’s table surface.

    Credit: @livesmallridefree

    2. Laminate Countertop Recovering Kit

    If you RV’s table is laminate, this may be a great option for you. Prep work involves sanding and cleaning, as with the previous method. Then, you can use a thick paint to cover the table before applying small paint chips to cover the surface. Next, you must use a sealant to protect the surfaces and ensure your hard work will last. This method is fairly simple and can be completed in just a few days. Kits can be purchased online or at hardware stores and come with all the tools you need for this project.

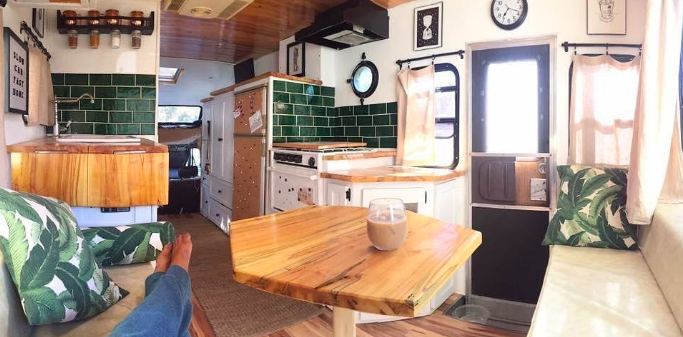
    3. Butcher Block or Wood

    Butcher block and wooden tables look beautiful in a traditional home, so why not try them out in an RV? For this method, you would need to remove your previous table entirely and build a new one. You can find a variety of woods at hardware stores or through online retailers. You must affix the new wood to the old table post securely. Be sure to seal the wood with a food-safe sealant before finalizing the project.

    Credit: @188sqft

    4. Peel-and-Stick Countertop Covers

    This method is also quite popular and holds up quite well, surprisingly. You can find peel-and-stick materials made for countertops at some hardware stores or through a variety of online retailers. They can come in wood-look, marble-look, granite-look, quartz-look, and more. These are cost-effective, lightweight, and simple to install. Simply clean your table well, and press the cover onto the table, starting at one end and working your way over to the next. Use a credit card to press out all the air bubbles, and cut the cover to size.
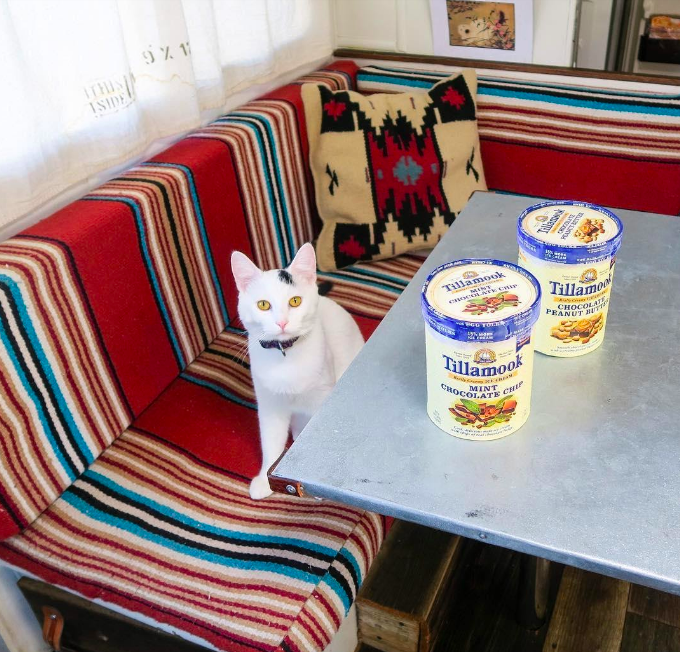
    5. Cover in Metal

    This method is very artsy and will leave your space with a bit of an industrial look. Thin sheet metal can be purchased at hardware stores and hammered around the edges of the table to cover over the old surface. You must nail the metal into the bottom of the table to ensure longevity.

    Credit: @ourvieadventures

    6. Cover in Leather

    Similar to covering your table in metal, you can also cover your table in leather fabric. The fabric can be purchased at your local fabric store ad comes in a variety of colors. Simply cut it to size, and wrap it around your table. Use fabric glue or to adhere the leather to the table, or nail it to the bottom of the table depending on your preference.

    7. Build Something Custom

    If none of these previous options suit you, you can always build something custom. With this method, options are endless, and you can end up with exactly the look you want. This is great for those who maybe don’t have a dedicated dinette space and want to add one in, or for those who are looking for something a bit more non-traditional. Whatever you try, be sure to keep your RV’s overall weight in mind and always seal with a food-safe sealant before finalizing your project.

    Credit: @slowcarfasthome

    8. Buy a Table

    This option was saved for last because it is often difficult to find an RV-sized table in stores. However, if you shop around, you may be able to find something you like that is professionally-made and of good quality. Be sure to anchor the table to the ground to ensure it does not slide around during travel.

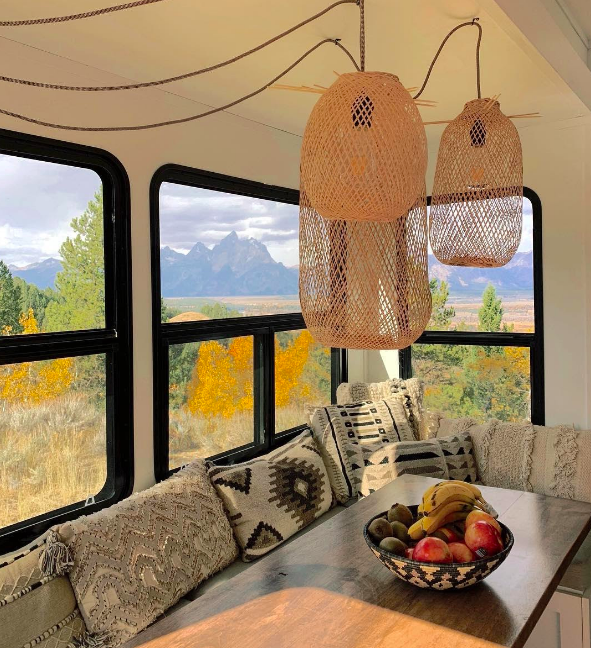
    Finish off your dinette space by decorating the area. Consider adding a plant or two to the table to make it feel more homey. Add candles for a seasonal ambiance. Hang some curtains for additional personality. Hang your favorite photo or piece of art on the wall to make it more personal. Add a few throw pillows to make the dinette comfier. This part is where your personality will really shine through, so be sure to add in items that make you happy and add character to the space. And remember, in a small home, less is often more.

    Renovating your dinette area is a challenging, yet rather rewarding process that will yield beautiful results and add plenty of personality to your overall space. Updating your table and decorating will add brightness and cheer to your space, leaving you even more excited to take your RV on trips all over the country. Be sure to consider these ideas for a brand-new dinette area that your whole family will love and enjoy.

    Have you recovered your RV’s dinette cushions or updated your table? Which method did you choose? Feel free to let us know in the comments below!

    Renovating not for you? That’s okay. Check out some of the latest RVs on RV Trader.

  • Deep Cleaning Your RV, Inside & Out

    Deep Cleaning Your RV, Inside & Out

    Summer is just around the corner—and with it, some of the best camping of the year. While the coronavirus has put many vacation plans on hold, you’ll want to be ready to go when campgrounds reopen. With all this extra time on your hands, there’s truly no better time to deep clean your RV.

    Ready to get your RV in order? We’ve put together a list of tips and tricks to get your RV super shiny and clean, so all you’ll have to do is pack and turn the key when it’s time to hit the road again.

    Let’s start with a few tips on cleaning the inside of your RV.

    Inside:

    • Mold can grow just about anywhere when your RV isn’t being used. Wipe down ceilings, walls, hard surfaces, and appliances with a multi-surface cleaner that is EPA registered to disinfect and remove bacteria, viruses, mold, and other allergens. Choose one that is safe for your whole interior, including finished wood, granite, and stainless steel.
    • Let’s face it—most of us have no idea what is in the back of our RV’s drawers, cabinets, and closets. Now’s the time to empty, vacuum, and wipe out storage areas. Haven’t used an item in a couple of years? Get rid of it. And toss out any old or expired foods or spices. Not sure if that mac and cheese is still safe to eat? Get the USDA’s FoodKeeper app for shelf-life guidelines.
    • With use, cabinet pulls get surrounded by a buildup of oil and dirt. Mix 2 parts baking soda and 1 part coconut or vegetable oil and use an old toothbrush to gently scrub away the gunk.
    • Strip and wash bedding, vacuum the mattress, and spray with an aerosol disinfectant before remaking the bed.
    • Window tracks, valances, blinds, and cloth lampshades all capture dust and dirt. For tracks, vacuum with a thin nozzle, then dip Q-tips in white vinegar or window cleaner and wipe out every nook and cranny. Vacuum blinds, valances, and lampshades with a soft brush, then go over with an adhesive lint roller.
    • Still see signs of last year’s vacation on your carpet and couches? Begin by removing small spots with a damp, soapy cloth. For hard-to-remove grease stains (think pizza), scrape with a knife, then layer paper towels on top of the stain. Using the lowest heat setting, iron the paper towels to lift the grease, then gently scrub the spot with a mix of dish soap, white vinegar, and water. Finish your routine by steam cleaning.
    • To flush your freshwater system lines, connect a clean water hose to your home’s outdoor faucet and connect the other end to your RV city water connection. Open your gray tank, turn on all the faucets, and run until the water looks, smells, and tastes clean. Use an RV freshwater deodorizer to flush your freshwater tank.
    • Smell something? It could be dried waste stuck to the sides and sensors in your black water holding tank. Some campers swear by the ice method—dump a few buckets of ice cubes down the toilet, then drive along and let the ice clean the sides. For a proven fix, purchase a wand-style tank rinser, hook up to a hose or faucet, and lower into the tank to wash away debris. For tanks mounted directly under the toilet, get a straight wand. If you have bends in your plumbing or an offset tank, choose a flexible wand.

    Outside:

    • Start at the top. For fiberglass roofs, use a soft brush, hose, and any wash-and-wax product to remove grime. While you’re up there, look for any loose or cracked sealant and follow the manufacturer’s directions to remove old caulking and repair. If you have an older RV with a rubber roof, you’ll need specific rubber roof cleaning products.
    • Know what you’re made of – metal or fiberglass. For painted or polished metal bodies, use a pre-wash to remove grime and grit, then clean with a non-abrasive cleaner, soft-bristled brush, and microfiber cloth or mitts. High-pressure washing is not recommended because these RVs are clad and riveted, and water can seep in between the seams. For fiberglass, use a wash-and-wax product with UV protection. Again, beware of the high-pressure washer—it can damage slideout seals and peel exterior decals. For seriously faded decals, gently scrub with a wet no-scratch fiberglass pad. This will brighten them but also shorten their lifespan.
    • Use a silicone-based cleaner on all window, door, and slide-in gaskets or flexible weather sealants. Most spray on and don’t require any wiping or additional cleaning. Don’t neglect your awnings—they need a rinse, too. Extend and hose off, but don’t scrub—it can weaken fabric and remove protective finishes.

    Before tackling any cleaning jobs, check your owner’s manual for specific recommendations. Remember, spring cleaning is an opportunity to look for any problems and give your RV the attention it deserves. And considering we all have a bit of extra time on our hands, let’s use it to our advantage. A little TLC now equals comfortable, worry-free vacations in the months ahead. Happy cleaning!

    Have any cleaning tips of your own? Let us know your methods in the comments below.

    Ready for a new RV instead? Check out our newest inventory.

  • How to Find Open Campgrounds During COVID-19

    How to Find Open Campgrounds During COVID-19

    In these complicated times, it’s difficult to find anyone who hasn’t been affected by the global coronavirus pandemic. And with the closure of many state parks and RV campgrounds, RVers have been left to wonder where to go next. It’s hard to “stay in place” when you don’t have a place to stay.

    We don’t pretend to have all the answers, but do feel it is our obligation to help in any way we can, and sometimes checking online can lead to information overload. For many people across the country, RVs aren’t just used for vacation, they are used as homes. This means that these parks and campgrounds that are closing are their homes as well.

    So where should these RVers turn? 

    Luckily, FMCA has compiled a robust list of campgrounds that have indicated to them directly that they are open and still have vacancy. Visit FMCA’s blog, FMCAdventure, to view the complete list.

    Please feel free to share it with anybody who may find it beneficial. And as information changes quickly, we recommend calling the RV campground ahead of time to confirm that they are in fact open before making the trip.

  • Boondocking Etiquette

    Boondocking Etiquette

    Boondocking is a fun type of camping where RVers ditch the hookups in lieu of beautiful, free campsites that often offer a unique sense of peace and solitude. Now that you have learned the boondocking basics, it’s time to learn a few rules associated with boondocking. Some of these rules are clearly stated, while others remain unspoken, yet equally important. Since there is no one to directly enforce the rules and regulations of boondocking, it is up to individual campers to know and respect them. Follow along with these seven important considerations of boondocking etiquette so that you can be prepared before camping in the wild.

    Credit: Go RVing

    1. Practice quietness

    When campers go off to boondock on public lands, they often do so to find a sense of peace and quiet. While there is no camp host to make sure that campers are remaining quiet and respectful, it is still generally customary to follow certain quiet hours. This means you should try to keep a respectful volume from the hours of 9pm until at least 7am the next day. During this time, you should avoid running generators, playing loud music, allowing dogs to bark, and anything else that could disturb other campers. This allows the camping areas to remain quiet and peaceful for the enjoyment of everyone.

    2. Keep your distance

    When choosing your boondocking campsite, it is best to choose a site that is a good distance from other campers. Many RVers choose to boondock in lieu of a crowded campground because they want some space for themselves. Unless the boondocking area you are visiting is very crowded, you should try to choose a campsite that allows others to maintain their own designated space. Never assume that other campers want nearby neighbors, especially if they have chosen a site off by themselves.
    Credit: Xscapers

    3. Keep a clean campsite

    When boondocking, it is best to keep a clean campsite. It is totally fine to leave a few items outside, such as camp chairs and tables, hammocks, outdoor decor, etc. However, if things begin to pile up, it can make your campsite a bit of an eyesore. You should never leave garbage or anything else outside that can make your campsite stick out. Be respectful of the land and others around you by keeping a clean campsite for both yourself and anyone else simultaneously using the land.

    Credit: Pheribee

    4. Pack it in, pack it out

    This principle ties into the previous rule but bears repeating. When camping on public lands, it is important to practice “Leave no trace” principles. This means that you leave your campsite better than you found it, with as little impact on the land as possible. You must avoid trampling any plants or brush underfoot and park on dirt or gravel only. Never dump black or gray water, and be sure to clean up after yourself. In addition, be sure to pack out all trash, even items that are biodegradable. After all, you must remember to respect the land, and leave it better than you found it. There have been public lands camping areas that were closed down to the public due to excessive garbage being left behind, and this is certainly possible for any other lands that are repeatedly abused by campers. If you see garbage left behind by other campers, pick it up. Remember that the free use of public lands is a privilege that can be taken away.

    Credit: Campendium

    5. Practice pet politeness

    Many campers bring their pets along with them to enjoy the fun. Boondocking can be a great way to allow your dog to run and stretch their legs. However, you must be sure to keep a close eye on your pets at all times, especially when they are outside. Clean up any waste that they leave behind, and do not allow them to chase or disturb any wildlife they may see. In addition, do not allow them to roam free off leash and disturb other campers. In general, just keep them close to you and in your campsite for both their safety and the safety of others around you.

    6. Respect fire bans

    There is nothing like enjoying a nice bonfire in the great outdoors. However, fires are banned on many lands and in many national forests in certain seasons throughout the year. Be sure to check local fire bans before lighting a campfire, especially during the drier summer months. If you are unsure of current local bans, call a local ranger or USFS station for more information.
    Credit: Roaming Remodelers

    7. Don’t overstay

    Finally, you must be sure to respect stay limitations. Most public lands allow a maximum of fourteen days of free camping, but some allow as little as three days and others up to twenty-one days. Look for signs posted when entering a new camping area, or check the rules and limitations on the website for your national forest or BLM (Bureau of Lands Management) area. If you are truly unsure, consult a ranger at the local station. Overstaying on public lands is a fineable offense and could result in being removed or even banned from certain areas. Be sure to know the rules and follow them for your own good and the good of all future campers.

    Boondocking is very enjoyable for those who know how to find the best sites, conserve utilities, and follow the rules. While this may seem like quite a few regulations, most of these are set to protect the land for future campers and and allow you to continue enjoying beautiful, free campsites year after year. This concludes our series on boondocking. Be sure to check out our other articles to learn all about boondocking before finding your next free campsite.

    Do you have a favorite boondocking site? Are there any rules you feel we missed? Feel free to share in the comments below!

  • What to Know Before Buying a Class A RV

    What to Know Before Buying a Class A RV

    Travel is usually at the top of almost anyone’s bucket list, but the cost alone often holds people back. This is where buying an RV can come into the picture. RVs allow travelers to reduce the cost of travel by eliminating the price of a plane ticket, hotel, and the frequency of eating meals out. Because of this, and other reasons, the RV lifestyle has become more and more popular for both travel solutions and for full time living.

    If you’re considering buying an RV for full time or part time use, or if you already own one and are considering switching to a different type, then follow along with this multi-part series to become an expert on all the different types of RVs. Let’s start with Class As.


    What is a Class A?

    One of the most common RVs seen on the road is called a Class A Motorhome. These are the large, self-contained rigs that are similar in size and shape to buses. The idea of operating such a large and heavy vessel can be intimidating, but like with driving any new vehicle, there are several designs to increase visibility for the driver. Class A rigs also tend to have onboard generators, which is a huge advantage.

    It’s important to note that Class As come in both gas or diesel varieties. Diesel engines are typically more powerful and tend to last longer and are a common choice for many RVers. Another benefit of diesel-powered Class A RVs is that the placement of the engine is in the back of the rig, making for a quieter ride. But with convenience, power, and longevity comes a higher price tag, not to mention that diesel fuel is more expensive than gasoline. Gas-powered motorhomes use regular fuel and the engine is situated up front, which can make for a noisier ride.


    Features

    Class A RVs come with a variety of premium features, most of which are dependent on when the RV was manufactured. Amenities can include propane stoves, propane ovens, convection ovens, couches, queen and king-sized beds, recessed lighting, recliners, TVs, and much more. Some are quite luxurious and others have a more humble and home-like feel. If you have the funds to purchase a brand new RV, the floorplans and colors are customizable. If you’re looking to purchase a used Class A, reputable websites, RV shows, and third-party sellers are your best choice, and it’s entirely possible to find the refurbished RV of your dreams.


    Traveling and Set-Up

    One of the many perks of traveling in a Class A is having full access to both the kitchen and bathroom. Instead of finding an exit with restrooms and food options, you simply pull off at an exit of your choice and can conveniently access your entire home on wheels. It’s also much more comfortable to travel with pets in a Class A, versus a truck towing a trailer.

    For many reasons, Class A motorhomes are a popular choice for full-timers or anyone using their RV for long stints. One favorite feature is the ease of set-up. Once you find your campsite, you can simply park, level the RV, open the slide outs, and connect your utilities.


    Long Term

    If you plan to use your Class A long term or to visit places other than campgrounds, then you will most likely need to tow a personal vehicle. There are many factors to take into account when towing and some of these factors can be quite costly.

    Because Class A motorhomes are self-contained units, they require more maintenance and upkeep. The maintenance and any work that needs to be done is much pricier than that of an automobile and requires specialty RV repair shops. Not to mention, if the rig breaks down for any reason, towing can be expensive – but if you’re looking for a true home on wheels – then a Class A might still be a great fit for your lifestyle.


    Other Considerations

    The intended use of an RV is one of the most important factors. Knowing your size and spacing needs will give you an idea of how much space your RV requires. For instance, a couple using an RV full time or a large family traveling part time would have different space requirements. Another important factor to consider is traveling with infants or young children that require car seats. Special safety accommodations must be made in order to provide a safe travel area for them.

    Another consideration is the amount of space the RV takes up. Parking can be a challenge, as not all areas can accommodate such a large vehicle. Campgrounds also only have limited sites that can accommodate big rigs. If you ever choose to forego campgrounds, then boondocking can also be a challenge because of the size, and also the lack of off-roading capabilities. These are all important factors to consider when considering a class A motorhome for your next rig.

    When choosing an RV, it’s crucial to decide what works best for your intended use and comfort. Bigger rigs mean more amenities, space, storage, and comfort, but that’s met with spacial challenges and cost. Class A motorhomes are the all-in-one rig that can give you, your family, and your pets the right amount of space for your next dream vacation. If you have decided that a Class A motorhome is the RV for you, take a look at the selection of new and used Class A RVs available on RV Trader.

    Pro Tip: When you shop for a Class A RV on RVTrader.com, you can find units that have received a complete inspection from RV Trader Assurance powered by Lemon Squad. Look for the RV Trader Inspection Badge on our online marketplace to view a full inspection report, which covers a computer diagnosis of the engine, along with a comprehensive examination of the vehicle condition, mechanical, underbody, tires, wheels, structural integrity, and more.

    Do you have a Class A motorhome? What other factors did you take into consideration before purchasing? Feel free to share in the comments below!

  • FMCA Tech Tip: Exterior Maintenance

    FMCA Tech Tip: Exterior Maintenance

    Keep your RV exterior looking its best with these tips from FMCA and the “RV Doctor” Gary Bunzer. Take pride in your home on wheels!

    RV Exterior Tip #1: The Roof

    Get into the habit of inspecting the RV exterior once a month, with special attention given to the roof. Examine the seams, edges, moldings, caps, and anything else attached to the roof. Any screw or mounting method used on the roof can become an entry point for moisture. Water intrusion is the largest threat to any RV.

    Small problems will not go away on their own. Left unaddressed, small problems will only worsen and quickly move (along with their associated cost) from the preventive maintenance stage. So follow these steps to manage small problems:

    • Keep the roof clean. Use a soft broom every couple of weeks to sweep away leaves, dirt, and road grime.
    • Look closely for evidence of mold and mildew, especially on synthetic surfaces.
    • Remove bird droppings or tree sap as soon as it is spotted.
    • Wash the roof with the appropriate cleaning agent four or five times each year. A clean roof is simply easier to inspect!

    And, finally, know what material forms your RV’s roof. Use products that are safe for your RV’s roof surface material.

    RV Exterior Tip #2: Sidewalls

    Likewise, learn what material is used on the exterior of your RV’s sides. Is it painted aluminum? Fiberglass? Filon or another FRP derivative? ABS or PVC plastic? Are steel components used? If you own a Type C motorhome, don’t forget about the cab portion and its exterior surface.

    Scan the sides of your RV and start counting how many components are attached: storage bay doors, refrigerator vents, furnace vents, city water inlet, etc. Every attachment point is a potential source for a water leak.

    Inspect all seals around the sidewall openings. At the first sign of a deteriorating sealant, reseal! In severe cases, it may be necessary to completely remove the component and reinstall using fresh sealant. In other cases, a quick but correct application of a silicone sealant over the suspected gap may be all that is required.

    Next, check for black streaks. Unfortunately, every RV is susceptible to those nuisance black streaks caused by four elements: dirt, moisture, time, and neglect. This video explains how these streaks form and how to remove them.

    When using any type of black streak remover, never apply the solution directly to the surface of the sidewall. Moisten a clean, soft cloth with the remover and try to keep within the boundaries of the black streak. All black streak removers contain components that will remove existing wax, so areas treated with the remover will need to be re-waxed.

    Unless the black streak is deep-seated and has become oxidized, it eventually should come off or at least be minimized. If the black streak has oxidized into the finish, other products exist that can address this specific type of problem. But, remember, it’s crucial to use a product compatible with your RV’s exterior surface to prevent further damage – read those labels!

    RV Exterior Tip #3: Fiberglass Caps

    Many RVs have some form of plastic caps covering their front or rear ends. Over time and with exposure to UV rays and ozone, the appearance of these fiberglass caps can become dull or fade to a certain extent. This is the first degree of oxidation. Whenever sunlight, heat, and moisture collide, oxidation can be expected.

    The second level of oxidation results in a pronounced chalking of the finish. You’ve probably seen front and rear caps that display a distinct, blotch-like chalky residue that can be wiped away with a moist rag. Neglected further, the cap surface eventually can crack and deteriorate and, in the process, cross the line between restorative maintenance and damage repair. If individual fibers become visible in the fiberglass, it may require a repair out of the DIYer’s realm.

    Fiberglass front and rear caps must be protected with wax or polish. Plain old car wash soap is a good option because it does not remove wax as detergents do. Polish is similar to wax, but some polishes and polishing compounds actually contain trace amounts of abrasives.

    RV Exterior Tip #4: Undercarriage

    The underneath surface of the RV is the “forgotten” exterior surface. The main concern is critter infestation. Look for large gaps around exposed plumbing that may pass through the floor and subfloor. It’s important to seal around all gaps that can trap moisture and road debris.

    Look for loose or damaged sections of the underbelly, regardless of the types of materials used under there. Some RVs have sealed underbellies, while other RVs may be open to the bottom of the subfloor. Others may have only a soft plastic wrap encasing the floor insulation. Look for anything that appears out of the norm. While you’re down there, check all chassis and suspension components for damage or irregularities, and look for evidence of water leaks. If you use the RV in winter conditions where salt is used on the roads, check for rust.

    For more RV exterior maintenance tips, visit Family RVing magazine.

    This information is for educational purposes. FMCA shall not be responsible nor retain liability for RVer’s use of the provided information. Prior to making any RV service decision, you are advised to consult with an RV professional.